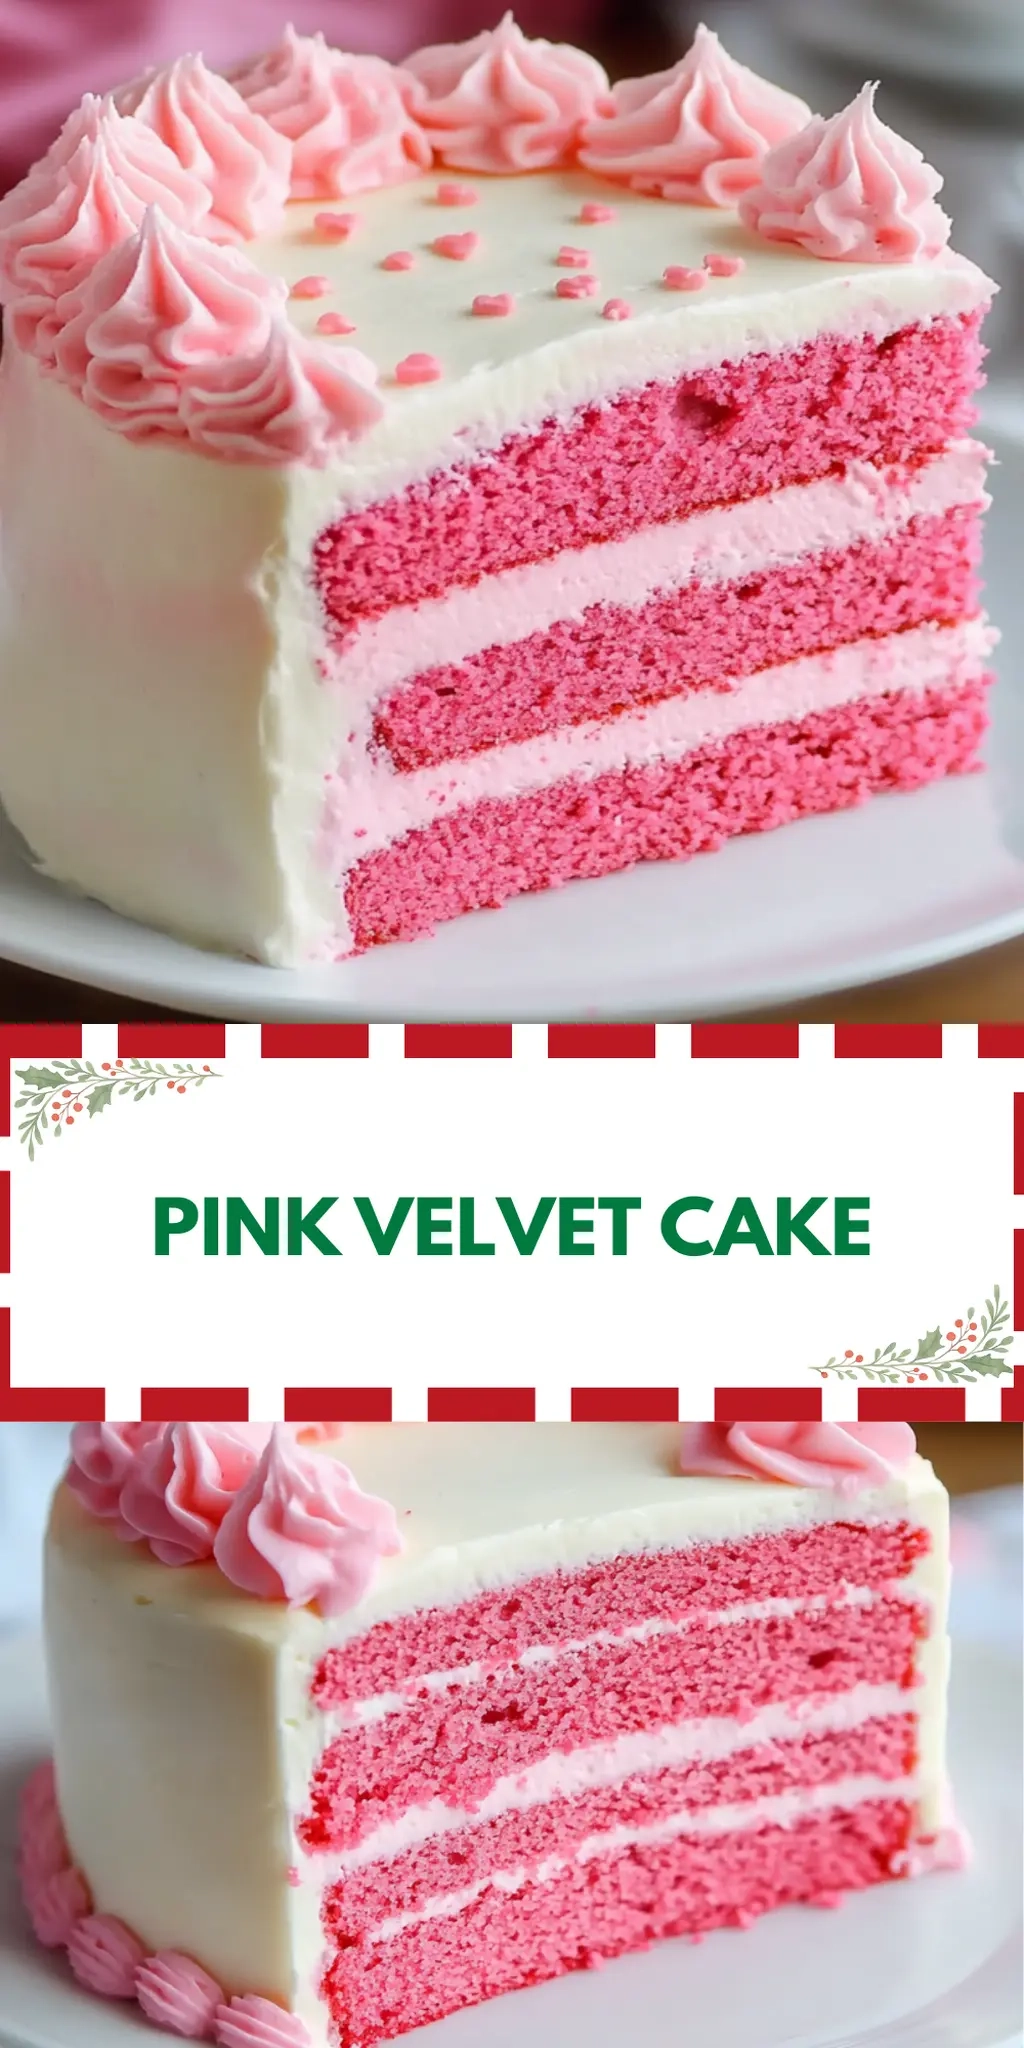
There’s something especially delightful about a cake that can instantly brighten your day—and my Pink Velvet Cake does just that! The first time I made it, I was in a creative mood, desperate to escape the ordinary chocolate and vanilla options that felt all too familiar. As soon as I pulled the layers from the oven, the warm, inviting fragrance filled my kitchen, and I knew I had stumbled upon a true gem.
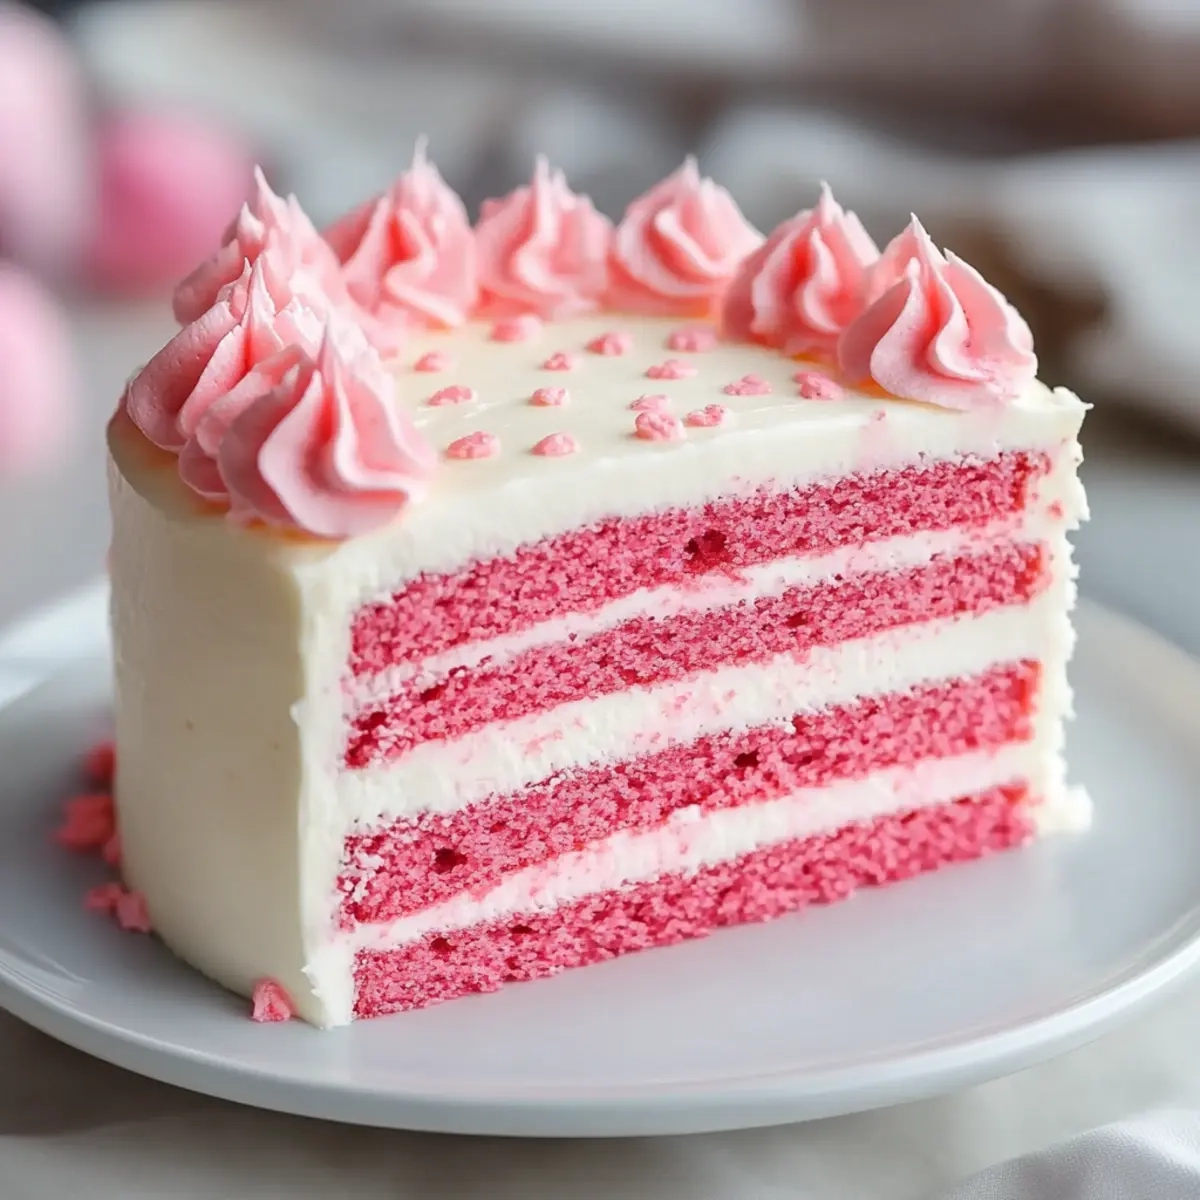
With its tender crumb and subtle sweetness, this cake is perfect for any celebration or even a cozy afternoon at home. What makes it truly irresistible, though, is the luscious cream cheese frosting that dances on your taste buds, taking this dessert to a whole new level of indulgence.
Whether you’re impressing friends at a gathering or simply treating yourself, this Pink Velvet Cake promises not just flavor, but also a stunning visual treat. So, let’s dive into the recipe, and soon you’ll have a slice of happiness on your plate!
Why You'll Love This Pink Velvet Cake
- This Pink Velvet Cake is incredibly easy to make, making it a great choice even for baking beginners.
- With its delightful flavor and unique pink hue, it’s bound to be a showstopper at any event or gathering.
- The versatility of this recipe allows you to customize it with different frostings or toppings to suit your taste and occasion.
- Its beautiful appearance is sure to impress your guests and leave them asking for seconds.
- Enjoying a slice of this cake not only brings joy but also creates lasting memories with friends and loved ones.
- Every bite is a celebration of sweetness and creativity, making it truly a treat you’ll adore.
Pink Velvet Cake Ingredients
• Get ready to bake a delicious treat!
For the Cake
- Cake flour – Essential for a soft, tender crumb in your Pink Velvet Cake.
- Granulated sugar – Sweetens the cake and helps create that lovely fluffy texture.
- Baking powder – Acts as a leavening agent, ensuring your cake rises beautifully.
- Fine salt – Enhances the sweetness and balances flavors perfectly.
- Unsalted butter – Brings richness and moisture; be sure it’s at room temperature for easy mixing.
- Egg whites – The base for a light and airy cake; room temperature helps create a better volume.
- Buttermilk – Adds a subtle tang and keeps the cake moist—don’t substitute with regular milk if possible!
- Vegetable or canola oil – Keeps the cake ultra moist; you can even use melted coconut oil for a twist.
- Vanilla extract – Adds warmth and depth to the flavor; vanilla bean paste works just as well!
- Pink gel food coloring – Gives your cake that gorgeous, eye-catching hue.
For the Frosting
- Unsalted butter – Use room temperature butter for a creamy and smooth frosting.
- Cream cheese – Adds a tangy flavor that pairs perfectly with the sweetness of the cake.
- Vanilla extract – Enhances the overall flavor of the frosting, making it extra delicious.
- Fine salt – A pinch adds depth to the sweetness—don’t skip this step!
- Powdered sugar – The base for your frosting, creating that luxurious sweetness.
- Heavy whipping cream – Helps achieve a silky, spreadable consistency; room temperature is key.
- Pink gel food coloring – Use to tint your frosting, creating a stunning visual appeal.
Get ready to bring this delightful Pink Velvet Cake to life in your kitchen!
How to Make Pink Velvet Cake
-
Preheat your oven to 350°F (175°C) and grease or line your cake pans with parchment paper to prevent sticking. This step ensures a perfectly baked cake that’s easy to remove.
-
Combine in a mixing bowl the cake flour, granulated sugar, baking powder, and fine salt. Whisk together until well blended, ensuring an even distribution of the dry ingredients that will work together for a fluffy texture.
-
Beat in another bowl the unsalted butter, egg whites, buttermilk, vegetable oil, and vanilla extract until creamy and smooth. This mixture creates a luscious batter, perfect for infusing flavor and moisture into your cake.
-
Gradually mix the dry ingredients into the wet ingredients, stirring gently until just combined. Avoid over-mixing; you want a batter that’s well-blended but still retains a fluffy texture.
-
Color your batter by adding a few drops of pink gel food coloring. Stir until you reach your desired hue, creating that beautiful pink that makes this cake so special. The color will be more vibrant once baked!
-
Pour the batter evenly into your prepared cake pans and smooth the tops with a spatula. Bake for 35 minutes or until a toothpick inserted into the center comes out clean. Keep an eye on your cakes for that perfect golden edge!
-
Cool the cakes completely on wire racks; this prevents them from becoming soggy and ensures they’re easy to frost. The aroma will fill your kitchen—try not to eat the whole cake while waiting!
-
Prepare the frosting by beating together the unsalted butter and cream cheese until light and fluffy. This will create the perfect base for your luxurious cream cheese frosting.
-
Mix in the vanilla extract, fine salt, and powdered sugar until smooth and well combined. Don’t rush this step; the cream cheese adds a delightful tang that balances the sweetness beautifully.
-
Gradually add the heavy whipping cream to your frosting, mixing until you reach your desired consistency for spreading or piping. It should be creamy and luscious, perfect for dolloping on your cake.
-
Frost the cooled layers generously, stacking them together as you go, and add any additional decorations to make your Pink Velvet Cake pop. Your creation is now a stunning masterpiece ready to be enjoyed!
Optional: Add fresh berries or edible flowers on top for a touch of elegance.
Exact quantities are listed in the recipe card below.
Make Ahead Options
These Pink Velvet Cake layers are ideal for meal prep, allowing you to save crucial time on busy baking days! You can prepare the cake layers up to 2-3 days ahead of time. Simply bake them, allow them to cool completely, and then tightly wrap each layer in plastic wrap before refrigerating to maintain their moist texture. If you’d like, the frosting can also be made up to 2 days in advance; store it in an airtight container in the fridge—just give it a quick mix to revive its creamy consistency before frosting. When you’re ready to assemble, just layer the chilled cakes with frosting, and your beautiful Pink Velvet Cake is ready to impress with minimal last-minute effort!
What to Serve with Pink Velvet Cake?
The vibrant hues and delightful flavors of this cake are just the beginning; let’s create a full spread that elevates your dessert experience!
-
Fresh Berries: Their tartness beautifully balances the sweetness of the cake, adding a refreshing touch to each bite.
-
Vanilla Ice Cream: A classic pairing, the creamy texture of the ice cream complements the tender layers, creating a heavenly combination. Serve a scoop alongside a slice for a timeless delight!
-
Chocolate Ganache: Drizzling silky ganache over the cake adds rich flavor and decadence that contrasts wonderfully with the pink velvet.
-
Lemonade: The zesty brightness of a fresh lemonade refreshes the palate, making it an ideal pairing for this sweet treat. It’s the perfect sip alongside your cake slice!
-
Coconut Whipped Cream: Light and airy, this alternative topping enhances the cake’s softness while adding a tropical twist that feels indulgent.
-
Coffee: A strong brew provides a delightful contrast to the cake’s sweetness, making for a comforting afternoon treat. The warmth of coffee brings the whole experience to life!
-
Fruit Salad: A mixture of seasonal fruits adds color and a natural sweetness that complements the cake—and it keeps things light and vibrant.
-
Sparkling Water: For a refreshing non-sweet option, sparkling water with a hint of lemon recharges your taste buds between bites. It’s simple, but oh-so-refreshing!
-
Cheesecake Bites: For those who love multiple desserts, serving mini cheesecake bites provides a creamy, tangy contrast to the cake, satisfying any sweet tooth’s cravings!
How to Store and Freeze Pink Velvet Cake
-
Room Temperature: Store the unfrosted Pink Velvet Cake layers at room temperature for up to 2 days, covered in plastic wrap to maintain moisture. Avoid placing it in direct sunlight.
-
Fridge: If frosted, the Pink Velvet Cake can be kept in the refrigerator for up to 5 days. Use an airtight container or cover it loosely with plastic wrap to prevent the frosting from hardening.
-
Freezer: To freeze, wrap the unfrosted cake layers in plastic wrap and then aluminum foil. They can last up to 3 months in the freezer. Frost after thawing for the best texture.
-
Reheating: When ready to enjoy, allow the frozen cake to thaw in the fridge overnight. For a warm slice, microwave it for 10-15 seconds, just enough to take the chill off without melting the frosting.
Pink Velvet Cake Variations
Feel free to get creative with this recipe and make it your own with these delightful twists!
-
Dairy-Free: Substitute buttermilk with almond or coconut milk and use dairy-free butter for a scrumptious vegan option. You’ll still enjoy that light, fluffy texture!
-
Chocolate Swirl: Add 1 cup of cocoa powder to half the batter and create a marble effect by swirling it into the original batter. This chocolatey delight will take your cake to new heights!
-
Nuts: Fold in 1 cup of chopped walnuts or pecans for a satisfying crunch. The nutty flavor complements the sweetness, adding another layer of deliciousness.
-
Fruit Flavor: Replace part of the liquid with pureed strawberries or raspberries for a fruity twist. The natural sweetness intermingles perfectly with the cake base, making it even more irresistible!
-
Layered Delight: Make a multi-layered cake by baking in three cake pans and filling the layers with fruit preserves or chocolate ganache. It’s a treat that turns heads and takes your taste buds on an adventure!
-
Spiced Version: Add a teaspoon of cinnamon and a dash of nutmeg for a warm, spiced flavor profile. This adds depth and warmth, perfect for cozy gatherings or a festive moment.
-
Gluten-Free: Use a 1:1 gluten-free flour blend in place of regular flour. It maintains the texture while being perfect for gluten-sensitive guests, ensuring no one misses out!
-
Zesty Lemon: Infuse the batter with lemon zest or a splash of lemon juice for a refreshing twist. This brightens the flavor and adds a lovely citrus note that pairs beautifully with cream cheese frosting.
Chef's Helpful Tips
- To ensure a light and airy Pink Velvet Cake, make sure your egg whites are at room temperature before beating them, as this helps achieve better volume.
- Avoid over-mixing when combining your wet and dry ingredients; mixing just until incorporated will keep the cake tender.
- For the frosting, it’s crucial to use room temperature butter and cream cheese to achieve a smooth and creamy texture without lumps.
- When baking, check the cakes at the 30-minute mark to avoid overbaking, ensuring they remain moist and flavorful.
Pink Velvet Cake Recipe FAQs
How do I select the best ingredients for my Pink Velvet Cake?
Absolutely! When choosing ingredients, select high-quality pink gel food coloring for the best visual appeal. For the butter, make sure it’s unsalted and at room temperature for easy mixing and a creamy texture. Use fresh egg whites from large eggs for the best results. The buttermilk should also be fresh, as it contributes to the cake’s moisture and flavor.
What’s the best way to store my Pink Velvet Cake?
Very! If unfrosted, keep the cake layers at room temperature for up to 2 days wrapped in plastic wrap to maintain moisture. For a frosted cake, store it in the fridge in an airtight container for up to 5 days. This protects the frosting while keeping it at a delightful temperature for enjoying!
Can I freeze my Pink Velvet Cake?
Absolutely! To freeze your Pink Velvet Cake, wrap the unfrosted layers tightly in plastic wrap followed by aluminum foil, ensuring there are no air pockets. They can last up to 3 months in the freezer. When you’re ready to enjoy, thaw them in the fridge overnight, then frost them to retain that lovely texture. For a warm slice, microwave it for 10-15 seconds!
What should I do if my cake is too dry?
Oh no! If you find your Pink Velvet Cake has turned out dry, that’s usually because of over-baking. Try to check it 5 minutes before the end of the recommended baking time. If it does happen, you can still revive the cake by brushing the layers lightly with simple syrup (made from equal parts sugar and water boiled until syrupy) before frosting. This adds moisture and sweetness back into the cake!
Are there any allergies I should be aware of when making Pink Velvet Cake?
Very! This recipe contains eggs, dairy, and gluten, so be mindful of those with allergies. For a dairy-free version, you can substitute the buttermilk with almond milk mixed with vinegar or lemon juice for a similar tang. If you need a gluten-free alternative, consider using a 1:1 gluten-free baking flour blend. Always double-check labels to ensure they’re free of allergens suitable for your guests!
Pink Velvet Cake
Ingredients
Equipment
Method
- Preheat your oven to 350°F (175°C) and grease or line your cake pans.
- Combine cake flour, granulated sugar, baking powder, and fine salt in a mixing bowl.
- Beat unsalted butter, egg whites, buttermilk, vegetable oil, and vanilla extract until creamy.
- Gradually mix the dry ingredients into the wet ingredients until just combined.
- Add pink gel food coloring, stirring until desired hue is reached.
- Pour batter into prepared pans and smooth the tops. Bake for 35 minutes or until a toothpick comes out clean.
- Cool the cakes completely on wire racks.
- Beat together unsalted butter and cream cheese until light and fluffy.
- Mix in vanilla extract, fine salt, and powdered sugar until smooth.
- Gradually add heavy whipping cream, mixing until desired consistency is achieved.
- Frost the cooled layers generously, adding decorations if desired.
Leave a Reply