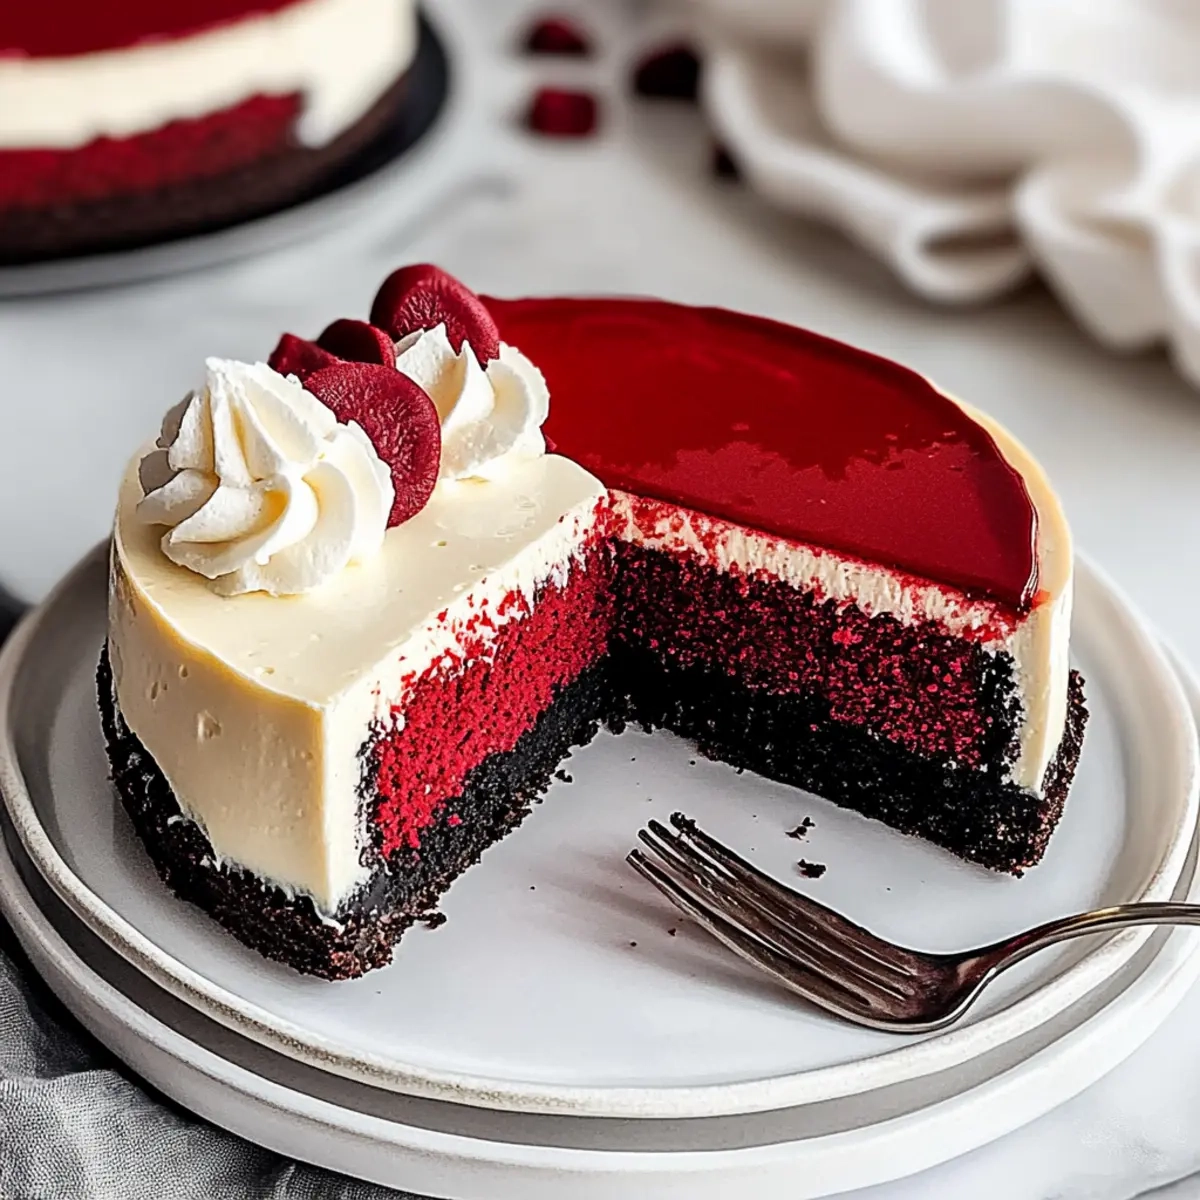
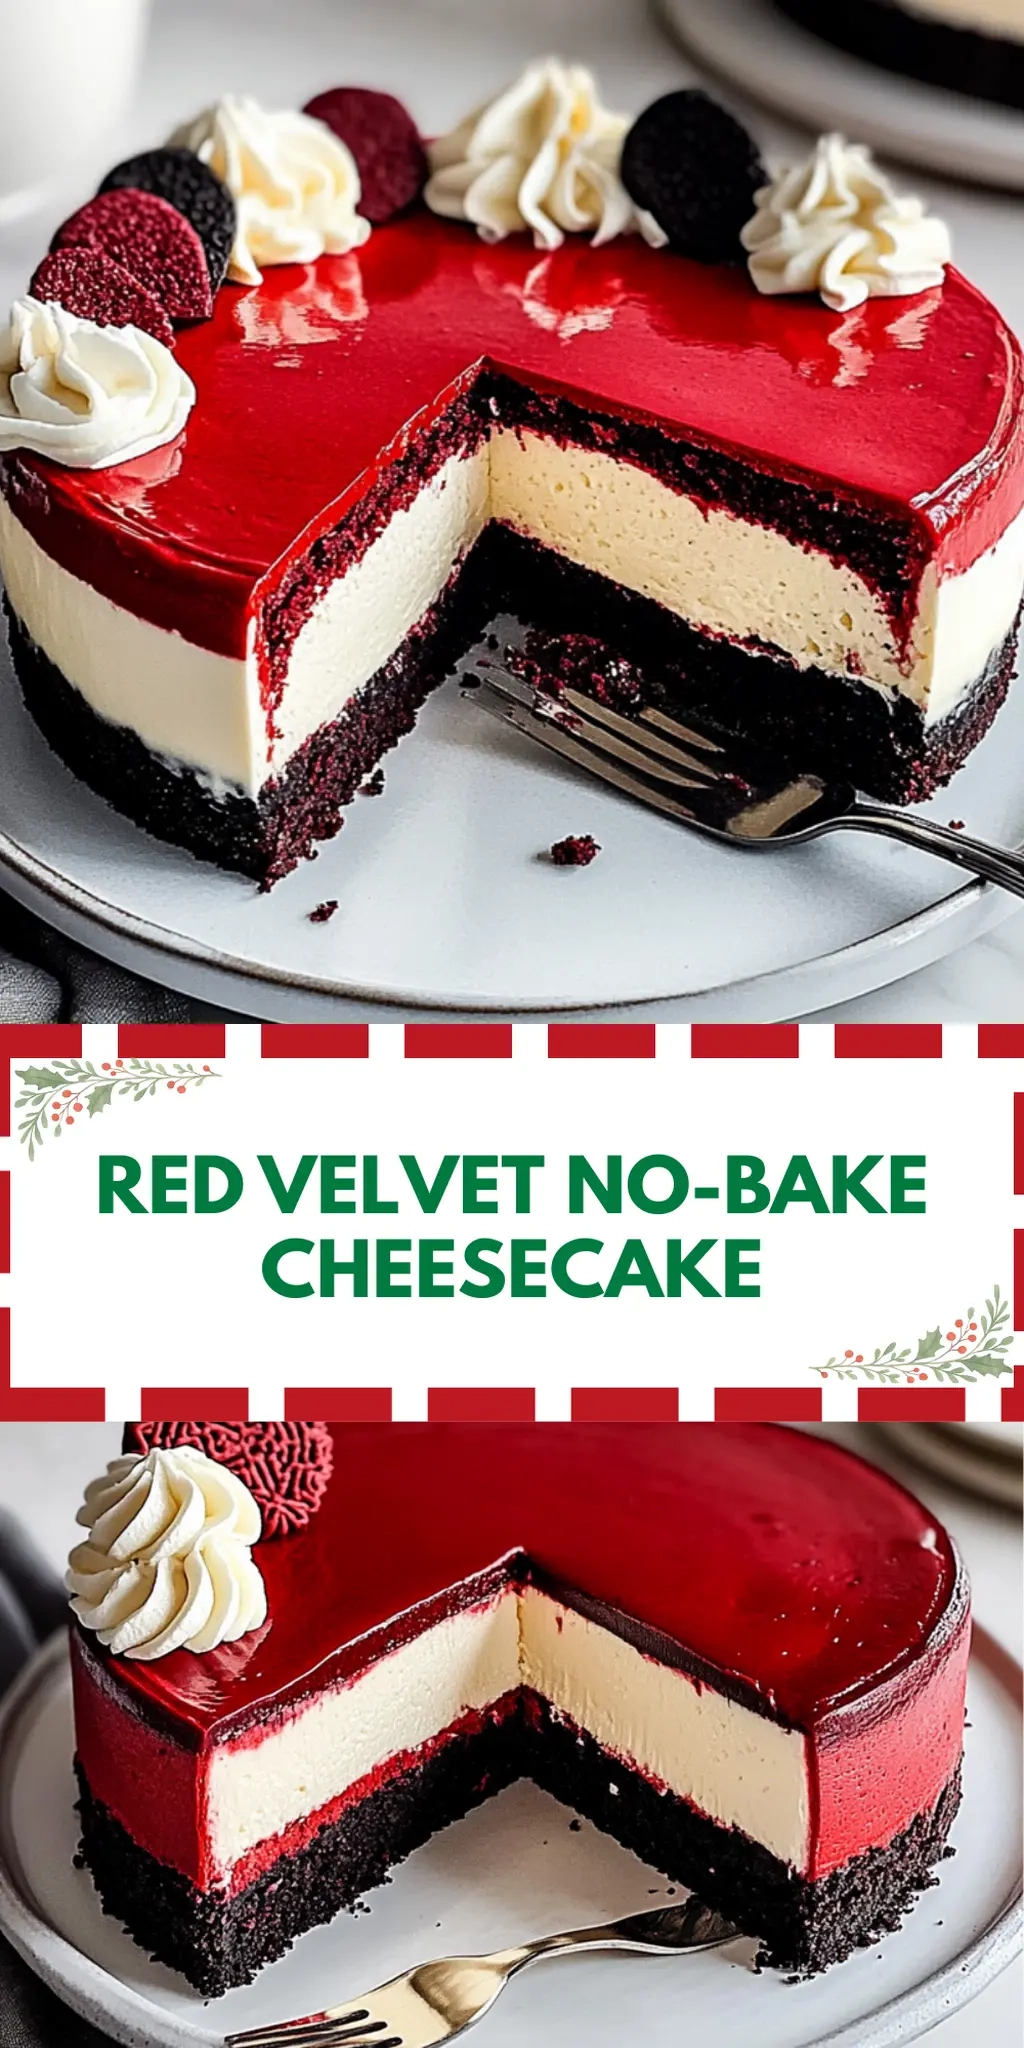
There’s something irresistibly inviting about a dessert that combines elegance with ease, and this Red Velvet No-Bake Cheesecake fits the bill perfectly. Picture this: a creamy cheesecake filling resting atop a crumbly red velvet crust that’s as delightful to the eyes as it is to the palate. Last Saturday, as friends gathered around my dining table, I decided to whip up this showstopper in no time at all.
With just 20 minutes of prep and the magic of chilling, I crafted a sweet treat that left everyone asking for seconds. The best part? No oven required! As we savored each rich, velvety bite, it became clear that this cheesecake is a game changer—perfect for celebrations or a simple indulgence on a warm afternoon. So, if you’re ready to elevate your dessert repertoire and impress your loved ones, let’s dive into this quick and delicious recipe that promises to be a favorite in your home!
Why You'll Love This Red Velvet No-Bake Cheesecake
- This Red Velvet No-Bake Cheesecake is incredibly easy to make, requiring just 20 minutes of prep time and no baking at all.
- Its rich and creamy texture combined with the vibrant red velvet crust creates a dessert that looks as spectacular as it tastes.
- This cheesecake is also versatile; it can be the star of special occasions or simply a delightful treat for a cozy night in.
- Plus, it’s a total crowd-pleaser that will have your guests coming back for more, ensuring it becomes a go-to recipe in your dessert collection.
Red Velvet No-Bake Cheesecake Ingredients
For the Crust
• Red velvet cake mix – helps create a vibrant, flavorful base for this cheesecake.
• Unsalted butter – adds richness and binds the crust together for perfect texture.
For the Filling
• Cream cheese – provides a creamy and smooth texture that’s essential for no-bake cheesecakes.
• Sour cream – adds a tangy flavor and ensures the filling is rich and luscious.
• Powdered sugar – sweetens the cheesecake while keeping it extra smooth and creamy.
• Vanilla extract – enhances the flavor and complements the richness of the cheesecake.
• Whipped topping – lightens the filling and gives it a delightful, airy texture, making this Red Velvet No-Bake Cheesecake irresistible!
How to Make Red Velvet No-Bake Cheesecake
-
Prepare the crust: In a mixing bowl, combine the melted butter and red velvet cake mix until it becomes crumbly. Press this mixture firmly into the bottom of a springform pan for a solid base.
-
Make the filling: In another bowl, beat the softened cream cheese and sour cream together until it’s smooth and creamy. Gradually add in the sifted powdered sugar and vanilla extract, mixing until everything is well combined and velvety.
-
Fold in the whipped topping: Gently fold in the whipped topping to the cream cheese mixture until smoothly incorporated. This will give your cheesecake a light and airy texture.
-
Assemble: Pour the delicious cream cheese filling over the prepared crust, spreading it evenly with a spatula. Cover the springform pan with plastic wrap and chill in the refrigerator for at least four hours or overnight to set properly.
-
Serve: Once set, carefully remove the cheesecake from the springform pan, slice it into portions, and enjoy the cheesecake chilled for the best flavor and texture!
Optional: Garnish with whipped cream or fresh berries for a beautiful presentation.
Exact quantities are listed in the recipe card below.
Make Ahead Options
These Red Velvet No-Bake Cheesecakes are perfect for meal prep enthusiasts! You can prepare the crust and filling up to 24 hours in advance, taking just a few moments to blend the melted butter with the red velvet cake mix and combine the creamy ingredients. Simply store the crust in an airtight container and refrigerate the filling in a separate container. When you’re ready to serve, pour the filling over the crust and let it chill for at least 4 hours (or overnight) to ensure it sets beautifully. This way, you’ll not only save time on busy weeknights but also delight your family and friends with a dessert that remains just as delicious!
How to Store and Freeze Red Velvet No-Bake Cheesecake
Fridge: Enjoy your Red Velvet No-Bake Cheesecake fresh for up to 3 days. Cover it tightly with plastic wrap or place it in an airtight container to prevent drying out.
Freezer: To freeze, slice the cheesecake and wrap each piece in plastic wrap, then place them in a freezer-safe container. It can be frozen for up to 2 months for a sweet treat later on!
Thawing: To enjoy, thaw the cheesecake slices in the fridge overnight. Avoid thawing at room temperature to maintain its creamy texture.
Reheating: There’s no need to reheat this dessert; simply serve chilled right from the fridge for the best flavor and texture!
Red Velvet No-Bake Cheesecake Variations
Feel free to give this cheesecake a personal twist based on your preferences and pantry staples!
-
Gluten-Free: Substitute the red velvet cake mix with a gluten-free version to accommodate dietary needs. Your cheesecake will still be delicious and enjoyable!
-
Dairy-Free: Replace cream cheese and sour cream with plant-based alternatives, like cashew cream and dairy-free yogurt. This option doesn’t skimp on creaminess!
-
Chocolate Lovers: Add ¼ cup of cocoa powder to the filling for a decadent chocolate boost that complements the red velvet beautifully. Chocolate and red velvet are a match made in heaven!
-
Nutty Crunch: Incorporate crushed nuts like pecans or walnuts into the crust for a delightful added crunch and a nutty flavor profile. The texture contrast will make each bite even more satisfying!
-
Mini Cheesecakes: Serve individual portions in small jars or cupcake liners for cute, portable desserts. These mini versions are perfect for parties or gatherings!
-
Fruit Toppings: Top your cheesecake with fresh raspberries or strawberries for a vibrant, fruity burst of flavor that complements the richness of the cream cheese. Nature’s candy adds a lovely touch!
-
Spicy Kick: Mix in a sprinkle of cayenne pepper or cinnamon to the filling for a warm, spicy flavor that enhances the cheesecake’s sweetness. It will surprise your taste buds!
-
Layered Delight: Create a layered dessert by alternating the red velvet crust and cheesecake filling with layers of chocolate or vanilla mousse. This creative approach offers a fun presentation and flavors to savor!
What to Serve with Red Velvet No-Bake Cheesecake?
Imagine gathering your loved ones around the table, indulging in sweet flavors and heartwarming conversations that pair perfectly with this delightful cheesecake.
- Fresh Berries: Summery strawberries or raspberries add a burst of tartness, beautifully balancing the sweetness of the cheesecake.
- Chocolate Drizzle: A rich dark or milk chocolate sauce drizzled on top elevates the dessert, adding a luscious depth that chocolate lovers adore.
- Mint Chocolate Chip Ice Cream: The cool, minty flavor of this ice cream introduces refreshing notes that complement the rich cheesecake in a delightful way.
- Coffee: A warm cup of freshly brewed coffee awakens and enhances the dessert’s flavor profiles, making every bite even more satisfying.
- Whipped Cream: Light and airy, a dollop of whipped cream atop each slice adds creaminess and enhances presentation, making it irresistible.
- Caramel Sauce: Golden, gooey caramel drizzled over the cheesecake introduces a sweet and creamy contrast that takes desserts to new heights.
- Almond Cookies: Crisp almond cookies on the side add a crunchy texture and nutty flavor that blends beautifully with the creamy cheesecake.
Let your sweet creation shine even brighter with these delightful companions as you round out your perfect dessert experience!
Chef's Helpful Tips
- To ensure a perfect crust for your Red Velvet No-Bake Cheesecake, make sure to press the crumb mixture firmly into the bottom of the springform pan to avoid a crumbly base.
- When combining the cream cheese and sour cream, let them soften to room temperature for an ultra-smooth filling, as cold ingredients can cause lumps.
- Be gentle when folding in the whipped topping, as this will maintain the light, airy texture of your filling that makes the cheesecake irresistible.
- Remember to chill the cheesecake for at least four hours or overnight, as this allows the flavors to meld and the filling to set properly for the best slice.
Red Velvet No-Bake Cheesecake Recipe FAQs
What kind of red velvet cake mix should I use?
Absolutely! Use any brand of red velvet cake mix that you prefer. Look for options without dark spots or signs of aging on the package. If you’re feeling adventurous, you could even make your own red velvet cake mix from scratch, adjusted to your taste!
How long can I store the Red Velvet No-Bake Cheesecake in the fridge?
You can enjoy your Red Velvet No-Bake Cheesecake fresh for up to 3 days. Just be sure to cover it tightly with plastic wrap or keep it in an airtight container to prevent it from drying out or absorbing other flavors from the fridge.
Can I freeze Red Velvet No-Bake Cheesecake? How?
Yes, you can! To freeze, first, slice the cheesecake into individual portions. Wrap each slice in plastic wrap securely to prevent freezer burn. Place the wrapped pieces in a freezer-safe container or bag. This delightful dessert can be frozen for up to 2 months!
How do I thaw the cheesecake once frozen?
When you’re ready to indulge, simply transfer the slices from the freezer to the fridge and let them thaw overnight. Avoid thawing at room temperature, as this can disrupt the texture. This method will preserve that creamy goodness we all love!
Are there any dietary considerations I should be aware of?
Very! This cheesecake contains dairy and gluten, so it’s not suitable for those with lactose intolerance or gluten allergies. If you’re serving guests with dietary restrictions, consider using gluten-free cake mix and dairy-free cream cheese for an alternative that’s still delicious! It’s essential to check labels for potential allergens.
Red Velvet No-Bake Cheesecake
Ingredients
Equipment
Method
- In a mixing bowl, combine the melted butter and red velvet cake mix until it becomes crumbly. Press this mixture firmly into the bottom of a springform pan for a solid base.
- In another bowl, beat the softened cream cheese and sour cream together until it's smooth and creamy. Gradually add in the sifted powdered sugar and vanilla extract, mixing until everything is well combined and velvety.
- Gently fold in the whipped topping to the cream cheese mixture until smoothly incorporated.
- Pour the cream cheese filling over the prepared crust, spreading it evenly. Cover with plastic wrap and chill in the refrigerator for at least four hours or overnight to set.
- Once set, carefully remove from the springform pan, slice, and enjoy chilled!
Leave a Reply