There’s nothing quite like the satisfying crunch of a homemade granola bar to brighten your day. Picture this: a busy morning, and I reach for my pre-packaged snack, only to realize it’s loaded with ingredients I can’t even pronounce. That’s when I decided to take matters into my own hands. With just a few wholesome ingredients, I discovered the joy of crafting my own granola bars, customized to suit my taste and nutritional needs.
These delightful treats are not only a breeze to whip up, taking only 40 minutes from start to finish, but they’re also packed with wholesome goodness. Imagine the nutty aroma wafting through your kitchen as oats come together with creamy nut butter and a hint of sweetness from honey or maple syrup—completely irresistible! Whether you’re a busy professional needing a quick grab-and-go snack or a foodie seeking a healthy treat to share, these granola bars tick all the boxes: nutritious, delicious, and surprisingly easy to make. Let’s dive into this recipe that will turn your snack time into a wholesome experience!
Why You'll Love This Granola Bars
- These granola bars are incredibly easy to make, allowing you to enjoy a wholesome snack in just 40 minutes.
- You’ll be amazed by the rich flavor that comes from the combination of oats, nut butter, and a touch of sweetness, creating a treat that is hard to resist.
- Their versatility means you can customize the ingredients to suit your preferences, whether it’s swapping in your favorite nuts or adding in extra dried fruits.
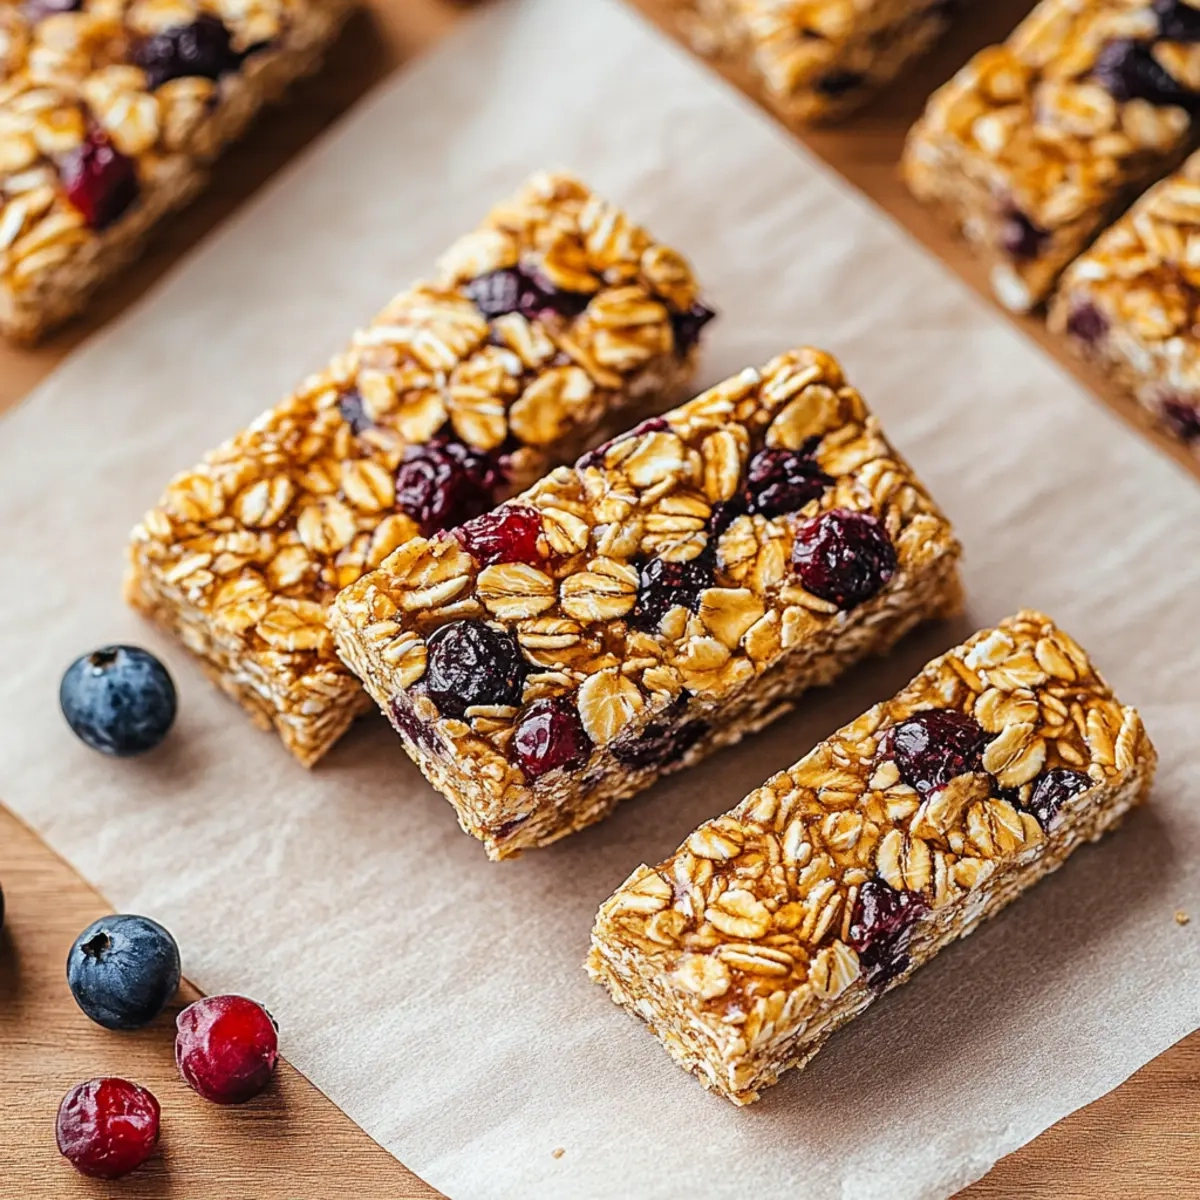
- Visually, these bars are a delight, with a beautiful golden color and appealing texture that make them perfect for sharing with friends and family.
Granola Bars Ingredients
For the Base
• Rolled oats – the backbone of your granola bars, providing hearty texture and fiber.
• Almond or peanut butter – adds creaminess and healthy fats; swap for sunflower seed butter if allergic.
• Honey or pure maple syrup – natural sweetener that holds the bars together; use agave syrup for a vegan option.
For the Crunch
• Mixed nuts – include chopped almonds and walnuts for a delightful crunch; feel free to add your favorites!
• Chia seeds or pumpkin seeds – these tiny powerhouses boost nutrition and add a nice crunch; both are great for omegas.
For the Sweetness
• Dried fruits – use cranberries, raisins, or apricots for a fruity flair; they add natural sweetness that complements the granola bars perfectly.
With these simple granola bars ingredients, you’ll be well on your way to creating a wholesome snack that you can feel good about enjoying!
How to Make Granola Bars
-
Preheat the Oven: Begin by preheating your oven to 350°F (175°C). This will prepare your space for baking, creating that lovely warmth that’ll enhance the flavors of your ingredients.
-
Mix Dry Ingredients: In a large mixing bowl, combine the rolled oats, chopped mixed nuts, chia seeds (or pumpkin seeds), and dried fruits. Stir until everything is well blended and evenly distributed for a balanced flavor in every bite.
-
Combine Wet Ingredients: In a separate bowl, whisk together the almond (or peanut) butter and honey (or maple syrup). If you’re finding it difficult to mix, a quick 15-second warming in the microwave can make it beautifully easy to combine.
-
Mix Together: Gently pour the creamy wet mixture over the dry ingredients. With a spatula or wooden spoon, mix everything together until thoroughly combined, making sure each ingredient is coated with that delicious nutty goodness.
-
Transfer to Dish: Carefully transfer the mixture into your lined 8×8-inch baking dish. Use your hands or a spatula to press down firmly, creating an even layer that holds together for perfectly shaped bars.
-
Bake to Perfection: Pop the dish into the preheated oven and bake for 25-30 minutes, or until the edges are golden brown. This is when your kitchen will fill with a heavenly aroma—trust me, it’s hard to resist!
-
Cool and Cut: Once baked, remove the dish from the oven and allow the bars to cool completely in the pan. Once cooled, slice into squares or rectangles as desired for easy snacking.
Optional: Drizzle melted dark chocolate over the bars for an extra indulgent treat.
Exact quantities are listed in the recipe card below.
Storage Tips for Granola Bars
Room Temperature: Store your granola bars in an airtight container at room temperature for up to 1 week to maintain freshness and flavor.
Fridge: For slightly longer shelf life, keep the bars in the fridge for up to 2 weeks, ensuring they remain in an airtight container to prevent drying out.
Freezer: Freeze granola bars in an airtight bag or container for up to 3 months. Just remember to separate layers with parchment paper to prevent sticking!
Reheating: If you prefer your bars warm, pop them in the microwave for about 10-15 seconds, making them taste freshly baked again!
What to Serve with Granola Bars?
Imagine enjoying a delightful array of sides that complement your homemade granola bars, elevating your snack time to a whole new level.
-
Fresh Fruit Salad: A vibrant mix of seasonal fruits not only brightens your plate but adds refreshing sweetness that pairs beautifully with the nutty bars.
-
Yogurt Parfait: Layer creamy yogurt with granola and fruit for a tasty, nutritious breakfast or snack that offers both protein and texture to your meal.
-
Nut Butter Dip: Serve with an extra scoop of almond or peanut butter for those who crave a bit more protein, enhancing the flavors of the granola bars while catering to your appetite.
-
Coconut Chips: Lightly toasted coconut chips add a delightful crunch and tropical flair to each bite, providing a perfect textural contrast to the chewy bars.
-
Milk or Plant-based Milks: A glass of cold milk or almond milk can complement the bars perfectly, creating a satisfying bite that can transport you back to childhood snack times.
-
Herbal Iced Tea: Refreshing iced herbal tea balances out the sweetness and adds a hint of herbal aroma that enhances your whole snacking experience.
-
Dark Chocolate Treats: For those with a sweet tooth, dark chocolate-covered almonds or pieces can enhance the richness of your granola bars while keeping things wholesome.
Each of these delightful pairings brings out the best in your granola bars, creating a memorable and satisfying meal.
Make Ahead Options
These granola bars are not only delicious but perfect for meal prep enthusiasts! You can mix the dry ingredients (rolled oats, nuts, seeds, and dried fruits) up to 3 days in advance and store them in an airtight container to maintain freshness. Additionally, the wet ingredients (nut butter and honey) can be prepared ahead of time and stored in the fridge for up to 24 hours. When you’re ready to bake, simply combine the two mixtures and follow the baking steps as usual. This way, you’ll have wholesome snacks ready to go, saving time on busy days while ensuring that your bars remain just as delicious!
Granola Bars Variations
Feel free to make these granola bars your own by experimenting with exciting twists and substitutions.
- Nut-Free: Substitute nut butter with sunflower seed butter and skip the mixed nuts for a safe option.
- Vegan: Use maple syrup instead of honey and select vegan-friendly chocolate chips for an indulgent treat.
- Protein Boost: Add a scoop of your favorite protein powder to the dry mix for an extra energy kick.
- Flavor-Fusion: Mix in a teaspoon of cinnamon or vanilla extract to elevate the flavor profile and warmth.
- Fruity Explosion: Swap dried fruits for tropical options like dried mango or pineapple to brighten up your bars.
- Chocolate Drizzle: Drizzle melted dark chocolate on top after baking for a deliciously decadent finishing touch.
- Hearty Texture: Add a 1/4 cup of crispy rice cereal for added crunch and a delightful surprise in every bite.
- Savory Twist: Incorporate a pinch of sea salt and chopped rosemary for a surprising herbaceous flavor that contrasts beautifully with sweetness.
Chef's Helpful Tips
- Always use rolled oats for the best texture in your granola bars, as instant oats can lead to a mushy consistency.
- To avoid overly sticky bars, ensure you measure your nut butter and honey accurately, as too much liquid can prevent them from holding together.
- When combining the wet and dry ingredients, mix gently but thoroughly to ensure an even distribution of flavors and textures throughout the bars.
- For optimal baking results, keep an eye on the bars in the oven and remove them once they are golden brown to prevent overcooking.
Granola Bars Recipe FAQs
What type of oats should I use for granola bars?
Absolutely, I recommend using rolled oats for the best texture in your granola bars. Instant oats can lead to a mushy consistency, while rolled oats maintain that delightful chewiness and help bind everything together.
How should I store granola bars to keep them fresh?
You can store your granola bars in an airtight container at room temperature for up to 1 week. For a slightly longer shelf life, keep them in the fridge where they’ll stay fresh for up to 2 weeks. Just make sure the container is air-tight to prevent any drying out!
Can I freeze granola bars, and if so, how?
Certainly! To freeze your granola bars, place them in an airtight bag or container, and they will stay good for up to 3 months. It’s a good idea to separate layers with parchment paper to prevent them from sticking together. When you want to enjoy them, just remove them from the freezer and let them thaw ay room temperature or pop them into the microwave for about 10-15 seconds to warm them back up!
What should I do if my granola bars are too crumbly?
If your granola bars are crumbling apart, it could be due to too much dry ingredients or not enough binding ingredients. To remedy this, try adding an extra tablespoon of nut butter or honey when mixing the ingredients, ensuring that everything is well-coated. When pressing the mixture into the baking dish, make sure to pack it down firmly so they hold together better!
Are there any allergy considerations when making granola bars?
Absolutely! If you’re making granola bars for a group, it’s wise to consider common allergens like nuts. You can easily substitute almond or peanut butter with sunflower seed butter for a nut-free version. Additionally, check your dried fruits and mixed nuts to ensure they’re compliant with anyone’s dietary restrictions. If you’re unsure about ingredients, it’s always best to ask before sharing!
Can I modify the ingredients in my granola bars?
The more the merrier! Feel free to customize your granola bars by swapping in different nuts, seeds, or dried fruits according to your preferences. If you want a more tropical flair, consider using dried mango or coconut, or go for a chocolatey touch by adding dark chocolate chips. The flexibility of this recipe is one of its many delights!
Granola Bars
Ingredients
Equipment
Method
- Preheat the Oven: Begin by preheating your oven to 350°F (175°C).
- Mix Dry Ingredients: In a large mixing bowl, combine the rolled oats, chopped mixed nuts, chia seeds (or pumpkin seeds), and dried fruits.
- Combine Wet Ingredients: In a separate bowl, whisk together the almond (or peanut) butter and honey (or maple syrup).
- Mix Together: Gently pour the creamy wet mixture over the dry ingredients and mix until thoroughly combined.
- Transfer to Dish: Carefully transfer the mixture into a lined 8×8-inch baking dish, press down firmly.
- Bake to Perfection: Pop the dish into the preheated oven and bake for 25-30 minutes, or until the edges are golden brown.
- Cool and Cut: Once baked, remove the dish from the oven and allow the bars to cool completely in the pan. Slice into squares or rectangles.
Leave a Reply