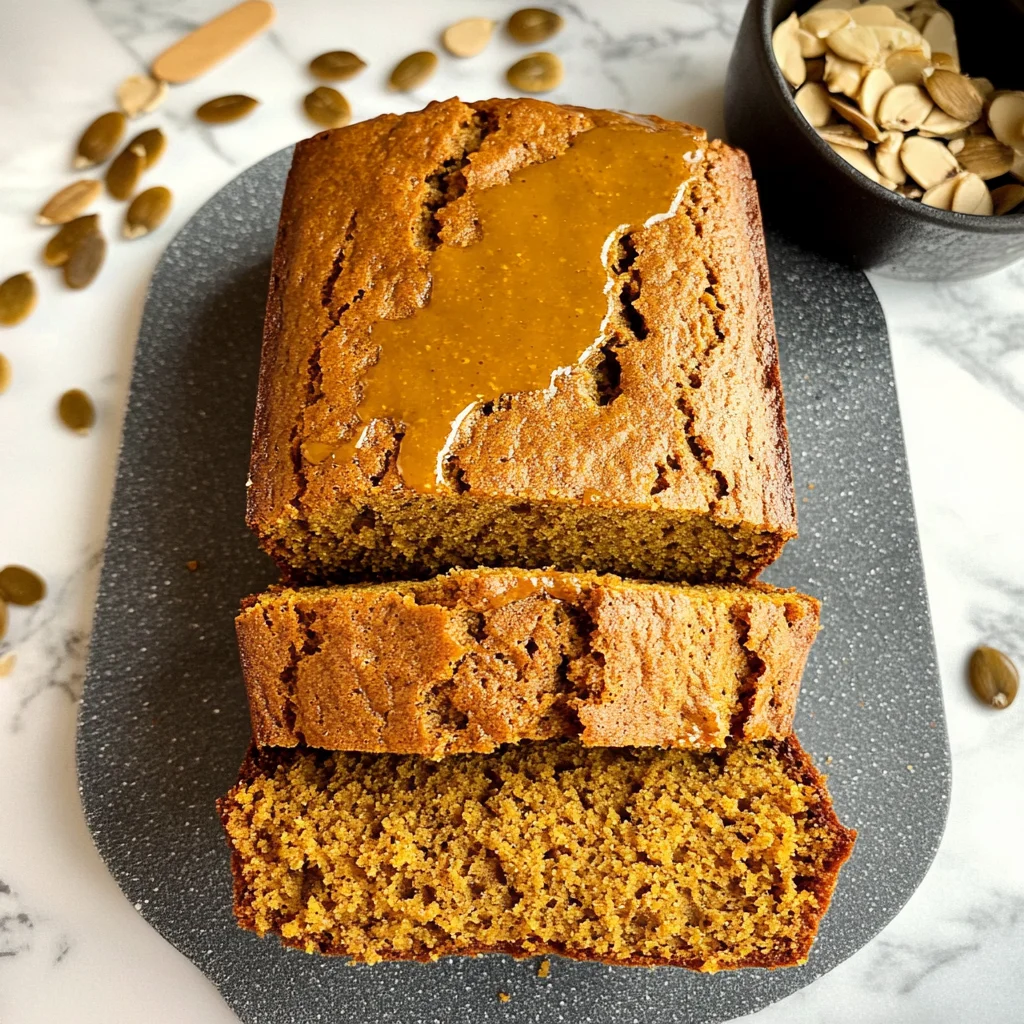
Imagine the warm aroma of autumn wafting through your kitchen as you bake a loaf of gluten free pumpkin bread, where the sweet notes of honey blend seamlessly with the earthy richness of pumpkin and warm spices like cinnamon, nutmeg, and ginger. The moment you slice into the golden-brown crust, you’re greeted by a tender, moist interior that practically melts in your mouth—a comforting treat that’s perfect for cozy gatherings or quiet afternoons.
There’s something truly special about sharing homemade bread with loved ones, especially when it’s as simple and rewarding as this recipe. You’ll find that not only is it easy to whip up in just over an hour, but the satisfaction of creating something so delicious from scratch makes every bite even more enjoyable. So let’s dive into this delightful baking adventure together!
Why You'll Love This Recipe
- You’ll adore this gluten free pumpkin bread for its delightful combination of warm spices and rich pumpkin flavor that fills your kitchen with an inviting aroma.
- The use of almond and coconut flour not only ensures a moist texture but also makes it a nutritious choice for gluten-sensitive bakers.
- Visually, the golden-brown crust is sure to impress, making it perfect for gatherings or cozy family breakfasts.
- Plus, this recipe is versatile enough to enjoy plain or with your favorite spreads for an extra touch of indulgence.
The first time I pulled the gluten free pumpkin bread from the oven, my family’s eyes lit up. They eagerly gathered around, and one bite in, I knew I’d found a new fall favorite that would warm our hearts.
This delightful recipe is simple to follow and perfect for sharing with loved ones.
Essential Ingredients
To create the perfect gluten free pumpkin bread, gather these key ingredients that work in harmony for flavor and texture.
1 cup almond flour: This nutty flour provides moisture and a tender crumb; make sure to sift it for the best consistency.
1/2 cup coconut flour: Known for its absorbent nature, coconut flour adds a hint of sweetness; sifting it ensures an even texture.
1 teaspoon baking soda: Ensure it’s fresh for proper leavening; this helps the bread rise beautifully while keeping it light.
1 teaspoon baking powder: Verify it’s gluten-free to maintain the integrity of the recipe; this ingredient also contributes to the bread’s fluffiness.
1 teaspoon ground cinnamon: A warm spice that enhances flavor; using fresh cinnamon can elevate your pumpkin bread experience.
1/2 teaspoon ground nutmeg: This spice adds depth and warmth; consider using freshly grated nutmeg for a more robust flavor.
1/4 teaspoon ground ginger: For a subtle kick, ginger complements the other spices perfectly, balancing the sweetness of the pumpkin.
1/2 teaspoon salt: Essential for enhancing all the flavors; don’t skip this ingredient as it ties everything together.
1 cup canned pumpkin puree: Use pure pumpkin puree (not pie filling) for authentic flavor and moisture in your bread.
1/2 cup honey: Acts as a natural sweetener, adding moisture; maple syrup can be used as a delicious alternative.
1/4 cup coconut oil: Melted and slightly cooled, it keeps your bread moist and imparts a subtle coconut flavor to enhance richness.
3 large eggs: At room temperature, eggs help bind everything together while providing structure and moisture to the bread.
1 teaspoon vanilla extract: Adds a lovely aromatic quality to your gluten free pumpkin bread, enriching its overall flavor profile.
The full ingredients list, including measurements, is provided in the recipe card directly below.
Let’s Make It Together
Step 1: Prepare the Oven and Pan:First, preheat your oven to 350°F (175°C). You’ll want that warm atmosphere to help your gluten free pumpkin bread rise beautifully. While the oven heats up, take a moment to line a 9×5 inch loaf pan with parchment paper, allowing an overhang for easy removal. This simple step not only prevents sticking but also makes cleanup a breeze!
Step 2: Mix Dry Ingredients:In a large mixing bowl, combine 1 cup of sifted almond flour, 1/2 cup of sifted coconut flour, 1 teaspoon of fresh baking soda, 1 teaspoon of gluten-free baking powder, 1 teaspoon of ground cinnamon, 1/2 teaspoon of ground nutmeg, 1/4 teaspoon of ground ginger, and 1/2 teaspoon of salt. Whisk them together until well combined; the aromas of the spices should start wafting through your kitchen! A personal tip: sifting your flours helps create a lighter texture in your bread.
Step 3: Mix Wet Ingredients:In another bowl, whisk together 1 cup of canned pumpkin puree (make sure it’s not pumpkin pie filling), 1/2 cup of honey (or maple syrup for a different sweetness), 1/4 cup of melted coconut oil that has cooled slightly, 3 large room temperature eggs, and 1 teaspoon of vanilla extract. The mixture should be smooth and velvety, with a lovely golden-orange hue! Remember to mix thoroughly so all those flavors meld together beautifully.
Step 4: Combine Mixtures:Now it’s time to bring everything together! Pour the wet ingredients into the dry ingredients and gently stir with a spatula until just combined. Be cautious not to overmix; you want the batter to be somewhat lumpy rather than smooth for optimal texture. This will yield a tender crumb when baked.
Step 5: Bake the Bread:Pour the delicious batter into your prepared loaf pan, smoothing the top with a spatula. Slide it into your preheated oven and bake for about 50-60 minutes. Keep an eye on it as it bakes—the smell will be intoxicating! To check for doneness, insert a toothpick into the center; it should come out clean when ready. Once baked, let it cool in the pan for about 10 minutes before lifting it out using the parchment paper to cool completely on a wire rack. This cooling step is crucial to avoid sogginess on the bottom.
With your gluten free pumpkin bread now perfectly baked and cooling down, let’s explore some delightful serving suggestions!
You Must Know
- Using freshly sifted almond and coconut flour is essential for achieving the ideal texture in your gluten free pumpkin bread, as it helps to aerate the flours and prevent clumping.
- I learned that even a small difference can affect the final product.
- Allowing the eggs to reach room temperature before mixing ensures better emulsification, resulting in a more cohesive batter.
- This tip has transformed my baking, creating a lighter loaf every time.
- Don’t skip the cooling step after baking; it’s vital for preventing sogginess.
- Trust me, letting the bread cool completely on a wire rack makes all the difference for perfect slices.
As you prepare this delightful gluten free pumpkin bread, remember that patience and attention to detail yield the best results in every bite.
Add Your Touch
Feel free to customize your gluten free pumpkin bread by adding a handful of chopped nuts like walnuts or pecans for crunch, or stir in some chocolate chips for a delightful sweetness. For an extra flavor twist, consider incorporating dried cranberries or raisins. If you prefer a spicier profile, try adding a pinch of cloves or allspice. Embrace your creativity and adjust the sweetness by using maple syrup instead of honey if that’s your preference. Remember, this recipe is just a canvas; let your imagination run wild! Now, let’s dive into how to bake this delicious bread perfectly.
Storing & Serving
To maintain the flavor and freshness of your gluten free pumpkin bread, store it in an airtight container at room temperature for up to 3 days. For longer storage, refrigerate it for up to a week or freeze slices for up to 3 months. Serve it plain, or with a spread of almond butter or cream cheese for added deliciousness. This ensures every bite remains delightful and moist.
Now that you have your gluten free pumpkin bread ready to enjoy, let’s explore some delicious variations you can try!
Chef's Helpful Tips
- 1. Ensure your baking soda is fresh for the best rise; expired baking soda can lead to a dense gluten free pumpkin bread. A simple test is to add a little vinegar to it—if it bubbles, it’s good to go!
- To prevent overmixing the batter, combine the wet and dry ingredients until just incorporated. This helps maintain a light texture, allowing your gluten free pumpkin bread to rise beautifully without becoming tough.
- For added flavor and moisture, consider folding in some chopped nuts or dairy-free chocolate chips before baking. This not only enhances taste but can also provide a delightful texture contrast in your gluten free pumpkin bread.
These tips will help you achieve the perfect loaf, making your baking experience enjoyable and rewarding!
As I pulled my gluten free pumpkin bread from the oven, the warm, spicy aroma filled my kitchen, and my family gathered around, eagerly awaiting their first slice—it’s moments like these that make baking so fulfilling.
How to Know It’s Done Perfectly
Your gluten free pumpkin bread is perfectly done when it has a golden-brown crust, feels firm yet springy to the touch, and releases a warm, inviting aroma of spices. A toothpick inserted into the center should come out clean. Remember, slight variations in texture and color are normal—trust your instincts!
As you prepare to enjoy your delicious creation, let’s explore some delightful serving suggestions.
FAQ
What makes this gluten free pumpkin bread recipe special?
This gluten free pumpkin bread is special because it combines the rich flavors of pumpkin with the nutty essence of almond and coconut flours, resulting in a moist and delicious loaf that everyone can enjoy.
Can I substitute any ingredients in the gluten free pumpkin bread?
While it’s best to stick to the official ingredients for optimal results, you can swap honey for maple syrup if you prefer a different sweetener. However, maintaining the balance of dry and wet ingredients is crucial for texture.
How long does gluten free pumpkin bread last?
When stored in an airtight container at room temperature, gluten free pumpkin bread will stay fresh for about 3-5 days. For longer storage, consider freezing it for up to three months.
Can I add nuts or chocolate chips to the gluten free pumpkin bread?
Absolutely! Adding nuts or chocolate chips can enhance the flavor and texture of your gluten free pumpkin bread. Just be sure to fold them into the batter gently so that they’re evenly distributed without overmixing.
What should I do if my gluten free pumpkin bread sinks in the middle?
If your gluten free pumpkin bread sinks in the middle, it may be due to underbaking or too much moisture in the batter. Always check that a toothpick comes out clean before removing it from the oven to ensure proper baking.
With these FAQs addressed, you’ll feel confident making this delightful gluten free pumpkin bread! Next up, let’s explore some serving suggestions that perfectly complement this seasonal treat.
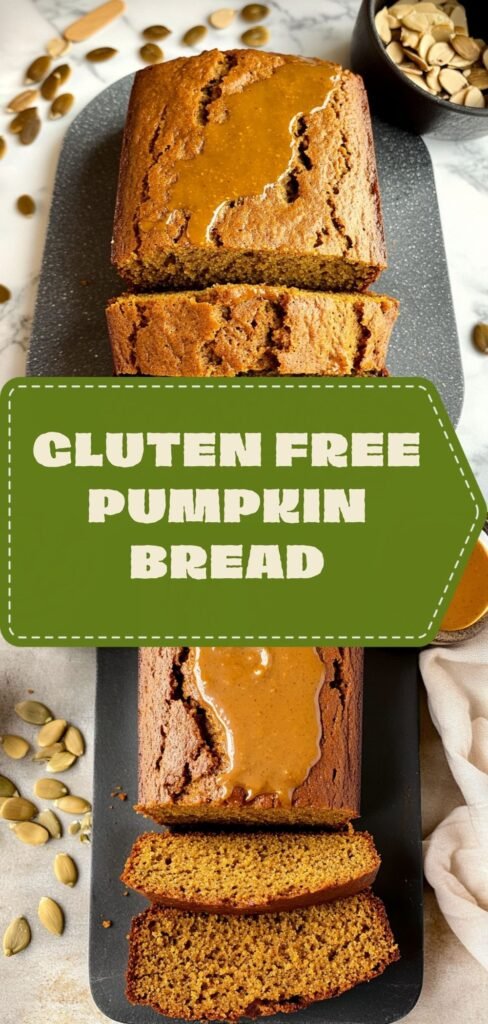
Gluten Free Pumpkin Bread
Ingredients
Dry Ingredients
- 1 cup almond flour sifted
- 1/2 cup coconut flour sifted
- 1 teaspoon baking soda ensure it's fresh
- 1 teaspoon baking powder ensure it's gluten-free
- 1 teaspoon ground cinnamon for flavor
- 1/2 teaspoon ground nutmeg for flavor
- 1/4 teaspoon ground ginger for flavor
- 1/2 teaspoon salt to enhance flavor
Wet Ingredients
- 1 cup canned pumpkin puree not pumpkin pie filling
- 1/2 cup honey or maple syrup for sweetness
- 1/4 cup coconut oil melted and slightly cooled
- 3 large eggs room temperature
- 1 teaspoon vanilla extract for flavor
Instructions
Prepare the Oven and Pan
- Preheat your oven to 350°F (175°C). This ensures that the bread bakes evenly and rises properly.
- Line a 9x5 inch loaf pan with parchment paper, allowing some overhang for easy removal. This prevents sticking and makes for easy cleanup.
Mix Dry Ingredients
- In a large mixing bowl, combine the almond flour, coconut flour, baking soda, baking powder, cinnamon, nutmeg, ginger, and salt. Whisk together until well combined. This helps to evenly distribute the leavening agents and spices.
Mix Wet Ingredients
- In another bowl, whisk together the pumpkin puree, honey (or maple syrup), melted coconut oil, eggs, and vanilla extract until smooth. This mixture adds moisture and sweetness to the bread.
Combine Mixtures
- Pour the wet ingredients into the dry ingredients. Stir gently with a spatula until just combined. Be careful not to overmix, as this can make the bread dense.
Bake the Bread
- Pour the batter into the prepared loaf pan, smoothing the top with a spatula. Bake in the preheated oven for 50-60 minutes, or until a toothpick inserted into the center comes out clean. This step is crucial for ensuring the bread is cooked through.
- Once baked, remove the bread from the oven and let it cool in the pan for 10 minutes. Then, lift it out using the parchment paper and let it cool completely on a wire rack. This prevents sogginess on the bottom.
Leave a Reply