There’s nothing quite like the enveloping warmth of a homemade soup on a chilly evening, and this Sicilian Chicken Soup is the ultimate comfort food. The moment you start chopping vegetables, the fresh, vibrant scents will transport you to a cozy Italian kitchen, where hearty dishes come to life. I stumbled upon this recipe during one of my weekend cooking marathons, yearning for something flavorful yet uncomplicated.
With bone-in chicken thighs simmering alongside a colorful medley of veggies, every spoonful bursts with rich flavors and nutrition. Perfect for those looking to escape the monotonous fast-food routine, this soup is easily customizable; throw in whatever seasonal veggies you have on hand.
In just under an hour, you’ll be cradling a warm bowl of Sicilian goodness, ready to share with family or savor quietly on your own. Get ready to impress your taste buds without breaking a sweat!
Why You'll Love This Sicilian Chicken Soup
- This Sicilian Chicken Soup is incredibly easy to make, allowing you to whip up a delicious meal without spending hours in the kitchen.
- The blend of vibrant vegetables and tender chicken creates a flavor explosion that will have everyone coming back for seconds.
- Its versatility means you can easily adapt it to include your favorite seasonal ingredients or whatever you have on hand.
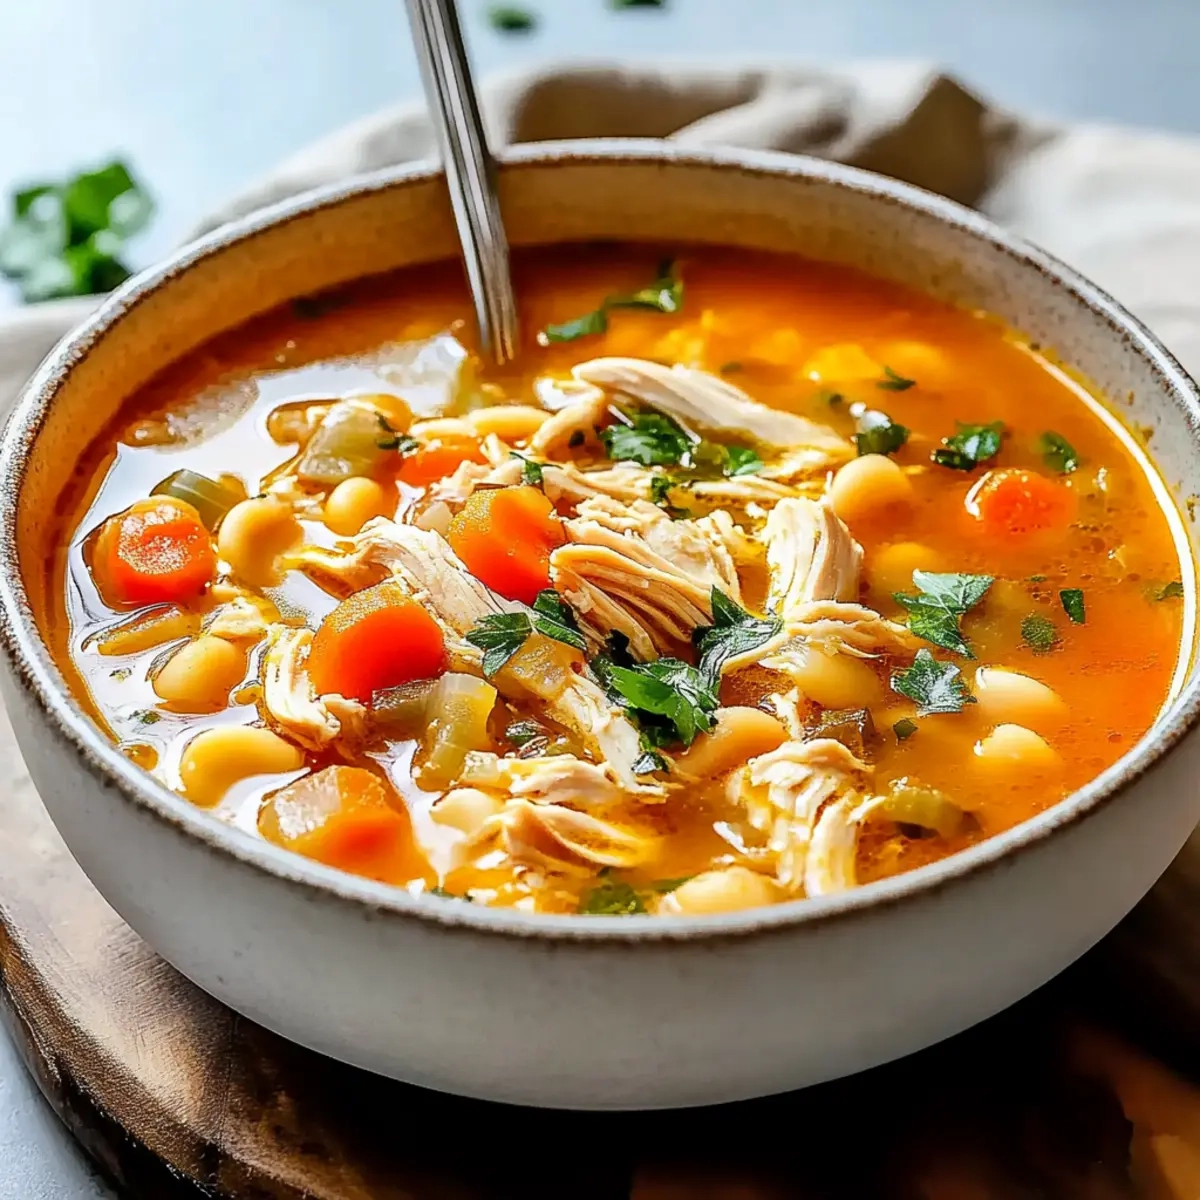
- Visually appealing with its colorful array of veggies and hearty noodles, this soup is not only nourishing but also a feast for the eyes.
Sicilian Chicken Soup Ingredients
• Here’s everything you need for a heartwarming bowl!
For the Soup Base
- Bone-in, skin-on chicken thighs – provide rich flavor and moisture as they simmer.
- Medium onion, chopped – adds a savory base that enhances the overall taste.
- Celery, chopped – lends a refreshing crunch and aromatic quality to the broth.
- Carrots, chopped – they not only sweeten the soup but also brighten up the color.
- Large yellow bell pepper, chopped – brings sweetness and a pop of color to the dish.
- Russet potatoes, peeled and cubed – add heartiness and act as a natural thickener.
- Garlic, chopped – offers a robust flavor that complements the chicken beautifully.
- No-salt diced tomatoes – bring acidity and brighten the overall flavor profile.
- Dry bay leaves – infuse the soup with a subtle and fragrant earthiness.
- Kosher salt – enhances all the other flavors; adjust to taste.
For the Stock
- Low-sodium chicken stock – allows you to control the saltiness while providing depth.
- Water or additional chicken stock – helps reach your desired soup consistency.
For the Pasta
- Dry ditalini pasta – tiny pasta shapes that soak up the flavorful broth perfectly.
For the Finish
- Fresh chopped Italian parsley – adds a burst of freshness right before serving.
- Fresh black pepper – season to taste for that final touch of warmth and flavor.
Now that you have all the ingredients ready, you’re just a step away from making this delightful Sicilian Chicken Soup!

How to Make Sicilian Chicken Soup
-
Combine ingredients: In a large soup pot, bring together the chicken, onion, celery, carrots, bell pepper, potatoes, garlic, diced tomatoes, bay leaves, and salt. This hearty mixture sets the foundation for your comforting soup.
-
Add liquids: Pour in the chicken stock and water, then season with black pepper to taste. Cover the pot and bring to a boil; then reduce the heat to low. Let it simmer for 30 minutes until the chicken is tender and easily falling off the bones.
-
Incorporate pasta: Remove the chicken using tongs, then add the ditalini pasta to the pot. Cook for an additional 13-15 minutes, partially covered, stirring occasionally to prevent sticking. The pasta should be tender but not mushy.
-
Shred chicken: Once cool, use two forks to shred the chicken, discarding the skin and bones. Stir the shredded chicken back into the pot and check the vegetables—especially the potatoes—to ensure they’re cooked to perfection.
-
Serve the soup: Discard the bay leaves and stir in the fresh parsley. Ladle the warm soup into bowls and enjoy the comforting aroma as you serve!
Optional: Garnish with a sprinkle of extra parsley for added color and freshness.
Exact quantities are listed in the recipe card below.
How to Store and Freeze Sicilian Chicken Soup
Fridge: Store leftover Sicilian Chicken Soup in an airtight container for up to 3 days. Make sure the soup cools completely before sealing to maintain freshness.
Freezer: For longer storage, freeze the soup in portion-sized containers for up to 3 months. Leave some space at the top of the container for expansion.
Reheating: When ready to enjoy, thaw frozen soup overnight in the fridge. Reheat on the stovetop over medium heat, stirring occasionally, until heated through—adding a splash of water or stock if needed.
Room Temperature: Avoid leaving the soup out for more than 2 hours to prevent bacterial growth. Always refrigerate promptly after serving to keep it safe.
What to Serve with Sicilian Chicken Soup?
There’s nothing quite like the satisfaction of creating a cozy meal that complements the heartwarming flavors of your homemade soup.
-
Garlic Bread: This classic side is perfect for soaking up every last drop of the savory broth. Crispy on the outside and soft inside, it’s a comforting companion.
-
Mixed Greens Salad: A refreshing salad with crunchy greens and a light vinaigrette cleanses your palate, balancing the richness of the soup and adding a burst of freshness.
-
Parmesan Crisps: These savory bites offer a delightful crunch and cheesy goodness, enhancing the experience while echoing the Italian essence of your soup.
-
Roasted Vegetables: Seasonal veggies roasted in olive oil bring earthiness and depth, perfectly harmonizing with the vibrant ingredients in the soup. A splash of balsamic can elevate the flavors even more.
-
Herbed Couscous: Light and fluffy, herbed couscous is a wonderful textural contrast. Each bite absorbs the delicious soup broth, creating a fusion of flavors.
-
Lemonade or Iced Tea: A glass of refreshing lemonade or chilled iced tea balances the warmth of the soup with a cool zing, making for a delightful meal experience.
-
Tiramisu: For dessert, this classic Italian treat rounds out your meal beautifully. Its creamy layers and coffee notes are a decadent finish to your Italian-inspired dinner.
Sicilian Chicken Soup Variations
Feel free to let your creativity shine and adapt this comforting soup to suit your taste buds!
-
Gluten-Free: Substitute ditalini pasta with gluten-free pasta or rice. You’ll enjoy the same heartiness without the gluten.
-
Vegetable Boost: Add your favorite seasonal veggies, like zucchini or spinach. They’ll not only enhance the flavor but also increase the nutritional value.
-
Spicy Kick: For a touch of heat, include red pepper flakes or diced jalapeños. Your taste buds will awaken with every spicy spoonful!
-
Herb Infusion: Experiment with fresh thyme or oregano for a fragrant twist. These herbs will elevate the soup’s aroma and depth of flavor beautifully.
-
Creamy Version: Stir in a splash of heavy cream or coconut milk before serving for a richer, creamier texture. It makes each bowl irresistibly indulgent.
-
Lemon Zest: Add a teaspoon of lemon zest or a splash of lemon juice before serving. This brightens the flavors and introduces a refreshing zing.
-
Shredded Cheese: Top servings with shredded parmesan or mozzarella for extra richness. Melted cheese adds a deliciously comforting layer to your soup.
-
Chickpea Addition: Toss in canned chickpeas for a hearty protein boost. They enhance the texture and make the soup even more filling!
Make Ahead Options
Perfect for busy weeknights, you can prepare your Sicilian Chicken Soup in advance to save time and enjoy deliciousness at a moment’s notice! Start by chopping all the vegetables (onions, celery, carrots, bell pepper, and potatoes) up to 24 hours in advance, storing them in an airtight container in the refrigerator to maintain freshness and prevent browning. You can also cook the chicken and add it back to the pot up to 3 days ahead. When you’re ready to serve, simply reheat the soup on the stove and stir in the pasta to cook during the last 15 minutes. This ensures the flavors meld beautifully, making your homemade soup just as delightful as when freshly made!
Chef's Helpful Tips
- When preparing Sicilian Chicken Soup, ensure that you properly brown the chicken thighs before adding other ingredients; this step enhances the overall flavor of the broth.
- Be mindful not to overcook the pasta; check for doneness a couple of minutes before the suggested cook time to achieve the perfect texture.
- For an even richer broth, consider roasting the vegetables first to deepen their flavors before adding them to the soup pot.
- Lastly, let the soup sit for a few minutes after cooking to allow the flavors to meld before serving for the best taste experience.
Sicilian Chicken Soup Recipe FAQs
What type of chicken should I use for this soup?
I recommend using bone-in, skin-on chicken thighs for the richest flavor and moisture. These cuts stand up well to the simmering process and yield tender, fall-off-the-bone meat!
How should I store leftovers of Sicilian Chicken Soup?
Store the leftover Sicilian Chicken Soup in an airtight container in the refrigerator for up to 3 days. Ensure it cools completely before sealing, as this helps maintain freshness and flavor.
Can I freeze Sicilian Chicken Soup?
Absolutely! For freezing, ladle the soup into portion-sized, freezer-safe containers, leaving about an inch of space at the top for expansion. It will maintain its best quality for up to 3 months. When you’re ready to enjoy it, thaw it in the refrigerator overnight.
What should I do if my pasta gets mushy in the soup?
If your pasta ends up mushy, don’t worry! For next time, cook the pasta separately and add it in just before serving. This way, you can fully control its texture and keep it al dente.
Are there any dietary considerations for Sicilian Chicken Soup?
Yes! For a gluten-free option, substitute the ditalini with gluten-free pasta. Always check the labels of canned ingredients if you’re concerned about allergens. And if you share your kitchen with furry friends, remember that onions and garlic are toxic to dogs, so keep the soup out of reach!
How can I customize the vegetables in the soup?
The more the merrier! Feel free to throw in seasonal veggies like zucchini, green beans, or spinach. Just chop them into similar sizes and add them during the last 10-15 minutes of cooking to ensure they stay vibrant and tender-crisp.
Sicilian Chicken Soup
Ingredients
Equipment
Method
- In a large soup pot, combine the chicken, onion, celery, carrots, bell pepper, potatoes, garlic, diced tomatoes, bay leaves, and salt.
- Pour in the chicken stock and water, then season with black pepper to taste. Cover and bring to a boil, then reduce heat to low and simmer for 30 minutes.
- Remove the chicken using tongs, then add the ditalini pasta to the pot. Cook for an additional 13-15 minutes, partially covered, stirring occasionally.
- Once cool, shred the chicken, discarding skin and bones. Stir shredded chicken back into the pot and check the vegetables.
- Discard the bay leaves, stir in the fresh parsley, and ladle the soup into bowls.