Forkono

  • BREAKFAST & BRUNCH
  • DESSERT RECIPES
  • DINNER RECIPES
  • LUNCH RECIPES
  • About uS
  • SNACKS & APPETIZERS
menu icon
go to homepage
  • BREAKFAST & BRUNCH
  • DESSERT RECIPES
  • DINNER RECIPES
  • LUNCH RECIPES
  • About uS
  • SNACKS & APPETIZERS
search icon
Homepage link
  • BREAKFAST & BRUNCH
  • DESSERT RECIPES
  • DINNER RECIPES
  • LUNCH RECIPES
  • About uS
  • SNACKS & APPETIZERS
×

Cheesy Ground Beef and Potato Casserole

December 16, 2025 by JudyWhite Leave a Comment

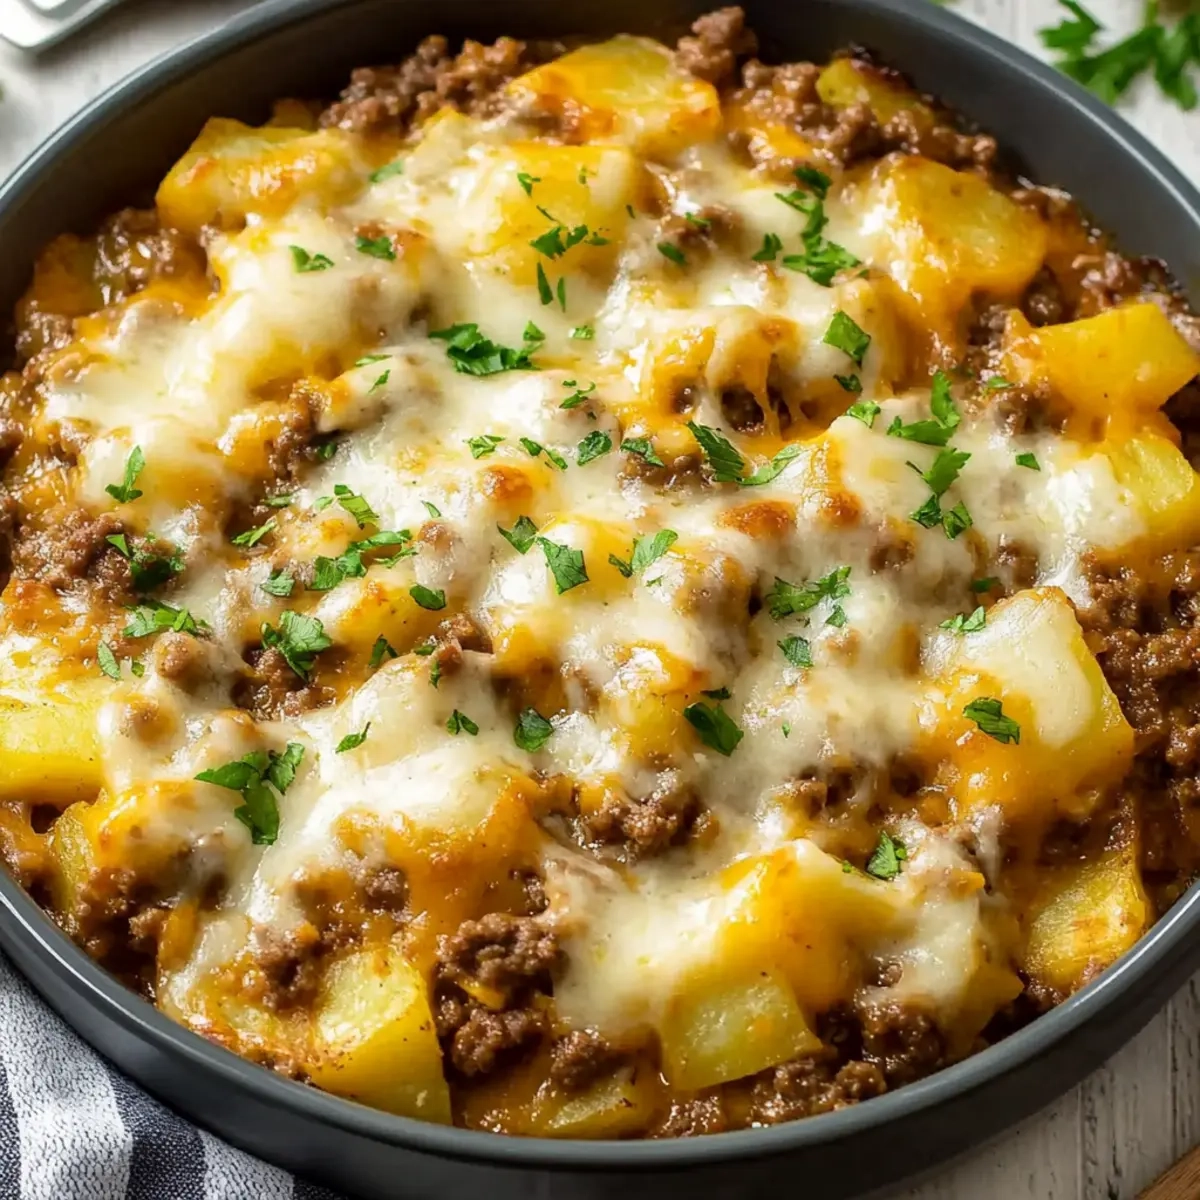
Every kitchen has its go-to comfort dishes, and my Cheesy Ground Beef and Potato Casserole is a treasure that never fails to bring smiles all around the table. There’s something about the blend of savory beef, creamy cheese, and tender potatoes that envelops you like a warm hug. Just imagining the rich aroma wafting through the house is enough to make anyone’s mouth water!

I discovered this recipe during a hectic week when takeout was luring me in like a siren call. Instead, I decided to turn my pantry staples into something heartwarming and satiating. The great news? This casserole comes together in just one skillet, making it a breeze to prepare and clean up. Perfect for busy weeknights or when you’re looking to impress guests without spending all day in the kitchen.

Let me guide you through this simple yet delicious dish that epitomizes homemade goodness—your new family favorite awaits!

Why You'll Love This Cheesy Ground Beef and Potato Casserole

  • This Cheesy Ground Beef and Potato Casserole is incredibly easy to prepare, making it the perfect option for even the busiest of weeknights.
  • The combination of savory ground beef, creamy cheese, and tender potatoes delivers an unbeatable flavor that will have everyone coming back for seconds.
  • Its versatility allows you to customize it with any leftover vegetables or cheeses you have on hand, ensuring that every dish is unique and delightful.
  • Plus, its appealing layers and melty cheese create a visually stunning presentation that will impress guests and family alike.

Cheesy Ground Beef and Potato Casserole Ingredients

• Get ready to create a delightful dish!

For the Casserole

  • Oil – A tablespoon helps prevent sticking while adding flavor.
  • Potatoes (1.5 lbs) – Cut into 1 cm or ½” cubes for even cooking and delightful texture.
  • Onion (0.5 medium) – Finely diced to bring sweetness and depth to the dish.
  • Green Bell Pepper (0.5 medium) – Finely diced to add color and a mild tang.
  • Lean Ground Beef (1 lb) – Choose lean for a healthier casserole without sacrificing flavor.
  • Tomato Paste (2 tablespoons) – Adds a rich depth and umami to balance the flavors.
  • Garlic (2 cloves) – Minced for that aromatic punch that elevates every bite.
  • Seasoning Salt (1.5 teaspoons) – A blend of salts and spices that enhances the overall taste.
  • Italian Seasoning (1 teaspoon) – Infuses your dish with a classic, herby goodness.
  • Ground Mustard (0.5 teaspoon) – Offers a subtle tang that complements the beef beautifully.
  • Black Pepper (0.25 teaspoon) – Adds a mild heat and brings out the flavors.
  • Red Pepper Flakes (0.125 teaspoon) – Optional for those who like a bit of spice!
  • Low Sodium Broth (0.75 cup) – Use beef or chicken for moisture; it helps create a savory base.
  • Tomato Sauce (0.5 cup) – Adds moisture and richness to your casserole.
  • Cream (0.25 cup) – Ensures a luscious, creamy texture that brings everything together.
  • Shredded Cheese (1 cup) – Mozzarella or cheddar for that irresistible melty finish.
  • Fresh Chopped Parsley or Green Onions – For garnish that adds a pop of color and freshness.

This Cheesy Ground Beef and Potato Casserole will surely warm hearts and fill bellies, making it a favorite in your home!

How to Make Cheesy Ground Beef and Potato Casserole

  1. Heat the Oil: In a large skillet, add the oil over medium-high heat. This will create a non-stick surface, ensuring your potatoes cook evenly and don’t stick to the pan.

  2. Cook the Potatoes: Add the 1.5 lbs of cubed potatoes to the pan. Cook for 5-6 minutes, stirring often, until they turn light golden and start to soften. The goal is to achieve that perfect texture for the base!

  3. Sauté the Vegetables: Toss in the finely diced onion and green bell pepper. Sauté for 1-2 minutes, or until the onion becomes translucent. This fragrant mix adds depth and flavor to your casserole.

  4. Brown the Beef: Stir in the 1 lb of lean ground beef. Cook until it’s thoroughly browned, making sure to stir frequently. Drain any excess fat with a paper towel to keep your dish lean and delicious.

  5. Mix the Flavors: Stir in the 2 tablespoons of tomato paste, minced garlic, and seasonings (seasoning salt, Italian seasoning, ground mustard, black pepper, and red pepper flakes). Cook and mix for 1 minute, allowing the spices to awaken and meld beautifully.

  6. Add the Liquids: Pour in the 0.75 cup of broth, 0.5 cup of tomato sauce, and 0.25 cup of cream. Bring everything to a gentle simmer, cover, and reduce the heat to medium-low. Cook until the potatoes are tender, stirring often—this should take about 10-15 minutes.

  7. Melt the Cheese: Once the potatoes are tender, remove the skillet from the heat. Uncover, add the 1 cup of shredded cheese on top, and cover again just until the cheese melts. This final step is where the magic happens—watch for that gooey goodness!

Optional: Garnish with fresh chopped parsley or green onions for a vibrant finish!

Exact quantities are listed in the recipe card below.

Make Ahead Options

These Cheesy Ground Beef and Potato Casseroles are perfect for meal prep, saving you time on hectic weeknights! You can prepare the filling (cooked potatoes, beef, and sauces) up to 3 days in advance. Simply follow the directions until the sauce begins to simmer, then let it cool completely before transferring it to an airtight container in the fridge. When you’re ready to enjoy, just reheat in a skillet over medium heat until warm, top with cheese, cover until melted, and serve! For maintaining quality, be sure to stir occasionally while reheating to prevent sticking. You’ll have comforting, delicious casserole results with little effort!

How to Store and Freeze Cheesy Ground Beef and Potato Casserole

Fridge: Store any leftovers in an airtight container for up to 3 days. Allow it to cool to room temperature before sealing to maintain freshness.

Freezer: For longer storage, freeze the casserole for up to 2 months. Wrap tightly in plastic wrap and then aluminum foil to prevent freezer burn.

Reheating: When ready to enjoy, thaw overnight in the fridge, and reheat in the oven at 350°F (175°C) for about 20-25 minutes, until warmed through and cheesy again.

Room Temperature: Avoid leaving the Cheesy Ground Beef and Potato Casserole out for more than 2 hours to prevent any spoilage; always refrigerate promptly.

What to Serve with Cheesy Ground Beef and Potato Casserole?

Nothing rounds off a comforting casserole quite like the perfect sides that elevate your meal experience.

  • Garlic Bread: The buttery, garlicky flavor and crisp texture of garlic bread are perfect for mopping up the creamy sauce. Each bite transports you to a cozy Italian kitchen, enhancing the meal’s warmth.

  • Steamed Broccoli: Vibrant green broccoli adds a delightful crunch and a fresh palate cleanser. Its mild flavor complements the robust casserole, bringing balance to your plate.

  • Coleslaw: A refreshing and tangy coleslaw can provide a delightful contrast to the hearty dish. The crunch and acidity lighten every mouthful of creamy goodness, making it a balanced choice.

  • Mixed Green Salad: A simple mixed green salad with vinaigrette offers a fresh, crisp contrast. Tossed with seasonal veggies, it adds texture and brightness to the meal.

  • Roasted Carrots: Sweet and tender roasted carrots enhance the casserole’s savory appeal while adding a pop of color to your table. Their caramelized edges create a lovely pairing that feels special.

  • Red Wine: Pairing with a glass of robust red wine, perhaps a Merlot or Cabernet Sauvignon, elevates your dinner experience. The wine’s rich tannins complement the beef’s depth beautifully.

  • Chocolate Cake: For dessert, a slice of rich chocolate cake finishes the meal on a sweet note. Its indulgent flavors provide a delightful contrast to the savory casserole, making for a balanced end to your feast.

Cheesy Ground Beef and Potato Casserole Variations

Feel free to make this dish your own with these fun twists that enhance flavor and cater to dietary preferences!

  • Vegetarian: Substitute 1 lb of cooked lentils or mushrooms for the ground beef, and use vegetable broth for a hearty veggie casserole.

  • Spicy: Add 1 tablespoon of diced jalapeños or increase red pepper flakes for a delightful kick. The additional heat will awaken your taste buds!

  • Herbed: Toss in fresh herbs like thyme or rosemary for an aromatic twist that compliments the savory layers beautifully. Freshly chopped herbs elevate the entire dish.

  • Creamy Dairy-Free: Use coconut cream and dairy-free cheese alternatives to create a luscious consistency that fits a plant-based lifestyle without compromising on flavor.

  • Bacon Lovers: Crisp up 4 to 6 slices of bacon, chop them, and mix them in for a smoky flavor boost that pairs perfectly with the beef and potatoes.

  • Cheese Variety: Experiment with Gouda or Pepper Jack cheese for a unique taste profile. Each cheese brings its own character, transforming every bite.

  • Loaded Casserole: Top the casserole with crispy fried onions, fresh chives, or bacon bits for an extra crunchy, indulgent layer everyone will love.

  • Sweet Potato Swap: Replace regular potatoes with sweet potatoes for a nutritious alternative that adds a hint of natural sweetness and vibrant color to the dish.

Chef's Helpful Tips

  • For the Cheesy Ground Beef and Potato Casserole, ensure your potatoes are cut into uniform 1 cm cubes to promote even cooking and avoid any mushy texture.
  • A common mistake is overcooking the ground beef; cook it just until browned to keep it juicy and flavorful.
  • Next, always drain any excess fat after browning to lighten the dish while still keeping it rich.
  • When adding liquids, bring the mixture to a gentle simmer instead of boiling to allow the flavors to meld perfectly without compromising the potatoes’ texture.

Cheesy Ground Beef and Potato Casserole Recipe FAQs

How do I select the right potatoes for this casserole?
Absolutely! For the best results, choose starchy potatoes like Russets or all-purpose types like Yukon Golds. Look for firm potatoes without dark spots or blemishes—fresh potatoes will cook evenly and give you that delightful texture!

How should I store leftovers of the Cheesy Ground Beef and Potato Casserole?
You can store leftovers in an airtight container in the fridge for up to 3 days. Always let the casserole cool to room temperature before sealing it; this helps keep it fresh and prevents condensation inside the container.

Can I freeze Cheesy Ground Beef and Potato Casserole?
Yes, indeed! To freeze, wrap the casserole tightly with plastic wrap, followed by aluminum foil to avoid freezer burn. It can be kept for up to 2 months. When you’re ready to enjoy it, simply thaw overnight in the fridge, and then reheat in the oven at 350°F (175°C) for about 20-25 minutes or until hot and bubbly!

What if my casserole is too watery after cooking?
Very! If your casserole turns out watery, you might need to reduce the liquid next time. You can also try draining some of the liquid off before topping it with cheese. A thicker tomato paste or adding a small amount of cornstarch mixed with water can also help if you’re looking to fix it while cooking!

Is this casserole suitable for special dietary needs?
It can be! If you’re mindful of allergies, you can easily substitute the ground beef with turkey or a plant-based ground meat. For a dairy-free option, use a non-dairy cream and cheese alternative to make it suitable for lactose intolerance. Just pay attention to the labels for allergens!

How can I include more vegetables in my Cheesy Ground Beef and Potato Casserole?
The more, the merrier! You can add diced carrots, peas, or even spinach for extra nutrition and flavor. If using frozen veggies, toss them in right at the end of cooking to warm them up without overcooking. Don’t be afraid to experiment with your favorites!

Cheesy Ground Beef and Potato Casserole

Cheesy Ground Beef and Potato Casserole

Indulge in the warmth of Cheesy Ground Beef and Potato Casserole, a comforting dish that combines savory beef, creamy cheese, and tender potatoes.
Print Recipe Pin Recipe
Prep Time 15 minutes mins
Cook Time 30 minutes mins
Total Time 45 minutes mins
Servings: 6 servings
Course: DINNER RECIPES
Cuisine: American
Calories: 450
Ingredients Equipment Method Nutrition Notes

Ingredients
  

For the Casserole
  • 1 tbsp Oil
  • 1.5 lbs Potatoes cut into 1 cm cubes
  • 0.5 medium Onion finely diced
  • 0.5 medium Green Bell Pepper finely diced
  • 1 lb Lean Ground Beef
  • 2 tbsp Tomato Paste
  • 2 cloves Garlic minced
  • 1.5 tsp Seasoning Salt
  • 1 tsp Italian Seasoning
  • 0.5 tsp Ground Mustard
  • 0.25 tsp Black Pepper
  • 0.125 tsp Red Pepper Flakes optional
  • 0.75 cup Low Sodium Broth beef or chicken
  • 0.5 cup Tomato Sauce
  • 0.25 cup Cream
  • 1 cup Shredded Cheese Mozzarella or cheddar
  • Fresh Chopped Parsley or Green Onions for garnish

Equipment

  • Large skillet

Method
 

Directions
  1. In a large skillet, add the oil over medium-high heat.
  2. Add the cubed potatoes to the pan. Cook for 5-6 minutes, stirring often, until they turn light golden and start to soften.
  3. Toss in the finely diced onion and green bell pepper. Sauté for 1-2 minutes, or until the onion becomes translucent.
  4. Stir in the lean ground beef. Cook until it’s thoroughly browned, stirring frequently.
  5. Stir in the tomato paste, minced garlic, and seasonings. Cook for 1 minute.
  6. Pour in the broth, tomato sauce, and cream. Bring to a gentle simmer, cover, and reduce to medium-low. Cook until the potatoes are tender.
  7. Remove from heat, add the shredded cheese on top, and cover just until the cheese melts.
  8. Garnish with fresh chopped parsley or green onions.

Nutrition

Serving: 1bowlCalories: 450kcalCarbohydrates: 32gProtein: 28gFat: 24gSaturated Fat: 12gPolyunsaturated Fat: 0.5gMonounsaturated Fat: 9gCholesterol: 80mgSodium: 600mgPotassium: 900mgFiber: 4gSugar: 3gVitamin A: 400IUVitamin C: 30mgCalcium: 200mgIron: 3mg

Notes

Ensure potatoes are cut into uniform cubes for even cooking and avoid mushy texture. Drain excess fat after browning beef for a lighter dish.

Tried this recipe?

Let us know how it was!

Filed Under: DINNER RECIPES

Cardamom Spiced Rhubarb Cream Donuts

December 16, 2025 by JudyWhite Leave a Comment

There’s a certain charm that comes from the combination of spices and seasonal fruits, and that’s exactly what inspired my latest creation: Cardamom Spiced Rhubarb Cream Donuts. The moment I caught a whiff of warm, cardamom-scented dough filling my kitchen, I was transported to a world of cozy flavors. The distinctive warmth of cardamom perfectly complements the tartness of fresh rhubarb, creating a delightful balance that makes each bite a little celebration.

On one particularly rainy afternoon, I found myself yearning for something comforting and homemade. As I rummaged through my pantry, a hidden stash of rhubarb caught my eye, and inspiration struck. I decided to craft these donuts as a perfect treat, ideal for a casual get-together or a cozy breakfast at home. The result? Pillowy, golden donuts filled with luscious rhubarb compote and a velvety cream that will undoubtedly impress family and friends alike. Ready to bring this sweet adventure to your own kitchen? Let’s dive in!

Why You'll Love This Cardamom Spiced Rhubarb Cream Donuts

  • These Cardamom Spiced Rhubarb Cream Donuts are incredibly easy to make, allowing both novice and experienced bakers to enjoy them.
  • The unique flavor combination of cardamom and rhubarb creates a delightful taste sensation that will have everyone coming back for more.
  • Not only are they versatile enough to be served at breakfast, brunch, or dessert, but their vibrant colors and charming presentation make them visually stunning as well.
  • Plus, with a relatively quick prep and cook time, you can whip up a batch to impress your friends and family without spending all day in the kitchen.

Cardamom Spiced Rhubarb Cream Donuts Ingredients

For the Donut Dough
• Whole milk – helps activate the yeast for a fluffy texture.
• Instant yeast – allows for a quicker rise, making these donuts easy and efficient to prepare.
• Granulated sugar – sweetens the dough and nourishes the yeast for a better rise.
• Bread flour – provides the perfect chewiness and structure to your donuts.
• Unsalted butter – adds richness and flavor to each bite.
• Large egg – binds the ingredients and contributes to a tender crumb.
• Ground cardamom – infuses the dough with a warm, fragrant spice that pairs beautifully with rhubarb.
• Kosher salt – enhances the overall flavor of the donuts.

For the Rhubarb Compote
• Forced rhubarb – offers a tart contrast to the sweetness of the donuts, elevating the flavor profile.
• Granulated sugar – sweetens the compote to balance the tartness of the rhubarb.
• Orange zest and juice – adds citrus notes that brighten the dish.
• Kosher salt – a pinch helps to round out the flavors.
• Vanilla bean paste or extract – brings warmth and complexity to the compote.

For the Cream Filling
• Heavy cream – is whipped until fluffy for a light, airy filling.
• Mascarpone – lends a creamy, luxurious texture to the filling.
• Granulated sugar – sweetens the cream for a delightful treat.
• Vanilla bean paste or extract – enriches the cream with its sweet aroma.

For Frying and Finishing
• Neutral oil – essential for frying; it allows the donuts to cook evenly without an overpowering flavor.
• Granulated sugar (for tossing) – adds a sweet, sparkling finish to the hot donuts.

Get ready to experience the delightful harmony of flavors in these Cardamom Spiced Rhubarb Cream Donuts!

How to Make Cardamom Spiced Rhubarb Cream Donuts

  1. Combine whole milk and instant yeast in a bowl, allowing it to sit until frothy, about 5-10 minutes. This is the first step to ensure your donuts will be light and airy.

  2. Mix in the granulated sugar, bread flour, unsalted butter, large egg, ground cardamom, and kosher salt to the yeast mixture. Stir until a dough forms, then get ready for some kneading!

  3. Knead the dough on a floured surface for about 8-10 minutes until smooth and elastic. Place the dough in a greased bowl, cover with a clean towel, and let it rise until doubled in size, roughly 1 hour.

  4. Prepare the rhubarb compote by cooking forced rhubarb with granulated sugar, orange zest, orange juice, kosher salt, and vanilla in a saucepan over medium heat. Stir until soft, then cool completely.

  5. Whip the heavy cream in a mixing bowl until soft peaks form. Gently fold in mascarpone, granulated sugar, and vanilla bean paste until fully combined for a luscious filling.

  6. Roll out the dough on a floured surface to about 1/2-inch thickness, then cut into donut shapes. Let them rise again for 30 minutes for that perfect fluffiness.

  7. Heat neutral oil in a deep fryer or heavy pot to 350°F (175°C). Carefully fry the donuts until golden brown on both sides, about 2-3 minutes per side, then drain on paper towels.

  8. Toss the hot donuts in granulated sugar for a sweet dusting. Once cooled slightly, fill each with rhubarb compote and cream filling, delighting your taste buds!

Optional: Serve with a sprinkle of extra cardamom for added flavor.
Exact quantities are listed in the recipe card below.

How to Store and Freeze Cardamom Spiced Rhubarb Cream Donuts

Room Temperature: Store your donuts in an airtight container at room temperature for up to 2 days. This helps maintain their soft texture and delightful creaminess.

Fridge: If you need them to last longer, you can refrigerate the donuts for up to 5 days. Just remember to cover them in plastic wrap to prevent them from drying out.

Freezer: For longer storage, freeze the filled donuts in a single layer on a baking sheet. Once solid, transfer them to a freezer-safe bag and store for up to 3 months.

Reheating: To enjoy frozen donuts, thaw them overnight in the fridge. Reheat briefly in the microwave or oven (350°F) for 5 minutes to restore their fluffy perfection.

Make Ahead Options

These Cardamom Spiced Rhubarb Cream Donuts are a fantastic choice for meal prep, allowing you to enjoy a delicious homemade treat with minimal effort during the week! You can prepare the dough and let it rise up to 24 hours in advance; just be sure to store it in the refrigerator to prevent over-proofing. The rhubarb compote can also be made up to 3 days ahead; simply refrigerate it in a sealed container and reheat before filling the donuts. When you’re ready to serve, roll out the dough, cut into shapes, let rise briefly, fry them up, and fill. This way, you’ll enjoy these delightful donuts just as fresh and flavorful as if you made them all at once!

Cardamom Spiced Rhubarb Cream Donuts Variations

Feel free to get creative and personalize your donuts with these delightful adjustments!

  • Gluten-Free: Use a gluten-free flour blend to make these donuts suitable for gluten-sensitive friends; the flavor still shines through!

  • Vegan: Substitute almond milk for whole milk, replace butter with coconut oil, and use flax eggs for egg alternatives for a completely plant-based treat.

  • Spice Up: For a warm twist, add 1 tablespoon of cinnamon to the dough for a delightful cinnamon-cardamom flavor blend!

  • Fruity Twist: Swap out rhubarb with diced strawberries or tart cherries for a vibrant fruit variation that brings a different kind of sweetness.

  • Zesty Orange: Boost the orange flavor by adding 1 teaspoon of orange extract to the cream filling for an extra citrus kick that’s refreshing and bright.

  • Chocolate Love: Drizzle melted dark chocolate over the donuts after frying for a rich, indulgent finish that pairs beautifully with the rhubarb.

  • Nutty Crunch: Add 1/2 cup of chopped nuts like pistachios or almonds to the cream filling for a delightful crunch that complements the creamy texture.

  • Heat Element: For a bit of excitement, mix in a pinch of cayenne pepper to the dough; the heat will surprise and tantalize your taste buds!

What to Serve with Cardamom Spiced Rhubarb Cream Donuts?

Elevate your donut experience with delightful pairings that complement the warm spices and luscious cream filling.

  • Fresh Berries: These juicy, sweet-tart fruits brighten up each bite, creating a lovely contrast with the rich flavors of the donuts.
  • Sweetened Coffee: A creamy latte or caramel macchiato creates the ultimate morning indulgence, perfectly balancing the sweetness of the donuts.
  • Herbal Tea: A soothing chamomile or mint tea complements the spices in the donuts while providing a refreshing contrast.
  • Vanilla Ice Cream: The cold creaminess of vanilla ice cream perfectly contrasts the warmth of the donuts, taking dessert to a new level.
  • Maple Syrup: Drizzling a bit of maple syrup over the filled donuts adds a touch of sweetness, enhancing their flavor and making them more decadent.
  • Citrus Salad: A refreshing salad of oranges and grapefruits offers a bright, zesty contrast that lightens up the richness of the donuts.
  • Chocolate Drizzle: Enhance each donut with a warm chocolate drizzle for an irresistible addition; the flavors meld beautifully with the cardamom.
  • Lemon Curd: A dollop of tangy lemon curd adds a zesty twist that brightens each bite, perfectly balancing the sweet elements.
  • Sparkling Water: A bubbly sip refreshes the palate between bites, ensuring that the richness of the donuts doesn’t overwhelm.
  • Chocolate Coffee Cake: A slice of this moist, fudgy goodness pairs beautifully with the donuts, offering more texture and layers of flavor.

Chef's Helpful Tips

  • For the Cardamom Spiced Rhubarb Cream Donuts, make sure your milk is warm but not hot when combining it with yeast to activate it properly without killing the yeast.
  • Kneading the dough thoroughly is crucial as it develops gluten, ensuring your donuts have a delightful chewiness.
  • When frying, maintain the oil temperature around 350°F to achieve that perfect golden brown exterior while keeping the inside light and airy.
  • Lastly, let the donuts cool slightly before tossing them in sugar, as this allows the sugar to adhere better for a more satisfying sweetness.

Cardamom Spiced Rhubarb Cream Donuts Recipe FAQs

What is the best way to select rhubarb for this recipe?
Absolutely! Look for forced rhubarb with vibrant red stalks that have a firm texture. Avoid any stalks with dark spots or wilting, as they may be past their prime. The freshness of the rhubarb is key to getting that tart flavor to balance the sweetness of the donuts!

How should I store leftover Cardamom Spiced Rhubarb Cream Donuts?
You can keep your donuts at room temperature in an airtight container for up to 2 days to preserve their softness. If you want to make them last longer, store them in the refrigerator for up to 5 days, wrapped securely in plastic wrap to prevent drying out.

Can I freeze the filled donuts, and how do I do it?
Yes, you can definitely freeze the Cardamom Spiced Rhubarb Cream Donuts! Start by placing the filled donuts on a baking sheet in a single layer and freeze until solid, about 1-2 hours. Then, transfer them to a freezer-safe bag for up to 3 months. Just remember to label the bag with the date for easy reference!

What should I do if my donut dough isn’t rising?
Very! If your dough isn’t rising, it might be due to the yeast not activating properly. Ensure the milk is warm (around 110°F) but not hot, as too much heat can kill the yeast. If it’s been over an hour and there’s little change, consider letting it sit in a warmer area or even adding a couple of teaspoons of sugar to the yeast when you mix it, which can sometimes give it a little boost.

Are these donuts suitable for people with allergies?
While these delicious Cardamom Spiced Rhubarb Cream Donuts contain common allergens like gluten (in the flour) and dairy (in the milk and butter), you can make substitutions to accommodate allergies. For a gluten-free option, try using a gluten-free flour blend. You can substitute almond milk or a nut-free alternative for the dairy components. Always check labels to ensure there are no hidden allergens.

How do I know when the oil is ready for frying?
You’ll want the oil to reach about 350°F (175°C) for perfect frying! You can test the oil by sprinkling a tiny bit of dough into it—if it sizzles and rises to the top, it’s ready. Maintaining the right temperature is crucial for achieving that golden-brown color while keeping the donuts light and fluffy on the inside.

Cardamom Spiced Rhubarb Cream Donuts

Cardamom Spiced Rhubarb Cream Donuts

Delight in Cardamom Spiced Rhubarb Cream Donuts, a perfect blend of spices and fresh rhubarb.
Print Recipe Pin Recipe
Prep Time 30 minutes mins
Cook Time 20 minutes mins
Rising Time 1 hour hr 30 minutes mins
Total Time 2 hours hrs 20 minutes mins
Servings: 12 donuts
Course: DESSERT RECIPES
Cuisine: American
Calories: 250
Ingredients Equipment Method Nutrition Notes

Ingredients
  

For the Donut Dough
  • 1 cup whole milk helps activate the yeast for a fluffy texture
  • 2 teaspoons instant yeast allows for a quicker rise
  • 1/2 cup granulated sugar sweetens the dough
  • 3 cups bread flour provides chewiness
  • 1/4 cup unsalted butter adds richness
  • 1 large egg binds the ingredients
  • 1 teaspoon ground cardamom infuses warmth and fragrance
  • 1/2 teaspoon kosher salt enhances flavor
For the Rhubarb Compote
  • 2 cups forced rhubarb offers tart contrast
  • 3/4 cup granulated sugar sweetens the compote
  • 1 tablespoon orange zest adds citrus notes
  • 1/4 cup orange juice brightens the dish
  • 1/4 teaspoon kosher salt rounds out flavors
  • 1 teaspoon vanilla bean paste or extract brings warmth and complexity
For the Cream Filling
  • 1 cup heavy cream whipped until fluffy
  • 1/2 cup mascarpone lends creaminess
  • 1/4 cup granulated sugar sweetens the cream
  • 1 teaspoon vanilla bean paste or extract enriches the cream
For Frying and Finishing
  • 4 cups neutral oil for frying
  • 1/2 cup granulated sugar for tossing

Equipment

  • Mixing bowl
  • Deep fryer
  • Saucepan
  • Whisk
  • Rolling pin
  • Donut cutter
  • paper towels

Method
 

How to Make Cardamom Spiced Rhubarb Cream Donuts
  1. Combine whole milk and instant yeast in a bowl, allowing it to sit until frothy, about 5-10 minutes.
  2. Mix in the granulated sugar, bread flour, unsalted butter, large egg, ground cardamom, and kosher salt to the yeast mixture.
  3. Knead the dough on a floured surface for about 8-10 minutes until smooth and elastic.
  4. Prepare the rhubarb compote by cooking forced rhubarb with granulated sugar, orange zest, orange juice, kosher salt, and vanilla in a saucepan over medium heat.
  5. Whip the heavy cream in a mixing bowl until soft peaks form, then fold in mascarpone, granulated sugar, and vanilla until fully combined.
  6. Roll out the dough on a floured surface to about 1/2-inch thickness, then cut into donut shapes. Let them rise again for 30 minutes.
  7. Heat neutral oil to 350°F (175°C). Carefully fry the donuts until golden brown on both sides, about 2-3 minutes per side.
  8. Toss the hot donuts in granulated sugar for a sweet dusting, then fill each with rhubarb compote and cream filling.

Nutrition

Serving: 1donutCalories: 250kcalCarbohydrates: 30gProtein: 3gFat: 15gSaturated Fat: 9gPolyunsaturated Fat: 1gMonounsaturated Fat: 5gCholesterol: 40mgSodium: 150mgPotassium: 150mgFiber: 1gSugar: 10gVitamin A: 500IUVitamin C: 2mgCalcium: 50mgIron: 1mg

Notes

Allow donuts to cool slightly before tossing in sugar for better adherence.

Tried this recipe?

Let us know how it was!

Filed Under: BREAKFAST & BRUNCH

Gourmet Grilled Cheese Sandwich

December 16, 2025 by JudyWhite Leave a Comment

There’s something undeniably comforting about the crunch of golden-brown bread cradling gooey, melted cheese, and I found myself nodding in agreement one rainy afternoon. I had a few items in my fridge that seemed ordinary: sourdough, some cheese, and an apple. Suddenly, inspiration struck! What if I transformed this humble fare into a Gourmet Grilled Cheese Sandwich? The end result is a delightful twist on the classic that tantalizes the senses with layers of creamy camembert, sharp cheddar, and a hint of lemon zest that brightens every bite.

Whether you’re looking to impress at brunch or indulge in a cozy night in, this recipe is quick, satisfying, and sure to bring smiles all around. Let’s take a break from the fast-food routine and rediscover the joy of homemade comfort food with this easy yet elegant sandwich that’s bursting with flavor. Ready to elevate your cheese game? Let’s dive into the deliciousness of this Gourmet Grilled Cheese Sandwich!

Why You'll Love This Gourmet Grilled Cheese Sandwich

  • This Gourmet Grilled Cheese Sandwich is incredibly easy to make, allowing you to whip up a gourmet meal in just 20 minutes.
  • The unique combination of creamy camembert, sharp cheddar, and fresh apple creates a flavor explosion that will delight your taste buds.
  • With its vibrant presentation and tantalizing aroma, this sandwich is sure to impress your guests and elevate any meal.
  • Plus, it’s versatile enough to customize by adding your favorite ingredients or trying different cheeses, making it a perfect option for any occasion.

Gourmet Grilled Cheese Sandwich Ingredients

For the Bread
• Fresh sourdough bread – the tangy flavor of sourdough enhances the gourmet feel of this grilled cheese sandwich.

For the Cheeses
• Camembert cheese – this creamy cheese adds a luxurious texture; feel free to substitute with brie for a different taste.
• Sharp, aged cheddar – contributes a rich, bold flavor that complements the sweetness of the apple.

For the Flavor Boosters
• Fresh thyme – this herb adds a fragrant note; rosemary can be substituted for an earthy twist.
• Whole lemon (zested) – the lemon zest brightens the flavors beautifully; using lime zest offers a fresh contrast.

For the Sweetness
• Honeycrisp apple – its crisp texture and sweetness balance the richness of the cheeses; try a Granny Smith for more tartness.

Extra Seasoning
• Fresh ground pepper – adds just the right amount of heat; keep it to your taste preference for a customized kick.

Let these ingredients gather on your kitchen counter, and get ready to elevate your sandwich game with a Gourmet Grilled Cheese Sandwich that will leave everyone asking for seconds!

How to Make a Gourmet Grilled Cheese Sandwich

  1. Slice the Bread: Begin by cutting the fresh sourdough bread into four 1/2-inch thick slices. This thickness will provide a delightful crunch while holding all that gooey goodness inside.

  2. Layer the Cheeses: On two of the slices, add a generous portion of camembert cheese. Sprinkle fresh thyme, lemon zest, and ground pepper across the cheese to infuse each bite with aromatic flavors.

  3. Add the Apple: Thinly slice half of a honeycrisp apple and arrange the slices lovingly over the camembert. This touch of sweetness balances the richness of the cheese beautifully.

  4. Top with Cheddar: On the remaining two slices of sourdough, layer sharp cheddar cheese. Close the sandwich by placing the apple-topped slices over the cheddar slices, and gently press to hold everything together.

  5. Heat the Skillet: Preheat a large non-stick skillet over medium heat. Give it a light spray with avocado oil spray to prevent sticking, allowing the sandwich to crisp up nicely.

  6. Cook the Sandwich: Place the sandwich in the skillet with the cheddar side down. Cook for several minutes, giving it a gentle press with a spatula, until the cheese starts to melt and the bottom side is golden brown.

  7. Flip and Finish: Carefully spray the top sides of the sandwich and flip it over with a spatula. Cook this side for additional minutes until it becomes golden brown and the cheese is fully melted.

  8. Check for Doneness: Don’t be shy to flip the sandwiches a couple of times to ensure even cooking. Once the cheese is adorably gooey, remove the sandwiches from the pan and place them on a cutting board.

  9. Slice and Serve: Using a serrated knife, slice the sandwiches in half and serve them immediately, allowing the mouthwatering aroma to take center stage at your table.

Optional: Serve with a side of tangy dipping sauce for extra flavor.

Exact quantities are listed in the recipe card below.

What to Serve with Gourmet Grilled Cheese Sandwich?

Cozy up your meal with delectable sides that enrich the experience of your savory creation.

  • Tomato Basil Soup: A classic pairing that adds a burst of fresh flavor; dip your sandwich for an irresistible combination.

  • Garlic Butter Baby Potatoes: These crispy golden delights complement the richness of the cheese, providing a delightful crunch with every bite.

  • Mixed Green Salad: A refreshing mix of greens with a zesty vinaigrette adds brightness to your plate, balancing the richness of the grilled cheese.

  • Honey Roasted Carrots: Sweet, caramelized carrots introduce a savory-sweet element that harmonizes beautifully with your sandwich’s flavors.

  • Sweet Potato Fries: Their slightly sweet and crispy texture is a perfect contrast to your cheesy delight. These fries provide a comforting crunch.

  • Sparkling Apple Cider: A fizzy drink that echoes the apple notes in your sandwich; it’s refreshing and elevates the meal experience.

  • Dark Chocolate Squares: End on a sweet note; a piece of rich dark chocolate offers a luxurious finish that pairs wonderfully with cheese.

How to Store and Freeze Gourmet Grilled Cheese Sandwich

Room Temperature: Store leftover sandwiches at room temperature for up to 2 hours; keep them wrapped in foil to prevent drying out.

Fridge: If you have leftovers, refrigerate them in an airtight container for up to 3 days. Reheat in a skillet over low heat for crispy results.

Freezer: For longer storage, freeze the assembled sandwiches, wrapped tightly in plastic wrap, for up to 1 month. Thaw overnight in the fridge before reheating.

Reheating: To enjoy your frozen Gourmet Grilled Cheese Sandwich, reheat in a skillet or oven until thoroughly heated and the cheese is gooey again, enhancing that delicious flavor!

Gourmet Grilled Cheese Sandwich Variations

Feel free to unleash your culinary creativity with these delicious twists on the classic grilled cheese!

  • Vegan Version: Swap the cheeses for plant-based alternatives and use vegan butter for a creamy, dairy-free delight.

  • Bacon-Lover’s Delight: Add crispy bacon layers for a savory crunch that pairs perfectly with the sweetness of the apple.

  • Spicy Kick: Sprinkle some red pepper flakes or add sliced jalapeños inside to give your sandwich a fiery twist.

  • Savory Herb Blend: Mix fresh basil or parsley with the thyme for an aromatic twist that elevates the herbaceous flavor profile.

  • Caramelized Onions: Sauté onions until golden and sweet before adding them to your sandwich, enhancing the depth of flavor beautifully.

  • Tomato Addition: Slice fresh tomatoes and layer them within the sandwich for a juicy freshness that balances the richness of the cheese.

  • Nutty Crunch: Incorporate a sprinkle of toasted walnuts or pecans inside for a delightful texture and earthy flavor boost.

  • Gourmet Grilled Cheese Swirl: Spread a thin layer of pesto or sun-dried tomato spread on the bread before grilling for an explosion of flavor in every bite.

Make Ahead Options

These Gourmet Grilled Cheese Sandwiches are perfect for those busy weeknights! You can slice the sourdough bread and even layer the cheeses and apples up to 24 hours in advance, refrigerating them in an airtight container to prevent them from getting soggy. To retain the delicious texture, keep the assembled sandwiches separated with parchment paper. When you’re ready to enjoy them, simply heat your skillet and cook as directed, flipping until golden brown and the cheese is melted. This way, you’ll have a gourmet meal at your fingertips with minimal effort, making each bite just as delightful as when freshly made!

Chef's Helpful Tips

  • For the perfect Gourmet Grilled Cheese Sandwich, make sure your bread slices are evenly cut to achieve a balanced crunch and flavor.
  • Avoid overfilling the sandwich with cheese and toppings, as this can lead to spills and uneven melting.
  • When cooking, a medium heat allows the cheese to melt without burning the bread; be patient and don’t rush the process.
  • Flipping the sandwich multiple times ensures that every side gets that golden-brown color and crispy texture you desire.

Gourmet Grilled Cheese Sandwich Recipe FAQs

What type of sourdough bread should I use for this recipe?
Absolutely! For the best results, look for a fresh, crusty sourdough loaf. The tangy flavor of artisanal sourdough enhances the richness of the cheese beautifully. Consider checking for a loaf with a dense crumb and a crisp crust—these will provide that perfect crunch you want in a gourmet grilled cheese sandwich.

How should I store leftover sandwiches?
Very! If you have any gourmet grilled cheese sandwiches left, store them in an airtight container in the fridge for up to 3 days. To keep them from drying out, it’s best to wrap them tightly in foil or plastic wrap. When you’re ready to enjoy, just heat them in a skillet over low heat for that lovely, crisp finish.

Can I freeze the Gourmet Grilled Cheese Sandwich?
Absolutely! To freeze, assemble the sandwiches, wrap each tightly in plastic wrap, and place them in a freezer-safe bag or container. They can be stored like this for up to 1 month. When you’re ready to eat, just transfer to the fridge overnight to thaw, and then reheat in a skillet or oven until the cheese is gooey and delicious again.

How can I troubleshoot if my sandwich is not melting well?
If you’re finding that the cheese isn’t melting properly, there are a couple of tips to ensure gooey perfection! First, make sure you’re cooking on medium heat rather than high heat; this helps melt the cheese without burning the bread. I also recommend flipping the sandwich occasionally while cooking—this allows for even melting and a nice golden-brown crust on both sides. If needed, you can place a lid on the skillet for a couple minutes to create a little steam, which helps with melting.

Are there any dietary considerations I should be aware of?
Very! If someone in your home has allergies, keep in mind that this gourmet grilled cheese contains dairy and gluten. For lactose-intolerant friends or family, you could substitute with non-dairy cheeses, and for a gluten-free option, use gluten-free bread. Always ensure to check ingredient labels for any allergens that may affect you or your loved ones.

What’s a great way to add extra flavor or variety?
For sure! You can customize your gourmet grilled cheese sandwich by adding various ingredients. Consider incorporating sautéed mushrooms, sun-dried tomatoes, or even a smear of pesto for an elevated vibe. Experimenting with different cheeses, like Gruyère or gouda, can also add a delightful twist to the flavor profile. Mix and match based on your taste preferences to make it truly your own!

Gourmet Grilled Cheese Sandwich

Gourmet Grilled Cheese Sandwich

This Gourmet Grilled Cheese Sandwich features layers of creamy camembert and sharp cheddar, perfect for a comforting meal.
Print Recipe Pin Recipe
Prep Time 10 minutes mins
Cook Time 10 minutes mins
Total Time 20 minutes mins
Servings: 2 sandwiches
Course: LUNCH RECIPES
Calories: 450
Ingredients Equipment Method Nutrition Notes

Ingredients
  

For the Bread
  • 4 slices fresh sourdough bread the tangy flavor enhances the gourmet feel
For the Cheeses
  • 100 grams camembert cheese can substitute with brie
  • 100 grams sharp, aged cheddar
For the Flavor Boosters
  • 1 tablespoon fresh thyme can substitute with rosemary
  • 1 whole lemon (zested) lime zest can be used for contrast
For the Sweetness
  • 1 whole Honeycrisp apple or Granny Smith for tartness
Extra Seasoning
  • to taste fresh ground pepper

Equipment

  • large non-stick skillet

Method
 

How to Make a Gourmet Grilled Cheese Sandwich
  1. Slice the Bread: Cut the bread into four 1/2-inch thick slices.
  2. Layer the Cheeses: On two slices, add camembert, thyme, lemon zest, and ground pepper.
  3. Add the Apple: Thinly slice half of an apple and arrange on camembert slices.
  4. Top with Cheddar: On remaining slices, layer sharp cheddar and place apple slices on top.
  5. Heat the Skillet: Preheat a non-stick skillet over medium heat with a light spray of oil.
  6. Cook the Sandwich: Place the sandwich in the skillet with cheddar side down, and cook until golden.
  7. Flip and Finish: Spray the top side and flip, cooking until golden brown.
  8. Check for Doneness: Flip a couple of times for even cooking, then remove from the pan.
  9. Slice and Serve: Slice in half and serve immediately.

Nutrition

Serving: 1sandwichCalories: 450kcalCarbohydrates: 30gProtein: 14gFat: 28gSaturated Fat: 15gPolyunsaturated Fat: 1gMonounsaturated Fat: 10gCholesterol: 60mgSodium: 800mgPotassium: 300mgFiber: 2gSugar: 4gVitamin A: 800IUVitamin C: 5mgCalcium: 400mgIron: 2mg

Notes

For best results, keep bread slices evenly cut and do not overfill the sandwich.

Tried this recipe?

Let us know how it was!

Filed Under: LUNCH RECIPES

Simpele Vanille Donuts

December 16, 2025 by JudyWhite Leave a Comment

The first time I made Simpele Vanille Donuts, my kitchen transformed into a cozy retreat, filled with the warm, comforting scents of vanilla and freshly fried goodness. It was a chilly Sunday morning, and I had indulged in countless store-bought treats, realizing that nothing compares to the joy of crafting something delightful from scratch. As I mixed the dough, the anticipation built, the promise of sweet, fluffy donuts danced in the air.

What I discovered was not just a recipe, but a journey filled with simple pleasures and a dash of nostalgia. These donuts are incredibly easy to make, yet they pack a flavor punch that’s perfect for impressing guests or simply treating yourself.

Whether you’re a busy chef in need of a quick indulgence or someone yearning for the satisfaction of homemade delights, this recipe is for you. Let me guide you through creating these scrumptious little rings of happiness that will bring smiles to any face, including your own!

Why You'll Love This Simpele Vanille Donuts

  • These Simpele Vanille Donuts are incredibly easy to prepare, making them a perfect choice for both novice and seasoned bakers alike.
  • Each bite is bursting with rich vanilla flavor that elevates them above store-bought options, ensuring a delightful experience.
  • Their versatility allows you to customize toppings or fillings, catering to any mood or occasion.
  • Plus, their warm, sugary exterior is so visually appealing that they are sure to impress anyone at your table.

Simpele Vanille Donuts Ingredients

• Get ready to create something sweet!

For the Dough

  • Lukewarm milk – Helps activate the yeast for a fluffy texture.
  • Instant yeast – Ensures quick rising of the dough for an effortless bake.
  • White caster sugar – Adds sweetness and enhances the dough’s flavor.
  • Vanilla sugar – Infuses an aromatic vanilla essence into every bite.
  • Vanilla cream – Provides richness and contributes to the moistness of the donuts.
  • Softened butter – Gives a delightful richness and keeps the donuts tender.
  • Flour – The foundation of your dough; choose high-quality for best results.
  • Baking powder – Pairs with the yeast for extra lift and fluffiness.
  • Salt – Enhances flavors and balances the sweetness.

For Coating

  • Extra granulated sugar – Gives a sweet, crunchy exterior that complements the fluffy inside.

Embrace the delightful process of making your Simpele Vanille Donuts, and enjoy the magic of homemade treats!

How to Make Simpele Vanille Donuts

  1. Combine Ingredients: In a bowl, blend the lukewarm milk with instant yeast. Let this sit for a few minutes until frothy, which activates the yeast for that perfect rise.

  2. Mix Wet Ingredients: Add the white caster sugar, vanilla sugar, vanilla cream, and softened butter to the yeast mixture. Stir well until fully combined, creating a rich and decadent base for your donuts.

  3. Incorporate Dry Ingredients: Gradually add in the flour, baking powder, and salt to the wet mixture. Mix until a soft dough forms, ensuring all ingredients are well integrated for the best texture.

  4. Knead the Dough: Turn the dough out onto a floured surface and knead until smooth and elastic, about 5 minutes. Place it in a greased bowl, cover with a cloth, and let rise until it doubles in size—roughly 1 hour.

  5. Shape the Donuts: Roll out the risen dough to about 1/2 inch thick, then cut into donut shapes using a cutter. Place them on a baking sheet and let them rise again for about 30 minutes.

  6. Fry the Donuts: Heat oil in a deep fryer to 350°F. Fry the donuts in batches until they are golden brown on both sides, approximately 2-3 minutes per side.

  7. Coat with Sugar: Remove the donuts from the oil and allow them to drain on paper towels. While still warm, generously coat them in extra granulated sugar for that delightful crunch.

Optional: Serve them warm with a sprinkle of cinnamon sugar for an extra treat!

Exact quantities are listed in the recipe card below.

How to Store and Freeze Simpele Vanille Donuts

Room Temperature: Store your donuts in an airtight container at room temperature for up to 2 days for optimal freshness.

Fridge: If not consumed within 2 days, keep them in the fridge, where they can last for up to 5 days. However, this may slightly change their texture.

Freezer: Place cooled donuts in a single layer on a baking sheet. Once frozen, transfer them to a resealable bag or airtight container, where they can stay fresh for up to 3 months.

Reheating: To enjoy your Simpele Vanille Donuts again, simply warm them in the microwave for about 10-15 seconds or in the oven at 350°F for a few minutes until slightly heated through.

Simpele Vanille Donuts Variations

Feel free to get creative with your donuts—there’s always a way to make them uniquely yours!

  • Gluten-Free: Substitute all-purpose flour with a gluten-free blend to enjoy fluffy donuts without gluten worries. Just ensure the baking powder is gluten-free as well!

  • Vegan: Replace milk with almond or oat milk, use plant-based butter, and swap in a flax egg for extra moisture. These vegan donuts will still shine with awesome flavor!

  • Chocolate Drizzle: Melt dark chocolate and drizzle over the cooled donuts for a rich, indulgent treat that brings in an irresistible chocolatey twist.

  • Spicy Kick: Add a pinch of cayenne or a dash of cinnamon into the dough for a warming kick that plays beautifully with the sweet vanilla.

  • Lemon Zest: Mix in some finely grated lemon zest to enhance the flavor profile. This brightens up your donuts, adding a delightful citrusy note that cuts through the sweetness.

  • Filled Donuts: Create a pocket in the center before frying and pipe in your favorite jam or cream filling after frying for a surprise burst of flavor.

  • Coffee Infusion: Blend instant coffee granules into the milk for a soft coffee flavor that pairs wonderfully with the vanilla. It’s a great combo for coffee lovers!

  • Nutty Crunch: Fold in crushed nuts, like almonds or hazelnuts, before shaping the donuts for added texture and a delightful nutty flavor that complements the vanilla essence.

With these variations, every time you make these Simpele Vanille Donuts, they’ll feel like a new adventure! Enjoy experimenting and making memories in your kitchen!

What to Serve with Simpele Vanille Donuts?

The warmth and sweetness of freshly made donuts invite a delightful meal experience, bursting with comforting flavors.

  • Rich Hot Chocolate: A creamy cup of hot chocolate enhances the vanilla flavors while providing a cozy warmth alongside your donuts.
  • Berries Medley: Fresh berries add a pop of color and a tart contrast, perfectly balancing the sweetness of the donuts.
  • Vanilla Ice Cream: Serve a scoop of vanilla ice cream beside your donuts for a sumptuous treat that amplifies the vanilla essence.
  • Maple Glaze: Drizzle warm donuts with maple glaze for added sweetness and a delightful sticky texture that everyone will love.
  • Coffee: A rich cup of coffee pairs beautifully, deepening the flavors while offering a delightful contrast to the sweetness.
  • Cinnamon Sugar Coating: First coat the donuts in cinnamon sugar for an extra burst of flavor—it’s a match made in heaven.
  • Milkshake: Indulge in a vanilla or chocolate milkshake to complement the fluffy donuts, making it a whimsical treat for all ages.
  • Greek Yogurt: A side of creamy Greek yogurt adds a refreshing touch and balances the sweetness beautifully, making this pairing a guilt-free option.
  • Fruit Compote: A homemade fruit compote can elevate your donut experience, creating a luscious complement with every bite.

Make Ahead Options

These Simpele Vanille Donuts are a fantastic option for busy home cooks looking to save time without sacrificing flavor! You can prepare the dough up to 24 hours in advance by following the first three steps of the recipe, then cover it tightly with plastic wrap and refrigerate. To maintain their deliciousness, make sure to let the dough come to room temperature and rise for about 30 minutes before rolling out and shaping. Once shaped, the donuts can also be left to rise for an additional 30 minutes before frying, perfect for those impromptu cravings. Just finish by frying and coating them in sugar, and you’ll enjoy fresh donuts with minimal effort!

Chef's Helpful Tips

  • When making Simpele Vanille Donuts, ensure your milk is just warm to the touch, as too hot can kill the yeast.
  • Avoid over-kneading the dough; stop as soon as it becomes smooth and elastic to prevent tough donuts.
  • Allow the dough to rise in a warm area; if your kitchen is cold, you can place it in a slightly warmed oven turned off.
  • For the best frying results, maintain the oil temperature around 350°F to achieve that perfect golden-brown color without absorbing excess oil.

Simpele Vanille Donuts Recipe FAQs

What is the best way to select ripe ingredients for Simpele Vanille Donuts?
When it comes to the ingredients, I recommend using fresh, high-quality items for the best flavor. Ensure your milk is lukewarm and not too hot, as overheating can kill the yeast’s effectiveness. For the butter, choose softened unsalted butter for rich flavor without excess salt. Always check for the freshness of your vanilla cream and sugars, as these will impact the richness and sweetness of your donuts.

How should I store leftover Simpele Vanille Donuts?
To keep your donuts fresh, store them in an airtight container at room temperature for up to 2 days. If you need to store them longer, place them in the fridge where they can last up to 5 days, though this might change their texture slightly. It’s best to enjoy them while they’re still soft and fluffy!

Can I freeze Simpele Vanille Donuts?
Absolutely! To freeze your donuts, let them cool completely first. Place them in a single layer on a baking sheet and freeze until solid. Once frozen, transfer them to a resealable plastic bag or airtight container, labeling it with the date. They can be stored in the freezer for up to 3 months. When you’re ready to enjoy them, simply warm them in the microwave for about 10-15 seconds or place them in a preheated oven at 350°F for a few minutes until just heated through.

What should I do if my dough doesn’t rise properly?
If your dough doesn’t rise, it could be due to the yeast not being activated properly. Make sure your yeast is fresh and that the milk is lukewarm—not hot. Another reason for poor rising could be a cool environment; try placing your dough in a warm spot, like an oven that has been turned off after preheating. If your dough has risen poorly, you can gently knead it again, allow it to rise a second time for about 30 minutes, and try to fry them once more.

Are Simpele Vanille Donuts suitable for people with allergies?
While these donuts are a treat, they do contain common allergens such as dairy, gluten, and eggs (from the vanilla cream). If making this for someone with allergies or dietary restrictions, consider alternatives such as using almond milk and gluten-free flour, but do note that this may alter the texture and taste slightly. Always consult with the individual to ensure their specific needs are met!

Can I make these donuts healthier?
Yes! You can substitute some ingredients for healthier versions. For example, you can use almond flour instead of regular flour for a lower-carb option. Additionally, you could sweeten with a natural sweetener like honey or maple syrup, but be mindful that this may change the dough’s consistency, so you might need to adjust the liquid ingredients. Another tip is to bake them instead of frying for a lighter alternative. Enjoy exploring these options!

Simpele Vanille Donuts

Simpele Vanille Donuts

Enjoy the homemade delight of Simpele Vanille Donuts, bursting with rich vanilla flavor and easy to prepare.
Print Recipe Pin Recipe
Prep Time 30 minutes mins
Cook Time 10 minutes mins
Rising Time 1 hour hr 30 minutes mins
Total Time 2 hours hrs 10 minutes mins
Servings: 12 donuts
Course: DESSERT RECIPES
Cuisine: American
Calories: 250
Ingredients Equipment Method Nutrition Notes

Ingredients
  

For the Dough
  • 1 cup Lukewarm milk Helps activate the yeast for a fluffy texture.
  • 2 teaspoons Instant yeast Ensures quick rising of the dough for an effortless bake.
  • 1/2 cup White caster sugar Adds sweetness and enhances the dough's flavor.
  • 1 packet Vanilla sugar Infuses an aromatic vanilla essence into every bite.
  • 1/4 cup Vanilla cream Provides richness and contributes to the moistness of the donuts.
  • 1/4 cup Softened butter Gives a delightful richness and keeps the donuts tender.
  • 3 cups Flour The foundation of your dough; choose high-quality for best results.
  • 1 tablespoon Baking powder Pairs with the yeast for extra lift and fluffiness.
  • 1/2 teaspoon Salt Enhances flavors and balances the sweetness.
For Coating
  • 1 cup Extra granulated sugar Gives a sweet, crunchy exterior that complements the fluffy inside.

Equipment

  • Deep fryer
  • Mixing bowl
  • Rolling pin
  • Donut cutter
  • Baking sheet

Method
 

How to Make Simpele Vanille Donuts
  1. In a bowl, blend the lukewarm milk with instant yeast. Let this sit for a few minutes until frothy, which activates the yeast for that perfect rise.
  2. Add the white caster sugar, vanilla sugar, vanilla cream, and softened butter to the yeast mixture. Stir well until fully combined, creating a rich and decadent base for your donuts.
  3. Gradually add in the flour, baking powder, and salt to the wet mixture. Mix until a soft dough forms, ensuring all ingredients are well integrated for the best texture.
  4. Turn the dough out onto a floured surface and knead until smooth and elastic, about 5 minutes. Place it in a greased bowl, cover with a cloth, and let rise until it doubles in size—roughly 1 hour.
  5. Roll out the risen dough to about 1/2 inch thick, then cut into donut shapes using a cutter. Place them on a baking sheet and let them rise again for about 30 minutes.
  6. Heat oil in a deep fryer to 350°F. Fry the donuts in batches until they are golden brown on both sides, approximately 2-3 minutes per side.
  7. Remove the donuts from the oil and allow them to drain on paper towels. While still warm, generously coat them in extra granulated sugar for that delightful crunch.

Nutrition

Serving: 1donutCalories: 250kcalCarbohydrates: 30gProtein: 3gFat: 12gSaturated Fat: 7gMonounsaturated Fat: 4gCholesterol: 30mgSodium: 150mgPotassium: 120mgFiber: 1gSugar: 10gVitamin A: 300IUCalcium: 50mgIron: 0.5mg

Notes

For extra flavor, serve warm donuts with a sprinkle of cinnamon sugar.

Tried this recipe?

Let us know how it was!

Filed Under: BREAKFAST & BRUNCH

Ground Beef and Chopped Cabbage Skillet Meal

December 16, 2025 by JudyWhite Leave a Comment

Life can get busy, and, let’s be honest, the allure of takeout often calls our name too loudly. But what if I told you that a homemade meal bursting with flavor can come together in just 20 minutes? I discovered this Ground Beef and Chopped Cabbage Skillet Meal during a hectic week when fast food was tempting, but my craving for something wholesome wouldn’t let me settle.

Imagine this: the savory scent of beef sizzling in a hot skillet, mingling with the sweetness of sautéed onions and the crunch of fresh cabbage. With a few simple ingredients that you likely already have in your kitchen, this dish transforms into something extraordinary—a one-pan wonder that’s as easy to make as it is delightful to eat. Whether you’re feeding a hungry family or looking to impress some friends, this hearty meal is sure to bring everyone to the table. Trust me, you won’t want to skip this gem!

Why You'll Love This Ground Beef and Chopped Cabbage Skillet Meal

  • This recipe comes together in just 20 minutes, making it perfect for busy weeknights when you need a delicious meal fast.
  • The incredible flavors of savory beef, sweet onions, and fresh cabbage create a delightful harmony that will tantalize your taste buds.
  • Its versatility allows you to customize the ingredients based on what you have on hand, making it a great option for using up leftovers or seasonal veggies.
  • Plus, being a one-pan dish, clean-up is a breeze, leaving you more time to relax and enjoy your meal with family and friends.

Ground Beef and Chopped Cabbage Skillet Meal Ingredients

For the Beef
• Lean ground beef – a hearty base that provides protein and richness to your meal.

For the Vegetables
• Chopped cabbage – adds crunch and nutrition, making this dish heartier.
• Medium onion – enhances flavor with its sweetness when sautéed.
• Grated or julienned carrot – for a pop of color and a touch of sweetness.

For the Sauce
• Tomato sauce or paste – lends a tangy depth to balance the savory beef.
• Beef broth or vegetable broth – keeps everything moist and adds flavor; it’s vital for the best Ground Beef and Chopped Cabbage Skillet Meal.

Seasoning
• Salt and pepper – essential for enhancing the dish’s overall flavor.
• Paprika – provides warmth; choose between regular or smoked for different depths.

For Cooking
• Vegetable oil – the key to a good sear on your beef and vegetables.

How to Make Ground Beef and Chopped Cabbage Skillet Meal

  1. Heat the Skillet: Place a large skillet over medium heat. Once it’s hot, add the ground beef along with salt and pepper to taste. Cook this savory mixture until the beef is nicely browned and cooked through, about 5-7 minutes. Don’t forget to drain any excess fat if necessary!

  2. Sauté the Onion: In the same skillet, toss in the chopped onion. Sauté until it becomes translucent and fragrant, about 3-4 minutes. Then, stir in the grated or julienned carrot, cooking for another 2-3 minutes until the carrot softens beautifully.

  3. Mix in the Sauce: Add the tomato sauce or paste to the skillet, followed by the broth. If you’re using a bouillon cube, mix it in with some water. Give everything a good stir, letting it simmer together for 2-3 minutes to meld the flavors.

  4. Combine with Cabbage: Now, it’s cabbage time! Add the chopped cabbage, along with extra salt, pepper, and paprika. Stir well to combine all the ingredients. Cover the skillet with a lid and let it simmer for about 5-8 minutes, stirring occasionally, until the cabbage is tender and vibrant.

  5. Final Touches: Return the cooked beef to the skillet, stirring everything together. If you’re feeling fancy, sprinkle some fresh herbs like parsley or chives on top for a lovely garnish. Serve your delicious meal hot and watch smiles light up around the table!

Optional: Serve with crusty bread for a delightful meal experience.
Exact quantities are listed in the recipe card below.

What to Serve with Ground Beef and Chopped Cabbage Skillet Meal?

Looking to elevate your dining experience? Pair this hearty skillet meal with delightful sides that complement its robust flavors.

  • Creamy Mashed Potatoes: Their smooth texture balances the savory beef and crunchy cabbage, creating a cozy comfort food vibe.

  • Garlicky Breadsticks: Freshly baked and warm, garlic breadsticks are perfect for soaking up any leftover sauce and add a delicious garlic kick.

  • Roasted Broccoli: The slight bitterness of roasted broccoli pairs well with the sweetness of cabbage, plus it adds a lovely green touch to your plate.

  • Apple Cider Vinegar Coleslaw: A tangy coleslaw adds bright acidity, cutting through the richness of the beef while providing a refreshing crunch.

  • Savory Cornbread: Moist and slightly sweet, cornbread adds a homey element, making every bite of the skillet meal even more satisfying.

  • Chilled Lettuce Salad: Crisp lettuce, tomatoes, and cucumbers dressed in a light vinaigrette contrast beautifully with the hearty dish, offering freshness and crunch.

  • Soda or Sparkling Water: Pair with a fizzy drink for a refreshing contrast that will refresh your palate between bites.

Indulge your taste buds and transform your meal into a welcome feast!

Ground Beef and Chopped Cabbage Skillet Meal Variations

Feel free to get creative with this recipe and make it your own!

  • Spicy Kick: Add a teaspoon of red pepper flakes or diced jalapeños for some heat. Spice lovers will adore this flavorful twist!

  • Herb Infusion: Incorporate fresh herbs like thyme or oregano during cooking for a fragrant and earthy flavor that elevates the dish. Such additions bring a beautiful aroma as they cook.

  • Add More Veggies: Toss in bell peppers, zucchini, or peas to bulk up the nutritional content and add vibrant colors. The crunch these veggies provide complements the tenderness of the cabbage perfectly.

  • Cheesy Goodness: Mix in some shredded cheese just before serving for a melty layer of goodness. Cheese lovers will find it hard to resist the comforting richness!

  • Whole Grain Twist: Substitute regular tomato sauce with marinara or chunky tomato sauce for added flavor. This swap creates a heartier sauce that pairs excellently with the beef.

  • Gluten-Free Alternative: Use quinoa or riced cauliflower instead of cabbage for a low-carb, gluten-free version. This swap brings a new texture and keeps the flavor intact.

  • Sweet Note: Stir in a dash of honey or a handful of raisins for a hint of sweetness that balances the savory elements beautifully. This touch can create a wonderful harmony of tastes.

  • Veggie Broth Boost: Swap beef broth for a robust vegetable broth for a lighter but still flavorful version that everyone can enjoy. On the health side, it’s a wonderful way to please all palates!

Make Ahead Options

These Ground Beef and Chopped Cabbage Skillet Meal components are perfect for meal prep, making your busy weeknights easier! You can brown the ground beef and sauté the onions, carrots, and spices up to 24 hours in advance. Store them in an airtight container in the refrigerator to maintain freshness. You can also prep the cabbage by chopping it a couple of days ahead, just be sure to keep it in a sealed bag to prevent wilting. When you’re ready to finish the dish, simply reheat the beef mixture in the skillet, add the chopped cabbage, and let everything simmer until it’s heated through and the cabbage is tender. This way, you’ll enjoy a wholesome meal with minimal effort, just as delicious as if made fresh!

How to Store and Freeze Ground Beef and Chopped Cabbage Skillet Meal

Fridge: Store any leftovers in an airtight container for up to 3 days. Allow the dish to cool before sealing to prevent condensation.

Freezer: You can freeze this Ground Beef and Chopped Cabbage Skillet Meal in an airtight container for up to 3 months. Make sure it’s fully cooled before freezing.

Reheating: When ready to enjoy, thaw in the fridge overnight, then reheat on the stovetop or in the microwave, stirring occasionally until heated thoroughly.

Serving Fresh: For the best flavor and texture, enjoy your skillet meal fresh. Only freeze if you have leftovers, as this dish is best served hot!

Chef's Helpful Tips

  • For the Ground Beef and Chopped Cabbage Skillet Meal, always ensure your skillet is preheated to guarantee a good sear on the beef, which enhances flavor and texture.
  • Avoid overcrowding the pan when cooking the ground beef; this will prevent steaming and keep the meat nice and browned.
  • When adding the cabbage, consider chopping it into uniform pieces for even cooking, as this helps ensure that all your ingredients are tender at the same time.
  • Keep an eye on the simmering time for the cabbage; overcooking can lead to a mushy texture, so aim for 5-8 minutes until it’s vibrant and soft yet still holds its shape.

Ground Beef and Chopped Cabbage Skillet Meal Recipe FAQs

What’s the best way to choose ripe cabbage for this dish?
Absolutely! Look for cabbages that feel heavy for their size and have crisp, vibrant leaves. Avoid any with dark spots or wilting, as these can indicate that the cabbage is past its prime. A fresh head should have a firm, compact feel and a bright green color.

How should I store leftovers from the Ground Beef and Chopped Cabbage Skillet Meal?
Store any leftovers in an airtight container in the refrigerator for up to 3 days. Be sure to allow the dish to cool down to room temperature before sealing to prevent condensation inside the container, which can make your meal soggy.

Can I freeze the Ground Beef and Chopped Cabbage Skillet Meal?
Absolutely! To freeze, let the dish cool completely, then transfer it to an airtight container or freezer bag, ensuring to remove as much air as possible. It can be frozen for up to 3 months. For easy reheating, consider portioning it into individual servings.

What is the best way to reheat the dish after freezing?
When you’re ready to enjoy your meal, thaw it in the refrigerator overnight. Then, reheat it on the stovetop over medium heat, stirring occasionally for even warming, or you can use the microwave. Aim for a warm internal temperature of 165°F (74°C) before serving.

Can I modify the recipe to accommodate food allergies?
Very! If you have a gluten allergy, simply make sure your broth is gluten-free. For those who are lactose intolerant or vegan, substituting the beef with plant-based ground meat and using vegetable broth will work beautifully. As always, check labels to ensure all ingredients meet your dietary needs!

What should I do if my cabbage turns out mushy?
It’s a common concern! If your cabbage becomes mushy, you might be simmering it for too long. To prevent this, make sure you monitor the simmering time closely—aim for 5-8 minutes under a closed lid until it becomes tender but still vibrant. If it’s mushy, consider adding a splash of lemon or vinegar to reinvigorate the flavor!

Ground Beef and Chopped Cabbage Skillet Meal

Ground Beef and Chopped Cabbage Skillet Meal

Enjoy a quick and flavorful Ground Beef and Chopped Cabbage Skillet Meal that's ready in just 20 minutes.
Print Recipe Pin Recipe
Prep Time 5 minutes mins
Cook Time 15 minutes mins
Total Time 20 minutes mins
Servings: 4 servings
Course: DINNER RECIPES
Cuisine: American
Calories: 350
Ingredients Equipment Method Nutrition Notes

Ingredients
  

For the Beef
  • 1 pound lean ground beef
For the Vegetables
  • 4 cups chopped cabbage
  • 1 medium onion chopped
  • 1 cup grated or julienned carrot
For the Sauce
  • 1 cup tomato sauce or paste
  • 1 cup beef broth or vegetable broth
Seasoning
  • 1 teaspoon salt
  • 1 teaspoon pepper
  • 1 teaspoon paprika
For Cooking
  • 2 tablespoons vegetable oil

Equipment

  • Large skillet

Method
 

How to Make Ground Beef and Chopped Cabbage Skillet Meal
  1. Heat the Skillet: Place a large skillet over medium heat. Add the ground beef along with salt and pepper. Cook until browned, about 5-7 minutes. Drain excess fat if necessary.
  2. Sauté the Onion: In the same skillet, toss in the chopped onion. Sauté until translucent, about 3-4 minutes. Stir in the carrot, cooking for another 2-3 minutes until softened.
  3. Mix in the Sauce: Add the tomato sauce or paste and the broth. Stir and let it simmer for 2-3 minutes to meld the flavors.
  4. Combine with Cabbage: Add the chopped cabbage, salt, pepper, and paprika. Stir and cover. Simmer for 5-8 minutes until cabbage is tender.
  5. Final Touches: Return cooked beef to the skillet and stir everything together. Optionally, garnish with fresh herbs. Serve hot.

Nutrition

Serving: 1servingCalories: 350kcalCarbohydrates: 20gProtein: 25gFat: 15gSaturated Fat: 5gPolyunsaturated Fat: 1gMonounsaturated Fat: 9gCholesterol: 80mgSodium: 600mgPotassium: 800mgFiber: 5gSugar: 4gVitamin A: 300IUVitamin C: 50mgCalcium: 50mgIron: 3mg

Notes

For the best flavor, serve this meal hot. Optionally serve with crusty bread.

Tried this recipe?

Let us know how it was!

Filed Under: DINNER RECIPES

Lentil Vegetable Stew

December 15, 2025 by JudyWhite Leave a Comment

As the weather turns crisp, I find myself craving hearty meals that warm both the body and soul. One evening, while rummaging through my pantry in search of inspiration, I unearthed a bag of lentils nestled among the spices. It sparked a memory of a comforting Lentil Vegetable Stew my grandmother used to make, filled with fresh veggies and aromatic spices.

In a matter of minutes, I realized that I didn’t need to order takeout; I could create something satisfying at home. This Lentil Vegetable Stew is not only easy to whip up but also bursting with flavor—perfect for cozy nights in or when you simply want to treat yourself and your loved ones to a wonderfully nourishing dish. With just a few staple ingredients, this recipe transforms simple lentils into a delightful bowl of comfort, proving that home-cooked meals can be both healthy and delicious. Ready to join me in reimagining dinner? Let’s get cooking!

Why You'll Love This Lentil Vegetable Stew

  • This Lentil Vegetable Stew is incredibly easy to prepare, making it a perfect option for busy weeknights.
  • The combination of hearty lentils and fresh vegetables delivers a burst of flavor that will leave everyone asking for seconds.
  • Its versatility allows you to customize the ingredients based on what you have on hand, ensuring it fits any meal plan.
  • Visually, this stew is a vibrant medley of colors, making it as appealing to the eyes as it is to the palate.

Lentil Vegetable Stew Ingredients

• Gather these ingredients to create your hearty stew!

For the Base
• 1 cup lentils – packed with protein and fiber, they serve as the perfect base for this comforting dish.
• 2 carrots, diced – they add a natural sweetness and vibrant color to your Lentil Vegetable Stew.
• 1 onion, chopped – this aromatic ingredient enhances the flavor profile, bringing depth to the stew.
• 2 cloves garlic, minced – a must for that rich, savory flavor that complements every bite.
• 1 bell pepper, diced – adds crunch and a pop of color, with a mild sweetness that balances the spices.

For the Liquid Gold
• 2 cups vegetable broth – provides a savory base; feel free to use homemade broth for extra flavor.
• 1 can diced tomatoes – contributes acidity and a juicy texture, elevating the overall taste of your stew.

For the Seasoning
• 1 teaspoon cumin – offers a warm, earthy flavor that enhances the stew’s comfort vibe.
• 1 teaspoon paprika – brings a hint of smokiness and depth to every spoonful.
• Salt and pepper to taste – essential for adjusting the flavor to suit your palate.

With these ingredients, you’ll be well on your way to savoring a delicious and nourishing bowl of Lentil Vegetable Stew. Let’s get cooking!

How to Make Lentil Vegetable Stew

  1. Rinse the lentils under cold water until the water runs clear. This step removes any dust or impurities and ensures your stew will have clean flavors.

  2. Sauté the onion and garlic in a large pot over medium heat until soft, about 3-5 minutes. The aroma of onions and garlic will fill your kitchen with warmth and anticipation.

  3. Add the diced carrots and bell pepper to the pot, cooking for another 5 minutes until they are tender. This step brings out their natural sweetness and brightens your stew’s color.

  4. Stir in the rinsed lentils, vegetable broth, diced tomatoes, cumin, and paprika. Make sure everything is well mixed before moving on to the next step.

  5. Bring the mixture to a boil, then reduce heat and cover to simmer for 30 minutes. You’ll know it’s done when the lentils are tender and the flavors meld beautifully together.

  6. Season with salt and pepper to taste before serving, allowing each bite to be perfectly balanced.

Optional: Garnish with fresh herbs for an added touch of flavor.

Exact quantities are listed in the recipe card below.

Make Ahead Options

These Lentil Vegetable Stew preparations are perfect for busy home cooks looking to save time without sacrificing flavor! You can chop the carrots, onion, and bell pepper up to 3 days in advance and store them in an airtight container in the refrigerator. Likewise, rinse the lentils and keep them ready to go. When it’s time to enjoy your meal, simply sauté the prepped vegetables, stir in the remaining ingredients, and simmer as directed. This approach ensures that your stew will still be just as delicious and comforting. Additionally, if you prepare the entire stew ahead of time, it can be refrigerated for up to 3 days and reheated on the stove to enjoy the rich, evolving flavors.

Lentil Vegetable Stew Variations

Feel free to let your creativity shine and make this dish your own with these tempting ideas!

  • Spicy Kick: Add diced jalapeños or a splash of hot sauce to bring some heat and ignite your taste buds.

  • Herb Infusion: Mix in fresh herbs like thyme or rosemary for an aromatic boost and a garden-fresh flavor intuition.

  • Coconut Cream: For a creamy twist, stir in a can of coconut milk at the end of cooking for richness and sweetness. It’s like a cozy hug in a bowl!

  • Sweet Potato: Substitute diced sweet potato for carrots for added sweetness and a comforting texture that perfectly complements the lentils.

  • Protein Boost: Add a can of chickpeas or black beans for an extra protein punch, creating a heartier stew that leaves you satisfied. The variation not only enhances nutrition but adds delightful texture.

  • Grain Blend: Stir in cooked quinoa or brown rice towards the end for extra heartiness, making this stew even more of a filling meal.

  • Lemon Zing: Finish with a squeeze of fresh lemon juice before serving to bright up the flavors and add a refreshing note.

  • Cheesy Delight: Top with a sprinkle of parmesan or feta cheese for a savory depth that pairs beautifully with the rich flavors of the stew. It’s a delightful finish that adds an extra layer of comfort.

What to Serve with Lentil Vegetable Stew?

Cozy up your meal with these delightful pairings that enhance the comforting flavors of your stew.

  • Crusty Bread: Perfect for sopping up every last drop of stew, a hearty loaf offers a satisfying crunch and warmth.
  • Simple Green Salad: A refreshing mix of greens adds brightness and balances the richness of the stew. Toss in some cherry tomatoes for a pop of sweetness!
  • Steamed Rice: Serve your lentil stew over fluffy rice for a filling meal that marries flavors beautifully. The rice soaks up the stew, creating the perfect bite.
  • Roasted Vegetables: A medley of seasonally roasted veggies enhances the meal with extra texture and deep, caramelized flavors.
  • Creamy Polenta: Smooth polenta provides a rich, comforting base that embraces the stew’s hearty goodness, creating a plate to remember.
  • Herbal Tea: A warm cup of herbal tea perfectly complements your stew, helping to cleanse the palate between bites and add warmth to your meal.
  • Chocolate Cake: End on a sweet note with a slice of rich chocolate cake, offering a delightful contrast to the savory stew—simply divine!

These pairings invite warmth and conviviality to the table, making your dinner truly special.

How to Store and Freeze Lentil Vegetable Stew

Fridge: Store leftover Lentil Vegetable Stew in an airtight container for up to 3 days. This will keep it fresh and maintain the flavors you love.

Freezer: For longer storage, freeze the stew in freezer-safe containers for up to 3 months. Make sure to leave some space at the top for expansion as it freezes.

Reheating: When ready to enjoy, thaw overnight in the fridge if frozen, then reheat on the stovetop over medium heat, adding a splash of broth if needed to loosen it up.

Room Temperature: Avoid leaving the stew out at room temperature for more than 2 hours to ensure food safety and maintain its delicious taste.

Chef's Helpful Tips

  • Always rinse your lentils before cooking to remove any dust and ensure a clean flavor in your Lentil Vegetable Stew.
  • If you find your stew too thick during cooking, simply add a little more vegetable broth or water to reach your desired consistency.
  • For maximum flavor, sauté the onion and garlic until they are golden brown, as this enhances sweetness and depth in the stew.
  • Remember to taste and adjust seasoning towards the end of cooking, as ingredients like vegetable broth and canned tomatoes can vary in saltiness.

Lentil Vegetable Stew Recipe FAQs

What type of lentils should I use for Lentil Vegetable Stew?
Absolutely! I recommend using green or brown lentils for this stew as they hold their shape well during cooking, providing a nice texture. Red lentils can be used as well, but they tend to break down more and create a creamier stew.

How should I store leftover Lentil Vegetable Stew?
Store any leftover Lentil Vegetable Stew in an airtight container in the refrigerator for up to 3 days. It’s best to allow the stew to cool to room temperature before sealing it up. You can warm it gently on the stovetop or in the microwave when you’re ready to enjoy another bowl.

Can I freeze Lentil Vegetable Stew?
Very! To freeze your stew, let it cool completely and then pour it into freezer-safe containers, leaving about an inch of space at the top for expansion. It can be frozen for up to 3 months. When you’re ready to eat it, thaw it overnight in the fridge, and then reheat on the stovetop, adding a splash of vegetable broth if it feels too thick.

What if my stew is too thick or too thin?
No worries! If your Lentil Vegetable Stew turns out too thick, simply stir in a bit of vegetable broth or water, heating it gently until the desired consistency is reached. If it’s too thin, you can let it simmer uncovered for a few extra minutes to allow some of the liquid to evaporate, thickening it up naturally.

Can I add other vegetables to this stew?
The more the merrier! You can definitely customize your Lentil Vegetable Stew with other vegetables based on your preferences. Some great options include spinach, zucchini, or sweet potatoes. Just make sure to adjust cooking times for any harder vegetables to ensure they cook thoroughly.

Is this stew suitable for a gluten-free diet?
Yes, this Lentil Vegetable Stew is naturally gluten-free as long as you use gluten-free vegetable broth and canned tomatoes. It’s a wholesome, nourishing option for anyone looking to enjoy a delicious meal without gluten!

Lentil Vegetable Stew

Lentil Vegetable Stew

A comforting Lentil Vegetable Stew packed with protein and fiber, perfect for cozy nights in.
Print Recipe Pin Recipe
Prep Time 10 minutes mins
Cook Time 30 minutes mins
Total Time 40 minutes mins
Servings: 4 bowls
Course: DINNER RECIPES
Cuisine: Vegetarian
Calories: 250
Ingredients Equipment Method Nutrition Notes

Ingredients
  

For the Base
  • 1 cup lentils packed with protein and fiber
  • 2 pieces carrots diced
  • 1 piece onion chopped
  • 2 cloves garlic minced
  • 1 piece bell pepper diced
For the Liquid Gold
  • 2 cups vegetable broth provides a savory base
  • 1 can diced tomatoes
For the Seasoning
  • 1 teaspoon cumin
  • 1 teaspoon paprika
  • Salt to taste
  • Pepper to taste

Equipment

  • Large pot

Method
 

How to Make Lentil Vegetable Stew
  1. Rinse the lentils under cold water until the water runs clear.
  2. Sauté the onion and garlic in a large pot over medium heat until soft, about 3-5 minutes.
  3. Add the diced carrots and bell pepper to the pot, cooking for another 5 minutes until they are tender.
  4. Stir in the rinsed lentils, vegetable broth, diced tomatoes, cumin, and paprika.
  5. Bring the mixture to a boil, then reduce heat and cover to simmer for 30 minutes.
  6. Season with salt and pepper to taste before serving.

Nutrition

Serving: 1bowlCalories: 250kcalCarbohydrates: 45gProtein: 15gFat: 3gSaturated Fat: 0.5gPolyunsaturated Fat: 1gMonounsaturated Fat: 1gSodium: 400mgPotassium: 800mgFiber: 12gSugar: 6gVitamin A: 5000IUVitamin C: 20mgCalcium: 60mgIron: 4mg

Notes

Garnish with fresh herbs for an added touch of flavor.

Tried this recipe?

Let us know how it was!

Filed Under: DINNER RECIPES

Carrot Ginger Coconut-Free Soup

December 15, 2025 by JudyWhite Leave a Comment

As the crisp air of winter makes its presence felt, there’s nothing quite like warming up with a cozy bowl of soup. One chilly afternoon, while digging through my veggie drawer, I discovered an abundance of vibrant carrots and a piece of ginger begging for attention. That’s when I decided to whip up my Carrot Ginger Coconut-Free Soup—a delightfully simple recipe that packs a punch of flavor while being both wholesome and satisfying.

The creamy texture you’ve always wanted minus the coconut is just a blender away! Not only does this soup warm the soul, but it also brings a delightful sweetness from the carrots and a hint of spice from the ginger. Plus, with just a handful of ingredients and minimal prep time, it’s perfect for those busy evenings when fast food tempts but homemade goodness is the goal. Join me as we journey into this deliciously easy dish that is bound to become a regular feature at your dinner table!

Why You'll Love This Carrot Ginger Coconut-Free Soup

  • This Carrot Ginger Coconut-Free Soup is incredibly easy to make, allowing you to enjoy a homemade meal without spending hours in the kitchen.
  • The delicious blend of sweet carrots and zesty ginger creates a flavor profile that is both comforting and invigorating, making each spoonful a delightful experience.
  • Its versatility means you can serve it as an elegant starter, a hearty main dish, or even a cozy side, perfect for any occasion.
  • Visually, the vibrant orange color of the soup is sure to brighten up your dining table and impress your guests.

Carrot Ginger Coconut-Free Soup Ingredients

For the Soup

  • Carrots – 4 cups, chopped, these root vegetables bring natural sweetness and a beautiful orange hue.
  • Onion – 1 diced, adds a savory depth that enhances the flavor profile.
  • Garlic – 2 cloves, minced, offering a fragrant kick that complements the carrots and ginger.
  • Ginger – 1-inch piece, grated; this spicy root elevates the soup, providing warmth and zest.
  • Vegetable Broth – 4 cups, the base that ties all ingredients together, ensuring a rich and hearty soup.
  • Olive Oil – 1 tablespoon, for sautéing; it adds healthy fats and a lovely flavor to the mix.
  • Salt – to taste, enhances the overall flavors and balances the sweetness of the carrots.
  • Pepper – to taste, a touch of spice to round out the soup’s deliciousness.

This nourishing Carrot Ginger Coconut-Free Soup is not only simple but incredibly satisfying. Get ready to warm your soul with each tasty spoonful!

How to Make Carrot Ginger Coconut-Free Soup

  1. Heat Olive Oil: In a large pot, warm the olive oil over medium heat. You want it shimmering but not smoking—just enough to sauté those aromatic veggies!

  2. Sauté Onions and Garlic: Add the diced onion and minced garlic to the pot. Sauté them for about 3-4 minutes until they become translucent and fragrant, filling your kitchen with a mouth-watering aroma.

  3. Add Carrots and Ginger: Stir in the chopped carrots and grated ginger, letting them cook together for about 5 minutes. This allows the flavors to meld and the carrots to soften slightly.

  4. Pour in Broth: Carefully pour the vegetable broth into the pot, bringing the mixture to a gentle boil. Listen for the bubbling sounds—it’s a cue that your soup is on its way!

  5. Simmer for Tenderness: Reduce the heat to a simmer and let the soup cook for 20 minutes. You’ll know it’s ready when the carrots are fork-tender and the flavors have beautifully developed.

  6. Blend Until Smooth: Using an immersion blender or a regular blender, puree the soup until it reaches a creamy smoothness. You’ll want it velvety—just like a comforting hug in a bowl!

  7. Season to Taste: Once blended, season with salt and pepper to your liking. Don’t be shy—taste as you go to find that perfect balance of flavors!

  8. Serve Hot: Ladle the warm soup into bowls and serve immediately, savoring each luscious bite of your homemade creation.

Optional: Top with a sprinkle of fresh herbs for a vibrant touch.
Exact quantities are listed in the recipe card below.

Make Ahead Options

This Carrot Ginger Coconut-Free Soup is perfect for meal prep enthusiasts looking to save time in the kitchen! You can chop the carrots, onion, and garlic up to 24 hours in advance, storing them in an airtight container in the refrigerator to maintain their freshness. Additionally, the soup itself can be made ahead and refrigerated for up to 3 days. When you’re ready to serve, simply reheat the soup on the stovetop and blend it again for that silky texture. Season with salt and pepper right before serving to keep the flavors vibrant. Enjoy restaurant-quality results with minimal effort, making your busy weeknights a little brighter!

How to Store and Freeze Carrot Ginger Coconut-Free Soup

Fridge: Store in an airtight container for up to 3 days. Be sure to let the soup cool completely before sealing to prevent condensation and sogginess.

Freezer: Freeze in portions using freezer-safe containers or bags for up to 3 months. Allow the soup to cool before packaging to maintain its flavor and texture.

Reheating: Thaw overnight in the fridge before reheating. Gently warm in a saucepan over medium heat, stirring frequently, until heated through. Adjust seasoning as needed.

Serving Tip: For an extra touch, reheat your Carrot Ginger Coconut-Free Soup with a splash of coconut milk or a swirl of olive oil before serving!

Carrot Ginger Coconut-Free Soup Variations

Feel free to embrace your creativity and elevate this comforting soup dish with these fun twists!

  • Spicy Kick: Add a pinch of red pepper flakes during cooking for a subtle heat that warms each spoonful. If you prefer it spicier, include diced jalapeño peppers for a bold flavor upgrade!

  • Creamy Texture: Swap half of the vegetable broth with coconut milk for a luscious creaminess while still keeping the coconut flavor at bay. This will create a richer taste that adds to the overall comfort of the soup.

  • Herb Infusion: Stir in a handful of fresh herbs like thyme or cilantro towards the end of cooking to infuse a fragrant layer of freshness. These herbs brighten the flavor and create a beautiful aromatic experience.

  • Root Veggie Boost: Mix in other root vegetables such as sweet potatoes or parsnips for added depth of flavor and nutrition. They add a lovely sweetness and variation in texture that makes every bite unique.

  • Zesty Citrus: Squeeze in some fresh lemon or lime juice right before serving for a bright, tangy lift. This touch of acidity will enhance all the other flavors in the soup and keep it feeling light.

  • Nutty Crunch: Top with toasted pumpkin seeds or crushed almonds for a delightful crunch and added protein. The nutty flavor complements the sweetness of the carrots and adds a satisfying texture contrast.

  • Creamy Vegan Option: Replace olive oil with avocado oil and blend in some silken tofu for a protein-packed vegan crema. This swap provides a lovely creamy consistency while ensuring all dietary needs are met.

  • Savoury Sauté: Consider sautéing mushrooms along with the onions and garlic for an earthy flavor that adds complexity to the soup. The combination of mushrooms and ginger is truly magical and will entice any mushroom lover!

What to Serve with Carrot Ginger Coconut-Free Soup?

Indulge in a cozy meal that beautifully complements the warm flavors of this delightful soup.

  • Crusty Bread: Perfect for dipping, its texture balances the soup’s creaminess while soaking up all that delicious broth.

  • Fresh Salad: A light, crisp salad with a tangy vinaigrette adds brightness and freshness, contrasting the warmth of the soup.

  • Grilled Cheese Sandwich: The gooey cheese and toasted bread provide a nostalgic comfort, making it a kid-favorite pairing.

  • Roasted Chickpeas: Crunchy and seasoned to perfection, they offer a delightful contrast in texture and are a nutritious addition.

  • Savory Quinoa Bowl: Heap this nutritious grain with your favorite veggies; it adds protein and a hearty base, making your meal complete.

  • Herbal Tea: A warm cup perfumed with hints of chamomile or mint soothes the palate and enhances the overall dining experience.

  • Dark Chocolate Dessert: After the soothing warmth of the soup, a little piece of dark chocolate provides a delightful, sweet finish.

Each of these pairings highlights the comforting nature of your Carrot Ginger Coconut-Free Soup while offering new flavors and textures to enjoy at the table.

Chef's Helpful Tips

  • For the Carrot Ginger Coconut-Free Soup, ensure you cut your carrots evenly to guarantee uniform cooking.
  • When sautéing the onions and garlic, avoid browning them too much as this can add bitterness to the soup.
  • If you prefer a smoother texture, blend the soup in small batches to avoid spillage and achieve a velvety consistency.
  • Remember to taste the soup before serving—it’s crucial for adjusting the seasoning and ensuring perfect flavor balance.

Carrot Ginger Coconut-Free Soup Recipe FAQs

How do I choose the best carrots for the soup?
Absolutely! When selecting carrots, look for firm, smooth ones without any dark spots or blemishes. Ideally, you want vibrant orange carrots, as they are tender and sweet. If possible, visit a local farmer’s market for fresh, in-season produce for the best flavor!

How can I store leftover Carrot Ginger Coconut-Free Soup?
Very easily! Allow the soup to cool completely before transferring it to an airtight container. It can be stored in the refrigerator for up to 3 days. Remember to label the container with the date, so you know when to enjoy it by!

Can I freeze this soup for later use?
Absolutely! To freeze your Carrot Ginger Coconut-Free Soup, first ensure it’s cooled completely. Then, pour it into freezer-safe containers or heavy-duty freezer bags, leaving about an inch of space at the top. It can be stored for up to 3 months. Just remember to defrost it in the fridge before reheating for the best result!

What should I do if my soup turns out too thick?
If your soup is thicker than you’d like, don’t worry! Gradually add more vegetable broth or water until you reach your desired consistency. Stir well and let it simmer for a few minutes to incorporate the added liquid. This can help balance the flavors as well!

Are there any allergy considerations for this recipe?
Good question! This Carrot Ginger Coconut-Free Soup is naturally vegan and gluten-free, making it a great option for many dietary needs. However, if you have specific allergies, always double-check that your vegetable broth doesn’t contain any allergens. Also, if you’re serving it to children or pets, ensure ginger and salt are used in moderation.

Can I adapt this recipe for other dietary preferences?
Absolutely! If you’re looking to make it creamier without using coconut, consider adding a splash of cashew milk or almond milk. For those avoiding alliums, substitute onions and garlic with herbs like thyme or rosemary for a different flavor profile. Feel free to experiment and tweak it to suit everyone’s tastes!

Carrot Ginger Coconut-Free Soup

Carrot Ginger Coconut-Free Soup

This Carrot Ginger Coconut-Free Soup is a warming, flavorful dish perfect for cold days.
Print Recipe Pin Recipe
Prep Time 10 minutes mins
Cook Time 25 minutes mins
Total Time 35 minutes mins
Servings: 4 cups
Course: DINNER RECIPES
Cuisine: American
Calories: 180
Ingredients Equipment Method Nutrition Notes

Ingredients
  

For the Soup
  • 4 cups Carrots chopped
  • 1 Onion diced
  • 2 cloves Garlic minced
  • 1 inch Ginger grated
  • 4 cups Vegetable Broth
  • 1 tablespoon Olive Oil for sautéing
  • Salt to taste
  • Pepper to taste

Equipment

  • Large pot
  • Immersion Blender

Method
 

How to Make Carrot Ginger Coconut-Free Soup
  1. In a large pot, warm the olive oil over medium heat.
  2. Add the diced onion and minced garlic to the pot. Sauté for about 3-4 minutes until translucent and fragrant.
  3. Stir in the chopped carrots and grated ginger, cooking together for about 5 minutes.
  4. Carefully pour in the vegetable broth, bringing the mixture to a gentle boil.
  5. Reduce the heat to a simmer and let the soup cook for 20 minutes.
  6. Using an immersion blender or regular blender, puree the soup until smooth.
  7. Once blended, season with salt and pepper to your liking.
  8. Ladle the warmed soup into bowls and serve immediately.

Nutrition

Serving: 1cupCalories: 180kcalCarbohydrates: 30gProtein: 4gFat: 6gSaturated Fat: 1gPolyunsaturated Fat: 0.5gMonounsaturated Fat: 4gSodium: 400mgPotassium: 800mgFiber: 6gSugar: 8gVitamin A: 12000IUVitamin C: 20mgCalcium: 80mgIron: 1.5mg

Notes

For an extra touch, reheat your soup with a splash of coconut milk or a swirl of olive oil before serving.

Tried this recipe?

Let us know how it was!

Filed Under: DINNER RECIPES

Tomato Basil Vegetable Soup

December 15, 2025 by JudyWhite Leave a Comment

As the cooler days of autumn approach, there’s nothing quite as comforting as a warm bowl of Tomato Basil Vegetable Soup. I first discovered this recipe during one of those cozy evenings when the wind whipped leaves across my yard, and I craved something hearty yet healthy. The fresh aroma of sautéed onions and garlic instantly filled my kitchen, bringing back memories of family dinners spent gathered around the table.

This soup isn’t just a bowl of vegetables; it’s rich in vibrant flavors and nourishment, making it the perfect remedy for those fast-food blues. With just a handful of ingredients—like juicy tomatoes, aromatic basil, and crisp veggies—you can whip up a meal that’s not only easy but also impressively delicious. Each spoonful warms the soul, and it’s versatile enough to adapt to whatever veggies you have on hand. Ready to dive into a comforting bowl of homemade goodness? Let’s get started!

Why You'll Love This Tomato Basil Vegetable Soup

  • This Tomato Basil Vegetable Soup is incredibly easy to make, requiring just a handful of fresh ingredients and minimal prep time.
  • The delightful combination of tomatoes and basil creates a deliciously rich flavor profile that will satisfy your taste buds.
  • Its versatility allows you to customize the soup with whatever vegetables you have on hand, making it a perfect dish for any season.
  • Not only is it visually appealing with its vibrant colors, but it also serves as a comforting and healthy option that is sure to please both family and friends.

Tomato Basil Vegetable Soup Ingredients

• Here’s what you need to create a flavorful Tomato Basil Vegetable Soup.

For the Base

  • Olive oil – A splash of healthy fat for sautéing and flavor.
  • Onion – Adds a savory foundation and sweetness as it cooks.
  • Garlic – Infuses the soup with aromatic depth and richness.

For the Vegetables

  • Vegetable broth – Serves as the savory liquid base of the soup.
  • Canned diced tomatoes – Adds acidity and sweetness; opt for low-sodium for a healthier choice.
  • Fresh tomatoes – Enhance freshness and bring vibrant flavor to the mix.
  • Carrots – Provide natural sweetness and a pop of color.
  • Celery – Contributes crunch and a slight earthiness.
  • Zucchini – Adds a mild flavor and tender texture to the soup.

For Seasoning

  • Dried basil – Intensifies the aromatic blend of flavors.
  • Salt – Essential for enhancing all the delicious tastes.
  • Pepper – Adds a hint of warmth and spice.

For Garnish

  • Fresh basil leaves – A fragrant finishing touch that brightens up the dish.

How to Make Tomato Basil Vegetable Soup

  1. Heat a large pot and pour in the olive oil over medium heat. Allow the oil to warm for about 1-2 minutes until it shimmers, preparing it for the delicious aroma to come.

  2. Sauté the diced onion and minced garlic in the heated oil, stirring frequently. Cook for about 3-5 minutes until the onion becomes translucent and aromatic, setting the stage for deeper flavors.

  3. Pour in the vegetable broth and add the canned diced tomatoes. Stir gently and bring this savory mixture to a lively boil, releasing a delightful aroma into your kitchen.

  4. Add the carrots, celery, and zucchini to the pot, ensuring an even distribution. Allow the soup to return to a boil for about 2 minutes, inviting those vibrant colors to blend.

  5. Stir in the dried basil, along with salt and pepper to taste. The basil’s earthy sweetness will enhance the soup’s overall flavor profile beautifully!

  6. Reduce the heat to low and let the soup simmer for 20 minutes. This slow cooking will soften the vegetables and elevate the flavors, filling your home with irresistible scents.

  7. Remove the pot from heat once the time is up and stir in the fresh basil leaves for a burst of freshness. The vibrant green will add a lovely touch to your soup!

  8. Serve the soup hot in bowls, and don’t forget to savor each warming spoonful. It’s the perfect way to unwind whether alone or with loved ones.

Optional: Pair with crusty bread for a heartier meal.
Exact quantities are listed in the recipe card below.

What to Serve with Tomato Basil Vegetable Soup?

As you dip into this vibrant bowl of warmth, consider these mouthwatering pairings to create a delightful meal experience.

  • Crusty Bread:
    A hearty slice of crusty bread is the perfect companion, ideal for soaking up every last drop of the savory soup.

  • Grilled Cheese Sandwich:
    This classic pairing adds a gooey, melty texture that complements the fresh flavors of the soup, making each bite irresistible!

  • Mixed Green Salad:
    A light salad of fresh greens with a tangy vinaigrette offers a refreshing contrast to the hearty soup, balancing the meal beautifully.

  • Garlic Breadsticks:
    Crunchy and buttery, these breadsticks not only enhance the soup’s flavor but also invite you to enjoy a more filling dining experience.

  • Roasted Veggies:
    Seasoned and caramelized vegetables on the side add both vibrant colors and a delightful additional layer of flavor to your meal.

  • White Wine:
    A crisp white wine, such as Sauvignon Blanc, elevates your dining experience, perfectly complementing the herbs and tomatoes in the soup.

  • Fruit Sorbet:
    For dessert, a scoop of light fruit sorbet can cleanse the palate and end the meal on a refreshing note, making it a sweet conclusion to your comforting evening.

How to Store and Freeze Tomato Basil Vegetable Soup

Fridge: Store the soup in an airtight container for up to 3 days. Make sure to let it cool completely before sealing to maintain freshness.

Freezer: Tomato Basil Vegetable Soup can be frozen for up to 3 months. Portion it into freezer-safe bags or containers, leaving some space for expansion.

Reheating: To reheat, thaw overnight in the fridge, then gently warm on the stovetop over medium heat, stirring occasionally until heated through. Enjoy the comforting flavors again!

Tomato Basil Vegetable Soup Variations

Feel free to experiment and transform this comforting recipe into something uniquely your own.

  • Dairy-Free: Swap out vegetable broth for coconut milk for a creamy texture and tropical twist.
    Enhance the flavors by adding a squeeze of lime just before serving for a refreshing zing!

  • Spicy Kick: Toss in some red pepper flakes or diced jalapeños to bring the heat.
    This adds a layer of warmth that dances on your palate, making the soup even more exciting!

  • Herb Explosion: Use fresh herbs like thyme or oregano in addition to basil for a fragrant blend.
    These aromatic herbs elevate the soup’s complexity, making each sip feel like a garden-fresh delight.

  • Protein Boost: Stir in cooked lentils or chickpeas to turn your soup into a hearty meal option.
    Not only does this enhance the nutrition, but it also adds variety to each spoonful.

  • Roasted Veggies: Roast your vegetables before adding them to the pot for deeper flavors.
    This little tweak creates a wonderful caramelization that transforms your soup into a comforting hug.

  • Creamy Version: Incorporate a splash of heavy cream or cashew cream toward the end of cooking.
    This creates a luscious texture that wraps around the veggies like a warm embrace.

  • Seasonal Veggies: Substitute or add in seasonal vegetables like squash, bell peppers, or sweet potatoes.
    This customization celebrates the bounty of each season, keeping your soup fresh and exciting all year long.

Each variation invites you to play with flavors and textures, ensuring that every bowl is a delightful surprise!

Make Ahead Options

Preparing your Tomato Basil Vegetable Soup ahead of time is a wonderful way to save time during busy weeknights! You can chop all the vegetables (onion, carrots, celery, zucchini) and store them in an airtight container in the refrigerator for up to 3 days. This allows you to simply sauté them on the day you plan to make the soup. Additionally, you can also cook and cool the soup up to 24 hours in advance—just refrigerate it in a covered pot. When you’re ready to serve, reheat it slowly on the stove over low heat, adding fresh basil just before serving to maintain its vibrant flavor and aroma. With these make-ahead options, you’ll enjoy all the delightful warmth of homemade soup with minimal effort!

Chef's Helpful Tips

  • When making Tomato Basil Vegetable Soup, always ensure your vegetables are diced uniformly for even cooking and a pleasing presentation.
  • Avoid overcooking the garlic by adding it to the pan just after the onions become translucent to prevent bitterness.
  • For a richer flavor, consider roasting your fresh tomatoes before adding them to the soup to intensify their sweetness.
  • Remember to simmer the soup for the full 20 minutes to allow the flavors to meld beautifully before serving.

Tomato Basil Vegetable Soup Recipe FAQs

How do I choose ripe tomatoes for this soup?
Absolutely! When selecting tomatoes, look for those that are firm yet slightly yielding to the touch, with vibrant color and no dark spots all over. The perfect tomatoes will enhance the freshness of your soup, giving it a delicious and tangy flavor!

How long can I store Tomato Basil Vegetable Soup in the fridge?
You can keep your Tomato Basil Vegetable Soup in an airtight container in the fridge for up to 3 days. Allow the soup to cool completely before sealing it, which helps maintain its fresh taste and aroma.

Can I freeze Tomato Basil Vegetable Soup, and how?
Very! You can freeze Tomato Basil Vegetable Soup for up to 3 months. To do this, portion the soup into freezer-safe bags or containers, leaving some space for expansion. It’s best to let it cool entirely before freezing. When you’re ready to enjoy it again, simply thaw it overnight in the fridge and reheat on the stovetop until warmed through.

What should I do if my soup tastes too acidic?
If your soup is leaning towards the acidic side, don’t worry! You can balance the flavors by adding a pinch of sugar or honey; this will mellow out the acidity beautifully. Alternatively, adding a bit more vegetable broth can dilute the flavors while keeping it delicious.

Can my pets enjoy Tomato Basil Vegetable Soup?
While it’s tempting to share, it’s best to keep the soup away from pets. Ingredients like onions and garlic can be harmful to dogs and cats. If you want to make a pet-friendly version, consider making a separate batch without any seasoning.

What’s the best way to reheat frozen Tomato Basil Vegetable Soup?
To reheat, start by transferring the frozen soup to the fridge and allow it to thaw overnight. Once thawed, gently heat it on the stovetop over medium heat, stirring occasionally until heated through. If you’re in a hurry, you can warm it in the microwave, just be sure to stir it often for even heating. Enjoy those comforting flavors again!

Tomato Basil Vegetable Soup

Tomato Basil Vegetable Soup

Enjoy a comforting bowl of Tomato Basil Vegetable Soup, perfect for cooler days and rich in vibrant flavors.
Print Recipe Pin Recipe
Prep Time 10 minutes mins
Cook Time 30 minutes mins
Total Time 40 minutes mins
Servings: 4 bowls
Course: LUNCH RECIPES
Cuisine: American
Calories: 150
Ingredients Equipment Method Nutrition Notes

Ingredients
  

For the Base
  • 2 tablespoons Olive oil A splash of healthy fat for sautéing and flavor.
  • 1 medium Onion Adds savory foundation and sweetness.
  • 3 cloves Garlic Infuses the soup with aromatic depth.
For the Vegetables
  • 4 cups Vegetable broth Savory liquid base.
  • 1 can Canned diced tomatoes Low-sodium for healthier choice.
  • 2 medium Fresh tomatoes Enhance freshness and flavor.
  • 2 medium Carrots Provides natural sweetness.
  • 2 stalks Celery Contributes crunch.
  • 1 medium Zucchini Adds mild flavor and texture.
For Seasoning
  • 1 tablespoon Dried basil Intensifies flavor.
  • 1 teaspoon Salt Enhances taste.
  • 1/2 teaspoon Pepper Adds warmth.
For Garnish
  • 1/4 cup Fresh basil leaves A fragrant finishing touch.

Equipment

  • Large pot

Method
 

How to Make Tomato Basil Vegetable Soup
  1. Heat a large pot and pour in the olive oil over medium heat for 1-2 minutes until it shimmers.
  2. Sauté the diced onion and minced garlic in the heated oil for 3-5 minutes until the onion is translucent.
  3. Pour in the vegetable broth and add the canned diced tomatoes. Stir and bring to a boil.
  4. Add the carrots, celery, and zucchini to the pot. Return to a boil for about 2 minutes.
  5. Stir in the dried basil, along with salt and pepper to taste.
  6. Reduce the heat to low and let the soup simmer for 20 minutes.
  7. Remove from heat and stir in the fresh basil leaves.
  8. Serve the soup hot in bowls and enjoy.

Nutrition

Serving: 1bowlCalories: 150kcalCarbohydrates: 20gProtein: 3gFat: 7gSaturated Fat: 1gMonounsaturated Fat: 6gSodium: 600mgPotassium: 600mgFiber: 4gSugar: 4gVitamin A: 4500IUVitamin C: 20mgCalcium: 40mgIron: 1mg

Notes

Optional: Pair with crusty bread for a heartier meal.

Tried this recipe?

Let us know how it was!

Filed Under: LUNCH RECIPES

Spicy Moroccan Lentil Soup

December 15, 2025 by JudyWhite Leave a Comment

When the weather starts to cool and the leaves turn, there’s nothing quite like a bowl of warm, hearty soup to brighten up your day. Picture this: the enticing aroma of spices swirling through your kitchen, creating a cozy atmosphere as you prepare a dish that feels like a warm hug. That’s the magic of this Spicy Moroccan Lentil Soup.

I discovered this delightful recipe one afternoon while experimenting with ingredients that had been patiently waiting in my pantry. The combination of tender lentils, vibrant veggies, and zesty spices transports you on a culinary journey straight to Morocco without breaking a sweat.

Not only is this soup a feast for the senses, but it’s also packed with nutrients and can be whipped up in just 40 minutes. Perfect for busy weeknights or a comforting weekend meal, it’s a surefire way to impress family and friends while steering clear of fast food. Let’s dive into how to make this savory delight that’s sure to become a staple in your home!

Why You'll Love This Spicy Moroccan Lentil Soup

  • This Spicy Moroccan Lentil Soup is incredibly easy to make, with just a quick 10-minute prep time that fits perfectly into your busy schedule.
  • The bold and zesty flavors of cumin, coriander, and cayenne pepper will tantalize your taste buds and leave you craving more after each spoonful.
  • It’s a versatile recipe that allows you to add any seasonal vegetables you have on hand, making it perfect for using up pantry staples.
  • With its rich colors and delicious presentation, this soup is not only satisfying but also visually appealing, making it a crowd-pleasing dish for any gathering.

Spicy Moroccan Lentil Soup Ingredients

• Here’s what you need to create this delightful soup!

For the Soup Base

  • Lentils – they provide a hearty texture and are packed with protein.
  • Medium onion, chopped – adds depth and sweetness to the soup.
  • Garlic cloves, minced – brings aromatic flavor that enhances overall taste.
  • Carrot, diced – contributes natural sweetness and vibrant color.
  • Bell pepper, diced – adds crunch and a hint of earthiness.

For the Flavor

  • Olive oil – essential for sautéing and adds richness.
  • Cumin – infuses the soup with a warm, earthy undertone.
  • Coriander – brightens the dish with its citrusy notes.
  • Paprika – delivers a gentle smokiness that enhances the soup’s flavor.
  • Cayenne pepper – adds a spicy kick, just as the name suggests!

For the Liquids

  • Vegetable broth – provides a flavorful base and keeps it vegetarian-friendly.
  • Diced tomatoes – adds acidity and balance to the rich flavors.

To Finish

  • Salt and pepper to taste – enhances all the other flavors beautifully.
  • Fresh cilantro for garnish – adds a burst of freshness and bright color before serving.

How to Make Spicy Moroccan Lentil Soup

  1. Heat the Oil: Begin by heating the olive oil in a large pot over medium heat. The oil should shimmer, signaling it’s ready for the next delicious ingredients.

  2. Sauté the Veggies: Add the chopped onion, minced garlic, diced carrot, and bell pepper to the pot. Sauté these colorful veggies until they soften, about 5-7 minutes, filling your kitchen with wonderful aromas.

  3. Add the Lentils and Spices: Stir in the lentils along with the cumin, coriander, paprika, and cayenne pepper. Mix well to ensure the lentils are completely coated in those fragrant spices, about 2 minutes.

  4. Pour in the Liquids: Carefully pour in the vegetable broth and diced tomatoes. Bring the mixture to a gentle boil, watching as it bubbles and froths with flavor.

  5. Simmer to Perfection: Once boiling, reduce the heat to low and let it simmer uncovered for about 30 minutes, or until the lentils are tender and the soup is thickened to your liking. Stir occasionally for even cooking.

  6. Season to Taste: Once cooked, taste the soup and season it with salt and pepper to your preference. Remember, a little seasoning goes a long way in enhancing those delightful flavors!

  7. Serve and Garnish: Ladle the hot soup into bowls and finish with a sprinkle of fresh cilantro on top. This brightens the dish and adds a touch of freshness that complements the spices beautifully.

Optional: Serve with warm crusty bread for a complete meal.
Exact quantities are listed in the recipe card below.

Spicy Moroccan Lentil Soup Variations

Feel free to mix things up and create your own version of this enticing soup with these delightful ideas!

  • Vegetable Boost: Add extra diced carrots, zucchini, or kale for more nutrition and vibrant color. Double the veggies, double the fun!

  • Creamy Finish: Stir in a splash of coconut milk or a dollop of plain yogurt just before serving. This adds richness and balances the spices beautifully.

  • Protein-Packed: Toss in some cooked chickpeas or diced chicken for added protein. This makes your soup even heartier, perfect for a satisfying meal.

  • Heat It Up: Increase the cayenne pepper or add diced jalapeños for an extra spicy kick. This is for those who love a serious heat challenge!

  • Herb Variations: Swap fresh cilantro for parsley or mint for a different aroma and flavor profile. Each herb brings its unique freshness to the dish.

  • Nutty Addition: Sprinkle in toasted almonds or pine nuts before serving for a delightful crunch. This textural twist takes the soup to the next level.

  • Bulk It Up: Use cooked quinoa or brown rice instead of lentils for a hearty alternative. It creates a different texture and offers a wholesome experience.

  • Smoky Flavor: Mix in a tablespoon of smoked paprika for a deeper, smoky aroma. This gives the soup a unique twist that you’ll absolutely love!

How to Store and Freeze Spicy Moroccan Lentil Soup

Fridge: Store your Spicy Moroccan Lentil Soup in an airtight container in the fridge for up to 3 days. This keeps the flavors vibrant and ready for a quick meal.

Freezer: For longer storage, freeze the soup in individual portions using freezer-safe containers; it will last up to 3 months. Just make sure to leave space for expansion!

Thawing: To reheat, simply thaw overnight in the fridge and warm on the stove over medium heat until heated through. Stir occasionally for even warming.

Reheating: If reheating from frozen, place the soup directly in a pot over medium heat, stirring often until heated thoroughly. Add a splash of water or broth if needed for desired consistency.

Make Ahead Options

These Spicy Moroccan Lentil Soup is perfect for meal prep! You can chop the vegetables (onion, garlic, carrot, and bell pepper) up to 24 hours in advance and store them in an airtight container in the refrigerator to save time on busy weeknights. You can also rinse and soak the lentils, which can help decrease cooking time, though they are fine stored dry as well. When you’re ready to cook, simply heat the olive oil, sauté the prepped veggies, and add the lentils and spices for a quick and comforting meal. This prep will ensure you have a delicious, homemade soup that’s just as hearty and flavorful when you finally serve it!

What to Serve with Spicy Moroccan Lentil Soup?

Warm your heart and home with comforting sides that elevate this spicy, aromatic soup into a full meal experience.

  • Crusty Bread: A must for dipping, it soaks up the rich flavors of the soup and adds a satisfying crunch.
  • Couscous Salad: Light and fluffy, tossed with fresh herbs and lemon juice to balance the soup’s heat.
  • Roasted Vegetables: Caramelized and sweet, they add a delicious contrast to the spicy lentils and showcase earthy flavors.
  • Feta Cheese: Crumbled on top, it provides a creamy, tangy element that beautifully complements the soup’s depth.
  • Greek Yogurt: A dollop of this cool, creamy backdrop rounds out the soup, perfect for balancing heat and adding richness.
  • Hummus with Pita Chips: The velvety texture and nutty taste of hummus make for a delightful contrast alongside the soup.
  • Mint Tea: Its refreshing nature cleanses the palate, creating a perfect beverage pairing with this hearty dish.
  • Cilantro Lime Rice: Bright and zesty, it resonates with the soup’s spices, enhancing each spoonful and balancing flavors harmoniously.
  • Baklava: A sweet finish with flaky layers and honey, it provides the perfect sweet contrast after a spicy meal.

Chef's Helpful Tips

  • To achieve the perfect texture in your Spicy Moroccan Lentil Soup, ensure you rinse the lentils before adding them to the pot to remove any impurities.
  • When sautéing your vegetables, giving them enough time to soften will enhance their flavors, so don’t rush this step.
  • For a more intense flavor, allow the spices to cook with the lentils for a few minutes before adding the liquids, as this helps release their essential oils.
  • Keep an eye on the soup as it simmers; stirring occasionally ensures the lentils cook evenly and prevents them from sticking to the bottom of the pot.

Spicy Moroccan Lentil Soup Recipe FAQs

How do I select the right lentils for this soup?
Absolutely! For this Spicy Moroccan Lentil Soup, I recommend using green or brown lentils as they hold their shape well during cooking. Avoid red lentils if you want a chunkier texture, as they tend to disintegrate and become mushy. When choosing lentils, look for those that are shiny and intact, without any dark spots or debris.

How should I store leftover soup?
Very! To keep your Spicy Moroccan Lentil Soup fresh, store it in an airtight container in the fridge for up to 3 days. This method helps maintain its vibrant flavors and keeps it ready for a quick meal. When reheating, just give it a gentle stir to mix any settled ingredients!

Can I freeze Spicy Moroccan Lentil Soup?
Definitely! For optimal convenience, freeze your soup in individual portions using freezer-safe containers. It can last up to 3 months in the freezer. Be sure to leave some space at the top of your containers to allow for expansion as the soup freezes.

What’s the best way to thaw and reheat the soup?
When you’re ready to enjoy your soup again, simply thaw it overnight in the fridge. To reheat, warm it over medium heat in a pot, stirring occasionally until heated through. If reheating from frozen, you don’t have to thaw first; just place it over medium heat directly from the freezer. Add a splash of water or vegetable broth if the consistency becomes too thick during reheating.

Are there any dietary considerations for this soup?
Absolutely! This Spicy Moroccan Lentil Soup is naturally vegetarian and gluten-free, making it suitable for a variety of diets. If you have allergies, ensure the vegetable broth you use is free from any allergens specific to your needs. Always check ingredient labels, especially for store-bought broth, and be mindful of additional garnishes like cilantro if you have a sensitivity or allergy to herbs.

How can I adjust the spiciness of the soup?
If you prefer a milder flavor, simply reduce or omit the cayenne pepper. For a little extra warmth without overwhelming heat, you can also swap it with a pinch of smoked paprika! The more the merrier; feel free to customize the spice levels according to your taste buds.

Spicy Moroccan Lentil Soup

Spicy Moroccan Lentil Soup

A hearty and nutritious Spicy Moroccan Lentil Soup that tantalizes your taste buds with its vibrant flavors.
Print Recipe Pin Recipe
Prep Time 10 minutes mins
Cook Time 30 minutes mins
Total Time 40 minutes mins
Servings: 4 bowls
Course: DINNER RECIPES
Cuisine: Moroccan
Calories: 250
Ingredients Equipment Method Nutrition Notes

Ingredients
  

Soup Base
  • 1 cup Lentils rinsed
  • 1 medium onion, chopped
  • 2 cloves garlic, minced
  • 1 large carrot, diced
  • 1 medium bell pepper, diced
Flavor
  • 2 tablespoons olive oil
  • 1 teaspoon cumin
  • 1 teaspoon coriander
  • 1 teaspoon paprika
  • 1/2 teaspoon cayenne pepper
Liquids
  • 4 cups vegetable broth
  • 1 can diced tomatoes
To Finish
  • to taste salt
  • to taste pepper
  • 1/4 cup fresh cilantro for garnish

Equipment

  • Large pot

Method
 

Preparation Steps
  1. Heat the olive oil in a large pot over medium heat.
  2. Add the chopped onion, minced garlic, diced carrot, and bell pepper. Sauté until softened, about 5-7 minutes.
  3. Stir in the lentils along with the cumin, coriander, paprika, and cayenne pepper, mixing well.
  4. Pour in the vegetable broth and diced tomatoes. Bring to a gentle boil.
  5. Reduce heat to low and simmer uncovered for about 30 minutes, or until the lentils are tender.
  6. Season with salt and pepper to taste.
  7. Ladle into bowls and garnish with fresh cilantro before serving.

Nutrition

Serving: 1bowlCalories: 250kcalCarbohydrates: 40gProtein: 12gFat: 7gSaturated Fat: 1gPolyunsaturated Fat: 0.5gMonounsaturated Fat: 5gSodium: 500mgPotassium: 700mgFiber: 12gSugar: 4gVitamin A: 5000IUVitamin C: 30mgCalcium: 60mgIron: 3mg

Notes

Serve with warm crusty bread for a more complete meal. Ensure to rinse lentils before adding them to the pot.

Tried this recipe?

Let us know how it was!

Filed Under: DINNER RECIPES

Sweet Potato & Kale Soup

December 15, 2025 by JudyWhite Leave a Comment

As the chilly air settles in, there’s nothing quite like a warm bowl of Sweet Potato & Kale Soup to wrap your hands around and savor. Imagine the enticing aroma of sautéed onions and garlic filling your kitchen—it’s an invitation that beckons you to slow down and relish the moment. I discovered this comforting gem one Sunday afternoon, when a craving for a healthy, hearty meal nudged me into action.

With just a handful of wholesome ingredients, I found not only a dish that warms my soul but also a recipe so effortless that it could become a weekly staple. The natural sweetness of the sweet potatoes pairs beautifully with the earthy, nutritious kale, all brought to life with a dash of cumin and a hint of heat from red pepper flakes. This soup is as versatile as it is delicious—perfect for warming you up on a long day or impressing guests with its rich flavors. Are you ready to reignite your love for homemade meals? Let’s dive into this quick and satisfying recipe!

Why You'll Love This Sweet Potato & Kale Soup

  • This Sweet Potato & Kale Soup is incredibly easy to make, allowing you to whip up a delicious meal in just 45 minutes.
  • The flavor combination of sweet potatoes and kale creates a rich and comforting taste that will leave your taste buds dancing with joy.
  • Not only is it nutritious, but it’s also versatile enough to serve as a cozy dinner or an impressive dish for guests.
  • The vibrant colors and aromatic ingredients make for a visually appealing presentation that is sure to impress everyone at the table.

Sweet Potato & Kale Soup Ingredients

Get ready to gather some wholesome goodies for this delightful dish!

For the Soup

  • Sweet potatoes – a natural sweetness that adds flavor and creaminess to the soup.
  • Onion – provides a savory base that enhances the overall taste.
  • Garlic – infuses the soup with a fragrant punch for a delightful aroma.
  • Vegetable broth – acts as the soul of the soup, adding depth and richness to the flavor.
  • Kale – packs a nutritious punch, making this dish both hearty and healthy.
  • Olive oil – used for sautéing, it adds a touch of healthy fat for richness.
  • Salt – enhances all the natural flavors, bringing the soup to life.
  • Black pepper – adds a gentle warmth without overpowering the other flavors.
  • Cumin – introduces a warm, earthy note, elevating the sweet potato & kale soup’s profile.
  • Red pepper flakes – a hint of heat to make your taste buds tingle!

This comforting bowl is beating the fast-food slump while being loaded with goodness!

How to Make Sweet Potato & Kale Soup

  1. Heat Oil: In a large pot, heat 1 tsp of olive oil over medium heat. This will create a flavorful base for your soup, so let it warm up nicely for a minute.

  2. Sauté Onion: Add the chopped onion to the pot and sauté until it becomes translucent, about 3-4 minutes. The aroma will start to fill your kitchen, making your mouth water!

  3. Add Garlic: Next, introduce 2 minced garlic cloves into the mix and cook for 1 minute. This step adds a fragrant punch that elevates the taste of your soup.

  4. Combine Ingredients: Add the diced sweet potatoes, 4 cups of vegetable broth, 1 tsp salt, 1/2 tsp black pepper, 1/2 tsp cumin, and 1/4 tsp red pepper flakes. Stir them well; the vibrant colors are a feast for the eyes!

  5. Bring to Boil: Increase the heat and bring the mixture to a boil. Once boiling, reduce the heat and let it simmer until the sweet potatoes are tender, roughly 15-20 minutes. You’ll know it’s time when the sweet potatoes are easily pierced with a fork.

  6. Add Kale: Stir in 4 cups of chopped kale and cook for an additional 5 minutes until the kale is tender and bright green. This will give your soup that rich, nourishing quality.

  7. Blend (Optional): If you prefer a smoother texture, use an immersion blender to blend the soup to your desired consistency. It’s a great option if you enjoy a creamy soup!

  8. Serve Hot: Ladle the warm soup into bowls and enjoy it while it’s steaming. This delightful dish is perfect for cozying up on a chilly day!

Optional: Garnish with a sprinkle of fresh black pepper for an extra kick.
Exact quantities are listed in the recipe card below.

Make Ahead Options

These Sweet Potato & Kale Soup ingredients are perfect for meal prep, making your busy weeknights a breeze! You can chop the sweet potatoes, onion, and garlic up to 24 hours ahead and refrigerate them in an airtight container to keep them fresh. Additionally, you can prepare the soup base (steps 1-6) and store it in the fridge for up to 3 days. To maintain quality, cool the soup completely before refrigerating and store the kale separately to prevent it from wilting. When ready to serve, simply reheat the soup on the stove, add the kale, and cook for 5 minutes, offering you a comforting bowl of Sweet Potato & Kale Soup with minimal effort.

Sweet Potato & Kale Soup Variations

Feel free to play around with this recipe and create your own twist on this delightful soup!

  • Spicy Kick: Add diced jalapeños or a few dashes of hot sauce for an extra layer of heat. Spice lovers will rejoice as the warmth dances on their tongues!

  • Creamy Delight: Stir in coconut milk or a splash of cream at the end for a luscious, velvety finish. This variation transforms your soup into a rich and indulgent experience.

  • Herbaceous Boost: Toss in fresh herbs like thyme or rosemary during the cooking process for an aromatic twist. These add a fragrant, earthy complexity that brightens every spoonful.

  • Protein Power: Include white beans or lentils to make the soup more filling and add a protein punch. This hearty addition turns your dish into a satisfying meal that fuels your day.

  • Root Veggie Medley: Swap out half the sweet potatoes with parsnips or carrots for a slightly sweeter flavor profile. This creates a delightful contrast that adds depth to the overall taste.

  • Grainy Goodness: Mix in cooked quinoa or barley to enhance the texture and heartiness of your soup. This twist adds a delightful chewiness that makes each bowl more satisfying.

  • Green Goodness: Replace kale with spinach or Swiss chard for a different leafy green experience. Each option brings its own unique flavor and nutrition, keeping your soup vibrant and delicious.

  • Nutty Flavor: Top with toasted pumpkin or sunflower seeds for a pleasant crunch and nutty flavor. This simple addition provides an irresistible texture contrast that elevates your soup.

How to Store and Freeze Sweet Potato & Kale Soup

Fridge: Store any leftovers in an airtight container for up to 3 days. This keeps your Sweet Potato & Kale Soup fresh and ready to enjoy whenever you need a warm meal.

Freezer: For longer storage, freeze the soup in freezer-safe containers or bags for up to 3 months. Make sure to leave some space for expansion as it freezes.

Reheating: To reheat, thaw overnight in the fridge, then gently warm on the stovetop over low heat, stirring occasionally. Add a splash of vegetable broth to loosen it up if needed. Enjoy your comforting soup!

What to Serve with Sweet Potato & Kale Soup?

As you cozy up with your steaming bowl of sweetness, why not enhance your meal with delightful sides that you’ll savor?

  • Crusty Bread: The perfect match for scooping up that creamy goodness while adding a satisfying crunch to every bite.
    A warm baguette or crunchy artisan loaf will complement the soup’s texture beautifully, transforming your dining experience.

  • Simple Green Salad: A refreshing mix of greens topped with vinaigrette adds brightness to your meal.
    This crisp contrast balances the silky soup, offering a light and invigorating palate cleanser between each comforting spoonful.

  • Roasted Brussels Sprouts: Nutty and caramelized, they elevate the wholesome vibe of your dinner.
    Sprinkle them with a little sea salt or balsamic glaze for an extra zing, making every mouthful a delightful surprise.

  • Quinoa Pilaf: Packed with protein and flavor, this nutty dish pairs wonderfully with the soup.
    The light, fluffy texture of quinoa adds a heartiness that complements the richness of your Sweet Potato & Kale Soup.

  • Apple Crisp: End your meal on a sweet note with this warm dessert.
    The comforting flavors of baked apples and oats create a lovely harmony with the soup, making a perfect seasonal treat.

  • Herbal Tea: A soothing cup of herbal tea pairs elegantly, enhancing the overall comforting experience.
    Choose a flavor like chamomile or peppermint to calm your senses after this nourishing meal.

  • Lemonade: A refreshing glass of lemonade offers a vibrant burst of citrus that brightens your palate between spoonfuls.
    The tangy sweetness beautifully offsets the earthy flavors of the soup, creating a well-balanced meal.

  • Cheese Platter: An assortment of cheeses with different textures and tastes can be a delightful appetizer.
    Add crackers and some dried fruits for a variety that excites the palate before diving into the warm soup you’re about to cherish.

Chef's Helpful Tips

  • When preparing the Sweet Potato & Kale Soup, ensure you cut the sweet potatoes into even-sized pieces for consistent cooking.
  • Avoid adding too much salt at the beginning; you can always adjust the seasoning later for better flavor control.
  • For a more vibrant color and nutrition boost, add the kale towards the end to maintain its bright green hue.
  • Simmer gently to let the flavors meld, but be careful not to overcook the sweet potatoes, as they can become mushy.
  • Incorporating these tips will enhance the overall flavor and texture of your soup.

Sweet Potato & Kale Soup Recipe FAQs

What type of sweet potatoes should I use?
Absolutely! When choosing sweet potatoes, look for ones that are firm, smooth, and free from dark spots or blemishes. The best sweet potatoes for this soup are slightly sweet and tender ones, like the orange-fleshed ones, as they add a lovely creaminess to the soup.

How should I store leftover Sweet Potato & Kale Soup?
Very! Store your delicious leftovers in an airtight container in the fridge for up to 3 days. This way, you can enjoy the comforting flavors again without the hassle of cooking from scratch!

Can I freeze Sweet Potato & Kale Soup?
Definitely! To freeze, pour the cooled soup into freezer-safe containers or bags, ensuring there’s enough space for expansion. It will keep well for up to 3 months. When you’re ready to enjoy it again, simply thaw it overnight in the fridge before reheating.

What if my soup is too thick after cooking?
No worries! If your Sweet Potato & Kale Soup turns out thicker than desired, you can easily fix it. Just add a bit of vegetable broth or water while reheating it on the stovetop until you reach your preferred consistency. Stir well to incorporate!

Is this soup suitable for vegans and those with allergies?
Absolutely! This Sweet Potato & Kale Soup is vegan-friendly, packed with nutritious ingredients. However, always check the labels of your vegetable broth to make sure it’s free from allergens. If you’re allergic to any specific ingredients like garlic, feel free to omit or substitute it with a suitable alternative.

Can I add additional vegetables to the soup?
Very much so! The more the merrier! Feel free to add more vegetables such as carrots, celery, or even bell peppers for additional flavor and nutrients. Just chop them finely and sauté them along with the onion to ensure they cook evenly.

Sweet Potato & Kale Soup

Sweet Potato & Kale Soup

This cozy Sweet Potato & Kale Soup is a wholesome meal perfect for chilly days, combining sweet potatoes and kale in a hearty broth.
Print Recipe Pin Recipe
Prep Time 10 minutes mins
Cook Time 35 minutes mins
Total Time 45 minutes mins
Servings: 4 bowls
Course: DINNER RECIPES
Cuisine: Vegetarian
Calories: 250
Ingredients Equipment Method Nutrition Notes

Ingredients
  

For the Soup
  • 4 cups sweet potatoes diced
  • 1 medium onion chopped
  • 2 cloves garlic minced
  • 4 cups vegetable broth
  • 4 cups kale chopped
  • 1 tbsp olive oil for sautéing
  • 1 tsp salt
  • 1/2 tsp black pepper
  • 1/2 tsp cumin
  • 1/4 tsp red pepper flakes

Equipment

  • Large pot

Method
 

How to Make Sweet Potato & Kale Soup
  1. In a large pot, heat 1 tsp of olive oil over medium heat.
  2. Add the chopped onion to the pot and sauté until it becomes translucent, about 3-4 minutes.
  3. Next, introduce 2 minced garlic cloves into the mix and cook for 1 minute.
  4. Add the diced sweet potatoes, 4 cups of vegetable broth, 1 tsp salt, 1/2 tsp black pepper, 1/2 tsp cumin, and 1/4 tsp red pepper flakes. Stir them well.
  5. Increase the heat and bring the mixture to a boil. Once boiling, reduce the heat and let it simmer until the sweet potatoes are tender, roughly 15-20 minutes.
  6. Stir in 4 cups of chopped kale and cook for an additional 5 minutes until the kale is tender and bright green.
  7. If you prefer a smoother texture, use an immersion blender to blend the soup to your desired consistency.
  8. Ladle the warm soup into bowls and enjoy it while it's steaming.

Nutrition

Serving: 1bowlCalories: 250kcalCarbohydrates: 40gProtein: 6gFat: 8gSaturated Fat: 1gPolyunsaturated Fat: 0.5gMonounsaturated Fat: 5gSodium: 500mgPotassium: 800mgFiber: 8gSugar: 6gVitamin A: 12000IUVitamin C: 45mgCalcium: 150mgIron: 2mg

Notes

Optional: Garnish with a sprinkle of fresh black pepper for an extra kick. Exact quantities are listed in the recipe card below.

Tried this recipe?

Let us know how it was!

Filed Under: DINNER RECIPES

  • « Previous Page
  • 1
  • …
  • 38
  • 39
  • 40
  • 41
  • 42
  • …
  • 49
  • Next Page »

Recent Posts

  • Crispy Potatoes in Oven
  • Lucky Charms Pancakes
  • Cheeseburger
  • Boiled Corn on the Cob
  • St. Patrick’s Day Dessert Parfaits

Recent Comments

No comments to show.

Footer

  • Contact
  • Privacy Policy
  • About Us
  • Terms
  • ↑ back to top

Copyright © 2024 www.Forkono.com

Table Of Content