Forkono

  • BREAKFAST & BRUNCH
  • DESSERT RECIPES
  • DINNER RECIPES
  • LUNCH RECIPES
  • About uS
  • SNACKS & APPETIZERS
menu icon
go to homepage
  • BREAKFAST & BRUNCH
  • DESSERT RECIPES
  • DINNER RECIPES
  • LUNCH RECIPES
  • About uS
  • SNACKS & APPETIZERS
search icon
Homepage link
  • BREAKFAST & BRUNCH
  • DESSERT RECIPES
  • DINNER RECIPES
  • LUNCH RECIPES
  • About uS
  • SNACKS & APPETIZERS
×

Thick & Chewy Breakfast Cookies

December 10, 2025 by JudyWhite Leave a Comment

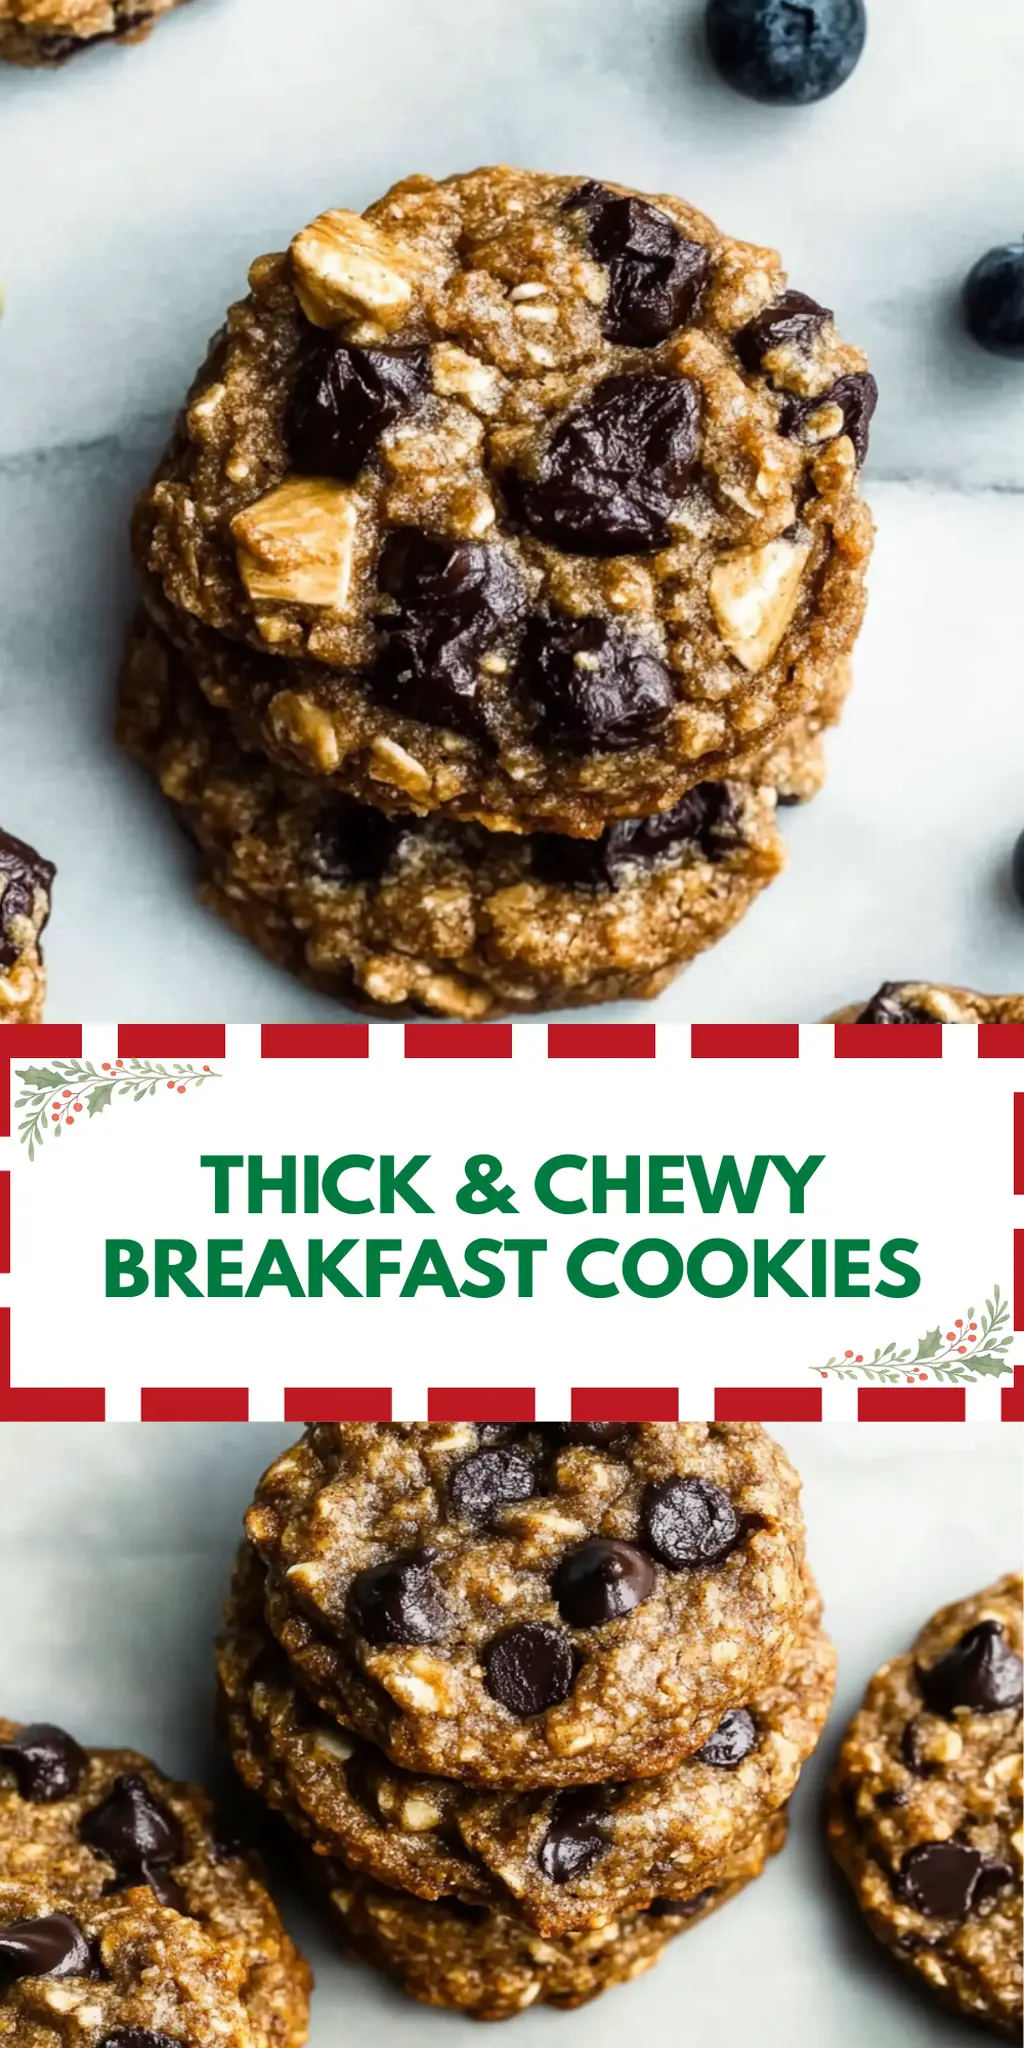
There’s something comforting about the simple act of baking, especially when it involves creating a delightful batch of Thick & Chewy Breakfast Cookies. Picture this: It’s early morning, the sun is just peeking through the window, and you crave something wholesome to start your day. Instead of reaching for the usual fast food, I found a recipe that not only satisfies my sweet tooth but fills the kitchen with the warm, inviting scent of cinnamon and baked oats.

I stumbled upon this recipe during a weekend kitchen binge, desperately seeking a new twist on breakfast. With a star-studded lineup of ingredients—from hearty oats to creamy nut butter and bursts of dried fruit—these cookies are not just a treat; they’re a versatile snack that can power you through any busy morning. They’re chewy, satisfying, and packed with nutrition, making them the perfect antidote to the blandness of quick meals. So, grab your mixing bowl and let’s indulge in a recipe that’s sure to become a breakfast favorite!

Why You'll Love This Thick & Chewy Breakfast Cookies

  • These Thick & Chewy Breakfast Cookies are a breeze to make, allowing you to whip up a delicious, nutritious treat in no time at all.
  • The vibrant combination of oats, nut butter, and dried fruits creates a flavor explosion that will delight your taste buds every morning.
  • Their versatility means you can easily customize them to include your favorite ingredients or adapt them for different dietary needs.
  • With their chewy texture and inviting aroma, these cookies are not only visually appealing but also a crowd-pleaser, perfect for sharing with family and friends.
  • You’ll find that these cookies are not only satisfying but also make your mornings a whole lot sweeter and easier!

Thick & Chewy Breakfast Cookies Ingredients

Prepare to indulge in these scrumptious cookies with this easy ingredient list!

For the Cookie Dough
• Quick oats or old-fashioned whole rolled oats – The base for all cookies; choose quick oats for a softer texture or rolled oats for a heartier bite.
• Salt – A pinch enhances the sweetness, balancing flavors beautifully.
• Ground cinnamon – Adds warmth and a cozy aroma, making your kitchen smell heavenly while baking.
• Almond butter or peanut butter or sunflower seed butter – Use your favorite nut or seed butter for creaminess and richness; they help bind the ingredients.
• Pure maple syrup or honey – Offers natural sweetness; maple syrup adds a distinct flavor, while honey brings a floral note.
• Apple butter – Adds moisture and a subtle apple taste, perfect for a fruity kick in your cookies.
• Mashed banana – A ripe banana acts as a natural sweetener and binder, making cookies tender and chewy.
• Dried cranberries – Provides a tart burst of flavor; you can also swap them for other dried fruits if desired.
• Pepitas (pumpkin seeds) – Add crunch and a boost of nutrients; they also give a delightful contrast in texture.
• Raisins – Offers natural sweetness and chews; feel free to mix them with other dried fruit options for variety.
• Ground flaxseed (optional) – Nutritionally packed, it adds fiber and omega-3s; consider mixing in for an extra health boost.

Feel free to get creative, and enjoy your baking journey with these Thick & Chewy Breakfast Cookies!

How to Make Thick & Chewy Breakfast Cookies

  1. Preheat your oven to 325°F (163°C). While it’s heating, line 2 large baking sheets with parchment paper or silicone baking mats. This prevents sticking and makes for easy cleanup!

  2. Combine all of the ingredients in a large bowl using a stand mixer or a hand mixer. Blend until everything is well mixed together. You’ll notice the dough is thick and heavy—this is exactly how it should be!

  3. Portion the cookie dough using a 1/4 cup measuring cup. Scoop out mounds (about 70g each) onto the prepared cookie sheets. Gently flatten them with the back of a spoon into a cookie shape, keeping in mind they won’t spread much during baking.

  4. Bake for 16–19 minutes or until the edges are beautifully lightly browned. Let them cool on the baking sheets for about 10 minutes, then transfer to a wire rack to cool completely.

  5. Store any leftover cookies in an airtight container. They can stay at room temperature for up to 5 days or in the refrigerator for up to 10 days without losing their delightful taste.

Optional: Drizzle with melted chocolate for an extra layer of indulgence.

Exact quantities are listed in the recipe card below.

Make Ahead Options

These Thick & Chewy Breakfast Cookies are a fantastic option for meal prep, allowing busy home cooks to enjoy wholesome goodness without the morning rush! You can prepare the cookie dough up to 24 hours in advance by mixing all the ingredients and storing the dough in an airtight container in the refrigerator. This helps maintain the quality and flavors. When you’re ready to bake, simply scoop the chilled dough onto your baking sheets, and bake as directed for that fresh, warm cookie experience. For those who want even more convenience, individually freeze baked cookies, and they’ll stay delicious for up to 3 months—just reheat them for a warm treat anytime!

Thick & Chewy Breakfast Cookies Variations

Let your creativity shine and make these cookies your own with delightful twists and substitutions!

  • Nut-Free: Substitute almond, peanut, or sunflower seed butter with tahini for a nut-free option that still brings richness.
  • Vegan: Use maple syrup instead of honey and replace the egg with an extra 1/4 cup of mashed banana for a fully plant-based treat.
  • Gluten-Free: Swap the oats for certified gluten-free oats and check that your maple syrup and other add-ins are also free from gluten.
  • Add Some Heat: Sprinkling in a pinch of cayenne or adding a dash of crushed red pepper flakes can give these cookies a surprising kick!
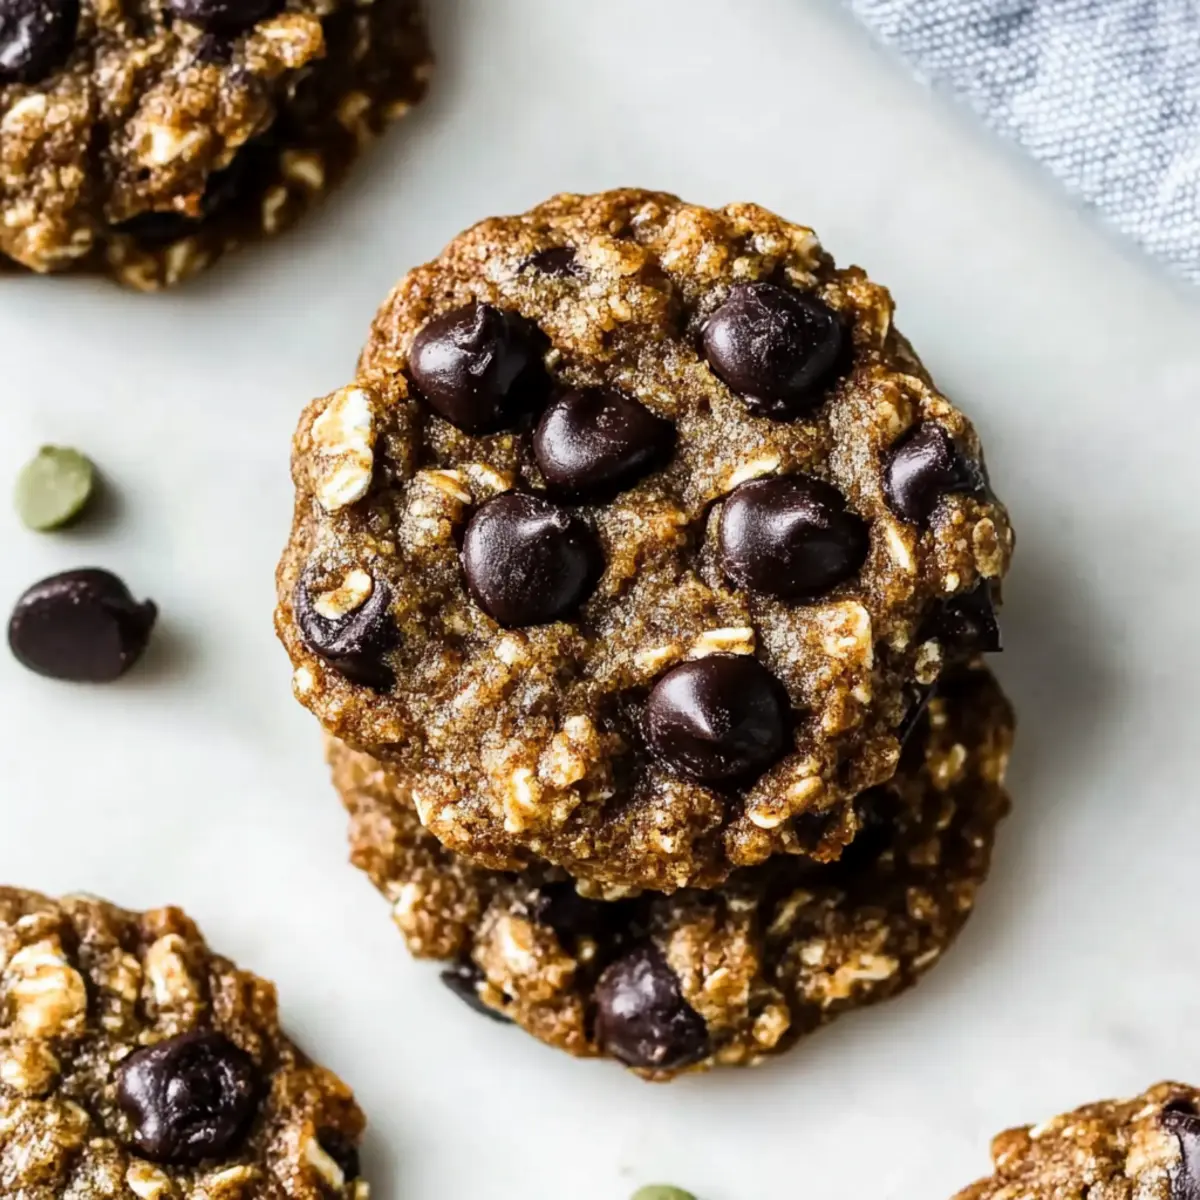
  • Chocolate Chip Delight: Fold in 1/2 cup of dark chocolate or dairy-free chips for an indulgent taste that elevates the cookie experience.

For a fruitier twist, consider swapping cranberries with dried blueberries or chopped dates. Their sweetness adds a different depth, making every cookie tasting an exciting adventure.

  • Coconut Crunch: Mix in 1/2 cup of unsweetened shredded coconut for added texture and a hint of tropical flavor.
  • Spiced Up: Experiment with different spices like nutmeg or ginger to create an aromatic variation that warms the heart while you munch.

How to Store and Freeze Thick & Chewy Breakfast Cookies

Room Temperature: Store cookies in an airtight container at room temperature for up to 5 days. This keeps them fresh and ready for a quick snack anytime!

Fridge: If you’d like to extend their shelf life, keep the cookies in the refrigerator for up to 10 days. Make sure they’re covered to maintain their moisture.

Freezer: For longer storage, freeze the cookies in a single layer on a baking sheet before transferring them to an airtight freezer bag. They can be frozen for up to 3 months.

Reheating: To enjoy your frozen Thick & Chewy Breakfast Cookies, simply thaw them in the fridge overnight or warm them in a microwave for 10-15 seconds for that fresh-out-of-the-oven taste!

What to Serve with Thick & Chewy Breakfast Cookies?

These delightful cookies make breakfast feel special, but pairing them with the right sides elevates your morning experience even more.

  • Fresh Fruit Salad: A vibrant mix of seasonal fruits adds refreshing sweetness and a burst of color, balancing the cookies’ richness perfectly.

  • Greek Yogurt with Honey: Creamy and tangy, this yogurt offers a satisfying contrast and a protein boost to help fuel your day.

  • Nutty Granola: The crunchy texture of nutty granola pairs wonderfully, adding a delightful crunch and an extra layer of flavor.

  • Chia Seed Pudding: Nutritious and super hydrating, chia seed pudding brings a creamy texture and complements the cookie’s chewy bite impressively.

  • Homemade Smoothie: Blend together your favorite fruits with spinach or protein powder for a quick, nutritious drink that pairs wonderfully with the cookies.

  • Hot Coffee or Tea: The warm, rich flavors of a fresh brew provide a perfect complement, enhancing the warm spice notes in the cookies.

  • Dark Chocolate Drizzle: For those sweet-toothed moments, a light drizzle of melted dark chocolate marries beautifully with the cookie flavors, making them irresistibly decadent.

Pairing these options with Thick & Chewy Breakfast Cookies creates a wholesome, satisfying breakfast that’s sure to please!

Chef's Helpful Tips

  • When making Thick & Chewy Breakfast Cookies, ensure your ingredients are all at room temperature to help them combine more easily.
  • Avoid overmixing the dough as this can lead to dense cookies; mix just until combined.
  • If you want to customize your cookies, feel free to substitute the dried fruits with your favorites to add variety.
  • Keep an eye on the baking time, as ovens can vary; start checking for doneness at the 16-minute mark to prevent overbaking.

Thick & Chewy Breakfast Cookies Recipe FAQs

What kind of oats should I use for the Thick & Chewy Breakfast Cookies?
You can use either quick oats or old-fashioned whole rolled oats, depending on your texture preference. Quick oats will result in softer cookies, while rolled oats will give them a heartier bite. Both choices will create a delicious cookie!

How should I store my Thick & Chewy Breakfast Cookies?
After baking, store any leftover cookies in an airtight container at room temperature for up to 5 days to keep them fresh. If you prefer a longer shelf life, refrigerate them for up to 10 days. Just ensure they are covered to maintain their delightful moisture.

Can I freeze the Thick & Chewy Breakfast Cookies?
Absolutely! For freezing, start by placing the cookies in a single layer on a baking sheet, then freeze until solid. Once frozen, transfer them to an airtight freezer bag or container. They can be stored in the freezer for up to 3 months. To enjoy, thaw them in the fridge overnight or warm them in the microwave for 10-15 seconds.

What should I do if my cookie dough is too dry?
If your dough seems dry, you can add a bit of moisture. I recommend incorporating one tablespoon of milk or an additional mashed banana. Mix it thoroughly until you achieve a thicker yet workable consistency. This will help bind everything together beautifully!

Are these Thick & Chewy Breakfast Cookies suitable for dietary restrictions?
Yes, especially when customizing! To make them gluten-free, use certified gluten-free oats. If you’re catering to nut allergies, feel free to swap in sunflower seed butter instead of nut butter. Additionally, you can skip the flaxseed if you prefer—these cookies will still turn out fantastic without it!

How can I tell when the cookies are done baking?
Keep an eye on the cookies as they bake! You’ll want to start checking around the 16-minute mark. They’re done when the edges are lightly browned, and the centers may look slightly soft—that’s perfect for a chewy texture! Let them cool on the baking sheet for about 10 minutes before transferring to a wire rack.

Thick & Chewy Breakfast Cookies

Thick & Chewy Breakfast Cookies

Delight in these Thick & Chewy Breakfast Cookies, a wholesome and satisfying snack perfect for a busy morning.
Print Recipe Pin Recipe
Prep Time 10 minutes mins
Cook Time 19 minutes mins
Cooling Time 10 minutes mins
Total Time 38 minutes mins
Servings: 12 cookies
Course: BREAKFAST & BRUNCH
Cuisine: American
Calories: 150
Ingredients Equipment Method Nutrition Notes

Ingredients
  

For the Cookie Dough
  • 2 cups Quick oats or old-fashioned whole rolled oats Choose quick oats for a softer texture or rolled oats for a heartier bite.
  • 0.5 teaspoon Salt Enhances sweetness and balances flavors.
  • 1 teaspoon Ground cinnamon Adds warmth and a cozy aroma.
  • 0.5 cup Almond butter or peanut butter or sunflower seed butter Use your favorite nut or seed butter.
  • 0.25 cup Pure maple syrup or honey Offers natural sweetness.
  • 0.5 cup Apple butter Adds moisture and a subtle apple taste.
  • 1 medium Mashed banana Acts as a natural sweetener and binder.
  • 0.5 cup Dried cranberries Can be swapped for other dried fruits.
  • 0.5 cup Pepitas (pumpkin seeds) Adds crunch and nutrients.
  • 0.5 cup Raisins Offers natural sweetness and chews.
  • 0.25 cup Ground flaxseed Optional for extra nutritional boost.

Equipment

  • Oven
  • Mixing bowl
  • Stand Mixer or Hand Mixer
  • baking sheets
  • Parchment Paper or Silicone Baking Mats

Method
 

How to Make Thick & Chewy Breakfast Cookies
  1. Preheat your oven to 325°F (163°C) and line 2 large baking sheets with parchment paper or silicone baking mats.
  2. Combine all of the ingredients in a large bowl using a stand mixer or a hand mixer. Blend until well mixed.
  3. Portion the cookie dough using a 1/4 cup measuring cup, scooping out mounds onto the prepared cookie sheets.
  4. Bake for 16–19 minutes or until the edges are lightly browned. Let cool on the baking sheets for about 10 minutes.
  5. Store any leftover cookies in an airtight container for up to 5 days at room temperature or up to 10 days in the refrigerator.

Nutrition

Serving: 1cookieCalories: 150kcalCarbohydrates: 22gProtein: 4gFat: 7gSaturated Fat: 1gPolyunsaturated Fat: 2gMonounsaturated Fat: 4gSodium: 50mgPotassium: 150mgFiber: 2gSugar: 6gVitamin C: 1mgCalcium: 2mgIron: 4mg

Notes

Customize the cookies by substituting dried fruits with your favorites. Avoid overmixing the dough to prevent dense cookies.

Tried this recipe?

Let us know how it was!

Filed Under: BREAKFAST & BRUNCH

Tomato Tartlets with Puff Pastry

December 10, 2025 by JudyWhite Leave a Comment

When the sun begins to shine just a little brighter, I often feel the urge to lighten up my meals, and these Tomato Tartlets with Puff Pastry are my go-to dish. Picture this: vibrant mini heirloom tomatoes nestled atop a bed of creamy, herb-infused ricotta, all encased in golden, flaky pastry. This dish not only looks stunning but also bursts with flavors that dance on your palate.

Whipping up these tartlets is a breeze—perfect for a spontaneous get-together or a delightful weeknight dinner. With just 30 minutes of prep and bake time, you’re gifted with a gourmet experience that impresses without the fuss. I still remember the joy of serving these at a friend’s gathering, where they vanished quicker than I could keep track!

Whether you’re seeking a satisfying treat to elevate your brunch table or a delicious appetizer for your next potluck, let’s dive into this recipe that promises simplicity and elegance in every bite.

Why You'll Love This Tomato Tartlets with Puff Pastry

  • These Tomato Tartlets with Puff Pastry are incredibly easy to make, allowing you to impress your guests without spending hours in the kitchen.
  • The delightful combination of creamy ricotta and fresh heirloom tomatoes creates a burst of flavor that will have everyone coming back for more.
  • Their versatility makes them perfect for any occasion, whether served as a fancy appetizer or a light lunch.
  • With just 30 minutes from start to finish, you’ll save time while still enjoying a gourmet treat that looks as good as it tastes.
  • These tartlets are not only delicious but also visually appealing, adding a pop of color to your table that is sure to impress.

Tomato Tartlets with Puff Pastry Ingredients

• Get ready to whip up something delicious!

For the Tartlet Base

  • Puff pastry – This flaky layer serves as the perfect canvas for your vibrant toppings.
  • Large egg – Use this for an egg wash to give your pastries that golden, shiny finish!

For the Cheese Mixture

  • Whole milk ricotta cheese – Its creamy texture brings richness to your Tomato Tartlets with Puff Pastry.
  • Grated Parmigiano-Reggiano – This adds a nutty depth of flavor that compliments the dish beautifully.
  • Kosher or sea salt – Essential for enhancing the ingredients’ natural flavors.
  • Freshly ground black pepper – This adds a subtle heat that brightens up the flavor profile.
  • Fresh basil (minced) – Offers a fragrant, herbaceous note that pairs perfectly with tomatoes.
  • Garlic powder – A dash of this enhances the savoriness of the cheese mixture.
  • Dried oregano – Provides an aromatic touch reminiscent of classic Italian cuisine.

For Topping

  • Mini heirloom tomatoes – Their sweetness and vibrant colors elevate the presentation and taste.
  • Olive oil – A drizzle on top adds richness and helps to caramelize the tomatoes during baking.
  • Flaky sea salt (to finish) – Sprinkling this on top just before serving adds a delightful crunch and burst of flavor.

How to Make Tomato Tartlets with Puff Pastry

  1. Preheat the oven – Set your oven to 425°F (220°C) and line a sheet pan with parchment paper to ensure easy cleanup and prevent sticking.

  2. Prepare the pastry – Roll out the puff pastry on a cutting board, then slice it into 9 even rectangles, leaving a quarter-inch border.

  3. Mix the cheese filling – In a bowl, whisk together ricotta, Parmigiano-Reggiano, kosher salt, black pepper, minced basil, garlic powder, and oregano until smooth and well combined.

  4. Assemble the tartlets – Place the puff pastry rectangles on the prepared baking sheet, spacing them about an inch apart. Spoon approximately 1½ tablespoons of the cheese mixture into the center of each rectangle.

  5. Add the tomatoes – Top each tartlet with halved mini heirloom tomatoes. Brush them with olive oil for a glossy finish and then brush the edges of the pastry with the egg wash you prepared earlier.

  6. Bake the tartlets – Bake in the preheated oven for 20 minutes, or until the pastry is golden brown. Halfway through baking, rotate the baking sheet for even cooking.

  7. Cool and garnish – Once baked, remove from the oven and let cool on a wire rack. Just before serving, sprinkle with fresh basil, flaky sea salt, and a dash of freshly ground pepper for a burst of flavor.

Optional: Drizzle with balsamic glaze for an extra touch of sweetness.

Exact quantities are listed in the recipe card below.

Make Ahead Options

These Tomato Tartlets with Puff Pastry are a fantastic choice for meal prep, allowing you to enjoy delicious bites without the last-minute rush! You can prepare the cheese filling (ricotta, Parmigiano-Reggiano, and herbs) up to 3 days in advance and store it in an airtight container in the refrigerator. Additionally, you can pre-cut the puff pastry and assemble the tartlets up to 24 hours before baking; simply cover them with plastic wrap to prevent drying out. When you’re ready to serve, just preheat your oven and bake them as directed for 20 minutes—they’ll be just as delightful and fresh! Enjoy the convenience and delectable results of homemade treats while saving time!

What to Serve with Tomato Tartlets with Puff Pastry?

Elevate your dining experience by pairing these delightful tartlets with complementary dishes that enhance their vibrant flavors.

  • Arugula Salad: A crisp arugula salad with a zesty lemon vinaigrette offers a fresh contrast to the richness of the tartlets.

  • Herbed Quinoa: Nutty quinoa cooked with herbs mirrors the savory notes of the cheese, providing a wholesome, fiber-rich side.

  • Roasted Veggies: Sweet roasted bell peppers and zucchini add a colorful, caramelized component that harmonizes with the tartlets’ flavors.

  • Chilled White Wine: A glass of chilled Sauvignon Blanc brings floral and fruity notes, perfectly balancing the dish’s savory richness.

  • Pesto Pasta: Tossed with olive oil, garlic, and Parmesan, pasta dressed in basil pesto echoes the tartlets’ herb-infused filling, creating a delightful pairing.

  • Olive Tapenade: A small bowl of olive tapenade offers a salty, umami punch that contrasts beautifully against the sweetness of the heirloom tomatoes.

  • Garlic Bread: Warm, crusty garlic bread allows for a satisfying crunch and serves as an excellent vessel to scoop up any leftover cheese filling.

  • Strawberry Sorbet: For dessert, a light strawberry sorbet refreshes the palate after the savory tartlets, completing the meal on a sweet note.

How to Store and Freeze Tomato Tartlets with Puff Pastry

Room Temperature: Store leftover tartlets at room temperature for up to 2 hours if they have not been refrigerated.

Fridge: If you have remaining Tomato Tartlets with Puff Pastry, refrigerate in an airtight container for up to 3 days. Reheat in the oven for the best texture.

Freezer: For longer storage, freeze the unbaked tartlets on a baking sheet until solid, then transfer to a freezer-safe bag for up to 2 months. Bake from frozen without thawing.

Reheating: To reheat baked tartlets, place them in a preheated oven at 350°F for about 10-15 minutes or until heated through and crispy.

Tomato Tartlets with Puff Pastry Variations

Get ready to explore the delightful possibilities that await these scrumptious tartlets!

  • Vegan Option: Swap out the ricotta for a plant-based alternative and use aquafaba for the egg wash. This won’t compromise on flavor while keeping it vegan-friendly!

  • Gluten-Free: Use gluten-free puff pastry to cater to those with dietary restrictions. Ensure all other ingredients are also gluten-free for a truly inclusive dish.

  • Herbed Ricotta: Add different herbs like thyme or dill to the ricotta filling for a fresh twist. These herbs create aromatic notes that elevate the overall dish.

  • Spicy Kick: Incorporate red pepper flakes or diced jalapeños into the cheese mixture for a little heat. The zesty addition complements the sweetness of the tomatoes beautifully.

  • Cheese Variety: Try substituting the Parmigiano-Reggiano with feta or goat cheese for a tangy flavor. Each cheese brings its unique character, transforming your tartlets into a new experience with every bite.

  • Roasted Garlic: For a deeper flavor, mix in some roasted garlic into the cheese filling. This adds a rich, buttery taste that pairs perfectly with the tart tomatoes.

  • Mushroom Medley: Sautéed mushrooms layered on top of the cheese mixture before adding the tomatoes offers a delightful texture and earthy flavor that will have everyone coming back for seconds!

  • Sweet Addition: For a hint of sweetness, drizzle a little honey or balsamic glaze over the tomatoes before baking. This contrasting flavor creates an exciting balance that tantalizes the taste buds.

Chef's Helpful Tips

  • When making Tomato Tartlets with Puff Pastry, ensure your puff pastry is cold before rolling it out, as this helps create a flaky texture.
  • Avoid overstuffing the tartlets with the cheese mixture; too much filling can prevent the pastry from rising properly.
  • To achieve a golden color, brush the edges with egg wash, but be careful not to let it drip onto the baking sheet.
  • Bake at 425°F for the full 20 minutes, but keep an eye on the pastry toward the end to avoid burning.

Tomato Tartlets with Puff Pastry Recipe FAQs

What kind of tomatoes should I use for the tartlets?
Absolutely! I recommend using mini heirloom tomatoes, as they add not only a burst of flavor but also vibrant colors that elevate your dish. Look for tomatoes that are firm and brightly colored. Avoid any that have dark spots all over, as these may be overripe.

How long can I store the leftover tartlets?
Very! You can keep your Tomato Tartlets with Puff Pastry in the refrigerator for up to 3 days. Just make sure to place them in an airtight container to maintain their freshness. When ready to enjoy, a gentle reheat in the oven will bring back that delicious texture.

Can I freeze the tartlets before baking?
Absolutely! To freeze, prepare the tartlets according to the recipe but do not bake them. Place them on a baking sheet and freeze until solid, about 1-2 hours. Once solid, transfer them into a freezer-safe bag. They can be stored in the freezer for up to 2 months. When you’re ready to bake, simply place them in the oven from frozen, increasing the bake time by a few minutes.

What should I do if the pastry isn’t rising properly?
I’ve encountered this too! If your pastry doesn’t rise as expected, it may be due to either warm puff pastry or overcrowding the baking sheet. Ensure the puff pastry is cold and chilled before rolling it out. Keep space between the tartlets, allowing hot air to circulate. Also, ensure your oven is fully preheated before baking!

Are there any dietary considerations for this recipe?
Very good question! This recipe contains dairy, so it’s not suitable for those with lactose intolerance or dairy allergies. If needed, a lactose-free ricotta could be a great substitute. Always check that your puff pastry is also dairy-free if you’re catering to dietary restrictions.

How do I keep the tartlets crispy when reheating?
For a delicious, crispy texture upon reheating, place the baked Tomato Tartlets with Puff Pastry in a preheated oven at 350°F (175°C) for about 10-15 minutes. This method rejuvenates the pastry so that it retains that lovely flakiness you adore. Enjoy every bite!

Tomato Tartlets with Puff Pastry

Tomato Tartlets with Puff Pastry

Delight in these Tomato Tartlets with Puff Pastry, featuring heirloom tomatoes and creamy ricotta, perfect for snacks or appetizers.
Print Recipe Pin Recipe
Prep Time 30 minutes mins
Cook Time 20 minutes mins
Total Time 50 minutes mins
Servings: 9 tartlets
Course: Snacks & Appetizers
Cuisine: Italian
Calories: 150
Ingredients Equipment Method Nutrition Notes

Ingredients
  

Tartlet Base
  • 1 sheet Puff pastry
  • 1 large egg for egg wash
Cheese Mixture
  • 1 cup Whole milk ricotta cheese
  • 1/4 cup Grated Parmigiano-Reggiano
  • 1/2 teaspoon Kosher or sea salt
  • 1/4 teaspoon Freshly ground black pepper
  • 2 tablespoons Fresh basil (minced)
  • 1/2 teaspoon Garlic powder
  • 1/2 teaspoon Dried oregano
Topping
  • 1 cup Mini heirloom tomatoes halved
  • 1 tablespoon Olive oil for drizzling
  • to taste Flaky sea salt for finishing

Equipment

  • Oven
  • sheet pan
  • parchment paper
  • Mixing bowl
  • Whisk
  • Cutting Board

Method
 

Preparation
  1. Preheat the oven to 425°F (220°C) and line a sheet pan with parchment paper.
  2. Roll out the puff pastry on a cutting board and slice it into 9 even rectangles, leaving a quarter-inch border.
  3. In a bowl, whisk together ricotta, Parmigiano-Reggiano, kosher salt, black pepper, minced basil, garlic powder, and oregano until smooth and well combined.
  4. Place the puff pastry rectangles on the prepared baking sheet, spacing them about an inch apart. Spoon approximately 1½ tablespoons of the cheese mixture into the center of each rectangle.
  5. Top each tartlet with halved mini heirloom tomatoes, brush with olive oil, and then brush the edges of the pastry with the egg wash.
  6. Bake in the preheated oven for 20 minutes, or until the pastry is golden brown, rotating halfway through for even cooking.
  7. Once baked, remove from the oven and let cool on a wire rack. Just before serving, sprinkle with fresh basil, flaky sea salt, and a dash of freshly ground pepper.

Nutrition

Serving: 1tartletCalories: 150kcalCarbohydrates: 12gProtein: 4gFat: 10gSaturated Fat: 3gPolyunsaturated Fat: 1gMonounsaturated Fat: 5gCholesterol: 25mgSodium: 200mgPotassium: 100mgFiber: 1gSugar: 2gVitamin A: 200IUVitamin C: 10mgCalcium: 150mgIron: 1mg

Notes

Drizzle with balsamic glaze for an extra touch of sweetness.

Tried this recipe?

Let us know how it was!

Filed Under: SNACKS & APPETIZERS

Orange Cranberry Mimosa Holiday Mocktail

December 10, 2025 by JudyWhite Leave a Comment

As the holiday season approaches, there’s an unmistakable magic in the air—twinkling lights, cheerful gatherings, and the joy of sharing delicious treats. It’s during this festive time that I stumbled upon the delightful creation of the Orange Cranberry Mimosa Holiday Mocktail. With its vibrant colors and refreshing flavors, it’s not just a drink; it’s an experience waiting to be savored!

I found myself searching for a drink that could be both festive and non-alcoholic, and this mocktail quickly became my go-to. The combination of freshly squeezed orange juice, sweetened cranberry juice, and bubbly sparkling apple cider dances on your palate, leaving a refreshing finish. Plus, who can resist the visual charm of a sugared rim and a garnish of bright, festive cranberries or a sprig of rosemary?

In just five minutes, you can whip up this crowd-pleasing beverage that’s sure to impress at any holiday gathering. Let’s dive in and elevate our home celebrations with this sparkling beauty!

Why You'll Love This Orange Cranberry Mimosa Holiday Mocktail

  • This Orange Cranberry Mimosa Holiday Mocktail is incredibly easy to whip up, taking just five minutes to prepare.
  • The delightful combination of flavors creates a refreshing beverage that everyone can enjoy, making it perfect for holiday gatherings.
  • With its vibrant colors and beautiful sugared rim, this mocktail is sure to impress your guests visually as well.
  • Its versatility allows you to customize garnishes, elevating the drink’s presentation and making it a festive staple for any occasion.

Orange Cranberry Mimosa Holiday Mocktail Ingredients

For the Sugared Rim

  • 1 slice orange – Perfect for wetting the rim and adding a zesty touch.
  • sugar – Choose superfine sugar for a sparkling finish that enhances the mocktail’s elegance.

For the Drink

  • 1 oz freshly squeezed orange juice – Freshly squeezed adds a burst of natural flavor, unlike store-bought.
  • 2 oz cold sweetened cranberry juice – Provides a rich sweetness that balances the tartness of the orange juice.
  • 2 oz cold sparkling apple cider – The bubbles bring a festive touch and elevate the overall experience of the Orange Cranberry Mimosa Holiday Mocktail.
  • pinch ground cinnamon – A warm spice that adds depth and holiday aromatics.

For Garnish

  • fresh cranberries (optional) – Add a pop of color and a festive feel to your presentation.
  • cinnamon stick (optional) – Ideal for a lovely stirrer that infuses extra flavor.
  • rosemary sprig (optional) – Provides a fragrant twist that pairs beautifully with the other ingredients.

How to Make Orange Cranberry Mimosa Holiday Mocktail

  1. Wet the Rim: Start by taking a slice of orange and gently rubbing it around the rim of your glass. This helps the sugar stick beautifully for that delightful sugared rim!

  2. Dip in Sugar: Next, dip the wet rim into sugar, preferably superfine, to create a sparkling finish. Make sure it coats evenly for maximum impact!

  3. Combine Ingredients: In the glass, whisk together the freshly squeezed orange juice, sweetened cranberry juice, and sparkling apple cider. Stir gently to blend the flavors, making sure everything is well combined.

  4. Add Cinnamon: Sprinkle in a pinch of ground cinnamon to infuse the drink with a warm, holiday aroma. This little addition will make a big difference in flavor!

  5. Garnish: Finally, enhance your charming mocktail with optional garnishes—add fresh cranberries, a cinnamon stick, or a sprig of rosemary for a festive touch.

Optional: For an extra special twist, try adding a splash of pomegranate juice for a gorgeous color!
Exact quantities are listed in the recipe card below.

What to Serve with Orange Cranberry Mimosa Holiday Mocktail?

Elevate your holiday gatherings with delightful food pairings that complement the vibrant flavors of this festive drink.

  • Savory Cheese Platter: A selection of creamy brie, sharp cheddar, and tangy goat cheese balances the sweetness of the mocktail, creating a harmonious spread.

  • Mini Quiches: Bite-sized quiches filled with spinach and feta offer a savory contrast to the fruity taste of your Orange Cranberry Mimosa. Their flaky crust and fluffy filling make them irresistible.

  • Fresh Fruit Salad: A medley of seasonal fruits like pomegranate, oranges, and apples brightens up your table, echoing the refreshing notes of your drink.

  • Holiday Spinach Dip: Creamy spinach dip served with crispy pita chips adds a comforting touch to your gathering, enhancing the overall festive vibe.

  • Roasted Nuts: A mix of spiced and salted nuts provides a delightful crunch and savory depth, making them perfect for munching alongside your mocktail.

  • Cinnamon Rolls: For a special sweet treat, warm cinnamon rolls drizzled with icing pair beautifully with the mocktail’s flavors, adding a festive sweetness.

  • Sparkling Water: Keep guests refreshed with fizzy sparkling water, enhancing the celebratory feel without overshadowing the flavor of your Orange Cranberry Mimosa Holiday Mocktail.

These pairings will transform your gathering into a memorable holiday celebration!

Make Ahead Options

These Orange Cranberry Mimosa Holiday Mocktails are perfect for meal prep enthusiasts! You can prepare the sugared rim by wetting the glass with orange juice and dipping it in sugar up to 24 hours in advance; just store it in an airtight container at room temperature to maintain its sparkle. Additionally, you can mix the orange juice, sweetened cranberry juice, and ground cinnamon together in a container and refrigerate it for up to 3 days. When you’re ready to serve, simply pour the mixture into the prepared glass, top with cold sparkling apple cider, and garnish with cranberries or a sprig of rosemary for that festive flair. This way, you’ll have a refreshing drink ready to impress with minimal effort!

Orange Cranberry Mimosa Holiday Mocktail Variations

Feel free to get creative with this recipe and make it your own with these delightful twists!

  • Citrus Medley: Swap the orange juice for a mix of grapefruit and tangerine juice for a refreshing citrus twist.

  • Spiced Kick: Add a dash of cayenne pepper or a slice of jalapeño to introduce a warm, spicy kick that complements the sweetness.

  • Sparkling Fruit Punch: Combine sparkling apple cider with your favorite fruit-flavored sparkling water for a bubbly, fruity delight.

  • Herbal Infusion: Infuse the drink with fresh mint or basil for a herbal layer that enhances the overall flavor profile. It adds an unexpected twist that could surprise your guests.

  • Non-Sweetened Version: Use unsweetened cranberry juice and adjust sweetness with a splash of maple syrup for a more natural sweetness and less sugar.

  • Tropical Bliss: Incorporate some pineapple juice or coconut water for a tropical vibe that transports you to a summer paradise amidst holiday festivities.

  • Berry Burst: Muddle fresh raspberries or blueberries into the mixture for a burst of flavor and a beautiful color that’s visually stunning.

  • Ginger Zing: Add a splash of ginger beer instead of sparkling apple cider for a zesty, invigorating mocktail that’s perfect for holiday cheer.

How to Store and Freeze Orange Cranberry Mimosa Holiday Mocktail

Fridge: Store any leftover Orange Cranberry Mimosa in the fridge, covered, for up to 2 days. The flavors will remain delightful, though the fizz might diminish slightly.

Freezer: Freezing isn’t recommended for this mocktail, as the carbonation will be lost when thawed. Instead, prepare fresh servings for each occasion!

Serving Tip: For the best experience, prepare your Orange Cranberry Mimosa right before serving to ensure it’s bubbly and refreshing!

Chef's Helpful Tips

  • To create a perfect sugared rim for your Orange Cranberry Mimosa Holiday Mocktail, ensure you use superfine sugar as it adheres better and looks more elegant.
  • When combining the juices and soda, stir gently to prevent the sparkling apple cider from losing its fizz, maintaining a refreshing effervescence.
  • Always use freshly squeezed orange juice for the best flavor, as it offers a vibrant taste compared to bottled varieties.
  • For a more aromatic experience, consider adding the pinch of ground cinnamon directly to the sparkling apple cider before mixing for an even distribution of flavor.

Orange Cranberry Mimosa Holiday Mocktail Recipe FAQs

How do I choose the perfect orange for my mocktail?
Absolutely! When selecting an orange, look for ones that are firm, bright, and heavy for their size. A bit of texture is okay, but avoid any with dark spots or blemishes that might indicate overripeness. The best oranges are in season during the winter months, so you’re in luck for your holiday mocktail!

How long can I store leftover Orange Cranberry Mimosa?
You can store any leftover Orange Cranberry Mimosa in the fridge, covered tightly, for up to 2 days. Just keep in mind that while the flavors will stay lovely, the effervescence from the sparkling apple cider may lessen over time. For the most bubbly experience, prepare fresh servings as needed!

Can I freeze the Orange Cranberry Mimosa?
Freezing isn’t recommended for this mocktail, as the carbonation will be lost when thawed. If you do want to make a frozen version, instead prepare a slushy mocktail by blending the orange juice and cranberry juice with ice right before serving!

What should I do if my mocktail is too sweet?
Very easily! If your Orange Cranberry Mimosa ends up sweeter than you’d like, consider adding a splash of lemon juice or a little extra sparkling apple cider. The acidity from the lemon helps to balance out sweetness, giving your drink a refreshing lift.

Is this recipe suitable for my guests with dietary restrictions?
Yes, it’s very versatile! The Orange Cranberry Mimosa is naturally gluten-free and dairy-free. However, always check the labels of your cranberry juice and any sugar you use, as some brands may include additives. If you’re serving guests with allergies, such as nut allergies, you can feel safe with this mocktail as it’s allergen-free!

Can I make this mocktail in larger batches for a party?
Absolutely! You can easily scale up the ingredients when you’re hosting a holiday gathering. For a pitcher, combine 1 part freshly squeezed orange juice, 2 parts sweetened cranberry juice, and 2 parts sparkling apple cider. Just prepare the sugared rims individually to maintain that lovely sparkle!

Orange Cranberry Mimosa Holiday Mocktail

Orange Cranberry Mimosa Holiday Mocktail

Enjoy the refreshing Orange Cranberry Mimosa Holiday Mocktail, a delightful non-alcoholic drink perfect for festive gatherings.
Print Recipe Pin Recipe
Prep Time 5 minutes mins
Total Time 5 minutes mins
Servings: 4 mimosas
Course: BREAKFAST & BRUNCH
Calories: 100
Ingredients Equipment Method Nutrition Notes

Ingredients
  

For the Sugared Rim
  • 1 slice orange Perfect for wetting the rim and adding a zesty touch.
  • sugar Choose superfine sugar for a sparkling finish.
For the Drink
  • 1 oz freshly squeezed orange juice Adds a burst of natural flavor.
  • 2 oz cold sweetened cranberry juice Balances the tartness of the orange.
  • 2 oz cold sparkling apple cider Brings a festive touch.
  • pinch ground cinnamon Adds depth and holiday aromatics.
For Garnish
  • fresh cranberries Optional, for a pop of color.
  • cinnamon stick Optional, for stirring and flavor.
  • rosemary sprig Optional, for a fragrant twist.

Equipment

  • Glass

Method
 

How to Make Orange Cranberry Mimosa Holiday Mocktail
  1. Wet the Rim: Start by taking a slice of orange and gently rubbing it around the rim of your glass.
  2. Dip in Sugar: Dip the wet rim into sugar, preferably superfine, to create a sparkling finish.
  3. Combine Ingredients: In the glass, whisk together the orange juice, sweetened cranberry juice, and sparkling apple cider. Stir gently.
  4. Add Cinnamon: Sprinkle in a pinch of ground cinnamon to infuse warmth.
  5. Garnish: Enhance your mocktail with optional garnishes like cranberries, a cinnamon stick, or a sprig of rosemary.

Nutrition

Serving: 1mimosaCalories: 100kcalCarbohydrates: 25gSodium: 5mgPotassium: 100mgSugar: 20gVitamin C: 60mgCalcium: 1mg

Notes

For the best experience, prepare your mocktail right before serving to ensure it's bubbly and refreshing.

Tried this recipe?

Let us know how it was!

Filed Under: BREAKFAST & BRUNCH

Peppermint Cheesecake Recipe with Oreo Crust

December 7, 2025 by JudyWhite Leave a Comment

The holidays always seem to bring a whirlwind of flavors, but there’s one dessert that has captured my heart and reignited my love for baking: the Peppermint Cheesecake with Oreo Crust. Picture this: as I opened the pantry searching for inspiration, a brilliant idea sparked just like the glistening frost outside my window. The creamy richness of cheesecake, perfectly paired with a chocolatey Oreo crust, seems just made for this festive season.

After a long week or tackling the usual routine, whipping up this dessert is the comforting escape I crave. It infuses my kitchen with the delightful aroma of peppermint and sweet chocolate, transforming even the coldest days into a cozy, festive celebration. You’ll be amazed at how simple it is to create this showstopper—perfect for gatherings or that special treat to enjoy in solitude. So grab your apron, and let’s dive into this luxurious yet easy Peppermint Cheesecake recipe that promises to make your taste buds dance!

Why You'll Love This Peppermint Cheesecake Recipe with Oreo Crust

  • This Peppermint Cheesecake with Oreo Crust is incredibly easy to make, allowing you to enjoy a rich dessert without the fuss.
  • The harmonious blend of cream cheese and peppermint creates a delightful flavor that perfectly captures the spirit of the holiday season.
  • Its stunning presentation, topped with fluffy whipped cream and crushed candy canes, makes it the showstopper of any gathering.
  • Plus, with a total time of just over an hour and a half, you can whip up this indulgent treat without spending all day in the kitchen.

Peppermint Cheesecake Ingredients

For the Crust
• 2 cups Oreo cookie crumbs – these form the delicious base of your cheesecake, adding a chocolatey crunch.
• 5 tbsp unsalted butter (melted) – binds the crumbs together for a sturdy crust.
• 1/4 teaspoon salt – enhances the overall flavor profile of the crust.

For the Cheesecake Filling
• 32 oz cream cheese (softened) – provides that rich and creamy texture you love in a cheesecake.
• 1 cup granulated sugar – sweetens the filling perfectly, balancing the minty flavor.
• 3 large eggs (at room temperature) – helps achieve a smooth and even batter.
• 1/2 cup sour cream (at room temperature) – adds nice creaminess and a slight tang.
• 1 tsp peppermint extract – the star flavor that brings holiday cheer to your cheesecake.
• 1 tsp vanilla extract – enhances the flavors, blending well with the peppermint.
• 1/4 tsp salt – brings out the sweetness and rounds out the flavors.
• 1 & 1/2 tbsp cornstarch – helps set the cheesecake and prevent cracking.

For the Toppings
• 1/3 cup crushed candy canes – adds a festive crunch and a burst of peppermint flavor.
• 8 oz white chocolate bar (chopped) – wonderfully creamy, it complements the minty cheesecake.
• 1/2 cup heavy cream – adds richness to the whipped cream topping.
• 1 tbsp butter – gives a nice shine to the melted white chocolate for drizzling.
• 1 cup heavy whipping cream (cold) – essential for creating a light and fluffy topping.
• 3 tbsp powdered sugar – sweetens the whipped cream, making it irresistible.
• 1 tsp vanilla extract – adds extra depth to the whipped cream.
• 6-8 Lindt Peppermint White Chocolate Truffles – perfect for an indulgent finishing touch.
• Additional crushed candy canes for garnish – provides a festive look and an extra crunch.

Dive into this easy Peppermint Cheesecake Recipe with Oreo Crust that will surely be a favorite during the holiday season!

How to Make Peppermint Cheesecake

  1. Preheat the oven to 325°F (163°C). This is essential for even baking, ensuring your cheesecake comes out perfectly set.

  2. Combine Oreo cookie crumbs, melted butter, and salt in a medium bowl. Mix until the crumbs are thoroughly coated, then press the mixture into the bottom of a springform pan for a deliciously firm crust.

  3. Beat cream cheese and sugar together in a large bowl using an electric mixer. Continue mixing until the mixture is smooth and creamy, with no lumps. This step is key for that velvety cheesecake texture.

  4. Add the eggs one at a time, mixing well after each addition. Ensure each egg is fully blended before adding the next to maintain a smooth consistency.

  5. Incorporate the sour cream, peppermint extract, vanilla extract, and salt into the cream cheese mixture. Blend until everything is well combined, creating a wonderful aroma that fills your kitchen.

  6. Sprinkle cornstarch over the mixture and fold it in gently with a spatula. This helps to set the cheesecake while keeping it light and airy.

  7. Fold in the crushed candy canes and chopped white chocolate. These ingredients add delightful bursts of flavor and texture to your cheesecake.

  8. Pour the cheesecake filling into the prepared crust, smoothing the top with a spatula. Make sure it’s evenly distributed for a beautiful result.

  9. Bake the cheesecake in the preheated oven for 65 minutes. It should be set around the edges but slightly jiggly in the center, a sign of creamy goodness.

  10. Cool the cheesecake to room temperature after removing it from the oven. Then refrigerate for at least 4 hours or until fully set, allowing the flavors to meld perfectly.

  11. Whip the heavy whipping cream in a medium bowl until soft peaks form. Gradually add the powdered sugar and vanilla extract, continuing to whip until stiff peaks form for a light, fluffy topping.

  12. Top your chilled cheesecake with the whipped cream and garnish with additional crushed candy canes and Lindt Peppermint White Chocolate Truffles for a festive finish.

Optional: Sprinkle extra crushed candy canes on top for added crunch and color!

Exact quantities are listed in the recipe card below.

Make Ahead Options

These Peppermint Cheesecake with Oreo Crust are perfect for busy home cooks looking to save time! You can prepare the crust and filling up to 24 hours in advance; just refrigerate them separately to maintain freshness. To do this, press the Oreo cookie mixture into the springform pan and store it covered in the fridge. For the filling, assemble it in a bowl but don’t pour it into the crust until you’re ready to bake. When it’s time to serve, bake the cheesecake the next day as directed and, once cooled, top with whipped cream and festive garnishes. This way, you’ll enjoy a delicious dessert with minimal effort on a busy day!

Peppermint Cheesecake Variations

Feel free to personalize your dessert experience with these fun twists that will take your peppermint cheesecake to delightful new heights!

  • Dairy-Free: Use coconut cream and dairy-free cream cheese for a luscious alternative without sacrificing flavor.

  • Gluten-Free: Swap Oreo crust for gluten-free chocolate cookies, ensuring everyone can enjoy this festive treat.

  • Chocolate Twist: Incorporate a layer of chocolate ganache under the whipped cream for a decadent chocolate surprise.

  • Peppermint Mocha: Add a tablespoon of instant coffee mixed into the batter for a delightful coffee-peppermint fusion.

  • Nutty Crunch: Fold in crushed walnuts or pecans for a satisfying crunch and an extra layer of flavor.

  • Lower Sugar: Substitute granulated sugar with natural sweeteners like stevia or monk fruit for a lighter option.

  • Fruit Blast: Top with fresh raspberries or strawberries alongside the cream for a fruity contrast that brightens each bite.

  • Spicy Kick: Add a pinch of cayenne or chili powder for an unexpected and exciting heat that pairs beautifully with the creamy filling.

Experiment with these variations and make this festive dessert uniquely yours!

What to Serve with Peppermint Cheesecake with Oreo Crust?

Elevate your dessert experience and create a magical meal with these delightful pairings that complement the rich flavors of your cheesecake.

  • Fresh Berries: The tartness of strawberries, raspberries, or blueberries adds a refreshing contrast, enhancing the creamy cheesecake with a pop of color and flavor.

  • Hot Chocolate: Cozy up with a warm mug of rich hot chocolate; its sweetness and creaminess create a perfect harmony with the peppermint notes of the cheesecake.

  • Whipped Cream: A dollop of freshly whipped cream helps lighten the dessert, providing a velvety texture that seamlessly blends with the cheesecake’s richness.

  • Chocolate Mint Cookies: These add a fun, crunchy element while echoing the peppermint flavor—perfect for a whimsical dessert table that invites everyone to indulge.

  • Peppermint Tea: A cup of soothing peppermint tea not only enhances the minty profile of your cheesecake but also cleanses the palate between bites.

  • Caramel Sauce: Drizzle some warm caramel sauce over the slices for an extra layer of sweetness that beautifully contrasts the cheesecake’s decadent creaminess.

  • Pecan Pie Bars: Bake bite-sized pecan pie bars for a sweet, nutty treat that pairs wonderfully with the chocolate and peppermint elements of your cheesecake.

  • Eggnog: For that festive touch, enjoy a glass of creamy eggnog alongside your cheesecake to bring in those cozy holiday vibes—pure magic in every bite!

  • Ice Cream: A scoop of vanilla or peppermint swirl ice cream can add a delightful cold contrast, making each bite of cheesecake a delicious experience.

How to Store and Freeze Peppermint Cheesecake

Fridge: Store leftover peppermint cheesecake in an airtight container in the fridge for up to 5 days. This keeps it fresh and maintains that delicious creamy texture.

Freezer: For longer storage, freeze slices wrapped in plastic wrap and then in aluminum foil. This can last up to 3 months without losing flavor.

Reheating: When ready to enjoy, thaw slices in the refrigerator overnight. Serve chilled for the best taste experience.

Garnish Removal: If you’ve added toppings like whipped cream or candy canes, remove them before freezing to prevent sogginess.

Chef's Helpful Tips

  • For the perfect Peppermint Cheesecake with Oreo Crust, ensure your cream cheese is fully softened to room temperature for the smoothest texture.
  • Avoid overmixing the batter after adding the eggs to prevent excess air, which can lead to cracking.
  • When incorporating the crushed candy canes and chopped white chocolate, fold gently to maintain the lightness of the batter while evenly distributing the flavors.
  • Bake your cheesecake until the edges are set but the center is still slightly jiggly to achieve that creamy consistency, and remember to let it cool completely before refrigerating for the best results.

Peppermint Cheesecake with Oreo Crust Recipe FAQs

What kind of peppermint extract should I use?
Absolutely! Use pure peppermint extract for the best flavor. You can also opt for artificial peppermint extract, but the pure version offers a stronger and more authentic peppermint taste that beautifully complements the cream cheese.

How do I know when the cheesecake is done baking?
The cheesecake should be set around the edges but still have a slight jiggle in the center. This typically takes around 65 minutes at 325°F (163°C). After taking it out, it will continue to firm up as it cools.

What’s the best way to store peppermint cheesecake?
Store leftover peppermint cheesecake in an airtight container in the refrigerator for up to 5 days. Make sure it’s fully cooled before refrigeration to maintain that creamy texture we all love.

Can I freeze peppermint cheesecake? How?
Absolutely! Here’s how to freeze it:

  1. Cool the cheesecake completely, then remove it from the springform pan.
  2. Wrap individual slices tightly in plastic wrap, ensuring no air can get in.
  3. For extra protection, wrap them in aluminum foil.
  4. Label your freezer bag with the date, and freeze for up to 3 months.
    When you’re ready to enjoy, simply thaw in the refrigerator overnight and serve chilled.

Are there any dietary considerations I should keep in mind?
Yes! This cheesecake contains dairy and eggs, which may pose concerns for those with lactose intolerance or egg allergies. If you’re making it for someone who is lactose intolerant, look for dairy-free cream cheese and alternative whipping cream. For a gluten-free option, substitute Oreos with gluten-free chocolate cookies.

How can I fix a cracked cheesecake?
If your cheesecake cracks during baking, don’t worry! It happens to the best of us. To minimize cracks in the future, be sure not to overmix after adding the eggs and avoid opening the oven door too frequently during baking. If it cracks, simply cover it with whipped cream and decorative toppings—the deliciousness will outshine any imperfections!

Peppermint Cheesecake Recipe with Oreo Crust

Peppermint Cheesecake Recipe with Oreo Crust

Indulge in this delightful Peppermint Cheesecake with Oreo Crust, perfect for the holiday season and easy to make.
Print Recipe Pin Recipe
Prep Time 30 minutes mins
Cook Time 1 hour hr 5 minutes mins
Cooling Time 4 hours hrs
Total Time 5 hours hrs 35 minutes mins
Servings: 10 slices
Course: DESSERT RECIPES
Cuisine: American
Calories: 450
Ingredients Equipment Method Nutrition Notes

Ingredients
  

Crust
  • 2 cups Oreo cookie crumbs these form the delicious base of your cheesecake, adding a chocolatey crunch.
  • 5 tbsp unsalted butter (melted) binds the crumbs together for a sturdy crust.
  • 1/4 teaspoon salt enhances the overall flavor profile of the crust.
Cheesecake Filling
  • 32 oz cream cheese (softened) provides that rich and creamy texture you love in a cheesecake.
  • 1 cup granulated sugar sweetens the filling perfectly, balancing the minty flavor.
  • 3 large eggs (at room temperature) helps achieve a smooth and even batter.
  • 1/2 cup sour cream (at room temperature) adds nice creaminess and a slight tang.
  • 1 tsp peppermint extract the star flavor that brings holiday cheer to your cheesecake.
  • 1 tsp vanilla extract enhances the flavors, blending well with the peppermint.
  • 1/4 teaspoon salt brings out the sweetness and rounds out the flavors.
  • 1.5 tbsp cornstarch helps set the cheesecake and prevent cracking.
Toppings
  • 1/3 cup crushed candy canes adds a festive crunch and a burst of peppermint flavor.
  • 8 oz white chocolate bar (chopped) wonderfully creamy, it complements the minty cheesecake.
  • 1/2 cup heavy cream adds richness to the whipped cream topping.
  • 1 tbsp butter gives a nice shine to the melted white chocolate for drizzling.
  • 1 cup heavy whipping cream (cold) essential for creating a light and fluffy topping.
  • 3 tbsp powdered sugar sweetens the whipped cream, making it irresistible.
  • 1 tsp vanilla extract adds extra depth to the whipped cream.
  • 6-8 Lindt Peppermint White Chocolate Truffles perfect for an indulgent finishing touch.
  • Additional crushed candy canes for garnish provides a festive look and an extra crunch.

Equipment

  • Springform pan
  • Electric mixer
  • Medium bowls
  • Spatula

Method
 

How to Make Peppermint Cheesecake
  1. Preheat the oven to 325°F (163°C). This is essential for even baking, ensuring your cheesecake comes out perfectly set.
  2. Combine Oreo cookie crumbs, melted butter, and salt in a medium bowl. Mix until the crumbs are thoroughly coated, then press the mixture into the bottom of a springform pan for a deliciously firm crust.
  3. Beat cream cheese and sugar together in a large bowl using an electric mixer. Continue mixing until the mixture is smooth and creamy, with no lumps.
  4. Add the eggs one at a time, mixing well after each addition. Ensure each egg is fully blended before adding the next.
  5. Incorporate the sour cream, peppermint extract, vanilla extract, and salt into the cream cheese mixture. Blend until everything is well combined.
  6. Sprinkle cornstarch over the mixture and fold it in gently with a spatula.
  7. Fold in the crushed candy canes and chopped white chocolate.
  8. Pour the cheesecake filling into the prepared crust, smoothing the top with a spatula.
  9. Bake the cheesecake in the preheated oven for 65 minutes.
  10. Cool the cheesecake to room temperature after removing it from the oven. Then refrigerate for at least 4 hours or until fully set.
  11. Whip the heavy whipping cream in a medium bowl until soft peaks form. Gradually add the powdered sugar and vanilla extract, continuing to whip until stiff peaks form.
  12. Top your chilled cheesecake with the whipped cream and garnish with additional crushed candy canes and Lindt Peppermint White Chocolate Truffles.

Nutrition

Serving: 1sliceCalories: 450kcalCarbohydrates: 38gProtein: 6gFat: 30gSaturated Fat: 18gPolyunsaturated Fat: 2gMonounsaturated Fat: 8gCholesterol: 90mgSodium: 200mgPotassium: 150mgFiber: 1gSugar: 25gVitamin A: 600IUCalcium: 90mgIron: 1mg

Notes

For the perfect Peppermint Cheesecake with Oreo Crust, ensure your cream cheese is fully softened to room temperature for the smoothest texture. Avoid overmixing the batter after adding the eggs to prevent excess air, which can lead to cracking.

Tried this recipe?

Let us know how it was!

Filed Under: DESSERT RECIPES

Cranberry Brie Bites

December 5, 2025 by JudyWhite Leave a Comment

As the crisp air settles in and holiday gatherings begin to fill our calendars, I can’t help but crave those comforting bites of flavor that bring people together. Just the thought of my Cranberry Brie Bites, bubbling with gooey cheese and a vibrant sweet-tart cranberry sauce, puts a smile on my face. Picture this: a flaky crescent roll hugging a warm morsel of brie, topped with crunchy pecans and a hint of rosemary. It’s like unwrapping a little present of happiness!

These bites are incredibly easy to whip up, making them a perfect choice for both seasoned chefs and home cooks eager to escape the fast-food rut. Whether you’re hosting a festive party or simply want a cozy snack, these treats marry deliciousness and convenience in a way that feels both special and approachable. Join me in creating a simple yet elegant dish that is sure to impress, and let’s indulge in the magic of home-cooked flavors!

Why You'll Love This Cranberry Brie Bites

  • These Cranberry Brie Bites are a breeze to make, allowing you to impress your guests without spending hours in the kitchen.
  • The combination of creamy brie and sweet-tart cranberry sauce creates a flavor explosion that everyone will adore.
  • With their delightful presentation and charming size, these bites are perfect for parties and gatherings, sure to wow your crowd.
  • Plus, they offer incredible versatility, allowing you to customize the toppings to suit your taste or seasonal ingredients.
  • Enjoy the ease of preparing a delicious appetizer that is both comforting and elegant, making every occasion feel extra special.

Cranberry Brie Bites Ingredients

Get ready to gather all the delightful flavors for your Cranberry Brie Bites!

For the Dough
• Crescent Roll – A flaky base that wraps all the delicious ingredients together.

For the Filling
• Brie Cheese – Creamy and luscious; it melts beautifully for that gooey center.
• Whole Cranberry Sauce – Adds a sweet-tart punch that complements the brie perfectly.
• Pecans, Chopped – Provides a satisfying crunch and nutty flavor contrast.
• Rosemary, Finely Chopped – A fresh herb that elevates the overall flavor profile.
• Orange Zest – Brightens the bites with a hint of citrus that balances richness.

How to Make Cranberry Brie Bites

  1. Preheat your oven to 350°F, filling your kitchen with warmth and anticipation. Generously spray a 24-count mini-muffin tin with non-stick spray to ensure your bites release easily once baked.

  2. Unroll the Crescent Roll dough onto a clean sheet of parchment paper. Pinch the seams together to create a seamless base. Gently flour a rolling pin and roll the dough out until it measures approximately 10″ x 15″, allowing for nice, even squares.

  3. Cut the dough into 24 squares, each about 2.5″ x 2.5″. These precious pieces will cradle the delicious filling and transform into golden bites of joy!

  4. Place each dough square snugly in one muffin spot of your prepared tin. This will create a lovely little cup for the flavorful ingredients to nestle into.

  5. Slice half of an 8″ wheel of brie cheese into 24 generous pieces. Each slice will become the creamy heart of your bites, ready to melt into gooey perfection.

  6. Layer a slice of brie into each dough square along with a pinch of chopped rosemary, 1 teaspoon of cranberry sauce, a sprinkle of orange zest, and some chopped pecans. This medley of flavors will create a symphony of taste that’s simply irresistible.

  7. Bake in the preheated oven for 10-12 minutes, watching for that glorious golden brown color that means they’re ready to make your taste buds dance with delight.

Optional: Serve warm with a drizzle of honey for an extra touch of sweetness.

Exact quantities are listed in the recipe card below.

Cranberry Brie Bites Variations

Feel free to explore these delightful twists that will elevate your Cranberry Brie Bites to new heights!

  • Nut-Free: Replace pecans with sunflower seeds for a nut-free version that still adds a crunchy texture.

  • Herb Infusion: Swap rosemary for fresh thyme or sage for a distinctly aromatic flavor that brings a new depth.

  • Spicy Kick: Mix a pinch of red pepper flakes into your cranberry sauce for a sweet and spicy flavor explosion.

  • Fruit Twist: Experiment with different jams, like fig or raspberry, for an unexpected fruity twist that complements the brie beautifully.

  • Balsamic Glaze: Drizzle a bit of balsamic reduction over the bites before serving to add a rich, tangy finish that takes them over the top.

For a mini-paragraph variation, consider using different cheeses, such as goat cheese or cream cheese, for a creamier filling. Each cheese offers a distinct flavor, transforming your bites into a unique experience each time.

  • Gluten-Free: Use gluten-free pastry dough to cater to those avoiding gluten while maintaining the yummy essence of this dish.

  • Sweet Treat: Add a sprinkle of cinnamon to the cranberry sauce for a warm, dessert-like flavor that makes these bites a delightful sweet appetizer.

These variations not only cater to different dietary needs but also ignite creativity in every batch you bake! Let your tastes guide you and enjoy the process of exploring new flavors.

How to Store and Freeze Cranberry Brie Bites

Room Temperature: Enjoy your Cranberry Brie Bites fresh for up to 2 hours after baking; they’re at their best when warm.

Fridge: Store cooled bites in an airtight container for up to 3 days. Reheat in the oven at 350°F for 5-7 minutes to restore their deliciousness.

Freezer: Freeze unbaked bites arranged on a baking sheet for about 1 hour before transferring them to a freezer-safe bag. They’ll keep well for up to 2 months.

Reheating: To reheat frozen Cranberry Brie Bites, bake directly from the freezer at 375°F for 15-20 minutes, ensuring that the cheese is melted and the dough is golden.

What to Serve with Cranberry Brie Bites?

Creating a full meal around these delightful bites will surely elevate your gathering or cozy night in.

  • Mixed Green Salad: A refreshing mix of greens adds a light crunch, balancing the richness of the bites beautifully.

  • Sparkling Apple Cider: This bubbly drink’s sweetness pairs wonderfully with the tart cranberries, enhancing the flavors in each bite.

  • Honey Glazed Carrots: The natural sweetness complements the savory dimensions of the bites, creating a pleasing contrast.

  • Cheese Platter: Adding a variety of cheeses can elevate your cheese experience, creating an elegant pairing that everyone will enjoy.

  • Spiced Red Wine: A comforting glass of warm spiced red wine enhances the cozy feel of the evening, perfect for autumn gatherings.

  • Chocolate Mousse Cups: To finish on a sweet note, rich chocolate mousse perfectly matches the playful elements of the bites and ends the meal indulgently.

Make Ahead Options

These Cranberry Brie Bites are a fantastic choice for meal prep enthusiasts looking to save time while still enjoying delightful homemade flavors! You can prepare the filling—slicing the brie, mixing the cranberry sauce with chopped pecans, rosemary, and orange zest—up to 3 days in advance. Simply refrigerate this mixture in an airtight container. On the day you’d like to serve, roll out the Crescent Roll dough, assemble the bites, and bake them fresh for about 10-12 minutes. This method ensures each bite comes out just as delicious and flaky as if made on the spot, allowing you to relax and enjoy your gathering without the last-minute rush!

Chef's Helpful Tips

  • When preparing your Cranberry Brie Bites, be sure to roll the Crescent Roll dough out evenly to avoid any undercooked spots.
  • A common mistake is overcrowding the muffin tin, so make sure each square has enough space to puff up.
  • For the best melting effect, take your brie cheese out of the refrigerator about 30 minutes before slicing to ensure it’s at room temperature.
  • Keep a close eye on the bites during the last few minutes of baking, as oven temperatures can vary and you want them golden brown without burning.

Cranberry Brie Bites Recipe FAQs

How do I choose the right Brie cheese for my Cranberry Brie Bites?
Absolutely! Look for Brie that has a smooth, creamy texture and a fresh aroma. Avoid any that have dark spots all over the rind or an overly pungent smell, as these indicate age or spoilage. A wheel of Brie with a soft, creamy center is ideal for melting perfectly in your bites.

How long can I store my Cranberry Brie Bites in the fridge?
Very! After baking, let your bites cool completely. Store them in an airtight container in the fridge for up to 3 days. When you’re ready to enjoy again, simply reheat them in the oven at 350°F for about 5-7 minutes. This will bring back that delightful gooeyness!

Can I freeze my Cranberry Brie Bites?
Definitely! To freeze, arrange the unbaked bites on a baking sheet lined with parchment paper and place them in the freezer for about 1 hour. Once they’re firm, transfer them to a freezer-safe bag. They can be stored for up to 2 months. When you’re ready to bake them, there’s no need to thaw; just pop them in the oven at 375°F for 15-20 minutes!

What should I do if my dough isn’t rising properly?
It’s a common hiccup, but don’t worry! If your Crescent Roll dough isn’t rising well, it may not have been rolled out evenly or may have spent too much time at room temperature before baking. Ensure that your dough squares are rolled out to the right thickness, and give them enough space in the muffin tin. Keeping an eye on them in the last few minutes of baking can help you catch that perfect golden brown!

Are there any dietary considerations I need to be aware of?
Absolutely! If you have guests with dairy allergies, consider using a non-dairy cheese alternative that melts well. For nut allergies, you can simply skip the pecans and substitute with sunflower seeds for that satisfying crunch. Always check the ingredient labels for any hidden allergens, especially in pre-made items like crescent rolls and cranberry sauce.

Can I add other toppings to my Cranberry Brie Bites?
The more the merrier! Feel free to customize your bites with other ingredients such as caramelized onions, chopped herbs like thyme or parsley, or even a drizzle of balsamic reduction post-baking. Experimenting with different flavors can lead to delightful and unique combinations that could become family favorites!

Cranberry Brie Bites

Cranberry Brie Bites

These Cranberry Brie Bites are delightful appetizers combining gooey brie and sweet-tart cranberry sauce, perfect for gatherings.
Print Recipe Pin Recipe
Prep Time 15 minutes mins
Cook Time 12 minutes mins
Total Time 27 minutes mins
Servings: 24 bites
Course: Snacks & Appetizers
Cuisine: American
Calories: 120
Ingredients Equipment Method Nutrition Notes

Ingredients
  

For the Dough
  • 1 roll Crescent Roll A flaky base
For the Filling
  • 8 ounces Brie Cheese Creamy and luscious; sliced
  • 1 cup Whole Cranberry Sauce Adds a sweet-tart punch
  • 1/2 cup Pecans, Chopped Provides a satisfying crunch
  • 1 tablespoon Rosemary, Finely Chopped Fresh herb
  • 1 teaspoon Orange Zest Brightens the bites

Equipment

  • mini-muffin tin
  • Rolling pin
  • Baking sheet

Method
 

How to Make Cranberry Brie Bites
  1. Preheat your oven to 350°F and spray a 24-count mini-muffin tin with non-stick spray.
  2. Unroll the Crescent Roll dough onto parchment paper and roll it out to 10" x 15".
  3. Cut the dough into 24 squares, approximately 2.5" x 2.5".
  4. Place each square in the prepared muffin tin.
  5. Slice the brie cheese into 24 generous pieces and layer into each dough square.
  6. Layer with chopped rosemary, cranberry sauce, orange zest, and pecans.
  7. Bake for 10-12 minutes until golden brown.

Nutrition

Serving: 1biteCalories: 120kcalCarbohydrates: 8gProtein: 2gFat: 10gSaturated Fat: 4gMonounsaturated Fat: 6gCholesterol: 15mgSodium: 200mgPotassium: 50mgFiber: 1gSugar: 2gVitamin A: 100IUVitamin C: 1mgCalcium: 50mgIron: 1mg

Notes

Optional: Serve warm with a drizzle of honey for added sweetness.

Tried this recipe?

Let us know how it was!

Filed Under: SNACKS & APPETIZERS

Carmelita Bar

December 5, 2025 by JudyWhite Leave a Comment

The moment I opened my pantry and spotted that roll of chocolate chip cookie dough, I felt a wave of inspiration wash over me. An idea popped into my head—what if I could create something that combines two childhood favorites: gooey caramel and soft, chewy cookies? That’s how my journey to perfecting Carmelita Bars began, and I can guarantee these delectable treats will transport your taste buds straight to dessert heaven.

Each bite is a blissful combination of sweet, rich caramel enveloped in a layer of melted chocolate and creamy cookie goodness. Perfect for those cozy gatherings with friends or as a cozy treat just for yourself, these bars are not only a crowd-pleaser but also incredibly easy to whip up in under 45 minutes. So, say goodbye to the monotony of fast food and indulge in something homemade that you’ll be craving time and again! Ready to dive into the world of Carmelita Bars? Let’s get baking!

Why You'll Love This Carmelita Bar

  • You’ll love how easy it is to prepare these bars in under 45 minutes, making them a perfect last-minute dessert option.
  • The combination of gooey caramel, melted chocolate, and soft cookie creates an explosion of flavor in every bite that everyone will rave about.
  • These Carmelita Bars are incredibly versatile; you can customize them by adding nuts or using different types of chocolate.
  • Visually appealing and layered to perfection, they make for a stunning addition to any dessert table that will impress your guests.

Carmelita Bar Ingredients

• Delight in creating irresistible Carmelita Bars with these simple ingredients!

For the Base

  • Refrigerated Chocolate Chip Cookie Dough – This convenient dough is the foundation, providing a soft and chewy base for your bars.
  • Milk Chocolate Chips – The creamy chocolate adds richness, melting beautifully into the layers of flavor.

For the Caramel Layer

  • Kraft Caramels – These chewy caramels create a gooey layer that perfectly complements the cookies.
  • Evaporated Milk – Mixing with the caramels helps achieve a smooth, pourable consistency that seeps into every bite.

Take the time to gather these essential Carmelita Bar ingredients and get ready to whip up a treat that will leave everyone asking for seconds!

How to Make Carmelita Bars

  1. Preheat your oven to 350°F. Generously spray a 9 x 13 pan with non-stick spray to ensure your bars won’t stick to the edges after baking.

  2. Press a little more than half of the refrigerated chocolate chip cookie dough into the bottom of the prepared pan. You want an even layer, so it bakes perfectly.

  3. Bake for 20 minutes. Keep an eye on it and remove from the oven once it’s slightly golden. Allow it to cool for a few minutes so that it can hold up the layers to come.

  4. Melt the caramel! While your base cools, unwrap the Kraft Caramels and place them in a saucepan with the evaporated milk. Over low heat, stir frequently until the caramel is wonderfully smooth.

  5. Layer the chocolate! Once the cookie base is slightly cooled, sprinkle the milk chocolate chips over the top. Then, pour the melted caramel evenly over the chocolate chips, allowing it to coat everything beautifully.

  6. Crumble the remaining cookie dough over the caramel layer. This will form a delightful topping that adds texture and crunch.

  7. Bake again for another 15-16 minutes, or until the top is lightly golden brown. This step seals all the flavors together for fab results.

  8. Cool completely before cutting into squares. This will help the bars hold their shape when you serve them to eager friends or family.

Optional: Drizzle with additional melted chocolate for an extra special touch!

Exact quantities are listed in the recipe card below.

What to Serve with Carmelita Bars?

Indulging in homemade treats can be an experience to savor. Pair these delightful bars with complementary flavors and textures for a perfect dessert spread.

  • Vanilla Ice Cream: The creamy, cold contrast enhances the warm, gooey Carmelita Bars, creating a delightful temperature play. A scoop on the side will make each bite even more heavenly.

  • Fresh Berries: Ripe strawberries or blueberries add a refreshing burst of tartness that balances the sweetness of the bars, offering a light, fruity twist.

  • Coffee or Espresso: A steaming cup of coffee or robust espresso elevates the dessert experience, harmonizing beautifully with the rich, chocolatey flavors of the bars.

  • Milk: An old favorite, a glass of cold milk is always a comforting companion to these caramel-loaded delights. It softens the sweetness and is a nostalgic reminder of childhood treats.

  • Whipped Cream: Light and fluffy, a dollop of whipped cream on top adds a lovely texture and extra creaminess, making each bar feel like a gourmet dessert.

  • Chocolate Drizzle: For an indulgent touch, drizzle melted chocolate over the bars when they are cool. This simple addition will enhance their visual appeal and chocolate flavor.

  • Chopped Nuts: Adding chopped pecans or walnuts in the layered bars introduces a crunchy texture that contrasts wonderfully with the soft caramel and cookie.

  • Hot Chocolate: For a chocolaty experience, serve your Carmelita Bars alongside a rich cup of hot chocolate, creating a cozy dessert duo that’s perfect for chilly evenings.

Get creative and enjoy these pairings while making the Carmelita Bars the star of your sweet table!

Make Ahead Options

These delightful Carmelita Bars are not only a treat for the taste buds but also a fantastic option for meal prep that saves you valuable time during busy weeks! To prepare ahead, you can bake the cookie base up to 24 hours in advance. Just follow the directions up to step 3, let it cool completely, then cover and refrigerate it. The caramel layer can also be made and refrigerated for up to 3 days; just remember to let it come to room temperature before layering it onto the cookie base. When you’re ready to enjoy your Carmelita Bars, simply sprinkle the chocolate chips, layer the melted caramel, crumble the remaining cookie dough, and bake as directed. This way, you’ll have all the homemade goodness with significantly less effort when it’s time to serve!

How to Store and Freeze Carmelita Bars

Room Temperature: Keep Carmelita Bars in an airtight container at room temperature for up to 3 days for optimal freshness and flavor.

Fridge: Store in the refrigerator for up to 7 days. Make sure to cover with plastic wrap or in an airtight container to prevent drying out.

Freezer: Freeze uncut bars or individual slices in freezer-safe bags for up to 3 months. Be sure to remove excess air to prevent freezer burn.

Reheating: To enjoy warm bars, microwave individual slices for 10-15 seconds or heat in the oven at 350°F for 5-7 minutes until warmed through.

Carmelita Bar Variations

Feel free to get creative with your Carmelita Bars—each delightful twist will elevate your experience!

  • Nutty Crunch: Add 1/2 cup of chopped nuts, like pecans or walnuts, between the layers for a satisfying crunch. The nutty flavor perfectly complements the caramel and chocolate.

  • Sea Salt Flakes: Sprinkle coarse sea salt on top just before baking for a sweet and salty contrast. This little twist enhances the flavor, making every bite unforgettable.

  • Dark Chocolate: Swap milk chocolate chips for dark chocolate chips for a richer, more intense flavor. Dark chocolate provides a lovely balance to the sweetness of the caramel.

  • Flavored Caramels: Use flavored caramels like chocolate or vanilla for an extra dimension of taste. Try blending different caramel types to create a unique flavor profile in each bite.

  • Gluten-Free: Use gluten-free cookie dough to make these bars suitable for those on a gluten-free diet. Everyone deserves to enjoy the deliciousness!

  • Spicy Kick: Add a pinch of cayenne or crushed red pepper flakes to the caramel mix for a surprising kick. This unexpected heat will excite your taste buds!

  • Coconut Delight: Stir in 1/2 cup of shredded coconut into the chocolate layer for a tropical twist. Coconut adds a delightful texture and a hint of sweetness.

  • Fruit Filling: Layer in some dried fruit, like cherries or cranberries, for a chewy contrast to the gooey caramel. The fruity bites will add a refreshing brightness to the bars.

Chef's Helpful Tips

  • To ensure your Carmelita Bars have a perfectly chewy base, make sure to press the cookie dough evenly into the pan without leaving any gaps.
  • Avoid over-melting the caramels; melting them too quickly can lead to burnt spots, so low heat and frequent stirring are key for a smooth consistency.
  • When layering the chocolate chips, allow the cookie base to cool slightly to prevent them from sinking too deep.
  • For the best texture, let the bars cool completely before cutting, as this helps maintain their shape and makes for cleaner cuts.

Carmelita Bar Recipe FAQs

How do I choose the best ingredients for Carmelita Bars?
Absolutely! For the most delightful Carmelita Bars, select fresh refrigerated chocolate chip cookie dough without any signs of dryness or cracks. The milk chocolate chips should be glossy and smooth, while the Kraft Caramels need to be soft and chewy. This selection ensures that you’ll have a gooey, rich texture when baked.

How should I store Carmelita Bars?
Very! To keep your Carmelita Bars fresh, place them in an airtight container at room temperature for up to 3 days. If you’d like to extend their shelf life, store them in the refrigerator for up to 7 days, covered securely with plastic wrap or in an airtight container. This prevents them from drying out and losing that wonderfully chewy texture!

Can I freeze Carmelita Bars?
Absolutely! You can freeze uncut bars or individual slices for up to 3 months. Simply wrap them in plastic wrap, followed by aluminum foil, or place them in freezer-safe bags. Be sure to remove any excess air to prevent freezer burn. When you’re ready to indulge, thaw them in the fridge overnight and enjoy them at room temperature or warm them up in the microwave for a few seconds.

What if my cookie base is too crumbly?
Don’t worry! If your cookie base seems too crumbly and doesn’t hold together, it may be due to using cold dough or over baking. To remedy this, ensure your cookie dough is at room temperature before pressing it into the pan. If it still crumbles, mix in a touch of melted butter to help bind it. When baking, bake just until golden for the perfect chewy texture.

Are Carmelita Bars suitable for guests with dietary restrictions?
Very! These bars can easily be made to accommodate various dietary needs by using gluten-free cookie dough, dairy-free chocolate chips, and caramels if you need to cater to lactose intolerance. Always check labels for allergens as some ingredients may contain traces of nuts or gluten. You can even use natural sweeteners for a healthier twist!

How do I know when my Carmelita Bars are done baking?
Great question! Keep an eye on the baking time, especially during the second bake. You’ll know your Carmelita Bars are done when the top is lightly golden brown and the edges start to pull away from the sides of the pan. Stick a toothpick in the center: if it comes out with moist crumbs (but not wet batter), they’re ready to cool!

Carmelita Bar

Carmelita Bar

These Carmelita Bars combine gooey caramel and soft cookie goodness, making them a delicious dessert option.
Print Recipe Pin Recipe
Prep Time 15 minutes mins
Cook Time 35 minutes mins
Cooling Time 10 minutes mins
Total Time 1 hour hr
Servings: 12 bars
Course: DESSERT RECIPES
Cuisine: American
Calories: 250
Ingredients Equipment Method Nutrition Notes

Ingredients
  

For the Base
  • 1 roll Refrigerated Chocolate Chip Cookie Dough This convenient dough is the foundation, providing a soft and chewy base for your bars.
  • 1 cup Milk Chocolate Chips The creamy chocolate adds richness, melting beautifully into the layers of flavor.
For the Caramel Layer
  • 14 oz Kraft Caramels These chewy caramels create a gooey layer that perfectly complements the cookies.
  • 1/4 cup Evaporated Milk Mixing with the caramels helps achieve a smooth, pourable consistency.

Equipment

  • 9 x 13 inch baking pan
  • Saucepan
  • mixing spoon
  • measuring cups
  • non-stick spray

Method
 

How to Make Carmelita Bars
  1. Preheat your oven to 350°F. Generously spray a 9 x 13 pan with non-stick spray.
  2. Press a little more than half of the refrigerated chocolate chip cookie dough into the bottom of the prepared pan.
  3. Bake for 20 minutes until slightly golden. Allow to cool for a few minutes.
  4. Melt the Kraft Caramels with evaporated milk over low heat until smooth.
  5. Sprinkle milk chocolate chips over the cookie base, then pour the melted caramel evenly over them.
  6. Crumble the remaining cookie dough over the caramel layer as a topping.
  7. Bake for another 15-16 minutes until the top is lightly golden brown.
  8. Cool completely before cutting into squares.

Nutrition

Serving: 1barCalories: 250kcalCarbohydrates: 35gProtein: 2gFat: 12gSaturated Fat: 6gPolyunsaturated Fat: 2gMonounsaturated Fat: 2gCholesterol: 20mgSodium: 150mgPotassium: 100mgFiber: 1gSugar: 20gVitamin A: 2IUCalcium: 4mgIron: 6mg

Notes

Optional: Drizzle with additional melted chocolate for an extra special touch!

Tried this recipe?

Let us know how it was!

Filed Under: BREAKFAST & BRUNCH

Black Bottom Cupcakes

December 5, 2025 by JudyWhite Leave a Comment

There’s an unmistakable joy in creating treats that not only satisfy your sweet tooth but also bring a cozy warmth to your kitchen. The moment I pulled these Black Bottom Cupcakes from the oven, I was greeted by a symphony of aromas—rich chocolate mingling with creamy sweetness that beckoned everyone lurking nearby. After a long week of mundane meals, the thrill of whipping up something fun and delicious was just what I needed.

These little delights are more than just a cupcake; they are a journey of flavors and textures. With a fluffy chocolate base and a surprising cream cheese center, they redefine what a dessert can be—comforting yet unexpected. Plus, this recipe is incredibly simple, making it a perfect choice for anyone looking to impress without spending all day in the kitchen. If you’re tired of the same old fast-food options or seeking a homemade indulgence, these Black Bottom Cupcakes might just become your new favorite go-to treat! Let’s dive into this delightful baking adventure together.

Why You'll Love This Black Bottom Cupcakes

  • These Black Bottom Cupcakes are incredibly easy to make, allowing you to whip up a delicious dessert in just over half an hour.
  • The delightful combination of rich chocolate and creamy cream cheese creates a mouthwatering flavor explosion that will leave everyone wanting more.
  • Versatile and fun, these cupcakes can be dressed up for any occasion or enjoyed simply as a sweet treat at home.
  • Not only do they taste amazing, but their visually appealing layers make them a showstopper on any dessert table.

Black Bottom Cupcake Ingredients

Dive into the delicious magic of Black Bottom Cupcakes with these simple, must-have ingredients!

For the Cupcake Batter
• 1 1/2 cups Flour – adds the essential structure for a fluffy texture.
• 1 cup Sugar – sweetens the batter perfectly; you can adjust for less sweetness if desired.
• 1/4 cup Cocoa Powder – brings rich chocolate flavor that defines these cupcakes.
• 1 tsp Baking Soda – helps the cupcakes rise beautifully while baking.
• 1 cup Water – keeps the batter moist and enhances the overall flavor.
• 1/3 cup Oil – provides added moisture and a tender crumb.
• 1 tsp Vinegar – reacts with baking soda to boost the cupcake’s fluffiness.
• 1 tsp Vanilla – adds warmth and depth to the chocolate flavor.

For the Cream Cheese Filling
• 1 (8 oz) Cream Cheese, Softened – creates a deliciously creamy surprise in each cupcake.
• 1 Egg – binds the filling ingredients together for a smooth texture.
• 1/3 cup Sugar – sweetens the cream cheese mix, balancing the chocolate flavor.
• 1 cup Chocolate Chips – gives an extra chocolate hit that no one can resist!

Get ready to mix, bake, and delight in the scrumptiousness of these Black Bottom Cupcakes!

How to Make Black Bottom Cupcakes

  1. Preheat your oven to 350°F (175°C) and line a muffin pan with paper liners. This sets the stage for perfectly baked cupcakes that won’t stick.
  2. Beat together the softened cream cheese, egg, and sugar in a small bowl until smooth. Then, stir in the chocolate chips and set this deliciously creamy mixture aside.
  3. Whisk together flour, sugar, cocoa powder, and baking soda in a medium bowl. This dry blend will create the rich chocolate base of your cupcakes.
  4. Add the water, oil, vinegar, and vanilla to the dry ingredients. Beat everything together until the batter is well combined and smooth, with a lovely chocolate hue.
  5. Fill each liner about 1/3 full with the chocolate cupcake batter. Then, add a heaping teaspoon of the cream cheese mixture on top of each one, finishing with a sprinkle of sugar for sweetness.
  6. Bake the cupcakes in your preheated oven for 16-18 minutes. They are done when a toothpick inserted comes out clean, and they look beautifully risen.

Optional: Serve with a dollop of whipped cream for an extra indulgent treat!

Exact quantities are listed in the recipe card below.

Make Ahead Options

These Black Bottom Cupcakes are perfect for busy home cooks who want to save time while still enjoying a homemade treat! You can prepare the chocolate cupcake batter up to 24 hours in advance. Just mix all the wet and dry ingredients, cover the bowl tightly, and refrigerate. Additionally, the cream cheese filling can be made ahead and stored in the fridge for up to 3 days; simply keep it in an airtight container. When you’re ready to bake, preheat the oven, fill the liners with batter and cream cheese mixture, and bake as directed. This way, you’ll still savor that fresh-out-of-the-oven goodness with minimal effort!

What to Serve with Black Bottom Cupcakes?

Indulging in a sweet treat like this can inspire a delightful meal to share with loved ones.

  • Fresh Berries: Their juicy burst contrasts beautifully with the rich chocolate, offering a light and refreshing balance to the cupcakes.

  • Vanilla Ice Cream: A scoop of creamy vanilla ice cream melts perfectly atop the warm cupcakes, enhancing the dessert experience with extra indulgence.

  • Coffee or Espresso: The robust flavors of coffee elevate the chocolate notes, creating a delightful pairing that energizes your afternoon treat.

  • Chocolate Ganache: Drizzling warm chocolate ganache transforms your cupcakes into an extra decadent dessert, adding an even more luxurious chocolate layer.

  • Creamy Cheesecake Mousse: This airy mousse complements the cream cheese center, enhancing the creamy decadence without overwhelming the palate.

  • Minty Lemonade: A refreshing mint lemonade cuts through the sweetness, providing a zesty contrast that leaves you feeling invigorated.

  • Pecan Pie Bars: These rich, nutty treats offer a contrasting texture and flavor, making for an exciting dessert spread at your gathering.

  • Sparkling Water with Lime: The fizzy bubbles and citrus zing refresh your palate, ensuring that each bite of these Black Bottom Cupcakes remains delightful.

Black Bottom Cupcake Variations

Feel free to explore these delightful twists and swaps to make these cupcakes your own!

  • Gluten-Free: Substitute all-purpose flour with a 1:1 gluten-free baking blend for a deliciously inclusive treat.

  • Dairy-Free: Use a dairy-free cream cheese alternative and coconut oil instead of regular oil for a tasty option that everyone can enjoy.

  • Nutty Surprise: Fold in 1/2 cup of chopped nuts, like walnuts or pecans, for a delightful crunch that complements the creamy filling.

  • Minty Fresh: Add 1 teaspoon of peppermint extract to the cupcake batter for a refreshing twist that pairs beautifully with chocolate.

  • Spicy Kick: Incorporate a pinch of cayenne pepper into the cocoa powder to enhance the chocolate flavor with a surprising kick of heat.

  • Fruit Burst: Mix in 1/2 cup of fresh raspberries or chopped cherries into the cream cheese filling for a fruity zing that elevates each bite.

  • Caramel Drizzle: Drizzle warm salted caramel over the baked cupcakes for an added layer of decadence that will impress any sweet tooth.

  • Chocolate Chip Variations: Experiment with different types of chocolate chips, such as white chocolate or dark chocolate, to change the flavor profile each time!

How to Store and Freeze Black Bottom Cupcakes

Room Temperature: Keep your Black Bottom Cupcakes at room temperature in an airtight container for up to 2 days. This preserves their delightful moisture and flavor.

Fridge: For longer freshness, refrigerate the cupcakes in an airtight container for up to 5 days. Just allow them to come to room temperature before serving for the best taste.

Freezer: Freeze the unfrosted Black Bottom Cupcakes individually wrapped in plastic wrap, then place them in a freezer-safe bag. They will stay fresh for up to 2 months.

Reheating: To enjoy them warm, simply pop your cupcakes in the microwave for about 10-15 seconds, ensuring you savor that sweet, gooey cream cheese center!

Chef's Helpful Tips

  • For the best Black Bottom Cupcakes, always use room temperature cream cheese to ensure a smooth filling that mixes easily.
  • Avoid overmixing the batter after adding wet ingredients, as this can lead to dense cupcakes instead of light and fluffy ones.
  • When filling the cupcake liners, remember to leave enough space to allow them to rise without overflowing.
  • To check for doneness, insert a toothpick into the center of a cupcake; it should come out clean for perfect results.

Black Bottom Cupcakes Recipe FAQs

What’s the best way to select ripe ingredients for Black Bottom Cupcakes?
Absolutely! When choosing your ingredients, especially the cream cheese, make sure it’s softened to room temperature, making it easier to mix smoothly. For the chocolate chips, select high-quality semi-sweet chips for that perfect melt-in-your-mouth experience!

How should I store my Black Bottom Cupcakes after baking?
For optimal freshness, store your Black Bottom Cupcakes in an airtight container at room temperature for up to 2 days. If you want to extend their life, refrigerate them for up to 5 days. Just let them come to room temperature before serving to enjoy their delightful texture!

Can I freeze Black Bottom Cupcakes, and if so, how?
Absolutely! To freeze your Black Bottom Cupcakes, allow them to cool completely, then wrap each one individually in plastic wrap. Place the wrapped cupcakes in a freezer-safe bag, and they will stay fresh for up to 2 months. When you’re ready to enjoy them, simply thaw in the fridge overnight or microwave for about 10-15 seconds for a warm treat!

What should I do if my cupcakes become dense instead of fluffy?
Very! If your Black Bottom Cupcakes turn out dense, it might be due to overmixing the batter once the wet ingredients are added. Be sure to mix until just combined to maintain a light, airy texture. Also, ensure your baking soda is fresh—expired leavening agents won’t help your cupcakes rise!

Are there any dietary considerations I should be aware of when making Black Bottom Cupcakes?
Definitely! If you’re serving these cupcakes to guests with dietary restrictions, keep in mind the cream cheese and egg in the filling can be modified. For a dairy-free option, look for vegan cream cheese alternatives, and an egg substitute like applesauce or flaxseed meal can work well too. Just remember to adjust the consistency for the filling!

What if I can’t find cocoa powder for the Black Bottom Cupcakes?
If cocoa powder isn’t available, you can substitute it with unsweetened dark chocolate melted down. Use about 1 ounce of melted chocolate for every 3 tablespoons of cocoa powder called for in the recipe. This will result in a beautifully rich flavor profile while keeping the spirit of those delightful Black Bottom Cupcakes intact!

Black Bottom Cupcakes

Black Bottom Cupcakes

Indulge in Black Bottom Cupcakes, a delightful dessert that combines rich chocolate and creamy fillings.
Print Recipe Pin Recipe
Prep Time 15 minutes mins
Cook Time 18 minutes mins
Total Time 33 minutes mins
Servings: 12 cupcakes
Course: DESSERT RECIPES
Cuisine: American
Calories: 250
Ingredients Equipment Method Nutrition Notes

Ingredients
  

Cupcake Batter
  • 1.5 cups Flour adds the essential structure for a fluffy texture.
  • 1 cup Sugar sweetens the batter perfectly; you can adjust for less sweetness if desired.
  • 0.25 cups Cocoa Powder brings rich chocolate flavor that defines these cupcakes.
  • 1 tsp Baking Soda helps the cupcakes rise beautifully while baking.
  • 1 cup Water keeps the batter moist and enhances the overall flavor.
  • 0.33 cups Oil provides added moisture and a tender crumb.
  • 1 tsp Vinegar reacts with baking soda to boost the cupcake’s fluffiness.
  • 1 tsp Vanilla adds warmth and depth to the chocolate flavor.
Cream Cheese Filling
  • 8 oz Cream Cheese, Softened creates a deliciously creamy surprise in each cupcake.
  • 0.33 cups Sugar sweetens the cream cheese mix, balancing the chocolate flavor.
  • 1 cup Chocolate Chips gives an extra chocolate hit that no one can resist!

Equipment

  • muffin pan
  • Mixing bowls
  • Whisk
  • mixer

Method
 

Instructions
  1. Preheat your oven to 350°F (175°C) and line a muffin pan with paper liners.
  2. Beat together the softened cream cheese, egg, and sugar in a small bowl until smooth. Then, stir in the chocolate chips and set aside.
  3. Whisk together flour, sugar, cocoa powder, and baking soda in a medium bowl.
  4. Add the water, oil, vinegar, and vanilla to the dry ingredients. Beat until well combined and smooth.
  5. Fill each liner about 1/3 full with the chocolate cupcake batter, then add a heaping teaspoon of the cream cheese mixture on top.
  6. Bake the cupcakes for 16-18 minutes until a toothpick comes out clean.

Nutrition

Serving: 1cupcakeCalories: 250kcalCarbohydrates: 30gProtein: 4gFat: 13gSaturated Fat: 8gPolyunsaturated Fat: 0.5gMonounsaturated Fat: 3gCholesterol: 40mgSodium: 150mgPotassium: 160mgFiber: 1gSugar: 18gVitamin A: 5IUCalcium: 4mgIron: 8mg

Notes

Optional: Serve with a dollop of whipped cream for an extra indulgent treat.

Tried this recipe?

Let us know how it was!

Filed Under: BREAKFAST & BRUNCH

Vegetarian Chili

December 5, 2025 by JudyWhite Leave a Comment

There’s something comforting about a warm bowl of Vegetarian Chili on a chilly evening. I found myself experimenting in the kitchen one afternoon, searching for a dish that could keep my family satisfied beyond the usual takeout. This slightly spicy, hearty chili quickly became a beloved dinner option, effortlessly blending rich flavors from tomato juice, stewed tomatoes, and a kick of chili powder.

Picture a bustling kitchen filled with the delightful aromas of sautéed onion and celery as I whip this dish together. With a handful of ingredients and just 45 minutes to spare, this Vegetarian Chili proves that home-cooked meals don’t have to be a hassle. It’s a feast in a pot that brings everyone to the table, whether you’re a long-time chef or just starting your culinary journey. Trust me, once you pour that final simmering concoction over al dente noodles, you’ll savor every spoonful of this crowd-pleaser, again and again.

Why You'll Love This Vegetarian Chili

  • This Vegetarian Chili is incredibly easy to make, ensuring that even the busiest of schedules can accommodate a delicious home-cooked meal.
  • Packed with rich flavors from fresh ingredients, every bite is a delightful explosion of taste that will have everyone asking for seconds.
  • Its versatility allows for adjustments according to your preferences, making it suitable for any palate or occasion.
  • Visually appealing with its vibrant colors, it also makes a beautiful centerpiece for dinner gatherings, impressing guests with minimal effort.

Vegetarian Chili Ingredients

Discover the key components that make this Vegetarian Chili a must-try dish!

For the Veggies
• Celery – 3 full stalks add a nice crunch and depth of flavor.
• Onion – 1 large onion brings sweetness and aromatic goodness to the mix.

For the Noodles
• Barilla Cellentani noodles – 16 oz for a sturdy base that holds the chili beautifully.

For the Chili Base
• Bush’s Mild Chili Beans – 27 oz can to provide protein and a hearty texture.
• Tomato juice – 8 cups for a rich and flavorful broth.
• Stewed tomatoes – 4 cups for added sweetness and thickness.
• Morningstar crumbles – 12 oz bag for a satisfying meat alternative.
• Ketchup – 1 cup adds a hint of sweetness and richness.

For the Flavor
• Chili powder – 3 tbsp gives it that signature spiciness; adjust to your taste!
• Golden Greek peperoncini – 2 tbsp for a zesty kick that enhances the overall flavor.

How to Make Vegetarian Chili

  1. Dice celery and onion. In a large skillet, melt some butter over medium heat, then add the diced vegetables. Sauté until they are tender and fragrant, about 5-7 minutes.

  2. Cook noodles according to package instructions until al dente, which means they should be tender but still firm. Once cooked, drain and return them to the pot, setting aside for later.

  3. Combine the stars of the dish! In the pot with the drained noodles, add the chili beans, tomato juice, stewed tomatoes, Morningstar crumbles, ketchup, chili powder, and golden Greek peperoncini. Stir well to combine.

  4. Simmer the mixture on low heat, allowing the flavors to meld together until piping hot, about 10-15 minutes. Stir occasionally to prevent sticking.

  5. Adjust the seasoning. Taste your chili and add more chili powder if you prefer a spicier kick. Remember, it’s all about your flavor preferences!

Optional: Serve with a dollop of sour cream or avocado slices on top for extra creaminess.

Exact quantities are listed in the recipe card below.

Make Ahead Options

These Vegetarian Chili preparations are perfect for busy home cooks looking to save time during the week! You can chop the celery and onion, sauté them, and refrigerate the mixture up to 3 days in advance. The noodles can also be cooked ahead of time; simply store them in an airtight container in the fridge for up to 24 hours. To maintain quality, make sure to cool the noodles completely before refrigerating to avoid clumping. When you’re ready to serve, combine your prepared ingredients in a pot and add the remaining components (chili beans, tomato juice, etc.). Simmer until heated through, and enjoy a delicious, homemade Vegetarian Chili with minimal effort!

What to Serve with Vegetarian Chili?

Imagine gathering around the table with loved ones, sharing warmth and laughter over a hearty meal that’s as comforting as it is delicious.

  • Cornbread Muffins: Soft, buttery cornbread muffins perfectly complement the chili’s spicy kick while adding a delightful sweetness to balance the flavors.

  • Fresh Green Salad: A crisp salad with mixed greens, tomatoes, and a zesty vinaigrette adds a refreshing crunch that brightens the meal. Top it with avocado for a creamy twist!

  • Sour Cream: A dollop of sour cream on top of your chili creates a creamy contrast that cools down the heat, making every bite even more scrumptious.

  • Avocado Slices: Creamy avocado slices lend a rich texture and healthy fats that elevate the dish, making for a satisfying, well-rounded meal.

  • Crusty Bread: A warm, crusty bread is perfect for dipping into the thick chili, soaking up all the flavors and providing a satisfying chewy texture.

  • Guacamole: Homemade guacamole adds a creamy, zesty flavor while enhancing the overall experience with its rich taste. Serve it on the side for a perfect pair!

  • Beer or Cider: A cold craft beer or a refreshing hard cider helps cut through the spices while enhancing the meal with complementary flavors. It’s the perfect drink to enjoy while gathered at the table!

This joyful spread not only beautifully complements your Vegetarian Chili but also creates an inviting atmosphere that fills the home with love. Enjoy!

How to Store and Freeze Vegetarian Chili

Fridge: Keep leftover Vegetarian Chili in an airtight container for up to 3 days. Reheat gently on the stovetop or in the microwave, adding a splash of water if needed.

Freezer: Freeze portions of Vegetarian Chili in freezer-safe bags for up to 3 months. Be sure to label them with the date for easy organization!

Thawing: When ready to enjoy, thaw in the refrigerator overnight before reheating. It can also be reheated straight from frozen—just allow extra time on the stove or in the microwave.

Reheating: Always heat the chili until it’s piping hot throughout, about 5-10 minutes on medium heat, stirring occasionally to prevent sticking.

Vegetarian Chili Variations

Feel free to play around with these ideas to make this Vegetarian Chili your own!

  • Spicy Kick: Add 1-2 diced jalapeños or a pinch of cayenne pepper for an extra heat boost.
  • Beans Galore: Mix in your favorite beans like black beans or kidney beans instead of just chili beans for different textures.
  • Veggie Boost: Toss in diced bell peppers, zucchini, or corn for added nutrients and vibrant color.
  • Creamy Twist: Stir in a splash of cream or coconut milk just before serving for a rich, creamy texture.
  • Herb Infusion: Incorporate fresh herbs like cilantro or parsley to brighten up the flavors before serving.
  • Vegan Version: Substitute Morningstar crumbles with cooked lentils or chickpeas for a hearty, plant-based protein source.
  • Cheesy Delight: Sprinkle shredded cheese on top before serving for a comforting, melty finish.
  • Smoky Flavor: Add a few drops of liquid smoke or smoked paprika for a delightful depth of flavor.

The beauty of this Vegetarian Chili lies in its versatility, inviting you to create your perfect bowl.

Chef's Helpful Tips

  • For a richer flavor in your Vegetarian Chili, sauté the celery and onion until they are well caramelized, which usually takes a bit longer but enhances the base of the dish.
  • Be careful not to overcook the noodles; cooking them just until al dente will prevent them from becoming mushy when mixed with the chili base.
  • When adding your spices, remember that you can always add more chili powder, but it’s hard to take it out once it’s in, so start with a smaller amount and adjust to taste.
  • Simmering the chili on low heat for at least 10-15 minutes allows the ingredients to meld and develop a deeper flavor, so don’t rush this step.

Vegetarian Chili Recipe FAQs

How do I choose the right celery and onions for this recipe?
Absolutely! When selecting celery, look for vibrant green stalks that are firm to the touch, avoiding any that are wilted or have dark spots. For onions, pick ones that feel heavy for their size and have smooth, dry skin; larger onions offer more sweetness.

What’s the best way to store leftover Vegetarian Chili?
To keep your Vegetarian Chili fresh, transfer it to an airtight container and store it in the refrigerator for 3 to 4 days. When reheating, I recommend adding a splash of water to bring back the original texture.

Can I freeze Vegetarian Chili, and how long will it last?
Yes, you can freeze it! Portion the chili into freezer-safe bags or containers and label them with the date. It’ll keep well for up to 3 months. When you’re ready to enjoy, simply thaw it in the refrigerator overnight, or if you’re in a hurry, reheat directly from frozen, adding extra time for thorough heating.

What should I do if my chili is too spicy?
If the chili turns out spicier than you’d like, try adding a dollop of sour cream or plain yogurt to counterbalance the heat. You can also incorporate an extra can of beans or diced tomatoes to dilute the spice.

Are there any dietary considerations I should know about?
Absolutely! This Vegetarian Chili is meat-free, making it suitable for vegetarians and vegans. However, it contains gluten from the noodles. If you have gluten sensitivities, you can substitute with gluten-free pasta or quinoa. Always check the label for any allergen information regarding the Morningstar crumbles, as they may contain soy.

How can I thicken my Vegetarian Chili if it’s too thin?
If you find your chili is a bit too runny, there are a couple of easy ways to thicken it up. One method is to mash a portion of the beans with a fork or a potato masher directly in the pot, allowing for a creamier texture. Another option is to let it simmer uncovered for an extra 10-15 minutes, allowing some of the liquid to evaporate and concentrate the flavors.

Vegetarian Chili

Vegetarian Chili

A comforting Vegetarian Chili packed with fresh flavors, perfect for a cozy dinner.
Print Recipe Pin Recipe
Prep Time 10 minutes mins
Cook Time 35 minutes mins
Total Time 45 minutes mins
Servings: 6 servings
Course: DINNER RECIPES
Cuisine: Vegetarian
Calories: 350
Ingredients Equipment Method Nutrition Notes

Ingredients
  

For the Veggies
  • 3 stalks Celery adds crunch and depth of flavor
  • 1 large Onion brings sweetness and aromatic goodness
For the Noodles
  • 16 oz Barilla Cellentani noodles a sturdy base
For the Chili Base
  • 27 oz Bush's Mild Chili Beans provides protein and texture
  • 8 cups Tomato juice for a rich broth
  • 4 cups Stewed tomatoes adds sweetness and thickness
  • 12 oz Morningstar crumbles a satisfying meat alternative
  • 1 cup Ketchup adds sweetness
For the Flavor
  • 3 tbsp Chili powder signature spiciness
  • 2 tbsp Golden Greek peperoncini for a zesty kick

Equipment

  • Large skillet
  • Pot

Method
 

How to Make Vegetarian Chili
  1. Dice celery and onion. In a large skillet, melt some butter over medium heat, then add the diced vegetables. Sauté until they are tender and fragrant, about 5-7 minutes.
  2. Cook noodles according to package instructions until al dente. Once cooked, drain and return them to the pot, setting aside.
  3. In the pot with the drained noodles, add the chili beans, tomato juice, stewed tomatoes, Morningstar crumbles, ketchup, chili powder, and golden Greek peperoncini. Stir well.
  4. Simmer the mixture on low heat for about 10-15 minutes, stirring occasionally to prevent sticking.
  5. Taste your chili and add more chili powder if you prefer a spicier kick.

Nutrition

Serving: 1servingCalories: 350kcalCarbohydrates: 58gProtein: 15gFat: 9gSaturated Fat: 1gPolyunsaturated Fat: 3gMonounsaturated Fat: 4gSodium: 800mgPotassium: 800mgFiber: 10gSugar: 7gVitamin A: 2500IUVitamin C: 15mgCalcium: 60mgIron: 3mg

Notes

Serve with a dollop of sour cream or avocado slices on top for extra creaminess.

Tried this recipe?

Let us know how it was!

Filed Under: DINNER RECIPES

Cottage Cheese Flatbread

December 3, 2025 by JudyWhite Leave a Comment

There’s something incredibly satisfying about creating a warm, homemade flatbread from scratch. The first time I made Cottage Cheese Flatbread, I was amazed at how simple ingredients transformed into something so delightful. Picture this: as you knead the dough, the subtle aroma of fresh herbs fills your kitchen, promising a delicious outcome. This recipe is not only a feast for the senses, but it also offers a healthier alternative to the heavy, store-bought variety that often lacks flavor.

Perfect for a quick weeknight meal or as a crowd-pleaser at gatherings, these flatbreads come together in just 25 minutes. Paired with a generous spread of whipped cottage cheese and drizzled with olive oil, they boast a delightful balance of creaminess and crispiness that is sure to impress. Whether you enjoy them fresh out of the oven or as a base for your favorite toppings, you’ll find this Cottage Cheese Flatbread will not only elevate your dining experience but also ignite your passion for homemade cooking!

Why You'll Love This Cottage Cheese Flatbread

  • This Cottage Cheese Flatbread is incredibly easy to make, allowing you to whip up a warm, fresh bread in just 25 minutes.
  • The flavor combination of whipped cottage cheese and olive oil offers a delightful creaminess that pairs perfectly with the crispy edges of the flatbread.
  • Its versatility means you can enjoy it as a simple side, a base for your favorite toppings, or even a satisfying snack on its own.
  • Plus, its visual appeal, with golden-brown edges and a sprinkle of herbs, makes it a showstopper at any gathering.

Cottage Cheese Flatbread Ingredients

• Get ready to create something delicious!

For the Dough

  • All-purpose flour – forms the base of the flatbread for a soft texture.
  • Baking powder – helps the dough rise, making it light and fluffy.
  • Salt – enhances the overall flavor, balancing the dough.
  • Greek yogurt – adds moisture and a tangy flavor while helping to bind the dough.
  • Full-fat cottage cheese, whipped – creates a creamy, rich topping that elevates your flatbread.

For the Garnish

  • Olive oil – drizzles on top for a luscious finish, adding flavor and a beautiful sheen.
  • Dried oregano or thyme – infuses each flatbread with aromatic notes of herbs.
  • Garlic powder or crushed red pepper (optional) – add a kick of flavor or spice, perfect for those who like a little heat!

With these Cottage Cheese Flatbread ingredients, you’re one step closer to serving up a warm, flavorful treat that your friends and family will love!

How to Make Cottage Cheese Flatbread

  1. Combine the dry ingredients in a bowl. Mix together the all-purpose flour, baking powder, and a pinch of salt for a flavorful base. This step will create the foundation for your flatbread.
  2. Stir in the Greek yogurt. Add the Greek yogurt to the dry mixture and mix until a sticky dough forms. This creamy ingredient is essential for moisture and gives the flatbread its delightful texture.
  3. Knead the dough. On a lightly floured surface, knead the dough for about 2–3 minutes until it’s smooth and elastic. You want it to feel soft but not overly sticky.
  4. Divide the dough. Cut the dough into two equal portions and roll each into ovals approximately 1/4-inch thick. The thickness will help the flatbreads puff up beautifully in the oven.
  5. Preheat your oven. Set your oven to 450°F (232°C) and prepare a baking sheet by lining it with parchment paper. This temperature will help achieve those perfect golden-brown edges.
  6. Bake the flatbreads. Place the unbaked flatbreads on the prepared baking sheet and bake for 6–8 minutes until they puff and are slightly golden. Keep an eye on them during this time!
  7. Spread the cottage cheese. Remove the flatbreads from the oven and generously spread whipped cottage cheese over each one. This creamy layer adds delicious richness!
  8. Drizzle with olive oil. Add a drizzle of olive oil on top and sprinkle the flatbreads with dried herbs or optional spices for added flavor. This is where your creativity can shine!
  9. Return to the oven. Put the flatbreads back in the oven and bake for another 5–7 minutes until bubbly and crisp at the edges. You’re going to love the enticing aroma!
  10. Cool and serve. Once done, let the flatbreads cool slightly before slicing. They’re best enjoyed warm, making them a fantastic addition to any meal!

Optional: Serve with a side of marinara sauce for dipping or fresh veggies for a delightful appetizer.

Exact quantities are listed in the recipe card below.

Make Ahead Options

These Cottage Cheese Flatbreads are perfect for meal prep enthusiasts! You can prepare the dough up to 24 hours in advance by mixing the dry ingredients and incorporating the Greek yogurt, then tightly wrap the dough in plastic wrap and refrigerate it to keep it fresh. The whipped cottage cheese topping can also be made up to 3 days ahead; just store it in an airtight container in the fridge to maintain its creamy texture. When you’re ready to serve, roll out the dough and bake the flatbreads as directed, spreading the prepared cottage cheese just before the final baking. This way, you’ll have warm, delicious flatbreads with minimal effort, perfect for busy weeknights!

Cottage Cheese Flatbread Variations

Feel free to get creative and personalize your flatbread experience with these delightful twists and swaps!

  • Gluten-Free: Substitute all-purpose flour with a gluten-free blend to make it accessible for those with dietary restrictions.
  • Herb-Infused: Add fresh chopped basil or rosemary to the dough for an aromatic flavor that shines through every bite.
  • Cheesy Delight: Mix in shredded mozzarella or cheddar to the dough for a cheesy surprise that melts beautifully.
  • Spicy Kick: Incorporate finely chopped jalapeños or a pinch of cayenne pepper for an adventurous heat that awakens your taste buds.
  • Sweet Twist: Replace the herbs with a drizzle of honey and a sprinkle of cinnamon for a sweet flatbread that pairs perfectly with fruit.
  • Nutty Flavor: Add a tablespoon of ground flaxseed or chia seeds to the dough for a nutritious boost and subtle nutty taste.
  • Veggie Boost: Fold in finely grated zucchini or carrots to the dough for added moisture and nutrition, making it a real powerhouse.

Customize these Cottage Cheese Flatbread variations to match your cravings, and watch them become a favorite in your kitchen!

How to Store and Freeze Cottage Cheese Flatbread

Room Temperature: Store the flatbread wrapped in a clean kitchen towel for up to 1 day. This keeps them soft while allowing you to enjoy them fresh.

Fridge: If you have leftover flatbread, place it in an airtight container and refrigerate for up to 3 days. Reheat in the oven for a few minutes to restore crispiness.

Freezer: For longer storage, freeze the flatbreads in a single layer on a baking sheet until solid, then transfer to a freezer bag. They can be frozen for up to 2 months.

Reheating: To reheat, place the frozen flatbread directly in a preheated oven at 400°F (204°C) for 10–12 minutes or until warmed through and crispy again. Enjoy your Cottage Cheese Flatbread!

What to Serve with Cottage Cheese Flatbread?

Imagine the aroma of freshly baked flatbread filling your kitchen—a warm invitation for creating a complete and delightful meal.

  • Garden Salad: A light, crisp salad topped with your favorite vegetables and a vinaigrette offers a refreshing contrast to the rich flatbread.
  • Grilled Vegetables: Smoky, charred veggies enhance the flatbread’s flavor, bringing a delightful mix of textures and a burst of color to your plate.
  • Hummus Platter: Pairing with creamy hummus makes it a perfect dip for the flatbread, creating a satisfying and nutritious snack or appetizer.
  • Tomato Bruschetta: The tangy sweetness of tomatoes and basil on the flatbread adds a delicious Mediterranean twist that will tantalize your taste buds.
  • Roasted Garlic Aioli: A smooth, garlicky dip complements the crunchy edges of the flatbread, creating a warm, indulgent experience.
  • Wine Pairing: A light white wine, like Sauvignon Blanc, enhances the creamy flavors of the cottage cheese while complementing the herbs beautifully.

Each pairing brings something special to the table, transforming your Cottage Cheese Flatbread into a truly memorable meal!

Chef's Helpful Tips

  • When making Cottage Cheese Flatbread, be sure to knead the dough just until it is smooth to avoid a dense texture.
  • It’s important to use full-fat cottage cheese for a creamier topping that enhances the dish’s richness.
  • Keep an eye on the flatbreads while they bake, as oven temperatures can vary and you want them to be golden and puffed, not burnt.
  • After adding the cottage cheese, returning the flatbreads to the oven will help the cheese melt beautifully and create a satisfying crispness at the edges.

Cottage Cheese Flatbread Recipe FAQs

How can I tell if my cottage cheese is fresh enough to use?
Absolutely! When selecting cottage cheese, look for containers that are within the sell-by date and check for a creamy texture without any dark spots or off-odors. Fresh cottage cheese should have a mild, pleasant smell. If it’s clumpy or has any liquid separation, it might be best to avoid using it.

How long can I store leftover Cottage Cheese Flatbread?
You can keep your leftover Cottage Cheese Flatbread in the refrigerator for up to 3 days. Make sure to place it in an airtight container. Reheating in the oven for a few minutes can help restore that delightful crispiness.

Can I freeze Cottage Cheese Flatbread?
Absolutely! For freezing, place the baked flatbreads in a single layer on a baking sheet and freeze until solid—this usually takes about 1 hour. Once they’re frozen, transfer them to a freezer bag. They will stay fresh for up to 2 months. When you’re ready to enjoy them, just pop them directly in a preheated oven at 400°F (204°C) for about 10-12 minutes to reheat.

What should I do if my flatbread didn’t puff up during baking?
If your Cottage Cheese Flatbread doesn’t puff up, it might be due to the dough being overworked or not enough baking powder added. Make sure to knead the dough gently only until smooth. If you suspect the baking powder might be old, consider replacing it, as it could be less effective over time.

Are there any dietary considerations I need to keep in mind for Cottage Cheese Flatbread?
Absolutely! If you’re serving this flatbread to guests, note that it contains dairy (cottage cheese and Greek yogurt). For those who are lactose intolerant, you might substitute with lactose-free alternatives. Additionally, if anyone has a gluten sensitivity, you can experiment with a gluten-free flour blend, though results may vary.

What are some alternative toppings I can use besides cottage cheese?
The more the merrier! While whipped cottage cheese is fantastic, you can also try topping your flatbread with hummus, avocado, or even a vibrant tomato and basil mix for a fresh spin. Cheese lovers might enjoy adding mozzarella or feta for a delightful twist!

Cottage Cheese Flatbread

Cottage Cheese Flatbread

Enjoy this quick, homemade Cottage Cheese Flatbread for a delightful and healthier alternative to store-bought bread.
Print Recipe Pin Recipe
Prep Time 10 minutes mins
Cook Time 15 minutes mins
Total Time 25 minutes mins
Servings: 2 flatbreads
Course: Snacks & Appetizers
Cuisine: American
Calories: 250
Ingredients Equipment Method Nutrition Notes

Ingredients
  

For the Dough
  • 2 cups all-purpose flour forms the base of the flatbread for a soft texture
  • 2 teaspoons baking powder helps the dough rise, making it light and fluffy
  • 1 teaspoon salt enhances the overall flavor, balancing the dough
  • 1 cup Greek yogurt adds moisture and a tangy flavor while helping to bind the dough
  • 1 cup full-fat cottage cheese, whipped creates a creamy, rich topping
For the Garnish
  • 2 tablespoons olive oil drizzles on top for a luscious finish
  • 1 teaspoon dried oregano or thyme infuses each flatbread with aromatic notes of herbs
  • 1 teaspoon garlic powder or crushed red pepper optional for those who like a little heat

Equipment

  • Mixing bowl
  • Baking sheet
  • Oven
  • parchment paper
  • Rolling pin

Method
 

Directions
  1. Combine the dry ingredients in a bowl. Mix together the all-purpose flour, baking powder, and a pinch of salt for a flavorful base.
  2. Stir in the Greek yogurt. Add the Greek yogurt to the dry mixture and mix until a sticky dough forms.
  3. Knead the dough on a lightly floured surface for about 2–3 minutes until it's smooth and elastic.
  4. Divide the dough into two equal portions and roll each into ovals approximately 1/4-inch thick.
  5. Preheat your oven to 450°F (232°C) and prepare a baking sheet by lining it with parchment paper.
  6. Place the unbaked flatbreads on the prepared baking sheet and bake for 6–8 minutes until they puff and are slightly golden.
  7. Remove the flatbreads from the oven and generously spread whipped cottage cheese over each one.
  8. Add a drizzle of olive oil on top and sprinkle the flatbreads with dried herbs or optional spices.
  9. Put the flatbreads back in the oven and bake for another 5–7 minutes until bubbly and crisp at the edges.
  10. Let the flatbreads cool slightly before slicing. They're best enjoyed warm!

Nutrition

Serving: 1flatbreadCalories: 250kcalCarbohydrates: 30gProtein: 10gFat: 10gSaturated Fat: 5gPolyunsaturated Fat: 1gMonounsaturated Fat: 4gCholesterol: 20mgSodium: 300mgPotassium: 200mgFiber: 2gSugar: 2gVitamin A: 5IUCalcium: 15mgIron: 8mg

Notes

Serve with a side of marinara sauce for dipping or fresh veggies for a delightful appetizer.

Tried this recipe?

Let us know how it was!

Filed Under: SNACKS & APPETIZERS

Lamb Gyro Bowls with Dreamy Creamy Sauce

December 3, 2025 by JudyWhite Leave a Comment

The rich, savory aroma of ground lamb sizzling in the skillet instantly transforms my kitchen into a cozy Mediterranean escape. It’s amazing how just a few simple ingredients can create a dish that feels both indulgent and comforting. That’s the magic behind my Lamb Gyro Bowls with Dreamy Creamy Sauce. This recipe has quickly become a favorite in my home, merging the vibrant flavors of Greece with the heartiness of a satisfying bowl meal.

Whether you’re tired of takeout or searching for a fresh weeknight dinner idea, these gyro bowls present a perfect solution. Juicy lamb, tangy feta, and refreshing cucumber yogurt sauce come together in a symphony that dances on your taste buds. Plus, it only takes about 35 minutes to prepare from start to finish—ideal for those busy evenings! Imagine serving this at your next gathering and watching your friends rave about the flavors. Let’s dive into this delicious masterpiece that’s both easy to craft and impossible to resist!

Why You'll Love This Lamb Gyro Bowls with Dreamy Creamy Sauce

  • This recipe is incredibly easy to make, requiring just 35 minutes from start to finish, making it perfect for busy weeknights.
  • The vibrant flavors of the seasoned lamb, fresh veggies, and creamy sauce create a delightful experience that will have everyone coming back for seconds.
  • These bowls are versatile, allowing you to customize toppings to suit your tastes or ingredients you have on hand.
  • Not to mention, the visually appealing presentation will impress your guests, turning any meal into a feast for the eyes.

Lamb Gyro Bowls Ingredients

For the Lamb
• 1 pound ground lamb – the star of your dish, bringing rich flavor and tenderness.
• 1 teaspoon garlic powder – adds a nice depth to the lamb’s seasoning.
• 1 teaspoon onion powder – enhances the overall savory taste.
• 1 teaspoon smoked paprika – gives a wonderful smoky aroma.
• 1/2 teaspoon ground cumin – adds warm, earthy notes that complement the lamb beautifully.
• 1/2 teaspoon dried oregano – a staple herb that brings a touch of the Mediterranean.
• 1/4 teaspoon salt – essential for amplifying the flavors.
• 1/8 teaspoon black pepper – adds just the right amount of heat.
• 1 tablespoon olive oil – helps to brown the lamb and keep it moist.

For the Rice and Veggies
• 3 cups cooked white rice – a fluffy base for your hearty topping.
• 1 cup cherry tomatoes – they add a sweet burst of flavor and color.
• 1/2 small red onion – brings a sharp crunch that balances the dish.
• 1/2 cup feta cheese – provides a creamy, tangy touch that enhances every bite.
• 2 tablespoons chopped fresh parsley – adds brightness and freshness.

For the Creamy Sauce
• 1 cup Greek yogurt – the base of your dreamy sauce, creamy and tangy.
• 1/2 cup finely grated cucumber – lends freshness and cooling against the spices.
• 2 cloves garlic – for that unmistakable aromatic kick.
• 1 tablespoon lemon juice – brightens the sauce with a zesty punch.
• 1 tablespoon olive oil – enriches the sauce texture.
• 1 tablespoon chopped fresh dill – an aromatic herb that pairs perfectly with yogurt.
• 1/4 teaspoon salt – to ensure the sauce is flavorful.
• 1/4 teaspoon black pepper – for a gentle hint of spice.

With these Lamb Gyro Bowls with Dreamy Creamy Sauce ingredients, you’re all set to create a dish that will not only satisfy your cravings but also impress your family and friends. Enjoy every delightful bite!

How to Make Lamb Gyro Bowls with Dreamy Creamy Sauce

  1. Heat the Skillet: Begin by heating a large skillet over medium heat and add 1 tablespoon of olive oil. Once hot, add the ground lamb, breaking it apart with a spoon. Cook until nicely browned and crispy, about 8–10 minutes. Don’t forget to drain any excess fat if needed!

  2. Season the Lamb: Add garlic powder, onion powder, smoked paprika, ground cumin, dried oregano, salt, and black pepper to the lamb. Stir well to ensure the spices evenly coat the meat and cook for an additional 2 minutes to toast those wonderful flavors.

  3. Prepare the Creamy Sauce: In a small bowl, combine Greek yogurt, finely grated cucumber, minced garlic, lemon juice, olive oil, chopped dill, salt, and black pepper. Mix it all together until smooth and creamy, then chill it until you’re ready to serve.

  4. Roast the Cherry Tomatoes (Optional): For added flavor, preheat your oven to 400°F (200°C). Spread the halved cherry tomatoes on a baking sheet, drizzle with olive oil, salt, and pepper, then roast for 10–15 minutes. They should be beautifully blistered and aromatic!

  5. Assemble the Bowls: Place a generous scoop of cooked white rice in each bowl. Top it with your deliciously seasoned lamb, roasted cherry tomatoes, thinly sliced red onion, and crumbled feta cheese. Drizzle with the creamy sauce and sprinkle chopped parsley on top for an extra burst of flavor.

  6. Serve and Enjoy: Your Lamb Gyro Bowls are ready! Serve immediately while warm, and watch as everyone relishes the vibrant Mediterranean flavors.

Optional: Garnish with an extra sprinkle of dill for freshness.
Exact quantities are listed in the recipe card below.

How to Store and Freeze Lamb Gyro Bowls

Fridge: Store leftovers in an airtight container for up to 3 days. Keep the creamy sauce separate to maintain its texture and flavor.

Freezer: You can freeze the seasoned lamb and rice in a freezer-safe container for up to 3 months. Thaw overnight in the fridge before reheating.

Reheating: Heat the thawed lamb and rice in the microwave or on the stovetop until heated through, about 3–5 minutes. Add the creamy sauce fresh when serving to ensure it’s dreamy and flavorful.

Assembly Tip: If you’re freezing, consider portioning out the rice and lamb separately, so they maintain their textures when reheated. Enjoy your Lamb Gyro Bowls whenever you’re ready!

Lamb Gyro Variations

Feel free to play around with these delightful variations to make your Lamb Gyro Bowls truly your own!

  • Herb-Infused: Use fresh mint alongside parsley for a refreshing twist that enhances the Mediterranean flavors.

  • Spice it Up: Add diced jalapeños to the lamb for a spicy kick that brings the heat to your meal.

  • Vegetarian Delight: Swap ground lamb for cooked lentils or chickpeas for a hearty, plant-based alternative that’s equally satisfying.

  • Cauliflower Rice: Replace white rice with cauliflower rice for a low-carb option that doesn’t sacrifice flavor or texture.

  • Zesty Sauce: Mix in a teaspoon of harissa or sriracha into the creamy sauce for an extra layer of flavor and heat. A little goes a long way!

  • Toppings Galore: Get creative with toppings like olives, roasted red peppers, or pickled vegetables for a burst of color and tang.

  • Greek Twist: Incorporate kalamata olives and artichoke hearts into your bowls for a classic Greek salad vibe that’s both vibrant and delicious.

  • Cheese Swap: If feta isn’t your favorite, try crumbled goat cheese or a dairy-free cheese option for a new flavor experience.

Discover the joy of customization and make these bowls a true reflection of your culinary style!

What to Serve with Lamb Gyro Bowls with Dreamy Creamy Sauce?

Creating a vibrant and delicious meal means finding the perfect sides that enhance each flavor.

  • Fresh Greek Salad: A medley of cucumbers, olives, and greens, this salad adds crunch and a refreshing tang that balances the rich lamb beautifully.

  • Pita Bread: Warm and soft, pita bread is perfect for scooping up the lamb and creamy sauce, offering a delightful texture contrast while making the meal even more fun.

  • Herbed Quinoa: Fluffy quinoa tossed with fresh herbs and lemon gives an extra layer of nutrition and flavor, marrying well with the savory spices in the gyro bowls.

  • Roasted Vegetables: Seasonal roasted veggies, such as zucchini and bell peppers, bring a sweet and smoky depth that complements the Mediterranean vibes of the dish.

  • Tzatziki Dip: A classic yogurt cucumber dip that mirrors your dreamy creamy sauce, tzatziki elevates the meal with additional zest and pairs perfectly with lamb.

  • Red Wine: A glass of Shiraz or Cabernet Sauvignon enhances the dish with rich, bold flavors, creating a sophisticated pairing for a cozy dinner at home.

  • Baklava: Finish your meal with a sweet touch! This flaky pastry filled with nuts and honey offers a delightful contrast to the savory bowls, making for a memorable dinner experience.

Make Ahead Options

These Lamb Gyro Bowls with Dreamy Creamy Sauce are perfect for busy meal prep enthusiasts! You can prepare the seasoned ground lamb and creamy sauce up to 24 hours in advance, allowing the flavors to meld beautifully. Simply cook the lamb fully, let it cool, then refrigerate in an airtight container. The sauce can also be mixed ahead and chilled overnight. When you’re ready to serve, just reheat the lamb in a skillet and assemble your bowls with fresh rice, cherry tomatoes, and feta. This method saves time on busy weeknights while ensuring your meal is just as delicious!

Chef's Helpful Tips

  • When making Lamb Gyro Bowls with Dreamy Creamy Sauce, be sure to break the lamb apart in the skillet to ensure it browns evenly and achieves a crispy texture.
  • Avoid overcooking the lamb after adding the spices; this can lead to tough meat instead of the desired tenderness.
  • For a smoother creamy sauce, grate the cucumber finely and make sure to mix the ingredients thoroughly before chilling.
  • If roasting the cherry tomatoes, keep an eye on them around the 10-minute mark to prevent them from burning and ensure they become perfectly blistered and flavorful.

Lamb Gyro Bowls with Dreamy Creamy Sauce Recipe FAQs

How do I select the best ground lamb?
When choosing ground lamb, look for meat that is bright pink or deep red, with a bit of marbling for flavor. Avoid packages with dark spots or a strong odor. Fresh lamb should have a light, pleasant smell. I often recommend talking to the butcher if you’re unsure; they can help you select the freshest option!

How should I store leftover Lamb Gyro Bowls?
Store leftovers in an airtight container in the fridge for up to 3 days. If possible, keep the creamy sauce separate to maintain its consistency and flavor. This way, you can enjoy perfectly fresh flavors when you’re ready to eat!

Can I freeze the Lamb Gyro Bowls?
Absolutely! You can freeze the seasoned lamb and cooked rice in a freezer-safe container for up to 3 months. To do this, let the lamb and rice cool completely, then portion them into containers. When you’re ready to enjoy them, thaw overnight in the fridge and reheat in the microwave or on the stovetop for about 3–5 minutes.

What should I do if my lamb is tough?
If your lamb turns out tough, it may mean it was overcooked or not broken apart finely enough at the beginning. To prevent this, cook it on medium heat and break the meat apart thoroughly in the skillet. When you add spices, keep cooking time to just 2 additional minutes to toast them while keeping the lamb tender.

Is this recipe suitable for people with dairy allergies?
For those with dairy allergies, you can substitute the Greek yogurt with a non-dairy yogurt alternative, such as coconut or almond yogurt. Make sure to check the labels for any added sugars or preservatives that may cause sensitivities. The overall dish will still be delicious and creamy!

How long does the creamy sauce last in the fridge?
The creamy sauce can last in your fridge for about 3 days when stored properly in an airtight container. I recommend only mixing it with your gyro bowls right before serving, as this keeps it fresh and dreamy!

Lamb Gyro Bowls with Dreamy Creamy Sauce

Lamb Gyro Bowls with Dreamy Creamy Sauce

Lamb Gyro Bowls with Dreamy Creamy Sauce is a comforting, flavorful dish combining seasoned lamb, fresh veggies, and a creamy sauce.
Print Recipe Pin Recipe
Prep Time 15 minutes mins
Cook Time 20 minutes mins
Total Time 35 minutes mins
Servings: 4 bowls
Course: Dinner
Cuisine: Mediterranean
Calories: 550
Ingredients Equipment Method Nutrition Notes

Ingredients
  

For the Lamb
  • 1 pound ground lamb the star of your dish, bringing rich flavor and tenderness
  • 1 teaspoon garlic powder adds a nice depth to the lamb's seasoning
  • 1 teaspoon onion powder enhances the overall savory taste
  • 1 teaspoon smoked paprika gives a wonderful smoky aroma
  • 1/2 teaspoon ground cumin adds warm, earthy notes that complement the lamb beautifully
  • 1/2 teaspoon dried oregano a staple herb that brings a touch of the Mediterranean
  • 1/4 teaspoon salt essential for amplifying the flavors
  • 1/8 teaspoon black pepper adds just the right amount of heat
  • 1 tablespoon olive oil helps to brown the lamb and keep it moist
For the Rice and Veggies
  • 3 cups cooked white rice a fluffy base for your hearty topping
  • 1 cup cherry tomatoes they add a sweet burst of flavor and color
  • 1/2 small red onion brings a sharp crunch that balances the dish
  • 1/2 cup feta cheese provides a creamy, tangy touch that enhances every bite
  • 2 tablespoons chopped fresh parsley adds brightness and freshness
For the Creamy Sauce
  • 1 cup Greek yogurt the base of your dreamy sauce, creamy and tangy
  • 1/2 cup finely grated cucumber lends freshness and cooling against the spices
  • 2 cloves garlic for that unmistakable aromatic kick
  • 1 tablespoon lemon juice brightens the sauce with a zesty punch
  • 1 tablespoon olive oil enriches the sauce texture
  • 1 tablespoon chopped fresh dill an aromatic herb that pairs perfectly with yogurt
  • 1/4 teaspoon salt to ensure the sauce is flavorful
  • 1/4 teaspoon black pepper for a gentle hint of spice

Equipment

  • Large skillet
  • Small bowl
  • Baking sheet

Method
 

Instructions
  1. Heat the skillet. Begin by heating a large skillet over medium heat and add 1 tablespoon of olive oil. Once hot, add the ground lamb, breaking it apart with a spoon. Cook until nicely browned and crispy, about 8–10 minutes.
  2. Season the lamb. Add garlic powder, onion powder, smoked paprika, ground cumin, dried oregano, salt, and black pepper to the lamb. Stir well to ensure the spices evenly coat the meat and cook for an additional 2 minutes.
  3. Prepare the creamy sauce. In a small bowl, combine Greek yogurt, finely grated cucumber, minced garlic, lemon juice, olive oil, chopped dill, salt, and black pepper. Mix until smooth and creamy, then chill.
  4. Roast the cherry tomatoes (optional). For added flavor, preheat your oven to 400°F (200°C). Spread halved cherry tomatoes on a baking sheet, drizzle with olive oil, salt, and pepper, then roast for 10–15 minutes.
  5. Assemble the bowls. Place a generous scoop of cooked white rice in each bowl. Top with seasoned lamb, cherry tomatoes, sliced onion, and feta cheese. Drizzle with creamy sauce and sprinkle parsley.
  6. Serve and enjoy. Your Lamb Gyro Bowls are ready! Serve immediately while warm.

Nutrition

Serving: 1bowlCalories: 550kcalCarbohydrates: 45gProtein: 25gFat: 30gSaturated Fat: 10gPolyunsaturated Fat: 5gMonounsaturated Fat: 10gCholesterol: 70mgSodium: 800mgPotassium: 600mgFiber: 3gSugar: 4gVitamin A: 500IUVitamin C: 20mgCalcium: 150mgIron: 3mg

Notes

For a smoother sauce, grate cucumber finely and mix thoroughly. If roasting tomatoes, watch them around the 10-minute mark.

Tried this recipe?

Let us know how it was!

Filed Under: DINNER RECIPES

  • « Previous Page
  • 1
  • …
  • 45
  • 46
  • 47
  • 48
  • 49
  • Next Page »

Recent Posts

  • Crispy Potatoes in Oven
  • Lucky Charms Pancakes
  • Cheeseburger
  • Boiled Corn on the Cob
  • St. Patrick’s Day Dessert Parfaits

Recent Comments

No comments to show.

Footer

  • Contact
  • Privacy Policy
  • About Us
  • Terms
  • ↑ back to top

Copyright © 2024 www.Forkono.com

Table Of Content