Forkono

  • BREAKFAST & BRUNCH
  • DESSERT RECIPES
  • DINNER RECIPES
  • LUNCH RECIPES
  • About uS
  • SNACKS & APPETIZERS
menu icon
go to homepage
  • BREAKFAST & BRUNCH
  • DESSERT RECIPES
  • DINNER RECIPES
  • LUNCH RECIPES
  • About uS
  • SNACKS & APPETIZERS
search icon
Homepage link
  • BREAKFAST & BRUNCH
  • DESSERT RECIPES
  • DINNER RECIPES
  • LUNCH RECIPES
  • About uS
  • SNACKS & APPETIZERS
×

Strawberry Fudge Recipe

December 27, 2025 by JudyWhite Leave a Comment

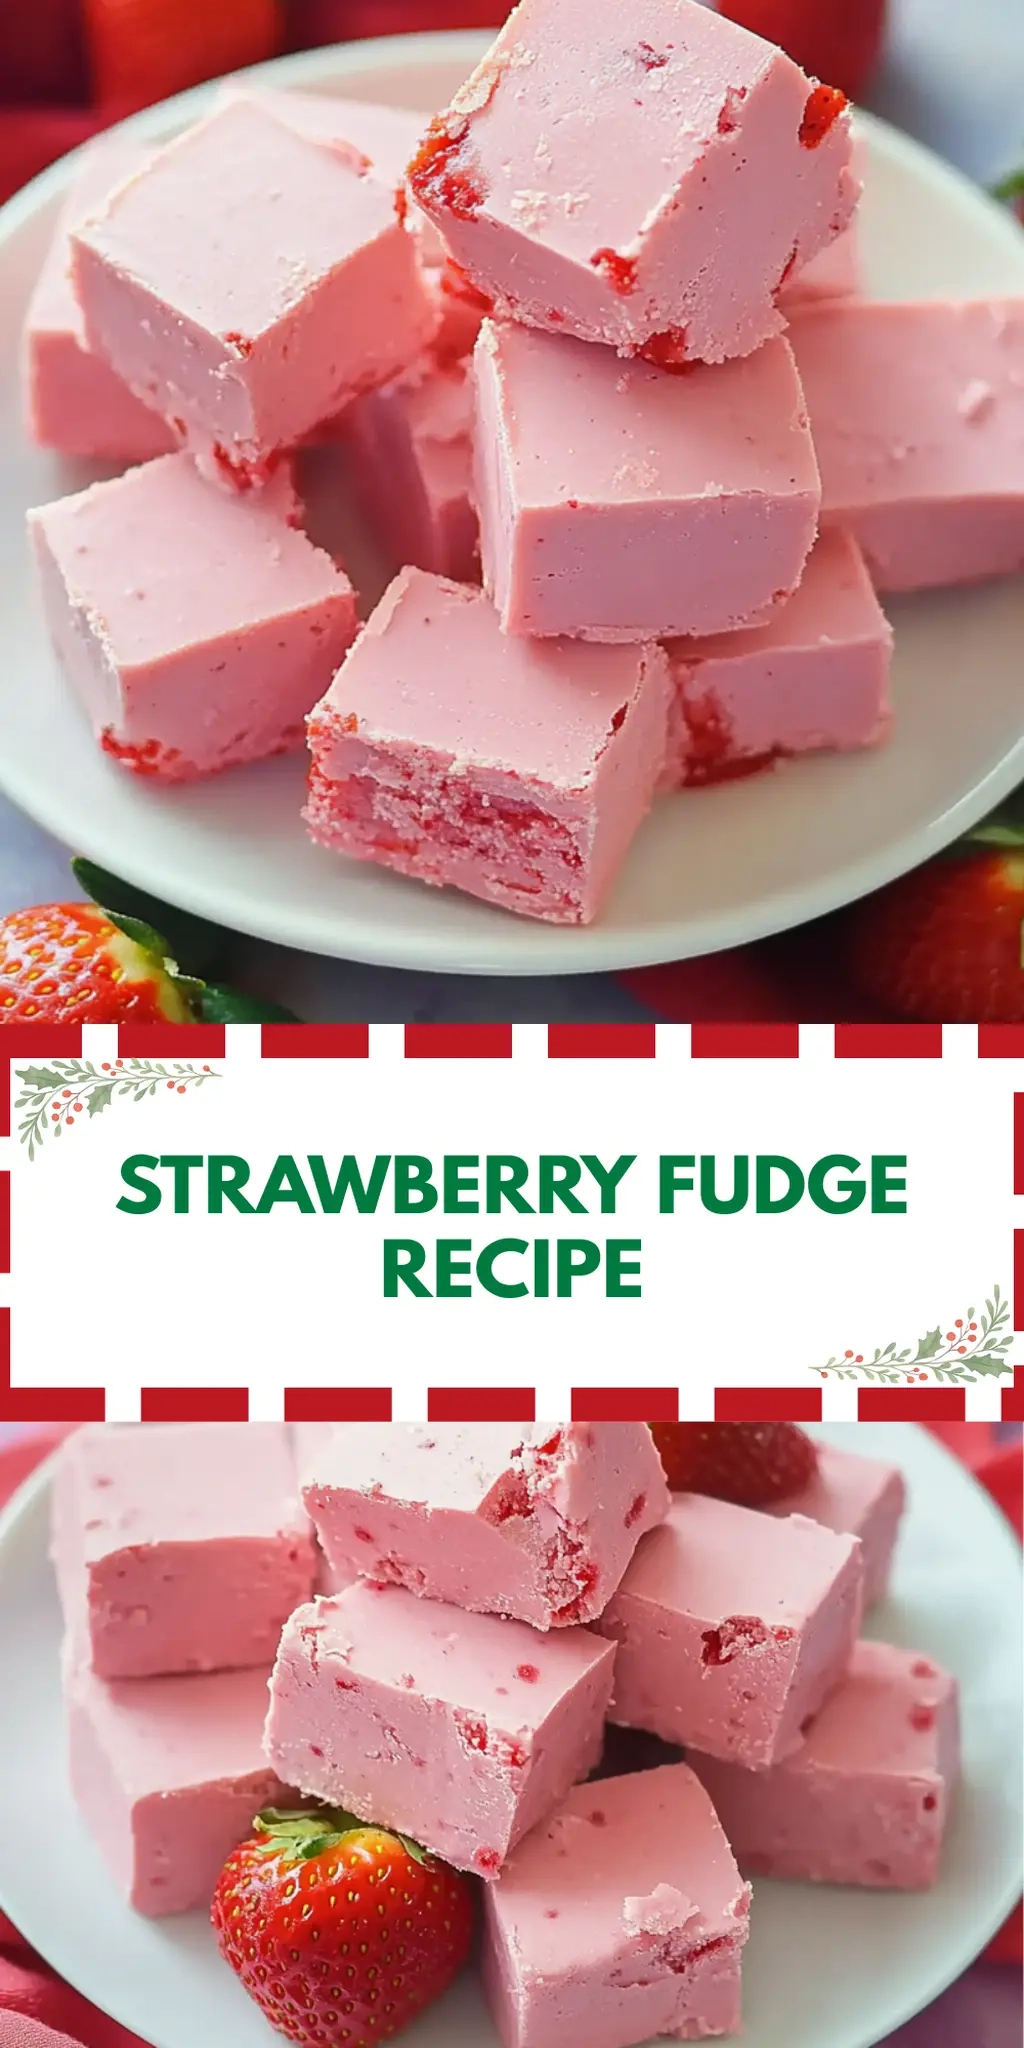
There’s something irresistibly charming about whipping up a sweet treat with minimal fuss, and this 2-Ingredient Strawberry Fudge is just that magic waiting to happen in your kitchen. Picture this: a rainy afternoon, the aroma of melting white chocolate filling the air, and the vibrant pink hue of strawberry frosting becoming the highlight of my day.

I stumbled upon this delightful recipe during a busy week when I found myself with a craving for something sweet but didn’t want to spend hours in the kitchen. In just 30 minutes—from prep to setting—you’ll have a batch of fudgy goodness that not only looks impressive but tastes divine. Whether you’re surprising friends at a gathering, treating yourself after a long day, or simply seeking a fresh alternative to fast food desserts, this Strawberry Fudge Recipe is sure to be a crowd-pleaser. Let’s dive into this simple yet delectable treat that’s as easy to make as it is delightful to eat!

Why You'll Love This Strawberry Fudge Recipe

  • This Strawberry Fudge Recipe is incredibly easy to make, requiring just two ingredients and minimal prep time.
  • You’ll be amazed at the rich and delightful flavor that results from the combination of white chocolate and strawberry frosting.
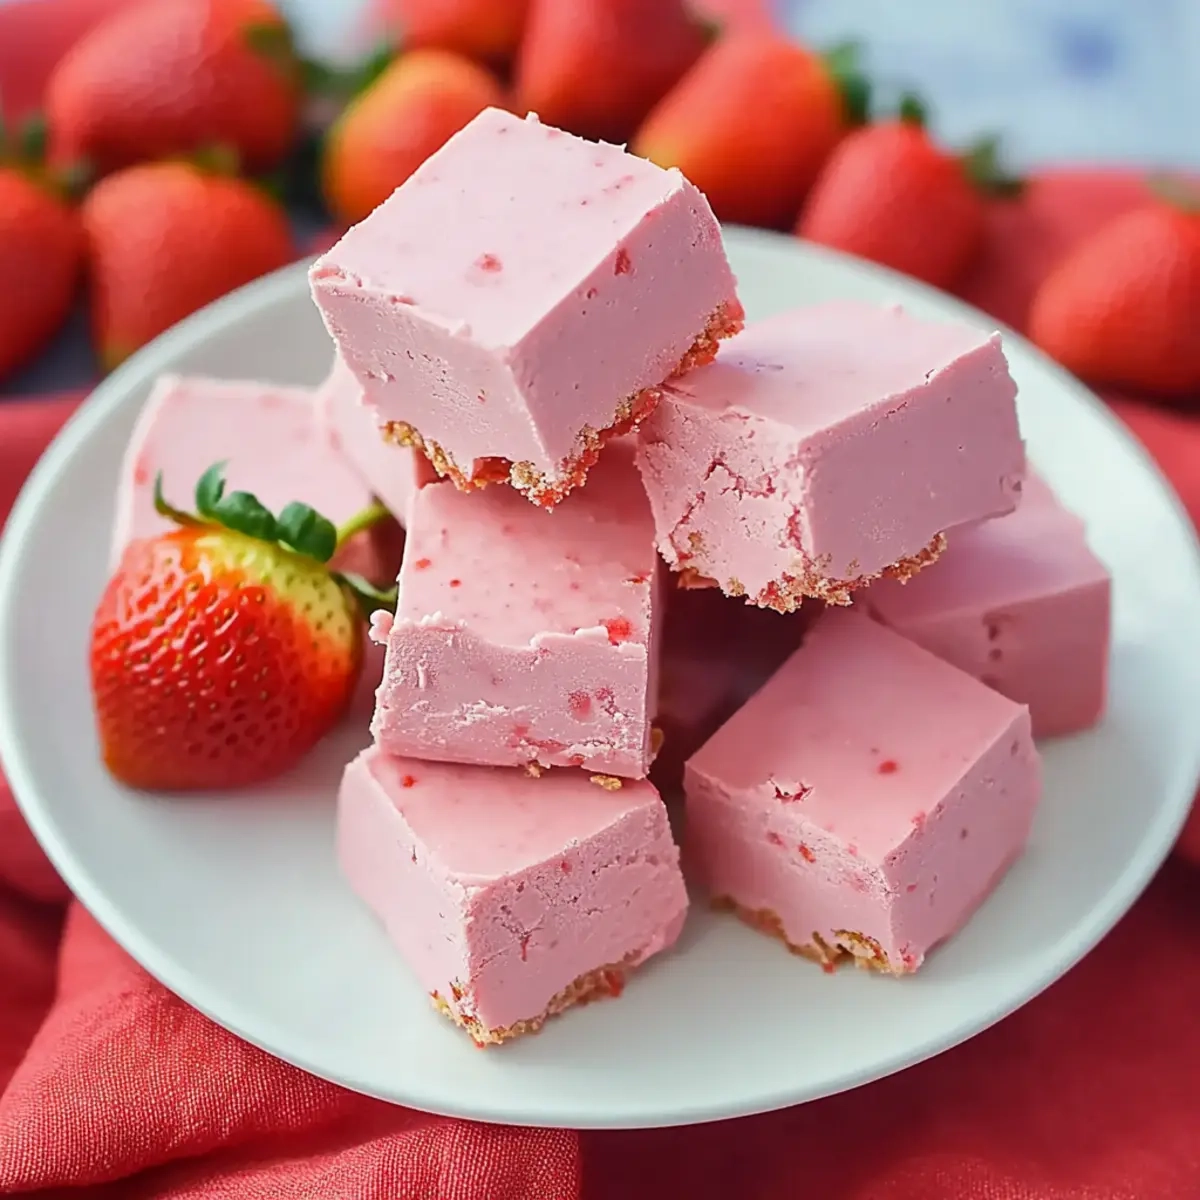
  • Its vibrant pink color makes it visually appealing, perfect for occasions where you want to impress.
  • Plus, this treat is a true crowd-pleaser, ensuring that everyone will be delighted with a fudgy piece.

Strawberry Fudge Ingredients

• Just the essentials for a delightful treat!

For the Fudge
• 12 oz white chocolate chips – a sweet base that melts beautifully and creates a rich, creamy fudge.
• 16 oz strawberry frosting – adds vibrant color and a burst of strawberry flavor, making this Strawberry Fudge Recipe a standout dessert.

How to Make Strawberry Fudge

  1. Prepare the Pan: Start by lining a 9-inch baking pan with parchment paper. This helps the fudge come out easily and ensures a smooth finish.

  2. Melt the Chocolate: Add the white chocolate chips to a microwave-safe glass bowl. Heat in the microwave for one minute, allowing the warmth to soften the chocolate.

  3. Stir and Continue Heating: Give the chocolate a good stir with a spatula. Heat it in 15-second intervals, stirring well each time until the chocolate is fully melted and smooth.

  4. Mix in the Frosting: Combine Quickly: Once melted, work quickly to stir in the can of strawberry frosting. Mix until fully incorporated; the colors and textures should blend seamlessly.

  5. Spread the Mixture: Pour the mixture into your prepared pan, using the spatula to spread it evenly. Aim for a smooth, uniform layer to ensure even setting.

  6. Chill the Fudge: Place the pan in the refrigerator for about 20 minutes or until set. Once firm, you can slice it into delightful squares and savor every bite!

Optional: Drizzle with chocolate for an extra touch of sweetness!
Exact quantities are listed in the recipe card below.

Make Ahead Options

These 2-Ingredient Strawberry Fudge treats are perfect for busy home cooks looking to save time! You can prepare the fudge mixture up to 24 hours in advance. Simply follow the recipe steps until you pour the mixture into the prepared pan, then cover the pan tightly with plastic wrap and refrigerate. This helps maintain the fudge’s vibrant color and creamy texture while preventing it from drying out. When you’re ready to serve, remove the fudge from the refrigerator, slice it into squares, and enjoy your delicious creation just as if it were freshly made. With these make-ahead tips, you’ll have a delightful dessert ready to go whenever you need it!

How to Store and Freeze Strawberry Fudge

Fridge: Keep the Strawberry Fudge in an airtight container in the fridge for up to 3 days. This helps maintain its freshness and creamy texture.

Freezer: For longer storage, wrap the fudge tightly in plastic wrap and place it in a freezer-safe container. It can last for up to 2 months in the freezer.

Thawing: When you’re ready to enjoy the fudge again, simply remove it from the freezer and let it thaw in the fridge for a few hours.

Reheating: If you’d like to soften the fudge slightly before serving, microwave it in 5-second intervals until it reaches your desired texture.

What to Serve with 2-Ingredient Strawberry Fudge?

Picture this: an indulgent sweet moment enhanced by perfect pairings that bring out the berry bliss in every bite.

  • Fresh Strawberries: Juicy and vibrant, they provide a refreshing contrast to the creamy fudge, making each bite a delightful balance.

  • Vanilla Ice Cream: The rich creaminess of vanilla ice cream complements the strawberry fudge, creating a heavenly dessert experience.

  • Chocolate Drizzle: A simple drizzle of melted chocolate adds a luxurious touch that elevates the flavor profile of your sweet treat.

  • Hot Coffee: The warmth and depth of a freshly brewed coffee can enhance the sweetness of the fudge, making for a cozy pairing.

  • Mint Leaves: Fresh mint adds a burst of freshness on the side, offering a cool note that brightens the rich flavors of the fudge.

  • Coconut Flakes: Toasted coconut sprinkles bring a tropical flair that contrasts beautifully with the sweet berry taste, creating a lovely textural element.

  • Sparkling Water: Serve with a glass of bubbly sparkling water for a refreshing palate cleanser that makes the fudge shine even brighter.

  • Chocolate-Covered Pretzels: For a playful sweet-and-salty combo, these give a delightful crunch, enhancing the texture of your indulgent moment.

Strawberry Fudge Variations

Feel free to embrace your creativity and personalize this delightful treat to suit your taste preferences!

  • Nutty Twist: Add 1 cup of chopped nuts like walnuts or almonds for a delightful crunch that complements the creamy fudge.

  • Berry Blast: Mix in 1 cup of crushed freeze-dried strawberries for an intensified strawberry flavor and an appealing texture.

  • Chocolate Lovers: Incorporate ½ cup of mini chocolate chips into the mixture before spreading it into the pan for a rich chocolatey surprise.

  • Flavored Frosting: Experiment with different frosting flavors, such as vanilla or lemon, to explore new taste profiles while maintaining that delightful creaminess.

  • Coconut Dreams: Stir in ½ cup of shredded coconut for a tropical twist that adds a chewy texture and wonderful flavor contrast.

  • Spicy Kick: Sprinkle a pinch of cayenne pepper into the mixture for those who enjoy a little heat; it adds an exciting twist to the sweetness!

  • Dairy-Free: Use dairy-free white chocolate chips and vegan frosting to create a delicious alternative that everyone can enjoy without the dairy.

  • Layered Delight: Pour half of the fudge base into the pan, let it set slightly, then spread a layer of your favorite fruit preserves before adding the remaining fudge on top for a stunning presentation!

Chef's Helpful Tips

  • When making the Strawberry Fudge Recipe, always use a microwave-safe glass bowl to melt the chocolate chips as they heat evenly.
  • A common mistake is not stirring the chocolate sufficiently between intervals, so ensure you mix well after each 15 seconds to avoid scorching.
  • To easily remove the fudge from the pan, make sure the parchment paper hangs over the edges for easy lifting once set.
  • Allow the fudge to chill for the full 20 minutes to achieve the perfect firm consistency before slicing into pieces.

2-Ingredient Strawberry Fudge Recipe FAQs

How do I choose the best white chocolate chips for this recipe?
Absolutely! When selecting white chocolate chips, look for high-quality brands with cocoa butter as one of the main ingredients; this will help ensure a smooth melt and rich flavor. Avoid options labeled as “white baking chips,” as these may contain less cocoa butter and more additives, which can affect the texture of your fudge.

How should I store leftover strawberry fudge?
For the best flavor and texture, store your strawberry fudge in an airtight container. It can sit at room temperature for up to 3 days or, better yet, keep it refrigerated for up to 1 week. Just make sure to keep it away from direct sunlight and humidity to preserve its delightful taste!

Can I freeze the strawberry fudge? What’s the best method?
Yes, you can! To freeze your strawberry fudge, first cut it into squares and lay them in a single layer on a baking sheet lined with parchment paper for about 1 hour. After they are slightly frozen, transfer them to a freezer-friendly container and separate layers with parchment paper to avoid sticking. They can be frozen for up to 3 months. When you’re ready to enjoy, simply let them thaw in the fridge or at room temperature for about 10-15 minutes.

What should I do if my fudge doesn’t set?
If your fudge doesn’t set properly, there may have been too much heat or an issue with the melting process. To troubleshoot, make sure you’re heating the chocolate in short intervals and stirring well each time to avoid overheating. If your fudge remains too soft after a full cooling period, return it to the microwave for a few seconds to gently re-melt, and then mix thoroughly before spreading again into the pan. Chill again to set properly!

Is this strawberry fudge safe for pets?
Great question! This strawberry fudge contains chocolate and frosting that are not safe for pets, particularly dogs and cats. Ensure that any leftovers are stored well out of reach of your furry friends to prevent any accidents. Always check ingredient labels for allergies, and remember to enjoy your homemade treats guilt-free!

Can I use other flavors of frosting in this recipe?
Very much so! The beauty of this easy fudge recipe lies in its adaptability. You can substitute the strawberry frosting with other flavors like vanilla, chocolate, or even peanut butter to create different variations. Just keep in mind that this might change the overall flavor and color of your final fudge!

Strawberry Fudge Recipe

Strawberry Fudge Recipe

This Strawberry Fudge Recipe is a delightful 2-ingredient dessert that’s irresistibly easy to make and tastes divine.
Print Recipe Pin Recipe
Prep Time 10 minutes mins
Cook Time 20 minutes mins
Chilling Time 20 minutes mins
Total Time 30 minutes mins
Servings: 16 squares
Course: DESSERT RECIPES
Calories: 120
Ingredients Equipment Method Nutrition Notes

Ingredients
  

Strawberry Fudge Ingredients
  • 12 oz white chocolate chips a sweet base that melts beautifully
  • 16 oz strawberry frosting adds vibrant color and a burst of flavor

Equipment

  • 9-inch baking pan
  • microwave-safe glass bowl
  • Spatula

Method
 

How to Make Strawberry Fudge
  1. Prepare the Pan: Start by lining a 9-inch baking pan with parchment paper.
  2. Melt the Chocolate: Add the white chocolate chips to a microwave-safe glass bowl. Heat in the microwave for one minute.
  3. Stir and Continue Heating: Stir with a spatula and heat in 15-second intervals until fully melted and smooth.
  4. Mix in the Frosting: Once melted, quickly stir in the can of strawberry frosting until fully combined.
  5. Spread the Mixture: Pour into the prepared pan and spread evenly.
  6. Chill the Fudge: Place in the refrigerator for about 20 minutes or until set.

Nutrition

Serving: 1squareCalories: 120kcalCarbohydrates: 18gProtein: 1gFat: 6gSaturated Fat: 3gCholesterol: 5mgSodium: 15mgPotassium: 50mgSugar: 12gCalcium: 2mg

Notes

Optional: Drizzle with chocolate for an extra touch of sweetness. Use parchment paper for easy lifting of the fudge once set.

Tried this recipe?

Let us know how it was!

Filed Under: DESSERT RECIPES

Baked Brie with Honey and Pecans

December 27, 2025 by JudyWhite Leave a Comment

There’s something truly delightful about gathering friends and family around a warm, cheesy indulgence. Picture this: the oven hums softly as a creamy brie bakes to perfection, enveloped in a golden drizzle of honey and topped with crunchy pecans and fragrant thyme. This simple yet elegant dish, Baked Brie with Honey and Pecans, bursts with flavor and is a showstopper at any gathering.

After a long week of rush-hour traffic and takeout dinners, I found myself yearning for a comforting treat that could bring everyone together without a fuss. With only 15 minutes and a handful of ingredients, this recipe transformed my ordinary evening into a cozy celebration. Whether you’re hosting a casual wine night or looking for the perfect appetizer for a holiday feast, this baked brie will never disappoint. It’s not just about taste; it’s about creating a moment to savor, one bite at a time. Let’s dive into this irresistible recipe that combines ease, flavor, and just a dash of sophistication!

Why You'll Love This Baked Brie with Honey and Pecans

  • This Baked Brie with Honey and Pecans is incredibly easy to make, requiring only 15 minutes from prep to serving.
  • The combination of creamy brie, sweet honey, and crunchy pecans makes for an explosion of flavor that you’ll crave again and again.
  • Its versatility allows for endless pairings with crackers, fruits, and meats, making it perfect for any occasion.
  • Plus, it visually impresses guests with its gooey center and beautiful toppings, making it a true centerpiece on any table.

Baked Brie with Honey and Pecans Ingredients

For the Brie
• 8 ounce brie – use a high-quality brie for the creamiest texture.
• 1/4 cup honey – opt for local honey for a unique flavor boost.
• 1/4 cup toasted pecans – toasting enhances their nutty flavor and crunch.
• 1 teaspoon fresh thyme – fresh herbs add a delightful aroma to the dish.
• Flaky sea salt – a pinch enhances all the flavors beautifully.

For Serving
• Crusty bread – slices of a rustic loaf provide the perfect base for the brie.
• Crackers – choose a variety for different textures and tastes.
• Grapes – fresh grapes add a sweet and juicy contrast to the savory cheese.
• Candied pecans – these add an extra layer of sweetness and crunch alongside.
• Pears or apples, sliced – the crispness of fruit balances the richness of the brie.
• Salami – adding a savory element, creating a delightful contrast.

This combination of ingredients for the Baked Brie with Honey and Pecans is sure to impress family and friends alike!

How to Make Baked Brie with Honey and Pecans

  1. Preheat the oven to 350°F (175°C).
    This temperature is just right for melting the brie to creamy perfection without burning it.

  2. Prepare the baking sheet.
    Gently place the brie on a baking sheet lined with parchment paper to catch any drippings. This will make cleanup a breeze!

  3. Drizzle honey over the brie.
    Let the golden honey cascade down the sides, enhancing the cheese’s flavor with its natural sweetness.

  4. Sprinkle the toasted pecans and fresh thyme on top.
    The pecans add a wonderful crunch, and the thyme infuses a fresh aroma that complements the brie beautifully.

  5. Bake for 10 minutes, or until the brie is soft.
    Keep an eye on it, and you’ll know it’s ready when it’s gooey but not fully melted—just sublime!

  6. Serve with flaky sea salt, crusty bread, crackers, grapes, candied pecans, sliced pears or apples, and salami.
    Arrange everything on a beautiful platter, inviting everyone to dig in and enjoy the deliciousness!

Optional: Drizzle a bit more honey on top just before serving for an extra touch of sweetness.
Exact quantities are listed in the recipe card below.

Make Ahead Options

These Baked Brie with Honey and Pecans are perfect for meal prep, allowing you to enjoy this elegant dish with minimal last-minute effort! You can prepare the brie with honey, pecans, and thyme up to 24 hours in advance. Simply assemble it on the baking sheet, cover it tightly with plastic wrap, and refrigerate until you’re ready to bake. This method keeps the flavors vibrant and ensures the cheese remains fresh. When you’re ready to serve, preheat the oven and bake for about 10 minutes until it’s gooey. You’ll get the same delicious results with less fuss, making this a lifesaver for busy nights or entertaining!

How to Store and Freeze Baked Brie with Honey and Pecans

Room Temperature: Keep any leftovers at room temperature for up to 2 hours to avoid spoilage. After that, promptly refrigerate to preserve freshness.

Fridge: Store leftover Baked Brie with Honey and Pecans in an airtight container for up to 3 days. Reheat gently in the oven to maintain its delightful creaminess.

Freezer: Although best enjoyed fresh, you can freeze a whole, unbaked brie for up to 2 months. Wrap tightly in plastic wrap and foil to prevent freezer burn.

Reheating: When ready to enjoy, bake in a preheated oven at 350°F (175°C) for about 10-15 minutes until warmed through. Drizzle with extra honey if desired for that fresh finish!

What to Serve with Baked Brie with Honey and Pecans?

Elevate your gathering with delightful accompaniments that perfectly complement the rich creaminess of the brie.

  • Crusty Bread: A warm, rustic loaf creates the ideal base for spreading creamy brie, enhancing each bite with satisfying texture.

  • Fresh Grapes: Their cool, juicy sweetness balances the savory richness, adding a refreshing touch that keeps your palate engaged.

  • Sliced Pears: The crispness of pears contrasts beautifully with the gooey brie, offering a burst of flavor that feels elegant and delightful.

  • Savory Salami: A slice of salami introduces a savory, meaty element that enriches the overall flavor profile, making each spoonful feel indulgent.

  • Candied Pecans: These sweet, crunchy gems not only amplify the nutty flavor of the dish but also provide a delightful textural contrast.

  • Sparkling Wine: A chilled glass of sparkling wine brightens the palate, making it a fabulous pairing for this indulgent appetizer.

Baked Brie with Honey and Pecans Variations

Let your creativity flow by customizing this delicious baked treat to suit your taste and dietary preferences!

  • Nut-Free: Swap out pecans for sunflower seeds or pumpkin seeds for a similar crunch without the nuts.
  • Herbed Delight: Experiment with different herbs like rosemary or sage to give your baked brie an aromatic twist.
  • Sweet and Spicy: Add a sprinkle of crushed red pepper flakes alongside the pecans for a surprising kick that balances the sweetness.
  • Fruit Fusion: Top with sliced figs or cranberries for a burst of seasonal flavor and a pop of color on your platter.
  • Maple Magic: Replace honey with maple syrup for a deeper, caramel-like sweetness that pairs beautifully with the brie.

For a delightful summer touch, try adding some fresh berries after baking; their natural sweetness makes the dish even more decadent.

  • Savory Spin: Lay thin slices of prosciutto on top before baking for an irresistible savory punch that complements the creamy brie.
  • Cheesy Upgrade: For extra gooeyness, add a layer of gouda or camembert beneath the brie, creating a luscious cheese blend.
  • Gluten-Free: Serve with gluten-free crackers or vegetable sticks for a wholesome, guilt-free pairing that’s perfect for any gathering.

Chef's Helpful Tips

  • When making Baked Brie with Honey and Pecans, always use a high-quality brie for the creamiest texture and best flavor.
  • Avoid overbaking by checking the cheese after 10 minutes to ensure it is soft but not fully melted for that perfect gooeyness.
  • Consider adding a sprinkle of flaky sea salt just before serving to enhance all the flavors beautifully.
  • If you’re looking to impress, try using local honey for a distinct flavor twist that your guests will love.

Baked Brie with Honey and Pecans Recipe FAQs

How do I choose the best brie for this recipe?
Absolutely! For the best results, look for a high-quality brie with a relatively soft texture. Aim for a wheel that’s free of dark spots and has a creamy, even rind. If you can, visit a local cheese shop to find artisanal options, which can often offer a more robust flavor.

How should I store leftover Baked Brie with Honey and Pecans?
After you indulge in this delightful treat, store any leftovers in an airtight container in the fridge, where they will stay fresh for up to 3 days. Just remember to reheat it gently in the oven at 350°F (175°C) for about 10 minutes to restore its creamy texture!

Can I freeze Baked Brie with Honey and Pecans?
Yes, you can! Wrap your unbaked brie tightly in plastic wrap and then in foil to prevent freezer burn. It will keep well in the freezer for up to 2 months. When you’re ready to enjoy it, simply bake it straight from the freezer at 350°F (175°C) for about 10-15 minutes, or until warmed through. Drizzle some extra honey before serving for that wonderful fresh flavor!

What if I want to make this dish gluten-free?
Very! For a gluten-free version, simply swap out the crusty bread and crackers for gluten-free alternatives. There are plenty of excellent gluten-free crackers available at most grocery stores. Fresh fruits, nuts, and just a hint of flaky sea salt will keep everything fresh and delicious!

How can I enhance the flavors of my Baked Brie with Honey and Pecans?
To take this irresistible dish up a notch, consider infusing additional flavors. You might sprinkle in some crushed red pepper flakes for a little heat or use a flavored honey (like lavender or chili-infused) for a interesting twist. Just remember to adjust your toppings to balance flavors so each one shines through beautifully!

Baked Brie with Honey and Pecans

Baked Brie with Honey and Pecans

This Baked Brie with Honey and Pecans is a stunning and delicious appetizer perfect for any gathering.
Print Recipe Pin Recipe
Prep Time 15 minutes mins
Cook Time 10 minutes mins
Total Time 25 minutes mins
Servings: 8 servings
Course: Snacks & Appetizers
Calories: 250
Ingredients Equipment Method Nutrition Notes

Ingredients
  

For the Brie
  • 8 ounces brie use a high-quality brie for the creamiest texture
  • 1/4 cup honey opt for local honey for a unique flavor boost
  • 1/4 cup toasted pecans toasting enhances their nutty flavor and crunch
  • 1 teaspoon fresh thyme fresh herbs add a delightful aroma
  • flaky sea salt a pinch enhances all flavors beautifully
For Serving
  • crusty bread slices of a rustic loaf provide the perfect base
  • crackers choose a variety for different textures and tastes
  • grapes fresh grapes add a sweet and juicy contrast
  • candied pecans these add an extra layer of sweetness and crunch
  • pears or apples, sliced the crispness balances the richness of brie
  • salami adding a savory element

Equipment

  • Oven
  • Baking sheet
  • parchment paper

Method
 

How to Make Baked Brie with Honey and Pecans
  1. Preheat the oven to 350°F (175°C).
  2. Prepare the baking sheet by placing the brie on parchment paper.
  3. Drizzle honey over the brie.
  4. Sprinkle the toasted pecans and fresh thyme on top.
  5. Bake for 10 minutes, or until the brie is soft.
  6. Serve with flaky sea salt, crusty bread, crackers, grapes, candied pecans, sliced pears or apples, and salami.

Nutrition

Serving: 1servingCalories: 250kcalCarbohydrates: 20gProtein: 6gFat: 18gSaturated Fat: 10gPolyunsaturated Fat: 2gMonounsaturated Fat: 4gCholesterol: 30mgSodium: 200mgPotassium: 150mgFiber: 1gSugar: 12gVitamin A: 400IUVitamin C: 2mgCalcium: 150mgIron: 0.5mg

Notes

Use a high-quality brie and check for doneness after 10 minutes, ensuring it's soft but not fully melted. Adding a sprinkle of flaky sea salt enhances all flavors beautifully.

Tried this recipe?

Let us know how it was!

Filed Under: SNACKS & APPETIZERS

Baked Brie with Honey and Pecans

December 27, 2025 by JudyWhite Leave a Comment

There’s something truly delightful about gathering friends and family around a warm, cheesy indulgence. Picture this: the oven hums softly as a creamy brie bakes to perfection, enveloped in a golden drizzle of honey and topped with crunchy pecans and fragrant thyme. This simple yet elegant dish, Baked Brie with Honey and Pecans, bursts with flavor and is a showstopper at any gathering.

After a long week of rush-hour traffic and takeout dinners, I found myself yearning for a comforting treat that could bring everyone together without a fuss. With only 15 minutes and a handful of ingredients, this recipe transformed my ordinary evening into a cozy celebration. Whether you’re hosting a casual wine night or looking for the perfect appetizer for a holiday feast, this baked brie will never disappoint. It’s not just about taste; it’s about creating a moment to savor, one bite at a time. Let’s dive into this irresistible recipe that combines ease, flavor, and just a dash of sophistication!

Why You'll Love This Baked Brie with Honey and Pecans

  • This Baked Brie with Honey and Pecans is incredibly easy to make, requiring only 15 minutes from prep to serving.
  • The combination of creamy brie, sweet honey, and crunchy pecans makes for an explosion of flavor that you’ll crave again and again.
  • Its versatility allows for endless pairings with crackers, fruits, and meats, making it perfect for any occasion.
  • Plus, it visually impresses guests with its gooey center and beautiful toppings, making it a true centerpiece on any table.

Baked Brie with Honey and Pecans Ingredients

For the Brie
• 8 ounce brie – use a high-quality brie for the creamiest texture.
• 1/4 cup honey – opt for local honey for a unique flavor boost.
• 1/4 cup toasted pecans – toasting enhances their nutty flavor and crunch.
• 1 teaspoon fresh thyme – fresh herbs add a delightful aroma to the dish.
• Flaky sea salt – a pinch enhances all the flavors beautifully.

For Serving
• Crusty bread – slices of a rustic loaf provide the perfect base for the brie.
• Crackers – choose a variety for different textures and tastes.
• Grapes – fresh grapes add a sweet and juicy contrast to the savory cheese.
• Candied pecans – these add an extra layer of sweetness and crunch alongside.
• Pears or apples, sliced – the crispness of fruit balances the richness of the brie.
• Salami – adding a savory element, creating a delightful contrast.

This combination of ingredients for the Baked Brie with Honey and Pecans is sure to impress family and friends alike!

How to Make Baked Brie with Honey and Pecans

  1. Preheat the oven to 350°F (175°C).
    This temperature is just right for melting the brie to creamy perfection without burning it.

  2. Prepare the baking sheet.
    Gently place the brie on a baking sheet lined with parchment paper to catch any drippings. This will make cleanup a breeze!

  3. Drizzle honey over the brie.
    Let the golden honey cascade down the sides, enhancing the cheese’s flavor with its natural sweetness.

  4. Sprinkle the toasted pecans and fresh thyme on top.
    The pecans add a wonderful crunch, and the thyme infuses a fresh aroma that complements the brie beautifully.

  5. Bake for 10 minutes, or until the brie is soft.
    Keep an eye on it, and you’ll know it’s ready when it’s gooey but not fully melted—just sublime!

  6. Serve with flaky sea salt, crusty bread, crackers, grapes, candied pecans, sliced pears or apples, and salami.
    Arrange everything on a beautiful platter, inviting everyone to dig in and enjoy the deliciousness!

Optional: Drizzle a bit more honey on top just before serving for an extra touch of sweetness.
Exact quantities are listed in the recipe card below.

Baked Brie with Honey and Pecans Variations

Let your creativity flow by customizing this delicious baked treat to suit your taste and dietary preferences!

  • Nut-Free: Swap out pecans for sunflower seeds or pumpkin seeds for a similar crunch without the nuts.
  • Herbed Delight: Experiment with different herbs like rosemary or sage to give your baked brie an aromatic twist.
  • Sweet and Spicy: Add a sprinkle of crushed red pepper flakes alongside the pecans for a surprising kick that balances the sweetness.
  • Fruit Fusion: Top with sliced figs or cranberries for a burst of seasonal flavor and a pop of color on your platter.
  • Maple Magic: Replace honey with maple syrup for a deeper, caramel-like sweetness that pairs beautifully with the brie.

For a delightful summer touch, try adding some fresh berries after baking; their natural sweetness makes the dish even more decadent.

  • Savory Spin: Lay thin slices of prosciutto on top before baking for an irresistible savory punch that complements the creamy brie.
  • Cheesy Upgrade: For extra gooeyness, add a layer of gouda or camembert beneath the brie, creating a luscious cheese blend.
  • Gluten-Free: Serve with gluten-free crackers or vegetable sticks for a wholesome, guilt-free pairing that’s perfect for any gathering.

What to Serve with Baked Brie with Honey and Pecans?

Elevate your gathering with delightful accompaniments that perfectly complement the rich creaminess of the brie.

  • Crusty Bread: A warm, rustic loaf creates the ideal base for spreading creamy brie, enhancing each bite with satisfying texture.

  • Fresh Grapes: Their cool, juicy sweetness balances the savory richness, adding a refreshing touch that keeps your palate engaged.

  • Sliced Pears: The crispness of pears contrasts beautifully with the gooey brie, offering a burst of flavor that feels elegant and delightful.

  • Savory Salami: A slice of salami introduces a savory, meaty element that enriches the overall flavor profile, making each spoonful feel indulgent.

  • Candied Pecans: These sweet, crunchy gems not only amplify the nutty flavor of the dish but also provide a delightful textural contrast.

  • Sparkling Wine: A chilled glass of sparkling wine brightens the palate, making it a fabulous pairing for this indulgent appetizer.

Make Ahead Options

These Baked Brie with Honey and Pecans are perfect for meal prep, allowing you to enjoy this elegant dish with minimal last-minute effort! You can prepare the brie with honey, pecans, and thyme up to 24 hours in advance. Simply assemble it on the baking sheet, cover it tightly with plastic wrap, and refrigerate until you’re ready to bake. This method keeps the flavors vibrant and ensures the cheese remains fresh. When you’re ready to serve, preheat the oven and bake for about 10 minutes until it’s gooey. You’ll get the same delicious results with less fuss, making this a lifesaver for busy nights or entertaining!

How to Store and Freeze Baked Brie with Honey and Pecans

Room Temperature: Keep any leftovers at room temperature for up to 2 hours to avoid spoilage. After that, promptly refrigerate to preserve freshness.

Fridge: Store leftover Baked Brie with Honey and Pecans in an airtight container for up to 3 days. Reheat gently in the oven to maintain its delightful creaminess.

Freezer: Although best enjoyed fresh, you can freeze a whole, unbaked brie for up to 2 months. Wrap tightly in plastic wrap and foil to prevent freezer burn.

Reheating: When ready to enjoy, bake in a preheated oven at 350°F (175°C) for about 10-15 minutes until warmed through. Drizzle with extra honey if desired for that fresh finish!

Chef's Helpful Tips

  • When making Baked Brie with Honey and Pecans, always use a high-quality brie for the creamiest texture and best flavor.
  • Avoid overbaking by checking the cheese after 10 minutes to ensure it is soft but not fully melted for that perfect gooeyness.
  • Consider adding a sprinkle of flaky sea salt just before serving to enhance all the flavors beautifully.
  • If you’re looking to impress, try using local honey for a distinct flavor twist that your guests will love.

Baked Brie with Honey and Pecans Recipe FAQs

How do I choose the best brie for this recipe?
Absolutely! For the best results, look for a high-quality brie with a relatively soft texture. Aim for a wheel that’s free of dark spots and has a creamy, even rind. If you can, visit a local cheese shop to find artisanal options, which can often offer a more robust flavor.

How should I store leftover Baked Brie with Honey and Pecans?
After you indulge in this delightful treat, store any leftovers in an airtight container in the fridge, where they will stay fresh for up to 3 days. Just remember to reheat it gently in the oven at 350°F (175°C) for about 10 minutes to restore its creamy texture!

Can I freeze Baked Brie with Honey and Pecans?
Yes, you can! Wrap your unbaked brie tightly in plastic wrap and then in foil to prevent freezer burn. It will keep well in the freezer for up to 2 months. When you’re ready to enjoy it, simply bake it straight from the freezer at 350°F (175°C) for about 10-15 minutes, or until warmed through. Drizzle some extra honey before serving for that wonderful fresh flavor!

What if I want to make this dish gluten-free?
Very! For a gluten-free version, simply swap out the crusty bread and crackers for gluten-free alternatives. There are plenty of excellent gluten-free crackers available at most grocery stores. Fresh fruits, nuts, and just a hint of flaky sea salt will keep everything fresh and delicious!

How can I enhance the flavors of my Baked Brie with Honey and Pecans?
To take this irresistible dish up a notch, consider infusing additional flavors. You might sprinkle in some crushed red pepper flakes for a little heat or use a flavored honey (like lavender or chili-infused) for a interesting twist. Just remember to adjust your toppings to balance flavors so each one shines through beautifully!

Baked Brie with Honey and Pecans

Baked Brie with Honey and Pecans

This Baked Brie with Honey and Pecans is a delightful and easy appetizer that combines warm, creamy brie cheese with sweet honey and crunchy pecans.
Print Recipe Pin Recipe
Prep Time 15 minutes mins
Cook Time 10 minutes mins
Total Time 25 minutes mins
Servings: 8 servings
Course: Snacks & Appetizers
Calories: 250
Ingredients Equipment Method Nutrition Notes

Ingredients
  

For the Brie
  • 8 ounces brie use a high-quality brie for the creamiest texture
  • 1/4 cup honey opt for local honey for a unique flavor boost
  • 1/4 cup toasted pecans toasting enhances their nutty flavor and crunch
  • 1 teaspoon fresh thyme fresh herbs add a delightful aroma to the dish
  • flaky sea salt a pinch enhances all the flavors beautifully
For Serving
  • crusty bread slices of a rustic loaf provide the perfect base for the brie
  • crackers choose a variety for different textures and tastes
  • grapes fresh grapes add a sweet and juicy contrast to the savory cheese
  • candied pecans these add an extra layer of sweetness and crunch alongside
  • pears or apples, sliced the crispness of fruit balances the richness of the brie
  • salami adding a savory element, creating a delightful contrast

Equipment

  • Oven
  • Baking sheet
  • parchment paper

Method
 

Instructions
  1. Preheat the oven to 350°F (175°C).
  2. Prepare the baking sheet by placing the brie on a baking sheet lined with parchment paper.
  3. Drizzle honey over the brie.
  4. Sprinkle toasted pecans and fresh thyme on top.
  5. Bake for 10 minutes, or until the brie is soft.
  6. Serve with flaky sea salt, crusty bread, crackers, grapes, candied pecans, sliced pears or apples, and salami.

Nutrition

Serving: 1servingCalories: 250kcalCarbohydrates: 12gProtein: 7gFat: 20gSaturated Fat: 10gPolyunsaturated Fat: 2gMonounsaturated Fat: 5gCholesterol: 40mgSodium: 200mgPotassium: 150mgFiber: 1gSugar: 8gVitamin A: 500IUVitamin C: 5mgCalcium: 200mgIron: 1mg

Notes

For an extra touch of sweetness, drizzle a bit more honey on top just before serving.

Tried this recipe?

Let us know how it was!

Filed Under: SNACKS & APPETIZERS

Strawberry Brownies with White Chocolate Ganache

December 27, 2025 by JudyWhite Leave a Comment

There’s something irresistible about a warm brownie, especially when it’s infused with the luscious essence of strawberries. Recently, I found myself craving a dessert that felt decadent yet refreshing, and that’s when I decided to whip up these Strawberry Brownies with White Chocolate Ganache. The moment the brownies start baking, your kitchen will fill with an intoxicating aroma that hints at the sweet surprise awaiting you.

This recipe is a delightful twist on a classic, with strawberries providing a burst of flavor and a vibrant color that elevates it to something truly special. Whether you’re satisfying your own sweet tooth or impressing guests at a gathering, these brownies are an easy yet elegant solution. They take just over an hour from start to finish, making them perfect for a cozy weekend treat or an unexpected weeknight indulgence. Let me guide you through these simple steps to create a dessert that’s not just a treat but a memory in the making!

Why You'll Love This Strawberry Brownies with White Chocolate Ganache

  • These Strawberry Brownies with White Chocolate Ganache are incredibly easy to make, allowing you to whip up a delightful dessert without the fuss.
  • The explosion of strawberry flavor combined with the richness of white chocolate creates a taste sensation that no one can resist.
  • Their eye-catching pink color and beautiful garnish make them a stunning centerpiece for any gathering, guaranteed to impress your guests.
  • Plus, you’ll love that they come together in under an hour, making them an ideal choice for a spontaneous sweet craving or as a special treat.

Strawberry Brownies with White Chocolate Ganache Ingredients

For the Brownies
• 1 lb fresh or frozen strawberries – these provide a vibrant flavor and color to your brownies.
• 1/4 cup granulated sugar – this helps to sweeten the berry mixture for a jam-like consistency.
• 1/2 tsp pure vanilla extract – adds a lovely depth of flavor to the brownies.
• 1 lemon zest and juice – the citrus brightens up the sweetness and balances the flavors.
• a pinch kosher salt – enhances the overall sweetness of the dessert.
• 10 Tbsp unsalted butter – brings richness to the brownies, ensuring they’re moist and decadent.
• 6 oz white chocolate melts – contributes to the creamy texture and irresistibly sweet flavor.
• 1 large egg – binds the ingredients together and lends structure to the brownies.
• 1 large egg yolk – adds moisture and richness for a fudgier brownie.
• 1 1/4 cups granulated sugar – the base sweetness that complements the strawberry flavor.
• 1/4 cup freeze-dried strawberries – optional, for an intensified strawberry flavor and a fun twist.
• 1 cup strawberry puree – infuses the brownies with a fresh, fruity taste.
• 1 tsp pure vanilla extract – to enhance the sweet notes in these delightful brownies.
• 2 cups all-purpose flour – provides structure and stability to the brownies.
• 1 tsp kosher salt – balances sweetness and brings out the flavors.
• 1/2 tsp baking powder – helps the brownies rise and achieve that perfect chewy texture.
• drops pink gel food coloring – for a playful, vibrant hue that’s perfect for presentation.

For the White Chocolate Ganache
• 8 oz white chocolate melts – the star of the show, creating a silky smooth finish for the brownies.
• 2/3 cup heavy cream – ensures a rich, creamy ganache that complements the strawberries perfectly.

For Garnishing
• 4 to 5 fresh strawberries – thinly sliced, optional but highly recommended for a beautiful finish.
• freeze-dried strawberries – crushed into powder for serving, adding a crunchy element and extra strawberry flavor.

These Strawberry Brownies with White Chocolate Ganache are guaranteed to please your palate and create memorable moments with every bite!

How to Make Strawberry Brownies with White Chocolate Ganache

  1. Cook the Strawberries: In a medium saucepan over medium heat, combine strawberries, sugar, vanilla, and lemon juice. Stir occasionally until strawberries soften and sugar dissolves, about 3-4 minutes. Simmer until thickened, about 12-15 minutes, then stir in lemon zest and a pinch of salt. Remove from heat.

  2. Puree the Mixture: Transfer the cooked strawberry mixture to a blender and puree until smooth. Allow it to cool completely.

  3. Preheat the Oven: Arrange a rack in the lower third of the oven and preheat to 325°F. Line a 9″ square baking pan with parchment paper to prevent sticking.

  4. Melt the Chocolate and Butter: In a medium heatproof bowl, microwave butter and chocolate melts in 30-second increments, stirring in between until melted and smooth, about 90 seconds total.

  5. Mix the Brownie Base: In the bowl of a stand mixer with a whisk attachment, beat together the egg, egg yolk, sugar, and optional freeze-dried strawberries on medium-high speed until pale and fluffy. Add vanilla and 1 cup of the strawberry puree; reserve the remaining puree. Gradually mix in the melted chocolate until combined.

  6. Combine Dry Ingredients: Switch to the paddle attachment. Sift in flour, salt, and baking powder, and mix on medium-low speed until just combined. Add food coloring a few drops at a time, being careful not to overmix. Pour the batter into the prepared pan.

  7. Bake the Brownies: Bake until edges are lightly browned and a tester comes out clean, about 35-40 minutes. Let them cool in the pan.

  8. Prepare the Ganache: In a heatproof bowl, microwave white chocolate melts and heavy cream in 30-second increments, stirring until melted and smooth, about 2 minutes total.

  9. Flavor the Ganache: Stir in 1/4 cup of the reserved strawberry puree into the ganache. Let it cool slightly.

  10. Assemble the Brownies: Spread the ganache over the cooled brownies. Top with thinly sliced strawberries and optional crushed freeze-dried strawberries for a delightful finish.

Optional: For an extra touch, sprinkle powdered freeze-dried strawberries on top for added flavor and crunch.
Exact quantities are listed in the recipe card below.

Make Ahead Options

These Strawberry Brownies with White Chocolate Ganache are ideal for busy cooks who want to simplify dessert prep! You can prepare the strawberry jam mixture up to 24 hours in advance; simply refrigerate it in an airtight container to keep it fresh and flavorful. Additionally, the brownie batter can be made ahead and stored in the fridge for up to 3 days. When you’re ready to bake, pour the chilled batter into the prepared pan and continue with the baking instructions as usual. For the ganache, it’s best to prepare this the day you plan to serve, ensuring it maintains its silky texture. Just reheat slightly if it firms up! Enjoy the convenience of these make-ahead tips for delightful, fuss-free dessert moments!

How to Store and Freeze Strawberry Brownies with White Chocolate Ganache

Fridge: Store leftover brownies in an airtight container in the fridge for up to 3 days to maintain freshness and flavor.

Freezer: If you want to keep them longer, freeze brownies wrapped tightly in plastic wrap and then in foil for up to 2 months.

Thawing: To enjoy your frozen brownies, thaw them in the fridge overnight before serving. You can also gently reheat them in the microwave for a warm, melty treat.

Reheating: For best results, reheat brownies in the microwave in 10-second increments until warmed through, but avoid overheating to keep them fudgy.

Strawberry Brownies Variations

Feel free to add your own twist to these delightful brownies with a few creative adjustments!

  • Gluten-Free: Substitute all-purpose flour with a 1:1 gluten-free blend for a wonderful and tempting option.

  • Dairy-Free: Use dairy-free chocolate melts and coconut oil instead of butter for a similar taste without dairy.

  • Nutty Addition: Fold in 1/2 cup of chopped nuts, like walnuts or almonds, for a deliciously crunchy texture.

  • Minty Fresh: Add 1/2 tsp of peppermint extract to the brownie batter for a refreshing minty flavor that brightens up every bite. Just imagine that initial coolness combined with the sweet strawberry notes!

  • Spicy Kick: For a subtle heat, mix in a pinch of cayenne pepper or red pepper flakes into the brownie batter. This unexpected twist creates a delightful contrast with the sweetness of strawberries.

  • Swirl in Peanut Butter: Create a marbled effect by stirring 1/2 cup of peanut butter into the brownie batter before baking for a rich, nutty contrast.

  • Chocolate Ganache Variants: Consider using dark or milk chocolate melts instead of white chocolate for a different flavor profile. The richness is simply divine!

  • Fruit Fusion: Experiment by adding other fruits like raspberries or cherries to the batter, giving it an exciting new flavor to enjoy with every bite. Their tangy notes will play beautifully with the strawberries.

What to Serve with Strawberry Brownies with White Chocolate Ganache?

Indulging in these brownies is a sweet experience, but pairing them with the right accompaniments elevates your dessert moment to pure bliss.

  • Vanilla Ice Cream: The creamy sweetness of vanilla ice cream pairs beautifully, balancing the tartness of the strawberries.
  • Fresh Strawberries: Slicing a few fresh strawberries on the side enhances the fruity flavor while adding a lovely, juicy element.
  • Whipped Cream: A dollop of lightly sweetened whipped cream adds a light, airy texture that complements the richness of the brownies perfectly.
  • Mint Sprigs: Garnishing with fresh mint leaves introduces a refreshing element, cutting through the sweetness and adding visual appeal.
  • Chocolate Sauce: Drizzling warm chocolate sauce over the brownies creates a double-chocolate experience that any chocolate lover will adore.
  • Sweet Tea: A chilled glass of sweet tea brings a calming contrast, making this a perfect pair for a summer gathering.
  • Sparkling Water: For a refreshing drink option, sparkling water with a squeeze of lemon can cleanse the palate beautifully between bites.
  • Cheesecake Bites: Offering a variety of mini desserts, like cheesecake bites, rounds out the dessert table with creamy decadence.
  • Coconut Macaroons: Their chewy texture and tropical flavor can provide an exciting contrast to your brownies, making each bite unique.
  • Coffee or Espresso: A rich cup of coffee or a shot of espresso rounds out this indulgence, sharpening the flavors of both the brownies and the strawberries.

Chef's Helpful Tips

  • To enhance the flavor of your Strawberry Brownies with White Chocolate Ganache, ensure you use ripe, fresh strawberries for the best taste, but frozen strawberries will work in a pinch.
  • When melting the butter and chocolate, do it in short bursts in the microwave and stir well between each burst to avoid burning.
  • Avoid overmixing the batter once you add the dry ingredients, as this can lead to dense brownies instead of a light and chewy texture.
  • Keep an eye on the baking time; every oven is different, so check for doneness a few minutes early by inserting a toothpick to ensure the brownies remain moist and fudgy inside.

Strawberry Brownies with White Chocolate Ganache Recipe FAQs

How do I choose ripe strawberries for this recipe?
Absolutely! Look for strawberries that are bright red, plump, and fragrant. Avoid any with dark spots or signs of mold, as these indicate overripeness. Fresh strawberries will yield the best flavor for your Strawberry Brownies with White Chocolate Ganache.

What’s the best way to store leftover brownies?
Very! Store leftover brownies in an airtight container in the fridge for up to 3 days. If you need to keep them fresher longer, consider freezing them. Slice the brownies first for easy serving later, and store them wrapped tightly in plastic wrap followed by foil.

Can I freeze my brownies, and if so, how?
Yes, indeed! To freeze your Strawberry Brownies with White Chocolate Ganache, wrap them individually to prevent freezer burn. Start by wrapping each brownie in plastic wrap, then place them in a freezer-safe bag or container. They’ll stay fresh for up to 2 months. When you’re ready to enjoy them, simply thaw in the fridge overnight.

I find that my brownies sometimes turn out dense. What can cause this?
Great question! Dense brownies can occur if the batter is overmixed after adding the dry ingredients. To avoid this, mix just until combined and be careful not to overbeat. Additionally, make sure you’re measuring your flour correctly — too much flour can lead to dense results. Always fluff up the flour in its container and spoon it into your measuring cup for accurate measurement.

Are these brownies okay for people with nut allergies?
Yes, these Strawberry Brownies with White Chocolate Ganache are nut-free, making them suitable for most who have nut allergies. Just ensure that your chocolate melts do not contain any nuts. If you’re serving these to someone with specific dietary restrictions, do double-check the labels for any potential cross-contamination.

How can I make these brownies gluten-free?
If you’d like to make these brownies gluten-free, simply substitute the all-purpose flour with a gluten-free flour blend. I recommend using one that includes xanthan gum for better texture. Just remember to check that all other ingredients, especially baking powder and chocolate melts, are also gluten-free. Following these steps, you’ll have a delightful treat that everyone can enjoy!

Strawberry Brownies with White Chocolate Ganache

Strawberry Brownies with White Chocolate Ganache

Indulge in these Strawberry Brownies with White Chocolate Ganache for a delightful twist on a dessert classic.
Print Recipe Pin Recipe
Prep Time 30 minutes mins
Cook Time 40 minutes mins
Cooling Time 10 minutes mins
Total Time 1 hour hr 20 minutes mins
Servings: 12 brownies
Course: DESSERT RECIPES
Cuisine: American
Calories: 350
Ingredients Equipment Method Nutrition Notes

Ingredients
  

For the Brownies
  • 1 lb fresh or frozen strawberries these provide a vibrant flavor and color to your brownies.
  • 1/4 cup granulated sugar this helps to sweeten the berry mixture for a jam-like consistency.
  • 1/2 tsp pure vanilla extract adds a lovely depth of flavor to the brownies.
  • 1 whole lemon zest and juice the citrus brightens up the sweetness and balances the flavors.
  • a pinch kosher salt enhances the overall sweetness of the dessert.
  • 10 Tbsp unsalted butter brings richness to the brownies, ensuring they’re moist and decadent.
  • 6 oz white chocolate melts contributes to the creamy texture and irresistibly sweet flavor.
  • 1 large egg binds the ingredients together and lends structure to the brownies.
  • 1 large egg yolk adds moisture and richness for a fudgier brownie.
  • 1 1/4 cups granulated sugar the base sweetness that complements the strawberry flavor.
  • 1/4 cup freeze-dried strawberries optional, for an intensified strawberry flavor and a fun twist.
  • 1 cup strawberry puree infuses the brownies with a fresh, fruity taste.
  • 1 tsp pure vanilla extract to enhance the sweet notes in these delightful brownies.
  • 2 cups all-purpose flour provides structure and stability to the brownies.
  • 1 tsp kosher salt balances sweetness and brings out the flavors.
  • 1/2 tsp baking powder helps the brownies rise and achieve that perfect chewy texture.
  • drops pink gel food coloring for a playful, vibrant hue that's perfect for presentation.
For the White Chocolate Ganache
  • 8 oz white chocolate melts the star of the show, creating a silky smooth finish for the brownies.
  • 2/3 cup heavy cream ensures a rich, creamy ganache that complements the strawberries perfectly.
For Garnishing
  • 4 to 5 fresh strawberries thinly sliced, optional but highly recommended for a beautiful finish.
  • freeze-dried strawberries crushed into powder for serving, adding a crunchy element and extra strawberry flavor.

Equipment

  • medium saucepan
  • blender
  • stand mixer
  • Heatproof bowl
  • 9" square baking pan
  • parchment paper

Method
 

How to Make Strawberry Brownies with White Chocolate Ganache
  1. In a medium saucepan over medium heat, combine strawberries, sugar, vanilla, and lemon juice. Stir occasionally until strawberries soften and sugar dissolves, about 3-4 minutes. Simmer until thickened, about 12-15 minutes, then stir in lemon zest and a pinch of salt. Remove from heat.
  2. Transfer the cooked strawberry mixture to a blender and puree until smooth. Allow it to cool completely.
  3. Arrange a rack in the lower third of the oven and preheat to 325°F. Line a 9" square baking pan with parchment paper to prevent sticking.
  4. In a medium heatproof bowl, microwave butter and chocolate melts in 30-second increments, stirring in between until melted and smooth, about 90 seconds total.
  5. In the bowl of a stand mixer with a whisk attachment, beat together the egg, egg yolk, sugar, and optional freeze-dried strawberries on medium-high speed until pale and fluffy. Add vanilla and 1 cup of the strawberry puree; reserve the remaining puree. Gradually mix in the melted chocolate until combined.
  6. Switch to the paddle attachment. Sift in flour, salt, and baking powder, and mix on medium-low speed until just combined. Add food coloring a few drops at a time, being careful not to overmix. Pour the batter into the prepared pan.
  7. Bake until edges are lightly browned and a tester comes out clean, about 35-40 minutes. Let them cool in the pan.
  8. In a heatproof bowl, microwave white chocolate melts and heavy cream in 30-second increments, stirring until melted and smooth, about 2 minutes total.
  9. Stir in 1/4 cup of the reserved strawberry puree into the ganache. Let it cool slightly.
  10. Spread the ganache over the cooled brownies. Top with thinly sliced strawberries and optional crushed freeze-dried strawberries for a delightful finish.

Nutrition

Serving: 1brownieCalories: 350kcalCarbohydrates: 45gProtein: 4gFat: 18gSaturated Fat: 10gPolyunsaturated Fat: 1gMonounsaturated Fat: 7gCholesterol: 50mgSodium: 150mgPotassium: 200mgFiber: 2gSugar: 25gVitamin A: 300IUVitamin C: 15mgCalcium: 50mgIron: 1mg

Notes

To enhance the flavor of your Strawberry Brownies with White Chocolate Ganache, ensure you use ripe, fresh strawberries for the best taste. Avoid overmixing the batter once you add the dry ingredients. Keep an eye on the baking time; every oven is different.

Tried this recipe?

Let us know how it was!

Filed Under: DESSERT RECIPES

Autumn Harvest Grain Salad with Cranberries

December 27, 2025 by JudyWhite Leave a Comment

As the leaves turn vibrant shades of amber and gold, I cannot help but smile at the thought of cozy gatherings and hearty meals. Recently, I discovered the ultimate fall dish: an Autumn Harvest Grain Salad with Cranberries that brings all the seasonal flavors to life. This salad isn’t just a feast for the eyes with its colorful medley; it also boasts an irresistible combination of nuttiness from farro and quinoa, balanced with the sweetness of roasted butternut squash and tangy cranberries.

Picture this: you’re enjoying a lazy weekend, the aroma of warm spices and roasted veggies wafting through your kitchen. This salad can be the centerpiece of your table, whether it’s just you or a gathering of friends. You’ll find it not only satisfies cravings but also nourishes the soul. It’s packed with goodness yet so easy to whip up, making it the perfect solution for those tired of the same old fast-food routine. Join me as we dive into this delightful recipe that makes autumn not just a season, but a celebration on your plate!

Why You'll Love This Autumn Harvest Grain Salad with Cranberries

  • This Autumn Harvest Grain Salad with Cranberries is incredibly easy to make, allowing you to enjoy a wholesome meal without spending hours in the kitchen.
  • The flavors come together beautifully, with the nuttiness of farro and quinoa complemented by the sweetness of butternut squash and cranberries, making every bite a delight.
  • Its versatility means it can be served as a main dish or a side, fitting perfectly into any fall gathering or holiday feast.
  • Visually, the vibrant colors of the salad are sure to impress your guests, making it a stunning centerpiece on your table.

Autumn Harvest Grain Salad Ingredients

Here’s everything you need to create your delicious Autumn Harvest Grain Salad with Cranberries!

For the Grains
• Quinoa – a protein-packed base that adds a lovely texture.
• Farro – brings a chewy, nutty flavor to the mix.

For the Salad
• Butternut squash – adds a sweet, caramelized touch when roasted.
• Kale – provides a nutritious crunch; its earthy flavor complements the sweetness beautifully.
• Dried cranberries – offer a burst of tartness that balances the sweetness of squash.

For the Toppings
• Walnuts – add a delightful crunch and healthy fats.
• Feta cheese – contributes a rich, salty note that ties all the flavors together.

For the Dressing
• Olive oil – enhances the salad’s flavor while keeping things light.
• Maple syrup – a touch of natural sweetness that elevates the dish.
• Salt – to taste; it brings out the natural flavors in all the ingredients.
• Pepper – adds a hint of spice to round out the dish.

How to Make Autumn Harvest Grain Salad with Cranberries

  1. Cook the Grains: Start by cooking the quinoa and farro according to the package instructions. This usually takes about 15-20 minutes; you’ll want them fluffy and tender.

  2. Sauté the Squash: In a large skillet, heat 2 tablespoons of olive oil over medium heat. Add the diced butternut squash and sauté for about 15 minutes, or until it’s tender and lightly caramelized.

  3. Combine Ingredients: In a large mixing bowl, combine the cooked quinoa, farro, sautéed butternut squash, chopped kale, dried cranberries, walnuts, and crumbled feta cheese. Stir gently to mix everything together beautifully.

  4. Make the Dressing: In a small bowl, whisk together the remaining tablespoon of olive oil, maple syrup, salt, and pepper. Drizzle this dressing over your salad mixture and toss well to combine all the flavors.

Optional: Add a sprinkle of pumpkin seeds for an extra crunch!
Exact quantities are listed in the recipe card below.

Autumn Harvest Grain Salad Variations

Feel free to get creative and customize your salad to match your taste and dietary needs!

  • Vegan: Omit the feta cheese or substitute with a plant-based cheese for a delightful creamy touch.
    Add in some avocado for a rich texture and added creaminess. It blends beautifully with the other flavors.

  • Nut-Free: Replace walnuts with sunflower seeds or pumpkin seeds for a satisfying crunch without nuts.
    These seeds not only add texture but are also packed with nutrients, making your salad even healthier.

  • Spicy Kick: Incorporate diced jalapeños or red pepper flakes for a bit of heat to balance the sweetness.
    This twist will delight your taste buds and warm your heart as the flavors dance together!

  • Quinoa Swap: Use brown rice or couscous in place of quinoa for variety in texture and flavor.
    Both substitutes can contribute an exciting new twist while keeping the meal hearty and filling.

  • Dried Fruit Boost: Mix in chopped dates or apricots instead of cranberries to add unique sweetness and chewiness.
    These fruits offer a delicious surprise in every bite and enhance the overall flavor profile of the salad.

  • Herbal Infusion: Add fresh herbs like mint or parsley to bring bright, refreshing notes to your salad.
    Herbs not only add flavor but also elevate the visual appeal, making your dish even more inviting.

  • Grilled Veggies: Swap sautéed butternut squash for grilled zucchini or eggplant for a smoky flavor contrast.
    Grilled veggies add depth and character to your salad, bringing the essence of a summer barbecue to fall.

  • Zesty Dressing: Experiment with adding lemon juice or apple cider vinegar to the dressing for an extra zing.
    This simple addition will brighten the overall flavor, creating a lively contrast with the other ingredients.

What to Serve with Autumn Harvest Grain Salad with Cranberries?

The vibrant flavors of this salad can create a delightful autumn-inspired meal.

  • Roasted Chicken: Serve succulent roasted chicken alongside to enhance the grain salad’s earthy tones, making for a satisfying meal. The juicy meat complements the sweetness of the butternut squash beautifully.

  • Herb-Infused Rice: A light and aromatic herb-infused rice provides a fluffy texture that pairs wonderfully with the chewy grains, creating a lovely contrast in every bite. Garnish with fresh herbs for an elevated touch.

  • Garlic Bread: Crispy, golden garlic bread is perfect for soaking up the sweet and tangy dressing. The crunchiness adds a welcome texture that balances the softness of the salad.

  • Apple Cider Vinaigrette: Drizzle a delightful apple cider vinaigrette over the salad. It brightens the flavors while echoing the seasonal theme; think of it as a fresh twist that ties everything together.

  • Grilled Shrimp: Add marinated grilled shrimp for a protein boost that complements the nutty flavors and gives an upscale feel to your meal. The subtle sweetness of the shrimp pairs nicely with the salad’s cranberries and maple syrup.

  • Pumpkin Pie: For dessert, serve a slice of pumpkin pie. The spiced flavors and creamy texture provide a comforting end to your meal, evoking the warmth and nostalgia of fall.

  • Chilled White Wine: A chilled glass of Sauvignon Blanc offers a crisp finish to your autumn feast while enhancing the flavors of the salad with its bright acidity.

  • Mixed Green Salad: A light mixed green salad drizzled with a zingy vinaigrette can balance the heartiness of the grain salad, offering a refreshing crunch. Top with sunflower seeds for extra nutrition and texture.

How to Store and Freeze Autumn Harvest Grain Salad

Fridge: Store any leftover Autumn Harvest Grain Salad with Cranberries in an airtight container in the fridge for up to 3 days.

Freezer: Freezing isn’t recommended for this salad, as the texture of the grains and veggies may suffer. For best flavor and quality, enjoy it fresh!

Reheating: If you’d like to warm it up slightly, heat in the microwave for 30 seconds to 1 minute, but serve chilled or at room temperature for the best taste experience.

Serving Tip: For optimal freshness, consider adding any delicate ingredients like feta or walnuts just before serving rather than mixing them in before storage.

Make Ahead Options

These Autumn Harvest Grain Salad with Cranberries are ideal for meal prep, ensuring you can enjoy delicious, healthy meals even on your busiest days! You can cook the quinoa and farro up to 3 days in advance, refrigerating them in airtight containers to maintain freshness. Additionally, the butternut squash can be roasted and stored for up to 24 hours before assembly. To keep the kale crisp and vibrant, chop it and store it separately. When you’re ready to serve, simply combine all the prepped ingredients, drizzle with the dressing, and toss gently to bring everything together. This prep-ahead method helps you savor restaurant-quality flavors with minimal effort while saving time during the week!

Chef's Helpful Tips

  • When preparing the Autumn Harvest Grain Salad with Cranberries, ensure that your quinoa and farro are cooked to the correct texture for the best mouthfeel; overcooking them can lead to a mushy salad.
  • For even cooking, dice the butternut squash into uniform pieces and consider pre-roasting for added caramelization and flavor depth.
  • Incorporating the chopped kale right at the end of mixing will help maintain its vibrant color and crunch, avoiding any wilting.
  • Finally, serve the salad at room temperature to allow the flavors to meld beautifully without losing the freshness of the ingredients.

Autumn Harvest Grain Salad with Cranberries Recipe FAQs

How do I choose the right butternut squash?
Absolutely! When selecting butternut squash, look for ones that are heavy for their size and have a smooth, unblemished skin. The color should be a creamy beige or tan with no dark spots. If you see any bruises or blemishes, opt for another squash, as these can indicate spoilage.

How should I store leftovers of the Autumn Harvest Grain Salad?
For sure! Store any leftover Autumn Harvest Grain Salad with Cranberries in an airtight container in the fridge. It will stay fresh for up to 3 days! Just remember to keep any delicate toppings like feta or walnuts separate until you’re ready to enjoy leftovers, as they can lose their crunch.

Can I freeze this salad?
Not really! Freezing the Autumn Harvest Grain Salad is not recommended, as the texture of the grains and vegetables may turn mushy once thawed. For the best flavor and quality, it’s best enjoyed fresh. If you have leftover grains, consider freezing them separately to use in another dish!

What if my quinoa turns out mushy?
Very good question! If your quinoa ends up mushy, it may have been overcooked or had too much water. Aim to cook quinoa for about 15 minutes, and use a 2:1 ratio of water to quinoa. For fluffy quinoa, let it sit covered for a few minutes after cooking and then fluff it with a fork before adding it to the salad.

Are there any allergy considerations for this salad?
Certainly! This salad contains several ingredients that could trigger allergies, including walnuts and feta cheese. If you’re preparing this for guests, consider asking about nut allergies beforehand. You can easily substitute the walnuts with seeds, such as sunflower or pumpkin seeds, and use a dairy-free cheese or entirely omit it for a vegan version.

Autumn Harvest Grain Salad with Cranberries

Autumn Harvest Grain Salad with Cranberries

This Autumn Harvest Grain Salad with Cranberries combines nutty grains, roasted butternut squash, and sweet cranberries for a colorful and nutritious fall dish.
Print Recipe Pin Recipe
Prep Time 15 minutes mins
Cook Time 30 minutes mins
Total Time 45 minutes mins
Servings: 4 servings
Course: LUNCH RECIPES
Cuisine: American
Calories: 360
Ingredients Equipment Method Nutrition Notes

Ingredients
  

For the Grains
  • 1 cup Quinoa a protein-packed seed that provides a nutty flavor
  • 1 cup Farro adds a chewy texture and nutty taste; consider using barley as a substitute
For the Salad
  • 2 cups Butternut Squash brings sweetness and creaminess when roasted; can swap with sweet potatoes
  • 2 cups Kale offers a nutritious crunch; can use spinach or arugula
  • 1 cup Dried Cranberries adds a burst of sweetness and tartness; can try dried cherries
  • 1/2 cup Walnuts provides healthy fats and a satisfying crunch; pecans or almonds can be alternatives
  • 1/2 cup Feta Cheese adds a salty, creamy element; can use goat cheese or ricotta
For the Dressing
  • 3 tablespoons Olive Oil essential for a rich mouthfeel; avocado oil works well too
  • 2 tablespoons Maple Syrup sweetens the salad naturally; honey can be a substitute if not vegan
  • 1 teaspoon Salt enhances flavors; consider using sea salt
  • 1/2 teaspoon Pepper adds a kick; fresh cracked black pepper elevates the dish

Equipment

  • Large skillet
  • Large Bowl
  • Small bowl

Method
 

How to Make Autumn Harvest Grain Salad with Cranberries
  1. Cook the Grains: Start by cooking the quinoa and farro according to the package instructions. This usually takes about 15 minutes for quinoa and 30 minutes for farro, until they're tender and fluffy.
  2. Sauté the Squash: In a large skillet, heat 2 tablespoons of olive oil over medium heat. Add the diced butternut squash and cook for about 15 minutes, stirring occasionally, until tender and slightly caramelized.
  3. Combine Ingredients: In a large bowl, mix the cooked quinoa, farro, sautéed butternut squash, chopped kale, dried cranberries, walnuts, and crumbled feta cheese. Toss gently to combine.
  4. Prepare the Dressing: In a small bowl, whisk together the remaining tablespoon of olive oil, maple syrup, salt, and pepper. Drizzle this over the salad mix and toss well to coat all ingredients evenly.

Nutrition

Serving: 1cupCalories: 360kcalCarbohydrates: 45gProtein: 10gFat: 16gSaturated Fat: 3gPolyunsaturated Fat: 2gMonounsaturated Fat: 9gCholesterol: 15mgSodium: 225mgPotassium: 400mgFiber: 7gSugar: 8gVitamin A: 500IUVitamin C: 35mgCalcium: 100mgIron: 2mg

Notes

For optimal freshness, add any delicate ingredients like feta or walnuts just before serving rather than mixing them in before storage.

Tried this recipe?

Let us know how it was!

Filed Under: LUNCH RECIPES

Christmas Appetizer Bites with Pesto and Sundried Tomatoes

December 27, 2025 by JudyWhite Leave a Comment

There’s a special joy that envelops the kitchen during the holiday season, and nothing brings that festive spirit to life quite like a stunning appetizer. Imagine the delightful crunch of miniature phyllo shells giving way to a creamy, flavorful filling—these Christmas Appetizer Bites with Pesto and Sundried Tomatoes are your ticket to holiday cheer!

I first whipped these up for a casual gathering, and you would have thought I’d served gourmet fare; they disappeared faster than I could reach for seconds. With each bite, the tang of creamy cheeses mingles beautifully with the herby pesto and the rich, sun-dried tomatoes, striking the perfect balance of flavor.

Best of all, they’re a breeze to prepare! In just 25 minutes, you can create a crowd-pleaser that will put your holiday hosting on the map. Whether it’s a cozy gathering or a festive soirée, these bites will become a staple on your appetizer table. Let’s dive into the recipe and get your holiday vibes rolling!

Why You'll Love This Christmas Appetizer Bites with Pesto and Sundried Tomatoes

  • These Christmas Appetizer Bites with Pesto and Sundried Tomatoes are incredibly easy to whip up, making them perfect for busy holiday gatherings.
  • The combination of creamy cheese, vibrant pesto, and sun-dried tomatoes delivers a burst of flavor that everyone will rave about.
  • Their elegant presentation in mini phyllo shells adds a touch of sophistication, ensuring your table looks festive and inviting.
  • Plus, with just 25 minutes from start to finish, you can spend less time in the kitchen and more time enjoying the company of friends and family.

Christmas Appetizer Bites Ingredients

Here are the delightful ingredients that come together to make your Christmas Appetizer Bites with Pesto and Sundried Tomatoes a festive hit!

For the Filling

  • Reduced fat cream cheese – provides a creamy base that keeps the bites light and delicious.
  • Plain non-fat Greek yogurt – adds a tangy flavor and creaminess without packing on the calories.
  • Prepared pesto – infuses a burst of herby goodness, ensuring an aromatic and flavorful filling.
  • Diced olive-oil packed sundried tomatoes – contributes a rich, sweet flavor and chewy texture; remember to pat them dry for the best consistency!
  • Freshly grated parmesan cheese – offers a savory note that complements the other ingredients beautifully.

For Assembly

  • Mini phyllo shells – these crispy shells provide the perfect crunch and elegant presentation for your bites!

For Garnish

  • Fresh basil or parsley – not just for decoration, fresh herbs elevate the richness with a vibrant touch.

With these ingredients, you’re all set to create stunning Christmas Appetizer Bites with Pesto and Sundried Tomatoes that will impress your guests and keep the holiday spirit alive!

How to Make Christmas Appetizer Bites

  1. Preheat your oven to 350°F (175°C). This will ensure a perfectly cooked and golden outside on your delicious bites. A warm oven is essential for those crispy phyllo shells!

  2. Mix the cream cheese, Greek yogurt, pesto, sundried tomatoes, and parmesan cheese in a mixing bowl until smooth and creamy. This flavorful filling is the heart of your Christmas Appetizer Bites, so blend until it’s well combined!

  3. Spoon the creamy mixture into the mini phyllo shells, being careful not to overfill. Each shell should be generously filled but not overflowing—there’s a little room for that tasty topping!

  4. Bake the filled shells on a baking sheet for about 8 minutes, or until they are golden brown. Watch closely for a perfect crunch—it’s the key to delightful textures in every bite!

  5. Garnish your beautiful bites with fresh basil or parsley just before serving. Not only does it add color, but it also elevates the flavor profile—your guests will adore the presentation!

Optional: Serve with a side of additional pesto for dipping!

Exact quantities are listed in the recipe card below.

What to Serve with Christmas Appetizer Bites with Pesto and Sundried Tomatoes?

These delightful bites are perfect for a festive gathering, and they deserve a beautiful spread to accompany them.

  • Crispy Green Salad: A fresh salad with mixed greens and a lemon vinaigrette will balance the creamy richness of the bites, adding a burst of freshness.

  • Garlic Butter Breadsticks: The warm, buttery flavor of breadsticks provides a lovely contrast to the appetizer’s crunch. Perfect for dipping or savoring alongside!

  • Roasted Vegetable Platter: A colorful mix of seasonal veggies brings warmth and earthiness, enhancing the herbal notes of your Christmas Appetizer Bites.

  • Creamy Potato Gratin: This cheesy, comforting dish delivers a satisfying texture and richness, making it an indulgent pairing while complementing the bite-sized treats perfectly.

  • Cheese and Charcuterie Board: Offer a variety of cheeses and cured meats to create an elegant board where guests can mix and match with the appetizers.

  • Sparkling Wine: A bubbly drink complements the flavors and brings a celebratory touch to the evening while refreshing the palate between bites.

A well-rounded meal that embraces both rich and light elements will make your gathering unforgettable!

Make Ahead Options

These Christmas Appetizer Bites with Pesto and Sundried Tomatoes are perfect for meal prep, allowing you to enjoy the festive season without the last-minute kitchen rush. You can prepare the creamy filling up to 24 hours in advance; simply mix the cream cheese, Greek yogurt, pesto, sundried tomatoes, and parmesan cheese and refrigerate it in an airtight container. If you prefer, you can fill the mini phyllo shells with the mixture up to 3 hours ahead of time—just keep them covered to maintain their crispiness. When you’re ready to impress your guests, bake the filled shells for about 8 minutes, garnish with fresh herbs, and serve. This way, you’ll have all the deliciousness and none of the stress!

Christmas Appetizer Bites Variations

Feel free to mix and match to make these bites uniquely yours—each change adds a delightful twist!

  • Vegan: Substitute cream cheese and Greek yogurt with vegan cream cheese and coconut yogurt for a plant-based delight.

  • Spicy Kick: Add a pinch of red pepper flakes or a dash of hot sauce to the filling for a warm, spicy finish. This twist brings an exciting heat that will leave taste buds tingling!

  • Herb Boost: Experiment with different fresh herbs like dill or chives to elevate flavor profiles. Fresh herbs can provide an aromatic touch that refreshes each bite!

  • Cheese Variation: Swap parmesan for crumbled feta for a tangy explosion to contrast the sweetness of sundried tomatoes. The combination of flavors will entice and surprise your guests!

  • Nutty Crunch: Sprinkle toasted pine nuts or chopped walnuts on top before baking to add a delicious crunch and depth. The extra texture will make each bite more memorable!

  • Mediterranean Twist: Include chopped kalamata olives and roasted red peppers in the filling for a Mediterranean flair. These savory additions create a vibrant taste that dances on the palate!

  • Dairy-Free: Use dairy-free cheese and yogurt alternatives to craft a delicious version for those with dietary restrictions. This way, everyone can enjoy the festive flavor!

  • Smoky Flavor: Add smoked paprika or a teaspoon of liquid smoke to the mixture for an intriguing smoky essence. This twist opens new flavor dimensions that take your bites to the next level!

Storage Tips for Christmas Appetizer Bites with Pesto and Sundried Tomatoes

Room Temperature: Enjoy your Christmas Appetizer Bites at room temperature for up to 2 hours for optimal flavor and texture.

Fridge: Store leftovers in an airtight container in the fridge for up to 3 days. Reheat in the oven for about 5 minutes at 350°F (175°C) for crispy bites.

Freezer: For longer storage, freeze unbaked filled phyllo shells by placing them on a baking sheet, covering, and freezing for up to 1 month. Bake them straight from the freezer for about 10 minutes.

Reheating: To reheat, bake previously cooked bites in the oven at 350°F (175°C) for 5-7 minutes until warmed through and crispy.

Chef's Helpful Tips

  • For the Christmas Appetizer Bites with Pesto and Sundried Tomatoes, ensure that your cream cheese is at room temperature for easier blending to achieve a smooth filling.
  • A common mistake is overfilling the phyllo shells, so be sure to fill them generously but leave a small space to prevent overflowing during baking.
  • When mixing the filling, combine the ingredients well to avoid any lumps which can affect the texture of your bites.
  • Keep an eye on the baking time, as phyllo can brown quickly; it’s best to check for doneness a minute or two before the 8-minute mark.

Christmas Appetizer Bites with Pesto and Sundried Tomatoes Recipe FAQs

How do I choose the right sundried tomatoes?
Absolutely! When selecting sundried tomatoes, look for ones that are packed in olive oil as they tend to have a richer flavor and softer texture. Avoid tomatoes with dark spots or excessive wrinkles as these could indicate they are over-dried or not fresh. The best picks are plump and vibrant in color, giving your appetizer bites a burst of flavor.

How should I store leftover Christmas Appetizer Bites?
Very good question! Store your leftovers in an airtight container in the refrigerator for up to 3 days. Simply reheat them in the oven at 350°F (175°C) for about 5 minutes to maintain that crunchy texture and flavorful filling. Just make sure they don’t sit too long at room temperature—up to 2 hours is perfect for serving.

Can I freeze the Christmas Appetizer Bites?
Of course! For the best results, freeze the unbaked filled phyllo shells. Place them on a baking sheet and cover with plastic wrap until completely frozen, about 2 hours. Once frozen, transfer them to a zip-top freezer bag for up to 1 month. No need to thaw; just bake frozen bites at 350°F (175°C) for about 10 minutes. You’ll have fresh, crispy appetizers ready in no time!

What if my filling is too thick or lumpy?
Great concern! If your filling is thick or lumpy, add a splash of milk or cream to loosen it up. Mix thoroughly until smooth. If lumps persist, consider using an electric mixer for a creamy consistency. This ensures a wonderful mouthfeel in every bite, making those holiday flavors pop!

Are these suitable for someone with dairy allergies?
A worthy consideration! This recipe does contain dairy from cream cheese, Greek yogurt, and parmesan. However, you can absolutely substitute these with dairy-free alternatives. Look for plant-based cream cheese (like cashew or almond), a dairy-free yogurt, and nutritional yeast for a cheesy flavor. Just keep in mind that the texture and taste might vary, but they can still be delicious!

How do I ensure my phyllo shells stay crispy?
A perfect question! To keep your mini phyllo shells crispy, avoid overfilling, as excess filling can lead to sogginess. You can also bake them a bit longer if you want extra crispiness, just monitor them closely. A good rule of thumb is to check around the 6-minute mark to whisk them away once they’re a beautiful golden brown. Enjoy your culinary adventure!

Christmas Appetizer Bites with Pesto and Sundried Tomatoes

Christmas Appetizer Bites with Pesto and Sundried Tomatoes

Delightful Christmas Appetizer Bites with Pesto and Sundried Tomatoes bring festive cheer to your table.
Print Recipe Pin Recipe
Prep Time 25 minutes mins
Cook Time 8 minutes mins
Total Time 33 minutes mins
Servings: 12 bites
Course: Snacks & Appetizers
Calories: 120
Ingredients Equipment Method Nutrition Notes

Ingredients
  

For the Filling
  • 8 oz reduced fat cream cheese softened
  • 1 cup plain non-fat Greek yogurt
  • 1/2 cup prepared pesto
  • 1/2 cup diced olive-oil packed sundried tomatoes pat dry
  • 1/4 cup freshly grated parmesan cheese
For Assembly
  • 24 pieces mini phyllo shells
For Garnish
  • 1/4 cup fresh basil or parsley for decoration

Equipment

  • Mixing bowl
  • Baking sheet
  • Oven

Method
 

How to Make Christmas Appetizer Bites
  1. Preheat your oven to 350°F (175°C) for crispy phyllo shells.
  2. Mix the cream cheese, Greek yogurt, pesto, sundried tomatoes, and parmesan cheese in a mixing bowl until smooth and creamy.
  3. Spoon the creamy mixture into the mini phyllo shells, being careful not to overfill.
  4. Bake the filled shells on a baking sheet for about 8 minutes, or until golden brown.
  5. Garnish your bites with fresh basil or parsley just before serving.

Nutrition

Serving: 2bitesCalories: 120kcalCarbohydrates: 10gProtein: 5gFat: 8gSaturated Fat: 3gPolyunsaturated Fat: 1gMonounsaturated Fat: 4gCholesterol: 20mgSodium: 150mgPotassium: 120mgFiber: 1gSugar: 1gVitamin A: 200IUVitamin C: 2mgCalcium: 80mgIron: 1mg

Notes

For best results, ensure cream cheese is at room temperature and avoid overfilling phyllo shells. Check baking time closely as phyllo can brown quickly.

Tried this recipe?

Let us know how it was!

Filed Under: SNACKS & APPETIZERS

Christmas Appetizer Bites with Pesto and Sundried Tomatoes

December 27, 2025 by JudyWhite Leave a Comment

There’s a special joy that envelops the kitchen during the holiday season, and nothing brings that festive spirit to life quite like a stunning appetizer. Imagine the delightful crunch of miniature phyllo shells giving way to a creamy, flavorful filling—these Christmas Appetizer Bites with Pesto and Sundried Tomatoes are your ticket to holiday cheer!

I first whipped these up for a casual gathering, and you would have thought I’d served gourmet fare; they disappeared faster than I could reach for seconds. With each bite, the tang of creamy cheeses mingles beautifully with the herby pesto and the rich, sun-dried tomatoes, striking the perfect balance of flavor.

Best of all, they’re a breeze to prepare! In just 25 minutes, you can create a crowd-pleaser that will put your holiday hosting on the map. Whether it’s a cozy gathering or a festive soirée, these bites will become a staple on your appetizer table. Let’s dive into the recipe and get your holiday vibes rolling!

Why You'll Love This Christmas Appetizer Bites with Pesto and Sundried Tomatoes

  • These Christmas Appetizer Bites with Pesto and Sundried Tomatoes are incredibly easy to whip up, making them perfect for busy holiday gatherings.
  • The combination of creamy cheese, vibrant pesto, and sun-dried tomatoes delivers a burst of flavor that everyone will rave about.
  • Their elegant presentation in mini phyllo shells adds a touch of sophistication, ensuring your table looks festive and inviting.
  • Plus, with just 25 minutes from start to finish, you can spend less time in the kitchen and more time enjoying the company of friends and family.

Christmas Appetizer Bites Ingredients

Here are the delightful ingredients that come together to make your Christmas Appetizer Bites with Pesto and Sundried Tomatoes a festive hit!

For the Filling

  • Reduced fat cream cheese – provides a creamy base that keeps the bites light and delicious.
  • Plain non-fat Greek yogurt – adds a tangy flavor and creaminess without packing on the calories.
  • Prepared pesto – infuses a burst of herby goodness, ensuring an aromatic and flavorful filling.
  • Diced olive-oil packed sundried tomatoes – contributes a rich, sweet flavor and chewy texture; remember to pat them dry for the best consistency!
  • Freshly grated parmesan cheese – offers a savory note that complements the other ingredients beautifully.

For Assembly

  • Mini phyllo shells – these crispy shells provide the perfect crunch and elegant presentation for your bites!

For Garnish

  • Fresh basil or parsley – not just for decoration, fresh herbs elevate the richness with a vibrant touch.

With these ingredients, you’re all set to create stunning Christmas Appetizer Bites with Pesto and Sundried Tomatoes that will impress your guests and keep the holiday spirit alive!

How to Make Christmas Appetizer Bites

  1. Preheat your oven to 350°F (175°C). This will ensure a perfectly cooked and golden outside on your delicious bites. A warm oven is essential for those crispy phyllo shells!

  2. Mix the cream cheese, Greek yogurt, pesto, sundried tomatoes, and parmesan cheese in a mixing bowl until smooth and creamy. This flavorful filling is the heart of your Christmas Appetizer Bites, so blend until it’s well combined!

  3. Spoon the creamy mixture into the mini phyllo shells, being careful not to overfill. Each shell should be generously filled but not overflowing—there’s a little room for that tasty topping!

  4. Bake the filled shells on a baking sheet for about 8 minutes, or until they are golden brown. Watch closely for a perfect crunch—it’s the key to delightful textures in every bite!

  5. Garnish your beautiful bites with fresh basil or parsley just before serving. Not only does it add color, but it also elevates the flavor profile—your guests will adore the presentation!

Optional: Serve with a side of additional pesto for dipping!

Exact quantities are listed in the recipe card below.

Make Ahead Options

These Christmas Appetizer Bites with Pesto and Sundried Tomatoes are perfect for meal prep, allowing you to enjoy the festive season without the last-minute kitchen rush. You can prepare the creamy filling up to 24 hours in advance; simply mix the cream cheese, Greek yogurt, pesto, sundried tomatoes, and parmesan cheese and refrigerate it in an airtight container. If you prefer, you can fill the mini phyllo shells with the mixture up to 3 hours ahead of time—just keep them covered to maintain their crispiness. When you’re ready to impress your guests, bake the filled shells for about 8 minutes, garnish with fresh herbs, and serve. This way, you’ll have all the deliciousness and none of the stress!

What to Serve with Christmas Appetizer Bites with Pesto and Sundried Tomatoes?

These delightful bites are perfect for a festive gathering, and they deserve a beautiful spread to accompany them.

  • Crispy Green Salad: A fresh salad with mixed greens and a lemon vinaigrette will balance the creamy richness of the bites, adding a burst of freshness.

  • Garlic Butter Breadsticks: The warm, buttery flavor of breadsticks provides a lovely contrast to the appetizer’s crunch. Perfect for dipping or savoring alongside!

  • Roasted Vegetable Platter: A colorful mix of seasonal veggies brings warmth and earthiness, enhancing the herbal notes of your Christmas Appetizer Bites.

  • Creamy Potato Gratin: This cheesy, comforting dish delivers a satisfying texture and richness, making it an indulgent pairing while complementing the bite-sized treats perfectly.

  • Cheese and Charcuterie Board: Offer a variety of cheeses and cured meats to create an elegant board where guests can mix and match with the appetizers.

  • Sparkling Wine: A bubbly drink complements the flavors and brings a celebratory touch to the evening while refreshing the palate between bites.

A well-rounded meal that embraces both rich and light elements will make your gathering unforgettable!

Christmas Appetizer Bites Variations

Feel free to mix and match to make these bites uniquely yours—each change adds a delightful twist!

  • Vegan: Substitute cream cheese and Greek yogurt with vegan cream cheese and coconut yogurt for a plant-based delight.

  • Spicy Kick: Add a pinch of red pepper flakes or a dash of hot sauce to the filling for a warm, spicy finish. This twist brings an exciting heat that will leave taste buds tingling!

  • Herb Boost: Experiment with different fresh herbs like dill or chives to elevate flavor profiles. Fresh herbs can provide an aromatic touch that refreshes each bite!

  • Cheese Variation: Swap parmesan for crumbled feta for a tangy explosion to contrast the sweetness of sundried tomatoes. The combination of flavors will entice and surprise your guests!

  • Nutty Crunch: Sprinkle toasted pine nuts or chopped walnuts on top before baking to add a delicious crunch and depth. The extra texture will make each bite more memorable!

  • Mediterranean Twist: Include chopped kalamata olives and roasted red peppers in the filling for a Mediterranean flair. These savory additions create a vibrant taste that dances on the palate!

  • Dairy-Free: Use dairy-free cheese and yogurt alternatives to craft a delicious version for those with dietary restrictions. This way, everyone can enjoy the festive flavor!

  • Smoky Flavor: Add smoked paprika or a teaspoon of liquid smoke to the mixture for an intriguing smoky essence. This twist opens new flavor dimensions that take your bites to the next level!

Storage Tips for Christmas Appetizer Bites with Pesto and Sundried Tomatoes

Room Temperature: Enjoy your Christmas Appetizer Bites at room temperature for up to 2 hours for optimal flavor and texture.

Fridge: Store leftovers in an airtight container in the fridge for up to 3 days. Reheat in the oven for about 5 minutes at 350°F (175°C) for crispy bites.

Freezer: For longer storage, freeze unbaked filled phyllo shells by placing them on a baking sheet, covering, and freezing for up to 1 month. Bake them straight from the freezer for about 10 minutes.

Reheating: To reheat, bake previously cooked bites in the oven at 350°F (175°C) for 5-7 minutes until warmed through and crispy.

Chef's Helpful Tips

  • For the Christmas Appetizer Bites with Pesto and Sundried Tomatoes, ensure that your cream cheese is at room temperature for easier blending to achieve a smooth filling.
  • A common mistake is overfilling the phyllo shells, so be sure to fill them generously but leave a small space to prevent overflowing during baking.
  • When mixing the filling, combine the ingredients well to avoid any lumps which can affect the texture of your bites.
  • Keep an eye on the baking time, as phyllo can brown quickly; it’s best to check for doneness a minute or two before the 8-minute mark.

Christmas Appetizer Bites with Pesto and Sundried Tomatoes Recipe FAQs

How do I choose the right sundried tomatoes?
Absolutely! When selecting sundried tomatoes, look for ones that are packed in olive oil as they tend to have a richer flavor and softer texture. Avoid tomatoes with dark spots or excessive wrinkles as these could indicate they are over-dried or not fresh. The best picks are plump and vibrant in color, giving your appetizer bites a burst of flavor.

How should I store leftover Christmas Appetizer Bites?
Very good question! Store your leftovers in an airtight container in the refrigerator for up to 3 days. Simply reheat them in the oven at 350°F (175°C) for about 5 minutes to maintain that crunchy texture and flavorful filling. Just make sure they don’t sit too long at room temperature—up to 2 hours is perfect for serving.

Can I freeze the Christmas Appetizer Bites?
Of course! For the best results, freeze the unbaked filled phyllo shells. Place them on a baking sheet and cover with plastic wrap until completely frozen, about 2 hours. Once frozen, transfer them to a zip-top freezer bag for up to 1 month. No need to thaw; just bake frozen bites at 350°F (175°C) for about 10 minutes. You’ll have fresh, crispy appetizers ready in no time!

What if my filling is too thick or lumpy?
Great concern! If your filling is thick or lumpy, add a splash of milk or cream to loosen it up. Mix thoroughly until smooth. If lumps persist, consider using an electric mixer for a creamy consistency. This ensures a wonderful mouthfeel in every bite, making those holiday flavors pop!

Are these suitable for someone with dairy allergies?
A worthy consideration! This recipe does contain dairy from cream cheese, Greek yogurt, and parmesan. However, you can absolutely substitute these with dairy-free alternatives. Look for plant-based cream cheese (like cashew or almond), a dairy-free yogurt, and nutritional yeast for a cheesy flavor. Just keep in mind that the texture and taste might vary, but they can still be delicious!

How do I ensure my phyllo shells stay crispy?
A perfect question! To keep your mini phyllo shells crispy, avoid overfilling, as excess filling can lead to sogginess. You can also bake them a bit longer if you want extra crispiness, just monitor them closely. A good rule of thumb is to check around the 6-minute mark to whisk them away once they’re a beautiful golden brown. Enjoy your culinary adventure!

Christmas Appetizer Bites with Pesto and Sundried Tomatoes

Christmas Appetizer Bites with Pesto and Sundried Tomatoes

Delightful Christmas Appetizer Bites with Pesto and Sundried Tomatoes bring festive cheer to your table.
Print Recipe Pin Recipe
Prep Time 25 minutes mins
Cook Time 8 minutes mins
Total Time 33 minutes mins
Servings: 12 bites
Course: Snacks & Appetizers
Calories: 120
Ingredients Equipment Method Nutrition Notes

Ingredients
  

For the Filling
  • 8 oz reduced fat cream cheese softened
  • 1 cup plain non-fat Greek yogurt
  • 1/2 cup prepared pesto
  • 1/2 cup diced olive-oil packed sundried tomatoes pat dry
  • 1/4 cup freshly grated parmesan cheese
For Assembly
  • 24 pieces mini phyllo shells
For Garnish
  • 1/4 cup fresh basil or parsley for decoration

Equipment

  • Mixing bowl
  • Baking sheet
  • Oven

Method
 

How to Make Christmas Appetizer Bites
  1. Preheat your oven to 350°F (175°C) for crispy phyllo shells.
  2. Mix the cream cheese, Greek yogurt, pesto, sundried tomatoes, and parmesan cheese in a mixing bowl until smooth and creamy.
  3. Spoon the creamy mixture into the mini phyllo shells, being careful not to overfill.
  4. Bake the filled shells on a baking sheet for about 8 minutes, or until golden brown.
  5. Garnish your bites with fresh basil or parsley just before serving.

Nutrition

Serving: 2bitesCalories: 120kcalCarbohydrates: 10gProtein: 5gFat: 8gSaturated Fat: 3gPolyunsaturated Fat: 1gMonounsaturated Fat: 4gCholesterol: 20mgSodium: 150mgPotassium: 120mgFiber: 1gSugar: 1gVitamin A: 200IUVitamin C: 2mgCalcium: 80mgIron: 1mg

Notes

For best results, ensure cream cheese is at room temperature and avoid overfilling phyllo shells. Check baking time closely as phyllo can brown quickly.

Tried this recipe?

Let us know how it was!

Filed Under: SNACKS & APPETIZERS

Candy Cane Bagels

December 27, 2025 by JudyWhite Leave a Comment

There’s a special kind of joy that comes from creating something delightfully unexpected in the kitchen. As the winter months kick in and cozy vibes fill the air, I found myself drawn to a unique project: Candy Cane Bagels. Picture this: gorgeous, swirled bagels that are not only visually stunning but also irresistibly delicious! I stumbled upon this whimsical recipe while preparing for a festive gathering, and it’s become a festive favorite in my home.

You may wonder how a bagel can evoke the playful spirit of the season. These vibrant, hand-crafted twists bring a cheerful touch to any breakfast table or brunch spread. Plus, they’re surprisingly simple to make, proving that creativity can flourish even amid busy holiday preparations. This recipe is the perfect antidote to fast food monotony, inviting you to indulge in a warm, homemade treat that’s both fun and flavorful. Let’s dive into how you can whip up a batch of these Candy Cane Bagels that will delight your friends and family!

Why You'll Love This Candy Cane Bagels

  • These Candy Cane Bagels are not only a feast for the eyes but also a delightful way to celebrate the holiday season.
  • They are surprisingly easy to make, allowing anyone, regardless of baking experience, to create these festive treats with minimal effort.
  • The vibrant colors and unique shape make them a guaranteed hit at any gathering, ensuring your guests will be impressed and asking for more.
  • Plus, their warm, homemade flavor adds a comforting touch to chilly mornings, making them the perfect breakfast choice during the winter months.

Candy Cane Bagel Ingredients

• Here’s everything you need for a fun baking adventure!

For the Dough
• 1.5 cups Warm water – helps activate the yeast for that perfect rise.
• 3 tablespoons Granulated Sugar – feeds the yeast, contributing to a delightful flavor.
• 4 teaspoons Active Dry Yeast – the star ingredient that makes our Candy Cane Bagels fluffy and delicious!
• 3.5 cups All Purpose Flour – provides the base for our soft and chewy bagels.
• 2 teaspoons Salt – enhances the overall flavor of the dough.

For the Colors
• Red Gel Food Colouring – adds a festive hue to make your bagels truly pop!
• Green Gel Food Colouring – perfect for bringing that classic holiday vibe to your breakfast spread.
• White Gel Food Colouring – helps achieve that beautiful swirled effect, blending beautifully with the other colors.

Get ready to mix, twist, and bake these delightful Candy Cane Bagels!

How to Make Candy Cane Bagels

  1. Measure warm water into a glass measuring cup or bowl, ensuring it’s warm but not hot. This helps to activate the yeast perfectly, ensuring your bagels rise beautifully.

  2. Stir in the granulated sugar and active dry yeast. Allow this mixture to stand for about 10 minutes until it becomes bubbly and foamy, a sure sign that your yeast is alive!

  3. Combine flour and salt in a large mixing bowl. Pour in the bubbly yeast mixture and stir well until you have a cohesive dough. The mixture should start to come together nicely.

  4. Knead the dough on a floured surface until it’s soft and elastic, about 5-10 minutes. Alternatively, you can use a stand mixer with a dough hook for about 7 minutes until the dough is smooth.

  5. Divide the dough into 3 equal pieces. Set one piece aside for later use, and further split one of the larger pieces into two equal halves.

  6. Mix gel food coloring into each piece: the largest will be white, the next will be red, and the smallest will be green. Knead the colors in until the dough is an even shade, creating a vibrant palette!

  7. Place each colored dough in separate lightly greased bowls. Cover them with plastic wrap and allow them to rise for about 1 hour, or until doubled in size.

  8. Flatten the red dough into a rectangle about 8 x 10 inches wide, and brush the top with water to help layers stick together.

  9. Stack the white dough on top of the red, making sure they’re the same size, and brush again with water. Repeat this with the green dough, ensuring a gorgeous layered effect!

  10. Repeat with the remaining piece of white dough by stacking it on top of the green. Once stacked, use a sharp knife to cut the loaf into 8 equal strips.

  11. Twist each strip of dough into a candy cane-like spiral, rolling it gently to form a smooth log. Secure the ends together to maintain that lovely shape.

  12. Prepare your baking sheets with parchment paper. Place the formed bagels on the sheets and cover them with plastic wrap. Allow them to rise for another 30 minutes.

  13. Preheat your oven to 350°F and bring a large pot of water to a boil. This will be used to boil the bagels for that chewy texture!

  14. Simmer the water, then carefully drop your bagels into the pot, cooking 2 or 3 at a time. Boil for 1 minute, then flip and cook for another minute.

  15. Drain the bagels well after boiling and place them on the prepared baking sheet.

  16. Bake them in the preheated oven for 38-40 minutes until they’re lightly golden brown on top. Your kitchen will smell amazing!

Optional: Drizzle with a light glaze for an extra festive touch.
Exact quantities are listed in the recipe card below.

What to Serve with Candy Cane Bagels?

There’s magic in creating a festive spread that complements these whimsical, colorful bagels, making your mealtime enchanting.

  • Creamy Maple Butter: A luscious spread that adds a sweet, buttery touch, enhancing each bite of your bagels. It pairs perfectly with the festive flavors!

  • Crisp Holiday Salad: Light and refreshing, a salad with pomegranate seeds and mixed greens offers a beautiful contrast, adding freshness to your plate.

  • Hot Chocolate Bar: Set up a cozy station with marshmallows, peppermint sticks, and whipped cream. This delightful drink pairs wonderfully with the sweetness of your bagels.

  • Cheddar Cheese Slices: The sharpness of cheddar cuts through the sweetness, creating a delightful balance. Try it warm for an extra savory twist!

  • Fruit Compote: A warm fruit compote made with apples and cranberries adds a sweet, tangy element, dressing your bagels with seasonal flavors.

  • Peppermint Tea: A gentle cup of peppermint tea provides a soothing, aromatic experience that complements the candy cane vibe of your bagels.

  • Gingerbread Cookies: Bring in a playful dessert that echoes the holiday season. These spiced cookies are a delightful accompaniment alongside your festive breakfast.

  • Yogurt Parfait: Layer yogurt with granola and berries for a creamy, crunchy contrast to the bagels. The freshness and flavor balance the meal perfectly.

  • Vanilla Glaze: Drizzle a light vanilla glaze over the warm bagels, adding a touch of sweetness that feels indulgent—perfect for holiday mornings.

How to Store and Freeze Candy Cane Bagels

Room Temperature: Store bagels at room temperature in an airtight container for up to 3 days to maintain freshness; this prevents them from becoming stale.

Fridge: For longer storage, place the bagels in the fridge, where they will stay fresh for up to a week. Just be sure to wrap them tightly to prevent drying.

Freezer: Freeze your Candy Cane Bagels by wrapping each bagel individually in plastic wrap, then placing them in a freezer-safe bag. They can be stored this way for up to 3 months.

Reheating: To enjoy, thaw slightly before reheating. Warm them in the oven at 350°F for about 10 minutes or toast until heated through.

Make Ahead Options

Candy Cane Bagels are perfect for busy home cooks looking to save time during the festive season! You can prepare the colored dough up to 24 hours in advance. Simply follow the recipe through the first rise, then divide and knead in the gel food coloring. After the dough has colored nicely, place each piece in greased bowls, cover tightly with plastic wrap, and refrigerate. When you’re ready to bake, remove the dough and let it come to room temperature before proceeding with the shaping and second rise (about 30 minutes). This method ensures that your bagels are just as delightful and fresh as when made the same day, making your holiday meal prep a breeze!

Candy Cane Bagel Variations

Get ready to play with flavors and colors—there’s always room for a little personal touch in your kitchen!

  • Whole Wheat: Swap half the all-purpose flour for whole wheat flour for a nuttier and healthier option. These bagels will have a lovely, earthy flavor that compliments the sweetness of the colors.

  • Vegan: Substitute warm water with unsweetened almond milk and use maple syrup instead of granulated sugar. Your bagels will still be flavorful, and everyone can enjoy them!

  • Gluten-Free: Use a gluten-free flour blend to make this recipe suitable for gluten-sensitive guests. The vibrant colors still shine through, making them just as festive for everyone!

  • Pumpkin Spice Twist: Incorporate pumpkin pie spice into the dough for a warm, spiced aroma that elevates your seasonal bagels. Imagine biting into those soft bagels and tasting the fall-spiced goodness.

  • Chocolate Drizzle: After baking, drizzle melted dark chocolate over the cooled bagels for an indulgent treat. The combination of chocolate and sweet dough creates a new level of deliciousness!

  • Spicy Kick: Add a pinch of cayenne pepper or crushed red pepper flakes to the dough for a surprising heat that contrasts beautifully with the sweetness. It’s a bold twist that adventurous eaters will love!

  • Fruit Infusion: Mix in dried cranberries or cherries into the dough for added sweetness and chewiness. Those bursts of flavor pair wonderfully with the delightful swirl.

  • Herbed Cream Cheese: Whip up a batch of herbed cream cheese to spread on your bagels, introducing a savory contrast to their sweet exterior. It’s the perfect finishing touch!

Chef's Helpful Tips

  • When making Candy Cane Bagels, always ensure your water is warm but not too hot to avoid killing the yeast.
  • A common mistake is not allowing the yeast mixture enough time to bubble, so be patient and let it sit for the full 10 minutes.
  • Kneading the dough until it is smooth and elastic is crucial for achieving the right texture, so don’t rush this step.
  • Lastly, keep an eye on your baking time, as ovens can vary; check for a light golden brown color for perfect bagels.

Candy Cane Bagels Recipe FAQs

What type of flour is best for Candy Cane Bagels?
All-purpose flour is perfect for Candy Cane Bagels, as it provides a good balance of structure and chewiness. If you want to experiment, you could also mix in some bread flour for a more elastic texture!

How should I store my Candy Cane Bagels?
Store your bagels at room temperature in an airtight container for up to 3 days. If you want them to last longer, place them in the refrigerator, where they’ll stay fresh for up to a week. Just be sure to wrap them tightly to avoid drying out.

Can I freeze Candy Cane Bagels?
Absolutely! Once they’ve cooled completely, wrap each bagel individually in plastic wrap and place them in a freezer-safe bag. They can be stored in the freezer for up to 3 months. When you’re ready to enjoy them, thaw at room temperature and warm them in the oven at 350°F for about 10 minutes.

How do I know if the yeast is active?
To check if your yeast is alive, mix it with warm water and sugar (as per the instructions) and let it sit for about 10 minutes. If it becomes bubbly and foamy, your yeast is active and ready to use! If it doesn’t foam, it’s best to start over with fresh yeast.

What if my dough is sticky after mixing?
If your dough feels too sticky, you can sprinkle in a little extra flour, one tablespoon at a time, until it reaches a soft, elastic texture. Remember to knead well after adding more flour to develop the gluten which will help the dough hold its shape when twisted into bagels.

Are Candy Cane Bagels suitable for people with allergies?
Candy Cane Bagels contain gluten and sugar, so they are not suitable for individuals with gluten intolerance or diabetes. If you have any specific dietary concerns, I recommend consulting your healthcare provider before indulging in this festive treat!

Candy Cane Bagels

Candy Cane Bagels

These Candy Cane Bagels are a delightful holiday treat that combines whimsical design with delicious flavor.
Print Recipe Pin Recipe
Prep Time 30 minutes mins
Cook Time 40 minutes mins
Rising Time 1 hour hr 30 minutes mins
Total Time 2 hours hrs 40 minutes mins
Servings: 8 bagels
Course: BREAKFAST & BRUNCH
Cuisine: American
Calories: 180
Ingredients Equipment Method Nutrition Notes

Ingredients
  

For the Dough
  • 1.5 cups Warm water helps activate the yeast for that perfect rise.
  • 3 tablespoons Granulated Sugar feeds the yeast, contributing to a delightful flavor.
  • 4 teaspoons Active Dry Yeast the star ingredient that makes our Candy Cane Bagels fluffy and delicious!
  • 3.5 cups All Purpose Flour provides the base for our soft and chewy bagels.
  • 2 teaspoons Salt enhances the overall flavor of the dough.
For the Colors
  • 1 drop Red Gel Food Colouring adds a festive hue to make your bagels truly pop!
  • 1 drop Green Gel Food Colouring perfect for bringing that classic holiday vibe to your breakfast spread.
  • 1 drop White Gel Food Colouring helps achieve that beautiful swirled effect.

Equipment

  • large mixing bowl
  • glass measuring cup
  • stand mixer with dough hook
  • sharp knife
  • baking sheets
  • parchment paper
  • pot for boiling

Method
 

How to Make Candy Cane Bagels
  1. Measure warm water into a glass measuring cup or bowl, ensuring it’s warm but not hot.
  2. Stir in the granulated sugar and active dry yeast. Allow this mixture to stand for about 10 minutes until it becomes bubbly and foamy.
  3. Combine flour and salt in a large mixing bowl. Pour in the bubbly yeast mixture and stir well until you have a cohesive dough.
  4. Knead the dough on a floured surface until it's soft and elastic, about 5-10 minutes.
  5. Divide the dough into 3 equal pieces. Set one piece aside for later use, and split one of the larger pieces into two equal halves.
  6. Mix gel food coloring into each piece: the largest will be white, the next will be red, and the smallest will be green.
  7. Place each colored dough in separate lightly greased bowls. Cover them with plastic wrap and allow them to rise for about 1 hour.
  8. Flatten the red dough into a rectangle about 8 x 10 inches wide, and brush with water.
  9. Stack the white dough on top of the red, brushing with water again. Repeat with the green dough.
  10. Stack the remaining piece of white dough on top of the green and cut the loaf into 8 equal strips.
  11. Twist each strip of dough into a candy cane-like spiral and secure the ends together.
  12. Prepare your baking sheets with parchment paper and place the formed bagels on the sheets.
  13. Preheat your oven to 350°F and bring a large pot of water to a boil.
  14. Simmer the water, then carefully drop your bagels into the pot, cooking 2 or 3 at a time.
  15. Drain the bagels well after boiling and place them on the prepared baking sheet.
  16. Bake them in the preheated oven for 38-40 minutes until lightly golden brown.
  17. Optional: Drizzle with a light glaze for an extra festive touch.

Nutrition

Serving: 1bagelCalories: 180kcalCarbohydrates: 36gProtein: 6gFat: 1gSodium: 210mgPotassium: 80mgFiber: 1gSugar: 4gCalcium: 20mgIron: 1mg

Notes

Ensure your water is warm but not too hot to avoid killing the yeast. Allow the yeast mixture enough time to bubble, and knead the dough until smooth and elastic for the right texture.

Tried this recipe?

Let us know how it was!

Filed Under: BREAKFAST & BRUNCH

Brown Butter Sugar Cookies

December 27, 2025 by JudyWhite Leave a Comment

There’s something delightfully nostalgic about the smell of cookies baking in the oven, and when brown butter is involved, it’s a whole new level of comfort. Picture this: the deep, nutty aroma wafting through your kitchen as the butter transforms into a golden elixir, ready to elevate your favorite treats. That’s exactly what inspired me to create my Brown Butter Sugar Cookies, a treat that’s not just about sweetness but also a luscious depth of flavor.

I found myself longing for a simple yet indulgent dessert that could impress friends and family without spending hours in the kitchen. These cookies offer the perfect solution—a charming blend of chewy and crispy textures, adorned with colorful sprinkles to add a festive touch. Whether it’s a casual gathering or just a cozy night in, these cookies are guaranteed to bring smiles and warm hearts. So grab your mixing bowl and let’s dive into creating these incredibly satisfying Brown Butter Sugar Cookies!

Why You'll Love This Brown Butter Sugar Cookies

  • These Brown Butter Sugar Cookies combine ease and indulgence, making them a go-to treat for any occasion.
  • The rich, nutty flavor of browned butter takes these classic cookies to a whole new level that everyone will adore.
  • They’re incredibly versatile too, perfect for festive gatherings or just a cozy night at home with family.
  • Plus, with their delightful appearance adorned with colorful sprinkles, they are as visually appealing as they are delicious.
  • You won’t believe how quickly they come together, saving you valuable time in the kitchen without compromising on taste.
  • These cookies are sure to be a crowd-pleaser, evoking smiles and nostalgia with every bite.

Brown Butter Sugar Cookies Ingredients

• Here’s everything you need to create your tasty cookies!

For the Cookie Dough

  • Unsalted butter – the star ingredient that transforms into rich, nutty brown butter for an unforgettable flavor.
  • Granulated sugar – adds sweetness and helps create a lovely texture.
  • Light brown sugar – brings warmth and depth, enhancing the caramel notes in the cookies.
  • All-purpose flour – provides the perfect structure for your cookies; you’ll need two cups plus an extra two tablespoons for adjustment.
  • Baking soda – gives the cookies a soft and chewy texture as they rise in the oven.
  • Salt – balances sweetness and enhances all flavors.
  • Large egg – binds everything together, giving the cookies their rich, tender crumb.
  • Pure vanilla extract – infuses a warm, aromatic essence that complements the cookie perfectly.

For Topping

  • Sprinkles – add vibrant color and fun, making these cookies festive for any occasion.
  • Nonpareils – tiny, round candies that provide an extra crunch and delightful visual appeal.

These ingredients come together seamlessly to create the ultimate Brown Butter Sugar Cookies!

How to Make Brown Butter Sugar Cookies

  1. Brown the Butter: In a skillet, melt the unsalted butter over medium heat. Stir frequently until it bubbles and begins to turn a golden brown, releasing a rich nutty aroma (about 5-7 minutes).

  2. Mix Sugars and Butter: In a mixing bowl, combine the granulated sugar, brown sugar, and the browned butter. Mix until well combined, creating a smooth and glossy texture that hints at the deliciousness to come.

  3. Incorporate Egg and Vanilla: Crack the large egg into the sugar mixture along with the vanilla extract. Mix until everything is beautifully blended, creating a luscious batter that’s hard to resist!

  4. Whisk Dry Ingredients: In a separate bowl, whisk together the all-purpose flour, baking soda, and salt. This step ensures your cookies will have the perfect rise and texture.

  5. Combine Wet and Dry: Gradually add the dry ingredients to the wet mixture, stirring gently until just combined. Aim for a soft dough that holds together but don’t overmix to keep your cookies tender.

  6. Adjust Dough Consistency: If the dough feels too soft, stir in the additional flour, one tablespoon at a time, until it reaches a desired consistency that you can easily scoop.

  7. Scoop and Decorate: Using a cookie scoop or spoon, drop dough onto a baking sheet lined with parchment paper. Top each cookie with colorful sprinkles and nonpareils for added flair before baking.

  8. Bake to Perfection: Place in a preheated oven at 350°F and bake until golden brown, about 13 minutes. You’ll know they’re ready when the edges are set, and the centers look slightly soft.

Optional: Drizzle a simple glaze on top for an extra sweet finishing touch.

Exact quantities are listed in the recipe card below.

How to Store and Freeze Brown Butter Sugar Cookies

Room Temperature: Store your Brown Butter Sugar Cookies in an airtight container at room temperature for up to 3 days for optimal freshness.

Fridge: To extend their lifespan, you can refrigerate the cookies in a sealed container for up to 1 week. Allow them to come to room temperature before serving.

Freezer: Freeze the cookies by placing them in a single layer in an airtight container with parchment paper between layers. They will stay fresh for up to 3 months.

Reheating: When ready to enjoy, let frozen cookies thaw at room temperature or microwave for 10-15 seconds to revive their delightful texture.

What to Serve with Brown Butter Sugar Cookies?

Imagine a delightful gathering, where the sweet aroma of freshly baked cookies is complemented by other comforting companions.

  • Rich Hot Chocolate: The creamy warmth of hot chocolate pairs beautifully with the nutty flavor of these cookies, making every bite a cozy indulgence.
  • Chai Tea: With its spiced undertones, chai tea creates a lovely contrast to the sweetness of the cookies—perfect for an evening treat.
  • Vanilla Ice Cream: A scoop of vanilla ice cream melting alongside these cookies creates a heavenly dessert experience; the cold creaminess beautifully balances their warm, chewy texture.
  • Fruit Salad: A vibrant fruit salad adds a refreshing burst of color and tartness, elevating the sweetness of the cookies for a well-rounded snack.
  • Milk: The classic pairing of milk is always a favorite, enhancing the flavors and making these cookies even more irresistible.
  • Coffee: A freshly brewed cup of coffee brings out the rich, nutty notes of the brown butter while adding a delightful aroma to your snack time.
  • Lemon Bars: The tangy zest of lemon bars provides a refreshing counterpart to the sweet richness of these cookies, adding a delightful zesty twist to your dessert spread.
  • Cheese Platter: Include a selection of creamy and sharp cheeses, as they can provide a delightful savory contrast that enhances each bite of the sugary delight.
  • Brownie Sundae: For the ultimate indulgence, pair with a brownie sundae. The combination of textures and flavors is a dream come true for any dessert lover!

Brown Butter Sugar Cookies Variations

Feel free to mix things up and make these cookies truly your own with these fun twists!

  • Nutty Delight: Add 1/2 cup of chopped walnuts or pecans for a delicious crunch that pairs perfectly with the brown butter.

  • Chocolate Chip: Stir in 1 cup of semi-sweet chocolate chips to elevate the sweetness and add a delightful gooeyness.

  • Oatmeal Twist: Substitute 1 cup of flour with rolled oats for a heartier texture and slight chewiness that satisfies.

  • Spiced Up: Incorporate 1 teaspoon of cinnamon or cardamom to add a warm, aromatic spice that dances with the sweetness.

  • Citrus Zing: Grate the zest of one orange or lemon into the dough for a bright, refreshing flavor that balances the richness of the butter.

  • Gluten-Free: Use a gluten-free all-purpose flour blend instead of regular flour, and enjoy the same tender, delightful cookies without gluten.

  • Chili Kick: Mix in a pinch of cayenne pepper for a surprising heat that complements the sweet cookie base.

  • Dried Fruit: Toss in 1/2 cup of dried cranberries or cherries for a tart contrast that enhances each bite.

These variations will spark your creativity and ensure you never have the same cookie twice!

Make Ahead Options

These Brown Butter Sugar Cookies are perfect for busy home cooks looking to save time without sacrificing flavor! You can prepare the cookie dough up to 3 days in advance by mixing all the ingredients and storing the dough in an airtight container in the refrigerator. This not only helps to meld the flavors beautifully but also makes it much easier to whip up fresh cookies on short notice. If you prefer, you can also scoop the dough onto baking sheets, freeze them for up to 24 hours until firm, then transfer to a freezer-safe bag. When you’re ready to bake, just pop them in the oven straight from the freezer, adding an extra minute or two to the baking time for delicious, freshly baked Brown Butter Sugar Cookies.

Chef's Helpful Tips

  • To achieve the best flavor in your Brown Butter Sugar Cookies, make sure to brown the butter over medium heat, stirring constantly until it reaches a deep golden color and smells nutty.
  • Avoid overmixing the dough after adding the dry ingredients, as this can lead to tough cookies; mix just until you no longer see dry flour.
  • If your dough seems too sticky, gradually add the extra flour, a tablespoon at a time, to reach the desired consistency without making the cookies too dry.
  • Bake the cookies until the edges are set and the centers are slightly soft for the perfect chewy texture.

Brown Butter Sugar Cookies Recipe FAQs

How do I select the best butter for making Brown Butter Sugar Cookies?
Absolutely! The key to great brown butter lies in quality. Choose unsalted butter, as it allows you to control the saltiness of your cookies. Look for butters with a higher fat content (around 82% or more) for a richer flavor. When you brown the butter, watch for a deep golden color and a nutty aroma—these are signs that it’s just perfect!

What is the best way to store Brown Butter Sugar Cookies?
To keep your delicious cookies fresh, store them in an airtight container at room temperature for up to 3 days. If you want to prolong their shelf life, pop them in the fridge where they can last about a week. Ensure they are cooled completely before placing them in the container to avoid any moisture build-up.

Can I freeze Brown Butter Sugar Cookies?
Very! Freezing these cookies is a fantastic option. To do this, let the cookies cool completely, then stack them in a single layer in an airtight container. Place parchment paper between layers to prevent sticking, and store for up to 3 months. When you’re ready to enjoy, simply let them thaw at room temperature, or microwave for 10-15 seconds for that freshly-baked taste.

What should I do if my cookie dough is too sticky?
No worries, it happens! If your dough is too sticky, add all-purpose flour in small increments—start with one tablespoon at a time—until it reaches a workable consistency. Keep in mind that overmixing can lead to tough cookies, so mix gently just until the dough holds together.

Are there any dietary considerations for these cookies?
Absolutely! If you’re making Brown Butter Sugar Cookies for someone with allergies, keep in mind they contain gluten and dairy. There are gluten-free flour blends that you can use as a substitute for all-purpose flour. Be cautious with sprinkles or nonpareils, as some brands may contain gluten or dairy, so check the labels. Enjoy baking while keeping everyone’s dietary needs in mind!

Brown Butter Sugar Cookies

Brown Butter Sugar Cookies

Delight in the rich, nutty flavor of Brown Butter Sugar Cookies, perfect for any occasion.
Print Recipe Pin Recipe
Prep Time 15 minutes mins
Cook Time 13 minutes mins
Total Time 28 minutes mins
Servings: 24 cookies
Course: DESSERT RECIPES
Cuisine: American
Calories: 150
Ingredients Equipment Method Nutrition Notes

Ingredients
  

For the Cookie Dough
  • 1 cup Unsalted butter brown
  • 3/4 cup Granulated sugar
  • 3/4 cup Light brown sugar
  • 2 cups All-purpose flour
  • 1 teaspoon Baking soda
  • 1/2 teaspoon Salt
  • 1 large Large egg
  • 1 teaspoon Pure vanilla extract
For the Toppings
  • 1/4 cup Sprinkles
  • 1/4 cup Nonpareils

Equipment

  • Skillet
  • Mixing bowl
  • Whisk
  • cookie scoop
  • Baking sheet
  • parchment paper

Method
 

How to Make Brown Butter Sugar Cookies
  1. In a skillet, melt the unsalted butter over medium heat. Stir frequently until it bubbles and begins to turn a golden brown, releasing a rich nutty aroma (about 5-7 minutes).
  2. In a mixing bowl, combine the granulated sugar, brown sugar, and the browned butter. Mix until well combined, creating a smooth and glossy texture that hints at the deliciousness to come.
  3. Crack the large egg into the sugar mixture along with the vanilla extract. Mix until everything is beautifully blended, creating a luscious batter that’s hard to resist!
  4. In a separate bowl, whisk together the all-purpose flour, baking soda, and salt. This step ensures your cookies will have the perfect rise and texture.
  5. Gradually add the dry ingredients to the wet mixture, stirring gently until just combined. Aim for a soft dough that holds together but don’t overmix to keep your cookies tender.
  6. If the dough feels too soft, stir in the additional flour, one tablespoon at a time, until it reaches a desired consistency that you can easily scoop.
  7. Using a cookie scoop or spoon, drop dough onto a baking sheet lined with parchment paper. Top each cookie with colorful sprinkles and nonpareils for added flair before baking.
  8. Place in a preheated oven at 350°F and bake until golden brown, about 13 minutes. You'll know they're ready when the edges are set, and the centers look slightly soft.

Nutrition

Serving: 1cookieCalories: 150kcalCarbohydrates: 20gProtein: 1gFat: 7gSaturated Fat: 4gPolyunsaturated Fat: 0.5gMonounsaturated Fat: 2gCholesterol: 25mgSodium: 100mgPotassium: 50mgSugar: 10gVitamin A: 200IUCalcium: 10mgIron: 0.5mg

Notes

For an extra sweet finishing touch, drizzle a simple glaze on top.

Tried this recipe?

Let us know how it was!

Filed Under: BREAKFAST & BRUNCH

Tuscan Kale Chopped Salad with Lemon and Tahini Dressing

December 25, 2025 by JudyWhite Leave a Comment

The crispness of freshly chopped Lacinato kale, combined with the vibrant colors of red cabbage and bell peppers, instantly lifts my spirits. There’s something about this Tuscan Kale Chopped Salad with Lemon and Tahini Dressing that feels like a celebration of health on a plate. After a week of busy schedules and takeout fatigue, this salad brings an exciting revival to my dinner table, captivating both my taste buds and my heart.

As I toss together the hearty greens and crunchy Brussels sprouts, I’m reminded of those sunny Mediterranean markets, where fresh produce sings of flavor and vitality. This salad isn’t just a side—it’s a wholesome, satisfying main event that can easily steal the show in any meal. With a creamy tahini dressing that comes together in mere minutes, it’s perfect for busy weeknights or a last-minute get-together. Whether you’re looking to impress guests or simply enjoy a guilt-free indulgence, this recipe promises to delight every palate while fitting seamlessly into your culinary repertoire. Let’s dive into the flavors and make this deliciously simple salad a part of your routine!

Why You'll Love This Tuscan Kale Chopped Salad with Lemon and Tahini Dressing

  • This Tuscan Kale Chopped Salad with Lemon and Tahini Dressing offers a burst of vibrant flavors that will make your taste buds dance with joy.
  • The recipe is incredibly easy to prepare, making it a perfect option for busy weeknights when you need a quick but satisfying meal.
  • With its colorful ingredients, this salad is visually appealing and sure to impress your guests at any gathering.
  • Plus, the creamy tahini dressing adds a unique twist that complements the fresh vegetables, making it a hit for everyone at the table.

Tuscan Kale Chopped Salad Ingredients

• Dive into the wholesome goodness of this Tuscan Kale Chopped Salad with Lemon and Tahini Dressing.

For the Salad
• Lacinato kale (or curly kale) – provides a nutritious base packed with vitamins.
• Olive oil – adds a rich flavor while helping to tenderize the kale.
• Kosher salt – enhances the natural sweetness of the vegetables.
• Brussels sprouts – adds a crunchy texture and a nutty flavor.
• Red cabbage – contributes brilliant color and crunch, making the salad visually stunning.
• Red peppers – bring a sweet, juicy burst that complements the other ingredients.
• Red onion – offers a sharp bite that balances the sweetness of the peppers.
• Chickpeas – a fantastic source of protein that makes this salad hearty and filling.
• Toasted pepitas (or walnuts, almonds, sunflower seeds) – provide a satisfying crunch and healthy fats.

For the Dressing
• Tahini – creates a creamy texture while imparting a distinctive nutty flavor.
• Plain, full-fat yogurt (or mayo) – adds creaminess and a tangy richness to the dressing.
• Warm water – helps to thin the dressing to the perfect consistency for drizzling.
• Apple cider vinegar – infuses the dressing with a zesty kick that complements the greens.
• Garlic (minced) – adds depth and aromatic flavor to the dressing.
• Maple syrup (or honey) – a touch of sweetness to balance the savory elements.
• Kosher salt – to taste, ensures the flavors pop!
• Freshly ground pepper – gives a hint of spice that wakes up the palate.
• Extra virgin olive oil – rounds out the dressing with a smooth finish that amplifies the flavors.

How to Make Tuscan Kale Chopped Salad

  1. Rinse and chop. Start by rinsing the Lacinato kale thoroughly, then chop it into bite-sized pieces. This ensures every bite is crisp and flavorful, making it the perfect base for your salad.

  2. Combine the vegetables. In a large bowl, combine the chopped kale, Brussels sprouts, shredded red cabbage, diced red peppers, and chopped red onion. Mix well to enjoy a colorful array of ingredients.

  3. Add chickpeas. Rinse and drain the chickpeas from the can, then gently fold them into the bowl with the vibrant vegetables. This will add heartiness and protein to your salad, making it a fulfilling dish.

  4. Whisk the dressing. In a separate bowl, whisk together tahini, yogurt, warm water, apple cider vinegar, minced garlic, maple syrup, Kosher salt, freshly ground pepper, and extra virgin olive oil until smooth and creamy. This heavenly dressing is the secret to your salad’s irresistible flavor!

  5. Combine and toss. Pour the dressing over the salad mixture and toss well to ensure every bite is coated in that luscious lemon-tahini goodness. Look for even distribution among the colorful veggies.

  6. Top and serve. Finally, sprinkle toasted pepitas on top for that extra crunch and a pop of flavor. Serve it right away to enjoy the fresh ingredients at their best!

Optional: Drizzle a little extra olive oil before serving for added richness.

Exact quantities are listed in the recipe card below.

What to Serve with Tuscan Kale Chopped Salad with Lemon and Tahini Dressing?

Savor the vibrant flavors and textures of this refreshing salad while creating a delightful meal experience.

  • Grilled Chicken: Juicy marinated chicken breast adds a satisfying protein element that pairs beautifully with the salad’s crispness.

  • Quinoa Bowl: A warm quinoa base can enhance the hearty feel of your meal, soaking up the delicious tahini dressing while providing extra nutrients.

  • Garlic Bread: Crunchy, buttery garlic bread offers a lovely contrast to the freshness of the kale, making each bite even more enjoyable.

  • Roasted Vegetables: The sweetness of caramelized Brussels sprouts and root vegetables complements the salad’s flavors, creating a warm, hearty side that balances health with comfort.

  • Hummus and Pita: Creamy hummus spreads served with warm pita make for a perfect appetizer that mirrors the Mediterranean inspiration of the salad.

  • Sparkling Water with Lemon: A refreshing citrusy drink enhances the lightness of the meal, cleansing the palate with every sip.

  • Chocolate Avocado Mousse: For dessert, indulge in a rich chocolate mousse made creamy with avocado, balancing the fresh and savory notes of your enticing salad.

Each of these pairings elevates your dining experience, making this Tuscan Kale Chopped Salad with Lemon and Tahini Dressing the star of the show.

Make Ahead Options

These Tuscan Kale Chopped Salad with Lemon and Tahini Dressing components are perfect for meal prep enthusiasts! You can wash and chop the Lacinato kale, Brussels sprouts, red cabbage, and peppers up to 24 hours in advance—simply store them in an airtight container in the refrigerator to keep them fresh and crisp. The dressing can also be made ahead and stored separately for up to 3 days, ensuring the ingredients remain vibrant and flavorful. When you’re ready to serve, just toss the prepped vegetables with the chilled dressing, add the chickpeas and toasted pepitas, and you’ll have a delicious, nutritious salad ready with minimal effort. Enjoy quality meals on busy weeknights with this easy make-ahead option!

Tuscan Kale Chopped Salad Variations

Get ready to let your imagination run wild and customize this salad to fit your tastes and dietary preferences!

  • Nut-Free: Replace pepitas with crispy chickpeas for a delightful crunch without the nuts. Just toss them in the oven for a quick roast.

  • Vegan: Swap yogurt with extra tahini or a dairy-free yogurt alternative, and use maple syrup instead of honey for a completely plant-based twist.

  • Spicy Kick: Add thinly sliced jalapeños or a pinch of red pepper flakes to the dressing for a zesty heat that elevates the flavor profile.

  • Extra Creamy: Incorporate an additional dollop of tahini or blend in an avocado for a rich, creamy texture that will make each bite feel indulgent.

  • Flavorful Herbs: Toss in fresh herbs like dill, parsley, or basil for an aromatic lift that adds complexity to the salad.

  • Fruity Sweetness: Mix in some apple or pear slices for a refreshing sweetness that pairs well with the savory elements of the salad.

  • Grain Boost: Consider adding cooked quinoa or farro for a heartier salad that’s perfect as a filling main dish. The grains will provide extra fiber and nutrients.

  • Roasted Veggies: Roast the Brussels sprouts and red peppers before adding them to the salad for a warm, caramelized flavor that brings a comforting contrast to the fresh greens.

How to Store and Freeze Tuscan Kale Chopped Salad

Fridge: Keep any leftover Tuscan Kale Chopped Salad in an airtight container in the refrigerator for up to 3 days to maintain freshness and crunch.

Freezer: For best results, avoid freezing the salad as the kale and other vegetables can become soggy upon thawing. Only freeze the dressing separately for up to 1 month.

Reheating: If you prefer your chickpeas warm, gently heat them in a microwave or on the stovetop before adding to the salad. Avoid reheating the entire salad to keep the veggies crisp.

Chef's Helpful Tips

  • When preparing the Tuscan Kale Chopped Salad with Lemon and Tahini Dressing, make sure to wash the kale thoroughly to remove any grit, as fresh greens can sometimes retain dirt.
  • To reduce bitterness, massage the kale gently with a bit of olive oil and salt for a minute before adding the other ingredients; this will soften the leaves and enhance their flavor.
  • When chopping vegetables, aim for uniform sizes to ensure even texture and beautiful presentation throughout the salad.
  • For the best taste, allow the salad to rest for about 10 minutes after dressing it; this gives the flavors time to meld together and develop.

Tuscan Kale Chopped Salad with Lemon and Tahini Dressing Recipe FAQs

How do I choose ripe Lacinato kale?
When selecting Lacinato kale (also known as dinosaur kale), look for deep green leaves that are crisp and free from dark spots or yellowing. The leaves should feel firm and have a vibrant color. Avoid bunches with wilting or browning edges, as these indicate that the kale is past its prime.

How should I store leftover Tuscan Kale Chopped Salad?
Store any leftover salad in an airtight container in the refrigerator. Ideally, it should be consumed within 3 days to ensure it maintains its freshness and crunch. If you notice that the kale becomes soggy, you can gently re-toss the salad before serving to revitalize it!

Can I freeze the dressing from the salad?
Absolutely! You can freeze the tahini dressing separately for up to 1 month. To freeze, simply pour it into a freezer-safe container, label it, and place it in the freezer. When ready to use, thaw it in the refrigerator overnight, then whisk again to restore its creamy texture before drizzling it over your salad.

What should I do if my kale salad turns out too bitter?
If you find the kale to be a bit bitter after making the salad, try massaging the leaves with a little salt and olive oil before mixing in the other ingredients. This process softens the kale and helps reduce its bitterness while enhancing its flavor, resulting in a much more pleasant salad experience!

Are there any dietary considerations with this recipe?
Yes! If you or someone you’re serving has allergies, be cautious with the ingredients. The recipe contains chickpeas and tahini, which can be allergens. For gluten sensitivities, rest assured this salad is gluten-free. If you’re serving pets, remember to keep any human salads away from them, as the dressing can be harmful due to garlic.

Tuscan Kale Chopped Salad with Lemon and Tahini Dressing

Tuscan Kale Chopped Salad with Lemon and Tahini Dressing

This Tuscan Kale Chopped Salad with Lemon and Tahini Dressing is a vibrant, healthy, and satisfying meal that celebrates fresh ingredients.
Print Recipe Pin Recipe
Prep Time 15 minutes mins
Resting Time 10 minutes mins
Total Time 25 minutes mins
Servings: 4 servings
Course: LUNCH RECIPES
Cuisine: Mediterranean
Calories: 320
Ingredients Equipment Method Nutrition Notes

Ingredients
  

For the Salad
  • 1 bunch Lacinato kale (or curly kale)
  • 2 tablespoons Olive oil
  • 1 teaspoon Kosher salt
  • 1 cup Brussels sprouts shredded
  • 1 cup Red cabbage shredded
  • 1 cup Red peppers diced
  • 1 small Red onion chopped
  • 1 can Chickpeas rinsed and drained
  • 1/4 cup Toasted pepitas (or walnuts, almonds, sunflower seeds)
For the Dressing
  • 1/4 cup Tahini
  • 1/4 cup Plain, full-fat yogurt (or mayo)
  • 3 tablespoons Warm water
  • 1 tablespoon Apple cider vinegar
  • 1 clove Garlic minced
  • 1 tablespoon Maple syrup (or honey)
  • 1/2 teaspoon Kosher salt to taste
  • 1/4 teaspoon Freshly ground pepper
  • 2 tablespoons Extra virgin olive oil

Equipment

  • Large Bowl
  • Whisk
  • Cutting Board
  • Knife

Method
 

Preparation Steps
  1. Start by rinsing the Lacinato kale thoroughly, then chop it into bite-sized pieces.
    Tuscan Kale Chopped Salad with Lemon and Tahini Dressing
  2. In a large bowl, combine the chopped kale, Brussels sprouts, shredded red cabbage, diced red peppers, and chopped red onion. Mix well.
    Tuscan Kale Chopped Salad with Lemon and Tahini Dressing
  3. Rinse and drain the chickpeas, then gently fold them into the bowl with the vegetables.
    Tuscan Kale Chopped Salad with Lemon and Tahini Dressing
  4. In a separate bowl, whisk together tahini, yogurt, warm water, apple cider vinegar, minced garlic, maple syrup, Kosher salt, pepper, and extra virgin olive oil until smooth.
    Tuscan Kale Chopped Salad with Lemon and Tahini Dressing
  5. Pour the dressing over the salad mixture and toss well to coat the ingredients.
    Tuscan Kale Chopped Salad with Lemon and Tahini Dressing
  6. Sprinkle toasted pepitas on top before serving.
    Tuscan Kale Chopped Salad with Lemon and Tahini Dressing

Nutrition

Serving: 1servingCalories: 320kcalCarbohydrates: 30gProtein: 10gFat: 20gSaturated Fat: 3gPolyunsaturated Fat: 5gMonounsaturated Fat: 10gSodium: 300mgPotassium: 700mgFiber: 8gSugar: 3gVitamin A: 1500IUVitamin C: 90mgCalcium: 150mgIron: 4mg

Notes

For extra richness, drizzle a little extra olive oil before serving.

Tried this recipe?

Let us know how it was!

Filed Under: LUNCH RECIPES

  • « Previous Page
  • 1
  • …
  • 27
  • 28
  • 29
  • 30
  • 31
  • …
  • 49
  • Next Page »

Recent Posts

  • Crispy Potatoes in Oven
  • Lucky Charms Pancakes
  • Cheeseburger
  • Boiled Corn on the Cob
  • St. Patrick’s Day Dessert Parfaits

Recent Comments

No comments to show.

Footer

  • Contact
  • Privacy Policy
  • About Us
  • Terms
  • ↑ back to top

Copyright © 2024 www.Forkono.com

Table Of Content