Forkono

  • BREAKFAST & BRUNCH
  • DESSERT RECIPES
  • DINNER RECIPES
  • LUNCH RECIPES
  • About uS
  • SNACKS & APPETIZERS
menu icon
go to homepage
  • BREAKFAST & BRUNCH
  • DESSERT RECIPES
  • DINNER RECIPES
  • LUNCH RECIPES
  • About uS
  • SNACKS & APPETIZERS
search icon
Homepage link
  • BREAKFAST & BRUNCH
  • DESSERT RECIPES
  • DINNER RECIPES
  • LUNCH RECIPES
  • About uS
  • SNACKS & APPETIZERS
×

Pizza with Crispy Crust

January 9, 2026 by JudyWhite Leave a Comment

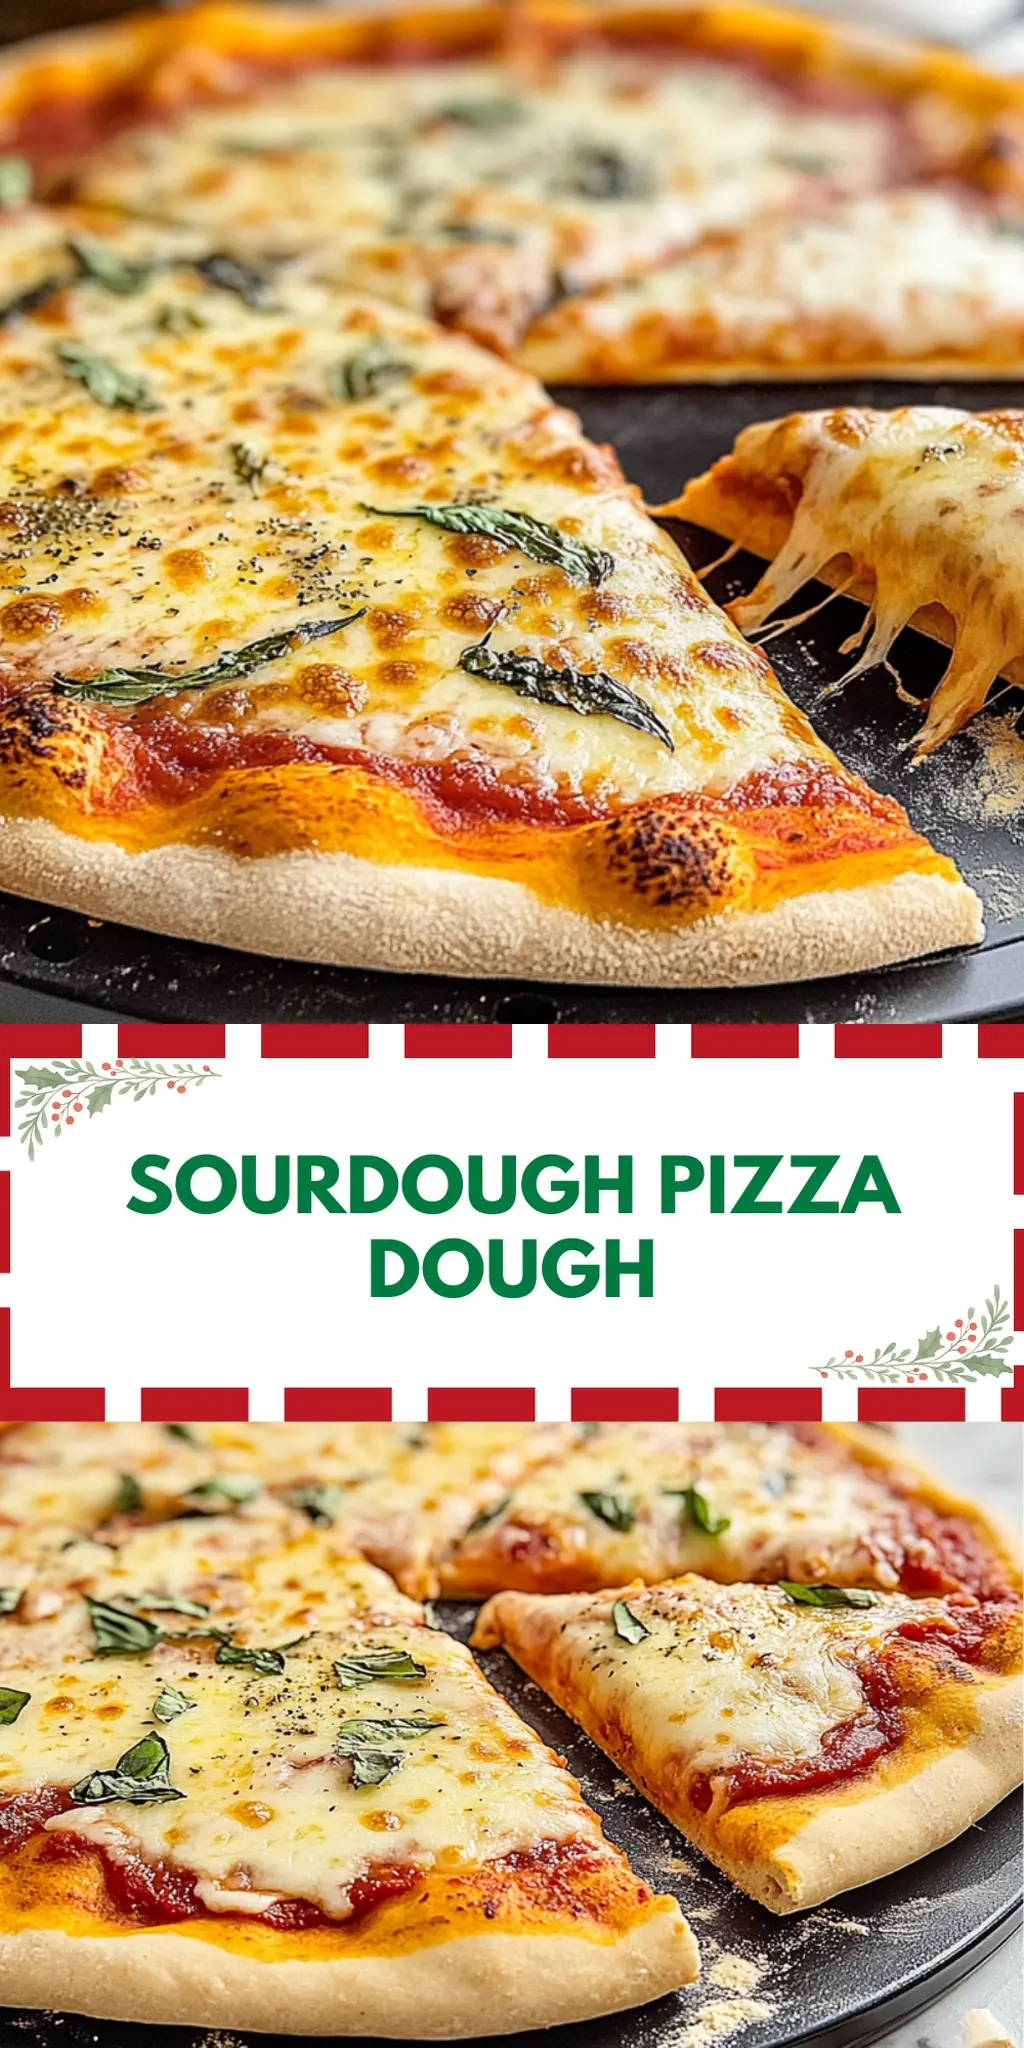
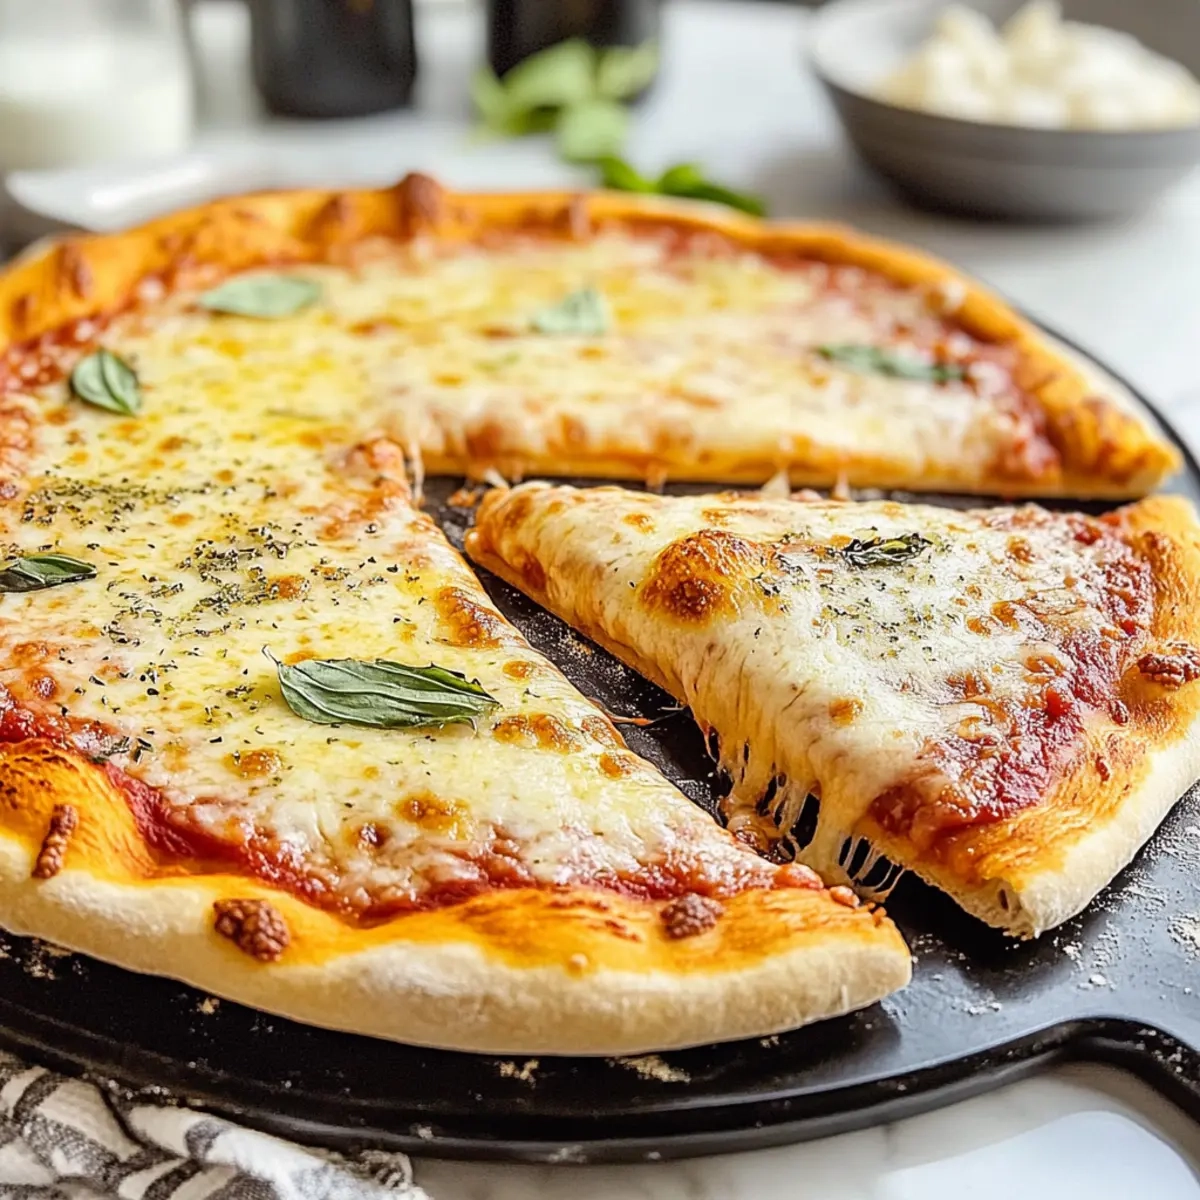
There’s something undeniably satisfying about the sound of dough being kneaded and the scent of bread baking in the oven. Picture this: a golden, crispy crust that crackles with each bite, topped with gooey mozzarella and your favorite toppings, emerging from your oven. This isn’t just any pizza; it’s the promise of comfort and flavor that transforms your kitchen into a pizzeria.

I was inspired to create this Pizza with Crispy Crust after spending one too many nights with mediocre takeout. It’s a revelation of homemade goodness that you’ll want to share with family and friends. Trust me, once you master this delightfully easy recipe, those fast-food cravings will be a thing of the past.

Whether you’re hosting a casual get-together or simply treating yourself, this pizza delivers on its promise of quality and taste without needing hours in the kitchen. Let’s dive into this delicious adventure together!

Why You'll Love This Pizza with Crispy Crust

  • This Pizza with Crispy Crust is incredibly easy to make, even for beginners, allowing you to create restaurant-quality pizza at home.
  • The flavor is out of this world, with a perfectly crispy crust that pairs beautifully with fresh toppings and melty cheese.
  • Its versatility means you can customize it to suit any palate, whether you prefer classic pepperoni or a garden veggie delight.
  • Plus, it looks absolutely stunning when served, making it not just a meal but a feast for the eyes as well.

Pizza with Crispy Crust Ingredients

• Get ready to make your homemade pizza dreams come true!

For the Dough

  • All-purpose flour – This forms the base of your crispy crust; for a healthier option, try whole wheat flour.
  • Active dry yeast – This helps your pizza dough rise, giving it that lovely airy texture.
  • Salt – Essential for flavor; don’t skip it!
  • Sugar – A pinch helps activate the yeast, resulting in a beautiful rise.
  • Warm water (110°F) – Make sure it’s not too hot; this is the ideal temperature for awakening the yeast.
  • Olive oil – Adds richness to your dough and prevents sticking.

For the Toppings

  • Pizza sauce – A key ingredient to bring all the flavors together; feel free to use store-bought or homemade.
  • Shredded mozzarella cheese – The classic cheese choice, it melts beautifully for that gooey texture.
  • Toppings of choice – Customize your pizza with favorites like pepperoni, bell peppers, or even gourmet options like arugula or goat cheese for a twist!

Dive into crafting your very own Pizza with Crispy Crust—it’s an adventure that starts in your kitchen and ends with a delicious reward!

How to Make Pizza with Crispy Crust

  1. Combine Ingredients: In a medium bowl, mix the warm water, sugar, and active dry yeast. Let this sit for about 5 minutes until it becomes frothy and bubbly—this means your yeast is ready to work its magic!

  2. Mix Dry Ingredients: In a large mixing bowl, stir together the all-purpose flour and salt. Slowly pour in the yeast mixture along with olive oil, combining them gradually until a dough begins to form.

  3. Knead the Dough: Lightly flour your countertop and transfer the dough. Knead it for about 5 minutes until it becomes smooth and elastic. This is where the fun begins, feeling the dough transform under your hands!

  4. Let It Rise: Place your kneaded dough in a greased bowl, cover it with a clean kitchen towel, and let it rise for 30 minutes in a warm spot. It should double in size, indicating it’s ready.

  5. Preheat the Oven: While your dough rises, preheat your oven to 475°F (245°C). If you have a pizza stone, place it inside to heat up for a perfectly baked crust.

  6. Roll Out the Dough: Once your dough has risen, turn it out onto a floured surface. Roll it out gently to about ¼ inch thick. Transfer it to a baking sheet or your hot pizza stone.

  7. Assemble the Pizza: Brush the surface of the dough with a little olive oil. Evenly spread the pizza sauce, then sprinkle on a generous amount of shredded mozzarella cheese followed by your choice of toppings.

  8. Bake to Perfection: Slide your pizza into the oven and bake for 12-15 minutes. Watch for that perfect moment when the crust turns golden brown and the cheese is bubbling—trust me, it’s worth the wait!

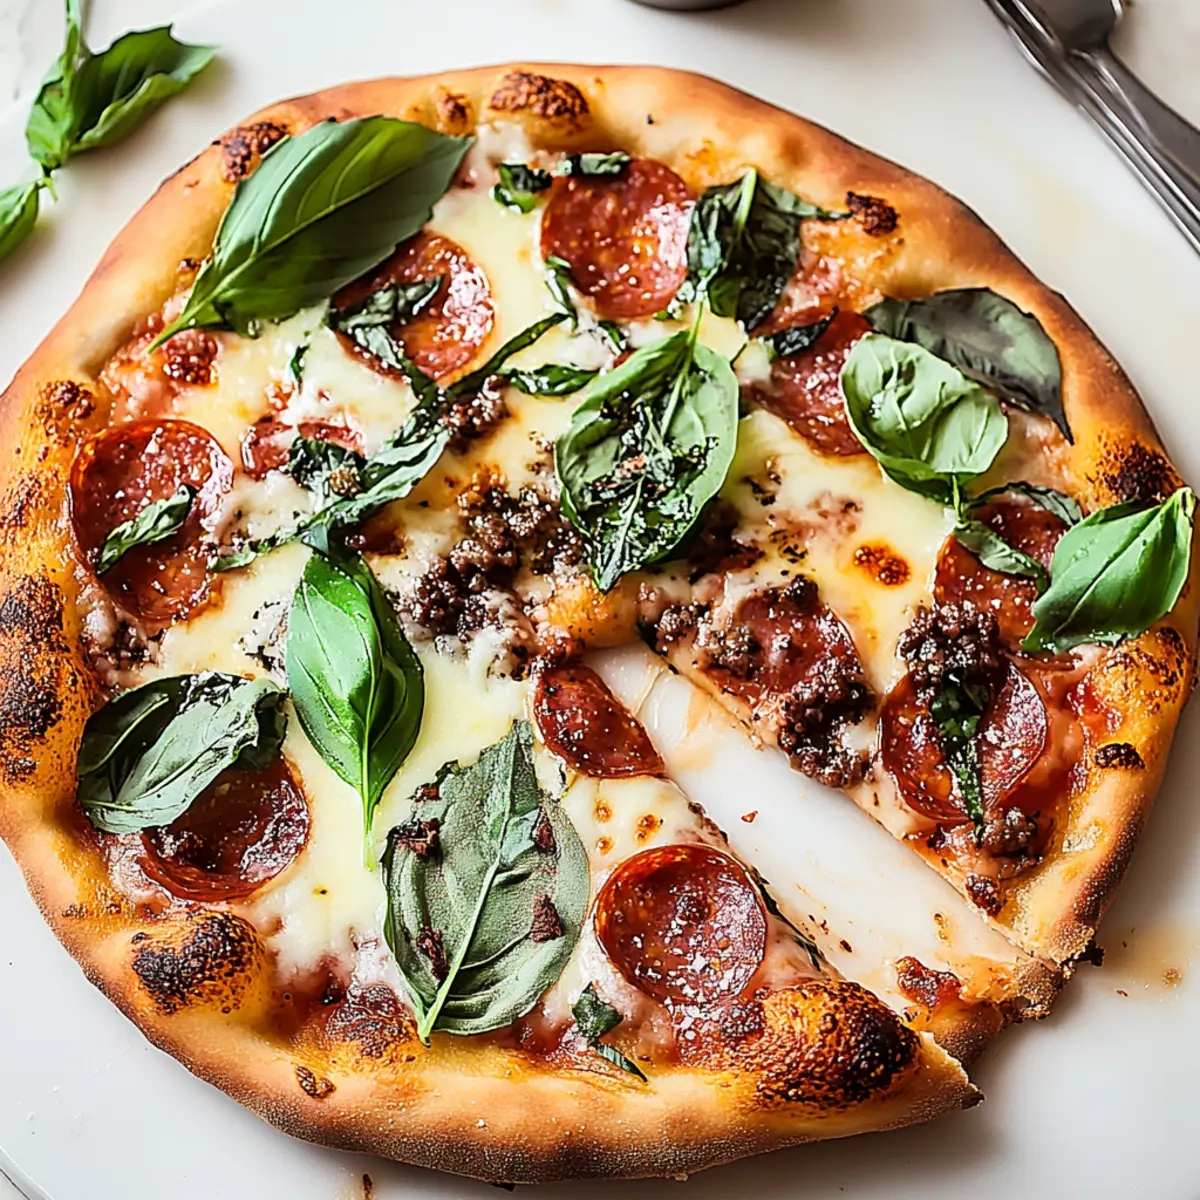
Optional: Sprinkle with fresh basil or chili flakes for an extra flavor boost.

Exact quantities are listed in the recipe card below.

Pizza with Crispy Crust Variations

Feel free to unleash your creativity and customize this pizza recipe with delightful twists that tantalize your taste buds.

  • Gluten-Free: Use a gluten-free all-purpose flour blend instead to cater to gluten sensitivities without sacrificing flavor.

  • Whole Wheat: Substitute half of the all-purpose flour with whole wheat flour for added nutrition and a heartier crust.

  • Herb-Infused: Mix in dried Italian herbs like oregano and basil into the dough for a fragrant crust enhancement.

  • Cheesy Crust: Fold shredded cheese directly into the dough before baking for a yummy cheesy layer hidden within every bite.

  • Spicy Kick: Spice things up by adding crushed red pepper flakes into the sauce or right onto the pizza before baking.

  • Vegan: Replace mozzarella with plant-based cheese and use a vegan pizza sauce for a delightful, dairy-free version.

  • Pesto Twist: Substitute pizza sauce with pesto for an aromatic blend of basil and garlic that transforms the flavor profile beautifully.

  • BBQ Style: Swap traditional sauce for barbecue sauce and add grilled chicken or roasted veggies for a smoky, savory experience that excites.

Elevate your pizza-making adventure with these variations, creating a meal that reflects your unique taste and brings happiness to your kitchen!

How to Store and Freeze Pizza with Crispy Crust

Room Temperature: Store leftover pizza at room temperature, loosely covered with foil, for up to 2 days. This keeps the crust from getting too soggy.

Fridge: For longer freshness, refrigerate your pizza in an airtight container or wrapped in plastic wrap for up to 4 days. Reheat in the oven to maintain that crispy texture.

Freezer: Wrap slices of pizza tightly in plastic wrap and aluminum foil to freeze for up to 3 months. When you’re ready to enjoy, reheat directly from frozen in the oven until heated through.

Reheating: To give your leftover pizza a fresh taste, reheat in a 375°F oven for about 10-15 minutes, allowing the crust to crisp up nicely.

What to Serve with Pizza with Crispy Crust?

Create a delightful Italian-inspired feast when savoring your homemade pizza. Each pairing enhances the comforting flavors of your crispy crust delight.

  • Garlic Bread: The buttery, garlicky flavor of this classic side perfectly complements the rich pizza sauce and gooey cheese.

  • Caesar Salad: The crisp greens and creamy dressing provide a refreshing contrast to the savory pizza, making it a well-rounded meal.

  • Antipasto Platter: A variety of cured meats, olives, and cheeses brings an exciting assortment of flavors, ideal for sharing before the main dish.

  • Italian Roasted Vegetables: An array of roasted seasonal veggies adds vibrant color and nutrients to your meal, balancing the richness of the pizza.

  • Chilled White Wine: A crisp Pinot Grigio or Sauvignon Blanc enhances the flavors of the pizza while providing a refreshing sip alongside each bite.

  • Tiramisu: Finish your meal with this creamy, coffee-infused dessert that erupts with flavor, offering a delightful sweet contrast to the savory elements.

  • Pesto Pasta Salad: This chilled pasta dish, tossed in fresh pesto, adds a lovely herbal note that pairs beautifully with the heartiness of your pizza.

By choosing any of these delightful pairings, your Pizza with Crispy Crust becomes the star of a comforting and satisfying family meal.

Make Ahead Options

These Pizza with Crispy Crust are perfect for busy weeknights when time is of the essence! You can prepare the pizza dough up to 24 hours in advance; simply follow the instructions to mix and knead, then place the dough in a greased bowl, cover it tightly, and refrigerate. For the best results, let it warm up for about 30 minutes before using. You can also chop your toppings and store them in the fridge for up to 3 days to keep them fresh. When you’re ready to bake, roll out the chilled dough, add the sauce and toppings, and bake until golden brown. This way, you’ll enjoy delicious homemade pizza without the last-minute rush!

Chef's Helpful Tips

  • For the perfect Pizza with Crispy Crust, ensure your warm water is at 110°F to effectively activate the yeast without killing it.
  • Always knead the dough until it’s smooth and elastic to develop gluten, which gives the crust its chewiness.
  • Prevent common mistakes by checking that your oven is preheated to 475°F to achieve that ideal crispy texture.
  • When baking, keep an eye on the pizza during the last few minutes to ensure the crust reaches a golden brown while the cheese bubbles just right.

Pizza with Crispy Crust Recipe FAQs

How do I choose the best ingredients for my pizza crust?
Absolutely! For the best pizza crust, opt for high-quality all-purpose flour, as it provides the ideal texture. Look for active dry yeast that is fresh; check the expiration date and ensure that it bubbles up when activated with warm water. Using freshly grated mozzarella cheese also adds a wonderful gooeyness that pre-shredded versions may lack.

How should I store my leftover Pizza with Crispy Crust?
Store your leftover pizza in the refrigerator in an airtight container for up to 3 days. Ensure it’s covered to avoid drying out. If you find yourself with extra slices, you can also wrap each slice in plastic wrap and place them in a freezer bag, allowing them to be stored for up to 2 months without losing their quality.

Can I freeze my Pizza with Crispy Crust?
Of course! To freeze your pizza effectively, start by letting it cool completely at room temperature. Then, wrap each slice in plastic wrap tightly to prevent freezer burn, and place them in a freezer-safe bag. Label the bag with the date and enjoy your pizza within 2 months for the best flavor. When you’re ready to indulge, reheat directly from frozen.

What should I do if my pizza crust isn’t rising?
Very! If your pizza crust isn’t rising, it might be due to the yeast being expired or not activating properly. Make sure your water was warm enough, around 110°F—too hot can kill the yeast. If you notice the dough still isn’t rising after 30 minutes, you can try placing it in a warmer spot, like an oven set to the lowest temperature for a few minutes, then turned off before placing the dough inside.

Can I make this pizza gluten-free?
Definitely! You can substitute the all-purpose flour with a 1-to-1 gluten-free flour blend. Just ensure it contains xanthan gum for elasticity. Additionally, always check your toppings and sauces to avoid any gluten-containing ingredients. This way, everyone at the table can enjoy this delicious Pizza with Crispy Crust!

Pizza with Crispy Crust

Pizza with Crispy Crust

This Pizza with Crispy Crust is a delightful homemade dish with a crispy exterior and customizable toppings for any occasion.
Print Recipe Pin Recipe
Prep Time 30 minutes mins
Cook Time 15 minutes mins
Rising Time 30 minutes mins
Total Time 1 hour hr 15 minutes mins
Servings: 4 slices
Course: DINNER RECIPES
Cuisine: Italian
Calories: 300
Ingredients Equipment Method Nutrition Notes

Ingredients
  

Dough Ingredients
  • 3 cups All-purpose flour the backbone of your crust, creating a chewy texture.
  • 2 teaspoons Active dry yeast essential for making the dough rise.
  • 1 teaspoon Salt enhances flavor.
  • 1 teaspoon Sugar feeds the yeast.
  • 1 cup Warm water activates the yeast; around 110°F.
  • 2 tablespoons Olive oil adds richness and helps keep the dough tender.
Toppings
  • 1 cup Pizza sauce a flavorful base.
  • 2 cups Shredded mozzarella cheese melts beautifully.
  • Toppings of choice customize with favorites like pepperoni or bell peppers.

Equipment

  • Mixing bowls
  • Rolling pin
  • Baking sheet
  • Oven
  • Pizza stone

Method
 

Making the Pizza
  1. In a medium bowl, mix the warm water, sugar, and active dry yeast. Let it sit for about 5 minutes until frothy.
  2. In a large mixing bowl, stir together the all-purpose flour and salt. Gradually add the yeast mixture and olive oil, mixing until a dough forms.
  3. Transfer the dough to a floured surface and knead for about 5 minutes until smooth and elastic.
  4. Place the kneaded dough in a greased bowl, cover with a towel, and let it rise for 30 minutes in a warm spot.
  5. Preheat your oven to 475°F (245°C). If using a pizza stone, place it inside to heat.
  6. Once risen, roll out the dough to about ¼ inch thick on a floured surface and transfer to a baking sheet or heated pizza stone.
  7. Brush the dough with olive oil, spread the pizza sauce, add mozzarella cheese and desired toppings.
  8. Bake for 12-15 minutes until the crust is golden brown and cheese is bubbling.

Nutrition

Serving: 1sliceCalories: 300kcalCarbohydrates: 36gProtein: 12gFat: 12gSaturated Fat: 4gPolyunsaturated Fat: 1gMonounsaturated Fat: 5gCholesterol: 20mgSodium: 600mgPotassium: 150mgFiber: 2gSugar: 2gVitamin A: 200IUVitamin C: 2mgCalcium: 200mgIron: 2mg

Notes

For an extra flavor boost, sprinkle with fresh basil or chili flakes before serving.

Tried this recipe?

Let us know how it was!

Filed Under: DINNER RECIPES

Enchiladas Verdes

January 9, 2026 by JudyWhite Leave a Comment

There’s nothing quite like the blend of flavors that comes rushing at you with a plate of Enchiladas Verdes. Picture this: the moment you pull these bubbling little treasures from the oven, their cheesy tops glistening in the light, and the rich aroma of green salsa filling the air. It takes me back to cozy evenings shared with friends, where laughter dances around the table, and everyone dives in for one more bite.

I first discovered Enchiladas Verdes during a crave-worthy taco night, and they’ve since become a beloved staple in my kitchen. The beauty of this dish lies not only in its incredible taste but also in its customizable nature; you can easily swap in your favorite proteins or tweak the cheese levels depending on what you have on hand.

Whether you’re looking to impress during a family gathering or simply satisfy your own cravings for comforting homemade food, these enchiladas offer the perfect solution. They come together in just 45 minutes, making them an ideal choice for busy weeknights or last-minute social gatherings. Let’s dive into the delicious details!

Why You'll Love This Enchiladas Verdes

  • You will love how quickly and easily you can whip up these delicious enchiladas in just 45 minutes.
  • The vibrant flavors and creamy textures create a mouthwatering dish that everyone at the table will rave about.
  • This recipe is incredibly versatile, allowing you to customize it with your favorite proteins or extra veggies based on what you have in your kitchen.
  • Visually stunning with a golden cheesy topping and fresh cilantro, these enchiladas are sure to be a feast for the eyes as well as the taste buds.

Enchiladas Verdes Ingredients

For the Chicken Filling
• Chicken breasts – about 1 lb, shredded for a tender, juicy filling.
• Garlic – 2 cloves, minced to add a delightful aromatic depth to the dish.
• Green enchilada sauce – 2 cups, bringing that signature zesty flavor to the enchiladas.

For the Tortillas
• Corn tortillas – 8, warmed to make rolling easier and enhance their flavor.

For the Toppings
• Cheddar cheese – 1 cup, shredded for a rich, comforting cheesy layer.
• Monterey Jack cheese – 1 cup, shredded to provide a creamy texture that melts beautifully.
• Sour cream – ½ cup, drizzled on top for added creaminess and a tangy finish.
• Cilantro – ¼ cup, chopped to sprinkle on top for a burst of freshness and color.

How to Make Enchiladas Verdes

  1. Preheat your oven to 375°F (190°C) and lightly grease a baking dish. This sets the stage for a delicious bake, ensuring the enchiladas don’t stick and become a deliciously golden delight.

  2. Boil about 3 cups of water in a pot; add your chicken breasts with a pinch of salt and pepper. Cook for 15-20 minutes until fully cooked. Once done, shred the chicken into tender pieces that will soak up all the flavors.

  3. Combine the shredded chicken with half of the green enchilada sauce and chopped cilantro in a bowl. This mixture creates a fragrant, zesty filling that brings life to every tortilla.

  4. Warm your corn tortillas in a pan or microwave for about 30 seconds. This makes them pliable and easier to roll. Fill each tortilla with the chicken mixture and roll tightly, sealing in all that deliciousness.

  5. Arrange the rolled tortillas seam-side down in your greased baking dish. Pour the remaining enchilada sauce over the top, ensuring every inch is coated, and sprinkle generously with both cheeses.

  6. Bake for 20-25 minutes, or until the enchiladas are bubbly and golden brown on top. Once they’re out of the oven, drizzle with sour cream to add that perfect creamy finish before serving.

Optional: Garnish with extra cilantro for a fresh pop of color.

Exact quantities are listed in the recipe card below.

How to Store and Freeze Enchiladas Verdes

Fridge: Store leftover Enchiladas Verdes in an airtight container for up to 3 days to maintain their delicious flavor and texture.

Freezer: For longer storage, freeze these enchiladas wrapped well in foil or plastic wrap for up to 2 months. Thaw in the fridge before reheating.

Reheating: Bake thawed enchiladas in a preheated oven at 350°F (175°C) for about 20 minutes, or until heated through. Drizzle with fresh sour cream for extra creaminess.

Room Temperature: Avoid leaving Enchiladas Verdes out for more than 2 hours to ensure they stay safe to eat.

Enchiladas Verdes Variations

Feel free to play around with these enchiladas to create your own unique twist on a classic dish!

  • Vegetarian: Replace chicken with black beans and sautéed bell peppers for a hearty, meat-free option. These flavors are a delightful dance that will keep you coming back for more.

  • Spicy Kick: Add chopped jalapeños or diced green chilies to the filling or sauce. Simply adjust the amount to suit your heat tolerance for a flavor bomb that packs a punch!

  • Cheesy Variation: Use a combination of pepper jack and queso fresco for a melty, creamy texture that adds a wonderful depth to your enchiladas.

  • Creamy Twist: Stir in some cream cheese into the chicken mixture for an extra creamy filling that takes these enchiladas to the next level of comfort.

  • Pork Lovers: Swap out chicken for shredded pulled pork and use salsa verde for a smokier, richer dish that friends and family will rave about!

  • Quinoa Boost: Add cooked quinoa to the chicken mix for added fiber and protein, creating a nutritious upgrade without sacrificing flavor.

  • Zesty Lime: Squeeze fresh lime juice over the rolled enchiladas before baking to brighten the flavors and add a refreshing tang.

  • Herby Delight: Incorporate fresh spinach or kale into the filling for additional nutrition and a pop of color that complements the vibrant sauce beautifully.

With these adaptations, you’re sure to create enchiladas that perfectly match your tastes and mood!

What to Serve with Enchiladas Verdes?

Imagine gathering around the table, plates filled with vibrant flavors, and everyone enjoying the feast together.

  • Cilantro Lime Rice: The zesty flavors of this rice elevate the meal, while the cilantro complements the enchiladas beautifully.

  • Refried Beans: Creamy and comforting, they offer a heartiness that pairs perfectly with the crispness of corn tortillas.

  • Grilled Corn on the Cob: Sweet and smoky, this fiber-rich side enhances the freshness of your enchiladas, making it a delightful addition.

  • Mexican Street Corn Salad: A burst of flavors and textures, this salad brings freshness with a touch of spice, balancing the richness of the enchiladas.

  • Guacamole: Creamy and rich, it’s a classic side that brings a lovely contrast to the tangy enchilada sauce and adds a party vibe.

  • Pineapple Agua Fresca: Refreshing and slightly sweet, this drink cuts through the richness of the dish, offering a delightful contrast with every sip.

  • Chocolate Flan: For dessert, this lush treat is the perfect way to end the night, balancing flavors with its sweet creaminess.

  • Churros: Crispy on the outside and supremely soft on the inside, these beloved pastries will surely make your meal unforgettable, complemented by a warm chocolate sauce.

Make Ahead Options

These Enchiladas Verdes are perfect for meal prep enthusiasts! You can prepare the shredded chicken mixed with half of the green enchilada sauce and cilantro up to 3 days in advance. Simply store it in an airtight container in the refrigerator to keep it fresh and flavorful. The corn tortillas can be warmed and filled the night before and kept packed tightly to prevent drying out. When you’re ready to enjoy, just roll them up, arrange them in a baking dish, pour over the remaining enchilada sauce, sprinkle with cheese, and bake for 20-25 minutes until bubbly and golden. This way, you will have a delicious, homemade meal with minimal effort, just like freshly made!

Chef's Helpful Tips

  • When preparing Enchiladas Verdes, make sure to shred your chicken while it’s still warm for easier handling and better absorption of flavors.
  • If you’re short on time, using a store-bought rotisserie chicken can save you the cooking step without sacrificing taste.
  • For a smoother filling, consider adding a bit of the enchilada sauce to the shredded chicken mixture to keep it moist.
  • Ensure your oven is fully preheated to 375°F before baking for an evenly cooked and golden top that enhances the overall presentation.

Enchiladas Verdes Recipe FAQs

What kind of chicken should I use for Enchiladas Verdes?
Absolutely! For the best texture and flavor, I recommend using boneless, skinless chicken breasts. They cook quickly and shred beautifully, giving you that tender filling. If you prefer dark meat, chicken thighs are also a great alternative. Just ensure they’re well-cooked and shredded!

How should I store leftover Enchiladas Verdes?
Leftovers should be stored in an airtight container in the fridge. I usually keep them for up to 3 days to maintain their delicious flavor and texture. Make sure they’re cooled down before sealing them up to prevent any condensation—the last thing you want is soggy enchiladas!

Can I freeze Enchiladas Verdes?
Yes, you can! For longer storage, wrap the enchiladas tightly in foil or plastic wrap, and then place them in a freezer bag. They can be frozen for up to 2 months. When you’re ready to enjoy them, simply thaw them in the fridge overnight before reheating.

How do I reheat frozen Enchiladas Verdes?
To reheat frozen enchiladas, preheat your oven to 350°F (175°C). Place the thawed enchiladas in a baking dish, cover with foil, and bake for about 20 minutes or until heated through. For an extra touch, drizzle some fresh sour cream on top before serving!

What if my enchiladas aren’t as flavorful as I hoped?
Very! If you find the flavor lacking, consider enhancing your chicken by marinating it with spices such as cumin and chili powder before boiling. You can also add sautéed onions or bell peppers to the filling. Remember, the green enchilada sauce is essential, so make sure you’re using a high-quality brand or homemade version.

Are there any dietary considerations for Enchiladas Verdes?
Definitely! If you’re cooking for someone with allergies or dietary restrictions, there are plenty of options. Use gluten-free corn tortillas for those who need to avoid gluten. If you’re catering to vegetarians, you can easily substitute shredded chicken with black beans or mushrooms, mixed with the same delicious enchilada sauce!

Enchiladas Verdes

Enchiladas Verdes

Experience the vibrant flavors of Enchiladas Verdes with tender chicken, tangy sauce, and melty cheese for a comforting dinner.
Print Recipe Pin Recipe
Prep Time 15 minutes mins
Cook Time 30 minutes mins
Total Time 45 minutes mins
Servings: 4 enchiladas
Course: DINNER RECIPES
Cuisine: Mexican
Calories: 350
Ingredients Equipment Method Nutrition Notes

Ingredients
  

For the Filling
  • 1 lb Boneless, skinless chicken breasts about
  • 2 cloves Fresh garlic minced
  • 2 cups Green enchilada sauce
For Assembly
  • 8 pieces Corn tortillas warmed
  • 1 cup Shredded cheddar cheese
  • 1 cup Shredded Monterey Jack cheese
For Topping
  • 0.5 cup Sour cream
  • 0.25 cup Chopped cilantro

Equipment

  • Oven
  • Baking dish
  • Pot
  • Mixing bowl
  • Pan or microwave

Method
 

Steps
  1. Preheat your oven to 375°F (190°C) and lightly grease a baking dish.
  2. Boil water in a pot, about 3 cups should do. Add the chicken breasts, a pinch of salt, and some pepper. Cook for 15-20 minutes until fully cooked, then shred the chicken.
  3. Combine the shredded chicken in a bowl with half of the green enchilada sauce and the chopped cilantro.
  4. Warm the corn tortillas to make them pliable. Fill each tortilla with the chicken mixture and roll tightly.
  5. Arrange the rolled tortillas seam-side down in your baking dish. Pour the remaining enchilada sauce over them and sprinkle the cheeses on top.
  6. Bake for 20-25 minutes until the cheese is bubbly and golden brown.
  7. Drizzle with sour cream before serving. Optional: Garnish with extra chopped cilantro.

Nutrition

Serving: 1enchiladaCalories: 350kcalCarbohydrates: 30gProtein: 25gFat: 15gSaturated Fat: 8gPolyunsaturated Fat: 0.5gMonounsaturated Fat: 2gCholesterol: 80mgSodium: 900mgPotassium: 400mgFiber: 3gSugar: 2gVitamin A: 500IUVitamin C: 6mgCalcium: 250mgIron: 2mg

Notes

Store leftovers in an airtight container for up to 3 days. For longer storage, freeze wrapped enchiladas for up to 2 months.

Tried this recipe?

Let us know how it was!

Filed Under: DINNER RECIPES

Oven Roasted Chicken Breast

January 9, 2026 by JudyWhite Leave a Comment

There’s something wonderfully satisfying about the sound of chicken sizzling in the oven, filling the kitchen with a mouthwatering aroma that beckons the entire household to come together. After a long day, when fast food no longer cuts it, I find refuge in the simplicity and warmth of Oven Roasted Chicken Breast. This dish is not just easy to prepare but also a true crowd-pleaser that captivates both family and friends.

I stumbled upon this recipe during one of those bustling weeks when meal planning felt like a daunting task. With just a handful of pantry staples and a little bit of time, this chicken transforms into a succulent centerpiece. Its sweet and savory marinade—composed of honey, soy sauce, and fragrant herbs—brings life to the basic chicken breast, making it an unforgettable meal that even the pickiest eaters will crave.

If you’re seeking a way to ditch the repetitive takeout routine while still enjoying a home-cooked meal, grab your oven mitts and join me on this delicious adventure!

Why You'll Love This Oven Roasted Chicken Breast

  • This Oven Roasted Chicken Breast recipe is incredibly easy to prepare, making it perfect for busy weeknights.
  • The sweet and savory marinade elevates the chicken, providing a burst of flavor that will tantalize your taste buds.
  • Its versatility allows you to serve it alongside a variety of sides, making it suitable for any occasion.
  • Visually appealing when plated, this dish will impress your family and friends at the dinner table.

Oven Roasted Chicken Breast Ingredients

• Check out the essentials you’ll need for this mouthwatering dish!

For the Chicken

  • Boneless, skinless chicken breasts – 4 pieces will ensure everyone gets a serving of tender chicken.

For the Marinade

  • Garlic – 4 cloves minced adds a fragrant, savory depth to the dish.
  • Olive oil – 2 tbsp helps keep the chicken moist and enhances flavor.
  • Dried thyme – 1 tsp gives an earthy aroma that complements the chicken beautifully.
  • Dried rosemary – 1 tsp brings a robust herbal note that pairs well with the other ingredients.
  • Salt – 1 tsp enhances the natural flavors of the chicken.
  • Black pepper – ½ tsp adds a subtle kick to the marinade.
  • Low-sodium soy sauce – 3 tbsp brings a savory umami flavor that elevates the dish.
  • Honey – 2 tbsp balances the savory elements with a touch of sweetness, making this Oven Roasted Chicken Breast truly irresistible.

How to Make Oven Roasted Chicken Breast

  1. Preheat your oven to 400°F (200°C). This ensures that your chicken will cook evenly and develop a golden-brown exterior.

  2. Prepare the baking dish by spraying it with nonstick spray. Season the chicken breasts generously with salt and pepper on both sides to enhance their flavor.

  3. Mix the marinade by combining olive oil, minced garlic, thyme, rosemary, soy sauce, and honey in a bowl. This sweet and savory blend will make your chicken mouthwatering.

  4. Coat the chicken in the baking dish with the marinade. Pour it over the chicken, ensuring each piece is well-covered. Let it marinate for at least 15 minutes so the flavors infuse beautifully.

  5. Roast the chicken in the preheated oven for 25–30 minutes. Use a meat thermometer to check that the internal temperature reaches 165°F (74°C) to guarantee it’s fully cooked.

  6. Rest the chicken for 5 minutes before serving. This allows the juices to redistribute, making every bite tender and succulent.

Optional: Serve with your favorite sides for a complete meal.

Exact quantities are listed in the recipe card below.

Oven Roasted Chicken Breast Variations

Feel free to get creative and customize this dish to suit your tastes and dietary needs!

  • Herb-Infused: Swap out dried thyme and rosemary for fresh herbs like basil or parsley to brighten the flavor profile.

  • Spicy Kick: Add a teaspoon of red pepper flakes to the marinade for a fiery twist that brings the heat and elevates the dish.

  • Citrus Zest: Incorporate the zest of one lemon or orange into the marinade for a refreshing, zesty flavor that pairs beautifully with chicken.

  • Pineapple Glaze: Replace honey with pineapple juice for a tropical sweetness that caramelizes beautifully as it roasts.

  • Smoky Flavor: Use smoked paprika in place of black pepper for a warm, smoky essence that adds depth to your chicken.

  • Asian Twist: Substitute the soy sauce with teriyaki sauce and add sesame seeds for a sweet and savory Asian-inspired dish.

  • Creamy Texture: Brush the chicken with garlic herb cream cheese before adding the marinade for a deliciously different, creamy finish.

  • Mustard Kick: Mix in a tablespoon of Dijon mustard for a tangy flavor that beautifully complements the honey and soy sauce.

Explore these variations to discover new favorite flavors and make this Oven Roasted Chicken Breast meal your very own!

What to Serve with Oven Roasted Chicken Breast?

Create a delightful dinner experience that will have your family asking for more, with these perfect side pairings.

  • Garlic Mashed Potatoes: Creamy and buttery, these mashed potatoes create a rich contrast to the savory chicken, complementing each bite beautifully.

  • Honey Glazed Carrots: The sweet glaze marries perfectly with the chicken, providing a colorful and nutritious addition to your plate.

  • Steamed Broccoli: Vibrant and crisp, this vegetable adds a fresh crunch that balances the dish, enhancing the overall meal experience.

  • Caesar Salad: Crisp romaine and savory dressing add a refreshing touch, making every forkful of chicken taste even better.

  • Rice Pilaf: Fluffy and herby, this side absorbs the flavors of the chicken, creating a wholesome bite that’s both satisfying and light.

  • Roasted Beets: Their earthy sweetness and vibrant color will elevate the meal while harmonizing with the honey notes from the chicken.

  • Chardonnay: This white wine’s crisp acidity pairs beautifully with the chicken’s savory notes, enhancing the flavor profile and making each sip refreshing.

  • Apple Crisp: End your meal with this warm, comforting dessert; its sweetness offers a lovely contrast to the savory chicken you’ve enjoyed.

Make Ahead Options

These Oven Roasted Chicken Breasts are a fantastic choice for meal prep, allowing you to enjoy a homemade dinner even on the busiest nights! You can marinate the chicken breasts up to 24 hours in advance; simply follow the marinating steps, then cover the dish tightly with plastic wrap or a lid and refrigerate. Additionally, you can chop the garlic and measure out the herbs ahead of time, which can be stored in an airtight container for up to 3 days. When you’re ready to cook, just remove the chicken from the fridge, let it sit at room temperature for 15 minutes before roasting, and follow the cooking instructions. This way, you ensure your Oven Roasted Chicken Breast retains all its juicy goodness while saving precious evening time!

How to Store and Freeze Oven Roasted Chicken Breast

Fridge: Store leftovers in an airtight container for up to 3 days. This helps preserve the flavors and prevents drying out.

Freezer: Freeze cooled chicken breasts in a freezer-safe bag or container for up to 3 months. Make sure to remove as much air as possible for best results.

Reheating: Thaw in the fridge overnight, then reheat in the oven at 350°F (175°C) until warmed through, about 15-20 minutes. This keeps the chicken juicy and flavorful.

Additional Tip: If you’re making a larger batch for meal prep, cooking extra Oven Roasted Chicken Breast is a great way to have healthy proteins ready throughout the week!

Chef's Helpful Tips

  • For the Oven Roasted Chicken Breast, always make sure to season the chicken breasts well with salt and pepper to enhance their natural flavor.
  • When mixing the marinade, try to combine the ingredients in a bowl until fully blended for a more uniform taste.
  • To ensure optimal tenderness, let the chicken marinate for at least 15 minutes, but if you have time, longer marination can deepen the flavors.
  • Remember to use a meat thermometer to check that the chicken reaches an internal temperature of 165°F to avoid dryness and ensure safety.

Oven Roasted Chicken Breast Recipe FAQs

How do I select the best chicken breasts for this recipe?
Absolutely! Look for chicken breasts that are plump and have a pinkish hue. Avoid those with dark spots or an off smell, as these can indicate spoilage. If possible, choose pasture-raised or organic options for better flavor and quality.

How should I store leftovers of the Oven Roasted Chicken Breast?
After enjoying your meal, you can store the leftovers in an airtight container in the refrigerator for up to 3 days. Just ensure they’ve cooled down before sealing to retain moisture. If you notice any dried-out areas, a splash of chicken broth or a drizzle of olive oil can help revive them when reheating!

Can I freeze Oven Roasted Chicken Breast?
Yes, you certainly can! Once the chicken has cooled, place it in a freezer-safe bag or container, removing as much air as possible to prevent freezer burn. It can be stored for up to 3 months. When you’re ready to enjoy it again, simply thaw it overnight in the fridge and reheat in the oven at 350°F (175°C) for about 15-20 minutes until warmed through.

How can I troubleshoot tough or dry chicken?
Very good question! If your chicken results in a tough or dry texture, it might be due to overcooking. Always use a meat thermometer to ensure you remove it from the oven at 165°F (74°C). If you find your chicken often turns out dry, consider brining it for a couple of hours before cooking. Just dissolve ¼ cup of salt in 4 cups of water and soak the chicken to help retain moisture during cooking.

Is this recipe suitable for those with dietary restrictions, such as gluten intolerance?
Absolutely! To make this Oven Roasted Chicken Breast gluten-free, simply swap the low-sodium soy sauce with tamari. For those avoiding sugar, you could use coconut aminos as a substitute for soy sauce and natural sweeteners like agave nectar or maple syrup for honey. Always check product labels to ensure they meet your dietary needs!

Oven Roasted Chicken Breast

Oven Roasted Chicken Breast

Savor the delightful flavors of Oven Roasted Chicken Breast, a quick and easy dinner that brings comfort and satisfaction to any table.
Print Recipe Pin Recipe
Prep Time 15 minutes mins
Cook Time 30 minutes mins
Resting Time 5 minutes mins
Total Time 50 minutes mins
Servings: 4 servings
Course: DINNER RECIPES
Cuisine: American
Calories: 220
Ingredients Equipment Method Nutrition Notes

Ingredients
  

For the Chicken
  • 4 pieces Boneless, skinless chicken breasts
  • 1 teaspoon Salt
  • 1 teaspoon Black pepper
For the Marinade
  • 3 tablespoons Olive oil can substitute with avocado oil
  • 2 cloves Garlic minced
  • 1 teaspoon Dried thyme
  • 1 teaspoon Dried rosemary crushed
  • 1/4 cup Low-sodium soy sauce or tamari for gluten-free
  • 2 tablespoons Honey or maple syrup

Equipment

  • Baking dish
  • Mixing bowl
  • meat thermometer

Method
 

Cooking Instructions
  1. Preheat the oven to 400°F (200°C).
  2. Prepare your baking dish by spraying it with nonstick spray. Season the chicken breasts generously with salt and pepper on both sides.
  3. Mix the marinade in a bowl by combining olive oil, minced garlic, dried thyme, dried rosemary, soy sauce, and honey.
  4. Coat the chicken with the marinade and let sit for at least 15 minutes.
  5. Roast the chicken in the preheated oven for 25–30 minutes or until the internal temperature reaches 165°F (74°C).
  6. Rest the chicken for 5 minutes before serving.

Nutrition

Serving: 1pieceCalories: 220kcalCarbohydrates: 5gProtein: 36gFat: 8gSaturated Fat: 1gPolyunsaturated Fat: 0.5gMonounsaturated Fat: 5gCholesterol: 80mgSodium: 300mgPotassium: 500mgSugar: 3gCalcium: 10mgIron: 1mg

Notes

Optional: Serve with a sprinkle of fresh herbs for added flavor.

Tried this recipe?

Let us know how it was!

Filed Under: DINNER RECIPES

Chicken Teriyaki Noodles

January 9, 2026 by JudyWhite Leave a Comment

There’s something irresistibly comforting about homemade Chicken Teriyaki Noodles—it’s the perfect dish to bring warmth and flavor to any weeknight. I discovered this delightful fusion while searching for ways to elevate my typical noodle dishes, and trust me, it’s a game changer! The way the garlic and bell peppers come together in the pan, filling your kitchen with an aromatic embrace, is pure magic.

With just 30 minutes of your time, you can transform simple ingredients like chicken, soy sauce, and crunchy peppers into a vibrant meal that not only satisfies but impresses. This recipe has quickly become a favorite in my household, and I know it will be in yours too. Let’s ditch the fast food and embrace a nourishing, homemade option that’s bursting with flavors and textures—perfect for busy days or cozy evenings at home! Ready to get cooking?

Why You'll Love This Chicken Teriyaki Noodles

  • This Chicken Teriyaki Noodles recipe is incredibly easy to make, requiring just 30 minutes from prep to plate.
  • The blend of savory soy sauce, sweet brown sugar, and fresh garlic creates a flavor explosion that will tantalize your taste buds.
  • Its versatility allows you to customize the dish by adding your favorite vegetables or adjusting the protein based on what you have at hand.
  • Not only is it visually appealing with its vibrant colors, but it also makes for a crowd-pleasing meal that everyone will rave about.

Chicken Teriyaki Noodles Ingredients

Get ready to create a flavor-packed meal!

For the Chicken
• Boneless, skinless chicken breasts – a lean protein choice that absorbs the teriyaki flavors beautifully.
• Fresh garlic – mincing it releases essential oils for a stronger aroma and taste.

For the Noodles & Veggies
• Egg noodles – they cook quickly, providing a perfect, chewy base for the dish.
• Bell peppers – vibrant colors not only enhance the dish’s appeal but add a slight sweetness.

For the Sauce
• Low-sodium soy sauce – helps to keep the dish flavorful without excessive salt, balancing the sweetness of the brown sugar.
• Brown sugar – this adds a touch of caramel-like sweetness that complements the savory flavors perfectly.
• Sesame oil – a little goes a long way in adding a nutty richness that rounds out the flavor of your Chicken Teriyaki Noodles.

How to Make Chicken Teriyaki Noodles

  1. Slice the chicken breasts into thin strips, as this allows them to cook evenly and absorb all the delicious flavors. Make sure to chop the garlic and bell peppers to set them aside for later!

  2. Boil water in a large pot, bringing it to a rolling boil. Add the egg noodles and cook them according to the package instructions until they reach that perfect al dente texture—usually about 5-7 minutes.

  3. Sauté the chicken in a large skillet over medium-high heat. Drizzle in the sesame oil and add the chicken strips, cooking them until they turn golden brown, which should take around 5 minutes.

  4. Add the minced garlic and sliced bell peppers to the skillet. Stir-fry everything together for about 3 minutes until the garlic is fragrant and the peppers are tender, yet still vibrant.

  5. Mix together the soy sauce, brown sugar, and sesame oil in a small bowl. Pour this delicious blend over the chicken and veggies, stirring well to combine and let those flavors meld.

  6. Toss in the cooked egg noodles into the skillet. Use tongs or a spatula to gently mix everything together until the noodles are well coated in that scrumptious sauce.

Optional: Top with sesame seeds for an extra crunch and a pop of flavor!

Exact quantities are listed in the recipe card below.

Make Ahead Options

These Chicken Teriyaki Noodles are perfect for busy home cooks who want to streamline their meal prep! You can slice the chicken, chop the garlic, and bell peppers up to 24 hours in advance, storing them in the refrigerator to maintain freshness. The egg noodles can also be cooked ahead of time—just toss them in a little oil to prevent sticking and refrigerate for up to 3 days. When you’re ready to serve, simply sauté the chicken and veggies, add the sauce, incorporate the noodles, and warm everything together. This way, you’ll enjoy restaurant-quality Chicken Teriyaki Noodles with minimal effort on hectic weeknights!

What to Serve with Chicken Teriyaki Noodles?

Looking to create a well-rounded meal that tantalizes the taste buds?

  • Steamed Broccoli: This green veggie adds a subtle crunch and its earthy flavor pairs perfectly with the sweetness of the teriyaki sauce.

  • Crispy Spring Rolls: Filled with fresh vegetables, they bring a satisfying crunch and refreshing contrast to the tender noodles.

  • Miso Soup: A warm, savory broth that offers comforting umami notes to balance the dish’s sweetness while warming your soul.

  • Asian Coleslaw: Crisp cabbage with sesame dressing cuts through the richness of the chicken, adding a zingy, refreshing element to your meal.

  • Grilled Pineapple: Sweet, caramelized fruit that enhances the dish’s teriyaki flavors, bringing a tropical twist to the table.

  • Green Tea: Its light, refreshing notes cleanse the palate, making it a perfect drink pairing with the savory and sweet elements of the noodles.

  • Chocolate Mousse: For dessert, this rich and creamy treat offers a delightful finish to your meal, sweeping away every savory bite with a touch of decadence.

  • Lemon Sorbet: A cool, tangy dessert that refreshes the palate and perfectly contrasts the sweet richness of the Chicken Teriyaki Noodles.

How to Store and Freeze Chicken Teriyaki Noodles

Fridge: Store any leftover Chicken Teriyaki Noodles in an airtight container in the fridge for up to 3 days to retain freshness and flavor.

Freezer: For longer storage, freeze the noodles in a freezer-safe container for up to 2 months. Ensure they are completely cooled before sealing.

Reheating: Thaw overnight in the fridge before reheating in a skillet over low heat, adding a splash of water or soy sauce to keep them moist.

Airtight Tips: Always ensure containers are well-sealed to prevent freezer burn and preserve the delicious teriyaki flavors.

Chicken Teriyaki Noodles Variations

Feel free to make this dish your own with these delicious twists!

  • Vegetable-Loaded: Add a mix of broccoli, carrots, or snap peas for extra crunch and nutrition, making it even more colorful.

  • Protein Swap: Use shrimp or tofu instead of chicken for a different protein profile that still soaks up that savory sauce.

  • Spicy Kick: Incorporate red pepper flakes or a dash of Sriracha to liven things up, bringing a delightful heat that complements the sweetness.

  • Whole Grain Noodles: Substitute egg noodles with whole wheat or rice noodles for a healthier option that adds a nutty flavor.

  • Sweet and Sour: Mix in pineapple chunks for a tropical twist that balances the savory notes with fruity sweetness.

  • Gluten-Free: Choose gluten-free soy sauce and rice noodles to create a dish that’s suitable for those avoiding gluten without sacrificing flavor.

  • Nutty Crunch: Toss in chopped peanuts or cashews before serving to introduce a satisfying crunch that elevates the overall texture.

  • Citrus Zing: Add a splash of fresh lime juice or zest to the sauce for a refreshing citrus brightening that enhances all the flavors.

Chef's Helpful Tips

  • When preparing Chicken Teriyaki Noodles, thinly slicing the chicken allows for quicker cooking and better flavor absorption.
  • Avoid overcooking the noodles by checking them a minute or two before the package instructions suggest, as they will continue to cook slightly after being drained.
  • Stir-fry the garlic and bell peppers just until the peppers are tender to maintain their vibrant colors and crunch.
  • For the sauce, adding the soy sauce mixture to the skillet right after sautéing the garlic helps to build rich flavors as it caramelizes during cooking.

Chicken Teriyaki Noodles Recipe FAQs

How do I choose the best chicken for my Chicken Teriyaki Noodles?
Absolutely! When selecting chicken breasts, look for those that are firm, plump, and free of any dark spots or unpleasant odors. Fresh chicken should have a pink hue and feel moist but not sticky. I often recommend choosing organic or free-range chicken for the best flavor and quality.

How should I store leftover Chicken Teriyaki Noodles?
Very easy! After eating, store any leftovers in an airtight container in the fridge. They’ll stay fresh for up to 3 days. Make sure to let them cool down before sealing to avoid condensation, which can lead to soggy noodles.

Can I freeze my Chicken Teriyaki Noodles?
Absolutely! For freezing, allow the noodles to cool completely. Transfer them to a freezer-safe container or zip-top bag, ensuring that as much air as possible is removed. They will keep well in the freezer for up to 2 months. When you’re ready to enjoy them again, simply thaw overnight in the refrigerator before reheating.

What can I do if my Chicken Teriyaki Noodles turn out too dry?
No worries! If your dish ends up on the drier side, it might be that you cooked the noodles too long or didn’t have enough sauce. To fix this, add a splash of low-sodium soy sauce or chicken broth while reheating on the stove. This will not only add moisture but also enhance the flavor.

Are there any dietary considerations I should be aware of for this recipe?
Definitely! If you have allergies, be sure to substitute the soy sauce with a gluten-free variety, and remember to check your egg noodles for gluten as well. You can easily make this dish vegetarian by swapping the chicken for tofu or your favorite veggies. Always consider any guests with dietary restrictions and adjust accordingly!

How do I know if my bell peppers are ripe?
Very simple! For the best flavor in your Chicken Teriyaki Noodles, choose bell peppers that are firm and shiny, with no blemishes or soft spots. The colors should be vibrant—look for bright reds and yellows for sweetness. If you see any dark spots or wrinkles, it might be best to pass on those.

Chicken Teriyaki Noodles

Chicken Teriyaki Noodles

Delight in Chicken Teriyaki Noodles, a savory dish featuring tender chicken, vibrant veggies, and a sweet-tangy sauce all in under 30 minutes.
Print Recipe Pin Recipe
Prep Time 10 minutes mins
Cook Time 20 minutes mins
Total Time 30 minutes mins
Servings: 4 servings
Course: DINNER RECIPES
Cuisine: Asian
Calories: 450
Ingredients Equipment Method Nutrition Notes

Ingredients
  

For the Chicken
  • 1 pound boneless, skinless chicken breasts lean protein
  • 2 cloves fresh garlic minced
For the Noodles & Veggies
  • 8 ounces egg noodles cooked to al dente
  • 1 cup bell peppers sliced
For the Sauce
  • 1/4 cup low-sodium soy sauce
  • 2 tablespoons brown sugar
  • 1 tablespoon sesame oil

Equipment

  • Large pot
  • Large skillet
  • Small bowl

Method
 

Directions
  1. Slice the chicken breasts into thin strips to ensure even cooking and flavor absorption.
  2. Boil water in a large pot and cook egg noodles according to package instructions until al dente, about 5-7 minutes.
  3. Sauté the chicken in a large skillet over medium-high heat with sesame oil until golden brown, approximately 5 minutes.
  4. Add minced garlic and sliced bell peppers to the skillet, stir-frying for about 3 minutes until fragrant.
  5. Mix soy sauce, brown sugar, and sesame oil in a small bowl, then pour it over the chicken and veggies, stirring to combine.
  6. Toss in the cooked egg noodles, gently mixing until noodles are well coated with the sauce.
  7. Optionally, top with sesame seeds before serving.

Nutrition

Serving: 1servingCalories: 450kcalCarbohydrates: 50gProtein: 30gFat: 15gSaturated Fat: 2gPolyunsaturated Fat: 0.5gMonounsaturated Fat: 1gCholesterol: 70mgSodium: 700mgPotassium: 600mgFiber: 3gSugar: 5gVitamin A: 15IUVitamin C: 60mgCalcium: 4mgIron: 10mg

Notes

Thinly slicing the chicken allows faster cooking and better absorption of flavors. Ensure noodles are not overcooked and stir-fry the veggies just until tender to retain their color.

Tried this recipe?

Let us know how it was!

Filed Under: DINNER RECIPES

Sweet & Sour Ground Chicken

January 9, 2026 by JudyWhite Leave a Comment

There’s a comforting familiarity to the clash of sweet and tangy that keeps me coming back for more, especially after a long day. Recently, I found myself yearning for a dish that could bring a delicious twist to our dinner table without the hassle of complicated recipes. Enter my Sweet & Sour Ground Chicken—perfectly balanced, vibrant, and bursting with flavors that tickle the taste buds.

Imagine sizzling diced chicken, mingling with colorful bell peppers and the alluring aroma of garlic, all topped off with juicy pineapple. This recipe not only delivers incredible taste but also takes just 30 minutes to whip up, making it an ideal choice for busy weeknights. What’s more, it invites versatility; serve it over rice, noodles, or even on its own as a protein-packed dish.

Join me as I guide you through preparing this crowd-pleaser that will have everyone at the table asking for seconds. Trust me, once you try it, fast food will feel like a distant memory!

Why You'll Love This Sweet & Sour Ground Chicken

  • This Sweet & Sour Ground Chicken is a breeze to prepare, taking only 30 minutes from start to finish, perfect for busy weeknights.
  • The explosion of flavors, combining the sweetness of pineapple with the tanginess of the sauce, creates a delicious experience that will delight your taste buds.
  • Its versatility allows you to serve it over rice, noodles, or even enjoy it on its own, making it a fantastic choice for any meal.
  • Visually appealing with its colorful ingredients, this dish is sure to impress family and friends alike, transforming everyday dinners into something special.
  • Enjoy a hearty meal that’s both nutritious and satisfying, making it a hit for the whole family.

Sweet & Sour Ground Chicken Ingredients

• Dive into this delightful dish with these essentials!

For the Chicken
• 1 lb boneless, skinless chicken breasts – diced for tender bites that absorb the sauce beautifully.

For the Stir-Fry
• 3 cloves fresh garlic – minced to add aromatic warmth and depth to the dish.
• 1 cup bell peppers – diced in mixed colors for a vibrant touch that enhances visual appeal.
• 1 cup pineapple chunks – fresh or canned, providing that signature sweetness that balances the dish.

For the Sauce
• 1/4 cup low-sodium soy sauce – use this to enhance umami without overwhelming saltiness.
• 2 tbsp brown sugar – adds sweetness and helps to balance the acidity in the sauce.
• 2 tbsp rice vinegar – brings a tangy kick that perfectly complements the dish.
• 1 tbsp vegetable oil – a neutral oil for sautéing that allows other flavors to shine.

Now you’re all set to create this mouthwatering Sweet & Sour Ground Chicken!

How to Make Sweet & Sour Ground Chicken

  1. Heat the Oil: Start by warming the vegetable oil in a large skillet over medium heat. This should take about 2 minutes, perfect for guaranteeing a nice sizzle when you add the chicken.

  2. Cook the Chicken: Once the oil is hot, add the diced chicken to the skillet. Cook for 6-8 minutes until the chicken is browned and no longer pink, stirring occasionally to ensure even cooking.

  3. Add Aromatics: Stir in the minced garlic and diced bell peppers. Sauté for about 3-4 minutes, just until the peppers begin to soften. The aroma will be heavenly!

  4. Prepare the Sauce: In a bowl, whisk together the low-sodium soy sauce, rice vinegar, brown sugar, and pineapple chunks. Pour this vibrant mixture over the chicken and vegetables in the skillet.

  5. Simmer to Perfection: Allow the mixture to simmer for 5-7 minutes. You’ll notice the sauce thickening slightly, coating everything in a deliciously glossy glaze.

  6. Serve and Enjoy: Serve your Sweet & Sour Ground Chicken hot over steamed rice or noodles for a satisfying meal. Enjoy the explosion of flavors!

Optional: Garnish with sesame seeds for an added crunch.

Exact quantities are listed in the recipe card below.

Sweet & Sour Ground Chicken Variations

Feel free to adjust this recipe to suit your taste—after all, cooking is all about exploration and creativity!

  • Pineapple Swap: Use mango chunks for a tropical twist, adding a different sweetness and texture to the dish.

  • Spicy Kick: Incorporate red pepper flakes or diced jalapeños for an exciting heat level that beautifully contrasts the sauce.

  • Vegetarian Option: Replace chicken with diced tofu, absorbing flavors while providing a protein-packed vegetarian dish.

  • Low-Sodium Twist: Opt for coconut aminos instead of soy sauce for a lower sodium alternative that still packs a punch of umami!

  • Nutty Flavor: Sprinkle in chopped cashews or peanuts just before serving for an added crunch and nutty flavor dimension.

  • Zesty Lime: Add the juice of half a lime to the sauce for a refreshing brightness that lifts the entire dish.

  • Sweet Alternative: Use honey or maple syrup in place of brown sugar for a natural sweetness that enriches the dish wonderfully.

  • Savory Greens: Stir in baby spinach or bok choy during the last few minutes of cooking for added nutrients and a pop of color.

Make Ahead Options

These Sweet & Sour Ground Chicken preparations are perfect for busy home cooks looking to save time during the week! You can chop the chicken, garlic, and bell peppers up to 24 hours in advance. Simply store them in airtight containers in the refrigerator to keep them fresh. The sauce can also be mixed beforehand—combine the soy sauce, rice vinegar, brown sugar, and pineapple chunks, and keep it sealed for up to 3 days. When you’re ready to cook, just heat the oil and add the prepped ingredients, then finish the recipe as usual! This way, you’ll still enjoy a delicious home-cooked meal without the last-minute rush.

What to Serve with Sweet & Sour Ground Chicken?

Transform your weeknight dinner into an extraordinary experience with vibrant sides and delightful complements!

  • Steamed Jasmine Rice: The fragrant, fluffy texture of jasmine rice soaks up the sweet and tangy sauce perfectly, making every bite a burst of flavor. It’s a classic pairing that balances the dish beautifully.

  • Vegetable Egg Rolls: Crispy on the outside, filled with fresh veggies inside, these egg rolls add a delightful crunch to your meal, enhancing the sweet and sour theme with every bite. Pair them with a side of sweet chili sauce for dipping.

  • Crispy Tofu Sticks: For a vegetarian twist, crispy tofu sticks lend a satisfying crunch and absorb the flavors of the sweet and sour sauce, providing a delightful contrast in texture. Serve them alongside for a hearty option.

  • Cucumber Salad: A refreshing cucumber salad with a vinegar dressing brightens the palate, offering a cool, crisp contrast to the warm, flavorful chicken. The acidity helps to balance the richness of the dish.

  • Sweet and Sour Slaw: Tossed with a light, tangy dressing, this colorful slaw adds crunch and zest, complementing the sweet and sour chicken beautifully. It’s a textural delight that brings freshness to the table.

  • Mango Lassi: This creamy yogurt drink provides a rich and refreshing counterbalance to the meal’s sweetness. Its tropical flavors enhance the overall experience, making every sip a treat.

  • Pineapple Upside-Down Cake: For dessert, this classic cake echoes the sweet flavors of the main dish and offers a delightful finish to your meal. Serve warm for a cozy, satisfying end to the evening.

How to Store and Freeze Sweet & Sour Ground Chicken

Fridge: Store leftovers in an airtight container for up to 3 days. Make sure to cool the dish to room temperature before sealing to maintain freshness.

Freezer: For longer storage, freeze in a freezer-safe container or bag for up to 3 months. Divide into portions for easy meals later!

Reheating: Thaw overnight in the fridge before reheating. Warm in a skillet over medium heat or in the microwave until heated through, stirring occasionally to keep moist.

Serving Suggestion: Reinvent meals by using leftover sweet & sour ground chicken in wraps, salads, or as a filling for tacos—delicious and versatile!

Chef's Helpful Tips

  • When making Sweet & Sour Ground Chicken, ensure your skillet is adequately heated before adding the chicken to achieve a nice brown color and prevent sticking.
  • Avoid overcooking the chicken, as it can become dry; cooking until it’s just no longer pink will keep it juicy.
  • For a more vibrant dish, use a mix of colorful bell peppers, as they not only enhance the visual appeal but also provide varying flavors and nutrients.
  • Remember to keep an eye on the simmering sauce, as it thickens quickly; stirring occasionally helps prevent sticking to the pan and promotes even coating on the chicken and vegetables.

Sweet & Sour Ground Chicken Recipe FAQs

How do I choose ripe bell peppers for this recipe?
Absolutely! Look for bell peppers that are firm and have shiny skin. Avoid those with dark spots or wrinkles, as they indicate overripeness. Colors matter too—choose a mix of red, yellow, and green for a visually appealing dish!

How long does Sweet & Sour Ground Chicken last in the fridge?
Very! This dish can be stored in an airtight container in the fridge for up to 3 days. Just make sure it’s completely cooled before storing, as this helps maintain quality and flavor over those days.

Can I freeze Sweet & Sour Ground Chicken?
Of course! To freeze, allow the dish to cool completely, then transfer it to a freezer-safe container. It will last for up to 3 months in the freezer. Mark the date on the container so you can keep track of freshness. When you’re ready to enjoy it again, thaw it in the fridge overnight before reheating.

What’s the best way to reheat leftover Sweet & Sour Ground Chicken?
I recommend reheating your leftovers in a skillet over medium heat. If the sauce has thickened too much, add a splash of water or broth to loosen it up. Stir occasionally until it’s heated throughout—this will keep your chicken tender and the dish delicious!

Is this recipe suitable for people with soy allergies?
No worries! If you’re avoiding soy, you can substitute the low-sodium soy sauce with coconut aminos or a homemade soy-free sauce made with beef or vegetable broth and a splash of vinegar for the tangy flavor.

My sauce didn’t thicken; what can I do?
That’s a common issue! If your sauce hasn’t thickened, let it simmer a bit longer and stir frequently. You can also mix a teaspoon of cornstarch with a tablespoon of water and stir that mixture into the sauce; it will quickly thicken up! Just keep an eye on it to prevent burning.

Sweet & Sour Ground Chicken

Sweet & Sour Ground Chicken

A quick and flavorful dish combining sweet and tangy elements that makes for a perfect weeknight dinner.
Print Recipe Pin Recipe
Prep Time 10 minutes mins
Cook Time 20 minutes mins
Total Time 30 minutes mins
Servings: 4 servings
Course: DINNER RECIPES
Cuisine: Asian
Calories: 320
Ingredients Equipment Method Nutrition Notes

Ingredients
  

For the Chicken
  • 1 lb boneless, skinless chicken breasts diced for tender bites that absorb the sauce beautifully
For the Stir-Fry
  • 3 cloves fresh garlic minced to add aromatic warmth and depth
  • 1 cup bell peppers diced in mixed colors for vibrancy
  • 1 cup pineapple chunks fresh or canned, providing sweetness
For the Sauce
  • 1/4 cup low-sodium soy sauce enhances umami without overwhelming saltiness
  • 2 tbsp brown sugar adds sweetness and balances acidity
  • 2 tbsp rice vinegar brings a tangy kick
  • 1 tbsp vegetable oil neutral oil for sautéing

Equipment

  • Large skillet

Method
 

Cooking Steps
  1. Heat the vegetable oil in a large skillet over medium heat for about 2 minutes.
  2. Add the diced chicken to the skillet and cook for 6-8 minutes until browned and no longer pink.
  3. Stir in the minced garlic and diced bell peppers, sauté for 3-4 minutes until softened.
  4. Whisk together the soy sauce, rice vinegar, brown sugar, and pineapple chunks in a bowl.
  5. Pour the mixture over the chicken and vegetables in the skillet and simmer for 5-7 minutes.
  6. Serve hot over steamed rice or noodles.

Nutrition

Serving: 1servingCalories: 320kcalCarbohydrates: 25gProtein: 30gFat: 10gSaturated Fat: 2gPolyunsaturated Fat: 1gMonounsaturated Fat: 3gCholesterol: 70mgSodium: 600mgPotassium: 450mgFiber: 2gSugar: 8gVitamin A: 10IUVitamin C: 25mgCalcium: 2mgIron: 8mg

Notes

Optional: Garnish with sesame seeds for added crunch. Store leftovers in an airtight container for up to 3 days.

Tried this recipe?

Let us know how it was!

Filed Under: DINNER RECIPES

Chicken Ramen

January 9, 2026 by JudyWhite Leave a Comment

When the craving for a warm bowl of comfort strikes, nothing beats the soul-soothing embrace of Chicken Ramen. I first discovered this delightful dish during a chilly evening, when the thought of takeout just didn’t cut it. Picture the warmth radiating from a steaming pot, as the aroma of garlic and ginger wafts through the air, teasing your senses.

This recipe brings the heart of Japanese cuisine to your kitchen without the fuss, making it a perfect weeknight treat or an impressive addition to your dinner parties. With tender chicken, fresh ramen noodles, and a rich broth that’s bursting with flavor, it’s hard to resist. You might even find it becomes your go-to solution for those bland fast-food cravings.

So, grab your apron and let’s create a bowl of happiness that will not only satisfy your taste buds but also fill your home with a warmth that only homemade meals can provide.

Why You'll Love This Chicken Ramen

  • This Chicken Ramen recipe is incredibly easy to whip up, making it a perfect choice for busy weeknights.
  • The combination of tender chicken, rich broth, and fresh ramen noodles creates a flavor explosion that will leave your taste buds dancing.
  • Its versatility means you can customize toppings to fit your preferences, from spicy chili oil to colorful veggies.
  • Visually stunning with vibrant greens and eggs, this bowl is sure to impress at any dinner gathering.

Chicken Ramen Ingredients

For the Broth

  • Boneless, skinless chicken breasts – a lean protein that creates a hearty base for your Chicken Ramen.
  • Fresh garlic – adds an aromatic depth that enhances the overall flavor.
  • Fresh ginger – brings a zesty warmth that perfectly complements the broth.
  • Low-sodium chicken broth – ensures a rich flavor without overwhelming saltiness; homemade is excellent if you have it!
  • Soy sauce – adds umami and a savory depth to balance the dish.

For the Noodles

  • Fresh ramen noodles – preferred for their chewy texture, they soak up the broth beautifully.

For Toppings

  • Green onions – contribute a fresh crunch and vibrant color to your Chicken Ramen.
  • Soft-boiled eggs – adding creaminess, they elevate your dish visually and texturally.
  • Nori sheets – provide a savory marine flavor and a delightful contrast to the other textures.

Feel free to customize your Chicken Ramen by adding your favorite veggies or seasonings for an extra pop of flavor!

How to Make Chicken Ramen

  1. Prepare ingredients: Start by chopping the garlic and grating the ginger, ensuring they’re ready to release their flavors into the broth. This step takes about 5 minutes.

  2. Sauté aromatics: In a large pot over medium heat, add a splash of oil and sauté the garlic and ginger until they become fragrant, which should take around 2 minutes. The aroma will fill your kitchen!

  3. Cook chicken: Add the chicken breasts, broth, and soy sauce to the pot. Bring it to a gentle simmer and cook until the chicken is fully cooked and tender, about 15-20 minutes. It should be beautifully moist.

  4. Shred chicken: Carefully remove the chicken from the pot and shred it using two forks. Return the shredded chicken to the pot, then add the fresh ramen noodles to the flavorful broth. Cook according to package instructions until tender.

  5. Assemble bowls: Divide the cooked noodles into bowls, topping with shredded chicken, soft-boiled eggs, sliced green onions, and pieces of nori. Each bowl should look like a work of art!

Optional: Drizzle with chili oil for an extra kick.

Exact quantities are listed in the recipe card below.

How to Store and Freeze Chicken Ramen

Fridge: Keep leftover Chicken Ramen in an airtight container for up to 3 days. Reheat gently on the stove or in the microwave, adding a splash of broth if needed.

Freezer: For longer storage, freeze the broth and shredded chicken separately from the noodles. This will maintain their textures best; it lasts for up to 3 months.

Reheating: When ready to enjoy, thaw overnight in the fridge. Reheat the broth on the stove until bubbling, and cook fresh noodles according to package instructions before serving.

Assembly Tip: To retain toppings’ freshness, store them separately and add them just before serving for the best flavor and presentation.

What to Serve with Chicken Ramen?

When you’ve prepared a comforting bowl of Chicken Ramen, it’s time to think about delightful companions that enhance the meal’s heartwarming experience.

  • Steamed Edamame: These tender, buttery beans add a fresh crunch and a pop of flavor that complements the rich broth beautifully.

  • Japanese Pickles (Tsukemono): Their tangy, crunchy texture brings a refreshing contrast, balancing the savory notes of your ramen. A small side of pickles can elevate the whole meal.

  • Crispy Tempura Vegetables: Lightly battered and fried, these add delightful crispiness and a hint of sweetness that pairs wonderfully with the warm noodles.

  • Miso Soup: A light and savory counterpart, miso soup lightens your dining experience while echoing Japanese flavors in a soothing way. Each sip can cleanse the palate between bites.

  • Asian Green Salad: Tossed with a sesame dressing, this salad offers a refreshing crunch, with crispy veggies that contrast beautifully against the soft noodles and chicken.

  • Sake or Plum Wine: A chilled glass of sake or sweet plum wine enhances the meal, bringing a touch of sophistication with a smooth, flavorful finish.

Each pairing not only complements the dish but also elevates your Chicken Ramen experience to a memorable feast, inviting warmth and joy to your dining table.

Chicken Ramen Variations

Customize your Chicken Ramen for a tasty twist that suits your cravings or dietary needs!

  • Dairy-Free: Substitute any creamy toppings like soft-boiled eggs or avoid dairy-based condiments for a completely dairy-free bowl.
  • Gluten-Free: Use gluten-free ramen noodles and tamari instead of soy sauce for a delicious gluten-free version.
  • Vegetable-Loaded: Add sautéed bok choy, mushrooms, or bean sprouts to boost nutrition and texture. Fresh veggies make each bite delightful!
  • Spicy Kick: Drizzle in some sriracha or chili oil to bring the heat. Extra spicy, flavorful, and unforgettable!
  • Protein Boost: Swap chicken with tofu or shrimp for a vegetarian or seafood variation that changes up the flavor profile beautifully.
  • Coconut Twist: Stir in a can of coconut milk for a creamy, slightly sweet twist on the broth that adds richness.
  • Herbed Flavor: Enhance the broth with fresh herbs like cilantro or basil for a fragrant, aromatic experience.
  • Savory Miso: Mix in a tablespoon of miso paste to the broth for an umami-packed flavor that enriches the overall taste.

Let your imagination roam as you create a Chicken Ramen that’s uniquely yours!

Make Ahead Options

These Chicken Ramen bowls are an excellent choice for meal prep enthusiasts! You can prepare the broth and shredded chicken up to 3 days in advance, storing them in separate airtight containers in the refrigerator for optimal freshness. To savor that comforting taste just like freshly made, be sure to reheat the broth gently on the stove before adding the fresh ramen noodles and simmering to cook them according to the package instructions. If you want to save even more time, soft-boil the eggs and keep them in their shells in the refrigerator for up to 24 hours. This way, you can throw together a delicious bowl of Chicken Ramen with minimal fuss whenever the craving strikes!

Chef's Helpful Tips

  • When making Chicken Ramen, ensure your garlic and ginger are sautéed just until fragrant to avoid bitterness.
  • Use low-sodium chicken broth for a healthier dish, and consider making your own for superior flavor.
  • Shredding the chicken while it’s still warm will make it easier to pull apart and more tender in the broth.
  • Finally, remember to cook the fresh ramen noodles just until al dente, as they will continue to soften in the hot broth once served.

Chicken Ramen Recipe FAQs

What type of chicken should I use for Chicken Ramen?
For the best results, I recommend using boneless, skinless chicken breasts as they’re lean and cook quickly, creating a tender texture that shreds beautifully for your ramen. If you prefer more flavor, thighs can also be used, but the cooking time may vary slightly.

How long can I store leftover Chicken Ramen?
Leftover Chicken Ramen can be stored in an airtight container in the fridge for up to 3 days. When reheating, do so gently on the stove or microwave. If the broth seems thick after refrigeration, simply add a little splash of chicken broth or water to restore its original consistency.

Can I freeze Chicken Ramen?
Absolutely! To freeze Chicken Ramen, I suggest separating the broth and shredded chicken from the noodles. Store them in airtight containers for up to 3 months. When you’re ready to enjoy it again, thaw the broth and chicken overnight in the fridge. Reheat the broth on the stove until bubbling, and cook fresh noodles according to package instructions.

What should I do if my broth tastes bland?
If you find your broth lacking flavor, consider adding more soy sauce, a splash of mirin, or extra herbs like green onions or cilantro. Additionally, simmering it longer can help deepen the flavors. If it’s still not quite there, don’t hesitate to season with salt or a dash of fish sauce for added umami.

Can I customize the ingredients in Chicken Ramen?
Very much so! Chicken Ramen is very versatile. You can add vegetables like bok choy, spinach, or mushrooms for extra nutrition and flavor. If you’re looking for a vegetarian option, tofu can be a great substitute for chicken. Just adjust the cooking times for any new additions accordingly.

Is this Chicken Ramen dish kid-friendly?
Absolutely! The flavors in Chicken Ramen are mild and comforting, making it a hit with kids. If your little ones prefer less spice, simply leave out any additional seasonings like chili oil. Plus, they’ll love assembling their bowls and choosing their favorite toppings!

Chicken Ramen

Chicken Ramen

Enjoy a comforting bowl of Chicken Ramen, a perfect blend of tender chicken and rich broth.
Print Recipe Pin Recipe
Prep Time 5 minutes mins
Cook Time 25 minutes mins
Total Time 30 minutes mins
Servings: 4 bowls
Course: DINNER RECIPES
Cuisine: Japanese
Calories: 450
Ingredients Equipment Method Nutrition Notes

Ingredients
  

For the Broth
  • 2 pieces Boneless, skinless chicken breasts a lean protein that creates a hearty base
  • 4 cloves Fresh garlic adds aromatic depth
  • 1 tablespoon Fresh ginger brings a zesty warmth
  • 4 cups Low-sodium chicken broth homemade is excellent if you have it
  • 1 tablespoon Soy sauce adds umami and savory depth
For the Noodles
  • 8 ounces Fresh ramen noodles preferred for chewy texture
For Toppings
  • 4 pieces Green onions for fresh crunch and color
  • 2 pieces Soft-boiled eggs adds creaminess and elevation
  • 2 sheets Nori sheets provides savory marine flavor

Equipment

  • Large pot
  • Cutting Board
  • Knife
  • measuring cups

Method
 

Preparation
  1. Chop the garlic and grate the ginger.
  2. In a large pot over medium heat, add a splash of oil and sauté the garlic and ginger until fragrant.
  3. Add the chicken breasts, broth, and soy sauce. Bring to a simmer and cook until chicken is tender.
  4. Remove chicken, shred it, and return to the pot. Add fresh ramen noodles and cook until tender.
  5. Divide noodles into bowls, add chicken, soft-boiled eggs, sliced green onions, and nori.

Nutrition

Serving: 1bowlCalories: 450kcalCarbohydrates: 50gProtein: 30gFat: 15gSaturated Fat: 3gPolyunsaturated Fat: 1gMonounsaturated Fat: 8gCholesterol: 150mgSodium: 900mgPotassium: 700mgFiber: 2gSugar: 3gVitamin A: 10IUVitamin C: 8mgCalcium: 4mgIron: 15mg

Notes

Customize with your favorite veggies or seasonings for extra flavor. Drizzle with chili oil for a kick.

Tried this recipe?

Let us know how it was!

Filed Under: DINNER RECIPES

Sourdough Pizza Dough

January 8, 2026 by JudyWhite Leave a Comment

There’s something truly special about gathering around a warm, cheesy pizza fresh from the oven, and what could elevate that experience more than homemade Sourdough Pizza Dough? I stumbled upon this delightful recipe while experimenting with my sourdough starter, which was becoming a pantry staple. With its tangy flavor and perfectly chewy texture, this dough takes pizza night to a whole new level—far beyond the average takeout!

Imagine the satisfaction of kneading the dough with your hands, feeling the magic come alive as it rises, eager to be stretched and topped with your favorite ingredients. Whether you’re a seasoned chef or just beginning your culinary journey, this recipe merges simplicity with exceptional flavor. I promise, it’s a brilliant way to delight your family and friends while steering clear of fast food. So roll up your sleeves, and let’s dive into this easy-to-follow Sourdough Pizza Dough recipe that will have everyone coming back for seconds!

Why You'll Love This Sourdough Pizza Dough

  • This Sourdough Pizza Dough is incredibly easy to make, allowing even beginners to enjoy the art of pizza crafting.
  • The unique tangy flavor and chewy texture created by the sourdough starter elevate your homemade pizzas to gourmet status.
  • It offers unparalleled versatility, enabling you to customize with your favorite toppings and create a meal everyone will love.
  • Not only is it time-saving with a total prep and cook time of just 30 minutes, but the long rise also fills your kitchen with a delightful aroma that will have your family excited for dinner.
  • Finally, the visual appeal of freshly baked pizza with beautifully browned edges makes this dish perfect for impressing guests.

Sourdough Pizza Dough Ingredients

Get ready to elevate your pizza game with these simple ingredients!

For the Dough

  • All-purpose flour – 3 cups (360g) will provide the perfect structure for your dough.
  • Active sourdough starter – 1 cup (240g) brings a delightful tanginess that distinguishes homemade pizza from takeout.
  • Room temperature water – 1 cup (240ml) helps activate the sourdough starter, ensuring a nice rise.
  • Salt – 2 tsp (10g) enhances flavor and strengthens the dough!
  • Olive oil – 2 tbsp (30ml) adds richness and contributes to a lovely, crisp crust.

With these ingredients, you’re well on your way to making a mouthwatering Sourdough Pizza Dough that will have everyone asking for more!

How to Make Sourdough Pizza Dough

  1. Mix: In a large bowl, combine the active sourdough starter, room temperature water, and olive oil. Whisk them together until frothy, which should take about a minute. This step activates your starter for a magnificent rise!

  2. Stir: Gradually add the flour and salt to the wet mixture. Use a wooden spoon or spatula to stir until everything is well combined and forms a shaggy dough. This should take about 2-3 minutes.

  3. Knead: Transfer the dough to a floured surface and knead for about 10 minutes. The dough should become smooth and elastic, allowing you to feel that satisfying stretch.

  4. Rise: Place the dough in a greased bowl, cover it with a clean kitchen towel, and let it rise in a warm area for 4-6 hours, or until it has doubled in size. The dough should look puffy and have a delightful aroma.

  5. Shape: Once risen, gently punch down the dough to release any air bubbles. Divide it into two balls, shaping each as desired. This is the moment for creativity!

  6. Bake: Preheat your oven to its highest setting (around 475°F or 245°C). Roll out each ball into a circle, add your favorite toppings, and bake for 12-15 minutes. You’re aiming for a golden-brown crust that smells heavenly!

Optional: Sprinkle with fresh basil after baking for an aromatic finish.

Exact quantities are listed in the recipe card below.

How to Store and Freeze Sourdough Pizza Dough

  • Room Temperature: Let the rolled-out dough rest for up to 30 minutes before baking for optimal crispness. If you don’t plan to use it right away, keep it covered with a damp cloth to prevent drying.
  • Fridge: Store any unused dough in an airtight container for up to 3 days. When ready to use, let it come to room temperature, which helps in restoration of texture.
  • Freezer: Freeze shaped, uncooked dough on a baking sheet for 1-2 hours, then transfer to a freezer bag for up to 3 months. Thaw overnight in the fridge before baking.
  • Reheating: For leftover baked pizza, reheat in a preheated oven at 350°F (175°C) for about 10 minutes. This will help preserve the delightful crunch of your Sourdough Pizza Dough.

What to Serve with Sourdough Pizza Dough?

Creating the perfect pizza experience goes beyond just the dough—it’s all about the delightful accompaniments that elevate your meal.

  • Fresh Garden Salad: Crisp greens with a zesty vinaigrette add a refreshing counterpoint to the cheesy richness of your pizza.
  • Garlic Bread: The buttery, garlic-infused toast is perfect for dipping into sauce or savoring alongside a slice.
  • Bruschetta: Topped with vibrant tomatoes and basil, this appetizer brings a burst of flavor that complements any pizza topping.
  • Roasted Veggies: Sweet and savory roasted veggies provide a medley of textures that pair beautifully with your sourdough creation.
  • Craft Beer: A hoppy IPA or a crisp lager enhances the savory flavors of your pizza while making every bite more enjoyable.
  • Pasta Salad: A chilled pasta salad with olive oil, pesto, or a vinaigrette can be a delicious side that balances out the meal.
  • Tiramisu: Conclude your pizza night with this luscious Italian dessert, adding an indulgent, sweet finish to your gathering.
  • Homemade Marinara Sauce: Serve a side of warm marinara for dipping pizza crusts; an irresistible combination!
  • Cheese Platter: A little selection of assorted cheeses can spark delightful conversations and pair well with various pizza toppings.
  • Sparkling Water: Refreshing and palate-cleansing, sparkling water accompanied by lemon or herbs elevates your pizza night.

Sourdough Pizza Dough Variations

Feel free to get creative and customize your sourdough pizza experience with these tempting variations!

  • Whole Wheat: Substitute half of the all-purpose flour with whole wheat flour for a nuttier flavor and added fiber.

  • Herbed Dough: Mix in 1 tablespoon of dried herbs like oregano or thyme into the flour for an aromatic twist. This addition will infuse the dough with lovely flavors right from the start.

  • Spicy Kick: Add a pinch of crushed red pepper flakes directly into the dough for an exciting heat that elevates your pizza game. Whether it’s a casual weeknight or a festive gathering, this spicy touch tantalizes the taste buds.

  • Garlic Infusion: Incorporate minced garlic or garlic powder into the dough for a fragrant, savory essence that pairs perfectly with classic pizza toppings. It’ll uplift the overall flavor profile in the most delightful way.

  • Cheesy Crust: Fold in shreds of mozzarella or parmesan cheese during the kneading process to create a deliciously cheesy crust. As the dough bakes, it creates a mouthwatering pull that welcomes everyone to your pizza night.

  • Gluten-Free Option: Substitute all-purpose flour with a 1:1 gluten-free blend that contains xanthan gum for those with dietary restrictions. Make sure to check if your sourdough starter is also gluten-free!

  • Sweet Pizza Base: For dessert pizzas, add a tablespoon of sugar or honey into the dough. This sweet base lends itself beautifully to toppings like nutella and strawberries or cinnamon and sugar.

Explore these variations and feel the thrill of creating unique pizzas that cater to your loved ones’ tastes!

Make Ahead Options

These Sourdough Pizza Dough balls are perfect for meal prep lovers! You can prepare the dough and let it rise up to 6 hours in advance, then shape the balls and refrigerate them for up to 24 hours. To do this, simply follow the recipe steps until the shaping stage, then tightly wrap the dough in plastic wrap to maintain its moisture. When you’re ready to bake, take the dough out of the fridge and let it sit at room temperature for about 30 minutes before rolling it out. This way, you’ll have fresh, gourmet-quality pizza with minimal effort on busy weeknights!

Chef's Helpful Tips

  • When making Sourdough Pizza Dough, always ensure your sourdough starter is active and bubbly for the best results.
  • A common mistake is adding too much flour; aim for a shaggy dough that is slightly sticky as you knead.
  • Kneading for the full 10 minutes is crucial for achieving that smooth, elastic texture which makes for a great crust.
  • Finally, for the best flavor and texture, allow the dough to rise in a warm, draft-free area for the full 4-6 hours until it has doubled in size.

Sourdough Pizza Dough Recipe FAQs

How do I know when my sourdough starter is active enough?
Absolutely! Your sourdough starter is ready when it’s bubbly and has doubled in volume within 4-6 hours after feeding. Look for a pleasant, slightly tangy aroma and make sure it’s fed with equal parts of water and flour to keep it lively.

How should I store the leftover Sourdough Pizza Dough?
You can keep any unused dough in an airtight container in the fridge for up to 3 days. Just be sure to let it come to room temperature before using; this will help restore its texture and make it easier to work with.

Can I freeze Sourdough Pizza Dough?
Yes! To freeze, shape the uncooked dough into balls and place them on a baking sheet. Freeze for about 1-2 hours until firm, then transfer to a freezer bag for up to 3 months. When you’re ready to use it, thaw it in the fridge overnight and allow it to come to room temperature before baking.

What should I do if my pizza dough isn’t rising properly?
Very! If your dough doesn’t rise, ensure your sourdough starter was active and fresh. Check that it’s warm enough in the area where the dough is rising—ideally around 75°F to 80°F (24°C to 27°C). If it’s cool, try placing it in an oven with just the light turned on, or a warm spot in your home.

Can I adjust this Sourdough Pizza Dough recipe for dietary restrictions?
Certainly! If you have gluten sensitivities, you can substitute the all-purpose flour with a gluten-free blend that has a binding agent like xanthan gum. Just keep in mind that the texture may differ slightly from traditional dough, but I often find that gluten-free works beautifully in pizzas!

Sourdough Pizza Dough

Sourdough Pizza Dough

This Sourdough Pizza Dough elevates pizza night with its tangy flavor and chewy texture, making it a delicious homemade option.
Print Recipe Pin Recipe
Prep Time 30 minutes mins
Cook Time 15 minutes mins
Rising Time 6 hours hrs
Total Time 6 hours hrs 45 minutes mins
Servings: 2 pizzas
Course: DINNER RECIPES
Cuisine: Italian
Calories: 250
Ingredients Equipment Method Nutrition Notes

Ingredients
  

For the Dough
  • 3 cups All-purpose flour 360g provides the perfect structure for your dough.
  • 1 cup Active sourdough starter 240g brings a delightful tanginess.
  • 1 cup Room temperature water 240ml helps activate the sourdough starter.
  • 2 tsp Salt 10g enhances flavor and strengthens the dough.
  • 2 tbsp Olive oil 30ml adds richness and contributes to a lovely crust.

Equipment

  • Mixing bowl
  • Wooden spoon
  • Spatula
  • Floured surface
  • Oven
  • Baking sheet

Method
 

How to Make Sourdough Pizza Dough
  1. In a large bowl, combine the active sourdough starter, room temperature water, and olive oil. Whisk until frothy, about a minute.
  2. Gradually add the flour and salt to the wet mixture. Stir until well combined and forms a shaggy dough, about 2-3 minutes.
  3. Transfer the dough to a floured surface and knead for about 10 minutes until smooth and elastic.
  4. Place the dough in a greased bowl, cover with a kitchen towel, and let rise in a warm area for 4-6 hours until doubled.
  5. Once risen, punch down the dough, divide into two balls, and shape as desired.
  6. Preheat the oven to 475°F (245°C). Roll out each ball, add toppings, and bake for 12-15 minutes until golden brown.

Nutrition

Serving: 1pizzaCalories: 250kcalCarbohydrates: 48gProtein: 8gFat: 3gSaturated Fat: 0.5gMonounsaturated Fat: 1gSodium: 400mgPotassium: 100mgFiber: 2gSugar: 1gIron: 10mg

Notes

For best results, ensure your sourdough starter is active and bubbly. A slightly sticky shaggy dough is ideal during kneading.

Tried this recipe?

Let us know how it was!

Filed Under: DINNER RECIPES

Fried Panko Chicken

January 8, 2026 by JudyWhite Leave a Comment

Sometimes, the simplest meals turn out to be the most memorable. I discovered this Fried Panko Chicken recipe after a long week when all I craved was something crispy, comforting, and homemade. The first time I took a bite, the golden, crunchy coating gave way to tender, juicy chicken. The combination of panko breadcrumbs and a hint of garlic created a delightful flavor that danced on my palate.

What I love most about this dish is its effortless elegance. In just 40 minutes, you can whip up a meal that feels indulgent without spending hours in the kitchen. It’s perfect for impressing guests at a casual dinner party or simply treating yourself to a satisfying weeknight dinner. With minimal ingredients and easy-to-follow steps, this recipe invites creativity—you could easily add your favorite herbs or spices into the mix.

Join me in discovering how to transform basic chicken into a crispy delight that will make you look forward to dinner!

Why You'll Love This Fried Panko Chicken

  • This Fried Panko Chicken recipe is incredibly easy to make, perfect for busy weeknights when you want something delicious without the hassle.
  • The flavor profile is simply irresistible, with a delightful crunch complemented by a subtle hint of garlic that elevates the dish.
  • Its versatility allows you to customize the seasonings, making it a canvas for your culinary creativity, whether you prefer herbs, spices, or even a zesty twist.
  • Visually appealing with its golden-brown crust, this dish is sure to impress your family and friends while being a true crowd-pleaser at any gathering.

Fried Panko Chicken Ingredients

• Get ready to create a crunchy delight!

For the Chicken
• Boneless, skinless chicken breasts – Choose fresh, high-quality chicken for the best flavor and tenderness.

For the Coating
• Panko breadcrumbs – These Japanese-style breadcrumbs create an extra crispy texture.
• All-purpose flour – This helps the egg wash adhere to the chicken, providing a solid base for the panko.
• Large eggs – Beaten eggs act as a glue to hold the crunchy coating in place.
• Garlic powder – This adds a subtle, savory flavor that compliments the chicken perfectly.
• Salt and pepper – Essential seasonings to enhance the overall taste of the Fried Panko Chicken.

For Baking
• Cooking spray – A light spray ensures the chicken cooks through and develops a golden-brown crust without sticking.

How to Make Fried Panko Chicken

  1. Preheat oven: Start by preheating your oven to 400°F (200°C). While the oven warms up, grab your baking dish and generously prepare it with cooking spray to prevent sticking.

  2. Pound chicken: Take each chicken breast and place them between two pieces of plastic wrap. With a meat mallet or rolling pin, pound them gently until they are about half an inch thick for even cooking.

  3. Set up stations: Create a breading station by setting up three bowls. In the first bowl, combine your flour, salt, pepper, and garlic powder. In the second, beat the eggs until well mixed. The third bowl will be filled with panko breadcrumbs.

  4. Dredge chicken: Take each chicken breast and first coat it in the flour mixture, shaking off any excess. Then, dip it into the egg wash, making sure it’s fully covered. Finally, press it firmly into the panko breadcrumbs to achieve that delightful crunch.

  5. Bake the chicken: Arrange the breaded chicken pieces in the prepared baking dish. Lightly spray the tops with cooking spray for that extra golden finish. Bake in the oven for 20-25 minutes, or until the chicken is cooked through and the coating is a beautiful golden brown.

Optional: Serve with a squeeze of fresh lemon juice for a zesty touch.

Exact quantities are listed in the recipe card below.

What to Serve with Fried Panko Chicken?

Elevate your dining experience with delightful sides that perfectly complement this crispy favorite.

  • Creamy Mashed Potatoes: Decadent and buttery, they provide a smooth contrast to the crispy chicken, enhancing every bite. The richness of the potatoes pairs wonderfully, making it a comforting classic.

  • Roasted Vegetables: A medley of seasonal veggies adds vibrant colors and a touch of sweetness, balancing the savory chicken. Think carrots, zucchini, and bell peppers roasted until caramelized for an added flavor dynamic.

  • Garlic Butter Green Beans: Sautéed until tender, these fresh green beans tossed with garlic and butter offer a crisp, flavorful side that echoes the mild garlic notes in the chicken. They’re not only crunchy but also a delightful way to add greens to your plate.

  • Caesar Salad: Crisp romaine lettuce, creamy dressing, and crunchy croutons create a fresh and tangy counterpoint to the fried panko chicken. The dressing enhances the meal, while the salad’s crunch complements the chicken’s texture beautifully.

  • Lemon Quinoa: This light, zesty quinoa dish adds a healthy grain option, full of fiber and protein. Flavored with lemon and herbs, it brightens the plate and keeps things refreshing.

  • Coleslaw: A refreshing, tangy slaw adds crunch and acidity, perfectly offsetting the richness of the chicken. It’s a classic pairing that brings a delightful contrast in textures and flavors.

  • Sparkling Water with Lime: A refreshing drink that cleanses the palate, adding a light effervescence to your meal. The zesty lime enhances the overall experience, making each bite of chicken feel even more vibrant.

  • Chocolate Mousse: For dessert, a silky chocolate mousse adds a touch of indulgence to the end of your meal. It’s a luxurious finish that sweetly contrasts the savory chicken.

Make Ahead Options

These Fried Panko Chicken pieces are fantastic for meal prep! You can bread the chicken up to 24 hours in advance by following the first four steps of the recipe, then cover and refrigerate them until you’re ready to bake. This method allows the flavors to meld beautifully while keeping the coating fresh and crunchy. When you’re ready to cook, simply preheat the oven and bake them directly from the fridge. Just make sure to add an extra minute or two to the cooking time, ensuring they reach that golden-brown perfection. By preparing ahead, you’ll have a delightful, homemade meal ready with minimal effort when the dinner rush hits!

How to Store and Freeze Fried Panko Chicken

Room Temperature: Store leftover Fried Panko Chicken in a covered dish at room temperature for up to 2 hours.

Fridge: Keep the chicken in an airtight container in the fridge for up to 3 days, ensuring it stays fresh and delicious.

Freezer: For longer storage, freeze the chicken in a single layer on a baking sheet for 1-2 hours, then transfer to a freezer bag. It can be frozen for up to 3 months.

Reheating: To reheat, place the chicken in a preheated oven at 350°F (175°C) for about 15-20 minutes until heated through and crispy again.

Fried Panko Chicken Variations

Feel free to get creative and personalize this recipe to your taste, ensuring every bite remains a joy!

  • Spicy Kick: Add cayenne pepper to the flour mixture for a fiery twist that complements the crunch beautifully.

  • Herb-Infused: Mix dried oregano or thyme into the panko for a fragrant and flavorful twist that elevates the dish.

  • Cheesy Delight: Sprinkle grated Parmesan cheese into the panko for a rich, savory flavor that pairs perfectly with the crispy chicken.

  • Gluten-Free: Substitute the all-purpose flour and panko with almond flour and gluten-free breadcrumbs for a delightful gluten-free option without sacrificing taste.

  • Lemon Zest: Grate fresh lemon zest into the breadcrumb mixture for a bright, zesty flavor that refreshes each bite.

  • Tangy Marinade: Marinate chicken in buttermilk or yogurt before breading to ensure moist, tender meat with a delightful tang.

  • Crispy Veggies: Add finely chopped vegetables, like spinach or bell peppers, to the panko for a colorful crunch that enhances texture and nutrition.

  • Oven-Fry Method: For an extra crisp, place the coated chicken on wire racks over the baking dish while cooking, allowing hot air to circulate freely.

Chef's Helpful Tips

  • To achieve the best texture in your Fried Panko Chicken, make sure to pound the chicken evenly to about half an inch thick; this ensures even cooking throughout.
  • Avoiding excess moisture on the chicken before breading will help the flour and breading adhere better, preventing a soggy coating.
  • When applying the panko, press firmly to create a thick, crunchy crust that holds up during baking.
  • Remember to preheat your oven to 400°F (200°C) and bake until the chicken reaches an internal temperature of 165°F (74°C) for safe and juicy results.

Fried Panko Chicken Recipe FAQs

How do I choose the best chicken for Fried Panko Chicken?
Absolutely! When selecting chicken breasts, look for fresh, boneless, and skinless options. Choose chicken that is pink in color with no dark spots or an unpleasant odor. This ensures you’ll have tender, juicy meat for your dish.

What’s the best way to store leftover Fried Panko Chicken?
Very! After enjoying your Fried Panko Chicken, let it cool completely. Then, place the chicken in an airtight container and store it in the fridge for up to 3 days. This keeps it fresh and ready to enjoy again!

Can I freeze Fried Panko Chicken?
Absolutely! To freeze, arrange the breaded chicken in a single layer on a baking sheet for about 1-2 hours until firm. Then transfer the chicken to a freezer-safe bag, removing as much air as possible. Your Chicken can be stored this way for up to 3 months.

How do I reheat Fried Panko Chicken to keep it crispy?
For the best results, preheat your oven to 350°F (175°C). Place the chicken on a baking sheet and reheat for about 15-20 minutes, or until the chicken is heated through and the coating feels crispy again. This method helps retain that delightful crunch!

What if my chicken breasts are too thick after pounding?
No worries at all! If you find your chicken breasts are still too thick after pounding, just go over them gently with the meat mallet until they reach about half an inch. This ensures even cooking and a juicy result.

Can I use this recipe for other proteins?
The more the merrier! This technique works well with other proteins like turkey cutlets, tofu, or even eggplant for a vegetarian option. Just adjust cook times accordingly until they’re golden and crispy. Enjoy!

Fried Panko Chicken

Fried Panko Chicken

This Fried Panko Chicken recipe features a crispy, golden coating that delivers delicious flavor, perfect for any dinner occasion.
Print Recipe Pin Recipe
Prep Time 15 minutes mins
Cook Time 25 minutes mins
Total Time 40 minutes mins
Servings: 4 servings
Course: DINNER RECIPES
Cuisine: American
Calories: 400
Ingredients Equipment Method Nutrition Notes

Ingredients
  

For the Chicken
  • 2 lbs Boneless, skinless chicken breasts Choose fresh, high-quality chicken for best flavor.
For the Coating
  • 1 cup Panko breadcrumbs These Japanese-style breadcrumbs create an extra crispy texture.
  • 1/2 cup All-purpose flour Helps the egg wash adhere to the chicken.
  • 2 large Large eggs Beaten eggs act as glue for the coating.
  • 1 teaspoon Garlic powder Adds a subtle, savory flavor.
  • 1 teaspoon Salt Essential seasoning.
  • 1 teaspoon Pepper Essential seasoning.
For Baking
  • cooking spray Cooking spray Ensures chicken cooks through and develops a golden-brown crust.

Equipment

  • Oven
  • Baking dish
  • Meat mallet or rolling pin
  • Three bowls

Method
 

How to Make Fried Panko Chicken
  1. Preheat your oven to 400°F (200°C). Prepare the baking dish with cooking spray.
  2. Pound each chicken breast between two pieces of plastic wrap until about half an inch thick.
  3. Set up a breading station with flour mixture, beaten eggs, and panko breadcrumbs in separate bowls.
  4. Dredge the chicken in flour, dip in egg wash, and press into panko breadcrumbs.
  5. Arrange the breaded chicken in the baking dish, spray the tops with cooking spray, and bake for 20-25 minutes until cooked through.

Nutrition

Serving: 1servingCalories: 400kcalCarbohydrates: 30gProtein: 30gFat: 20gSaturated Fat: 5gPolyunsaturated Fat: 2gMonounsaturated Fat: 13gCholesterol: 150mgSodium: 600mgPotassium: 500mgFiber: 2gVitamin A: 200IUCalcium: 20mgIron: 2mg

Notes

Serve optionally with fresh lemon juice for a zesty touch.

Tried this recipe?

Let us know how it was!

Filed Under: DINNER RECIPES

Korean Glass Noodles

January 8, 2026 by JudyWhite Leave a Comment

There’s a certain comfort that comes with a warm bowl of Korean Glass Noodles. As the delicate strands of dangmyeon glisten on your plate, you can’t help but feel a sense of contentment wash over you. I first experimented with this dish on a particularly busy evening, trying to escape the mundane cycle of takeout. The result was this vibrant, flavorful stir-fry that has since become a household favorite.

With simple ingredients that you likely already have in your kitchen, the beauty of this recipe lies in its versatility—you can easily swap in your favorite proteins, be it chicken, beef, or tofu, depending on what’s on hand. Plus, in just 25 minutes from start to finish, you’ll have a nourishing meal that’s both quick and satisfying. Trust me; once you make it, you may find yourself tossing out the takeout menu for good! Let’s dive into how to create this delightful dish that’s as pleasing to the palate as it is to the eyes.

Why You'll Love This Korean Glass Noodles

  • This Korean Glass Noodles recipe is incredibly easy to make, requiring only 25 minutes from start to finish.
  • The flavor combination of garlic, sesame oil, and soy sauce creates a deliciously savory dish that is sure to impress your taste buds.
  • Its versatility allows you to customize it with your protein of choice, whether it’s chicken, beef, or tofu, making it perfect for any dietary preference.
  • Additionally, the vibrant colors of the vegetables make this dish visually appealing and a feast for the eyes, making it an excellent choice for entertaining or family dinners.

Korean Glass Noodles Ingredients

• Get ready to create a delicious dish!

For the Noodles

  • Korean Glass Noodles (dangmyeon) – These unique noodles provide a delightful chewy texture that perfectly absorbs the flavors of the dish.

For the Stir-Fry

  • Bell peppers – Colorful additions that bring a sweet crunch to the meal.
  • Carrots – Their natural sweetness and crunch make them a nutritious and delicious choice.
  • Onion – Adds aromatic flavor and sweetness when sautéed.

For the Protein

  • Chicken, beef, or tofu – Choose your preferred protein for a filling source of nutrition.

For Flavoring

  • Garlic – Essential for a savory depth, minced for maximum flavor release.
  • Low-sodium soy sauce – Provides savory umami without overwhelming saltiness.
  • Sesame oil – Adds a rich, nutty flavor that elevates the dish.
  • Brown sugar – Balances the savory ingredients with subtle sweetness.
  • Cooking oil – Used for sautéing; any neutral oil will work well.

Transform these ingredients into a delightful dish of Korean Glass Noodles, bursting with flavor and color!

How to Make Korean Glass Noodles

  1. Soak the Italian glass noodles in warm water for about 30 minutes until soft. This step is essential; once they’re pliable, drain and set them aside for later.

  2. Heat oil in a large skillet over medium-high heat. Add minced garlic and sauté it until fragrant, which should take about 1-2 minutes. Enjoy that aromatic bliss!

  3. Add your choice of protein to the skillet and cook until browned, roughly 5 minutes. Stir occasionally for even cooking, and feel free to season lightly!

  4. Stir in bell peppers, carrots, and onions, sautéing for an additional 5 minutes. You want the veggies tender yet crisp for that satisfying texture contrast.

  5. Add the soaked noodles along with soy sauce, sesame oil, and brown sugar; toss well to combine everything. The noodles should absorb the flavors beautifully!

  6. Cook for an additional 3 minutes, allowing these incredible flavors to meld together. Serve hot, and enjoy every delightful bite!

Optional: Garnish with sesame seeds or chopped green onions for added flavor and presentation.

Exact quantities are listed in the recipe card below.

What to Serve with Korean Glass Noodles?

Elevate your dining experience with delightful accompaniments that enhance the flavors of this Asian-inspired dish.

  • Spicy Kimchi: A tangy and spicy contrast that adds depth and a probiotic kick to the meal.

  • Crispy Spring Rolls: These crunchy bites offer a delightful texture and fresh flavors, making them a perfect starter.

  • Sesame Cucumber Salad: This refreshing salad cools your palate and adds a crisp element to balance the warm noodles.

  • Egg Drop Soup: The silky texture and gentle flavors of this soup provide a comforting and light side to pair with your noodles.

  • Park Hills Chardonnay: A glass of this white wine enhances the dish’s savory profile with its bright notes and crisp finish.

  • Mango Sticky Rice: For dessert, this sweet and creamy dish offers a delightful way to end your meal on a luscious note.

Each pairing brings something unique to the table, creating a harmonious dining experience that your loved ones will adore!

How to Store and Freeze Korean Glass Noodles

Fridge: Store leftovers in an airtight container in the fridge for up to 3 days. Simply reheat in a skillet over medium heat, adding a splash of water or soy sauce to revive moisture.

Freezer: If you want to freeze Korean Glass Noodles, portion them in freezer-safe bags or containers. They can be frozen for up to 2 months. Thaw overnight in the fridge before reheating.

Reheating: For best results, reheat in a skillet rather than the microwave. This ensures even heating and helps maintain the texture of the noodles.

Airtight Storage: Make sure to remove as much air as possible when storing in the freezer to prevent freezer burn. Proper storage will keep your dish delicious!

Make Ahead Options

These Korean Glass Noodles are a fantastic meal prep choice for busy home cooks! You can soak the glass noodles and chop all your vegetables up to 24 hours in advance, storing them in airtight containers in the refrigerator to keep them fresh. The protein can also be cooked ahead of time and refrigerated for up to 3 days. When you’re ready to serve, simply sauté your garlic, add the prepped protein and vegetables, toss in the soaked noodles with the sauces, and cook for about 3 minutes until heated through. This method ensures that your meal is just as delicious and saves you precious time on hectic weeknights!

Korean Glass Noodles Variations

Feel free to get creative with this dish and put your personal touch on it!

  • Vegan Option: Substitute chicken or beef with extra-firm tofu or tempeh for a hearty plant-based meal. Simply marinate in soy sauce before cooking for extra flavor.

  • Spicy Kick: Add red pepper flakes or Sriracha to boost the heat level. Start with a little; you can always add more if you prefer a spicier kick!

  • Veggie-Loaded: Toss in mushrooms, zucchini, or snap peas for added nutrition and vibrant colors. The variety of textures will make this dish even more enjoyable.

  • Gluten-Free: Use gluten-free soy sauce and ensure the noodles are certified gluten-free to cater to dietary needs. Your taste buds won’t miss a beat!

  • Nutty Flavor: Sprinkle toasted sesame seeds on top just before serving. This adds a delightful crunch and rich flavor that enhances every bite.

  • Citrus Zing: Squeeze fresh lime or lemon juice over the finished dish for a zesty brightness. The acidity will elevate the savory notes splendidly.

  • Savory Broth: Transform this stir-fry into a noodle soup by adding vegetable or chicken broth after cooking the noodles. Let it simmer for a comforting, warming dish.

  • Herbaceous Touch: Incorporate fresh herbs like cilantro or green onions for a fresh, fragrant finish. This will not only enhance the presentation but also elevate the flavor profile.

Chef's Helpful Tips

  • For the best texture when making Korean Glass Noodles, soak them just until they are pliable, but avoid over-soaking as it can make them mushy.
  • Make sure to sauté the garlic until aromatic; this ignites the flavors and adds depth to your dish.
  • When adding the vegetables, keep them tender-crisp by stirring frequently and being mindful of the cooking time.
  • To enhance the overall flavor, allow the noodles to cook in the sauce mixture for those last few minutes, ensuring they fully absorb all the delicious ingredients.

Korean Glass Noodles Recipe FAQs

What should I look for when selecting Korean glass noodles?
Absolutely! When selecting Korean glass noodles, look for packages labeled “dangmyeon.” They should be clear and glossy, indicating freshness. Avoid any with dark spots or unusual odors. If possible, choose those that have a softer texture when you bend them, as they will cook up perfectly when soaked.

How do I store leftovers of Korean glass noodles?
Very! You can store any leftovers of Korean glass noodles in an airtight container in the fridge for up to 3 days. When you’re ready to enjoy them again, simply reheat in a skillet over medium heat. Add a splash of water or soy sauce to help revive moisture and flavor—this keeps them from becoming dry!

Can I freeze Korean glass noodles, and if so, how?
Absolutely! Freezing is a great way to preserve Korean glass noodles. Start by allowing the dish to cool completely before portioning it into freezer-safe bags or containers. Aim to consume them within 2 months for optimal quality. To thaw, place the frozen portion in the fridge overnight before reheating. When you’re ready, warm them gently in a skillet over medium heat until heated through, adding a little liquid to prevent sticking.

What if my noodles are too sticky or clumped together after cooking?
Don’t worry! If your noodles become sticky or clumped, simply add a bit of warm water to the skillet while reheating. Toss gently to separate the noodles, and allow them to absorb some of the liquid. This can help restore their texture without sacrificing flavor. Also, stirring frequently while cooking can help prevent clumping in the first place.

Are there any dietary considerations I should keep in mind for Korean glass noodles?
Of course! If you are preparing Korean glass noodles for someone with specific dietary needs, consider the protein choice and sauces used. For a gluten-free version, opt for tamari instead of soy sauce and ensure the noodles are confirmed gluten-free. Additionally, if serving kids or those with allergies, always check the ingredient labels for any hidden allergens, such as peanuts in the sesame oil.

Can I substitute the vegetables in the recipe?
Absolutely! One of the best things about Korean glass noodles is their versatility. Feel free to swap out the bell peppers, carrots, and onions for your favorite veggies! Broccoli, snap peas, or even zucchini can add delightful crunch and flavor. Just make sure to cut them into similar sizes for even cooking!

Korean Glass Noodles

Korean Glass Noodles

Enjoy a warm bowl of Korean Glass Noodles, a vibrant and flavorful stir-fry that is quick and versatile.
Print Recipe Pin Recipe
Prep Time 10 minutes mins
Cook Time 15 minutes mins
Total Time 25 minutes mins
Servings: 4 servings
Course: DINNER RECIPES
Cuisine: Korean
Calories: 350
Ingredients Equipment Method Nutrition Notes

Ingredients
  

For the Noodles
  • 200 grams Korean Glass Noodles (dangmyeon) Provides a chewy texture that absorbs flavors.
For the Stir-Fry
  • 1 cup Bell peppers Colorful and sweet.
  • 1 cup Carrots Adds sweetness and crunch.
  • 1 medium Onion Adds aromatic flavor.
For the Protein
  • 400 grams Chicken, beef, or tofu Choose your preferred protein.
For Flavoring
  • 3 cloves Garlic Minced for maximum flavor release.
  • 3 tablespoons Low-sodium soy sauce
  • 2 tablespoons Sesame oil Adds a rich, nutty flavor.
  • 1 tablespoon Brown sugar Balances savory ingredients.
  • 2 tablespoons Cooking oil For sautéing.

Equipment

  • Large skillet

Method
 

How to Make Korean Glass Noodles
  1. Soak the Korean glass noodles in warm water for about 30 minutes until soft. Drain and set aside.
  2. Heat oil in a large skillet over medium-high heat. Add minced garlic and sauté until fragrant, about 1-2 minutes.
  3. Add your choice of protein to the skillet and cook until browned, roughly 5 minutes.
  4. Stir in bell peppers, carrots, and onions, sautéing for an additional 5 minutes.
  5. Add the soaked noodles along with soy sauce, sesame oil, and brown sugar; toss to combine.
  6. Cook for an additional 3 minutes to meld flavors. Serve hot.

Nutrition

Serving: 1servingCalories: 350kcalCarbohydrates: 45gProtein: 20gFat: 10gSaturated Fat: 1gPolyunsaturated Fat: 5gMonounsaturated Fat: 3gCholesterol: 70mgSodium: 600mgPotassium: 500mgFiber: 3gSugar: 5gVitamin A: 100IUVitamin C: 150mgCalcium: 4mgIron: 10mg

Notes

For added flavor, garnish with sesame seeds or chopped green onions. Store leftovers in an airtight container for up to 3 days in the fridge.

Tried this recipe?

Let us know how it was!

Filed Under: DINNER RECIPES

Madras Curry

January 8, 2026 by JudyWhite Leave a Comment

When the weather starts to cool and the evenings become a little longer, there’s nothing quite like indulging in a warm bowl of homemade Madras Curry. A recent weeknight found me rummaging through my spice cabinet, and the vibrant colors and aromas of Madras curry powder practically jumped out at me, calling for an adventure in flavor. It’s amazing how a few simple ingredients can transform into a luxurious dish bursting with rich, comforting essence.

Whether you’re looking to impress dinner guests or simply want to elevate your weeknight meals, this Madras Curry recipe is a game-changer. With tender chicken thighs or chickpeas for a vegetarian twist, creamy coconut milk, and the aromatic embrace of ginger and garlic, every bite is a delightful experience. Best of all, it comes together in just 45 minutes! Get ready to captivate your taste buds and warm up your kitchen—let’s dive into the delicious world of Madras Curry!

Why You'll Love This Madras Curry

  • This Madras Curry is incredibly easy to make, requiring just 45 minutes from start to finish.
  • The rich flavors of coconut milk, ginger, and garlic create a mouthwatering experience that will have everyone asking for seconds.
  • It’s versatile too, allowing you to swap chicken for chickpeas for a delicious vegetarian option that doesn’t compromise on taste.
  • Not only is it visually appealing with its vibrant colors, but it’s also a fantastic crowd-pleaser, making it perfect for family dinners or entertaining guests.

Madras Curry Ingredients

• Dive into this flavorful dish with these essential elements needed for a delightful Madras Curry!

For the Protein
• 1 lb boneless chicken thighs – tender and juicy, perfect for absorbing the rich flavors.
• Chickpeas – a fantastic vegetarian substitute that adds protein and texture.

For the Sauce
• 1 can (14 oz) full-fat coconut milk – brings creaminess and a hint of sweetness to balance the spices.
• 3 tbsp Madras curry powder – the heart of this dish, lending bold, aromatic flavor.
• 1 can (14 oz) diced tomatoes – adds acidity and a touch of freshness to the curry sauce.

Aromatics
• 1-inch piece fresh ginger, grated – infuses warmth and zest into the dish.
• 4 garlic cloves, minced – enhances the flavor profile and adds depth.
• 1 large onion, finely chopped – forms the aromatic base for a savory start.

Seasoning & Cooking Essentials
• Salt to taste – enhances all the wonderful flavors, so adjust according to preference.
• Oil for sautéing – use a neutral oil for frying the aromatics until golden.

Get ready to cook up something amazing with these ingredients!

How to Make Madras Curry

  1. Heat oil in a large skillet over medium heat. Sauté the chopped onion until golden brown, which should take about 5 minutes. Add in the minced garlic and grated ginger, cooking until fragrant for approximately 1 minute.

  2. Stir in the Madras curry powder and cook for another minute. This step is crucial as it releases the aromatic flavors and makes your kitchen smell divine!

  3. Add protein of your choice, whether it’s the boneless chicken thighs or chickpeas. Cook until the chicken is no longer pink, which should take about 5 minutes—be sure to stir regularly for even cooking.

  4. Pour in the coconut milk and diced tomatoes. Stir everything well and then let it simmer on low heat for about 20 minutes. The sauce should thicken slightly and become creamy.

  5. Taste and adjust the seasoning with salt as needed. This step allows you to personalize the dish according to your taste profile—don’t be shy!

  6. Serve hot over rice or alongside naan bread, garnished with fresh cilantro if desired. Enjoy every warm, flavorful bite!

Optional: Garnish with lime wedges for an extra zing!
Exact quantities are listed in the recipe card below.

How to Store and Freeze Madras Curry

Fridge: Store your Madras Curry in an airtight container and refrigerate for up to 3 days. Reheat gently on the stove or in the microwave before serving.

Freezer: For longer storage, freeze your Madras Curry in a freezer-safe container for up to 2 months. Make sure it has cooled down completely before sealing to avoid freezer burn.

Thawing: When you’re ready to enjoy it again, thaw the curry overnight in the fridge. Reheat in a pan or microwave, adding a splash of coconut milk if needed to restore creaminess.

Reheating: Warm leftovers on the stovetop over low heat, stirring occasionally. This allows the flavors to revive beautifully and keeps the curry from sticking to the pan.

Madras Curry Variations

Feel free to get creative with your Madras Curry and try these tasty twists that will add your unique flair!

  • Dairy-Free: Substitute coconut milk with almond milk for a lighter, nutty flavor without sacrificing creaminess.
    Add a sprinkle of nutritional yeast for a cheesy touch—great for dairy avoiders!

  • Spicy Kick: Add a diced habanero or a teaspoon of chili paste to amp up the heat in your curry.
    This spiciness will create a bold, unforgettable experience for spice lovers.

  • Vegetable Boost: Incorporate a mix of diced bell peppers, carrots, and peas for a hearty and colorful addition.
    This will not only enhance the nutritional profile but also add a delightful crunch!

  • Herb Infusion: Add a handful of fresh spinach or kale during the last few minutes of cooking for nutritional goodness.
    The greens wilt beautifully, bringing a vibrant color and texture to the dish.

  • Smoky Flavor: Incorporate smoked paprika or ground cumin for a subtle smoky undertone to complement the curry spices.
    This adds a layer of complexity that’s sure to surprise and delight your taste buds.

  • Coconut-Lime Zing: Sprinkle zest from a lime into the curry and finish with a squeeze of fresh lime juice.
    This brightens up the dish exponentially, making it feel fresh and rejuvenating!

  • Slow Cooker Option: Cook the curry in a slow cooker on low for about 6 hours for deeply developed flavors.
    This method allows all the ingredients to meld perfectly, making for a comforting meal at the end of the day.

  • Grain Swap: Serve the curry over quinoa or farro instead of traditional rice for extra protein and fiber.
    This twist adds a nutty flavor and chewy texture that’s wonderfully satisfying!

What to Serve with Madras Curry?

When you’ve got a simmering pot of Madras Curry, it’s time to think about what will enhance this aromatic dish and wow your guests.

  • Fluffy Basmati Rice: The fragrant grains absorb the creamy sauce beautifully, making every bite a delightful adventure.

  • Warm Naan Bread: Perfect for scooping up the rich curry, naan adds a comforting touch with its soft, chewy texture. Pair it with a bit of garlic butter for an extra indulgence.

  • Crispy Roasted Vegetables: The slight char and sweetness from veggies like carrots and bell peppers provide a wonderful contrast to the spiced curry.

  • Cooling Cucumber Raita: This yogurt-based side offers a refreshing balance to the warmth of Madras Curry, soothing the palate with its creamy, crisp flavor.

  • Fresh Mango Chutney: A touch of sweetness and tang, this condiment elevates the flavors and adds a vibrant pop that pairs splendidly with the spiced notes of the curry.

  • Herbed Quinoa Salad: Light yet flavorful, a quinoa salad with fresh herbs and lemon zest makes for a nutritious companion that complements the dish nicely.

  • Chilled Lemonade: This refreshing drink cuts through the richness of the curry, enhancing your meal with a citrus zing that keeps you refreshed.

Let these accompaniments create a vibrant and delicious spread that turns your Madras Curry into a truly memorable feast!

Make Ahead Options

These Madras Curry preparations are ideal for busy home cooks seeking more time during the week! You can chop the onion, garlic, and ginger, and mix the spices up to 24 hours in advance; just store them in an airtight container in the fridge to keep them fresh. Moreover, you can marinate the chicken thighs (or chickpeas) with the curry powder up to 3 days ahead, allowing flavors to deepen. When you’re ready to enjoy this delectable dish, simply sauté the aromatics, add your protein, pour in the coconut milk and diced tomatoes, and let it simmer. Trust me—your Madras Curry will turn out just as delicious as if you made it fresh that day, but with far less effort!

Chef's Helpful Tips

  • For a perfect Madras Curry, ensure that your onions are sautéed until they are golden brown, as this builds a rich flavor base.
  • When adding your Madras curry powder, cook it for just a minute longer to fully bloom the spices and enhance their aroma.
  • If using chicken thighs, remember to cut them into uniform pieces for even cooking and tenderness.
  • Allow the curry to simmer gently on low heat for about 20 minutes to achieve a creamy consistency from the coconut milk while infusing all the flavors together.

Madras Curry Recipe FAQs

What type of chicken is best for Madras Curry?
Absolutely! Boneless chicken thighs are ideal for this dish due to their tenderness and ability to absorb rich flavors. However, if you’re opting for a vegetarian variation, chickpeas are a fantastic substitute that still deliver a hearty, satisfying texture.

How do I store leftover Madras Curry?
You can store your Madras Curry in an airtight container in the refrigerator for up to 3 days. When ready to eat, reheat it gently on the stovetop or in the microwave. If you notice it thickening, you can add a splash of water or coconut milk to bring back the creamy consistency.

Can I freeze Madras Curry?
Certainly! To freeze your Madras Curry, cool it completely, then transfer it to a freezer-safe container. It can be frozen for up to 2 months. When you’re ready for a comforting meal, thaw it overnight in the refrigerator. Reheat it gently over low heat, adding a bit of coconut milk if needed to improve its creaminess.

What should I do if the curry is too spicy?
If your Madras Curry turns out spicier than desired, don’t worry! You can balance the heat by adding a bit more coconut milk or a spoonful of sugar to help tone it down. Stir well and let it simmer for a few minutes for the flavors to meld, and taste until it reaches your preferred level of spice.

Can I make Madras Curry vegetarian or vegan?
Very! For a vegetarian or vegan version of the Madras Curry, simply replace the chicken thighs with chickpeas and ensure you use vegetable oil instead of any animal-derived products. Using coconut milk keeps the dish creamy, while the spices will still deliver all the delicious flavors. If you’re cautious about allergens, check your spice blends for potential cross-contamination.

How can I tell if my spices are fresh enough?
Always check your spices for freshness! If your Madras curry powder lacks aroma, or if you see dark spots all over (which indicate age), it may be time to replace them. Generally, spices should be replaced every 6 months for optimal flavor. When fresh, they should give a strong, enticing aroma when you open the jar!

Madras Curry

Madras Curry

Indulge in a warm bowl of Madras Curry, a luxurious dish bursting with rich flavors and comforting essence, ideal for dinner guests or weeknight meals.
Print Recipe Pin Recipe
Prep Time 15 minutes mins
Cook Time 30 minutes mins
Total Time 45 minutes mins
Servings: 4 servings
Course: DINNER RECIPES
Cuisine: Indian
Calories: 350
Ingredients Equipment Method Nutrition Notes

Ingredients
  

For the Protein
  • 1 lb boneless chicken thighs tender and juicy, perfect for absorbing the rich flavors.
  • Chickpeas a fantastic vegetarian substitute that adds protein and texture.
For the Sauce
  • 1 can (14 oz) full-fat coconut milk brings creaminess and a hint of sweetness to balance the spices.
  • 3 tbsp Madras curry powder the heart of this dish, lending bold, aromatic flavor.
  • 1 can (14 oz) diced tomatoes adds acidity and a touch of freshness to the curry sauce.
Aromatics
  • 1 inch piece fresh ginger, grated infuses warmth and zest into the dish.
  • 4 cloves garlic, minced enhances the flavor profile and adds depth.
  • 1 large onion, finely chopped forms the aromatic base for a savory start.
Seasoning & Cooking Essentials
  • Salt to taste, enhances all the wonderful flavors.
  • Oil for sautéing, use a neutral oil for frying the aromatics until golden.

Equipment

  • Large skillet

Method
 

Cooking Process
  1. Heat oil in a large skillet over medium heat. Sauté the chopped onion until golden brown, about 5 minutes. Add in the minced garlic and grated ginger, cooking until fragrant for approximately 1 minute.
  2. Stir in the Madras curry powder and cook for another minute to release the aromatic flavors.
  3. Add protein of your choice, whether it’s the boneless chicken thighs or chickpeas. Cook until the chicken is no longer pink, about 5 minutes, stirring regularly for even cooking.
  4. Pour in the coconut milk and diced tomatoes. Stir everything well and then let it simmer on low heat for about 20 minutes until the sauce thickens slightly.
  5. Taste and adjust the seasoning with salt as needed.
  6. Serve hot over rice or alongside naan bread, garnished with fresh cilantro if desired.

Nutrition

Serving: 1servingCalories: 350kcalCarbohydrates: 20gProtein: 25gFat: 20gSaturated Fat: 15gPolyunsaturated Fat: 2gMonounsaturated Fat: 3gCholesterol: 70mgSodium: 600mgPotassium: 800mgFiber: 5gSugar: 6gVitamin A: 100IUVitamin C: 5mgCalcium: 50mgIron: 2mg

Notes

Optional: Garnish with lime wedges for an extra zing! Store leftovers in an airtight container in the fridge for up to 3 days.

Tried this recipe?

Let us know how it was!

Filed Under: DINNER RECIPES

  • « Previous Page
  • 1
  • …
  • 5
  • 6
  • 7
  • 8
  • 9
  • …
  • 16
  • Next Page »

Recent Posts

  • Crispy Potatoes in Oven
  • Lucky Charms Pancakes
  • Cheeseburger
  • Boiled Corn on the Cob
  • St. Patrick’s Day Dessert Parfaits

Recent Comments

No comments to show.

Footer

  • Contact
  • Privacy Policy
  • About Us
  • Terms
  • ↑ back to top

Copyright © 2024 www.Forkono.com

Table Of Content