Forkono

  • BREAKFAST & BRUNCH
  • DESSERT RECIPES
  • DINNER RECIPES
  • LUNCH RECIPES
  • About uS
  • SNACKS & APPETIZERS
menu icon
go to homepage
  • BREAKFAST & BRUNCH
  • DESSERT RECIPES
  • DINNER RECIPES
  • LUNCH RECIPES
  • About uS
  • SNACKS & APPETIZERS
search icon
Homepage link
  • BREAKFAST & BRUNCH
  • DESSERT RECIPES
  • DINNER RECIPES
  • LUNCH RECIPES
  • About uS
  • SNACKS & APPETIZERS
×

Black Bottom Cupcakes

January 6, 2026 by JudyWhite Leave a Comment

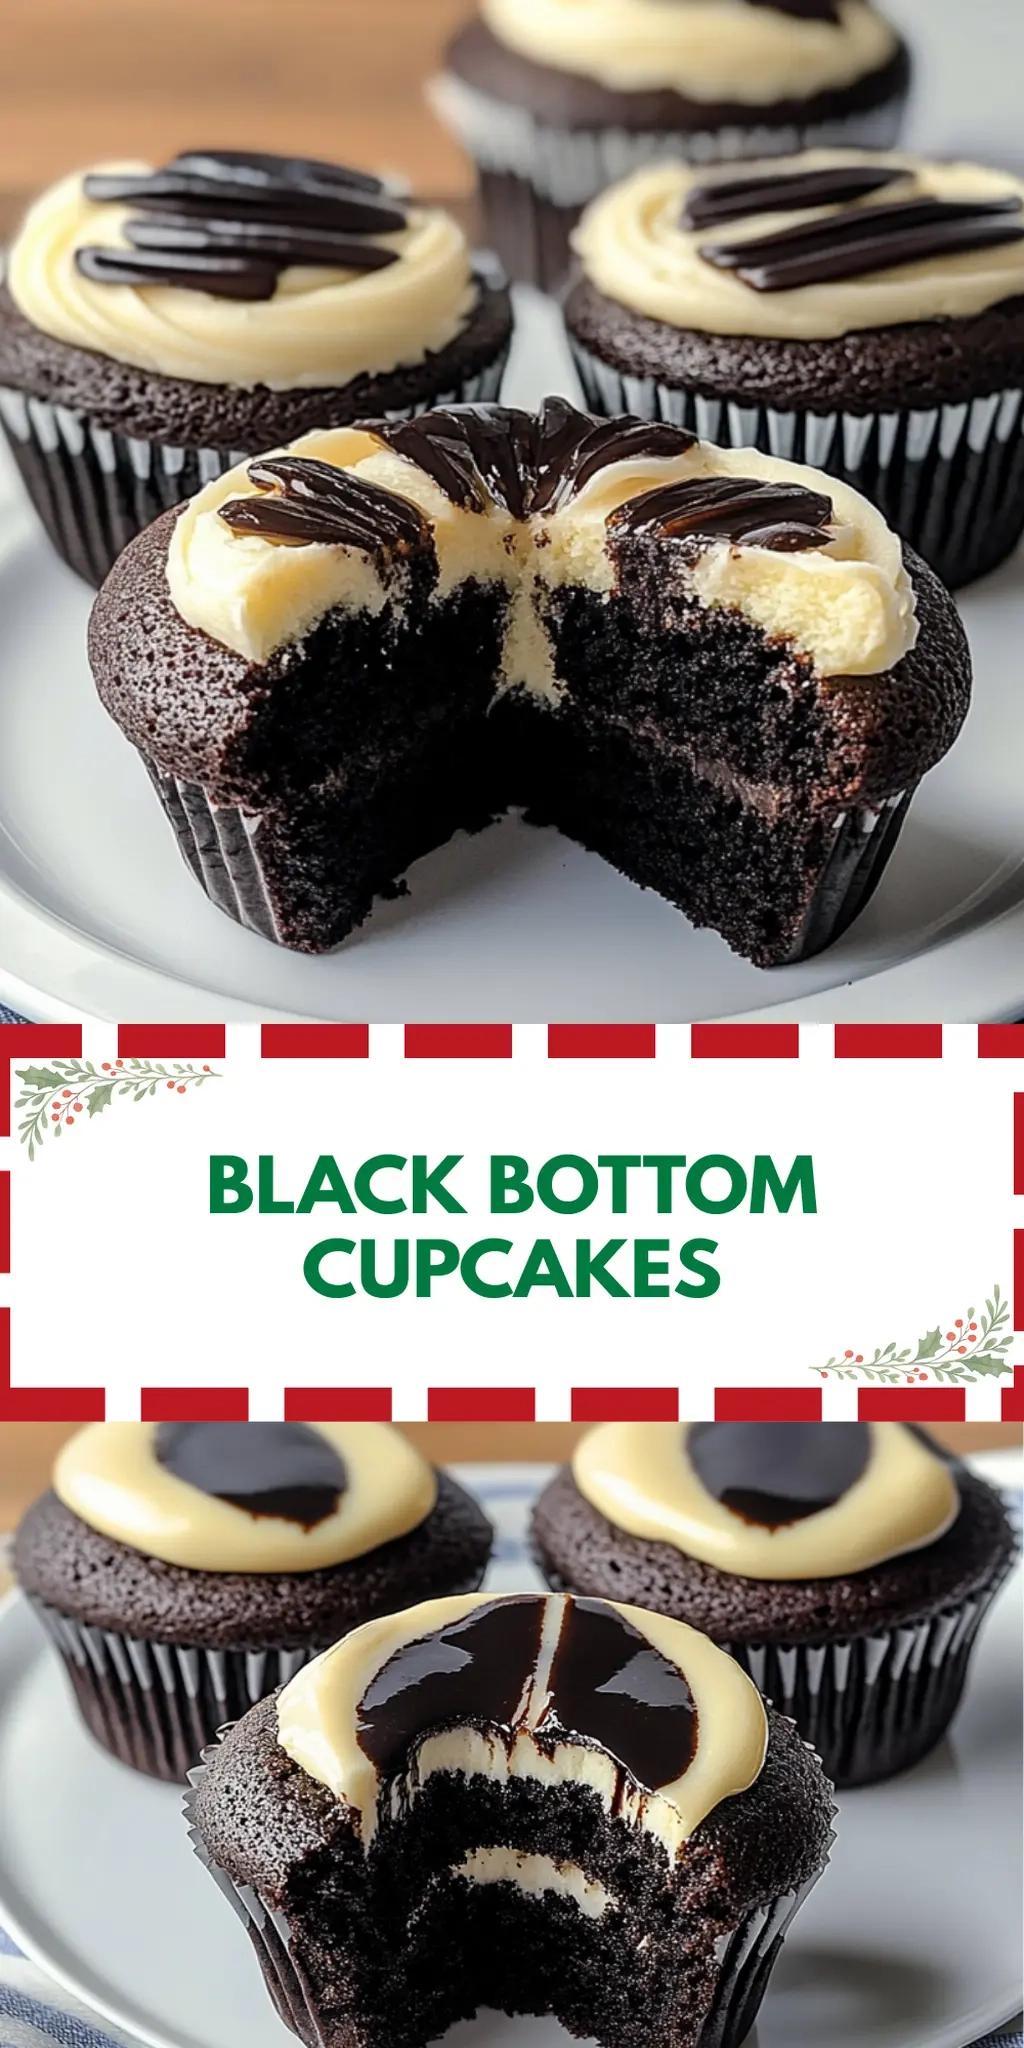
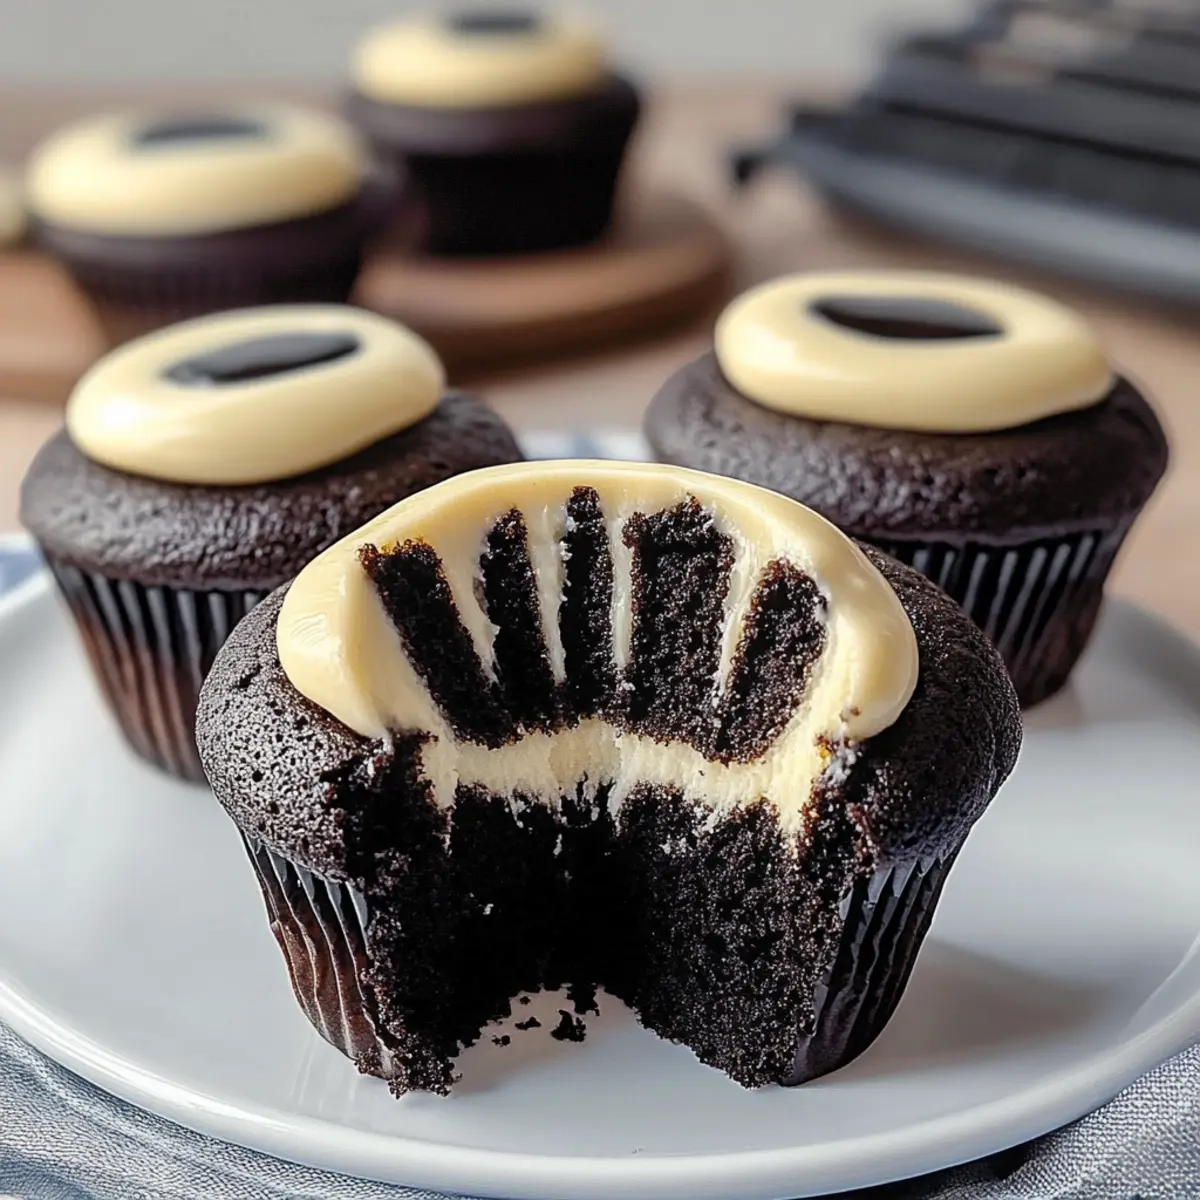
There’s something truly special about the moment you peel back the paper liner of a cupcake, revealing a rich, chocolatey treasure beneath. These Black Bottom Cupcakes are the kind of indulgence that turns an ordinary afternoon into a delightful occasion. Picture this: a perfectly moist chocolate cake hugging a velvety cream cheese center studded with mini chocolate chips. It’s like biting into a little piece of heaven, and the best part? They’re surprisingly easy to make!

I discovered this gem while searching for a dessert that would both impress my friends and keep my sanity intact on a busy weeknight. With minimal ingredients and just a quick 45 minutes from start to finish, these cupcakes are a lifesaver for anyone who loves homemade treats but feels crunched for time. Let’s dive into this delicious recipe that promises to elevate your baking game and leave everyone asking for seconds!

Why You'll Love This Black Bottom Cupcakes

  • These Black Bottom Cupcakes are incredibly easy to make, allowing you to whip up a delicious dessert in just 45 minutes.
  • The rich chocolate flavor combined with the creamy center creates an indulgent treat that will satisfy any sweet tooth.
  • Their versatility makes them perfect for any occasion, from casual gatherings to festive celebrations, ensuring they are a hit with everyone.
  • Plus, the visual appeal of these cupcakes, with their enticing chocolate exterior and creamy-filled center, makes them a stunning addition to your dessert table.

Black Bottom Cupcakes Ingredients

• Get ready to create a chocolatey delight!

For the Cupcake Batter

  • All-purpose flour – a staple for the perfect texture in your Black Bottom Cupcakes.
  • Unsweetened cocoa powder – provides that deep chocolate flavor that’s simply irresistible.
  • Baking soda – helps the cupcakes rise beautifully, giving them a light, fluffy consistency.
  • Granulated sugar – sweetens the batter and balances the rich cocoa taste.
  • Large eggs – bind the ingredients together, adding moisture and richness.
  • Buttermilk – keeps the cupcakes moist and tender; you can substitute with milk plus a splash of vinegar if needed.
  • Vegetable oil – adds moisture and helps keep the cupcakes soft.
  • Vanilla extract – a splash of warmth that enhances the overall flavor of the batter.

For the Cream Cheese Filling

  • Cream cheese – softened for easy mixing; it creates a rich and creamy center that contrasts perfectly with the chocolate exterior.
  • Mini chocolate chips – add a delightful burst of chocolate in every bite!

How to Make Black Bottom Cupcakes

  1. Preheat your oven to 350°F (175°C). Line a cupcake tin with paper liners to ensure easy removal and a neat presentation for your delicious treats.

  2. Whisk together the flour, cocoa powder, baking soda, and granulated sugar in a large bowl. This step is crucial for blending dry ingredients, which helps provide an even texture in your cupcakes.

  3. Mix the eggs, buttermilk, vegetable oil, and vanilla extract in a separate bowl until everything is well blended and the mixture is smooth. This ensures a moist and flavorful cupcake base.

  4. Combine the wet and dry ingredients gently, stirring until just mixed. Avoid overmixing, as this can lead to dense cupcakes; a few lumps are perfectly fine!

  5. Beat the softened cream cheese with a bit of sugar in another bowl until smooth. This creamy filling is what makes your Black Bottom Cupcakes so special!

  6. Fill each cupcake liner with two tablespoons of batter, then add a spoonful of the cream cheese mixture in the center, and top it off with another tablespoon of batter. This layering creates that delightful surprise in every bite!

  7. Bake for about 20-25 minutes or until a toothpick inserted in the center comes out clean. You’ll know they’re ready when they look fluffy and the tops are set.

Optional: Dust with powdered sugar for an elegant touch before serving.

Exact quantities are listed in the recipe card below.

Black Bottom Cupcakes Variations

Feel free to experiment and make these cupcakes your own with these fun twists!

  • Vegan: Use flax eggs and almond milk in place of traditional eggs and buttermilk for a plant-based delight. You won’t miss the eggs with this creamy filling!

  • Gluten-Free: Swap all-purpose flour with a gluten-free blend to enjoy the same rich texture. Just check your baking soda for gluten-free certification!

  • Nutty Add-In: Add 1/2 cup of chopped walnuts or pecans for a crunchy texture that complements the soft, creamy center. It brings a delightful surprise in every bite!

  • Minty Fresh: Stir in a teaspoon of peppermint extract into the chocolate batter for a refreshing mint-infused cupcake. This twist can give your cupcakes a festive flair!

  • Spicy Chocolate: Mix in a pinch of cayenne pepper or chili powder to the batter for a surprising kick that pairs perfectly with chocolate. The balance of heat will leave everyone curious for more!

  • Coconut Cream: Replace cream cheese with coconut cream for a tropical twist that adds a rich, velvety quality and a hint of paradise.

  • Coffee Boost: Add a tablespoon of instant espresso powder to the batter to intensify the chocolate flavor. It’s like a magical espresso escape in every bite!

  • Caramel Swirl: Drizzle a tablespoon of caramel sauce into the cream cheese filling before baking for a sweet surprise that elevates these cupcakes to the next level.

Embrace your culinary creativity and enjoy all the delicious possibilities these variations bring!

What to Serve with Black Bottom Cupcakes?

Picture an enchanting dessert table where each item complements the rich decadence of your Black Bottom Cupcakes.

  • Fresh Berries: The tartness of strawberries or raspberries balances the sweetness, adding a refreshing bite alongside your treats.
  • Vanilla Ice Cream: A scoop of creamy vanilla ice cream melts into the warm cupcake, creating an indulgent chocolate experience that’s simply irresistible.
  • Coffee or Espresso: Pairing with a hot cup of coffee brings out the deep chocolate flavors, making each bite even more satisfying.
  • Whipped Cream: Light and airy, whipped cream adds a delightful softness that contrasts beautifully with the dense cupcake texture.
  • Dark Chocolate Sauce: Drizzling dark chocolate sauce elevates the decadence, enhancing the chocolate flavor while adding an elegant touch.
  • Chocolate Chip Cookies: For a fun dessert spread, offer warm chocolate chip cookies. Their chewy texture enhances the cupcake experience.
  • Milkshake: An ice-cold milkshake brings a nostalgic vibe and pairs marvelously with the rich chocolatey goodness of the cupcakes.
  • Chocolate Ganache: Spreading a layer of smooth ganache on top of your cupcakes takes them to the next level of decadence.

Make Ahead Options

These Black Bottom Cupcakes are perfect for busy home cooks looking to save time on dessert preparation! You can prepare the cupcake batter and cream cheese filling up to 24 hours in advance. Simply store the batter in an airtight container in the refrigerator to keep it fresh. Additionally, you can fill the cupcake liners with the batter and cream cheese filling, cover with plastic wrap, and refrigerate for up to 3 days before baking. This method helps maintain their moisture and flavor integrity. When you’re ready to indulge, toss them in the oven straight from the fridge, adding a couple of extra minutes to the baking time for delicious, freshly baked cupcakes with minimal effort!

How to Store and Freeze Black Bottom Cupcakes

Fridge: Store your cooled Black Bottom Cupcakes in an airtight container for up to 3 days to maintain their moist texture and rich flavor.

Freezer: For longer storage, wrap each cupcake individually in plastic wrap and place them in a zip-top freezer bag. They can be frozen for up to 3 months.

Reheating: When ready to enjoy, thaw the cupcakes in the fridge overnight. Reheat briefly in the microwave for about 10-15 seconds if you prefer them warm and soft.

Room Temperature: If you’re serving the cupcakes on the same day, keeping them covered at room temperature is perfectly fine for up to 2 hours.

Chef's Helpful Tips

  • To achieve the perfect texture in your Black Bottom Cupcakes, make sure to sift the cocoa powder with the dry ingredients to eliminate any lumps.
  • When mixing the wet ingredients, whisk them until fully combined to ensure a smooth batter and avoid an uneven rise.
  • Remember to fill the cupcake liners only two-thirds full to allow for adequate rising and prevent overflow during baking.
  • For the best results, always preheat your oven fully before placing the cupcakes inside, as this helps them bake evenly and rise properly.

Black Bottom Cupcakes Recipe FAQs

What type of chocolate do I need for the Black Bottom Cupcakes?
Absolutely! For the best flavor, use high-quality unsweetened cocoa powder in your batter. It adds that rich chocolate taste that pairs wonderfully with the cream cheese filling.

How should I store my Black Bottom Cupcakes?
I recommend storing your cooled cupcakes in an airtight container in the fridge for up to 3 days. This helps keep them moist and preserves the delightful flavors. If you’re planning to eat them later, their incredible taste is perfect when kept in the fridge!

Can I freeze Black Bottom Cupcakes?
Yes! For longer storage, wrap each cupcake tightly in plastic wrap and place them in a zip-top freezer bag. They can be kept in the freezer for up to 3 months without losing their flavor. When you’re ready to enjoy them, simply thaw in the fridge overnight and warm them up in the microwave for about 10-15 seconds to bring back that fresh-baked feel.

What should I do if my cupcakes are dry?
If your Black Bottom Cupcakes turn out dry, it might be due to overbaking or not enough moisture in the batter. Ensure you check for doneness a couple of minutes before the recommended baking time by using a toothpick. If this happens again, try adding a touch more buttermilk or keep an eye on the time. Remember, a little something at the center is perfectly fine!

Are there any allergies I need to consider when making these cupcakes?
Very! The main allergens in Black Bottom Cupcakes are gluten (from the flour), eggs, dairy (from the buttermilk and cream cheese), and soy (in some vegetable oils). Always check ingredient labels if you’re baking for someone with allergies, and feel free to swap ingredients to cater to dietary needs—like gluten-free flour or plant-based cream cheese.

Black Bottom Cupcakes

Black Bottom Cupcakes

Indulge in rich chocolate and creamy goodness with these Black Bottom Cupcakes, a delightful treat that's surprisingly easy to make.
Print Recipe Pin Recipe
Prep Time 15 minutes mins
Cook Time 25 minutes mins
Total Time 45 minutes mins
Servings: 12 cupcakes
Course: DESSERT RECIPES
Cuisine: American
Calories: 200
Ingredients Equipment Method Nutrition Notes

Ingredients
  

Cupcake Batter
  • 1 cup All-purpose flour
  • 1/2 cup Unsweetened cocoa powder
  • 1 teaspoon Baking soda
  • 1 cup Granulated sugar
  • 2 large Eggs
  • 1/2 cup Buttermilk Substitutable with milk plus vinegar
  • 1/3 cup Vegetable oil
  • 1 teaspoon Vanilla extract
Cream Cheese Filling
  • 8 ounces Cream cheese softened
  • 1/2 cup Mini chocolate chips

Equipment

  • Cupcake tin
  • Mixing bowls
  • Whisk
  • Spatula

Method
 

Preparation
  1. Preheat your oven to 350°F (175°C). Line a cupcake tin with paper liners.
  2. Whisk together the flour, cocoa powder, baking soda, and granulated sugar in a large bowl.
  3. Mix the eggs, buttermilk, vegetable oil, and vanilla extract in a separate bowl until smooth.
  4. Combine the wet and dry ingredients gently, stirring until just mixed.
  5. Beat the softened cream cheese with a bit of sugar in another bowl until smooth.
  6. Fill each cupcake liner with two tablespoons of batter, add a spoonful of cream cheese mixture, then top with another tablespoon of batter.
  7. Bake for 20-25 minutes or until a toothpick comes out clean from the center.

Nutrition

Serving: 1cupcakeCalories: 200kcalCarbohydrates: 25gProtein: 3gFat: 10gSaturated Fat: 3gPolyunsaturated Fat: 1gMonounsaturated Fat: 5gCholesterol: 50mgSodium: 150mgPotassium: 150mgFiber: 1gSugar: 12gVitamin A: 200IUCalcium: 40mgIron: 1mg

Notes

Optional: Dust with powdered sugar before serving.

Tried this recipe?

Let us know how it was!

Filed Under: DESSERT RECIPES

Chicken Pot Pie

January 6, 2026 by JudyWhite Leave a Comment

There’s something incredibly comforting about a freshly baked Chicken Pot Pie, especially when the chill of autumn settles in. Picture this: as I rolled out the flaky crust, the warm aromas of garlic and thyme filled my kitchen, instantly whisking me back to my grandmother’s cheerful home where Sunday dinners were a feast for the senses. This beloved classic not only warms the heart but also brings everyone to the table — it’s the meal I crave after a long day or the dish that makes a chilly evening feel special.

I discovered this recipe during one of my late-night, hunger-fueled searches for something hearty and satisfying. It’s been a crowd-pleaser ever since, with its tender chicken, colorful vegetables, and creamy sauce enveloped in a golden crust. Best of all, this Chicken Pot Pie is deceptively easy to prepare, making it the perfect solution for those mundane weeknight dinners or cozy family gatherings. Join me in creating this delightful dish that celebrates homemade goodness and leaves fast food in the dust!

Why You'll Love This Chicken Pot Pie

  • This Chicken Pot Pie is an absolute breeze to prepare, allowing you to whip up a delicious meal in under an hour.
  • The flavor is so rich and satisfying with tender chicken, vibrant veggies, and a creamy sauce that will have everyone asking for seconds.
  • Its versatility means you can easily customize the filling with your favorite ingredients, making it a perfect dish for whatever you have on hand.
  • Plus, the golden flaky crust and colorful filling create a stunning presentation that will impress any crowd and make your dinner table shine.

Chicken Pot Pie Ingredients

For the Filling
• Boneless, skinless chicken breasts – diced for tenderness and a hearty base.
• Fresh garlic – minced to enhance the savory aroma of the dish.
• Medium carrots – diced for a touch of sweetness and color in your Chicken Pot Pie.
• Frozen peas – add a pop of freshness and vibrant green to the filling.
• Yukon Gold potatoes – diced to create a comforting, creamy texture.
• Low-sodium chicken broth – use for depth of flavor without excess salt.
• Heavy cream – lends a rich, velvety texture to the filling.
• Dried thyme – a must for its earthy aroma that complements the chicken beautifully.
• Salt and pepper – to taste, enhancing all the lovely flavors in your pot pie.

For the Crust
• Pie crust – store-bought for convenience or homemade for a personal touch, providing that essential flaky layer.

How to Make Chicken Pot Pie

  1. Preheat your oven to 400°F (200°C) and lightly spray a baking dish with nonstick cooking spray. This ensures that your Chicken Pot Pie bakes evenly and doesn’t stick to the dish.

  2. Cook the diced chicken in a large skillet over medium heat for about 8-10 minutes, until it turns golden brown. Be sure to season with salt and pepper to enhance its delicious flavor.

  3. Sauté the minced garlic and diced carrots in the skillet for about five minutes. This will add wonderful aromas and a splash of color to your filling.

  4. Combine the chicken broth and heavy cream in the skillet, and stir in the dried thyme. Allow the mixture to simmer for five minutes until it thickens slightly; it should look creamy and inviting.

  5. Transfer the chicken mixture into your prepared baking dish, and layer the diced potatoes and frozen peas on top. This colorful layer not only looks great but also adds texture to your pot pie.

  6. Cover the filling with the pie crust, trimming any excess. Don’t forget to cut slits for ventilation, allowing steam to escape. Bake for 30-35 minutes until the crust is golden brown and the filling is bubbling.

Optional: Serve with a sprinkle of fresh parsley for added color and flavor!

Exact quantities are listed in the recipe card below.

Chicken Pot Pie Variations

Feel free to make this Chicken Pot Pie your own with these creative twists and substitutions that inspire deliciousness!

  • Dairy-Free: Use coconut milk or almond milk instead of heavy cream for a lighter, creamy base that remains indulgent.

  • Vegetarian: Swap the chicken for hearty mushrooms and chickpeas, adding a variety of colorful vegetables for texture and flavor.

  • Herb Enchantment: Experiment with fresh herbs like rosemary or parsley instead of thyme for a fragrant and vibrant twist on the classic flavors.

  • Spicy Kick: Add diced jalapeños or a sprinkle of cayenne pepper to the filling for a delightful level of heat that warms the soul.

  • Crust Alternatives: Try using phyllo dough or a biscuit topping for a different texture that still captures the comforting spirit of pot pie.

  • Root Veggie Boost: Incorporate diced rutabaga or butternut squash in place of potatoes for a unique flavor twist and even more nutrition.

  • Savory Cheese: Mix in cheddar or gruyère cheese into the filling for an extra layer of richness that perfectly complements the savory ingredients.

  • Mini Pies: Portion the filling into ramekins and top each with individual crusts for charming, personal-sized pot pies that are perfect for gatherings.

Let these variations inspire creativity in your kitchen as you make this cozy classic truly yours!

What to Serve with Chicken Pot Pie?

There’s nothing quite like gathering around a warm table with comforting sides that elevate your meal experience.

  • Simple Green Salad: A mix of crisp greens and vibrant vegetables adds freshness and balances the creaminess of the pot pie.
  • Garlic Bread: Crunchy and buttery, a piece of garlic bread is perfect for sopping up any leftover creamy filling on your plate.
  • Roasted Vegetables: Seasonal roasted veggies bring a smoky flavor and slight sweetness, complementing the rich textures of your pot pie beautifully.
  • Creamy Mashed Potatoes: Fluffy mashed potatoes make a delightful pairing, offering an extra layer of comfort while soaking up the savory gravy.
  • Savory Cornbread: Sweet, buttery cornbread enhances the meal’s warmth and provides a lovely contrast to the rich fillings of your Chicken Pot Pie.
  • Apple Crisp: Finish your dinner on a sweet note with a warm, spiced apple crisp that adds a delightful contrast to the savory taste.

Each of these sides brings a unique taste and texture to the table, transforming a simple dinner into a heartwarming feast that everyone will cherish.

Make Ahead Options

These Chicken Pot Pies are perfect for busy weeknights, allowing you to save precious time without sacrificing flavor! You can prepare the filling up to 24 hours in advance by cooking the chicken and veggie mixture, then letting it cool completely before transferring it to an airtight container in the refrigerator. Just before serving, layer the filling into your pie crust, add the diced potatoes and peas, cover with the crust, and bake according to the recipe instructions. To maintain quality, refrain from covering the pie until you’re ready to bake to prevent sogginess; it will still be just as delicious and comforting!

How to Store and Freeze Chicken Pot Pie

Room Temperature: Allow Chicken Pot Pie to cool for about 30 minutes before serving. It can be left out for up to 2 hours, but any leftovers should be refrigerated promptly.

Fridge: Store leftover Chicken Pot Pie in an airtight container in the fridge for up to 3 days. Reheat portions in the microwave or oven until heated through.

Freezer: For longer storage, wrap the pie tightly in plastic wrap and aluminum foil; it can be frozen for up to 2 months. Thaw overnight in the fridge before reheating.

Reheating: To reheat, bake the thawed Chicken Pot Pie in a preheated oven at 350°F (175°C) for about 25-30 minutes, or until the crust is golden and filling is hot.

Chef's Helpful Tips

  • When preparing Chicken Pot Pie, ensure your chicken is evenly diced for consistent cooking and tenderness.
  • Avoid overcrowding the skillet when browning the chicken; this helps achieve a nice golden color and crisp texture.
  • For extra flavor, sauté your garlic until fragrant but not browned to prevent bitterness.
  • Keep an eye on your pot pie as it bakes, and if the crust starts to brown too quickly, cover the edges with foil to prevent burning while the filling cooks through.

Chicken Pot Pie Recipe FAQs

How do I choose the right chicken for my Chicken Pot Pie?
Absolutely! Choose boneless, skinless chicken breasts for this recipe as they cook evenly and result in tender meat. Look for chicken that is pink and moist, with no dark spots. If possible, try to select chicken that is organic or free-range for the best flavor.

How should I store leftover Chicken Pot Pie?
Very good question! After it cools for about 30 minutes, store leftover Chicken Pot Pie in an airtight container in the refrigerator for up to 3 days. Just make sure it’s completely covered to prevent drying out, and reheat portions in a microwave or oven until heated through.

Can I freeze Chicken Pot Pie?
Absolutely! To freeze, wrap the Chicken Pot Pie tightly in plastic wrap, then cover it with aluminum foil to protect it from freezer burn. It can be frozen for up to 2 months. When you’re ready to enjoy it again, thaw it overnight in the fridge before baking.

What if my chicken pot pie filling is too runny?
If you find that your filling is too runny, don’t worry! You can thicken it by either adding a cornstarch slurry (mix 2 tablespoons cornstarch with 2 tablespoons cold water) and heating it gently, or by simmering it for a few more minutes until some liquid evaporates. Just be sure to stir constantly to avoid lumps.

Can I make Chicken Pot Pie in advance?
Yes! You can prepare the filling and assemble the Chicken Pot Pie one day ahead. Just store the assembled pie covered in the fridge. When you’re ready to bake, remove it from the fridge, allow it to come to room temperature for about 15-20 minutes, and then follow the baking instructions. This makes it easier for those busy weeknight dinners!

Is this recipe suitable for those with allergies?
Great point! This Chicken Pot Pie contains chicken, dairy, and possible gluten from the crust. For dietary restrictions, consider using a gluten-free pie crust and plant-based cream alternatives. Always check labels for allergens, and consult with a medical professional if you have specific concerns regarding food allergies.

Chicken Pot Pie

Chicken Pot Pie

This Chicken Pot Pie is a comforting classic that combines tender chicken, vegetables, and a creamy sauce in a flaky crust.
Print Recipe Pin Recipe
Prep Time 15 minutes mins
Cook Time 35 minutes mins
Total Time 50 minutes mins
Servings: 6 slices
Course: DINNER RECIPES
Cuisine: American
Calories: 450
Ingredients Equipment Method Nutrition Notes

Ingredients
  

Filling
  • 2 cups diced boneless, skinless chicken breasts for tenderness
  • 3 cloves fresh garlic minced
  • 2 medium carrots diced
  • 1 cup frozen peas
  • 2 cups Yukon Gold potatoes diced
  • 2 cups low-sodium chicken broth
  • 1 cup heavy cream
  • 1 teaspoon dried thyme
  • to taste salt
  • to taste pepper
Crust
  • 1 package pie crust store-bought or homemade

Equipment

  • Skillet
  • Baking dish
  • Oven

Method
 

Preparation
  1. Preheat your oven to 400°F (200°C) and lightly spray a baking dish with nonstick cooking spray.
  2. Cook the diced chicken in a large skillet over medium heat for about 8-10 minutes, until golden brown. Season with salt and pepper.
  3. Sauté the minced garlic and diced carrots in the skillet for about five minutes.
  4. Combine the chicken broth and heavy cream in the skillet, and stir in the dried thyme. Simmer for five minutes until thickened.
  5. Transfer the chicken mixture into your prepared baking dish, and layer the diced potatoes and frozen peas on top.
  6. Cover the filling with the pie crust, trimming any excess and cutting slits for ventilation. Bake for 30-35 minutes until golden brown.

Nutrition

Serving: 1sliceCalories: 450kcalCarbohydrates: 40gProtein: 25gFat: 25gSaturated Fat: 10gPolyunsaturated Fat: 5gMonounsaturated Fat: 10gCholesterol: 80mgSodium: 600mgPotassium: 600mgFiber: 4gSugar: 2gVitamin A: 2000IUVitamin C: 15mgCalcium: 30mgIron: 2mg

Notes

Optional: Serve with a sprinkle of fresh parsley for added color and flavor.

Tried this recipe?

Let us know how it was!

Filed Under: DINNER RECIPES

Chicken Pot Pie

January 6, 2026 by JudyWhite Leave a Comment

There’s something incredibly comforting about a freshly baked Chicken Pot Pie, especially when the chill of autumn settles in. Picture this: as I rolled out the flaky crust, the warm aromas of garlic and thyme filled my kitchen, instantly whisking me back to my grandmother’s cheerful home where Sunday dinners were a feast for the senses. This beloved classic not only warms the heart but also brings everyone to the table — it’s the meal I crave after a long day or the dish that makes a chilly evening feel special.

I discovered this recipe during one of my late-night, hunger-fueled searches for something hearty and satisfying. It’s been a crowd-pleaser ever since, with its tender chicken, colorful vegetables, and creamy sauce enveloped in a golden crust. Best of all, this Chicken Pot Pie is deceptively easy to prepare, making it the perfect solution for those mundane weeknight dinners or cozy family gatherings. Join me in creating this delightful dish that celebrates homemade goodness and leaves fast food in the dust!

Why You'll Love This Chicken Pot Pie

  • This Chicken Pot Pie is an absolute breeze to prepare, allowing you to whip up a delicious meal in under an hour.
  • The flavor is so rich and satisfying with tender chicken, vibrant veggies, and a creamy sauce that will have everyone asking for seconds.
  • Its versatility means you can easily customize the filling with your favorite ingredients, making it a perfect dish for whatever you have on hand.
  • Plus, the golden flaky crust and colorful filling create a stunning presentation that will impress any crowd and make your dinner table shine.

Chicken Pot Pie Ingredients

For the Filling
• Boneless, skinless chicken breasts – diced for tenderness and a hearty base.
• Fresh garlic – minced to enhance the savory aroma of the dish.
• Medium carrots – diced for a touch of sweetness and color in your Chicken Pot Pie.
• Frozen peas – add a pop of freshness and vibrant green to the filling.
• Yukon Gold potatoes – diced to create a comforting, creamy texture.
• Low-sodium chicken broth – use for depth of flavor without excess salt.
• Heavy cream – lends a rich, velvety texture to the filling.
• Dried thyme – a must for its earthy aroma that complements the chicken beautifully.
• Salt and pepper – to taste, enhancing all the lovely flavors in your pot pie.

For the Crust
• Pie crust – store-bought for convenience or homemade for a personal touch, providing that essential flaky layer.

How to Make Chicken Pot Pie

  1. Preheat your oven to 400°F (200°C) and lightly spray a baking dish with nonstick cooking spray. This ensures that your Chicken Pot Pie bakes evenly and doesn’t stick to the dish.

  2. Cook the diced chicken in a large skillet over medium heat for about 8-10 minutes, until it turns golden brown. Be sure to season with salt and pepper to enhance its delicious flavor.

  3. Sauté the minced garlic and diced carrots in the skillet for about five minutes. This will add wonderful aromas and a splash of color to your filling.

  4. Combine the chicken broth and heavy cream in the skillet, and stir in the dried thyme. Allow the mixture to simmer for five minutes until it thickens slightly; it should look creamy and inviting.

  5. Transfer the chicken mixture into your prepared baking dish, and layer the diced potatoes and frozen peas on top. This colorful layer not only looks great but also adds texture to your pot pie.

  6. Cover the filling with the pie crust, trimming any excess. Don’t forget to cut slits for ventilation, allowing steam to escape. Bake for 30-35 minutes until the crust is golden brown and the filling is bubbling.

Optional: Serve with a sprinkle of fresh parsley for added color and flavor!

Exact quantities are listed in the recipe card below.

What to Serve with Chicken Pot Pie?

There’s nothing quite like gathering around a warm table with comforting sides that elevate your meal experience.

  • Simple Green Salad: A mix of crisp greens and vibrant vegetables adds freshness and balances the creaminess of the pot pie.
  • Garlic Bread: Crunchy and buttery, a piece of garlic bread is perfect for sopping up any leftover creamy filling on your plate.
  • Roasted Vegetables: Seasonal roasted veggies bring a smoky flavor and slight sweetness, complementing the rich textures of your pot pie beautifully.
  • Creamy Mashed Potatoes: Fluffy mashed potatoes make a delightful pairing, offering an extra layer of comfort while soaking up the savory gravy.
  • Savory Cornbread: Sweet, buttery cornbread enhances the meal’s warmth and provides a lovely contrast to the rich fillings of your Chicken Pot Pie.
  • Apple Crisp: Finish your dinner on a sweet note with a warm, spiced apple crisp that adds a delightful contrast to the savory taste.

Each of these sides brings a unique taste and texture to the table, transforming a simple dinner into a heartwarming feast that everyone will cherish.

Make Ahead Options

These Chicken Pot Pies are perfect for busy weeknights, allowing you to save precious time without sacrificing flavor! You can prepare the filling up to 24 hours in advance by cooking the chicken and veggie mixture, then letting it cool completely before transferring it to an airtight container in the refrigerator. Just before serving, layer the filling into your pie crust, add the diced potatoes and peas, cover with the crust, and bake according to the recipe instructions. To maintain quality, refrain from covering the pie until you’re ready to bake to prevent sogginess; it will still be just as delicious and comforting!

Chicken Pot Pie Variations

Feel free to make this Chicken Pot Pie your own with these creative twists and substitutions that inspire deliciousness!

  • Dairy-Free: Use coconut milk or almond milk instead of heavy cream for a lighter, creamy base that remains indulgent.

  • Vegetarian: Swap the chicken for hearty mushrooms and chickpeas, adding a variety of colorful vegetables for texture and flavor.

  • Herb Enchantment: Experiment with fresh herbs like rosemary or parsley instead of thyme for a fragrant and vibrant twist on the classic flavors.

  • Spicy Kick: Add diced jalapeños or a sprinkle of cayenne pepper to the filling for a delightful level of heat that warms the soul.

  • Crust Alternatives: Try using phyllo dough or a biscuit topping for a different texture that still captures the comforting spirit of pot pie.

  • Root Veggie Boost: Incorporate diced rutabaga or butternut squash in place of potatoes for a unique flavor twist and even more nutrition.

  • Savory Cheese: Mix in cheddar or gruyère cheese into the filling for an extra layer of richness that perfectly complements the savory ingredients.

  • Mini Pies: Portion the filling into ramekins and top each with individual crusts for charming, personal-sized pot pies that are perfect for gatherings.

Let these variations inspire creativity in your kitchen as you make this cozy classic truly yours!

How to Store and Freeze Chicken Pot Pie

Room Temperature: Allow Chicken Pot Pie to cool for about 30 minutes before serving. It can be left out for up to 2 hours, but any leftovers should be refrigerated promptly.

Fridge: Store leftover Chicken Pot Pie in an airtight container in the fridge for up to 3 days. Reheat portions in the microwave or oven until heated through.

Freezer: For longer storage, wrap the pie tightly in plastic wrap and aluminum foil; it can be frozen for up to 2 months. Thaw overnight in the fridge before reheating.

Reheating: To reheat, bake the thawed Chicken Pot Pie in a preheated oven at 350°F (175°C) for about 25-30 minutes, or until the crust is golden and filling is hot.

Chef's Helpful Tips

  • When preparing Chicken Pot Pie, ensure your chicken is evenly diced for consistent cooking and tenderness.
  • Avoid overcrowding the skillet when browning the chicken; this helps achieve a nice golden color and crisp texture.
  • For extra flavor, sauté your garlic until fragrant but not browned to prevent bitterness.
  • Keep an eye on your pot pie as it bakes, and if the crust starts to brown too quickly, cover the edges with foil to prevent burning while the filling cooks through.

Chicken Pot Pie Recipe FAQs

How do I choose the right chicken for my Chicken Pot Pie?
Absolutely! Choose boneless, skinless chicken breasts for this recipe as they cook evenly and result in tender meat. Look for chicken that is pink and moist, with no dark spots. If possible, try to select chicken that is organic or free-range for the best flavor.

How should I store leftover Chicken Pot Pie?
Very good question! After it cools for about 30 minutes, store leftover Chicken Pot Pie in an airtight container in the refrigerator for up to 3 days. Just make sure it’s completely covered to prevent drying out, and reheat portions in a microwave or oven until heated through.

Can I freeze Chicken Pot Pie?
Absolutely! To freeze, wrap the Chicken Pot Pie tightly in plastic wrap, then cover it with aluminum foil to protect it from freezer burn. It can be frozen for up to 2 months. When you’re ready to enjoy it again, thaw it overnight in the fridge before baking.

What if my chicken pot pie filling is too runny?
If you find that your filling is too runny, don’t worry! You can thicken it by either adding a cornstarch slurry (mix 2 tablespoons cornstarch with 2 tablespoons cold water) and heating it gently, or by simmering it for a few more minutes until some liquid evaporates. Just be sure to stir constantly to avoid lumps.

Can I make Chicken Pot Pie in advance?
Yes! You can prepare the filling and assemble the Chicken Pot Pie one day ahead. Just store the assembled pie covered in the fridge. When you’re ready to bake, remove it from the fridge, allow it to come to room temperature for about 15-20 minutes, and then follow the baking instructions. This makes it easier for those busy weeknight dinners!

Is this recipe suitable for those with allergies?
Great point! This Chicken Pot Pie contains chicken, dairy, and possible gluten from the crust. For dietary restrictions, consider using a gluten-free pie crust and plant-based cream alternatives. Always check labels for allergens, and consult with a medical professional if you have specific concerns regarding food allergies.

Chicken Pot Pie

Chicken Pot Pie

This Chicken Pot Pie is a comforting classic that combines tender chicken, vegetables, and a creamy sauce in a flaky crust.
Print Recipe Pin Recipe
Prep Time 15 minutes mins
Cook Time 35 minutes mins
Total Time 50 minutes mins
Servings: 6 slices
Course: DINNER RECIPES
Cuisine: American
Calories: 450
Ingredients Equipment Method Nutrition Notes

Ingredients
  

Filling
  • 2 cups diced boneless, skinless chicken breasts for tenderness
  • 3 cloves fresh garlic minced
  • 2 medium carrots diced
  • 1 cup frozen peas
  • 2 cups Yukon Gold potatoes diced
  • 2 cups low-sodium chicken broth
  • 1 cup heavy cream
  • 1 teaspoon dried thyme
  • to taste salt
  • to taste pepper
Crust
  • 1 package pie crust store-bought or homemade

Equipment

  • Skillet
  • Baking dish
  • Oven

Method
 

Preparation
  1. Preheat your oven to 400°F (200°C) and lightly spray a baking dish with nonstick cooking spray.
  2. Cook the diced chicken in a large skillet over medium heat for about 8-10 minutes, until golden brown. Season with salt and pepper.
  3. Sauté the minced garlic and diced carrots in the skillet for about five minutes.
  4. Combine the chicken broth and heavy cream in the skillet, and stir in the dried thyme. Simmer for five minutes until thickened.
  5. Transfer the chicken mixture into your prepared baking dish, and layer the diced potatoes and frozen peas on top.
  6. Cover the filling with the pie crust, trimming any excess and cutting slits for ventilation. Bake for 30-35 minutes until golden brown.

Nutrition

Serving: 1sliceCalories: 450kcalCarbohydrates: 40gProtein: 25gFat: 25gSaturated Fat: 10gPolyunsaturated Fat: 5gMonounsaturated Fat: 10gCholesterol: 80mgSodium: 600mgPotassium: 600mgFiber: 4gSugar: 2gVitamin A: 2000IUVitamin C: 15mgCalcium: 30mgIron: 2mg

Notes

Optional: Serve with a sprinkle of fresh parsley for added color and flavor.

Tried this recipe?

Let us know how it was!

Filed Under: DINNER RECIPES

Valentine’s Day Snack Board

January 3, 2026 by JudyWhite Leave a Comment

As I was flipping through my recipe collection in preparation for Valentine’s Day, a burst of inspiration hit me like a sweet surprise. There’s something wonderfully romantic about sharing a beautifully arranged snack board—especially one that showcases vibrant colors and a mix of delightful textures. Picture this: a spread loaded with creamy brie, juicy strawberries, and a pop of exotic dragonfruit, all nestled among crunchy rice crackers and decadent white chocolate pretzels.

This Valentine’s Day Snack Board isn’t just easy to prepare in just 15 minutes; it’s also designed to dazzle any palate. Whether you’re planning a cozy night in with your partner, a vibrant gathering with friends, or an indulgent treat for yourself, this charming platter has got you covered. So let’s dive into this recipe that promises to elevate your Valentine’s Day celebrations, bringing joy with every bite!

Why You'll Love This Valentine’s Day Snack Board

  • This Valentine’s Day Snack Board is incredibly easy to prepare, taking just 15 minutes to assemble, making it perfect for even the busiest schedules.
  • The vibrant colors and elegant presentation are sure to impress anyone, making it a visual delight that enhances the atmosphere of your celebration.
  • With a variety of flavors from creamy brie to fresh fruits and sweet treats, this board caters to diverse tastes and ensures that everyone will find something they love.
  • It’s versatile enough for a romantic evening at home or a lively gathering with friends, making it a truly crowd-pleasing treat for any Valentine’s Day occasion.

Valentine’s Day Snack Board Ingredients

For the Base

  • Rice Crackers – 16 pieces provide a crunchy contrast to the creamy brie and sweet fruits.

For the Sweet Treats

  • White Chocolate Pretzels – 4 ounces add a delightful sweet-salty flavor that pairs beautifully with fresh fruit.

For the Cheese

  • Brie Cheese – 3 ounces offers a rich, creamy element that balances the board perfectly.

For the Fruits

  • Strawberries – 2 cups bring vibrant color and a juicy sweetness that everyone loves.
  • Raspberries – 1 cup adds a tartness that beautifully complements the sweeter elements.
  • Dragonfruit – 1 whole, sliced for a stunning visual appeal and mild flavor.
  • Pomegranate Arils – 1/4 cup provides juicy bursts of flavor and an extra touch of elegance.

For the Garnish

  • Toasted Coconut – 1/4 cup adds a crunchy texture and tropical flavor, making this Valentine’s Day Snack Board truly special.

Get ready to create a gorgeous display that will not only tantalize the taste buds but also provide a feast for the eyes!

How to Make a Valentine’s Day Snack Board

  1. Gather Ingredients: Start by collecting all your beautiful ingredients. Having everything on hand will make assembly a breeze, ensuring a smooth and enjoyable preparation experience.

  2. Arrange the Base: Lay out your rice crackers evenly across the large cutting board or serving tray. Feel free to overlap them slightly to create a visually interesting starting point for your snack board.

  3. Add the Cheese: Next, place your brie cheese in the center or at one end of the board. Its creamy texture will draw the eye and, trust me, it pairs wonderfully with everything else!

  4. Incorporate Fresh Fruits: Scatter the strawberries and raspberries around the cheese, and don’t forget to slice and artfully arrange the dragonfruit. Create a vibrant tapestry of colors—this is what makes your board truly eye-catching!

  5. Sprinkle the Sweet Treats: Now, add the white chocolate pretzels around the fruits, allowing the sweet and salty combo to shine. Their whimsical shape will add a fun touch to your board.

  6. Finish with Garnishes: Complete your masterpiece by sprinkling the toasted coconut and pomegranate arils over the board. These little accents add a delightful crunch and burst of flavor, ensuring each bite is flavorful and fresh.

Optional: Drizzle with honey for an extra touch of sweetness!

Exact quantities are listed in the recipe card below.

Make Ahead Options

This Valentine’s Day Snack Board is perfect for busy home cooks who love the convenience of prepping in advance! You can slice the dragonfruit and prepare the strawberries and raspberries up to 24 hours ahead to maintain their freshness. Simply store them in airtight containers in the refrigerator to keep them vibrant and juicy. You can also assemble the cheese and crackers the night before; just keep them covered to prevent the crackers from getting soggy. When you’re ready to serve, all you need to do is scatter the white chocolate pretzels, sprinkle with toasted coconut and pomegranate arils, and voilà—your charming board is ready to impress with minimal effort!

What to Serve with Valentine’s Day Snack Board?

Imagine the joy of pairing delicious snacks with enticing sides that elevate your celebration.

  • Chilled White Wine: A crisp Sauvignon Blanc pairs beautifully, complementing the creamy brie and fresh fruit flavors with its refreshing notes.

  • Sparkling Water with Lime: This bubbly choice adds a refreshing, zesty touch that keeps the palate invigorated between the rich bites.

  • Chocolate-Dipped Strawberries: A decadent addition, these sweet treats enhance the romance of your snack board and create a dreamy pairing with white chocolate pretzels.

  • Nuts and Dried Fruits: A mixed bowl of almonds and apricots adds crunchiness and natural sweetness, balancing the flavors while introducing a delightful texture contrast.

  • Cheese Platter: Adding a variety of cheeses like feta or gouda can offer complexity, catering to everyone’s cheese cravings and adding to the presentation.

  • Heart-Shaped Cookies: These charming treats provide a playful element to your display, appealing to the festive spirit of Valentine’s Day.

  • Chocolate Lava Cake: For an indulgent touch, this warm dessert can be an irresistible ending to your romantic gathering, offering a rich contrast to the fresh elements.

How to Store and Freeze Valentine’s Day Snack Board

Fridge: Store any leftover items in an airtight container. The fruits and brie cheese will stay fresh for up to 3 days.

Room Temperature: If serving at a gathering, keep the snack board at room temperature for no longer than 2 hours, ensuring safety and freshness.

Freezer: It’s not recommended to freeze this Valentine’s Day Snack Board, as the textures of the cheese and fruits will be compromised upon thawing.

Reheating: If enjoyed chilled, there’s no need to reheat. However, if you prefer a warm brie, gently heat in the microwave for 10–15 seconds before serving.

Valentine’s Day Snack Board Variations

Feel free to mix things up and make this snack board uniquely yours with these enticing variations!

  • Gluten-Free: Substitute rice crackers with gluten-free options like almond flour crackers for a crispy base everyone can enjoy.

  • Vegan Delight: Swap out the brie cheese for a plant-based cream cheese alternative, maintaining that creamy texture without dairy.

  • Flavor Boost: Sprinkle some cinnamon or nutmeg over the fruit for a warm spice twist that adds unexpected depth to your snack board.

  • Add Nuts: Toss on a handful of mixed nuts for a crunchy texture and added protein, bringing a satisfying bite to each piece.

  • Heat It Up: Drizzle a light touch of sriracha or chili honey over the fruit and cheese for a sweet and spicy flavor explosion that will surprise your taste buds.

  • Chocolate Lover’s Dream: Swap white chocolate pretzels for dark chocolate-covered pretzels, elevating the flavor and richness.

  • Nostalgic Touch: Include some favorite childhood candies alongside the fruit for a fun and playful twist that brings back fond memories.

  • Seasonal Fruits: Depending on the season, replace strawberries and raspberries with cherries or peaches to discover new flavor profiles that shine.

With these variations, your Valentine’s Day Snack Board will not only be visually stunning, but also bursting with personalized flavors that cater to every palate!

Chef's Helpful Tips

  • When assembling your Valentine’s Day Snack Board, ensure that you have all ingredients prepped and ready to go for an efficient assembly process.
  • Avoid overcrowding the board by strategically placing items to maintain a beautiful presentation and accessibility.
  • Use a variety of colors and shapes to enhance visual appeal, making sure to position the brie cheese prominently as it acts as a centerpiece.
  • To keep fruits fresh, prepare them just before serving to prevent any oxidation and loss of vibrant color.

Valentine’s Day Snack Board Recipe FAQs

How do I choose ripe strawberries for my Valentine’s Day Snack Board?
Absolutely! Look for strawberries that are bright red without any white spots or dark spots all over. The strawberry should feel firm but slightly soft to the touch, indicating that it’s juicy and ready to enjoy. Avoid any that appear overly soft or have blemishes.

What’s the best way to store leftover brie cheese?
I often wrap leftover brie cheese in wax paper or parchment paper, followed by a loose layer of plastic wrap. This keeps it from drying out while allowing it to breathe. Stored this way, it can last in the fridge for up to 5 days.

Can I freeze dragonfruit or other fruits for my snack board?
While I don’t recommend freezing your entire Valentine’s Day Snack Board, you can freeze dragonfruit for future use. Just peel and cut it into cubes, then spread the pieces on a baking sheet lined with parchment paper. Freeze for about 2 hours, then transfer to an airtight container. It will keep well for up to 3 months, but the texture may change when thawed. Use thawed pieces in smoothies or fruit salads!

What should I do if my brie cheese doesn’t melt properly?
If you hope to enjoy melty brie, make sure to keep it at room temperature for about 30 minutes before serving. This allows it to soften. If it doesn’t melt in the microwave as expected, try microwaving it for an additional 5–10 seconds. Keep an eye on it, as you don’t want it to overheat and separate!

Can I replace any ingredients for dietary restrictions?
Very! If you’re looking to accommodate allergies, consider using rice crackers made without gluten for a gluten-free option. For a nut-free diet, ensure your toasted coconut doesn’t come from a facility that processes nuts. You can also swap out the fruits according to seasonal availability or personal preference—kiwis or melons make great alternatives!

How long can I leave my snack board out at a party?
I recommend serving your Valentine’s Day Snack Board at room temperature for no more than 2 hours to ensure freshness and food safety. If you notice the fruits starting to wilt or the cheese losing its charm, it’s time to wrap it up!

Valentine’s Day Snack Board

Valentine’s Day Snack Board

A vibrant and delightful Valentine’s Day Snack Board perfect for sharing, featuring fruits, brie, and sweet treats.
Print Recipe Pin Recipe
Prep Time 15 minutes mins
Total Time 15 minutes mins
Servings: 4 servings
Course: Snacks & Appetizers
Calories: 350
Ingredients Equipment Method Nutrition Notes

Ingredients
  

For the Base
  • 16 pieces Rice Crackers Provides a crunchy contrast to the creamy brie and sweet fruits.
For the Sweet Treats
  • 4 ounces White Chocolate Pretzels Add a delightful sweet-salty flavor.
For the Cheese
  • 3 ounces Brie Cheese Offers a rich, creamy element.
For the Fruits
  • 2 cups Strawberries Brings vibrant color and juicy sweetness.
  • 1 cup Raspberries Adds a tartness that complements sweeter elements.
  • 1 whole Dragonfruit Sliced for visual appeal.
  • 1/4 cup Pomegranate Arils Provides juicy bursts and elegance.
For the Garnish
  • 1/4 cup Toasted Coconut Adds a crunchy texture and tropical flavor.

Equipment

  • Cutting Board
  • serving tray

Method
 

How to Make a Valentine’s Day Snack Board
  1. Gather Ingredients: Start by collecting all your beautiful ingredients.
  2. Arrange the Base: Lay out your rice crackers evenly across the large cutting board or serving tray.
  3. Add the Cheese: Place your brie cheese in the center or at one end of the board.
  4. Incorporate Fresh Fruits: Scatter the strawberries and raspberries around the cheese, and slice the dragonfruit.
  5. Sprinkle the Sweet Treats: Add the white chocolate pretzels around the fruits.
  6. Finish with Garnishes: Sprinkle the toasted coconut and pomegranate arils over the board.

Nutrition

Serving: 1boardCalories: 350kcalCarbohydrates: 45gProtein: 5gFat: 15gSaturated Fat: 10gPolyunsaturated Fat: 1gMonounsaturated Fat: 3gCholesterol: 20mgSodium: 350mgPotassium: 150mgFiber: 5gSugar: 20gVitamin A: 200IUVitamin C: 70mgCalcium: 150mgIron: 1mg

Notes

Optional: Drizzle with honey for an extra touch of sweetness.

Tried this recipe?

Let us know how it was!

Filed Under: SNACKS & APPETIZERS

Valentine’s Day Snack Board

January 3, 2026 by JudyWhite Leave a Comment

As I was flipping through my recipe collection in preparation for Valentine’s Day, a burst of inspiration hit me like a sweet surprise. There’s something wonderfully romantic about sharing a beautifully arranged snack board—especially one that showcases vibrant colors and a mix of delightful textures. Picture this: a spread loaded with creamy brie, juicy strawberries, and a pop of exotic dragonfruit, all nestled among crunchy rice crackers and decadent white chocolate pretzels.

This Valentine’s Day Snack Board isn’t just easy to prepare in just 15 minutes; it’s also designed to dazzle any palate. Whether you’re planning a cozy night in with your partner, a vibrant gathering with friends, or an indulgent treat for yourself, this charming platter has got you covered. So let’s dive into this recipe that promises to elevate your Valentine’s Day celebrations, bringing joy with every bite!

Why You'll Love This Valentine’s Day Snack Board

  • This Valentine’s Day Snack Board is incredibly easy to prepare, taking just 15 minutes to assemble, making it perfect for even the busiest schedules.
  • The vibrant colors and elegant presentation are sure to impress anyone, making it a visual delight that enhances the atmosphere of your celebration.
  • With a variety of flavors from creamy brie to fresh fruits and sweet treats, this board caters to diverse tastes and ensures that everyone will find something they love.
  • It’s versatile enough for a romantic evening at home or a lively gathering with friends, making it a truly crowd-pleasing treat for any Valentine’s Day occasion.

Valentine’s Day Snack Board Ingredients

For the Base

  • Rice Crackers – 16 pieces provide a crunchy contrast to the creamy brie and sweet fruits.

For the Sweet Treats

  • White Chocolate Pretzels – 4 ounces add a delightful sweet-salty flavor that pairs beautifully with fresh fruit.

For the Cheese

  • Brie Cheese – 3 ounces offers a rich, creamy element that balances the board perfectly.

For the Fruits

  • Strawberries – 2 cups bring vibrant color and a juicy sweetness that everyone loves.
  • Raspberries – 1 cup adds a tartness that beautifully complements the sweeter elements.
  • Dragonfruit – 1 whole, sliced for a stunning visual appeal and mild flavor.
  • Pomegranate Arils – 1/4 cup provides juicy bursts of flavor and an extra touch of elegance.

For the Garnish

  • Toasted Coconut – 1/4 cup adds a crunchy texture and tropical flavor, making this Valentine’s Day Snack Board truly special.

Get ready to create a gorgeous display that will not only tantalize the taste buds but also provide a feast for the eyes!

How to Make a Valentine’s Day Snack Board

  1. Gather Ingredients: Start by collecting all your beautiful ingredients. Having everything on hand will make assembly a breeze, ensuring a smooth and enjoyable preparation experience.

  2. Arrange the Base: Lay out your rice crackers evenly across the large cutting board or serving tray. Feel free to overlap them slightly to create a visually interesting starting point for your snack board.

  3. Add the Cheese: Next, place your brie cheese in the center or at one end of the board. Its creamy texture will draw the eye and, trust me, it pairs wonderfully with everything else!

  4. Incorporate Fresh Fruits: Scatter the strawberries and raspberries around the cheese, and don’t forget to slice and artfully arrange the dragonfruit. Create a vibrant tapestry of colors—this is what makes your board truly eye-catching!

  5. Sprinkle the Sweet Treats: Now, add the white chocolate pretzels around the fruits, allowing the sweet and salty combo to shine. Their whimsical shape will add a fun touch to your board.

  6. Finish with Garnishes: Complete your masterpiece by sprinkling the toasted coconut and pomegranate arils over the board. These little accents add a delightful crunch and burst of flavor, ensuring each bite is flavorful and fresh.

Optional: Drizzle with honey for an extra touch of sweetness!

Exact quantities are listed in the recipe card below.

How to Store and Freeze Valentine’s Day Snack Board

Fridge: Store any leftover items in an airtight container. The fruits and brie cheese will stay fresh for up to 3 days.

Room Temperature: If serving at a gathering, keep the snack board at room temperature for no longer than 2 hours, ensuring safety and freshness.

Freezer: It’s not recommended to freeze this Valentine’s Day Snack Board, as the textures of the cheese and fruits will be compromised upon thawing.

Reheating: If enjoyed chilled, there’s no need to reheat. However, if you prefer a warm brie, gently heat in the microwave for 10–15 seconds before serving.

What to Serve with Valentine’s Day Snack Board?

Imagine the joy of pairing delicious snacks with enticing sides that elevate your celebration.

  • Chilled White Wine: A crisp Sauvignon Blanc pairs beautifully, complementing the creamy brie and fresh fruit flavors with its refreshing notes.

  • Sparkling Water with Lime: This bubbly choice adds a refreshing, zesty touch that keeps the palate invigorated between the rich bites.

  • Chocolate-Dipped Strawberries: A decadent addition, these sweet treats enhance the romance of your snack board and create a dreamy pairing with white chocolate pretzels.

  • Nuts and Dried Fruits: A mixed bowl of almonds and apricots adds crunchiness and natural sweetness, balancing the flavors while introducing a delightful texture contrast.

  • Cheese Platter: Adding a variety of cheeses like feta or gouda can offer complexity, catering to everyone’s cheese cravings and adding to the presentation.

  • Heart-Shaped Cookies: These charming treats provide a playful element to your display, appealing to the festive spirit of Valentine’s Day.

  • Chocolate Lava Cake: For an indulgent touch, this warm dessert can be an irresistible ending to your romantic gathering, offering a rich contrast to the fresh elements.

Make Ahead Options

This Valentine’s Day Snack Board is perfect for busy home cooks who love the convenience of prepping in advance! You can slice the dragonfruit and prepare the strawberries and raspberries up to 24 hours ahead to maintain their freshness. Simply store them in airtight containers in the refrigerator to keep them vibrant and juicy. You can also assemble the cheese and crackers the night before; just keep them covered to prevent the crackers from getting soggy. When you’re ready to serve, all you need to do is scatter the white chocolate pretzels, sprinkle with toasted coconut and pomegranate arils, and voilà—your charming board is ready to impress with minimal effort!

Valentine’s Day Snack Board Variations

Feel free to mix things up and make this snack board uniquely yours with these enticing variations!

  • Gluten-Free: Substitute rice crackers with gluten-free options like almond flour crackers for a crispy base everyone can enjoy.

  • Vegan Delight: Swap out the brie cheese for a plant-based cream cheese alternative, maintaining that creamy texture without dairy.

  • Flavor Boost: Sprinkle some cinnamon or nutmeg over the fruit for a warm spice twist that adds unexpected depth to your snack board.

  • Add Nuts: Toss on a handful of mixed nuts for a crunchy texture and added protein, bringing a satisfying bite to each piece.

  • Heat It Up: Drizzle a light touch of sriracha or chili honey over the fruit and cheese for a sweet and spicy flavor explosion that will surprise your taste buds.

  • Chocolate Lover’s Dream: Swap white chocolate pretzels for dark chocolate-covered pretzels, elevating the flavor and richness.

  • Nostalgic Touch: Include some favorite childhood candies alongside the fruit for a fun and playful twist that brings back fond memories.

  • Seasonal Fruits: Depending on the season, replace strawberries and raspberries with cherries or peaches to discover new flavor profiles that shine.

With these variations, your Valentine’s Day Snack Board will not only be visually stunning, but also bursting with personalized flavors that cater to every palate!

Chef's Helpful Tips

  • When assembling your Valentine’s Day Snack Board, ensure that you have all ingredients prepped and ready to go for an efficient assembly process.
  • Avoid overcrowding the board by strategically placing items to maintain a beautiful presentation and accessibility.
  • Use a variety of colors and shapes to enhance visual appeal, making sure to position the brie cheese prominently as it acts as a centerpiece.
  • To keep fruits fresh, prepare them just before serving to prevent any oxidation and loss of vibrant color.

Valentine’s Day Snack Board Recipe FAQs

How do I choose ripe strawberries for my Valentine’s Day Snack Board?
Absolutely! Look for strawberries that are bright red without any white spots or dark spots all over. The strawberry should feel firm but slightly soft to the touch, indicating that it’s juicy and ready to enjoy. Avoid any that appear overly soft or have blemishes.

What’s the best way to store leftover brie cheese?
I often wrap leftover brie cheese in wax paper or parchment paper, followed by a loose layer of plastic wrap. This keeps it from drying out while allowing it to breathe. Stored this way, it can last in the fridge for up to 5 days.

Can I freeze dragonfruit or other fruits for my snack board?
While I don’t recommend freezing your entire Valentine’s Day Snack Board, you can freeze dragonfruit for future use. Just peel and cut it into cubes, then spread the pieces on a baking sheet lined with parchment paper. Freeze for about 2 hours, then transfer to an airtight container. It will keep well for up to 3 months, but the texture may change when thawed. Use thawed pieces in smoothies or fruit salads!

What should I do if my brie cheese doesn’t melt properly?
If you hope to enjoy melty brie, make sure to keep it at room temperature for about 30 minutes before serving. This allows it to soften. If it doesn’t melt in the microwave as expected, try microwaving it for an additional 5–10 seconds. Keep an eye on it, as you don’t want it to overheat and separate!

Can I replace any ingredients for dietary restrictions?
Very! If you’re looking to accommodate allergies, consider using rice crackers made without gluten for a gluten-free option. For a nut-free diet, ensure your toasted coconut doesn’t come from a facility that processes nuts. You can also swap out the fruits according to seasonal availability or personal preference—kiwis or melons make great alternatives!

How long can I leave my snack board out at a party?
I recommend serving your Valentine’s Day Snack Board at room temperature for no more than 2 hours to ensure freshness and food safety. If you notice the fruits starting to wilt or the cheese losing its charm, it’s time to wrap it up!

Valentine’s Day Snack Board

Valentine’s Day Snack Board

A vibrant and delightful Valentine’s Day Snack Board perfect for sharing, featuring fruits, brie, and sweet treats.
Print Recipe Pin Recipe
Prep Time 15 minutes mins
Total Time 15 minutes mins
Servings: 4 servings
Course: Snacks & Appetizers
Calories: 350
Ingredients Equipment Method Nutrition Notes

Ingredients
  

For the Base
  • 16 pieces Rice Crackers Provides a crunchy contrast to the creamy brie and sweet fruits.
For the Sweet Treats
  • 4 ounces White Chocolate Pretzels Add a delightful sweet-salty flavor.
For the Cheese
  • 3 ounces Brie Cheese Offers a rich, creamy element.
For the Fruits
  • 2 cups Strawberries Brings vibrant color and juicy sweetness.
  • 1 cup Raspberries Adds a tartness that complements sweeter elements.
  • 1 whole Dragonfruit Sliced for visual appeal.
  • 1/4 cup Pomegranate Arils Provides juicy bursts and elegance.
For the Garnish
  • 1/4 cup Toasted Coconut Adds a crunchy texture and tropical flavor.

Equipment

  • Cutting Board
  • serving tray

Method
 

How to Make a Valentine’s Day Snack Board
  1. Gather Ingredients: Start by collecting all your beautiful ingredients.
  2. Arrange the Base: Lay out your rice crackers evenly across the large cutting board or serving tray.
  3. Add the Cheese: Place your brie cheese in the center or at one end of the board.
  4. Incorporate Fresh Fruits: Scatter the strawberries and raspberries around the cheese, and slice the dragonfruit.
  5. Sprinkle the Sweet Treats: Add the white chocolate pretzels around the fruits.
  6. Finish with Garnishes: Sprinkle the toasted coconut and pomegranate arils over the board.

Nutrition

Serving: 1boardCalories: 350kcalCarbohydrates: 45gProtein: 5gFat: 15gSaturated Fat: 10gPolyunsaturated Fat: 1gMonounsaturated Fat: 3gCholesterol: 20mgSodium: 350mgPotassium: 150mgFiber: 5gSugar: 20gVitamin A: 200IUVitamin C: 70mgCalcium: 150mgIron: 1mg

Notes

Optional: Drizzle with honey for an extra touch of sweetness.

Tried this recipe?

Let us know how it was!

Filed Under: SNACKS & APPETIZERS

Chocolate Raspberry Cake

January 3, 2026 by JudyWhite Leave a Comment

There’s a distinct joy that fills the kitchen as the rich scent of cocoa mingles with the tart sweetness of fresh raspberries. The moment I decided to whip up this Chocolate Raspberry Cake, I didn’t just want a dessert; I craved an experience—a delicious fusion that dances on your palate. It all began on a cozy weekend, inspired by the fresh berries from my garden that were begging to be showcased in something special.

Imagine surprising your loved ones with a cake that looks as magnificent as it tastes, yet surprises everyone with how simple it is to make. This cake doesn’t just dazzle the eyes; it’s a delightful blend of moist chocolate, vibrant raspberries, and creamy buttercream that feels luxurious without the fuss. Perfect for birthdays, gatherings, or just because—it effortlessly elevates any occasion.

So, if you’re tired of the mundane and searching for that standout dessert that will make you look like a kitchen superstar, grab your apron and let’s create this Chocolate Raspberry Cake together!

Why You'll Love This Chocolate Raspberry Cake

  • This Chocolate Raspberry Cake is incredibly easy to make, allowing both novice and experienced bakers to shine in the kitchen.
  • The rich, decadent flavors of chocolate paired with the tart raspberries create a delightful taste sensation that will leave everyone wanting more.
  • Its stunning visual appeal makes it the perfect centerpiece for any celebration or special occasion, guaranteed to impress your guests.
  • Plus, the versatility of this recipe means you can customize it with your favorite fillings and decorations to make it truly your own.

Chocolate Raspberry Cake Ingredients

Here’s everything you need to create this delightful Chocolate Raspberry Cake!

For the Cake
• All-purpose flour – perfect for creating a light and fluffy texture.
• Unsweetened cocoa powder – choose high-quality cocoa for a rich chocolate flavor.
• Baking soda – helps the cake rise and achieve that perfect crumb.
• Baking powder – works in tandem with baking soda for an extra lift.
• Salt – enhances the sweetness of the cake, balancing the flavors.
• White granulated sugar – adds sweetness and moisture to the chocolate cake.
• Buttermilk – adds tenderness and helps to achieve a moist cake.
• Oil – for that melt-in-your-mouth texture; can substitute with melted butter if desired.
• Large eggs – binding the ingredients together and helping with the cake’s rise.
• Pure vanilla extract – infuses a warm, aromatic flavor throughout.
• Hot water – steams into the cake for a moist and rich chocolate blend.
• Raspberries – fresh or frozen, these gems add a tangy burst to the cake.

For the Raspberry Mixture
• Water – helps in blending the raspberry puree smoothly.
• Reduced raspberry puree – intensifies the raspberry flavor without excess liquid.
• Ground freeze-dried raspberries – adds a concentrated raspberry kick, perfect for garnishing.

For the Buttercream Frosting
• Unsalted butter – room temperature for a smooth mixing process.
• Powdered sugar – sifted to ensure a creamy, lump-free frosting.
• Salt – enhances the overall taste of the frosting.
• Pure vanilla extract – adds a comforting undertone to the frosting’s flavor.

For the Ganache and Topping
• Semi-sweet chocolate chips – melted down for a rich and decadent ganache.
• Heavy cream – creates a smooth ganache and balances the sweetness of the chocolate.
• Fresh raspberries – for decoration, adding a fresh touch and vibrant colors to the cake.

When you combine these ingredients, magic happens, and trust me, your Chocolate Raspberry Cake will steal the show!

How to Make Chocolate Raspberry Cake

  1. Preheat your oven to 350°F (175°C), allowing it to reach the right temperature for baking your cake evenly. This step ensures that your cake rises perfectly and develops a gooey, delicious texture.

  2. Mix the dry ingredients by whisking together the flour, cocoa powder, baking soda, baking powder, and salt in a large bowl. This step is essential for an even distribution of flavors and leavening agents.

  3. Combine the wet ingredients in a separate bowl, blending the sugar, buttermilk, oil, eggs, and vanilla extract until fully mixed. This step creates a rich and flavorful base for your cake batter.

  4. Pour the wet mixture into the dry ingredients and mix well. Stir until the batter is combined; it should be smooth and slightly thick.

  5. Gradually add the hot water to the batter, mixing continuously until you achieve a silky smooth consistency. The hot water enhances the chocolate flavor and keeps the cake moist.

  6. Fold in the raspberries gently, allowing their flavor to blend into the batter without breaking them apart or over-mixing. This adds delightful bursts of tartness in every bite.

  7. Pour the cake batter into prepared baking pans, filling each about halfway. Bake for 25 minutes, or until a toothpick inserted into the center comes out clean. Your cakes should look puffed and firm.

  8. Cool the cakes in the pans for 10 minutes before transferring them to a cooling rack. This allows them to set perfectly, preventing breakage when you’re ready to assemble.

  9. Beat the room temperature butter with the sifted powdered sugar in a bowl until fluffy. This should take about 3-5 minutes, creating a light and airy buttercream.

  10. Add the salt and vanilla extract to the butter mixture, continue mixing to incorporate fully. This step elevates the overall flavor of your frosting.

  11. Melt the semi-sweet chocolate chips with the heavy cream in a heatproof bowl until smooth. Allow to cool slightly before combining it with the butter mixture for a rich ganache.

  12. Assemble your cake layers with the buttercream and raspberry puree, spreading evenly between layers. For decoration, top with fresh raspberries, creating a stunning centerpiece.

Optional: Drizzle some extra ganache on top for an extra touch of indulgence!

Exact quantities are listed in the recipe card below.

Make Ahead Options

These Chocolate Raspberry Cakes are perfect for busy cooks looking to save time without sacrificing flavor! You can prepare the cake layers up to 24 hours in advance by baking and allowing them to cool completely before wrapping them tightly in plastic wrap and refrigerating to maintain their moistness. The buttercream frosting can also be made and stored in an airtight container in the fridge for up to 3 days. When you’re ready to serve, simply take the cakes and frosting out, allow the frosting to soften at room temperature, then assemble and decorate the cake with fresh raspberries. This prep-ahead approach ensures your Chocolate Raspberry Cake remains just as delicious and delightful to share!

How to Store and Freeze Chocolate Raspberry Cake

Fridge: Store any leftover Chocolate Raspberry Cake in an airtight container for up to 3 days to maintain its moist texture and rich flavor.

Freezer: To freeze, wrap individual slices or the whole cake tightly in plastic wrap, then aluminum foil; it can last for up to 3 months.

Reheating: When ready to enjoy, thaw in the fridge overnight then reheat slices in the microwave for about 10-15 seconds for a delightful warm treat.

Room Temperature: If consuming within a day, you can leave the cake covered at room temperature, keeping it fresh and delicious.

Chocolate Raspberry Variations

Feel free to explore these delightful twists to make your Chocolate Raspberry Cake truly your own!

  • Gluten-Free: Use a 1:1 gluten-free flour blend to replace all-purpose flour for a gluten-free treat that everyone can enjoy.

  • Dairy-Free: Substitute the buttermilk with almond or coconut milk mixed with a tablespoon of vinegar to create a perfect dairy-free version.

  • Sugary Twist: Try substituting half of the granulated sugar with brown sugar for added moisture and a hint of caramel flavor.

  • Nutty Crunch: Fold in 1 cup of chopped walnuts or almonds for a satisfying crunch that complements the tartness of the raspberries beautifully.

  • Extra Berry Goodness: Add a layer of raspberry jam in between the cake layers for an extra burst of berry flavor that elevates every bite.

  • Zesty Kick: Mix in the zest of one orange or lemon into the batter for a bright flavor contrast that pairs wonderfully with the chocolate and raspberries.

  • Spice it Up: A teaspoon of cinnamon or a pinch of cayenne can be added to the dry ingredients for a unique warmth that adds depth to the cake’s flavor.

  • Rich Chocolate Ganache: Swap the semi-sweet chips for dark chocolate for an even richer ganache that enhances the overall chocolate experience.

Feel the excitement as you adjust and create your masterpiece!

What to Serve with Chocolate Raspberry Cake?

Imagine the perfect gathering where your decadent dessert shines alongside equally delightful companions.

  • Fresh Whipped Cream: A dollop of lightly sweetened whipped cream brings a airy contrast to the rich cake, balancing flavors beautifully.

  • Vanilla Ice Cream: The creamy, cool taste of vanilla ice cream complements the chocolate and raspberry pairings, turning every bite into an indulgent experience.

  • Chocolate Ganache: Pouring extra melted chocolate ganache on each slice intensifies the decadence and adds a smooth, luxurious texture.

  • Mint Tea: A fragrant cup of mint tea refreshes the palate between bites, enhancing the fruity notes while adding a floral touch to the experience.

  • Mixed Berry Salad: A fresh salad of mixed berries brightens your dessert table with its vibrant colors and flavors that echo the cake’s raspberry notes.

  • Sparkling Wine: A glass of bubbly sparkling wine pairs perfectly; its lightness cuts through the richness while enhancing the celebratory vibe.

  • Almond Cookies: Crunchy almond cookies can provide a delightful texture contrast alongside the moist cake while adding a hint of nuttiness to your dessert spread.

Indulging in these pairings will elevate your Chocolate Raspberry Cake from a simple dessert to an unforgettable feast for the senses!

Chef's Helpful Tips

  • For the Chocolate Raspberry Cake, be sure to measure your flour correctly by spooning it into the measuring cup and leveling it off to avoid a dense texture.
  • When mixing your wet ingredients, ensure that your buttermilk and eggs are at room temperature to help achieve a smoother batter and better rise.
  • When folding in the raspberries, do so gently to prevent them from breaking apart and turning your batter pink.
  • Lastly, remember to preheat your oven to the specified temperature to ensure even baking, as an oven that is too cool can lead to undercooked centers.

Chocolate Raspberry Cake Recipe FAQs

What type of raspberries should I use in my Chocolate Raspberry Cake?
Absolutely! You can use either fresh or frozen raspberries in this recipe. Fresh raspberries add a juicy burst of flavor, while frozen raspberries are perfectly fine and still provide that lovely tartness. Just ensure that if you’re using frozen, you don’t need to thaw them before folding into the batter.

How should I store leftover Chocolate Raspberry Cake?
To keep your Chocolate Raspberry Cake fresh and delicious, store any leftovers in an airtight container at room temperature for one day. If you have more left, transfer it to the refrigerator, where it will stay tasty for up to 3 days. It’s best to keep it covered to maintain its moisture.

Can I freeze my Chocolate Raspberry Cake?
Yes! Freezing this cake is a great option for preserving any extra slices. Wrap the entire cake, or individual slices, tightly in plastic wrap followed by aluminum foil to avoid freezer burn. It can be frozen for up to 3 months. When you’re ready to enjoy, simply thaw it in the fridge overnight before serving.

What should I do if my cake comes out dry?
If your Chocolate Raspberry Cake turns out dry, it might be due to overbaking or incorrect measuring of flour. To avoid this in the future, make sure to check the cake a few minutes before the recommended time using a toothpick. Additionally, measuring flour by spooning it into the measuring cup rather than scooping can prevent packing it too tightly.

Is this Chocolate Raspberry Cake suitable for people with nut allergies?
Yes, this recipe doesn’t contain nuts; however, it’s always a good idea to check your specific ingredients. Ensure that your baking products are processed in nut-free facilities to avoid cross-contamination, especially if you are serving someone with severe allergies.

How long does the Chocolate Raspberry Cake last in the fridge?
Stored properly in an airtight container, your Chocolate Raspberry Cake can last for up to 3 days in the fridge. This allows you to enjoy the deliciousness for a few days after baking, but I bet it won’t last that long with how delicious it is!

Chocolate Raspberry Cake

Chocolate Raspberry Cake

Experience the rich fusion of chocolate and raspberry in this delightful Chocolate Raspberry Cake, perfect for any occasion.
Print Recipe Pin Recipe
Prep Time 30 minutes mins
Cook Time 25 minutes mins
Cooling Time 10 minutes mins
Total Time 1 hour hr 5 minutes mins
Servings: 12 slices
Course: DESSERT RECIPES
Cuisine: American
Calories: 350
Ingredients Equipment Method Nutrition Notes

Ingredients
  

For the Cake
  • 2 cups All-purpose flour
  • 3/4 cup Unsweetened cocoa powder high-quality
  • 1 teaspoon Baking soda
  • 1/2 teaspoon Baking powder
  • 1/2 teaspoon Salt
  • 2 cups White granulated sugar
  • 1 cup Buttermilk room temperature
  • 1/2 cup Oil or melted butter
  • 2 large Large eggs room temperature
  • 2 teaspoons Pure vanilla extract
  • 1 cup Hot water
  • 1 cup Raspberries fresh or frozen
For the Raspberry Mixture
  • 1/4 cup Water
  • 1 cup Reduced raspberry puree
  • 2 tablespoons Ground freeze-dried raspberries
For the Buttercream Frosting
  • 1 cup Unsalted butter room temperature
  • 4 cups Powdered sugar sifted
  • 1/4 teaspoon Salt
  • 1 teaspoon Pure vanilla extract
For the Ganache and Topping
  • 1 cup Semi-sweet chocolate chips
  • 1/2 cup Heavy cream
  • 1 cup Fresh raspberries

Equipment

  • Oven
  • Mixing bowls
  • Whisk
  • Spatula
  • Baking pans
  • Cooling rack

Method
 

How to Make Chocolate Raspberry Cake
  1. Preheat your oven to 350°F (175°C).
  2. Mix the dry ingredients: whisk together flour, cocoa powder, baking soda, baking powder, and salt in a large bowl.
  3. Combine wet ingredients: blend sugar, buttermilk, oil, eggs, and vanilla extract until mixed in a separate bowl.
  4. Pour the wet mixture into the dry ingredients and mix until combined.
  5. Gradually add hot water to the batter, mixing until smooth.
  6. Fold in raspberries gently, ensuring they stay whole.
  7. Pour the batter into prepared pans, filling each halfway, and bake for 25 minutes.
  8. Cool cakes in pans for 10 minutes before transferring to a cooling rack.
  9. Beat butter with sifted powdered sugar until fluffy, then add salt and vanilla extract.
  10. Melt chocolate chips with heavy cream until smooth, then combine with the butter mixture.
  11. Assemble the cake layers with buttercream and raspberry puree, then top with fresh raspberries.
  12. Optional: Drizzle extra ganache on top for indulgence.

Nutrition

Serving: 1sliceCalories: 350kcalCarbohydrates: 45gProtein: 4gFat: 18gSaturated Fat: 10gPolyunsaturated Fat: 1gMonounsaturated Fat: 5gCholesterol: 70mgSodium: 200mgPotassium: 180mgFiber: 2gSugar: 30gVitamin A: 5IUVitamin C: 7mgCalcium: 3mgIron: 10mg

Notes

Be sure to measure your flour correctly and allow ingredients to reach room temperature for best results.

Tried this recipe?

Let us know how it was!

Filed Under: BREAKFAST & BRUNCH

Classic Caesar Salad

January 3, 2026 by JudyWhite Leave a Comment

Whenever I find myself craving a meal that feels indulgent yet healthy, I whip up my Classic Caesar Salad Supreme with Chicken and Avocado Delight. It’s astonishing how a simple dish can transform ordinary ingredients into a symphony of flavors and textures, creating an experience that’s both satisfying and refreshing. Picture this: the crunch of fresh romaine, the creaminess of ripe avocado, and the rich umami notes from anchovies—each bite is a little celebration on your palate.

This salad perfectly balances hearty and light elements, making it an ideal choice for those languid summer afternoons or as a delightful dinner option after a hectic day. With cooked chicken and boiled eggs mixed with a zesty dressing, you’ll find it’s more than just your typical lettuce affair—it’s a versatile dish that works brilliantly for meal prep or impressing guests at your next gathering. So, grab your cutting board and let’s dive into the vibrant world of fresh ingredients that will make your taste buds dance!

Why You'll Love This Classic Caesar Salad

  • This Classic Caesar Salad is incredibly easy to prepare, making it a perfect option for busy weeknights or spontaneous gatherings.
  • The vibrant flavors of fresh avocado, crisp romaine, and savory anchovies come together to create a delicious dish that never disappoints.
  • Its versatility allows you to customize ingredients, ensuring everyone at the table is satisfied, whether you’re serving it as a side or a main course.
  • With its beautiful presentation, this salad is sure to be a crowd-pleaser that will leave your guests asking for seconds.

Classic Caesar Salad Ingredients

• Get ready to create a fresh masterpiece!

For the Salad

  • Chicken breast – cooked and shredded for a protein-packed base.
  • Boiled eggs – quartered for a creamy touch that enhances flavor.
  • Avocado – chopped to add a rich, buttery texture.
  • Celery – finely chopped to offer a satisfying crunch.
  • Courgette – finely chopped for a subtle green addition.
  • Toasted sourdough bread or boiled potatoes – both options create a delightful heartiness.
  • Romaine lettuce – it provides the perfect crispiness as the salad’s foundation.
  • Parmesan shavings – these lend a nutty flavor and elegance.

For the Dressing

  • 0% fat organic yogurt – gives a creamy base without the guilt.
  • Anchovies – just two will elevate your Classic Caesar Salad with umami richness.
  • Dijon mustard – adds a little tang that brightens the dressing.
  • Garlic – grated for that aromatic kick.
  • Lemon juice – freshly squeezed to infuse zesty freshness.
  • Parmesan – finely grated for extra cheesy goodness.
  • Black pepper – to taste, adding a little warmth and complexity.

How to Make Classic Caesar Salad

  1. Cook the Chicken: Begin by cooking the chicken breast until it’s no longer pink in the center, then shred it into bite-sized pieces. This adds a protein-rich foundation that keeps the salad hearty.

  2. Boil the Eggs: Carefully boil the eggs for about 9-10 minutes. Once done, peel them and quarter for that creamy richness that complements the salad beautifully.

  3. Chop the Veggies: Take your avocado, celery, and courgette and chop them finely. Each brings a unique texture to the dish, creating a fresh, vibrant experience.

  4. Toast the Bread: If using sourdough, toast the slices until golden brown, adding a lovely crunch. Alternatively, boil potatoes for a softer, comforting option.

  5. Prepare the Lettuce: Chop the romaine lettuce into large chunks. This will be the crisp base of your Classic Caesar Salad, adding freshness to each mouthful.

  6. Combine Ingredients: In a large bowl, mix together the shredded chicken, boiled eggs, avocado, celery, courgette, toasted sourdough (or potatoes), and romaine. The colors will be a feast for your eyes!

  7. Add Cheese and Yogurt: Sprinkle in the Parmesan shavings along with the organic yogurt. These ingredients help bind everything and infuse each forkful with delicious creaminess.

  8. Mix the Dressing: Incorporate the anchovies, Dijon mustard, grated garlic, lemon juice, and black pepper into the bowl. This zesty dressing will enhance the flavors throughout the salad.

  9. Toss Together and Serve: Gently toss everything until well mixed. Serve immediately for the freshest experience; you’ll adore how every bite is packed with flavor!

Optional: For an extra touch, sprinkle additional Parmesan on top before serving.

Exact quantities are listed in the recipe card below.

Make Ahead Options

These Classic Caesar Salad preparations are perfect for busy home cooks looking to save time without sacrificing flavor! You can easily prepare the chicken and boiled eggs up to 3 days in advance. Simply store them in airtight containers in the refrigerator to maintain quality. Additionally, chop the avocado, celery, and courgette up to 24 hours prior for a quick assembly when you’re ready to serve. To prevent the avocado from browning, toss it in a bit of lemon juice. When you’re set to enjoy your salad, combine all the prepped ingredients with the dressing and toss to delight in the fresh, vibrant flavors of your Classic Caesar Salad!

Classic Caesar Salad Variations

Feel free to get creative with your Classic Caesar Salad, bringing in flavors and ingredients that excite your taste buds!

  • Vegan: Substitute chicken with marinated tofu and use cashew cream instead of yogurt for a rich, plant-based flair. It’s a fantastic way to enjoy the classic flavors without the animal products.

  • Gluten-Free: Replace the sourdough bread with a gluten-free alternative or skip the bread entirely in favor of quinoa for added texture. A little crunch from toasted nuts can also enhance the experience!

  • Spicy: Add diced jalapeños or a sprinkle of red pepper flakes for a kick that complements the creamy dressing. Just a hint of heat takes this classic to a whole new level of enjoyment.

  • Mediterranean Twist: Incorporate olives or sun-dried tomatoes for a burst of Mediterranean flavor. This variation introduces a savory tang that beautifully marries with the creamy dressing.

  • Herby Delight: Toss in fresh herbs like basil or cilantro to brighten the salad and add depth. These herbs not only elevate the taste but also make for a vibrant presentation.

  • Crunchy Add-ins: Mix in roasted chickpeas or sunflower seeds for an added crunch that contrasts nicely with the creamy textures of the dressing and avocado. Each bite becomes a delightful textural adventure!

  • Fruit Fusion: Include tangy fruits like sliced strawberries or apple chunks for a refreshing sweetness that pairs beautifully with the savory elements. This surprising addition will have everyone asking for your secret!

  • Creamy Avocado Dressing: Puree ripe avocado with yogurt and lemon juice for a rich, creamy alternative to traditional dressing. This twist makes the salad even more indulgent while keeping it healthy.

Customize your Classic Caesar Salad to suit your palate, and enjoy the process of experimenting with these exciting variations!

What to Serve with Classic Caesar Salad?

Create a beautiful meal that’s both satisfying and fresh with these delightful pairings.

  • Garlic Bread: A crispy companion that’s perfect for soaking up any leftover dressing, enhancing every bite. The buttery, garlicky aroma will whisk you into a comforting culinary realm.

  • Grilled Shrimp Skewers: Their smoky flavor elevates the freshness of your salad while adding an elegant touch perfect for gatherings or special occasions.

  • Roasted Vegetables: A medley of seasonal veggies roasted to perfection adds warmth and complements the crunchy textures. Think of the earthiness mingling with the zesty salad—it’s pure bliss!

  • Quinoa Salad: Light and nutritious, this dish acts as a wholesome side that brings in additional fiber and protein, harmonizing beautifully with the robust flavors of the Caesar.

  • Iced White Wine: Crisp and refreshing, a chilled Sauvignon Blanc makes for an ideal pairing, balancing the umami of the anchovies and richness of the avocado.

  • Fruit Sorbet: End your meal on a light note with this refreshing dessert. Its vibrant sweetness cleanses the palate, making it a delightful experience after the richness of the salad.

Each option provides a delightful contrast, ensuring your meal is anything but ordinary!

How to Store and Freeze Classic Caesar Salad

Fridge: Keep any leftover Classic Caesar Salad in an airtight container for up to 3 days. This helps maintain freshness, though the texture may soften slightly over time.

Separation: If possible, store the dressing separately to preserve the crispness of the romaine lettuce and other veggies until you’re ready to enjoy your salad again.

Freezer: While not ideal for salads, if you really need to freeze it, do so without the lettuce and dressing. The remaining ingredients can be frozen for up to 2 months; just thaw and add fresh greens when ready to serve.

Reheating: For any warmed components, like chicken or potatoes, reheat gently in the microwave or in a skillet until just warm—avoid overcooking to retain flavor and texture.

Chef's Helpful Tips

  • When preparing the Classic Caesar Salad, ensure the chicken is cooked thoroughly and shredded while it’s still warm for better integration into the salad.
  • Avoid overcooking the eggs to maintain a creamy yolk texture; 9-10 minutes is ideal for hard-boiled eggs.
  • When chopping the vegetables, aim for uniform sizes to ensure even distribution and texture in every bite.
  • Finally, serve the salad immediately after tossing to keep the romaine lettuce crisp and fresh.

Classic Caesar Salad Recipe FAQs

What kind of chicken should I use for the Classic Caesar Salad?
Absolutely! You can use grilled or roasted chicken breast, which adds great flavor and texture. If you’re short on time, rotisserie chicken works just as well!

How should I store leftover Classic Caesar Salad?
Keep your leftovers in an airtight container in the fridge, and aim to eat them within 3 days. This helps maintain the flavors. If the dressing is mixed in, the romaine may lose its crunch, so store that separately if you can.

Can I freeze Classic Caesar Salad?
While it’s not ideal to freeze salads, you can freeze the other ingredients like chicken and boiled eggs without the lettuce and dressing. Place them in a vacuum-sealed bag or an airtight container, and they can last for up to 2 months. Thaw in the fridge and add fresh lettuce when ready to serve.

What is the best way to avoid a soggy salad?
To keep your Classic Caesar Salad fresh, prepare the dressing separately and add it just before serving. Also, use the freshest ingredients possible, discarding any wilted greens or overripe avocados.

Are there any dietary considerations for this salad?
Very! If you’re making this salad for someone with allergies, keep in mind that it contains dairy (cheese and yogurt) and anchovies. For a vegetarian version, simply omit the anchovies and replace the yogurt with a plant-based alternative. Enjoy making it versatile for everyone’s tastes!

Classic Caesar Salad

Classic Caesar Salad

Indulge in a classic Caesar salad that combines fresh romaine, creamy avocado, and savory anchovies, creating a delicious and satisfying meal.
Print Recipe Pin Recipe
Prep Time 15 minutes mins
Cook Time 20 minutes mins
Total Time 35 minutes mins
Servings: 4 servings
Course: LUNCH RECIPES
Cuisine: American
Calories: 450
Ingredients Equipment Method Nutrition Notes

Ingredients
  

For the Salad
  • 2 pieces Chicken breast cooked and shredded
  • 2 pieces Boiled eggs quartered
  • 1 medium Avocado chopped
  • 1 cup Celery finely chopped
  • 1 medium Courgette finely chopped
  • 2 slices Toasted sourdough bread or boiled potatoes
  • 4 cups Romaine lettuce
  • 1/2 cup Parmesan shavings
For the Dressing
  • 1/2 cup 0% fat organic yogurt
  • 2 pieces Anchovies
  • 1 tablespoon Dijon mustard
  • 1 clove Garlic grated
  • 2 tablespoons Lemon juice freshly squeezed
  • 1/4 cup Parmesan finely grated
  • to taste Black pepper

Equipment

  • Cutting Board
  • Knife
  • Pot
  • bowl
  • pan

Method
 

Steps
  1. Cook the Chicken: Begin by cooking the chicken breast until it’s no longer pink in the center, then shred it into bite-sized pieces.
  2. Boil the Eggs: Carefully boil the eggs for about 9-10 minutes. Once done, peel them and quarter.
  3. Chop the Veggies: Take your avocado, celery, and courgette and chop them finely.
  4. Toast the Bread: If using sourdough, toast the slices until golden brown, or boil potatoes.
  5. Prepare the Lettuce: Chop the romaine lettuce into large chunks.
  6. Combine Ingredients: In a large bowl, mix together the shredded chicken, boiled eggs, avocado, celery, courgette, toasted sourdough (or potatoes), and romaine.
  7. Add Cheese and Yogurt: Sprinkle in the Parmesan shavings along with the organic yogurt.
  8. Mix the Dressing: Incorporate the anchovies, Dijon mustard, grated garlic, lemon juice, and black pepper into the bowl.
  9. Toss Together and Serve: Gently toss everything until well mixed and serve immediately.

Nutrition

Serving: 1servingCalories: 450kcalCarbohydrates: 20gProtein: 35gFat: 25gSaturated Fat: 5gPolyunsaturated Fat: 2gMonounsaturated Fat: 15gCholesterol: 135mgSodium: 1000mgPotassium: 550mgFiber: 4gSugar: 2gVitamin A: 1500IUVitamin C: 12mgCalcium: 300mgIron: 3mg

Notes

For an extra touch, sprinkle additional Parmesan on top before serving.

Tried this recipe?

Let us know how it was!

Filed Under: LUNCH RECIPES

Chocolate Raspberry Cake

January 3, 2026 by JudyWhite Leave a Comment

There’s a distinct joy that fills the kitchen as the rich scent of cocoa mingles with the tart sweetness of fresh raspberries. The moment I decided to whip up this Chocolate Raspberry Cake, I didn’t just want a dessert; I craved an experience—a delicious fusion that dances on your palate. It all began on a cozy weekend, inspired by the fresh berries from my garden that were begging to be showcased in something special.

Imagine surprising your loved ones with a cake that looks as magnificent as it tastes, yet surprises everyone with how simple it is to make. This cake doesn’t just dazzle the eyes; it’s a delightful blend of moist chocolate, vibrant raspberries, and creamy buttercream that feels luxurious without the fuss. Perfect for birthdays, gatherings, or just because—it effortlessly elevates any occasion.

So, if you’re tired of the mundane and searching for that standout dessert that will make you look like a kitchen superstar, grab your apron and let’s create this Chocolate Raspberry Cake together!

Why You'll Love This Chocolate Raspberry Cake

  • This Chocolate Raspberry Cake is incredibly easy to make, allowing both novice and experienced bakers to shine in the kitchen.
  • The rich, decadent flavors of chocolate paired with the tart raspberries create a delightful taste sensation that will leave everyone wanting more.
  • Its stunning visual appeal makes it the perfect centerpiece for any celebration or special occasion, guaranteed to impress your guests.
  • Plus, the versatility of this recipe means you can customize it with your favorite fillings and decorations to make it truly your own.

Chocolate Raspberry Cake Ingredients

Here’s everything you need to create this delightful Chocolate Raspberry Cake!

For the Cake
• All-purpose flour – perfect for creating a light and fluffy texture.
• Unsweetened cocoa powder – choose high-quality cocoa for a rich chocolate flavor.
• Baking soda – helps the cake rise and achieve that perfect crumb.
• Baking powder – works in tandem with baking soda for an extra lift.
• Salt – enhances the sweetness of the cake, balancing the flavors.
• White granulated sugar – adds sweetness and moisture to the chocolate cake.
• Buttermilk – adds tenderness and helps to achieve a moist cake.
• Oil – for that melt-in-your-mouth texture; can substitute with melted butter if desired.
• Large eggs – binding the ingredients together and helping with the cake’s rise.
• Pure vanilla extract – infuses a warm, aromatic flavor throughout.
• Hot water – steams into the cake for a moist and rich chocolate blend.
• Raspberries – fresh or frozen, these gems add a tangy burst to the cake.

For the Raspberry Mixture
• Water – helps in blending the raspberry puree smoothly.
• Reduced raspberry puree – intensifies the raspberry flavor without excess liquid.
• Ground freeze-dried raspberries – adds a concentrated raspberry kick, perfect for garnishing.

For the Buttercream Frosting
• Unsalted butter – room temperature for a smooth mixing process.
• Powdered sugar – sifted to ensure a creamy, lump-free frosting.
• Salt – enhances the overall taste of the frosting.
• Pure vanilla extract – adds a comforting undertone to the frosting’s flavor.

For the Ganache and Topping
• Semi-sweet chocolate chips – melted down for a rich and decadent ganache.
• Heavy cream – creates a smooth ganache and balances the sweetness of the chocolate.
• Fresh raspberries – for decoration, adding a fresh touch and vibrant colors to the cake.

When you combine these ingredients, magic happens, and trust me, your Chocolate Raspberry Cake will steal the show!

How to Make Chocolate Raspberry Cake

  1. Preheat your oven to 350°F (175°C), allowing it to reach the right temperature for baking your cake evenly. This step ensures that your cake rises perfectly and develops a gooey, delicious texture.

  2. Mix the dry ingredients by whisking together the flour, cocoa powder, baking soda, baking powder, and salt in a large bowl. This step is essential for an even distribution of flavors and leavening agents.

  3. Combine the wet ingredients in a separate bowl, blending the sugar, buttermilk, oil, eggs, and vanilla extract until fully mixed. This step creates a rich and flavorful base for your cake batter.

  4. Pour the wet mixture into the dry ingredients and mix well. Stir until the batter is combined; it should be smooth and slightly thick.

  5. Gradually add the hot water to the batter, mixing continuously until you achieve a silky smooth consistency. The hot water enhances the chocolate flavor and keeps the cake moist.

  6. Fold in the raspberries gently, allowing their flavor to blend into the batter without breaking them apart or over-mixing. This adds delightful bursts of tartness in every bite.

  7. Pour the cake batter into prepared baking pans, filling each about halfway. Bake for 25 minutes, or until a toothpick inserted into the center comes out clean. Your cakes should look puffed and firm.

  8. Cool the cakes in the pans for 10 minutes before transferring them to a cooling rack. This allows them to set perfectly, preventing breakage when you’re ready to assemble.

  9. Beat the room temperature butter with the sifted powdered sugar in a bowl until fluffy. This should take about 3-5 minutes, creating a light and airy buttercream.

  10. Add the salt and vanilla extract to the butter mixture, continue mixing to incorporate fully. This step elevates the overall flavor of your frosting.

  11. Melt the semi-sweet chocolate chips with the heavy cream in a heatproof bowl until smooth. Allow to cool slightly before combining it with the butter mixture for a rich ganache.

  12. Assemble your cake layers with the buttercream and raspberry puree, spreading evenly between layers. For decoration, top with fresh raspberries, creating a stunning centerpiece.

Optional: Drizzle some extra ganache on top for an extra touch of indulgence!

Exact quantities are listed in the recipe card below.

What to Serve with Chocolate Raspberry Cake?

Imagine the perfect gathering where your decadent dessert shines alongside equally delightful companions.

  • Fresh Whipped Cream: A dollop of lightly sweetened whipped cream brings a airy contrast to the rich cake, balancing flavors beautifully.

  • Vanilla Ice Cream: The creamy, cool taste of vanilla ice cream complements the chocolate and raspberry pairings, turning every bite into an indulgent experience.

  • Chocolate Ganache: Pouring extra melted chocolate ganache on each slice intensifies the decadence and adds a smooth, luxurious texture.

  • Mint Tea: A fragrant cup of mint tea refreshes the palate between bites, enhancing the fruity notes while adding a floral touch to the experience.

  • Mixed Berry Salad: A fresh salad of mixed berries brightens your dessert table with its vibrant colors and flavors that echo the cake’s raspberry notes.

  • Sparkling Wine: A glass of bubbly sparkling wine pairs perfectly; its lightness cuts through the richness while enhancing the celebratory vibe.

  • Almond Cookies: Crunchy almond cookies can provide a delightful texture contrast alongside the moist cake while adding a hint of nuttiness to your dessert spread.

Indulging in these pairings will elevate your Chocolate Raspberry Cake from a simple dessert to an unforgettable feast for the senses!

Chocolate Raspberry Variations

Feel free to explore these delightful twists to make your Chocolate Raspberry Cake truly your own!

  • Gluten-Free: Use a 1:1 gluten-free flour blend to replace all-purpose flour for a gluten-free treat that everyone can enjoy.

  • Dairy-Free: Substitute the buttermilk with almond or coconut milk mixed with a tablespoon of vinegar to create a perfect dairy-free version.

  • Sugary Twist: Try substituting half of the granulated sugar with brown sugar for added moisture and a hint of caramel flavor.

  • Nutty Crunch: Fold in 1 cup of chopped walnuts or almonds for a satisfying crunch that complements the tartness of the raspberries beautifully.

  • Extra Berry Goodness: Add a layer of raspberry jam in between the cake layers for an extra burst of berry flavor that elevates every bite.

  • Zesty Kick: Mix in the zest of one orange or lemon into the batter for a bright flavor contrast that pairs wonderfully with the chocolate and raspberries.

  • Spice it Up: A teaspoon of cinnamon or a pinch of cayenne can be added to the dry ingredients for a unique warmth that adds depth to the cake’s flavor.

  • Rich Chocolate Ganache: Swap the semi-sweet chips for dark chocolate for an even richer ganache that enhances the overall chocolate experience.

Feel the excitement as you adjust and create your masterpiece!

How to Store and Freeze Chocolate Raspberry Cake

Fridge: Store any leftover Chocolate Raspberry Cake in an airtight container for up to 3 days to maintain its moist texture and rich flavor.

Freezer: To freeze, wrap individual slices or the whole cake tightly in plastic wrap, then aluminum foil; it can last for up to 3 months.

Reheating: When ready to enjoy, thaw in the fridge overnight then reheat slices in the microwave for about 10-15 seconds for a delightful warm treat.

Room Temperature: If consuming within a day, you can leave the cake covered at room temperature, keeping it fresh and delicious.

Make Ahead Options

These Chocolate Raspberry Cakes are perfect for busy cooks looking to save time without sacrificing flavor! You can prepare the cake layers up to 24 hours in advance by baking and allowing them to cool completely before wrapping them tightly in plastic wrap and refrigerating to maintain their moistness. The buttercream frosting can also be made and stored in an airtight container in the fridge for up to 3 days. When you’re ready to serve, simply take the cakes and frosting out, allow the frosting to soften at room temperature, then assemble and decorate the cake with fresh raspberries. This prep-ahead approach ensures your Chocolate Raspberry Cake remains just as delicious and delightful to share!

Chef's Helpful Tips

  • For the Chocolate Raspberry Cake, be sure to measure your flour correctly by spooning it into the measuring cup and leveling it off to avoid a dense texture.
  • When mixing your wet ingredients, ensure that your buttermilk and eggs are at room temperature to help achieve a smoother batter and better rise.
  • When folding in the raspberries, do so gently to prevent them from breaking apart and turning your batter pink.
  • Lastly, remember to preheat your oven to the specified temperature to ensure even baking, as an oven that is too cool can lead to undercooked centers.

Chocolate Raspberry Cake Recipe FAQs

What type of raspberries should I use?
You can use either fresh or frozen raspberries for this Chocolate Raspberry Cake. Fresh raspberries provide a delightful burst of flavor and vibrant color, while frozen raspberries are a great alternative and can be used year-round. Just make sure to thaw any frozen raspberries before folding them into your batter for even distribution.

How should I store my Chocolate Raspberry Cake?
To keep your Chocolate Raspberry Cake fresh, store it in an airtight container in the fridge for up to 3 days. This helps retain its moisture and rich flavor. If you have leftovers after a family gathering, simply cover the cake tightly to prevent it from drying out.

Can I freeze Chocolate Raspberry Cake?
Absolutely! To freeze your Chocolate Raspberry Cake, wrap it tightly in plastic wrap and then in aluminum foil. This two-step process prevents freezer burn. You can freeze whole cakes or individual slices for up to 3 months. When ready to enjoy, thaw in the fridge overnight, and reheat individual slices in the microwave for a cozy treat.

What if my cake sinks in the middle?
If your Chocolate Raspberry Cake sinks in the middle, it may be due to several factors—perhaps the oven temperature was too low, the cake was underbaked, or the batter was overmixed. To troubleshoot, make sure to preheat your oven correctly and check for doneness with a toothpick. If it comes out clean, the cake is done. Aim to mix just until the batter is combined for the best rise.

Is this Chocolate Raspberry Cake safe for people with allergies?
This cake contains common allergens such as eggs, dairy (buttermilk and butter), and gluten (flour). If you or your guests have allergies, consider substituting with egg replacers, dairy-free butter, and gluten-free flour. It’s always best to inform your guests about the ingredients used, just in case!

How can I enhance the raspberry flavor in the cake?
To impart an even stronger raspberry taste, you can incorporate raspberry extract or additional reduced raspberry puree into the batter. Simply add a teaspoon or two along with the wet ingredients for an intensified flavor. You might also consider topping the cake with a raspberry glaze or sauce for an extra punch!

Chocolate Raspberry Cake

Chocolate Raspberry Cake

Indulge in a delicious Chocolate Raspberry Cake that combines rich chocolate flavors with fresh raspberries—a perfect dessert for any occasion.
Print Recipe Pin Recipe
Prep Time 30 minutes mins
Cook Time 25 minutes mins
Cooling Time 10 minutes mins
Total Time 1 hour hr 5 minutes mins
Servings: 8 slices
Course: DESSERT RECIPES
Cuisine: American
Calories: 350
Ingredients Equipment Method Nutrition Notes

Ingredients
  

For the Cake
  • 2 cups All-purpose flour
  • 3/4 cup Unsweetened cocoa powder choose high-quality
  • 1 teaspoon Baking soda
  • 1 teaspoon Baking powder
  • 1/2 teaspoon Salt
  • 1.5 cups White granulated sugar
  • 1 cup Buttermilk
  • 1/2 cup Oil can substitute with melted butter if desired
  • 2 large Large eggs
  • 1 teaspoon Pure vanilla extract
  • 1 cup Hot water
  • 1 cup Raspberries fresh or frozen
For the Raspberry Mixture
  • 1/4 cup Water
  • 1/2 cup Reduced raspberry puree
  • 1/4 cup Ground freeze-dried raspberries
For the Buttercream Frosting
  • 1 cup Unsalted butter room temperature
  • 4 cups Powdered sugar sifted
  • 1/4 teaspoon Salt
  • 1 teaspoon Pure vanilla extract
For the Ganache and Topping
  • 1 cup Semi-sweet chocolate chips
  • 1/2 cup Heavy cream
  • 1/2 cup Fresh raspberries for decoration

Equipment

  • large mixing bowl
  • Whisk
  • Baking pans
  • Cooling rack
  • Heatproof bowl

Method
 

Steps
  1. Preheat your oven to 350°F (175°C).
  2. Mix the dry ingredients by whisking together the flour, cocoa powder, baking soda, baking powder, and salt in a large bowl.
  3. Combine the wet ingredients in a separate bowl, blending the sugar, buttermilk, oil, eggs, and vanilla extract until fully mixed.
  4. Pour the wet mixture into the dry ingredients and mix well until combined.
  5. Gradually add the hot water to the batter, mixing continuously until smooth.
  6. Fold in the raspberries gently.
  7. Pour the cake batter into prepared baking pans, filling each about halfway. Bake for 25 minutes.
  8. Cool the cakes in the pans for 10 minutes before transferring them to a cooling rack.
  9. Beat the butter with the sifted powdered sugar until fluffy, about 3-5 minutes.
  10. Add the salt and vanilla extract to the butter mixture and mix thoroughly.
  11. Melt the chocolate chips with the heavy cream until smooth, then mix with the butter mixture for ganache.
  12. Assemble your cake layers with the buttercream and raspberry puree, topping with fresh raspberries.

Nutrition

Serving: 1sliceCalories: 350kcalCarbohydrates: 45gProtein: 4gFat: 18gSaturated Fat: 10gPolyunsaturated Fat: 2gMonounsaturated Fat: 4gCholesterol: 55mgSodium: 250mgPotassium: 180mgFiber: 2gSugar: 30gVitamin A: 500IUVitamin C: 5mgCalcium: 40mgIron: 2mg

Notes

Ensure the correct measurement of flour to maintain texture. Use room temperature ingredients for better mixing. Fold raspberries gently to avoid breaking them.

Tried this recipe?

Let us know how it was!

Filed Under: BREAKFAST & BRUNCH

Roasted Lamb Shoulder Mandi

January 3, 2026 by JudyWhite Leave a Comment

When the first hints of spring arrive, I can’t help but imagine gathering around a table filled with aromatic delights. One dish that never fails to make every mouth water is my Roasted Lamb Shoulder Mandi. The moment you take it out of the oven, the tantalizing scent of spices clings to the air, making it impossible to resist. This Arabic classic offers an incredible fusion of flavors—tender, juicy lamb paired with fluffy saffron-infused rice creates a meal that can transform any gathering into a feast.

This recipe is a celebration in itself. While it may sound elaborate, the process is surprisingly straightforward. It’s the perfect antidote to the mundane fast-food routine, and I promise you, it will leave even the pickiest eaters begging for more. Whether you’re trying to impress guests, enjoy a cozy night in, or just explore new culinary terrains, this dish delivers on every front. Grab your apron, and let’s elevate your home-cooked meals to a whole new level!

Why You'll Love This Roasted Lamb Shoulder Mandi

  • This Roasted Lamb Shoulder Mandi is incredibly easy to prepare, making it an ideal choice for both novice and experienced cooks alike.
  • The rich, aromatic flavors will tantalize your taste buds and leave everyone asking for seconds.
  • Its versatility means it can be served at lavish gatherings or cozy family dinners, fitting perfectly into any occasion.
  • The stunning presentation of juicy lamb alongside fluffy saffron-infused rice is sure to impress your guests and elevate your dining experience.

Roasted Lamb Shoulder Mandi Ingredients

To create this flavorful dish, gather these essential ingredients:

For the Lamb
• Whole lamb shoulder – a beautifully marbled cut that becomes tender during cooking.
• Salt and pepper powder – simple seasonings that enhance the lamb’s rich flavors.
• Garlic paste – infuses a warm, savory depth into the meat.
• Ginger paste – adds brightness and a kick of spice.
• Arabian Mandi spice – the secret to authentic flavor; don’t skip this!

For the Cooking Base
• Oil – for browning and adding richness; you can use olive or vegetable oil.
• Sliced onions – creates a sweet and savory base when sautéed until golden.
• Bay leaves – impart a subtle aromatic essence.
• Stick cinnamon – offers warm, sweet notes perfect for braising.
• Whole cumin – brings an earthy aroma that complements the lamb.
• Cloves – a hint of warmth and sweetness in every bite.
• Peppercorn – adds a touch of heat to balance the flavors.
• Coriander seeds – enhance the dish with citrusy undertones.
• Green cardamom – infuses a fragrant sweetness that’s unmistakable.
• Black cardamoms – contributes a smoky depth that pairs perfectly with lamb.
• Green chilies – adjust the heat to your preference!
• Dried lime – a unique ingredient that adds a tangy kick.
• Water – enough to cover the lamb and ensure it stays juicy.

For the Rice
• Rice – use long-grain rice for the perfect fluffy texture.
• Reserved meat broth – ensures the rice is rich and flavorful.
• Saffron strands – adds luxurious color and a distinct taste.
• Fresh lemon juice – brightens the overall dish with its zing.
• Orange color – for that stunning saffron-like hue.

For Garnish
• Fresh coriander – adds a burst of freshness once served.
• Full-fat yogurt – a creamy, tangy topping that balances the dish.
• Mayonnaise – optional, but creates a delightful creamy contrast.
• Chopped onion, carrot, and garlic – sautéed together to add flavor to the rice.

Optional
• Saffron concoction – from earlier preparation for an extra touch of luxury.

Gather these ingredients, and let the cooking adventure begin! This Roasted Lamb Shoulder Mandi is sure to transform your kitchen into a feast of aromas and flavors.

How to Make Roasted Lamb Shoulder Mandi

  1. Prepare the Lamb: Season the whole lamb shoulder with salt and pepper powder, garlic paste, ginger paste, and Arabian Mandi spice. This will infuse the meat with unforgettable flavors as it cooks.

  2. Sauté Onions: In a large pot, heat oil and sauté sliced onions until they turn golden brown. This aromatic base will bring warmth and depth to your dish.

  3. Brown the Lamb: Add the seasoned lamb shoulder to the pot and brown it on all sides. This step is essential for retaining moisture and flavor, creating a rich crust.

  4. Add Spices and Water: Stir in bay leaves, cinnamon stick, whole cumin, cloves, peppercorn, coriander seeds, green cardamom, black cardamoms, green chilies, and dried lime. Pour in enough water to cover the lamb completely.

  5. Simmer Slowly: Cover the pot and let it simmer for approximately 170 minutes until the lamb is tender. The long cooking time will ensure that every bite melts in your mouth.

  6. Set Aside the Lamb: Once the lamb is cooked, carefully remove it from the pot and set it aside. This resting time allows the juices to redistribute and keep the meat succulent.

  7. Strain the Broth: Strain the broth used for cooking the lamb, reserving 6 cups for the rice. This flavorful broth will be the key to perfectly cooked rice.

  8. Sauté Vegetables: In a separate pot, heat 2 tbsp of oil and sauté chopped onion, carrot, and garlic until soft. This will create a tasty foundation for the rice.

  9. Add Rice: Stir in the 3 cups of rice and sauté with the vegetables for a couple of minutes to coat the grains with flavor.

  10. Cook the Rice: Pour in the reserved meat broth, along with the saffron strands, fresh lemon juice, and orange color. Bring the mixture to a boil, then cover and reduce heat to low. Cook for about 20 minutes until the rice is fluffy and fully absorbed.

  11. Serve: Serve the roasted lamb shoulder atop the saffron-infused rice, garnished with fresh coriander, a dollop of yogurt, and a drizzle of mayonnaise to enhance the flavors.

Optional: Add toasted pine nuts for an extra crunchy texture.

Exact quantities are listed in the recipe card below.

Make Ahead Options

These Roasted Lamb Shoulder Mandi are perfect for busy weeknights and meal prep enthusiasts! You can season the lamb shoulder up to 24 hours in advance, allowing the spices to deeply penetrate the meat for unforgettable flavor. Additionally, you can prepare the broth and sauté the onions, carrots, and garlic a day before, storing them separately in the refrigerator. When you’re ready to serve, simply reheat the broth, add your rice to the sautéed vegetables, and let it cook as instructed. This way, you’ll enjoy restaurant-quality results with minimal effort, and your dish will be just as delicious as if made fresh!

Storage Tips for Roasted Lamb Shoulder Mandi

Room Temperature: Serve your Roasted Lamb Shoulder Mandi immediately for the best flavor. If leftovers are not consumed within 2 hours, refrigerate to maintain freshness.

Fridge: Store leftover lamb and rice in airtight containers in the fridge for up to 3 days. Reheat gently using the stovetop or microwave, adding a splash of broth to keep the rice moist.

Freezer: For longer storage, freeze portions in airtight containers for up to 2 months. Thaw in the fridge overnight before reheating for a wonderfully satisfying meal on a busy day.

Reheating: When ready to enjoy leftovers, heat the lamb and rice on the stovetop with a bit of broth or water until warmed through, ensuring the flavors shine as they did fresh.

Roasted Lamb Shoulder Mandi Variations

Feel free to make this delightful dish your own by exploring these fun and flavorful variations!

  • Herb-Infused: Add fresh rosemary or thyme while simmering for added depth of flavor. These herbs will enhance the aroma and make it even more comforting.

  • Spice Heat: Use red pepper flakes or jalapeños instead of green chilies for an extra kick. Adjusting the spice level can elevate the dish to new heights, perfect for heat lovers!

  • Vegetarian Adaptation: Swap lamb for jackfruit or cauliflower for a hearty vegetarian option. The texture will still give you that comforting feel, making it a great family-friendly meal.

  • Coconut Twist: Incorporate coconut milk into the broth for a creamy, tropical flavor. This adds a rich sweetness that complements the spices beautifully.

  • Nutty Crunch: Top your finished dish with toasted almonds or pine nuts for added texture. This simple addition will elevate your presentation and add a delicious crunch.

  • Citrus Spark: Add orange or lime zest during the cooking process for a subtle citrusy lift. This brightness can brighten the dish and make it more refreshing, especially in warmer months.

  • Dried Fruit: Incorporate raisins or apricots into the rice for delightful bursts of sweetness. The contrast between savory and sweet makes each bite exciting!

  • Quinoa Substitute: Use quinoa instead of rice for a nutritious twist. This swap not only boosts protein content but also brings a nutty flavor that pairs well with the lamb.

What to Serve with Roasted Lamb Shoulder Mandi?

Elevate your dining experience by pairing delightful sides that balance flavors with every tender morsel of lamb.

  • Crispy Roasted Vegetables: A medley of seasonal vegetables, roasted to perfection, adds vibrant color and a touch of sweetness. Their natural char complements the savory richness of the lamb beautifully.

  • Hummus Platter: Creamy, flavorful hummus served with warm pita bread brings a touch of Middle Eastern charm, enhancing the meal’s cultural essence. It’s perfect for sharing and adds a rich, nutty layer.

  • Tabbouleh Salad: This refreshing parsley and bulgur salad, bright with lemon and mint, cuts through the dish’s richness while adding a refreshing crunch. The zesty flavors awaken the palate with each bite.

  • Mint Yogurt Sauce: Light and creamy, this sauce offers a cooling contrast to the warm spices of the lamb. It’s a delightful dip that invites everyone to dig in and savor their meal.

  • Stuffed Grape Leaves: Known as Dolmas, these provide a delightful tang and a unique flavor experience. Their herby filling pairs wonderfully with roasted lamb for a traditional touch.

  • Pine Nut Rice: Elevate your rice game by toasting pine nuts and mixing them in. This adds a crunchy texture that harmonizes with the fluffy saffron rice beneath the succulent lamb.

  • Fresh Pomegranate Seeds: Generously sprinkled over the dish, they add a burst of sweetness and color, elevating the aesthetic and taste of your dining experience.

  • Rose Mint Lemonade: A refreshing drink, the floral notes of rose complement the rich lamb, while the mint adds freshness to keep you cool. Perfect for rinsing your palate!

These delightful pairings will create a symphony of flavors around your Roasted Lamb Shoulder Mandi, making every gathering an unforgettable feast!

Chef's Helpful Tips

  • When making Roasted Lamb Shoulder Mandi, ensure you give the lamb plenty of time to marinate with the seasonings for deeper flavor penetration.
  • A common mistake is not browning the meat properly, which locks in moisture and enhances the taste, so take your time with this step.
  • Always use a meat thermometer to check for doneness; the lamb should reach an internal temperature of at least 160 degrees Fahrenheit for optimal tenderness.
  • Lastly, let the rice rest for a few minutes after cooking to absorb any remaining liquid for perfect fluffiness.

Roasted Lamb Shoulder Mandi Recipe FAQs

How do I choose the right lamb shoulder?
Absolutely! When selecting a lamb shoulder, look for meat that is well-marbled with creamy white fat. The fat will melt during cooking, keeping the meat juicy and flavorful. Fresh lamb should have a bright red color without any dark spots or unpleasant odors.

What’s the best way to store leftover Roasted Lamb Shoulder Mandi?
Very! You can store leftover lamb and rice in airtight containers in the fridge for up to 3 days. It’s best to reheat them gently, either on the stovetop or in the microwave, with a splash of broth added to keep the rice moist and prevent it from drying out.

Can I freeze Roasted Lamb Shoulder Mandi?
Absolutely! To freeze your Roasted Lamb Shoulder Mandi, portion it into airtight containers or freezer bags for up to 2 months. Ensure as much air as possible is removed before sealing. When you’re ready to enjoy it again, thaw the container in the fridge overnight, then reheat on the stovetop with a bit of broth to bring back the flavors.

What if my lamb shoulder is tough after cooking?
A common troubleshooting tip is to ensure the meat was cooked long enough; lamb shoulder benefits from low and slow cooking, around 170 minutes in this recipe. If it’s still tough, let it simmer longer, checking every 20 minutes until tender—this way, you’ll be sure the flavors have blossomed beautifully.

Are there any dietary considerations with this dish?
The more the merrier! If you’re serving guests with dietary restrictions, you can easily adapt this recipe. For example, if anyone has allergies, make sure to check any pre-made spices or sauces for hidden ingredients. This dish contains dairy from the yogurt and mayonnaise, so consider offering coconut yogurt or leaving these out for a dairy-free version. If making vegetarian options, substitute the lamb with hearty mushrooms or jackfruit and use vegetable broth.

How can I ensure my rice turns out perfectly fluffy?
Absolutely! When preparing the rice, after adding in the reserved meat broth and saffron, bring it to a boil before covering and reducing the heat to low. Cooking for about 20 minutes should yield fluffy rice, but let it rest off the heat for about 5 minutes after cooking. Fluff with a fork before serving for that extra lightness!

Roasted Lamb Shoulder Mandi

Roasted Lamb Shoulder Mandi

Enjoy the rich flavors of Roasted Lamb Shoulder Mandi, an Arabic classic that's a true feast for the senses.
Print Recipe Pin Recipe
Prep Time 30 minutes mins
Cook Time 2 hours hrs 50 minutes mins
Total Time 3 hours hrs 20 minutes mins
Servings: 6 servings
Course: DINNER RECIPES
Cuisine: Arabic
Calories: 800
Ingredients Equipment Method Nutrition Notes

Ingredients
  

For the Lamb
  • 1 whole lamb shoulder a beautifully marbled cut
  • to taste salt powder
  • to taste pepper powder
  • 2 tbsp garlic paste
  • 2 tbsp ginger paste
  • 3 tbsp Arabian Mandi spice the secret to authentic flavor
For the Cooking Base
  • 4 tbsp oil olive or vegetable oil
  • 2 medium sliced onions sauté until golden
  • 2 bay leaves
  • 1 stick cinnamon for braising
  • 1 tbsp whole cumin
  • 6-8 cloves
  • 6-8 peppercorn
  • 1 tbsp coriander seeds
  • 6 green cardamom
  • 2 black cardamoms
  • 2 green chilies adjust for heat
  • 1 dried lime adds tangy kick
  • 6 cups water enough to cover the lamb
For the Rice
  • 3 cups rice long-grain rice
  • 6 cups reserved meat broth from cooking the lamb
  • 1 tbsp saffron strands
  • 2 tbsp fresh lemon juice
  • 1 tbsp orange color for saffron-like hue
For Garnish
  • 1/4 cup fresh coriander added when served
  • 1 cup full-fat yogurt for a creamy topping
  • to taste mayonnaise optional
  • 1 chopped onion for sautéing
  • 1 chopped carrot for sautéing
  • 2 cloves garlic for sautéing
Optional
  • to taste saffron concoction for an extra touch of luxury

Equipment

  • Large pot
  • separate pot

Method
 

Cooking Instructions
  1. Season the whole lamb shoulder with salt and pepper powder, garlic paste, ginger paste, and Arabian Mandi spice.
  2. In a large pot, heat oil and sauté sliced onions until they turn golden brown.
  3. Add the seasoned lamb shoulder to the pot and brown it on all sides.
  4. Stir in bay leaves, cinnamon stick, whole cumin, cloves, peppercorn, coriander seeds, green cardamom, black cardamoms, green chilies, and dried lime. Pour in enough water to cover the lamb completely.
  5. Cover the pot and let it simmer for approximately 170 minutes until the lamb is tender.
  6. Once the lamb is cooked, carefully remove it from the pot and set aside.
  7. Strain the broth used for cooking the lamb, reserving 6 cups for the rice.
  8. In a separate pot, heat 2 tbsp of oil and sauté chopped onion, carrot, and garlic until soft.
  9. Stir in the rice and sauté with the vegetables for a couple of minutes.
  10. Pour in the reserved meat broth, along with the saffron strands, fresh lemon juice, and orange color. Bring to a boil, then cover and reduce heat to low. Cook for about 20 minutes.
  11. Serve the roasted lamb shoulder atop the saffron-infused rice, garnished with fresh coriander, yogurt, and mayonnaise.

Nutrition

Serving: 1servingCalories: 800kcalCarbohydrates: 75gProtein: 35gFat: 40gSaturated Fat: 15gPolyunsaturated Fat: 4gMonounsaturated Fat: 14gCholesterol: 120mgSodium: 800mgPotassium: 600mgFiber: 3gSugar: 2gVitamin A: 10IUVitamin C: 5mgCalcium: 80mgIron: 5mg

Notes

Ensure to marinate the lamb well and check the internal temperature for optimal tenderness.

Tried this recipe?

Let us know how it was!

Filed Under: DINNER RECIPES

Classic Caesar Salad

January 3, 2026 by JudyWhite Leave a Comment

There’s a certain joy that comes with transforming simple ingredients into something spectacular, and that’s precisely what you’ll discover with my Classic Caesar Salad Supreme. Picture this: the crisp crunch of fresh Romaine lettuce, paired with tender shredded chicken, and rich, creamy avocado. This is not just another salad; it’s a vibrant meal that brings together delightful flavors and textures in every bite.

After a long day battling the mundane routine, you deserve a dish that’s both fulfilling and refreshing. I whipped up this recipe on an evening when fast food felt like the only option—until I remembered how satisfying a homemade salad could be. The secret lies in the tangy yogurt-based dressing, highlighted with anchovies and a hint of garlic, which takes the classic Caesar flavors to new heights.

Whether you’re impressing guests or simply indulging yourself, this salad is a delightful mix of simplicity and sophistication, sure to please even the pickiest eater. Ready to dive into a flavor-packed experience that will rekindle your love for homemade meals? Let’s get started!

Why You'll Love This Classic Caesar Salad

  • This Classic Caesar Salad is incredibly easy to make, allowing you to whip up a delicious meal in just 35 minutes.
  • The blend of fresh ingredients creates a vibrant and flavorful dish that tantalizes your taste buds with every bite.
  • Its versatility means you can customize the salad by adding your favorite toppings or proteins, making it perfect for any occasion.
  • Plus, the stunning presentation with colorful veggies and garnishes will impress your family and friends, making it a true crowd-pleaser.

Classic Caesar Salad Ingredients

For the Salad
• Chicken – cooked and shredded to provide tender protein that enhances your salad goodness.
• Boiled eggs – they add a creamy texture and rich flavor, making your Classic Caesar Salad even more satisfying.
• Avocado – chopped for creaminess that melds beautifully with the other ingredients.
• Celery – finely chopped to give a crunchy freshness that elevates every bite.
• Courgette – this finely chopped veggie adds a subtle sweetness and vibrant color.
• Toasted Sourdough bread or boiled potatoes – the toasted sourdough provides crispiness, while potatoes can add heartiness, offering a delightful alternative.
• Romaine Lettuce – the star of the show, crisp and refreshing for that classic salad base.

For the Dressing
• 0% fat organic yoghurt – a creamy base that lightens up the dressing without sacrificing flavor.
• Anchovies – they infuse the dressing with savory depth that perfectly complements the Caesar style.
• Dijon Mustard – adds a zesty kick, enhancing the overall flavor profile of your salad.
• Garlic – grated for that aromatic essence that every Caesar dressing craves.
• Lemon juice – fresh-squeezed to brighten the flavors and balance the richness.
• Parmesan – adds luxury with its nutty notes, making your Classic Caesar Salad shine.
• Black pepper – sprinkle to taste for a perfect finish that brings the whole dish together.

How to Make Classic Caesar Salad

  1. Prepare the ingredients by cooking and shredding the chicken. Peel and quarter the boiled eggs, then chop the avocado, celery, and courgette finely. Toast the sourdough bread or boil the potatoes until tender.

  2. Combine the Romaine lettuce, shredded chicken, boiled eggs, avocado, celery, courgette, and toasted sourdough bread (or potatoes) in a large bowl. Toss gently to mix the vibrant ingredients together.

  3. Mix the dressing in a separate bowl by combining the yogurt, anchovies, Dijon mustard, grated garlic, lemon juice, and Parmesan. Whisk until smooth and creamy, with a tangy scent.

  4. Pour the dressing over the salad mixture and toss everything together delicately. Make sure all the ingredients are coated in the delicious dressing for maximum flavor.

  5. Serve the salad in bowls or on a platter, topped with delicate Parmesan shavings and a sprinkle of black pepper to taste. Enjoy the burst of flavors!

Optional: Add fresh herbs like basil or parsley for an extra flavor boost.

Exact quantities are listed in the recipe card below.

Make Ahead Options

These Classic Caesar Salad ingredients are perfect for meal prep, allowing you to enjoy a fresh salad any day of the week! You can prepare the shredded chicken, boiled eggs, and chopped veggies up to 3 days in advance. Simply store them separately in airtight containers in the refrigerator to maintain their freshness. You can also whisk the yogurt-based dressing ahead of time and refrigerate it for up to 24 hours to allow the flavors to meld beautifully. When you’re ready to serve, just combine everything in a large bowl, toss with the dressing, and top with Parmesan shavings. This way, you’ll have a delicious, hassle-free meal ready in minutes!

Classic Caesar Salad Variations

Feel free to mix things up and make this delightful salad your own! Dive into these exciting twists that will tantalize your taste buds.

  • Gluten-Free: Swap sourdough for gluten-free bread or skip it entirely. Toss in some extra roasted veggies for crunch.

  • Vegan Delight: Replace chicken with chickpeas or tofu and use cashew cream instead of yogurt. Flavorful and satisfying!

  • Smoky Flavor: Add smoked paprika and a dash of liquid smoke to the dressing. It’ll give your salad a unique, smoky depth.

  • Spicy Kick: Incorporate sliced jalapeños or a dash of hot sauce to the dressing. This will light up your taste buds!

  • Herbed Goodness: Blend fresh herbs like dill or basil into the dressing. The fragrant notes brighten the overall flavor profile nicely.

  • Creamy Twist: Substitute the yogurt with avocado for an even richer dressing. It adds a buttery texture that’s simply divine.

  • Roasted Veggies: Toss in roasted bell peppers or carrots for added sweetness and depth. These additions create delightful flavor contrasts.

  • Fruit Infusion: For a touch of sweetness, include sliced strawberries or apples. Their crispness will refresh your salad experience!

How to Store and Freeze Classic Caesar Salad

Fridge: Store any leftover Classic Caesar Salad in an airtight container for up to 3 days to maintain freshness. Make sure to keep the dressing separate until serving for optimal texture.

Freezer: It’s not recommended to freeze the Classic Caesar Salad, as the ingredients, particularly lettuce and avocado, don’t thaw well and may become mushy.

Reheating: If you have leftover chicken, you can gently reheat it in the microwave for about 30 seconds until warmed through. Avoid reheating the salad itself to keep its crispness.

Serving: To refresh the salad before serving, toss it with a bit of extra dressing or lemon juice to revive the flavors and textures.

What to Serve with Classic Caesar Salad?

Elevate your meal experience by pairing this vibrant salad with delightful sides that complement its fresh flavors.

  • Garlic Bread: The crispy, buttery goodness of garlic bread adds a warm, savory touch that enhances the meal’s appeal.

  • Roasted Vegetables: Seasoned with herbs, these tender and slightly charred veggies bring depth and color to your plate.

  • Quinoa Pilaf: This nutty and fluffy grain salad introduces an enjoyable texture contrast, making every bite exciting.

  • Grilled Shrimp: Tender, smoky shrimp add a touch of elegance and protein, creating a delicious harmony with the Caesar’s richness.

  • Chilled White Wine: A glass of light, refreshing white wine complements the salad’s zest, enhancing the overall dining experience.

  • Fruit Sorbet: For dessert, a vibrant fruit sorbet cleanses the palate and adds a refreshing finish to your meal.

Let your dinner shine with these delightful pairings, making your Classic Caesar Salad even more enjoyable!

Chef's Helpful Tips

  • When preparing your Classic Caesar Salad, ensure that you shred the chicken evenly for consistent texture and flavor distribution.
  • To prevent your salad from becoming soggy, consider toasting the sourdough bread just before serving to maintain its crunchiness.
  • For a deeper flavor in the dressing, allow the anchovies to blend well with the yogurt by letting the mixture sit for a few minutes before adding lemon juice.
  • Lastly, always taste your salad before serving, as adjusting the black pepper and lemon juice can elevate the overall flavor profile significantly.

Classic Caesar Salad Recipe FAQs

What type of chicken should I use for the Classic Caesar Salad?
Absolutely! I recommend using cooked and shredded chicken breast for your Classic Caesar Salad, as it provides tender meat and blends seamlessly with the fresh ingredients. You can also use rotisserie chicken for convenience, just make sure to remove the skin for a lighter touch.

How long can I store leftover Classic Caesar Salad?
You can store any leftover Classic Caesar Salad in an airtight container in the fridge for up to 3 days. To keep the ingredients fresh and crunchy, it’s best to keep the dressing separate until you’re ready to serve. When ready to enjoy, just drizzle the dressing over and give it a gentle toss!

Can I freeze the Classic Caesar Salad?
It’s generally not recommended to freeze your Classic Caesar Salad, as the lettuce and avocado do not thaw well and can become mushy. However, if you’ve removed the dressing and just want to freeze the chicken for future salads, you can store cooked chicken in an airtight container in the freezer for up to 3 months. Make sure to label it with the date!

What should I do if my dressing is too thick?
If you find that your dressing is too thick, don’t worry! Simply add a teaspoon of cold water or an extra splash of lemon juice to loosen it up while whisking the mixture. This will help achieve your desired consistency and keep the tangy flavor intact.

Are there any allergy considerations for the Classic Caesar Salad?
The Classic Caesar Salad contains several ingredients that could trigger allergies, including dairy (from yogurt and Parmesan), fish (from anchovies), and eggs (from boiled eggs). If you’re making this salad for someone with allergies, feel free to substitute with dairy-free yogurt and omit the anchovies or use a plant-based alternative. Always check labels for specific allergens.

Classic Caesar Salad

Classic Caesar Salad

Enjoy a vibrant Classic Caesar Salad with fresh ingredients and a tangy yogurt dressing, perfect for any occasion.
Print Recipe Pin Recipe
Prep Time 15 minutes mins
Cook Time 20 minutes mins
Total Time 35 minutes mins
Servings: 4 servings
Course: LUNCH RECIPES
Cuisine: Italian
Calories: 450
Ingredients Equipment Method Nutrition Notes

Ingredients
  

For the Salad
  • 2 cups cooked chicken shredded
  • 2 large boiled eggs peeled and quartered
  • 1 medium avocado chopped
  • 1 cup celery finely chopped
  • 1 medium courgette finely chopped
  • 2 slices toasted sourdough bread or boiled potatoes
  • 4 cups Romaine lettuce chopped
For the Dressing
  • 1 cup 0% fat organic yogurt
  • 2 fillets anchovies
  • 1 tablespoon Dijon mustard
  • 1 clove garlic grated
  • 2 tablespoons lemon juice fresh-squeezed
  • 1/4 cup Parmesan cheese grated
  • to taste black pepper

Equipment

  • Large Bowl
  • Whisk
  • Knife
  • Cutting Board

Method
 

How to Make Classic Caesar Salad
  1. Prepare the ingredients by cooking and shredding the chicken. Peel and quarter the boiled eggs, then chop the avocado, celery, and courgette finely. Toast the sourdough bread or boil the potatoes until tender.
  2. Combine the Romaine lettuce, shredded chicken, boiled eggs, avocado, celery, courgette, and toasted sourdough bread (or potatoes) in a large bowl. Toss gently to mix the vibrant ingredients together.
  3. Mix the dressing in a separate bowl by combining the yogurt, anchovies, Dijon mustard, grated garlic, lemon juice, and Parmesan. Whisk until smooth and creamy, with a tangy scent.
  4. Pour the dressing over the salad mixture and toss everything together delicately. Make sure all the ingredients are coated in the delicious dressing for maximum flavor.
  5. Serve the salad in bowls or on a platter, topped with delicate Parmesan shavings and a sprinkle of black pepper to taste. Enjoy the burst of flavors!

Nutrition

Serving: 1servingCalories: 450kcalCarbohydrates: 30gProtein: 32gFat: 24gSaturated Fat: 6gPolyunsaturated Fat: 2gMonounsaturated Fat: 10gCholesterol: 150mgSodium: 800mgPotassium: 800mgFiber: 6gSugar: 3gVitamin A: 2000IUVitamin C: 20mgCalcium: 150mgIron: 3mg

Notes

Consider adding fresh herbs like basil or parsley for an extra flavor boost.

Tried this recipe?

Let us know how it was!

Filed Under: LUNCH RECIPES

  • « Previous Page
  • 1
  • …
  • 17
  • 18
  • 19
  • 20
  • 21
  • …
  • 49
  • Next Page »

Recent Posts

  • Crispy Potatoes in Oven
  • Lucky Charms Pancakes
  • Cheeseburger
  • Boiled Corn on the Cob
  • St. Patrick’s Day Dessert Parfaits

Recent Comments

No comments to show.

Footer

  • Contact
  • Privacy Policy
  • About Us
  • Terms
  • ↑ back to top

Copyright © 2024 www.Forkono.com

Table Of Content