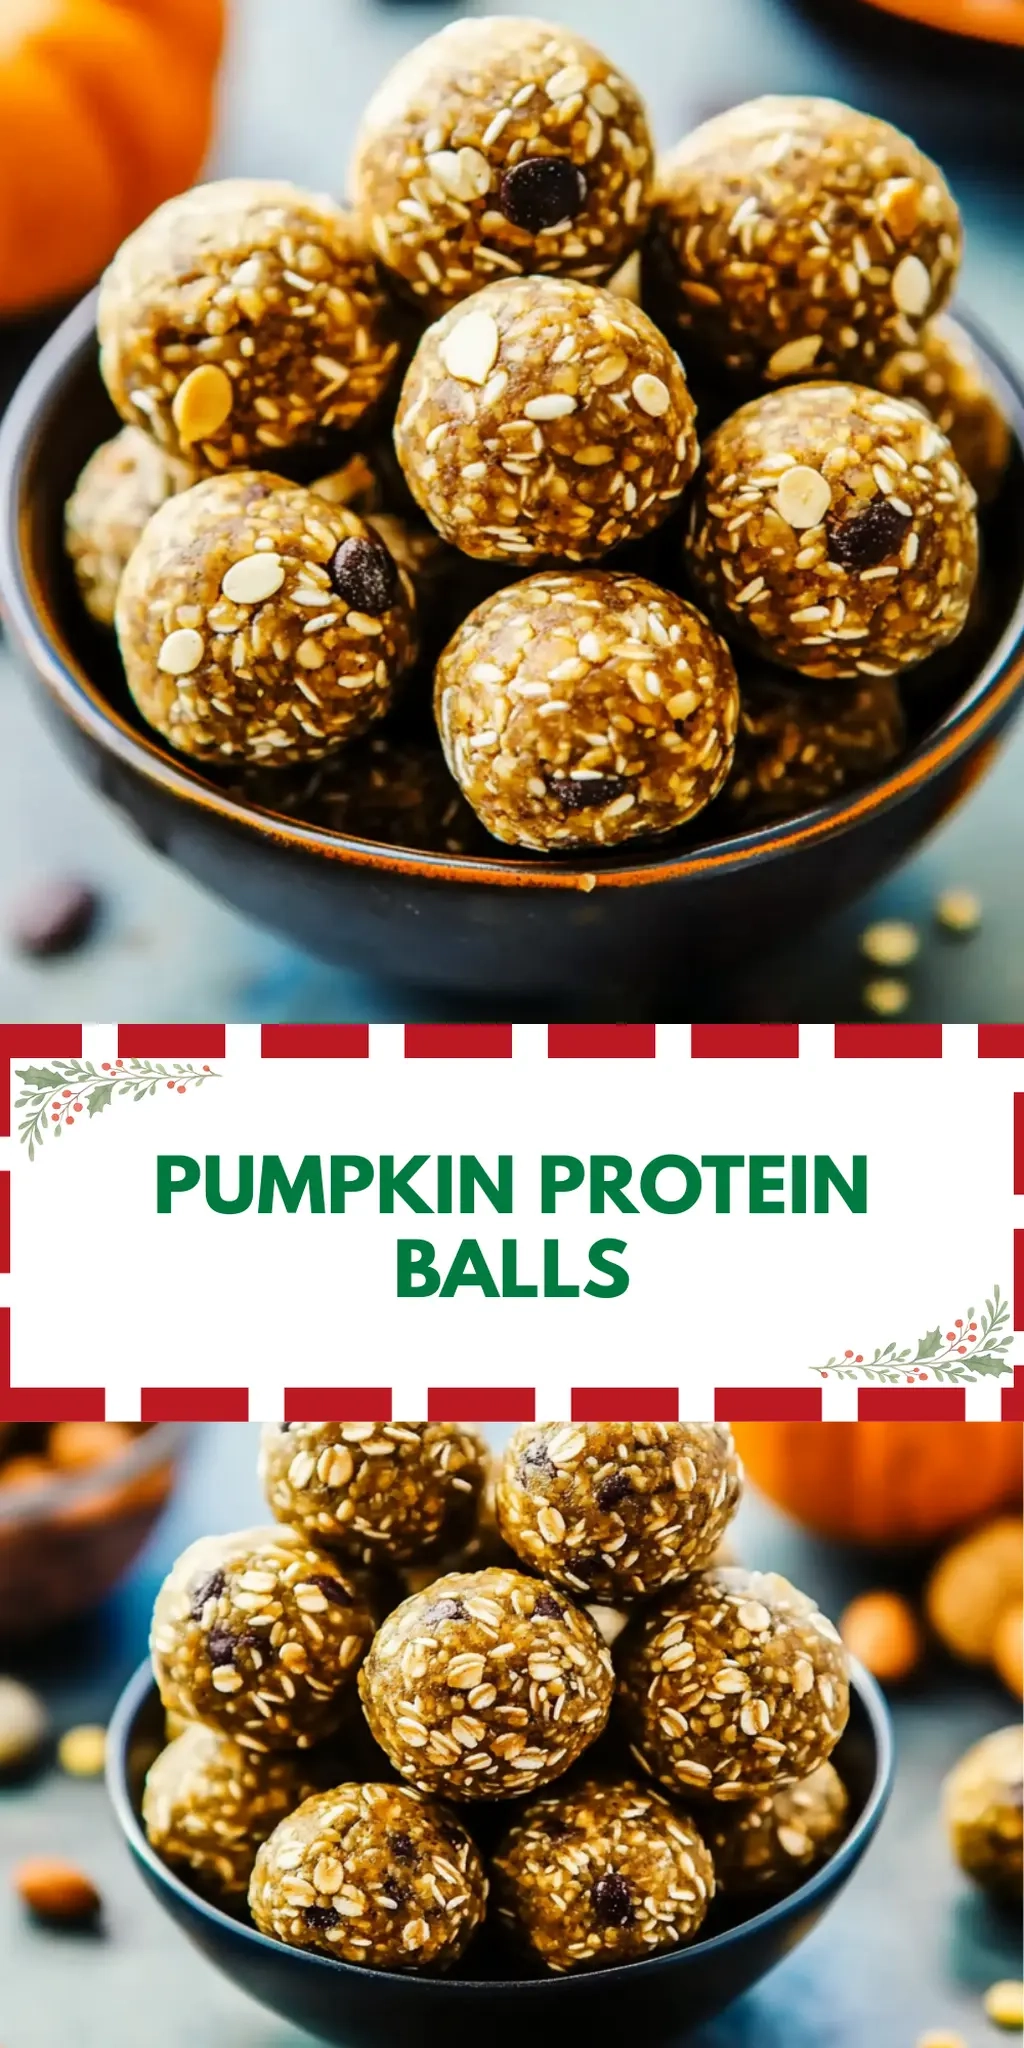
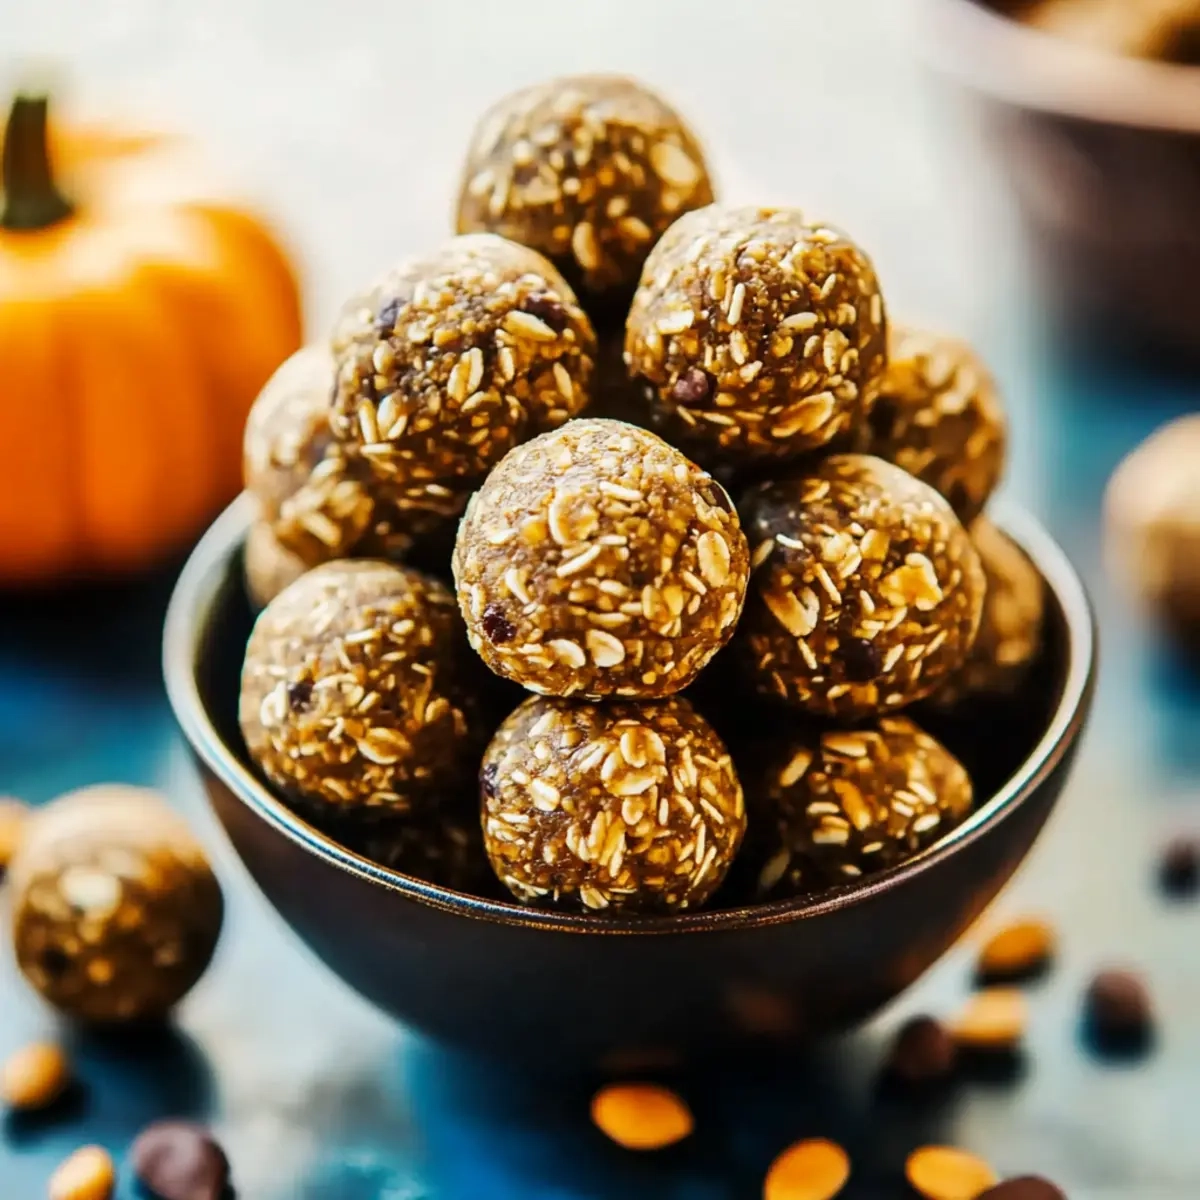
Forkono

  • BREAKFAST & BRUNCH
  • DESSERT RECIPES
  • DINNER RECIPES
  • LUNCH RECIPES
  • About uS
  • SNACKS & APPETIZERS
menu icon
go to homepage
  • BREAKFAST & BRUNCH
  • DESSERT RECIPES
  • DINNER RECIPES
  • LUNCH RECIPES
  • About uS
  • SNACKS & APPETIZERS
search icon
Homepage link
  • BREAKFAST & BRUNCH
  • DESSERT RECIPES
  • DINNER RECIPES
  • LUNCH RECIPES
  • About uS
  • SNACKS & APPETIZERS
×

Authentic Jamaican Curry Chicken

December 22, 2025 by JudyWhite Leave a Comment

There’s nothing quite like the comforting aroma of spices wafting through my kitchen, especially when I’m preparing my Authentic Jamaican Curry Chicken. The vibrant colors and rich flavors of this dish have a way of turning an ordinary night into a culinary adventure. Just the thought of tender chicken bathing in creamy coconut milk, accented by the heat of scotch bonnet peppers, gets my taste buds dancing.

I originally discovered this amazing recipe during a trip to Jamaica, where the locals shared their passion for hearty, homemade meals bursting with flavor. It quickly became a staple in my own kitchen—a solution to those evenings when I crave a break from the fast-food routine. The beauty of this dish lies in its simplicity; loaded with fresh vegetables and a medley of spices, it’s both easy to cook and wonderfully satisfying.

So, whether you’re impressing guests or just treating yourself to something special, join me as we create a vibrant bowl of Authentic Jamaican Curry Chicken that’s sure to spice up your dinner table!

Why You'll Love This Authentic Jamaican Curry Chicken

  • This recipe is a breeze to prepare, allowing you to create a delicious meal without spending hours in the kitchen.
  • The bold and vibrant flavors will transport your taste buds straight to the Caribbean with every bite.
  • Versatile enough to serve on various occasions, this dish can easily impress both family and friends or be enjoyed as a comforting weeknight dinner.
  • Plus, the stunning visual appeal of the colorful ingredients makes it as delightful to look at as it is to eat.

Authentic Jamaican Curry Chicken Ingredients

For the Chicken
• Organic chicken – 3-4 lbs. skin removed for a lean, flavorful base.
• Browning (optional) – 1-2 Tbsps add rich color and depth to the dish.
• Jamaican Green Seasoning – 2-3 Tbsps for a burst of Caribbean flavor.
• Jamaican curry powder – 2 Tbsps to give the dish its signature taste.
• On Everything All-Purpose Blend – 2 tsps enhance the overall flavor profile.
• Sea salt – 1 teaspoon for essential seasoning.
• Smoked paprika – ½ teaspoon for a hint of smokiness.
• Extra virgin olive oil – 4 Tbsps helps to sauté the chicken perfectly.

For the Sauce and Vegetables
• Organic brown sugar – 2 Tbsps to balance the heat from the peppers.
• Coconut milk – 1 can (14 oz.) for creaminess and richness.
• Russet potatoes – 2 medium, peeled and cubed to add heartiness.
• Carrots – 2 medium, peeled and chopped for a touch of sweetness.
• Bell pepper – 1 medium, cored and chopped for color and crunch.
• Garlic – 3 cloves, minced to infuse robust flavor.
• Fresh ginger – 2 tsps minced to brighten up the dish.
• Scotch bonnet peppers – 1-3 pieces, adjust to taste for heat!
• Green onions – 2 pieces, lightly crushed or chopped for freshness.
• Fresh thyme – 2 sprigs to add an aromatic touch.
• Organic chicken stock – 1 cup, low-sodium to keep it healthy.
• Jamaican pepper sauce – 1 tablespoon for an extra kick.
• Ground allspice – 1 teaspoon for warm, complex flavors.
• Sea salt + black pepper – to taste for final seasoning.

Now that you’ve gathered your ingredients, you’re one step closer to delighting your family with this Authentic Jamaican Curry Chicken that captures the essence of sunshine and warmth. Get ready to enjoy a culinary journey right in your own kitchen!

How to Make Authentic Jamaican Curry Chicken

  1. Combine Ingredients: In a large bowl, toss the organic chicken with browning, Jamaican green seasoning, Jamaican curry powder, On Everything All-Purpose Blend, sea salt, smoked paprika, and olive oil. Ensure each piece is evenly coated for maximum flavor.

  2. Sear Chicken: Heat a large pot over medium heat and add the seasoned chicken. Cook it until uniformly browned on all sides, about 5-7 minutes, which will lock in those delicious flavors.

  3. Add Veggies and Sauce: Stir in organic brown sugar, coconut milk, cubed potatoes, chopped carrots, bell pepper, minced garlic, ginger, scotch bonnet peppers, green onions, fresh thyme, and chicken stock. The pot should be bubbling with colorful ingredients!

  4. Simmer: Bring the mixture to a boil, then reduce the heat to low. Let it simmer for 30-35 minutes, stirring occasionally, until the chicken is tender and the vegetables are soft. You’ll know it’s ready when the chicken falls off the bone!

  5. Adjust and Serve: Taste the curry and adjust the seasoning with additional salt and pepper if needed. Serve hot to enjoy a warming, aromatic dish that brings a taste of Jamaica to your table.

Optional: Serve with fluffy rice or warm naan for a complete meal.

Exact quantities are listed in the recipe card below.

Storage Tips for Authentic Jamaican Curry Chicken

Fridge: Store leftover Authentic Jamaican Curry Chicken in an airtight container for up to 3 days to keep it fresh and flavorful.

Freezer: For longer storage, freeze your curry in a freezer-safe container for up to 3 months. Make sure to cool it completely before freezing.

Reheating: When ready to enjoy, thaw overnight in the fridge and reheat gently on the stove over low heat, adding a splash of coconut milk if needed to revive the creamy texture.

Avoid Room Temperature: Don’t leave the curry out at room temperature for more than 2 hours to prevent spoilage.

Make Ahead Options

Preparing your Authentic Jamaican Curry Chicken in advance is a fantastic way to save time during busy weeknights! You can marinate the chicken with the browning, Jamaican green seasoning, curry powder, and spices up to 24 hours in advance, allowing those vibrant flavors to infuse deeply. Additionally, you can chop the vegetables (potatoes, carrots, and bell pepper) and store them in an airtight container in the refrigerator for up to 3 days. When you’re ready to cook, simply bring the marinated chicken to room temperature, combine with the vegetables and remaining ingredients in the pot, and follow the simmering instructions. This make-ahead approach ensures your meal is just as delicious while significantly cutting down on cooking time!

What to Serve with Authentic Jamaican Curry Chicken?

Transform your meal into a Caribbean feast with delightful pairings that complement the rich, spicy flavors of this dish.

  • Fluffy White Rice: Perfect for soaking up the creamy coconut curry, providing a blank canvas for the vibrant flavors.
  • Fried Plantains: Sweet and caramelized, these add a delicious contrast to the savory heat of the curry.
  • Rasta Pasta: A colorful, savory pasta dish, this brings a playful twist to your table while enhancing the meal’s overall flavor profile.

Serve with a side of stewed greens, allowing the earthy and slightly bitter notes to balance the bold spices beautifully.

  • Coleslaw: The crunch and tang of a fresh coleslaw can refresh your palate and provide a crisp texture that’s wonderful with the creamy curry.
  • Mango Chutney: A sweet and zesty chutney adds a delightful contrast, amplifying the dish’s tropical essence while cutting through the richness.
  • Pineapple Juice: A refreshing drink that balances the heat, it adds a sweet twist that echoes the Caribbean vibe.
  • Coconut Cream Pie: Finish with a light dessert that echoes the creamy flavors of the curry, offering a soothing end to your delightful meal.

Authentic Jamaican Curry Chicken Variations

Feel free to get creative with this dish and make it even more delectable to suit your family’s tastes!

  • Spicy Twist: Add 1-2 more scotch bonnet peppers for an extra kick, or use fresh jalapeños for a milder heat. Spice lovers will rejoice at this fiery upgrade!

  • Vegetable-Loaded: Toss in additional veggies like green beans or cauliflower for a nutrient boost, giving you more color and crunch. The more, the merrier in your curry pot!

  • Sweet Alternative: Substitute the organic brown sugar with honey or maple syrup for a natural sweetness that complements the spices beautifully. It’s a delightful twist that may surprise your palate.

  • Coconut-Free: For a lighter version, replace full-fat coconut milk with almond milk or chicken broth, but add a dollop of Greek yogurt before serving for creaminess. A change of pace that doesn’t skimp on flavor!

  • Herb Infusion: Experiment with different herbs like cilantro or parsley instead of thyme for a fresh flavor profile. It’s a simple swap that can refresh this classic dish!

  • Quinoa Base: Serve over a bed of fluffy quinoa instead of rice for a nutritious twist that adds a nutty texture. Your curry will become a superfood feast!

  • Protein Variations: Use chickpeas or lentils for a vegetarian version, or swap chicken for shrimp that cooks quickly and absorbs the spices beautifully. A win-win for non-meat eaters!

  • Slow-Cooked: Allow the ingredients to simmer in a slow cooker instead for a hands-off approach that results in fall-apart tender chicken. Just set it and forget it for a super convenient meal!

These variations will inspire you to craft a personalized version of Authentic Jamaican Curry Chicken that fits your family’s cravings. Enjoy the adventure of flavors!

Chef's Helpful Tips

  • When preparing Authentic Jamaican Curry Chicken, ensure to marinate the chicken for at least an hour, allowing the flavors to penetrate deeply.
  • A common mistake is not browning the chicken thoroughly; taking an extra 2-3 minutes can enhance the flavor significantly.
  • For a richer sauce, you can use full-fat coconut milk instead of lite to achieve a creamier texture.
  • Remember that simmering the curry for 30-35 minutes will not only tenderize the chicken but also meld the flavors beautifully, so resist the urge to rush this step.

Authentic Jamaican Curry Chicken Recipe FAQs

How do I choose the right chicken for this recipe?
Absolutely! For the best results, opt for organic chicken, ideally bone-in and skinless. This type adds extra flavor. Look for chicken that is firm and not discolored. If you can, choose pieces that have a fresh, pleasant smell.

What’s the best way to store leftover Authentic Jamaican Curry Chicken?
Store your leftover curry in an airtight container in the refrigerator for up to 3 days. Make sure it cools completely before sealing it; this keeps the flavors intact and prevents any sogginess.

Can I freeze Authentic Jamaican Curry Chicken?
Very! To freeze, allow the curry to cool completely. Portion it into freezer-safe containers or heavy-duty freezer bags. This keeps it fresh for up to 3 months. When you’re ready to enjoy it again, just thaw it overnight in the refrigerator before reheating gently on the stove.

What’s the best way to reheat the curry?
I often reheat my curry by slowly warming it on the stove over low heat. You may want to add a splash of coconut milk to bring back that creamy consistency. Stir occasionally until heated through, which usually takes around 5-10 minutes.

Are there dietary considerations with this recipe?
Certainly! This Authentic Jamaican Curry Chicken is gluten-free, but if you’re allergic to specific spices or ingredients like scotch bonnet peppers, you can substitute them or adjust the amount. Additionally, always verify your chicken stock and seasoning blends to ensure they meet your dietary needs.

What should I do if the curry is too spicy?
If your curry turns out to be a bit too spicy, don’t worry! You can add a little more coconut milk or stir in some sugar, which balances the heat. Alternatively, serve it over rice or with bread to help mellow out the spiciness.

Authentic Jamaican Curry Chicken

Authentic Jamaican Curry Chicken

This Authentic Jamaican Curry Chicken is a flavorful, comforting dish made with chicken, spices, and coconut milk.
Print Recipe Pin Recipe
Prep Time 15 minutes mins
Cook Time 35 minutes mins
Total Time 50 minutes mins
Servings: 4 servings
Course: DINNER RECIPES
Cuisine: Jamaican
Calories: 400
Ingredients Equipment Method Nutrition Notes

Ingredients
  

For the Chicken
  • 3-4 lbs Organic chicken skin removed
  • 1-2 Tbsps Browning optional
  • 2-3 Tbsps Jamaican Green Seasoning
  • 2 Tbsps Jamaican curry powder
  • 2 tsps On Everything All-Purpose Blend
  • 1 teaspoon Sea salt
  • 1/2 teaspoon Smoked paprika
  • 4 Tbsps Extra virgin olive oil
For the Sauce and Vegetables
  • 2 Tbsps Organic brown sugar
  • 1 can (14 oz) Coconut milk
  • 2 medium Russet potatoes peeled and cubed
  • 2 medium Carrots peeled and chopped
  • 1 medium Bell pepper cored and chopped
  • 3 cloves Garlic minced
  • 2 tsps Fresh ginger minced
  • 1-3 pieces Scotch bonnet peppers adjust to taste
  • 2 pieces Green onions lightly crushed or chopped
  • 2 sprigs Fresh thyme
  • 1 cup Organic chicken stock low-sodium
  • 1 tablespoon Jamaican pepper sauce
  • 1 teaspoon Ground allspice
  • Sea salt + black pepper to taste

Equipment

  • Large Bowl
  • Large pot

Method
 

Cooking Instructions
  1. In a large bowl, toss the organic chicken with browning, Jamaican green seasoning, Jamaican curry powder, On Everything All-Purpose Blend, sea salt, smoked paprika, and olive oil. Ensure each piece is evenly coated for maximum flavor.
  2. Heat a large pot over medium heat and add the seasoned chicken. Cook it until uniformly browned on all sides, about 5-7 minutes.
  3. Stir in organic brown sugar, coconut milk, cubed potatoes, chopped carrots, bell pepper, minced garlic, ginger, scotch bonnet peppers, green onions, fresh thyme, and chicken stock.
  4. Bring the mixture to a boil, then reduce the heat to low. Let it simmer for 30-35 minutes, stirring occasionally.
  5. Taste the curry and adjust the seasoning with additional salt and pepper if needed. Serve hot.

Nutrition

Serving: 1servingCalories: 400kcalCarbohydrates: 40gProtein: 30gFat: 20gSaturated Fat: 10gPolyunsaturated Fat: 3gMonounsaturated Fat: 5gCholesterol: 70mgSodium: 600mgPotassium: 800mgFiber: 4gSugar: 6gVitamin A: 500IUVitamin C: 40mgCalcium: 50mgIron: 2mg

Notes

Serve with fluffy rice or warm naan for a complete meal. Allow marination for at least an hour for enhanced flavor.

Tried this recipe?

Let us know how it was!

Filed Under: DINNER RECIPES

Apple Cranberry Walnut Salad

December 21, 2025 by JudyWhite Leave a Comment

The moment I took my first bite of this Apple Cranberry Walnut Salad, it felt like autumn had arrived in my mouth. The crispness of the greens, combined with the sweet crunch of apples and the tangy burst of cranberries, is a symphony of flavors that dances on your palate. It’s the kind of dish that makes you want to gather around the table with loved ones, sharing stories and laughter while savoring each colorful bite.

I often find myself whipping up this salad when I want something delicious yet healthy, or when unexpected guests drop by. With minimal prep time and a blend of textures that truly elevate your salad game, it’s both versatile and wonderful for any occasion. Plus, if you’re feeling a little adventurous, the optional candied walnuts add a crowned touch of sweetness that everyone will adore. Ready to bring the taste of this delightful dish into your kitchen? Let’s dive in!

Why You'll Love This Apple Cranberry Walnut Salad

  • This Apple Cranberry Walnut Salad is incredibly easy to make, with just 10 minutes of prep time, making it perfect for busy weeknights or last-minute gatherings.
  • The combination of sweet apples, tart cranberries, and crunchy walnuts delivers a vibrant flavor profile that is sure to impress everyone at your table.
  • Its versatility allows you to customize it with optional ingredients like bacon and candied walnuts, catering to various tastes and preferences.
  • Visually, this salad is a feast for the eyes, featuring a colorful medley of ingredients that make it an appealing centerpiece for any meal.

Apple Cranberry Walnut Salad Ingredients

Get ready to create the perfect medley of flavors!

For the Greens
• Salad greens – Use a mix of spinach and arugula for an extra peppery kick.

For the Fruit
• Red apple – Adds a sweet crunch that brightens the dish.
• Green apple – Balances the sweetness with a tart zing.
• Dried cranberries – Provides a chewy texture and bursts of tangy flavor.

For the Nuts
• Walnuts – Roughly chopped for a crunchy component; they also add healthy fats.
• Walnut halves (optional) – For those extra special touches on top!

For the Cheese
• Feta cheese – Crumbled for a creamy, salty contrast that enhances the salad experience.

For the Dressing
• Apple juice – Sweetens the dressing naturally and complements the apples.
• Apple cider vinegar – Provides a tangy bite that balances the sweetness.
• Honey – Use local honey for added flavor and health benefits.
• Olive oil – Adds richness to the dressing; feel free to substitute with avocado oil.
• Salt – Enhances all the flavors; adjust to taste.
• Black pepper – A pinch adds an extra layer of flavor.

For Optional Sweetness
• Butter – Used to caramelize walnuts for a delightful treat.
• Sugar – Sweetens the walnuts during the candying process.
• Ground cinnamon – A warm spice that elevates the candied walnuts.

How to Make Apple Cranberry Walnut Salad

  1. Combine Ingredients: In a large bowl, mix together the salad greens, red apple, green apple, walnuts, bacon (if you’re using it), feta cheese, and dried cranberries. This colorful combo offers the ultimate crunch and taste!

  2. Whisk Dressing: In another bowl, whisk together the apple juice, apple cider vinegar, honey, salt, black pepper, and oil. Ensure the dressing is well combined, creating a delightful balance of flavors.

  3. Dress the Salad: Pour the dressing over the salad mixture and gently toss everything together. Aim for an even coating so every bite bursts with flavor.

  4. For the Candied Walnuts: Melt the butter in a skillet over medium heat. Add sugar, salt, and cinnamon, and then mix in the walnut halves. Cook until they’re beautifully coated and caramelized, giving them a sweet crunch!

  5. Serve and Enjoy: Plate the salad and top with the optional candied walnuts if you’re feeling indulgent. This is the cherry on top that transforms the salad into something extra special.

Optional: Add a drizzle of balsamic reduction for an extra touch of gourmet flair.

Exact quantities are listed in the recipe card below.

Make Ahead Options

Preparing your Apple Cranberry Walnut Salad ahead of time is a fantastic way to save time during busy weeknights! You can chop the salad greens and fruits (apples and cranberries) up to 24 hours in advance. Simply store them in an airtight container in the refrigerator to keep everything fresh and prevent browning. The dressing can also be whisked together and refrigerated for up to 3 days; just give it a good shake before serving. When you’re ready to enjoy, combine the prepped ingredients, toss with the dressing, and top with candied walnuts for that delightful crunch. This way, you’ll have a vibrant, delicious salad ready to impress your family!

Storage Tips for Apple Cranberry Walnut Salad

Fridge: Store leftovers in an airtight container in the fridge for up to 3 days. Keeping the salad dressed will make it soggy, so consider storing the dressing separately.

Freezer: This salad is best enjoyed fresh, but if you have components like candied walnuts left, freeze them in an airtight bag for up to 2 months.

Reheating: If you include bacon or candied walnuts, simply reheat them in a pan over low heat until warmed through. Avoid reheating the salad greens to maintain their crispness.

Serving Ideas: For best flavor, serve the salad chilled, allowing the vibrant tastes of the Apple Cranberry Walnut Salad to shine through in every delightful bite.

Apple Cranberry Walnut Salad Variations

Feel free to let your culinary creativity shine by tailoring this salad to your taste!

  • Dairy-Free: Replace feta cheese with a vegan cheese alternative or simply omit it for a lighter option.
    The salad still bursts with flavors thanks to the apples and cranberries, ensuring no one misses the dairy!

  • Nut-Free: Swap out walnuts for crispy chickpeas or sunflower seeds.
    These substitutes provide delightful crunch while keeping the salad nut-free and allergy-friendly.

  • Bacon Lover’s Delight: Go all in by adding extra crispy bacon or pancetta.
    The smoky, savory addition will create a delicious contrast to the sweet apples and tart cranberries.

  • Spicy Kick: Toss in some thinly sliced jalapeños or a pinch of cayenne pepper in the dressing.
    This adds an unexpected heat that elevates the dish, making it even more memorable.

  • Fruit Fusion: Incorporate seasonal fruits like pears or pomegranate seeds.
    These additions not only enhance the flavor profile but also add vibrant color and texture!

  • Herbaceous Twist: Add a handful of fresh herbs like mint or parsley for a refreshing touch.
    Herbs elevate the taste experience, making it feel even more alive and exciting.

  • Maple Sweetness: Substitute honey with maple syrup for a rich, earthy sweetness.
    It’s a delightful twist that pairs beautifully with the apples and complements the rest of the flavors.

  • Hearty Grain Boost: Toss in cooked quinoa or farro for added protein and fiber.
    This makes the salad more filling, turning it into a standalone dish ideal for lunch or dinner.

What to Serve with Apple Cranberry Walnut Salad?

This fresh, vibrant salad is the perfect centerpiece to elevate your meal and excite your guests’ taste buds.

  • Grilled Chicken Breast: Juicy and lightly seasoned chicken pairs perfectly, adding a satisfying protein kick to this wholesome salad.
  • Quinoa Pilaf: The nutty flavor and chewy texture complement the salad’s crispness while enhancing its nutritional profile.
  • Roasted Sweet Potatoes: Their natural sweetness balances the tartness of the apples and cranberries, creating a harmony of flavors.

For a complete experience, consider adding a toasted baguette spread with herbed goat cheese. The creamy goodness and crunch from the bread enhance each bite of the salad’s freshness, making it a perfect accompaniment for those leisurely family dinners.

  • Sparkling Apple Cider: A non-alcoholic drink that mirrors the apple essence, adding a celebratory fizz to your meal.
  • Chocolate Mousse: Rich and creamy, this light dessert contrasts beautifully with the salad’s sharp and fruity notes, ensuring everyone leaves with a smile!

Chef's Helpful Tips

  • When making the Apple Cranberry Walnut Salad, be sure to prep all your ingredients before starting to ensure a smooth assembly process.
  • A common mistake is to chop the apples too early, causing them to brown; instead, chop them last or toss them in lemon juice to maintain their vibrant color.
  • For a more flavorful dressing, consider letting it sit for a few minutes after whisking to allow the flavors to meld together.
  • When cooking the candied walnuts, keep an eye on them and stir frequently to prevent burning, as the caramel can go from perfect to burnt very quickly.

Apple Cranberry Walnut Salad Recipe FAQs

How do I choose the best apples for this salad?
Absolutely! For a delightful balance of flavors, I recommend using a mix of sweet and tart apples. Look for firm apples without any dark spots or bruises. Firmness indicates freshness; I love using Honeycrisp or Granny Smith apples, as they stay crunchy and vibrant in the salad.

How should I store leftovers of the Apple Cranberry Walnut Salad?
After enjoying your fresh salad, store leftovers in an airtight container in the fridge for up to 3 days. To keep your greens crisp, I suggest storing the dressing separately. This will prevent the greens from wilting and going soggy, ensuring your next serving is just as delightful!

Can I freeze the components of the salad?
Yes! While the salad is best fresh, you can freeze the candied walnuts. Place them in an airtight bag and store them in the freezer for up to 2 months. When you’re ready to use them, simply let them thaw at room temperature or warm them gently in a pan. Unfortunately, the salad greens and apples don’t freeze well due to their high water content, so it’s best to prepare those fresh.

What should I do if my salad dressing is too thick?
Very! If your dressing comes out thicker than expected, it simply needs a little help. Gradually whisk in a splash of apple juice or water until you reach your desired consistency. This allows the flavors to meld beautifully while keeping the dressing pourable.

Can my pet eat any of the ingredients in this salad?
It’s important to be cautious! While apples are safe for dogs (without seeds), the walnuts and bacon should be avoided as they can be harmful in larger amounts. Feta cheese is not recommended for pets either, so it’s best to keep this delicious salad to yourself!

Apple Cranberry Walnut Salad

Apple Cranberry Walnut Salad

Enjoy the vibrant flavors of autumn with this refreshing Apple Cranberry Walnut Salad, perfect for any occasion.
Print Recipe Pin Recipe
Prep Time 10 minutes mins
Cook Time 10 minutes mins
Total Time 20 minutes mins
Servings: 4 servings
Course: LUNCH RECIPES
Calories: 250
Ingredients Equipment Method Nutrition Notes

Ingredients
  

For the Greens
  • 6 cups salad greens (spinach and arugula)
For the Fruit
  • 1 medium red apple
  • 1 medium green apple
  • 1 cup dried cranberries
For the Nuts
  • 1 cup walnuts (roughly chopped)
  • 1/2 cup walnut halves (optional)
For the Cheese
  • 1/2 cup feta cheese (crumbled)
For the Dressing
  • 1/2 cup apple juice
  • 2 tablespoons apple cider vinegar
  • 1 tablespoon honey use local honey for added flavor
  • 1/4 cup olive oil can substitute with avocado oil
  • 1/2 teaspoon salt adjust to taste
  • 1/4 teaspoon black pepper add a pinch for extra flavor
For Optional Sweetness
  • 2 tablespoons butter for caramelizing walnuts
  • 1/4 cup sugar for sweetening walnuts
  • 1/2 teaspoon ground cinnamon to elevate the walnuts

Equipment

  • Large Bowl
  • Skillet
  • Whisk

Method
 

Steps to Make Salad
  1. In a large bowl, mix together the salad greens, red apple, green apple, walnuts, feta cheese, and dried cranberries.
  2. In another bowl, whisk together the apple juice, apple cider vinegar, honey, salt, black pepper, and olive oil until well combined.
  3. Pour the dressing over the salad mixture and gently toss to ensure even coating.
  4. Melt the butter in a skillet over medium heat. Add sugar, salt, and cinnamon, then mix in walnut halves. Cook until coated and caramelized.
  5. Plate the salad and top with the optional candied walnuts if desired.

Nutrition

Serving: 1servingCalories: 250kcalCarbohydrates: 30gProtein: 5gFat: 14gSaturated Fat: 2gPolyunsaturated Fat: 3gMonounsaturated Fat: 8gCholesterol: 5mgSodium: 150mgPotassium: 300mgFiber: 4gSugar: 10gVitamin A: 500IUVitamin C: 15mgCalcium: 70mgIron: 1mg

Notes

For best flavor, serve the salad chilled and consider storing dressing separately to avoid sogginess.

Tried this recipe?

Let us know how it was!

Filed Under: LUNCH RECIPES

Pizza Night Salad Recipe with Chickpeas and Veggies

December 21, 2025 by JudyWhite Leave a Comment

There’s something refreshing about a vibrant salad that makes dinner feel special, and that’s exactly what my Pizza Night Salad brings to the table. Picture this: you’ve just finished a long week, and the weekend is ripe for indulgence. Instead of opting for greasy takeout, I discovered this delightful creation that perfectly marries my love for homemade food with the comfort of pizza flavors, minus the carbs.

Chickpeas have always been my go-to for a protein boost, and when paired with crunchy veggies and a tangy dressing, they add such a satisfying texture. It’s amazing how a handful of simple ingredients can come together to create a salad that feels like a celebration.

Whether you’re entertaining friends or just craving something light yet filling, this salad is a crowd-pleaser. Join me in exploring how to make the magic happen with fresh chickpeas, zesty pepperoncini, and a medley of colorful vegetables! Get ready to transform your pizza night into a feast that keeps you coming back for more.

Why You'll Love This Pizza Night Salad Recipe with Chickpeas and Veggies

  • This Pizza Night Salad is incredibly easy to whip up, making it a perfect choice for busy weeknights.
  • The vibrant flavors dance on your palate, combining the zest of pepperoncini and the creaminess of the dressing for an unforgettable taste experience.
  • Its versatility allows you to customize the ingredients based on what you have on hand or your personal preferences, ensuring you never get bored.
  • Visually, this salad is a feast for the eyes, showcasing a rainbow of fresh veggies that will impress your guests and make your dinner table pop.
  • This dish comes together in just 30 minutes, saving you time while still delivering a satisfying meal that will leave everyone asking for seconds.
  • Lastly, it’s a fantastic crowd-pleaser that brings everyone together over delicious, healthy food without sacrificing the fun of pizza night.

Pizza Night Salad Ingredients

For the Dressing
• ¼ cup red wine vinegar – adds a tangy kick that brightens the salad.
• 1 tablespoon fresh thyme leaves, minced – brings an aromatic flavor that complements the veggies.
• 1 tablespoon pepperoncini pepper brine – infuses a zesty tang reminiscent of pizza night.
• 1 tablespoon vegan mayonnaise – offers a creamy texture without dairy.
• 2-3 teaspoons agave nectar/fine sugar/honey – balances the acidity of the vinegar with a hint of sweetness.
• ½ teaspoon Dijon mustard – adds depth and a subtle spiciness to the dressing.
• ½ teaspoon Tamari soy sauce – enhances the umami flavor while being gluten-free.
• 1 clove garlic, finely minced – introduces a robust flavor that elevates the dressing.
• sea salt (to taste) – essential for amplifying all the flavors.
• ground black pepper (to taste) – brings a bit of warmth and spice.
• 7 tablespoons olive oil – helps to emulsify the dressing and provides richness.

For the Salad
• 1 cup cooked chickpeas – a fantastic source of protein that adds heartiness.
• 1 cup cherry tomatoes, cut into quarters – bursts of sweetness that add color and flavor.
• ½ medium red onion, small dice (about ¾ cup diced red onion) – provides a sharp bite and crunch.
• ½ English cucumber, small dice (about 1 cup diced cucumber) – refreshing and crunchy addition.
• ½ cup pepperoncini peppers, chopped fine (stems removed) – adds a spicy kick reminiscent of pizza flavors.
• ½ cup pitted olives, chopped fine – salty and savory, perfect for a Mediterranean touch.
• 2 sun dried tomatoes packed in oil, minced (about ⅓ cup minced sun dried tomato) – intense flavor that deepens the salad’s taste.
• 2 romaine hearts, finely shredded (about 5-6 cups shredded romaine) – provides a crunchy base that holds everything together.
• 1 small head radicchio, finely shredded (about 2-3 cups shredded radicchio) – adds a beautiful color and a slight bitterness that balances the sweetness of other ingredients.
• vegan “parmesan” (for serving, optional) – sprinkle on top for a cheesy finish without dairy.

This Pizza Night Salad Recipe with Chickpeas and Veggies is sure to be a hit, delighting your taste buds with every bite!

How to Make Pizza Night Salad

  1. Combine Ingredients: In a large bowl, mix together red wine vinegar, fresh thyme, pepperoncini brine, vegan mayonnaise, agave nectar (or sugar/honey), Dijon mustard, Tamari soy sauce, minced garlic, sea salt, and black pepper. Whisk until well blended.

  2. Emulsify Dressing: Gradually pour in the olive oil while whisking continuously. This will create a beautifully emulsified dressing that’s creamy and smooth.

  3. Mix the Salad: In another bowl, toss together the chickpeas, cherry tomatoes, red onion, cucumber, pepperoncini peppers, olives, sun dried tomatoes, romaine hearts, and radicchio until everything is evenly distributed and colorful.

  4. Dress the Salad: Drizzle the prepared dressing over the salad mix and gently toss to ensure every bite is coated in that flavorful goodness.

  5. Serve Immediately: Transfer to a serving platter and garnish with optional vegan “parmesan” for a delightful finishing touch. Enjoy!

Optional: Serve with crusty bread for a complete pizza-inspired meal.
Exact quantities are listed in the recipe card below.

What to Serve with Pizza Night Salad?

Elevate your dining experience and bring balance to this vibrant and tangy salad with delightful accompaniments.

  • Garlic Bread: Perfectly crunchy and buttery, garlic bread is a comforting pairing that complements the bold flavors of the salad. Plus, who doesn’t love a little dunking action?

  • Roasted Veggie Platter: A warm array of roasted vegetables will add a lovely depth of flavor and texture, enhancing the freshness of your salad while providing a hearty side option.

  • Italian Pasta Salad: This light and zesty pasta salad bursting with Mediterranean flavors brings a delightful contrast to your meal, ensuring every bite tingles your taste buds.

  • Grilled Lemon Herb Chicken: Juicy and perfectly seasoned, this protein addition will harmonize beautifully with the chickpeas, making for a filling and accessible dinner while staying delightfully fresh.

  • Olive Tapenade Crostini: Crispy bread topped with a savory olive tapenade offers an incredible burst of flavor that pairs well with the tangy notes in the salad. A simply irresistible appetizer!

  • Sparkling Water with Lime: Refreshing and light, this drink elevates the whole meal and cleanses the palate between bites, providing a fizzy and zesty touch.

  • Chocolate Mousse: For a sweet finish, indulge in rich, creamy chocolate mousse that offers a decadent contrast to the fresh and zesty salad.

Each of these pairings complements the essence of the Pizza Night Salad Recipe with Chickpeas and Veggies while adding variety and joy to your meal!

Pizza Night Salad Variations

Feel free to make this salad your own with these fun and flavorful twists!

  • Gluten-Free: Switch out Tamari soy sauce for coconut aminos to keep the salad gluten-free without losing flavor.

  • Creamy Avocado: Add sliced or diced avocado for an extra creamy texture that pairs perfectly with the sharp flavors of the dressing.

  • Extra Crunch: Toss in some toasted pine nuts or sunflower seeds for a delightful crunch that enhances the texture even more. The added nuttiness brings a lovely dimension to your salad.

  • Spicy Kick: Sprinkle in some red pepper flakes or diced jalapeños for a hotter version. This twist transforms the salad into a zesty delight that wakes up your taste buds!

  • Herb Explosion: Experiment with fresh basil or parsley in addition to thyme for an aromatic adventure. These herbs can elevate the freshness and flavor profile, creating a garden-fresh taste.

  • Roasted Veggies: For a hearty twist, mix in some roasted bell peppers or zucchini. Roasting brings out their natural sweetness, adding depth and warmth to your salad.

  • Fruit Fusion: Diced apples or pears can bring a delightful sweetness and crunch—balance those savory chickpeas with a touch of fruitiness. It’s a lovely surprise that makes every bite feel more special.

  • Cheesy Addition: Mix in crumbled feta or goat cheese for a salty, creamy richness. This addition enhances that pizza vibe, making it even more indulgent and satisfying!

How to Store and Freeze Pizza Night Salad

Fridge: Store any leftover Pizza Night Salad in an airtight container for up to 3 days. Keep the dressing separate if possible to maintain the crispness of the veggies.

Freezer: It’s not recommended to freeze this salad due to the high water content in fresh vegetables. Freezing might alter the texture when thawed.

Reheating: Since this salad is served cold, there’s no need to reheat. Just give it a good toss before serving to refresh the flavors!

Make Ahead: You can prepare the dressing in advance and store it in the fridge for up to a week. Assemble the salad just before serving for the best taste.

Make Ahead Options

This Pizza Night Salad Recipe with Chickpeas and Veggies is an excellent choice for meal prep, saving you time on busy weeknights! You can prepare the dressing and salad components separately up to 3 days in advance. Simply whisk together the dressing ingredients and store it in an airtight container in the refrigerator. Chop the veggies and combine the chickpeas, cherry tomatoes, red onion, cucumber, pepperoncini peppers, olives, sun dried tomatoes, romaine, and radicchio in another bowl, then refrigerate them in a separate container. When you’re ready to serve, just drizzle the dressing over the salad mix, toss gently, and enjoy a refreshing and satisfying dish that tastes just as delicious as when freshly made!

Chef's Helpful Tips

  • For the Pizza Night Salad, ensure you chop your veggies uniformly to allow for even texture and flavor in every bite.
  • When whisking your dressing, add the olive oil gradually to create a stable emulsion that won’t separate.
  • To enhance flavors, let the salad sit for about 10 minutes after dressing it, allowing the ingredients to marinate slightly.
  • For the best flavor, serve your salad immediately after mixing to maintain the crispness of the veggies.

Pizza Night Salad Recipe with Chickpeas and Veggies Recipe FAQs

What type of chickpeas should I use?
Absolutely! You can use canned chickpeas for convenience; just make sure to rinse and drain them well to remove excess sodium. If you have time, cooking dried chickpeas enhances the flavor and texture. Soak them overnight and boil until tender for the best results!

How do I store leftovers of Pizza Night Salad?
Very simple! Keep any leftover Pizza Night Salad in an airtight container for up to 3 days. I recommend storing the dressing separately to maintain the crunchiness of the fresh veggies. Just mix it in right before serving for the best experience!

Can I freeze this salad?
Not really! It’s not recommended to freeze the Pizza Night Salad due to the high water content in fresh vegetables, which can become mushy when thawed. Instead, enjoy it fresh and savor that vibrant crunch!

What should I do if my dressing doesn’t emulsify?
No worries! If the dressing won’t emulsify, try whisking it continuously as you slowly drizzle in the olive oil. If it’s still separating, add a teaspoon of mustard or an extra bit of vegan mayonnaise to help bind it together. You could also blend it in a small food processor for an ultra-smooth consistency!

Is this salad suitable for those with allergies?
Very! Most ingredients in the Pizza Night Salad are plant-based, making it great for vegans and vegetarians. If you have nut allergies, just double-check your vegan mayonnaise to ensure it’s free of nuts. For gluten sensitives, make sure to use tamari and confirm that all ingredients are certified gluten-free.

How can I customize the salad to suit my tastes?
The more the merrier! You can add or substitute ingredients based on your preferences; try adding avocados for creaminess, peppers for an extra crunch, or even grains like quinoa or farro to make it heartier. Enjoy playing with flavors while maintaining the pizza theme!

Pizza Night Salad Recipe with Chickpeas and Veggies

Pizza Night Salad Recipe with Chickpeas and Veggies

This Pizza Night Salad Recipe with Chickpeas and Veggies is refreshing, easy to make, and a crowd-pleaser for your weekend dinner.
Print Recipe Pin Recipe
Prep Time 30 minutes mins
Total Time 30 minutes mins
Servings: 4 servings
Course: LUNCH RECIPES
Cuisine: Mediterranean
Calories: 250
Ingredients Equipment Method Nutrition Notes

Ingredients
  

Dressing
  • 0.25 cups red wine vinegar adds a tangy kick that brightens the salad
  • 1 tablespoon fresh thyme leaves, minced brings an aromatic flavor that complements the veggies
  • 1 tablespoon pepperoncini pepper brine infuses a zesty tang reminiscent of pizza night
  • 1 tablespoon vegan mayonnaise offers a creamy texture without dairy
  • 2-3 teaspoons agave nectar/fine sugar/honey balances the acidity of the vinegar with a hint of sweetness
  • 0.5 teaspoons Dijon mustard adds depth and a subtle spiciness
  • 0.5 teaspoons Tamari soy sauce enhances the umami flavor while being gluten-free
  • 1 clove garlic, finely minced introduces a robust flavor that elevates the dressing
  • sea salt to taste, essential for amplifying all the flavors
  • ground black pepper to taste, brings a bit of warmth and spice
  • 7 tablespoons olive oil helps to emulsify the dressing and provides richness
Salad
  • 1 cup cooked chickpeas a fantastic source of protein that adds heartiness
  • 1 cup cherry tomatoes, cut into quarters bursts of sweetness that add color and flavor
  • 0.5 medium red onion, small dice provides a sharp bite and crunch
  • 0.5 English cucumber small dice refreshing and crunchy addition
  • 0.5 cup pepperoncini peppers, chopped fine adds a spicy kick reminiscent of pizza flavors
  • 0.5 cup pitted olives, chopped fine salty and savory, perfect for a Mediterranean touch
  • 2 sun dried tomatoes packed in oil, minced intense flavor that deepens the salad's taste
  • 2 romaine hearts finely shredded provides a crunchy base that holds everything together
  • 1 small head radicchio, finely shredded adds a beautiful color and a slight bitterness
  • vegan 'parmesan' for serving, optional

Equipment

  • Large Bowl
  • Whisk
  • Serving platter

Method
 

How to Make Pizza Night Salad
  1. In a large bowl, mix together red wine vinegar, fresh thyme, pepperoncini brine, vegan mayonnaise, agave nectar (or sugar/honey), Dijon mustard, Tamari soy sauce, minced garlic, sea salt, and black pepper. Whisk until well blended.
  2. Gradually pour in the olive oil while whisking continuously to create a beautifully emulsified dressing that’s creamy and smooth.
  3. In another bowl, toss together the chickpeas, cherry tomatoes, red onion, cucumber, pepperoncini peppers, olives, sun dried tomatoes, romaine hearts, and radicchio until everything is evenly distributed and colorful.
  4. Drizzle the prepared dressing over the salad mix and gently toss to ensure every bite is coated in that flavorful goodness.
  5. Transfer to a serving platter and garnish with optional vegan 'parmesan' for a delightful finishing touch. Enjoy!

Nutrition

Serving: 1plateCalories: 250kcalCarbohydrates: 30gProtein: 10gFat: 14gSaturated Fat: 2gPolyunsaturated Fat: 3gMonounsaturated Fat: 8gSodium: 400mgPotassium: 600mgFiber: 7gSugar: 5gVitamin A: 2000IUVitamin C: 30mgCalcium: 50mgIron: 3mg

Notes

For a complete pizza-inspired meal, serve with crusty bread.

Tried this recipe?

Let us know how it was!

Filed Under: LUNCH RECIPES

Crispy Hot Honey Feta Chicken

December 21, 2025 by JudyWhite Leave a Comment

There’s a joyous crunch that fills the air as the Crispy Hot Honey Feta Chicken bakes in the oven, making it impossible not to feel excited about dinner. Picture this: golden chicken coated in panko breadcrumbs, transforming into a crispy delight while a warm, spicy honey glaze bubbles enticingly on top. It’s a dish that invites you to elevate your typical weeknight meal with just a handful of pantry staples.

I discovered this recipe on a particularly hectic evening when I craved something comforting yet special—a culinary antidote to my fast-food fatigue. With just 40 minutes from prep to plate, this fantastic creation promises mouthwatering flavors without the fuss. It’s the kind of meal that draws everyone to the table, leaving friends and family raving about the perfect balance of sweet and heat. Whether you’re a seasoned chef or new to the kitchen, get ready to impress with this crispy, crowd-pleasing dish that might just become a weeknight staple!

Why You'll Love This Crispy Hot Honey Feta Chicken

  • This recipe is incredibly easy to make, allowing you to whip up a delightful meal in just 40 minutes.
  • The combination of crispy panko crumbs and the sweet-and-spicy honey glaze creates a flavor explosion that’s sure to please your taste buds.
  • Not only is this dish versatile enough to pair with various sides, but its stunning presentation will impress any dinner guest.
  • Plus, it’s a guaranteed crowd-pleaser, making it perfect for family meals or entertaining friends.

Crispy Hot Honey Feta Chicken Ingredients

For the Chicken

  • Boneless skinless chicken breasts – the star of this dish, tender and juicy.
  • All-purpose flour – provides a lovely base coating for extra crunch.
  • Large eggs – essential for binding the panko to the chicken, ensuring every bite is crispy.
  • Panko breadcrumbs – light and airy, they create that perfect crispy texture.

For the Seasoning

  • Garlic powder – adds a savory depth that complements the honey glaze.
  • Onion powder – brings a hint of sweetness and balances the flavors beautifully.
  • Paprika – introduces a mild smokiness that enhances the overall taste.
  • Salt – to taste, amplifying all the delicious flavors.
  • Pepper – a dash will add great warmth to the chickens’ coating.

For the Sweet and Spicy Glaze

  • Honey – the star of this glaze for that irresistible sweetness in the Crispy Hot Honey Feta Chicken.
  • Hot sauce – adjust to your desired spice level for the perfect kick.
  • Apple cider vinegar – adds a tang that cuts through the sweetness, creating a balanced flavor profile.

How to Make Crispy Hot Honey Feta Chicken

  1. Preheat the oven to 400°F (200°C) to ensure a crispy finish on your chicken. It’s important to have it hot and ready when the chicken is prepared!

  2. Prepare three bowls: one with all-purpose flour, another with beaten eggs, and the last with panko breadcrumbs mixed with garlic powder, onion powder, paprika, salt, and pepper. This setup makes coating easy and organized.

  3. Dredge each chicken breast first in the flour to create a base layer, then dip it in the egg for binding, and finally coat thoroughly in the seasoned panko breadcrumbs. This three-step process guarantees a delightful crunch.

  4. Arrange the coated chicken breasts on a baking sheet lined with parchment paper. Spacing them out allows for even baking and crispiness, so they don’t steam!

  5. Mix in a small bowl the honey, hot sauce, and apple cider vinegar until well combined. This glaze will add an irresistible sweet and spicy kick to your chicken.

  6. Drizzle the honey mixture generously over the chicken before baking. Be sure to cover each piece for that flavor contrast between the crispy coating and the sweet glaze.

  7. Bake in the preheated oven for about 25 minutes or until the chicken is golden brown and cooked through. Look for a crispy exterior and an internal temperature of 165°F (75°C).

Optional: Serve with a sprinkle of feta cheese on top for extra flavor.

Exact quantities are listed in the recipe card below.

How to Store and Freeze Crispy Hot Honey Feta Chicken

Fridge: Store any leftover Crispy Hot Honey Feta Chicken in an airtight container for up to 3 days. This keeps the chicken moist while preserving that delicious crispy coating.

Freezer: For longer storage, freeze the chicken in a single layer wrapped tightly in plastic wrap, then transfer to a freezer bag. It can last up to 3 months in the freezer.

Reheating: When you’re ready to enjoy the leftovers, reheat in the oven at 350°F (175°C) for about 10-15 minutes until warmed through and crispy again.

Tip: Avoid reheating in the microwave, as this can make the coating soggy.

Make Ahead Options

These Crispy Hot Honey Feta Chicken breasts are perfect for meal prep enthusiasts! You can prepare the chicken up to 24 hours in advance by following the coating steps, then layering the flour, egg, and panko breadcrumbs on the chicken. To maintain that delightful crunch, store the coated chicken in the refrigerator, covered tightly with plastic wrap. When ready to serve, drizzle the honey mixture over each piece and bake as directed—no need for thawing! This approach allows busy cooks to enjoy a delicious, hassle-free dinner while still maintaining all the flavors and textures that make this dish so special.

Crispy Hot Honey Feta Chicken Variations

Get ready to take your Crispy Hot Honey Feta Chicken to new heights with these fun and flavorful twists!

  • Gluten-Free: Use a gluten-free flour blend and panko to make this dish suitable for gluten-sensitive eaters. The crunchy texture will remain delightful!

  • Feta Cheese: Crumble feta cheese on top before baking to enhance the savory flavor of the chicken and add an extra layer of creaminess.

  • Crispy Baked Tofu: For a plant-based alternative, replace chicken with firm tofu sliced into steaks, following the same coating method for a satisfying crispy bite.

  • Zesty Lemon: Adding a sprinkle of fresh lemon zest to the honey glaze lends a refreshing tang that beautifully brightens the flavors.

  • Herbed Panko: Mix in fresh herbs like parsley or thyme with the panko breadcrumbs for an aromatic twist that’s bursting with flavor.

  • Buffalo Style: Swap out the hot sauce for your favorite buffalo sauce for a spicy, tangy kick that’s perfect for those who love heat.

  • Nuts for Crunch: Coarsely ground nuts, like almonds or pistachios, in the breadcrumb mixture can create a unique crunch and a nutty flavor profile.

  • Sweet & Spicy Peppers: Add finely chopped roasted red peppers or jalapeños to the honey glaze for an added touch of sweet and spicy goodness.

Each of these variations opens up a world of flavor possibilities and ensures that your dinner table will never feel boring again. Happy cooking!

What to Serve with Crispy Hot Honey Feta Chicken?

Your dinner table is about to transform into a cozy gathering spot, where the aromatic warmth of Honey Feta Chicken invites laughter and conversation.

  • Creamy Mashed Potatoes: The rich, buttery texture is a perfect vehicle for soaking up the honey glaze dripped from the chicken, creating a harmony of flavors.

  • Garlic Roasted Broccoli: This vibrant green side brings a delightful crunch and earthy flavor, balancing the sweetness of the chicken beautifully.

  • Crispy Brussels Sprouts: With their tender centers and crispy edges, these savory bites provide a robust contrast to the sweet and spicy chicken.

  • Coleslaw: A zesty, crunchy coleslaw adds a refreshing crunch and tang that brightens up every bite of the dish. The acidity cuts through the richness deliciously.

  • Citrusy Quinoa Salad: A light and refreshing salad with zesty citrus notes gives a burst of flavor that complements the warm spices of the chicken.

  • Honey-Glazed Carrots: Sweet and tender, these carrots mirror the honey theme while adding a lovely colorful pop to your plate.

  • Chilled Wine Spritzer: A refreshing spritzer with bubbles pairs perfectly with the dish, enhancing the sweet and spicy notes of the chicken with every sip.

  • Chocolate Chip Cookies: For dessert, these classic treats create a sweet finale to your meal, serving as a comforting reminder of home.

Chef's Helpful Tips

  • Ensure your oven is preheated to 400°F to achieve that crispy texture on your Crispy Hot Honey Feta Chicken.
  • When dredging the chicken, make sure to thoroughly coat it in flour before dipping it in the egg to create a solid base for the panko breadcrumbs.
  • Avoid overcrowding the baking sheet to prevent steam and ensure even browning; give each chicken breast some space.
  • For a variation in flavor, consider adjusting the hot sauce in the glaze to match your desired spiciness, and remember to check the chicken’s internal temperature to verify it’s cooked through at 165°F.

Crispy Hot Honey Feta Chicken Recipe FAQs

Which types of chicken are best for this recipe?
I highly recommend using boneless skinless chicken breasts for this Crispy Hot Honey Feta Chicken. They cook evenly and retain juicy tenderness while the exterior becomes beautifully crunchy. If you want something different, you can also use chicken thighs—just adjust the cooking time to ensure they reach 165°F (75°C).

How should I store leftover Crispy Hot Honey Feta Chicken?
Make sure to store any leftover chicken in an airtight container in the refrigerator for up to 3 days. This method helps maintain its moisture while keeping that delicious crispy coating intact. Just remember to let it cool completely before sealing to avoid condensation.

Can I freeze the cooked chicken?
Absolutely! To freeze your Crispy Hot Honey Feta Chicken, first wrap each piece tightly in plastic wrap, ensuring no air remains. Then, place the wrapped chicken in a labeled freezer bag for clarity. It will stay fresh for up to 3 months. When you’re ready to eat, simply thaw overnight in the fridge and reheat in the oven for the best texture.

What if my coating is soggy after baking?
Oh no! If you find your coating turns out soggy, it could be due to overcrowding on the baking sheet or not enough heat. Make sure to give each chicken breast enough space on the tray to avoid steaming. Also, ensure your oven is preheated properly to 400°F (200°C) before baking! If you encounter this problem, a quick fix is to pop the chicken back in the oven for a few extra minutes to crisp up the coating.

Can I use a gluten-free option for this recipe?
Certainly! You can substitute the all-purpose flour with a gluten-free flour blend and choose gluten-free panko breadcrumbs for the coating. The result will still bring that delightful crunch and incredible flavors to your plate. Just be sure to check all labels to avoid any hidden gluten.

Is this dish safe for pets?
While the Crispy Hot Honey Feta Chicken is safe for humans, it’s best to avoid sharing with pets due to the honey and hot sauce. These ingredients can be harmful to them, so it’s always wise to keep the spiciness and sweetness for yourself!

Crispy Hot Honey Feta Chicken

Crispy Hot Honey Feta Chicken

Crispy Hot Honey Feta Chicken combines golden chicken coated in panko with a warm honey glaze for a mouthwatering delight.
Print Recipe Pin Recipe
Prep Time 15 minutes mins
Cook Time 25 minutes mins
Total Time 40 minutes mins
Servings: 4 pieces
Course: DINNER RECIPES
Cuisine: American
Calories: 360
Ingredients Equipment Method Nutrition Notes

Ingredients
  

For the Chicken
  • 4 pieces Boneless skinless chicken breasts the star of this dish, tender and juicy
  • 1 cup All-purpose flour provides a lovely base coating for extra crunch
  • 2 large eggs essential for binding the panko to the chicken
  • 1 cup Panko breadcrumbs light and airy for perfect crispy texture
For the Seasoning
  • 1 teaspoon Garlic powder adds savory depth
  • 1 teaspoon Onion powder brings hint of sweetness
  • 1 teaspoon Paprika introduces mild smokiness
  • to taste Salt amplifying all the flavors
  • to taste Pepper adds warmth to the coating
For the Sweet and Spicy Glaze
  • 1/2 cup Honey the star of the glaze
  • 2 tablespoons Hot sauce adjust to desired spice level
  • 1 tablespoon Apple cider vinegar adds tang

Equipment

  • Oven
  • Baking sheet
  • Mixing bowls
  • Whisk

Method
 

How to Make Crispy Hot Honey Feta Chicken
  1. Preheat the oven to 400°F (200°C) to ensure a crispy finish on your chicken.
  2. Prepare three bowls: one with all-purpose flour, another with beaten eggs, and the last with panko breadcrumbs mixed with garlic powder, onion powder, paprika, salt, and pepper.
  3. Dredge each chicken breast first in the flour, then dip it in the egg, and finally coat thoroughly in the seasoned panko breadcrumbs.
  4. Arrange the coated chicken breasts on a baking sheet lined with parchment paper.
  5. Mix in a small bowl the honey, hot sauce, and apple cider vinegar until well combined.
  6. Drizzle the honey mixture generously over the chicken before baking.
  7. Bake in the preheated oven for about 25 minutes or until the chicken is golden brown and cooked through.

Nutrition

Serving: 1pieceCalories: 360kcalCarbohydrates: 40gProtein: 30gFat: 15gSaturated Fat: 2.5gPolyunsaturated Fat: 0.5gMonounsaturated Fat: 4gCholesterol: 100mgSodium: 600mgPotassium: 500mgFiber: 1gSugar: 10gVitamin A: 200IUCalcium: 20mgIron: 1.5mg

Notes

Optional: Serve with a sprinkle of feta cheese on top for extra flavor.

Tried this recipe?

Let us know how it was!

Filed Under: DINNER RECIPES

Coconut Lavender Lemonade Mocktail

December 21, 2025 by JudyWhite Leave a Comment

As the summer sun begins to warm the air and fragrant flowers bloom all around, I find myself craving something refreshing yet indulgent. That’s when I discovered the delightful Coconut Lavender Lemonade Mocktail—a drink that perfectly captures the essence of sunny days and relaxed afternoons. This mocktail is a game changer, taking just 10 minutes to whip up, so you can impress friends without spending hours in the kitchen.

The creamy coconut blended with the soothing notes of lavender creates a unique flavor combination that dances on your palate, while the bright zing of lemon adds just the right touch of tartness. What I love most is how versatile it is; whether you’re hosting a brunch, celebrating a special occasion, or simply treating yourself after a long day, this mocktail elevates any moment. So grab your blender, and let’s bring a taste of summer into your home with this heavenly Coconut Lavender Lemonade Mocktail!

Why You'll Love This Coconut Lavender Lemonade Mocktail

  • This Coconut Lavender Lemonade Mocktail is incredibly easy to make, taking just 10 minutes to blend and serve.
  • The irresistible combination of creamy coconut, soothing lavender, and zesty lemon delivers an extraordinary flavor that will have your guests raving.
  • Its versatility means it’s perfect for any occasion, whether it’s a casual gathering or a festive celebration.
  • Visually appealing with garnishes of lemon slices and lavender sprigs, this mocktail is as delightful to look at as it is to sip.
  • You’re guaranteed to please a crowd with this refreshing beverage for everyone to enjoy.

Coconut Lavender Lemonade Mocktail Ingredients

For the Base

  • Coconut cream – adds a rich, creamy texture to balance the tartness of the lemonade.
  • Lavender syrup – infuses a delightful floral aroma and sweetness, making the mocktail unique.
  • Lemon juice – brightens the drink with a zesty kick, enhancing the overall flavor profile.

For Sweetness

  • Honey or agave syrup – use honey for a richer flavor or agave for a vegan option.

For Dilution

  • Cold water – adjusts the consistency of the mocktail; feel free to substitute sparkling water for a fizzy twist.

Optional Garnish

  • Lemon slices – not only adds a pop of color but also a refreshing touch when served.

How to Make Coconut Lavender Lemonade Mocktail

  1. Combine ingredients: In a blender, add the coconut cream, lavender syrup, and freshly squeezed lemon juice. Blend until smooth and creamy, emulating that heavenly summer vibe.

  2. Sweeten up: Add the honey or agave syrup to the blender. Blend again for about 15 seconds to fully incorporate the sweetness into the drink.

  3. Mix with water: Pour in the cold water gradually, blending until you achieve your desired consistency. Make it as thick or thin as you like!

  4. Strain the mixture: Using a fine strainer, pour the blended mixture into a serving pitcher to remove any unwanted pulp or bits; this ensures a silky-smooth drink.

  5. Serve over ice: Fill glasses with ice cubes and pour in your refreshing mocktail, letting those vibrant colors shine through.

  6. Garnish with flair: Add a slice of lemon and a sprig of lavender for that picture-perfect finish. Your guests will be impressed!

Optional: For a refreshing twist, substitute half the cold water with sparkling water.

Exact quantities are listed in the recipe card below.

Storage Tips for Coconut Lavender Lemonade Mocktail

Fridge: Keep any leftover Coconut Lavender Lemonade Mocktail in an airtight container for up to 3 days. Shake or stir before serving to redistribute the flavors.

Freezer: If you want to freeze the mocktail, pour it into an ice cube tray. This allows you to enjoy a chilled, slushy version later. Use within 1 month for optimal taste.

Thawing: When ready to enjoy your frozen cubes, allow them to thaw in the fridge or blend them directly into a fresh glass of lemonade for a delightful summer treat.

Reheating: Since this is a refreshing mocktail meant to be served cold, reheating isn’t recommended. Simply make sure your liquids are well-chilled before serving!

Coconut Lavender Lemonade Mocktail Variations

Feel free to get creative with this delightful recipe, as there are endless ways to personalize it!

  • Minty Fresh: Add a handful of fresh mint leaves before blending for an invigorating twist. Mint and lavender together create a refreshing aromatic experience.

  • Pineapple Bliss: Substitute half the coconut cream with pineapple juice for a tropical flair. The blend brings a sweetness and bright tropical notes that dance on your taste buds.

  • Herbal Infusion: Experiment with fresh basil or rosemary in place of lavender. These herbs lend a unique depth of flavor and a lovely aromatic quality.

  • Sparkling Delight: Use sparkling water instead of still water for that bubbly fizz. It adds a delightful sparkle that will make every sip feel like a celebration.

  • Berry Boost: Blend in a cup of fresh or frozen berries, like blueberries or raspberries, for a fruity burst of flavor. Berries not only brighten the drink but also add natural sweetness.

  • Chilly Slush: Pour the mixture into an ice-filled blender for a slushy version. This frozen drink is perfect for hot summer days, turning your mocktail into a frosty treat.

  • Ginger Kick: Add a grated inch of fresh ginger before blending for a spicy, zesty kick. Ginger works wonderfully with the lavender and lemon for a flavor explosion.

  • Sweetness Upgrade: Swap honey or agave syrup with maple syrup for a deep, rich sweetness. This alternative creates a beautifully complex flavor that differentiates your mocktail.

What to Serve with Coconut Lavender Lemonade Mocktail?

As you sip this fragrant mocktail, imagine the perfect dishes to accompany your vibrant drink and elevate your summer gatherings.

  • Light Salad: A crisp garden salad with fresh herbs complements the mocktail’s florals while adding crunchy, refreshing textures.
  • Grilled Shrimp Skewers: The smoky sweetness of grilled shrimp pairs beautifully with the citrusy notes of the lemonade, creating a delightful contrast.
  • Fruit Platter: A colorful assortment of seasonal fruits enhances the taste of the mocktail, making for a visually stunning and refreshing side.
  • Savory Cheese Board: Rich cheeses like Brie or Goat cheese contrast the drink’s sweetness, along with nuts and honey for an indulgent treat.
  • Coconut Rice: Aromatic coconut rice mirrors the mocktail’s base flavors, offering a creamy, tropical twist that ties the meal together.
  • Mini Tartlets: Lemon or berry tartlets provide a delightful burst of fruity flavor, echoing the refreshing elements of the mocktail.

Imagine hosting your friends, drinks in hand, while serving these delightful pairings for a summer experience to remember!

Make Ahead Options

These Coconut Lavender Lemonade Mocktails are perfect for busy weeknights or anytime you want a refreshing drink without the last-minute hassle! You can blend the coconut cream, lavender syrup, lemon juice, and sweetener up to 24 hours in advance, storing the mixture in an airtight container in the refrigerator. When you’re ready to serve, simply stir in the cold water for your desired consistency and strain it into a pitcher. For the best quality, delay adding ice until serving to prevent dilution. This way, your mocktail will be just as delicious and vibrant as if you made it fresh on the spot!

Chef's Helpful Tips

  • When making the Coconut Lavender Lemonade Mocktail, be sure to blend the ingredients thoroughly to achieve a smooth texture; this helps to fully integrate the coconut cream and lavender syrup.
  • Avoid using juice from concentrate, as fresh lemon juice enhances the brightness and overall flavor of the mocktail.
  • If you prefer a fizzy drink, consider substituting half of the cold water with sparkling water for an added effervescence.
  • Finally, remember to chill your glasses beforehand for an extra refreshing experience when serving the mocktail.

Coconut Lavender Lemonade Mocktail Recipe FAQs

What type of coconut cream should I use?
I recommend using full-fat coconut cream for the creamiest texture and flavor in your Coconut Lavender Lemonade Mocktail. You can usually find it in cans in the international aisle of your grocery store. Be sure to check the ingredient list to avoid additives. If you’re looking for a lighter option, coconut milk can also work, but it will be less rich.

How long can I store leftover mocktail?
Absolutely! You can store any leftover Coconut Lavender Lemonade Mocktail in an airtight container in the fridge for up to 3 days. Just give it a good shake or stir before pouring, as the ingredients may separate over time. Enjoy this refreshing drink at your leisure!

Can I freeze the Coconut Lavender Lemonade Mocktail?
Very! To freeze, pour the prepared mocktail into an ice cube tray. Once frozen, transfer the cubes to a zip-top freezer bag for easy storage. These cubes can last up to 1 month in the freezer. When you’re ready to indulge, you can either let them thaw in the fridge or blend them directly into a new batch of lemonade for a delightful slushy treat.

What should I do if my mocktail is too thick?
If your Coconut Lavender Lemonade Mocktail comes out thicker than desired, don’t worry! Simply add a little more cold water, one tablespoon at a time, blending in between until you reach your desired consistency. You’re in control of how refreshing you’d like it!

Can I make this mocktail vegan?
Absolutely! To keep it 100% vegan, simply use agave syrup instead of honey. Both options provide sweetness, but agave syrup is plant-based and will fit perfectly into a vegan lifestyle!

Are there any allergies I should be aware of?
Yes. This mocktail contains coconut, which could be a potential allergen for some individuals. Always make sure to check with your guests for any allergies before serving. If you’re unsure, you could also experiment with alternatives, like almond milk, for a different flavor profile, though it will alter the taste significantly.

Coconut Lavender Lemonade Mocktail

Coconut Lavender Lemonade Mocktail

Coconut Lavender Lemonade Mocktail is a refreshing drink that captures the essence of summer, combining creamy coconut, soothing lavender, and zesty lemon.
Print Recipe Pin Recipe
Prep Time 10 minutes mins
Total Time 10 minutes mins
Servings: 4 glasses
Course: Snacks & Appetizers
Cuisine: Beverage
Calories: 150
Ingredients Equipment Method Nutrition Notes

Ingredients
  

For the Base
  • 1 cup Coconut cream
  • 1/4 cup Lavender syrup
  • 1/2 cup Lemon juice freshly squeezed
For Sweetness
  • 1 tablespoon Honey or agave syrup use honey for richer flavor or agave for vegan option
For Dilution
  • 1 cup Cold water can substitute with sparkling water for a fizzy twist
Optional Garnish
  • 1 slice Lemon adds color and refreshing touch

Equipment

  • blender
  • Fine strainer
  • Serving pitcher
  • Glasses

Method
 

How to Make Coconut Lavender Lemonade Mocktail
  1. In a blender, add the coconut cream, lavender syrup, and freshly squeezed lemon juice. Blend until smooth and creamy, emulating that heavenly summer vibe.
  2. Add the honey or agave syrup to the blender. Blend again for about 15 seconds to fully incorporate the sweetness into the drink.
  3. Pour in the cold water gradually, blending until you achieve your desired consistency.
  4. Using a fine strainer, pour the blended mixture into a serving pitcher to remove any unwanted pulp or bits.
  5. Fill glasses with ice cubes and pour in your refreshing mocktail.
  6. Add a slice of lemon and a sprig of lavender for that picture-perfect finish.

Nutrition

Serving: 1glassCalories: 150kcalCarbohydrates: 36gProtein: 1gFat: 3gSaturated Fat: 2gMonounsaturated Fat: 1gSodium: 10mgPotassium: 150mgSugar: 30gVitamin C: 15mgCalcium: 2mgIron: 1mg

Notes

For a refreshing twist, substitute half the cold water with sparkling water. Blend thoroughly to achieve a smooth texture and avoid using juice from concentrate for best flavor.

Tried this recipe?

Let us know how it was!

Filed Under: SNACKS & APPETIZERS

Strawberry Limoncello Spritz Mojito Recipe

December 21, 2025 by JudyWhite Leave a Comment

Picture this: a warm sunset illuminating your backyard, laughter echoing off the walls, and the air filled with the sweet scent of strawberries mingling with zesty limoncello. As I poured my first Strawberry Limoncello Spritz Mojito, I realized I had stumbled upon the perfect cocktail to set the mood for any gathering. This delightful drink transforms the classic mojito into something refreshingly vibrant and whimsically delicious with just a few ingredients!

After a long week, nothing beats unwinding with a drink that’s not only easy to whip up but also brings a burst of flavor that dances on your palate. With only five minutes of prep time, you’ll have this sparkling drink ready to impress your friends or lift your spirits solo. So, whether you’re a seasoned chef or looking to elevate your home bartending skills, let’s dive into this irresistible Strawberry Limoncello Spritz Mojito Recipe that’s sure to become a new favorite!

Why You'll Love This Strawberry Limoncello Spritz Mojito

  • This Strawberry Limoncello Spritz Mojito is incredibly easy to make, requiring just five minutes of prep time.
  • The combination of sweet strawberry and zesty limoncello creates a flavor explosion that will tantalize your taste buds.
  • Its stunning presentation with vibrant garnishes makes it a visual masterpiece that will impress your guests at any gathering.
  • This cocktail is versatile enough to enjoy on a warm summer evening or as a refreshing treat any time of year.

Strawberry Limoncello Spritz Mojito Ingredients

To create this gorgeous cocktail, gather the freshest ingredients!

For the Cocktail
• Limoncello – adds a delightful citrusy sweetness that complements the strawberries beautifully.
• Strawberry Puree – fresh or frozen blended strawberries enhance the vibrant flavor and color of your drink.
• Prosecco – this sparkling wine introduces bubbly effervescence, making the mojito feel festive.
• Sparkling Water – a splash lightens up the drink while keeping it refreshing.

For the Garnish
• Lemon Slices – these bright slices not only look beautiful but also add a zesty aroma as you sip.
• Strawberries – fresh strawberries enhance the presentation and amplify the berry flavor.
• Edible Flowers – these add a touch of whimsy and elegance to your Strawberry Limoncello Spritz Mojito.

With these key ingredients in hand, you’re just moments away from rejuvenating your evening with this delightful cocktail!

How to Make Strawberry Limoncello Spritz Mojito

  1. Combine Ingredients: In a suitable glass, pour in the 2 oz of limoncello and the 1 oz of fresh strawberry puree. This mix forms the zesty and fruity base of your drink.

  2. Add Sparkle: Gently pour in 4 oz of prosecco for that bubbly touch, followed by a splash of sparkling water. The effervescence will lift the flavors and make it feel like a celebration in a glass.

  3. Stir with Care: Using a spoon, stir the ingredients gently to combine them, ensuring you don’t lose any of that delightful fizz. A few swirls will do!

  4. Garnish to Impress: Finish with beautiful garnishes by placing lemon slices, a few fresh strawberries, and edible flowers on top. These colorful accents not only enhance the look but also the aroma as you sip.

Optional: Consider adding a mint sprig for an extra burst of freshness!

Exact quantities are listed in the recipe card below.

What to Serve with Strawberry Limoncello Spritz Mojito?

What better way to elevate your cocktail experience than by pairing the refreshing Strawberry Limoncello Spritz Mojito with delightful accompaniments that tantalize your taste buds?

  • Light Bruschetta: The fresh tomatoes and basil on crusty bread balance the cocktail’s sweetness, creating a perfect bite for your gathering.
  • Zesty Shrimp Tacos: These tacos, with their citrusy marinade, echo the bright flavors of the drink, making them a match made in heaven.
  • Crispy Veggie Chips: Crunchy and flavorful, these chips add an exciting texture that complements the mojito’s effervescence wonderfully.

Imagine crunching into these snacks while sipping your cocktail and enjoying the light summer breeze.

  • Tart Lemon Sorbet: This icy treat captures the zesty essence of the drink but offers a delightful contrast with its tangy flavor.
  • Herbed Goat Cheese Spread: This creamy spread with fresh herbs and tangy goat cheese provides a luscious and savory pairing for your fruity drink.
  • Sparkling Water with Fresh Fruit: Enhance your mojito experience by serving a refreshing non-alcoholic beverage that keeps the flavor theme consistent, perfect for guests who prefer it!

Make Ahead Options

These Strawberry Limoncello Spritz Mojito Recipe components are perfect for meal prep, allowing you to enjoy a fresh cocktail with minimal fuss! You can prepare the limoncello and strawberry puree mixture up to 24 hours in advance; simply mix 2 oz of limoncello with 1 oz of strawberry puree and refrigerate it in an airtight container. This ensures the flavors meld beautifully without compromising quality. When you’re ready to serve, just pour the mixture over ice, add 4 oz of prosecco and a splash of sparkling water, stirring gently to maintain the fizz. Finish with your garnishes, and you’ll have a delightful drink ready to celebrate any occasion!

Storage Tips for Strawberry Limoncello Spritz Mojito

  • Room Temperature: This cocktail is best enjoyed fresh; do not leave it at room temperature for more than 2 hours to maintain its vibrant flavor.
  • Fridge: If you have leftovers, you can store the mixed drink in the fridge for up to 1 hour. Keep it covered with cling film to prevent losing carbonation.
  • Freezer: Freezing is not recommended, as it can alter the texture and fizz of the Strawberry Limoncello Spritz Mojito.
  • Reheating: Since this cocktail is served cold, simply enjoy it straight from the fridge. Avoid reheating to preserve its refreshing taste.

Strawberry Limoncello Spritz Mojito Variations

Feel free to play around with this delightful drink and make it your own!

  • Herbal Twist: Add fresh mint leaves for a refreshing minty flavor that complements the sweetness of strawberries beautifully. Muddle the mint with the limoncello for maximum infusion.

  • Fruit Fusion: Swap strawberry puree for other fruit purees like mango or peach for a tropical twist. Each fruit brings its own vibrant color and flavor profile!

  • Sparkling Filter: Use flavored sparkling water, like lemon or berry, to intensify the freshness. Just a splash can elevate your spritz and surprise your taste buds.

  • Sweetness Adjust: If you prefer a sweeter cocktail, stir in a teaspoon of simple syrup or agave nectar until dissolved. Balance is key, and a little sweetness can enhance the overall experience.

  • Bubbly Boost: Replace prosecco with champagne for a more luxurious feel. The added depth and elegance with champagne can turn your spritz into a true celebration of flavors.

  • Spice It Up: For a bit of heat, muddle in a slice of jalapeño or sprinkle in some chili powder. This unexpected kick provides a thrilling contrast to the sweet and zesty elements.

  • Non-Alcoholic Option: For a refreshing mocktail, replace limoncello and prosecco with lemonade and sparkling water. This variation retains the bright flavors and effervescence without the alcohol.

  • Floral Essence: Incorporate elderflower cordial or a dash of rose water for a floral touch that harmonizes beautifully with the lemon and strawberries. It’s like a spring garden in a glass!

Chef's Helpful Tips

  • For the perfect Strawberry Limoncello Spritz Mojito, always use fresh strawberries for the puree as frozen can change the texture.
  • Be careful not to over-stir the mixture after adding the prosecco to keep the bubbles lively.
  • When garnishing, slice the lemons thinly to maximize their aroma and appearance.
  • Serve the cocktail immediately after preparation to enjoy its refreshing effervescence at its best.

Strawberry Limoncello Spritz Mojito Recipe FAQs

What is the best way to select strawberries for this recipe?
Absolutely, the key to a wonderful Strawberry Limoncello Spritz Mojito is using ripe, fresh strawberries! Look for berries that are bright red, plump, and free of dark spots. If possible, smell the strawberries—ripe ones have a sweet aroma. I often recommend choosing organic strawberries if available, as they tend to have richer flavors compared to conventionally grown ones.

How long can I store my mixed Strawberry Limoncello Spritz Mojito?
If you have any leftovers, you can keep your cocktail in the fridge for up to 1 hour. Just make sure to cover it with cling film or a lid to prevent the loss of carbonation. However, it’s important to note that the drink is best enjoyed fresh for optimal taste and fizziness!

Can I freeze a Strawberry Limoncello Spritz Mojito?
Freezing this cocktail is not recommended. The carbonation from the prosecco and sparkling water will be lost, and the texture will change, resulting in a drink that doesn’t deliver the same refreshing experience. If you want to prepare ahead, consider blending the strawberries into a puree and freezing that, then mix your cocktail when you’re ready to enjoy.

What if my mixture is too sweet or too tart?
If you find your Strawberry Limoncello Spritz Mojito too sweet, you can balance it out by adding a splash more sparkling water or a squeeze of fresh lemon juice. Conversely, if it’s too tart, a bit of additional strawberry puree or a drizzle of honey can sweeten it up. Adjust the flavors to your liking, that’s part of the fun!

Are there any dietary considerations I should be aware of?
Very! It’s worth mentioning that limoncello contains alcohol, so please enjoy responsibly. For those avoiding alcohol, you can substitute limoncello with a non-alcoholic lemon-lime soda or lemonade. As for allergies, this recipe is naturally gluten-free, but always verify the specific brands of your ingredients for any other dietary concerns.

Strawberry Limoncello Spritz Mojito Recipe

Strawberry Limoncello Spritz Mojito Recipe

Discover the refreshing Strawberry Limoncello Spritz Mojito recipe, perfect for any gathering, combining zesty limoncello and sweet strawberries.
Print Recipe Pin Recipe
Prep Time 5 minutes mins
Total Time 5 minutes mins
Servings: 2 glasses
Course: Snacks & Appetizers
Cuisine: Cocktail
Calories: 150
Ingredients Equipment Method Nutrition Notes

Ingredients
  

For the Cocktail
  • 2 oz Limoncello adds a delightful citrusy sweetness
  • 1 oz Fresh Strawberry Puree fresh or frozen blended strawberries
  • 4 oz Prosecco introduces bubbly effervescence
  • splash Sparkling Water lightens up the drink
For the Garnish
  • Lemon Slices adds a zesty aroma
  • Strawberries enhances presentation
  • Edible Flowers adds a touch of whimsy

Equipment

  • Glass

Method
 

Step by Step
  1. In a suitable glass, pour in the 2 oz of limoncello and the 1 oz of fresh strawberry puree.
  2. Gently pour in 4 oz of prosecco, followed by a splash of sparkling water.
  3. Using a spoon, stir the ingredients gently to combine.
  4. Finish with lemon slices, fresh strawberries, and edible flowers.

Nutrition

Serving: 1glassCalories: 150kcalCarbohydrates: 10gSodium: 10mgPotassium: 200mgFiber: 1gSugar: 8gVitamin C: 15mgCalcium: 1mgIron: 1mg

Notes

For the perfect cocktail, use fresh strawberries for the puree. Avoid over-stirring after adding prosecco to retain bubbles.

Tried this recipe?

Let us know how it was!

Filed Under: SNACKS & APPETIZERS

Marry Me Butter Beans

December 21, 2025 by JudyWhite Leave a Comment

There’s something truly delightful about inviting a bit of romance into your weeknight meals, and this Marry Me Butter Beans recipe does just that. Picture this: the moment you sauté shallots and garlic in rich olive oil, your kitchen fills with an irresistible aroma, teasing your taste buds long before the first bite. This dish not only bursts with flavor but also offers a unique blend of creamy butter beans, vibrant greens, and the tanginess of fresh lemon.

As someone who often craves hearty, homemade meals instead of the usual fast-food fare, I’ve found this recipe to be a game-changer. It’s quick to prepare, assuming just 35 minutes of your time, yet it feels luxurious enough to serve at any gathering or cozy dinner for two. With layers of flavor from sundried tomatoes and a kick from Calabrian chili paste, you’ll be surprised at how effortlessly impressive this dish becomes. Get ready to marry your taste buds with a delightful bowl of buttery goodness that’s sure to steal hearts!

Why You'll Love This Marry Me Butter Beans

  • This Marry Me Butter Beans recipe is incredibly easy to whip up, making it perfect for busy weeknights or last-minute gatherings.
  • You’ll adore the rich and comforting flavors that come together in just 35 minutes, keeping you satisfied without spending hours in the kitchen.
  • Its versatility allows you to enjoy it as a main dish or a side, and you can easily customize it with your favorite greens or spices.
  • The vibrant colors and enticing aromas will captivate your guests, making this dish a true crowd-pleaser that never fails to impress.

Marry Me Butter Beans Ingredients

Unlock the secrets to this romantic dish!

For the Base
• Olive oil or vegan butter – A rich foundation that enhances all flavors.
• Calabrian chili paste (optional) – Adds a delightful kick; adjust to your heat preference.
• Shallots or small onion – Finely diced for a sweet and aromatic base.
• Garlic – Minced to bring an irresistible fragrance to your dish.

For the Flavor
• Paprika – Offers a smoky undertone that deepens the flavor profile.
• Sundried tomatoes – Their concentrated sweetness elevates the dish considerably.
• Tomato paste – Adds depth and richness, making the butter beans shine.
• Vegetable broth – Provides moisture and balances the dish while keeping it plant-based.
• Italian seasoning – A fragrant blend that ties all the flavors together.

For the Goodness
• Butter beans – Creamy texture and protein-rich; definitely the star of Marry Me Butter Beans!
• Kale or spinach – A handful boosts the nutrition and color of your dish.
• Cashew cream – Creamy richness that makes each bite heavenly.
• Vegan parmesan – Adds a cheesy texture and flavor without the dairy.
• Fresh basil – Chopped for brightening up the dish and adding freshness.
• Lemon juice – A squeeze brings out the flavors, balancing the creaminess perfectly.

How to Make Marry Me Butter Beans

  1. Heat olive oil or vegan butter in a pan over medium heat. This sets the stage for the delicious flavors to come, creating a warm and inviting base for your dish.

  2. Sauté the diced shallots or small onion until translucent. Allow about 3-4 minutes for them to soften and release their natural sweetness, making your kitchen smell heavenly!

  3. Stir in the minced garlic and cook for about 1 minute until fragrant. This is your aromatic boost, transforming your dish with a delightful garlicky aroma.

  4. Add paprika, chopped sundried tomatoes, and tomato paste; cook for another 2 minutes. This step intensifies the flavors, giving your dish a beautiful depth and color.

  5. Pour in the vegetable broth and stir well. This adds moisture and creates a lovely base for your creamy beans to absorb all the deliciousness.

  6. Mix in the Italian seasoning and butter beans; combine gently. You’re aiming for a cozy, integrated texture that harmonizes all the wonderful flavors.

  7. Fold in the sliced kale or spinach and cook until wilted, about 2-3 minutes. Watch for that vibrant green color; it means your dish is packed with nutrition!

  8. Stir in the cashew cream and cook until heated through, about 3 minutes. This step brings creaminess and indulgence into every single bite.

  9. Remove from heat and mix in shredded vegan parmesan, chopped basil, and lemon juice. This final touch elevates the dish, bringing freshness and an irresistible zing.

Optional: Serve with crusty bread for a delightful meal experience!
Exact quantities are listed in the recipe card below.

Make Ahead Options

These Marry Me Butter Beans are a splendid choice for meal prep enthusiasts! You can sauté the shallots, garlic, and spices up to 24 hours in advance and store them in an airtight container in the fridge. Additionally, mix the cooked butter beans, kale (or spinach), and cashew cream, refrigerating them separately for freshness. When you’re ready to enjoy your dish, simply heat the sautéed mixture in a pan, stir in the prepped components, and cook until warm, about 5-7 minutes. This ensures the flavors meld beautifully while keeping your meal just as delicious as when freshly made. Enjoy the ease of having a hearty, homemade meal ready in minutes!

How to Store and Freeze Marry Me Butter Beans

Fridge: Store leftover Marry Me Butter Beans in an airtight container for up to 3 days. Reheat gently on the stovetop or in the microwave, adding a splash of vegetable broth if needed.

Freezer: This dish freezes wonderfully! Transfer cooled Marry Me Butter Beans to a freezer-safe container and freeze for up to 3 months. Thaw overnight in the fridge before reheating.

Reheating: When ready to enjoy, reheat in a saucepan over low heat, stirring occasionally, until warmed through. You may want to add a little extra cashew cream or broth for creaminess.

Serving Suggestions: Pair reheated beans with fresh basil or a squeeze of lemon juice for an extra zing just before serving.

Marry Me Butter Beans Variations

Feel free to customize your Marry Me Butter Beans to match your taste and dietary needs!

  • Spicy Kick: Increase the Calabrian chili paste for a fiery version that warms the soul.

  • Creamy Dream: Substitute cashew cream with coconut cream for a tropical twist that enhances creaminess.

  • Herbal Delight: Swap basil for fresh cilantro or parsley, adding a new dimension of freshness to the dish.

  • Protein Boost: Add cooked lentils or chickpeas for extra protein and heartiness, making the meal even more satisfying.

  • Nut-Free Option: Omit cashew cream and replace it with silken tofu blended until smooth for a nut-free alternative.

  • Smoky Flavor: Incorporate a dash of liquid smoke or smoked paprika to bring a delightful smokiness to this dish.

  • Zesty Twist: Add some lime juice instead of lemon for a vibrant fresh taste that’s perfect for summer dining.

  • Whole Grain Goodness: Serve over a bed of quinoa or farro instead of just on its own, adding texture and nutritional value.

Each variation invites you to play with flavors and make this dish uniquely yours!

What to Serve with Marry Me Butter Beans?

Imagine a dinner that delights all your senses and leaves you savoring every bite, perfectly complementing this creamy dish.

  • Crusty Bread: A warm, crunchy loaf is perfect for soaking up every luscious drop of butter bean goodness. It creates a satisfying, hearty meal that warms the soul.

  • Simple Green Salad: A refreshing mix of greens, cucumbers, and a tangy vinaigrette adds a bright contrast to the creamy beans. This pairing not only balances the meal but also introduces a crisp texture that harmonizes beautifully.

  • Roasted Vegetables: Caramelized veggies like zucchini, bell peppers, or carrots bring out natural sweetness and add vibrant color to your plate. Their earthy flavors and slight sweetness perfectly offset the richness of the beans.

  • Quinoa Pilaf: Nutty quinoa tossed with herbs and citrus makes for a nutritious and textured side dish. Its lightness contrasts nicely with the creaminess of the butter beans, creating a delightful medley of flavors.

  • Stuffed Bell Peppers: These make an impressive side, filled with rice, beans, and spices. The smoky taste and tender texture will elevate your meal and offer a unique twist alongside Marry Me Butter Beans.

  • Sparkling Lemonade: Refreshing and bubbly, this drink complements the dish’s flavors while offering a kick of citrus that enhances the creaminess of the beans. It’s a delightful sip to accompany your delicious meal.

  • Chocolate Avocado Mousse: For dessert, this creamy, decadent treat is a surprise finish. The rich, fudgy texture will leave you and your loved ones craving more, making your romantic meal truly unforgettable.

Chef's Helpful Tips

  • When making Marry Me Butter Beans, ensure to finely dice your shallots to achieve a sweet and aromatic base that cooks evenly.
  • Avoid overcooking the garlic as it can turn bitter; just cook until fragrant to keep its wonderful flavor intact.
  • When folding in the kale or spinach, keep an eye on the heat to prevent overcooking, as you want the greens to remain vibrant and nutritious.
  • Finally, letting the cashew cream heat gently ensures it blends seamlessly into the dish without curdling or separating.

Marry Me Butter Beans Recipe FAQs

What type of butter beans should I use?
I recommend using canned butter beans for convenience, but if you’re feeling adventurous, dried butter beans work too! Just soak them overnight and cook until tender before adding them to your recipe.

How do I know when the shallots are ready?
Sauté your diced shallots or onion until they’re translucent, which typically takes about 3-4 minutes over medium heat. They should look soft but not browned, as this will continue the sweet and aromatic base of your Marry Me Butter Beans.

How long can I store Marry Me Butter Beans in the refrigerator?
You can store the leftovers in an airtight container in the fridge for up to 3 days. When reheating, if you find they’ve thickened up, just add a splash of vegetable broth to bring back that creamy consistency!

Can I freeze Marry Me Butter Beans? How should I do it?
Absolutely! To freeze, let your Marry Me Butter Beans cool completely first. Then, transfer them to a freezer-safe container, ensuring an airtight seal. They’ll keep well for up to 3 months. When you’re ready to enjoy, simply thaw overnight in the fridge and reheat gently on the stove.

Are there any dietary considerations I should be aware of?
This dish is plant-based and suitable for vegans, but if you have nut allergies, you might want to substitute the cashew cream with coconut cream or a soy-based alternative. Always feel free to adjust the seasoning to fit your dietary preferences!

What happens if I overcook the garlic or greens?
If garlic is overcooked, it can develop a bitter taste, while overcooked greens will lose their vibrant color and nutritional value. Cook the garlic until it’s fragrant (about 1 minute) and add the kale or spinach, cooking them just until wilted (about 2-3 minutes) for the best flavor and texture.

Marry Me Butter Beans

Marry Me Butter Beans

This Marry Me Butter Beans recipe offers a creamy blend of butter beans, vibrant greens, and tangy lemon, perfect for a romantic weeknight meal.
Print Recipe Pin Recipe
Prep Time 10 minutes mins
Cook Time 25 minutes mins
Total Time 35 minutes mins
Servings: 4 servings
Course: DINNER RECIPES
Cuisine: Italian
Calories: 350
Ingredients Equipment Method Nutrition Notes

Ingredients
  

For the Base
  • 2 tablespoons Olive oil or vegan butter
  • 1 tablespoon Calabrian chili paste optional
  • 1 medium Shallots or small onion finely diced
  • 3 cloves Garlic minced
For the Flavor
  • 1 teaspoon Paprika
  • 1/2 cup Sundried tomatoes chopped
  • 2 tablespoons Tomato paste
  • 1 cup Vegetable broth
  • 1 teaspoon Italian seasoning
For the Goodness
  • 2 cups Butter beans
  • 1 cup Kale or spinach sliced
  • 1/2 cup Cashew cream
  • 1/4 cup Vegan parmesan shredded
  • 1/4 cup Fresh basil chopped
  • 1 tablespoon Lemon juice

Equipment

  • pan

Method
 

How to Make Marry Me Butter Beans
  1. Heat olive oil or vegan butter in a pan over medium heat.
  2. Sauté the diced shallots or small onion until translucent for about 3-4 minutes.
  3. Stir in the minced garlic and cook for about 1 minute until fragrant.
  4. Add paprika, chopped sundried tomatoes, and tomato paste; cook for another 2 minutes.
  5. Pour in the vegetable broth and stir well.
  6. Mix in the Italian seasoning and butter beans; combine gently.
  7. Fold in the sliced kale or spinach and cook until wilted, about 2-3 minutes.
  8. Stir in the cashew cream and cook until heated through, about 3 minutes.
  9. Remove from heat and mix in shredded vegan parmesan, chopped basil, and lemon juice.

Nutrition

Serving: 1bowlCalories: 350kcalCarbohydrates: 45gProtein: 12gFat: 15gSaturated Fat: 4gPolyunsaturated Fat: 1gMonounsaturated Fat: 9gSodium: 500mgPotassium: 800mgFiber: 10gSugar: 3gVitamin A: 500IUVitamin C: 30mgCalcium: 80mgIron: 3mg

Notes

Serve with crusty bread for a delightful meal experience.

Tried this recipe?

Let us know how it was!

Filed Under: DINNER RECIPES

Baked Feta Pasta

December 21, 2025 by JudyWhite Leave a Comment

The kitchen is my favorite place to unwind, and nothing brings me more joy than discovering an easy, crowd-pleasing dish like Baked Feta Pasta. Picture this: fresh grape tomatoes bursting with sweetness, mingling with fragrant garlic, all smothered in creamy, golden feta cheese. The best part? It all comes together with minimal fuss. As the aroma wafts through my home, everyone gathers in anticipation, eager to dig into this comforting meal.

I stumbled upon this recipe during one of those evenings when I wanted something delicious but didn’t want to spend hours in the kitchen. With a few kitchen staples and some vibrant greens, I crafted a pasta dish that boasts wonderful layers of flavor and texture. This Baked Feta Pasta is the perfect answer to the monotonous takeout cycle. Whether you’re hosting a cozy dinner party or just craving a feel-good meal at home, this dish is sure to impress and satisfy. Ready to let your oven do the work? Let’s dive into the recipe!

Why You'll Love This Baked Feta Pasta

  • This Baked Feta Pasta is incredibly easy to make, requiring just a few simple ingredients and minimal preparation time.
  • The rich and creamy feta mingles perfectly with the sweet roasted tomatoes, creating a delicious sauce that everyone will rave about.
  • Its versatility allows you to customize it with any vegetables or pasta shapes you have on hand, while still maintaining its comforting appeal.
  • Visually, the vibrant colors of the tomatoes and greens create a stunning dish that will delight your guests and family alike.

Baked Feta Pasta Ingredients

For the Base

  • 20 oz grape tomatoes – these juicy gems burst with sweetness when baked, elevating the dish.
  • 5 cloves garlic (peeled and halved) – roasting garlic adds a rich, aromatic depth that complements the feta beautifully.
  • 1/2 cup extra-virgin olive oil – a must for drizzling, it enriches the sauce while roasting the veggies.
  • Salt and freshly ground black pepper – season to taste to enhance all the flavors of the baked feta pasta.

For the Pasta

  • 7-8 oz feta cheese (drained) – this creamy cheese transforms into a luscious sauce when baked, bringing everything together.
  • 10 oz dry pasta (such as campanelle, rigatoni, rotini, penne, bow tie, or cavatappi) – choose your favorite shape for delightful bites.

For the Greens

  • 8 oz spinach (roughly chopped) – a wonderful way to sneak in some greens; it wilts beautifully into the pasta.
  • 1/4 cup fresh basil (thinly sliced) – adds a burst of freshness and an aromatic lift to your meal.
  • 2 Tbsp fresh parsley (minced) – enhances flavor and adds a lovely pop of green.

For the Heat

  • 1/4 tsp crushed red pepper flakes (or more to taste) – a pinch adds just the right amount of warmth to balance the dish.

For the Sauce

  • 1/2 cup reserved pasta water – use it to adjust the sauce consistency, making it creamy and delicious for your baked feta pasta.

How to Make Baked Feta Pasta

  1. Preheat the oven to 400°F (200°C).
    This step ensures your tomatoes and feta get beautifully roasted and meld together with rich flavors.

  2. Combine grape tomatoes and garlic in a baking dish, then drizzle with olive oil and season with salt and pepper.
    Toss everything together to make sure the tomatoes and garlic are coated evenly, creating a delicious base.

  3. Center the feta cheese in the dish with the tomatoes and garlic.
    This will allow the feta to soak up all the flavors while it cooks, becoming wonderfully creamy and decadent.

  4. Bake in the preheated oven for about 30 minutes, or until the tomatoes have burst and the feta is golden.
    You’ll know it’s done when the kitchen fills with an irresistible aroma!

  5. Cook the dry pasta according to package instructions until al dente.
    Remember to reserve 1/2 cup of the pasta water before draining; this is key for your sauce!

  6. Remove the baking dish from the oven, then add the cooked pasta, spinach, basil, parsley, and crushed red pepper flakes.
    Toss everything together, adding reserved pasta water as needed to create a creamy sauce that coats every bite.

  7. Serve warm, and enjoy the delightful combination of flavors!
    This dish is best enjoyed fresh, with everyone gathering around the table!

Optional: Sprinkle with additional crushed red pepper for extra heat!
Exact quantities are listed in the recipe card below.

Make Ahead Options

These Baked Feta Pasta ingredients are fantastic for meal prep! You can assemble the grape tomatoes, garlic, and feta in the baking dish and store it in the refrigerator for up to 24 hours before baking. This ensures all the flavors meld together beautifully. You can also cook the pasta ahead of time; just toss it with a touch of olive oil to prevent sticking, and refrigerate for up to 3 days. When ready to enjoy, simply bake the prepared dish according to the recipe, then combine with the cooked pasta, spinach, and herbs, adding reserved pasta water as needed. Following these tips, your Baked Feta Pasta will be just as delicious, saving you precious time on busy evenings!

How to Store and Freeze Baked Feta Pasta

Room Temperature: Allow Baked Feta Pasta to cool to room temperature before storing, but it’s best consumed fresh to enjoy its delightful flavors.

Fridge: Store leftovers in an airtight container in the fridge for up to 3 days. Reheat gently on the stove or microwave, adding a splash of pasta water to restore creaminess.

Freezer: You can freeze Baked Feta Pasta for up to 2 months. Portion it into airtight containers, letting it cool completely first. Thaw in the fridge overnight before reheating.

Reheating: To reheat, use the stove or microwave, adding reserved pasta water as needed to bring the sauce back to life for a creamy finish!

What to Serve with Baked Feta Pasta?

As the comforting aroma of baked feta fills the kitchen, it’s time to consider what delightful sides and accompaniments will elevate this glorious meal.

  • Garlicky Bruschetta: Topped with fresh tomatoes and basil, this vibrant appetizer lightens the palate and adds a fresh zing.

  • Herbed Garlic Bread: Crispy and buttery, it’s perfect for savoring every last bit of that creamy feta sauce.

  • Mixed Green Salad: A simple tossed salad with a tangy vinaigrette adds a refreshing crunch, balancing the richness of the pasta.

  • Oven-Roasted Vegetables: Seasoned with herbs and olive oil, these bring depth and contrast, perfectly complementing the dish’s flavors.

  • Crispy Roasted Chickpeas: Crunchy and packed with flavor, these make a delightful snack or side, adding a fun texture to your meal.

  • Chilled White Wine: A glass of Sauvignon Blanc or Pinot Grigio pairs perfectly, enhancing the meal’s freshness and cut through the creaminess.

  • Creamy Polenta: Comforting and versatile, it offers a creamy base that pairs exquisitely with the baked feta pasta.

  • Lemon Sorbet: To cleanse the palate, a refreshing dessert like this will leave everyone feeling delightful after a hearty meal.

Baked Feta Pasta Variations

Feel free to play around with these variations to make the dish your own and delight your taste buds!

  • Vegetarian Delight: Add more vegetables like zucchini or bell peppers for a colorful twist that packs a nutritious punch.
  • Herb-Infused: Swap in fresh oregano or thyme for a fragrant flavor profile that will transport you to the Mediterranean.
  • Creamy Ricotta: Substitute ricotta for feta for a rich and creamy texture that adds a subtle sweetness to every bite.
  • Pasta Choices: Experiment with gluten-free pasta or whole-grain options to cater to dietary needs while maintaining taste.
  • Zesty Lemon: Squeeze fresh lemon juice before serving for a bright, tangy finish that elevates the flavors beautifully.
  • Spicy Kick: Add chopped jalapeños or a dash of hot sauce for those who like their pasta with a bit of heat.
  • Nutty Crunch: Toss in some toasted pine nuts or walnuts for an unexpected crunch that adds depth to the dish.
  • Pesto Perk: Mix in a spoonful of basil pesto to the sauce for an herby, garlicky boost that will impress your guests.

Chef's Helpful Tips

  • Always use good quality extra-virgin olive oil in your Baked Feta Pasta for the best flavor enhanced by roasting.
  • To prevent the tomatoes from burning, make sure they are well-coated with oil and tossed in the dish before baking.
  • If you’re using different pasta shapes, keep in mind that cooking times may vary, so check the package instructions closely.
  • For a creamier sauce, gradually add your reserved pasta water a little at a time until you achieve the desired consistency.

Baked Feta Pasta Recipe FAQs

What kind of tomatoes should I use for Baked Feta Pasta?
Absolutely stick with grape tomatoes for this recipe! Their sweetness intensifies when roasted, creating a delicious burst of flavor. If you can’t find grape tomatoes, feel free to substitute with cherry tomatoes, as they offer similar sweetness and juiciness.

How should I store leftover Baked Feta Pasta?
Store any leftovers in an airtight container in the refrigerator for up to 3 days. It’s best when enjoyed fresh, but if you have extras, just reheat gently on the stove or in the microwave, adding a splash of reserved pasta water to revive the creamy texture.

Can I freeze Baked Feta Pasta?
Yes, you can freeze Baked Feta Pasta for up to 2 months. Portion it into airtight containers, making sure it’s completely cooled before freezing. When you’re ready to enjoy it again, thaw it in the fridge overnight and reheat on the stove, adding reserved pasta water as needed to bring back the creaminess.

What if my sauce is too thick after cooking?
If you find your sauce is thicker than desired, don’t worry! Just add a little of the reserved pasta water in small increments while gently stirring. This will help create a luscious, creamy sauce that coats the pasta beautifully. Always incorporate the water gradually to reach your preferred consistency without making it too watery.

Are there any dietary considerations for Baked Feta Pasta?
If you’re accommodating dietary restrictions, you might want to substitute feta cheese with a non-dairy alternative to cater to vegan diets. Always check labels for allergens if you’re cooking for someone with allergies, especially to dairy or gluten, as different pasta shapes may contain wheat.

How do I choose the right pasta for Baked Feta Pasta?
The more the merrier when it comes to pasta shapes! You can use campanelle, rigatoni, rotini, penne, bow tie, or cavatappi. Just make sure to follow the cooking instructions on the pasta package for perfect al dente results. If you opt for a whole wheat or gluten-free pasta, adjust the cooking time as necessary.

Baked Feta Pasta

Baked Feta Pasta

Baked Feta Pasta is a delicious, crowd-pleasing dish featuring roasted tomatoes and creamy feta, perfect for a cozy dinner.
Print Recipe Pin Recipe
Prep Time 10 minutes mins
Cook Time 30 minutes mins
Total Time 40 minutes mins
Servings: 4 servings
Course: DINNER RECIPES
Cuisine: Italian
Calories: 350
Ingredients Equipment Method Nutrition Notes

Ingredients
  

For the Base
  • 20 oz grape tomatoes these juicy gems burst with sweetness when baked
  • 5 cloves garlic peeled and halved
  • 1/2 cup extra-virgin olive oil for drizzling
  • Salt to taste
  • freshly ground black pepper to taste
For the Pasta
  • 7-8 oz feta cheese drained
  • 10 oz dry pasta such as campanelle, rigatoni, rotini, penne, bow tie, or cavatappi
For the Greens
  • 8 oz spinach roughly chopped
  • 1/4 cup fresh basil thinly sliced
  • 2 Tbsp fresh parsley minced
For the Heat
  • 1/4 tsp crushed red pepper flakes or more to taste
For the Sauce
  • 1/2 cup reserved pasta water

Equipment

  • Baking dish
  • Pot

Method
 

Directions
  1. Preheat the oven to 400°F (200°C).
  2. Combine grape tomatoes and garlic in a baking dish, then drizzle with olive oil and season with salt and pepper.
  3. Center the feta cheese in the dish with the tomatoes and garlic.
  4. Bake in the preheated oven for about 30 minutes, or until the tomatoes have burst and the feta is golden.
  5. Cook the dry pasta according to package instructions until al dente, reserving 1/2 cup of the pasta water before draining.
  6. Remove the baking dish from the oven, then add the cooked pasta, spinach, basil, parsley, and crushed red pepper flakes.
  7. Toss everything together, adding reserved pasta water as needed to create a creamy sauce that coats every bite.
  8. Serve warm, and enjoy the delightful combination of flavors!

Nutrition

Serving: 1servingCalories: 350kcalCarbohydrates: 50gProtein: 12gFat: 15gSaturated Fat: 5gPolyunsaturated Fat: 2gMonounsaturated Fat: 8gCholesterol: 30mgSodium: 500mgPotassium: 800mgFiber: 3gSugar: 5gVitamin A: 5000IUVitamin C: 20mgCalcium: 200mgIron: 2mg

Notes

Best enjoyed fresh, with everyone gathering around the table! Sprinkle with additional crushed red pepper for extra heat if desired.

Tried this recipe?

Let us know how it was!

Filed Under: DINNER RECIPES

Chicken Enchilada Soup

December 21, 2025 by JudyWhite Leave a Comment

The moment the first chill of autumn arrives, I crave something warm, comforting, and bursting with flavor. That’s when my Chicken Enchilada Soup becomes my go-to recipe, a dish that has truly elevated my weeknight meals. The sizzle of the onion and jalapeño mingling in a pot creates a symphony of scents that can lift anyone’s spirits, transforming my kitchen into a cozy oasis.

This soul-warming soup isn’t just good for the soul—it’s also a breeze to make! With just 10 minutes of prep and a total cooking time of 35 minutes, I can whip up a hearty meal that feeds the whole family. Each spoonful is a delightful marriage of zesty enchilada sauce, creamy cheeses, and tender pieces of chicken. Trust me, it’s a dish that has turned my friends into soup enthusiasts, captivating even the pickiest eaters among us. So let’s dive in and transform your dinner routine with this simple yet irresistible Chicken Enchilada Soup!

Why You'll Love This Chicken Enchilada Soup

  • This Chicken Enchilada Soup is incredibly easy to make, allowing you to enjoy a delicious meal without spending hours in the kitchen.
  • The bold flavors will excite your taste buds, combining rich enchilada sauce with creamy cheeses for a truly satisfying experience.
  • It’s versatile enough to suit various dietary preferences by adding or substituting ingredients as needed.
  • Plus, the vibrant colors and inviting aroma make it a visually stunning dish that is sure to impress your family and friends.

Chicken Enchilada Soup Ingredients

• Get ready for a flavor-packed experience!

For the Spices

  • Chili powder – adds depth and warmth to your soup.
  • Mustard powder – provides a subtle tang that enhances the flavor profile.
  • Garlic powder – boosts the savory notes in the chicken enchilada soup.
  • Onion powder – complements the fresh onion for an extra layer of taste.
  • Cumin – a key ingredient that imparts a comforting earthiness.
  • Cinnamon – a pinch brings a surprising hint of sweetness.
  • Cayenne pepper – adjust this for your desired spice level; a little goes a long way.

For the Base

  • Butter – adds richness and depth to the soup’s flavor.
  • Olive oil – helps in sautéing the vegetables for a delightful aroma.
  • Yellow onion, diced – a classic base for flavor in many dishes; it caramelizes beautifully.
  • Jalapeno pepper, diced – brings a kick of heat; remove seeds for less spice.
  • Garlic, minced – essential for a robust, aromatic foundation.

For the Soup

  • Red enchilada sauce – the star of the dish, lending vibrant flavor.
  • Diced tomatoes with green chilies – adds freshness and a zesty punch; do not drain.
  • Black beans – provides protein and texture; rinse to reduce sodium content.
  • Canned whole kernel corn – sweet pops of corn balance the spices; drain before adding.
  • Hot sauce (optional) – customize the heat to your taste preference.
  • Chicken broth – forms the comforting liquid base of your soup.
  • Boneless skinless chicken breast – ensures tender meat that shreds beautifully.

For the Creaminess

  • Cream cheese, cubed and softened – results in a rich and creamy texture.
  • Cheddar cheese, shredded – melty goodness that adds sharpness to the soup.
  • Monterey Jack cheese, shredded – provides a smooth and creamy finish.

How to Make Chicken Enchilada Soup

  1. Combine spices: Gather all the seasoning ingredients like chili powder and cumin, mixing them well in a small bowl. Set aside and let the cream cheese soften at room temperature for easier incorporation.

  2. Sauté vegetables: Heat the butter and olive oil in a large soup pot over medium heat. Add the diced onions and jalapeño pepper, cooking for about 4 minutes until soft. Stir in the minced garlic for an additional minute until fragrant.

  3. Add chicken and ingredients: Pat chicken dry and season both sides with salt and pepper. Place it into the soup pot along with the red enchilada sauce, diced tomatoes (with juices), drained black beans, drained corn, chicken broth, and any hot sauce if desired.

  4. Cook chicken: Bring the soup to a gentle boil and let it simmer for about 15-20 minutes, allowing the chicken to cook through. Once done, remove the chicken and shred it using two forks, then return the shredded chicken to the pot.

  5. Incorporate cheese: Reduce heat to low and stir in the softened cream cheese until it’s fully blended. Next, add in the shredded cheddar and Monterey Jack cheeses, mixing until melted and creamy.

  6. Season and serve: Taste the soup and adjust seasoning if needed. Serve your creamy Chicken Enchilada Soup warm, and enjoy all the flavors!

Optional: Garnish with fresh cilantro or a dollop of sour cream for extra flair.

Exact quantities are listed in the recipe card below.

Chicken Enchilada Soup Variations

Feel free to personalize your Chicken Enchilada Soup with these fun twists and swaps that enhance flavor and suit your preferences!

  • Vegetarian: Substitute chicken with diced tofu or additional beans for a protein-packed, meat-free option. The robust flavors of the enchilada sauce will still shine through!

  • Spicy Kick: Add in more diced jalapeños or a few diced chipotle peppers in adobo sauce. This will give your soup a smoky, fiery depth, perfect for those who love the heat.

  • Dairy-Free: Use cashew cream instead of cream cheese and skip the cheese or use a dairy-free alternative. You can still achieve a rich texture without the dairy!

  • Corn Chowder Style: Toss in some diced potatoes for extra heartiness. These will soak up the delicious soup flavors while adding a comforting, creamy feel.

  • Roasted Veggies: Amp up your nutrient intake by adding roasted bell peppers, zucchini, or corn throughout the cooking process. Not only do they contribute vibrant colors, but they also enhance the flavor.

  • Herb Infusion: Fresh cilantro or lime juice stirred in just before serving brightens the soup and adds a fresh, zesty finish. Plus, a sprinkle of green onion offers an additional crunch!

  • Coconut Cream Twist: For a unique flavor profile, replace cream cheese with coconut cream. It adds a subtle sweetness and creaminess that beautifully contrasts the spices.

  • Quinoa Boost: Stir in cooked quinoa just before serving, elevating the nutritional content. This twist provides a delightful texture and ensures the soup remains hearty and filling.

How to Store and Freeze Chicken Enchilada Soup

Fridge: Store your Chicken Enchilada Soup in an airtight container for up to 3 days. Make sure it cools completely before sealing to maintain freshness.

Freezer: Portion the soup into freezer-safe containers to keep it for up to 3 months. Be sure to leave some space at the top, as the soup will expand when frozen.

Reheating: When ready to enjoy, thaw the soup overnight in the fridge, and reheat gently on the stove over medium-low heat until warmed through. Add a splash of chicken broth if needed for consistency.

Airtight Container: Always use a good-quality airtight container to preserve the rich flavors and creamy texture of your Chicken Enchilada Soup.

Make Ahead Options

These Chicken Enchilada Soup preparations are perfect for busy weeknights and meal prep! You can chop the onions, jalapeños, and garlic, and combine the spices up to 24 hours in advance. Simply store them in airtight containers in the refrigerator. The shredded chicken can also be cooked and stored in the soup to keep it flavorful; just refrigerate the soup for up to 3 days. When you’re ready to enjoy, reheat the soup gently on the stove over low heat, then stir in the cream cheese and shredded cheeses just before serving to ensure they melt beautifully, giving you that deliciously creamy texture. With a little prep, you’ll have a comforting meal ready in no time!

What to Serve with Chicken Enchilada Soup?

Elevate your cozy dinner experience with these delightful side dishes that perfectly complement the rich and zesty soup.

  • Crispy Tortilla Chips: Ideal for dipping, these crunchy bites add texture and enhance the flavor of the soup. A sprinkle of salt elevates the taste even further!

  • Fresh Guacamole: Smooth and creamy, guacamole provides a refreshing contrast to the hearty flavors of the enchilada soup. Scoop some up with tortilla chips for a perfect pairing.

  • Mexican Street Corn Salad: The sweetness of corn, combined with tangy lime and creamy cheese, creates a vibrant side that brightens the entire meal. It’s a colorful addition that’s sure to impress!

  • Avocado Salad: A light salad with ripe avocados, cherry tomatoes, and a squeeze of lime offers a fresh and zesty balance to the richness of the soup. It adds a burst of freshness to each bite.

  • Pineapple Jasmine Rice: Delicately sweet, this fragrant rice dish brings a tropical note, wonderfully complementing the robust flavors of the soup while providing a comforting side.

  • Chilled Watermelon Slices: Refreshing watermelon slices are perfect for cooling down the heat of your enchilada soup. Their juiciness offers a playful contrast and is a delightful surprise to the taste buds.

  • Classic Margaritas: For a festive touch, pair the dish with zesty margaritas to elevate the entire dining experience. The tangy lime complements the richness of the soup, creating an unbeatable combination.

Chef's Helpful Tips

  • When preparing Chicken Enchilada Soup, make sure to properly season the chicken before adding it to the pot for enhanced flavor.
  • Avoid rushing the sautéing process; allowing the onions and jalapeño to soften thoroughly builds a flavorful base.
  • For a creamier texture, ensure the cream cheese is fully softened at room temperature before mixing it into the soup.
  • Remember to keep an eye on the soup once it starts to boil, as simmering too aggressively can overcook the chicken and alter its tenderness.

Chicken Enchilada Soup Recipe FAQs

How do I select ripe ingredients for my Chicken Enchilada Soup?
Absolutely! For optimal flavor, choose fresh ingredients. Look for firm, vibrant jalapeños without dark spots and onions that are solid and dry. When selecting canned goods, avoid dented cans, and ensure your red enchilada sauce has a vibrant color without any separation.

How should I store leftover Chicken Enchilada Soup?
Store your Chicken Enchilada Soup in an airtight container in the fridge for up to 3 days. Make sure it cools to room temperature before sealing to preserve the flavor and prevent spoilage. You can easily enjoy it again by reheating!

Can I freeze Chicken Enchilada Soup?
Yes! Portion the soup into freezer-safe containers, leaving about an inch of space at the top because the soup expands as it freezes. It will stay fresh for up to 3 months. To thaw, simply transfer the container to the refrigerator overnight and reheat gently on the stove when you’re ready to enjoy!

What should I do if my soup is too thick?
If your Chicken Enchilada Soup turns out too thick, no worries! Gradually stir in a little chicken broth or water until you reach your desired consistency. This will help restore the creaminess while ensuring all those delicious flavors shine through!

Are there any dietary concerns I should keep in mind?
If you’re cooking for someone with dietary restrictions, be careful about allergies! This recipe contains dairy and can be high in sodium. Opt for low-sodium chicken broth and use dairy-free cream cheese alternatives if needed. Additionally, if your guests have a gluten sensitivity, check that your enchilada sauce is gluten-free!

Can I add more vegetables to my Chicken Enchilada Soup?
Very much so! The more the merrier! Incorporating vegetables like bell peppers, zucchini, or even spinach can add vibrant colors and extra nutrients. Just sauté them alongside the onion and jalapeño for a delicious twist on the classic recipe.

Chicken Enchilada Soup

Chicken Enchilada Soup

A comforting Chicken Enchilada Soup that warms you up with zesty flavors and creamy textures.
Print Recipe Pin Recipe
Prep Time 10 minutes mins
Cook Time 35 minutes mins
Total Time 45 minutes mins
Servings: 6 cups
Course: DINNER RECIPES
Cuisine: Mexican
Calories: 350
Ingredients Equipment Method Nutrition Notes

Ingredients
  

Spices
  • 2 tbsp chili powder
  • 1 tbsp mustard powder
  • 1 tbsp garlic powder
  • 1 tbsp onion powder
  • 2 tsp cumin
  • 1 pinch cinnamon
  • 1 tsp cayenne pepper adjust to taste
Base
  • 2 tbsp butter
  • 2 tbsp olive oil
  • 1 cup yellow onion, diced
  • 1 medium jalapeño pepper, diced remove seeds to reduce spice
  • 3 cloves garlic, minced
Soup
  • 2 cups red enchilada sauce
  • 1 can diced tomatoes with green chilies do not drain
  • 1 can black beans rinsed and drained
  • 1 can canned whole kernel corn drained
  • 1 tbsp hot sauce optional
  • 4 cups chicken broth
  • 1 lb boneless skinless chicken breast
Creaminess
  • 8 oz cream cheese, cubed and softened
  • 1 cup cheddar cheese, shredded
  • 1 cup Monterey Jack cheese, shredded

Equipment

  • large soup pot

Method
 

Preparation
  1. Combine spices: Gather all the seasoning ingredients like chili powder and cumin, mixing them well in a small bowl. Set aside and let the cream cheese soften at room temperature for easier incorporation.
  2. Sauté vegetables: Heat the butter and olive oil in a large soup pot over medium heat. Add the diced onions and jalapeño pepper, cooking for about 4 minutes until soft. Stir in the minced garlic for an additional minute until fragrant.
  3. Add chicken and ingredients: Pat chicken dry and season both sides with salt and pepper. Place it into the soup pot along with the red enchilada sauce, diced tomatoes (with juices), drained black beans, drained corn, chicken broth, and any hot sauce if desired.
  4. Cook chicken: Bring the soup to a gentle boil and let it simmer for about 15-20 minutes, allowing the chicken to cook through. Once done, remove the chicken and shred it using two forks, then return the shredded chicken to the pot.
  5. Incorporate cheese: Reduce heat to low and stir in the softened cream cheese until it's fully blended. Next, add in the shredded cheddar and Monterey Jack cheeses, mixing until melted and creamy.
  6. Season and serve: Taste the soup and adjust seasoning if needed. Serve your creamy Chicken Enchilada Soup warm, and enjoy all the flavors!

Nutrition

Serving: 1cupCalories: 350kcalCarbohydrates: 35gProtein: 25gFat: 15gSaturated Fat: 8gPolyunsaturated Fat: 1gMonounsaturated Fat: 6gCholesterol: 70mgSodium: 800mgPotassium: 600mgFiber: 6gSugar: 5gVitamin A: 15IUVitamin C: 25mgCalcium: 20mgIron: 15mg

Notes

Optional: Garnish with fresh cilantro or a dollop of sour cream for extra flair.

Tried this recipe?

Let us know how it was!

Filed Under: DINNER RECIPES

Fall Pasta Salad with Greek Ingredients

December 21, 2025 by JudyWhite Leave a Comment

As the crispness of autumn begins to settle in, there’s nothing quite like a vibrant Fall Pasta Salad with Greek Ingredients to celebrate the season. Picture this: a medley of colorful red bell peppers, sweet grape tomatoes, and the distinct richness of feta cheese all tossed together—each bite a delightful dance of flavors that will awaken your taste buds. I usually whip this dish up when I want to impress my friends at gatherings, yet it’s so effortlessly easy that I often find myself making it for a cozy dinner at home, too.

One of my favorite moments involves strolling through the farmers’ market, where the gorgeous colors of fresh produce draw me in. That’s when I glean inspiration for this salad, transforming simple staples like pasta and olives into a showcase of flavor. The secret? A zesty dressing that ties everything together and gives you a taste of the Mediterranean in every forkful. Whether you’re fighting off the lethargy of fast food or simply craving something fresh, this pasta salad is your ticket to a fulfilling, homemade feast!

Why You'll Love This Fall Pasta Salad with Greek Ingredients

  • This Fall Pasta Salad with Greek Ingredients is incredibly easy to prepare, making it perfect for both weeknight dinners and festive gatherings.
  • The explosion of flavors from fresh vegetables and tangy feta will leave your taste buds impressed and asking for more.
  • Its vibrant colors not only make it visually appealing but also create a beautiful centerpiece for any table setting.
  • Plus, it can be made ahead of time, saving you precious minutes when you need to focus on hosting or enjoying your meal.
  • This dish is versatile enough to cater to various dietary preferences, pleasing both vegetarians and meat lovers alike.

Fall Pasta Salad with Greek Ingredients

For the Salad

  • 16 oz dry pasta – Use your favorite shape; rotini or penne work brilliantly to hold the dressing.
  • 2 medium red bell peppers – Chopped for a sweet crunch, adding vibrant color to the dish.
  • 1/2 cup red onion – Diced to bring a zesty bite; soak in cold water if you prefer a milder taste.
  • 1 small cucumber – Diced for a refreshing crunch that complements the other rich flavors.
  • 1 pint grape tomatoes – Sliced for a burst of sweetness; feel free to substitute with cherry tomatoes if desired.
  • 3.8 oz sliced olives – Adds a briny richness; Kalamata olives are a great choice for an authentic Greek flavor.
  • 1/4 cup fresh dill – Chopped for an aromatic herb note; can be replaced with parsley if dill isn’t your favorite.
  • 7 oz crumbled feta – This creamy cheese adds a delightful tang; look for high-quality cheese for the best flavor.

For the Dressing

  • 1/2 cup red wine vinegar – Offers a tangy base to elevate the salad’s flavors; balsamic vinegar can be used if preferred.
  • 1/2 cup olive oil – Provides richness and helps to bind the dressing; extra virgin olive oil is recommended.
  • 2 cloves garlic – Minced to add a pungent kick; adjust the amount to suit your taste.
  • 1 tbsp dried oregano – This herb adds a classic Mediterranean flavor; fresh oregano can be substituted if you have it.
  • 1 tsp onion powder – A subtle flavor enhancer that complements the fresh ingredients.
  • 1/2 tsp salt – To enhance all the flavors in this delicious Fall Pasta Salad with Greek Ingredients.
  • 1/4 tsp pepper – A dash of black pepper to finish with just the right amount of spice.

How to Make Fall Pasta Salad with Greek Ingredients

  1. Cook the Pasta: Begin by boiling water in a large pot, then cook the dry pasta according to package instructions. Once tender, drain and set aside to cool completely.

  2. Mix the Veggies: In a large mixing bowl, combine the chopped red bell peppers, diced red onion, diced cucumber, sliced grape tomatoes, sliced olives, chopped fresh dill, and crumbled feta. This colorful medley is what makes this salad a feast for the eyes!

  3. Whisk the Dressing: In another bowl, whisk together the red wine vinegar, olive oil, minced garlic, dried oregano, onion powder, salt, and pepper. This zesty dressing is crucial for bringing all the flavors together.

  4. Combine the Mixtures: Pour the dressing over the salad mixture and carefully toss until everything is well coated. Ensure the dressing clings to every flavorful piece!

  5. Add the Pasta: Gently fold in the cooled pasta until it’s evenly mixed with the salad. The pasta will absorb some of the dressing, enhancing the taste.

  6. Serve or Chill: Serve immediately for a fresh experience, or refrigerate the salad for at least an hour to let the flavors meld beautifully before serving.

Optional: Garnish with extra feta and fresh dill for a beautiful presentation.
Exact quantities are listed in the recipe card below.

Make Ahead Options

These Fall Pasta Salad with Greek Ingredients are a wonderful choice for meal prep! You can prepare the salad veggies (like red bell peppers, red onion, cucumber, grape tomatoes, olives, dill, and feta) up to 3 days in advance—just store them in an airtight container in the refrigerator to keep them fresh and crisp. The dressing can also be made the day before and stored separately to prevent the salad from getting soggy. When you’re ready to serve, simply cook the pasta, then combine everything in a large bowl, add the dressing, and toss well. You’ll have a vibrant, delicious meal ready with minimal effort!

What to Serve with Fall Pasta Salad with Greek Ingredients?

Imagine your table adorned with vibrant colors and the aroma of fresh ingredients fills the air. Pair this delightful salad with complementary dishes that elevate your meal.

  • Grilled Chicken Skewers: Juicy chicken marinated in herbs provides a delicious protein contrast, perfectly balancing the salad’s freshness. These skewers are ideal for a family cookout or a cozy dinner gathering.

  • Tzatziki Sauce: This cool and creamy yogurt dip infused with cucumbers and garlic offers a refreshing touch, mirroring the salad’s Mediterranean notes. Serve it alongside warm pita bread for a well-rounded starter.

  • Garlic Bread: Golden and crispy, garlic bread brings a comforting, buttery richness that contrasts beautifully with the salad’s acidity. Perfect for soaking up any leftover dressing!

  • Roasted Vegetables: A medley of seasonal veggies tossed in olive oil and roasted until caramelized brings earthiness to your meal. Their sweet and savory flavors will charm everyone at the table.

  • Lemon-Dill Quinoa: Fluffy quinoa tossed with lemon juice and fresh dill echoes the salad’s herbaceous notes while adding a satisfying nuttiness. It’s a great gluten-free alternative!

  • Red Wine: A glass of medium-bodied red wine, like a Syrah or Merlot, pairs beautifully, enhancing the flavors of the dish and creating a cozy vibe for your dinner.

These delightful options not only enhance the flavors of your Fall Pasta Salad with Greek Ingredients but also create a well-rounded and satisfying meal for you and your loved ones to enjoy.

How to Store and Freeze Fall Pasta Salad with Greek Ingredients

  • Room Temperature: It’s best to avoid leaving the Fall Pasta Salad with Greek Ingredients out for more than 2 hours to ensure food safety.

  • Fridge: Store leftover pasta salad in an airtight container in the refrigerator for up to 3 days. The flavors will continue to meld, making it even more delicious the next day!

  • Freezer: Freezing is not recommended for this salad, as the textures of the fresh vegetables and feta won’t hold up well once thawed. Enjoy it fresh!

  • Reheating: If you have any leftovers that feel a bit dry, simply sprinkle a little bit of olive oil or a splash of red wine vinegar to refresh the flavors before serving again.

Fall Pasta Salad Variations

Feel free to bring your personal touch to this delightful salad, creating a dish that truly sings to your taste buds.

  • Gluten-Free: Substitute the dry pasta with your choice of gluten-free pasta for a tasty alternative that everyone can enjoy.
  • Protein Boost: Toss in grilled chicken, shrimp, or chickpeas for an added protein punch—perfect for a filling meal.
  • Creamy Twist: Add a dollop of Greek yogurt or mayo to the dressing for a creamy texture that clings beautifully to the ingredients.
  • Herb Substitution: Swap fresh dill for fresh basil or parsley to give the salad an entirely new flavor profile, freshening things up.
  • Extra Crunch: Include toasted pine nuts or sunflower seeds for a delightful crunch that complements the creamy feta and tender pasta beautifully.
  • Spicy Kick: Add sliced jalapeños or a pinch of crushed red pepper flakes to the dressing for a spicy surprise that will awaken your senses.
  • Seasonal Add-Ins: Late autumn? Toss in roasted butternut squash or sweet potatoes for a heartier salad that’s perfect for fall feasting.
  • Fruit Fusion: Incorporate diced apples or pomegranate seeds for a sweet contrast that brightens the salad and adds seasonal flair.

Chef's Helpful Tips

  • When preparing the Fall Pasta Salad with Greek Ingredients, ensure your pasta is cooked al dente to maintain a perfect texture even after being mixed with the dressing.
  • A common mistake is overcooking the pasta, which can lead to a mushy salad, so keep an eye on the cooking time.
  • For the freshest flavor, chop your vegetables just before combining them to retain their crunch and vibrant colors.
  • Remember to chill the salad for at least an hour before serving; this allows the flavors to meld beautifully, creating a more delicious dish.

Fall Pasta Salad with Greek Ingredients Recipe FAQs

How do I choose ripe vegetables for the salad?
Absolutely! When selecting vegetables, look for vibrant colors and firm textures. For bell peppers, pick ones that are smooth with no dark spots; they should feel heavy for their size. The cucumbers should be bright green and without blemishes, while grape tomatoes should be plump and shiny.

What is the best way to store leftover pasta salad?
Very! To keep your Fall Pasta Salad with Greek Ingredients fresh, transfer any leftovers to an airtight container and store it in the refrigerator. It will stay good for up to 3 days. As it sits, the flavors become more robust, making it a tasty option for a quick meal or snack the next day.

Can I freeze pasta salad?
Not really. Freezing this salad is not recommended because the textures of fresh vegetables and crumbled feta can become unappetizing once thawed. If you’re planning to meal prep, consider making the dressing and pasta in advance, but combine them with fresh veggies just before serving.

What if my pasta turns mushy?
Sure thing! To prevent mushy pasta, always cook it al dente, which means it should be slightly firm when bitten. Drain it and let it cool completely before adding it to the salad. If you’ve accidentally overcooked it, try tossing in a little extra olive oil to help coat it, and consider using it in a different dish where the texture won’t be as noticeable.

Are there any dietary considerations for this recipe?
Yes! This Fall Pasta Salad with Greek Ingredients is vegetarian-friendly, making it a great option for meatless meals. However, if you’re hosting guests with allergies, take a closer look at the ingredients. For those sensitive to dairy, you can replace the feta with a vegan alternative to accommodate. Always check the labels of packaged ingredients like olives and pasta to ensure they meet dietary needs.

How can I enhance the flavors of this pasta salad?
Definitely! To elevate the flavors, consider adding a splash of fresh lemon juice for brightness or some crushed red pepper for a bit of heat. Fresh herbs, such as parsley or basil, can be added for extra aroma and flavor depth. A sprinkle of toasted pine nuts or walnuts can also provide a satisfying crunch and a lovely nutty flavor.

Fall Pasta Salad with Greek Ingredients

Fall Pasta Salad with Greek Ingredients

Celebrate autumn with a vibrant Fall Pasta Salad featuring Greek ingredients, bursting with fresh flavors.
Print Recipe Pin Recipe
Prep Time 20 minutes mins
Cook Time 10 minutes mins
Chilling Time 1 hour hr
Total Time 1 hour hr 30 minutes mins
Servings: 4 servings
Course: LUNCH RECIPES
Cuisine: Greek
Calories: 350
Ingredients Equipment Method Nutrition Notes

Ingredients
  

For the Salad
  • 16 oz dry pasta Use your favorite shape; rotini or penne work brilliantly.
  • 2 medium red bell peppers Chopped for sweet crunch.
  • 1/2 cup red onion Diced; soak in cold water for a milder taste.
  • 1 small cucumber Diced for refreshing crunch.
  • 1 pint grape tomatoes Sliced for a burst of sweetness.
  • 3.8 oz sliced olives Kalamata olives recommended.
  • 1/4 cup fresh dill Chopped; can substitute with parsley.
  • 7 oz crumbled feta Look for high-quality cheese.
For the Dressing
  • 1/2 cup red wine vinegar Or balsamic vinegar.
  • 1/2 cup olive oil Extra virgin is recommended.
  • 2 cloves garlic Minced for a pungent kick.
  • 1 tbsp dried oregano Classic Mediterranean flavor.
  • 1 tsp onion powder Subtle flavor enhancer.
  • 1/2 tsp salt To enhance flavors.
  • 1/4 tsp pepper For a dash of spice.

Equipment

  • Large pot
  • Mixing bowl
  • Whisk

Method
 

Steps
  1. Cook the Pasta: Begin by boiling water in a large pot, then cook the dry pasta according to package instructions. Once tender, drain and set aside to cool completely.
  2. Mix the Veggies: In a large mixing bowl, combine the chopped red bell peppers, diced red onion, diced cucumber, sliced grape tomatoes, sliced olives, chopped fresh dill, and crumbled feta.
  3. Whisk the Dressing: In another bowl, whisk together the red wine vinegar, olive oil, minced garlic, dried oregano, onion powder, salt, and pepper.
  4. Combine the Mixtures: Pour the dressing over the salad mixture and carefully toss until well coated.
  5. Add the Pasta: Gently fold in the cooled pasta until evenly mixed with the salad.
  6. Serve or Chill: Serve immediately or refrigerate for at least an hour to let the flavors meld.

Nutrition

Serving: 1servingCalories: 350kcalCarbohydrates: 45gProtein: 10gFat: 15gSaturated Fat: 3gPolyunsaturated Fat: 2gMonounsaturated Fat: 8gCholesterol: 15mgSodium: 400mgPotassium: 300mgFiber: 4gSugar: 6gVitamin A: 10IUVitamin C: 20mgCalcium: 15mgIron: 10mg

Notes

Optional: Garnish with extra feta and fresh dill for presentation.

Tried this recipe?

Let us know how it was!

Filed Under: LUNCH RECIPES

  • « Previous Page
  • 1
  • …
  • 21
  • 22
  • 23
  • 24
  • 25
  • …
  • 37
  • Next Page »

Recent Posts

  • One Pot Cheesy Pasta
  • Steak with Mushroom Sauce
  • St. Patrick’s Day Puppy Chow
  • Salmon with Lemon Butter
  • St. Patrick’s Day Puppy Chow

Recent Comments

No comments to show.

Footer

  • Contact
  • Privacy Policy
  • About Us
  • Terms
  • ↑ back to top

Copyright © 2024 www.Forkono.com

Table Of Content