Forkono

  • BREAKFAST & BRUNCH
  • DESSERT RECIPES
  • DINNER RECIPES
  • LUNCH RECIPES
  • About uS
  • SNACKS & APPETIZERS
menu icon
go to homepage
  • BREAKFAST & BRUNCH
  • DESSERT RECIPES
  • DINNER RECIPES
  • LUNCH RECIPES
  • About uS
  • SNACKS & APPETIZERS
search icon
Homepage link
  • BREAKFAST & BRUNCH
  • DESSERT RECIPES
  • DINNER RECIPES
  • LUNCH RECIPES
  • About uS
  • SNACKS & APPETIZERS
×

Homemade Brownies Recipe

December 19, 2025 by JudyWhite Leave a Comment

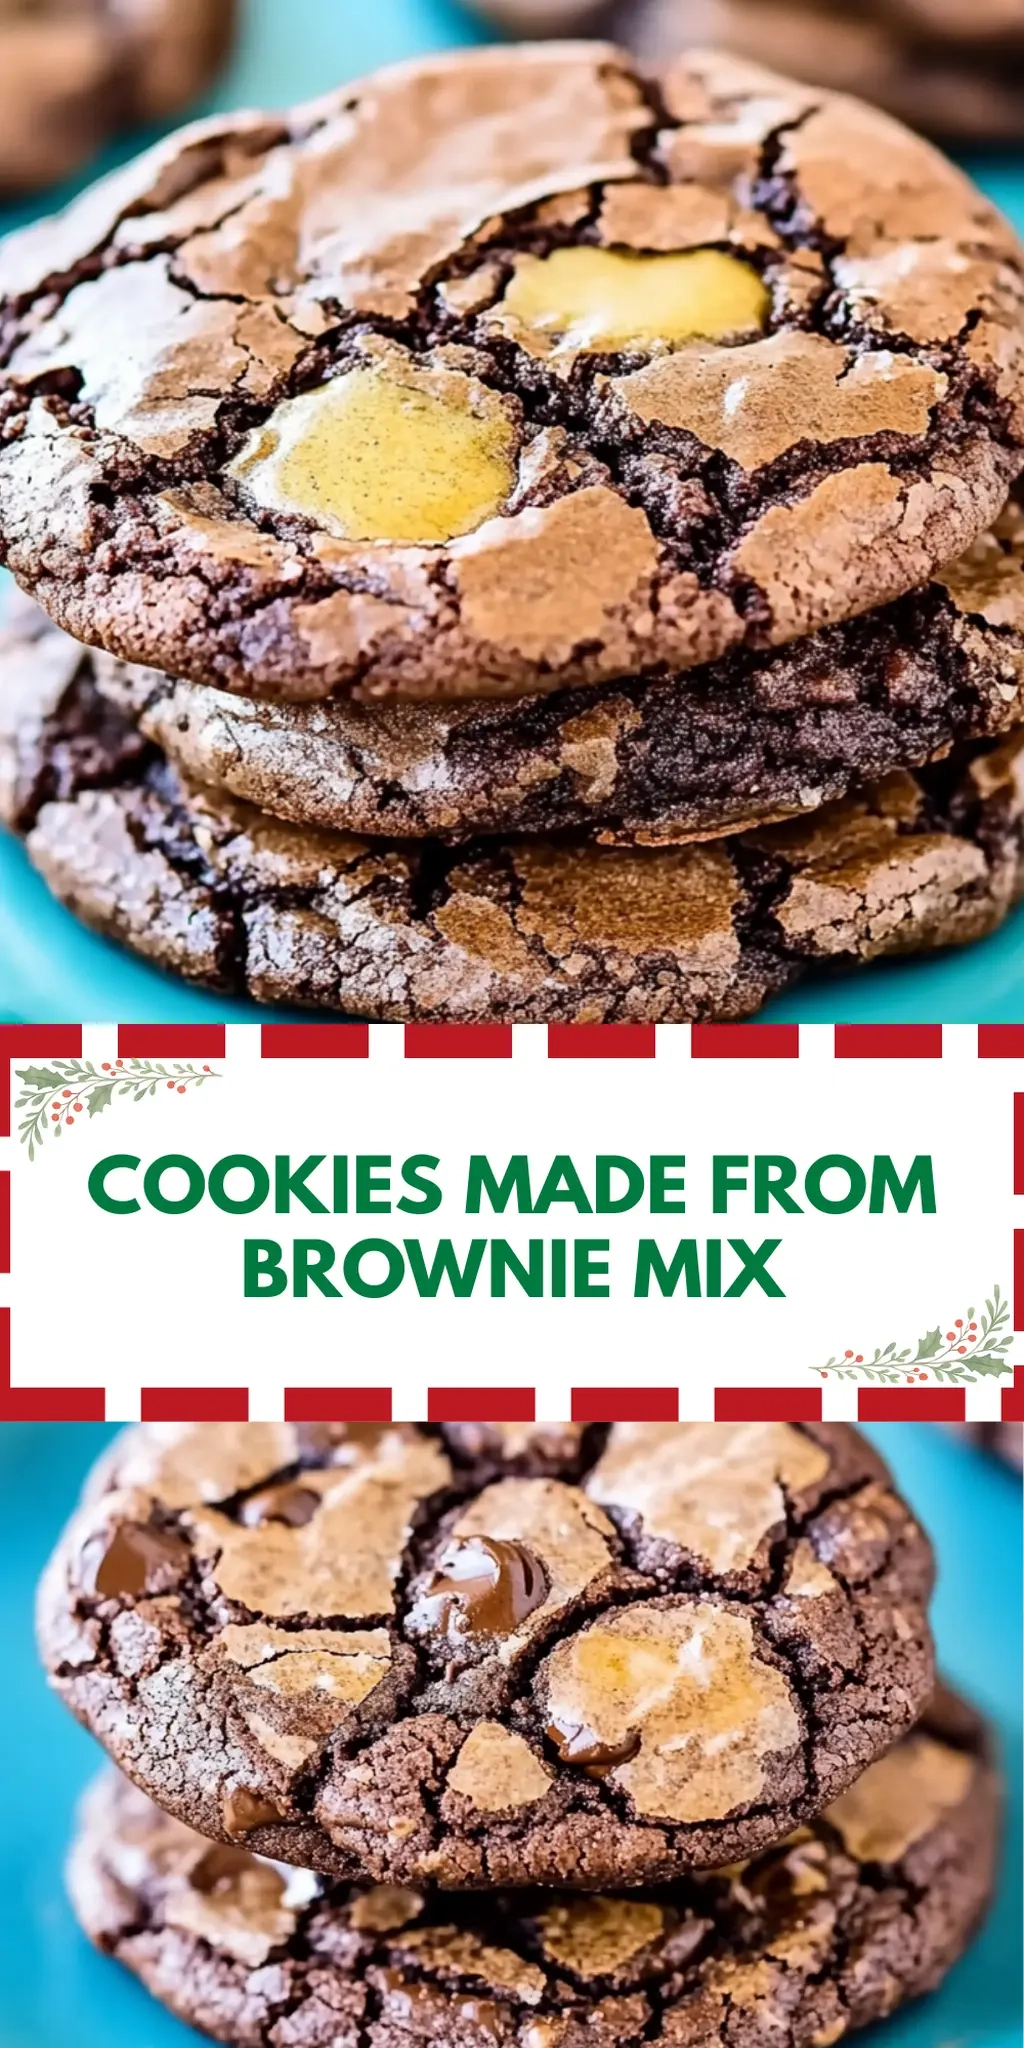
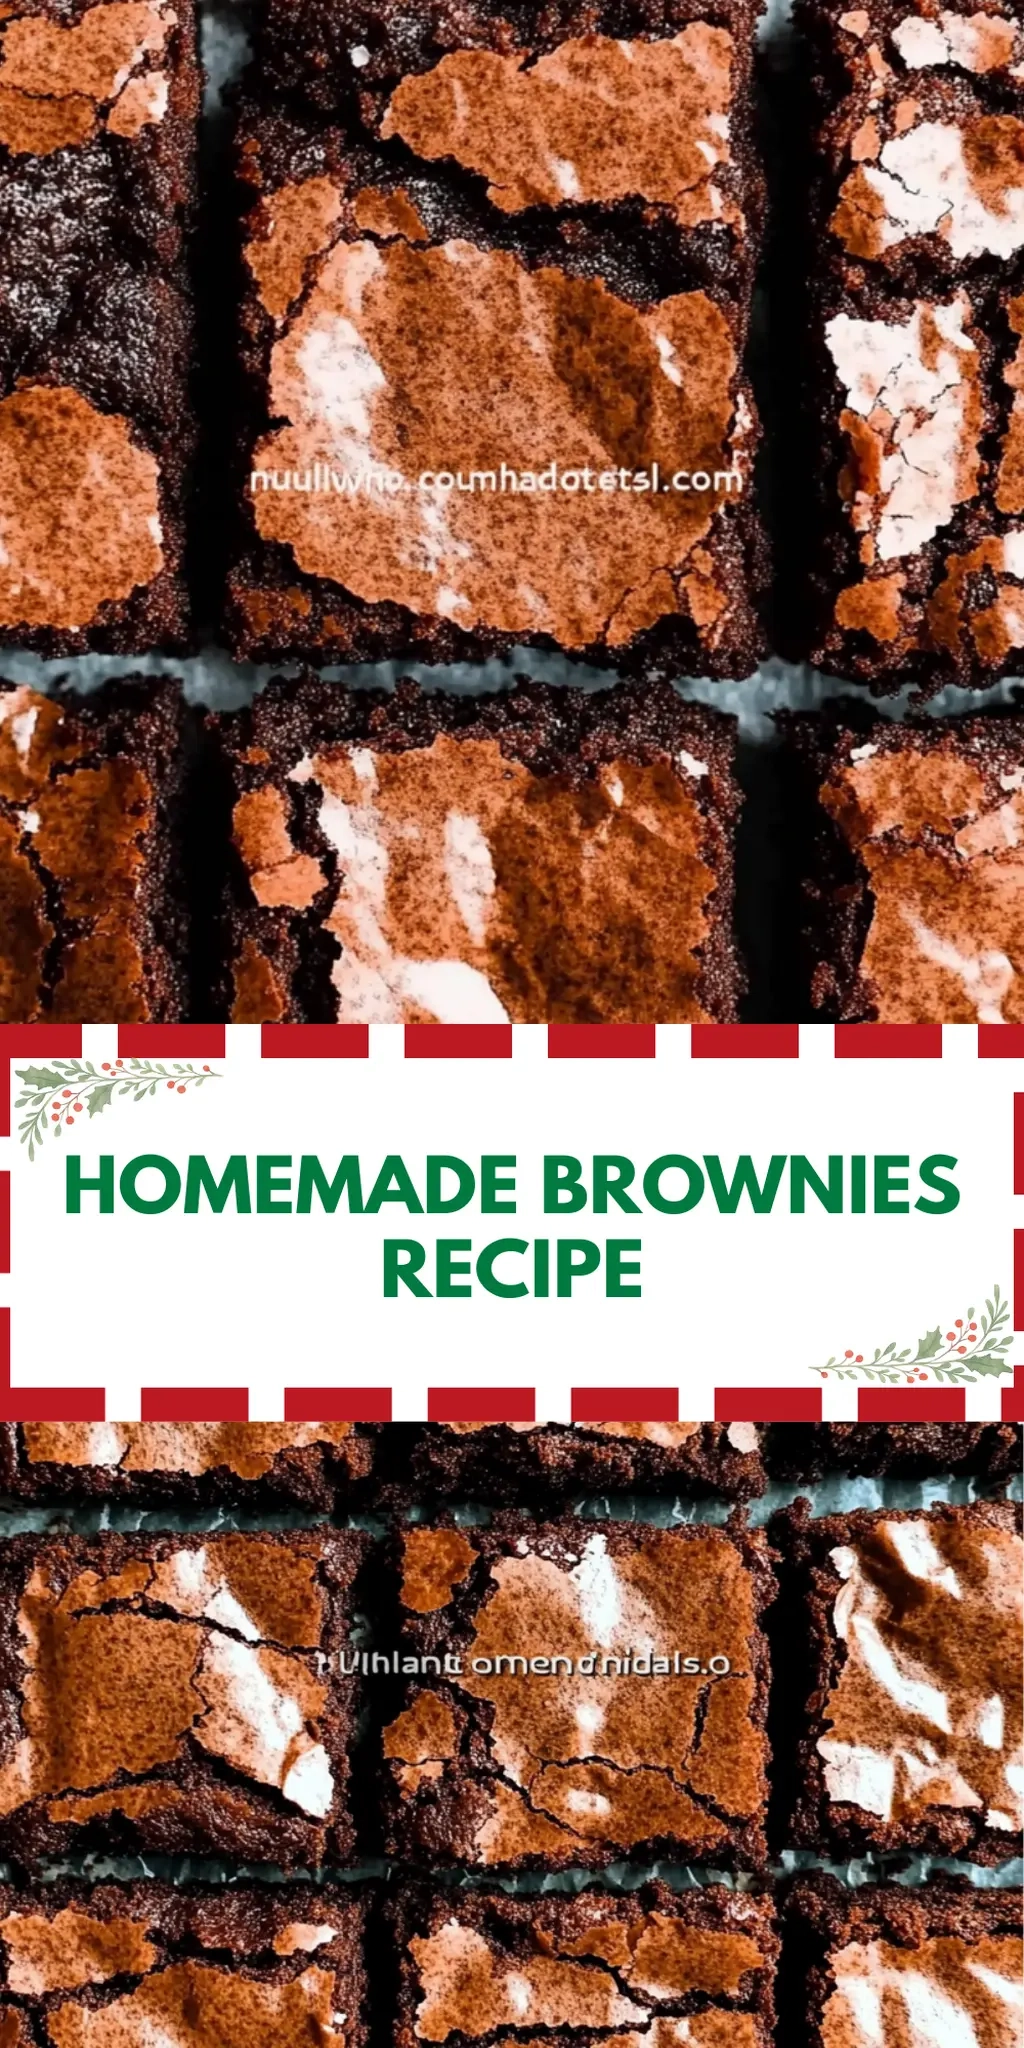
There’s nothing quite like the sheer joy of pulling a pan of freshly baked brownies out of the oven. The moment that warm, fudgy aroma drifts through your kitchen, it transforms the atmosphere into something magical. The rich scent of cocoa and the hint of vanilla beckon you, promising a deliciously indulgent treat that’s perfect for cozy nights in or sharing with friends.

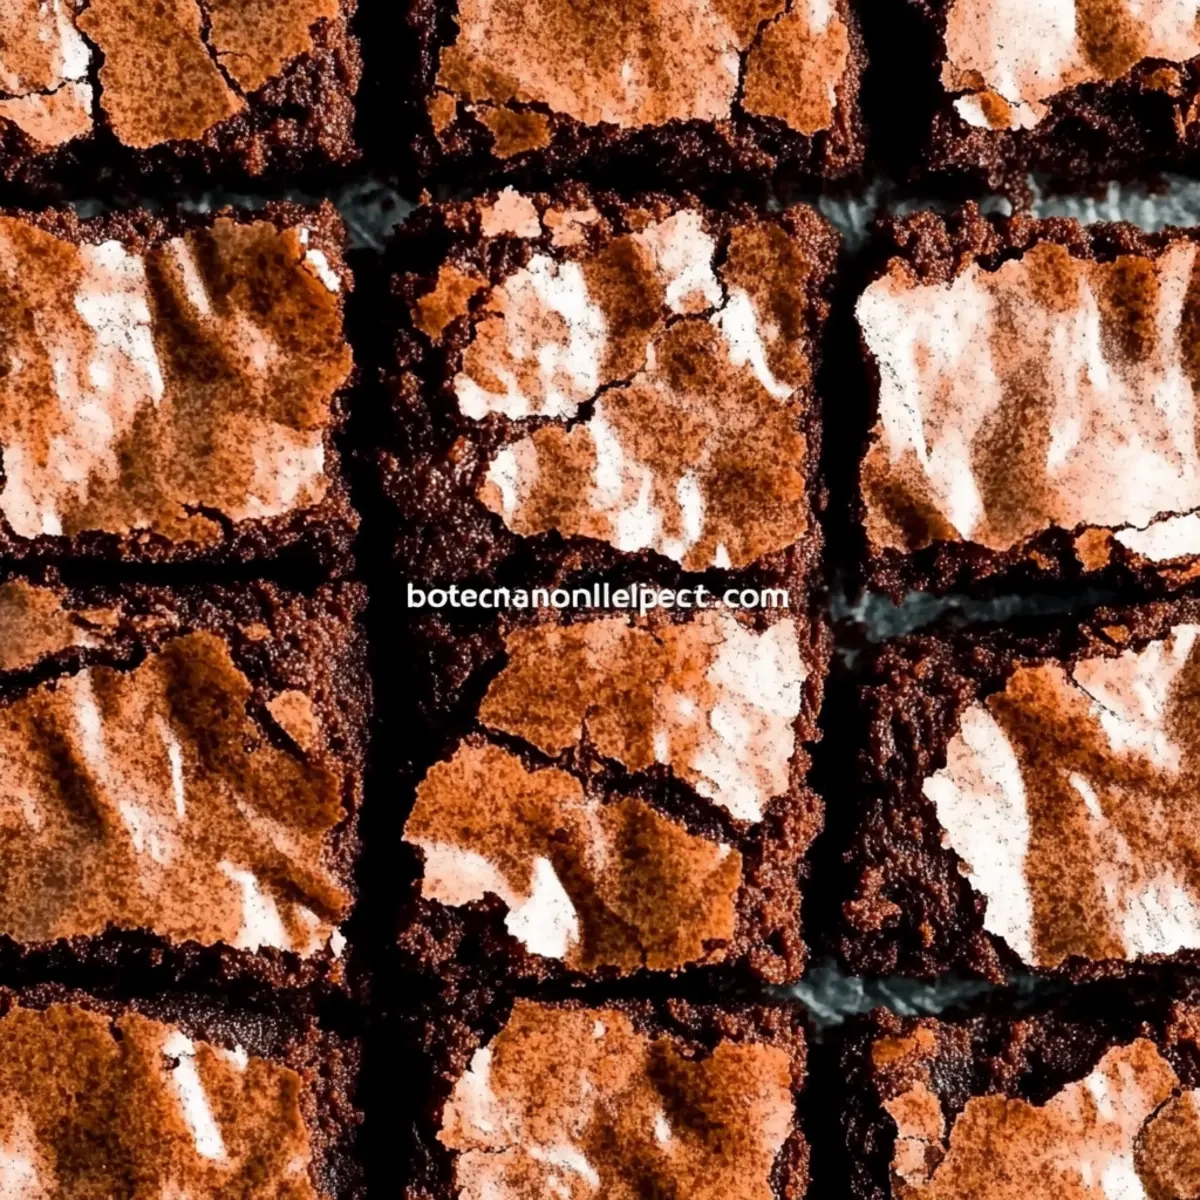
I stumbled upon this homemade brownies recipe during one of my weekend adventures in the kitchen, searching for a dessert that would elevate my usual routine. I wanted something that felt a bit fancy yet was still easy to whip up—even on a busy evening. These brownies hit all the right notes: they’re incredibly rich and chocolaty, with a delightful crust on top that gives way to a gooey interior. Plus, there’s a secret touch of espresso powder that enhances the chocolate flavor without overpowering it.

With just a few simple ingredients—most of which you probably have on hand—you’ll create a treat that delights the senses and satisfies that sweet craving. So, let’s dive into this homemade brownies recipe and bring some warmth and happiness to your kitchen!

Why You'll Love This Homemade Brownies Recipe

  • This homemade brownies recipe is incredibly easy to make, perfect for anyone looking to bake a delicious dessert without spending hours in the kitchen.
  • The rich chocolate flavor will have you craving more, while the addition of espresso powder takes it to a whole new level of indulgence.
  • These brownies are versatile enough to serve at a gathering or enjoy as a cozy treat at home, making them a great choice for any occasion.
  • Not only will you impress your friends and family with their fudgy texture and delightful crust, but the enticing aroma will fill your home with warmth and joy while they bake.

Homemade Brownies Recipe Ingredients

Discover the magic behind the perfect brownie!

For the Brownie Batter
• All-purpose flour – gives structure for your fudgy brownies.
• Baking powder – adds a slight lift for a lighter texture.
• Salt – enhances the chocolate flavor for a richer taste.
• Unsweetened cocoa powder – provides the deep chocolate richness you crave.
• Espresso powder – intensifies the chocolate flavor in your homemade brownies recipe.
• Unsalted butter – adds a creamy richness and moisture.
• Oil – helps achieve an extra fudgy texture.
• Granulated sugar – sweetens and creates that delightful crust.
• Large eggs – bind the ingredients and add moisture.
• Large egg yolk – enriches the batter for an even fudgier result.
• Vanilla extract – contributes warmth and depth of flavor.
• Chocolate chips – offer bursts of melty chocolate in every bite.

Enjoy this comforting treat with loved ones or savor it all to yourself!

How to Make Homemade Brownies

  1. Preheat the oven: Set your oven to 350°F (175°C). Prepare a 9×9-inch baking pan by lining it with parchment paper and giving it a light spray of non-stick baking spray.

  2. Sift the dry ingredients: In a large bowl, sift together the all-purpose flour, baking powder, salt, cocoa powder, and espresso powder. This ensures your brownies will be light and free of lumps—set this bowl aside.

  3. Melt the butter: In a medium saucepan, combine the unsalted butter, oil, and 1/3 cup of the granulated sugar. Heat over medium heat, stirring frequently until the butter melts completely. Remove from heat once smooth and glossy.

  4. Mix the wet ingredients: In a separate large mixing bowl, whisk together the eggs, egg yolk, vanilla extract, and the remaining sugar until well combined—about 30 seconds should do the trick.

  5. Combine the mixtures: Slowly pour the warm butter mixture into the egg mixture. Add it gradually while whisking constantly to ensure everything is fully incorporated.

  6. Fold in the dry ingredients: Gently add the sifted dry ingredients and the chocolate chips to the wet mixture. Using a rubber spatula, stir until just combined—be careful not to overmix for that perfect fudgy texture!

  7. Prepare for baking: Scrape the brownie batter into the prepared pan. Use the spatula to smooth the top, making sure it’s even and ready to go.

  8. Bake: Place your pan in the oven and bake for 28 to 30 minutes. Keep an eye on them until the edges feel firm and the top has that shiny, slightly cracked look.

  9. Cool and slice: Once baked, transfer the pan to a cooling rack. Allow the brownies to cool completely before slicing them into squares—this’ll help achieve those clean edges!

Optional: Dust with powdered sugar for an elegant touch before serving.
Exact quantities are listed in the recipe card below.

Make Ahead Options

These Homemade Brownies Recipe are perfect for meal prep enthusiasts! You can prepare the brownie batter up to 24 hours in advance. Simply follow the recipe instructions up until step 6, then cover the bowl with plastic wrap and refrigerate it. This helps the flavors meld together while keeping the batter fresh. When you’re ready to bake, just take the batter out, give it a gentle stir to incorporate, and spread it into the prepared pan. Bake as directed in step 8, and you’ll have delicious, fudgy brownies that taste just as good as if you’d made them fresh! Perfect for busy weeknights or unexpected guests!

How to Store and Freeze Homemade Brownies

Room Temperature: Keep your brownies in an airtight container at room temperature for up to 3 days to maintain their fudgy texture and delicious flavor.

Fridge: If you want to extend freshness, store brownies in the fridge for up to a week in an airtight container. Let them come to room temperature before serving for the best taste.

Freezer: Freeze brownies by wrapping them tightly in plastic wrap, then aluminum foil, storing them for up to 3 months. Thaw in the fridge or at room temperature before enjoying.

Reheating: For a warm treat, reheat individual brownies in the microwave for about 10-15 seconds. This enhances the gooeyness and brings back that fresh-baked taste.

Homemade Brownies Recipe Variations

Feel free to get creative and customize these brownies to suit your taste buds!

  • Nutty Delight: Add 1/2 cup of chopped walnuts or pecans for a delightful crunch. The rich flavors of the nuts beautifully complement the chocolate.

  • Mint Chocolate: Stir in 1/2 teaspoon of peppermint extract into the batter for a refreshing twist. It brings a cool, invigorating flavor that transforms every bite.

  • Spicy Kick: Add a pinch of cayenne pepper or chili powder for a surprising heat that balances the sweetness perfectly. This spicy twist is sure to excite your palate!

  • Gluten-Free: Substitute the all-purpose flour with a 1-to-1 gluten-free baking blend. It’s a delicious way to cater to your gluten-sensitive friends.

  • Vegan-Friendly: Replace the eggs with 1/4 cup of unsweetened applesauce and use a plant-based butter alternative. You won’t miss a thing with this velvety vegan version.

  • Fruit Infusion: Fold in 1/2 cup of fresh raspberries or blueberries into the batter for a fruity burst. The combination of chocolate and berries is simply divine!

  • Caramel Swirl: Drizzle caramel sauce into the brownie batter just before baking for a sweet surprise. Swirling caramel gives an extra gooey texture and irresistible flavor.

  • Chocolate Overload: Mix in an additional 1/2 cup of chocolate chips or chunks for an extra chocolatey experience. It’s a chocoholic’s dream come true!

What to Serve with Homemade Brownies Recipe?

There’s nothing quite like indulging in rich, chocolatey brownies as the centerpiece of a delightful dessert experience.

  • Vanilla Ice Cream: The creamy, cool ice cream pairs perfectly with warm brownies, creating a luxurious contrast that’s hard to resist.
  • Fresh Berries: Juicy strawberries or raspberries add a refreshing tartness that balances the sweetness of the brownies beautifully.
  • Chocolate Sauce: Drizzling warm chocolate sauce enhances the chocolate flavor, making each bite even more decadent and delightful.
  • Whipped Cream: A dollop of freshly whipped cream brings a light, airy texture to the dish, inviting you to take another bite.
  • Coffee: Enjoy a rich cup of coffee alongside your brownies; the warm, bold flavors enhance the chocolate and keep the experience cozy.
  • Nutty Caramel Sauce: A drizzle of nutty caramel adds a sweet, crunchy texture that complements the fudgy interior of the brownies.
  • Peanut Butter Swirl: Adding a peanut butter swirl to your brownies brings an irresistible salty-sweet flavor that chocolate lovers will adore.
  • Chocolate Mint Smoothie: A cool, minty smoothie grounds the indulgence of the brownies in refreshing freshness, creating a well-rounded dessert experience.

Chef's Helpful Tips

  • For the Homemade Brownies Recipe, be sure to sift your dry ingredients together to eliminate lumps and ensure a smoother batter.
  • A common mistake is overmixing the batter; instead, stir until just combined for that ideal fudgy texture.
  • Use a rubber spatula to gently incorporate the chocolate chips, as this helps maintain the integrity of your mixture.
  • When baking, check for doneness around 28 minutes, and remember that the brownies will continue to cook slightly as they cool in the pan.

Homemade Brownies Recipe FAQs

How do I know if my ingredients are ripe or fresh enough?
Absolutely! For the best homemade brownies, ensure that your eggs are fresh, ideally within a couple of weeks of their expiration date. The butter should be creamy and not showing any signs of separation or off-putting odors. Your cocoa powder should be rich and fragrant, without any lumps. As for your baking powder, give it a quick freshness test by adding a pinch to warm water—if it fizzes, it’s good to go!

What’s the best way to store homemade brownies?
Very! To keep your brownies fresh, store them in an airtight container at room temperature for up to 3 days. If you’d like them to last longer, they can be refrigerated for up to a week. Just make sure to wrap them tightly! You want to avoid any drying out, ensuring every bite remains deliciously fudgy.

Can I freeze my brownies, and how do I do it properly?
Absolutely! For the best results, let your brownies cool completely first. Then, cut them into squares and place them in an airtight container with parchment paper between layers to prevent sticking. Alternatively, you can wrap each piece individually in plastic wrap before placing them in a freezer bag. They’ll stay tasty and fudgy for up to 3 months! When you’re ready to enjoy them, simply thaw at room temperature or pop them in the microwave for a few seconds.

What are some common troubleshooting tips for dry brownies?
If your brownies turn out dry, it’s often due to overbaking or using too much flour. Always measure your flour accurately, spooning it into your measuring cup without packing it down. For testing doneness, aim for edges that firm up while the center remains slightly soft but not gooey. Pull them out of the oven when the top looks shiny and slightly cracked!

Are there any dietary considerations I should keep in mind?
Certainly! If you’re baking for someone with dietary restrictions, consider using gluten-free flour in your homemade brownies recipe and dairy-free butter alternatives. Always double-check for allergies to eggs or chocolate, especially when sharing. If you’re baking for pets, these brownies aren’t suitable due to harmful ingredients like chocolate! Always stick to pet-safe treats for your furry friends.

Can I use substitutes for the chocolate chips?
The more the merrier! If you’re out of chocolate chips, feel free to use chopped chocolate bars, cocoa nibs, or even nuts for a crunchy variation. You can also experiment with dark chocolate for a richer taste, or switch it up and try white chocolate for a sweeter twist. Enjoy experimenting and making this homemade brownies recipe truly your own!

Homemade Brownies Recipe

Homemade Brownies Recipe

This Homemade Brownies Recipe creates rich, fudgy brownies that are simple to make and perfect for any occasion.
Print Recipe Pin Recipe
Prep Time 15 minutes mins
Cook Time 30 minutes mins
Cooling Time 10 minutes mins
Total Time 55 minutes mins
Servings: 16 slices
Course: DESSERT RECIPES
Cuisine: American
Calories: 200
Ingredients Equipment Method Nutrition Notes

Ingredients
  

For the Brownie Batter
  • 1 cup All-purpose flour
  • 1 tsp Baking powder
  • 1/2 tsp Salt
  • 1/2 cup Unsweetened cocoa powder
  • 1 tsp Espresso powder
  • 1/2 cup Unsalted butter melted
  • 1/4 cup Oil
  • 1 1/4 cup Granulated sugar
  • 2 large Large eggs
  • 1 large Large egg yolk
  • 2 tsp Vanilla extract
  • 1/2 cup Chocolate chips

Equipment

  • 9×9-inch baking pan
  • Mixing bowls
  • rubber spatula
  • medium saucepan
  • sifter

Method
 

How to Make Homemade Brownies
  1. Preheat the oven to 350°F (175°C) and prepare a 9×9-inch baking pan with parchment paper and non-stick spray.
  2. Sift together all-purpose flour, baking powder, salt, cocoa powder, and espresso powder. Set aside.
  3. Melt the unsalted butter and oil with 1/3 cup of granulated sugar over medium heat until smooth.
  4. In a mixing bowl, whisk together the eggs, egg yolk, vanilla extract, and remaining sugar until combined.
  5. Gradually blend the warm butter mixture into the egg mixture while whisking continuously.
  6. Fold in the sifted dry ingredients and chocolate chips until just combined.
  7. Scrape the brownie batter into the prepared pan, smoothing the top.
  8. Bake for 28 to 30 minutes until the edges are firm and the top is shiny.
  9. Allow the brownies to cool completely before slicing into squares.

Nutrition

Serving: 1sliceCalories: 200kcalCarbohydrates: 25gProtein: 3gFat: 10gSaturated Fat: 6gPolyunsaturated Fat: 1gMonounsaturated Fat: 3gCholesterol: 40mgSodium: 150mgPotassium: 150mgFiber: 1gSugar: 15gVitamin A: 200IUCalcium: 20mgIron: 1.5mg

Notes

Optional: Dust with powdered sugar before serving for an elegant touch.

Tried this recipe?

Let us know how it was!

Filed Under: BREAKFAST & BRUNCH

Cookies Made From Brownie Mix

December 19, 2025 by JudyWhite Leave a Comment

There’s something undeniably comforting about the smell of freshly baked cookies wafting through the house, especially when the recipe takes a mere 15 minutes from start to finish! Recently, I found myself craving something sweet but didn’t want to deal with a complicated baking situation. That’s when I stumbled upon an idea that transformed my usual brownie mix into something truly delightful.

These Cookies Made From Brownie Mix are the answer to your sweet tooth cravings without the fuss. Imagine rich, fudgy treats that deliver on flavor while being super easy to whip up. Whether you’re a seasoned chef or just someone tired of fast food, this recipe allows you to savor that homemade touch with minimal effort. So grab that box of Ghirardelli brownie mix lurking in your pantry, and let’s bake some memories together!

Why You'll Love This Cookies Made From Brownie Mix

  • This recipe is a total time-saver, taking just 15 minutes from start to finish, making it perfect for busy days.
  • Not only are these cookies irresistibly fudgy and rich in flavor, but they also satisfy your sweet cravings without the hassle of traditional baking.
  • You’ll love how versatile they are, allowing you to customize with mix-ins like nuts or chocolate chips for extra delight.
  • Plus, the visual appeal of these round, chewy cookies will impress your friends and family, making them a crowd-pleaser at any gathering.

Cookies Made From Brownie Mix Ingredients

For the Base

  • Ghirardelli Double Chocolate Brownie Mix – This mix adds rich, fudgy flavor that’s perfect for cookies.
  • All-purpose flour – A bit of flour helps give structure to our delicious cookies.
  • Large eggs – Eggs help bind everything together for that perfect chewy texture.
  • Vegetable oil – Adds moisture and richness, enhancing the cookie’s overall taste.
  • Water – Just a splash helps to blend all ingredients smoothly.

For the Mix-ins

  • Mini chocolate chips – Add these for a delightful burst of chocolate in every bite!
  • Chopped walnuts (optional) – These provide a lovely crunch, but feel free to skip if nuts aren’t your thing!

Get ready to indulge in these comforting Cookies Made From Brownie Mix that come together in no time!

How to Make Cookies Made From Brownie Mix

  1. Preheat the oven to the temperature specified on the brownie mix package. A properly heated oven ensures even baking and that delicious cookies emerge at their best!

  2. Combine the brownie mix, flour, eggs, vegetable oil, and water in a mixing bowl. Stir until everything is well blended, and you can see that rich chocolate color starting to form.

  3. Add in the mini chocolate chips and chopped walnuts (if you’re using them). This is where the magic happens—those little chocolate bursts and crunchy nuts will elevate your cookies to a whole new level.

  4. Drop tablespoon-sized amounts of dough onto a lined baking sheet, spacing them about 2 inches apart. They’ll spread a bit while baking, so give them room to grow into delicious cookies!

  5. Bake according to the brownie mix package instructions or until the cookies are set in the middle—typically around 10 minutes. Look for that glossy top, signaling they’re ready!

  6. Cool the cookies on the baking sheet for a few minutes before transferring them to a wire rack. This makes sure they firm up perfectly, giving you that ideal chewy texture.

Optional: Serve warm with a scoop of vanilla ice cream on top!

Exact quantities are listed in the recipe card below.

Cookies Made From Brownie Mix Variations

Feel free to put your own spin on these delightful cookies and make them truly yours!

  • Nut-Free: Swap walnuts with sunflower seeds for a delightful crunch without the nuts. Perfect for school lunches or nut-free gatherings!

  • Gluten-Free: Use a gluten-free all-purpose flour blend in place of regular flour. This will keep the cookies enjoyable for everyone, regardless of dietary needs.

  • Chewy Boost: Add an extra tablespoon of vegetable oil for even chewier cookies. This simple tweak will enhance their fudgy texture, making them irresistibly soft.

  • Spicy Chocolate: Mix in a pinch of cayenne pepper for a spicy kick! The warmth of the spice beautifully contrasts the sweetness, creating a unique flavor profile.

  • Minty Fresh: Stir in some peppermint extract along with the chocolate chips. This will give your cookies a refreshing minty twist, perfect for the holidays!

  • Caramel Delight: Add spoonfuls of caramel sauce into the dough for unexpected gooeyness. Imagine biting into a soft cookie only to find molten caramel oozing out—pure bliss!

  • Fruit Twist: Toss in dried cranberries or chopped cherries for a fruity burst. They add a delightful tartness that balances the rich chocolate flavor.

  • Rocky Road: Make them rocky road cookies by adding mini marshmallows along with the chocolate chips and walnuts. This fun variation will remind you of the classic dessert!

How to Store and Freeze Cookies Made From Brownie Mix

Room Temperature: Store cookies in an airtight container at room temperature for up to 3 days to keep them soft and chewy.

Fridge: If you prefer your cookies chilled, place them in a sealed container in the fridge for up to 1 week. Just remember to let them warm up a bit before enjoying!

Freezer: For longer storage, freeze the cookies in a single layer on a baking sheet, then transfer to a zip-top freezer bag for up to 3 months. Thaw at room temperature before indulging.

Reheating: To revive the fudgy texture, warm cookies in the microwave for about 10-15 seconds. Enjoy your delightful Cookies Made From Brownie Mix fresh and warm!

What to Serve with Cookies Made From Brownie Mix?

Indulging in these rich cookies opens a world of delightful pairings to elevate your dessert experience.

  • Cold Milk: The classic pairing, cold milk brings out the chocolate richness while balancing the sweetness. It’s a nostalgic dipper for your cookies!

  • Vanilla Ice Cream: A scoop of creamy vanilla ice cream on top creates a dreamy combination—imagine the chocolate melting into the cold, smooth ice cream.

  • Fresh Berries: Juicy strawberries or raspberries offer a refreshing contrast and a pop of color, brightening up the plate and your palate.

  • Dark Chocolate Sauce: Drizzle warm dark chocolate sauce over the cookies for a decadent treat that enhances the chocolatey goodness.

Pairing these cookies with something sweet can also be fun.

  • Coffee or Espresso: A nice cup of coffee or a shot of espresso enhances the flavors and adds a delightful bitterness to balance the sweetness.

  • Mint Tea: The refreshing note of mint tea offers a soothing finish after the chocolaty indulgence, perfect for sharing with friends.

  • Chocolate-Covered Strawberries: Celebrate the love of chocolate by adding chocolate-covered strawberries for an elegant touch to your dessert spread.

  • Cheesecake Bites: Mini cheesecake bites provide a creamy, tangy contrast, making for a lovely surprise when served alongside your cookies.

Make Ahead Options

These Cookies Made From Brownie Mix are a fantastic choice for meal prep, allowing you to enjoy homemade treats with minimal effort! You can prepare the cookie dough up to 24 hours in advance. Simply follow the recipe up to the point of dropping the dough onto the baking sheet, then cover and refrigerate the cookie dough. This not only saves time on busy days but also allows the flavors to meld beautifully. When you’re ready to bake, simply scoop the dough onto a lined baking sheet and proceed to bake as directed. Your cookies will turn out just as delicious, and you’ll have freshly baked cookies ready for any occasion without the last-minute rush!

Chef's Helpful Tips

  • When making Cookies Made From Brownie Mix, ensure your brownie mix is fresh for the best flavor and texture.
  • Avoid overmixing the dough to maintain a chewy consistency in the cookies.
  • For an extra chocolatey experience, consider adding more mini chocolate chips or even chunks of your favorite chocolate.
  • Always monitor the cookies closely in the last few minutes of baking to prevent them from overcooking and becoming dry.

Cookies Made From Brownie Mix Recipe FAQs

How do I choose the best brownie mix for these cookies?
Absolutely! Opt for a high-quality brownie mix like Ghirardelli, as it provides a rich, fudgy flavor that’s perfect for this cookie recipe. Check for freshness by ensuring the package is not near its expiration date. Keep an eye out for the thickness of the mix; a denser mix yields chewier cookies!

How should I store leftover cookies?
To keep your Cookies Made From Brownie Mix soft and chewy, store them in an airtight container at room temperature for up to 3 days. If you prefer, you can refrigerate them in a sealed container for up to 1 week. Just allow them to come to room temperature before enjoying for the best flavor and texture!

Can I freeze these cookies for later?
Very much so! To freeze your Cookies Made From Brownie Mix, place the baked cookies in a single layer on a baking sheet and freeze until solid. Once firm, transfer them to a zip-top freezer bag, ensuring to remove as much air as possible. You can enjoy them later for up to 3 months. To thaw, simply let them sit at room temperature for about 30 minutes before indulging!

What if my cookies turn out dry?
Oh no! If your cookies come out a bit dry, it could be due to overbaking or not properly measuring the oil or eggs. Next time, try removing them from the oven just as they set in the middle—ultra gooey is okay! If they still end up dry, you can help rejuvenate them by microwaving for 10-15 seconds before eating, which makes them delightfully fudgy again.

Are these cookies safe for people with nut allergies?
Certainly! To make the Cookies Made From Brownie Mix safe for those with nut allergies, simply omit the chopped walnuts from the mix-ins. It’s always a good idea to check the packaging of your brownie mix too, as some brands may be processed in facilities that handle nuts. Enjoy with peace of mind!

Cookies Made From Brownie Mix

Cookies Made From Brownie Mix

These Cookies Made From Brownie Mix are rich, fudgy treats perfect for satisfying your sweet tooth quickly.
Print Recipe Pin Recipe
Prep Time 15 minutes mins
Cook Time 10 minutes mins
Total Time 25 minutes mins
Servings: 12 cookies
Course: DESSERT RECIPES
Calories: 120
Ingredients Equipment Method Nutrition Notes

Ingredients
  

Cookies Made From Brownie Mix Ingredients
  • 1 box Ghirardelli Double Chocolate Brownie Mix This mix adds rich, fudgy flavor.
  • 1/4 cup All-purpose flour Helps give structure to the cookies.
  • 2 large eggs Binds everything together.
  • 1/4 cup vegetable oil Adds moisture and richness.
  • 2 tablespoons water Helps to blend all ingredients.
  • 1/2 cup mini chocolate chips For a delightful burst of chocolate.
  • 1/2 cup chopped walnuts Optional for added crunch.

Equipment

  • Mixing bowl
  • Baking sheet
  • Oven

Method
 

How to Make Cookies Made From Brownie Mix
  1. Preheat the oven to the temperature specified on the brownie mix package.
  2. Combine the brownie mix, flour, eggs, vegetable oil, and water in a mixing bowl.
  3. Add in the mini chocolate chips and chopped walnuts (if using).
  4. Drop tablespoon-sized amounts of dough onto a lined baking sheet.
  5. Bake according to the brownie mix package instructions or until set, about 10 minutes.
  6. Cool the cookies on the baking sheet for a few minutes before transferring to a wire rack.

Nutrition

Serving: 1cookieCalories: 120kcalCarbohydrates: 18gProtein: 2gFat: 6gSaturated Fat: 1gPolyunsaturated Fat: 2gMonounsaturated Fat: 2gCholesterol: 30mgSodium: 100mgPotassium: 50mgFiber: 1gSugar: 10gCalcium: 2mgIron: 4mg

Notes

Serve warm with a scoop of vanilla ice cream for extra delight.

Tried this recipe?

Let us know how it was!

Filed Under: BREAKFAST & BRUNCH

Triple-Layer Chocolate Mousse Cake

December 17, 2025 by JudyWhite Leave a Comment

There’s a certain joy that comes from creating a dessert that feels like a celebration all on its own. Imagine walking into your kitchen, the soft scent of melting chocolate wafting through the air, as if whispering sweet promises of indulgence. That’s precisely what you’ll experience with this Triple-Layer Chocolate Mousse Cake.

This masterpiece of a dessert is more than just a cake; it’s an invitation to savor life’s moments, whether it’s a special occasion or simply a well-deserved treat after a long day. The rich, velvety layers of chocolate mousse resting atop a decadent cake create a symphony of flavors and textures that will enchant both you and your guests.

Even if you’re feeling overwhelmed by the fast-paced monotony of everyday meals, this recipe shines as a beacon of creativity and culinary delight. With straightforward steps and ingredients you might already have on hand, crafting this luxurious cake will elevate your dessert game and transform any gathering into a memorable occasion. Get ready to impress!

Why You'll Love This Triple-Layer Chocolate Mousse Cake

  • This Triple-Layer Chocolate Mousse Cake is an absolute showstopper that combines impressive visual appeal with an indulgent flavor that everyone will adore.
  • The recipe is straightforward and easy to follow, making it accessible even for novice bakers who want to create a stunning dessert.
  • Its rich layers of mousse and cake not only please the palate but also satisfy the sweet tooth, making it a guaranteed crowd-pleaser at any gathering.
  • Additionally, this cake is incredibly versatile, perfect for birthdays, anniversaries, or simply as a well-deserved treat to enjoy at home.

Triple-Layer Chocolate Mousse Cake Ingredients

For the Chocolate Cake
• Unsweetened chocolate – this deepens the rich flavors of the cake.
• Unsalted butter – using unsalted allows you to control the saltiness of the cake.
• Granulated sugar – sweetens the cake while enhancing its moisture.
• Large eggs – ensure they are at room temperature for better mixing.
• Pure vanilla extract – adds warmth and depth to the chocolate flavor.
• All-purpose flour – provides structure while keeping the cake tender.
• Dutch-process cocoa powder – gives a rich and smooth cocoa flavor.
• Salt – amplifies the sweetness and balances the flavors.

For the Mousse
• Unflavored gelatin – helps the mousse set perfectly for smooth layers.
• Water – used to bloom the gelatin, ensuring it activates properly.
• Semisweet chocolate – offers a luscious, balanced sweetness in the mousse.
• Heavy cream – whip until soft peaks form for a light, airy texture.
• Granulated sugar – a touch here enhances the creaminess of the mousse.

For the Whipped Cream Topping
• Heavy cream – using cold cream creates a fluffy topping that’s perfect for finishing.
• Unsalted butter – adds richness and helps stabilize the whipped cream.
• Semisweet chocolate – for an extra layer of indulgence on top.

Get ready to whip up this amazing Triple-Layer Chocolate Mousse Cake that not only impresses but also brings joy to everyone who takes a bite!

How to Make Triple-Layer Chocolate Mousse Cake

  1. Preheat your oven to 350°F (175°C). Grease and flour three 8-inch round baking pans to ensure the cake layers release easily once baked.

  2. Melt the unsweetened chocolate and butter together in a double boiler or microwave, stirring until smooth and glossy. This rich mixture is the foundation of your decadent cake.

  3. Stir in the granulated sugar until fully combined. You’ll know it’s ready when the mixture looks thick and slightly glossy.

  4. Add the eggs one at a time, whisking well after each addition. Follow up with the pure vanilla extract, which will infuse a delightful aroma into your batter.

  5. Sift together the all-purpose flour, Dutch-process cocoa powder, and salt in a separate bowl. Gradually add this dry mixture to the chocolate mixture, stirring gently until just combined.

  6. Prepare the gelatin by sprinking it over the water in a small bowl. Let it bloom for about 5 minutes, then melt it gently over low heat or in the microwave.

  7. Fold the melted gelatin into the chocolate batter, blending it in carefully to ensure a smooth texture that will help the layers hold up beautifully.

  8. Pour the batter evenly into the prepared pans. Bake for 25-30 minutes, or until a toothpick inserted into the center comes out clean. The tops should look set and slightly cracked.

  9. While cooling, start on the mousse. Melt the semisweet chocolate in a heatproof bowl until smooth, allowing it to cool slightly before incorporating.

  10. Whip the heavy cream for the mousse until soft peaks form. Gently fold this creamy mixture into the melted chocolate until fully blended—this creates the light, airy texture.

  11. Layer the mousse onto the cooled cake layers. Use a spatula for a smooth finish, then refrigerate for at least 2 hours or until the mousse is set.

  12. Top the finished cake with additional whipped cream for a final touch of elegance before serving. Enjoy every blissful bite!

Optional: Garnish with chocolate shavings or fresh berries for a delightful finish.

Exact quantities are listed in the recipe card below.

How to Store and Freeze Triple-Layer Chocolate Mousse Cake

Fridge: Keep your Triple-Layer Chocolate Mousse Cake stored in an airtight container in the fridge for up to 3 days. This helps maintain its moist texture and rich flavor.

Freezer: If you’d like to freeze it, wrap each layer tightly in plastic wrap and then place them in a freezer-safe container. This way, it can last for up to 2 months without compromising quality.

Reheating: When ready to serve, simply remove from the freezer and let it thaw in the fridge overnight. For a refreshing touch, consider serving it chilled or at room temperature.

Storing Leftovers: Any leftover whipped cream can be stored separately in the fridge for up to 2 days. If the mousse has set and looks too soft upon storage, it can be gently re-whipped to restore its airy texture.

Triple-Layer Chocolate Mousse Cake Variations

Feel free to mix things up with these delightful twists on your decadent cake creation!

  • Gluten-Free: Substitute all-purpose flour with a gluten-free blend for an equally delightful and inclusive dessert.

  • Dairy-Free: Use coconut cream and dairy-free chocolate to create a luscious mousse that everyone can enjoy. The flavors will still shine beautifully.

  • Coffee-Infused: Add 1 tablespoon of instant coffee granules to the melted chocolate for a rich, deep flavor that enhances the chocolate’s natural notes. A brilliant way to tantalize taste buds!

  • Nutty Texture: Fold in chopped nuts like walnuts or hazelnuts into the mousse for a delightful crunch with each bite, adding complexity and flavor contrast to the smooth layers.

  • Fruity Boost: Layer fresh raspberries or strawberries between the mousse and cake layers for a pop of freshness and a beautiful tartness, making each slice more vibrant.

  • Minty Fresh: Add a few drops of peppermint extract to the mousse for a refreshing mint chocolate combination that’s festive and fun!

  • Spiced Delight: Mix in a teaspoon of cinnamon or cayenne pepper to the cake batter for a surprising warmth and depth that pairs surprisingly well with chocolate.

  • Dark Chocolate Excellence: Swap semisweet chocolate for dark chocolate for an intense and deeply satisfying flavor that chocolate aficionados will adore.

These variations allow you to put your personal touch on the classic recipe while staying true to the essence of your decadent Triple-Layer Chocolate Mousse Cake!

What to Serve with Triple-Layer Chocolate Mousse Cake?

Creating an unforgettable meal is all about balancing flavors, textures, and delightful experiences that elevate the occasion.

  • Fresh Berries: The tangy burst of raspberries or strawberries contrasts beautifully with the rich chocolate, adding a refreshing touch.
  • Vanilla Ice Cream: A scoop of velvety vanilla ice cream provides a creamy companion that complements the cake’s textures. The coldness pairs perfectly with the warm, moist layers of chocolate.
  • Espresso or Coffee: A bold cup of espresso enhances the chocolate flavor, making each bite of cake even more indulgent while providing a delightful energy boost.
  • Chocolate Sauce: Drizzling warm chocolate sauce over the cake offers extra decadence. The luxurious sauce can also be served on the side for dipping, creating an irresistible treat.
  • Mint Leaves: A sprinkle of fresh mint adds a refreshing herbal note that balances the sweetness of the mousse, making it a lovely finishing touch.
  • Whipped Cream: A dollop of lightly sweetened whipped cream creates a dreamy cloud that enhances the cake’s rich layers while adding a light texture.
  • Port or Dessert Wine: A glass of sweet dessert wine or port elevates the experience, enriching the chocolate flavors and making for a sophisticated pairing that guests will adore.
  • Chocolate-Covered Strawberries: These luscious treats not only match the chocolate theme but provide a little crunch and freshness alongside the cake.

Each of these pairings makes for a delightful ensemble that enhances the enjoyment of your Triple-Layer Chocolate Mousse Cake, turning any occasion into a sweet celebration!

Make Ahead Options

These Triple-Layer Chocolate Mousse Cake layers are perfect for busy home cooks who love to meal prep! You can bake the chocolate cake layers up to 2 days in advance; once cooled, wrap them tightly in plastic wrap or foil and refrigerate. The mousse can be prepared and layered on the cake 24 hours before serving. To maintain the mousse’s airy texture, make sure to refrigerate it immediately after assembling. When ready to serve, top with freshly whipped cream and any desired garnishes just before presentation. With these make-ahead steps, you’ll save time while ensuring your dessert is just as delicious and stunning as if made on the day!

Chef's Helpful Tips

  • Ensure your eggs are at room temperature before mixing them into the batter, as this helps create a smoother emulsion.
  • When melting chocolate, be careful not to overheat it; doing so can cause it to seize, so constantly stir and check the temperature.
  • For the perfect mousse consistency, fold in the whipped cream gently to maintain the airiness that gives it a light texture.
  • Keep an eye on the baking time, as every oven varies; a toothpick inserted in the center should come out clean but moist to indicate your chocolate cake layers are perfectly baked.

Triple-Layer Chocolate Mousse Cake Recipe FAQs

How do I select the best chocolate for the cake?
Absolutely! When choosing unsweetened and semisweet chocolate for your Triple-Layer Chocolate Mousse Cake, look for brands with high cocoa content (70% or higher). Check for a smooth texture and a rich aroma—this indicates freshness and quality. Avoid chocolates that have a chalky feel or a dull appearance.

What are the best storage methods for the cake?
To keep your Triple-Layer Chocolate Mousse Cake fresh, simply store it in an airtight container in your refrigerator. It will stay delicious for up to 3 days. If you’re dealing with warmer temperatures, placing it in the fridge right after baking will help maintain its creamy texture, preventing it from melting.

Can I freeze the cake layers?
Certainly! To freeze the layers of your cake, wrap each cooled layer tightly in plastic wrap, ensuring there’s no air exposure to minimize freezer burn. Place the wrapped layers in a freezer-safe container, and they can be stored for up to 2 months. When you’re ready to enjoy, thaw them in the refrigerator overnight for the best results.

What should I do if my mousse doesn’t set properly?
If your mousse isn’t setting as expected, don’t worry! First, check if you’ve allowed the gelatin to bloom properly. If your mousse seems too soft, gently reheat it on a low setting while stirring, then let it cool slightly before whisking in additional whipped cream. Chill the mixture for a bit longer if needed, and it should firm up beautifully!

Is this recipe suitable for those with food allergies?
Great question! The Triple-Layer Chocolate Mousse Cake contains gluten, dairy, and eggs, which can be a concern for some. For dairy-free options, consider using dairy-free chocolate and plant-based butter. If you’re looking for a gluten-free alternative, you could substitute all-purpose flour with a gluten-free blend, although this may affect the cake’s texture slightly. Always read labels carefully, especially for allergens!

How can I make the cake more visually appealing when serving?
Very! To elevate the presentation of your cake, consider adding a drizzle of ganache over the top or sprinkling some cocoa powder or powdered sugar. Fresh berries, mint leaves, or chocolate shavings can also make stunning garnishes, enhancing both the look and the flavor of your dessert. Enjoy making it as beautiful as it is delicious!

Triple-Layer Chocolate Mousse Cake

Triple-Layer Chocolate Mousse Cake

This Triple-Layer Chocolate Mousse Cake is a decadent dessert that showcases rich chocolate flavors and a delightful mousse texture, perfect for any celebration.
Print Recipe Pin Recipe
Prep Time 30 minutes mins
Cook Time 30 minutes mins
Chilling Time 2 hours hrs
Total Time 3 hours hrs
Servings: 12 slices
Course: DESSERT RECIPES
Cuisine: American
Calories: 450
Ingredients Equipment Method Nutrition Notes

Ingredients
  

For the Chocolate Cake
  • 8 oz unsweetened chocolate this deepens the rich flavors of the cake
  • 1 cup unsalted butter using unsalted allows you to control the saltiness
  • 2 cups granulated sugar sweetens the cake while enhancing moisture
  • 4 large eggs ensure they are at room temperature for better mixing
  • 2 tsp pure vanilla extract adds warmth and depth to the chocolate flavor
  • 1.5 cups all-purpose flour provides structure while keeping the cake tender
  • 0.75 cups Dutch-process cocoa powder gives a rich and smooth cocoa flavor
  • 0.5 tsp salt amplifies the sweetness and balances the flavors
For the Mousse
  • 1 tsp unflavored gelatin helps the mousse set perfectly
  • 2 tbsp water used to bloom the gelatin
  • 12 oz semisweet chocolate offers a luscious, balanced sweetness
  • 2 cups heavy cream whip until soft peaks form
  • 2 tbsp granulated sugar enhances the creaminess of the mousse
For the Whipped Cream Topping
  • 1 cup heavy cream using cold cream creates a fluffy topping
  • 0.5 cup unsalted butter adds richness and helps stabilize
  • 4 oz semisweet chocolate for an extra layer of indulgence on top

Equipment

  • 8-inch round baking pans
  • double boiler or microwave
  • Mixing bowls
  • Whisk
  • Spatula

Method
 

Instructions
  1. Preheat your oven to 350°F (175°C). Grease and flour three 8-inch round baking pans to ensure the cake layers release easily once baked.
  2. Melt the unsweetened chocolate and butter together in a double boiler or microwave, stirring until smooth and glossy.
  3. Stir in the granulated sugar until fully combined.
  4. Add the eggs one at a time, whisking well after each addition.
  5. Sift together the all-purpose flour, Dutch-process cocoa powder, and salt in a separate bowl. Gradually add this dry mixture to the chocolate mixture, stirring gently until just combined.
  6. Prepare the gelatin by sprinkling it over the water in a small bowl. Let it bloom for about 5 minutes.
  7. Fold the melted gelatin into the chocolate batter, blending it in carefully.
  8. Pour the batter evenly into the prepared pans. Bake for 25-30 minutes, or until a toothpick inserted into the center comes out clean.
  9. While cooling, start on the mousse. Melt the semisweet chocolate in a heatproof bowl until smooth, allowing it to cool slightly.
  10. Whip the heavy cream for the mousse until soft peaks form. Gently fold this into the melted chocolate.
  11. Layer the mousse onto the cooled cake layers. Refrigerate for at least 2 hours or until set.
  12. Top the finished cake with additional whipped cream before serving.

Nutrition

Serving: 1sliceCalories: 450kcalCarbohydrates: 50gProtein: 6gFat: 25gSaturated Fat: 15gPolyunsaturated Fat: 1gMonounsaturated Fat: 3gCholesterol: 120mgSodium: 200mgPotassium: 250mgFiber: 2gSugar: 30gVitamin A: 500IUCalcium: 30mgIron: 2mg

Notes

Garnish with chocolate shavings or fresh berries for a delightful finish.

Tried this recipe?

Let us know how it was!

Filed Under: BREAKFAST & BRUNCH

Tiramisu Truffles

December 17, 2025 by JudyWhite Leave a Comment

There’s an undeniable joy that stirs within when you savor the rich, creamy layers of Tiramisu Truffles. The first moment your teeth sink into that blissfully soft exterior, and the flavors of coffee and cocoa dance on your palate, it’s like experiencing a delicate Italian escape right in your own kitchen. I discovered this delicious treat during a lively dinner party, and what started as a simple craving quickly turned into an unforgettable dessert that left my guests raving.

These Tiramisu Truffles not only elevate any occasion but also come together with astonishing ease. Imagine indulging in a dessert that’s both luxurious and ridiculously simple to make—perfect for impressing loved ones or spoiling yourself after a long week. With a delightful combination of mascarpone, espresso, and a hint of cocoa, each bite is a little piece of heaven. Whether you’re a seasoned home chef or just starting your culinary journey, these truffles are a must-try. Join me as we create these irresistible bites of joy that are sure to become a staple in your dessert repertoire!

Why You'll Love This Tiramisu Truffles

  • These Tiramisu Truffles are incredibly easy to make, allowing you to whip up a stunning dessert in no time.
  • With their rich flavor profile featuring coffee and cocoa, every bite transports you to a delightful Italian café.
  • Their elegant appearance makes them perfect for any occasion, whether it’s a dinner party or a cozy night in.
  • Plus, they are sure to impress your friends and family, making you the star of the show.

Tiramisu Truffles Ingredients

• To create these heavenly truffles, gather your ingredients!

For the Truffle Base

  • Mascarpone cheese – a rich and creamy layer essential for that authentic tiramisu flavor.
  • Espresso – brewed strong to provide that invigorating coffee kick that makes these truffles so delightful.
  • Powdered sugar – sweetens the mixture while ensuring a smooth texture.
  • Vanilla extract – adds a warm note that complements the coffee beautifully.
  • Cocoa powder – for dusting, giving a classic chocolatey finish and enhancing the flavor of the truffles.

For the Coating

  • Dark chocolate – melted, it creates a decadent shell that adds richness and depth.
  • Additional cocoa powder – for an extra dusting to enhance the visual appeal and cocoa flavor.

With these ingredients, you’ll be on your way to crafting Tiramisu Truffles that are sure to impress!

How to Make Tiramisu Truffles

  1. Combine Ingredients: In a mixing bowl, blend together the mascarpone cheese, strong espresso, powdered sugar, and vanilla extract. Mix until smooth and creamy, about 2-3 minutes.

  2. Chill the Mixture: Cover the bowl with plastic wrap and refrigerate the mixture for at least 1 hour. This helps the truffle base firm up, making it easier to shape.

  3. Scoop and Shape: Once chilled, use a small cookie scoop or your hands to form the mixture into bite-sized balls. Place them on a parchment-lined tray to keep them from sticking.

  4. Melt Chocolate: In a microwave-safe bowl, melt the dark chocolate in 30-second intervals, stirring in between, until completely smooth.

  5. Coat the Truffles: Dip each truffle into the melted chocolate, ensuring they’re fully coated, then return them to the tray. Let excess chocolate drip off before placing them back.

  6. Dust with Cocoa Powder: While the chocolate is still soft, lightly dust each truffle with cocoa powder for that classic finish.

  7. Chill Again: Return the tray to the refrigerator and let the truffles set for at least 30 minutes, until the chocolate hardens.

  8. Serve and Enjoy: Once set, your Tiramisu Truffles are ready to impress! Serve them on a lovely platter and savor the delightful flavors.

Optional: Add a sprinkle of finely grated chocolate on top for an extra touch of elegance.

Exact quantities are listed in the recipe card below.

Make Ahead Options

These Crispy Fried Homemade Mac and Cheese Bites are perfect for busy weeknights, allowing you to enjoy a delicious homemade dish with minimal last-minute effort. You can prepare the cheese mixture and shape the bites up to 24 hours in advance, storing them in the refrigerator to maintain their quality. Simply follow the first six steps of the recipe, then refrigerate the shaped balls until you’re ready to coat and fry them. When you’re set to serve, just dredge them in the prepared breading and fry until golden brown. This method ensures that your mac and cheese bites are just as delicious and crispy, saving you valuable time while still impressing your family or guests!

Tiramisu Truffles Variations

Feel free to get creative with your Tiramisu Truffles and personalize them to your taste!

  • Nutty Delight: Add crushed hazelnuts to the truffle mixture for a delightful crunch that complements the creamy texture beautifully. It’s a lovely twist that elevates each bite!

  • Liquor Infusion: Replace some of the espresso with coffee liqueur or amaretto. This richer flavor profile adds an authentic Italian touch, making the truffles even more luxurious.

  • Vegan Option: Substitute mascarpone with a vegan cream cheese or cashew cream. Use dairy-free chocolate for coating, ensuring everyone can enjoy these luscious treats.

  • Flavored Variants: Mix in a splash of flavored extract, like almond or coffee. This simple change adds a unique aroma and taste, tailoring your truffles to different palates.

  • Textural Contrast: Roll some truffles in finely chopped nuts or crushed cookies instead of cocoa powder. This twist offers a fun crunch and makes each bite a little different.

  • Fruity Twist: Incorporate finely chopped dried fruits like cherries or apricots into the mixture. The sweetness of the fruits melds with the chocolate for a surprising burst of flavor.

  • Spicy Kick: For those who like a bit of heat, add a pinch of cayenne pepper or chili powder to the cocoa powder dusting. It creates an interesting contrast with the sweet and creamy layers.

  • Decadent Chocolate Coat: Swap the dark chocolate for milk or white chocolate for a sweeter truffle version. This change creates a different flavor experience that’s just as delightful!

With these variations, you can create a Tiramisu Truffle experience that’s uniquely yours!

How to Store and Freeze Tiramisu Truffles

Fridge: Keep your Tiramisu Truffles in an airtight container in the fridge for up to 1 week. This helps to preserve their creamy texture and rich flavors.

Freezer: For longer storage, freeze the truffles in a single layer on a baking sheet, then transfer them to an airtight container for up to 3 months. Thaw in the fridge before serving.

Reheating: There’s no need to reheat these truffles; simply enjoy them cold for the best experience. Each truffle offers a delightful taste of coffee and cocoa bliss.

Baking Tip: If you’re making a large batch for a special occasion, consider layering the frozen truffles between sheets of parchment to avoid sticking.

What to Serve with Crispy Fried Homemade Mac and Cheese Bites?

These delightful bites are the perfect start to a comforting meal that’s sure to please everyone at the table.

  • Tangy Coleslaw: A fresh and crunchy slaw adds a zesty contrast to the creamy mac and cheese, creating a balanced bite.
  • Garlic Breadsticks: Soft and buttery, they’re perfect for soaking up any leftover cheese sauce and provide a satisfying crunch.
  • Crispy Fried Pickles: These give a delightful tang and crunch, which complements the richness of the cheese-filled bites and is sure to spark joy.
  • Buffalo Cauliflower Bites: For a spicy twist, these cauliflower bites bring heat without overshadowing the flavor of your mac and cheese.
  • Creamy Tomato Soup: A classic combination! The acidity of the soup enhances the cheesy goodness, making every dip an experience.
  • Garden Salad: Light and refreshing, a mix of greens adds a healthy touch, cutting through the indulgence of fried mac and cheese.
  • Apple Pie: End your meal on a sweet note! The warmth of cinnamon and the flaky crust pairs perfectly with the savory bites.

Each pairing enhances the experience, inviting you to enjoy a nostalgic twist on comfort food in every delicious bite!

Chef's Helpful Tips

  • When making Tiramisu Truffles, ensure that your mascarpone cheese is at room temperature for easier mixing and smoother texture.
  • Avoid overmixing the truffle base once you’ve added the powdered sugar to prevent a grainy consistency.
  • When shaping the truffles, wet your hands with a little water to prevent the mixture from sticking and to help achieve a perfect round shape.
  • Lastly, allow the melted chocolate to cool slightly before coating the truffles to create a glossy finish without the chocolate melting the truffles.

Tiramisu Truffles Recipe FAQs

What type of coffee should I use for Tiramisu Truffles?
I recommend using a strong brewed espresso to capture that authentic tiramisu flavor. If espresso isn’t available, a high-quality strong brewed coffee can work well too. Just make sure it’s a robust blend to ensure that lovely coffee punch shines through!

How long can I store Tiramisu Truffles?
Keep your Tiramisu Truffles in an airtight container in the fridge for up to 1 week. This will help preserve their creamy texture and rich flavors. If you’re planning to make them in advance, storing them properly is key for enjoying those delightful bites later!

Can I freeze Tiramisu Truffles?
Absolutely! For longer storage, lay the truffles out in a single layer on a baking sheet and freeze them until firm. Afterward, transfer them to an airtight container or a resealable freezer bag for up to 3 months. When you’re ready to enjoy them, just thaw in the fridge for a few hours, and they’ll be ready to serve!

What should I do if my truffle mixture is too soft to shape?
If your mixture feels too soft, don’t worry—just pop it back in the fridge to chill for another 30 minutes or so. This will help firm it up and make it easier to scoop and shape into those perfect little balls. Additionally, you can try rolling it in your hands while having slightly damp hands.

Can I use a different chocolate for coating the truffles?
You can definitely use milk chocolate or white chocolate for coating if you prefer a sweeter flavor! Just make sure to melt it gently to avoid burning, and consider adjusting the sweetness of the truffle base a little to balance the flavors. Explore and have fun with it; the more variations, the merrier!

Are Tiramisu Truffles suitable for people with nut allergies?
Yes, Tiramisu Truffles are generally nut-free since they don’t require nuts in the recipe. However, always double-check the labels on your ingredients to ensure there are no trace allergens, especially if using pre-packaged items like dark chocolate, as some may be processed in facilities that handle nuts. Enjoy this delicious treat worry-free!

Tiramisu Truffles

Tiramisu Truffles

Savor the rich flavors of Tiramisu Truffles, a delightful dessert combining coffee and cocoa.
Print Recipe Pin Recipe
Prep Time 15 minutes mins
Chilling Time 1 hour hr 30 minutes mins
Total Time 1 hour hr 45 minutes mins
Servings: 12 truffles
Course: DESSERT RECIPES
Cuisine: Italian
Calories: 150
Ingredients Equipment Method Nutrition Notes

Ingredients
  

Truffle Base
  • 8 oz Mascarpone cheese
  • 1 cup Espresso brewed strong
  • 1 cup Powdered sugar
  • 1 tsp Vanilla extract
  • 1 tbsp Cocoa powder for dusting
Coating
  • 8 oz Dark chocolate melted
  • 2 tbsp Additional cocoa powder for dusting

Equipment

  • Mixing bowl
  • cookie scoop
  • microwave-safe bowl
  • parchment paper

Method
 

Preparation Steps
  1. In a mixing bowl, blend together the mascarpone cheese, espresso, powdered sugar, and vanilla extract. Mix until smooth and creamy, about 2-3 minutes.
  2. Cover the bowl with plastic wrap and refrigerate the mixture for at least 1 hour.
  3. Once chilled, use a small cookie scoop or your hands to form the mixture into bite-sized balls. Place them on a parchment-lined tray.
  4. In a microwave-safe bowl, melt the dark chocolate in 30-second intervals, stirring in between, until completely smooth.
  5. Dip each truffle into the melted chocolate, ensuring they're fully coated, then return them to the tray.
  6. While the chocolate is still soft, lightly dust each truffle with cocoa powder.
  7. Return the tray to the refrigerator and let the truffles set for at least 30 minutes.
  8. Once set, serve the Tiramisu Truffles on a lovely platter and enjoy.

Nutrition

Serving: 1truffleCalories: 150kcalCarbohydrates: 10gProtein: 2gFat: 11gSaturated Fat: 7gPolyunsaturated Fat: 1gMonounsaturated Fat: 3gCholesterol: 25mgSodium: 5mgPotassium: 80mgFiber: 1gSugar: 8gVitamin A: 200IUCalcium: 40mgIron: 0.5mg

Notes

For best results, ensure the mascarpone cheese is at room temperature. You can add a sprinkle of finely grated chocolate on top for elegance.

Tried this recipe?

Let us know how it was!

Filed Under: BREAKFAST & BRUNCH

Banana Brown Sugar Muffins for Breakfast

December 16, 2025 by JudyWhite Leave a Comment

There’s something incredibly comforting about the warmth of freshly baked muffins filling your kitchen, especially when the aroma of bananas and brown sugar wafts through the air. Picture this: you wake up on a lazy Sunday morning, sunlight streaming through the window, and all you want is a delightful breakfast to reward your efforts. That’s when these Banana Brown Sugar Muffins come into play—simple yet indulgent, they transform ordinary bananas into a moist, flavorful treat that’s perfect for brunch or a quick bite during the week.

I stumbled upon this recipe during a quest to use up some overripe bananas, and it quickly became a family favorite. With just a handful of ingredients, these muffins are both easy to whip up and utterly satisfying. The blend of brown sugar and cinnamon on top offers a sweet crunch that perfectly complements the soft banana base. You’ll be amazed at how quickly you can have a dozen delicious muffins ready to share—or savor all to yourself! So, let’s dive in and elevate your breakfast game with this scrumptious recipe!

Why You'll Love This Banana Brown Sugar Muffins for Breakfast

  • These Banana Brown Sugar Muffins are incredibly easy to make, requiring just five minutes of prep time, so you can quickly whip them up even on a busy morning.
  • Their delightful flavor achieves the perfect balance of sweetness from the bananas and brown sugar, making each bite a heavenly experience.
  • With their fluffy texture and a crunchy topping of cinnamon and sugar, these muffins are visually appealing and guaranteed to impress anyone who sees them.
  • Plus, they are versatile enough to be enjoyed for breakfast, brunch, or as a delicious snack throughout the day.

Banana Brown Sugar Muffin Ingredients

For the Muffin Batter

  • Unbleached all-purpose flour – enhances structure and texture, giving your muffins a delightful base.
  • Baking powder – acts as a leavening agent, ensuring your muffins rise beautifully.
  • Baking soda – complements the acidity of the bananas for that perfect fluffy crumb.
  • Salt – a pinch balances sweetness, bringing out all the flavors effectively.
  • Large ripe bananas – the star ingredient; super ripe bananas provide natural sweetness and moisture.
  • Large egg – adds richness and binds the ingredients together for a perfect texture.
  • Greek yogurt or sour cream – keeps the muffins moist and adds a hint of tanginess.
  • Unsalted butter – adds essential flavor and richness to the muffins.
  • Brown sugar – this key ingredient in Banana Brown Sugar Muffins creates a deep, caramel-like sweetness.
  • Pure vanilla extract – enhances the overall flavor profile with its warm notes.

For the Muffin Topping

  • Granulated sugar – provides a sweet crunch on top, enhancing the muffin’s appeal.
  • Ground cinnamon – adds a warm, aromatic touch that perfectly complements the banana flavor.

How to Make Banana Brown Sugar Muffins

  1. Preheat the oven – Begin by preheating your oven to 350°F (175°C) and prepare a muffin tin by lightly greasing or lining it with muffin cups for easy removal.

  2. Mix dry ingredients – In a large bowl, whisk together 1.5 cups of unbleached all-purpose flour, 1 teaspoon of baking powder, 1 teaspoon of baking soda, and 0.5 teaspoon of salt until all ingredients are well combined.

  3. Combine wet ingredients – In another bowl, mash 3 large ripe bananas until smooth. Then, mix in 1 large egg, 0.25 cups of Greek yogurt (or sour cream), 0.5 cups of melted unsalted butter, 0.5 cups of packed brown sugar, and 1 teaspoon of pure vanilla extract until everything is well integrated.

  4. Combine mixtures – Pour the wet banana mixture into the bowl with the dry ingredients. Gently stir until just combined—avoid overmixing as this helps keep your muffins tender!

  5. Fill muffin tin – Using a spoon or ice cream scoop, fill each muffin cup about 2/3 full with the batter to allow room for rising.

  6. Prepare the topping – In a small bowl, mix 4 tablespoons of granulated sugar with 1 teaspoon of ground cinnamon. Evenly sprinkle this sweet mixture over the muffin batter in each cup for a delightful crunch.

  7. Bake the muffins – Place the muffin tin in the preheated oven and bake for about 20 minutes, or until a toothpick inserted in the center comes out clean. Your kitchen will smell heavenly at this point!

  8. Cool before serving – Once baked, allow the muffins to cool in the tin for a few minutes before transferring them to a wire rack to cool completely. Enjoy!

Optional: Serve warm with a pat of butter for extra indulgence.
Exact quantities are listed in the recipe card below.

How to Store and Freeze Banana Brown Sugar Muffins

Room Temperature: Store muffins at room temperature in an airtight container for up to 3 days to maintain freshness and flavor.

Fridge: If you need them to last longer, place the muffins in the fridge in a sealed container for up to a week, keeping them moist and delicious.

Freezer: For longer storage, freeze the Banana Brown Sugar Muffins by wrapping them individually in plastic wrap and placing them in a freezer-safe bag. They’ll stay fresh for up to 3 months.

Reheating: To enjoy your muffins warm, reheat them in the microwave for about 15-20 seconds or in a 350°F oven for 5-7 minutes straight from the freezer.

Banana Brown Sugar Muffin Variations

Feel free to sprinkle your creativity into these delightful muffins; the possibilities are endless!

  • Nutty Twist: Add 1/2 cup of chopped walnuts or pecans for a crunchy texture that perfectly complements the softness of the muffins. Nut enthusiasts will absolutely love the added depth of flavor!

  • Chocolate Lovers: Fold in 1/2 cup of mini chocolate chips into the batter for a sweet, decadent touch that takes these muffins to a whole new level of indulgence. A chocolatey surprise in each bite will be heavenly!

  • Fruit Fusion: Incorporate 1/2 cup of blueberries or chopped strawberries for a fruity explosion. Their natural sweetness and juicy bite will elevate your muffins to a delightful breakfast treat!

  • Dairy-Free: Swap the Greek yogurt for a non-dairy yogurt or applesauce, and use coconut oil instead of butter. This simple change keeps the muffins moist while accommodating dietary preferences—everyone can enjoy!

  • Spice It Up: Add a pinch of nutmeg or a dash of cardamom to the cinnamon topping for a warm and aromatic flavor twist. It infuses your muffins with cozy spices that’ll warm your heart.

  • Zesty Orange: Mix in the zest of one orange into the batter for a refreshing citrus twist. The bright citrus notes will make each muffin taste like a sunny morning, perfect for brightening your day!

  • Gluten-Free: Substitute the all-purpose flour with a gluten-free blend. Ensure you also use gluten-free baking powder to maintain that airy texture everyone loves.

  • Maple Sweet: Replace half of the brown sugar with pure maple syrup for an earthy sweetness that adds depth to your muffins. This will not only change the flavor profile but also create a delightful, moist crumb.

What to Serve with Banana Brown Sugar Muffins?

Imagine savoring these delightful muffins alongside perfectly paired accompaniments that enhance their sweet, comforting flavor and take your breakfast experience to another level.

  • Fresh Fruit Medley: A vibrant mix of berries and citrus adds a refreshing contrast, balancing the sweet richness of the muffins. The pops of color and flavor bring joy to your table!

  • Greek Yogurt Parfait: Creamy yogurt layered with honey and granola creates a wholesome balance of textures that complement the muffins wonderfully. Adding granola gives that delightful crunch, while the yogurt’s tanginess pairs beautifully with the sweetness.

  • Nutty Trail Mix: A handful of roasted nuts and seeds provides a satisfyingly crunchy texture and nutty flavor that contrasts with the soft muffins. Each bite becomes an adventure, perfect for those moments when you want a bit of everything.

  • Maple Syrup Drizzle: A touch of warm, rich maple syrup over the muffins transforms each bite into a little piece of heaven. The sweet syrup, with its unique flavor, enhances the muffin’s brown sugar notes beautifully!

  • Herbal Tea: A cup of soothing chamomile or mint tea provides a warm, calming beverage option that contrasts impeccably with the sweet muffins. The fragrant aroma of the tea will transport you to a tranquil breakfast nook.

  • Cinnamon-Spiced Coffee: The warmth of a freshly brewed cup of coffee, especially with hints of cinnamon, complements the muffins splendidly. It’s a classic pairing, perfect for those cozy mornings and lazy brunches.

Serve your Banana Brown Sugar Muffins with these delightful options, and watch your breakfast become a memorable feast!

Make Ahead Options

These Banana Brown Sugar Muffins for Breakfast are a fantastic choice for meal prep! You can mix the dry ingredients (flour, baking powder, baking soda, and salt) and store them in an airtight container for up to 3 days. Additionally, mash the ripe bananas and combine them with the wet ingredients (egg, Greek yogurt, melted butter, brown sugar, and vanilla) to prep ahead and refrigerate for up to 24 hours. When you’re ready to bake, simply follow the finishing steps, combining the prepped mixtures and filling the muffin tin. This way, you can enjoy freshly baked muffins any day of the week with minimal effort—just as delicious as if made that morning!

Chef's Helpful Tips

  • When making Banana Brown Sugar Muffins, ensure your bananas are very ripe for maximum sweetness and moisture.
  • Be careful not to overmix the batter, as this can result in dense muffins instead of light and fluffy ones.
  • For an even texture, consider using room temperature ingredients like the egg and yogurt before mixing.
  • Always keep an eye on your muffins towards the end of the baking time, as ovens can vary; start checking for doneness at the 18-minute mark.

Banana Brown Sugar Muffins for Breakfast Recipe FAQs

How ripe should the bananas be for this recipe?
Absolutely, the riper the bananas, the better! Look for bananas that have a few dark spots on the skin; this indicates sweetness and moisture. Ideally, you want bananas that are fully yellow with some brown spots, as they’ll mash easily and merge beautifully into your muffin batter.

How should I store the muffins after baking?
To keep your muffins fresh, store them at room temperature in an airtight container for up to 3 days. If you wish to extend their shelf life, placing them in the fridge in a sealed container can keep them tasty for up to a week. Just remember to let them cool completely before storing!

Can I freeze Banana Brown Sugar Muffins?
Very! Freezing is a fantastic way to keep your muffins for later. Wrap each muffin individually in plastic wrap, ensuring they’re well sealed to prevent freezer burn, and then place them in a freezer-safe bag. They’ll stay delicious for up to 3 months!

When you’re ready to enjoy, simply reheat in the microwave for 15-20 seconds or in a preheated oven at 350°F for about 5-7 minutes straight from the freezer.

What if my muffins turn out dense?
If your muffins come out dense, it’s likely due to overmixing. When combining the wet and dry ingredients, mix just until there are no dry spots. Another tip is to make sure your baking powder and baking soda are fresh; expired leavening agents can prevent proper rising. Check for doneness a tad earlier, around the 18-minute mark!

Are these muffins suitable for people with allergies?
These Banana Brown Sugar Muffins contain common allergens such as gluten and dairy. If you have a gluten allergy, you can substitute the all-purpose flour with a gluten-free blend. For a dairy-free option, swap out the Greek yogurt and butter for almond milk yogurt and coconut oil, respectively. Always check your specific ingredient labels for any allergy warnings!

Banana Brown Sugar Muffins for Breakfast

Banana Brown Sugar Muffins for Breakfast

Delight in these Banana Brown Sugar Muffins for Breakfast, simple to prepare and filled with flavor.
Print Recipe Pin Recipe
Prep Time 5 minutes mins
Cook Time 20 minutes mins
Cooling Time 10 minutes mins
Total Time 35 minutes mins
Servings: 12 muffins
Course: BREAKFAST & BRUNCH
Cuisine: American
Calories: 180
Ingredients Equipment Method Nutrition Notes

Ingredients
  

For the Muffin Batter
  • 1.5 cups unbleached all-purpose flour enhances structure and texture
  • 1 teaspoon baking powder acts as a leavening agent
  • 1 teaspoon baking soda complements the acidity of the bananas
  • 0.5 teaspoon salt balances sweetness
  • 3 large ripe bananas provides natural sweetness and moisture
  • 1 large egg adds richness
  • 0.25 cups Greek yogurt or sour cream keeps the muffins moist
  • 0.5 cups unsalted butter adds flavor and richness
  • 0.5 cups packed brown sugar creates caramel-like sweetness
  • 1 teaspoon pure vanilla extract enhances flavor profile
For the Muffin Topping
  • 4 tablespoons granulated sugar provides a sweet crunch
  • 1 teaspoon ground cinnamon adds warm, aromatic touch

Equipment

  • Muffin tin
  • Mixing bowls
  • Whisk

Method
 

How to Make Banana Brown Sugar Muffins
  1. Preheat the oven to 350°F (175°C) and prepare a muffin tin.
  2. In a bowl, whisk together flour, baking powder, baking soda, and salt.
  3. Mash the ripe bananas in another bowl and mix in egg, yogurt, melted butter, brown sugar, and vanilla extract until integrated.
  4. Combine the wet banana mixture with the dry ingredients, mixing gently.
  5. Fill each muffin cup about 2/3 full with batter.
  6. Mix granulated sugar and cinnamon and sprinkle over the batter in each cup.
  7. Bake in the preheated oven for about 20 minutes or until a toothpick comes out clean.
  8. Allow muffins to cool in the tin for a few minutes before transferring to a wire rack.

Nutrition

Serving: 1muffinCalories: 180kcalCarbohydrates: 28gProtein: 3gFat: 7gSaturated Fat: 4gPolyunsaturated Fat: 0.5gMonounsaturated Fat: 2gCholesterol: 30mgSodium: 180mgPotassium: 150mgFiber: 1gSugar: 10gVitamin A: 200IUVitamin C: 3mgCalcium: 50mgIron: 1mg

Notes

Serve warm with a pat of butter for extra indulgence. Ensure bananas are very ripe for maximum sweetness.

Tried this recipe?

Let us know how it was!

Filed Under: BREAKFAST & BRUNCH

Cardamom Spiced Rhubarb Cream Donuts

December 16, 2025 by JudyWhite Leave a Comment

There’s a certain charm that comes from the combination of spices and seasonal fruits, and that’s exactly what inspired my latest creation: Cardamom Spiced Rhubarb Cream Donuts. The moment I caught a whiff of warm, cardamom-scented dough filling my kitchen, I was transported to a world of cozy flavors. The distinctive warmth of cardamom perfectly complements the tartness of fresh rhubarb, creating a delightful balance that makes each bite a little celebration.

On one particularly rainy afternoon, I found myself yearning for something comforting and homemade. As I rummaged through my pantry, a hidden stash of rhubarb caught my eye, and inspiration struck. I decided to craft these donuts as a perfect treat, ideal for a casual get-together or a cozy breakfast at home. The result? Pillowy, golden donuts filled with luscious rhubarb compote and a velvety cream that will undoubtedly impress family and friends alike. Ready to bring this sweet adventure to your own kitchen? Let’s dive in!

Why You'll Love This Cardamom Spiced Rhubarb Cream Donuts

  • These Cardamom Spiced Rhubarb Cream Donuts are incredibly easy to make, allowing both novice and experienced bakers to enjoy them.
  • The unique flavor combination of cardamom and rhubarb creates a delightful taste sensation that will have everyone coming back for more.
  • Not only are they versatile enough to be served at breakfast, brunch, or dessert, but their vibrant colors and charming presentation make them visually stunning as well.
  • Plus, with a relatively quick prep and cook time, you can whip up a batch to impress your friends and family without spending all day in the kitchen.

Cardamom Spiced Rhubarb Cream Donuts Ingredients

For the Donut Dough
• Whole milk – helps activate the yeast for a fluffy texture.
• Instant yeast – allows for a quicker rise, making these donuts easy and efficient to prepare.
• Granulated sugar – sweetens the dough and nourishes the yeast for a better rise.
• Bread flour – provides the perfect chewiness and structure to your donuts.
• Unsalted butter – adds richness and flavor to each bite.
• Large egg – binds the ingredients and contributes to a tender crumb.
• Ground cardamom – infuses the dough with a warm, fragrant spice that pairs beautifully with rhubarb.
• Kosher salt – enhances the overall flavor of the donuts.

For the Rhubarb Compote
• Forced rhubarb – offers a tart contrast to the sweetness of the donuts, elevating the flavor profile.
• Granulated sugar – sweetens the compote to balance the tartness of the rhubarb.
• Orange zest and juice – adds citrus notes that brighten the dish.
• Kosher salt – a pinch helps to round out the flavors.
• Vanilla bean paste or extract – brings warmth and complexity to the compote.

For the Cream Filling
• Heavy cream – is whipped until fluffy for a light, airy filling.
• Mascarpone – lends a creamy, luxurious texture to the filling.
• Granulated sugar – sweetens the cream for a delightful treat.
• Vanilla bean paste or extract – enriches the cream with its sweet aroma.

For Frying and Finishing
• Neutral oil – essential for frying; it allows the donuts to cook evenly without an overpowering flavor.
• Granulated sugar (for tossing) – adds a sweet, sparkling finish to the hot donuts.

Get ready to experience the delightful harmony of flavors in these Cardamom Spiced Rhubarb Cream Donuts!

How to Make Cardamom Spiced Rhubarb Cream Donuts

  1. Combine whole milk and instant yeast in a bowl, allowing it to sit until frothy, about 5-10 minutes. This is the first step to ensure your donuts will be light and airy.

  2. Mix in the granulated sugar, bread flour, unsalted butter, large egg, ground cardamom, and kosher salt to the yeast mixture. Stir until a dough forms, then get ready for some kneading!

  3. Knead the dough on a floured surface for about 8-10 minutes until smooth and elastic. Place the dough in a greased bowl, cover with a clean towel, and let it rise until doubled in size, roughly 1 hour.

  4. Prepare the rhubarb compote by cooking forced rhubarb with granulated sugar, orange zest, orange juice, kosher salt, and vanilla in a saucepan over medium heat. Stir until soft, then cool completely.

  5. Whip the heavy cream in a mixing bowl until soft peaks form. Gently fold in mascarpone, granulated sugar, and vanilla bean paste until fully combined for a luscious filling.

  6. Roll out the dough on a floured surface to about 1/2-inch thickness, then cut into donut shapes. Let them rise again for 30 minutes for that perfect fluffiness.

  7. Heat neutral oil in a deep fryer or heavy pot to 350°F (175°C). Carefully fry the donuts until golden brown on both sides, about 2-3 minutes per side, then drain on paper towels.

  8. Toss the hot donuts in granulated sugar for a sweet dusting. Once cooled slightly, fill each with rhubarb compote and cream filling, delighting your taste buds!

Optional: Serve with a sprinkle of extra cardamom for added flavor.
Exact quantities are listed in the recipe card below.

How to Store and Freeze Cardamom Spiced Rhubarb Cream Donuts

Room Temperature: Store your donuts in an airtight container at room temperature for up to 2 days. This helps maintain their soft texture and delightful creaminess.

Fridge: If you need them to last longer, you can refrigerate the donuts for up to 5 days. Just remember to cover them in plastic wrap to prevent them from drying out.

Freezer: For longer storage, freeze the filled donuts in a single layer on a baking sheet. Once solid, transfer them to a freezer-safe bag and store for up to 3 months.

Reheating: To enjoy frozen donuts, thaw them overnight in the fridge. Reheat briefly in the microwave or oven (350°F) for 5 minutes to restore their fluffy perfection.

Make Ahead Options

These Cardamom Spiced Rhubarb Cream Donuts are a fantastic choice for meal prep, allowing you to enjoy a delicious homemade treat with minimal effort during the week! You can prepare the dough and let it rise up to 24 hours in advance; just be sure to store it in the refrigerator to prevent over-proofing. The rhubarb compote can also be made up to 3 days ahead; simply refrigerate it in a sealed container and reheat before filling the donuts. When you’re ready to serve, roll out the dough, cut into shapes, let rise briefly, fry them up, and fill. This way, you’ll enjoy these delightful donuts just as fresh and flavorful as if you made them all at once!

Cardamom Spiced Rhubarb Cream Donuts Variations

Feel free to get creative and personalize your donuts with these delightful adjustments!

  • Gluten-Free: Use a gluten-free flour blend to make these donuts suitable for gluten-sensitive friends; the flavor still shines through!

  • Vegan: Substitute almond milk for whole milk, replace butter with coconut oil, and use flax eggs for egg alternatives for a completely plant-based treat.

  • Spice Up: For a warm twist, add 1 tablespoon of cinnamon to the dough for a delightful cinnamon-cardamom flavor blend!

  • Fruity Twist: Swap out rhubarb with diced strawberries or tart cherries for a vibrant fruit variation that brings a different kind of sweetness.

  • Zesty Orange: Boost the orange flavor by adding 1 teaspoon of orange extract to the cream filling for an extra citrus kick that’s refreshing and bright.

  • Chocolate Love: Drizzle melted dark chocolate over the donuts after frying for a rich, indulgent finish that pairs beautifully with the rhubarb.

  • Nutty Crunch: Add 1/2 cup of chopped nuts like pistachios or almonds to the cream filling for a delightful crunch that complements the creamy texture.

  • Heat Element: For a bit of excitement, mix in a pinch of cayenne pepper to the dough; the heat will surprise and tantalize your taste buds!

What to Serve with Cardamom Spiced Rhubarb Cream Donuts?

Elevate your donut experience with delightful pairings that complement the warm spices and luscious cream filling.

  • Fresh Berries: These juicy, sweet-tart fruits brighten up each bite, creating a lovely contrast with the rich flavors of the donuts.
  • Sweetened Coffee: A creamy latte or caramel macchiato creates the ultimate morning indulgence, perfectly balancing the sweetness of the donuts.
  • Herbal Tea: A soothing chamomile or mint tea complements the spices in the donuts while providing a refreshing contrast.
  • Vanilla Ice Cream: The cold creaminess of vanilla ice cream perfectly contrasts the warmth of the donuts, taking dessert to a new level.
  • Maple Syrup: Drizzling a bit of maple syrup over the filled donuts adds a touch of sweetness, enhancing their flavor and making them more decadent.
  • Citrus Salad: A refreshing salad of oranges and grapefruits offers a bright, zesty contrast that lightens up the richness of the donuts.
  • Chocolate Drizzle: Enhance each donut with a warm chocolate drizzle for an irresistible addition; the flavors meld beautifully with the cardamom.
  • Lemon Curd: A dollop of tangy lemon curd adds a zesty twist that brightens each bite, perfectly balancing the sweet elements.
  • Sparkling Water: A bubbly sip refreshes the palate between bites, ensuring that the richness of the donuts doesn’t overwhelm.
  • Chocolate Coffee Cake: A slice of this moist, fudgy goodness pairs beautifully with the donuts, offering more texture and layers of flavor.

Chef's Helpful Tips

  • For the Cardamom Spiced Rhubarb Cream Donuts, make sure your milk is warm but not hot when combining it with yeast to activate it properly without killing the yeast.
  • Kneading the dough thoroughly is crucial as it develops gluten, ensuring your donuts have a delightful chewiness.
  • When frying, maintain the oil temperature around 350°F to achieve that perfect golden brown exterior while keeping the inside light and airy.
  • Lastly, let the donuts cool slightly before tossing them in sugar, as this allows the sugar to adhere better for a more satisfying sweetness.

Cardamom Spiced Rhubarb Cream Donuts Recipe FAQs

What is the best way to select rhubarb for this recipe?
Absolutely! Look for forced rhubarb with vibrant red stalks that have a firm texture. Avoid any stalks with dark spots or wilting, as they may be past their prime. The freshness of the rhubarb is key to getting that tart flavor to balance the sweetness of the donuts!

How should I store leftover Cardamom Spiced Rhubarb Cream Donuts?
You can keep your donuts at room temperature in an airtight container for up to 2 days to preserve their softness. If you want to make them last longer, store them in the refrigerator for up to 5 days, wrapped securely in plastic wrap to prevent drying out.

Can I freeze the filled donuts, and how do I do it?
Yes, you can definitely freeze the Cardamom Spiced Rhubarb Cream Donuts! Start by placing the filled donuts on a baking sheet in a single layer and freeze until solid, about 1-2 hours. Then, transfer them to a freezer-safe bag for up to 3 months. Just remember to label the bag with the date for easy reference!

What should I do if my donut dough isn’t rising?
Very! If your dough isn’t rising, it might be due to the yeast not activating properly. Ensure the milk is warm (around 110°F) but not hot, as too much heat can kill the yeast. If it’s been over an hour and there’s little change, consider letting it sit in a warmer area or even adding a couple of teaspoons of sugar to the yeast when you mix it, which can sometimes give it a little boost.

Are these donuts suitable for people with allergies?
While these delicious Cardamom Spiced Rhubarb Cream Donuts contain common allergens like gluten (in the flour) and dairy (in the milk and butter), you can make substitutions to accommodate allergies. For a gluten-free option, try using a gluten-free flour blend. You can substitute almond milk or a nut-free alternative for the dairy components. Always check labels to ensure there are no hidden allergens.

How do I know when the oil is ready for frying?
You’ll want the oil to reach about 350°F (175°C) for perfect frying! You can test the oil by sprinkling a tiny bit of dough into it—if it sizzles and rises to the top, it’s ready. Maintaining the right temperature is crucial for achieving that golden-brown color while keeping the donuts light and fluffy on the inside.

Cardamom Spiced Rhubarb Cream Donuts

Cardamom Spiced Rhubarb Cream Donuts

Delight in Cardamom Spiced Rhubarb Cream Donuts, a perfect blend of spices and fresh rhubarb.
Print Recipe Pin Recipe
Prep Time 30 minutes mins
Cook Time 20 minutes mins
Rising Time 1 hour hr 30 minutes mins
Total Time 2 hours hrs 20 minutes mins
Servings: 12 donuts
Course: DESSERT RECIPES
Cuisine: American
Calories: 250
Ingredients Equipment Method Nutrition Notes

Ingredients
  

For the Donut Dough
  • 1 cup whole milk helps activate the yeast for a fluffy texture
  • 2 teaspoons instant yeast allows for a quicker rise
  • 1/2 cup granulated sugar sweetens the dough
  • 3 cups bread flour provides chewiness
  • 1/4 cup unsalted butter adds richness
  • 1 large egg binds the ingredients
  • 1 teaspoon ground cardamom infuses warmth and fragrance
  • 1/2 teaspoon kosher salt enhances flavor
For the Rhubarb Compote
  • 2 cups forced rhubarb offers tart contrast
  • 3/4 cup granulated sugar sweetens the compote
  • 1 tablespoon orange zest adds citrus notes
  • 1/4 cup orange juice brightens the dish
  • 1/4 teaspoon kosher salt rounds out flavors
  • 1 teaspoon vanilla bean paste or extract brings warmth and complexity
For the Cream Filling
  • 1 cup heavy cream whipped until fluffy
  • 1/2 cup mascarpone lends creaminess
  • 1/4 cup granulated sugar sweetens the cream
  • 1 teaspoon vanilla bean paste or extract enriches the cream
For Frying and Finishing
  • 4 cups neutral oil for frying
  • 1/2 cup granulated sugar for tossing

Equipment

  • Mixing bowl
  • Deep fryer
  • Saucepan
  • Whisk
  • Rolling pin
  • Donut cutter
  • paper towels

Method
 

How to Make Cardamom Spiced Rhubarb Cream Donuts
  1. Combine whole milk and instant yeast in a bowl, allowing it to sit until frothy, about 5-10 minutes.
  2. Mix in the granulated sugar, bread flour, unsalted butter, large egg, ground cardamom, and kosher salt to the yeast mixture.
  3. Knead the dough on a floured surface for about 8-10 minutes until smooth and elastic.
  4. Prepare the rhubarb compote by cooking forced rhubarb with granulated sugar, orange zest, orange juice, kosher salt, and vanilla in a saucepan over medium heat.
  5. Whip the heavy cream in a mixing bowl until soft peaks form, then fold in mascarpone, granulated sugar, and vanilla until fully combined.
  6. Roll out the dough on a floured surface to about 1/2-inch thickness, then cut into donut shapes. Let them rise again for 30 minutes.
  7. Heat neutral oil to 350°F (175°C). Carefully fry the donuts until golden brown on both sides, about 2-3 minutes per side.
  8. Toss the hot donuts in granulated sugar for a sweet dusting, then fill each with rhubarb compote and cream filling.

Nutrition

Serving: 1donutCalories: 250kcalCarbohydrates: 30gProtein: 3gFat: 15gSaturated Fat: 9gPolyunsaturated Fat: 1gMonounsaturated Fat: 5gCholesterol: 40mgSodium: 150mgPotassium: 150mgFiber: 1gSugar: 10gVitamin A: 500IUVitamin C: 2mgCalcium: 50mgIron: 1mg

Notes

Allow donuts to cool slightly before tossing in sugar for better adherence.

Tried this recipe?

Let us know how it was!

Filed Under: BREAKFAST & BRUNCH

Simpele Vanille Donuts

December 16, 2025 by JudyWhite Leave a Comment

The first time I made Simpele Vanille Donuts, my kitchen transformed into a cozy retreat, filled with the warm, comforting scents of vanilla and freshly fried goodness. It was a chilly Sunday morning, and I had indulged in countless store-bought treats, realizing that nothing compares to the joy of crafting something delightful from scratch. As I mixed the dough, the anticipation built, the promise of sweet, fluffy donuts danced in the air.

What I discovered was not just a recipe, but a journey filled with simple pleasures and a dash of nostalgia. These donuts are incredibly easy to make, yet they pack a flavor punch that’s perfect for impressing guests or simply treating yourself.

Whether you’re a busy chef in need of a quick indulgence or someone yearning for the satisfaction of homemade delights, this recipe is for you. Let me guide you through creating these scrumptious little rings of happiness that will bring smiles to any face, including your own!

Why You'll Love This Simpele Vanille Donuts

  • These Simpele Vanille Donuts are incredibly easy to prepare, making them a perfect choice for both novice and seasoned bakers alike.
  • Each bite is bursting with rich vanilla flavor that elevates them above store-bought options, ensuring a delightful experience.
  • Their versatility allows you to customize toppings or fillings, catering to any mood or occasion.
  • Plus, their warm, sugary exterior is so visually appealing that they are sure to impress anyone at your table.

Simpele Vanille Donuts Ingredients

• Get ready to create something sweet!

For the Dough

  • Lukewarm milk – Helps activate the yeast for a fluffy texture.
  • Instant yeast – Ensures quick rising of the dough for an effortless bake.
  • White caster sugar – Adds sweetness and enhances the dough’s flavor.
  • Vanilla sugar – Infuses an aromatic vanilla essence into every bite.
  • Vanilla cream – Provides richness and contributes to the moistness of the donuts.
  • Softened butter – Gives a delightful richness and keeps the donuts tender.
  • Flour – The foundation of your dough; choose high-quality for best results.
  • Baking powder – Pairs with the yeast for extra lift and fluffiness.
  • Salt – Enhances flavors and balances the sweetness.

For Coating

  • Extra granulated sugar – Gives a sweet, crunchy exterior that complements the fluffy inside.

Embrace the delightful process of making your Simpele Vanille Donuts, and enjoy the magic of homemade treats!

How to Make Simpele Vanille Donuts

  1. Combine Ingredients: In a bowl, blend the lukewarm milk with instant yeast. Let this sit for a few minutes until frothy, which activates the yeast for that perfect rise.

  2. Mix Wet Ingredients: Add the white caster sugar, vanilla sugar, vanilla cream, and softened butter to the yeast mixture. Stir well until fully combined, creating a rich and decadent base for your donuts.

  3. Incorporate Dry Ingredients: Gradually add in the flour, baking powder, and salt to the wet mixture. Mix until a soft dough forms, ensuring all ingredients are well integrated for the best texture.

  4. Knead the Dough: Turn the dough out onto a floured surface and knead until smooth and elastic, about 5 minutes. Place it in a greased bowl, cover with a cloth, and let rise until it doubles in size—roughly 1 hour.

  5. Shape the Donuts: Roll out the risen dough to about 1/2 inch thick, then cut into donut shapes using a cutter. Place them on a baking sheet and let them rise again for about 30 minutes.

  6. Fry the Donuts: Heat oil in a deep fryer to 350°F. Fry the donuts in batches until they are golden brown on both sides, approximately 2-3 minutes per side.

  7. Coat with Sugar: Remove the donuts from the oil and allow them to drain on paper towels. While still warm, generously coat them in extra granulated sugar for that delightful crunch.

Optional: Serve them warm with a sprinkle of cinnamon sugar for an extra treat!

Exact quantities are listed in the recipe card below.

How to Store and Freeze Simpele Vanille Donuts

Room Temperature: Store your donuts in an airtight container at room temperature for up to 2 days for optimal freshness.

Fridge: If not consumed within 2 days, keep them in the fridge, where they can last for up to 5 days. However, this may slightly change their texture.

Freezer: Place cooled donuts in a single layer on a baking sheet. Once frozen, transfer them to a resealable bag or airtight container, where they can stay fresh for up to 3 months.

Reheating: To enjoy your Simpele Vanille Donuts again, simply warm them in the microwave for about 10-15 seconds or in the oven at 350°F for a few minutes until slightly heated through.

Simpele Vanille Donuts Variations

Feel free to get creative with your donuts—there’s always a way to make them uniquely yours!

  • Gluten-Free: Substitute all-purpose flour with a gluten-free blend to enjoy fluffy donuts without gluten worries. Just ensure the baking powder is gluten-free as well!

  • Vegan: Replace milk with almond or oat milk, use plant-based butter, and swap in a flax egg for extra moisture. These vegan donuts will still shine with awesome flavor!

  • Chocolate Drizzle: Melt dark chocolate and drizzle over the cooled donuts for a rich, indulgent treat that brings in an irresistible chocolatey twist.

  • Spicy Kick: Add a pinch of cayenne or a dash of cinnamon into the dough for a warming kick that plays beautifully with the sweet vanilla.

  • Lemon Zest: Mix in some finely grated lemon zest to enhance the flavor profile. This brightens up your donuts, adding a delightful citrusy note that cuts through the sweetness.

  • Filled Donuts: Create a pocket in the center before frying and pipe in your favorite jam or cream filling after frying for a surprise burst of flavor.

  • Coffee Infusion: Blend instant coffee granules into the milk for a soft coffee flavor that pairs wonderfully with the vanilla. It’s a great combo for coffee lovers!

  • Nutty Crunch: Fold in crushed nuts, like almonds or hazelnuts, before shaping the donuts for added texture and a delightful nutty flavor that complements the vanilla essence.

With these variations, every time you make these Simpele Vanille Donuts, they’ll feel like a new adventure! Enjoy experimenting and making memories in your kitchen!

What to Serve with Simpele Vanille Donuts?

The warmth and sweetness of freshly made donuts invite a delightful meal experience, bursting with comforting flavors.

  • Rich Hot Chocolate: A creamy cup of hot chocolate enhances the vanilla flavors while providing a cozy warmth alongside your donuts.
  • Berries Medley: Fresh berries add a pop of color and a tart contrast, perfectly balancing the sweetness of the donuts.
  • Vanilla Ice Cream: Serve a scoop of vanilla ice cream beside your donuts for a sumptuous treat that amplifies the vanilla essence.
  • Maple Glaze: Drizzle warm donuts with maple glaze for added sweetness and a delightful sticky texture that everyone will love.
  • Coffee: A rich cup of coffee pairs beautifully, deepening the flavors while offering a delightful contrast to the sweetness.
  • Cinnamon Sugar Coating: First coat the donuts in cinnamon sugar for an extra burst of flavor—it’s a match made in heaven.
  • Milkshake: Indulge in a vanilla or chocolate milkshake to complement the fluffy donuts, making it a whimsical treat for all ages.
  • Greek Yogurt: A side of creamy Greek yogurt adds a refreshing touch and balances the sweetness beautifully, making this pairing a guilt-free option.
  • Fruit Compote: A homemade fruit compote can elevate your donut experience, creating a luscious complement with every bite.

Make Ahead Options

These Simpele Vanille Donuts are a fantastic option for busy home cooks looking to save time without sacrificing flavor! You can prepare the dough up to 24 hours in advance by following the first three steps of the recipe, then cover it tightly with plastic wrap and refrigerate. To maintain their deliciousness, make sure to let the dough come to room temperature and rise for about 30 minutes before rolling out and shaping. Once shaped, the donuts can also be left to rise for an additional 30 minutes before frying, perfect for those impromptu cravings. Just finish by frying and coating them in sugar, and you’ll enjoy fresh donuts with minimal effort!

Chef's Helpful Tips

  • When making Simpele Vanille Donuts, ensure your milk is just warm to the touch, as too hot can kill the yeast.
  • Avoid over-kneading the dough; stop as soon as it becomes smooth and elastic to prevent tough donuts.
  • Allow the dough to rise in a warm area; if your kitchen is cold, you can place it in a slightly warmed oven turned off.
  • For the best frying results, maintain the oil temperature around 350°F to achieve that perfect golden-brown color without absorbing excess oil.

Simpele Vanille Donuts Recipe FAQs

What is the best way to select ripe ingredients for Simpele Vanille Donuts?
When it comes to the ingredients, I recommend using fresh, high-quality items for the best flavor. Ensure your milk is lukewarm and not too hot, as overheating can kill the yeast’s effectiveness. For the butter, choose softened unsalted butter for rich flavor without excess salt. Always check for the freshness of your vanilla cream and sugars, as these will impact the richness and sweetness of your donuts.

How should I store leftover Simpele Vanille Donuts?
To keep your donuts fresh, store them in an airtight container at room temperature for up to 2 days. If you need to store them longer, place them in the fridge where they can last up to 5 days, though this might change their texture slightly. It’s best to enjoy them while they’re still soft and fluffy!

Can I freeze Simpele Vanille Donuts?
Absolutely! To freeze your donuts, let them cool completely first. Place them in a single layer on a baking sheet and freeze until solid. Once frozen, transfer them to a resealable plastic bag or airtight container, labeling it with the date. They can be stored in the freezer for up to 3 months. When you’re ready to enjoy them, simply warm them in the microwave for about 10-15 seconds or place them in a preheated oven at 350°F for a few minutes until just heated through.

What should I do if my dough doesn’t rise properly?
If your dough doesn’t rise, it could be due to the yeast not being activated properly. Make sure your yeast is fresh and that the milk is lukewarm—not hot. Another reason for poor rising could be a cool environment; try placing your dough in a warm spot, like an oven that has been turned off after preheating. If your dough has risen poorly, you can gently knead it again, allow it to rise a second time for about 30 minutes, and try to fry them once more.

Are Simpele Vanille Donuts suitable for people with allergies?
While these donuts are a treat, they do contain common allergens such as dairy, gluten, and eggs (from the vanilla cream). If making this for someone with allergies or dietary restrictions, consider alternatives such as using almond milk and gluten-free flour, but do note that this may alter the texture and taste slightly. Always consult with the individual to ensure their specific needs are met!

Can I make these donuts healthier?
Yes! You can substitute some ingredients for healthier versions. For example, you can use almond flour instead of regular flour for a lower-carb option. Additionally, you could sweeten with a natural sweetener like honey or maple syrup, but be mindful that this may change the dough’s consistency, so you might need to adjust the liquid ingredients. Another tip is to bake them instead of frying for a lighter alternative. Enjoy exploring these options!

Simpele Vanille Donuts

Simpele Vanille Donuts

Enjoy the homemade delight of Simpele Vanille Donuts, bursting with rich vanilla flavor and easy to prepare.
Print Recipe Pin Recipe
Prep Time 30 minutes mins
Cook Time 10 minutes mins
Rising Time 1 hour hr 30 minutes mins
Total Time 2 hours hrs 10 minutes mins
Servings: 12 donuts
Course: DESSERT RECIPES
Cuisine: American
Calories: 250
Ingredients Equipment Method Nutrition Notes

Ingredients
  

For the Dough
  • 1 cup Lukewarm milk Helps activate the yeast for a fluffy texture.
  • 2 teaspoons Instant yeast Ensures quick rising of the dough for an effortless bake.
  • 1/2 cup White caster sugar Adds sweetness and enhances the dough's flavor.
  • 1 packet Vanilla sugar Infuses an aromatic vanilla essence into every bite.
  • 1/4 cup Vanilla cream Provides richness and contributes to the moistness of the donuts.
  • 1/4 cup Softened butter Gives a delightful richness and keeps the donuts tender.
  • 3 cups Flour The foundation of your dough; choose high-quality for best results.
  • 1 tablespoon Baking powder Pairs with the yeast for extra lift and fluffiness.
  • 1/2 teaspoon Salt Enhances flavors and balances the sweetness.
For Coating
  • 1 cup Extra granulated sugar Gives a sweet, crunchy exterior that complements the fluffy inside.

Equipment

  • Deep fryer
  • Mixing bowl
  • Rolling pin
  • Donut cutter
  • Baking sheet

Method
 

How to Make Simpele Vanille Donuts
  1. In a bowl, blend the lukewarm milk with instant yeast. Let this sit for a few minutes until frothy, which activates the yeast for that perfect rise.
  2. Add the white caster sugar, vanilla sugar, vanilla cream, and softened butter to the yeast mixture. Stir well until fully combined, creating a rich and decadent base for your donuts.
  3. Gradually add in the flour, baking powder, and salt to the wet mixture. Mix until a soft dough forms, ensuring all ingredients are well integrated for the best texture.
  4. Turn the dough out onto a floured surface and knead until smooth and elastic, about 5 minutes. Place it in a greased bowl, cover with a cloth, and let rise until it doubles in size—roughly 1 hour.
  5. Roll out the risen dough to about 1/2 inch thick, then cut into donut shapes using a cutter. Place them on a baking sheet and let them rise again for about 30 minutes.
  6. Heat oil in a deep fryer to 350°F. Fry the donuts in batches until they are golden brown on both sides, approximately 2-3 minutes per side.
  7. Remove the donuts from the oil and allow them to drain on paper towels. While still warm, generously coat them in extra granulated sugar for that delightful crunch.

Nutrition

Serving: 1donutCalories: 250kcalCarbohydrates: 30gProtein: 3gFat: 12gSaturated Fat: 7gMonounsaturated Fat: 4gCholesterol: 30mgSodium: 150mgPotassium: 120mgFiber: 1gSugar: 10gVitamin A: 300IUCalcium: 50mgIron: 0.5mg

Notes

For extra flavor, serve warm donuts with a sprinkle of cinnamon sugar.

Tried this recipe?

Let us know how it was!

Filed Under: BREAKFAST & BRUNCH

Cranberry Orange Muffins

December 14, 2025 by JudyWhite Leave a Comment

There’s something incredibly uplifting about the bright burst of citrus paired with the tartness of cranberries. Just the thought of baked Cranberry Orange Muffins evokes memories of cozy mornings spent in the kitchen, the warm glow of sunlight streaming through the window, and the delightful aroma wafting through the air. These muffins have become a staple in my home, a perfect antidote to those monotonous days filled with fast food.

What I love most about this recipe is its simplicity. With just a handful of ingredients and a mere 35 minutes from start to finish, you can whip up a batch that not only satisfies but impresses. They’re fluffy, flavorful, and versatile—great for breakfast, a snack, or even as a sweet surprise at any gathering. Imagine pulling a tray of golden muffins from the oven, each topped with a sprinkle of coarse sugar, ready to be enjoyed with friends and family. Let’s bring a little zest back into your kitchen with these delightful Cranberry Orange Muffins!

Why You'll Love This Cranberry Orange Muffins

  • These Cranberry Orange Muffins are incredibly easy to make, with just a handful of ingredients and a total time of only 35 minutes.
  • The bright citrus flavor combined with the tartness of cranberries creates a deliciously unique taste that will keep you coming back for more.
  • They are also versatile enough to serve at breakfast, as an afternoon snack, or as a delightful dessert for gatherings, making them perfect for any occasion.
  • The visual appeal is undeniable, with their golden tops shimmered with coarse sugar, making them an enticing treat that will impress your friends and family.

Cranberry Orange Muffin Ingredients

For the Muffin Batter
• Orange Zest – adds a fresh, vibrant flavor that perfectly complements the cranberries.
• Sugar – sweetens the muffins and helps achieve a golden top when baked.
• Softened Butter – lends richness and moisture, contributing to a fluffy texture.
• Large Eggs – binds the ingredients together while adding structure to the muffins.
• Milk – keeps the batter moist and soft; feel free to use any milk or plant-based alternative.
• Vanilla Extract – enhances the overall flavor profile, bringing warmth to each bite.
• Flour – forms the base structure of the muffins; ensure it’s properly measured for the best results.
• Salt – balances the sweetness and enhances the other flavors.
• Baking Powder – provides leavening; make sure it’s fresh for optimal rise.
• Baking Soda – works with the acidity of the cranberries to further aid in leavening.
• Ground Cinnamon – adds a cozy spice note that pairs beautifully with the citrus and cranberries.
• Cranberries – the star of the show, whether using fresh or frozen for that delightful tartness.

For the Topping
• Coarse Sugar – adds a delightful crunch and sparkle on top of each muffin, making them extra tempting.

How to Make Cranberry Orange Muffins

  1. Preheat the oven to 375°F and line a muffin pan with paper liners or grease it well. This preparation helps in achieving a perfect bake and easy muffin removal.

  2. Combine the orange zest with the sugar in a mixing bowl. Press the zest into the sugar to release its aromatic oils, then cream this mixture with softened butter until it’s light and fluffy, about 2-3 minutes.

  3. Add the large eggs one at a time, ensuring each is fully mixed in before adding the next. This step helps create a well-emulsified batter, resulting in fluffy muffins.

  4. Mix in the milk and vanilla extract, stirring gently until combined. The liquid ingredients enhance moisture and flavor—it’s important not to overmix at this stage!

  5. Toss 1 tablespoon of flour with the cranberries to prevent them from sinking. Fold in the remaining flour, salt, baking powder, baking soda, and cinnamon until just a few flour streaks remain. Then, gently fold in the cranberries for a pop of tartness.

  6. Scoop the batter into your lined muffin pan, filling each cup about two-thirds full. Sprinkle coarse sugar on top of each muffin to create a beautiful sweet crust.

  7. Bake for 30-35 minutes, or until a toothpick inserted into the center comes out clean and the tops are golden brown. Let them cool for a few minutes before serving.

Optional: Serve warm with a pat of butter for a delightful treat.

Exact quantities are listed in the recipe card below.

Cranberry Orange Muffins Variations

Feel free to explore these tempting twists and make these delightful muffins your own!

  • Gluten-Free: Substitute all-purpose flour with a 1:1 gluten-free flour blend for a deliciously fluffy alternative.

  • Whole Wheat: Swap half of the all-purpose flour with whole wheat flour for added nuttiness and health benefits. The subtle flavor enhances the muffin experience wonderfully.

  • Nutty Crunch: Add ½ cup of chopped walnuts or pecans to the batter for an extra crunch that pairs beautifully with the soft muffins.

  • Spiced Up: Throw in a pinch of nutmeg or cardamom to deepen the spice profile, bringing a warm and cozy twist to each bite.

  • Dried Fruit: Replace cranberries with a mix of dried cherries, blueberries, or raisins for a sweeter muffin experience; adjust the sugar accordingly.

  • Citrus Twist: Experiment with lemon or lime zest instead of orange for a refreshing citrus surprise that’s equally delightful.

  • Vegan: Use flax eggs (1 tablespoon ground flaxseed mixed with 2.5 tablespoons water per egg) and a plant-based butter substitute for a vegan-friendly treat.

  • Zesty Icing: Drizzle a simple glaze made from powdered sugar and fresh orange juice on top for a delightful sweet finish, elevating your muffin game even more.

What to Serve with Cranberry Orange Muffins?

Imagine the delightful aroma of freshly baked muffins mingling with the sound of laughter and chatter at your table.

  • Creamy Yogurt Parfait: The smoothness of yogurt layered with fresh fruits enhances the muffins’ citrus notes while adding creaminess to your breakfast spread.
  • Fresh Fruit Salad: A medley of seasonal fruits brings a burst of color and freshness, perfectly balancing the sweetness of the muffins with its natural tartness.
  • Herbal Tea: A cup of warm herbal tea not only soothes the soul but also complements the fruity flavor of cranberry orange nicely, adding warmth to your meal.
  • Maple Syrup Drizzle: A light drizzle of pure maple syrup adds an extra layer of sweetness, making each bite even more indulgent and inviting.
  • Nutty Granola: The crunch of homemade granola sprinkled over yogurt creates interesting textures against soft muffins, while the nutty flavor rounds out the meal.
  • Cheese Platter: Soft cheeses like Brie or goat cheese pair beautifully with the tangy cranberries, adding an elegant touch to a brunch spread.
  • Hot Coffee: A classic pairing, the rich bitterness of coffee contrasts beautifully with the sweetness of the muffins, offering a delightful balance of flavors.
  • Chocolate Chip Cookies: For those who love to mix flavors, enjoy these muffins alongside chocolate chip cookies for a nostalgic dessert experience that tickles the taste buds.
  • Lemonade: A refreshing glass of lemonade provides a zesty counterpart to the muffins, making it a perfect choice for warm gatherings.

How to Store and Freeze Cranberry Orange Muffins

Room Temperature: Store cooled muffins in an airtight container for up to 3 days to maintain their soft texture.

Fridge: For longer freshness, refrigerate in an airtight container for up to a week. Just be mindful that they may lose a bit of moisture.

Freezer: Freeze muffins for up to 3 months. Wrap each one individually in plastic wrap, then place them in a freezer bag to prevent freezer burn.

Reheating: To enjoy warm muffins, simply microwave for 15-20 seconds or let them thaw at room temperature before enjoying.

Make Ahead Options

These Cranberry Orange Muffins are a fantastic option for meal prep! You can prepare the muffin batter up to 24 hours in advance; simply mix all the ingredients up to step 5, then cover and refrigerate the bowl. This not only saves you time on busy mornings but also allows the flavors to meld beautifully. Alternatively, you can bake the muffins and cool them completely before storing them in an airtight container for up to 3 days at room temperature. If you want to enjoy them crispy, reheat the muffins in a toaster oven for a few minutes before serving. Just remember to keep them wrapped tightly to maintain their fluffy texture and moistness—these make-ahead muffins will be just as delicious as when they were freshly baked!

Chef's Helpful Tips

  • For the perfect Cranberry Orange Muffins, make sure your butter is softened to room temperature so it creams well with the sugar, creating a light and airy batter.
  • Avoid overmixing the batter once the dry ingredients are added to maintain a tender crumb; just mix until you see a few streaks of flour.
  • When tossing the cranberries in flour before adding them to the batter, it helps prevent them from sinking to the bottom while baking.
  • Always check your muffins a few minutes before the recommended baking time, as ovens can vary, and you want them to be perfectly golden and baked through.

Cranberry Orange Muffins Recipe FAQs

What type of cranberries should I use?
Absolutely! You can use either fresh or frozen cranberries. If using frozen, there’s no need to thaw them first; just toss them directly into the batter. I often find fresh ones provide a slight crunch and burst of flavor, but frozen can be a convenient option, especially when they’re out of season.

How should I store cranberry orange muffins?
For optimal freshness, store your cooled Cranberry Orange Muffins in an airtight container at room temperature for up to 3 days. If you want to extend their shelf life, you can refrigerate them, where they’ll stay fresh for about a week. Just keep in mind that refrigeration may make them a tad drier.

Can I freeze cranberry orange muffins?
Very! To freeze your muffins, first, wrap each one individually in plastic wrap. Then, place them in a freezer-safe bag or container. This method prevents freezer burn and keeps them fresh for up to 3 months. When you’re ready to enjoy one, simply let it thaw at room temperature or microwave it for 15-20 seconds.

What can I do if my muffins don’t rise properly?
If your muffins aren’t rising as expected, check a couple of things. First, is your baking powder fresh? It loses potency over time, so it’s important to replace it regularly. Second, have you overmixed your batter? Overmixing can lead to dense muffins, so mix just until ingredients are combined.

Can these muffins be made gluten-free?
Absolutely! To make gluten-free Cranberry Orange Muffins, swap the all-purpose flour for a 1:1 gluten-free baking blend. Brands like Bob’s Red Mill or King Arthur Flour work great. Just keep an eye on the batter’s consistency, as gluten-free flours can sometimes retain moisture differently from regular flour.

Are these muffins safe for pets?
It’s best to avoid giving these muffins to pets, particularly due to the sugar and possible chocolate or nut toppings that could be added. Always check ingredients and consult your vet if you’re unsure; your furry friends may be better off with treats specifically made for them!

Cranberry Orange Muffins

Cranberry Orange Muffins

Bright burst of citrus and tart cranberries make these Cranberry Orange Muffins a delightful treat for any occasion.
Print Recipe Pin Recipe
Prep Time 10 minutes mins
Cook Time 30 minutes mins
Total Time 40 minutes mins
Servings: 12 muffins
Course: BREAKFAST & BRUNCH
Cuisine: American
Calories: 200
Ingredients Equipment Method Nutrition Notes

Ingredients
  

For the Muffin Batter
  • 1 tablespoon Orange Zest adds a fresh flavor
  • 3/4 cup Sugar sweetens the muffins
  • 1/2 cup Softened Butter lends richness
  • 2 large Eggs binds ingredients
  • 1 cup Milk keeps the batter moist
  • 1 teaspoon Vanilla Extract enhances flavor
  • 2 cups Flour forms the base
  • 1/2 teaspoon Salt balances sweetness
  • 2 teaspoons Baking Powder provides leavening
  • 1/2 teaspoon Baking Soda aids in leavening
  • 1 teaspoon Ground Cinnamon adds spice note
  • 2 cups Cranberries star ingredient
For the Topping
  • 1 tablespoon Coarse Sugar adds crunch and sparkle

Equipment

  • muffin pan
  • Mixing bowls
  • Whisk
  • Spoon

Method
 

How to Make Cranberry Orange Muffins
  1. Preheat the oven to 375°F and line a muffin pan with paper liners or grease it well.
  2. Combine the orange zest with the sugar in a mixing bowl. Press the zest into the sugar, then cream with softened butter until light and fluffy.
  3. Add the large eggs one at a time, ensuring each is fully mixed before adding the next.
  4. Mix in the milk and vanilla extract, stirring gently until combined.
  5. Toss 1 tablespoon of flour with the cranberries. Fold in the remaining flour, salt, baking powder, baking soda, and cinnamon until just combined, then gently fold in the cranberries.
  6. Scoop the batter into the lined muffin pan, filling each cup about two-thirds full. Sprinkle coarse sugar on top.
  7. Bake for 30-35 minutes, or until a toothpick inserted comes out clean. Let cool for a few minutes before serving.

Nutrition

Serving: 1muffinCalories: 200kcalCarbohydrates: 30gProtein: 3gFat: 9gSaturated Fat: 5gMonounsaturated Fat: 3gCholesterol: 35mgSodium: 150mgPotassium: 150mgFiber: 1gSugar: 10gVitamin A: 200IUVitamin C: 6mgCalcium: 20mgIron: 1mg

Notes

Serve warm with a pat of butter for a delightful treat.

Tried this recipe?

Let us know how it was!

Filed Under: BREAKFAST & BRUNCH

Cream Cheese Cranberry Bread

December 14, 2025 by JudyWhite Leave a Comment

Just the other day, I found myself in a cozy kitchen, the air filled with the irresistible aroma of baking bread—sweet, tangy, and oh-so-comforting. I couldn’t help but reflect on the magic of homemade treats, especially when they bring a vibrant pop of flavor to our everyday lives. That’s when I decided to whip up my favorite Cream Cheese Cranberry Bread, a delightful fusion of rich cream cheese and fresh cranberries that dances on your taste buds.

This recipe is not just about indulgence; it’s the perfect antidote to fast food fatigue and a surefire way to impress your family or friends. Picture this: a warm slice of moist bread, with its creamy texture and bursts of tart cranberries, ideal for breakfast or a cozy afternoon snack. Even better, it’s incredibly simple to make, requiring just a few basic ingredients and about an hour of your time. Trust me, your kitchen will be the place to be—with all your loved ones eager to grab a slice! Dive in and let’s create something delicious together.

Why You'll Love This Cream Cheese Cranberry Bread

  • This Cream Cheese Cranberry Bread is incredibly easy to make, requiring just a handful of simple ingredients and minimal prep time.
  • The flavor is an irresistible blend of rich cream cheese and fresh, tangy cranberries that will have everyone coming back for seconds.
  • It’s a versatile treat that can be enjoyed for breakfast, dessert, or as a snack, making it perfect for any occasion.
  • Plus, its beautiful golden-brown crust and vibrant cranberry speckles make it visually appealing and a true showstopper at gatherings.

Cream Cheese Cranberry Bread Ingredients

Unlock the secret to your new favorite homemade treat!

For the Batter
• 1 cup unsalted butter – A rich base that adds moistness to the bread.
• 8 oz cream cheese – Creaminess that elevates the texture and flavor.
• 1.5 cups white sugar – Sweetness that balances the tart cranberries.
• 4 eggs – Essential for binding the ingredients together.
• 1 tsp vanilla extract – Adds a warm, aromatic note to the bread.
• 0.5 tsp almond extract – A hint of nutty flavor that complements the cream cheese.

For the Dry Mix
• 2 cups all-purpose flour – The backbone of the bread’s structure.
• 1.5 tsp baking powder – Ensures a lovely rise and fluffy texture.
• 0.5 tsp salt – Enhances the flavors and balances sweetness.

For the Cranberry Goodness
• 2 cups whole fresh cranberries – Tart bursts of flavor that make this Cream Cheese Cranberry Bread a standout!

How to Make Cream Cheese Cranberry Bread

  1. Preheat the oven to 350°F. While waiting, grab your two 8×4″ loaf pans and grease them with a touch of butter or non-stick spray to ensure easy release after baking.

  2. Beat together the butter and cream cheese in a stand mixer fitted with a paddle attachment on medium-high speed. Continue until the mixture is smooth and creamy, about 2-3 minutes.

  3. Add the sugar to the creamy mixture and beat until it’s fluffy—this usually takes another 2-3 minutes. Your batter should look light and airy!

  4. Incorporate the eggs one at a time, mixing well after each addition. This allows for perfect blending, resulting in a rich texture.

  5. Mix in the vanilla and almond extracts. These aromatic flavors will give your bread that cozy, warm undertone everyone loves.

  6. Whisk together the flour, baking powder, and salt in a separate bowl. This step ensures an even distribution of dry ingredients, which is crucial for that perfect rise.

  7. Combine the dry mix with the wet ingredients on low speed. Gradually add the flour mixture; mix just until incorporated—overmixing can make the bread dense.

  8. Fold in the cranberries gently. This step is where the magic happens! You’ll want those tart bursts of flavor throughout your bread without breaking them.

  9. Pour the batter into the prepared loaf pans, ensuring an even distribution. Bake in the preheated oven for 50-60 minutes, or until a toothpick inserted into the center comes out clean.

  10. Cool the bread completely in the pans for about 10 minutes before transferring to a wire rack. Slicing it while warm makes it tempting, but letting it cool is key for that perfect slice!

Optional: Sprinkle with powdered sugar for a beautiful finish!
Exact quantities are listed in the recipe card below.

What to Serve with Cream Cheese Cranberry Bread?

Imagine savoring a slice of warm bread while enjoying contrasts of flavors and textures on your plate.

  • Creamy Mashed Potatoes: Their velvety richness balances the tartness of the cranberries, making for a comforting, cohesive meal.

  • Sautéed Spinach: This fresh green side provides a light and vibrant touch that perfectly complements the dense bread.

  • Maple-Glazed Carrots: The sweetness of the glaze enhances the bread’s flavors, creating a delightful harmony on your palate.

  • Herbed Chicken Breast: Juicy and savory, this protein adds depth to your meal while still allowing the bread to shine.

  • Mixed Green Salad: Crisp and refreshing, a salad with a zesty vinaigrette contrasts nicely with the moist, creamy bread.

  • Fresh Fruit Compote: A sweet-tart spread bursting with flavor that complements each slice, making for an unforgettable pairing.

  • Chai Tea: Warm, spicy notes in chai create a soothing backdrop, enhancing the bread’s creamy and tangy elements beautifully.

  • Vanilla Ice Cream: For dessert, melt-in-your-mouth ice cream is a wonderful way to take this treat to a whole new level of indulgence.

How to Store and Freeze Cream Cheese Cranberry Bread

Room Temperature: Keep your Cream Cheese Cranberry Bread in an airtight container at room temperature for up to 3 days for optimal freshness and flavor.

Fridge: For longer storage, place your bread in the fridge where it will stay fresh for up to a week. Wrap it tightly in plastic wrap to prevent drying out.

Freezer: Slice and freeze the bread by wrapping each slice in cling film, then store in a freezer bag. It can last for up to 3 months.

Reheating: To enjoy your frozen slices, simply thaw in the fridge overnight and reheat in the oven at 350°F for about 10-15 minutes or microwave for 20-30 seconds.

Cream Cheese Cranberry Bread Variations

Feel free to mix things up and unleash your creativity with these delightful twists!

  • Gluten-Free: Substitute all-purpose flour with a gluten-free blend to enjoy this bread without the gluten.

  • Nutty Delight: Add 1 cup of chopped walnuts or pecans for a satisfying crunch and additional flavor.

  • Dried Fruit Twist: Swap half the cranberries for dried cherries or blueberries for a slightly sweeter variation.

  • Zesty Citrus: Grate in the zest of one orange or lemon for a bright, citrusy flavor that complements the tartness of cranberries beautifully.

  • Spicy Kick: Incorporate 1 teaspoon of ground cinnamon or a pinch of cayenne pepper for a warm or spicy note, perfect for cozy evenings.

  • Vegan Swap: Replace eggs with flax eggs (1 tablespoon flaxseed meal plus 2.5 tablespoons water per egg) and use vegan butter to create a delicious vegan version.

  • Low-Sugar Option: Reduce the sugar to 1 cup or substitute with a sugar alternative like monk fruit or erythritol for a healthier treat.

  • Chocolate Lovers: Fold in ½ cup of mini chocolate chips alongside the cranberries for a decadent and indulgent twist!

Make Ahead Options

These Cream Cheese Cranberry Bread loaves are perfect for meal prep enthusiasts! You can prepare the batter up to 24 hours in advance. Simply mix the wet ingredients together as instructed, then fold in the cranberries and refrigerate the batter in an airtight container. On baking day, pour the chilled mixture into the prepared loaf pans and bake as directed. This ensures the bread stays just as delicious and moist while saving you precious time during busy mornings or gatherings. If you prefer, you can also bake the bread ahead of time; it keeps well in the refrigerator for up to 3 days. Just let it cool completely, wrap it tightly, and slice when ready to serve!

Chef's Helpful Tips

  • When making Cream Cheese Cranberry Bread, ensure that your butter and cream cheese are at room temperature for easier blending and a smoother batter.
  • Avoid overmixing once you add the flour, as this can lead to a dense bread instead of the light texture you desire.
  • To enhance the cranberries’ natural tartness, consider soaking them in a bit of warm water for 10 minutes before folding them into the batter.
  • Remember to check for doneness by inserting a toothpick into the center; it should come out clean after 50-60 minutes of baking at 350F.

Cream Cheese Cranberry Bread Recipe FAQs

How do I select the best cranberries for this recipe?
Absolutely! When choosing whole fresh cranberries, look for bright, plump berries with no dark spots or bruises. The fresher they are, the more vibrant and tangy your Cream Cheese Cranberry Bread will be. Avoid any that appear wrinkly or have dark spots, as these might be overripe or spoiled.

What’s the best way to store leftover Cream Cheese Cranberry Bread?
You can keep your bread fresh by storing it in an airtight container at room temperature for up to 3 days. If you want to extend its shelf life, wrap it tightly in plastic wrap and place it in the refrigerator, where it will last up to a week. Just make sure it’s completely cooled before wrapping to prevent sogginess!

Can I freeze Cream Cheese Cranberry Bread? If so, how?
Very! To freeze, slice your bread first, as this makes it easy to grab a single slice later. Wrap each slice in cling film, ensuring it’s tightly sealed. Then, place them in a freezer bag or an airtight container. Your delicious bread can last for up to 3 months in the freezer. When you’re ready to enjoy it, simply thaw in the fridge overnight and reheat as desired.

What should I do if my bread turns out too dense?
If your Cream Cheese Cranberry Bread is denser than you’d like, it’s often due to overmixing the batter once you add the flour. To avoid this, mix just until the ingredients are combined—leave a few small flour streaks if necessary. Additionally, make sure your baking soda and powder are fresh, and consider using room-temperature ingredients for a better rise.

Are there any dietary considerations to keep in mind when making this bread?
Many guests enjoy this Cream Cheese Cranberry Bread, but if you have dietary restrictions, be mindful of the cream cheese for lactose intolerance or dairy allergies. You can substitute with lactose-free cream cheese or a dairy-free alternative if needed. Additionally, if you’re preparing this for pets, remember that cranberries can be safe in small amounts for dogs, but avoid any sweeteners or additives in the bread itself.

Can I substitute ingredients in this recipe?
Absolutely! If you’re looking to reduce sugar, you can replace half of it with a natural sweetener like honey or maple syrup. For a different flavor profile, try substituting walnuts or pecans for cranberries, or add some orange zest for a citrusy kick. Just remember that these substitutions may alter the texture and baking time slightly, so monitor your bread closely!

Cream Cheese Cranberry Bread

Cream Cheese Cranberry Bread

Delightful Cream Cheese Cranberry Bread combines cream cheese and fresh cranberries for a flavorful, moist treat perfect for breakfast or snacks.
Print Recipe Pin Recipe
Prep Time 15 minutes mins
Cook Time 1 hour hr
Cooling Time 10 minutes mins
Total Time 1 hour hr 25 minutes mins
Servings: 10 slices
Course: BREAKFAST & BRUNCH
Cuisine: American
Calories: 250
Ingredients Equipment Method Nutrition Notes

Ingredients
  

For the Batter
  • 1 cup unsalted butter A rich base that adds moistness to the bread.
  • 8 oz cream cheese Creaminess that elevates the texture and flavor.
  • 1.5 cups white sugar Sweetness that balances the tart cranberries.
  • 4 pcs eggs Essential for binding the ingredients together.
  • 1 tsp vanilla extract Adds a warm, aromatic note to the bread.
  • 0.5 tsp almond extract A hint of nutty flavor that complements the cream cheese.
For the Dry Mix
  • 2 cups all-purpose flour The backbone of the bread’s structure.
  • 1.5 tsp baking powder Ensures a lovely rise and fluffy texture.
  • 0.5 tsp salt Enhances the flavors and balances sweetness.
For the Cranberry Goodness
  • 2 cups whole fresh cranberries Tart bursts of flavor that make this Cream Cheese Cranberry Bread a standout!

Equipment

  • stand mixer
  • loaf pans
  • Mixing bowls
  • measuring cups
  • measuring spoons
  • Wire Rack

Method
 

Directions
  1. Preheat the oven to 350°F. While waiting, grab your two 8x4" loaf pans and grease them with a touch of butter or non-stick spray to ensure easy release after baking.
  2. Beat together the butter and cream cheese in a stand mixer fitted with a paddle attachment on medium-high speed until smooth and creamy, about 2-3 minutes.
  3. Add the sugar to the creamy mixture and beat until fluffy, about 2-3 minutes.
  4. Incorporate the eggs one at a time, mixing well after each addition.
  5. Mix in the vanilla and almond extracts.
  6. Whisk together the flour, baking powder, and salt in a separate bowl.
  7. Combine the dry mix with the wet ingredients on low speed until just incorporated.
  8. Fold in the cranberries gently.
  9. Pour the batter into the prepared loaf pans and bake for 50-60 minutes, until a toothpick inserted into the center comes out clean.
  10. Cool the bread in the pans for about 10 minutes before transferring to a wire rack.

Nutrition

Serving: 1sliceCalories: 250kcalCarbohydrates: 34gProtein: 3gFat: 12gSaturated Fat: 7gPolyunsaturated Fat: 1gMonounsaturated Fat: 4gCholesterol: 65mgSodium: 200mgPotassium: 80mgFiber: 1gSugar: 15gVitamin A: 400IUVitamin C: 1mgCalcium: 20mgIron: 1mg

Notes

Optional: Sprinkle with powdered sugar for a beautiful finish. Ensure butter and cream cheese are at room temperature for easier blending. Avoid overmixing once adding flour to keep bread light and fluffy.

Tried this recipe?

Let us know how it was!

Filed Under: BREAKFAST & BRUNCH

Chocolate Caramel Pretzels

December 12, 2025 by JudyWhite Leave a Comment

There’s something truly delightful about the combination of sweet and salty, and my latest obsession—Chocolate Caramel Pretzels—captures this magic perfectly. Picture this: the irresistible crunch of mini pretzels topped with silky caramel, smothered in luscious chocolate, and finished off with a sprinkle of flaky sea salt. It’s a symphony of flavors that effortlessly transforms a simple snack into a gourmet treat.

I stumbled upon this delightful recipe during a quiet afternoon in my kitchen, searching for something to satisfy my sweet tooth while also bringing a touch of fun to my usual snack routine. These pretzels are not only incredibly easy to whip up—taking just 35 minutes from start to finish—but they also offer a crowd-pleasing appeal that makes them perfect for parties, movie nights, or even a cozy afternoon indulgence.

Join me as I share how this simple yet indulgent treat can elevate your snacking experience, and trust me, you won’t be able to stop at just one!

Why You'll Love This Chocolate Caramel Pretzels

  • You’ll love how easy this recipe is, coming together in just 35 minutes for a delicious treat.
  • The delightful combination of sweet caramel and rich chocolate perfectly complements the salty crunch of the pretzels, making every bite utterly irresistible.
  • These pretzels are incredibly versatile, perfect for any occasion from parties to cozy nights in.
  • Plus, their stunning presentation and shimmering sea salt topping make them a visually appealing treat that will impress your guests.

Chocolate Caramel Pretzel Ingredients

• Here’s what you need to create these delightful treats!

For the Pretzels

  • 16 ounce mini pretzels – The perfect crunchy base to hold all that sweetness without getting soggy.

For the Caramel

  • 1 cup caramel sauce – Drizzling this sweet goodness over the pretzels adds a luscious layer of flavor.

For the Chocolate

  • 14 ounces dark or milk chocolate chips – Choose your favorite for a rich coating that enhances the chocolate caramel pretzels experience.

For the Finish

  • Flaky sea salt – A light sprinkle balances the sweetness and elevates the overall flavor profile.

How to Make Chocolate Caramel Pretzels

  1. Prepare the Baking Sheets: Line 2 baking sheets with parchment paper. Spread out the mini pretzels in a single layer on the sheets, leaving a little space between each pretzel for the caramel to drip.

  2. Heat the Caramel: In a microwave-safe bowl, heat the caramel sauce for 10 seconds. This makes it easier to drizzle. Pour the melted caramel over the pretzels and allow them to sit for 5 minutes until the caramel is set.

  3. Melt the Chocolate: In another bowl, add the chocolate chips and microwave them in 20-second intervals, stirring until smooth. Aim for a silky texture that will coat the pretzels beautifully.

  4. Top the Pretzels: Drizzle the melted chocolate generously over the caramel-coated pretzels. Before the chocolate firms up, sprinkle them with flaky sea salt for that perfect sweet-salty harmony.

  5. Chill to Set: Place the baking sheets in the refrigerator for 15 minutes, allowing the chocolate to set completely. This step is essential for the perfect bite.

  6. Enjoy! Once the pretzels are set, remove them from the fridge and indulge in this delightful treat that’s sure to satisfy your cravings!

Optional: Serve with a drizzle of extra caramel on top for an indulgent touch.
Exact quantities are listed in the recipe card below.

How to Store and Freeze Chocolate Caramel Pretzels

Room Temperature: Store in an airtight container for up to 3 days. This keeps the pretzels crunchy and delicious.

Fridge: If you prefer a chilled treat, keep the pretzels in the refrigerator for up to a week. Just make sure they’re in a tight container to avoid moisture.

Freezer: For longer storage, freeze the chocolate caramel pretzels in a single layer within an airtight bag for up to 1 month. Thaw before serving for the best taste experience.

Reheating: If you prefer them warm, microwave in short bursts of 5 seconds to revive the deliciousness without melting the chocolate completely.

What to Serve with Chocolate Caramel Pretzels?

Elevate your snacking experience with delightful pairings that complement the sweet and salty flavors of these treats.

  • Creamy Milkshake: A rich, velvety milkshake balances the pretzels’ sweetness, making for a fun and indulgent pairing.

  • Fresh Fruit Skewers: Bright, juicy fruits add freshness and a pop of color to your dessert table, offering a refreshing contrast.

  • Cheese Platter: Salty cheeses like gouda or aged cheddar provide a savory backdrop that enhances the flavors of the sweet pretzels.

  • Caramel Sauce Drizzle: For those who can never have too much caramel, serve extra for dipping, creating a decadent experience.

  • Chocolate-Covered Strawberries: The combination of chocolate and fruit echoes the flavors while adding an elegant touch to your spread.

  • Cozy Hot Chocolate: This warm beverage mirrors the richness of your pretzels and makes for a comforting match on chilly evenings.

  • Coffee or Espresso: A bold cup of coffee enhances the chocolate notes, inviting rich flavors that make each bite more satisfying.

  • Vanilla Ice Cream: Soft and creamy, a scoop of vanilla ice cream lends a classic dessert touch that balances the texture of the pretzels nicely.

These pairings not only complement the Chocolate Caramel Pretzels but also create a joyful atmosphere for sharing with loved ones!

Chocolate Caramel Pretzel Variations

Feel free to customize your Chocolate Caramel Pretzels with these delightful twists that enhance flavor and cater to different tastes!

  • Nutty Addition: Sprinkle crushed nuts like pecans or almonds for a crunchy texture that adds an irresistible nutty flavor.

  • Spicy Salt: Use chili-lime seasoning or spicy salt to add a kick, creating a sweet-and-spicy combination that will tantalize your taste buds.

  • Drizzle Swirl: Instead of just chocolate, top with a white chocolate drizzle for a visually stunning contrast and a hint of sweetness.

  • Vegan Option: Swap chocolate chips for dairy-free chocolate and use coconut cream-based caramel for an indulgent vegan treat.

  • Seasonal Flavors: Add a pinch of cinnamon or pumpkin spice to the chocolate for a festive twist during the holidays or fall.

  • Sweetened Coconut: Toss shredded sweetened coconut on top before the chocolate sets for a tropical flair that enhances the flavor depth.

  • Fruit Infusion: Mix in small dried fruits like cranberries or cherries to complement the sweet and salty balance with a fruity punch.

  • Chocolate Variance: Experiment with different types of chocolate, such as white, milk, or even flavored varieties for a personalized touch.

With these variations, you can create a unique batch of Chocolate Caramel Pretzels that cater to your and your guests’ flavor preferences!

Make Ahead Options

These Chocolate Caramel Pretzels are fantastic for meal prep and can save you precious time on busy days! You can prepare the pretzels and drizzle them with caramel up to 24 hours in advance. Simply follow the initial steps of lining the baking sheets and drizzling the caramel, then cover the pretzels with plastic wrap and refrigerate them. This keeps the pretzels fresh and the caramel perfectly set. When you’re ready to enjoy, melt your chocolate and drizzle it over the chilled pretzels, topping with flaky sea salt as you go. This way, you’ll have delicious, ready-to-serve treats in no time, perfect for unexpected guests or cozy movie nights!

Chef's Helpful Tips

  • For the Chocolate Caramel Pretzels, ensure your pretzels are spaced out on the baking sheets to prevent them from sticking together.
  • When heating the caramel sauce, start with short intervals to avoid overheating it, which can lead to a thick consistency that is difficult to drizzle.
  • To achieve a smooth melted chocolate, frequently stir between intervals instead of just heating continuously, as this helps to prevent burning.
  • After chilling the pretzels, allow them to sit at room temperature for a few minutes before serving to enhance the flavors and make them easier to bite into.

Chocolate Caramel Pretzels Recipe FAQs

What kind of pretzels should I use?
I recommend using mini pretzels for the best combination of crunch and coverage. Their smaller size allows for perfect caramel and chocolate adherence, creating an enjoyable bite-sized treat!

How should I store Chocolate Caramel Pretzels?
To store them at room temperature, place the pretzels in an airtight container for up to 3 days. This keeps them fresh and crunchy. If you prefer a chilled snack, you can store them in the refrigerator for up to a week in a sealed container to prevent moisture.

Can I freeze Chocolate Caramel Pretzels?
Absolutely! To freeze, lay the pretzels in a single layer in an airtight freezer bag, making sure to remove as much air as possible to prevent freezer burn. They can last for up to 1 month. When you’re ready to enjoy, simply thaw them in the fridge or at room temperature.

What should I do if my chocolate isn’t melting smoothly?
If your chocolate isn’t melting well, it may be overheating. Instead of microwaving continuously, heat it in 20-second intervals and stir in between until it’s completely smooth. This method helps prevent burning and ensures you achieve a lovely melted consistency for drizzling over your pretzels.

Are there any dietary considerations for Chocolate Caramel Pretzels?
Yes, if you’re cooking for someone with dietary restrictions, be aware that chocolate chips may contain allergens like dairy or nuts. For a nut-free option, check the brands before purchasing. Vegan chocolate chips can be used for dairy-free versions, and always ensure the caramel sauce aligns with the dietary needs of your guests.

How can I enhance the flavor of Chocolate Caramel Pretzels?
You can elevate the taste by adding a sprinkle of crushed nuts or colorful sprinkles before that chocolate sets, or switch the sea salt for a flavored variety to introduce an unexpected twist. A touch of espresso powder in your chocolate also brings a delightful depth to the sweetness of the caramel!

Chocolate Caramel Pretzels

Chocolate Caramel Pretzels

Delight in the combination of sweet and salty with these irresistible Chocolate Caramel Pretzels.
Print Recipe Pin Recipe
Prep Time 15 minutes mins
Cook Time 20 minutes mins
Total Time 35 minutes mins
Servings: 10 pretzels
Course: DESSERT RECIPES
Cuisine: American
Calories: 150
Ingredients Equipment Method Nutrition Notes

Ingredients
  

For the Pretzels
  • 16 ounces mini pretzels The perfect crunchy base to hold all that sweetness without getting soggy.
For the Caramel
  • 1 cup caramel sauce Drizzling this sweet goodness over the pretzels adds a luscious layer of flavor.
For the Chocolate
  • 14 ounces dark or milk chocolate chips Choose your favorite for a rich coating that enhances the treat.
For the Finish
  • flaky sea salt A light sprinkle balances the sweetness and elevates the overall flavor profile.

Equipment

  • baking sheets
  • parchment paper
  • Microwave-safe bowls

Method
 

Steps to Make Chocolate Caramel Pretzels
  1. Prepare the Baking Sheets: Line 2 baking sheets with parchment paper. Spread out the mini pretzels in a single layer on the sheets, leaving a little space between each pretzel for the caramel to drip.
  2. Heat the Caramel: In a microwave-safe bowl, heat the caramel sauce for 10 seconds. This makes it easier to drizzle. Pour the melted caramel over the pretzels and allow them to sit for 5 minutes until the caramel is set.
  3. Melt the Chocolate: In another bowl, add the chocolate chips and microwave them in 20-second intervals, stirring until smooth. Aim for a silky texture that will coat the pretzels beautifully.
  4. Top the Pretzels: Drizzle the melted chocolate generously over the caramel-coated pretzels. Before the chocolate firms up, sprinkle them with flaky sea salt.
  5. Chill to Set: Place the baking sheets in the refrigerator for 15 minutes, allowing the chocolate to set completely.
  6. Enjoy! Enjoy your delightful treat that’s sure to satisfy your cravings!

Nutrition

Serving: 1pretzelCalories: 150kcalCarbohydrates: 20gProtein: 2gFat: 7gSaturated Fat: 4gMonounsaturated Fat: 3gCholesterol: 5mgSodium: 150mgPotassium: 50mgFiber: 1gSugar: 10gCalcium: 2mgIron: 4mg

Notes

For extra indulgence, serve with a drizzle of extra caramel on top.

Tried this recipe?

Let us know how it was!

Filed Under: BREAKFAST & BRUNCH

  • « Previous Page
  • 1
  • …
  • 10
  • 11
  • 12
  • 13
  • 14
  • Next Page »

Recent Posts

  • Crispy Potatoes in Oven
  • Lucky Charms Pancakes
  • Cheeseburger
  • Boiled Corn on the Cob
  • St. Patrick’s Day Dessert Parfaits

Recent Comments

No comments to show.

Footer

  • Contact
  • Privacy Policy
  • About Us
  • Terms
  • ↑ back to top

Copyright © 2024 www.Forkono.com

Table Of Content