Forkono

  • BREAKFAST & BRUNCH
  • DESSERT RECIPES
  • DINNER RECIPES
  • LUNCH RECIPES
  • About uS
  • SNACKS & APPETIZERS
menu icon
go to homepage
  • BREAKFAST & BRUNCH
  • DESSERT RECIPES
  • DINNER RECIPES
  • LUNCH RECIPES
  • About uS
  • SNACKS & APPETIZERS
search icon
Homepage link
  • BREAKFAST & BRUNCH
  • DESSERT RECIPES
  • DINNER RECIPES
  • LUNCH RECIPES
  • About uS
  • SNACKS & APPETIZERS
×

Strawberry Shortcake Cupcakes

February 3, 2026 by JudyWhite Leave a Comment

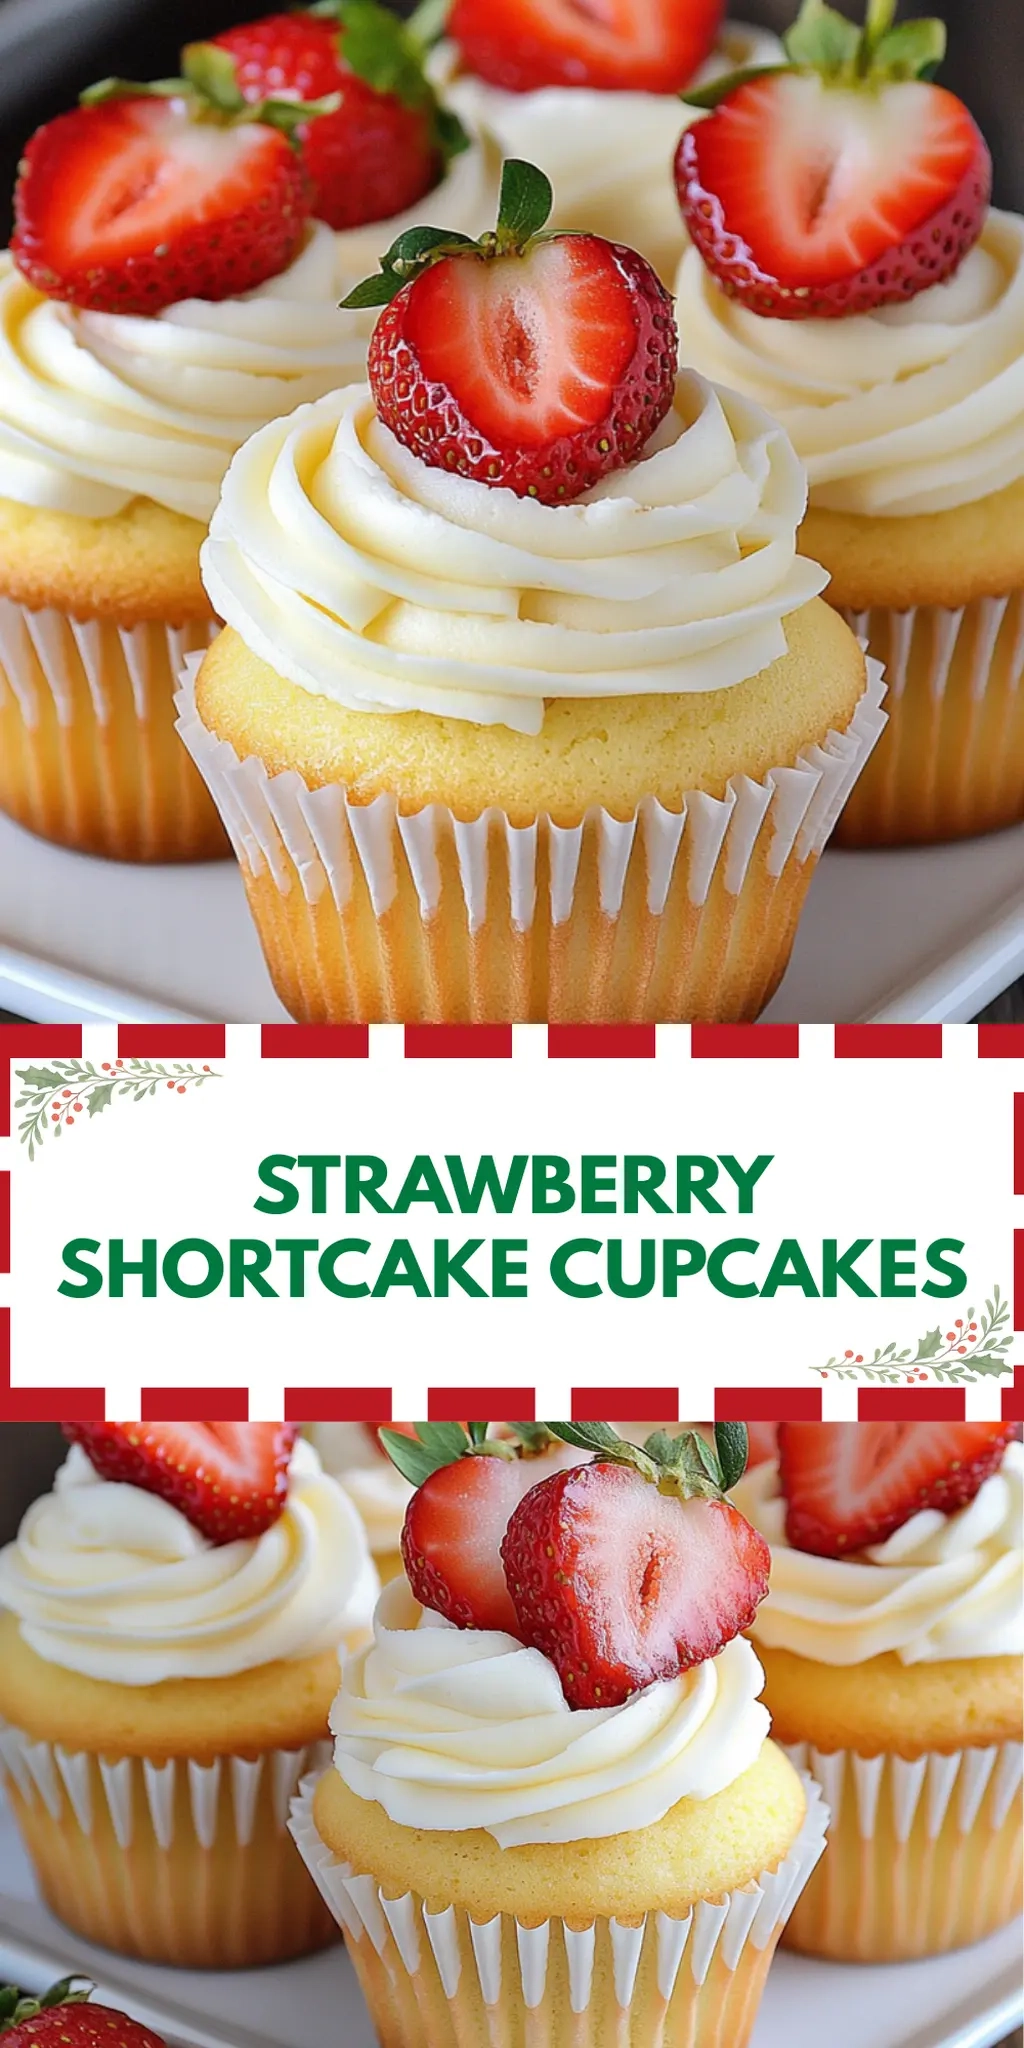
As I stood in my kitchen, the sweet scent of fresh strawberries began to fill the air, instantly brightening my mood. With summer in full swing, I often find myself yearning for a dessert that captures the essence of the season, and that’s when Strawberry Shortcake Cupcakes come to mind. They’re not just your ordinary cupcakes; these little beauties bring together fluffy vanilla cake, juicy strawberries, and a decadent whipped cream topping, creating a delightful treat that will have everyone reaching for seconds.

These Strawberry Shortcake Cupcakes are my go-to solution whenever I need to impress guests or simply indulge my cravings. They strike the perfect balance between lightness and richness, making them a crowd-pleaser at picnics, parties, or even quiet nights at home. With minimal prep time and easily accessible ingredients, you’ll be whipping up a batch before you know it. So, let’s dive into this recipe and bring some sunshine to your dessert table!

Why You'll Love This Strawberry Shortcake Cupcakes

  • You’ll adore how easy these Strawberry Shortcake Cupcakes are to make, allowing you to whip up a delightful dessert in just 40 minutes.
  • Their beautifully vibrant appearance will make your dessert table stand out and impress guests at any gathering.
  • The flavor combination of light vanilla cake, juicy strawberries, and creamy whipped topping is simply irresistible and will have everyone coming back for more.
  • Plus, these cupcakes are versatile enough to be served at various occasions, from picnics to birthday celebrations, making them a perfect treat for any time of year.

Strawberry Shortcake Cupcake Ingredients

• Gather everything you need to create these delightful treats!

For the Cupcake Batter

  • All-purpose flour – Provides the structure needed for a light, fluffy cupcake.
  • Granulated sugar – Sweetens the batter and helps achieve a moist texture.
  • Baking powder – Ensures the cupcakes rise beautifully while baking.
  • Salt – Balances the sweetness for a more flavorful treat.
  • Unsalted butter – Adds richness and a tender crumb; be sure it’s softened for easy mixing.
  • Large eggs – Act as a binding agent, contributing to the cupcake’s structure.
  • Vanilla extract – Infuses the batter with a lovely aromatic sweetness.
  • Whole milk – Creates moisture; feel free to substitute with almond or oat milk for a dairy-free version.

For the Strawberry Filling

  • Fresh strawberries – These are key for a fresh burst of flavor in each bite; make sure they’re ripe and sweet!
  • Granulated sugar – Helps macerate the strawberries, enhancing their natural sweetness.

For the Whipped Topping

  • Heavy cream – This creamy base whips up into a light, airy topping that complements the cupcakes perfectly.
  • Powdered sugar – Sweetens the cream while aiding in achieving the ideal consistency.

Get ready to indulge in these Strawberry Shortcake Cupcakes, where each bite brings you one step closer to summer bliss!

How to Make Strawberry Shortcake Cupcakes

  1. Preheat the oven to 350°F (175°C) and line a cupcake tin with paper liners. This initial step ensures your cupcakes bake evenly and don’t stick to the pan.

  2. Whisk together the flour, sugar, baking powder, and salt in a bowl until combined. Getting this dry mixture blended well is key for the perfect cupcake rise.

  3. Beat the softened butter in another bowl until creamy; gradually add sugar and mix until fluffy. Aim for a light, airy texture—this will make your cupcakes delightfully tender!

  4. Incorporate the eggs, one at a time, followed by vanilla extract until the mixture is smooth and well combined. Each egg adds richness, contributing to the overall flavor and texture.

  5. Alternate adding the milk and the dry ingredients to the butter mixture until just combined. Stir gently to avoid overmixing—the batter should be slightly lumpy for optimal fluffiness.

  6. Fill each liner about two-thirds full with the batter and bake for 18-20 minutes or until a toothpick inserted comes out clean. Perfectly baked cupcakes will be golden on top and spring back when lightly pressed.

  7. Mix the chopped strawberries with sugar while the cupcakes are baking and let them sit to release their juices. This delicious filling will seep into the cupcakes, elevating the flavor.

  8. Whip the heavy cream with powdered sugar until soft peaks form. This luscious topping will not only taste heavenly but also add a wonderful visual appeal to your cupcakes.

  9. Hollow out the centers of the cooled cupcakes slightly, then fill with the macerated strawberries and top generously with whipped cream. Every bite will be an explosion of strawberry goodness!

Optional: Garnish with a fresh strawberry slice on top for an extra pop of color!
Exact quantities are listed in the recipe card below.

Make Ahead Options

These Strawberry Shortcake Cupcakes are a fantastic choice for meal prep enthusiasts! You can prepare the cupcake batter and store it in the refrigerator for up to 24 hours before baking. Just be sure to cover it tightly to maintain freshness. The chopped strawberries can also be mixed with sugar and refrigerated to macerate for up to 3 days. When you’re ready to enjoy these delightful treats, simply bake the cupcakes as directed and proceed with hollowing them out, filling them with strawberries, and topping with whipped cream. This method ensures you can whip up a delicious dessert with minimal effort, making busy weeknights a little sweeter!

Strawberry Shortcake Cupcake Variations

Feel free to personalize your Strawberry Shortcake Cupcakes for even more delightful surprises!

  • Gluten-Free: Use a 1:1 gluten-free flour blend to ensure everyone can enjoy these cupcakes without compromising flavor or texture.

  • Dairy-Free: Substitute the butter with coconut oil and use almond milk instead of whole milk for a scrumptious dairy-free option!

  • Sweetness Boost: Add an extra tablespoon of sugar or two tablespoons of honey to enhance the sweetness. It’ll bring out the strawberries’ natural flavors even more.

  • Chocolate Twist: Fold in mini chocolate chips into the batter before baking to create a delicious chocolate-strawberry fusion that will wow your guests.

  • Lemon Zest: Grate the zest of one lemon into the cupcake batter for a refreshing citrus twist that complements the strawberries beautifully.

  • Spicy Kick: Add a pinch of cayenne or cayenne pepper to the strawberry filling for a surprising heat that balances the sweetness.

Imagine the fun of trying each version at your next gathering! Each variation brings its unique charm to the table.

What to Serve with Strawberry Shortcake Cupcakes?

As you prepare to delight in these airy treats, consider building a delightful meal that balances flavors and textures.

  • Fresh Berry Salad: A mix of strawberries, blueberries, and raspberries tossed with a drizzle of honey elevates the fruity essence of the cupcakes, creating a refreshing contrast.

  • Honey Vanilla Yogurt: Smooth, creamy yogurt serves as a perfect companion to your cupcakes, offering tangy sweetness that complements the strawberries beautifully.

  • Chocolate-Dipped Biscotti: The crunch of biscotti dipped in dark chocolate contrasts with the softness of the cupcakes, introducing a sophisticated touch to your dessert spread.

  • Lemonade Spritzer: Refresh your palate with a light and bubbly lemonade spritzer that pairs well with the sweet richness of the cupcakes, making each bite feel like a sunny afternoon.

  • Ice Cream Sundae Bar: Create a fun serving option with vanilla ice cream and assorted toppings. Guests can enjoy their cupcakes alongside an indulgent ice cream, adding whimsy to the dessert table.

  • Almond Scones: Light, nutty scones provide a nice balance to the sweetness of the cupcakes, allowing guests to mix and match flavors for a more complex dessert experience.

These pairings are sure to elevate your Strawberry Shortcake Cupcakes, making for an unforgettable gathering!

How to Store and Freeze Strawberry Shortcake Cupcakes

Room Temperature: Keep leftover Strawberry Shortcake Cupcakes in an airtight container for up to 2 days at room temperature. This maintains their fluffy texture and fresh flavor.

Fridge: These cupcakes can be stored in the refrigerator for up to 5 days. Make sure to cover them well to prevent them from drying out or absorbing fridge odors.

Freezer: For long-term storage, you can freeze the cupcakes (without the whipped cream topping) for up to 3 months. Wrap each cupcake tightly in plastic wrap and place them in a freezer-safe bag.

Reheating: Let frozen cupcakes thaw in the fridge overnight, then enjoy them at room temperature or warm them up briefly in the microwave before topping with fresh strawberries and whipped cream.

Chef's Helpful Tips

  • For the best Strawberry Shortcake Cupcakes, ensure your butter is perfectly softened to achieve a light and fluffy batter.
  • When combining wet and dry ingredients, mix just until incorporated to avoid dense cupcakes; a few lumps are okay.
  • Always keep an eye on your baking time, as oven temperatures may vary; check for doneness a couple of minutes before the recommended time.
  • To enhance the strawberry filling, allow it to sit longer so the sugar fully draws out the juices for maximum flavor.

Strawberry Shortcake Cupcakes Recipe FAQs

How do I choose ripe strawberries for the filling?
Absolutely! When selecting strawberries, look for ones that are vibrant red and feel firm to the touch. Avoid berries with dark spots or dull color, which can indicate overripeness. The aroma is also a great tell; ripe strawberries should have a sweet fragrance.

What’s the best way to store leftover strawberry shortcake cupcakes?
Very! To keep your cupcakes fresh, store any leftovers in an airtight container at room temperature for up to 2 days. For longer storage, place them in the refrigerator for up to 5 days, ensuring they’re well covered to prevent them from drying out or absorbing any other flavors.

Can I freeze these cupcakes?
Of course! To freeze your Strawberry Shortcake Cupcakes, it’s best to do so without the whipped cream topping. Wrap each cooled cupcake tightly in plastic wrap and place them in a freezer-safe zip-top bag. They can be stored for up to 3 months. When you’re ready to enjoy, thaw the cupcakes in the fridge overnight, then top them with fresh strawberries and whipped cream.

My cupcakes didn’t rise, what went wrong?
Oh no! If your cupcakes didn’t rise properly, it could be due to a few reasons. Firstly, check the freshness of your baking powder—it should be active. Make sure to measure your ingredients accurately, as too much flour can lead to dense cupcakes. Additionally, don’t overmix the batter; it’s best to mix just until combined to maintain that beloved fluffiness.

Are these cupcakes suitable for those with allergies?
Great question! This recipe contains common allergens like gluten (from the flour), dairy (from the butter and milk), and eggs. If you’re looking for alternatives, you might try using a gluten-free flour blend and egg replacements like applesauce or flaxseed meal. It’s always best to check with your guests regarding specific allergies before serving.

Can I make these cupcakes dairy-free?
Absolutely! For a dairy-free version of these Strawberry Shortcake Cupcakes, substitute unsweetened almond or oat milk for whole milk and use a plant-based butter in place of the unsalted butter. You can whip coconut cream as a delicious alternative for the topping!

Strawberry Shortcake Cupcakes

Strawberry Shortcake Cupcakes

These delightful Strawberry Shortcake Cupcakes combine fluffy vanilla cake, juicy strawberries, and whipped cream for a perfect summer dessert.
Print Recipe Pin Recipe
Prep Time 20 minutes mins
Cook Time 20 minutes mins
Total Time 40 minutes mins
Servings: 12 cupcakes
Course: DESSERT RECIPES
Cuisine: American
Calories: 220
Ingredients Equipment Method Nutrition Notes

Ingredients
  

For the Cupcake Batter
  • 2 cups all-purpose flour
  • 1 cup granulated sugar
  • 1 tbsp baking powder
  • 1 tsp salt
  • 1/2 cup unsalted butter, softened
  • 3 large eggs
  • 2 tsp vanilla extract
  • 1 cup whole milk Can be substituted with almond or oat milk.
For the Strawberry Filling
  • 2 cups fresh strawberries, chopped Ripe and sweet.
  • 1/4 cup granulated sugar
For the Whipped Topping
  • 1 cup heavy cream
  • 1/4 cup powdered sugar

Equipment

  • Cupcake tin
  • Mixing bowls
  • Whisk
  • Electric mixer
  • measuring cups
  • measuring spoons

Method
 

How to Make Strawberry Shortcake Cupcakes
  1. Preheat the oven to 350°F (175°C) and line a cupcake tin with paper liners.
  2. Whisk together the flour, sugar, baking powder, and salt in a bowl until combined.
  3. Beat the softened butter in another bowl until creamy; gradually add sugar and mix until fluffy.
  4. Incorporate the eggs, one at a time, followed by vanilla extract until the mixture is smooth.
  5. Alternate adding the milk and the dry ingredients to the butter mixture until just combined.
  6. Fill each liner about two-thirds full with the batter and bake for 18-20 minutes or until a toothpick inserted comes out clean.
  7. Mix the chopped strawberries with sugar while the cupcakes are baking and let them sit to release their juices.
  8. Whip the heavy cream with powdered sugar until soft peaks form.
  9. Hollow out the centers of the cooled cupcakes slightly, then fill with the macerated strawberries and top generously with whipped cream.

Nutrition

Serving: 1cupcakeCalories: 220kcalCarbohydrates: 28gProtein: 2gFat: 10gSaturated Fat: 6gMonounsaturated Fat: 4gCholesterol: 40mgSodium: 150mgPotassium: 100mgFiber: 1gSugar: 15gVitamin A: 250IUVitamin C: 5mgCalcium: 80mgIron: 1mg

Notes

For best results, ensure your butter is softened and be mindful of mixing gently to avoid dense cupcakes.

Tried this recipe?

Let us know how it was!

Filed Under: BREAKFAST & BRUNCH

Ham and Cheese Quiche

February 3, 2026 by JudyWhite Leave a Comment

Every now and then, life throws a delightful surprise your way. This Ham and Cheese Quiche is one of those surprises that turns even the simplest weeknight dinner into a special occasion. Just picture this: the aroma of sautéed onions mingling with rich, creamy eggs and savory ham wafts through your kitchen, instantly lifting your spirits.

One day, as I rummaged through my fridge for inspiration, I stumbled upon a lonely pie crust and some leftover ham. A little experimentation later, and I had created this creamy quiche that’s as comforting as it is versatile. Whether you enjoy it for brunch with friends or dinner on a cozy night in, it fits the bill perfectly.

What I love most about this quiche is how effortlessly it comes together. With just a handful of ingredients and under an hour to prepare, it’s the ultimate solution for anyone tired of the fast food rut. Its golden, flaky crust and velvety filling make it a crowd-pleaser that will have everyone asking for seconds! Let’s dive into making this fabulous dish a staple in your home!

Why You'll Love This Ham and Cheese Quiche

  • This Ham and Cheese Quiche is incredibly easy to make, allowing you to whip up a delicious meal without any fuss.
  • The rich and savory flavors of ham, cheese, and sautéed onions blend together perfectly, making every bite a delight.
  • Its versatility shines through as it can be enjoyed for breakfast, brunch, or dinner, adapting to whatever occasion you have in mind.
  • Visually, the golden crust and fluffy filling create an eye-catching centerpiece that will impress your guests and family alike.

Ham and Cheese Quiche Ingredients

For the Crust
• Pre-made pie crust – This saves time and ensures a flaky base for your delicious Ham and Cheese Quiche.

For the Filling
• Large eggs – Rich in protein, they create the creamy custard texture that holds everything together.
• Heavy cream – Adds a luscious richness, making every slice decadently smooth.
• Diced ham (cooked) – Leftover ham is perfect here, adding savory flavor and heartiness.
• Shredded Gruyère or cheddar cheese – Choose your favorite for a melty, flavorful bite; Gruyère gives a nutty taste.
• Medium onion (chopped) – Sautéing brings out its sweetness, balancing the savory elements beautifully.
• Butter (for sautéing) – Helps unlock rich flavors in the onions and contributes to a deeper taste.
• Salt and pepper to taste – Essential for seasoning; don’t skip these to let all flavors shine.

How to Make Ham and Cheese Quiche

  1. Preheat your oven to 375°F (190°C). This ensures an even bake, helping your quiche rise beautifully as it cooks.

  2. Place the pie crust in a pie dish. Gently press it against the sides, making sure it’s even all around. This forms the perfect base for your delicious filling.

  3. Melt butter over medium heat in a skillet. Then, sauté the chopped onions until they’re golden brown (about 5 minutes), releasing a sweet aroma that will invite everyone to the kitchen.

  4. Whisk together the eggs and heavy cream in a mixing bowl. Season with salt and pepper to your liking until everything is well combined for a creamy custard base.

  5. Stir in the diced ham, shredded cheese, and the sautéed onions. Make sure all ingredients are evenly distributed, ensuring every bite is packed with flavor.

  6. Pour the mixture into the prepared pie crust. Let it settle evenly so it cooks through nicely, filling your kitchen with delectable scents as it bakes.

  7. Bake for 35-40 minutes until the quiche is puffed and golden brown. A knife inserted in the center should come out clean.

  8. Cool for 10 minutes before slicing. This allows the quiche to set, making it easier to serve and more enjoyable to eat!

Optional: Sprinkle with fresh herbs like chives or parsley for a burst of color and freshness.

Exact quantities are listed in the recipe card below.

Make Ahead Options

These Ham and Cheese Quiches are perfect for meal prep enthusiasts! You can prepare the filling—whisking together the eggs, heavy cream, diced ham, cheese, and sautéed onions—up to 24 hours in advance. Simply store the mixture in an airtight container in the refrigerator to maintain its quality. The pie crust can also be placed into your pie dish and refrigerated to save time. When you’re ready to enjoy your quiche, pour the filling into the prepared crust and bake as directed. This way, you’ll have a delicious homemade meal ready with minimal effort, perfect for busy weeknights!

Ham and Cheese Quiche Variations

Feel free to let your creativity shine and customize this quiche to suit your tastes and dietary needs.

  • Vegetarian: Replace ham with sautéed spinach, mushrooms, or bell peppers for a delightful veggie-packed quiche.
  • Gluten-Free: Use a gluten-free pre-made pie crust or make a crustless version in a greased baking dish.
  • Spicy: Add diced jalapeños or a pinch of cayenne pepper to the egg mixture for a zesty kick. The extra heat can turn a cozy meal into a fun flavor adventure!
  • Herb-Infused: Incorporate fresh herbs like thyme, basil, or parsley into the filling for a fragrant and flavor-packed twist. Subtle yet aromatic changes elevate every bite.
  • Cheese Variety: Experiment with different cheeses like feta or goat cheese for a unique taste that adds a different creaminess and tang to your quiche.
  • Protein-Packed: Swap out the ham for cooked bacon or sausage for a heartier quiche that’ll satisfy the hungriest of diners.
  • Nutty Flavor: Add a sprinkle of toasted pine nuts or walnuts into the filling, providing a delightful crunch and enhancing the flavor profile.
  • Sweet Touch: For a sweet option, include caramelized onions and gruyère, creating a luxurious twist that intrigues your taste buds. Enrich your meal with this unexpected savory-sweet combination!

How to Store and Freeze Ham and Cheese Quiche

Room Temperature: Store any leftover quiche at room temperature for up to 2 hours. After that, refrigerate to keep it fresh and safe to eat.

Fridge: Keep the quiche covered with plastic wrap or in an airtight container in the fridge for up to 3 days. This helps maintain its flavor and moisture.

Freezer: If you plan to save it for later, freeze the quiche wrapped tightly in plastic and then foil for up to 2 months. Thaw in the fridge before reheating.

Reheating: To reheat, place slices in a preheated oven at 350°F (175°C) for about 15-20 minutes or until heated through. This ensures a warm, delightful taste reminiscent of fresh-baked Ham and Cheese Quiche.

What to Serve with Ham and Cheese Quiche?

Imagine sharing a delightful meal with loved ones, where every bite bursts with flavor and warmth, and every side dish elevates your quiche experience.

  • Mixed Green Salad: A light, tangy salad with a zesty vinaigrette provides a crisp contrast, balancing the richness of the quiche.

  • Roasted Asparagus: Tender, caramelized asparagus adds a delightful crunch and earthy flavor, making it a perfect sidekick to your creamy quiche.

  • Fresh Fruit Platter: Juicy berries, citrus slices, and melon offer a refreshing, sweet contrast, brightening up your plate and palate.

  • Garlic Breadsticks: Chewy and warm, these cheesy breadsticks complement the savory elements of the quiche while giving a satisfying bite.

  • Savory Potato Wedges: Crispy on the outside and fluffy on the inside, these seasoned wedges layer in another hearty texture making every meal more filling.

  • Sparkling Lemonade: A fizzy drink with a hint of tartness refreshes your taste buds, enhancing the flavors and creating a charming dining experience.

  • Chocolate Mousse: End your meal on a sweet note with a silky chocolate mousse, delightfully rich yet light enough to cap off your feast.

Chef's Helpful Tips

  • When making Ham and Cheese Quiche, always ensure your eggs are at room temperature before whisking them with the heavy cream for a smoother custard base.
  • Be careful not to overmix the filling; a gentle stir will keep the mixture light and airy, preventing a dense quiche.
  • Sautéing the onions until they are just golden enhances their sweetness, adding depth to the flavor profile.
  • Remember to check the quiche at the 35-minute mark; baking times can vary based on your oven, and you want it to be puffed and golden without overcooking it.

Ham and Cheese Quiche Recipe FAQs

How do I choose the best eggs for my quiche?
Absolutely! Look for large eggs with intact shells. Eggs should be stored in a cool place and can be bought organic or free-range for enhanced flavor. Checking for freshness is key—try the water test: place an egg in a bowl of water; fresh eggs sink, while older ones float.

What’s the best way to store leftover Ham and Cheese Quiche?
Very! After letting it cool, cover the quiche with plastic wrap or transfer it to an airtight container. It can be stored in the fridge for up to 3 days. This keeps it fresh and preserves the wonderful flavors, perfect for quick meals!

Can I freeze my Ham and Cheese Quiche?
Absolutely! To freeze, wrap the cooled quiche tightly in plastic wrap, then in aluminum foil. It can be saved in the freezer for up to 2 months. When you’re ready to enjoy it again, thaw it in the fridge overnight before reheating.

What if my quiche doesn’t set properly during baking?
Don’t worry! If the quiche is still liquid in the center after baking, simply continue baking it at 375°F (190°C) and check every 5 minutes until set. If you notice the edges browning too much before the center sets, cover the edges with foil to prevent burning.

Are there any dietary considerations for pets or allergies?
Very important! This Ham and Cheese Quiche includes ingredients like eggs and dairy which could pose risks to pets. Always keep any leftovers out of their reach. Additionally, it’s essential to ensure no one is allergic to specific ingredients, like dairy or eggs, before serving.

How can I make my quiche healthier or cater it to dietary restrictions?
Absolutely! To lighten things up, consider using a whole wheat crust or a cauliflower crust for a gluten-free option. You can swap heavy cream for milk or a non-dairy alternative (like almond or coconut milk) and use low-fat cheese for fewer calories without losing flavor.

Ham and Cheese Quiche

Ham and Cheese Quiche

This Ham and Cheese Quiche is a delightful surprise that elevates any weeknight dinner into a special occasion.
Print Recipe Pin Recipe
Prep Time 15 minutes mins
Cook Time 40 minutes mins
Cooling Time 10 minutes mins
Total Time 1 hour hr 5 minutes mins
Servings: 6 slices
Course: BREAKFAST & BRUNCH
Cuisine: French
Calories: 400
Ingredients Equipment Method Nutrition Notes

Ingredients
  

For the Crust
  • 1 pre-made pie crust This saves time and ensures a flaky base.
For the Filling
  • 4 large eggs Rich in protein, they create a creamy custard.
  • 1 cup heavy cream Adds richness and smoothness.
  • 1 cup diced ham (cooked) Leftover ham adds savory flavor.
  • 1 cup shredded Gruyère or cheddar cheese Choose your favorite for a melty bite.
  • 1 medium onion (chopped) Sautéing brings out its sweetness.
  • 1 tablespoon butter (for sautéing) Unlocks flavors in the onions.
  • to taste salt Essential for seasoning.
  • to taste pepper Essential for seasoning.

Equipment

  • pie dish
  • Skillet
  • Mixing bowl

Method
 

General Instructions
  1. Preheat your oven to 375°F (190°C).
  2. Place the pie crust in a pie dish and press it against the sides.
  3. Melt butter over medium heat in a skillet and sauté the chopped onions until golden brown.
  4. Whisk together the eggs and heavy cream in a mixing bowl and season with salt and pepper.
  5. Stir in the diced ham, shredded cheese, and sautéed onions.
  6. Pour the mixture into the prepared pie crust.
  7. Bake for 35-40 minutes until puffed and golden brown.
  8. Cool for 10 minutes before slicing.

Nutrition

Serving: 1sliceCalories: 400kcalCarbohydrates: 30gProtein: 20gFat: 25gSaturated Fat: 12gPolyunsaturated Fat: 1gMonounsaturated Fat: 5gCholesterol: 150mgSodium: 700mgPotassium: 200mgFiber: 1gSugar: 1gVitamin A: 500IUVitamin C: 2mgCalcium: 200mgIron: 2mg

Notes

Optional: Sprinkle with fresh herbs like chives or parsley before serving.

Tried this recipe?

Let us know how it was!

Filed Under: BREAKFAST & BRUNCH

Strawberry Cheesecake Truffle Bites

February 3, 2026 by JudyWhite Leave a Comment

The sun was shining, and the farmers’ market was bursting with vibrant strawberries, their sweet scent calling me over. As I picked up a pint of the juiciest ones, inspiration struck: why not blend that fresh fruit with creamy goodness into an easy, delightful treat? That’s how my Strawberry Cheesecake Truffle Bites were born—an irresistible fusion of flavors that captures the essence of summer in every bite.

These delightful morsels are not only a breeze to whip up but also a stunning addition to any gathering or a perfect way to satisfy your sweet tooth. With a balance of fluffy cream cheese, a hint of vanilla, and a rich chocolate coating, you’ll find yourself reaching for seconds—if not thirds! Get ready to impress friends and family, or simply indulge your own cravings with these luscious truffle bites that take less than an hour from start to finish. Let’s dive into this delicious adventure together!

Why You'll Love This Strawberry Cheesecake Truffle Bites

  • These Strawberry Cheesecake Truffle Bites are incredibly easy to make, requiring just 20 minutes of prep time and yielding a delightful treat in under an hour.
  • The combination of creamy cheesecake and fresh strawberries creates a burst of flavor that will leave your taste buds dancing with joy.
  • Perfect for parties or as a sweet snack, their versatility makes them suitable for any occasion, whether it’s a picnic or a cozy movie night.
  • Visually, these truffles are a feast for the eyes, with a rich chocolate coating that gives them an irresistible allure sure to impress your guests.

Strawberry Cheesecake Truffle Bites Ingredients

• Let’s gather everything we need to create these delightful bites!

For the Filling

  • Fresh Strawberries – 1 cup, hulled and chopped; these juicy fruits will add vibrant flavor to the truffles.
  • Cream Cheese – 8 oz, softened; this ingredient gives your truffles a rich and creamy base.
  • Powdered Sugar – 1/2 cup; adds sweetness while blending smoothly with the cream cheese.
  • Vanilla Extract – 1 tsp; brings warmth and depth to the overall flavor of your filling.

For the Coating

  • Graham Cracker Crumbs – 1/2 cup; for a classic cheesecake crunch, although optional for those who prefer a smoother bite.
  • Chocolate Coating – 8 oz (milk or white); use your favorite type of chocolate for a luscious outer layer that makes these Strawberry Cheesecake Truffle Bites truly special.

Now that we have our ingredients ready, let’s create a treat that’s sure to make your taste buds sing!

How to Make Strawberry Cheesecake Truffle Bites

  1. Prepare the Strawberries: Wash and hull the strawberries, ensuring they are dry before use. This helps maintain the truffle consistency and prevents excess moisture from ruining the filling.

  2. Mix the Filling: In a mixing bowl, blend the softened cream cheese with powdered sugar and vanilla extract until smooth. This creamy mixture will be the heart of your truffles, creating a delightful cheesecake base.

  3. Fold in the Strawberries: Gently fold the chopped strawberries into your cream cheese mixture. Take your time with this step; you want those juicy bits to be evenly distributed for that perfect strawberry surprise in every bite!

  4. Scoop and Shape: Using a small scoop or your hands, form the mixture into small balls, about 1 inch in diameter. Place them on a parchment-lined baking sheet; this ensures they don’t stick as they freeze.

  5. Freeze Until Firm: Place the baking sheet in the freezer for about 1 hour. This step is crucial for solidifying your truffles, making it easier to coat them in chocolate.

  6. Dip in Chocolate: Melt the chocolate coating according to the package instructions. Once melted, carefully dip each frozen truffle in the chocolate until fully coated, then return them to the baking sheet to set.

Optional: Drizzle some extra melted chocolate on top for a decorative touch.
Exact quantities are listed in the recipe card below.

What to Serve with Strawberry Cheesecake Truffle Bites?

To create a memorable gathering or treat yourself, consider these delightful pairs that enhance the truffle experience.

  • Fresh Whipped Cream: A dollop of light and airy whipped cream adds a luscious touch that balances the truffles’ richness, perfect for dipping.

  • Coffee or Espresso: The boldness of coffee or a smooth espresso complements the sweet cheesecake flavors, making it an excellent pairing for an afternoon treat.

  • Mixed Berry Salad: Vibrant and refreshing, a salad of mixed berries brings a burst of freshness that beautifully contrasts the creamy truffles, enhancing every bite.

  • Chocolate Dipped Strawberries: For an indulgent double treat, serve chocolate-dipped strawberries alongside the truffles, echoing their decadent flavor and adding a fun bite-sized option.

  • Sparkling Wine: The effervescence of sparkling wine, whether a sweet Prosecco or a dry Champagne, elevates the dessert experience, creating a festive atmosphere perfect for celebrations.

  • Mini Cupcakes: Light and airy mini cupcakes with cream cheese frosting create a delightful variety on your dessert table, appealing to lovers of sweet treats.

  • Dark Chocolate Squares: Rich dark chocolate squares provide a sophisticated counterpoint to the sweet truffles, allowing guests to choose their desired flavor intensity.

  • Green Tea: The subtle bitterness of green tea serves as a refreshing palate cleanser, balancing the sweetness of the truffles while adding a unique touch to your dessert experience.

Make Ahead Options

These Strawberry Cheesecake Truffle Bites are an ideal treat for busy home cooks looking to save time without sacrificing flavor! You can prepare the filling (cream cheese, powdered sugar, and strawberries) up to 24 hours in advance. Simply mix the ingredients and store them in an airtight container in the refrigerator to keep everything fresh and flavorful. When you’re ready to serve, scoop the mixture into balls and freeze them for about 1 hour, then dip in chocolate as directed. For the best results, finish the truffles just before your gathering to ensure the chocolate coating stays perfectly glossy and the truffles remain creamy and delicious!

How to Store and Freeze Strawberry Cheesecake Truffle Bites

Room Temperature: Keep these truffle bites at room temperature for up to 1 hour. If they sit out longer, the chocolate coating may soften, affecting their texture.

Fridge: Store in an airtight container in the fridge for up to 3 days. Make sure the container is sealed to maintain freshness and prevent the truffles from drying out.

Freezer: These Strawberry Cheesecake Truffle Bites freeze beautifully! Place them in a single layer in an airtight container or freezer bag, where they’ll last up to 2 months.

Reheating: For best results, let the truffles thaw in the fridge overnight before enjoying. Avoid using the microwave, as it can melt the chocolate coating.

Strawberry Cheesecake Truffle Bites Variations

Feel free to get creative and make these delightful truffles your own with a few simple swaps and enhancements!

  • Dairy-Free: Substitute cream cheese with dairy-free cream cheese and use a plant-based chocolate coating for a delicious, non-dairy option.

  • Fruit Variations: Swap strawberries for raspberries or blueberries to create a refreshing twist with different flavor profiles that sing of summer.

  • Nutty Delight: Add 1/4 cup of finely chopped nuts, like almonds or walnuts, to the filling for a delightful crunch that contrasts with the creamy texture.

  • Chocolate Twist: Use dark chocolate coating instead of milk or white chocolate for a rich, bold flavor that brings a touch of sophistication to your truffles.

  • Add Spice: Mix in a pinch of cinnamon or nutmeg for a warm, inviting spice that adds depth and warmth to every luscious bite.

  • Decadent Drizzle: After coating the truffles, drizzle with melted caramel or white chocolate for an elegant touch that beautifully elevates the presentation.

  • Zesty Lemon: Add the zest of one lemon to the filling for a bright, citrusy zing that complements the sweetness of the strawberries perfectly.

These variations not only enhance the flavors but also allow you to personalize your Strawberry Cheesecake Truffle Bites. Enjoy the journey of discovering your favorite combinations!

Chef's Helpful Tips

  • Make sure your strawberries are completely dry before mixing them into the filling, as excess moisture can affect the texture of your truffles.
  • When blending the cream cheese, powdered sugar, and vanilla extract, be patient and mix until fully smooth to ensure a creamy filling.
  • Gently fold in the strawberries to maintain their shape and flavor, preventing them from breaking down too much.
  • Always freeze the truffles for at least an hour to help them hold their shape during the chocolate dipping process.

Strawberry Cheesecake Truffle Bites Recipe FAQs

What kind of strawberries should I use for the best flavor?
Absolutely! For the best flavor, use ripe, fresh strawberries that are bright red and fragrant. Look for strawberries without dark spots or signs of mold. The juicier the berries, the more flavor they’ll contribute to your Strawberry Cheesecake Truffle Bites, making each bite a delicious taste of summer.

How should I store leftover Strawberry Cheesecake Truffle Bites?
To keep your truffle bites fresh, store them in an airtight container in the fridge for up to 3 days. Make sure the container is tightly sealed to prevent them from drying out. If you’re planning to eat them later, you can also freeze them.

Can I freeze these truffle bites for later?
Yes! To freeze Strawberry Cheesecake Truffle Bites, place them in a single layer in an airtight container or freezer bag. They will keep well in the freezer for up to 2 months. When you’re ready to enjoy them, simply thaw them in the refrigerator overnight for the best texture. Avoid the microwave, as it can melt the chocolate coating.

What if my chocolate coating doesn’t set properly?
No worries! If your chocolate coating isn’t setting, it might have been too warm when you dipped your truffles. To troubleshoot, quickly pop the dipped truffles back in the freezer for about 10-15 minutes to allow the chocolate to firm up. Additionally, ensure that your chocolate is melted at the correct temperature for a smooth coating.

Can I make these truffles gluten-free?
Very! To make your Strawberry Cheesecake Truffle Bites gluten-free, simply use gluten-free graham cracker crumbs or omit them entirely. The truffles will still be delicious thanks to the creamy cheesecake filling and chocolate coating. Always double-check your chocolate for gluten-free labeling, as some brands might contain traces.

How long will these bites keep in the fridge?
Stored properly in an airtight container, these Strawberry Cheesecake Truffle Bites can last for up to 3 days in the fridge. I recommend enjoying them within the first day or two for the best flavor and texture, but they will still be tasty after a couple of days.

Strawberry Cheesecake Truffle Bites

Strawberry Cheesecake Truffle Bites

Delight in these Strawberry Cheesecake Truffle Bites, a fusion of flavors perfect for summer and gatherings.
Print Recipe Pin Recipe
Prep Time 20 minutes mins
Freezing Time 1 hour hr
Total Time 1 hour hr 20 minutes mins
Servings: 12 bites
Course: DESSERT RECIPES
Cuisine: American
Calories: 120
Ingredients Equipment Method Nutrition Notes

Ingredients
  

For the Filling
  • 1 cup Fresh Strawberries hulled and chopped
  • 8 oz Cream Cheese softened
  • 1/2 cup Powdered Sugar
  • 1 tsp Vanilla Extract
For the Coating
  • 1/2 cup Graham Cracker Crumbs optional
  • 8 oz Chocolate Coating (milk or white)

Equipment

  • Mixing bowl
  • Baking sheet
  • parchment paper
  • small scoop
  • freezer
  • microwave or double boiler

Method
 

How to Make Strawberry Cheesecake Truffle Bites
  1. Prepare the Strawberries: Wash and hull the strawberries, ensuring they are dry before use.
  2. Mix the Filling: In a mixing bowl, blend the softened cream cheese with powdered sugar and vanilla extract until smooth.
  3. Fold in the Strawberries: Gently fold the chopped strawberries into your cream cheese mixture.
  4. Scoop and Shape: Using a small scoop or your hands, form the mixture into small balls, about 1 inch in diameter.
  5. Freeze Until Firm: Place the baking sheet in the freezer for about 1 hour.
  6. Dip in Chocolate: Melt the chocolate coating according to the package instructions and dip each frozen truffle.

Nutrition

Serving: 1biteCalories: 120kcalCarbohydrates: 15gProtein: 1gFat: 7gSaturated Fat: 4gMonounsaturated Fat: 2gCholesterol: 15mgSodium: 50mgPotassium: 65mgSugar: 10gVitamin A: 5IUVitamin C: 15mgCalcium: 2mgIron: 2mg

Notes

Store at room temperature for up to 1 hour, or in the fridge for up to 3 days. Freeze for up to 2 months. Thaw in the fridge before enjoying.

Tried this recipe?

Let us know how it was!

Filed Under: BREAKFAST & BRUNCH

Chocolate Chip Scones

January 30, 2026 by JudyWhite Leave a Comment

There’s something uniquely satisfying about savoring a fresh-baked scone, especially when it’s speckled with rich chocolate chips and drizzled with a vibrant blood orange glaze. The combination of sweet and citrusy aromas wafting through the kitchen instantly elevates any morning ritual or afternoon tea break. After a long week filled with fast food and takeout, I found myself yearning for a homemade treat that wouldn’t take hours to whip up—something simple but with a touch of flair.

These Chocolate Chip Scones are your answer! With just 15 minutes of prep time and fewer than 35 minutes from start to finish, they easily fit into even the busiest of schedules. The delightful crunch on the outside gives way to an incredibly tender interior, while the zesty blood orange glaze adds a refreshing twist that perfectly complements the richness of the chocolate. So grab your apron, and let’s transform those simple pantry staples into an irresistible treat that proves homemade is always better!

Why You'll Love This Chocolate Chip Scones

  • These Chocolate Chip Scones are not only easy to make but also incredibly quick, taking just 35 minutes from start to finish.
  • The vibrant blood orange glaze adds a unique and refreshing flavor that elevates the classic scone experience.
  • Their delightful texture offers a satisfying crunch outside while remaining tender and melt-in-your-mouth on the inside.
  • Perfect as a delightful breakfast treat or an afternoon snack, they are sure to impress family and friends alike, making them a true crowd-pleaser.
  • Create a beautiful presentation on your serving platter, and watch these scones disappear in no time!

Chocolate Chip Scones Ingredients

• Here’s everything you need to create these mouthwatering Chocolate Chip Scones!

For the Scone Dough

  • 2 cups all-purpose flour – essential for the scone’s fluffy structure and texture.
  • 1 tbsp baking powder – provides that light rise, making every bite airy.
  • 1/4 cup granulated sugar – sweetens the dough and enhances the overall flavor.
  • 1/2 tsp salt – balances the sweetness and brings out all the flavors.
  • 1/2 cup unsalted butter, cold and cubed – ensures a rich flavor and flaky texture; work quickly so it stays cold.
  • 1 cup semi-sweet chocolate chips – the star ingredient, adding rich chocolatey goodness!
  • 3/4 cup heavy cream – keeps the dough moist and tender; feel free to use buttermilk as a substitute.
  • Zest of 1 blood orange – infuses the scones with a vibrant citrus flavor that shines through.

For the Glaze

  • 1/2 cup powdered sugar – creates a sweet, smooth icing that finishes off the scones beautifully.
  • 3 tbsp fresh blood orange juice – adds a tangy kick and complements the sweetness of the powdered sugar perfectly.

How to Make Chocolate Chip Scones

  1. Preheat your oven to 400°F (200°C) and line a baking sheet with parchment paper for easy cleanup. This ensures your scones will bake evenly and won’t stick.

  2. Whisk together the flour, baking powder, sugar, and salt in a large mixing bowl. This is the base of your scone dough, so make sure it’s well mixed to avoid clumps.

  3. Add the cold cubed butter and mix until the mixture resembles coarse crumbs. You want to see small pea-sized pieces of butter for that flaky texture!

  4. Fold in the chocolate chips and blood orange zest gently, ensuring they’re evenly distributed throughout your mixture. The zest will add a lovely aroma and flavor.

  5. Pour in the heavy cream and stir until just combined. Be careful not to over-mix; a gentle touch keeps your scones tender and fluffy!

  6. Turn dough onto a floured surface, then shape it into a circle, about 1 inch thick. Cut into wedges for that classic scone look, and arrange them on the prepared sheet.

  7. Bake for 15-20 minutes until the scones are golden brown on top and have a delightful aroma wafting through your kitchen. Let them cool slightly before glazing.

  8. For the glaze: In a small bowl, mix the powdered sugar with fresh blood orange juice until smooth. Drizzle over the cooled scones for a zesty finish that ties it all together.

Optional: Serve with a dusting of powdered sugar for extra elegance!
Exact quantities are listed in the recipe card below.

What to Serve with Chocolate Chip Scones?

Indulging in warm scones, particularly with the aromatic hints of blood orange glaze, sets the perfect stage for a cozy gathering or leisurely tea time.

  • Fresh Fruit Salad: Juicy berries and citrus segments brighten the plate and provide a refreshing contrast to the richness of the scones.

  • Spiced Chai Latte: The warm spices and creamy texture enhance the scone’s flavors and create a comforting beverage pairing. It’s a delightful way to sip and savor.

  • Honey-Butter Spread: Whipped honey butter adds a sweet, creamy richness that complements the chocolate and citrus notes without overwhelming them. Spread it generously for that extra special touch!

  • Simple Green Salad: A light mix of greens dressed in a tangy vinaigrette can balance the sweetness of your scones, offering a refreshing contrast for brunch or tea.

  • Vanilla Yogurt with Granola: A dollop of creamy yogurt topped with crunchy granola provides a delightful texture contrast alongside the scones, making every bite exciting.

  • Herbal Iced Tea: A refreshing glass of herbal iced tea can cleanse the palate and elevate the enjoyment of scones, especially on a warm afternoon.

  • Homemade Lemon Curd: The tartness of lemon curd brings a delightful zing that complements the sweetness of chocolate, making for an indulgent topping option.

  • Dark Chocolate Drizzle: For the chocolate lovers, an extra drizzle of dark chocolate over the scones can elevate their richness and add a dramatic flair.

Chocolate Chip Scones Variations

Feel free to put your personal twist on these delightful scones and create something uniquely yours!

  • Gluten-Free: Substitute all-purpose flour with a gluten-free flour blend for a deliciously tender scone that everyone can enjoy.

  • Dairy-Free: Use coconut oil or a dairy-free butter alternative instead of unsalted butter and almond milk or coconut milk in place of heavy cream for a vegan-friendly option.

  • Citrus Burst: Try using lemon or lime zest instead of blood orange for a zesty variation that brightens the flavor profile.

  • Nut Variations: Incorporate chopped walnuts or pecans into the dough to add a delightful crunch and rich flavor.

  • Flavor Infusion: Add a teaspoon of vanilla extract to the scone dough for an extra layer of warmth and sweetness.

  • Sweet Swap: Replace the semi-sweet chocolate chips with white chocolate chips or dark chocolate for a different flavor twist that can cater to your preferences.

  • Fruity Addition: Fold in dried cranberries or blueberries to the dough for a burst of flavor and a pop of color that will make your scones even more enticing.

  • Extra Spice: Sprinkle in a teaspoon of cinnamon or pumpkin spice for a cozy, aromatic touch that will evoke the feeling of a warm, homey kitchen.

Make Ahead Options

These Chocolate Chip Scones are perfect for meal prep enthusiasts looking to save time during busy mornings! You can prepare the scone dough up to 24 hours in advance. Simply follow the steps until you shape the dough into a circle, then wrap it tightly in plastic wrap and refrigerate. This will keep your scones just as delicious while allowing the flavors to meld beautifully. When you’re ready to bake, simply cut the dough into wedges and follow the baking instructions, adding an extra minute if needed. For the glaze, mix the powdered sugar and blood orange juice a few hours ahead or even the night before; just give it a stir before drizzling to maintain that smooth texture. Enjoy your homemade scones in a snap!

How to Store and Freeze Chocolate Chip Scones

Room Temperature: Store cooled scones in an airtight container for up to 2 days to maintain freshness. Be sure to let them cool completely before sealing.

Fridge: If you need to keep them longer, place the scones in the fridge in an airtight container for up to 5 days. Warm them in the oven for a few minutes before serving.

Freezer: For longer storage, freeze baked scones by wrapping each individually in plastic wrap and placing them in a freezer bag for up to 3 months. Thaw in the refrigerator overnight before enjoying.

Reheating: To revive your Chocolate Chip Scones, reheat them in a toaster oven or conventional oven at 350°F (175°C) for about 10 minutes until warmed through.

Chef's Helpful Tips

  • When making chocolate chip scones, ensure your butter is cold to achieve that perfectly flaky texture; this will help create delicious layers.
  • Avoid over-mixing the dough after adding the heavy cream to keep the scones tender and airy.
  • Use a sharp knife to cut the dough into wedges cleanly, which helps them bake evenly.
  • Keep an eye on your scones during the last few minutes of baking, as they can go from golden brown to overdone quickly.

Chocolate Chip Scones Recipe FAQs

How do I choose ripe blood oranges?
Absolutely! Look for blood oranges that are firm yet slightly soft to the touch, signaling ripeness. The skin should be vibrant with that characteristic deep red hue. Avoid any fruit with dark spots or wrinkles, as these may indicate overripeness.

How should I store leftover scones?
Very simple! For room temperature storage, place cooled Chocolate Chip Scones in an airtight container for up to 2 days. If you want to extend their shelf life, refrigerate them in an airtight container for up to 5 days, remembering to warm them slightly in the oven before serving to bring back their delightful texture.

Can I freeze these scones?
Yes, you can! To freeze Chocolate Chip Scones, wrap each one individually in plastic wrap and place them inside a freezer-safe bag. They will maintain their quality for up to 3 months. When you’re ready to enjoy them, simply thaw them overnight in the refrigerator and reheat as described.

What should I do if my scone dough is too sticky?
Not a problem! If your dough is sticking to your hands or the surface, gently sprinkle in a bit more flour—just a tablespoon at a time—until it’s manageable. When working the scone dough, remember to keep everything as cool as possible; that way, you’ll maintain the right texture.

Are these scones safe for anyone with nut allergies?
Absolutely! This Chocolate Chip Scones recipe is made without any nuts. However, always double-check your chocolate chip packaging to ensure they haven’t been processed in a facility that handles nuts, especially if you’re entertaining guests with allergies.

How do I know when my scones are done baking?
Look for visual cues! Your scones are ready when they puff up slightly and turn a golden brown color on top, typically after 15-20 minutes in the oven. You can gently tap the tops; they should feel firm. If they seem too soft or doughy, give them a couple more minutes, but keep a close eye on them to prevent overbaking.

Chocolate Chip Scones

Chocolate Chip Scones

Delightful Chocolate Chip Scones with a zesty blood orange glaze, perfect for breakfast or an afternoon snack.
Print Recipe Pin Recipe
Prep Time 15 minutes mins
Cook Time 20 minutes mins
Total Time 35 minutes mins
Servings: 8 scones
Course: BREAKFAST & BRUNCH
Cuisine: American
Calories: 250
Ingredients Equipment Method Nutrition Notes

Ingredients
  

For the Scone Dough
  • 2 cups all-purpose flour essential for the scone's fluffy structure and texture.
  • 1 tbsp baking powder provides that light rise, making every bite airy.
  • 1/4 cup granulated sugar sweetens the dough and enhances the overall flavor.
  • 1/2 tsp salt balances the sweetness and brings out all the flavors.
  • 1/2 cup unsalted butter, cold and cubed ensures a rich flavor and flaky texture.
  • 1 cup semi-sweet chocolate chips the star ingredient, adding rich chocolatey goodness!
  • 3/4 cup heavy cream keeps the dough moist and tender.
  • zest of 1 blood orange infuses the scones with a vibrant citrus flavor.
For the Glaze
  • 1/2 cup powdered sugar creates a sweet, smooth icing.
  • 3 tbsp fresh blood orange juice adds a tangy kick that complements the sweetness.

Equipment

  • Oven
  • Mixing bowl
  • Baking sheet
  • parchment paper
  • Whisk
  • Knife

Method
 

Preparation
  1. Preheat your oven to 400°F (200°C) and line a baking sheet with parchment paper.
  2. Whisk together the flour, baking powder, sugar, and salt in a large mixing bowl.
  3. Add the cold cubed butter and mix until the mixture resembles coarse crumbs.
  4. Fold in the chocolate chips and blood orange zest gently.
  5. Pour in the heavy cream and stir until just combined.
  6. Turn dough onto a floured surface, then shape it into a circle about 1 inch thick.
  7. Cut into wedges and arrange them on the prepared sheet.
  8. Bake for 15-20 minutes until golden brown. Let them cool slightly before glazing.
  9. For the glaze: Mix powdered sugar with fresh blood orange juice until smooth. Drizzle over the cooled scones.

Nutrition

Serving: 1sconeCalories: 250kcalCarbohydrates: 34gProtein: 3gFat: 12gSaturated Fat: 7gMonounsaturated Fat: 4gCholesterol: 30mgSodium: 200mgPotassium: 100mgFiber: 1gSugar: 10gVitamin A: 200IUVitamin C: 1mgCalcium: 80mgIron: 1mg

Notes

Serve with a dusting of powdered sugar for extra elegance.

Tried this recipe?

Let us know how it was!

Filed Under: BREAKFAST & BRUNCH

Raspberry Dark Chocolate Truffles

January 30, 2026 by JudyWhite Leave a Comment

There’s something undeniably enchanting about the moment fresh raspberries meet rich dark chocolate. As I prepared to indulge in my latest sweet creation, the vibrant purple hue of the chopped berries combined with the glossy melt of the chocolate left me mesmerized. Little did I know, this was the start of a delightful adventure that would lead to these irresistible Raspberry Dark Chocolate Truffles.

After a long week, a burst of fruity sweetness paired with the deep flavors of cocoa felt like the perfect treat. With just a few simple ingredients and under an hour of preparation, these truffles quickly became my go-to dessert for impressing guests or satisfying my own sweet cravings. Whether you’re a seasoned chef or someone looking to break free from the monotony of fast food, you’ll find these truffles to be both easy to make and a true crowd-pleaser! So roll up your sleeves, and let’s dive into this deliciously decadent recipe!

Why You'll Love This Raspberry Dark Chocolate Truffles

  • These Raspberry Dark Chocolate Truffles are incredibly easy to make, perfect for both novice and experienced cooks alike.
  • The exquisite combination of rich dark chocolate and fresh raspberries creates a flavor profile that is both indulgent and refreshing.
  • With only a few ingredients and minimal prep time, you can whip up a delicious treat that’s sure to impress your guests.
  • Not only do they look stunning with their glossy finish and vibrant color, but they are also a delightful way to elevate any gathering or special occasion.

Raspberry Dark Chocolate Truffles Ingredients

• Get ready to indulge in this deliciously rich treat!

For the Truffle Mixture

  • 8 oz dark chocolate (70% cocoa) – Choose high-quality chocolate for a deep, rich flavor in your Raspberry Dark Chocolate Truffles.
  • ½ cup heavy cream – This adds a luscious creaminess that makes the truffles melt in your mouth.
  • 1 cup fresh raspberries, finely chopped – Fresh raspberries bring a burst of tartness that perfectly balances the sweetness of the chocolate.
  • ½ cup powdered sugar, sifted – Sifting removes lumps, ensuring your truffles have a smooth finish.

For the Coating

  • ¼ cup unsweetened cocoa powder – Use as a coating to add a delightful bitterness, enhancing the overall flavor contrast of the truffles.

How to Make Raspberry Dark Chocolate Truffles

  1. Gather all your ingredients and finely chop the fresh raspberries. Ensure they are small enough to blend well with the chocolate mixture without leaving large chunks.

  2. Heat the heavy cream in a saucepan over medium heat until it simmers. Be careful not to let it boil, as we want it just hot enough to melt the chocolate beautifully.

  3. Remove the saucepan from heat and stir in the dark chocolate pieces. Continue mixing until the chocolate is melted and smooth, creating a glossy ganache.

  4. Fold in the chopped raspberries and sifted powdered sugar into the ganache. Allow the mixture to sit at room temperature until it thickens slightly—this usually takes about 15-20 minutes.

  5. Chill the mixture in the refrigerator for about an hour or until it is firm enough to scoop. You want it to be set but still pliable enough to handle.

  6. Shape the mixture into small balls using your hands, then roll them in cocoa powder until well coated. This adds a nice touch and enhances the rich chocolate flavor.

Optional: For an extra touch, drizzle some melted white chocolate over the truffles before serving.

Exact quantities are listed in the recipe card below.

Raspberry Dark Chocolate Truffles Variations

Get ready to get creative and transform these truffles with delightful twists to suit your cravings!

  • Vegan: Substitute heavy cream with coconut cream and use dairy-free dark chocolate for a luscious vegan treat. The coconut adds a tropical flair that beautifully complements the raspberries!

  • Nutty Delight: Mix in finely chopped nuts like hazelnuts or almonds for added crunch and flavor. The texture contrast will bring a delightful surprise in each bite.

  • Minty Fresh: Incorporate a few drops of peppermint extract into the ganache for a refreshing minty flavor. This cool addition is perfect for holiday festivities or a summer treat.

  • Spicy Kick: Add a sprinkle of cayenne pepper or chipotle powder to the raspberry mixture to give your truffles a surprising heat twist. It enhances the rich chocolate and fruity notes beautifully.

  • Coffee Infusion: Stir in instant coffee granules while melting the chocolate for a coffee-flavored truffle. The coffee accentuates the deep chocolate flavor, making it irresistible!

  • Fruit Fusion: Substitute fresh raspberries with other berries or fruits, like strawberries or even diced mango. Each fruit brings its unique sweetness and joy to the truffles.

  • Zesty Citrus: Add a teaspoon of orange or lemon zest to the mixture for a bright and zesty flavor boost. This citrus notes add a lovely freshness and balance to the rich chocolate.

  • Swap Coatings: Instead of cocoa powder, roll your truffles in crushed nuts, shredded coconut, or even sprinkles for a fun and festive look! This simple change can make your truffles even more eye-catching.

How to Store and Freeze Raspberry Dark Chocolate Truffles

Room Temperature: Keep your Raspberry Dark Chocolate Truffles in an airtight container at room temperature for up to 3 days. Make sure they’re in a cool, dry place to prevent melting.

Fridge: For longer freshness, refrigerate the truffles in an airtight container for up to 1 week. Allow them to come to room temperature before serving for the best texture.

Freezer: You can freeze the truffles for up to 3 months. Place them in a single layer on a baking sheet to freeze solid, then transfer to a freezer bag, removing excess air.

Reheating: If the truffles become slightly soft after refrigeration, let them sit at room temperature for 15-20 minutes to regain their shape and flavor before indulging.

What to Serve with Raspberry Dark Chocolate Truffles?

Treat yourself to a delightful dessert experience that pairs beautifully with these rich, sweet bites.

  • Fresh Berries: The acidity of strawberries or blueberries balances the sweetness, offering a refreshing bite alongside the creamy truffles.
  • Vanilla Ice Cream: A scoop of creamy vanilla creates a dreamy contrast, enhancing the chocolate’s richness while cooling your palate.
  • Espresso: The bold flavor of espresso elevates the chocolate, making each truffle sing with a touch of sophistication to your dessert table.
  • Chocolate Sauce: Drizzling melted chocolate on the truffles adds an extra layer of indulgence, perfect for chocolate lovers seeking a decadent treat.
  • Whipped Cream: Light and airy, fresh whipped cream provides a lovely contrast in texture while adding a touch of sweetness to each truffle.
  • Red Wine: A glass of fruity red wine harmonizes beautifully with the dark chocolate, enhancing the berry notes and completing a romantic dessert experience.
  • Almond Biscotti: Crunchy biscotti adds a delightful texture that complements the softness of the truffles, making for a perfect pairing during coffee breaks.
  • Mint Tea: A soothing cup of mint tea cleanses the palate, refreshing your taste buds between bites of rich chocolate.
  • Pistachio Crumble: The nutty crunch of pistachios brings an exciting texture and flavor contrast, creating a delightful experience with every mouthful.

Make Ahead Options

These Raspberry Dark Chocolate Truffles are a perfect make-ahead treat for busy home cooks! You can prepare the truffle mixture up to 24 hours in advance by following the first five steps of the recipe, up until chilling. Once mixed, cover the bowl tightly with plastic wrap to prevent any absorption of fridge odors and ensure maximum freshness. When you’re ready to finish, simply scoop the firm mixture and roll it in cocoa powder just before serving. This not only saves time but allows the flavors to deepen, making your truffles just as delicious, if not more! With this prep-ahead approach, you’ll impress your guests with minimal stress.

Chef's Helpful Tips

  • For the Raspberry Dark Chocolate Truffles, using high-quality dark chocolate is essential for achieving rich flavor and smooth texture in your ganache.
  • Keep a close eye on the heavy cream as it heats; letting it boil can result in a grainy texture that affects the final truffles.
  • When folding in the raspberries and powdered sugar, do it gently to maintain the airiness of the mixture for a light texture.
  • Allow the truffle mixture to sit at room temperature for about 15-20 minutes before chilling to ensure it thickens properly for easier shaping.

Raspberry Dark Chocolate Truffles Recipe FAQs

How do I choose ripe raspberries for my truffles?
Absolutely! When selecting fresh raspberries, look for berries that are plump, firm, and vibrant in color. They should have a sweet aroma and be free of any dark spots or mushiness. If possible, choose organic raspberries to avoid pesticides, which can impact the flavor and quality of your delicious Raspberry Dark Chocolate Truffles.

How should I store leftover truffles?
To ensure your Raspberry Dark Chocolate Truffles stay fresh, store them in an airtight container at room temperature for up to 3 days. If you want to extend their shelf life, refrigerate them for up to a week. Just remember to let them come to room temperature before serving for that perfect melt-in-your-mouth experience!

Can Raspberry Dark Chocolate Truffles be frozen?
Very! You can freeze your truffles for up to 3 months. Here’s how: First, place the truffles in a single layer on a baking sheet and freeze them until solid. Then, transfer them to a freezer-safe bag or container, removing as much air as possible to avoid freezer burn. When you’re ready to indulge, simply let them thaw in the fridge or at room temperature.

What if my truffle mixture is too runny?
No worries! If your mixture turns out too runny, it may not have cooled down enough. Try letting it sit at room temperature for a little longer, around 15-20 minutes, before chilling it again. If it’s still too soft, you can add a bit more melted chocolate to thicken it up. Just ensure the chocolate is warm enough to blend smoothly.

Are Raspberry Dark Chocolate Truffles suitable for those with allergies?
The truffles contain dairy and chocolate, so if you’re making them for someone with allergies, consider using dairy-free dark chocolate and coconut cream as substitutes. Additionally, always check the ingredient labels for any allergens, as cross-contamination can occur, and inform your guests about the ingredients for their safety.

How long can homemade raspberry truffles last?
If stored correctly, your Raspberry Dark Chocolate Truffles can last a delightful 1 week in the fridge and up to 3 months in the freezer. They make great gifts, so if you want to enjoy them later, don’t hesitate to whip up a batch and store them for that sweet craving down the road!

Raspberry Dark Chocolate Truffles

Raspberry Dark Chocolate Truffles

Indulge in these delightful Raspberry Dark Chocolate Truffles, where fresh raspberries meet rich dark chocolate for a perfect treat.
Print Recipe Pin Recipe
Prep Time 20 minutes mins
Cook Time 10 minutes mins
Chilling Time 1 hour hr
Total Time 1 hour hr 30 minutes mins
Servings: 12 truffles
Course: DESSERT RECIPES
Cuisine: American
Calories: 100
Ingredients Equipment Method Nutrition Notes

Ingredients
  

For the Truffle Mixture
  • 8 oz dark chocolate (70% cocoa) Choose high-quality chocolate for the best flavor.
  • 1/2 cup heavy cream This adds creaminess.
  • 1 cup fresh raspberries, finely chopped Brings tartness to balance sweetness.
  • 1/2 cup powdered sugar, sifted Ensures a smooth finish.
For the Coating
  • 1/4 cup unsweetened cocoa powder Adds bitterness, enhancing flavor.

Equipment

  • Saucepan
  • Mixing bowl
  • Baking sheet
  • air-tight container

Method
 

How to Make Raspberry Dark Chocolate Truffles
  1. Gather all your ingredients and finely chop the fresh raspberries.
  2. Heat the heavy cream in a saucepan over medium heat until it simmers.
  3. Remove the saucepan from heat and stir in the dark chocolate pieces.
  4. Fold in the chopped raspberries and sifted powdered sugar into the ganache.
  5. Chill the mixture in the refrigerator for about an hour until firm.
  6. Shape the mixture into small balls and roll them in cocoa powder.

Nutrition

Serving: 1truffleCalories: 100kcalCarbohydrates: 10gProtein: 1gFat: 7gSaturated Fat: 4gPolyunsaturated Fat: 0.5gMonounsaturated Fat: 2.5gCholesterol: 10mgSodium: 20mgPotassium: 100mgFiber: 1gSugar: 6gVitamin C: 2mgCalcium: 2mgIron: 5mg

Notes

Using high-quality dark chocolate is essential for a rich flavor. Keep an eye on the cream while heating to avoid a grainy texture.

Tried this recipe?

Let us know how it was!

Filed Under: BREAKFAST & BRUNCH

Rhubarb Rose Dark Chocolate Parfaits

January 30, 2026 by JudyWhite Leave a Comment

There’s something simply exquisite about the combination of flavors that dance together in these Rhubarb Rose Dark Chocolate Parfaits. Imagine the refreshing tartness of fresh rhubarb, slowly transformed into a luscious compote, mingling with the rich depth of high-quality dark chocolate. It’s a pairing that evokes cozy afternoons and indulgent decadence—all wrapped up in one elegant dessert.

I first created this recipe after rummaging through my pantry, discovering a forgotten bottle of rosewater. What began as an experimental kitchen endeavor turned into a delightful surprise that has since become a staple at my gatherings. Each layer of this parfait is a treat for the senses—the vibrant pink of the rhubarb contrasts beautifully with the deep, dark chocolate, while the floral notes of the rosewater add a dreamy essence that’s hard to resist.

Perfect for impressing guests or simply treating yourself after a long day, these parfaits are quick to prepare yet undeniably sophisticated. Let’s dive into this delicious recipe, and elevate your dessert game!

Why You'll Love This Rhubarb Rose Dark Chocolate Parfaits

  • This recipe is a breeze to make, requiring just 35 minutes of active time and minimal effort for a stunning outcome.
  • The exquisite combination of tart rhubarb, rich dark chocolate, and fragrant rosewater delivers an unforgettable flavor experience that will leave everyone wanting more.
  • Versatile and elegant, these parfaits are perfect for any occasion, from casual dinners to special celebrations.
  • The striking visual appeal of the layered ingredients creates a show-stopping dessert that will impress your guests and make your table come alive.

Rhubarb Rose Dark Chocolate Parfaits Ingredients

For the Rhubarb Compote
• Fresh rhubarb – This fruit’s tartness beautifully balances the sweetness of the chocolate!
• Granulated sugar – Adjust to taste; remember, the sugar will enhance the rhubarb’s flavor.

For the Chocolate Mousse
• High-quality dark chocolate – Opt for 70% cocoa or higher for a richer flavor profile.
• Heavy cream – Ensure it’s chilled for the best whipped consistency.
• Rosewater – Adds a delicate floral note, making these parfaits truly special!
• Vanilla extract – A classic flavor enhancer that complements both chocolate and cream.

This delightful combination in the Rhubarb Rose Dark Chocolate Parfaits yields an unforgettable dessert experience your loved ones will cherish!

How to Make Rhubarb Rose Dark Chocolate Parfaits

  1. Prepare Rhubarb Compote: In a saucepan, combine the chopped rhubarb and sugar. Cook over medium heat for 10-15 minutes until the rhubarb is soft and tender. Let it cool completely before layering.

  2. Melt Dark Chocolate: Place your high-quality dark chocolate in a heatproof bowl set over a pot of simmering water. Stir until melted and smooth, then let cool slightly. The goal is a silky chocolate without lumps!

  3. Whip Cream: In a mixing bowl, beat the chilled heavy cream with sugar (if desired) and vanilla extract. Continue whipping until soft peaks form—this adds lightness to your parfait!

  4. Combine Mixtures: Gently fold the rosewater into the melted chocolate, creating a fragrant chocolate base. Next, carefully fold in half of the prepared whipped cream until well combined—this adds a lovely airy texture.

  5. Layer Parfaits: Grab your clear glasses! Start layering the rhubarb compote and chocolate mousse alternately until filled, being sure to finish with a luscious layer of mousse on top for that perfect presentation.

  6. Chill & Serve: Once layered, refrigerate the parfaits for at least two hours—this allows them to set beautifully. Serve chilled and enjoy the delightful mix of flavors!

Optional: Garnish with fresh mint leaves for a touch of color and freshness.
Exact quantities are listed in the recipe card below.

Make Ahead Options

These Rhubarb Rose Dark Chocolate Parfaits are perfect for busy weeknights and can easily be made ahead of time! You can prepare the rhubarb compote up to 3 days in advance; simply store it in an airtight container in the refrigerator to maintain its vibrant flavor and prevent browning. Additionally, you can melt the dark chocolate and whip the cream up to 24 hours ahead, keeping them covered until it’s time to assemble. When you’re ready to serve, just fold the rosewater into the chocolate, combine with the whipped cream, layer the parfaits, and refrigerate for a minimum of two hours to set. This way, you’ll have an elegant dessert with minimal effort, ready to impress your guests!

What to Serve with Rhubarb Rose Dark Chocolate Parfaits?

Indulging in these parfaits opens up a world of delightful pairings that enhance your dessert experience.

  • Fresh Berries: The burst of fruity sweetness from strawberries or raspberries beautifully contrasts the tartness of the rhubarb and the richness of the chocolate.

  • Shortbread Cookies: These buttery cookies add a delightful crunch that balances the creaminess of the parfait, making each bite a symphony of textures.

  • Vanilla Ice Cream: A scoop of classic vanilla ice cream provides a creamy, cool counterpart to the warm notes of dark chocolate, elevating the enjoyment.

  • Sparkling Wine: The effervescence of a sparkling wine complements the parfaits, cutting through the richness while adding a celebratory flair to your meal.

  • Hazelnut Praline: Crushed hazelnut praline introduces a nutty crunch that harmonizes with the chocolate and amplifies the dessert’s luxurious experience.

  • Mint Tea: The fresh herbal notes of mint tea can cleanse the palate beautifully between bites of the rich parfait, enhancing your overall enjoyment and relaxation.

  • Whipped Cream Topping: Add an additional dollop of sweetened whipped cream for extra decadence, offering a lightness that balances the dense mousse and compote layers.

  • Chocolate-Covered Strawberries: These delectable treats echo the flavors of your parfait while providing an elegant touch that impresses guests at any gathering.

How to Store and Freeze Rhubarb Rose Dark Chocolate Parfaits

Fridge: Keep your parfaits stored in the refrigerator for up to 3 days, covered with plastic wrap or in airtight containers to maintain freshness.

Freezer: For longer storage, freeze the chocolate mousse base without the layers for up to 1 month. Thaw in the fridge before layering with rhubarb compote and serving.

Reheating: There’s no need to reheat these parfaits; serve them chilled straight from the fridge or freezer for a refreshing dessert experience.

Assembly Tips: It’s best to layer the parfaits just before serving for optimal texture and presentation; this way, the crispness of the layered ingredients is preserved.

Rhubarb Rose Dark Chocolate Parfaits Variations

Feel free to explore these delightful twists to make your parfaits truly your own!

  • Gluten-Free: Substitute cornstarch for any thickening agent, keeping the parfaits deliciously gluten-free without compromising texture.

  • Sugar-Free: Use sugar alternatives like erythritol or stevia to create a lower-calorie version that retains sweetness and flavor.

  • Vegan: Swap heavy cream with coconut cream and dark chocolate with dairy-free options. Perfect for plant-based friends!

  • Spicy Kick: Add a pinch of cayenne pepper to the melted chocolate for a surprising heat that complements the sweetness.

  • Berry Bliss: Layer in some fresh berries like strawberries or raspberries for an additional burst of flavor and texture.

  • Honeyed Touch: Replace granulated sugar in the rhubarb compote with honey for a natural sweetness that enhances those tart notes beautifully.

  • Nutty Crunch: Fold in finely chopped nuts such as pistachios or almonds into the chocolate mousse for an irresistible crunch.

  • Caramel Drizzle: Top your parfaits with a swirl of caramel sauce before serving, adding decadent richness and a touch of indulgence.

Chef's Helpful Tips

  • When making Rhubarb Rose Dark Chocolate Parfaits, always ensure your heavy cream is thoroughly chilled for the best whipping results.
  • A common mistake is overcooking the rhubarb; keep an eye on it while cooking to maintain its vibrant color and tartness.
  • When melting dark chocolate, avoid direct heat to prevent burning; instead, use a double boiler or microwave in short bursts.
  • Allow the parfaits to chill in the refrigerator for at least two hours to achieve the perfect set before serving.

Rhubarb Rose Dark Chocolate Parfaits Recipe FAQs

How do I choose the best rhubarb for this recipe?
Absolutely! Look for bright, firm stalks of rhubarb without dark spots or wilting. The skin should be smooth and shiny, indicating freshness. Smaller stalks can often be more tender and flavorful, making them ideal for compote.

How long can I store the parfaits in the refrigerator?
You can keep your Rhubarb Rose Dark Chocolate Parfaits stored in the refrigerator for up to 3 days. Make sure they are covered with plastic wrap or kept in airtight containers to keep them fresh and delicious.

Can I freeze Rhubarb Rose Dark Chocolate Parfaits?
Yes, you can freeze the chocolate mousse base for additional storage! To do this, prepare the chocolate mousse without layering it with the rhubarb compote, and place it in an airtight container. It will keep well for up to 1 month. When you’re ready to enjoy, simply thaw it in the fridge overnight before layering with the compote and serving.

What should I do if my rhubarb compote is too tart?
If you find the rhubarb compote too tart for your taste, don’t worry—this happens sometimes! You can gently stir in a bit more sugar while it’s still warm, tasting as you go until it reaches your desired sweetness. Alternatively, adding a splash of vanilla extract can help balance out the tartness too.

Are these parfaits suitable for those with allergies?
It’s essential to be cautious—these parfaits contain heavy cream and dark chocolate, which may not be suitable for those with dairy allergies. If you’re accommodating allergies, consider using dairy-free cream alternatives and ensuring the chocolate is vegan, if necessary. Always double-check the ingredient labels for potential allergens.

What’s the best way to whip the cream for these parfaits?
The key to perfectly whipped cream is to start with chilled heavy cream. Whip it in a chilled mixing bowl with a hand mixer or stand mixer—this usually takes about 3-5 minutes. Stop once soft peaks form to keep it light and fluffy; overwhipping can turn it grainy. Enjoy the lightness it brings to your parfaits!

Rhubarb Rose Dark Chocolate Parfaits

Rhubarb Rose Dark Chocolate Parfaits

Indulge in Rhubarb Rose Dark Chocolate Parfaits, a sophisticated dessert combining tart rhubarb, rich chocolate, and floral rosewater.
Print Recipe Pin Recipe
Prep Time 15 minutes mins
Cook Time 20 minutes mins
Chilling Time 2 hours hrs
Total Time 2 hours hrs 35 minutes mins
Servings: 4 parfaits
Course: DESSERT RECIPES
Cuisine: American
Calories: 350
Ingredients Equipment Method Nutrition Notes

Ingredients
  

For the Rhubarb Compote
  • 2 cups Fresh rhubarb Chopped
  • 1/2 cup Granulated sugar Adjust to taste
For the Chocolate Mousse
  • 8 oz High-quality dark chocolate 70% cocoa or higher
  • 1 cup Heavy cream Chilled
  • 1 tbsp Rosewater Adds floral note
  • 1 tsp Vanilla extract Classic flavor enhancer

Equipment

  • Saucepan
  • Heatproof bowl
  • Mixing bowl
  • Whisk
  • Spatula
  • Clear glasses

Method
 

How to Make Rhubarb Rose Dark Chocolate Parfaits
  1. In a saucepan, combine the chopped rhubarb and sugar. Cook over medium heat for 10-15 minutes until the rhubarb is soft and tender. Let it cool completely before layering.
  2. Place your high-quality dark chocolate in a heatproof bowl set over a pot of simmering water. Stir until melted and smooth, then let cool slightly.
  3. In a mixing bowl, beat the chilled heavy cream with sugar (if desired) and vanilla extract until soft peaks form.
  4. Gently fold the rosewater into the melted chocolate, then carefully fold in half of the prepared whipped cream.
  5. Layer the rhubarb compote and chocolate mousse alternately in clear glasses, finishing with a layer of mousse on top.
  6. Refrigerate the parfaits for at least two hours before serving.

Nutrition

Serving: 1parfaitCalories: 350kcalCarbohydrates: 30gProtein: 5gFat: 24gSaturated Fat: 14gCholesterol: 40mgSodium: 50mgPotassium: 260mgFiber: 2gSugar: 18gVitamin A: 500IUVitamin C: 3mgCalcium: 60mgIron: 2mg

Notes

Garnish with fresh mint leaves for added color and freshness. Serve chilled for the best experience.

Tried this recipe?

Let us know how it was!

Filed Under: BREAKFAST & BRUNCH

Chocolate Fondue

January 30, 2026 by JudyWhite Leave a Comment

There’s something wonderfully nostalgic about gathering around a bubbling pot of chocolate fondue. Whenever I dip a luscious strawberry into that velvety chocolate, I’m transported back to evenings spent with friends, laughter filling the air as we all eagerly reach for our favorite dippers. Just the sight of that warm, melted chocolate, glistening and inviting, brings joy and a hint of excitement to any occasion.

Perfect for celebrating special moments or simply indulging after a long day, this chocolate fondue recipe is wonderfully easy to whip up. With just a handful of simple ingredients—high-quality dark chocolate, creamy goodness, and a touch of vanilla—you’ll create a rich, decadent experience that outshines even the most elaborate desserts. And the best part? You get to customize it with your choice of fresh fruits, airy marshmallows, or crunchy cookies.

So, let’s dive into this delightful world of chocolate fondue together—it’s time to rekindle your love for homemade treats and redefine your dessert game!

Why You'll Love This Chocolate Fondue

  • This chocolate fondue recipe is incredibly easy to prepare, making it perfect for even the busiest of days.
  • The rich, smooth flavor of high-quality dark chocolate combined with creamy heavy cream creates a melt-in-your-mouth experience that is simply irresistible.
  • Versatility is at its best here, as you can use an array of dippers like fresh fruits, cookies, or marshmallows to suit every taste preference.
  • Its eye-catching presentation and warm, inviting aroma will keep your guests coming back for more, making it a real crowd-pleaser for any gathering.

Chocolate Fondue Ingredients

For the Fondue
• 8 oz high-quality dark chocolate – use premium chocolate for a richer taste.
• 1 cup heavy cream – this gives the fondue its creamy and luscious texture.
• 1 tsp pure vanilla extract – enhances the chocolate flavor and adds warmth.

For the Dippers
• Fresh fruits (e.g., strawberries, bananas, apple slices) – the perfect balance of sweetness and acidity.
• 1 cup marshmallows – add a fun and fluffy element to your dipping experience.
• 1 cup biscotti or shortbread cookies – their crunchiness complements the creamy chocolate beautifully.

Get ready to create a memorable dessert experience with these delightful ingredients for your Chocolate Fondue!

How to Make Chocolate Fondue

  1. Chop the dark chocolate into small pieces for even melting. This ensures that your fondue will be smooth and creamy, giving you that luscious texture we all crave.

  2. Warm the heavy cream in a medium saucepan over low heat until it simmers, but be careful not to boil. This gentle heat will keep the cream from curdling, allowing for a silky blend.

  3. Stir in the chopped chocolate off the heat until it melts and becomes smooth. This magical moment transforms your ingredients into a decadent treat worthy of any gathering.

  4. Add the vanilla extract for a lovely enhancement of flavor. It brings a warm touch to the rich chocolate, making each dip more delightful.

  5. Transfer the mixture to a fondue pot or a heatproof bowl to keep it warm. The inviting aroma will draw your guests closer and add to the fun of sharing!

  6. Arrange dippers like fresh fruits, cookies, and marshmallows around the pot for serving. This colorful display not only looks inviting but also lets everyone customize their chocolate experience.

Optional: Serve with a sprinkle of sea salt for a gourmet touch.

Exact quantities are listed in the recipe card below.

What to Serve with Chocolate Fondue?

There’s nothing quite like gathering around a warm pot of melted chocolate, creating memories and deliciously dipping treats to enhance your experience.

  • Fresh Strawberries: Their juicy sweetness perfectly balances the rich chocolate, making each bite a delightful explosion of flavor.
  • Banana Slices: Creamy and subtly sweet, bananas hold their shape well when dipped, adding a smooth contrast to the melt-in-your-mouth chocolate.
  • Marshmallows: Fluffy and soft, these sweet treats get a delightful makeover when coated in chocolate, creating a fun and nostalgic experience.
  • Shortbread Cookies: Their buttery crunch provides a lovely texture that pairs beautifully with the silky chocolate, offering a delightful mix of flavors.
  • Biscotti: Crunchy and slightly sweet, biscotti adds a wonderful bite that complements the warm chocolate and enhances the dipping excitement.
  • Pretzel Sticks: Their salty and crunchy nature gives a delectable contrast to the sweetness, creating a surprising twist to each dip.
  • Sparkling Wine: A glass of bubbly enhances the celebratory aspect, cutting through the richness of the chocolate and elevating the overall experience.
  • Coffee: A warm cup of coffee alongside can provide a lovely contrast, making for the perfect afternoon indulgence or after-dinner treat.
  • Ice Cream: For those looking to really indulge, serving a scoop of vanilla or salted caramel ice cream creates an extravagant dessert.

Chocolate Fondue Variations

Feel free to play around with these delightful options to make your chocolate fondue even more special!

  • Milk Chocolate: Swap dark chocolate for milk chocolate for a sweeter, creamier treat that kids will adore.

  • Fruit-Infused: Add a splash of orange or raspberry liqueur to the melted chocolate for a fruity twist that elevates the flavors.

  • Nutty Chocolate: Stir in a tablespoon of almond or hazelnut spread to enhance the richness and add depth to the chocolate.

  • Spicy Kick: For those who love heat, incorporate a pinch of cayenne pepper or chili powder into the melted chocolate for a surprising zing.

  • Vegan Delight: Substitute coconut cream for heavy cream and use dairy-free chocolate to create a luscious vegan version.

  • Crunchy Add-ins: Fold in chopped nuts or crushed cookies after melting the chocolate for delightful texture contrasts.

  • Herbal Hint: Add a few fresh mint leaves or a drop of peppermint extract for a refreshing twist that complements the chocolate beautifully.

  • Coffee Lovers: Mix in a teaspoon of strong brewed coffee or espresso powder to deepen the chocolate flavor, making it perfect for adults!

How to Store and Freeze Chocolate Fondue

Room Temperature: Chocolate fondue is best enjoyed fresh, but if you have leftovers, it can be left at room temperature for up to 2 hours.

Fridge: Store any leftover chocolate fondue in an airtight container in the fridge for up to 3 days. Allow it to cool completely before sealing to avoid condensation.

Freezer: For longer storage, freeze chocolate fondue in an airtight container for up to 2 months. Thaw overnight in the fridge before reheating.

Reheating: Gently reheat the chocolate fondue in a saucepan over low heat, adding a splash of cream if it appears too thick for dipping. Enjoy your revived chocolate fondue experience!

Make Ahead Options

Chocolate fondue is perfect for meal prep, allowing you to enjoy a warm dessert with minimal last-minute hustle. You can prepare the chocolate mixture up to 24 hours in advance; simply chop the dark chocolate, then combine it with cream and vanilla extract as instructed and store it in an airtight container in the refrigerator. To maintain the fondue’s silky texture, reheat gently over low heat while stirring until it’s smooth again. The dippers, like fresh fruits and cookies, should be prepared just before serving to ensure they stay fresh and vibrant. With these simple make-ahead steps, you’ll have a delightful chocolate fondue ready to impress your guests with ease!

Chef's Helpful Tips

  • When making Chocolate Fondue, always chop the chocolate into small, uniform pieces for consistent melting.
  • This helps avoid any clumps and ensures a smooth, creamy texture.
  • Be cautious while warming the heavy cream by using low heat and keeping an eye on it to prevent boiling, as this can ruin the fondue’s consistency.
  • Stir the chocolate into the cream off the heat to achieve the best melt, and remember to add the vanilla extract to enhance its rich flavor.
  • To keep the fondue warm during serving, use a fondue pot or a heatproof bowl placed over a candle or warm water.
  • Finally, arrange the dippers in an appealing manner around the pot because presentation makes the chocolate experience even more enjoyable.

Chocolate Fondue Recipe FAQs

What type of chocolate is best for making fondue?
Absolutely! High-quality dark chocolate is recommended as it melts beautifully and offers a rich, smooth flavor. Look for chocolate with at least 60% cocoa content for the best results. If you prefer a sweeter taste, you can blend dark chocolate with milk chocolate.

How should I store leftover chocolate fondue?
Very! Leftover chocolate fondue can be stored in an airtight container in the fridge for up to 3 days. Make sure it has cooled completely before sealing it to avoid condensation, which might affect the texture.

Can I freeze chocolate fondue?
The more the merrier! You can freeze chocolate fondue in an airtight container for up to 2 months. When you’re ready to enjoy, simply thaw it overnight in the fridge. To reheat, gently warm it in a saucepan over low heat, adding a splash of heavy cream if it’s too thick—this keeps it smooth and perfect for dipping.

What should I do if my chocolate fondue is too thick?
Don’t worry! If your fondue turns out too thick, you can easily fix it. Simply add a little warm heavy cream while gently stirring over low heat until you reach the desired consistency. This will ensure that your fondue is perfectly smooth and dippable.

Is chocolate fondue suitable for people with dietary restrictions?
Absolutely! If you’re making fondue for guests with dietary restrictions, choose dairy-free or vegan chocolate to accommodate lactose intolerance or dairy allergies. Additionally, you can use gluten-free cookies and fruits as dippers to cater to those with gluten sensitivities.

Chocolate Fondue

Chocolate Fondue

Indulge in this easy-to-make Chocolate Fondue recipe, a nostalgic treat perfect for gatherings.
Print Recipe Pin Recipe
Prep Time 10 minutes mins
Cook Time 10 minutes mins
Total Time 20 minutes mins
Servings: 4 people
Course: DESSERT RECIPES
Cuisine: American
Calories: 250
Ingredients Equipment Method Nutrition Notes

Ingredients
  

For the Fondue
  • 8 oz high-quality dark chocolate use premium chocolate for a richer taste
  • 1 cup heavy cream this gives the fondue its creamy and luscious texture
  • 1 tsp pure vanilla extract enhances the chocolate flavor and adds warmth
For the Dippers
  • Fresh fruits (e.g., strawberries, bananas, apple slices) the perfect balance of sweetness and acidity
  • 1 cup marshmallows add a fun and fluffy element to your dipping experience
  • 1 cup biscotti or shortbread cookies their crunchiness complements the creamy chocolate beautifully

Equipment

  • fondue pot
  • medium saucepan

Method
 

How to Make Chocolate Fondue
  1. Chop the dark chocolate into small pieces for even melting.
  2. Warm the heavy cream in a medium saucepan over low heat until it simmers.
  3. Stir in the chopped chocolate off the heat until it melts and becomes smooth.
  4. Add the vanilla extract for a lovely enhancement of flavor.
  5. Transfer the mixture to a fondue pot or a heatproof bowl to keep it warm.
  6. Arrange dippers like fresh fruits, cookies, and marshmallows around the pot for serving.

Nutrition

Serving: 1servingCalories: 250kcalCarbohydrates: 30gProtein: 3gFat: 14gSaturated Fat: 8gMonounsaturated Fat: 6gCholesterol: 30mgSodium: 50mgPotassium: 150mgFiber: 1gSugar: 22gVitamin A: 200IUVitamin C: 1mgCalcium: 50mgIron: 1mg

Notes

Optional: Serve with a sprinkle of sea salt for a gourmet touch. Chocolate fondue is best enjoyed fresh, but leftovers can be stored at room temperature for up to 2 hours.

Tried this recipe?

Let us know how it was!

Filed Under: BREAKFAST & BRUNCH

Brownie in a Mug

January 30, 2026 by JudyWhite Leave a Comment

There’s something undeniably comforting about the idea of a warm brownie, but what if I told you it can be whipped up in just three minutes? One evening, with a sudden craving and an empty pantry, I found myself reaching for a trusty mug and a few simple ingredients. The result was nothing short of a delightful surprise—a decadent Brownie in a Mug that not only satisfied my sweet tooth but also proved to be the perfect antidote to a busy day.

Imagine the rich aroma of cocoa wafting through your kitchen, as your microwave works its magic. This recipe blends the joy of homemade treats with the unmatched convenience of microwave cooking. With minimal prep time and zero fuss, it’s a perfect choice for anyone looking to escape the dull routine of takeout or pre-packaged snacks. Whether you’re treating yourself after a long day, hosting a fun movie night, or simply craving a late-night sweet, this brownie is sure to impress. Let’s dive into this easy and utterly delicious dessert that’s ready to enjoy in a snap!

Why You'll Love This Brownie in a Mug

  • This Brownie in a Mug is the ultimate quick fix for your chocolate cravings, ready in just three minutes.
  • Its simplicity makes it perfect for anyone, regardless of baking experience, requiring only a few pantry staples.
  • The rich and indulgent flavor of freshly made brownies will satisfy your sweet tooth like nothing else.
  • Plus, with its single-serving size, it’s an ideal dessert for solo indulgence or a fun treat to share during a movie night.

Brownie in a Mug Ingredients

For the Brownie
• All-purpose flour – This forms the base of your brownie; make sure it’s level for the best texture!
• Cocoa powder – Use high-quality cocoa for a rich chocolate flavor that makes this Brownie in a Mug shine.
• Granulated sugar – Sweetens the brownie and balances the cocoa’s bitterness.
• Whole milk – Adds moisture and richness; you can substitute with almond or oat milk for a dairy-free version.
• Vegetable oil – Keeps your brownie moist; feel free to use melted butter for extra flavor.
• Vanilla extract – A splash enhances the overall flavor, making each bite even more delightful.
• Pinch of salt – This elevates all the flavors and enhances the sweetness of the brownie.

How to Make Brownie in a Mug

  1. Combine dry ingredients. In a microwave-safe mug, whisk together the all-purpose flour, cocoa powder, granulated sugar, and a pinch of salt until well combined. This will ensure an even distribution of flavors!

  2. Mix in wet ingredients. Add the whole milk, vegetable oil, and vanilla extract to your dry ingredients. Stir until the mixture is smooth and there are no lumps—this creates the luscious brownie batter.

  3. Microwave with care. Place your mug in the microwave and cook on high for approximately 1 minute. Keep a watchful eye to prevent overflow; you want it to puff up beautifully!

  4. Cool and enjoy! Let your brownie cool for a minute before digging in—this will help it set slightly. Enjoy straight from the mug or top it with a scoop of ice cream for an extra treat!

Optional: Top with a sprinkle of chocolate chips for added decadence.

Exact quantities are listed in the recipe card below.

Make Ahead Options

These Brownie in a Mug are perfect for meal prep enthusiasts! You can combine the dry ingredients (flour, cocoa powder, sugar, and salt) up to 24 hours in advance, storing them in an airtight container to maintain freshness. When you’re ready to indulge, simply transfer the pre-mixed dry ingredients to your microwave-safe mug and add the wet ingredients (milk, vegetable oil, and vanilla extract). Stir until smooth, microwave for about 1 minute, and let it cool briefly before enjoying. This method allows you to whip up a decadent brownie quickly, making it an ideal dessert for busy weeknights or last-minute cravings!

How to Store and Freeze Brownie in a Mug

Room Temperature: Store any leftovers in the mug, covered with plastic wrap, for up to 1 day. It’s best enjoyed fresh, but if you must keep it longer, consider refrigeration.

Fridge: If you have leftover Brownie in a Mug, refrigerate it in a sealed container for up to 3 days. Reheat in the microwave for 15-20 seconds, adding a splash of milk to refresh its moisture.

Freezer: For longer storage, freeze the cooled brownie in an airtight container for up to 1 month. Thaw in the fridge overnight before microwaving for about 30 seconds to enjoy it warm again.

Reheating: Always reheat in short intervals, checking regularly to avoid overheating. The goal is a warm, gooey brownie, perfect for dessert cravings!

Brownie in a Mug Variations

Customize your Brownie in a Mug to suit your taste and pantry! With just a few tweaks, you can create a delightful twist on this classic treat.

  • Dairy-Free: Substitute whole milk with almond or soy milk for a creamy, dairy-free delight. This keeps the brownie luscious without the lactose!

  • Nutty Twist: Stir in a tablespoon of almond or peanut butter for a delightful nutty flavor that pairs perfectly with chocolate. This adds richness and a touch of creaminess to your brownie.

  • Minty Fresh: Add a few drops of peppermint extract to infuse a refreshing mint flavor, reminiscent of your favorite mint chocolate desserts. It’s a surprising and delightful twist!

  • Spicy Kick: Mix in a pinch of cayenne pepper or a sprinkle of chili powder for a subtle heat that amplifies the chocolate richness. It’s a fun way to wake up your taste buds!

  • Chocolate Overload: Incorporate a tablespoon of mini chocolate chips into the batter for extra gooeyness. The melted chocolate bits will create delightful pockets of deliciousness.

  • Fruit Fusion: Toss in a tablespoon of mashed banana or applesauce to add moisture and a hint of fruity flavor. This not only enhances taste but also adds nutritional value.

  • Caramel Surprise: Swirl in some caramel sauce before microwaving for a decadent, ooey-gooey center. This adds a luxurious touch to your mug brownie experience!

  • Coconut Dream: Sprinkle shredded coconut on top before microwaving for a tropical twist that makes your brownie feel like a little getaway! The coconut adds a delightful chewiness.

What to Serve with Brownie in a Mug?

There’s nothing quite like a warm, fudgy treat to lift your spirits, and pairing it right can make your indulgence even sweeter.

  • Vanilla Ice Cream: A classic pairing, the cold creaminess of vanilla ice cream beautifully contrasts the warm brownie, creating a delightful temperature play on your palate.

  • Fresh Berries: Strawberries or raspberries add a juicy tartness that cuts through the richness of the brownie, making every bite refreshing.

  • Whipped Cream: Light and airy, adding a dollop of freshly whipped cream enhances the brownie’s texture, creating a dreamy dessert experience.

  • Caramel Sauce: Drizzling warm caramel over your brownie adds an extra layer of sweetness and a sumptuous, gooey consistency that’s hard to resist.

  • Coffee: A freshly brewed cup of coffee complements the chocolate flavors superbly, adding a touch of bitterness that highlights the brownie’s sweetness.

  • Nutty Topping: Chopped walnuts or pecans provide a satisfying crunch, offering a contrast to the brownie’s soft texture, and enhancing the overall flavor profile with nutty notes.

Pairing these delicious elements will elevate your Brownie in a Mug to new levels of enjoyment!

Chef's Helpful Tips

  • When making the Brownie in a Mug, ensure your dry ingredients are well mixed to prevent clumping; this will help achieve a uniform flavor throughout.
  • Using high-quality cocoa powder can significantly enhance the chocolate taste, so choose wisely for the best results.
  • Be mindful of the microwave time and keep an eye on your brownie to avoid overflow; a minute is often perfect, but microwaves can vary.
  • Allowing the brownie to cool for a minute not only makes it safer to eat but also improves its texture, making each bite more enjoyable.

Brownie in a Mug Recipe FAQs

What type of cocoa powder should I use for the Brownie in a Mug?
I recommend using high-quality unsweetened cocoa powder for the best rich chocolate flavor. Brands like Ghirardelli or Valrhona can elevate your brownie experience significantly!

How long can I store a leftover Brownie in a Mug?
If you have any leftovers, it’s best to store them in the mug, covered with plastic wrap, for up to 1 day at room temperature. For longer storage, transfer it to an airtight container and refrigerate for up to 3 days.

Can I freeze my Brownie in a Mug?
Absolutely! After the brownie has cooled completely, place it in an airtight container or wrap it tightly in plastic wrap, making sure to remove as much air as possible. It can be frozen for up to 1 month. When you’re ready to enjoy it, simply thaw it in the fridge overnight before microwaving for about 30 seconds!

What should I do if my brownie overflows in the microwave?
If your brownie in a mug spills over, don’t worry! Next time, try microwaving it in shorter intervals, around 30 seconds, and keep a close eye on it. You can also reduce the amount of batter slightly or use a larger mug to give it space to rise without spilling.

Is this recipe suitable for those with allergies?
This Brownie in a Mug contains gluten (from the flour) and dairy (from milk). For a gluten-free version, you can substitute the all-purpose flour with a gluten-free blend. If you’re aiming for a dairy-free treat, try using almond or oat milk instead of whole milk. Always double-check labels for any additional allergens.

How can I make my Brownie in a Mug extra decadent?
For an extra touch of indulgence, consider adding a sprinkle of chocolate chips, nuts, or a swirl of peanut butter or Nutella into the batter before microwaving. This will provide delightful textures and flavors that will elevate your treat!

Brownie in a Mug

Brownie in a Mug

Enjoy a quick and easy Brownie in a Mug ready in just three minutes to satisfy your chocolate cravings.
Print Recipe Pin Recipe
Prep Time 2 minutes mins
Cook Time 1 minute min
Cooling Time 1 minute min
Total Time 4 minutes mins
Servings: 1 mug
Course: DESSERT RECIPES
Cuisine: American
Calories: 350
Ingredients Equipment Method Nutrition Notes

Ingredients
  

Brownie Ingredients
  • 4 tablespoons all-purpose flour make sure it’s level
  • 2 tablespoons cocoa powder high-quality for best flavor
  • 4 tablespoons granulated sugar
  • 3 tablespoons whole milk or dairy-free alternative
  • 2 tablespoons vegetable oil or melted butter for flavor
  • 1 teaspoon vanilla extract
  • a pinch salt to enhance sweetness

Equipment

  • microwave-safe mug

Method
 

Directions
  1. In a microwave-safe mug, whisk together the all-purpose flour, cocoa powder, granulated sugar, and a pinch of salt until well combined.
  2. Add the whole milk, vegetable oil, and vanilla extract to your dry ingredients. Stir until the mixture is smooth and there are no lumps.
  3. Place your mug in the microwave and cook on high for approximately 1 minute, keeping an eye to prevent overflow.
  4. Let your brownie cool for a minute before enjoying it straight from the mug or topped with ice cream.

Nutrition

Serving: 1mugCalories: 350kcalCarbohydrates: 45gProtein: 5gFat: 15gSaturated Fat: 2gCholesterol: 5mgSodium: 210mgPotassium: 180mgFiber: 2gSugar: 25gVitamin A: 100IUCalcium: 50mgIron: 1.5mg

Notes

Optional: Top with a sprinkle of chocolate chips for added decadence.

Tried this recipe?

Let us know how it was!

Filed Under: BREAKFAST & BRUNCH

Oatmeal Bowl

January 30, 2026 by JudyWhite Leave a Comment

There’s something incredibly comforting about starting your day with a warm bowl of oatmeal. Picture this: as the rolled oats simmer gently on the stove, the air fills with the sweet scent of cinnamon and maple syrup, inviting you to embrace a moment of peace before the hustle begins. This Oatmeal Bowl recipe is not just quick and easy—it’s a blank canvas that allows you to unleash your creativity with toppings that delight, from vibrant berries to crunchy nuts.

Whether you’re fueling up for a busy day ahead, recovering from a late night, or simply seeking a wholesome breakfast alternative to fast food, this bowl has your back. In just 10 minutes, you can whip up a nourishing meal that’s packed with flavor and can be tailored to your personal taste. Join me in discovering the magic of homemade oatmeal, where every bite is a reminder of how simple ingredients can bring so much joy to your morning routine!

Why You'll Love This Oatmeal Bowl

  • This Oatmeal Bowl is incredibly easy to make, taking just 10 minutes from start to finish.
  • You’ll fall in love with the wonderful flavors that come together with just a few simple ingredients like cinnamon and maple syrup.
  • The versatility of this recipe is unmatched, allowing you to customize your bowl with your favorite toppings to suit any mood or craving.
  • It’s not only nutritious but also visually appealing, as you can layer colorful fruits and nuts that make your breakfast look as good as it tastes.

Oatmeal Bowl Ingredients

For the Oatmeal

  • Rolled oats – a hearty base that provides fiber and essential nutrients.
  • Milk (or nut milk) – adds creaminess; try almond or oat milk for a dairy-free option.
  • Cinnamon – infuses warm spice notes to enhance the oatmeal’s natural sweetness.

For the Sweetness

  • Maple syrup (or honey) – this natural sweetener brings a rich flavor; adjust to your taste.

For the Toppings

  • Sliced banana – a creamy addition that pairs perfectly with oatmeal.
  • Berries – choose your favorites like strawberries or blueberries for a burst of color and antioxidants.
  • Nuts – provide a satisfying crunch and healthy fats; walnuts or almonds work beautifully.

Let your imagination lead the way and create your own unique twist on this Oatmeal Bowl!

How to Make Oatmeal Bowl

  1. Gather your tools: Collect a medium saucepan, a whisk, and some bowls for your delightful toppings. Having everything ready will make your cooking experience smoother and more enjoyable.

  2. Combine: Pour the rolled oats and milk into the saucepan over medium heat. Stir the mixture well, ensuring the oats are submerged and ready to soak up the liquid’s goodness.

  3. Simmer: Once your oats are bubbling away, add the cinnamon. Cook for about 5 minutes, stirring occasionally, until the oats become tender and creamy. You’ll know it’s ready when they look soft and luscious!

  4. Sweeten: Remove the saucepan from the heat and stir in the maple syrup to your desired sweetness. Take a moment to enjoy that heavenly aroma before moving on!

  5. Serve: Spoon the oatmeal into bowls and let your creativity shine as you generously top each serving with your favorite fruits, nuts, or seeds. Make it a masterpiece!

Optional: Sprinkle with a dash of additional cinnamon for an extra warm kick.

Exact quantities are listed in the recipe card below.

Oatmeal Bowl Variations

Feel free to explore these creative twists to elevate your oatmeal experience!

  • Dairy-Free: Substitute milk with your favorite nut milk, such as almond or coconut, for a creamy, plant-based option.

  • Sweetness Swap: Replace maple syrup with agave nectar or brown sugar for a different sweet twist that adds caramel notes.

  • Fruit Explosion: Add fresh or dried fruits like apples, raisins, or peaches for bursts of flavor and sweetness in every bite.

  • Nutty Crunch: Mix in nut butters like almond or peanut for an added creaminess and protein boost that transforms your bowl into a hearty meal.

  • Choco Delight: For a chocolatey treat, stir in cocoa powder or dark chocolate chips, creating a decadent breakfast that feels like dessert.

  • Spicy Kick: Add a pinch of cayenne or nutmeg for a surprising heat that will tantalize your taste buds and give your oatmeal an exciting twist.

  • Protein Boost: Mix in a scoop of protein powder or Greek yogurt before serving to enhance the nutritional value and keep you full longer.

  • Savory Twist: Try adding sautéed spinach, sautéed mushrooms, and a poached egg on top for a savory take on the classic oatmeal bowl that’s perfect for brunch.

How to Store and Freeze Oatmeal Bowl

Fridge: Store any leftovers of your Oatmeal Bowl in an airtight container in the fridge for up to 3 days. This way, you can enjoy a quick breakfast later in the week!

Freezer: If you’d like to freeze it, portion the oatmeal into freezer-safe containers and keep for up to 3 months. Just remember to leave some space for expansion as it freezes.

Reheating: To reheat, simply microwave your oatmeal for about 1-2 minutes, adding a splash of milk to revive its creamy texture. Stir well and enjoy!

Toppings: Add fresh toppings after reheating to maintain their texture and flavor. This will help your Oatmeal Bowl look and taste fresh every time!

What to Serve with Oatmeal Bowl?

Starting your day with a warm, cozy bowl is just the beginning—let’s create a full breakfast experience!

  • Fresh Fruit Salad: A colorful mix of seasonal fruits adds brightness and tang, perfectly balancing the warmth of oats.
  • Greek Yogurt: This creamy addition introduces protein and richness, turning your oatmeal into a delightful parfait if layered.
  • Nut Butter: Drizzling almond or peanut butter brings a nutty depth and creaminess, intensifying flavor and providing healthy fats.
  • Chocolate Chips: For those sweet moments, a sprinkle of dark chocolate chips offers a decadent touch that’s perfect for satisfying cravings.
  • Granola: Add a crunchy texture with granola; its sweetness and toasted oats elevate the oatmeal experience. The variety of flavors can enhance every bite.
  • Chai Tea: Start your morning with a warm cup of chai, whose spices echo the cinnamon in your bowl, creating a comforting and fragrant pairing.
  • Coconut Flakes: Sprinkling toasted coconut on top introduces a tropical sweetness, enhancing your oatmeal’s textures and flavor.
  • Maple Glazed Bacon: For the savory lovers, a side of crispy bacon drizzled with maple syrup adds a delicious contrast of salty and sweet.
  • Coffee Smoothie: Blend your favorite coffee with bananas and spinach for a refreshing drink that energizes your breakfast without overwhelming the oatmeal.

Each pairing transforms your oatmeal bowl into a hearty meal that warms the heart and satisfies every craving!

Make Ahead Options

These Oatmeal Bowls are perfect for those busy mornings when you need a nutritious jumpstart! You can prepare the oatmeal base (with rolled oats and milk) up to 3 days in advance. Simply cook the oats as directed, then let them cool before transferring them to an airtight container to refrigerate. To maintain their creamy texture, reheat on the stove with a splash of milk or water when you’re ready to serve. Just before serving, stir in the cinnamon and maple syrup, then top with your favorite fruits and nuts. This way, you’re guaranteed a delicious, hassle-free breakfast with minimal effort!

Chef's Helpful Tips

  • For your Oatmeal Bowl, make sure to stir the oats frequently while simmering to prevent them from sticking to the bottom of the saucepan.
  • If you’re looking for a creamier texture, consider cooking the oats a little longer, adding more milk as needed.
  • To enhance the flavor, toast your nuts lightly before adding them on top for a richer crunch.
  • Remember to taste your oatmeal after stirring in the maple syrup to adjust the sweetness to your liking before serving.

Oatmeal Bowl Recipe FAQs

How do I choose the right oats for my Oatmeal Bowl?
Absolutely! For the best texture and flavor in your Oatmeal Bowl, go for rolled oats. They cook quickly and offer a creamy consistency. Steel-cut oats can also be used but will require a longer cooking time; be prepared for about 20-30 minutes instead.

What’s the best way to store leftovers of the Oatmeal Bowl?
You can store any leftovers in an airtight container in the fridge for up to 3 days. This keeps your oatmeal fresh and delicious for a quick breakfast later in the week. Just remember to add a splash of milk when reheating to bring back that creamy goodness!

Can I freeze my Oatmeal Bowl, and if so, how?
Yes, you can! Simply portion your prepared oatmeal into freezer-safe containers, leaving a little room to allow for expansion, as it may thicken. It’s good for up to 3 months in the freezer. When you’re ready to enjoy it, thaw overnight in the fridge and reheat in the microwave, adding a touch of milk to restore creaminess.

What should I do if my oatmeal is too thick while cooking?
Very! If you find your oatmeal thickening more than desired, simply stir in a little extra milk (dairy or nut milk) during cooking. Do this gradually until you reach your preferred consistency. Remember that as it sits, the oatmeal will continue to thicken, so keep that in mind!

Are there any dietary considerations for the Oatmeal Bowl?
Absolutely! This Oatmeal Bowl can easily accommodate various diets. If you’re dairy-free, use almond, oat, or coconut milk. For sweeteners, opt for agave or coconut sugar as alternatives. It’s also adaptable for allergies—just be cautious with toppings that include nuts or allergens like strawberries. If you have pets, make sure to keep their food far from any leftovers!

Can I add protein to my Oatmeal Bowl?
Yes, you can definitely add more protein! A popular option is to stir in a scoop of protein powder while cooking. Alternatively, you can top your oatmeal with Greek yogurt or nut butter for a satisfying boost that makes it even more nourishing and filling!

Oatmeal Bowl

Oatmeal Bowl

This Oatmeal Bowl is a comforting breakfast option that's easy to customize with your favorite toppings.
Print Recipe Pin Recipe
Prep Time 5 minutes mins
Cook Time 5 minutes mins
Total Time 10 minutes mins
Servings: 2 bowls
Course: BREAKFAST & BRUNCH
Cuisine: American
Calories: 300
Ingredients Equipment Method Nutrition Notes

Ingredients
  

Oatmeal Base
  • 1 cup Rolled oats a hearty base that provides fiber and essential nutrients.
  • 2 cups Milk (or nut milk) adds creaminess; try almond or oat milk for a dairy-free option.
  • 1 tsp Cinnamon infuses warm spice notes to enhance the oatmeal's natural sweetness.
Sweetness
  • 2 tbsp Maple syrup (or honey) this natural sweetener brings a rich flavor; adjust to your taste.
Toppings
  • 1 banana Sliced banana a creamy addition that pairs perfectly with oatmeal.
  • 1 cup Berries choose your favorites like strawberries or blueberries for a burst of color and antioxidants.
  • 1/4 cup Nuts provide a satisfying crunch and healthy fats; walnuts or almonds work beautifully.

Equipment

  • medium saucepan
  • Whisk
  • bowls

Method
 

Preparation Steps
  1. Gather your tools: Collect a medium saucepan, a whisk, and some bowls for your delightful toppings.
  2. Combine: Pour the rolled oats and milk into the saucepan over medium heat. Stir well to ensure the oats are submerged.
  3. Simmer: Once bubbling, add the cinnamon and cook for about 5 minutes, stirring occasionally, until the oats become tender.
  4. Sweeten: Remove from heat and stir in the maple syrup to your desired sweetness.
  5. Serve: Spoon oatmeal into bowls and top with your favorite fruits, nuts, or seeds.

Nutrition

Serving: 1bowlCalories: 300kcalCarbohydrates: 50gProtein: 8gFat: 10gSaturated Fat: 2gPolyunsaturated Fat: 3gMonounsaturated Fat: 4gSodium: 150mgPotassium: 350mgFiber: 6gSugar: 8gVitamin C: 5mgCalcium: 15mgIron: 10mg

Notes

For creamier texture, cook longer and add milk as needed. Toast nuts for richer flavor.

Tried this recipe?

Let us know how it was!

Filed Under: BREAKFAST & BRUNCH

Egg Toast

January 30, 2026 by JudyWhite Leave a Comment

There’s something incredibly satisfying about a simple meal that feels gourmet, isn’t there? When I first discovered my love for Egg Toast, it was one of those lazy Sunday mornings when I craved a breakfast that required minimal effort but would still make my taste buds dance. The golden, crispy sourdough paired with creamy eggs? Pure bliss!

As I stood in my kitchen, the aroma of toasting bread filled the air, teasing my senses. In no time, I had a deliciously versatile dish that opened the door to endless topping possibilities—from the freshness of sliced avocado to a sprinkle of herbs. This Egg Toast recipe is not just a breakfast; it’s a canvas for your culinary creativity, ready to impress both family and guests alike.

Best of all, it comes together in just 15 minutes, proving that fast homemade food can be both nourishing and delightful. So, let’s dive into this easy-to-follow recipe that’s sure to banish any lingering boredom from fast food meals!

Why You'll Love This Egg Toast

  • This Egg Toast recipe is incredibly easy to whip up, making it perfect for busy mornings or a lazy weekend brunch.
  • The delightful combination of crispy, golden bread and creamy eggs creates a mouthwatering flavor profile that is sure to satisfy your taste buds.
  • Its versatility allows you to customize each serving with a variety of toppings, ensuring that every bite feels unique and special.
  • Not to mention, this dish is visually appealing, making it a gorgeous addition to any breakfast table.

Egg Toast Ingredients

• Here’s everything you need for a delightful serving of Egg Toast!

For the Base

  • Sourdough or Whole Grain Bread – Use your favorite type for a hearty and flavorful base.
  • Large Eggs – Fresh eggs will give you the best flavor and richness for your dish.

For Cooking

  • Unsalted Butter (or Olive Oil) – Butter adds a rich flavor, while olive oil maintains a healthier profile.
  • Salt – A dash of salt elevates the overall taste of the eggs.
  • Black Pepper – Freshly cracked black pepper brings a lovely kick to your Egg Toast.

Optional Toppings

  • Sliced Avocado – Adds a creamy texture and healthy fats to your dish.
  • Shredded Cheese – A sprinkle of cheese can make your Egg Toast indulgently savory.
  • Fresh Herbs – Chopped herbs like chives or parsley brighten up the flavors with freshness.

How to Make Egg Toast

  1. Toast the bread slices until golden brown. This typically takes about 3-4 minutes in your toaster or under the broiler—keep an eye on them for that perfect crunch!

  2. Melt the butter in a non-stick skillet over medium heat. As it sizzles and turns slightly bubbly, you’re ready to add the eggs.

  3. Crack the eggs into the skillet, cooking until they reach your desired doneness. Whether you prefer sunny-side-up or scrambled, take about 3-5 minutes for either option.

  4. Place the beautifully cooked eggs on top of your crispy toast and sprinkle with salt and pepper. The seasoning will elevate the flavors perfectly!

  5. Add your optional toppings as desired, creating a personalized touch to your Egg Toast. Whether it’s creamy avocado or a handful of herbs, have fun with it!

  6. Serve hot and enjoy! Your delicious Egg Toast is now ready to impress.

Optional: A drizzle of hot sauce adds an extra zing!

Exact quantities are listed in the recipe card below.

What to Serve with Egg Toast?

Looking to elevate your Egg Toast experience? These delightful pairings will transform a simple dish into a full-hearted meal.

  • Crispy Bacon: The salty crunch of bacon adds a savory contrast to creamy eggs, making each bite a heavenly experience.

  • Fruit Salad: A refreshing mix of seasonal fruits brings a bright and sweet element, balancing the richness of the Egg Toast beautifully.

  • Herbed Yogurt: A dollop of tangy yogurt with fresh herbs not only enhances flavor but also adds a creamy texture to complement the toast.

  • Roasted Tomatoes: These sweet, caramelized bites provide a juicy burst that pairs wonderfully with the richness of the eggs.

  • Mixed Green Salad: A simple salad drizzled with vinaigrette adds a fresh, zesty crunch that lightens the meal and adds color to your plate.

  • Coffee or Tea: A warm cup of your favorite brew complements the dish, making for a cozy breakfast experience.

Serving your Egg Toast with these options creates a well-rounded meal that delights the taste buds and nourishes the soul. Enjoy the culinary journey!

Egg Toast Variations

Feel free to elevate your Egg Toast experience with these creative twists and substitutions!

  • Dairy-Free: Substitute the butter with coconut oil or a vegan butter alternative for a plant-based option.
  • Spicy Kick: Add a sprinkle of crushed red pepper flakes or your favorite hot sauce to pack some heat. It’s a wonderful surprise that brings warmth to every bite!
  • Herbed Delight: Mix fresh chopped herbs like dill or basil into the eggs while cooking for an aromatic flair. This little addition bursts with freshness.
  • Savory Add-Ins: Toss in sautéed spinach, mushrooms, or bell peppers when cooking your eggs for extra veggies and flavor. These additions bring a comforting heartiness!
  • Cheesy Twist: Use cream cheese or feta instead of shredded cheese for a creamy, tangy layer that pairs beautifully with the eggs. This change adds a delightful richness to each mouthful.
  • Avocado Toast: Swap the eggs for sliced or smashed avocado and top with a pinch of salt and chili powder for a bright, creamy version. The flavor combination is simply irresistible!
  • Breakfast Meats: Layer crispy bacon or smoked salmon beneath the eggs for a protein-packed version that’s perfect for any brunch. The savory depth of flavor will have your taste buds dancing!
  • Gluten-Free: Use gluten-free bread as a base for your Egg Toast to cater to dietary preferences while still enjoying all those wonderful flavors. It ensures everyone can join in on the deliciousness!

How to Store and Freeze Egg Toast

Fridge: Store leftover Egg Toast in an airtight container for up to 3 days. Reheat in the microwave or on a skillet to restore that crispy texture.

Freezer: If making a batch, freeze the toasted bread and cooked eggs separately for up to 1 month. To enjoy, reheat the bread in a toaster and warm the eggs in the microwave.

Room Temperature: It’s best to consume Egg Toast fresh, but if you leave it out, limit to 2 hours to maintain safety.

Reheating: For reheating, use the microwave for quick warmth but consider using an oven or toaster for better texture!

Make Ahead Options

Egg Toast is a fantastic recipe for meal prep aficionados! You can prepare the bread by toasting it in advance and storing it in an airtight container for up to 3 days without losing its crispness. For the eggs, you can crack them into a bowl, whisk with salt and pepper, and refrigerate for up to 24 hours. When you’re ready to enjoy your Egg Toast, simply melt the butter in a skillet, pour in the prepped eggs, and cook to your liking. This way, you’ll save precious time on busy mornings while still delivering a delicious breakfast that tastes just as delightful!

Chef's Helpful Tips

  • For the perfect Egg Toast, ensure your bread is adequately toasted to your liking, as this provides the essential crunch for the base.
  • When melting butter in the skillet, opt for medium heat to prevent it from burning and create a lovely, golden egg finish.
  • Crack your eggs gently into the skillet to avoid shells and ensure a neat presentation on your toast.
  • Keep a close watch on your cooking time, aiming for 3-5 minutes for sunny-side-up or scrambled eggs to achieve your preferred doneness without overcooking.

Egg Toast Recipe FAQs

How do I choose the right bread for my Egg Toast?
Absolutely! Look for sourdough or whole grain bread that is fresh and soft, with a nice crust. When choosing, check for any visible mold or stale areas—good bread should have no dark spots and should smell fresh.

What’s the best way to store leftover Egg Toast?
Store your leftover Egg Toast in an airtight container in the fridge for up to 3 days. To reheat, I recommend placing it in a skillet over medium heat for a minute or two to revive that crispy texture, then adding a splash of water and covering the pan briefly to warm the eggs.

Can I freeze Egg Toast?
Yes, you can! I often make a batch for busy mornings. To freeze, store the toasted bread and cooked eggs separately in airtight freezer bags for up to 1 month. When ready to enjoy, toast the bread directly from the freezer and warm the eggs in the microwave on low until heated through.

What should I do if my eggs are overcooked?
If you find your eggs have become overcooked, don’t fret! For future preparation, pay close attention to the cooking time, aiming for about 3-5 minutes depending on your preference. If they do get overcooked, consider cutting them into smaller pieces and mixing them with toppings—like avocado or cheese—to create a delicious scramble.

Are there any dietary considerations for pets or allergies?
Very! When making Egg Toast, be mindful of any dietary restrictions. While eggs are generally safe for dogs, it’s best to avoid seasoning with salt or pepper for their portions. Additionally, some people may have allergies to certain bread types, so opt for gluten-free alternatives if needed.

What toppings can I add for different dietary preferences?
The more the merrier! For a vegan option, try using mashed avocado or a tofu scramble as the egg substitute. If you’re aiming for a low-carb option, instead of bread, use slices of roasted zucchini or eggplant as the base. Customize to your heart’s content!

Egg Toast

Egg Toast

Egg Toast is a gourmet breakfast that combines crispy sourdough with creamy eggs, perfect for any lazy morning.
Print Recipe Pin Recipe
Prep Time 10 minutes mins
Cook Time 5 minutes mins
Total Time 15 minutes mins
Servings: 2 slices
Course: BREAKFAST & BRUNCH
Cuisine: American
Calories: 250
Ingredients Equipment Method Nutrition Notes

Ingredients
  

For the Base
  • 2 slices Sourdough or Whole Grain Bread Use your favorite type for a hearty and flavorful base.
  • 2 large Eggs Fresh eggs will give you the best flavor and richness.
For Cooking
  • 1 tablespoon Unsalted Butter or Olive Oil Butter adds richness, while olive oil is healthier.
  • 1 pinch Salt Elevates the overall taste of the eggs.
  • 1 pinch Black Pepper Freshly cracked brings a lovely kick.
Optional Toppings
  • 1/2 avocado Sliced Avocado Adds creamy texture and healthy fats.
  • 1/4 cup Shredded Cheese Makes the dish indulgently savory.
  • 2 tablespoons Fresh Herbs Chopped herbs like chives or parsley brighten up the flavors.

Equipment

  • toaster
  • non-stick skillet

Method
 

Preparation
  1. Toast the bread slices until golden brown, about 3-4 minutes.
  2. Melt the butter in a non-stick skillet over medium heat.
  3. Crack the eggs into the skillet, cooking until your desired doneness (3-5 minutes).
  4. Place the cooked eggs on top of your crispy toast and sprinkle with salt and pepper.
  5. Add your optional toppings as desired, creating a personalized touch.
  6. Serve hot and enjoy!

Nutrition

Serving: 1sliceCalories: 250kcalCarbohydrates: 20gProtein: 12gFat: 15gSaturated Fat: 8gPolyunsaturated Fat: 1gMonounsaturated Fat: 6gCholesterol: 186mgSodium: 350mgPotassium: 200mgFiber: 3gSugar: 2gVitamin A: 500IUVitamin C: 5mgCalcium: 150mgIron: 2mg

Notes

For the perfect Egg Toast, ensure bread is adequately toasted to your liking and watch cooking time closely for optimal egg doneness.

Tried this recipe?

Let us know how it was!

Filed Under: BREAKFAST & BRUNCH

  • « Previous Page
  • 1
  • 2
  • 3
  • 4
  • 5
  • …
  • 14
  • Next Page »

Recent Posts

  • Crispy Potatoes in Oven
  • Lucky Charms Pancakes
  • Cheeseburger
  • Boiled Corn on the Cob
  • St. Patrick’s Day Dessert Parfaits

Recent Comments

No comments to show.

Footer

  • Contact
  • Privacy Policy
  • About Us
  • Terms
  • ↑ back to top

Copyright © 2024 www.Forkono.com

Table Of Content