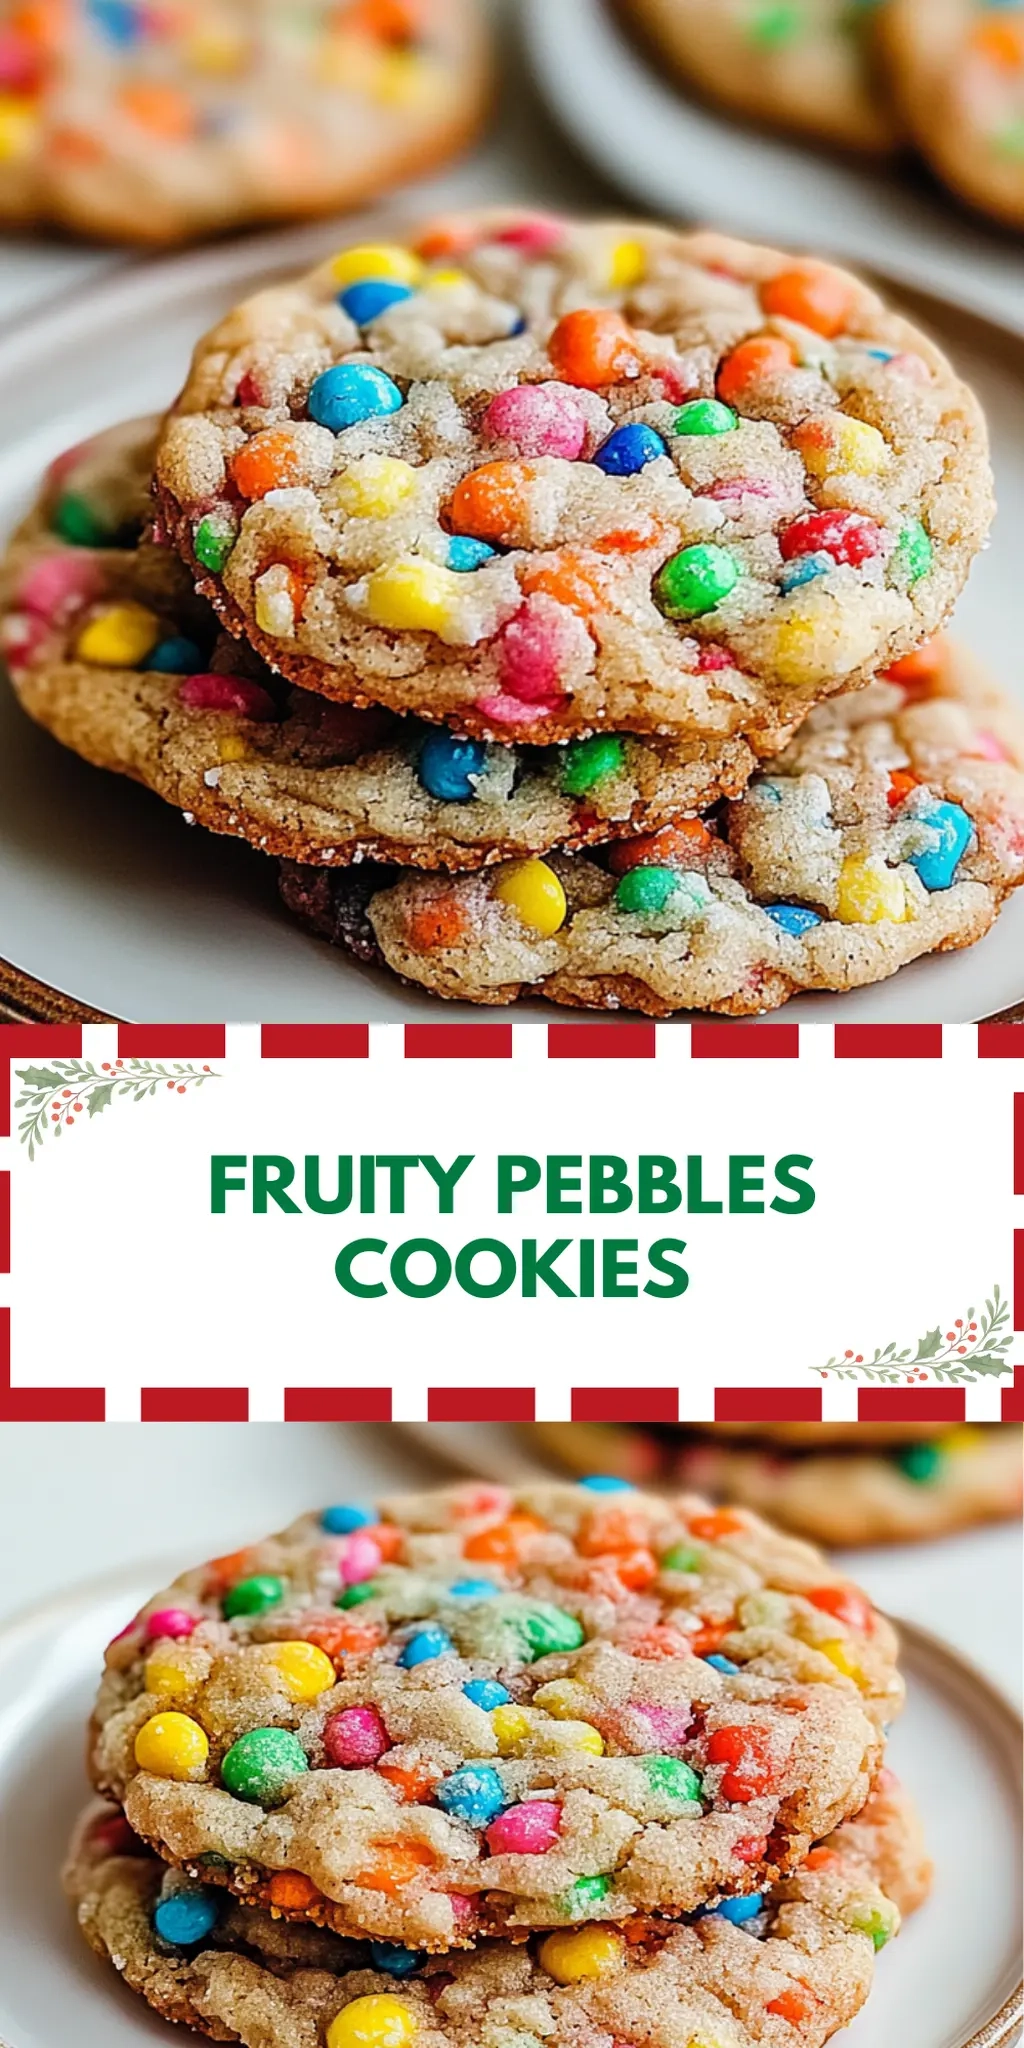
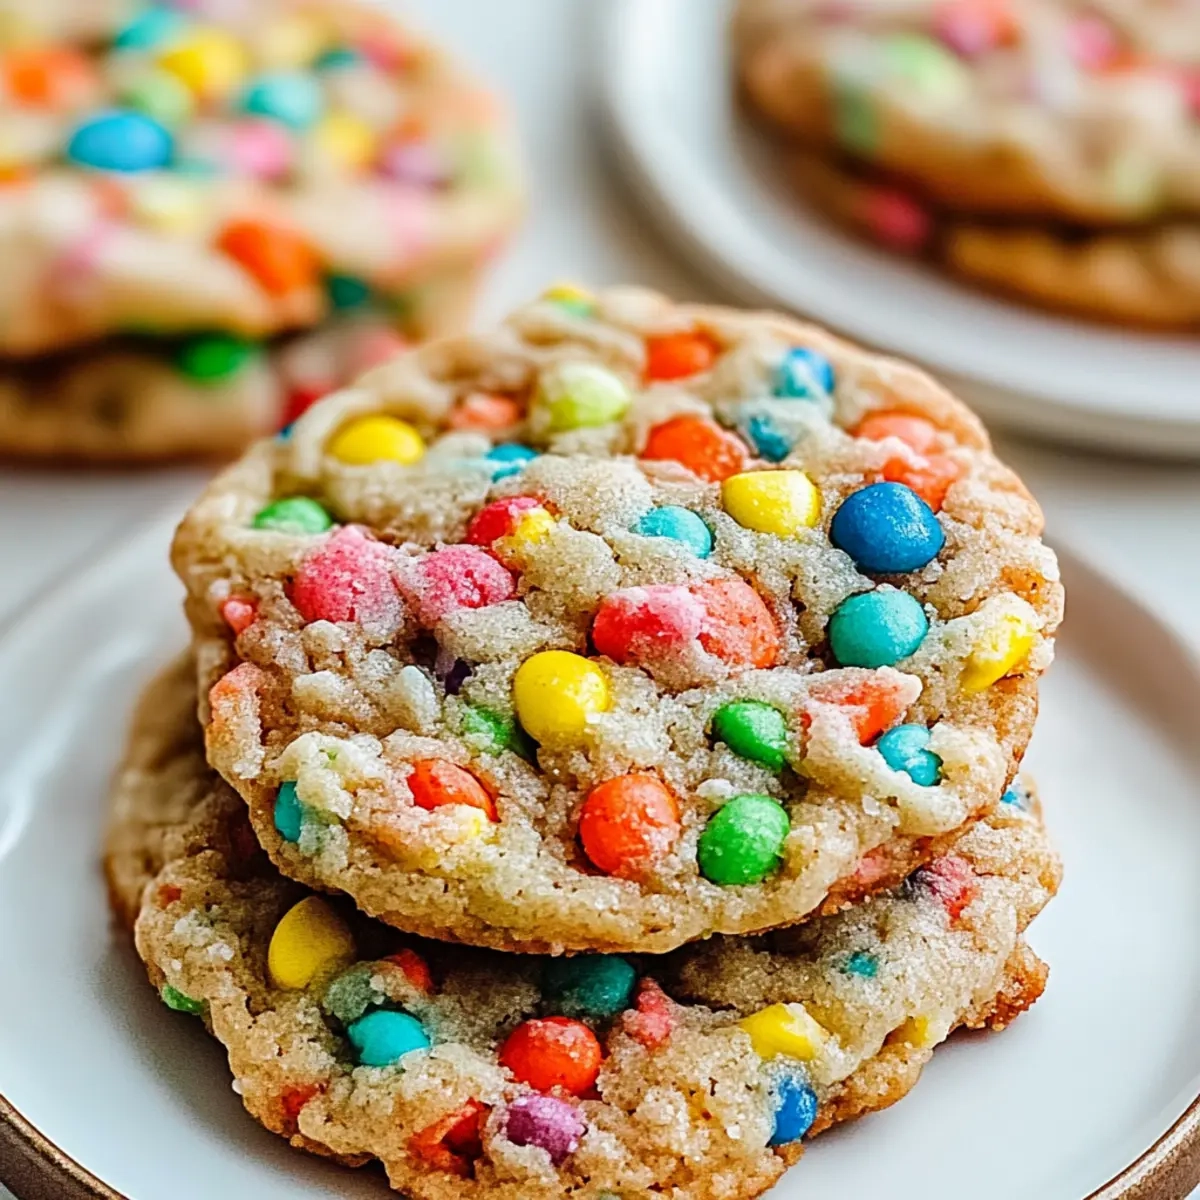
Forkono

  • BREAKFAST & BRUNCH
  • DESSERT RECIPES
  • DINNER RECIPES
  • LUNCH RECIPES
  • About uS
  • SNACKS & APPETIZERS
menu icon
go to homepage
  • BREAKFAST & BRUNCH
  • DESSERT RECIPES
  • DINNER RECIPES
  • LUNCH RECIPES
  • About uS
  • SNACKS & APPETIZERS
search icon
Homepage link
  • BREAKFAST & BRUNCH
  • DESSERT RECIPES
  • DINNER RECIPES
  • LUNCH RECIPES
  • About uS
  • SNACKS & APPETIZERS
×

Cookie Cake

January 16, 2026 by JudyWhite Leave a Comment

As I stood in my kitchen, the delightful scent of melted butter and sweet sugars blended in the air, it dawned on me: what could be better than transforming my favorite cookies into a stunning cake? That’s when the idea for this Cookie Cake was born. With just a handful of simple ingredients, this delightful dessert has turned my ordinary baking days into something truly extraordinary.

Whether you’re a passionate home chef or someone who wants to impress family and friends during gatherings, this recipe is a game-changer. Imagine a cake that combines the rich flavors of chocolate chips and a hint of vanilla, all while offering a texture that’s both chewy and moist. And the best part? You can customize it in three delicious ways to suit any occasion, from birthdays to brunches. If you’re tired of fast food desserts or regular cakes that don’t bring joy, let’s dive into this fun and scrumptious Cookie Cake recipe that’s sure to satisfy your sweet cravings!

Why You'll Love This Cookie Cake

  • This Cookie Cake is incredibly easy to whip up, making it perfect for both novice bakers and seasoned pros.
  • Its rich, indulgent flavors blend the sweetness of chocolate chips with the warmth of vanilla, creating a treat that’s truly irresistible.
  • You can easily customize the recipe in three different ways, allowing you to cater to any occasion and satisfy diverse taste preferences.
  • With its eye-catching presentation, this cake is not only delicious but also a stunning centerpiece for any gathering, ensuring it will please a crowd.

Cookie Cake Ingredients

For the Cake Batter
• All-Purpose Flour – provides the perfect base for your Cookie Cake, ensuring a deliciously chewy texture.
• Granulated Sugar – adds sweetness that balances beautifully with the rich flavors of the cake.
• Brown Sugar – contributes moisture and a hint of caramel flavor, enriching your cookie cake.
• Unsalted Butter (melted) – ensures a rich taste and moist texture; feel free to use coconut oil as a dairy-free substitute.
• Large Eggs (room temperature) – help bind the ingredients together for a lovely, airy cake; use flax eggs for a vegan alternative.
• Baking Powder – adds lift, making your Cookie Cake soft and fluffy; this is essential for that irresistible texture.
• Vanilla Extract – enhances all flavors, delivering a warm, inviting aroma that elevates your Cookie Cake.
• Semi-Sweet Chocolate Chips – provide bursts of melty chocolate goodness; swap in dark chocolate or white chocolate for fun variations.

Feel free to mix things up with the base recipe to discover your perfect version of this delightful Cookie Cake!

How to Make Cookie Cake

  1. Preheat your oven to 350°F (175°C) and grease a round cake pan to prepare for that delicious batter. This ensures your cake will release easily after baking, setting you up for success!

  2. Whisk together the flour, baking powder, granulated sugar, and brown sugar in a large bowl until combined. This step helps to evenly distribute the dry ingredients, ensuring a perfect rise and texture.

  3. Cream the melted butter with the granulated and brown sugars in another bowl until smooth. Then, add the eggs and vanilla extract; mix well for a luscious, sweet batter that’s bound to delight your taste buds.

  4. Combine the dry mixture with the wet batter gradually, stirring until no flour streaks remain. Fold in the chocolate chips, creating pockets of gooey goodness in the cake!

  5. Pour the luscious batter into your prepared pan and bake for 25-30 minutes or until a toothpick inserted in the center comes out clean. Your kitchen will start smelling heavenly—just wait for that moment!

  6. Cool the cake for 10 minutes in the pan before transferring it to a wire rack. This allows it to set properly while avoiding any crumbling as you move it.

Optional: Drizzle with chocolate or sprinkle with powdered sugar for a festive touch!
Exact quantities are listed in the recipe card below.

What to Serve with Cookie Cake?

As you embrace the deliciousness of your Cookie Cake, imagine complementing it with the perfect side dishes and treats to elevate the experience.

  • Vanilla Ice Cream: The creamy sweetness of vanilla ice cream contrasts beautifully with the chewy texture of the cake, making each bite a blissful delight. Picture warm chocolate oozing into the melting ice cream—what a dream!

  • Fresh Berries: Tart raspberries or sweet strawberries add a refreshing burst of flavor, cutting through the richness of the cake. These fresh elements not only enhance the presentation but also provide a lovely balance with every forkful.

  • Chocolate Drizzle: A decadent drizzle of melted chocolate over each slice amplifies the cake’s indulgent nature. It’s a simple touch that transforms your dessert into an artful masterpiece, sure to impress any guest!

  • Almond Milk Shake: Creamy almond milk blended into a shake is a delightful drink to pair with your cake. Its nutty flavor complements the sweet notes perfectly, making it a refreshing choice!

  • Warm Caramel Sauce: Drizzling warm caramel over each slice adds an enticing sweetness that enhances the cake’s flavor. The combination of soft, gooey caramel and rich chocolate is simply irresistible.

  • Cup of Coffee: A hot cup of coffee with your slice brings out those nutty, buttery undertones in the Cookie Cake. The warmth and mild bitterness of the brew create an irresistible pairing for indulgent afternoons!

Elevate your Cookie Cake experience with these delightful accompaniments, each adding a unique twist to your delicious creation!

Cookie Cake Variations

Dive into delightful twists for your Cookie Cake recipe that will spark your creativity and satisfy your cravings!

  • Gluten-Free: Substitute all-purpose flour with a gluten-free flour blend for a deliciously inclusive treat that everyone can enjoy. Watch how the flavors shine through in this version!

  • Nutty Addition: Stir in 1 cup of chopped nuts like walnuts or pecans for a crunchy contrast and a nutty flavor that complements the chocolate. It adds a delightful surprise in every bite!

  • Fruit-Infused: Add 1 cup of diced strawberries or blueberries to the batter for a fruity flair! This sweet addition creates beautiful bursts of flavor, enhancing the cake’s sweetness.

  • Spiced Delight: Mix in a teaspoon of cinnamon or pumpkin spice to warm up the flavor profile. This twist adds a cozy feeling to your dessert, perfect for gatherings.

  • Frosted Perfection: Top your cooled cake with a cream cheese frosting or whipped cream for extra decadence. A light frosting provides balance, making each slice even more irresistible.

  • Vegan-Friendly: Use flax eggs instead of regular eggs and substitute melted coconut oil for butter, creating a cake that everyone can indulge in without sacrificing flavor.

  • Salted Caramel: Drizzle salted caramel sauce over the top before serving for an irresistible sweet and salty contrast. This luscious addition elevates every bite to pure bliss!

  • Spicy Kick: Incorporate a pinch of cayenne pepper for a subtle heat that plays nicely against the sweetness. It adds a new exhilarating layer of flavor that will surprise your taste buds!

Make Ahead Options

These Cookie Cakes are perfect for meal prep enthusiasts looking to save time during busy weeknights! You can prepare the batter up to 24 hours in advance and refrigerate it in an airtight container, ensuring the flavors meld beautifully. To maintain freshness, avoid adding chocolate chips until you’re ready to bake; this prevents any melting during storage. When you’re ready to enjoy your delicious Cookie Cake, simply preheat your oven, fold in the chocolate chips, and pour the batter into your prepared pan. Bake as directed, and you’ll delight in the same warm, gooey goodness with minimal effort!

How to Store and Freeze Cookie Cake

Room Temperature: Store your Cookie Cake at room temperature in an airtight container for up to 3 days. This helps retain its moisture and chewy texture.

Fridge: If you want it to last a bit longer, keep it in the fridge for up to a week. Just make sure it’s well-wrapped to prevent it from drying out.

Freezer: To freeze your Cookie Cake, wrap it tightly in plastic wrap and then in aluminum foil. It can be stored in the freezer for up to 3 months; simply thaw in the fridge overnight before serving.

Reheating: For a warm treat, reheat individual slices in the microwave for about 10-15 seconds. This brings back that freshly-baked goodness and melts the chocolate chips!

Chef's Helpful Tips

  • When making your Cookie Cake, ensure your butter is not too hot when mixing it with the sugars as this can cause the sugars to dissolve too quickly, leading to a denser cake.
  • Always measure your flour accurately by spooning it into the measuring cup and leveling it off with a knife to avoid incorporating too much flour, which can result in a dry texture.
  • Instead of mixing the dry and wet ingredients vigorously, gently fold them together to maintain a light and airy cake.
  • Keep an eye on your baking time as ovens can vary; start checking for doneness a few minutes before the recommended 25-30 minutes to ensure your cake is perfectly baked without overcooking.

Cookie Cake Recipe FAQs

How do I pick the best chocolate chips for my Cookie Cake?
Absolutely! When selecting chocolate chips, opt for semi-sweet for a classic flavor, or embrace the rich taste of dark chocolate for a more intense experience. If you’re in the mood for something different, try milk chocolate for extra creaminess or even white chocolate for a fun twist. Just make sure they’re fresh—avoid any bags with broken chips or those that have stuck together, as they can indicate age.

How should I store my Cookie Cake?
Very! You can keep your Cookie Cake at room temperature in an airtight container for up to 3 days to maintain its chewy texture. If you want it to last longer, pop it in the fridge, well-wrapped, for up to a week. Just remember that refrigeration may slightly alter the cake’s texture, making it a touch firmer.

Can I freeze my Cookie Cake, and if so, how?
Yes! Freezing is a fantastic way to preserve your Cookie Cake. First, let the cake cool completely. Then, wrap it tightly in plastic wrap, and follow with aluminum foil to keep out as much air as possible. Store it in the freezer for up to 3 months. When you’re ready to enjoy it, simply transfer the wrapped cake to the fridge to thaw overnight. For that freshly-baked warmth, reheat individual slices in the microwave for about 10-15 seconds.

What should I do if my Cookie Cake comes out too dry?
Oh no! If your Cookie Cake turns out dry, it may be due to measuring too much flour or over-baking. To address this, I recommend double-checking your flour measurement by spooning it into the measuring cup and leveling it off with a knife. Next time, reduce baking time by checking for doneness a couple of minutes earlier. Once baked, you can also add a simple syrup or drizzling some melted chocolate over the cake to bring back moisture and enhance flavor.

Is this Cookie Cake suitable for people with allergies?
Very much! This recipe contains common allergens like eggs and gluten, but there are easy swaps. For a gluten-free version, use a 1:1 gluten-free flour blend in place of all-purpose flour. A flax egg (1 tablespoon ground flaxseed + 2.5 tablespoons water) can replace each egg if you’re looking for a vegan alternative. Always check labels and ingredient lists to ensure safety for those with all allergies!

Cookie Cake

Cookie Cake

This Cookie Cake is a delightful blend of rich flavors, offering a chewy and moist texture that satisfies sweet cravings.
Print Recipe Pin Recipe
Prep Time 10 minutes mins
Cook Time 30 minutes mins
Cooling Time 10 minutes mins
Total Time 50 minutes mins
Servings: 8 slices
Course: DESSERT RECIPES
Calories: 350
Ingredients Equipment Method Nutrition Notes

Ingredients
  

Cake Batter
  • 2 cups All-Purpose Flour
  • 1 cup Granulated Sugar
  • 1/2 cup Brown Sugar
  • 1/2 cup Unsalted Butter (melted) can substitute with coconut oil
  • 2 Large Eggs (room temperature) can use flax eggs for vegan option
  • 1 teaspoon Baking Powder essential for texture
  • 1 teaspoon Vanilla Extract
  • 1 cup Semi-Sweet Chocolate Chips can substitute with dark or white chocolate

Equipment

  • round cake pan
  • large mixing bowl
  • Whisk
  • Spatula

Method
 

Baking Instructions
  1. Preheat your oven to 350°F (175°C) and grease a round cake pan.
  2. Whisk together flour, baking powder, granulated sugar, and brown sugar in a large bowl until combined.
  3. Cream the melted butter with the granulated and brown sugars in another bowl until smooth. Add the eggs and vanilla extract; mix well.
  4. Combine the dry mixture with the wet batter gradually, stirring until no flour streaks remain. Fold in the chocolate chips.
  5. Pour the batter into your prepared pan and bake for 25-30 minutes or until a toothpick comes out clean.
  6. Cool the cake for 10 minutes in the pan before transferring to a wire rack.

Nutrition

Serving: 1sliceCalories: 350kcalCarbohydrates: 50gProtein: 6gFat: 15gSaturated Fat: 9gPolyunsaturated Fat: 0.5gMonounsaturated Fat: 4gCholesterol: 60mgSodium: 200mgPotassium: 150mgFiber: 1gSugar: 28gVitamin A: 500IUCalcium: 20mgIron: 1mg

Notes

Optional: Drizzle with chocolate or sprinkle with powdered sugar for a festive touch.

Tried this recipe?

Let us know how it was!

Filed Under: DESSERT RECIPES

Strawberry Cheesecake Bars

January 11, 2026 by JudyWhite Leave a Comment

The mere sight of luscious strawberries brightening a creamy cheesecake filling brings back a wave of nostalgia. I can’t help but smile as I think of sunny afternoons spent in my grandmother’s kitchen, where her famous Strawberry Cheesecake Bars made every gathering feel special. The simplicity of this dessert is its secret weapon—it’s an elegant treat that’s surprisingly easy to whip up, making it a perfect solution for those moments when you want to impress without the fuss.

Whether I’m preparing for a potluck or simply indulging my sweet tooth on a cozy evening, these bars always deliver. Picture creamy layers studded with fresh strawberries, all perched atop a buttery graham cracker crust that provides the perfect crunch. In just over an hour, you can transform humble ingredients into a show-stopping dessert that both family and friends will relish. Join me in creating this delightful recipe and experience the joy of homemade desserts once again!

Why You'll Love This Strawberry Cheesecake Bars

  • These Strawberry Cheesecake Bars are incredibly easy to make, allowing you to impress your guests without spending hours in the kitchen.
  • The vibrant strawberry flavor shines through the creamy cheesecake, creating a delightful balance that’s sure to please any palate.
  • Their versatility makes them perfect for any occasion, whether it’s a summer picnic or a holiday gathering.
  • Plus, the beautiful layers and bright colors make these bars a visually stunning addition to your dessert table.

Strawberry Cheesecake Bars Ingredients

Get ready to create a dessert masterpiece!

For the Crust

  • Graham cracker crumbs – the foundation of your bars, adding that sweet crunch!
  • Unsalted butter – melted for binding the crumbs nicely together.
  • Granulated sugar – a touch of sweetness to enhance the crust flavor.

For the Filling

  • Cream cheese – soften it well for that smooth, velvety texture.
  • Sour cream – adds a tangy depth that balances perfectly with sweetness.
  • Large eggs – they help achieve a rich and creamy consistency.
  • Fresh strawberries – chop them carefully; their bright flavor is the heart of these Strawberry Cheesecake Bars!

Each ingredient plays a vital role, making this dessert a delightful treat you won’t forget. Happy baking!

How to Make Strawberry Cheesecake Bars

  1. Preheat your oven to 325°F (160°C), and line a 9×9-inch baking dish with parchment paper for easy removal later. This step ensures a smooth baking experience and helps your bars hold their shape!

  2. Combine graham cracker crumbs, melted butter, and ¼ cup of granulated sugar in a bowl. Stir until everything is evenly mixed, then press the mixture firmly into the bottom of your prepared dish to create a sturdy crust.

  3. Beat the cream cheese in another bowl until it’s wonderfully smooth and creamy. Gradually incorporate the remaining ½ cup of sugar and sour cream, mixing well. Add the eggs one at a time, blending until just combined to keep your filling light.

  4. Fold in the chopped strawberries gently so that they maintain their lovely shape and flavor. Carefully pour the creamy filling over the crust, spreading it evenly for that perfect balance in every bite.

  5. Bake in the preheated oven for 40-45 minutes. You’ll know it’s ready when the edges are set, but the center still jiggles slightly. This will give you that lovely creamy texture!

  6. Cool the bars at room temperature for a bit, then transfer them to the fridge to chill for at least two hours or overnight. This allows the flavors to meld beautifully and makes slicing a breeze!

  7. Slice into squares and serve as desired, sharing these delicious Strawberry Cheesecake Bars with family and friends.

Optional: Garnish with additional fresh strawberries for an extra burst of color and flavor.

Exact quantities are listed in the recipe card below.

What to Serve with Strawberry Cheesecake Bars?

Creating the perfect meal experience around these delightful bars will elevate any gathering or cozy evening in.

  • Fresh Whipped Cream: A dollop of lightly sweetened whipped cream adds a luxurious touch, enhancing the creamy goodness of the cheesecake.

  • Basil-Infused Lemonade: This refreshing drink offers a zesty contrast, quenching your thirst while complementing the strawberry flavor beautifully.

  • Chocolate Dipped Strawberries: Indulge in a sweet treat tandem, as the rich chocolate perfectly pairs with the tartness of strawberries, echoing your dessert.

  • Minty Fruit Salad: Bright, fresh fruit with a hint of mint offers a refreshing bite, clearing your palate and highlighting the cheesecake’s sweetness.

  • Coffee or Espresso: The rich, bold flavors of brewed coffee or a shot of espresso provide a delightful counterpoint to the luscious bars—perfect for any gathering!

  • Graham Cracker Crumbles: Serve alongside for added crunch! Sprinkle some on top for extra texture, echoing the crust in your dessert.

  • Vanilla Ice Cream: A scoop of creamy vanilla ice cream adds indulgence, balancing the rich cheesecake with a cool, smooth complement.

  • Sparkling Water with Lime: For a bubbly refreshment, the sparkling water with a twist of lime adds a light sparkling note without overwhelming the sweetness, offering a delightful contrast.

How to Store and Freeze Strawberry Cheesecake Bars

Room Temperature: Keep the bars wrapped in plastic wrap for up to 2 hours if serving at a gathering. For longer storage, refrigerate.

Fridge: Store leftover Strawberry Cheesecake Bars in an airtight container for up to 3 days. Chilling enhances their flavors, making each bite even more delightful!

Freezer: For longer storage, freeze the bars for up to 2 months. Wrap them individually in plastic wrap and then place in a freezer-safe bag. Thaw in the fridge before serving.

Reheating: If preferred, let the bars sit at room temperature for about 30 minutes before enjoying, allowing them to soften slightly after freezing.

Strawberry Cheesecake Bars Variations

Feel free to get creative with these delicious Strawberry Cheesecake Bars and make them your own!

  • Gluten-Free: Substitute graham cracker crumbs with finely ground almond flour or gluten-free cookies to cater to gluten sensitivities.

  • Low-Sugar: Use a sugar substitute like erythritol or a natural sweetener like honey to reduce sugar content without sacrificing flavor.

  • Dairy-Free: Replace cream cheese with a dairy-free cream cheese alternative, and use coconut yogurt instead of sour cream for a creamy texture.

  • Berry Mix: Swap fresh strawberries for a mixture of berries like blueberries or raspberries, creating a colorful and flavorful twist.

  • Chocolate Drizzle: Melt dark chocolate and drizzle it over the top of your bars after chilling for an indulgent chocolatey surprise.

  • Nutty Crunch: Add crushed nuts like walnuts or pecans to the crust for an added crunch and unique flavor pairing.

  • Citrus Zing: Mix in some lemon or lime zest into the filling for a refreshing zing that pairs beautifully with strawberries.

  • Spicy Kick: Add a pinch of cayenne pepper or a dash of cinnamon to the filling for an unexpected twist that enhances the flavors.

Let your culinary creativity shine as you try these variations! Each one promises to add a delightful twist to this classic dessert.

Make Ahead Options

These Strawberry Cheesecake Bars are perfect for busy home cooks looking to save time! You can prepare the graham cracker crust up to 24 hours in advance by storing it tightly wrapped in the refrigerator. Additionally, the creamy filling can be made ahead of time; simply mix and refrigerate it for up to 3 days in an airtight container. To maintain optimal flavor and texture, cover the filling tightly to prevent it from absorbing any odors. When you’re ready to bake, pour the prepared filling over the crust and follow the baking instructions. This way, you’ll have delicious, fresh Strawberry Cheesecake Bars ready to impress your family and friends without the last-minute rush!

Chef's Helpful Tips

  • To achieve the perfect crust for your Strawberry Cheesecake Bars, make sure to press the graham cracker mixture firmly into the bottom of the baking dish so it holds together well.
  • When beating the cream cheese, ensure it is fully softened to avoid lumps and create a smooth filling that incorporates easily with other ingredients.
  • Be gentle when folding the strawberries into the filling as this will help preserve their shape and make your bars visually appealing.
  • After baking, allow the bars to cool at room temperature for about 15-20 minutes before chilling them in the fridge, which helps enhance their flavors and makes them easier to slice later.

Strawberry Cheesecake Bars Recipe FAQs

How do I choose ripe strawberries for this recipe?
Absolutely! Look for strawberries that are bright red and firm. Avoid any with dark spots or mushy areas, as they may not taste sweet and fresh. I recommend using strawberries that are in season for the best flavor!

What’s the best way to store leftover Strawberry Cheesecake Bars?
Very! Store your leftover bars in an airtight container in the fridge for up to 3 days. The flavors only get better after chilling! Make sure they are completely set and cooled to room temperature before sealing them away.

Can I freeze Strawberry Cheesecake Bars?
Yes, you can! To freeze, wrap the bars individually in plastic wrap, ensuring there’s no air to avoid freezer burn. Then place them in a freezer-safe bag. They’ll stay delicious in the freezer for up to 2 months. Thaw in the fridge overnight before serving.

What should I do if my crust is too crumbly?
If your crust falls apart, it’s often a sign you may need more melted butter or to press it more firmly into the pan. If it’s too crumbly, melt a tablespoon or two more of butter and mix it in, then press the mixture in tightly again for a sturdier base.

Are these bars suitable for pets or those with lactose intolerance?
Not at all! The bars contain dairy ingredients which may upset pets’ stomachs. For those who are lactose intolerant, consider trying a dairy-free cream cheese alternative and lactose-free sour cream. Always check the labels for hidden dairy ingredients!

Strawberry Cheesecake Bars

Strawberry Cheesecake Bars

Strawberry Cheesecake Bars are an elegant dessert that's easy to make and perfect for impressing guests.
Print Recipe Pin Recipe
Prep Time 15 minutes mins
Cook Time 45 minutes mins
Chilling Time 2 hours hrs
Total Time 3 hours hrs
Servings: 12 slices
Course: DESSERT RECIPES
Cuisine: American
Calories: 250
Ingredients Equipment Method Nutrition Notes

Ingredients
  

For the Crust
  • 1 cup Graham cracker crumbs
  • 1/2 cup Unsalted butter melted
  • 1/4 cup Granulated sugar
For the Filling
  • 16 oz Cream cheese softened
  • 1/2 cup Sour cream
  • 2 large Large eggs
  • 2 cups Fresh strawberries chopped

Equipment

  • 9x9-inch baking dish
  • Mixing bowls
  • Electric mixer

Method
 

How to Make Strawberry Cheesecake Bars
  1. Preheat your oven to 325°F (160°C), and line a 9x9-inch baking dish with parchment paper.
  2. Combine graham cracker crumbs, melted butter, and 1/4 cup of granulated sugar in a bowl. Press into the bottom of the dish.
  3. Beat the cream cheese until smooth. Gradually add the remaining 1/2 cup of sugar and sour cream; mix well. Add the eggs one at a time.
  4. Fold in the chopped strawberries gently. Pour the filling over the crust, spreading it evenly.
  5. Bake for 40-45 minutes until edges are set and center jiggles slightly.
  6. Cool at room temperature for a bit, then refrigerate for at least 2 hours or overnight.
  7. Slice into squares and serve, garnishing with additional strawberries if desired.

Nutrition

Serving: 1sliceCalories: 250kcalCarbohydrates: 30gProtein: 4gFat: 12gSaturated Fat: 7gMonounsaturated Fat: 5gCholesterol: 50mgSodium: 180mgPotassium: 120mgFiber: 1gSugar: 15gVitamin A: 400IUVitamin C: 5mgCalcium: 50mgIron: 0.5mg

Notes

Press the graham cracker mixture firmly for the best crust. Ensure cream cheese is softened to avoid lumps. Cool bars before slicing for easier portions.

Tried this recipe?

Let us know how it was!

Filed Under: DESSERT RECIPES

2 Ingredient Healthier Cottage Cheese Candy Bars

January 11, 2026 by JudyWhite Leave a Comment

Have you ever found yourself rummaging through the pantry, wishing for a sweet treat that doesn’t feel like a guilty pleasure? I stumbled upon this delightful creation, the 2 Ingredient Healthier Cottage Cheese Candy Bars, during one of those late-night snack cravings. With just two simple ingredients—a cup of creamy low-fat cottage cheese and a touch of honey or maple syrup—what emerges is a surprisingly decadent dessert that feels indulgent yet nourishing.

Picture this: You open the fridge, the coolness hits you, and a treat awaits that’s not just good for the waistline but packed with protein as well. Whether you’re looking to make a quick snack after a long day or wanting to impress friends with an unexpected dessert, these candy bars are incredibly fun to prepare, taking only 10 minutes of your time before they chill and set. Get ready to experience a delightful twist on dessert that’s both easy to whip up and sure to become a staple in your home!

Why You'll Love This 2 Ingredient Healthier Cottage Cheese Candy Bars

  • This recipe is a breeze to make, requiring just 10 minutes of prep time and minimal effort.
  • The flavor combination of creamy cottage cheese and sweet honey or maple syrup creates a deliciously satisfying treat without the guilt.
  • These bars are incredibly versatile, making them perfect for a quick snack, a healthy dessert, or even a protein boost post-workout.
  • Their charming appearance and unique texture will impress your friends and family, turning any gathering into a fun and sweet experience.

2 Ingredient Healthier Cottage Cheese Candy Bars

For the Base
• Low-Fat Cottage Cheese – A creamy base that adds protein, making these candy bars a guilt-free indulgence.
• Honey or Maple Syrup – Choose your sweetener to add natural sweetness; both options work beautifully in this recipe!

These quick and delightful 2 Ingredient Healthier Cottage Cheese Candy Bars are not only easy to make but also a fun way to enjoy a sweet treat without the extra calories.

How to Make 2 Ingredient Healthier Cottage Cheese Candy Bars

  1. Measure 1 cup of low-fat cottage cheese and 1/2 cup of honey or maple syrup. Gather your ingredients and have them ready, ensuring they’re at room temperature for easier blending.

  2. Blend the cottage cheese and sweetener together until smooth. Use a blender or food processor, which will create a silky texture that’s perfectly suitable for candy bars, around 1-2 minutes.

  3. Pour the mixture into a lined baking dish. Use a spatula to smooth the top evenly, ensuring the bars will have a nice, flat surface once set.

  4. Refrigerate for at least 2 hours until firm. This chilling time is essential for the bars to set properly, so resist the temptation to dive in too early!

  5. Cut into bars and enjoy chilled. Once set, slice them into bars of your desired size. Take a moment to admire your creation before enjoying a sweet treat that feels indulgent yet healthy.

Optional: Top with fresh berries before serving for an extra touch of sweetness.

Exact quantities are listed in the recipe card below.

How to Store and Freeze 2 Ingredient Healthier Cottage Cheese Candy Bars

Fridge: Store the bars in an airtight container in the fridge for up to 5 days. This keeps them fresh and ready for snacking.

Freezer: For longer storage, freeze the candy bars in a sealed container or freezer bag for up to 2 months. Just remember to label them!

Thawing: When ready to enjoy, thaw in the fridge overnight or at room temperature for a few hours before serving for the best texture.

Reheating: These bars are best enjoyed chilled; however, you can gently warm them in the microwave for a few seconds if desired.

Cottage Cheese Candy Variations

Feel free to get creative with this recipe and add your own personal touch!

  • Fruit-Infused: Mix in 1/4 cup of pureed fruit like berries or banana for a fruity sweetness that brings a pop of color and flavor.

  • Nutty Crunch: Add 1/4 cup of chopped nuts, such as almonds or walnuts, for a delightful crunch that complements the creamy bars beautifully.

  • Chocolate Swirl: Fold in 2 tablespoons of cocoa powder into the mixture before blending for a rich chocolate version that feels decadent yet healthy.

  • Spiced Delight: Sprinkle in a teaspoon of cinnamon or nutmeg for a warm, comforting flavor that will remind you of cozy desserts.

  • Almond Joy: Stir in a tablespoon of almond extract and a handful of shredded coconut for a tropical twist reminiscent of a classic candy bar.

  • Peanut Butter Bliss: Swirl in 1/4 cup of creamy peanut butter for an irresistibly nutty flavor that pairs perfectly with the sweetness.

  • Zesty Surprise: Add the zest of one lemon or lime to the blend for a refreshing citrus element that brightens up each bite.

  • Chili Chocolate: For those who like it spicy, sprinkle a pinch of cayenne or chili powder into the mixture for an unexpected kick against the sweetness.

Make Ahead Options

These 2 Ingredient Healthier Cottage Cheese Candy Bars are fantastic for meal prep, making them an ideal choice for busy home cooks! You can prepare the mixture and pour it into the lined baking dish up to 24 hours in advance. Simply blend the cottage cheese and honey or maple syrup, then refrigerate, allowing the bars to set overnight. To maintain their quality, ensure they are properly covered in the fridge to prevent moisture from forming. When you’re ready to serve, slice them into bars and enjoy chilled for a delicious treat that’s just as satisfying as when freshly made!

What to Serve with 2 Ingredient Healthier Cottage Cheese Candy Bars?

Imagine a delightful addition to your dessert table that dances between indulgence and health, making every bite a delightful experience.

  • Fresh Berries: Juicy strawberries, blueberries, or raspberries add vibrant color and a refreshing tartness that balances the sweetness of the bars.

  • Greek Yogurt: A dollop of creamy Greek yogurt enhances the dessert’s protein content and adds a tangy contrast to the sweet candy bars.

  • Nut Butter Drizzle: A warm drizzle of almond or peanut butter brings a rich, nutty flavor that complements the creaminess, creating a delightful texture.

  • Granola: A sprinkle of granola adds a satisfying crunch and a wholesome touch, making each bite of your bars a fun adventure in texture.

  • Chilled Herbal Tea: Serve with a refreshing glass of herbal iced tea for a light, soothing drink that elevates your sweet experience.

  • Dark Chocolate Shavings: A sprinkle of dark chocolate adds an elegant touch and a hint of bittersweet richness that perfectly balances the candy’s sweetness.

  • Almond Milk: This nutty, creamy beverage offers a lovely contrast to the dessert while keeping things light and flavorful.

  • Coconut Whipped Cream: For a luscious finish, a scoop of coconut whipped cream adds creaminess and tropical flair, turning your treat into a mini celebration.

  • Fruit Salad: A fresh fruit salad brings in bright, seasonal flavors, enhancing the overall light and healthy theme of your dessert selection.

Chef's Helpful Tips

  • When making 2 Ingredient Healthier Cottage Cheese Candy Bars, ensure that your cottage cheese is at room temperature for easier blending, which helps achieve a smoother texture.
  • A common mistake is over-blending; aim for a silky consistency without turning the mixture too runny.
  • To create even bars, use a spatula to smooth the top of the mixture before refrigerating, making sure it is evenly distributed in the dish.
  • Allow the bars to chill for at least 2 hours, as this will ensure they firm up properly and hold their shape when cut.

2 Ingredient Healthier Cottage Cheese Candy Bars Recipe FAQs

What type of cottage cheese should I use?
Absolutely! It’s best to use low-fat cottage cheese for this recipe to keep the bars healthy, but you can also use regular cottage cheese if you prefer a richer flavor. Just make sure it’s smooth and not overly grainy for the best texture.

How should I store these candy bars?
Very good question! Store your candy bars in an airtight container in the fridge for up to 5 days. This way, they’ll stay fresh and ready for snacking whenever you crave a sweet treat.

Can I freeze 2 Ingredient Healthier Cottage Cheese Candy Bars?
Yes! For longer storage, feel free to freeze the bars in a sealed container or freezer bag for up to 2 months. Just make sure to label them with the date. When you’re ready to enjoy, simply thaw them in the fridge overnight or at room temperature for a few hours to regain that delightful texture.

What can I do if my mixture is too runny?
No worries! If your mixture ends up a bit too runny, you can add a tablespoon of almond flour or oats to help thicken it. Blend well until you reach a creamy consistency that will hold its shape. Just be cautious not to over-blend; aim for a silky texture, not a watery one!

Are these bars safe for kids and those with dietary restrictions?
Definitely! These candy bars are a fantastic option for kids and can even fit into various dietary needs. With only two ingredients, they are free from added preservatives and can easily be made gluten-free by choosing a suitable sweetener. However, be mindful of honey if you’re serving younger children under one year, as it’s not recommended for them.

Can I add extras like nuts or chocolate chips?
The more the merrier! Feel free to customize your bars by mixing in some crushed nuts, mini chocolate chips, or dried fruits. Adding these extras will enhance flavor and texture—just remember to adjust the sweetness if necessary!

2 Ingredient Healthier Cottage Cheese Candy Bars

2 Ingredient Healthier Cottage Cheese Candy Bars

Discover the delight of 2 Ingredient Healthier Cottage Cheese Candy Bars, a nourishing sweet treat.
Print Recipe Pin Recipe
Prep Time 10 minutes mins
Chilling Time 2 hours hrs
Total Time 2 hours hrs 10 minutes mins
Servings: 8 bars
Course: DESSERT RECIPES
Calories: 120
Ingredients Equipment Method Nutrition Notes

Ingredients
  

For the Base
  • 1 cup low-fat cottage cheese
  • 1/2 cup honey or maple syrup choose your sweetener

Equipment

  • blender
  • Spatula
  • Baking dish

Method
 

How to Make
  1. Measure 1 cup of low-fat cottage cheese and 1/2 cup of honey or maple syrup. Gather your ingredients and have them ready, ensuring they’re at room temperature for easier blending.
  2. Blend the cottage cheese and sweetener together until smooth. Use a blender or food processor, which will create a silky texture that’s perfectly suitable for candy bars, around 1-2 minutes.
  3. Pour the mixture into a lined baking dish. Use a spatula to smooth the top evenly, ensuring the bars will have a nice, flat surface once set.
  4. Refrigerate for at least 2 hours until firm. This chilling time is essential for the bars to set properly.
  5. Cut into bars and enjoy chilled. Once set, slice them into bars of your desired size.

Nutrition

Serving: 1barCalories: 120kcalCarbohydrates: 15gProtein: 8gFat: 2gSaturated Fat: 1gCholesterol: 10mgSodium: 50mgPotassium: 150mgFiber: 1gSugar: 8gVitamin A: 500IUCalcium: 100mgIron: 0.5mg

Notes

For an extra touch of sweetness, top with fresh berries before serving.

Tried this recipe?

Let us know how it was!

Filed Under: DESSERT RECIPES

Black Bottom Cupcakes

January 6, 2026 by JudyWhite Leave a Comment

There’s something truly special about the moment you peel back the paper liner of a cupcake, revealing a rich, chocolatey treasure beneath. These Black Bottom Cupcakes are the kind of indulgence that turns an ordinary afternoon into a delightful occasion. Picture this: a perfectly moist chocolate cake hugging a velvety cream cheese center studded with mini chocolate chips. It’s like biting into a little piece of heaven, and the best part? They’re surprisingly easy to make!

I discovered this gem while searching for a dessert that would both impress my friends and keep my sanity intact on a busy weeknight. With minimal ingredients and just a quick 45 minutes from start to finish, these cupcakes are a lifesaver for anyone who loves homemade treats but feels crunched for time. Let’s dive into this delicious recipe that promises to elevate your baking game and leave everyone asking for seconds!

Why You'll Love This Black Bottom Cupcakes

  • These Black Bottom Cupcakes are incredibly easy to make, allowing you to whip up a delicious dessert in just 45 minutes.
  • The rich chocolate flavor combined with the creamy center creates an indulgent treat that will satisfy any sweet tooth.
  • Their versatility makes them perfect for any occasion, from casual gatherings to festive celebrations, ensuring they are a hit with everyone.
  • Plus, the visual appeal of these cupcakes, with their enticing chocolate exterior and creamy-filled center, makes them a stunning addition to your dessert table.

Black Bottom Cupcakes Ingredients

• Get ready to create a chocolatey delight!

For the Cupcake Batter

  • All-purpose flour – a staple for the perfect texture in your Black Bottom Cupcakes.
  • Unsweetened cocoa powder – provides that deep chocolate flavor that’s simply irresistible.
  • Baking soda – helps the cupcakes rise beautifully, giving them a light, fluffy consistency.
  • Granulated sugar – sweetens the batter and balances the rich cocoa taste.
  • Large eggs – bind the ingredients together, adding moisture and richness.
  • Buttermilk – keeps the cupcakes moist and tender; you can substitute with milk plus a splash of vinegar if needed.
  • Vegetable oil – adds moisture and helps keep the cupcakes soft.
  • Vanilla extract – a splash of warmth that enhances the overall flavor of the batter.

For the Cream Cheese Filling

  • Cream cheese – softened for easy mixing; it creates a rich and creamy center that contrasts perfectly with the chocolate exterior.
  • Mini chocolate chips – add a delightful burst of chocolate in every bite!

How to Make Black Bottom Cupcakes

  1. Preheat your oven to 350°F (175°C). Line a cupcake tin with paper liners to ensure easy removal and a neat presentation for your delicious treats.

  2. Whisk together the flour, cocoa powder, baking soda, and granulated sugar in a large bowl. This step is crucial for blending dry ingredients, which helps provide an even texture in your cupcakes.

  3. Mix the eggs, buttermilk, vegetable oil, and vanilla extract in a separate bowl until everything is well blended and the mixture is smooth. This ensures a moist and flavorful cupcake base.

  4. Combine the wet and dry ingredients gently, stirring until just mixed. Avoid overmixing, as this can lead to dense cupcakes; a few lumps are perfectly fine!

  5. Beat the softened cream cheese with a bit of sugar in another bowl until smooth. This creamy filling is what makes your Black Bottom Cupcakes so special!

  6. Fill each cupcake liner with two tablespoons of batter, then add a spoonful of the cream cheese mixture in the center, and top it off with another tablespoon of batter. This layering creates that delightful surprise in every bite!

  7. Bake for about 20-25 minutes or until a toothpick inserted in the center comes out clean. You’ll know they’re ready when they look fluffy and the tops are set.

Optional: Dust with powdered sugar for an elegant touch before serving.

Exact quantities are listed in the recipe card below.

Black Bottom Cupcakes Variations

Feel free to experiment and make these cupcakes your own with these fun twists!

  • Vegan: Use flax eggs and almond milk in place of traditional eggs and buttermilk for a plant-based delight. You won’t miss the eggs with this creamy filling!

  • Gluten-Free: Swap all-purpose flour with a gluten-free blend to enjoy the same rich texture. Just check your baking soda for gluten-free certification!

  • Nutty Add-In: Add 1/2 cup of chopped walnuts or pecans for a crunchy texture that complements the soft, creamy center. It brings a delightful surprise in every bite!

  • Minty Fresh: Stir in a teaspoon of peppermint extract into the chocolate batter for a refreshing mint-infused cupcake. This twist can give your cupcakes a festive flair!

  • Spicy Chocolate: Mix in a pinch of cayenne pepper or chili powder to the batter for a surprising kick that pairs perfectly with chocolate. The balance of heat will leave everyone curious for more!

  • Coconut Cream: Replace cream cheese with coconut cream for a tropical twist that adds a rich, velvety quality and a hint of paradise.

  • Coffee Boost: Add a tablespoon of instant espresso powder to the batter to intensify the chocolate flavor. It’s like a magical espresso escape in every bite!

  • Caramel Swirl: Drizzle a tablespoon of caramel sauce into the cream cheese filling before baking for a sweet surprise that elevates these cupcakes to the next level.

Embrace your culinary creativity and enjoy all the delicious possibilities these variations bring!

What to Serve with Black Bottom Cupcakes?

Picture an enchanting dessert table where each item complements the rich decadence of your Black Bottom Cupcakes.

  • Fresh Berries: The tartness of strawberries or raspberries balances the sweetness, adding a refreshing bite alongside your treats.
  • Vanilla Ice Cream: A scoop of creamy vanilla ice cream melts into the warm cupcake, creating an indulgent chocolate experience that’s simply irresistible.
  • Coffee or Espresso: Pairing with a hot cup of coffee brings out the deep chocolate flavors, making each bite even more satisfying.
  • Whipped Cream: Light and airy, whipped cream adds a delightful softness that contrasts beautifully with the dense cupcake texture.
  • Dark Chocolate Sauce: Drizzling dark chocolate sauce elevates the decadence, enhancing the chocolate flavor while adding an elegant touch.
  • Chocolate Chip Cookies: For a fun dessert spread, offer warm chocolate chip cookies. Their chewy texture enhances the cupcake experience.
  • Milkshake: An ice-cold milkshake brings a nostalgic vibe and pairs marvelously with the rich chocolatey goodness of the cupcakes.
  • Chocolate Ganache: Spreading a layer of smooth ganache on top of your cupcakes takes them to the next level of decadence.

Make Ahead Options

These Black Bottom Cupcakes are perfect for busy home cooks looking to save time on dessert preparation! You can prepare the cupcake batter and cream cheese filling up to 24 hours in advance. Simply store the batter in an airtight container in the refrigerator to keep it fresh. Additionally, you can fill the cupcake liners with the batter and cream cheese filling, cover with plastic wrap, and refrigerate for up to 3 days before baking. This method helps maintain their moisture and flavor integrity. When you’re ready to indulge, toss them in the oven straight from the fridge, adding a couple of extra minutes to the baking time for delicious, freshly baked cupcakes with minimal effort!

How to Store and Freeze Black Bottom Cupcakes

Fridge: Store your cooled Black Bottom Cupcakes in an airtight container for up to 3 days to maintain their moist texture and rich flavor.

Freezer: For longer storage, wrap each cupcake individually in plastic wrap and place them in a zip-top freezer bag. They can be frozen for up to 3 months.

Reheating: When ready to enjoy, thaw the cupcakes in the fridge overnight. Reheat briefly in the microwave for about 10-15 seconds if you prefer them warm and soft.

Room Temperature: If you’re serving the cupcakes on the same day, keeping them covered at room temperature is perfectly fine for up to 2 hours.

Chef's Helpful Tips

  • To achieve the perfect texture in your Black Bottom Cupcakes, make sure to sift the cocoa powder with the dry ingredients to eliminate any lumps.
  • When mixing the wet ingredients, whisk them until fully combined to ensure a smooth batter and avoid an uneven rise.
  • Remember to fill the cupcake liners only two-thirds full to allow for adequate rising and prevent overflow during baking.
  • For the best results, always preheat your oven fully before placing the cupcakes inside, as this helps them bake evenly and rise properly.

Black Bottom Cupcakes Recipe FAQs

What type of chocolate do I need for the Black Bottom Cupcakes?
Absolutely! For the best flavor, use high-quality unsweetened cocoa powder in your batter. It adds that rich chocolate taste that pairs wonderfully with the cream cheese filling.

How should I store my Black Bottom Cupcakes?
I recommend storing your cooled cupcakes in an airtight container in the fridge for up to 3 days. This helps keep them moist and preserves the delightful flavors. If you’re planning to eat them later, their incredible taste is perfect when kept in the fridge!

Can I freeze Black Bottom Cupcakes?
Yes! For longer storage, wrap each cupcake tightly in plastic wrap and place them in a zip-top freezer bag. They can be kept in the freezer for up to 3 months without losing their flavor. When you’re ready to enjoy them, simply thaw in the fridge overnight and warm them up in the microwave for about 10-15 seconds to bring back that fresh-baked feel.

What should I do if my cupcakes are dry?
If your Black Bottom Cupcakes turn out dry, it might be due to overbaking or not enough moisture in the batter. Ensure you check for doneness a couple of minutes before the recommended baking time by using a toothpick. If this happens again, try adding a touch more buttermilk or keep an eye on the time. Remember, a little something at the center is perfectly fine!

Are there any allergies I need to consider when making these cupcakes?
Very! The main allergens in Black Bottom Cupcakes are gluten (from the flour), eggs, dairy (from the buttermilk and cream cheese), and soy (in some vegetable oils). Always check ingredient labels if you’re baking for someone with allergies, and feel free to swap ingredients to cater to dietary needs—like gluten-free flour or plant-based cream cheese.

Black Bottom Cupcakes

Black Bottom Cupcakes

Indulge in rich chocolate and creamy goodness with these Black Bottom Cupcakes, a delightful treat that's surprisingly easy to make.
Print Recipe Pin Recipe
Prep Time 15 minutes mins
Cook Time 25 minutes mins
Total Time 45 minutes mins
Servings: 12 cupcakes
Course: DESSERT RECIPES
Cuisine: American
Calories: 200
Ingredients Equipment Method Nutrition Notes

Ingredients
  

Cupcake Batter
  • 1 cup All-purpose flour
  • 1/2 cup Unsweetened cocoa powder
  • 1 teaspoon Baking soda
  • 1 cup Granulated sugar
  • 2 large Eggs
  • 1/2 cup Buttermilk Substitutable with milk plus vinegar
  • 1/3 cup Vegetable oil
  • 1 teaspoon Vanilla extract
Cream Cheese Filling
  • 8 ounces Cream cheese softened
  • 1/2 cup Mini chocolate chips

Equipment

  • Cupcake tin
  • Mixing bowls
  • Whisk
  • Spatula

Method
 

Preparation
  1. Preheat your oven to 350°F (175°C). Line a cupcake tin with paper liners.
  2. Whisk together the flour, cocoa powder, baking soda, and granulated sugar in a large bowl.
  3. Mix the eggs, buttermilk, vegetable oil, and vanilla extract in a separate bowl until smooth.
  4. Combine the wet and dry ingredients gently, stirring until just mixed.
  5. Beat the softened cream cheese with a bit of sugar in another bowl until smooth.
  6. Fill each cupcake liner with two tablespoons of batter, add a spoonful of cream cheese mixture, then top with another tablespoon of batter.
  7. Bake for 20-25 minutes or until a toothpick comes out clean from the center.

Nutrition

Serving: 1cupcakeCalories: 200kcalCarbohydrates: 25gProtein: 3gFat: 10gSaturated Fat: 3gPolyunsaturated Fat: 1gMonounsaturated Fat: 5gCholesterol: 50mgSodium: 150mgPotassium: 150mgFiber: 1gSugar: 12gVitamin A: 200IUCalcium: 40mgIron: 1mg

Notes

Optional: Dust with powdered sugar before serving.

Tried this recipe?

Let us know how it was!

Filed Under: DESSERT RECIPES

Raspberry Cream Sandwich Cookies

January 2, 2026 by JudyWhite Leave a Comment

There’s a whimsical charm to baking, especially when it involves the delightful pairing of raspberries and creamy white chocolate. Picture this: a cozy afternoon, the warm sun streaming through the window, and the sweet aroma of Raspberry Cream Sandwich Cookies filling your home. These cookies are not just your average treat—they’re an enchanting combination of crunchy exteriors and luscious, fruity filling that will leave you and your loved ones craving more.

I first whipped these up during a laid-back weekend, searching for a way to use those freeze-dried raspberries I stumbled upon in the back of my pantry. The moment I took my first bite, it felt like a mini celebration of flavor, and I knew I had to share them. Perfect for any occasion, from a casual coffee catch-up to an elegant dessert table, these sandwich cookies are sure to impress without keeping you chained to the kitchen for hours.

So grab your apron and let’s dive into this easy yet crowd-pleasing recipe that will surely elevate your dessert game!

Why You'll Love This Raspberry Cream Sandwich Cookies

  • These Raspberry Cream Sandwich Cookies are incredibly easy to make, allowing you to whip up a delightful treat without spending all day in the kitchen.
  • The explosion of raspberry and white chocolate flavors creates a harmonious taste that will leave your taste buds dancing with joy.
  • Their versatility makes them perfect for any occasion, whether it’s a cozy family gathering or an elegant soirée.
  • Plus, the visual appeal of these beautiful cookies drizzled with white chocolate and sprinkled with crushed raspberries will impress anyone who lays eyes on them.

Raspberry Cream Sandwich Cookies Ingredients

• Get ready to bake something special!

For the Cookies

  • All-purpose flour – This forms the base of your cookies for a perfect texture.
  • Baking powder – Helps the cookies rise and stay soft.
  • Fine sea salt – Enhances the sweetness of the cookies beautifully.
  • Unsalted butter – Softened, it provides richness and helps create that delightful texture.
  • Granulated sugar – Sweetens your cookies to perfection.
  • Large egg – Binds the ingredients together while adding moisture.
  • Vanilla extract – Adds a lovely depth of flavor; pure vanilla is best for the richest taste.

For the Filling

  • Freeze-dried raspberries – These give a concentrated raspberry flavor; grind them for the best consistency.
  • White baking chocolate – Melts beautifully for a creamy filling; opt for high-quality chocolate for a richer taste.
  • Heavy cream – Whipped into the chocolate, it creates a luscious filling.

For the Topping

  • Whole freeze-dried raspberries – Use these for an eye-catching finish that enhances flavor.
  • White chocolate – Drizzle this over the tops for a decadent touch.

Now you’re all set to create those delightful Raspberry Cream Sandwich Cookies!

How to Make Raspberry Cream Sandwich Cookies

  1. Preheat your oven to 350°F. Line two baking sheets with parchment paper to prevent sticking and ensure even baking.

  2. Whisk together the flour, baking powder, and salt in a medium bowl until well combined. This mixture will create the perfect base for your cookie dough.

  3. Beat the softened butter and granulated sugar in a large bowl with an electric mixer until the mixture is light and fluffy, about 2 to 3 minutes. Scrape down the bowl’s sides to ensure everything is well mixed. Then, add the egg and vanilla, beating until fully combined. Gradually beat in the flour mixture until just incorporated.

  4. Scoop the dough using a small spring-loaded scoop and place it in a shallow dish with the remaining 2 tablespoons of sugar. Roll each scoop of dough in the sugar to coat. Arrange them 2 inches apart on the prepared baking sheets and gently flatten each ball slightly with your palm.

  5. Bake for about 9-10 minutes, or until the cookies are set and slightly golden around the edges. Let them cool for 5 minutes on the sheet before transferring to a wire rack to cool completely.

  6. Grind the freeze-dried raspberries into a fine powder using a food processor or mortar and pestle, then sift it twice to remove any seeds for a smooth filling texture.

  7. Melt the white chocolate in a double boiler or microwave. Once melted, remove it from heat and whisk in the heavy cream until fully blended. Stir in the raspberry powder and allow the mixture to cool to room temperature.

  8. Spread about 1 heaping teaspoon of raspberry filling onto the bottom of half the cookies. Top them with the remaining cookies to form sandwiches.

  9. Decorate by filling a piping or zip-top bag with the remaining melted white chocolate. Drizzle it over the tops of each sandwich and finish with a sprinkle of crushed freeze-dried raspberries for an extra pop of color.

Optional: Serve with a cup of tea or coffee for a delightful afternoon treat!

Exact quantities are listed in the recipe card below.

Raspberry Cream Sandwich Cookies Variations

Feel free to let your creativity shine as you adapt this delightful recipe to suit your taste!

  • Gluten-Free: Substitute all-purpose flour with a gluten-free blend for a tasty, celiac-friendly option. Just make sure your baking powder is gluten-free, too!

  • Dairy-Free: Swap unsalted butter with coconut oil and use dairy-free chocolate to create a rich, creamy filling everyone can enjoy. The texture will slightly differ, but the flavor will remain incredible.

  • Fruitful Twist: Mix in a tablespoon of lemon zest or use freeze-dried strawberries instead of raspberries for a refreshing citrusy kick that brightens every bite. Both variations provide a delightful contrast to the creaminess.

  • Nutty Addition: Incorporate finely chopped nuts like almonds or hazelnuts into the cookie dough for added crunch and flavor. The nutty texture balances beautifully with the smooth filling.

  • Chili Chocolate: Sprinkle a pinch of cayenne pepper into your melted white chocolate for a whimsical kick that pairs surprisingly well with the sweet raspberry flavor. Spice up your desserts and impress your guests!

  • Minty Fresh: Fold in crushed mint leaves into the filling or topping for a refreshing minty twist that brings a whole new dimension to these scrumptious cookies. It’s perfect for spring gatherings!

  • Layered Delight: Transform these cookies into a cake by doubling the recipe, stacking the cookies with filling in between, and frosting the top with additional melted chocolate. A show-stopping dessert fit for any celebration!

  • Different Shapes: Use fun cookie cutters to create various shapes instead of traditional circles. You’ll add a playful element that kids and adults alike will love! Enjoy the process and have fun decorating!

Make Ahead Options

These Raspberry Cream Sandwich Cookies are perfect for meal prep, allowing you to enjoy them even on the busiest days! You can prepare the cookie dough up to 24 hours in advance by wrapping it tightly in plastic wrap and refrigerating. The baked cookies can also be stored in an airtight container for up to 3 days to maintain their freshness. If you want to prep the raspberry filling, mix it and keep it in the fridge in a sealed container for up to 3 days. When ready to serve, simply sandwich the filling between the cookies and drizzle with white chocolate for that delightful finish. By prepping ahead, you ensure that these treats are just as delicious and perfect for any occasion!

How to Store and Freeze Raspberry Cream Sandwich Cookies

Room Temperature: Keep the cookies in an airtight container at room temperature for up to 3 days to maintain their freshness and texture.

Fridge: If you prefer a chilled treat, store the Raspberry Cream Sandwich Cookies in the refrigerator for up to 5 days. Just be sure to separate layers with parchment paper to avoid sticking.

Freezer: For longer storage, freeze the cookies without filling in a single layer. Once frozen, transfer to an airtight container and enjoy them for up to 2 months. Thaw before filling and decorating.

Reheating: If enjoyed warm, pop the cookies in a preheated oven at 350°F for about 5 minutes before serving, allowing the flavors to come back to life!

What to Serve with Raspberry Cream Sandwich Cookies?

Elevate your dessert experience with delightful pairings that enhance the sweet, tangy flavors of these charming cookies.

  • Fresh Berries: Serve alongside a mix of fresh raspberries and strawberries for a vibrant, fruity contrast that echoes the cookie’s filling.

  • Vanilla Ice Cream: A scoop of creamy vanilla ice cream complements the cookies beautifully, providing a rich and cooling balance to the sweet flavors.

  • Herbal Tea: Steep a fragrant herbal tea, like chamomile or mint, to cleanse the palate and enhance the cookie’s fruity notes during your tea time.

  • Sparkling Water with Lime: Refresh your senses with a glass of sparkling water adorned with fresh lime slices. Its zesty flavor cuts through the sweetness of the cookies.

  • Cream Cheese Frosting: Spread a thin layer of cream cheese frosting on top for a tangy twist that adds depth and creaminess, taking indulgence to the next level.

  • Lemonade: Enjoy with a chilled glass of homemade lemonade for a fun, sunny pairing; the tartness of the lemonade complements the raspberry filling perfectly.

  • Chocolate-covered Strawberries: These delightful treats echo the white chocolate drizzle on the cookies, creating a symphony of flavors that any sweet tooth would adore.

Remember, the right pairing can elevate your Raspberry Cream Sandwich Cookies from delightful to unforgettable!

Chef's Helpful Tips

  • Start by ensuring your butter is at room temperature for easy mixing, which results in a lighter texture for the Raspberry Cream Sandwich Cookies.
  • Avoid overmixing the dough once you add the flour; stop as soon as you no longer see dry flour to prevent tough cookies.
  • When baking, keep an eye on your cookies and rotate the trays halfway through to ensure even browning.
  • Let the cookies cool completely on a wire rack to maintain their texture before adding the filling and decorations.

Raspberry Cream Sandwich Cookies Recipe FAQs

How do I choose the right freeze-dried raspberries?
Absolutely! Look for freeze-dried raspberries that are bright in color and free of dark spots or moisture. They should crumble easily when rubbed between your fingers. Avoid any that seem chewy or have an off smell, as these may be old or improperly stored.

What’s the best way to store leftover Raspberry Cream Sandwich Cookies?
To keep your cookies fresh, store them in an airtight container at room temperature for up to 3 days. You can also place them in the fridge for up to 5 days for a delightful chilled treat. Just remember to separate layers with parchment paper to avoid sticking.

Can I freeze Raspberry Cream Sandwich Cookies?
Yes, you can! To freeze, first place the filled cookies on a baking sheet in a single layer and freeze until solid. Afterward, transfer them to an airtight container and enjoy for up to 2 months. When you’re ready to enjoy, just thaw them at room temperature and then indulge!

What do I do if my cookies spread too much when baking?
Oh no! If that happens, it’s likely due to melted butter or too much mixing. Ensure that your butter is softened and not melted. When mixing, stop as soon as the dry ingredients are incorporated—this helps maintain structure. If they do spread, no worries; they’ll still taste fantastic!

Are these cookies suitable for those with allergies?
Great question! These Raspberry Cream Sandwich Cookies contain gluten, dairy, and eggs, making them unsuitable for those with related allergies. For a gluten-free version, you can substitute the all-purpose flour with a gluten-free blend. Always check ingredient labels, especially for chocolate, to ensure they meet your dietary needs.

How long do Raspberry Cream Sandwich Cookies last after baking?
Properly stored, these cookies will last for about 3 days at room temperature and up to 5 in the refrigerator. If you plan to keep them longer, freezing is the best option! They can stay fresh for up to 2 months in the freezer.

Raspberry Cream Sandwich Cookies

Raspberry Cream Sandwich Cookies

Delightful Raspberry Cream Sandwich Cookies combining crunchy exteriors and luscious filling, perfect for any occasion.
Print Recipe Pin Recipe
Prep Time 30 minutes mins
Cook Time 10 minutes mins
Cooling Time 5 minutes mins
Total Time 45 minutes mins
Servings: 12 cookies
Course: DESSERT RECIPES
Cuisine: American
Calories: 150
Ingredients Equipment Method Nutrition Notes

Ingredients
  

For the Cookies
  • 2 cups all-purpose flour This forms the base of your cookies for a perfect texture.
  • 1 teaspoon baking powder Helps the cookies rise and stay soft.
  • 1/2 teaspoon fine sea salt Enhances sweetness beautifully.
  • 1 cup unsalted butter Softened for richness.
  • 1 cup granulated sugar Sweetens your cookies.
  • 1 large egg Binds ingredients together, adding moisture.
  • 1 teaspoon vanilla extract Adds depth of flavor.
For the Filling
  • 1 cup freeze-dried raspberries Gives concentrated raspberry flavor.
  • 8 ounces white baking chocolate Melts beautifully for a creamy filling.
  • 1/2 cup heavy cream Whipped into chocolate for luscious filling.
For the Topping
  • 1/2 cup whole freeze-dried raspberries For an eye-catching finish.
  • 1/2 cup white chocolate Drizzle over the tops.

Equipment

  • Oven
  • baking sheets
  • parchment paper
  • Mixing bowls
  • Electric mixer
  • Food processor
  • piping bag

Method
 

How to Make Raspberry Cream Sandwich Cookies
  1. Preheat your oven to 350°F. Line two baking sheets with parchment paper.
  2. Whisk together the flour, baking powder, and salt in a medium bowl.
  3. Beat the softened butter and granulated sugar in a large bowl with an electric mixer until fluffy, about 2 to 3 minutes. Add the egg and vanilla and beat until combined. Gradually beat in the flour mixture until just incorporated.
  4. Scoop the dough using a small spring-loaded scoop and roll in the remaining sugar. Arrange on baking sheets and gently flatten each ball slightly.
  5. Bake for about 9-10 minutes, or until set and slightly golden. Let cool on the sheet for 5 minutes before transferring to a wire rack.
  6. Grind the freeze-dried raspberries into a fine powder and sift to remove seeds.
  7. Melt the white chocolate and whisk in heavy cream until blended. Stir in the raspberry powder and cool to room temperature.
  8. Spread about 1 teaspoon of raspberry filling onto half the cookies and top with the remaining cookies.
  9. Drizzle melted white chocolate over the tops and sprinkle with crushed freeze-dried raspberries.

Nutrition

Serving: 1cookieCalories: 150kcalCarbohydrates: 22gProtein: 2gFat: 6gSaturated Fat: 3gPolyunsaturated Fat: 0.5gMonounsaturated Fat: 2gCholesterol: 20mgSodium: 90mgPotassium: 50mgSugar: 10gVitamin A: 200IUCalcium: 10mgIron: 0.5mg

Notes

For best results, ensure butter is at room temperature before mixing. Avoid overmixing once flour is added to prevent tough cookies.

Tried this recipe?

Let us know how it was!

Filed Under: DESSERT RECIPES

Orange Cardamom Date Cake

January 1, 2026 by JudyWhite Leave a Comment

There’s something incredibly inviting about the soft glow of the kitchen at dusk, especially when a cake is gently baking away, filling the air with warm notes of orange and exotic cardamom. This Orange Cardamom Date Cake is more than just a dessert; it’s a delightful centerpiece for gatherings or a comforting slice enjoyed alone with a cup of tea.

After a long week, I often find solace in whipping up this elegant yet simple recipe. With just a handful of ingredients like extra-virgin olive oil and the sweet, rich flavor of dates, it’s both indulgent and surprisingly light. You’ll definitely be smitten by the intoxicating combination of citrus and spice that dances on your palate! The best part? This cake is approachable for both kitchen novices and seasoned chefs alike, making it an instant crowd-pleaser.

Whether you’re looking to impress guests or simply treat yourself, this Orange Cardamom Date Cake is the perfect solution. It effortlessly brings a slice of joy to any occasion—so let’s get baking!

Why You'll Love This Orange Cardamom Date Cake

  • This Orange Cardamom Date Cake is incredibly easy to prepare, making it perfect for bakers of all skill levels.
  • You’ll be captivated by the unique blend of bright orange and warm cardamom flavors that create a truly delightful taste experience.
  • Its versatility means it can shine at any gathering, whether it’s a festive celebration or a cozy afternoon tea.
  • The stunning presentation, topped with powdered sugar and fresh zest, will impress your guests and elevate your dessert table.

Orange Cardamom Date Cake Ingredients

This delightful cake combines rich flavors and simple ingredients!

For the Batter

  • Extra-virgin olive oil – adds a lush moisture and depth, making the cake light yet indulgent.
  • All-purpose flour – provides the perfect structure to support the cake’s airy texture.
  • Kosher salt – enhances all the flavors while balancing the sweetness.
  • Baking powder – ensures the cake rises beautifully, giving it that fluffy bite.
  • Baking soda – works with the acidic elements, creating a lovely lift.
  • Ground cardamom – infuses warm, exotic notes, elevating the cake’s aroma and taste.
  • Granulated sugar – sweetens the cake and contributes to its moist texture; don’t forget the extra for sprinkling on top!
  • Large eggs – bind the ingredients together and add richness.
  • Zest of 2 oranges – imparts a fresh, citrusy brightness that’s simply irresistible.
  • Fresh orange juice – boosts the orange flavor and keeps the cake moist.
  • Whole milk or plant-based alternative – keeps the batter creamy, perfect for any dietary preference.

For the Garnish

  • Sifted confectioners’ sugar – a light dusting adds a touch of sweetness and visual appeal.
  • Additional orange zest – for a fresh, vibrant finish that ties all the flavors together!

This Orange Cardamom Date Cake will quickly become a cherished recipe in your kitchen. Happy baking!

How to Make Orange Cardamom Date Cake

  1. Preheat the oven to 350°F. Make sure the rack is positioned in the center for even baking. This ensures your cake rises beautifully and bakes evenly, creating that perfect fluffy texture.

  2. Prepare your cake pan by brushing the bottom and sides with olive oil. Line the bottom with parchment paper and dust with flour. This helps prevent sticking and makes for easy removal later.

  3. Whisk together in a medium bowl the flour, kosher salt, baking powder, and baking soda. This step is crucial to evenly distribute the leavening agents, ensuring your cake rises just right.

  4. Combine granulated sugar, cardamom, and eggs in a large bowl. Beat until thick and fluffy, about 5 minutes. This incorporates air into the mixture, making your cake light and airy. Slowly drizzle in the olive oil while mixing.

  5. Add half of the orange zest, fresh orange juice, and whole milk to the mixture. Reduce the mixer speed and beat until smooth. The creamy texture is essential for a rich and moist cake!

  6. Mix in the dry flour mixture into the wet ingredients on low until a uniform batter forms. You want to see no dry streaks; this means your batter is ready for baking.

  7. Pour the batter into the prepared pan, then sprinkle the top with the remaining granulated sugar. This will create a slightly crisp crust while baking, adding a delightful touch. Bake for 40 to 45 minutes or until a skewer inserted in the center comes out clean.

  8. Cool the cake in the pan for 30 minutes, then carefully invert it onto a plate to cool completely on a rack. This helps maintain its moisture and flavor while cooling.

  9. Dust the cooled cake with sifted confectioners’ sugar and sprinkle the fresh orange zest on top before serving. This not only adds sweetness but also a burst of citrus beauty!

Optional: Serve with a dollop of whipped cream for an extra touch of indulgence.

Exact quantities are listed in the recipe card below.

How to Store and Freeze Orange Cardamom Date Cake

Room Temperature: Keep your Orange Cardamom Date Cake covered at room temperature for up to 3 days to maintain its fresh flavor and moist texture.

Fridge: For longer storage, place the cake in an airtight container in the fridge. It will stay fresh for about 5 days, but may dry out slightly.

Freezer: Wrap the cooled cake tightly in plastic wrap, then in aluminum foil, and store in the freezer for up to 2 months. Thaw in the fridge overnight before serving.

Reheating: To enjoy a warm slice, microwave individual pieces for 15-20 seconds. This brings back that just-baked softness, especially delightful with a cup of tea!

Orange Cardamom Date Cake Variations

Feel free to sprinkle your own magic on this delightful cake with these easy tweaks and substitutions!

  • Gluten-Free: Substitute all-purpose flour with a 1:1 gluten-free flour blend for a cake everyone can enjoy.
  • Date-Less: Swap out dates for chopped fresh figs or raisins to create a different fruity flavor profile. This change enhances the cake’s natural sweetness.
  • Nutty Crunch: Add 1 cup of chopped walnuts or almonds into the batter to introduce a delightful crunch and a rich flavor. The nuts pair beautifully with the spiced notes.
  • Citrus Twist: Substitute the orange zest with lemon or grapefruit zest for a refreshing variation that still packs a citrus punch. It creates a lively twist on the classic.
  • Dairy-Free: Use almond milk or coconut milk as your liquid base instead of whole milk, making this cake suitable for those avoiding dairy. It keeps the cake deliciously moist.
  • Spice It Up: Increase the cardamom to 1.5 teaspoons or add a pinch of ground ginger for an extra flavor kick that will warm your senses. This twist creates an inviting aroma.
  • Chocolate Lovers: Fold in 1 cup of chocolate chips to bring a rich chocolatey decadence to the cake. This melty addition is sure to please a crowd!
  • Fruity Delight: Incorporate 1 cup of diced apples or pears to add moisture and a sweet burst of fruitiness that harmonizes beautifully with the orange and cardamom.

What to Serve with Orange Cardamom Date Cake?

As the heavenly aroma of the Orange Cardamom Date Cake fills your kitchen, consider these delightful pairings to create a complete experience.

  • Whipped Cream: A dollop on top adds lightness and a creamy contrast to the moist cake. It’s the perfect partner for your cake’s warm spices.

  • Fresh Berries: A mix of raspberries, blueberries, and strawberries adds a burst of freshness and a hint of tartness, balancing the cake’s sweetness beautifully.

  • Turmeric Latte: The warm, spiced notes of this golden drink resonate with cardamom, making it an uplifting choice that complements the cake’s flavors.

  • Citrus Salad: Toss together some citrus segments with mint for a refreshing, zesty salad that mirrors the bright orange notes in your cake.

  • Vanilla Ice Cream: The cold, creamy texture of vanilla ice cream serves as a delightful contrast, melting gently into each slice for a tempting dessert fusion.

  • Almond Biscotti: A crunchy treat that pairs well with your cake’s soft texture, these biscotti are perfect for enjoying with a cup of coffee or tea.

  • Honeyed Nuts: A sprinkle of honeyed walnuts or almonds brings a sweet crunch that beautifully complements the cake’s moistness, adding extra flavor and texture.

  • Chai Tea: The spiced warmth of chai matches the cardamom while enhancing the cake’s comforting qualities, creating a full-bodied pairing that feels cozy.

Make Ahead Options

This Orange Cardamom Date Cake is perfect for busy home cooks looking to save time without sacrificing flavor! You can prepare the batter up to 24 hours in advance; simply mix all the ingredients as directed, then cover the bowl tightly and refrigerate. For best results, keep the batter in the fridge to maintain its freshness and rise. On baking day, just pour the chilled batter into the pan, sprinkle with sugar, and bake as instructed. Additionally, you can bake the cake completely and store it at room temperature for up to 3 days; just ensure it’s wrapped well to keep it moist and delicious. When ready to serve, dust with confectioners’ sugar and fresh orange zest for a delightful finishing touch!

Chef's Helpful Tips

  • For the Orange Cardamom Date Cake, make sure to whisk your dry ingredients thoroughly to avoid clumps and ensure even rising.
  • A common mistake is overmixing the batter after adding the flour; mix just until combined for the best texture.
  • When measuring your flour, spoon it into the measuring cup and level it off for accuracy, which will prevent a dense cake.
  • Always check your oven’s temperature with an oven thermometer, as inaccurate temperatures can lead to uneven baking.

Orange Cardamom Date Cake Recipe FAQs

What type of oranges should I use for the zest and juice?
Absolutely! I recommend using fresh, sweet oranges such as navel or Valencia oranges. Their natural sweetness enhances the cake’s flavor, giving it that bright citrus note you’ll love. Avoid using sour oranges, as they can alter the intended taste of your cake.

How should I store leftover Orange Cardamom Date Cake?
You can keep your Orange Cardamom Date Cake covered at room temperature for up to 3 days. If you want to preserve its moisture longer, transfer it to an airtight container in the fridge, where it will last for about 5 days. Just remember, refrigerated cakes can dry out a bit, so consider enjoying the last pieces the first couple of days!

Can I freeze the Orange Cardamom Date Cake?
Yes! To freeze your cake, let it cool completely. Then, wrap it tightly in plastic wrap followed by aluminum foil. This will prevent freezer burn and keep it fresh for up to 2 months. When you’re ready to enjoy it, just thaw the cake in the fridge overnight before serving. You can even warm individual slices in the microwave for about 15-20 seconds to restore that fresh-baked goodness!

What can I do if my cake doesn’t rise as expected?
Very! If your cake doesn’t rise properly, it could be due to expired baking powder or baking soda. Always check the expiration date before using these ingredients. Additionally, make sure to mix the wet and dry ingredients correctly; overmixing can develop gluten and result in a dense cake. If you see small bumps on the batter, that’s the perfect consistency!

Are there any dietary considerations I should remember?
In terms of allergies, this recipe contains gluten and eggs, so it may not be suitable for those with celiac disease or egg allergies. To make it gluten-free, I suggest using a 1-to-1 gluten-free flour blend. For a vegan option, you can substitute eggs with unsweetened applesauce (1/4 cup per egg) and use a plant-based milk alternative. Enjoy the deliciousness worry-free!

What can I substitute for the ground cardamom?
If cardamom isn’t available, you can absolutely use ground cinnamon or a mix of cinnamon and nutmeg for a warm, spicy flavor. However, keep in mind that the unique taste of cardamom is hard to replicate, so use these substitutes if you’re in a pinch! Adjust the quantity based on your taste preference, about 1 teaspoon of cinnamon is usually sufficient.

Orange Cardamom Date Cake

Orange Cardamom Date Cake

This Orange Cardamom Date Cake is a delightful dessert that beautifully combines citrus and spice, making it perfect for any occasion.
Print Recipe Pin Recipe
Prep Time 20 minutes mins
Cook Time 45 minutes mins
Cooling Time 30 minutes mins
Total Time 1 hour hr 35 minutes mins
Servings: 12 slices
Course: DESSERT RECIPES
Cuisine: American
Calories: 250
Ingredients Equipment Method Nutrition Notes

Ingredients
  

For the Batter
  • 1/2 cup extra-virgin olive oil adds moisture
  • 2 cups all-purpose flour for structure
  • 1 teaspoon kosher salt enhances flavors
  • 2 teaspoons baking powder for rising
  • 1 teaspoon baking soda works with acid
  • 1 teaspoon ground cardamom for flavor
  • 1 cup granulated sugar for sweetness
  • 3 large eggs for binding
  • Zest of 2 oranges orange zest for brightness
  • 1/2 cup fresh orange juice for moisture
  • 1/2 cup whole milk or plant-based alternative for creaminess
For the Garnish
  • 1 cup sifted confectioners' sugar for dusting
  • Zest of 1 orange additional orange zest for garnish

Equipment

  • Cake pan
  • Mixing bowls
  • Whisk
  • measuring cups
  • measuring spoons
  • Oven

Method
 

How to Make Orange Cardamom Date Cake
  1. Preheat the oven to 350°F and position the rack in the center.
  2. Prepare your cake pan by brushing with olive oil, lining with parchment, and dusting with flour.
  3. Whisk together flour, kosher salt, baking powder, and baking soda in a medium bowl.
  4. In a large bowl, combine granulated sugar, cardamom, and eggs; beat until thick and fluffy, about 5 minutes. Slowly drizzle in olive oil while mixing.
  5. Add half of the orange zest, fresh orange juice, and milk to the egg mixture; beat until smooth.
  6. Mix in the dry flour mixture until a uniform batter forms with no dry streaks.
  7. Pour the batter into the prepared pan, sprinkle the top with remaining granulated sugar, and bake for 40-45 minutes or until a skewer comes out clean.
  8. Cool the cake in the pan for 30 minutes before inverting onto a plate to cool completely.
  9. Dust the cooled cake with sifted confectioners' sugar and sprinkle with fresh orange zest before serving.

Nutrition

Serving: 1sliceCalories: 250kcalCarbohydrates: 34gProtein: 3gFat: 12gSaturated Fat: 1.5gPolyunsaturated Fat: 2gMonounsaturated Fat: 7gCholesterol: 50mgSodium: 180mgPotassium: 120mgFiber: 1gSugar: 15gVitamin A: 300IUVitamin C: 10mgCalcium: 30mgIron: 1mg

Notes

Serve with a dollop of whipped cream for an extra touch of indulgence.

Tried this recipe?

Let us know how it was!

Filed Under: DESSERT RECIPES

Orange Cardamom Date Cake

January 1, 2026 by JudyWhite Leave a Comment

There’s something incredibly inviting about the soft glow of the kitchen at dusk, especially when a cake is gently baking away, filling the air with warm notes of orange and exotic cardamom. This Orange Cardamom Date Cake is more than just a dessert; it’s a delightful centerpiece for gatherings or a comforting slice enjoyed alone with a cup of tea.

After a long week, I often find solace in whipping up this elegant yet simple recipe. With just a handful of ingredients like extra-virgin olive oil and the sweet, rich flavor of dates, it’s both indulgent and surprisingly light. You’ll definitely be smitten by the intoxicating combination of citrus and spice that dances on your palate! The best part? This cake is approachable for both kitchen novices and seasoned chefs alike, making it an instant crowd-pleaser.

Whether you’re looking to impress guests or simply treat yourself, this Orange Cardamom Date Cake is the perfect solution. It effortlessly brings a slice of joy to any occasion—so let’s get baking!

Why You'll Love This Orange Cardamom Date Cake

  • This Orange Cardamom Date Cake is incredibly easy to prepare, making it perfect for bakers of all skill levels.
  • You’ll be captivated by the unique blend of bright orange and warm cardamom flavors that create a truly delightful taste experience.
  • Its versatility means it can shine at any gathering, whether it’s a festive celebration or a cozy afternoon tea.
  • The stunning presentation, topped with powdered sugar and fresh zest, will impress your guests and elevate your dessert table.

Orange Cardamom Date Cake Ingredients

This delightful cake combines rich flavors and simple ingredients!

For the Batter

  • Extra-virgin olive oil – adds a lush moisture and depth, making the cake light yet indulgent.
  • All-purpose flour – provides the perfect structure to support the cake’s airy texture.
  • Kosher salt – enhances all the flavors while balancing the sweetness.
  • Baking powder – ensures the cake rises beautifully, giving it that fluffy bite.
  • Baking soda – works with the acidic elements, creating a lovely lift.
  • Ground cardamom – infuses warm, exotic notes, elevating the cake’s aroma and taste.
  • Granulated sugar – sweetens the cake and contributes to its moist texture; don’t forget the extra for sprinkling on top!
  • Large eggs – bind the ingredients together and add richness.
  • Zest of 2 oranges – imparts a fresh, citrusy brightness that’s simply irresistible.
  • Fresh orange juice – boosts the orange flavor and keeps the cake moist.
  • Whole milk or plant-based alternative – keeps the batter creamy, perfect for any dietary preference.

For the Garnish

  • Sifted confectioners’ sugar – a light dusting adds a touch of sweetness and visual appeal.
  • Additional orange zest – for a fresh, vibrant finish that ties all the flavors together!

This Orange Cardamom Date Cake will quickly become a cherished recipe in your kitchen. Happy baking!

How to Make Orange Cardamom Date Cake

  1. Preheat the oven to 350°F. Make sure the rack is positioned in the center for even baking. This ensures your cake rises beautifully and bakes evenly, creating that perfect fluffy texture.

  2. Prepare your cake pan by brushing the bottom and sides with olive oil. Line the bottom with parchment paper and dust with flour. This helps prevent sticking and makes for easy removal later.

  3. Whisk together in a medium bowl the flour, kosher salt, baking powder, and baking soda. This step is crucial to evenly distribute the leavening agents, ensuring your cake rises just right.

  4. Combine granulated sugar, cardamom, and eggs in a large bowl. Beat until thick and fluffy, about 5 minutes. This incorporates air into the mixture, making your cake light and airy. Slowly drizzle in the olive oil while mixing.

  5. Add half of the orange zest, fresh orange juice, and whole milk to the mixture. Reduce the mixer speed and beat until smooth. The creamy texture is essential for a rich and moist cake!

  6. Mix in the dry flour mixture into the wet ingredients on low until a uniform batter forms. You want to see no dry streaks; this means your batter is ready for baking.

  7. Pour the batter into the prepared pan, then sprinkle the top with the remaining granulated sugar. This will create a slightly crisp crust while baking, adding a delightful touch. Bake for 40 to 45 minutes or until a skewer inserted in the center comes out clean.

  8. Cool the cake in the pan for 30 minutes, then carefully invert it onto a plate to cool completely on a rack. This helps maintain its moisture and flavor while cooling.

  9. Dust the cooled cake with sifted confectioners’ sugar and sprinkle the fresh orange zest on top before serving. This not only adds sweetness but also a burst of citrus beauty!

Optional: Serve with a dollop of whipped cream for an extra touch of indulgence.

Exact quantities are listed in the recipe card below.

Orange Cardamom Date Cake Variations

Feel free to sprinkle your own magic on this delightful cake with these easy tweaks and substitutions!

  • Gluten-Free: Substitute all-purpose flour with a 1:1 gluten-free flour blend for a cake everyone can enjoy.
  • Date-Less: Swap out dates for chopped fresh figs or raisins to create a different fruity flavor profile. This change enhances the cake’s natural sweetness.
  • Nutty Crunch: Add 1 cup of chopped walnuts or almonds into the batter to introduce a delightful crunch and a rich flavor. The nuts pair beautifully with the spiced notes.
  • Citrus Twist: Substitute the orange zest with lemon or grapefruit zest for a refreshing variation that still packs a citrus punch. It creates a lively twist on the classic.
  • Dairy-Free: Use almond milk or coconut milk as your liquid base instead of whole milk, making this cake suitable for those avoiding dairy. It keeps the cake deliciously moist.
  • Spice It Up: Increase the cardamom to 1.5 teaspoons or add a pinch of ground ginger for an extra flavor kick that will warm your senses. This twist creates an inviting aroma.
  • Chocolate Lovers: Fold in 1 cup of chocolate chips to bring a rich chocolatey decadence to the cake. This melty addition is sure to please a crowd!
  • Fruity Delight: Incorporate 1 cup of diced apples or pears to add moisture and a sweet burst of fruitiness that harmonizes beautifully with the orange and cardamom.

What to Serve with Orange Cardamom Date Cake?

As the heavenly aroma of the Orange Cardamom Date Cake fills your kitchen, consider these delightful pairings to create a complete experience.

  • Whipped Cream: A dollop on top adds lightness and a creamy contrast to the moist cake. It’s the perfect partner for your cake’s warm spices.

  • Fresh Berries: A mix of raspberries, blueberries, and strawberries adds a burst of freshness and a hint of tartness, balancing the cake’s sweetness beautifully.

  • Turmeric Latte: The warm, spiced notes of this golden drink resonate with cardamom, making it an uplifting choice that complements the cake’s flavors.

  • Citrus Salad: Toss together some citrus segments with mint for a refreshing, zesty salad that mirrors the bright orange notes in your cake.

  • Vanilla Ice Cream: The cold, creamy texture of vanilla ice cream serves as a delightful contrast, melting gently into each slice for a tempting dessert fusion.

  • Almond Biscotti: A crunchy treat that pairs well with your cake’s soft texture, these biscotti are perfect for enjoying with a cup of coffee or tea.

  • Honeyed Nuts: A sprinkle of honeyed walnuts or almonds brings a sweet crunch that beautifully complements the cake’s moistness, adding extra flavor and texture.

  • Chai Tea: The spiced warmth of chai matches the cardamom while enhancing the cake’s comforting qualities, creating a full-bodied pairing that feels cozy.

Make Ahead Options

This Orange Cardamom Date Cake is perfect for busy home cooks looking to save time without sacrificing flavor! You can prepare the batter up to 24 hours in advance; simply mix all the ingredients as directed, then cover the bowl tightly and refrigerate. For best results, keep the batter in the fridge to maintain its freshness and rise. On baking day, just pour the chilled batter into the pan, sprinkle with sugar, and bake as instructed. Additionally, you can bake the cake completely and store it at room temperature for up to 3 days; just ensure it’s wrapped well to keep it moist and delicious. When ready to serve, dust with confectioners’ sugar and fresh orange zest for a delightful finishing touch!

How to Store and Freeze Orange Cardamom Date Cake

Room Temperature: Keep your Orange Cardamom Date Cake covered at room temperature for up to 3 days to maintain its fresh flavor and moist texture.

Fridge: For longer storage, place the cake in an airtight container in the fridge. It will stay fresh for about 5 days, but may dry out slightly.

Freezer: Wrap the cooled cake tightly in plastic wrap, then in aluminum foil, and store in the freezer for up to 2 months. Thaw in the fridge overnight before serving.

Reheating: To enjoy a warm slice, microwave individual pieces for 15-20 seconds. This brings back that just-baked softness, especially delightful with a cup of tea!

Chef's Helpful Tips

  • For the Orange Cardamom Date Cake, make sure to whisk your dry ingredients thoroughly to avoid clumps and ensure even rising.
  • A common mistake is overmixing the batter after adding the flour; mix just until combined for the best texture.
  • When measuring your flour, spoon it into the measuring cup and level it off for accuracy, which will prevent a dense cake.
  • Always check your oven’s temperature with an oven thermometer, as inaccurate temperatures can lead to uneven baking.

Orange Cardamom Date Cake Recipe FAQs

What type of oranges should I use for the zest and juice?
Absolutely! I recommend using fresh, sweet oranges such as navel or Valencia oranges. Their natural sweetness enhances the cake’s flavor, giving it that bright citrus note you’ll love. Avoid using sour oranges, as they can alter the intended taste of your cake.

How should I store leftover Orange Cardamom Date Cake?
You can keep your Orange Cardamom Date Cake covered at room temperature for up to 3 days. If you want to preserve its moisture longer, transfer it to an airtight container in the fridge, where it will last for about 5 days. Just remember, refrigerated cakes can dry out a bit, so consider enjoying the last pieces the first couple of days!

Can I freeze the Orange Cardamom Date Cake?
Yes! To freeze your cake, let it cool completely. Then, wrap it tightly in plastic wrap followed by aluminum foil. This will prevent freezer burn and keep it fresh for up to 2 months. When you’re ready to enjoy it, just thaw the cake in the fridge overnight before serving. You can even warm individual slices in the microwave for about 15-20 seconds to restore that fresh-baked goodness!

What can I do if my cake doesn’t rise as expected?
Very! If your cake doesn’t rise properly, it could be due to expired baking powder or baking soda. Always check the expiration date before using these ingredients. Additionally, make sure to mix the wet and dry ingredients correctly; overmixing can develop gluten and result in a dense cake. If you see small bumps on the batter, that’s the perfect consistency!

Are there any dietary considerations I should remember?
In terms of allergies, this recipe contains gluten and eggs, so it may not be suitable for those with celiac disease or egg allergies. To make it gluten-free, I suggest using a 1-to-1 gluten-free flour blend. For a vegan option, you can substitute eggs with unsweetened applesauce (1/4 cup per egg) and use a plant-based milk alternative. Enjoy the deliciousness worry-free!

What can I substitute for the ground cardamom?
If cardamom isn’t available, you can absolutely use ground cinnamon or a mix of cinnamon and nutmeg for a warm, spicy flavor. However, keep in mind that the unique taste of cardamom is hard to replicate, so use these substitutes if you’re in a pinch! Adjust the quantity based on your taste preference, about 1 teaspoon of cinnamon is usually sufficient.

Orange Cardamom Date Cake

Orange Cardamom Date Cake

This Orange Cardamom Date Cake is a delightful dessert that beautifully combines citrus and spice, making it perfect for any occasion.
Print Recipe Pin Recipe
Prep Time 20 minutes mins
Cook Time 45 minutes mins
Cooling Time 30 minutes mins
Total Time 1 hour hr 35 minutes mins
Servings: 12 slices
Course: DESSERT RECIPES
Cuisine: American
Calories: 250
Ingredients Equipment Method Nutrition Notes

Ingredients
  

For the Batter
  • 1/2 cup extra-virgin olive oil adds moisture
  • 2 cups all-purpose flour for structure
  • 1 teaspoon kosher salt enhances flavors
  • 2 teaspoons baking powder for rising
  • 1 teaspoon baking soda works with acid
  • 1 teaspoon ground cardamom for flavor
  • 1 cup granulated sugar for sweetness
  • 3 large eggs for binding
  • Zest of 2 oranges orange zest for brightness
  • 1/2 cup fresh orange juice for moisture
  • 1/2 cup whole milk or plant-based alternative for creaminess
For the Garnish
  • 1 cup sifted confectioners' sugar for dusting
  • Zest of 1 orange additional orange zest for garnish

Equipment

  • Cake pan
  • Mixing bowls
  • Whisk
  • measuring cups
  • measuring spoons
  • Oven

Method
 

How to Make Orange Cardamom Date Cake
  1. Preheat the oven to 350°F and position the rack in the center.
  2. Prepare your cake pan by brushing with olive oil, lining with parchment, and dusting with flour.
  3. Whisk together flour, kosher salt, baking powder, and baking soda in a medium bowl.
  4. In a large bowl, combine granulated sugar, cardamom, and eggs; beat until thick and fluffy, about 5 minutes. Slowly drizzle in olive oil while mixing.
  5. Add half of the orange zest, fresh orange juice, and milk to the egg mixture; beat until smooth.
  6. Mix in the dry flour mixture until a uniform batter forms with no dry streaks.
  7. Pour the batter into the prepared pan, sprinkle the top with remaining granulated sugar, and bake for 40-45 minutes or until a skewer comes out clean.
  8. Cool the cake in the pan for 30 minutes before inverting onto a plate to cool completely.
  9. Dust the cooled cake with sifted confectioners' sugar and sprinkle with fresh orange zest before serving.

Nutrition

Serving: 1sliceCalories: 250kcalCarbohydrates: 34gProtein: 3gFat: 12gSaturated Fat: 1.5gPolyunsaturated Fat: 2gMonounsaturated Fat: 7gCholesterol: 50mgSodium: 180mgPotassium: 120mgFiber: 1gSugar: 15gVitamin A: 300IUVitamin C: 10mgCalcium: 30mgIron: 1mg

Notes

Serve with a dollop of whipped cream for an extra touch of indulgence.

Tried this recipe?

Let us know how it was!

Filed Under: DESSERT RECIPES

Red Velvet Cookies

January 1, 2026 by JudyWhite Leave a Comment

There’s something irresistibly enchanting about the vibrant red hue of these Red Velvet Cookies that beckons you to take a bite. Picture this: the gentle warmth of freshly baked cookies filling your kitchen, mingling with the sweet, rich scent of cream cheese and white chocolate. Every mouthful is a delight, combining the subtle chocolate flavor with a burst of sweetness that dances on your palate. I discovered this recipe during a spur-of-the-moment baking session, and it has since become a staple in my home, loved by everyone who tries them.

These cookies are perfect not only for special occasions but also for those cozy nights in when you want something a little indulgent to share with loved ones. With minimal prep time and a simple list of ingredients, whipping up a batch of these beauties is a breeze. Trust me, once you serve them, you’ll be the star of any gathering—not to mention your friends’ or family’s new favorite cookie! So, let’s roll up our sleeves and get baking—these Red Velvet Cookies are about to take center stage in your kitchen!

Why You'll Love This Red Velvet Cookies

  • These Red Velvet Cookies are incredibly easy to make, allowing you to whip up a batch in under 30 minutes.
  • With their vibrant color and luscious flavor, they are sure to impress anyone who lays eyes on them.
  • The delightful combination of red velvet and creamy white chocolate makes these cookies a crowd-pleaser for any occasion.
  • Plus, they can be enjoyed warm or at room temperature, making them versatile for different gatherings.

Red Velvet Cookies Ingredients

Discover the essential elements for delightful Red Velvet Cookies!

For the Dough
• 3/4 cup unsalted butter – helps create a tender, rich texture.
• 4 ounces cream cheese – adds a delicious creaminess that pairs perfectly with the red velvet flavor.
• 1 cup white sugar – sweetens the cookies beautifully.
• 1 cup packed dark brown sugar – brings moisture and a subtle molasses flavor.
• 1 teaspoon baking soda – helps the cookies rise for a soft bite.
• 1 teaspoon kosher salt – balances the sweetness.
• 2 teaspoons vanilla extract – infuses a lovely warmth into the cookies.
• 1 large egg – binds the ingredients together.
• 1 large egg yolk – adds richness for a fudgier texture.
• 1 tablespoon red food coloring – gives those iconic red velvet cookies their stunning hue.
• 2 3/4 cups all-purpose flour – provides structure to the cookie dough.
• 1/4 cup natural cocoa powder – imparts a subtle chocolate flavor that complements the red velvet.

For the Topping
• 2 cups white chocolate baking chips (divided) – adds bursts of sweetness; reserve half for topping the cookies.

How to Make Red Velvet Cookies

  1. Preheat your oven to 350°F and line two baking sheets with a silicone baking mat or parchment paper. This sets the stage for perfect cookies that won’t stick!

  2. Mix the butter, cream cheese, both sugars, baking soda, salt, and vanilla extract in the bowl of a stand mixer with a paddle attachment. Blend on medium speed for about 1 to 2 minutes until creamy and uniform.

  3. Incorporate the egg by scraping down the sides of the bowl and mixing on medium speed. Then, add the egg yolk and the red food coloring, mixing on low speed to keep that vibrant hue from splattering.

  4. Combine the dry ingredients! Mix on low until the flour and cocoa powder are just absorbed by the wet mixture. You want it well blended, but don’t overdo it!

  5. Add 1 1/2 cups of the baking chips to the dough, keeping the remaining 1/2 cup aside for topping later. Mix slowly until the chips are evenly distributed throughout the dough.

  6. Shape the cookie dough by wetting your hands and rolling 1-inch balls. Place these lovely dough balls on your prepared baking sheet, leaving some space between them.

  7. Bake the cookies for 11 to 13 minutes or until the edges are dry and set. They will puff up a little, so don’t worry if they look slightly soft in the center!

  8. Top the warm cookies by gently pressing a few reserved white chips into each one. Let them cool on the baking sheet for 5 minutes before transferring them to a wire cooling rack for complete cooling.

Optional: Sprinkle with a dusting of cocoa powder for an extra touch!
Exact quantities are listed in the recipe card below.

How to Store and Freeze Red Velvet Cookies

Room Temperature: Store cookies in an airtight container for up to 3 days to maintain their softness and flavor.

Fridge: For longer freshness, keep them in the refrigerator for up to 1 week, ensuring they’re well-wrapped to prevent drying out.

Freezer: Freeze cookies in a single layer on a baking sheet, then transfer to a freezer-safe container for up to 3 months. Flash freezing prevents them from sticking together.

Reheating: Thaw at room temperature before enjoying, or warm them in the microwave for about 10-15 seconds for that fresh-baked taste.

Make Ahead Options

These Red Velvet Cookies are a delightful treat that can easily fit into your meal prep routine! You can prepare the cookie dough up to 24 hours in advance; simply store it in an airtight container in the refrigerator. This keeps the flavors well blended and makes the baking process a breeze when you’re ready to enjoy them. If you’d like to go even further, you can roll the cookie balls and freeze them for up to 3 months. When it’s time to bake, just pop them straight from the freezer into the oven—add an extra minute or two to the baking time for perfectly puffy cookies. With these make-ahead tips, you can save time and still impress your family and friends with fresh-baked Red Velvet Cookies!

Red Velvet Cookies Variations

Feel free to get creative and make this cookie recipe uniquely yours with these delightful twists!

  • Chocolate Chip: Swap half the white chocolate chips for semisweet chocolate chips for a richer flavor. The combination of chocolates adds deeper complexity.

  • Nutty Addition: Add 1 cup of chopped walnuts or pecans to the dough for a delightful crunch. The nuts give a textured contrast against the soft cookie.

  • Spice It Up: Incorporate 1 teaspoon of cinnamon or nutmeg for a warm spice infusion. A hint of spice can elevate the flavor profile beautifully.

  • Minty Fresh: Mix in 1 teaspoon of peppermint extract along with the vanilla for a refreshing mint chocolate twist. Perfect for the holiday season or those who love a cool burst in their treats!

  • Fruit Forward: Fold in 1 cup of dried cranberries or cherries for a tart bite amidst the sweetness. The vibrant fruit adds color and enhances each mouthful.

  • Flourless Option: Use almond flour instead of all-purpose flour for a gluten-free treat. This swap gives the cookies a rich and nutty flavor.

  • Lemon Zest: Add the zest of one lemon for a bright citrus note that contrasts with the sweet chocolate. The zing from the lemon can brighten up your cookies immensely.

  • Spicy Kick: Incorporate a pinch of cayenne pepper or ground ginger for a subtle heat. This unexpected twist can surprise and delight anyone who takes a bite!

What to Serve with Red Velvet Cookies?

The warmth of freshly baked Red Velvet Cookies can easily be complemented with the right pairings for a delightful experience.

  • Creamy Vanilla Ice Cream: A scoop of velvety vanilla ice cream adds a cool, creamy contrast to the warm cookies, enhancing the sweetness.

  • Rich Hot Chocolate: A steaming mug of rich hot chocolate deepens the indulgence; the chocolate notes in both will make your taste buds sing.

  • Fresh Berries: The tartness of raspberries or strawberries cuts through the sweetness, adding a refreshing twist that balances the dessert beautifully.

  • Sparkling Lemonade: A bubbly glass of sparkling lemonade offers a zesty kick that clears the palate, making each cookie taste even better.

  • Chocolate Dipped Strawberries: Strawberries dipped in chocolate echo the flavors of the Red Velvet Cookies, uniting two beloved treats into one delicious experience.

  • Decadent Cheesecake: A slice of cheesecake drizzled with a berry sauce provides a luxurious pairing, ensuring a rich and satisfying dessert table for any occasion.

  • Espresso: A shot of bold espresso stimulates the senses, balancing the sweet flavors while enhancing the overall tasting adventure.

Elevate your cookie experience with these irresistible pairings that create a memory-making moment!

Chef's Helpful Tips

  • When making Red Velvet Cookies, be sure to use room temperature butter and cream cheese for a smoother batter that incorporates well.
  • A common mistake is overmixing the dough after adding the flour, which can lead to tougher cookies; mix just until you see no dry flour.
  • For the best flavor, use high-quality red food coloring, as it will ensure a vibrant color and a nice taste without an artificial aftertaste.
  • Remember to check the cookies at the lower end of the baking time; they should be set around the edges with a slightly soft center, allowing for a perfect chewy texture once cooled.

Red Velvet Cookies Recipe FAQs

How do I choose ripe ingredients for my Red Velvet Cookies?
Absolutely! When selecting ingredients, ensure your butter and cream cheese are at room temperature for easy mixing. Look for fresh eggs and high-quality red food coloring for the best results. If you see any dark spots on the cream cheese or eggs that seem off, it’s best to avoid using them.

What’s the best way to store Red Velvet Cookies?
To keep your cookies fresh, store them in an airtight container at room temperature for up to 3 days. If you want to prolong their shelf life, wrap them tightly and store in the refrigerator for up to 1 week. Just make sure they’re well-sealed to prevent drying out!

Can I freeze Red Velvet Cookies and how?
Very! To freeze, start by arranging the cookies in a single layer on a baking sheet. Place them in the freezer until solid, which usually takes about 1 to 2 hours. Once frozen, transfer the cookies to a freezer-safe container or a resealable bag for up to 3 months. This method prevents them from sticking together. When you’re ready to enjoy, thaw them at room temperature or pop them in the microwave for about 10-15 seconds for that fresh-baked taste.

What should I do if my cookies are turning out too cakey?
If your Red Velvet Cookies are too cakey, it may be due to overmixing the dough after adding the flour. Try mixing just until the dry ingredients are incorporated. Also, make sure not to overbake; they should be soft in the center. Aim for that golden edge and take them out when they look puffed yet slightly underbaked at the center.

Are there any dietary considerations I should keep in mind with these cookies?
Absolutely! If you’re baking for someone with allergies, take note that these Red Velvet Cookies contain dairy (butter and cream cheese) and gluten (all-purpose flour). To make them gluten-free, consider substituting with a gluten-free flour blend. Always check the labels of your ingredients—especially the cocoa powder and white chocolate chips—for potential allergens.

How can I enhance the flavor of my Red Velvet Cookies?
Adding a pinch of espresso powder can elevate the chocolate flavor without making them taste like coffee. Additionally, consider incorporating some chopped nuts or even a hint of almond extract to make your cookies extra special. A little creativity goes a long way!

Red Velvet Cookies

Red Velvet Cookies

Delightfully vibrant Red Velvet Cookies, rich in flavor and perfect for any occasion.
Print Recipe Pin Recipe
Prep Time 15 minutes mins
Cook Time 13 minutes mins
Cooling Time 5 minutes mins
Total Time 33 minutes mins
Servings: 24 cookies
Course: DESSERT RECIPES
Cuisine: American
Calories: 120
Ingredients Equipment Method Nutrition Notes

Ingredients
  

For the Dough
  • 3/4 cup unsalted butter helps create a tender, rich texture
  • 4 ounces cream cheese adds a delicious creaminess
  • 1 cup white sugar sweetens the cookies beautifully
  • 1 cup packed dark brown sugar brings moisture and a subtle molasses flavor
  • 1 teaspoon baking soda helps the cookies rise for a soft bite
  • 1 teaspoon kosher salt balances the sweetness
  • 2 teaspoons vanilla extract infuses a lovely warmth
  • 1 large egg binds the ingredients together
  • 1 large egg yolk adds richness for a fudgier texture
  • 1 tablespoon red food coloring gives the iconic red hue
  • 2 3/4 cups all-purpose flour provides structure to the cookie dough
  • 1/4 cup natural cocoa powder imparts a subtle chocolate flavor
For the Topping
  • 2 cups white chocolate baking chips reserve half for topping the cookies

Equipment

  • stand mixer
  • baking sheets
  • silicone baking mat

Method
 

How to Make Red Velvet Cookies
  1. Preheat your oven to 350°F and line two baking sheets with a silicone baking mat or parchment paper.
  2. Mix the butter, cream cheese, both sugars, baking soda, salt, and vanilla extract in a stand mixer bowl. Blend on medium speed until creamy and uniform.
  3. Incorporate the egg and egg yolk, mixing in the red food coloring on low speed.
  4. Combine the dry ingredients, mixing on low until just absorbed.
  5. Add 1 1/2 cups of the baking chips to the dough, mixing until evenly distributed.
  6. Shape the cookie dough into 1-inch balls and place on the prepared baking sheet.
  7. Bake for 11 to 13 minutes until the edges are dry.
  8. Top warm cookies with reserved white chips and let cool for 5 minutes before transferring to a cooling rack.

Nutrition

Serving: 1cookieCalories: 120kcalCarbohydrates: 17gProtein: 1gFat: 6gSaturated Fat: 3gMonounsaturated Fat: 2gCholesterol: 20mgSodium: 100mgPotassium: 70mgSugar: 10gVitamin A: 300IUCalcium: 30mgIron: 0.5mg

Notes

Store cookies in an airtight container for up to 3 days, in the fridge for up to 1 week, or freeze for up to 3 months.

Tried this recipe?

Let us know how it was!

Filed Under: DESSERT RECIPES

Red Velvet Cookies

January 1, 2026 by JudyWhite Leave a Comment

There’s something irresistibly enchanting about the vibrant red hue of these Red Velvet Cookies that beckons you to take a bite. Picture this: the gentle warmth of freshly baked cookies filling your kitchen, mingling with the sweet, rich scent of cream cheese and white chocolate. Every mouthful is a delight, combining the subtle chocolate flavor with a burst of sweetness that dances on your palate. I discovered this recipe during a spur-of-the-moment baking session, and it has since become a staple in my home, loved by everyone who tries them.

These cookies are perfect not only for special occasions but also for those cozy nights in when you want something a little indulgent to share with loved ones. With minimal prep time and a simple list of ingredients, whipping up a batch of these beauties is a breeze. Trust me, once you serve them, you’ll be the star of any gathering—not to mention your friends’ or family’s new favorite cookie! So, let’s roll up our sleeves and get baking—these Red Velvet Cookies are about to take center stage in your kitchen!

Why You'll Love This Red Velvet Cookies

  • These Red Velvet Cookies are incredibly easy to make, allowing you to whip them up in under 30 minutes.
  • The rich flavor profile combines creamy cream cheese and decadent white chocolate, making every bite a delicious indulgence.
  • Their vibrant red color and snowy white chocolate chips create a stunning visual appeal that will impress any guest.
  • These cookies are versatile enough to serve for any occasion, from cozy family gatherings to holiday parties, and they’re sure to become a crowd-pleaser.

Red Velvet Cookies Ingredients

These ingredients will make your baking experience truly delightful!

For the Cookie Dough

  • Unsalted butter – adds richness and helps create a soft, chewy texture.
  • Cream cheese – brings a creamy element that deepens the flavor profile.
  • White sugar – sweetens the dough for a balanced flavor.
  • Dark brown sugar – enhances moisture and adds a subtle caramel flavor.
  • Baking soda – helps the cookies rise to that perfect soft, puffed-up shape.
  • Kosher salt – balances the sweetness and enhances overall flavor.
  • Vanilla extract – infuses warmth and depth into your cookies.
  • Large egg – binds the ingredients and gives the cookies structure.
  • Large egg yolk – adds extra moisture for a soft, rich cookie.
  • Red food coloring – delivers that signature red velvet color.
  • All-purpose flour – provides the main structure of the cookies.
  • Natural cocoa powder – adds a hint of chocolatey flavor, keeping the recipe true to red velvet.

For the Topping

  • White chocolate baking chips – melt in your mouth and add a burst of sweetness; you’ll reserve half for topping!

How to Make Red Velvet Cookies

  1. Preheat your oven to 350°F and prepare two baking sheets by lining them with a silicone baking mat or parchment paper. This step is essential to prevent sticking and ensures perfect cookies every time!

  2. Combine the butter, cream cheese, both sugars, baking soda, salt, and vanilla extract in the bowl of a stand mixer fitted with a paddle attachment. Mix on medium speed until creamy and uniform, about 1 to 2 minutes. This creamy base is the heart of your cookies!

  3. Incorporate the egg by scraping down the sides of the bowl and mixing on medium speed until fully combined. Next, repeat with the egg yolk, then add the red food coloring carefully, mixing on low speed to avoid any splatters. Look for a vibrant red hue!

  4. Stir in the dry ingredients (flour and cocoa powder) just until they are absorbed. This gentle mixing helps keep your cookies soft and tender—no overworking allowed!

  5. Fold in 1 1/2 cups of the white chocolate baking chips, reserving 1/2 cup for the topping. Mix slowly until evenly distributed, ensuring each cookie has that delightful surprise of melted chocolate.

  6. Roll 1-inch balls of dough using wet hands, placing them on the prepared baking sheets. This keeps the dough from sticking to your fingers and makes handling super easy!

  7. Bake the cookies for 11 to 13 minutes or until the edges are dry and set, yet the centers remain puffed. You’re aiming for that perfect, soft interior!

  8. Press several reserved white chocolate chips into the tops of the cookies while they’re still warm. Cool on the baking sheet for 5 minutes before transferring them to a wire cooling rack, allowing the chocolate to melt slightly and create divine bites.

Optional: Drizzle with melted chocolate for an extra indulgent treat!

Exact quantities are listed in the recipe card below.

What to Serve with Red Velvet Cookies?

Imagine the laughter and warmth surrounding your table as you share delightful treats with those you cherish most.

  • Creamy Vanilla Ice Cream: The coolness of vanilla ice cream balances the rich flavors of the cookies, creating a perfect pairing.

  • Fresh Berries: A mix of strawberries and raspberries adds a tartness that cuts through the sweetness, making each bite refreshing.

  • Coffee or Espresso: A cup of rich coffee enhances the cookies’ flavor and provides a delightful contrast to their sweetness. It’s a classic duo!

  • Milk: You can’t go wrong with a tall glass of cold milk; it complements those soft, chewy textures and makes for nostalgia.

  • Chocolate Dipped Strawberries: The added chocolate and freshness create a luxurious experience, matching both the aesthetics and sweetness of the cookies.

  • Cream Cheese Frosting: For an extra indulgent treat, drizzle some cream cheese frosting over the cookies, echoing the creamy elements within.

These pairings not only enhance the experience but also create a joyful atmosphere, making your dessert time a memorable occasion.

Make Ahead Options

These Red Velvet Cookies are a fantastic choice for meal prep lovers! You can prepare the cookie dough up to 24 hours in advance, simply by rolling the dough into balls and refrigerating them in an airtight container. This helps maintain their freshness and flavor. When you’re ready to bake, just place the chilled dough on a lined baking sheet and add an extra minute or two to the baking time. Additionally, the baked cookies can be stored in an airtight container at room temperature for up to 3 days. They’ll remain just as delicious and soft, making your busy weeknights sweeter!

Red Velvet Cookies Variations

Feel free to personalize your cookies with these delightful twists and substitutions that will add new dimensions to flavor and texture!

  • Gluten-Free: Substitute all-purpose flour with a 1:1 gluten-free flour blend for a delightful, gluten-free version.

  • Vegan: Replace the butter and cream cheese with vegan alternatives and use flax eggs to create a plant-based treat, ensuring everyone can indulge.

  • Dark Chocolate Delight: Swap white chocolate chips for dark or semi-sweet chocolate chips for a rich, deep flavor that balances nicely with the red velvet.

  • Nutty Crunch: Add 1 cup of chopped walnuts or pecans to the dough for a delightful crunchy texture and nutty flavor that contrasts beautifully with the soft cookies.

  • Minty Freshness: Incorporate a few drops of peppermint extract for a refreshing mint twist; perfect for the holidays or to tantalize your taste buds!

  • Spicy Kick: Fold in a teaspoon of cinnamon or cayenne pepper for an unexpected warmth that intertwines deliciously with the sweetness of the cookies.

  • Dried Fruits: Toss in a half cup of dried cherries or cranberries; their tartness brightens the flavor, creating a delightful contrast to the creamy chocolate goodness.

  • Coconut Flake Surprise: Mix in some shredded coconut for added texture and a tropical flair that will transport your taste buds to paradise with each bite.

How to Store and Freeze Red Velvet Cookies

Room Temperature: Keep your Red Velvet Cookies in an airtight container at room temperature for up to 3 days for optimal freshness.

Fridge: For longer storage, place the cookies in the fridge, where they will stay fresh for up to a week. Just make sure they are in an airtight container to prevent drying out.

Freezer: Freeze the cookies for up to 3 months. Place them in a single layer on a baking sheet until frozen solid, then transfer to a freezer bag or airtight container.

Reheating: To enjoy them warm, reheat the cookies in the microwave for about 10-15 seconds or in a preheated oven at 350°F for 5 minutes.

Chef's Helpful Tips

  • When making Red Velvet Cookies, be sure to cream the butter and cream cheese thoroughly for a smooth texture; this is key to achieving a soft, chewy cookie.
  • Avoid overmixing the dry ingredients once added to the wet; mix just until combined to maintain the cookies’ tender texture.
  • For an even spread and appropriate cooking, make sure your dough balls are uniformly sized—using a cookie scoop can help with this.
  • Always check your cookies a minute or two before the full bake time, as ovens may vary; they should be set around the edges but slightly soft in the center for the perfect finish.

Red Velvet Cookies Recipe FAQs

How do I select the right ingredients for Red Velvet Cookies?
Absolutely! For the best results, choose unsalted butter that is room temperature and high-quality cream cheese to ensure richness and proper flavor. The red food coloring should also be of good quality, preferably gel-based for vibrant color without altering the texture.

How should I store my Red Velvet Cookies?
I recommend storing your Red Velvet Cookies in an airtight container at room temperature for up to 3 days for maximum freshness. If you want them to last longer, place them in the fridge, where they can stay fresh for up to a week. Just remember to keep them sealed so they don’t dry out!

Can I freeze Red Velvet Cookies, and if so, how?
Absolutely! To freeze your Red Velvet Cookies, first, place them in a single layer on a baking sheet and freeze until solid—this usually takes about 1 to 2 hours. Once frozen, transfer them to a freezer bag or an airtight container. They can be stored in the freezer for up to 3 months. When you’re ready to enjoy them, simply thaw at room temperature or reheat in the oven.

What should I do if my cookies spread too much during baking?
Very! If your Red Velvet Cookies are spreading more than expected, it could be due to melted butter or too much mixing after adding the dry ingredients. To troubleshoot, make sure your butter is softened but not melted and avoid overmixing once you incorporate the flour. You can also refrigerate the dough for 15-30 minutes before baking to help maintain shape.

Are Red Velvet Cookies suitable for people with allergies or dietary restrictions?
Yes, there are ways to adapt this recipe! If you’re making these cookies for someone with gluten sensitivity, consider using a gluten-free flour blend. Alternatively, for a dairy-free option, substitute the butter and cream cheese with plant-based versions. Always check the labels for allergens, especially in chocolate chips, and ensure that any food coloring is allergy-friendly.

Red Velvet Cookies

Red Velvet Cookies

These Red Velvet Cookies are a delightful twist on a classic favorite, rich in flavor and visually stunning.
Print Recipe Pin Recipe
Prep Time 15 minutes mins
Cook Time 13 minutes mins
Cooling Time 5 minutes mins
Total Time 33 minutes mins
Servings: 12 cookies
Course: DESSERT RECIPES
Calories: 150
Ingredients Equipment Method Nutrition Notes

Ingredients
  

For the Cookie Dough
  • 1 cup Unsalted butter adds richness and helps create a soft, chewy texture
  • 8 oz Cream cheese brings a creamy element that deepens the flavor profile
  • 1 cup White sugar sweetens the dough for a balanced flavor
  • 1/2 cup Dark brown sugar enhances moisture and adds a subtle caramel flavor
  • 1 tsp Baking soda helps the cookies rise to that perfect soft, puffed-up shape
  • 1/2 tsp Kosher salt balances the sweetness and enhances overall flavor
  • 1 tsp Vanilla extract infuses warmth and depth into your cookies
  • 1 large Egg binds the ingredients and gives the cookies structure
  • 1 large Egg yolk adds extra moisture for a soft, rich cookie
  • 1 tbsp Red food coloring delivers that signature red velvet color
  • 2 cups All-purpose flour provides the main structure of the cookies
  • 1 tbsp Natural cocoa powder adds a hint of chocolatey flavor, keeping the recipe true to red velvet
For the Topping
  • 1 cup White chocolate baking chips reserve half for topping

Equipment

  • stand mixer
  • baking sheets
  • parchment paper

Method
 

How to Make Red Velvet Cookies
  1. Preheat your oven to 350°F and prepare two baking sheets by lining them with a silicone baking mat or parchment paper.
  2. Combine the butter, cream cheese, both sugars, baking soda, salt, and vanilla extract in the bowl of a stand mixer fitted with a paddle attachment. Mix on medium speed until creamy and uniform, about 1 to 2 minutes.
  3. Incorporate the egg by scraping down the sides of the bowl and mixing on medium speed until fully combined. Repeat with the egg yolk, then add the red food coloring carefully, mixing on low speed to avoid any splatters.
  4. Stir in the dry ingredients (flour and cocoa powder) just until they are absorbed.
  5. Fold in 1 1/2 cups of the white chocolate baking chips, reserving 1/2 cup for the topping. Mix slowly until evenly distributed.
  6. Roll 1-inch balls of dough using wet hands, placing them on the prepared baking sheets.
  7. Bake the cookies for 11 to 13 minutes or until the edges are dry and set, yet the centers remain puffed.
  8. Press several reserved white chocolate chips into the tops of the cookies while they’re still warm. Cool on the baking sheet for 5 minutes before transferring them to a wire cooling rack.

Nutrition

Serving: 1cookieCalories: 150kcalCarbohydrates: 20gProtein: 2gFat: 7gSaturated Fat: 4gCholesterol: 30mgSodium: 120mgPotassium: 50mgSugar: 10gVitamin A: 200IUCalcium: 20mgIron: 0.5mg

Notes

Drizzle with melted chocolate for an extra indulgent treat!

Tried this recipe?

Let us know how it was!

Filed Under: DESSERT RECIPES

Chocolate Cupcakes with Cream Cheese Frosting

December 29, 2025 by JudyWhite Leave a Comment

There’s a certain joy that comes from the sound of cupcakes rising in the oven, and it’s even sweeter when you know they’re all yours! While rummaging through my pantry one rainy afternoon, I stumbled upon a treasure trove of baking goodies, and it inspired me to whip up the perfect indulgence: Chocolate Cupcakes with Cream Cheese Frosting.

These delightful little treats aren’t just about satisfying a sweet tooth; they represent the ultimate comfort food that can turn an ordinary day into a celebration. Picture this: a rich, moist chocolate cupcake topped with creamy, luscious frosting that dances on your taste buds. Whether you’re planning a romantic dinner, a birthday bash, or just craving something deliciously homemade, these cupcakes are here to win hearts.

What’s even better? They’re surprisingly easy to make! So grab your apron and let’s dive into a world of chocolatey goodness that will have everyone asking for seconds.

Why You'll Love This Chocolate Cupcakes with Cream Cheese Frosting

  • These Chocolate Cupcakes with Cream Cheese Frosting are incredibly easy to make, allowing even novice bakers to create something impressive.
  • The rich chocolate flavor combined with the creamy frosting is a taste sensation that will delight any chocolate lover.
  • They are versatile enough to be perfect for any occasion, whether it’s a casual get-together or a special celebration.
  • Visually appealing, these cupcakes are sure to make a statement on any dessert table, enticing everyone to indulge.

Chocolate Cupcakes Ingredients

Gather these simple ingredients and get ready to create the most delightful Chocolate Cupcakes with Cream Cheese Frosting!

For the Cupcakes

  • Sugar – 2 cups – this is the magic that sweetens your cupcakes to perfection.
  • All-purpose flour – 1 3/4 cups – gives structure to your cupcakes for that perfect bite.
  • Unsweetened cocoa – 3/4 cup – adds intense chocolate flavor that will make your cupcakes irresistible.
  • Baking powder – 1 1/2 teaspoons – helps your cupcakes rise to fluffy heights.
  • Baking soda – 1 1/2 teaspoons – enhances the leavening process for light and airy cupcakes.
  • Salt – 1 teaspoon – balances the sweetness and enhances cocoa flavor.
  • Whole milk – 1 cup – keeps your cupcakes moist and tender.
  • Vegetable oil – 1/2 cup – adds richness to the batter for a delightful texture.
  • Vanilla extract – 2 teaspoons – infuses warmth and depth of flavor.
  • Boiling water – 1 cup – activates cocoa powder and enriches the chocolate richness.

For the Cream Cheese Frosting

  • Unsalted butter (softened) – 1/2 cup – ensures a creamy, smooth base for your frosting.
  • Cream cheese (softened) – 8 oz – gives that luscious tang that pairs beautifully with the chocolate.
  • Vanilla extract – 1 teaspoon – adds aromatic flavor to the frosting.
  • Unsweetened cocoa – 1/2 cup – enhances the chocolate goodness in your frosting.
  • Powdered confectioners sugar – 4 cups – sweetens and thickens the frosting to a wonderful consistency.
  • Heavy cream – 1 to 4 tablespoons – adjust for desired frosting consistency that spreads easily.

How to Make Chocolate Cupcakes with Cream Cheese Frosting

  1. Prepare the oven: Preheat your oven to 350°F (175°C) and line a muffin tin with paper liners. This ensures even baking and easy removal of your cupcakes.

  2. Mix dry ingredients: In a large mixing bowl, stir together 2 cups of sugar, 1 3/4 cups of flour, 3/4 cup of cocoa, baking powder, baking soda, and salt. This dry mix is the foundation of your rich batter.

  3. Add wet ingredients: Mix in the eggs, 1 cup of whole milk, 1/2 cup of vegetable oil, and 2 teaspoons of vanilla extract. Beat on medium speed for one minute until the mixture is well combined and smooth.

  4. Incorporate boiling water: Carefully stir in 1 cup of boiling water. Don’t worry; the batter will be thin, which is perfect for moist cupcakes!

  5. Fill liners: Pour the batter into the cupcake liners, filling them about 2/3 full. This allows space for the cupcakes to rise without overflowing.

  6. Bake perfectly: Bake in the preheated oven for approximately 18-22 minutes, or until a toothpick inserted into the center comes out clean. They should be fluffy and spring back when lightly pressed.

  7. Cool cupcakes: Once baked, transfer the cupcakes to a wire rack to cool completely before frosting. This step is crucial for avoiding melted frosting!

  8. Prepare the frosting: In a large mixing bowl, beat 1/2 cup of softened unsalted butter until smooth. This will be the creamy base for your scrumptious frosting.

  9. Blend in cream cheese: Add 8 oz of softened cream cheese and mix until fully combined and smooth. The frosting will take on a delightful tanginess.

  10. Add cocoa powder: Mix in 1/2 cup of unsweetened cocoa until just blended. This enhances the chocolatey goodness of your cream cheese frosting.

  11. Sweeten it up: Pour in 4 cups of powdered sugar and 1 teaspoon of vanilla extract. Blend on low speed until incorporated and then increase to medium speed to achieve a fluffy texture.

  12. Achieve the right consistency: Slowly mix in 1 to 4 tablespoons of heavy cream until you reach your desired frosting consistency, allowing you to spread it easily on your cupcakes.

  13. Fluff it up: Beat the frosting until fluffy, about 1 minute. The light texture will complement the dense cupcakes beautifully.

  14. Frost your cupcakes: Use the cream cheese frosting immediately, or refrigerate for later use. It keeps wonderfully if stored correctly!

Optional: Add chocolate shavings or sprinkles on top for a festive touch!

Exact quantities are listed in the recipe card below.

Chocolate Cupcakes Variations

Feel free to get creative and adjust the flavors and textures of your cupcakes to suit your taste!

  • Dairy-Free: Substitute whole milk with almond or oat milk and replace butter with coconut oil for a creamy frosting alternative.

  • Gluten-Free: Use a 1:1 gluten-free flour blend in place of all-purpose flour for delightful results without wheat.

  • Nutty Flavor: Add 1 cup of finely chopped walnuts or pecans into the batter for a rich, nutty crunch that brings an extra bite.

  • Spicy Touch: Incorporate 1 teaspoon of cayenne pepper or espresso powder into the dry ingredients for a surprising kick and depth of flavor.

  • Citrus Zest: Add 1 tablespoon of orange or lemon zest to the batter for a bright, zesty contrast that elevates the chocolate beautifully.

  • Chocolate Chocolate Chip: Fold in 1 cup of chocolate chips into the batter for extra chocolatey goodness and melting pockets of joy in every bite.

  • Fruity Twist: Top with fresh raspberries or strawberries before frosting for a burst of fruity freshness that complements the rich chocolate.

  • Layered Cake: Bake the batter in a 9×13-inch pan instead of cupcake liners for a fluffy sheet cake, then frost generously for a big celebration!

How to Store and Freeze Chocolate Cupcakes with Cream Cheese Frosting

Room Temperature: Store unfrosted cupcakes in an airtight container at room temperature for up to 2 days to maintain their moist texture.

Fridge: If frosted, place your cupcakes in the fridge for up to 5 days. Cover them loosely with plastic wrap to prevent the frosting from hardening.

Freezer: For longer storage, freeze unfrosted cupcakes in a zip-top bag for up to 3 months. Thaw them in the fridge overnight before frosting.

Reheating: To enjoy warm cupcakes, microwave for about 10-15 seconds. Just be sure to keep the cream cheese frosting refrigerated until ready to serve!

What to Serve with Chocolate Valentine’s Day Cupcakes?

These decadent cupcakes will steal the show at any gathering, but pairing them with the right sides can transform dessert into a truly magical experience.

  • Fresh Berries: Juicy strawberries and raspberries add a pop of color and natural sweetness that beautifully balances the rich chocolate.

  • Vanilla Ice Cream: A scoop of creamy vanilla ice cream adds a delightful contrast, making each bite of your cupcakes even more indulgent.

  • Chocolate Fondue: Serve alongside a warm chocolate fondue for a fun and interactive dessert table. Dip fruit, marshmallows, or even mini cupcakes for a chocolaty explosion!

  • Coffee or Espresso: A cup of rich coffee or a shot of espresso enhances the flavors of your chocolate cupcakes, creating a perfect afternoon treat.

  • Chocolate Dipped Pretzels: The salty crunch of pretzels dipped in chocolate complements the sweetness of the cupcakes, offering a delightful mix of flavors and textures.

  • Chocolate Mousse: For an elegant touch, serve a small cup of light and fluffy chocolate mousse. It’s a chocolate lover’s dream that takes indulgence to a whole new level.

  • Red Wine: A glass of smooth red wine, such as a Merlot, pairs beautifully with the chocolate, enhancing the overall experience with its bold flavor.

Let your dessert table shine with these delightful pairings that ensure your Chocolate Cupcakes with Cream Cheese Frosting are the star of the evening!

Make Ahead Options

These Chocolate Cupcakes with Cream Cheese Frosting are fantastic for busy home cooks looking to save time! You can prepare the cupcake batter up to 24 hours in advance, simply mixing and refrigerating it until you’re ready to bake. To do this, cover the mixing bowl tightly with plastic wrap to keep it fresh. The frosted cupcakes can be stored in the refrigerator for up to 3 days, just be sure to cover them well to maintain the texture of the cream cheese frosting. When you’re ready to serve, allow the cupcakes to sit at room temperature for about 30 minutes before enjoying them to restore their delicious soft texture. With these make-ahead tips, you’ll be able to treat your loved ones with delightful homemade desserts without the last-minute rush!

Chef's Helpful Tips

  • When preparing Chocolate Cupcakes with Cream Cheese Frosting, make sure to accurately measure your ingredients for the best results, as even a slight variation can affect texture and flavor.
  • Avoid overmixing the batter after adding the boiling water, as this can lead to dense cupcakes instead of the desired light and fluffy texture.
  • For the cream cheese frosting, ensure your cream cheese and butter are at room temperature to achieve a smooth consistency without lumps.
  • Keep an eye on your cupcakes while baking as oven temperatures can vary; check for doneness at 18 minutes to prevent overbaking and maintain their moistness.

Chocolate Cupcakes with Cream Cheese Frosting Recipe FAQs

How do I choose the right cocoa for my cupcakes?
Absolutely! For the best flavor, I always recommend using high-quality unsweetened cocoa powder. Look for brands that are Dutch-processed, as they provide a richer, smoother chocolate experience. If you notice the cocoa powder is clumping or has an expired date, it’s better to replace it to ensure the best taste in your chocolate cupcakes with cream cheese frosting.

What’s the best way to store my cupcakes?
Great question! Unfrosted cupcakes can be stored at room temperature in an airtight container for up to 2 days. If they’re already topped with that delicious cream cheese frosting, place them in the fridge, loosely covered, for up to 5 days. This keeps them fresh while maintaining the wonderful texture of the frosting!

Can I freeze the cupcakes?
Yes, you can absolutely freeze your cupcakes! To do this, allow your unfrosted cupcakes to cool completely, then place them in a zip-top freezer bag. They can be stored for up to 3 months. When you’re ready to enjoy, simply thaw them in the fridge overnight and frost before serving. If you want a quick treat, you can microwave the thawed cupcakes for about 10-15 seconds to warm them slightly.

What if my cupcakes come out dense?
No worries! This can happen if the batter is overmixed or if there’s too much flour. To prevent this, make sure to mix until just combined after adding the boiling water; a few lumps are perfectly fine. Additionally, ensuring that your leavening agents are fresh helps maintain that fluffy texture. If you still experience density, it’s a good idea to check ingredient ratios when you bake again.

Can my pets eat any part of these cupcakes?
It’s best to keep these cupcakes away from your furry friends! Chocolate can be toxic to pets, especially dogs, as it contains theobromine, which they can’t metabolize properly. As sweet as it may be to share a treat, play it safe and enjoy these cupcakes yourself!

How can I adjust the sweetness of the frosting?
If you find the cream cheese frosting too sweet for your taste, simply reduce the amount of powdered sugar by 1 to 2 cups. You can also enhance the tanginess by adding a touch more cream cheese, which not only lowers the sweetness but also gives you a delightful flavor balance. Adjust gradually and taste as you go for the perfect mount!

Chocolate Cupcakes with Cream Cheese Frosting

Chocolate Cupcakes with Cream Cheese Frosting

Delight in these Chocolate Cupcakes with Cream Cheese Frosting, perfect for any occasion.
Print Recipe Pin Recipe
Prep Time 20 minutes mins
Cook Time 20 minutes mins
Total Time 40 minutes mins
Servings: 12 cupcakes
Course: DESSERT RECIPES
Cuisine: American
Calories: 320
Ingredients Equipment Method Nutrition Notes

Ingredients
  

For the Cupcakes
  • 2 cups sugar this is the magic that sweetens your cupcakes to perfection.
  • 1 3/4 cups all-purpose flour gives structure to your cupcakes for that perfect bite.
  • 3/4 cup unsweetened cocoa adds intense chocolate flavor that will make your cupcakes irresistible.
  • 1 1/2 teaspoons baking powder helps your cupcakes rise to fluffy heights.
  • 1 1/2 teaspoons baking soda enhances the leavening process for light and airy cupcakes.
  • 1 teaspoon salt balances the sweetness and enhances cocoa flavor.
  • 1 cup whole milk keeps your cupcakes moist and tender.
  • 1/2 cup vegetable oil adds richness to the batter for a delightful texture.
  • 2 teaspoons vanilla extract infuses warmth and depth of flavor.
  • 1 cup boiling water activates cocoa powder and enriches the chocolate richness.
For the Cream Cheese Frosting
  • 1/2 cup unsalted butter softened, ensures a creamy, smooth base for your frosting.
  • 8 oz cream cheese softened, gives that luscious tang that pairs beautifully with the chocolate.
  • 1 teaspoon vanilla extract adds aromatic flavor to the frosting.
  • 1/2 cup unsweetened cocoa enhances the chocolate goodness in your frosting.
  • 4 cups powdered confectioners sugar sweetens and thickens the frosting to a wonderful consistency.
  • 1 to 4 tablespoons heavy cream adjust for desired frosting consistency that spreads easily.

Equipment

  • Muffin tin
  • Mixing bowl
  • Electric mixer
  • measuring cups
  • measuring spoons

Method
 

How to Make Chocolate Cupcakes
  1. Preheat your oven to 350°F (175°C) and line a muffin tin with paper liners.
  2. In a large mixing bowl, stir together 2 cups of sugar, 1 3/4 cups of flour, 3/4 cup of cocoa, baking powder, baking soda, and salt.
  3. Mix in the eggs, 1 cup of whole milk, 1/2 cup of vegetable oil, and 2 teaspoons of vanilla extract. Beat on medium speed for one minute until the mixture is well combined and smooth.
  4. Carefully stir in 1 cup of boiling water.
  5. Pour the batter into the cupcake liners, filling them about 2/3 full.
  6. Bake in the preheated oven for approximately 18-22 minutes, or until a toothpick inserted into the center comes out clean.
  7. Once baked, transfer the cupcakes to a wire rack to cool completely before frosting.
  8. In a large mixing bowl, beat 1/2 cup of softened unsalted butter until smooth.
  9. Add 8 oz of softened cream cheese and mix until fully combined and smooth.
  10. Mix in 1/2 cup of unsweetened cocoa until just blended.
  11. Pour in 4 cups of powdered sugar and 1 teaspoon of vanilla extract. Blend on low speed until incorporated.
  12. Slowly mix in 1 to 4 tablespoons of heavy cream until you reach your desired frosting consistency.
  13. Beat the frosting until fluffy, about 1 minute.
  14. Use the cream cheese frosting immediately, or refrigerate for later use.

Nutrition

Serving: 1cupcakeCalories: 320kcalCarbohydrates: 45gProtein: 3gFat: 15gSaturated Fat: 8gPolyunsaturated Fat: 1gMonounsaturated Fat: 5gCholesterol: 40mgSodium: 250mgPotassium: 150mgFiber: 2gSugar: 25gVitamin A: 500IUCalcium: 50mgIron: 1mg

Notes

Optional: Add chocolate shavings or sprinkles on top for a festive touch. Ensure your ingredients are at room temperature for best results.

Tried this recipe?

Let us know how it was!

Filed Under: DESSERT RECIPES

  • 1
  • 2
  • 3
  • …
  • 5
  • Next Page »

Recent Posts

  • One Pot Cheesy Pasta
  • Steak with Mushroom Sauce
  • St. Patrick’s Day Puppy Chow
  • Salmon with Lemon Butter
  • St. Patrick’s Day Puppy Chow

Recent Comments

No comments to show.

Footer

  • Contact
  • Privacy Policy
  • About Us
  • Terms
  • ↑ back to top

Copyright © 2024 www.Forkono.com

Table Of Content