Forkono

  • BREAKFAST & BRUNCH
  • DESSERT RECIPES
  • DINNER RECIPES
  • LUNCH RECIPES
  • About uS
  • SNACKS & APPETIZERS
menu icon
go to homepage
  • BREAKFAST & BRUNCH
  • DESSERT RECIPES
  • DINNER RECIPES
  • LUNCH RECIPES
  • About uS
  • SNACKS & APPETIZERS
search icon
Homepage link
  • BREAKFAST & BRUNCH
  • DESSERT RECIPES
  • DINNER RECIPES
  • LUNCH RECIPES
  • About uS
  • SNACKS & APPETIZERS
×

Chicken Rice Casserole

December 20, 2025 by JudyWhite Leave a Comment

The warmth of a homemade meal can turn an ordinary evening into something special. When I first discovered this Chicken Rice Casserole, I knew I had found a recipe that effortlessly brings the family together. Imagine the delightful aroma of sautéed onions mingling with garlic and melted cheese as it wafts through your kitchen—it’s an invitation to the dinner table that no one can resist.

Perfect for those busy weeknights or a cozy Sunday gathering, this delightful casserole combines the comforting flavors of shredded chicken, wholesome brown rice, and a medley of vibrant vegetables. All it takes is a little time and some simple ingredients, transforming into an elegant dish that looks and tastes like it took hours to prepare. Plus, the addition of Greek yogurt gives it a creamy texture without weighing you down.

So, whether you’re tired of fast food options or simply yearning for a comforting homemade dish, let’s dive into this easy recipe that promises to make your evenings a little brighter, one flavorful bite at a time.

Why You'll Love This Chicken Rice Casserole

  • This Chicken Rice Casserole is incredibly easy to make, allowing you to whip up a delicious meal in just about 50 minutes.
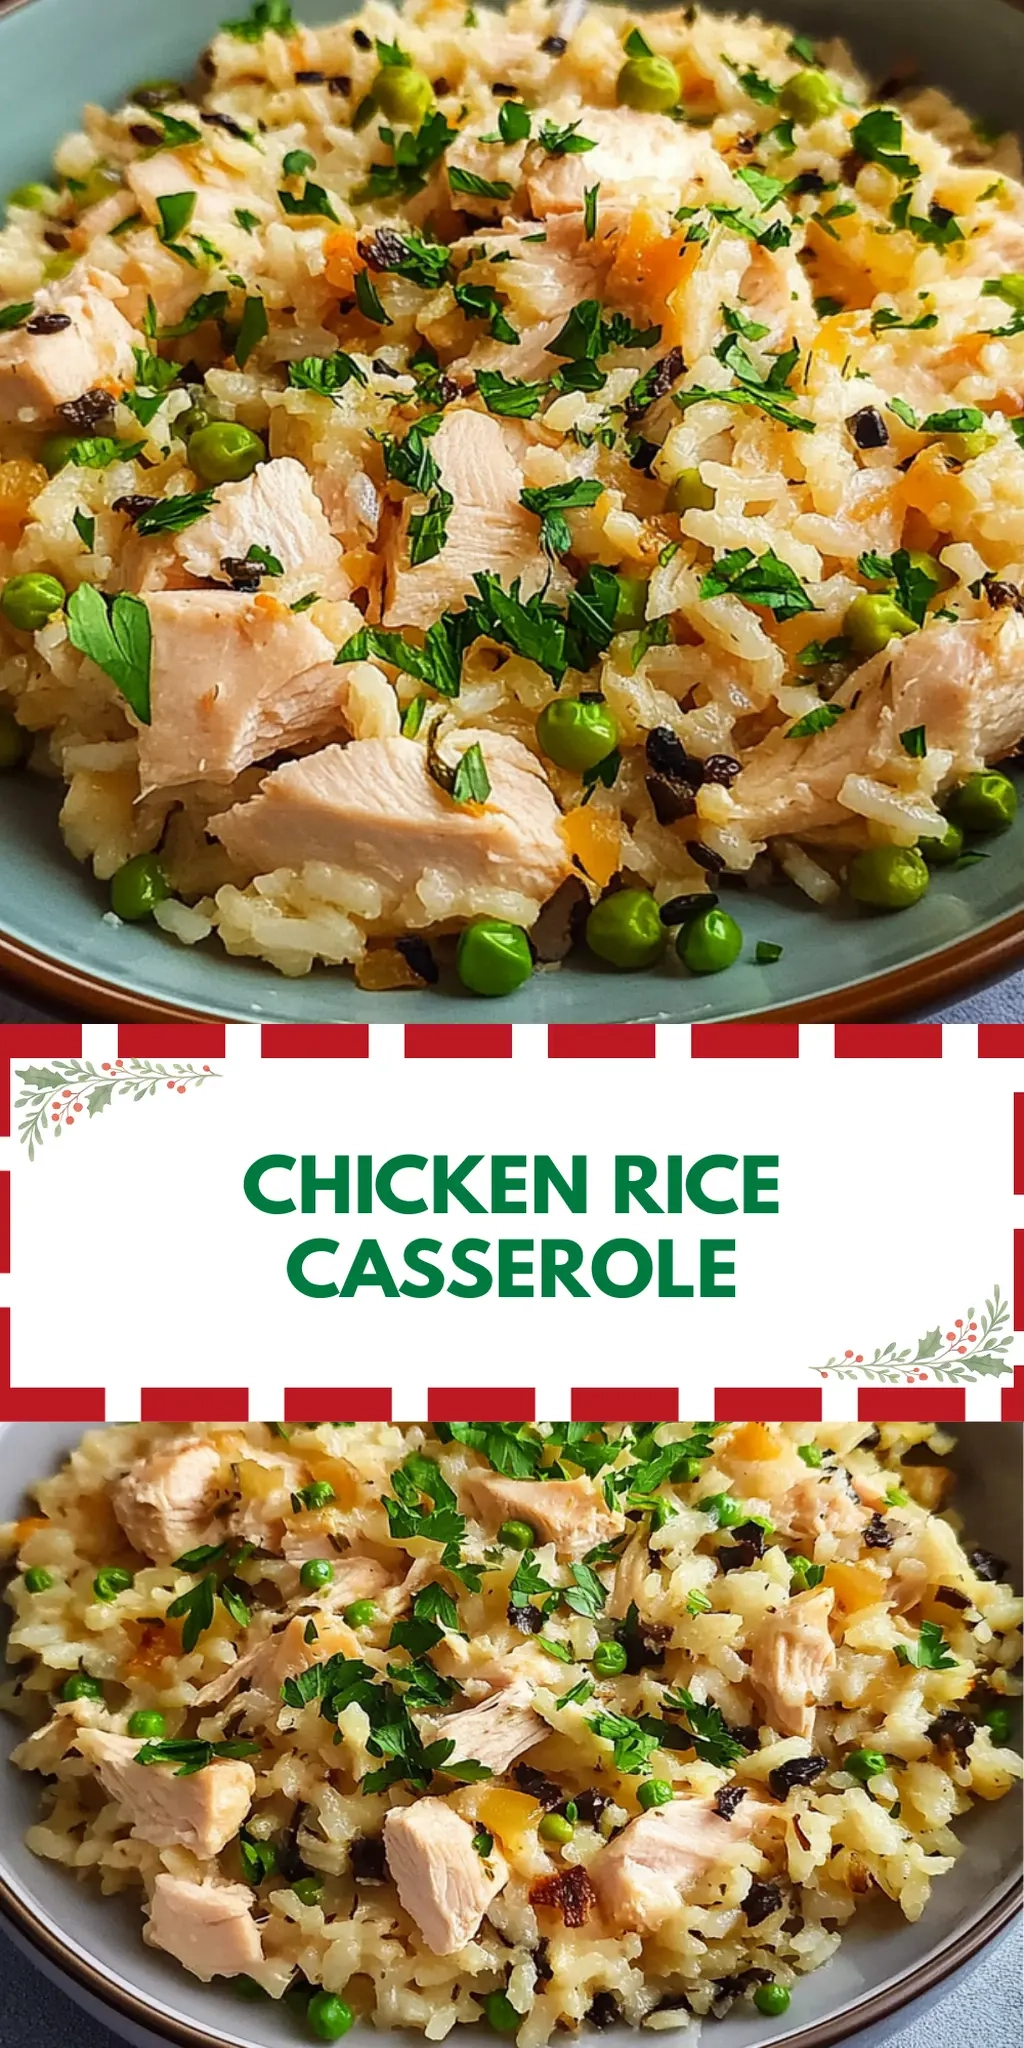
  • The flavor profile is absolutely delightful, combining savory chicken, creamy cheeses, and vibrant vegetables in every bite.
  • Its versatility means you can easily adapt the ingredients to suit your preferences or use up leftovers, making it a fantastic weeknight dinner solution.
  • The visual appeal of a bubbling, cheesy casserole will surely impress your family and friends, turning your dinner into a special occasion.

Chicken Rice Casserole Ingredients

Here’s everything you need to make this delicious Chicken Rice Casserole!

For the Casserole

  • Shredded cooked chicken breast – a great way to use up leftovers or rotisserie chicken.
  • Cooked brown rice or wild and brown rice blend – adds heartiness and texture to your dish.
  • Extra virgin olive oil – for sautéing ingredients to enhance flavor.
  • Unsalted butter – creates a rich depth in the casserole base.
  • Yellow onion, diced – a classic ingredient that imparts sweetness and aroma to the dish.
  • Kosher salt – elevates all the flavors in your casserole.
  • Black pepper – adds a slight kick to the overall taste.
  • Minced garlic – for that wonderful savory essence that makes meals unforgettable.
  • White whole wheat flour – serves as a thickener for a creamy texture.
  • Reduced-sodium chicken broth – keep it flavorful while controlling the salt content.
  • Nonfat milk or milk of choice – adds creaminess without weighing it down.
  • Frozen mixed vegetables – a colorful and convenient way to include veggies.
  • 2% Greek yogurt or full-fat – for added creaminess and a hint of tanginess.
  • Shredded sharp cheddar cheese (divided) – adds a melty, cheesy goodness that everyone loves.
  • Shredded mozzarella cheese – contributes to the casserole’s gooey top layer.
  • Dijon mustard – provides a subtle brightness that enhances the flavors.
  • Dried thyme – infuses an herby note that complements the dish beautifully.
  • Chopped fresh parsley or thyme for serving – adds a touch of freshness when garnished on top.

How to Make Chicken Rice Casserole

  1. Preheat the oven to 350°F (175°C). This ensures your casserole bakes evenly and comes out perfectly bubbly and golden brown.

  2. Sauté the onion. In a large skillet over medium heat, add olive oil and butter. Once melted, add diced onion and cook until softened, about 3-4 minutes.

  3. Add flavorings. Stir in the minced garlic, kosher salt, black pepper, and dried thyme. Cook until fragrant, around 1 minute. Your kitchen will start to smell amazing!

  4. Thicken the base. Sprinkle in the white whole wheat flour, stirring to combine and cook for an additional minute to create a roux.

  5. Whisk in the liquids. Gradually add the reduced-sodium chicken broth and nonfat milk. Bring it to a simmer and let it thicken slightly, about 2-3 minutes.

  6. Combine the ingredients. Remove from heat and stir in the shredded chicken, cooked rice, frozen mixed vegetables, Greek yogurt, Dijon mustard, and half of the shredded cheddar cheese until well combined.

  7. Transfer to baking dish. Pour the mixture into a greased baking dish. Top with the remaining cheddar cheese and shredded mozzarella cheese, ensuring an even layer for a melty finish.

  8. Bake your casserole. Place in the preheated oven and bake for 30-35 minutes, or until bubbly and golden on top.

  9. Cool & garnish. Allow to cool slightly before serving. Garnish with chopped fresh parsley or thyme for an inviting touch.

Optional: Add a sprinkle of red pepper flakes for a delightful kick!
Exact quantities are listed in the recipe card below.

Chicken Rice Casserole Variations

Feel free to add your personal touch to this delicious recipe with these fun twists and substitutes!

  • Dairy-Free: Substitute Greek yogurt and cheese with vegan alternatives for a creamy, plant-based option.
  • Extra Veggies: Add in fresh spinach, bell peppers, or zucchini for an extra boost of nutrition and flavor.
  • Protein Boost: Swap chicken for shredded turkey, or try it with cooked chickpeas for a hearty vegetarian option.
  • Spice It Up: Mix in diced jalapeños or a few dashes of hot sauce for a zesty kick that will warm you from within.
  • Different Grains: Use quinoa or cauliflower rice instead of brown rice for a lighter, gluten-free alternative.
  • Herb Swap: Experiment with different herbs like rosemary or oregano in place of thyme for a distinct flavor profile.
  • Savory Crunch: Top with crushed crackers or breadcrumbs before baking for an irresistible crispy topping that adds texture.
  • One-Pan Wonder: Combine all ingredients in a slow cooker for an effortless, set-it-and-forget-it meal that’s perfect for busy days.

Make Ahead Options

These Chicken Rice Casserole make ahead options are perfect for busy weeknights! You can prepare the entire casserole mixture (steps 1-6) up to 24 hours in advance. Simply follow the instructions, cover the baking dish tightly with plastic wrap, and refrigerate it overnight. For best quality, sprinkle the cheeses on top just before baking to ensure they remain melty and fresh. When you’re ready to enjoy, preheat your oven and bake directly from the fridge, adding an extra 5-10 minutes to the baking time for that delicious, bubbling finish. This way, you can savor homemade comfort food without the last-minute scramble!

What to Serve with Chicken Rice Casserole?

The warmth of a homemade meal is a wonderful way to complete your dining experience.

  • Garden Salad: A fresh garden salad brings a crunchy contrast that complements the creamy casserole while providing a burst of color and nutrients. Toss in some cherry tomatoes, cucumbers, and a zesty vinaigrette for a refreshing bite.

  • Garlic Bread: Add golden, buttery garlic bread, which is perfect for scooping up the savory casserole, making dinner feel extra indulgent. The crunchy texture paired with the soft interior adds an appealing variety to your meal.

  • Steamed Broccoli: The slight bitterness of steamed broccoli not only balances the richness of the casserole but also adds a vibrant green touch to your plate. A squeeze of lemon just before serving can elevate the flavors beautifully.

  • Fruit Medley: A light fruit medley with seasonal berries and citrus slices adds a sweet note to your meal. It’s a perfect palate cleanser and ensures you end on a refreshing, delightful note.

  • Sweet Potato Wedges: Sweet potato wedges offer a sweet and savory contrast, beautifully complementing the flavors of the Chicken Rice Casserole. Drizzle with a hint of honey and sprinkle with sea salt for added depth.

  • Chilled White Wine: A crisp, chilled white wine can elevate the dinner experience, accentuating the dish’s flavors. Choose a Sauvignon Blanc or Chardonnay for a refreshing pairing.

  • Brown Rice Pilaf: If you’re craving a bit more rice, a light brown rice pilaf seasoned with herbs and spices can add texture without overpowering the casserole. It’s comforting and complements the dish seamlessly.

  • Cheese Platter: A simple cheese platter featuring sharp cheddar and creamy brie can make a lovely appetizer. It warms up the palate before the main course, making every bite of casserole more enjoyable.

  • Chocolate Mousse: End your meal on a sweet note with a rich chocolate mousse. Its velvety texture contrasts the hearty casserole while offering a satisfying dessert option that feels truly indulgent.

How to Store and Freeze Chicken Rice Casserole

Room Temperature: Keep the Chicken Rice Casserole out for no more than 2 hours after cooking to prevent spoilage.

Fridge: Store leftovers in an airtight container in the refrigerator for up to 3 days. Reheat in the microwave or oven until heated through.

Freezer: To freeze, wrap the casserole tightly in plastic wrap or aluminum foil before placing it in a freezer-safe container. It can be stored for up to 3 months.

Reheating: When you’re ready to enjoy, thaw overnight in the fridge and reheat in the oven at 350°F (175°C) for about 25-30 minutes, or until warm and bubbly.

Chef's Helpful Tips

  • For the Chicken Rice Casserole, be sure to finely dice the onion to ensure it cooks evenly and blends into the sauce smoothly.
  • A common mistake is not allowing the sauce to simmer enough, so give it a few extra minutes to thicken before combining with the other ingredients.
  • When layering the cheese on top, mix a bit of the mozzarella with the cheddar for a more flavorful crust.
  • Remember to let the casserole rest for about 5 minutes after baking to allow the flavors to settle before serving.

Chicken Rice Casserole Recipe FAQs

What is the best way to select ripe vegetables for the Chicken Rice Casserole?
When selecting vegetables for your casserole, look for vibrant colors and firm textures. For fresh options, avoid any with dark spots or wilting leaves. Frozen mixed vegetables are a great time-saver, but ensure they’re not freezer-burned; good ones should appear bright and not clumped together.

How should I store leftovers of the Chicken Rice Casserole?
To store leftovers, transfer the casserole to an airtight container and keep it in the refrigerator for up to 3 days. When ready to enjoy, reheat in the microwave or the oven at 350°F (175°C) until warmed through. Cover with foil to prevent the top from over-browning as it reheats.

Can I freeze Chicken Rice Casserole?
Absolutely! To freeze, wrap the casserole tightly in plastic wrap or aluminum foil, and place it in a freezer-safe container. It will stay fresh for up to 3 months. When you’re ready to enjoy it, thaw it in the refrigerator overnight, and bake at 350°F (175°C) for 25-30 minutes until warm and bubbly.

What if my Chicken Rice Casserole is too dry after baking?
If your casserole turns out dry, it’s likely due to over-baking. Keep an eye on the baking time, as oven temperatures can vary. Adding a splash of chicken broth or milk when reheating can help restore moisture. For future meals, consider slightly undercooking the casserole, as it will continue to cook while resting.

Is this Chicken Rice Casserole suitable for people with dairy allergies?
If you’re accommodating dairy allergies, simply substitute Greek yogurt and cheeses with dairy-free alternatives. There are several great brands available that mimic the texture and flavor, ensuring everyone can enjoy this comforting dish. Just be sure to check labels for any specific allergens.

How long can I leave the Chicken Rice Casserole out at room temperature?
It’s important to keep food safety in mind; the Chicken Rice Casserole should not sit out at room temperature for more than 2 hours. After that, harmful bacteria can start to grow. Store leftovers promptly to ensure a delicious and safe meal!

Chicken Rice Casserole

Chicken Rice Casserole

Experience the comforting flavors of Chicken Rice Casserole, a perfect dish for busy weeknights and gatherings.
Print Recipe Pin Recipe
Prep Time 15 minutes mins
Cook Time 35 minutes mins
Cooling Time 5 minutes mins
Total Time 50 minutes mins
Servings: 6 servings
Course: DINNER RECIPES
Cuisine: American
Calories: 425
Ingredients Equipment Method Nutrition Notes

Ingredients
  

Casserole Ingredients
  • 3 cups shredded cooked chicken breast a great way to use up leftovers or rotisserie chicken.
  • 2 cups cooked brown rice or wild and brown rice blend.
  • 2 tablespoons extra virgin olive oil for sautéing ingredients.
  • 2 tablespoons unsalted butter creates a rich depth in the casserole base.
  • 1 medium yellow onion, diced imparts sweetness and aroma.
  • 1 teaspoon kosher salt elevates all the flavors.
  • 1/2 teaspoon black pepper adds a slight kick.
  • 2 cloves minced garlic for savory essence.
  • 1/4 cup white whole wheat flour serves as a thickener.
  • 2 cups reduced-sodium chicken broth for flavor.
  • 1 cup nonfat milk adds creaminess.
  • 2 cups frozen mixed vegetables a colorful way to include veggies.
  • 1 cup 2% Greek yogurt for added creaminess and tanginess.
  • 1 cup shredded sharp cheddar cheese divided, for melty goodness.
  • 1 cup shredded mozzarella cheese contributes to the gooey top layer.
  • 1 tablespoon Dijon mustard provides brightness.
  • 1 teaspoon dried thyme infuses an herby note.
  • to taste chopped fresh parsley or thyme for garnish.

Equipment

  • Large skillet
  • Baking dish
  • measuring cups
  • measuring spoons
  • Whisk

Method
 

Cooking Instructions
  1. Preheat the oven to 350°F (175°C) to ensure even baking.
  2. In a large skillet over medium heat, add olive oil and butter. Once melted, add diced onion and cook until softened, about 3-4 minutes.
  3. Stir in minced garlic, kosher salt, black pepper, and dried thyme. Cook until fragrant, around 1 minute.
  4. Sprinkle in the white whole wheat flour, stirring to combine and cook for another minute to create a roux.
  5. Gradually add the reduced-sodium chicken broth and nonfat milk. Bring to a simmer and let it thicken slightly, about 2-3 minutes.
  6. Remove from heat and stir in shredded chicken, cooked rice, frozen mixed vegetables, Greek yogurt, Dijon mustard, and half of the shredded cheddar cheese until well combined.
  7. Pour the mixture into a greased baking dish. Top with remaining cheddar and mozzarella cheeses.
  8. Place in the preheated oven and bake for 30-35 minutes, or until bubbly and golden on top.
  9. Allow to cool slightly before serving. Garnish with chopped fresh parsley or thyme.

Nutrition

Serving: 1servingCalories: 425kcalCarbohydrates: 45gProtein: 30gFat: 18gSaturated Fat: 8gPolyunsaturated Fat: 1gMonounsaturated Fat: 5gCholesterol: 85mgSodium: 650mgPotassium: 670mgFiber: 3gSugar: 4gVitamin A: 15IUVitamin C: 40mgCalcium: 20mgIron: 10mg

Notes

Optional: Add a sprinkle of red pepper flakes for a delightful kick. Let the casserole rest for about 5 minutes after baking to allow flavors to settle.

Tried this recipe?

Let us know how it was!

Filed Under: DINNER RECIPES

Creamy White Chicken and Rice Soup

December 20, 2025 by JudyWhite Leave a Comment

On a chilly evening, nothing warms the soul quite like a bowl of homemade soup. As I set the table, the fragrant aroma of my Creamy White Chicken and Rice Soup fills the air, instantly transporting me to cozy family dinners that once brought everyone together. There’s something about the combination of tender chicken, wild rice, and rich, creamy broth that simply wraps around you like a soft blanket—comfort food at its finest.

I remember the first time I stumbled upon this recipe; it was a gaming night with friends, and I wanted to impress them without spending hours in the kitchen. Remarkably, this soup turned out to be a crowd-pleaser and quickly became a staple in my home. It’s not just the flavor that captivates but the simplicity of the cooking process, making it perfect for busy weeknights or laid-back weekends.

So grab your aprons, gather the ingredients, and let’s dive into this deliciously creamy dish that will surely banish any lingering fast-food cravings!

Why You'll Love This Creamy White Chicken and Rice Soup

  • This recipe is incredibly easy to make, allowing you to whip up a comforting meal in just over an hour.
  • The rich flavors of tender chicken, wild rice, and creamy broth create a sumptuous experience that will leave you wanting more.
  • Its versatility means you can customize the recipe with your favorite vegetables or spices to suit your taste.
  • Plus, this soup is visually appealing, with vibrant colors that make it a stunning centerpiece for any table.

Creamy White Chicken and Rice Soup Ingredients

For the Soup Base

  • Olive oil – Adds depth and richness to the flavors as you sauté the veggies.
  • Yellow onion – Use a medium-sized onion for sweetness; diced small for quicker cooking.
  • Garlic – Freshly minced garlic will elevate the aroma and taste of your creamy soup.
  • Carrots – Sliced to add natural sweetness and a pop of color.
  • Celery – Adds a satisfying crunch and flavor balance to the soup.
  • Chicken breast – Boneless and skinless ensures a tender, juicy finish in your Creamy White Chicken and Rice Soup.
  • Bay leaf – Infuses herbal notes into the broth; remember to discard it before serving.
  • Dried oregano – This herb complements the chicken beautifully for a classic flavor profile.
  • Dried thyme – Another essential herb that adds warmth and earthiness to your soup.
  • Black pepper – Freshly cracked gives a delightful hint of spice.

For the Rice and Broth

  • Wild rice mix – This unique rice blend enhances the texture and nuttiness of the soup.
  • Water – The base of your broth, adjusting the amount depending on desired thickness.

For the Creamy Finish

  • Butter – A key ingredient for creating a silky roux that thickens your soup.
  • All-purpose flour – Combines with butter to form a roux, helping achieve that creamy consistency.
  • Whole milk – Provides the rich creaminess that makes this soup decadent.
  • Fresh parsley – Adds vibrant color and a fresh pop of flavor right before serving.
  • Salt – Use 1-2 tsp to taste, enhancing all the ingredients’ natural flavors in your delightful soup.

How to Make Creamy White Chicken and Rice Soup

  1. Heat Oil: In a large pot, warm the olive oil over medium heat. This initial step is essential for building flavor, so wait until it shimmers before moving on.
  2. Sauté Onion: Add the diced yellow onion and cook until it becomes translucent—about 5-7 minutes. This softens the onion and releases its natural sweetness.
  3. Add Garlic: Stir in the minced garlic and sauté for an additional minute. The fragrant aroma will begin to fill your kitchen, inviting everyone to gather around.
  4. Incorporate Vegetables: Toss in the sliced carrots and celery, cooking until they soften, usually around 5-6 minutes. Let the veggies bloom in flavor!
  5. Add Chicken and Spices: Place the chicken breast into the pot, along with the bay leaf, oregano, thyme, and black pepper. Stir well to combine all the lovely flavors.
  6. Pour in Rice and Water: Add the wild rice mix and 6 cups of water to the pot. Bring the mixture to a boil, letting the anticipation build for that creamy soup!
  7. Simmer: Once boiling, reduce the heat and let it simmer for about 45 minutes or until the rice is tender and absorbs the flavors beautifully.
  8. Shred Chicken: Remove the chicken breast from the pot, shred it, and return it to the soup for that delightful texture in each spoonful.
  9. Make the Roux: In a separate pan, melt the butter and whisk in the flour to create a roux. Cook for a few minutes until golden; this base will bring the creaminess together.
  10. Whisk in Milk: Gradually whisk in the whole milk to the roux, cooking until it thickens, about 4-5 minutes. This will elevate your soup to lusciousness!
  11. Combine and Season: Stir the roux into the soup along with fresh parsley and salt to taste, bringing everything together for a final burst of aroma and flavor.

Optional: Garnish with extra parsley or a sprinkle of fresh black pepper before serving.
Exact quantities are listed in the recipe card below.

Make Ahead Options

These Creamy White Chicken and Rice Soup preparations are perfect for meal prep enthusiasts looking to save time during the week! You can chop the vegetables—onion, carrots, and celery—and store them in an airtight container for up to 3 days in the refrigerator. Additionally, you can cook the rice in advance and refrigerate it separately for up to 3 days as well, preventing it from becoming overly soggy when combined later. When you’re ready to enjoy the soup, simply sauté the veggies, add the chicken, broth, and pre-cooked rice, simmer, and then stir in your roux just before serving. This approach ensures your soup remains just as delicious and comforting while slashing your cooking time!

Creamy White Chicken and Rice Soup Variations

Feel free to make this delicious soup your own with these exciting twists and substitutes!

  • Dairy-Free: Substitute whole milk with coconut milk or cashew milk for a creamy, dairy-free version that adds a delightful nutty flavor.

  • Vegetable Boost: Add spinach or kale in the last few minutes of cooking for an extra dose of greens and a vibrant color boost.

  • Spicy Kick: Throw in some diced jalapeños or a pinch of red pepper flakes to elevate the heat level for those who enjoy a bit of spice.

  • Hearty Grains: Swap wild rice with quinoa or brown rice for a different texture and added health benefits, making it equally satisfying.

  • Herb Infusion: Experiment with fresh herbs like thyme, dill, or rosemary for a flavor enhancement that can completely transform the profile of the soup.

  • Zesty Lemon: Squeeze in some fresh lemon juice before serving to brighten the flavors and add a refreshing burst of citrus.

  • Protein Swap: Use shredded rotisserie chicken or even turkey to save time and add an interesting flavor twist without sacrificing tenderness.

  • Umami Upgrade: Add a splash of soy sauce or Worcestershire sauce for a deeper flavor that adds richness and complexity to the broth.

What to Serve with Creamy White Chicken and Rice Soup?

As the heartwarming aroma of soup fills the air, envision the perfect companions that will make your meal extraordinary.

  • Garlic Bread: Perfectly toasted, this bread adds a delightful crunch and buttery garlic flavor, making it the ideal side for dipping into the creamy soup.
  • Simple Salad: A mix of fresh greens, cherry tomatoes, and a light vinaigrette offers a crisp contrast to the rich, creamy broth, balancing your meal beautifully.
  • Roasted Vegetables: Caramelized seasonal veggies bring a slight sweetness and earthy flavor, complementing the hearty chicken and wild rice. You might just find your new favorite flavor combination here!
  • Homemade Biscuits: Fluffy and buttery, they are not only comforting but also perfect for soaking up every last bite of the creamy soup.
  • Cornbread: Slightly sweet and moist, cornbread is a classic pairing that brings warmth and heartiness, making your meal even more satisfying.
  • Crispy Potato Wedges: Seasoned and baked to perfection, they provide a delightful crunch alongside the creamy soup, enhancing the overall texture of your meal.
  • Sparkling Water: Light and refreshing, a fizzing beverage cuts through the richness of the soup while keeping you refreshed and hydrated.
  • Apple Crisp: A warm, comforting dessert with a perfect crumble that complements the soup’s heartiness, finishing off your meal on a sweet note.

How to Store and Freeze Creamy White Chicken and Rice Soup

Fridge: Store leftovers in an airtight container in the fridge for up to 3 days. This keeps the flavors intact and makes for a quick meal option.

Freezer: For longer storage, freeze the soup in freezer-safe containers or bags for up to 3 months. Make sure to leave some space for expansion.

Reheating: To reheat, thaw in the fridge overnight, then heat on the stove over low-medium heat, stirring often. You may need to add a splash of milk to restore creaminess.

Avoid Freezing: Note that the rice may absorb too much liquid upon freezing. If you plan to freeze, consider adding it freshly cooked when reheating for optimal texture.

Chef's Helpful Tips

  • When making Creamy White Chicken and Rice Soup, be sure to sauté the onion until it’s fully translucent for the best flavor development.
  • Avoid overcooking the chicken by checking its internal temperature at 165°F before shredding it for the soup.
  • To ensure a creamy texture, whisk the roux continuously while adding the milk to prevent lumps from forming.
  • Remember to simmer the soup long enough—approximately 45 minutes—so the wild rice can absorb the flavors and become perfectly tender.

Creamy White Chicken and Rice Soup Recipe FAQs

How do I choose the right chicken breast for this recipe?
Absolutely! Look for boneless, skinless chicken breasts that feel firm to the touch and have a light pink color. Avoid any pieces with dark spots or a sour smell, as that indicates they might not be fresh.

How should I store leftovers of Creamy White Chicken and Rice Soup?
Very simply! Transfer the leftover soup into an airtight container and place it in the fridge. It will stay fresh for up to 3 days. Just make sure it’s cooled down before sealing it tightly.

Can I freeze Creamy White Chicken and Rice Soup?
Absolutely! You can freeze this delicious soup in freezer-safe containers or heavy-duty freezer bags for up to 3 months. It’s best to leave about an inch of space at the top of the container to allow for expansion. Just remember to thaw it overnight in the fridge before reheating!

How do I reheat frozen Creamy White Chicken and Rice Soup?
For a cozy bowl of soup, first, thaw it in the refrigerator overnight. When you’re ready to enjoy, heat it on the stovetop over low to medium heat, stirring often. You may need to add a splash of whole milk to bring back that luscious creaminess!

Is this soup suitable for people with allergies?
Great question! The recipe contains common allergens such as milk and flour. If you’re serving someone with gluten intolerance, consider substituting the all-purpose flour with a gluten-free blend. Always check ingredient labels to ensure safety for those with allergies or sensitivities.

What if my soup turns out too thick after refrigerating?
No worries! If you find your Creamy White Chicken and Rice Soup has thickened upon chilling, simply stir in a bit of warm water or milk as you reheat it. This not only restores the consistency but keeps it rich and enjoyable!

Creamy White Chicken and Rice Soup

Creamy White Chicken and Rice Soup

Enjoy a cozy bowl of Creamy White Chicken and Rice Soup, perfect for chilly evenings and easy to prepare.
Print Recipe Pin Recipe
Prep Time 15 minutes mins
Cook Time 45 minutes mins
Total Time 1 hour hr
Servings: 4 bowls
Course: DINNER RECIPES
Cuisine: American
Calories: 350
Ingredients Equipment Method Nutrition Notes

Ingredients
  

For the Soup Base
  • 2 tablespoons Olive oil Adds depth and richness
  • 1 medium Yellow onion Diced small for quicker cooking
  • 3 cloves Garlic Freshly minced
  • 2 medium Carrots Sliced
  • 2 stalks Celery
  • 1 pound Chicken breast Boneless and skinless
  • 1 leaf Bay leaf Discard before serving
  • 1 teaspoon Dried oregano Classic flavor profile
  • 1 teaspoon Dried thyme Adds warmth and earthiness
  • 1 teaspoon Black pepper Freshly cracked
For the Rice and Broth
  • 1 cup Wild rice mix Enhances the texture
  • 6 cups Water Adjust depending on desired thickness
For the Creamy Finish
  • 4 tablespoons Butter Key for roux
  • 1/4 cup All-purpose flour For roux
  • 2 cups Whole milk For richness
  • 1 tablespoon Fresh parsley Chopped, for garnish
  • 1-2 teaspoons Salt To taste

Equipment

  • Large pot
  • separate pan

Method
 

How to Make Creamy White Chicken and Rice Soup
  1. In a large pot, warm the olive oil over medium heat until it shimmers.
  2. Add the diced yellow onion and cook until translucent, about 5-7 minutes.
  3. Stir in the minced garlic and sauté for an additional minute.
  4. Toss in the sliced carrots and celery and cook until softened, around 5-6 minutes.
  5. Place the chicken breast into the pot along with bay leaf, oregano, thyme, and black pepper.
  6. Add the wild rice mix and 6 cups of water to the pot and bring to a boil.
  7. Once boiling, reduce heat and let it simmer for about 45 minutes until rice is tender.
  8. Remove the chicken breast from the pot, shred it, and return it to the soup.
  9. In a separate pan, melt the butter and whisk in the flour to create a roux.
  10. Gradually whisk in whole milk to the roux and cook until thickened, about 4-5 minutes.
  11. Stir the roux into the soup along with fresh parsley and salt to taste.

Nutrition

Serving: 1bowlCalories: 350kcalCarbohydrates: 40gProtein: 30gFat: 10gSaturated Fat: 4gPolyunsaturated Fat: 0.5gMonounsaturated Fat: 0.5gCholesterol: 75mgSodium: 500mgPotassium: 800mgFiber: 3gSugar: 2gVitamin A: 500IUVitamin C: 4mgCalcium: 200mgIron: 3mg

Notes

Garnish with extra parsley or a sprinkle of fresh black pepper before serving.

Tried this recipe?

Let us know how it was!

Filed Under: DINNER RECIPES

Slow Cooker Chicken Stew

December 19, 2025 by JudyWhite Leave a Comment

There’s something incredibly comforting about coming home to the warm embrace of a home-cooked meal, especially on those chilly evenings when time seems to slip away. Picture this: the rich aroma of a slow-cooked chicken stew wafting through your living space, mingling with hints of fragrant rosemary and thyme. It’s a scene that invites both warmth and hunger!

I discovered this Slow Cooker Chicken Stew with White Wine and Veggies on one such gray afternoon, where I found myself yearning for something hearty yet effortless. All it took was a handful of ingredients, and a trusty slow cooker, to transform simple chicken thighs and vibrant vegetables into a culinary delight that would have anyone forgetting fast food forever.

Perfect for busy weeknights or cozy gatherings, this stew isn’t just about ease—it’s a celebration of flavors, with tender chicken and veggies that lure everyone to the table. So, if you’re tired of the same old dinner routine and want to impress without the stress, let’s dive into this delightful recipe!

Why You'll Love This Slow Cooker Chicken Stew

  • This Slow Cooker Chicken Stew is a dream come true for busy cooks since it requires minimal prep and allows the slow cooker to do all the work for you.
  • The combination of white wine and fresh herbs brings an incredible depth of flavor that elevates this dish to comfort food perfection.
  • Its versatility means you can easily adapt the ingredients based on what you have on hand, making it a great option for any day of the week.
  • With its inviting aroma and hearty ingredients, this stew is guaranteed to impress your family and friends, turning any meal into a memorable gathering.

Slow Cooker Chicken Stew Ingredients

• Get ready to savor every spoonful!

For the Stew

  • 1 tablespoon olive oil – a heart-healthy fat that helps to brown the chicken perfectly.
  • 1.5 pounds boneless skinless chicken thighs – these provide a juicy texture and rich flavor to the stew.
  • freshly ground salt – enhances all the flavors; adjust to your taste.
  • freshly ground black pepper – add to taste for a nice kick of heat.
  • 2 cups chicken broth – the base of your stew, lending savory depth.
  • 0.5 cup dry white wine – adds a wonderful acidity and richness; think of it as a secret ingredient!
  • 1 tablespoon worcestershire sauce – brings umami goodness and a delightful complexity.
  • 1 teaspoon balsamic vinegar – this cuts through the richness, adding just the right touch of sweetness.

For the Herbs and Aromatics

  • 2 teaspoons chopped fresh rosemary – this aromatic herb brings a pine-like freshness to the stew.
  • 2 teaspoons chopped fresh thyme – adds an earthy, grounding flavor that complements the chicken beautifully.
  • 0.5 teaspoon dried oregano – a classic herb that enhances the overall flavor profile.
  • 6 garlic cloves – these pack a flavorful punch and should never be skimped on!
  • 1 large yellow onion – it adds sweetness and depth when caramelized.

For the Vegetables

  • 3 large carrots – these lend a natural sweetness and vibrant color.
  • 1 pound yukon gold potatoes – creamy and buttery, they make the stew hearty and satisfying.
  • 0.67 cup frozen peas – for a pop of color and sweetness to balance the dish.

For Thickening the Stew

  • 0.25 cup all purpose flour – helps to thicken the stew and create a luscious consistency.
  • 0.5 cup unsweetened almond milk – this adds creaminess without dairy; perfect for those with dietary restrictions.

Feel the excitement build as you gather these ingredients for your Slow Cooker Chicken Stew!

How to Make Slow Cooker Chicken Stew

  1. Sauté the chicken: Add 1 tablespoon olive oil to a large skillet and place over high heat. Season the chicken thighs with salt and pepper, and brown them for about 5-6 minutes until golden. Transfer to a large slow cooker.

  2. Combine the liquids and seasonings: In the slow cooker, add chicken broth, dry white wine, Worcestershire sauce, balsamic vinegar, thyme, rosemary, oregano, salt, and pepper. Stir well to blend all the flavors.

  3. Add the vegetables: Toss in minced garlic, diced onion, sliced carrots, and cubed potatoes. Cover and cook on low for 7-8 hours or on high for 4-5 hours, until everything is tender and fragrant.

  4. Thicken the stew: Remove 1/2 cup of broth from the slow cooker and combine it in a medium bowl with ½ cup almond milk and ¼ cup flour, whisking until completely smooth. Stir this mixture back into the slow cooker and mix gently.

  5. Finish with peas: Stir in frozen peas and cook uncovered on HIGH for 15-20 minutes until the stew thickens up beautifully. Taste and adjust seasoning with extra salt and pepper as necessary.

Optional: Garnish with fresh parsley for an extra splash of color and flavor!

Exact quantities are listed in the recipe card below.

Slow Cooker Chicken Stew Variations

Feel free to get creative with this stew and make it your own, enhancing flavors and personalizing ingredients to suit your taste!

  • Dairy-Free: Substitute almond milk with coconut milk for a creamy, tropical twist that adds a hint of sweetness.

  • Vegetable-Loaded: Add more veggies like bell peppers, zucchini, or celery for extra nutrition and colors that make every bowl a feast.

  • Spicy Kick: Toss in a teaspoon of red pepper flakes or diced jalapeños to bring some heat, warming you from the inside out.

  • Herb Medley: Experiment with different herbs like parsley, dill, or tarragon for unique flavor profiles that take your stew to new heights.

  • Protein Swap: If you’re not a fan of chicken, try using turkey, beef, or even mushrooms for a hearty, satisfying alternative that’s equally delicious.

  • Wine Flavor Boost: Replace dry white wine with a splash of sherry or add a hint of lemon juice for a zesty and bright twist.

  • Root Veggie Variation: Replace Yukon gold potatoes with sweet potatoes or parsnips for a sweet, earthy flavor that pairs beautifully with the spices.

  • Global Twist: Stir in a tablespoon of curry powder or harissa for an exotic flavor journey that makes this dish truly memorable.

Each variation invites you to savor new experiences, enriching the joyful ritual of preparing a home-cooked meal. Happy cooking!

How to Store and Freeze Slow Cooker Chicken Stew

Room Temperature: Store any leftovers at room temperature for no more than 2 hours to prevent bacterial growth.

Fridge: Place cooled stew in an airtight container and refrigerate for up to 3 days. When reheating, make sure it is heated thoroughly.

Freezer: Freeze Slow Cooker Chicken Stew in a freezer-safe container for up to 3 months. Thaw overnight in the fridge before reheating.

Reheating: Reheat on the stovetop or in the microwave until heated through. Stir well to ensure even heating.

What to Serve with Slow Cooker Chicken Stew?

Set the stage for a cozy dinner with delicious side dishes that will complement every warm spoonful of your savory stew.

  • Crusty Bread: A slice of freshly baked bread is perfect for soaking up the rich broth, creating a delightful textural contrast. There’s nothing quite like tearing off a piece and diving into the stew.

  • Garlic Green Beans: Steamed green beans tossed with garlic offer a bright, fresh crunch, balancing the heartiness with a touch of vibrancy. Their crispness makes for the ideal pairing!

  • Simple Salad: A light mixed greens salad with a vinaigrette can brighten the meal, adding freshness and a pop of color to counter the rich flavors of the stew.

  • Creamy Polenta: Velvety polenta serves as a comforting base, soaking up all the delicious juices and adding a creamy dimension to your dinner. It’s an unexpected twist that will impress your loved ones!

  • Roasted Brussels Sprouts: Crispy, caramelized sprouts with a sprinkle of parmesan offer an earthy side, enhancing the wholesome nature of the stew. Their nutty flavors will echo those of the herbs in the dish.

  • Chardonnay: A chilled glass of chardonnay would mirror the wine used in cooking, providing smooth notes that lift the meal while enhancing its flavors.

  • Apple Crisp: For dessert, a warm apple crisp drizzled in caramel adds a sweet finishing touch, making the evening feel complete and oh so satisfying. It’s the perfect sweet closure to a heartwarming meal!

Make Ahead Options

Preparing this Slow Cooker Chicken Stew ahead of time is a fantastic way to streamline your meal planning and save precious time on busy days! You can chop the vegetables (carrots, onions, and potatoes) and marinate the chicken in the seasonings up to 24 hours in advance; just be sure to refrigerate them tightly sealed to maintain freshness. Additionally, you can combine the broth, white wine, and thickening ingredients in a separate container to make the cooking process even smoother. When you’re ready to serve, simply transfer everything into your slow cooker, set it to cook, and let the flavors develop beautifully—enjoy a comforting meal that tastes like you’ve slaved away in the kitchen but is ready with minimal effort!

Chef's Helpful Tips

  • When making Slow Cooker Chicken Stew, always brown the chicken in the skillet first to develop a rich flavor before adding it to the slow cooker.
  • Don’t rush the cooking time; low and slow allows the ingredients to meld beautifully, creating a stew that’s bursting with flavor.
  • To ensure the perfect consistency, remove a portion of broth to mix with flour and almond milk before adding it back into the slow cooker for thickening.
  • Remember that different slow cookers may vary in temperature, so check for doneness and adjust the cooking time if necessary to prevent overcooking.

Slow Cooker Chicken Stew with White Wine and Veggies Recipe FAQs

How do I select the best chicken thighs for my stew?
Absolutely! When choosing chicken thighs, look for pieces that are plump and have a nice, pink hue. Avoid any thighs with dark spots or a dull appearance, as they might be past their prime. Fresh chicken should feel moist but not sticky.

What are the best storage methods for my Slow Cooker Chicken Stew?
You can store your leftover stew in an airtight container in the fridge for up to 3 days. Make sure it cools completely before sealing it up. When reheating, do so gently on the stovetop until heated through to maintain flavor and texture.

Can I freeze my Slow Cooker Chicken Stew?
Yes, you can! To freeze your stew, transfer it to a freezer-safe container once it has cooled. It’s best to freeze it in individual portions for easy reheating later. It should be consumed within 3 months for optimal quality. When you’re ready to enjoy it again, simply thaw overnight in the fridge and reheat on the stovetop or in the microwave until steaming hot.

What should I do if my stew is too thin after cooking?
If you find your stew isn’t thickening as you’d like, don’t worry! You can create a simple slurry by mixing equal parts of flour and cold water, then whisking it into your stew about 15-20 minutes before serving. Stir well and let it cook uncovered; this will help it reach the desired consistency.

Is this recipe safe for someone with dairy allergies?
Very! This Slow Cooker Chicken Stew is made with unsweetened almond milk instead of traditional dairy milk, making it a suitable option for those with lactose intolerance or dairy allergies. Always double-check the labels of your ingredients to ensure they’re allergy-friendly, and feel free to customize further based on specific dietary needs!

Slow Cooker Chicken Stew

Slow Cooker Chicken Stew

This Slow Cooker Chicken Stew is the perfect cozy dish for chilly evenings, combining flavorful chicken, vegetables, and aromatic herbs effortlessly.
Print Recipe Pin Recipe
Prep Time 15 minutes mins
Cook Time 8 hours hrs
Total Time 8 hours hrs 15 minutes mins
Servings: 6 servings
Course: DINNER RECIPES
Cuisine: American
Calories: 350
Ingredients Equipment Method Nutrition Notes

Ingredients
  

For the Stew
  • 1 tablespoon olive oil a heart-healthy fat that helps to brown the chicken perfectly.
  • 1.5 pounds boneless skinless chicken thighs these provide a juicy texture and rich flavor to the stew.
  • freshly ground salt enhances all the flavors; adjust to your taste.
  • freshly ground black pepper add to taste for a nice kick of heat.
  • 2 cups chicken broth the base of your stew, lending savory depth.
  • 0.5 cup dry white wine adds a wonderful acidity and richness.
  • 1 tablespoon worcestershire sauce brings umami goodness and a delightful complexity.
  • 1 teaspoon balsamic vinegar this cuts through the richness, adding just the right touch of sweetness.
For the Herbs and Aromatics
  • 2 teaspoons chopped fresh rosemary this aromatic herb brings a pine-like freshness.
  • 2 teaspoons chopped fresh thyme adds an earthy, grounding flavor that complements the chicken beautifully.
  • 0.5 teaspoon dried oregano a classic herb that enhances the overall flavor profile.
  • 6 garlic cloves these pack a flavorful punch.
  • 1 large yellow onion it adds sweetness and depth when caramelized.
For the Vegetables
  • 3 large carrots these lend a natural sweetness and vibrant color.
  • 1 pound yukon gold potatoes creamy and buttery, they make the stew hearty and satisfying.
  • 0.67 cup frozen peas for a pop of color and sweetness.
For Thickening the Stew
  • 0.25 cup all purpose flour helps to thicken the stew and create a luscious consistency.
  • 0.5 cup unsweetened almond milk this adds creaminess without dairy.

Equipment

  • Slow Cooker
  • Skillet

Method
 

How to Make Slow Cooker Chicken Stew
  1. Sauté the chicken: Add 1 tablespoon olive oil to a large skillet and place over high heat. Season the chicken thighs with salt and pepper, and brown them for about 5-6 minutes until golden. Transfer to a large slow cooker.
  2. Combine the liquids and seasonings: In the slow cooker, add chicken broth, dry white wine, Worcestershire sauce, balsamic vinegar, thyme, rosemary, oregano, salt, and pepper. Stir well to blend all the flavors.
  3. Add the vegetables: Toss in minced garlic, diced onion, sliced carrots, and cubed potatoes. Cover and cook on low for 7-8 hours or on high for 4-5 hours, until everything is tender and fragrant.
  4. Thicken the stew: Remove 1/2 cup of broth from the slow cooker and combine it in a medium bowl with ½ cup almond milk and ¼ cup flour, whisking until completely smooth. Stir this mixture back into the slow cooker and mix gently.
  5. Finish with peas: Stir in frozen peas and cook uncovered on HIGH for 15-20 minutes until the stew thickens up beautifully. Taste and adjust seasoning with extra salt and pepper as necessary.

Nutrition

Serving: 1servingCalories: 350kcalCarbohydrates: 30gProtein: 25gFat: 15gSaturated Fat: 3gPolyunsaturated Fat: 1gMonounsaturated Fat: 5gCholesterol: 100mgSodium: 800mgPotassium: 800mgFiber: 5gSugar: 4gVitamin A: 300IUVitamin C: 20mgCalcium: 50mgIron: 2mg

Notes

Optional: Garnish with fresh parsley for an extra splash of color and flavor!

Tried this recipe?

Let us know how it was!

Filed Under: DINNER RECIPES

Slow Cooker Chicken Stew

December 19, 2025 by JudyWhite Leave a Comment

There’s something incredibly comforting about coming home to the warm embrace of a home-cooked meal, especially on those chilly evenings when time seems to slip away. Picture this: the rich aroma of a slow-cooked chicken stew wafting through your living space, mingling with hints of fragrant rosemary and thyme. It’s a scene that invites both warmth and hunger!

I discovered this Slow Cooker Chicken Stew with White Wine and Veggies on one such gray afternoon, where I found myself yearning for something hearty yet effortless. All it took was a handful of ingredients, and a trusty slow cooker, to transform simple chicken thighs and vibrant vegetables into a culinary delight that would have anyone forgetting fast food forever.

Perfect for busy weeknights or cozy gatherings, this stew isn’t just about ease—it’s a celebration of flavors, with tender chicken and veggies that lure everyone to the table. So, if you’re tired of the same old dinner routine and want to impress without the stress, let’s dive into this delightful recipe!

Why You'll Love This Slow Cooker Chicken Stew

  • This Slow Cooker Chicken Stew is a dream come true for busy cooks since it requires minimal prep and allows the slow cooker to do all the work for you.
  • The combination of white wine and fresh herbs brings an incredible depth of flavor that elevates this dish to comfort food perfection.
  • Its versatility means you can easily adapt the ingredients based on what you have on hand, making it a great option for any day of the week.
  • With its inviting aroma and hearty ingredients, this stew is guaranteed to impress your family and friends, turning any meal into a memorable gathering.

Slow Cooker Chicken Stew Ingredients

• Get ready to savor every spoonful!

For the Stew

  • 1 tablespoon olive oil – a heart-healthy fat that helps to brown the chicken perfectly.
  • 1.5 pounds boneless skinless chicken thighs – these provide a juicy texture and rich flavor to the stew.
  • freshly ground salt – enhances all the flavors; adjust to your taste.
  • freshly ground black pepper – add to taste for a nice kick of heat.
  • 2 cups chicken broth – the base of your stew, lending savory depth.
  • 0.5 cup dry white wine – adds a wonderful acidity and richness; think of it as a secret ingredient!
  • 1 tablespoon worcestershire sauce – brings umami goodness and a delightful complexity.
  • 1 teaspoon balsamic vinegar – this cuts through the richness, adding just the right touch of sweetness.

For the Herbs and Aromatics

  • 2 teaspoons chopped fresh rosemary – this aromatic herb brings a pine-like freshness to the stew.
  • 2 teaspoons chopped fresh thyme – adds an earthy, grounding flavor that complements the chicken beautifully.
  • 0.5 teaspoon dried oregano – a classic herb that enhances the overall flavor profile.
  • 6 garlic cloves – these pack a flavorful punch and should never be skimped on!
  • 1 large yellow onion – it adds sweetness and depth when caramelized.

For the Vegetables

  • 3 large carrots – these lend a natural sweetness and vibrant color.
  • 1 pound yukon gold potatoes – creamy and buttery, they make the stew hearty and satisfying.
  • 0.67 cup frozen peas – for a pop of color and sweetness to balance the dish.

For Thickening the Stew

  • 0.25 cup all purpose flour – helps to thicken the stew and create a luscious consistency.
  • 0.5 cup unsweetened almond milk – this adds creaminess without dairy; perfect for those with dietary restrictions.

Feel the excitement build as you gather these ingredients for your Slow Cooker Chicken Stew!

How to Make Slow Cooker Chicken Stew

  1. Sauté the chicken: Add 1 tablespoon olive oil to a large skillet and place over high heat. Season the chicken thighs with salt and pepper, and brown them for about 5-6 minutes until golden. Transfer to a large slow cooker.

  2. Combine the liquids and seasonings: In the slow cooker, add chicken broth, dry white wine, Worcestershire sauce, balsamic vinegar, thyme, rosemary, oregano, salt, and pepper. Stir well to blend all the flavors.

  3. Add the vegetables: Toss in minced garlic, diced onion, sliced carrots, and cubed potatoes. Cover and cook on low for 7-8 hours or on high for 4-5 hours, until everything is tender and fragrant.

  4. Thicken the stew: Remove 1/2 cup of broth from the slow cooker and combine it in a medium bowl with ½ cup almond milk and ¼ cup flour, whisking until completely smooth. Stir this mixture back into the slow cooker and mix gently.

  5. Finish with peas: Stir in frozen peas and cook uncovered on HIGH for 15-20 minutes until the stew thickens up beautifully. Taste and adjust seasoning with extra salt and pepper as necessary.

Optional: Garnish with fresh parsley for an extra splash of color and flavor!

Exact quantities are listed in the recipe card below.

How to Store and Freeze Slow Cooker Chicken Stew

Room Temperature: Store any leftovers at room temperature for no more than 2 hours to prevent bacterial growth.

Fridge: Place cooled stew in an airtight container and refrigerate for up to 3 days. When reheating, make sure it is heated thoroughly.

Freezer: Freeze Slow Cooker Chicken Stew in a freezer-safe container for up to 3 months. Thaw overnight in the fridge before reheating.

Reheating: Reheat on the stovetop or in the microwave until heated through. Stir well to ensure even heating.

Make Ahead Options

Preparing this Slow Cooker Chicken Stew ahead of time is a fantastic way to streamline your meal planning and save precious time on busy days! You can chop the vegetables (carrots, onions, and potatoes) and marinate the chicken in the seasonings up to 24 hours in advance; just be sure to refrigerate them tightly sealed to maintain freshness. Additionally, you can combine the broth, white wine, and thickening ingredients in a separate container to make the cooking process even smoother. When you’re ready to serve, simply transfer everything into your slow cooker, set it to cook, and let the flavors develop beautifully—enjoy a comforting meal that tastes like you’ve slaved away in the kitchen but is ready with minimal effort!

What to Serve with Slow Cooker Chicken Stew?

Set the stage for a cozy dinner with delicious side dishes that will complement every warm spoonful of your savory stew.

  • Crusty Bread: A slice of freshly baked bread is perfect for soaking up the rich broth, creating a delightful textural contrast. There’s nothing quite like tearing off a piece and diving into the stew.

  • Garlic Green Beans: Steamed green beans tossed with garlic offer a bright, fresh crunch, balancing the heartiness with a touch of vibrancy. Their crispness makes for the ideal pairing!

  • Simple Salad: A light mixed greens salad with a vinaigrette can brighten the meal, adding freshness and a pop of color to counter the rich flavors of the stew.

  • Creamy Polenta: Velvety polenta serves as a comforting base, soaking up all the delicious juices and adding a creamy dimension to your dinner. It’s an unexpected twist that will impress your loved ones!

  • Roasted Brussels Sprouts: Crispy, caramelized sprouts with a sprinkle of parmesan offer an earthy side, enhancing the wholesome nature of the stew. Their nutty flavors will echo those of the herbs in the dish.

  • Chardonnay: A chilled glass of chardonnay would mirror the wine used in cooking, providing smooth notes that lift the meal while enhancing its flavors.

  • Apple Crisp: For dessert, a warm apple crisp drizzled in caramel adds a sweet finishing touch, making the evening feel complete and oh so satisfying. It’s the perfect sweet closure to a heartwarming meal!

Slow Cooker Chicken Stew Variations

Feel free to get creative with this stew and make it your own, enhancing flavors and personalizing ingredients to suit your taste!

  • Dairy-Free: Substitute almond milk with coconut milk for a creamy, tropical twist that adds a hint of sweetness.

  • Vegetable-Loaded: Add more veggies like bell peppers, zucchini, or celery for extra nutrition and colors that make every bowl a feast.

  • Spicy Kick: Toss in a teaspoon of red pepper flakes or diced jalapeños to bring some heat, warming you from the inside out.

  • Herb Medley: Experiment with different herbs like parsley, dill, or tarragon for unique flavor profiles that take your stew to new heights.

  • Protein Swap: If you’re not a fan of chicken, try using turkey, beef, or even mushrooms for a hearty, satisfying alternative that’s equally delicious.

  • Wine Flavor Boost: Replace dry white wine with a splash of sherry or add a hint of lemon juice for a zesty and bright twist.

  • Root Veggie Variation: Replace Yukon gold potatoes with sweet potatoes or parsnips for a sweet, earthy flavor that pairs beautifully with the spices.

  • Global Twist: Stir in a tablespoon of curry powder or harissa for an exotic flavor journey that makes this dish truly memorable.

Each variation invites you to savor new experiences, enriching the joyful ritual of preparing a home-cooked meal. Happy cooking!

Chef's Helpful Tips

  • When making Slow Cooker Chicken Stew, always brown the chicken in the skillet first to develop a rich flavor before adding it to the slow cooker.
  • Don’t rush the cooking time; low and slow allows the ingredients to meld beautifully, creating a stew that’s bursting with flavor.
  • To ensure the perfect consistency, remove a portion of broth to mix with flour and almond milk before adding it back into the slow cooker for thickening.
  • Remember that different slow cookers may vary in temperature, so check for doneness and adjust the cooking time if necessary to prevent overcooking.

Slow Cooker Chicken Stew with White Wine and Veggies Recipe FAQs

How do I select the best chicken thighs for my stew?
Absolutely! When choosing chicken thighs, look for pieces that are plump and have a nice, pink hue. Avoid any thighs with dark spots or a dull appearance, as they might be past their prime. Fresh chicken should feel moist but not sticky.

What are the best storage methods for my Slow Cooker Chicken Stew?
You can store your leftover stew in an airtight container in the fridge for up to 3 days. Make sure it cools completely before sealing it up. When reheating, do so gently on the stovetop until heated through to maintain flavor and texture.

Can I freeze my Slow Cooker Chicken Stew?
Yes, you can! To freeze your stew, transfer it to a freezer-safe container once it has cooled. It’s best to freeze it in individual portions for easy reheating later. It should be consumed within 3 months for optimal quality. When you’re ready to enjoy it again, simply thaw overnight in the fridge and reheat on the stovetop or in the microwave until steaming hot.

What should I do if my stew is too thin after cooking?
If you find your stew isn’t thickening as you’d like, don’t worry! You can create a simple slurry by mixing equal parts of flour and cold water, then whisking it into your stew about 15-20 minutes before serving. Stir well and let it cook uncovered; this will help it reach the desired consistency.

Is this recipe safe for someone with dairy allergies?
Very! This Slow Cooker Chicken Stew is made with unsweetened almond milk instead of traditional dairy milk, making it a suitable option for those with lactose intolerance or dairy allergies. Always double-check the labels of your ingredients to ensure they’re allergy-friendly, and feel free to customize further based on specific dietary needs!

Slow Cooker Chicken Stew

Slow Cooker Chicken Stew

This Slow Cooker Chicken Stew is the perfect cozy dish for chilly evenings, combining flavorful chicken, vegetables, and aromatic herbs effortlessly.
Print Recipe Pin Recipe
Prep Time 15 minutes mins
Cook Time 8 hours hrs
Total Time 8 hours hrs 15 minutes mins
Servings: 6 servings
Course: DINNER RECIPES
Cuisine: American
Calories: 350
Ingredients Equipment Method Nutrition Notes

Ingredients
  

For the Stew
  • 1 tablespoon olive oil a heart-healthy fat that helps to brown the chicken perfectly.
  • 1.5 pounds boneless skinless chicken thighs these provide a juicy texture and rich flavor to the stew.
  • freshly ground salt enhances all the flavors; adjust to your taste.
  • freshly ground black pepper add to taste for a nice kick of heat.
  • 2 cups chicken broth the base of your stew, lending savory depth.
  • 0.5 cup dry white wine adds a wonderful acidity and richness.
  • 1 tablespoon worcestershire sauce brings umami goodness and a delightful complexity.
  • 1 teaspoon balsamic vinegar this cuts through the richness, adding just the right touch of sweetness.
For the Herbs and Aromatics
  • 2 teaspoons chopped fresh rosemary this aromatic herb brings a pine-like freshness.
  • 2 teaspoons chopped fresh thyme adds an earthy, grounding flavor that complements the chicken beautifully.
  • 0.5 teaspoon dried oregano a classic herb that enhances the overall flavor profile.
  • 6 garlic cloves these pack a flavorful punch.
  • 1 large yellow onion it adds sweetness and depth when caramelized.
For the Vegetables
  • 3 large carrots these lend a natural sweetness and vibrant color.
  • 1 pound yukon gold potatoes creamy and buttery, they make the stew hearty and satisfying.
  • 0.67 cup frozen peas for a pop of color and sweetness.
For Thickening the Stew
  • 0.25 cup all purpose flour helps to thicken the stew and create a luscious consistency.
  • 0.5 cup unsweetened almond milk this adds creaminess without dairy.

Equipment

  • Slow Cooker
  • Skillet

Method
 

How to Make Slow Cooker Chicken Stew
  1. Sauté the chicken: Add 1 tablespoon olive oil to a large skillet and place over high heat. Season the chicken thighs with salt and pepper, and brown them for about 5-6 minutes until golden. Transfer to a large slow cooker.
  2. Combine the liquids and seasonings: In the slow cooker, add chicken broth, dry white wine, Worcestershire sauce, balsamic vinegar, thyme, rosemary, oregano, salt, and pepper. Stir well to blend all the flavors.
  3. Add the vegetables: Toss in minced garlic, diced onion, sliced carrots, and cubed potatoes. Cover and cook on low for 7-8 hours or on high for 4-5 hours, until everything is tender and fragrant.
  4. Thicken the stew: Remove 1/2 cup of broth from the slow cooker and combine it in a medium bowl with ½ cup almond milk and ¼ cup flour, whisking until completely smooth. Stir this mixture back into the slow cooker and mix gently.
  5. Finish with peas: Stir in frozen peas and cook uncovered on HIGH for 15-20 minutes until the stew thickens up beautifully. Taste and adjust seasoning with extra salt and pepper as necessary.

Nutrition

Serving: 1servingCalories: 350kcalCarbohydrates: 30gProtein: 25gFat: 15gSaturated Fat: 3gPolyunsaturated Fat: 1gMonounsaturated Fat: 5gCholesterol: 100mgSodium: 800mgPotassium: 800mgFiber: 5gSugar: 4gVitamin A: 300IUVitamin C: 20mgCalcium: 50mgIron: 2mg

Notes

Optional: Garnish with fresh parsley for an extra splash of color and flavor!

Tried this recipe?

Let us know how it was!

Filed Under: DINNER RECIPES

Chicken Enchiladas with Sour Cream White Sauce

December 19, 2025 by JudyWhite Leave a Comment

As I flipped through my recipe collection on a rainy afternoon, I stumbled across a dish that instantly transported me to sun-soaked evenings filled with laughter: Chicken Enchiladas with Sour Cream White Sauce. The thought of tender chicken wrapped in pillowy tortillas, smothered in a velvety, tangy sauce got my taste buds tingling with anticipation.

With each bite, the gentle heat of serrano and jalapeño peppers dances with the creamy richness of sour cream, creating a delightful harmony that feels both comforting and exciting. This dish is not just another weeknight meal; it’s a celebration of flavors that brings family and friends together around the table.

The best part? You won’t need to spend hours in the kitchen to impress your loved ones. In just under an hour, you can serve these cheesy, scrumptious enchiladas straight from your oven. Whether you’re a seasoned chef or just starting on your culinary journey, this recipe is your ticket to a satisfying home-cooked meal that’s sure to leave everyone asking for seconds. Ready to dive in? Let’s get cooking!

Why You'll Love This Chicken Enchiladas with Sour Cream White Sauce

  • This recipe is incredibly easy to whip up, making it a perfect choice for busy weeknights or impromptu gatherings.
  • The flavor combination of the creamy sour cream and zesty peppers will tantalize your taste buds and leave everyone craving more.
  • With its versatility, you can easily customize the fillings or toppings to suit any dietary preference, ensuring everyone at the table is satisfied.
  • Plus, the visual appeal of these cheesy, bubbling enchiladas fresh from the oven is simply irresistible, making them a crowd-pleaser that is sure to impress.

Chicken Enchiladas with Sour Cream White Sauce Ingredients

Unlock the secrets to this flavorful dish!

For the Sauce
• Butter – adds richness and depth to the sauce.
• Serrano peppers – provides a mild heat that elevates the dish.
• Jalapeño pepper – adds a zesty kick; feel free to adjust to your spice level.
• Garlic – brings aromatic flavor to the sauce base.
• All-purpose flour – thickens the sauce for a creamy consistency.
• Chicken broth – infuses a savory depth to the sauce.
• Sour cream – gives a creamy tanginess that pairs beautifully with the spices.
• Salsa verde – adds a fresh, tangy kick to the overall flavor profile.
• Cumin – contributes earthy warmth, essential for authentic taste.
• Salt – enhances all flavors in the sauce.
• Garlic powder – boosts garlic taste without the hassle of peeling.
• White pepper – imparts subtle spice without affecting the color.
• Cayenne – adds a bit of heat; adjust according to preference.
• Cilantro – brings freshness and a hint of brightness.

For the Filling
• Cooked and shredded chicken – the star protein of your enchiladas, full of flavor.
• Flour tortillas – soft and pliable, perfect for wrapping up delicious fillings.
• Sharp cheddar cheese – adds a bold, cheesy flavor that melts beautifully.
• Monterrey Jack cheese – gives a creamy texture that balances well with cheddar.
• Yellow onion – sautéed for sweetness and added depth in the filling.

Dive into making these Chicken Enchiladas with Sour Cream White Sauce for a delightful meal everyone will adore!

How to Make Chicken Enchiladas with Sour Cream White Sauce

  1. Melt Butter: In a skillet, melt the butter over medium heat until bubbling and fragrant. Add the diced serrano and jalapeño peppers along with the onion, sautéing until softened, about 3-5 minutes.

  2. Add Garlic: Stir in the minced garlic and cook for another minute, letting that delicious aroma fill your kitchen.

  3. Mix in Flour: Sprinkle in the all-purpose flour, stirring continuously for 1-2 minutes to create a roux, which will help thicken the sauce.

  4. Whisk in Broth: Gradually whisk in the chicken broth, bringing the mixture to a gentle simmer. This will create a savory base for your sauce.

  5. Incorporate Sour Cream: Stir in the sour cream, salsa verde, cumin, salt, garlic powder, white pepper, cayenne, and half of the cilantro. Allow to simmer for about 5 minutes, until thick and well combined.

  6. Preheat Oven: While the sauce simmers, preheat your oven to 350°F (175°C) to prepare for baking those tasty enchiladas.

  7. Prepare Filling: In a separate bowl, mix together the cooked chicken, shredded cheeses, and the remaining cilantro until fully combined and creamy.

  8. Fill Tortillas: Take each tortilla and fill it generously with the chicken mixture. Roll them up tightly and place seam side down in a greased baking dish.

  9. Add Sauce: Pour the luscious sour cream sauce generously over the enchiladas, ensuring every bit is covered.

  10. Bake: Place the dish in the preheated oven and bake for 25-30 minutes, or until the enchiladas are bubbly and golden brown on top.

Optional: Garnish with fresh cilantro or a sprinkle of lime juice before serving for an added zest!

Exact quantities are listed in the recipe card below.

Storage Tips for Chicken Enchiladas with Sour Cream White Sauce

Fridge: Keep any leftovers in an airtight container for up to 3 days. This will preserve the creamy texture of the sour cream sauce while allowing you to enjoy these delicious enchiladas again.

Freezer: Store wrapped enchiladas in freezer-safe containers or tightly covered with foil for up to 3 months. Thaw in the fridge overnight before reheating for best results.

Reheating: To reheat, place enchiladas in a baking dish, cover with foil, and heat at 350°F (175°C) for about 20-25 minutes, or until warmed through. Add a splash of chicken broth to maintain moisture.

Serving Recommendations: For the best flavor experience, garnish with fresh cilantro or a squeeze of lime right before serving those tasty Chicken Enchiladas with Sour Cream White Sauce!

Chicken Enchiladas with Sour Cream White Sauce Variations

Feel free to get creative and tailor these enchiladas to your personal taste with these fun and delicious ideas!

  • Veggie Delight: Substitute shredded chicken with sautéed bell peppers, zucchini, and mushrooms for a hearty vegetarian option. This addition infuses fresh flavors and a satisfying texture.

  • Spicy Kick: Add extra jalapeño slices or a splash of hot sauce to the filling for those who crave heat. You’ll awaken those taste buds and keep everyone on their toes!

  • Creamy Avocado: Blend ripe avocado into the sour cream sauce for a rich, creamy twist that brings a hint of sweetness. This twist adds a lovely creamy layer that balances the spices beautifully.

  • Cheese Lover’s Dream: Swap the cheddar and Monterey Jack for a mixture of pepper jack cheese and queso fresco. This blend creates a flavorful, cheesy richness that enchilada enthusiasts will adore.

  • Whole Wheat Tortillas: Use whole wheat tortillas for a healthier and heartier option. Not only do they offer extra fiber, but they also bring a nutty flavor that complements the dish.

  • Cilantro-Lime Sauce: Replace sour cream with Greek yogurt mixed with lime juice and zest for a tangy flair that brightens the entire dish. This refreshing change will leave everyone wanting more!

  • Smoky Tomatillo: Trade the salsa verde for smoked tomatillo sauce to add a depth of flavor that brings a whole new dimension to these enchiladas. Smoky meets creamy in the best way!

  • Pineapple Salsa: Top your baked enchiladas with a refreshing pineapple salsa for a sweet and tangy contrast to the spiciness. The balance of flavors will take your enchiladas to new tropical heights!

What to Serve with Chicken Enchiladas with Sour Cream White Sauce?

Looking to create a memorable dining experience that complements your flavorful enchiladas? Here are some delightful options!

  • Refried Beans: These creamy and savory beans add a hearty touch, balancing the flavors and textures beautifully.

  • Mexican Rice: Fluffy, seasoned rice provides a perfect base, soaking up the delicious sauce and adding depth to your meal.

  • Guacamole: Smooth and creamy, guacamole brings a refreshing coolness that contrasts the heat from the peppers, enhancing every bite.

  • Corn Salad: A vibrant mix of sweet corn, tomatoes, and lime juice adds a fresh and crunchy element, brightening up the dish’s rich flavors.

  • Pico de Gallo: This zesty salsa adds a burst of freshness with its chopped tomatoes, onions, and cilantro, making the entire meal feel light and rejuvenating.

  • Chips and Salsa: A side of crispy tortilla chips with zesty salsa is the perfect starter, setting a festive tone for your enchilada feast.

  • Margaritas: For a fun pairing, sip on a classic margarita. Its refreshing tang complements the savory notes of the enchiladas.

  • Flan: This creamy dessert, with its caramel topping, offers a sweet and satisfying finish that leaves you and your guests smiling.

Each pairing adds its own unique twist to the meal, ensuring a delightful dining experience that lingers long after the last bite of enchilada is enjoyed!

Make Ahead Options

These Chicken Enchiladas with Sour Cream White Sauce are a fantastic option for meal prep enthusiasts! You can prepare the filling (chicken, cheeses, and spices) and sauce up to 24 hours in advance, allowing the flavors to meld beautifully. Store them in airtight containers in the refrigerator for optimal freshness. When you’re ready to cook, fill the tortillas with the prepared mixture, roll them up, and place them in a greased baking dish. Pour the sauce over the top and bake according to the original instructions. This way, you can enjoy a comforting, homemade meal with minimal effort on busy weeknights!

Chef's Helpful Tips

  • When making Chicken Enchiladas with Sour Cream White Sauce, be sure to sauté the peppers and onions until they are softened to enhance their flavors and sweetness.
  • A common mistake is overcooking the garlic, so add it towards the end of the sautéing process to prevent bitterness.
  • For a smoother sauce, gradually whisk in the chicken broth to avoid lumps and ensure even consistency.
  • To achieve that perfect bubbly and golden top, make sure your oven is preheated to 350°F and keep an eye on your enchiladas during the final minutes of baking to avoid overcooking.

Chicken Enchiladas with Sour Cream White Sauce Recipe FAQs

How do I choose the right peppers for my enchiladas?
Absolutely! For Chicken Enchiladas with Sour Cream White Sauce, select firm serrano and jalapeño peppers with vibrant colors—avoid any that have dark spots or wrinkles. Fresh peppers will give your sauce the best flavor and the right amount of kick.

How should I store leftovers?
Very! To store any leftovers, place the enchiladas in an airtight container in the fridge for up to 3 days. This will keep the creamy texture of the sour cream sauce intact while you savor each delicious bite over the next few days!

Can I freeze my enchiladas?
You bet! For freezing, wrap the enchiladas tightly in foil or use freezer-safe containers, ensuring no air can enter. They can be stored for up to 3 months. When you’re ready to enjoy them, thaw overnight in the fridge, and then reheat as needed.

What’s the best way to reheat enchiladas?
Here’s a comprehensive method: Preheat your oven to 350°F (175°C). Place your enchiladas in a baking dish and cover them with foil to retain moisture. Heat for about 20-25 minutes or until they are warmed through. If they seem a bit dry, adding a splash of chicken broth before covering can work wonders!

Is this recipe suitable for those with allergies?
Absolutely! If you have specific dietary needs, you can easily adapt the Chicken Enchiladas with Sour Cream White Sauce. For a dairy-free option, consider using cashew or coconut cream in place of sour cream. Always check ingredients such as chicken broth for potential allergens, and feel free to substitute with vegetable broth if needed.

Do I need to adjust the recipe for my pets?
It’s a great consideration! While some components like shredded chicken may be pet-friendly, ingredients such as onions and peppers can be harmful to dogs and cats. It’s best to set aside plain cooked chicken for your pets instead. Enjoy your meal worry-free!

Chicken Enchiladas with Sour Cream White Sauce

Chicken Enchiladas with Sour Cream White Sauce

Delicious Chicken Enchiladas with Sour Cream White Sauce combining tender chicken, zesty peppers, and a creamy sauce for a satisfying dinner.
Print Recipe Pin Recipe
Prep Time 20 minutes mins
Cook Time 30 minutes mins
Total Time 50 minutes mins
Servings: 4 enchiladas
Course: DINNER RECIPES
Cuisine: Mexican
Calories: 350
Ingredients Equipment Method Nutrition Notes

Ingredients
  

For the Sauce
  • 4 tablespoons Butter adds richness and depth
  • 1 medium Serrano pepper diced, provides mild heat
  • 1 medium Jalapeño pepper diced, adds a zesty kick
  • 2 cloves Garlic minced, brings aromatic flavor
  • 1/4 cup All-purpose flour thickens the sauce
  • 2 cups Chicken broth infuses savory depth
  • 1 cup Sour cream gives creaminess
  • 1/2 cup Salsa verde adds fresh tang
  • 1 teaspoon Cumin contributes earthy warmth
  • 1/2 teaspoon Salt enhances flavors
  • 1/2 teaspoon Garlic powder boosts garlic taste
  • 1/4 teaspoon White pepper adds subtle spice
  • 1/4 teaspoon Cayenne add heat to preference
  • 1/4 cup Cilantro for garnish and flavor
For the Filling
  • 2 cups Cooked and shredded chicken star protein
  • 8 large Flour tortillas soft and pliable
  • 1 cup Sharp cheddar cheese bold flavor
  • 1 cup Monterrey Jack cheese creamy texture
  • 1 medium Yellow onion sautéed for sweetness

Equipment

  • Skillet
  • Baking dish
  • Mixing bowl

Method
 

Directions
  1. In a skillet, melt the butter over medium heat until bubbling and fragrant. Add the diced serrano and jalapeño peppers along with the onion, sautéing until softened, about 3-5 minutes.
  2. Stir in the minced garlic and cook for another minute, letting that delicious aroma fill your kitchen.
  3. Sprinkle in the all-purpose flour, stirring continuously for 1-2 minutes to create a roux, which will help thicken the sauce.
  4. Gradually whisk in the chicken broth, bringing the mixture to a gentle simmer.
  5. Stir in the sour cream, salsa verde, cumin, salt, garlic powder, white pepper, cayenne, and half of the cilantro. Allow to simmer for about 5 minutes.
  6. While the sauce simmers, preheat your oven to 350°F (175°C).
  7. In a separate bowl, mix together the cooked chicken, shredded cheeses, and the remaining cilantro until fully combined.
  8. Take each tortilla and fill it generously with the chicken mixture. Roll them up tightly and place seam side down in a greased baking dish.
  9. Pour the luscious sour cream sauce generously over the enchiladas.
  10. Place the dish in the preheated oven and bake for 25-30 minutes, or until the enchiladas are bubbly and golden brown on top.

Nutrition

Serving: 1enchiladaCalories: 350kcalCarbohydrates: 40gProtein: 22gFat: 15gSaturated Fat: 7gPolyunsaturated Fat: 1gMonounsaturated Fat: 3gCholesterol: 75mgSodium: 800mgPotassium: 300mgFiber: 2gSugar: 3gVitamin A: 8IUVitamin C: 15mgCalcium: 20mgIron: 10mg

Notes

Garnish with fresh cilantro or a sprinkle of lime juice before serving for an added zest.

Tried this recipe?

Let us know how it was!

Filed Under: DINNER RECIPES

Italian Penicillin Soup with Pastina

December 19, 2025 by JudyWhite Leave a Comment

The first time I tasted Italian Penicillin Soup with Pastina, I was curled up under a blanket on a chilly evening, craving something warm and comforting. As the steam rose from the bowl, it carried with it the fragrant whispers of garlic and chicken broth—a delicious invitation to indulge. This soup is not just a remedy for the soul; it’s a take on a beloved Italian classic that easily transforms humble ingredients into a nourishing meal.

With its blend of vegetables, tiny pasta, and a hint of turmeric, this soup dances on your palate while delivering a wave of warmth. I find that it’s perfect for any time of year: a soothing antidote to winter’s chill or a light dish during the warmer months. Plus, it’s quick to whip up—just 25 minutes from start to finish—making it a delightful option for busy weeknights. So, let’s dive into this cozy bowl of goodness that’s bound to become a staple in your kitchen!

Why You'll Love This Italian Penicillin Soup with Pastina

  • This Italian Penicillin Soup with Pastina is the ultimate comfort food that warms you from the inside out.
  • You’ll love how effortless it is to prepare, taking just 25 minutes from start to finish, making it perfect for those busy weeknights.
  • The blend of garlic, vegetables, and chicken bone broth creates a flavor profile that is as delicious as it is soothing.
  • Not only is it visually appealing with its colorful ingredients, but it’s also versatile, allowing you to customize it with your favorite toppings.
  • This soup is sure to please a crowd, making it a fantastic choice for family dinners or gatherings.

Italian Penicillin Soup Ingredients

• Discover what makes this dish comforting!

For the Soup

  • Butter – Adds richness and depth to the flavor.
  • Celery – Provides a light, refreshing crunch to balance the soup.
  • Carrot – Brings natural sweetness and color to your bowl.
  • Onion – Enhances the overall taste with its aromatic qualities.
  • Garlic – Offers a robust layer of flavor that’s undeniably delightful.
  • Pastina – Tiny pasta shapes that soak up the chicken broth beautifully.
  • Chicken Bone Broth – The heart of this Italian Penicillin Soup, offering unmatched depth.
  • Turmeric – Adds a vibrant yellow hue and a hint of earthy warmth.
  • Kosher Salt – Essential for balancing flavors in the soup.
  • Fresh Ground Pepper – A dash of spice to elevate each spoonful.

For the Toppings

  • Parmesan Cheese – Brings a creamy, salty finish to your soup.
  • Egg (optional) – Whisked in for added protein and a silky texture.
  • Parsley – Freshness that brightens up the dish visually and flavor-wise.
  • Fresh Lemon Juice – A splash adds a zesty lift to round out the flavors.

How to Make Italian Penicillin Soup with Pastina

  1. Melt the Butter: In a large pot, melt 2 tablespoons of butter over medium heat, creating a flavorful base for your soup.

  2. Sauté the Veggies: Add the diced celery, carrot, onion, and minced garlic to the pot. Sauté until the vegetables are softened, about 3-4 minutes, filling your kitchen with a delightful aroma.

  3. Add the Pasta: Stir in the pastina and cook for approximately 1 minute, allowing the pasta to absorb the flavors of the sautéed vegetables.

  4. Pour the Broth: Carefully pour in the chicken bone broth along with turmeric, kosher salt, and fresh ground pepper. Stir everything together, ensuring the spices are well mixed.

  5. Simmer: Bring the mixture to a boil, then reduce the heat and let it simmer for 15 minutes. The soup should become fragrant and comforting as it cooks.

  6. Incorporate the Egg: If you’re using the optional egg, stir in the thoroughly whisked egg now and cook for an additional 1-2 minutes, which will enrich the soup with a lovely silky texture.

  7. Serve and Garnish: Ladle the hot soup into bowls and garnish with grated parmesan cheese, freshly chopped parsley, and a squeeze of lemon juice if desired. Each bowl is a warm hug in a dish!

Optional: For an extra zing, sprinkle some red pepper flakes on top!

Exact quantities are listed in the recipe card below.

What to Serve with Italian Penicillin Soup with Pastina?

Cozy up your meal and elevate your soup night with these perfect pairings that bring comfort to every bite.

  • Crusty Bread: Warm, crispy bread enhances the broth and is perfect for dipping. Each bite carries nostalgia from family dinners.

  • Simple Side Salad: A fresh, crunchy salad adds brightness and texture. Think mixed greens with a light vinaigrette to balance the soup’s richness.

  • Garlic Breadsticks: These buttery, herb-kissed sticks are delightful for soaking up the soup. The aromas of garlic and herbs are simply irresistible!

  • Roasted Vegetables: A medley of roasted root veggies complements the warm flavors. Their caramelized edges bring a touch of sweetness that contrasts beautifully.

  • Cheesy Rice Casserole: This creamy side adds comforting texture and pairs wonderfully with the soup’s lightness. The gooey cheese will keep everyone coming back for more.

  • Lemon Basil Risotto: The citrusy notes from the risotto perfectly harmonize with the soup. Each creamy spoonful brings a refreshing twist to your meal.

  • Cold Iced Tea: A refreshing glass of iced tea can cut through the richness of the soup, making each bite feel lighter and more invigorating.

  • Homemade Tiramisu: End your meal with a touch of sweetness and Italian flair. The coffee and cocoa flavors of this classic dessert create a divine finish.

Make Ahead Options

Italian Penicillin Soup with Pastina is a fantastic choice for meal prep, allowing you to save time on busy weeknights! You can chop the vegetables (celery, carrot, onion, and garlic) up to 24 hours in advance and store them in an airtight container in the refrigerator to keep them fresh. Additionally, you can cook the soup base (steps 1-5) and refrigerate it for up to 3 days. When you’re ready to serve, simply reheat the soup on the stove and stir in the pastina, cooking until it’s al dente. For the perfect finishing touch, add the whisked egg if desired, along with the garnishes just before serving. This method ensures your soup stays just as delicious, offering comforting warmth with minimal effort!

Italian Penicillin Soup Variations

Feel free to give this comforting soup your unique spin and elevate it just the way you like!

  • Vegetarian: Swap chicken bone broth for vegetable broth and add more veggies like spinach or zucchini for a hearty option.
    The flavors remain rich and satisfying without the meat, perfect for a comforting bowl any night.

  • Gluten-Free: Replace pastina with gluten-free orzo or rice for the same delightful texture without any gluten.
    Enjoy each spoonful knowing you’re accommodating dietary needs while keeping the soup rich and comforting.

  • Creamy Twist: Stir in a splash of heavy cream or coconut milk just before serving to give the soup a decadently creamy finish.
    This variation will make each bite luxuriously smooth and satisfying!

  • Extra Protein: Toss in shredded rotisserie chicken or white beans after simmering for an extra protein boost.
    This not only enriches the soup but also turns it into a filling meal that’s perfect for hungry bellies.

  • Herb Infusion: Incorporate fresh herbs like thyme or rosemary while simmering to introduce a fragrant, herbal note.
    The earthiness will enhance the comfort and warmth of this delightful soup.

  • Spicy Kick: Add a pinch of red pepper flakes or a dash of hot sauce for a warming touch of heat.
    This variation will wake up your taste buds and is great for those who love a little zing!

  • Citrus Zest: Mix in some grated lemon or orange zest while cooking for a bright, refreshing twist that cuts through the richness.
    This zesty surprise will invigorate the flavors and keep your palate excited.

  • Savory Add-Ins: For more texture, consider rocky diced potatoes or roasted vegetables added with the broth for a heartier soup.
    This will transform your classic recipe into a rustic, wholesome dish that’s even more satisfying.

How to Store and Freeze Italian Penicillin Soup with Pastina

Fridge: Store leftover Italian Penicillin Soup in an airtight container for up to 3 days. Keep it covered to maintain its flavor and prevent absorption of other odors.

Freezer: You can freeze the soup for up to 3 months. Just ensure it’s completely cooled, then transfer to a freezer-safe container, leaving some space for expansion.

Reheating: When you’re ready to enjoy your soup, thaw it overnight in the fridge. Reheat gently on the stovetop until piping hot, stirring occasionally to maintain consistency.

Tip: If you freeze the soup, consider undercooking the pastina slightly, as it will continue to cook when reheated.

Chef's Helpful Tips

  • To ensure your Italian Penicillin Soup with Pastina has a rich flavor, sauté the vegetables until they are just softened, which takes about 3-4 minutes to release their natural sweetness.
  • Avoid overcooking the pastina; it only needs about a minute in the pot before adding the broth to maintain its texture.
  • When adding the whipped egg, remove the soup from the heat to prevent scrambling, allowing for a smooth incorporation.
  • Finally, serve immediately after cooking to enjoy the soup at its warmest, and consider garnishing with freshly squeezed lemon juice for that extra brightness.

Italian Penicillin Soup with Pastina Recipe FAQs

What type of pastina should I use for this recipe?
I recommend using small pasta shapes like pastina or orzo, as they can soak up the broth beautifully. If you can’t find pastina, any small pasta will do; just adjust the cooking times accordingly to prevent overcooking.

How should I store leftover Italian Penicillin Soup?
Store your leftover soup in an airtight container in the fridge for up to 3 days. Make sure the container is covered tightly to retain the flavors and prevent the soup from absorbing other odors from the fridge.

Can I freeze Italian Penicillin Soup with Pastina?
Absolutely! To freeze the soup, let it cool completely, then transfer it to a freezer-safe container. It can be frozen for up to 3 months. When you’re ready to enjoy it, thaw it overnight in the fridge and reheat it gently on the stovetop.

What if my soup is too thick or too thin?
If your soup turns out too thick, simply stir in a little extra chicken bone broth or water until you reach your desired consistency. Conversely, if it’s too thin, you can simmer it for a bit longer to concentrate the flavors. Just keep an eye on the pasta to ensure it doesn’t overcook.

Is Italian Penicillin Soup suitable for kids or those with dietary restrictions?
Yes! This soup is very family-friendly and can easily be tailored. For allergies, substitute the pasta with gluten-free options, and if you’re cooking for little ones, consider reducing the garlic and spices for a milder flavor. Always check ingredient labels for any specific allergens.

How can I enhance the flavor if I’m using store-bought bone broth?
If you’re using store-bought chicken bone broth, consider adding a bit more minced garlic, or a splash of lemon juice for brightness. Fresh herbs like thyme or rosemary can also elevate the flavor profile and give it that homemade touch!

Italian Penicillin Soup with Pastina

Italian Penicillin Soup with Pastina

A comforting and nourishing Italian Penicillin Soup with Pastina perfect for any time of year.
Print Recipe Pin Recipe
Prep Time 10 minutes mins
Cook Time 15 minutes mins
Total Time 25 minutes mins
Servings: 4 bowls
Course: DINNER RECIPES
Cuisine: Italian
Calories: 320
Ingredients Equipment Method Nutrition Notes

Ingredients
  

For the Soup
  • 2 tablespoons Butter Adds richness and depth to the flavor.
  • 2 stalks Celery Provides a light, refreshing crunch.
  • 1 medium Carrot Brings natural sweetness and color.
  • 1 medium Onion Enhances the overall taste.
  • 3 cloves Garlic Offers a robust layer of flavor.
  • 1 cup Pastina Tiny pasta shapes that soak up the broth.
  • 6 cups Chicken Bone Broth The heart of the soup.
  • 1 teaspoon Turmeric Adds a vibrant hue and hint of warmth.
  • 1 teaspoon Kosher Salt Essential for balancing flavors.
  • 1 dash Fresh Ground Pepper A dash of spice to elevate the soup.
For the Toppings
  • 1/2 cup Parmesan Cheese Brings a creamy, salty finish.
  • 1 large Egg Optional, whisked in for added protein.
  • 1/4 cup Fresh Parsley Freshness that brightens up the dish.
  • 1 tablespoon Fresh Lemon Juice A splash adds a zesty lift.

Equipment

  • Large pot

Method
 

Directions
  1. In a large pot, melt 2 tablespoons of butter over medium heat.
  2. Add the diced celery, carrot, onion, and minced garlic. Sauté until softened, about 3-4 minutes.
  3. Stir in the pastina and cook for approximately 1 minute.
  4. Carefully pour in the chicken bone broth along with turmeric, kosher salt, and fresh ground pepper.
  5. Bring the mixture to a boil, then reduce the heat and let it simmer for 15 minutes.
  6. If using the optional egg, stir it in now and cook for an additional 1-2 minutes.
  7. Ladle the hot soup into bowls and garnish with grated parmesan, chopped parsley, and lemon juice if desired.

Nutrition

Serving: 1bowlCalories: 320kcalCarbohydrates: 39gProtein: 12gFat: 14gSaturated Fat: 8gPolyunsaturated Fat: 1gMonounsaturated Fat: 5gCholesterol: 80mgSodium: 750mgPotassium: 500mgFiber: 3gSugar: 4gVitamin A: 2500IUVitamin C: 15mgCalcium: 200mgIron: 3mg

Notes

For an extra zing, sprinkle some red pepper flakes on top! To ensure rich flavor, sauté vegetables until just softened, avoid overcooking the pastina, and serve immediately for best enjoyment.

Tried this recipe?

Let us know how it was!

Filed Under: DINNER RECIPES

Crockpot Creamy French Onion Chicken and Orzo

December 19, 2025 by JudyWhite Leave a Comment

There’s nothing quite like the cozy embrace of comfort food, especially when it comes from the magic of a slow cooker. Imagine the moment you walk into your home after a long day, met with the intoxicating aroma of sweet, caramelized onions mingling with savory chicken and a hint of herbs – it’s pure bliss. That’s exactly what my Crockpot Creamy French Onion Chicken and Orzo delivers, transforming a few simple ingredients into a luxurious meal that tastes like it took hours to prepare.

I discovered this recipe on a particularly rainy afternoon when takeout just didn’t cut it. I craved something hearty, something that reminded me of home. The mix of tender chicken, creamy sauce, and perfectly cooked orzo will make you forget all about fast food. It’s a dish that effortlessly brings family together around the table, creating those treasured moments that linger long after the last bite.

So grab your slow cooker; let’s dive into this culinary delight that’s not only easy to whip up but also sure to impress your loved ones!

Why You'll Love This Crockpot Creamy French Onion Chicken and Orzo

  • This recipe is a breeze to prepare, making it perfect for busy weeknights when you want a delicious meal without the fuss.
  • The rich, creamy flavors will delight your taste buds and have everyone coming back for seconds.
  • It’s incredibly versatile, allowing for substitutions based on your pantry staples or personal preferences.
  • The beautiful presentation with melted cheese and caramelized onions will impress your guests and elevate your dinner table.

Crockpot Creamy French Onion Chicken and Orzo Ingredients

• Get ready to savor every bite!

For the Chicken

  • Boneless chicken breasts or thighs – perfect for soaking up all the flavors in this dish.
  • Kosher salt – enhances the natural taste of the chicken, making it juicy and flavorful.
  • Black pepper – adds a touch of warmth and complements the savory elements beautifully.
  • Yellow onions – caramelizes sweetly in the slow cooker, creating that classic French onion flavor.

For the Flavor

  • Salted butter – brings richness to the dish, making it irresistibly creamy.
  • Fresh thyme leaves – adds a fragrant herbaceous note that’s essential for depth of flavor.
  • Chopped fresh sage – a lovely earthy element that pairs beautifully with chicken.
  • Garlic cloves – infuses the dish with aromatic essence that enhances all the other flavors.
  • Dry white wine – contributes acidity and complexity, lifting the overall taste.
  • Chicken or vegetable broth – the base for a delicious sauce that keeps everything moist.

For the Pasta and Creaminess

  • Sliced mushrooms – adds a meaty texture while soaking up the delicious sauce.
  • Dry orzo pasta – serves as a lovely base, soaking up the creamy sauce for maximum flavor.
  • Heavy cream – brings a luscious, creamy texture that’s simply divine.
  • Grated parmesan cheese – a savory kick that adds depth to the dish.
  • Shredded gruyere cheese – melts beautifully, finishing the dish with a delightful gooeyness.

This Crockpot Creamy French Onion Chicken and Orzo brings comfort food to new heights!

How to Make Crockpot Creamy French Onion Chicken and Orzo

  1. Layer Ingredients: In your slow cooker, start by adding the sliced yellow onions, followed by 3 tablespoons of salted butter. Lay the boneless chicken breasts or thighs on top, seasoning them with fresh thyme, sage, minced garlic, kosher salt, and black pepper. Pour in the dry white wine and chicken or vegetable broth, then sprinkle in the sliced mushrooms. Cover and cook on low for 3-4 hours or high for 1-2 hours until the chicken is tender and juicy.

  2. Preheat Broiler: Once the chicken and onions have cooked, preheat your broiler to high. Carefully remove the chicken and most of the caramelized onions from the slow cooker and transfer them to a baking sheet.

  3. Cook Orzo: Turn the slow cooker heat to high, then stir in the dry orzo and 1 cup of water. Cover and cook for 20-30 minutes, or until the orzo reaches al dente. If it requires more liquid, add a little extra water as needed. Mix in the heavy cream and grated parmesan cheese for that creamy goodness.

  4. Broil for Cheese: Top the onions on the baking sheet with the remaining 3 tablespoons of butter and the shredded gruyere cheese. Broil for 3-5 minutes, just until the cheese is bubbly and golden brown.

  5. Serve and Enjoy: Spoon the creamy orzo mixture onto plates, topping it generously with the chicken and luscious onions. Enjoy a warm serving of your Crockpot Creamy French Onion Chicken and Orzo with your loved ones!

Optional: Garnish with fresh herbs for an extra touch of flavor.

Exact quantities are listed in the recipe card below.

Crockpot Creamy French Onion Chicken and Orzo Variations

Feel free to get creative and make this dish your own with these delicious twists and substitutions!

  • Gluten-Free: Swap in gluten-free orzo or rice for a gluten-friendly base without sacrificing flavor.
  • Dairy-Free: Use coconut cream and dairy-free cheese alternatives to create a creamy texture that’s completely plant-based.
  • Spicy Kick: Add red pepper flakes or sliced jalapeños for a warming spice that’ll awaken your taste buds.
  • Mushroom Medley: Experiment with different types of mushrooms, like shiitake or cremini, to add depth and earthiness to the dish.
  • Herb Infusion: Mix in fresh rosemary or oregano for an extra layer of fragrant herb flavors that will enhance the overall experience.
  • Vegetarian Delight: Leave out the chicken and replace it with hearty veggies like bell peppers and zucchini, adding protein with chickpeas for a filling meal.
  • Sundried Tomatoes: Toss in some chopped sundried tomatoes for a burst of tangy flavor, perfectly complementing the creamy sauce.
  • Smoky Bacon: For added richness, sauté crispy bacon bits and sprinkle them on top just before serving, infusing a deep, smoky flavor.

With these variations, your Crockpot Creamy French Onion Chicken and Orzo can be tailored to suit every craving or dietary need!

Make Ahead Options

These Crockpot Creamy French Onion Chicken and Orzo are perfect for busy home cooks looking to save time during their week! You can chop the onions, prepare the herbs, and season the chicken up to 24 hours in advance. Simply store them in an airtight container in the refrigerator to maintain freshness. The sliced mushrooms can also be prepped ahead of time (just cover to prevent browning). When you’re ready to enjoy this comforting meal, layer the prepped ingredients in the slow cooker, pour in the wine and broth, and let it cook. Finish by stirring in the orzo and cream as instructed, and you’ll have a deliciously satisfying dinner without the last-minute rush!

What to Serve with Crockpot Creamy French Onion Chicken and Orzo?

A cozy meal deserves delightful companions that elevate the experience, enhancing every comforting bite.

  • Garlic Bread: A crunchy, buttery side that’s perfect for mopping up those creamy, delicious sauces.
  • Roasted Green Beans: Their crisp texture and lightly charred flavor provide a fresh contrast to the rich chicken and orzo.
  • Steamed Broccoli: This vibrant green veggie adds color and nutrition, balancing the meal beautifully without overpowering it.
  • Simple Green Salad: A salad with mixed greens, tomatoes, and a light vinaigrette offers a refreshing bite alongside the richness of the dish.
  • Crispy Brussels Sprouts: Their nutty flavor and crispy exterior make an ideal pairing, adding depth to your meal.
  • Red Wine: A glass of Pinot Noir brings out the savory notes of the dish, enhancing the overall dining experience.
  • Chocolate Mousse: For dessert, a silky chocolate mousse makes for a sweet ending that’s decadent yet light.
  • Apple Pie: A classic choice, serving warm apple pie with a scoop of vanilla ice cream rounds off the meal on a comforting note.
  • Lemon Sorbet: Light and refreshing, it cleanses the palate after the rich chicken and creamy orzo, perfect for balancing the flavors.
  • Herbal Tea: A soothing cup of chamomile or peppermint tea is perfect to enjoy after dinner, wrapping up the evening with warmth.

How to Store and Freeze Crockpot Creamy French Onion Chicken and Orzo

Fridge: Store leftovers in an airtight container for up to 3 days. This ensures the rich flavors are preserved and ready for an easy reheat.

Freezer: For longer storage, freeze the chicken and orzo mixture in a freezer-safe container for up to 3 months. Just remember to cool completely before sealing.

Reheating: To reheat, thaw the frozen container in the fridge overnight. Gently warm in a saucepan over low heat, adding a splash of broth or water to restore creaminess.

Best Enjoyed Fresh: For optimal taste and texture, enjoy your Crockpot Creamy French Onion Chicken and Orzo within a few days.

Chef's Helpful Tips

  • For the best results in your Crockpot Creamy French Onion Chicken and Orzo, layer the ingredients in the order listed to ensure even cooking and flavor integration.
  • Avoid opening the slow cooker lid frequently during cooking, as this can extend cooking time and affect tenderness.
  • Stir the orzo carefully to prevent it from clumping together while cooking, and adjust the liquid amount based on your desired creaminess.
  • Always taste and adjust seasoning towards the end for the most balanced flavor before serving.

Crockpot Creamy French Onion Chicken and Orzo Recipe FAQs

How do I select the best onions for this recipe?
Absolutely! Look for yellow onions that are firm and free from dark spots or soft spots. The skin should be papery and dry. Fresh onions will bring that sweet, caramelized flavor that makes this dish so marvelous!

How long can I store leftovers of the Crockpot Creamy French Onion Chicken and Orzo?
You can store leftovers in an airtight container in the fridge for up to 3 days. Just make sure they’re cooled down before sealing them in. This way, you can enjoy that deliciousness for a quick meal the next day!

Can I freeze the Crockpot Creamy French Onion Chicken and Orzo?
Absolutely! To freeze, allow the chicken and orzo mixture to cool completely. Then, transfer it to a freezer-safe container or resealable bag and freeze for up to 3 months. When you’re ready to enjoy it again, just thaw it in the fridge overnight, then warm it up gently on the stove, adding a splash of broth or water if necessary to bring back that creamy texture!

What should I do if the orzo is too sticky after cooking?
The more the merrier when it comes to solutions! If your orzo turns out sticky, it’s likely due to not enough water or overcooking. Next time, try stirring in a tablespoon of olive oil while it cooks or adding a little extra broth for moisture. If you’re already serving, you can fluff it with a fork or stir in a bit of broth to loosen it up.

Are there any dietary considerations I should keep in mind for this recipe?
Very much so! If you’re cooking for someone with dairy allergies, consider using a plant-based cream and cheese alternative. For gluten-free options, swap the orzo with a gluten-free pasta that fits your preferences. Always check labels for hidden allergens!

What’s the best way to reheat this dish?
For sure! To reheat, gently warm the frozen or refrigerated Crockpot Creamy French Onion Chicken and Orzo in a saucepan over low heat. To maintain its creaminess, add a splash of chicken broth or water while stirring occasionally. This step will help revive those luscious flavors and textures!

Crockpot Creamy French Onion Chicken and Orzo

Crockpot Creamy French Onion Chicken and Orzo

Enjoy a delicious Crockpot Creamy French Onion Chicken and Orzo, a comforting dish made effortlessly in your slow cooker.
Print Recipe Pin Recipe
Prep Time 15 minutes mins
Cook Time 4 hours hrs
Total Time 4 hours hrs 15 minutes mins
Servings: 4 servings
Course: DINNER RECIPES
Cuisine: French
Calories: 550
Ingredients Equipment Method Nutrition Notes

Ingredients
  

For the Chicken
  • 1 lb Boneless chicken breasts or thighs Perfect for soaking up all the flavors.
  • 1 tsp Kosher salt Enhances the natural taste of the chicken.
  • 1 tsp Black pepper Adds warmth.
  • 2 cups Yellow onions Caramelizes sweetly.
For the Flavor
  • 4 tbsp Salted butter Brings richness.
  • 2 tbsp Fresh thyme leaves Adds a fragrant note.
  • 2 tbsp Chopped fresh sage Pairs beautifully with chicken.
  • 4 cloves Garlic cloves Infuses with aroma.
  • 1 cup Dry white wine Contributes acidity.
  • 2 cups Chicken or vegetable broth Keeps everything moist.
For the Pasta and Creaminess
  • 8 oz Sliced mushrooms Adds texture.
  • 1 cup Dry orzo pasta Serves as base.
  • 1 cup Heavy cream Brings creamy texture.
  • 1/2 cup Grated parmesan cheese Adds depth.
  • 1 cup Shredded gruyere cheese Melts beautifully.

Equipment

  • Slow Cooker

Method
 

How to Make
  1. Layer ingredients in the slow cooker starting with sliced yellow onions and 3 tablespoons of salted butter. Lay the chicken on top and season.
  2. Pour in dry white wine and chicken broth, sprinkle in sliced mushrooms. Cover and cook on low for 3-4 hours or high for 1-2 hours.
  3. Preheat the broiler.
  4. Remove chicken and most of the onions. Transfer to a baking sheet.
  5. Turn the slow cooker to high, add dry orzo and 1 cup of water. Cover and cook for 20-30 minutes.
  6. Add heavy cream and grated parmesan cheese.
  7. Top the onions with remaining butter and gruyere cheese, broil for 3-5 minutes.
  8. Serve the orzo topped with chicken and onions.

Nutrition

Serving: 1servingCalories: 550kcalCarbohydrates: 45gProtein: 40gFat: 23gSaturated Fat: 12gPolyunsaturated Fat: 2gMonounsaturated Fat: 4gCholesterol: 100mgSodium: 800mgPotassium: 750mgFiber: 2gSugar: 3gVitamin A: 800IUVitamin C: 10mgCalcium: 200mgIron: 2mg

Notes

For best results, layer ingredients as listed. Avoid opening the lid frequently during cooking.

Tried this recipe?

Let us know how it was!

Filed Under: DINNER RECIPES

Creamy Italian Sausage Gnocchi Soup

December 19, 2025 by JudyWhite Leave a Comment

There’s something soul-soothing about a warm bowl of soup on a chilly evening, and this Creamy Italian Sausage Gnocchi Soup is a real standout in my kitchen. As the chilly winds pick up and the first signs of fall emerge, I find myself craving something hearty yet comforting. This soup checks all the boxes—creamy, flavorful, and so easy to whip up, even after a long day.

One evening, while experimenting with a few ingredients I had on hand, I stumbled upon this delightful combination. The rich Italian sausage paired with tender mini gnocchi and vibrant spinach creates a symphony of flavors that warms my heart. And best of all? It comes together in just 45 minutes, making it perfect for weeknight dinners or cozy gatherings with friends.

So, if you’re looking to elevate your soup game and say goodbye to fast food without sacrificing flavor, grab your apron and let’s dive into this luscious, crowd-pleasing bowl of joy!

Why You'll Love This Creamy Italian Sausage Gnocchi Soup

  • This Creamy Italian Sausage Gnocchi Soup is a breeze to make, requiring just 45 minutes from start to finish.
  • The flavor is simply unmatched, with rich Italian sausage and tender gnocchi creating a delightful combination that your taste buds will adore.
  • Its versatility allows for easy customization, so feel free to toss in your favorite veggies or spices.
  • Plus, its inviting presentation topped with parmesan cheese makes it a visually stunning dish perfect for impressing guests or warming up family dinners.

Creamy Italian Sausage Gnocchi Soup Ingredients

For the Base
• Olive oil – adds a lovely depth of flavor as you sauté your ingredients.
• Bulk Italian sausage – provides a hearty and spiced foundation for this creamy delight.
• Medium yellow onion – brings sweetness and aroma to the soup.
• Garlic – infuses the soup with its vibrant, savory essence.

For the Flavor
• Tomato paste – thickens the soup and enhances the rich tomato flavor.
• Italian seasoning – a blend of herbs that captures the essence of Italian cuisine.
• Low-sodium chicken broth – keeps the soup hearty without excessive salt.
• Crushed fire-roasted tomatoes – adds a smoky touch and rich color to the soup.

For the Creaminess
• Mini gnocchi – these little pillows of potato bring a unique texture that makes the soup satisfying.
• Baby spinach – offers a pop of color and nutrients, elevating the soup’s goodness.
• Kosher salt – seasons the soup while allowing the other flavors to shine.
• Freshly ground black pepper – adds a finishing kick without overpowering.
• Heavy cream – makes the soup luxuriously creamy, ensuring each spoonful is indulgent.

For Serving
• Parmesan cheese – sprinkle generously on top for a salty, nutty flavor.
• Crushed red pepper flakes – a sprinkle of this adds just the right amount of heat to complement the creamy Italian sausage gnocchi soup.

How to Make Creamy Italian Sausage Gnocchi Soup

  1. Heat Oil: Pour 1 teaspoon of olive oil into a large pot over medium heat. Warm it up until it shimmers invitingly, creating a perfect base for your soup.

  2. Brown Sausage: Add 1 pound of bulk Italian sausage. Cook, breaking it apart with a wooden spoon, until it’s beautifully browned and aromatic, about 5-7 minutes.

  3. Sauté Aromatics: Stir in a diced medium yellow onion and minced 4 cloves of garlic. Cook until the onion turns translucent and soft, about 3-4 minutes.

  4. Incorporate Tomato Paste: Mix in 2 tablespoons of tomato paste and 2 teaspoons of Italian seasoning. Stir well until everything is evenly coated in the rich color of the tomato paste.

  5. Add Broth & Tomatoes: Pour in 4 cups of low-sodium chicken broth along with 28 ounces of crushed fire-roasted tomatoes. Give it a good stir and bring this delightful mixture to a simmer.

  6. Cook Gnocchi: Once simmering, add 16 ounces of mini gnocchi. Let them cook in the broth for 3-5 minutes until they float and become tender.

  7. Mix in Spinach & Cream: Stir in 3 cups of baby spinach, 1.5 teaspoons of kosher salt, 0.5 teaspoon of freshly ground black pepper, and 1/3 cup of heavy cream. Mix until the spinach wilts and everything is creamy and integrated.

  8. Serve & Garnish: Ladle the soup into bowls while hot, and finish with a generous sprinkling of parmesan cheese and a dash of crushed red pepper flakes for a bit of warmth.

Optional: Add fresh basil for a burst of flavor and color on top.

Exact quantities are listed in the recipe card below.

How to Store and Freeze Creamy Italian Sausage Gnocchi Soup

Fridge: Store any leftover Creamy Italian Sausage Gnocchi Soup in an airtight container for up to 3 days. Reheat gently on the stove to restore its creamy consistency.

Freezer: If you want to freeze this delicious soup, portion it into freezer-safe containers and freeze for up to 3 months. Thaw overnight in the fridge before reheating.

Reheating: To reheat from the fridge or after thawing, warm it gently on medium-low heat, adding a splash of broth or water if it seems too thick. Stir until heated through.

Storing Gnocchi: If you have uncooked gnocchi leftover, store them in a cool, dry place for up to 2 days. Cook them fresh to enjoy the best texture in your soup.

What to Serve with Creamy Italian Sausage Gnocchi Soup?

A warm, inviting meal truly shines when paired with the right accompaniments. Here are some delightful ideas to enhance your dining experience.

  • Garlic Bread: This classic side is perfect for dunking into your creamy soup, soaking up every delicious drop. Its crunchy exterior and buttery, garlicky flavor make it irresistible.

  • Caesar Salad: Crisp romaine lettuce with tangy dressing and crunchy croutons creates a refreshing contrast to the richness of the soup. Plus, the hint of parmesan ties in beautifully!

  • Roasted Vegetables: A medley of seasonal veggies, lightly seasoned and roasted, adds a colorful touch to your meal, enhancing the overall flavor profile. The caramelized sweetness from roasting complements the soup’s savory notes.

  • Cheesy Biscuits: Fluffy biscuits, perhaps with a cheesy touch, offer a delightful texture and flavor that pairs wonderfully with hot soup. They’re perfect for a cozy, comforting dinner.

  • White Wine: A chilled glass of crisp pinot grigio or sauvignon blanc elevates your meal, balancing the creaminess of the soup with its refreshing acidity.

  • Chocolate Mousse: For dessert, a light chocolate mousse is an excellent way to round off the meal. Its rich yet airy texture provides a sweet contrast to the hearty soup.

  • Herb-Infused Olive Oil: Drizzle this fragrant oil over your soup just before serving for an extra burst of flavor. The herbal notes will beautifully enhance the Italian spices already at play.

This selection caters to various textures and flavors, perfectly complementing your Creamy Italian Sausage Gnocchi Soup!

Make Ahead Options

Preparing this Creamy Italian Sausage Gnocchi Soup in advance is a fantastic way to save time during busy weeknights! You can cook the entire soup, then let it cool before refrigerating it for up to 3 days. To maintain its wonderfully creamy texture, it’s best to add the heavy cream just before serving; simply reheat the soup on the stove, stir in the cream, and enjoy! Alternatively, you can pre-cook the sausage, onions, and garlic, and store them in an airtight container for up to 24 hours. This way, when you’re ready to enjoy this comforting dish, all you have to do is combine the remaining ingredients, and you’ll have a delicious, homemade meal without the fuss!

Creamy Italian Sausage Gnocchi Soup Variations

Dive into the world of flavors and customize this comforting soup to make it your own!

  • Dairy-Free: Substitute heavy cream with coconut cream for a luscious, dairy-free version that still keeps the soup nice and creamy.

  • Spicy Twist: Add extra crushed red pepper flakes or minced jalapeños while cooking for an added kick that warms the soul.

  • Veggie Boost: Toss in chopped zucchini or bell peppers for an explosion of color and crunch that melds beautifully with the soup’s creamy base.

  • Herbaceous Delight: Fresh basil or parsley stirred in just before serving adds a fragrant freshness that brightens the overall flavor profile.

  • Protein Swap: Use ground turkey or chicken instead of Italian sausage to create a lighter soup without sacrificing flavor or texture.

  • Gnocchi Alternatives: Try using tortellini or even homemade dumplings for a delightful twist that keeps the dish exciting and new.

  • Umami Rich: Incorporate a splash of soy sauce or Worcestershire sauce to deepen the savory notes, balancing out the creaminess.

  • Pasta Options: Replace mini gnocchi with small shells or orzo for a similar hearty texture that captures all the delicious flavors in each bite.

Chef's Helpful Tips

  • When making Creamy Italian Sausage Gnocchi Soup, ensure that you properly brown the sausage to develop deep flavors before adding the other ingredients.
  • Avoid adding too much salt initially since the parmesan cheese and chicken broth already contribute saltiness; adjust to taste at the end if needed.
  • To enhance the texture, gently stir the gnocchi to avoid clumping as they cook in the soup.
  • Lastly, remember to keep the heat on medium-low when adding the cream to prevent it from curdling and maintain a smooth consistency throughout the soup.

Creamy Italian Sausage Gnocchi Soup Recipe FAQs

What type of Italian sausage should I use?
Absolutely! For the richest flavor, I recommend using bulk Italian sausage rather than pre-cased links. You can go for sweet or spicy, depending on your personal preference. Just make sure to remove the casing before browning it in the pot!

How long can I store leftover soup in the fridge?
Leftover Creamy Italian Sausage Gnocchi Soup can be stored in an airtight container in the fridge for up to 3 days. Just remember to reheat it gently on the stove to keep that creamy consistency intact!

Can I freeze Creamy Italian Sausage Gnocchi Soup?
Certainly! To freeze this delightful soup, portion it into freezer-safe containers. Make sure to leave a bit of room at the top as the liquid may expand. It can be frozen for up to 3 months. Thaw in the fridge overnight before reheating over medium-low heat.

Why is my soup too thick after reheating?
Very! If you find your soup has thickened too much after refrigerating or freezing, simply stir in a splash of chicken broth or water while reheating. This will help restore that delightful creamy texture without losing flavor!

Is this recipe suitable for gluten-free diets?
If you’re looking for a gluten-free option, absolutely! Substitute the mini gnocchi with gluten-free gnocchi available at many grocery stores. Just check the packaging to ensure it fits your dietary needs. Enjoy your soup without worry!

Can my pet share this soup with me?
While it might be tempting to share a spoonful with your furry friend, it’s best to skip it. The sausage, seasonings, and cream can be harmful to pets. Instead, consider saving some plain, boiled potatoes or chicken from the dish for a tasty treat for them!

Creamy Italian Sausage Gnocchi Soup

Creamy Italian Sausage Gnocchi Soup

This Creamy Italian Sausage Gnocchi Soup is a comforting, flavorful, and easy recipe perfect for chilly evenings.
Print Recipe Pin Recipe
Prep Time 15 minutes mins
Cook Time 30 minutes mins
Total Time 45 minutes mins
Servings: 6 bowls
Course: DINNER RECIPES
Cuisine: Italian
Calories: 400
Ingredients Equipment Method Nutrition Notes

Ingredients
  

For the Base
  • 1 tablespoon olive oil for sautéing
  • 1 pound bulk Italian sausage
  • 1 medium yellow onion diced
  • 4 cloves garlic minced
For the Flavor
  • 2 tablespoons tomato paste
  • 2 teaspoons Italian seasoning
  • 4 cups low-sodium chicken broth
  • 28 ounces crushed fire-roasted tomatoes
For the Creaminess
  • 16 ounces mini gnocchi
  • 3 cups baby spinach
  • 1.5 teaspoons kosher salt
  • 0.5 teaspoon freshly ground black pepper
  • 1/3 cup heavy cream
For Serving
  • 1 cup Parmesan cheese for garnishing
  • to taste crushed red pepper flakes optional for heat

Equipment

  • Large pot

Method
 

How to Make Creamy Italian Sausage Gnocchi Soup
  1. Pour 1 tablespoon of olive oil into a large pot over medium heat. Warm it up until it shimmers invitingly.
  2. Add 1 pound of bulk Italian sausage. Cook until it's beautifully browned and aromatic, about 5-7 minutes.
  3. Stir in a diced medium yellow onion and minced 4 cloves of garlic. Cook until the onion turns translucent and soft, about 3-4 minutes.
  4. Mix in 2 tablespoons of tomato paste and 2 teaspoons of Italian seasoning. Stir well until everything is evenly coated.
  5. Pour in 4 cups of low-sodium chicken broth along with 28 ounces of crushed fire-roasted tomatoes. Stir and bring to a simmer.
  6. Once simmering, add 16 ounces of mini gnocchi. Let them cook for 3-5 minutes until they float and become tender.
  7. Stir in 3 cups of baby spinach, 1.5 teaspoons of kosher salt, 0.5 teaspoon of freshly ground black pepper, and 1/3 cup of heavy cream. Mix well.
  8. Ladle the soup into bowls while hot, and finish with a sprinkle of parmesan cheese and crushed red pepper flakes.

Nutrition

Serving: 1bowlCalories: 400kcalCarbohydrates: 35gProtein: 20gFat: 25gSaturated Fat: 10gPolyunsaturated Fat: 2gMonounsaturated Fat: 5gCholesterol: 70mgSodium: 800mgPotassium: 800mgFiber: 3gSugar: 4gVitamin A: 1500IUVitamin C: 30mgCalcium: 300mgIron: 2mg

Notes

Consider adding fresh basil for enhanced flavor and color on top.

Tried this recipe?

Let us know how it was!

Filed Under: DINNER RECIPES

Creamy Gnocchi with Spinach and Feta

December 17, 2025 by JudyWhite Leave a Comment

There’s something undeniably comforting about the creamy texture of homemade gnocchi, especially when smothered in a rich, savory sauce. As I prepared this dish one chilly evening, the warm aroma of sautéed spinach mingling with the tangy feta brought back memories of cherished family dinners. I can still picture my grandma bustling around the kitchen, her laughter filling the air as she shared stories while cooking – a beautiful reminder that food is all about connection.

In a world overwhelmed by fast food and quick fixes, this Creamy Gnocchi with Spinach and Feta stands out as a delicious invitation to slow down and appreciate the simple joys of homemade cooking. Not only is this dish surprisingly easy to whip up, but it also offers a delightful combination of flavors that will impress even the most discerning palates. Perfect for a cozy night in or a gathering with friends, this recipe promises to transport you to a place where comfort food reigns supreme. Ready to dive into a bowl of creamy goodness? Let’s cook!

Why You'll Love This Creamy Gnocchi with Spinach and Feta

  • This Creamy Gnocchi with Spinach and Feta is incredibly easy to make, ensuring that anyone can whip it up in no time.
  • The wonderful blend of creamy sauce and tangy feta creates a flavor explosion that will leave your taste buds dancing.
  • Versatility is key, as this dish can be served as a main course or a delightful side, catering to any occasion.
  • Visually appealing, the vibrant green spinach against the creamy backdrop makes every plate a feast for the eyes.
  • This comforting meal is guaranteed to please a crowd, making it perfect for gatherings or family dinners.

Creamy Gnocchi with Spinach and Feta Ingredients

For the Gnocchi
• Potato Gnocchi – this pre-made version saves time and ensures a fluffy texture.
• Olive Oil – adds richness and helps sauté the spinach.
• Fresh Spinach – packed with nutrients, it wilts beautifully in the sauce.
• Garlic – enhances the overall flavor, providing depth and warmth.
• Feta Cheese – the tanginess beautifully complements the creamy sauce.
• Heavy Cream – brings a luscious creaminess to the dish.
• Parmesan Cheese – adds extra flavor and a touch of saltiness.
• Black Pepper – freshly ground, it enhances the dish’s rich flavors.
• Red Pepper Flakes (optional) – for a hint of spice, make sure to adjust for your preference.

For Seasoning
• Salt – to taste, balancing the flavors perfectly in this creamy gnocchi.

Embrace the joy of creating a comforting meal with this delectable creamy gnocchi with spinach and feta!

How to Make Creamy Gnocchi with Spinach and Feta

  1. Sauté the spinach: In a large skillet, heat olive oil over medium heat. Add fresh spinach and minced garlic, cooking until the spinach wilts beautifully, about 3-4 minutes.

  2. Combine the gnocchi: Gently add the cooked potato gnocchi to the skillet, stirring to mix with the spinach and garlic. Cook for an additional 2-3 minutes until the gnocchi are heated through.

  3. Pour in the heavy cream: Slowly add heavy cream, stirring continuously. Let it simmer for 5 minutes, allowing the flavors to meld together and the sauce to thicken slightly.

  4. Mix in the feta cheese: Crumble feta cheese into the mixture, stirring until it’s melted and well incorporated. This will create a luxurious, creamy texture.

  5. Season to taste: Add salt and freshly ground black pepper according to your preference. If you like a bit of heat, sprinkle in some red pepper flakes.

  6. Garnish and serve: Remove from heat, and serve immediately. Optional: Top with freshly grated Parmesan cheese for an extra cheesy finish.

Optional: Add lemon zest before serving for a bright flavor boost.

Exact quantities are listed in the recipe card below.

Make Ahead Options

These Creamy Gnocchi with Spinach and Feta are perfect for meal prep enthusiasts! You can sauté the spinach and garlic up to 3 days in advance, storing them in an airtight container in the refrigerator to maintain freshness. Additionally, you can cook the gnocchi and prepare the creamy sauce (minus the feta) ahead of time, refrigerating them separately. When you’re ready to enjoy, simply reheat the spinach mixture and gnocchi in a skillet, then stir in the heavy cream and feta for a quick, comforting meal. This prepped approach not only saves time but ensures your dinner retains that delightful creamy goodness just like when you first made it!

Creamy Gnocchi Variations

Feel free to let your creativity shine with these delightful twists to make the gnocchi your own!

  • Gluten-Free: Substitute potato gnocchi with gluten-free gnocchi options or zucchini noodles for a lighter, veggie twist.

  • Cheese Lovers: Add ricotta cheese along with the feta for an extra creamy and indulgent taste.

  • Herb-Infused: Incorporate fresh herbs like basil or dill to enhance the dish’s freshness and elevate the flavor.

  • Mushroom Medley: Sauté sliced mushrooms alongside the spinach for an earthy depth that complements the creamy sauce beautifully.

  • Nutty Kick: Toss in toasted pine nuts before serving for a delightful crunch and a hint of nuttiness.

  • Sun-Dried Tomatoes: Add chopped sun-dried tomatoes for a burst of tangy flavor that pairs excellently with the feta.

  • Spicy Kick: Drizzle in a bit of sriracha or add diced jalapeños for a spicy touch that warms the palate.

  • Veggie Boost: Include roasted bell peppers or artichoke hearts for an added layer of texture and flavor while increasing the nutrient content.

How to Store and Freeze Creamy Gnocchi with Spinach and Feta

Fridge: Store any leftovers in an airtight container for up to 3 days. The creamy sauce may thicken, so add a splash of milk or cream when reheating.

Freezer: For longer storage, freeze the dish in a freezer-safe container for up to 2 months. Keep in mind that the texture of the gnocchi may change slightly after thawing.

Reheating: To reheat, thaw in the refrigerator overnight and warm gently over low heat, stirring frequently to restore creaminess. Add a little extra cream if needed.

Avoid Refreezing: It’s best to avoid refreezing once you’ve thawed your creamy gnocchi with spinach and feta, as it may compromise texture and flavor.

What to Serve with Salted Caramel Chocolate Fudge Cake?

Looking for the perfect accompaniments to elevate your dessert experience? Let’s dive into these delightful pairings that enhance every bite.

  • Fresh Berries: The tartness of raspberries or strawberries beautifully balances the rich flavors of the fudge cake.

  • Whipped Cream: Light and airy, freshly whipped cream adds a luscious touch that complements the dense cake perfectly.

  • Vanilla Ice Cream: A scoop of creamy vanilla ice cream brings a delightful contrast, creating a satisfying temperature play with the warm cake.

  • Espresso: The robust flavor of a shot of espresso enhances the cake’s chocolate notes, making for a perfect flavor duo.

  • Chocolate Ganache Dip: For the chocolate lovers, a side of chocolate ganache lets you dip each bite, making it a decadent treat!

  • Salted Caramel Drizzle: Create an indulgent experience by drizzling extra salted caramel on top, enhancing its flavor profile incredibly.

  • Almond Biscotti: Crunchy biscotti offers a lovely texture contrast and is perfect for dipping into a warm drink or your ganache.

  • Milk Stout or Porter: Pairing the cake with a rich stout helps highlight the chocolate and caramel flavors, making the experience even more indulgent.

  • Caramel Popcorn: For a sweet and salty twist, serve some caramel popcorn on the side for a playful crunch that echoes the cake’s flavors.

Each of these options will elevate your Salted Caramel Chocolate Fudge Cake experience, creating a delightful meal that lingers long after the last bite!

Chef's Helpful Tips

  • To ensure your creamy gnocchi with spinach and feta turns out perfect, always cook the gnocchi according to package instructions to achieve the ideal texture.
  • When sautéing the spinach, make sure the heat is medium to avoid burning the garlic, which can impart a bitter taste.
  • Stir the heavy cream in gradually and let it simmer for a few minutes, as this will help the sauce thicken without curdling.
  • For the best flavor, always season the dish with salt and pepper just before serving to enhance the overall taste profile.

Creamy Gnocchi with Spinach and Feta Recipe FAQs

What type of potato gnocchi should I use?
Absolutely, store-bought potato gnocchi is a great time-saver. Look for fresh or vacuum-sealed gnocchi, which typically has a fluffy texture that works perfectly with the creamy sauce. If you’re feeling adventurous, making homemade gnocchi can elevate this dish, but pre-made varieties are delicious and user-friendly!

How should I store leftovers?
For any leftover creamy gnocchi with spinach and feta, store them in an airtight container in the fridge for up to 3 days. The sauce may thicken, so to perk it up during reheating, add a splash of milk or cream and stir well!

Can I freeze this dish?
Yes, you can! Freeze your creamy gnocchi with spinach and feta in a freezer-safe container for up to 2 months. When you’re ready to enjoy, thaw it in the refrigerator overnight. Reheat gently over low heat, stirring frequently, and consider adding a bit more cream for that luscious texture.

What if my sauce is too thick?
Very common! If you find your creamy sauce thickens too much during cooking or after storing, simply stir in a little bit of heavy cream or milk while reheating. Heat over low and stir consistently until you get the desired consistency.

Is this recipe suitable for vegetarians?
Yes, indeed! This creamy gnocchi with spinach and feta is a delightful vegetarian option. However, if you have dietary restrictions related to dairy, you can substitute the heavy cream and cheese with plant-based alternatives to suit your needs. Enjoy experimenting to find what works best for you!

Can I add other vegetables to this dish?
The more, the merrier! You can definitely add other veggies such as cherry tomatoes, bell peppers, or even mushrooms for added flavor and nutrition. Just sauté them along with the spinach to incorporate a variety of textures and tastes into your meal!

Creamy Gnocchi with Spinach and Feta

Creamy Gnocchi with Spinach and Feta

Enjoy this Creamy Gnocchi with Spinach and Feta for a comforting and flavorful dinner option.
Print Recipe Pin Recipe
Prep Time 10 minutes mins
Cook Time 15 minutes mins
Total Time 25 minutes mins
Servings: 4 servings
Course: DINNER RECIPES
Cuisine: Italian
Calories: 400
Ingredients Equipment Method Nutrition Notes

Ingredients
  

For the Gnocchi
  • 1 package Potato Gnocchi this pre-made version saves time and ensures a fluffy texture.
  • 2 tablespoons Olive Oil adds richness and helps sauté the spinach.
  • 4 cups Fresh Spinach packed with nutrients, it wilts beautifully in the sauce.
  • 2 cloves Garlic enhances the overall flavor, providing depth and warmth.
  • 1 cup Feta Cheese the tanginess beautifully complements the creamy sauce.
  • 1 cup Heavy Cream brings a luscious creaminess to the dish.
  • 1/2 cup Parmesan Cheese adds extra flavor and a touch of saltiness.
  • 1 teaspoon Black Pepper freshly ground, it enhances the dish's rich flavors.
  • 1/4 teaspoon Red Pepper Flakes optional, for a hint of spice.
For Seasoning
  • to taste Salt to balance the flavors perfectly in this creamy gnocchi.

Equipment

  • Large skillet

Method
 

Directions
  1. In a large skillet, heat olive oil over medium heat. Add fresh spinach and minced garlic, cooking until the spinach wilts beautifully, about 3-4 minutes.
  2. Gently add the cooked potato gnocchi to the skillet, stirring to mix with the spinach and garlic. Cook for an additional 2-3 minutes until the gnocchi are heated through.
  3. Slowly add heavy cream, stirring continuously. Let it simmer for 5 minutes, allowing the flavors to meld together and the sauce to thicken slightly.
  4. Crumble feta cheese into the mixture, stirring until it’s melted and well incorporated.
  5. Add salt and freshly ground black pepper according to your preference. If you like a bit of heat, sprinkle in some red pepper flakes.
  6. Remove from heat, and serve immediately. Optional: Top with freshly grated Parmesan cheese for an extra cheesy finish.

Nutrition

Serving: 1servingCalories: 400kcalCarbohydrates: 50gProtein: 12gFat: 20gSaturated Fat: 10gPolyunsaturated Fat: 2gMonounsaturated Fat: 8gCholesterol: 50mgSodium: 800mgPotassium: 500mgFiber: 2gSugar: 2gVitamin A: 2500IUVitamin C: 15mgCalcium: 250mgIron: 2mg

Notes

For a bright flavor boost, consider adding lemon zest before serving.

Tried this recipe?

Let us know how it was!

Filed Under: DINNER RECIPES

Garlic Butter Salmon

December 17, 2025 by JudyWhite Leave a Comment

There’s something undeniably special about the simplicity and satisfaction of a homemade meal. Picture this: the moment you pull a tray of Garlic Butter Salmon, perfectly roasted potatoes, and vibrant asparagus from the oven, your kitchen fills with the enticing aroma of garlic and fresh herbs. Just last week, after a relentless day battling work emails, I craved something healthy yet comforting—something that would remind me of the joys of home-cooked dinners.

This recipe is my go-to solution, combining tender salmon with a luscious garlic butter that elevates the dish to new heights. With just a handful of ingredients, you’ll have a meal that’s not only bursting with flavor but also easy enough for a weeknight delight. Whether you’re seeking to impress friends or simply indulge in a satisfying dinner, this Garlic Butter Salmon dish is a delightful answer to your culinary calls. Let’s dive into the recipe that will transform your mealtime into a moment of joy!

Why You'll Love This Garlic Butter Salmon

  • This Garlic Butter Salmon is incredibly easy to make, requiring just a handful of ingredients and minimal prep time.
  • The combination of garlic, butter, and lemon creates a flavor explosion that will have everyone raving about your cooking.
  • Its versatility allows you to customize the sides, making it perfect for any occasion, whether it’s a casual weeknight dinner or a special gathering.
  • Plus, the vibrant colors of the dish make it visually appealing, ensuring it’s a feast for the eyes as well as the taste buds.

Garlic Butter Salmon Ingredients

Unlock the secret to a flavorful dish with these key ingredients!

For the Potatoes
• 1 pound baby Yukon Gold potatoes – They’re creamy and hold their shape beautifully when roasted.
• 2 tablespoons extra-virgin olive oil – Adds richness and helps crisp the potatoes.
• ¾ teaspoon salt – Enhances the flavor of the potatoes.
• ½ teaspoon ground pepper – A little spice elevates the tastiness.

For the Asparagus
• 12 ounces asparagus – Fresh and vibrant, they bring color and nutrients to the dish.
• 1 tablespoon extra-virgin olive oil – Ensures even roasting and adds flavor.
• ⅛ teaspoon salt – To season the asparagus just right.
• ⅛ teaspoon ground pepper – Brings out the natural sweetness of the veggies.

For the Salmon
• 1¼ pounds salmon fillet – Rich in omega-3 fatty acids, it’s the star of this meal.
• 2 tablespoons melted butter – Adds a luscious, buttery layer of flavor.
• 1 tablespoon lemon juice – Brightens up the dish and pairs beautifully with salmon.
• 2 cloves garlic, minced – The secret ingredient for that irresistible aroma and taste!
• ⅛ teaspoon salt – A final touch to amplify the flavor of the salmon.

For Garnish
• 4 tablespoons chopped parsley – Fresh herbs enhance the visual appeal and add a fresh flavor punch.

With these simple yet delightful ingredients, your Garlic Butter Salmon will shine, creating a comforting and deliciously memorable meal!

How to Make Garlic Butter Salmon

  1. Preheat oven: Set your oven to 400°F. This hot start will help your vegetables cook perfectly and give that salmon a lovely finish.

  2. Prepare the potatoes: In a medium bowl, toss your halved baby Yukon Gold potatoes with 1 tablespoon of olive oil, ¼ teaspoon of salt, and ⅛ teaspoon of pepper. Spread them out in an even layer on a large rimmed baking sheet. Roast until they start to soften and turn golden brown, about 15 minutes.

  3. Season the asparagus: While the potatoes are roasting, grab that medium bowl again and toss the trimmed asparagus with the remaining 1 tablespoon of olive oil, ⅛ teaspoon of salt, and ⅛ teaspoon of pepper. This will bring out their natural flavor.

  4. Mix the garlic butter: In a small bowl, combine the melted butter, lemon juice, minced garlic, ¼ teaspoon of salt, and the remaining ¼ teaspoon of pepper, creating a luscious mixture to drizzle over your salmon.

  5. Add the salmon: After the potatoes have roasted for 15 minutes, sprinkle the salmon fillets with the remaining ⅛ teaspoon of salt. Move the potatoes to one side of the baking sheet, then place the salmon in the center. Drizzle that delicious garlic butter mixture over the salmon and arrange the asparagus on the other side of the pan.

  6. Roast together: Return the pan to the oven and roast for an additional 10 to 12 minutes. Look for the salmon to be just cooked through and the veggies to be tender and vibrant.

  7. Garnish and serve: Once done, take it out of the oven and sprinkle the dish with freshly chopped parsley for that final touch of freshness and color.

Optional: Serve with lemon wedges for an extra burst of tang!

Exact quantities are listed in the recipe card below.

Garlic Butter Salmon Variations

Feel free to sprinkle your own magic on this recipe and turn it into your personal masterpiece!

  • Dairy-Free: Substitute the butter with coconut oil or a dairy-free butter alternative for a creamy, plant-based twist.
    Adding a touch of nutty flavor with coconut oil enhances the tropical vibes of your dish!

  • Spicy Kick: Mix in some red pepper flakes or a splash of hot sauce in the garlic butter for a spicy finish.
    This allows your taste buds to dance while enjoying a zesty enhancement to the savory salmon.

  • Herb-Infused: Try adding fresh dill or tarragon into the garlic butter for a fragrant herbal twist.
    These herbs beautifully complement the salmon and infuse your dish with aromatic flavors.

  • Veggie Variety: Replace asparagus with seasonal vegetables like green beans or zucchini for a vibrant mix.
    Each vegetable brings its own unique texture and flavor, keeping your meal fresh and exciting.

  • Zesty Lemon Herb: Swap the lemon juice with lime juice and add cilantro for a zesty Latin-inspired version.
    This citrus addition brightens the dish even more, providing a refreshing and lively experience.

  • Garlic Lovers: Boost the garlic flavor by roasting extra cloves alongside the potatoes, adding depth to your dish.
    Roasted garlic mellows and sweetens, creating an irresistible richness that enhances the entire meal.

  • Whole Grain Boost: Serve the salmon over a bed of quinoa or farro instead of potatoes for a nutty twist.
    The whole grains add texture and a healthy dose of fiber, making your meal even more satisfying.

  • Sweet Addition: Incorporate some sliced cherry tomatoes into the roasting pan for a pop of sweetness and color.
    They burst during roasting, adding a lovely glaze and tang that marries perfectly with the garlic butter.

What to Serve with Garlic Butter Salmon?

Imagine completing your meal with sides that not only elevate the delicious garlic butter flavors but also create a symphony of textures and colors on your plate.

  • Creamy Mashed Potatoes: A classic pairing, buttery mashed potatoes provide a rich counterpart to the succulent salmon and crisp asparagus. Their smooth texture will comfort you in every bite.

  • Citrus Herb Quinoa: Light and fluffy, this grain dish adds a refreshing zing that brightens the palette. With a sprinkle of herbs and a touch of lemon, it perfectly complements the salmon’s richness.

  • Grilled Lemon Asparagus: For a double dose of greens, this charred side brings bold smoky flavors that mesh beautifully with the garlic butter. The lemon enhances the overall brightness of the meal.

  • Roasted Brussels Sprouts: Crispy, caramelized sprouts offer a satisfying crunch and a slight bitterness that rounds out the dish, balancing the richness of the salmon beautifully.

  • Garlic Bread: Add a crunchy, buttery delight on the side! The garlic in the bread echoes the salmon, creating a cohesive flavor journey that leaves you wanting more.

  • Arugula Salad: With its peppery notes and light dressing, this salad offers a refreshing contrast to the heartiness of the salmon and potatoes. Tossed with cherry tomatoes, it adds vibrant color and nutrition.

  • Chardonnay or Sauvignon Blanc: Pair your meal with a chilled glass of Chardonnay or Sauvignon Blanc. Their crisp acidity will enhance the salmon and cleanse the palate perfectly.

  • Lemon Tart for Dessert: End your meal on a sweet and zesty note. The refreshing citrus flavor will tie everything together, leaving you satisfied and delighted.

With these delightful sides, your Garlic Butter Salmon will become the centerpiece of a memorable dinner that nourishes not just the body, but also the soul.

Make Ahead Options

Prepare your Garlic Butter Salmon for a worry-free dinner that saves you precious time on busy weeknights! You can chop the baby Yukon Gold potatoes and trim the asparagus up to 24 hours in advance; simply store them in an airtight container in the refrigerator to maintain their freshness. Additionally, mix the garlic butter (butter, lemon juice, garlic, and seasonings) and refrigerate it, as this will keep the flavors well blended. When you’re ready to cook, all you need to do is follow the roasting instructions as directed, knowing that your prep work has made dinner a breeze. You’ll enjoy the same delicious results while spending less time in the kitchen!

How to Store and Freeze Garlic Butter Salmon

Fridge: Store leftover Garlic Butter Salmon in an airtight container for up to 3 days. Ensure it’s sealed well to maintain flavor and freshness.

Freezer: For longer storage, freeze cooked salmon portions in zip-top bags for up to 3 months. Squeeze out air before sealing to prevent freezer burn.

Reheating: To reheat, place the salmon in the oven at 350°F until heated through, about 10-15 minutes. This keeps the salmon moist and flavorful.

Tip: If using frozen salmon, thaw in the fridge overnight before reheating for best results.

Chef's Helpful Tips

  • To achieve perfectly roasted potatoes for your Garlic Butter Salmon, make sure to spread them evenly on the baking sheet without overcrowding to ensure they get crispy.
  • A common mistake is to skip seasoning vegetables; be generous with your salt and pepper to enhance their natural flavors.
  • When preparing the garlic butter mixture, let the melted butter cool slightly before adding the garlic to prevent it from burning.
  • For optimal salmon doneness, check that the internal temperature reaches 145°F, ensuring a moist and flaky texture without overcooking.

Garlic Butter Salmon Recipe FAQs

What type of potatoes should I use for this recipe?
I recommend using baby Yukon Gold potatoes for their creamy texture and ability to hold their shape while roasting. They offer a delightful taste that pairs perfectly with the other flavors in the dish.

How long can I store leftovers in the fridge?
You can store leftover Garlic Butter Salmon in an airtight container in the fridge for up to 3 days. Make sure it’s sealed well to maintain the dish’s flavor and freshness!

Can I freeze Garlic Butter Salmon?
Absolutely! For longer storage, freeze cooked salmon portions in zip-top bags for up to 3 months. Be sure to squeeze out as much air as possible before sealing to prevent freezer burn. When you’re ready to reheat, place the salmon in the oven at 350°F until heated through, about 10-15 minutes.

What if my salmon is overcooked?
If your salmon turns out dry, don’t worry! One trick is to serve it with a drizzle of olive oil or some extra lemon butter to add moisture back in. Also, make sure to check that the internal temperature of the salmon reaches 145°F for perfectly cooked fish.

Are there any dietary considerations I should keep in mind?
Certainly! When serving Garlic Butter Salmon, check for allergies to fish, shellfish, or dairy, as this recipe contains butter. For a dairy-free version, you can substitute the butter with olive oil or a plant-based butter.

How do I know when the asparagus is perfectly cooked?
The best way to tell if asparagus is cooked perfectly is by looking for bright green color and slight tenderness. It should be vibrant and still have a bit of crunch, typically around 10-12 minutes in the oven.

Garlic Butter Salmon

Garlic Butter Salmon

A delightful Garlic Butter Salmon recipe that elevates your dinner with rich flavors and simple preparation.
Print Recipe Pin Recipe
Prep Time 10 minutes mins
Cook Time 25 minutes mins
Total Time 35 minutes mins
Servings: 4 servings
Course: DINNER RECIPES
Cuisine: American
Calories: 450
Ingredients Equipment Method Nutrition Notes

Ingredients
  

For the Potatoes
  • 1 pound baby Yukon Gold potatoes They’re creamy and hold their shape beautifully when roasted.
  • 2 tablespoons extra-virgin olive oil Adds richness and helps crisp the potatoes.
  • ¾ teaspoon salt Enhances the flavor of the potatoes.
  • ½ teaspoon ground pepper A little spice elevates the tastiness.
For the Asparagus
  • 12 ounces asparagus Fresh and vibrant, they bring color and nutrients to the dish.
  • 1 tablespoon extra-virgin olive oil Ensures even roasting and adds flavor.
  • ⅛ teaspoon salt To season the asparagus just right.
  • ⅛ teaspoon ground pepper Brings out the natural sweetness of the veggies.
For the Salmon
  • 1¼ pounds salmon fillet Rich in omega-3 fatty acids, it's the star of this meal.
  • 2 tablespoons melted butter Adds a luscious, buttery layer of flavor.
  • 1 tablespoon lemon juice Brightens up the dish and pairs beautifully with salmon.
  • 2 cloves garlic, minced The secret ingredient for that irresistible aroma and taste!
  • ⅛ teaspoon salt A final touch to amplify the flavor of the salmon.
For Garnish
  • 4 tablespoons chopped parsley Fresh herbs enhance the visual appeal and add a fresh flavor punch.

Equipment

  • Baking sheet
  • medium bowl
  • Small bowl

Method
 

How to Make Garlic Butter Salmon
  1. Preheat oven: Set your oven to 400°F. This hot start will help your vegetables cook perfectly and give that salmon a lovely finish.
  2. Prepare the potatoes: In a medium bowl, toss your halved baby Yukon Gold potatoes with 1 tablespoon of olive oil, ¼ teaspoon of salt, and ⅛ teaspoon of pepper. Spread them out in an even layer on a large rimmed baking sheet. Roast until they start to soften and turn golden brown, about 15 minutes.
  3. Season the asparagus: While the potatoes are roasting, grab that medium bowl again and toss the trimmed asparagus with the remaining 1 tablespoon of olive oil, ⅛ teaspoon of salt, and ⅛ teaspoon of pepper. This will bring out their natural flavor.
  4. Mix the garlic butter: In a small bowl, combine the melted butter, lemon juice, minced garlic, ¼ teaspoon of salt, and the remaining ¼ teaspoon of pepper, creating a luscious mixture to drizzle over your salmon.
  5. Add the salmon: After the potatoes have roasted for 15 minutes, sprinkle the salmon fillets with the remaining ⅛ teaspoon of salt. Move the potatoes to one side of the baking sheet, then place the salmon in the center. Drizzle that delicious garlic butter mixture over the salmon and arrange the asparagus on the other side of the pan.
  6. Roast together: Return the pan to the oven and roast for an additional 10 to 12 minutes. Look for the salmon to be just cooked through and the veggies to be tender and vibrant.
  7. Garnish and serve: Once done, take it out of the oven and sprinkle the dish with freshly chopped parsley for that final touch of freshness and color.

Nutrition

Serving: 1servingCalories: 450kcalCarbohydrates: 32gProtein: 30gFat: 24gSaturated Fat: 10gPolyunsaturated Fat: 4gMonounsaturated Fat: 8gCholesterol: 90mgSodium: 700mgPotassium: 900mgFiber: 5gSugar: 2gVitamin A: 700IUVitamin C: 10mgCalcium: 40mgIron: 2mg

Notes

For optimal salmon doneness, check that the internal temperature reaches 145°F, ensuring a moist and flaky texture without overcooking.

Tried this recipe?

Let us know how it was!

Filed Under: DINNER RECIPES

  • « Previous Page
  • 1
  • …
  • 10
  • 11
  • 12
  • 13
  • 14
  • …
  • 16
  • Next Page »

Recent Posts

  • Crispy Potatoes in Oven
  • Lucky Charms Pancakes
  • Cheeseburger
  • Boiled Corn on the Cob
  • St. Patrick’s Day Dessert Parfaits

Recent Comments

No comments to show.

Footer

  • Contact
  • Privacy Policy
  • About Us
  • Terms
  • ↑ back to top

Copyright © 2024 www.Forkono.com

Table Of Content