Forkono

  • BREAKFAST & BRUNCH
  • DESSERT RECIPES
  • DINNER RECIPES
  • LUNCH RECIPES
  • About uS
  • SNACKS & APPETIZERS
menu icon
go to homepage
  • BREAKFAST & BRUNCH
  • DESSERT RECIPES
  • DINNER RECIPES
  • LUNCH RECIPES
  • About uS
  • SNACKS & APPETIZERS
search icon
Homepage link
  • BREAKFAST & BRUNCH
  • DESSERT RECIPES
  • DINNER RECIPES
  • LUNCH RECIPES
  • About uS
  • SNACKS & APPETIZERS
×

The Best Ever Shrimp Etouffee

December 12, 2025 by JudyWhite Leave a Comment

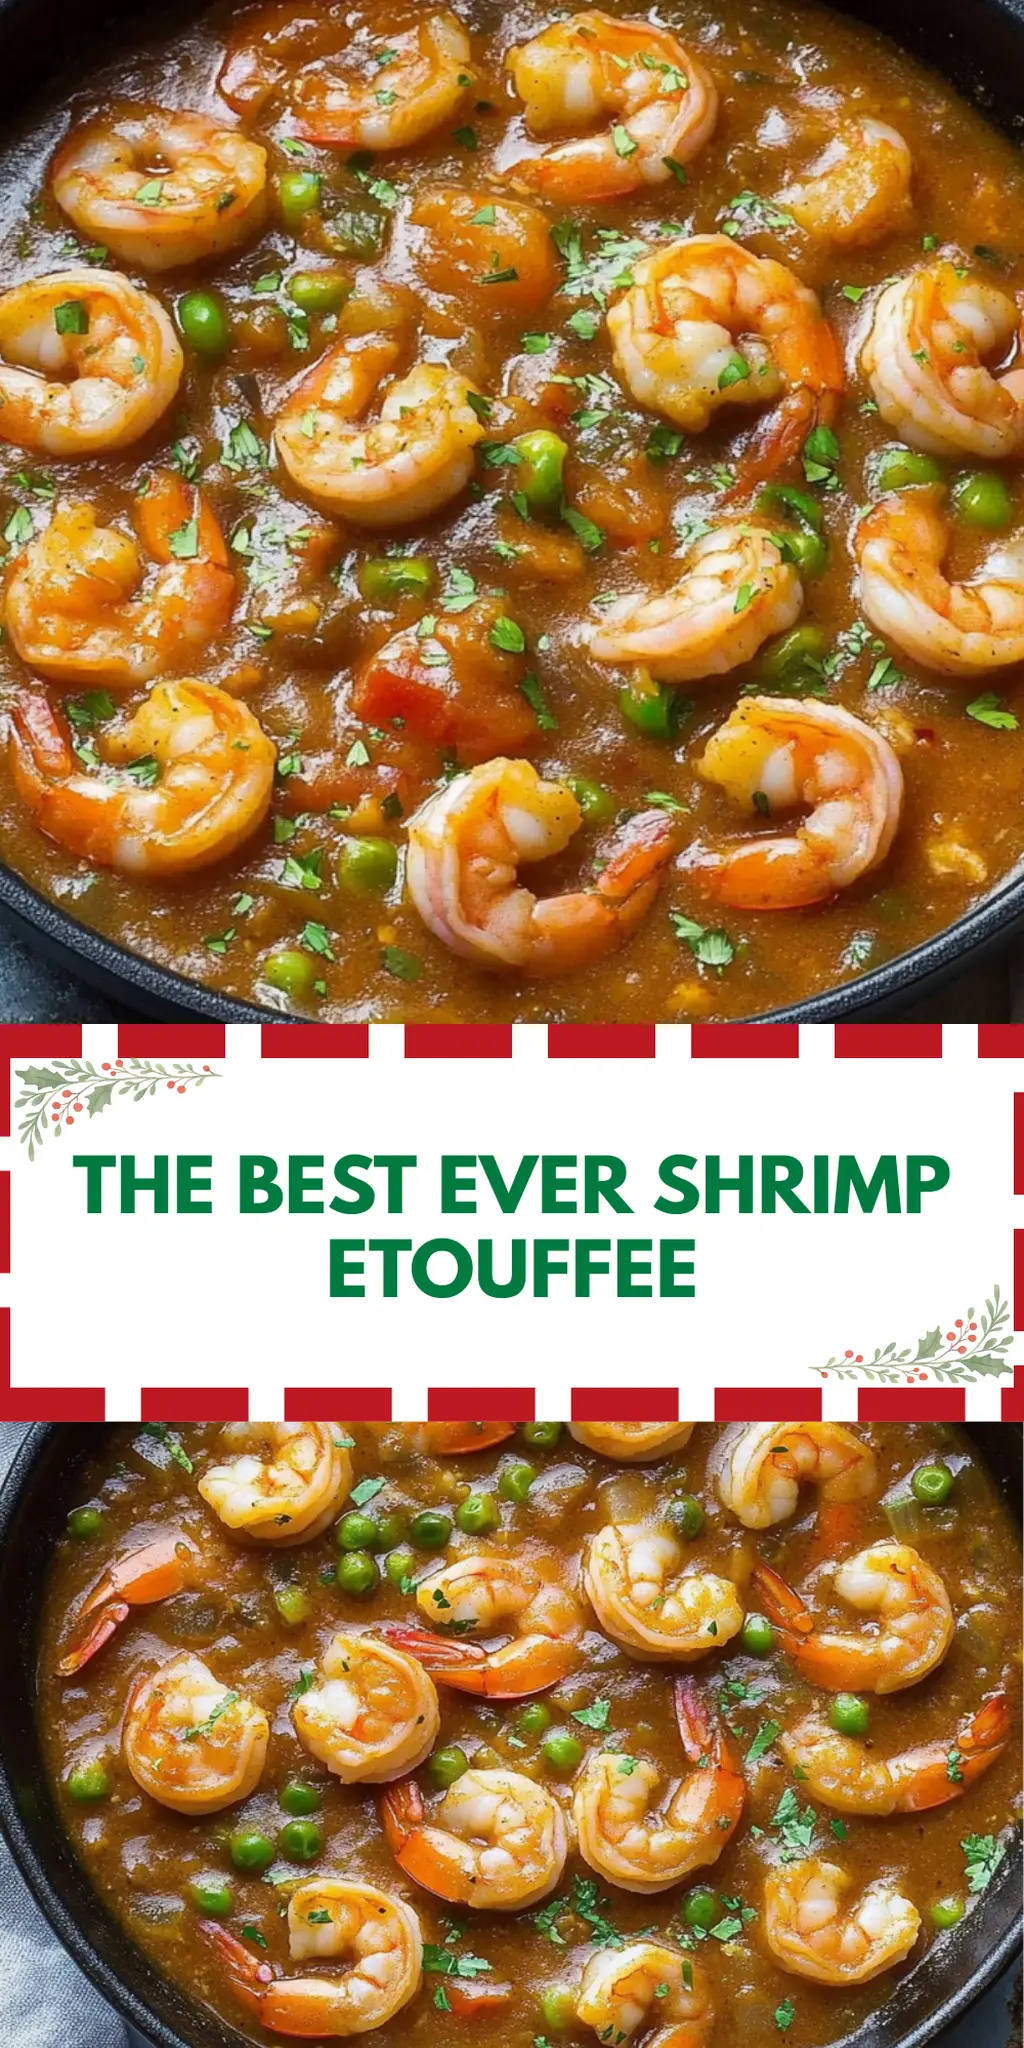
There’s nothing quite like the warmth of a homemade dish that wraps you in comfort, and that’s exactly what I felt when I first tasted this incredible shrimp étouffée. The vibrant aroma of sautéed garlic mingling with the rich spices instantly transported me to the heart of New Orleans, where flavors dance, and good times abound.

Imagine a bustling kitchen, the sound of laughter filling the air as friends gather around a steaming pot. This dish perfectly captures those social moments—its inviting spiciness is sure to create memories over good food and great company. Best of all, this is not just a meal for special occasions: it’s quick, easy, and achievable on a busy weeknight, requiring only 28 minutes from prep to plate!

Whether you’re trying to impress dinner guests or simply craving a comforting bowl of goodness, my version of “The Best Ever Shrimp Étouffée” promises to be a crowd-pleaser. So, roll up your sleeves and let’s dive into the deliciousness!

Why You'll Love This The Best Ever Shrimp Etouffee

  • This recipe is incredibly easy to follow, making it perfect for busy weeknights.
  • With bold flavors from Cajun spices and fresh ingredients, each bite is a taste of New Orleans that you won’t forget.
  • Its versatility allows you to serve it as a comforting meal or an impressive dish for entertaining guests.
  • Visually appealing with vibrant colors, this shrimp étouffée will surely catch the eye and delight the taste buds of everyone at your table.

The Best Ever Shrimp Etouffee Ingredients

Elevate your dinner with these essentials!

For the Base
• Olive oil – adds richness and depth to the dish.
• Onion – infuses a sweet, aromatic base while sautéing.
• Garlic – brings a bold flavor that complements the shrimp beautifully.
• Celery – adds a crunchy textural contrast with a hint of freshness.
• Green bell pepper – contributes brightness and color to the mix.

For the Flavor
• Ghee or butter – enriches the sauce for a creamy texture; substitute with coconut oil for dairy-free.
• Arrowroot powder – thickens the sauce; use cornstarch if unavailable.
• Cajun seasoning – provides a spicy kick, integral to achieving the best ever shrimp étouffée.
• Diced tomatoes – add tangy sweetness that balances the spices.

For the Shrimp
• Peeled shrimp – the star protein of the dish; fresh or frozen work well, but thawed shrimp is essential for even cooking.

For Garnish
• Chopped parsley or green onions – brighten the dish with fresh herbs right before serving.

For Seasoning
• Paprika – gives a smoky depth; consider smoked paprika for extra flavor.
• Garlic powder & onion powder – enhance the dish without overwhelming with fresh ingredients.
• Oregano, thyme, salt, black pepper, and cayenne pepper – create a harmonious blend of flavors, adjusting the cayenne to control heat levels.

With these ingredients, you’re just a few steps away from the comfort of a heartfelt homemade meal!

How to Make The Best Ever Shrimp Etouffee

  1. Heat the oil: In a large pan, heat 1/2 tablespoon of olive oil over medium heat to create a rich foundation for your dish.

  2. Sauté the veggies: Add in 1 finely diced onion, 4 minced garlic cloves, 1 cup of finely diced celery, and 1 finely diced green bell pepper. Sauté until softened and fragrant, about 5-7 minutes.

  3. Mix the spices: Stir in 2 tablespoons of arrowroot powder and follow with 2 tablespoons of Cajun seasoning, 2 teaspoons of paprika, 2 teaspoons of garlic powder, 1 teaspoon of onion powder, 1 teaspoon of oregano, 1 teaspoon of salt, 1/2 teaspoon of black pepper, 1/2 teaspoon of cayenne pepper, and 1/2 teaspoon of thyme. This will create a vibrant flavor profile.

  4. Add tomatoes and stock: Pour in 1 cup of diced tomatoes and 1 1/2 cups of chicken stock. Bring the mixture to a simmer, allowing the flavors to meld together for about 5 minutes.

  5. Cook the shrimp: Add 1 pound of peeled shrimp to the sauce and gently stir. Cook until the shrimp turn pink and opaque, typically about 3-5 minutes.

  6. Garnish and serve: Before serving, sprinkle 1 tablespoon of chopped parsley or green onions on top for a fresh touch, enhancing the dish’s appeal.

Optional: Serve with crusty bread for a delightful dipping experience.

Exact quantities are listed in the recipe card below.

What to Serve with The Best Ever Shrimp Etouffee?

There’s nothing quite like the excitement of pairing delightful sides with a comforting bowl of this New Orleans classic.

  • Crusty French Bread: Perfect for sopping up the rich sauce, the bread offers a satisfying crunch that complements the creamy texture beautifully.

  • Steamed Rice: A classic accompaniment, fluffy rice absorbs the flavors and adds a wholesome balance to every bite of shrimp étouffée.

  • Garlic Green Beans: Crisp-tender green beans sautéed with garlic bring a fresh, vibrant crunch that contrasts nicely with the dish’s warmth.

  • Coleslaw: A tangy, creamy slaw adds brightness to your plate, creating an exciting contrast with the spicy richness of the shrimp stew.

  • Cornbread: Sweet, moist cornbread is a comforting touch that resonates with southern flavors, making it a delightful partner for shrimp étouffée.

  • Cajun Spiced Sweet Potato Fries: With their sweetness and a hint of spice, these fries not only make a scrumptious side but also tie in perfectly with the dish’s flavor profile.

Elevate your mealtime experience by crafting a spread that mirrors the joy and warmth of this heartwarming dish!

How to Store and Freeze The Best Ever Shrimp Etouffee

Room Temperature: Keep the shrimp étouffée at room temperature for no longer than 2 hours after cooking. If left out longer, bacteria may develop.

Fridge: Store leftovers in an airtight container in the fridge for up to 3 days. Reheat gently on the stove over low heat until warmed through, adding a splash of chicken stock if needed.

Freezer: Freeze the shrimp étouffée in a freezer-safe container for up to 3 months. Thaw in the fridge overnight before reheating, following the same instructions for stovetop warming.

Reheating: For best results, reheat the shrimp étouffée on the stove rather than in the microwave to maintain the dish’s creamy texture and flavor.

The Best Ever Shrimp Etouffee Variations

Feel free to get creative and make this recipe your own with these delightful twists and swaps!

  • Dairy-Free: Use coconut oil instead of ghee or butter for a dairy-free version that’s just as rich and flavorful.

  • Vegetable-Packed: Add chopped mushrooms or zucchini to the sauté for extra veggies and texture, making it even heartier.

  • Spicy Kick: Increase the cayenne pepper or add sliced jalapeños for a prominent heat level that spice lovers will adore.

  • Seafood Medley: Mix in scallops or crab meat along with the shrimp for an oceanic delight that elevates the dish to a new level.

  • Quinoa Base: Serve the étouffée over fluffy quinoa instead of rice for a protein-packed grain that’s equally satisfying.

  • Slow-Cooked: Transform the recipe into a slow cooker dish; let it simmer on low for a few hours for deeply infused flavors.

  • Creamy Variation: Stir in a splash of heavy cream or coconut milk at the end for a luscious, creamy sauce that envelops each shrimp.

  • Herb Swap: Experiment with fresh herbs like cilantro or basil instead of parsley or green onions for earthy flair and a fresh twist.

Make Ahead Options

These make ahead options for The Best Ever Shrimp Etouffee are a game changer for busy weeknights! You can prep the base by sautéing the vegetables (onions, garlic, celery, and green bell pepper) and mixing in the spices up to 24 hours in advance; just refrigerate them in an airtight container. When you’re ready to serve, simply heat the veggie and spice mix in a pan, add the diced tomatoes and chicken stock, then cook the shrimp until they turn pink. This method ensures your meal is just as delicious and saves you valuable time at dinner! Enjoy the convenience of a comforting, homemade dish with minimal effort!

Chef's Helpful Tips

  • When making The Best Ever Shrimp Etouffee, be sure to sauté your vegetables until they are tender and fragrant, as this builds a robust flavor base.
  • One common mistake is to add the shrimp too early; cook them just until they turn pink to avoid overcooking.
  • For an extra depth of flavor, use smoked paprika instead of regular paprika, enhancing the dish’s smokiness.
  • Finally, allow the sauce to simmer for at least 5 minutes to ensure all the spices and flavors properly meld together before adding the shrimp.

The Best Ever Shrimp Etouffee Recipe FAQs

What type of shrimp should I use for shrimp étouffée?
Absolutely! You can use fresh or frozen peeled shrimp for this recipe. If using frozen shrimp, be sure to thaw them completely before adding to the dish to ensure even cooking.

How should I store leftovers of shrimp étouffée?
Store your shrimp étouffée in an airtight container in the refrigerator for up to 3 days. To reheat, gently warm it on the stove over low heat, adding a splash of chicken stock if it seems too thick.

Can shrimp étouffée be frozen?
Yes, you can freeze shrimp étouffée! Let it cool completely, then transfer it to a freezer-safe container. It can be stored in the freezer for up to 3 months. To reheat, thaw it overnight in the refrigerator and gently reheat it on the stove to preserve its creamy consistency.

How do I know if my shrimp are overcooked?
Overcooked shrimp will be rubbery and have a dull color rather than the bright pink you want. When cooking, keep an eye on them—they only need about 3-5 minutes until they turn pink and opaque!

What can I substitute for ghee if I want a dairy-free version?
If you’re looking to keep this dish dairy-free, coconut oil is a fantastic substitute for ghee or butter. It adds a subtle sweetness without overshadowing the rich flavors of the étouffée.

Are there any dietary considerations for shrimp étouffée?
Definitely! If anyone at your table has shellfish allergies, be sure to substitute the shrimp with a plant-based protein like chickpeas or tofu. Additionally, always check your Cajun seasoning for allergens, as some blends may contain gluten or other additives.

The Best Ever Shrimp Etouffee

The Best Ever Shrimp Etouffee

A comforting and flavorful dish that embodies the essence of New Orleans, perfect for busy weeknights.
Print Recipe Pin Recipe
Prep Time 15 minutes mins
Cook Time 13 minutes mins
Total Time 28 minutes mins
Servings: 4 servings
Course: DINNER RECIPES
Cuisine: Cajun, Louisiana
Calories: 320
Ingredients Equipment Method Nutrition Notes

Ingredients
  

For the Base
  • 1/2 tablespoon olive oil
  • 1 onion finely diced
  • 4 cloves garlic minced
  • 1 cup celery finely diced
  • 1 green bell pepper finely diced
For the Flavor
  • 2 tablespoons arrowroot powder or cornstarch if unavailable
  • 2 tablespoons Cajun seasoning
  • 1 cup diced tomatoes
For the Shrimp
  • 1 pound peeled shrimp fresh or thawed frozen
For Garnish
  • 1 tablespoon chopped parsley or green onions for serving
For Seasoning
  • 2 teaspoons paprika smoked paprika recommended
  • 2 teaspoons garlic powder
  • 1 teaspoon onion powder
  • 1 teaspoon oregano
  • 1 teaspoon salt
  • 1/2 teaspoon black pepper
  • 1/2 teaspoon cayenne pepper adjust for heat
  • 1/2 teaspoon thyme

Equipment

  • large pan

Method
 

How to Make The Best Ever Shrimp Etouffee
  1. In a large pan, heat olive oil over medium heat.
  2. Add onion, garlic, celery, and green bell pepper. Sauté until softened, about 5-7 minutes.
  3. Stir in arrowroot powder, Cajun seasoning, paprika, garlic powder, onion powder, oregano, salt, black pepper, cayenne, and thyme.
  4. Pour in diced tomatoes and chicken stock. Bring to a simmer for about 5 minutes.
  5. Add peeled shrimp and cook until pink and opaque, about 3-5 minutes.
  6. Garnish with chopped parsley or green onions before serving.

Nutrition

Serving: 1bowlCalories: 320kcalCarbohydrates: 25gProtein: 25gFat: 15gSaturated Fat: 5gCholesterol: 200mgSodium: 800mgPotassium: 550mgFiber: 3gSugar: 5gVitamin A: 10IUVitamin C: 30mgCalcium: 5mgIron: 15mg

Notes

Serve with crusty bread for a delightful dipping experience.

Tried this recipe?

Let us know how it was!

Filed Under: DINNER RECIPES

Rustic Seafood Soup Zuppa di Pesce

December 12, 2025 by JudyWhite Leave a Comment

The moment I walked into the kitchen, the scent of sautéed garlic and fennel enveloped me like a warm hug. It was during one of those cozy evenings when the sun sets early, and all I could think about was a comforting bowl of Rustic Seafood Soup, or Zuppa di Pesce, to warm my soul. This dish represents the perfect blend of vibrant flavors, showcasing the ocean’s treasures, and it’s surprisingly easy to make!

Bored with the usual fast food options? Let me show you how you can turn your kitchen into a seafood haven without feeling overwhelmed. With a rich base of tomatoes, white wine, and a variety of fresh seafood, each spoonful transports you directly to a seaside Italian trattoria. Best of all, this recipe offers a delightful return to home-cooked goodness that’ll impress your family and friends. Grab your apron, and let’s dive into this delightful seafood adventure!

Why You'll Love This Rustic Seafood Soup Zuppa di Pesce

  • This Rustic Seafood Soup Zuppa di Pesce is incredibly easy to prepare, making it a perfect weeknight meal or a special occasion dish.
  • The rich and vibrant flavors of fresh seafood, tomatoes, and white wine will tantalize your taste buds and leave you craving more.
  • Its versatility means you can easily customize it with your favorite seafood or whatever is fresh at the market.
  • Visually stunning with its colorful array of seafood, this soup also makes an impressive centerpiece for gatherings, ensuring it will be a crowd-pleaser at your dinner table.
  • Enjoy a comforting, hearty meal that is both wholesome and satisfying, all in under an hour!

Rustic Seafood Soup Zuppa di Pesce Ingredients

• Get ready to elevate your dinner game with these fresh ingredients!

For the Base

  • Extra virgin olive oil – a must for that rich, flavorful foundation.
  • Medium shallots (diced) – sweet and aromatic, they add depth to your soup.
  • Medium fennel bulb (sliced) – brings a lovely anise flavor that complements the seafood.
  • Garlic (sliced) – because everything is better with garlic, it fills your kitchen with a welcoming aroma.
  • Crushed hot red pepper flakes – add a pinch for a spicy kick, or leave it out for a milder soup.
  • Dry white wine – enhances flavors and gives a touch of elegance to your Rustic Seafood Soup.
  • Plum tomatoes – either pulsed or hand crushed, they’ll create the luscious tomato base.
  • Clam juice – an essential for that authentic seafood taste, it intensifies the soup’s flavor.

For the Seafood

  • Calamari – tender and quick-cooking, they’ll soak up all the delicious broth.
  • Cod or other meaty white fish (cut into chunks) – adds heartiness and a delightful texture.
  • Little neck clams (scrubbed) – these beauties seal in the briny ocean flavor, just perfect for a seafood soup.
  • Mussels (scrubbed & beards removed) – essential for a true Zuppa di Pesce, they add a rich taste and elevate the dish.
  • Extra large shrimp – juicy and plump, they’re a real treat in this bowl of goodness.

For Garnish

  • Salt and pepper – simple yet crucial for balancing flavors.
  • Minced flat-leaf Italian parsley – brings a fresh, herbal finish to brighten up your soup.

Gather these ingredients and get ready to bring the ocean into your kitchen!

How to Make Rustic Seafood Soup Zuppa di Pesce

  1. Heat a large Dutch oven or heavy pot over medium-low heat. Add the shallots and fennel to the olive oil, sautéing for about 5 minutes until they soften and become fragrant.

  2. Add the garlic to the pot and cook for an additional 2 minutes. You’ll know it’s ready when the garlic releases its enticing aroma.

  3. Sprinkle in the crushed red pepper flakes and sauté for 30 seconds, allowing the flavors to meld and create a slight kick.

  4. Pour in the dry white wine, turning the heat to medium-high. Scrape the bottom of the pot to lift any brown bits, cooking the wine for 90 seconds.

  5. Combine the pulsed or crushed tomatoes with the clam juice, and then reduce the heat to medium. Allow the sauce to simmer moderately for 10 minutes, letting flavors develop before adding the seafood.

  6. Incorporate the calamari into the simmering sauce, and cook for 15 minutes until tender.

  7. Add the chunks of cod or your chosen white fish, cooking for an additional 5 minutes to ensure it’s just cooked through.

  8. Introduce the cleaned little neck clams to the pot, covering it with a lid. Cook for 5-7 minutes, or until the clams just begin to open.

  9. Stir in the mussels and shrimp, covering once more. Cook until the shrimp turn pink and the mussels open (about 5-7 minutes).

  10. Discard any clams or mussels that remain closed after cooking, as they’re no longer safe to eat.

  11. Taste the broth and season with salt and pepper as needed. Turn off the heat and gently fold in the minced parsley. Serve warm in bowls alongside toasted Italian bread rubbed with garlic and a drizzle of olive oil.

Optional: Serve with a squeeze of lemon for a zestier flavor!
Exact quantities are listed in the recipe card below.

What to Serve with Rustic Seafood Soup Zuppa di Pesce?

Warm up your dinner table with a seafood feast that will leave everyone craving more.

  • Toasted Italian Bread: Great for soaking up the delicious broth, this classic pairing elevates the dining experience. Rub with garlic for an extra flavorful touch.

  • Crispy Garlic Fries: The crunch of fries adds texture contrast, while the garlic echoes the flavors in the soup. Perfect for those who love a little indulgence!

  • Mixed Green Salad: A light and fresh salad adds a vibrant contrast and balances the richness of the soup with a burst of citrus dressing.

  • Grilled Vegetable Platter: Seasonal veggies enhance your meal with smoky flavors, providing a colorful array of textures and freshness alongside the hearty soup.

  • Lemon Sorbet: A refreshing finish that cleanses the palate, this light dessert is ideal after the rich seafood delight. It offers a zesty twist that’s perfect for any season.

  • Chardonnay: This white wine complements the soup’s flavors beautifully, enhancing the seafood and adding a touch of elegance to your meal.

Each of these pairings brings out the best in your Rustic Seafood Soup, creating a delightful culinary adventure for you and your loved ones!

Rustic Seafood Soup Zuppa di Pesce Variations

Feel free to get creative with this delicious recipe and make it your own. You’ll discover a world of flavors waiting to be explored!

  • Spicy Kick: Add fresh jalapeños or a diced habanero for an exciting heat that lingers and enhances the overall flavor.
    The spice will dance on your palate, providing a bold twist that can make the soup even more irresistible.

  • Creamy Addition: Stir in a splash of heavy cream at the end for a luxurious, velvety texture that complements the seafood beautifully.
    This creamy variation transforms your soup into a rich masterpiece, delighting all who take a sip.

  • Veggie Boost: Toss in diced zucchini or bell peppers for extra nutrition and vibrant colors to brighten the dish.
    These fresh veggies add not only texture but also a beautiful splash of color that makes the soup visually appealing.

  • Citrus Twist: Incorporate some zest from lemon or orange to brighten the flavors, balancing the richness of the seafood.
    A hint of citrus creates a refreshing contrast, elevating every spoonful and making your taste buds sing.

  • Herb Infusion: Experiment with other herbs like dill or basil alongside the parsley for extra layers of flavor that sing in harmony.
    Each herb adds its own unique aroma, weaving a tapestry of tastes that will keep everyone guessing.

  • Seafood Mix-Up: Swap out the seafood for your favorites like scallops or lobster when they’re in season for an indulgent upgrade.
    There’s something special about choosing your own seafood; it turns a comforting meal into a luxurious feast.

  • Savory Broth: Use fish stock instead of clam juice for an even richer seafood base that amplifies the flavors in your soup.
    This adjustment creates an intense depth that transports you straight to the seaside.

  • Grains Galore: Add cooked rice or orzo pasta for a heartier, more filling version that transforms your soup into a complete meal.
    As the grains soak up the broth, you’ll find each bowl to be a warm, satisfying hug on a chilly day.

Make Ahead Options

Planning ahead with this Rustic Seafood Soup Zuppa di Pesce can save you precious time on busy weeknights! You can prepare the base of the soup up to 24 hours in advance by sautéing the shallots, fennel, and garlic, then adding the wine, tomatoes, and clam juice. Allow the mixture to cool, transfer to an airtight container, and refrigerate. When you’re ready to serve, just reheat the base on the stove, then add the calamari, fish, clams, mussels, and shrimp, cooking until fully heated through. This way, you ensure the seafood stays fresh and just as delicious, meaning a comforting meal is only minutes away from your dinner table!

How to Store and Freeze Rustic Seafood Soup Zuppa di Pesce

  • Room Temperature: Serve hot and enjoy immediately. Do not leave out for more than 2 hours to prevent spoilage.
  • Fridge: Store leftover Rustic Seafood Soup in an airtight container for up to 3 days. Reheat on the stove over medium heat, stirring occasionally.
  • Freezer: For longer storage, freeze the soup for up to 3 months. Use a freezer-safe container, leaving some space for expansion. Thaw overnight in the fridge before reheating.
  • Reheating: Gently reheat on the stove to preserve seafood texture, adding a splash of water or broth if it appears too thick. Enjoy the flavors just as vibrant as the first serving!

Chef's Helpful Tips

  • When making Rustic Seafood Soup Zuppa di Pesce, be sure to sauté the shallots and fennel slowly to bring out their natural sweetness and flavor.
  • Avoid overcrowding the pot when adding the seafood, as this can lead to uneven cooking and rubbery texture.
  • Allow the soup to simmer gently after adding the tomatoes and clam juice to fully develop the rich base before introducing the seafood.
  • Remember to check for doneness on the clams and mussels, discarding any that do not open to ensure safety.

Rustic Seafood Soup Zuppa di Pesce Recipe FAQs

How do I choose the best seafood for my Rustic Seafood Soup?
Absolutely! Freshness is key to an unforgettable Zuppa di Pesce. Look for seafood that’s firm with a clean ocean scent. For shrimp, they should be bright and translucent, while fish fillets ought to be moist and not smell fishy. Calamari should appear opaque and slightly glossy. If you must use frozen seafood, make sure it’s well-sealed and not freezer-burned.

What’s the best way to store leftover Rustic Seafood Soup?
Very! Store your soup in an airtight container in the fridge for up to 3 days. Make sure it cools down completely before sealing to avoid temperature fluctuations that can lead to spoilage. When you’re ready to reheat, simply warm it on the stove over medium heat, stirring occasionally to ensure even warming!

Can I freeze Rustic Seafood Soup Zuppa di Pesce?
Certainly! Freezing is a great option to extend the life of this soup. Pour the cooled soup into a freezer-safe container and leave about an inch of space at the top for expansion. It can be frozen for up to 3 months. When you’re ready to enjoy it again, thaw the soup overnight in the fridge, then gently reheat on the stove over low heat, adding some broth or water to loosen it if needed.

What should I do if my clams or mussels don’t open while cooking?
Good question! If you find any clams or mussels that remain closed after cooking, it’s essential to discard them. This indicates that they were not fresh or safe to eat. To avoid this, always buy seafood from reputable sources and give your shellfish a good scrub before cooking. They’re the stars of the dish, and it’s critical to make sure they’re safe!

Can I make this soup gluten-free or dairy-free?
Absolutely! The Rustic Seafood Soup Zuppa di Pesce is naturally gluten-free and dairy-free, as it consists of wholesome ingredients without any hidden gluten or dairy products. Just ensure the white wine used is gluten-free, and avoid adding any bread if you’re adhering strictly to a gluten-free diet. For dietary restrictions or preferences, feel free to swap ingredients while keeping the core flavors intact!

Rustic Seafood Soup Zuppa di Pesce

Rustic Seafood Soup Zuppa di Pesce

Experience the comforting flavors of Rustic Seafood Soup Zuppa di Pesce with vibrant seafood and rich tomatoes, perfect for any occasion.
Print Recipe Pin Recipe
Prep Time 15 minutes mins
Cook Time 30 minutes mins
Total Time 45 minutes mins
Servings: 4 bowls
Course: DINNER RECIPES
Cuisine: Italian
Calories: 360
Ingredients Equipment Method Nutrition Notes

Ingredients
  

For the Base
  • 2 tablespoons extra virgin olive oil
  • 2 medium shallots (diced)
  • 1 medium fennel bulb (sliced)
  • 4 cloves garlic (sliced)
  • 1/4 teaspoon crushed hot red pepper flakes adjust to taste
  • 1 cup dry white wine
  • 28 ounces plum tomatoes pulsed or hand crushed
  • 1 cup clam juice
For the Seafood
  • 1 pound calamari
  • 1 pound cod or other meaty white fish (cut into chunks)
  • 1 pound little neck clams (scrubbed)
  • 1 pound mussels (scrubbed & beards removed)
  • 1 pound extra large shrimp
For Garnish
  • to taste salt
  • to taste pepper
  • 1/4 cup minced flat-leaf Italian parsley

Equipment

  • large Dutch oven or heavy pot

Method
 

Cooking Steps
  1. Heat a large Dutch oven or heavy pot over medium-low heat. Add the shallots and fennel to the olive oil, sautéing for about 5 minutes until they soften and become fragrant.
  2. Add the garlic to the pot and cook for an additional 2 minutes.
  3. Sprinkle in the crushed red pepper flakes and sauté for 30 seconds.
  4. Pour in the dry white wine, turning the heat to medium-high. Scrape the bottom of the pot to lift any brown bits, cooking the wine for 90 seconds.
  5. Combine the pulsed or crushed tomatoes with the clam juice, and then reduce the heat to medium. Allow the sauce to simmer moderately for 10 minutes.
  6. Incorporate the calamari into the simmering sauce, and cook for 15 minutes until tender.
  7. Add the chunks of cod or your chosen white fish, cooking for an additional 5 minutes.
  8. Introduce the cleaned little neck clams to the pot, covering it with a lid. Cook for 5-7 minutes, or until the clams just begin to open.
  9. Stir in the mussels and shrimp, covering once more. Cook until the shrimp turn pink and the mussels open (about 5-7 minutes).
  10. Discard any clams or mussels that remain closed after cooking.
  11. Taste the broth and season with salt and pepper as needed. Turn off the heat and fold in the minced parsley. Serve warm.

Nutrition

Serving: 1bowlCalories: 360kcalCarbohydrates: 35gProtein: 30gFat: 12gSaturated Fat: 2gPolyunsaturated Fat: 1gMonounsaturated Fat: 4gCholesterol: 150mgSodium: 600mgPotassium: 800mgFiber: 4gSugar: 5gVitamin A: 400IUVitamin C: 20mgCalcium: 80mgIron: 4mg

Notes

Serve alongside toasted Italian bread rubbed with garlic and a drizzle of olive oil. Optional: Add a squeeze of lemon for zest.

Tried this recipe?

Let us know how it was!

Filed Under: DINNER RECIPES

New England Clam Chowder with Fresh Clams

December 12, 2025 by JudyWhite Leave a Comment

There’s nothing quite like the rich, creamy warmth of a comforting bowl of New England Clam Chowder with Fresh Clams. Picture this: the first chill of autumn descends, and the air is filled with earthy scents from your kitchen, a teasing hint of salty ocean waves mingling with the buttery aroma of bacon and hearty potatoes. This dish isn’t just another soup; it’s a feel-good classic that invites memories of family gatherings and cozy evenings.

I discovered this recipe through a spontaneous visit to my local seafood market, where the vibrant displays of freshly caught cherrystone clams caught my eye. My excitement quickly turned into inspiration as I began picturing a cozy dinner with friends, where laughter and stories would blend seamlessly with the delightful flavors of homemade chowder. Trust me, once you savor that first spoonful, you’ll understand why it’s become a beloved staple.

Join me in creating this soul-soothing dish that’ll not only delight your taste buds but impress any guests at your table. Let’s dive into the creamy goodness and make some memories together!

Why You'll Love This New England Clam Chowder with Fresh Clams

  • This New England Clam Chowder with Fresh Clams is incredibly easy to make, allowing you to enjoy a hearty, homemade meal without spending all day in the kitchen.
  • The combination of fresh clams, smoky bacon, and creamy potatoes creates a flavor profile that is both comforting and unforgettable.
  • Its versatility means you can customize ingredients to suit your taste, whether you prefer it with more herbs or a dash of spice.
  • Visually, this chowder is a feast for the eyes, with its creamy texture and vibrant clams making for an appetizing presentation.

New England Clam Chowder Ingredients

• Dive into the deliciousness of New England Clam Chowder with Fresh Clams!

For the Chowder Base

  • 5 pounds live cherrystone clams – ensure they are scrubbed clean for the best flavor.
  • 1 ounce salt pork – adds a savory depth that elevates the chowder.
  • 1.5 ounces bacon – finely diced, it brings a delightful smokiness to the mix.
  • 2 tablespoons butter – enhances the richness of the chowder.
  • 1/4 cup minced celery – adds a subtle crunch and fresh taste.
  • 1 cup onion – chopped for sweetness and depth of flavor.
  • 2 teaspoons fresh garlic – minced garlic provides an aromatic boost.

For the Potatoes

  • 1.25 pounds Russet potatoes – peeled and diced to give the chowder hearty texture.
  • 2 tablespoons flour – helps thicken the chowder, making it luxuriously creamy.

For the Seasoning

  • 3 cups stock from cooking the clams – this flavorful base is essential for authentic taste.
  • 1 teaspoon fresh thyme – or 1/2 teaspoon dried, for an earthy note.
  • 1 leaf bay – adds depth and complexity to the overall flavor.

For the Creaminess

  • 2 cups heavy cream – the key to that rich, velvety finish.
  • Black pepper – to taste, enhancing all the beautiful flavors.

For Serving

  • Butter – for extra richness when serving.
  • Oyster crackers – a delightful crunchy companion to your chowder.

How to Make New England Clam Chowder

  1. Scrub and Cook Clams: Start by scrubbing the cherrystone clams thoroughly. Place them in a pot of water and cook over medium heat until they open. Remember to reserve the cooking liquid—this is your clam stock!

  2. Render Pork and Bacon: In a large pot, add the diced salt pork and bacon. Cook over medium heat until crispy and golden brown, allowing those wonderful smoky flavors to infuse into the pot.

  3. Sauté Veggies: Add the butter, minced celery, chopped onion, and garlic to the pot. Sauté them for about 5-7 minutes until they’re soft and fragrant, filling your kitchen with warmth and flavor.

  4. Add Potatoes and Flour: Toss in the diced Russet potatoes and flour, stirring well for about 3 minutes. This will help to coat the potatoes and prepare them for the broth ahead.

  5. Pour in Clam Stock & Seasoning: Gradually add the reserved clam stock, along with the fresh thyme and bay leaf. Bring the mixture to a gentle simmer, allowing the flavors to meld together beautifully.

  6. Cook Until Tender: Let the chowder simmer for 15-20 minutes, or until the potatoes are tender. You’ll know it’s ready when a fork easily goes through the bits of potato.

  7. Add Cream and Clams: Stir in the heavy cream and the cooked clams. Gently heat everything through, allowing the chowder to thicken and become luxuriously creamy.

  8. Season to Taste: Sprinkle in black pepper as desired, adjusting the seasoning to suit your taste buds. You deserve a hearty flavor in every spoonful!

  9. Serve Warm: Ladle the chowder into bowls, adding a pat of butter to each and a sprinkle of oyster crackers for that delightful crunch when serving.

Optional: A sprinkle of freshly chopped parsley adds a lovely touch of freshness on top!
Exact quantities are listed in the recipe card below.

Make Ahead Options

These New England Clam Chowder with Fresh Clams are perfect for meal prep enthusiasts! You can scrub the clams and cook them up to 24 hours in advance; simply store them in their cooking liquid in the refrigerator to preserve their freshness. You can also sauté the vegetables and bacon a day ahead and refrigerate them. When you’re ready to serve, just combine everything in the pot, add the reserved clam stock, and throw in the clams and cream. This way, you’ll have a rich and hearty chowder that tastes just as delicious as if you made it from scratch that same day! Enjoy a cozy meal without the fuss on busy weeknights.

Storage Tips for New England Clam Chowder

  • Room Temperature: Enjoy your New England Clam Chowder with Fresh Clams right after cooking for the best flavor. If left out, consume within 2 hours to ensure safety.
  • Fridge: Store leftovers in an airtight container in the fridge for up to 3 days. Reheat gently on the stovetop or microwave until warmed through, stirring occasionally.
  • Freezer: For longer storage, freeze the chowder in a freezer-safe container for up to 3 months. Thaw in the fridge overnight before reheating. Avoid freezing if the chowder contains cream, as it may separate.
  • Reheating: When reheating, do so over low heat on the stove, stirring frequently to maintain a creamy texture. Add a splash of cream if it thickens too much during reheating.

New England Clam Chowder Variations

Feel free to tailor this chowder recipe to match your tastes and dietary needs!

  • Vegetarian: Substitute clams with diced mushrooms, adding depth and umami, leaving out the pork and bacon for a lighter version.
  • Creamy & Hearty: Swap heavy cream for coconut milk; this will give the chowder a subtle sweetness and extra creaminess.
  • Spicy Twist: Add a pinch of cayenne pepper or diced jalapeños for a warm kick that dances on your tongue.
  • Herb-Infused: Enhance with fresh dill or basil; a fragrant pop of herbaceousness elevates the chowder to new heights.
  • Smoky Flavor: Introduce smoked paprika or liquid smoke for a flavor profile reminiscent of cozy beach bonfires.
  • Seafood Medley: Toss in shrimp or scallops along with the clams for a delightful seafood mix that satisfies any craving.
  • Corny Goodness: Add sweet corn kernels for a burst of sweetness and texture that brightens up each bowl.
  • Gluten-Free: Switch out regular flour for cornstarch or a gluten-free flour blend to maintain the creamy base without gluten.

Experimenting with these variations will make your chowder uniquely yours and deeply satisfying!

What to Serve with New England Clam Chowder?

Pairing a delicious side or beverage with your rich New England Clam Chowder can elevate your dining experience to a whole new level.

  • Garlic Bread: The crispy, buttery texture of garlic bread perfectly complements the creamy chowder, ideal for dipping.

  • Cornbread Muffins: Sweet and crumbly cornbread offers a delightful contrast to the chowder’s savory, rich flavors. These muffins are great for sopping up every drop!

  • Fresh Side Salad: A light, vibrant salad with mixed greens adds a refreshing crunch and balances the richness of the chowder beautifully. Topped with a zesty vinaigrette, it just sings summer.

  • Steamed Asparagus: Tossed with a touch of lemon and olive oil, steamed asparagus brings a bright, fresh element that pairs wonderfully with the clam flavor.

  • Beer or White Wine: A crisp, cold lager or a glass of chilled Sauvignon Blanc complements the sea-salty essence of the chowder while enhancing the savory depth of the ingredients.

  • Apple Pie: This classic dessert rounds off the meal with its sweet and tart flavors, providing a perfect contrast to the savory chowder experience.

Chef's Helpful Tips

  • When making New England Clam Chowder with Fresh Clams, it’s essential to scrub the clams thoroughly to remove any sand or grit that can affect the chowder’s texture.
  • Always reserve the clam cooking liquid, as this flavorful stock is the backbone of your chowder and enhances its taste.
  • When sautéing the vegetables, cook them until they’re just softened to avoid overcooking and losing their fresh flavors.
  • Finally, be careful not to boil the chowder after adding the cream, as this can cause it to curdle; a gentle heat is key to achieving the perfect creamy consistency.

New England Clam Chowder with Fresh Clams Recipe FAQs

How do I choose the best clams for chowder?
Absolutely! When selecting cherrystone clams, look for ones that are tightly closed and smell like the ocean. Avoid clams with dark spots or cracks in their shells, as these can indicate they are not fresh. If they are open, give them a gentle tap; if they close up, they are alive and safe to cook!

How should I store leftover chowder?
Very good question! You can store your New England Clam Chowder with Fresh Clams in an airtight container in the fridge for up to 3 days. Just ensure it cools down before sealing it. When you reheat, do so gently on the stovetop or microwave—stirring occasionally to keep that creamy texture intact!

Can I freeze clam chowder?
Yes, you can! However, if your chowder contains cream, it’s best to avoid freezing as it can separate when thawed. If you must, freeze it in a freezer-safe container for up to 3 months. To thaw, place it in the fridge overnight. When you’re ready to enjoy it, slowly reheat on low, stirring frequently, and consider adding a splash of cream to revive its creaminess.

What should I do if my chowder is too thick?
Don’t worry; it happens! If your chowder is thicker than you like, simply stir in a bit of clam stock or milk to reach your desired consistency. Heat it gently on the stove while stirring, so it warms through evenly without curdling the cream.

Is this recipe suitable for people with shellfish allergies?
No, unfortunately! This New England Clam Chowder with Fresh Clams is not suitable for anyone with shellfish allergies. Always be cautious and read labels if you’re using any pre-packaged ingredients. If you’re looking for alternatives, consider substituting with vegetables like mushrooms or hearty beans to create a different but delicious chowder!

How long should I cook the potatoes for the ideal texture?
Great question! After adding the potatoes, let the chowder simmer for about 15-20 minutes. Check for doneness by poking a potato cube with a fork—if it slides in easily, then it’s perfect! You want them tender yet not falling apart, ensuring that lovely texture remains in every spoonful.

New England Clam Chowder with Fresh Clams

New England Clam Chowder with Fresh Clams

Enjoy the rich, creamy warmth of New England Clam Chowder with Fresh Clams, a comforting dish perfect for cozy evenings.
Print Recipe Pin Recipe
Prep Time 30 minutes mins
Cook Time 45 minutes mins
Total Time 1 hour hr 15 minutes mins
Servings: 6 cups
Course: DINNER RECIPES
Cuisine: American
Calories: 300
Ingredients Equipment Method Nutrition Notes

Ingredients
  

Chowder Base
  • 5 pounds live cherrystone clams ensure they are scrubbed clean for the best flavor
  • 1 ounce salt pork adds a savory depth that elevates the chowder
  • 1.5 ounces bacon finely diced for smokiness
  • 2 tablespoons butter enhances the richness of the chowder
  • 1/4 cup minced celery adds a subtle crunch and fresh taste
  • 1 cup onion chopped for sweetness and depth of flavor
  • 2 teaspoons fresh garlic minced for aromatic boost
Potatoes
  • 1.25 pounds Russet potatoes peeled and diced for hearty texture
  • 2 tablespoons flour helps thicken the chowder
Seasoning
  • 3 cups stock from cooking the clams essential for authentic taste
  • 1 teaspoon fresh thyme or 1/2 teaspoon dried
  • 1 leaf bay adds depth and complexity
Creaminess
  • 2 cups heavy cream key to rich, velvety finish
  • Black pepper to taste, enhancing flavors
Serving
  • Butter for extra richness when serving
  • Oyster crackers crunchy companion to chowder

Equipment

  • Large pot
  • Saucepan

Method
 

Steps to Make Chowder
  1. Scrub and Cook Clams: Start by scrubbing the cherrystone clams thoroughly. Place them in a pot of water and cook over medium heat until they open. Remember to reserve the cooking liquid—this is your clam stock!
  2. Render Pork and Bacon: In a large pot, add the diced salt pork and bacon. Cook over medium heat until crispy and golden brown, allowing those wonderful smoky flavors to infuse into the pot.
  3. Sauté Veggies: Add the butter, minced celery, chopped onion, and garlic to the pot. Sauté them for about 5-7 minutes until they’re soft and fragrant.
  4. Add Potatoes and Flour: Toss in the diced Russet potatoes and flour, stirring well for about 3 minutes.
  5. Pour in Clam Stock & Seasoning: Gradually add the reserved clam stock, along with the fresh thyme and bay leaf. Bring the mixture to a gentle simmer.
  6. Cook Until Tender: Let the chowder simmer for 15-20 minutes, or until the potatoes are tender.
  7. Add Cream and Clams: Stir in the heavy cream and the cooked clams. Gently heat everything through.
  8. Season to Taste: Sprinkle in black pepper as desired.
  9. Serve Warm: Ladle the chowder into bowls, adding a pat of butter and a sprinkle of oyster crackers.

Nutrition

Serving: 1cupCalories: 300kcalCarbohydrates: 25gProtein: 10gFat: 20gSaturated Fat: 10gPolyunsaturated Fat: 1gMonounsaturated Fat: 5gCholesterol: 60mgSodium: 800mgPotassium: 450mgFiber: 2gSugar: 2gVitamin A: 500IUVitamin C: 3mgCalcium: 50mgIron: 1mg

Notes

For extra freshness, add a sprinkle of freshly chopped parsley on top before serving.

Tried this recipe?

Let us know how it was!

Filed Under: DINNER RECIPES

Cajun Potato Soup with Andouille Sausage

December 12, 2025 by JudyWhite Leave a Comment

There’s something undeniably comforting about a warm bowl of soup simmering on the stove, especially as the evenings grow cooler. I was inspired to perfect my own version of a Cajun classic one chilly evening, where the smoky aroma of andouille sausage mingled with the rich scent of spices, filling my home with a vibrant warmth that beckoned me to the kitchen. This Cajun Potato Soup with Andouille Sausage is a delicious blend of hearty goodness and zesty flavor, making it the perfect antidote to those tired weeknights spent dodging the drive-thru.

Not only does this soup come together with simple, wholesome ingredients, but it also celebrates the versatility of potatoes and the bold flavors of Cajun cooking. Whether you’re cooking for a busy family or hosting a cozy gathering with friends, this recipe is sure to impress and satisfy. Grab a spoon and let’s dive into this delightful dish that promises warmth, comfort, and a touch of culinary adventure!

Why You'll Love This Cajun Potato Soup with Andouille Sausage

  • This Cajun Potato Soup with Andouille Sausage is incredibly easy to make, allowing you to whip up a hearty meal without any fuss.
  • The bold flavors of andouille sausage and Cajun spices create a deliciously rich experience that’s perfect for warming you up on chilly nights.
  • Not only does it taste fantastic, but the vibrant colors of the ingredients make it a visually appealing dish that will impress your guests.
  • It’s also versatile enough to adapt to your pantry staples, making it a great option for any occasion.

Cajun Potato Soup with Andouille Sausage Ingredients

Get ready for a flavorful journey!

For the Soup

  • Vegetable oil – perfect for sautéing, enhancing flavors without overpowering the dish.
  • Andouille sausage – brings a smoky, spicy kick; feel free to substitute with kielbasa for a milder taste.
  • Large onion – adds sweetness and depth; yellow onions work best in this soup.
  • Celery – contributes crunch and freshness; you can swap it for leeks if desired.
  • Red bell pepper – adds a pop of color and sweetness; use any bell pepper if needed.
  • Garlic – infuses the soup with aromatic goodness; fresh garlic is always best for flavor.
  • Cajun seasoning – the star of this dish, adding zest and warmth; adjust the amount based on your spice preference.
  • Kosher salt – enhances all the flavors; keep it to your taste, especially if your broth is salty.
  • Black pepper – adds a mild heat; adjust according to your preference.
  • Paprika – enhances the color and flavor with a subtle smokiness.
  • Cayenne pepper – gives that extra kick; start with a little and add more if you like it spicier.
  • Chicken broth – the base for a hearty soup; vegetable broth can be used for a vegetarian option.
  • Russet potatoes – provide creaminess and body to the soup; Yukon gold works well too.
  • Heavy whipping cream – adds richness and creamy texture; substitute with half-and-half for a lighter option.
  • Mild cheddar cheese – melts beautifully into the soup for extra indulgence; a sprinkle of pepper jack can spice it up!
  • Parsley – for a fresh, vibrant garnish that enhances presentation.

This Cajun Potato Soup with Andouille Sausage recipe is a delightful way to bring warmth and flavor to your table!

How to Make Cajun Potato Soup with Andouille Sausage

  1. Heat Oil: In a large pot over medium heat, pour in the vegetable oil. Once it shimmers, add the sliced andouille sausage and cook, stirring occasionally until browned and fragrant, about 3-4 minutes. Remove the sausage and set aside.

  2. Sauté Vegetables: In the same pot, add the diced onion, celery, and red bell pepper. Sauté until softened and the colors brighten, approximately 5-8 minutes. Stir in the minced garlic and cook for an additional minute.

  3. Simmer Soupy Goodness: Now it’s time to add flavor! Stir in the Cajun seasoning, kosher salt, black pepper, paprika, cayenne pepper, chicken broth, and cubed potatoes. Reduce the heat and let it simmer for 20-25 minutes, until the potatoes are fork-tender.

  4. Mix in Cream and Cheese: Return the browned sausage to the pot, then gently stir in the heavy cream and shredded cheddar cheese. Let everything simmer together for an extra 5 minutes, or until heated through and the cheese melts beautifully.

  5. Garnish and Serve: Finally, garnish with freshly chopped parsley for a pop of color and brightness. Serve the soup warm and enjoy the comforting flavors!

Optional: A sprinkle of extra Cajun seasoning can elevate the flavor even more!

Exact quantities are listed in the recipe card below.

Make Ahead Options

These Cajun Potato Soup with Andouille Sausage preparations are perfect for busy weeknights or meal planning! You can chop the vegetables (onion, celery, and bell pepper) and garlic up to 24 hours in advance, storing them in an airtight container in the refrigerator to keep them fresh. Additionally, you can cook the sausage and store it separately for up to 3 days. When you’re ready to enjoy the soup, simply reheat the sautéed veggies and sausage in a pot, add the chicken broth, potatoes, and spices, and let it simmer. Stir in the heavy cream and cheese just before serving for that creamy, delicious finish. This way, you’ll have a hearty, flavorful meal ready with minimal effort!

How to Store and Freeze Cajun Potato Soup with Andouille Sausage

Fridge: Store leftover Cajun Potato Soup in an airtight container for up to 3 days. The flavors deepen as it rests, making it even more delicious!

Freezer: Freeze the soup in individual portions for up to 3 months. Make sure to leave some space in the container for expansion as it freezes.

Reheating: Thaw overnight in the fridge and reheat on the stovetop over medium heat, stirring occasionally until heated through. You can also microwave it in short intervals.

Serving Suggestions: Consider adding a splash of cream or a sprinkle of cheese when reheating to restore its creamy texture and indulgent flavors.

Cajun Potato Soup with Andouille Sausage Variations

Feel free to explore these exciting twists and substitutions to make this soup uniquely yours!

  • Dairy-Free: Substitute heavy cream with coconut milk and cheese with nutritional yeast for a rich, creamy texture without dairy.

  • Spicy Kick: Add diced jalapeños or a dash more cayenne for an added layer of heat that can ignite your taste buds!

  • Veggie-Lover: Replace andouille sausage with hearty mushrooms or tempeh for a delicious vegetarian option that retains the soup’s robustness.

  • Smoky Flavor: Use smoked paprika instead of regular paprika, creating an irresistible smoky depth that enhances the Cajun flare beautifully.

  • Herb Infusion: Fresh thyme or bay leaves can elevate the dish, providing a fragrant twist that makes every spoonful a comforting delight.

  • Crispy Topping: Top the soup with crispy fried onions or bacon bits for a satisfying crunch that adds a beautiful contrast to the creamy soup.

  • Cheesy Variants: Try goat cheese or a sharper cheddar for a tangy flavor that enhances the soup’s rich profile and brings a delightful twist.

  • Quinoa Boost: Stir in cooked quinoa for added protein and texture, transforming this soup into a filling meal that’s both hearty and nutritious.

What to Serve with Cajun Potato Soup with Andouille Sausage?

Pair your hearty bowl of soup with these delightful sides that elevate the entire meal experience.

  • Crusty Bread: A warm loaf, perfect for dipping, soaks up the leftover flavors of the soup.

  • Homemade Cornbread: Sweet and fluffy, it provides a comforting balance to the spicy Cajun flavors in the soup.

  • Caesar Salad: Crisp romaine and creamy dressing offer freshness and crunch, complementing the velvety soup beautifully. The flavors meld perfectly, creating a satisfying contrast with every bite.

  • Roasted Vegetables: Seasoned garlic and herbs enhance the natural sweetness, bringing a vibrant health boost alongside the rich soup. They add color and a bit of earthiness to the meal.

  • Brewed Iced Tea: The refreshing chill and slight sweetness of the tea is a wonderful match with the bold spices in the soup, providing a delightful contrast.

  • Apple Crisp: A warm dessert with a touch of cinnamon provides a sweet finale to your meal, finishing off the evening with a comforting note. The combination of the soup’s warmth and the crisp’s sweetness creates a cozy atmosphere.

Enjoy these pairings alongside your Cajun Potato Soup with Andouille Sausage for a complete, soul-warming experience!

Chef's Helpful Tips

  • When making Cajun Potato Soup with Andouille Sausage, make sure to cook the sausage until nicely browned to enhance its flavor before adding other ingredients.
  • Avoid overcrowding the pot when sautéing vegetables; give them enough space to soften and caramelize properly for maximum flavor development.
  • For a creamier texture, mash a portion of the potatoes in the soup before stirring in the cream and cheese, ensuring a rich consistency.
  • Always taste and adjust the seasoning towards the end of cooking, especially since the broth can vary in saltiness.
  • Fresh parsley not only adds flavor but also brightens the dish visually, so don’t skip the garnish!

Cajun Potato Soup with Andouille Sausage Recipe FAQs

What type of potatoes are best for this soup?
For the best results, I recommend using russet potatoes as they become wonderfully creamy when cooked. Yukon gold potatoes work well too, providing a slightly different texture if you want to mix things up!

How should I store leftover Cajun Potato Soup?
Absolutely! Store any leftovers in an airtight container in the fridge for up to 3 days. The flavors will develop further, making each spoonful even more delightful. Just remember to let the soup cool to room temperature before sealing it up.

Can I freeze Cajun Potato Soup with Andouille Sausage?
Very much so! Pour the cooled soup into freezer-safe containers or heavy-duty freezer bags. Make sure to leave some space at the top for expansion, and it can be frozen for up to 3 months. When you’re ready to enjoy it again, simply thaw it overnight in the fridge.

What if my soup is too thick?
No worries! If you find the soup to be thicker than you’d like, simply stir in a little extra chicken broth or water while reheating until you reach your desired consistency. It’s a quick fix that keeps everything flavorful and comforting!

Are there any allergies I should be aware of when making this recipe?
Absolutely! This Cajun Potato Soup contains dairy, gluten (in the sausage), and potentially allergens from the andouille sausage. If cooking for someone with dietary restrictions, consider using gluten-free sausage options and substituting the heavy cream for a non-dairy milk to maintain creaminess without the lactose.

Cajun Potato Soup with Andouille Sausage

Cajun Potato Soup with Andouille Sausage

A comforting and flavorful Cajun Potato Soup with Andouille Sausage, perfect for chilly evenings.
Print Recipe Pin Recipe
Prep Time 15 minutes mins
Cook Time 40 minutes mins
Total Time 55 minutes mins
Servings: 6 bowls
Course: DINNER RECIPES
Cuisine: Cajun
Calories: 450
Ingredients Equipment Method Nutrition Notes

Ingredients
  

For the Soup
  • 2 tablespoons vegetable oil perfect for sautéing
  • 12 ounces andouille sausage or kielbasa for a milder taste
  • 1 large onion yellow onions work best
  • 2 stalks celery can be substituted with leeks
  • 1 medium red bell pepper or any bell pepper
  • 3 cloves garlic fresh is best for flavor
  • 2 tablespoons Cajun seasoning adjust based on spice preference
  • 1 teaspoon kosher salt to taste
  • 1 teaspoon black pepper adjust to preference
  • 1 teaspoon paprika adds smokiness
  • 0.5 teaspoon cayenne pepper add more for extra heat
  • 4 cups chicken broth or vegetable broth for vegetarian
  • 3 large russet potatoes or Yukon gold
  • 1 cup heavy whipping cream or half-and-half
  • 1 cup mild cheddar cheese can use pepper jack for spice
  • 0.25 cup parsley for garnish

Equipment

  • Large pot

Method
 

How to Make Cajun Potato Soup with Andouille Sausage
  1. Heat Oil: In a large pot over medium heat, pour in the vegetable oil. Once it shimmers, add the sliced andouille sausage and cook, stirring occasionally until browned and fragrant, about 3-4 minutes. Remove the sausage and set aside.
  2. Sauté Vegetables: In the same pot, add the diced onion, celery, and red bell pepper. Sauté until softened and the colors brighten, approximately 5-8 minutes. Stir in the minced garlic and cook for an additional minute.
  3. Simmer Soupy Goodness: Stir in the Cajun seasoning, kosher salt, black pepper, paprika, cayenne pepper, chicken broth, and cubed potatoes. Reduce the heat and let it simmer for 20-25 minutes, until the potatoes are fork-tender.
  4. Mix in Cream and Cheese: Return the browned sausage to the pot, then gently stir in the heavy cream and shredded cheddar cheese. Let everything simmer together for an extra 5 minutes, or until heated through and the cheese melts beautifully.
  5. Garnish and Serve: Finally, garnish with freshly chopped parsley for a pop of color and brightness. Serve the soup warm and enjoy the comforting flavors!

Nutrition

Serving: 1bowlCalories: 450kcalCarbohydrates: 30gProtein: 20gFat: 30gSaturated Fat: 15gPolyunsaturated Fat: 2gMonounsaturated Fat: 12gCholesterol: 80mgSodium: 1200mgPotassium: 800mgFiber: 3gSugar: 3gVitamin A: 500IUVitamin C: 30mgCalcium: 200mgIron: 2mg

Notes

Ensure to adjust seasonings towards the end of cooking. Fresh parsley adds a bright touch, don't skip it!

Tried this recipe?

Let us know how it was!

Filed Under: DINNER RECIPES

One Pan Garlic Herb Chicken and Veggies

December 12, 2025 by JudyWhite Leave a Comment

Picture this: it’s a busy weeknight, and the last thing you want is to be stuck in the kitchen for hours. I vividly remember the day when I craved something comforting yet effortless, and that’s when I discovered the magic of One Pan Garlic Herb Chicken and Veggies. With just a single baking sheet, this dish becomes a delightful symphony of roasted chicken breasts, tender red potatoes, and vibrant green beans—each bite bursting with the fresh flavor of rosemary, thyme, and garlic.

As I squeezed a lemon over the colorful medley, I felt a wave of relief wash over me; no need for complicated prep or endless cleanup. In just 32 minutes, I had a wholesome, mouthwatering meal that even satisfied my pickiest eaters. It’s perfect for those cozy family dinners or a quick dinner for one after a long day. If you’re ready to revive your weeknight cooking with ease, let’s dive into this recipe that promises deliciousness in every bite!

Why You'll Love This One Pan Garlic Herb Chicken and Veggies

  • This recipe makes dinner a breeze by keeping everything in one pan, saving you time on cleanup.
  • The flavor combination of garlic, rosemary, and thyme infuses the chicken and veggies, creating a meal that is rich and satisfying.
  • Its versatility lets you swap in your favorite seasonal vegetables or adjust the herbs to suit your taste.
  • The vibrant colors of the roasted potatoes and green beans make for an eye-catching presentation that’s sure to impress at the dinner table.
  • Enjoy a comforting dish that not only delights the palate but brings the family together in just over half an hour.

One Pan Garlic Herb Chicken and Veggies Ingredients

Here’s everything you need for this scrumptious, quick meal!

For the Veggies

  • 20 oz petite red potatoes – these tender spuds absorb all the herby goodness!
  • 1 pkg frozen green beans (12 oz) – a convenient option that keeps prep simple and fresh.
  • 1 medium lemon – adds a zesty brightness that enhances all the flavors.

For the Chicken

  • 4 (6 oz) boneless skinless chicken breasts – lean protein that becomes juicy and infused with herbs.

Herbs & Spices

  • 3 tsp chopped fresh rosemary leaves (divided) – this fragrant herb elevates the entire dish.
  • 2 tsp chopped fresh thyme leaves (divided) – offers a subtle earthiness and depth.
  • Salt to taste – essential for bringing out the flavors in your One Pan Garlic Herb Chicken and Veggies.
  • Freshly ground black pepper to taste – adds a gentle kick that rounds out the seasoning.

Richness & Flavor

  • 2 Tbsp butter (divided) – contributes a creamy richness while keeping the chicken moist.
  • 2 Tbsp olive oil (divided) – helps in roasting and adds a light, fruity flavor.
  • 3 cloves garlic (minced) – infuses a delicious aroma and savory taste throughout the dish.

How to Make One Pan Garlic Herb Chicken and Veggies

  1. Preheat your oven to 400°F (200°C) for perfectly cooked chicken and veggies. This initial step sets the stage for roasting perfection!

  2. Cut the petite red potatoes into quarters and arrange them in the center of a large baking sheet. Their golden crust will create a delightful texture.

  3. Add the frozen green beans around the potatoes, creating a vibrant and colorful mix. They’ll cook quickly, soaking up all the delicious flavors!

  4. Squeeze the juice of the lemon over the veggies, then tuck the lemon halves onto the sheet. This zesty addition brightens the entire dish!

  5. Season everything generously with salt, pepper, and 1 1/2 tsp of rosemary and 1 tsp of thyme. This is where the flavor magic truly begins!

  6. Drizzle 1 Tbsp of olive oil over the veggies, tossing to coat them evenly for that irresistible roasted finish.

  7. Mix together the remaining rosemary, thyme, butter, olive oil, garlic, salt, and pepper in a bowl. This aromatic concoction is crucial for flavor!

  8. Rub the mixture over the chicken breasts, ensuring each piece is well-coated in herby goodness, and then place them on the baking sheet.

  9. Bake for 22 minutes or until the chicken is cooked through and the veggies are tender. You want them golden brown and bursting with flavor!

Optional: Garnish with fresh herbs before serving for a pop of color.

Exact quantities are listed in the recipe card below.

Make Ahead Options

These One Pan Garlic Herb Chicken and Veggies are a lifesaver for busy home cooks! You can prep the veggies and seasonings up to 24 hours in advance. Just chop the petite red potatoes and keep them in an airtight container in the refrigerator. Toss the frozen green beans in with the potatoes when you’re ready to cook. Mix your herbs, garlic, and olive oil as directed, then rub it over the chicken breasts and seal them in the fridge to marinate. When it’s time to serve, simply arrange everything on the baking sheet and bake as directed. This way, you’ll have a delicious, wholesome meal ready with minimal effort, just as satisfying as if you made it that night!

What to Serve with One Pan Garlic Herb Chicken and Veggies?

Imagine a table filled with vibrant colors and delightful aromas, all set to complement that luscious chicken and veggie dish you’ve prepared.

  • Creamy Mashed Potatoes: The buttery goodness of mashed potatoes provides a comforting, velvety texture that pairs beautifully with the savory chicken.

  • Garlic Bread: A crisp, golden loaf is perfect for soaking up the juices from the chicken and herbs, adding a delightful crunch to every meal.

  • Fresh Garden Salad: Light, crisp greens dressed with a simple vinaigrette introduce a refreshing contrast to the hearty chicken and potatoes.

  • Roasted Brussels Sprouts: With their slightly nutty flavor and crispy finish, they add an exciting twist that complements the herbaceous notes of your dish.

  • Steamed Asparagus: Tender asparagus drizzled with olive oil brings a subtle elegance and bright green freshness that balances the meal.

  • Zesty Lemonade: A cool glass of lemonade enhances that citrus zing from the dish, providing a refreshing balance to the hearty flavors.

Choose any combination from this list to elevate your dining experience and delight every member of your family.

How to Store and Freeze One Pan Garlic Herb Chicken and Veggies

Fridge: Store leftovers in an airtight container for up to 3 days. This allows you to enjoy the delicious flavors once more without losing freshness.

Freezer: Freeze the chicken and veggies in a freezer-safe container for up to 3 months. Make sure to cool them completely before sealing to avoid freezer burn.

Reheating: When ready to enjoy, reheat in a 350°F (175°C) oven for about 15-20 minutes until warmed through. This will help retain the dish’s tasty texture and flavors.

Meal Prep: Perfect for meal prep! You can section out portions for easy lunches or dinners throughout the week. Just remember, your One Pan Garlic Herb Chicken and Veggies deserves to be enjoyed deliciously fresh!

One Pan Garlic Herb Chicken and Veggies Variations

Feel free to make this dish your own with these delightful twists!

  • Herb Substitutes: Swap rosemary for oregano or basil for a completely different flavor profile. Both herbs bring a vibrant twist that’s equally aromatic.

  • Veggie Mix-Up: Replace green beans with asparagus or broccoli for varied textures and tastes. Each vegetable offers its unique crunch and flavor, making the dish even more enticing.

  • Add Sweetness: Incorporate sweet potatoes in place of red potatoes for a delectable sweetness. Their creamy texture complements the savory chicken beautifully.

  • Spicy Kick: Sprinkle in red pepper flakes or add chopped jalapeños to bring some heat to the dish. A little spice adds a surprising and enjoyable layer of flavor!

  • Cheesy Finish: Top with grated Parmesan or crumbled feta right before serving for a creamy, tangy finish that elevates the entire dish.

  • Lemon Zing: Add lemon zest along with the juice for an extra pop of citrusy flavor. This brightens the dish and enhances those herbal notes.

  • Lean Protein: Use turkey breasts or thighs instead of chicken for a different lean protein option. The flavors work beautifully, and turkey offers a slightly sweet taste.

  • Liquid Gold: Drizzle a balsamic reduction over the finished dish for a tart, sweet glaze that adds an elegant touch to your one-pan meal. This delightful finish will have everyone coming back for seconds!

Chef's Helpful Tips

  • For the One Pan Garlic Herb Chicken and Veggies, make sure to cut the potatoes into uniform sizes to ensure even cooking throughout.
  • Avoid overcrowding the baking sheet as this can cause steaming instead of roasting – give your veggies room to crisp up.
  • When mixing the herb and butter mixture, let it sit for a few minutes to allow the flavors to meld together, enhancing the chicken’s taste.
  • Always check the chicken’s internal temperature with a meat thermometer, which should reach 165°F (74°C) for safe consumption.

One Pan Garlic Herb Chicken and Veggies Recipe FAQs

How do I choose the best potatoes for this recipe?
Absolutely! When selecting petite red potatoes, look for those that are firm, smooth, and free of dark spots or blemishes. Smaller potatoes are ideal as they’ll cook evenly and quickly, giving you that delicious roasted flavor you want in your One Pan Garlic Herb Chicken and Veggies.

Can I store leftovers, and for how long?
Yes, you can! Store your One Pan Garlic Herb Chicken and Veggies in an airtight container in the refrigerator for up to 3 days. Just make sure to let it cool completely before sealing, which helps preserve its delicious flavors when you reheat it!

Can I freeze this dish? If so, how?
Yes, you can freeze it! To freeze, allow your chicken and veggies to cool down completely, then place them in a freezer-safe container. Make sure to label the container with the date; it can be frozen for up to 3 months. When you’re ready to enjoy, simply reheat in a 350°F (175°C) oven for about 15-20 minutes until heated through.

What if my chicken is still raw after baking for 22 minutes?
Very! If your chicken isn’t cooked through, it may be due to varying oven temperatures or thickness of the chicken breasts. I recommend using a meat thermometer to check for an internal temperature of 165°F (74°C). If it’s not there yet, pop it back in the oven and check every 5 minutes until it’s perfect!

Are there any dietary considerations for this recipe?
Certainly! This recipe is naturally gluten-free as it contains no gluten products. If you’re preparing this dish for someone with dietary restrictions like allergies, ensure they aren’t allergic to chicken or any of the herbs used. For a healthier variation, feel free to swap butter with a dairy-free alternative!

Can I use other vegetables in this dish?
Absolutely! The more the merrier! This recipe is versatile, so you can substitute the green beans with broccoli, bell peppers, or snap peas. Just remember to adjust cooking times slightly based on the vegetables you choose to use, ensuring everything comes out tender and delicious!

One Pan Garlic Herb Chicken and Veggies

One Pan Garlic Herb Chicken and Veggies

One Pan Garlic Herb Chicken and Veggies is an effortless weeknight meal featuring roasted chicken, red potatoes, and green beans, infused with garlic and herbs.
Print Recipe Pin Recipe
Prep Time 10 minutes mins
Cook Time 22 minutes mins
Total Time 32 minutes mins
Servings: 4 servings
Course: DINNER RECIPES
Calories: 400
Ingredients Equipment Method Nutrition Notes

Ingredients
  

For the Veggies
  • 20 oz petite red potatoes these tender spuds absorb all the herby goodness!
  • 12 oz frozen green beans a convenient option that keeps prep simple and fresh.
  • 1 medium lemon adds a zesty brightness that enhances all the flavors.
For the Chicken
  • 4 (6 oz) boneless skinless chicken breasts lean protein that becomes juicy and infused with herbs.
Herbs & Spices
  • 3 tsp chopped fresh rosemary leaves this fragrant herb elevates the entire dish.
  • 2 tsp chopped fresh thyme leaves offers a subtle earthiness and depth.
  • Salt to taste
  • Freshly ground black pepper to taste
Richness & Flavor
  • 2 Tbsp butter contributes a creamy richness while keeping the chicken moist.
  • 2 Tbsp olive oil helps in roasting and adds a light, fruity flavor.
  • 3 cloves garlic minced, infuses a delicious aroma and savory taste throughout the dish.

Equipment

  • Baking sheet
  • Mixing bowl
  • meat thermometer

Method
 

How to Make One Pan Garlic Herb Chicken and Veggies
  1. Preheat your oven to 400°F (200°C) for perfectly cooked chicken and veggies. This initial step sets the stage for roasting perfection!
  2. Cut the petite red potatoes into quarters and arrange them in the center of a large baking sheet. Their golden crust will create a delightful texture.
  3. Add the frozen green beans around the potatoes, creating a vibrant and colorful mix. They’ll cook quickly, soaking up all the delicious flavors!
  4. Squeeze the juice of the lemon over the veggies, then tuck the lemon halves onto the sheet. This zesty addition brightens the entire dish!
  5. Season everything generously with salt, pepper, and 1 1/2 tsp of rosemary and 1 tsp of thyme. This is where the flavor magic truly begins!
  6. Drizzle 1 Tbsp of olive oil over the veggies, tossing to coat them evenly for that irresistible roasted finish.
  7. Mix together the remaining rosemary, thyme, butter, olive oil, garlic, salt, and pepper in a bowl. This aromatic concoction is crucial for flavor!
  8. Rub the mixture over the chicken breasts, ensuring each piece is well-coated in herby goodness, and then place them on the baking sheet.
  9. Bake for 22 minutes or until the chicken is cooked through and the veggies are tender. You want them golden brown and bursting with flavor!

Nutrition

Serving: 1plateCalories: 400kcalCarbohydrates: 35gProtein: 30gFat: 15gSaturated Fat: 5gPolyunsaturated Fat: 0.5gMonounsaturated Fat: 9gCholesterol: 80mgSodium: 400mgPotassium: 800mgFiber: 6gSugar: 2gVitamin A: 10IUVitamin C: 30mgCalcium: 4mgIron: 10mg

Notes

Optional: Garnish with fresh herbs before serving for a pop of color. For meal prep, section out portions for easy lunches or dinners throughout the week.

Tried this recipe?

Let us know how it was!

Filed Under: DINNER RECIPES

New England Clam Chowder with Fresh Clams

December 12, 2025 by JudyWhite Leave a Comment

There’s nothing quite like the rich, creamy warmth of a comforting bowl of New England Clam Chowder with Fresh Clams. Picture this: the first chill of autumn descends, and the air is filled with earthy scents from your kitchen, a teasing hint of salty ocean waves mingling with the buttery aroma of bacon and hearty potatoes. This dish isn’t just another soup; it’s a feel-good classic that invites memories of family gatherings and cozy evenings.

I discovered this recipe through a spontaneous visit to my local seafood market, where the vibrant displays of freshly caught cherrystone clams caught my eye. My excitement quickly turned into inspiration as I began picturing a cozy dinner with friends, where laughter and stories would blend seamlessly with the delightful flavors of homemade chowder. Trust me, once you savor that first spoonful, you’ll understand why it’s become a beloved staple.

Join me in creating this soul-soothing dish that’ll not only delight your taste buds but impress any guests at your table. Let’s dive into the creamy goodness and make some memories together!

Why You'll Love This New England Clam Chowder with Fresh Clams

  • This New England Clam Chowder with Fresh Clams is incredibly easy to make, allowing you to enjoy a hearty, homemade meal without spending all day in the kitchen.
  • The combination of fresh clams, smoky bacon, and creamy potatoes creates a flavor profile that is both comforting and unforgettable.
  • Its versatility means you can customize ingredients to suit your taste, whether you prefer it with more herbs or a dash of spice.
  • Visually, this chowder is a feast for the eyes, with its creamy texture and vibrant clams making for an appetizing presentation.

New England Clam Chowder Ingredients

• Here’s everything you need for a delightful New England Clam Chowder with Fresh Clams!

For the Chowder Base

  • Live cherrystone clams – 5 pounds, shells scrubbed; the star ingredient that gives this chowder its vibrant ocean flavor.
  • Salt pork – 1 ounce, diced; adds a savory, rich undertone to the broth.
  • Bacon – 1.5 ounces, diced fine; enriches the dish with smoky goodness.
  • Butter – 2 tablespoons; helps to sauté the vegetables, enhancing flavor.
  • Celery – 1/4 cup, minced; brings a subtle crunch and freshness to the chowder.
  • Onion – 1 cup, chopped; adds sweetness and aroma to the base.
  • Garlic – 2 teaspoons, minced; infuses the chowder with a delicious depth of flavor.

For the Chowder Thickness

  • Russet potatoes – 1.25 pounds, peeled and diced into 1/2-inch pieces; these starches create a creamy, comforting texture.
  • Flour – 2 tablespoons; helps to thicken the broth just right for that perfect mouthfeel.

For the Broth

  • Clam stock – 3 cups, reserved from cooking the clams; infuses the chowder with the ultimate seafood essence.
  • Fresh thyme – 1 teaspoon, or 1/2 teaspoon dried; adds an herbal aroma that balances the dish beautifully.
  • Bay leaf – 1 leaf; enhances the overall flavor profile with its aromatic qualities.

For Serving

  • Heavy cream – 2 cups; gives the chowder its signature creaminess that wraps around your taste buds.
  • Black pepper – to taste; a warm spice that elevates the flavors.
  • Butter – for serving; a touch of luxury when dolloped atop the chowder.
  • Oyster crackers – for serving; perfect for adding a delightful crunch with each spoonful.

How to Make New England Clam Chowder

  1. Scrub and Steam
    Start by scrubbing the live cherrystone clams under cold water. Place them in a pot over medium-high heat and cover until they open, about 5-7 minutes. Reserve the cooking liquid for later!

  2. Render the Meats
    In a large pot, add the diced salt pork and bacon. Cook over medium heat until they’re crisp and golden, about 5-6 minutes. The aroma will be simply irresistible!

  3. Sauté the Vegetables
    Add the butter along with the minced celery, chopped onion, and minced garlic to the pot. Sauté these ingredients until softened, roughly 4-5 minutes, allowing their flavors to meld beautifully.

  4. Add Potatoes and Flour
    Stir in the diced Russet potatoes and flour. Cook for an additional 3-4 minutes, letting the potatoes absorb the savory goodness and prepare for the broth.

  5. Pour in the Stock
    Carefully pour in the reserved clam stock, then add the fresh thyme and bay leaf. Bring everything to a gentle simmer, allowing the flavors to develop for about 15 minutes.

  6. Cook the Potatoes
    Continue simmering until the potatoes are tender, about 10-12 minutes. You’ll know they’re ready when they’re fork tender but still hold their shape.

  7. Finish with Cream and Clams
    Gently stir in the heavy cream and the reserved clams. Heat through for another 3-4 minutes, just until everything is warmed and mingled together.

  8. Season to Perfection
    Taste your chowder and season it with black pepper to your liking. A good sprinkle will make those flavors pop even more!

  9. Serve Warm
    Ladle your delicious chowder into bowls, adding a pat of butter on top and crunchy oyster crackers on the side for that delightful texture contrast.

Optional: Garnish with fresh chopped parsley for a touch of color!

Exact quantities are listed in the recipe card below.

How to Store and Freeze New England Clam Chowder

Fridge: Keep leftover New England Clam Chowder in an airtight container for up to 3 days. Reheat gently over low heat, stirring occasionally to maintain the creamy texture.

Freezer: You can freeze this chowder for up to 3 months. However, it’s best to omit the cream before freezing. Thaw in the fridge overnight, then reheat and add the cream before serving.

Reheating: For the best flavor, reheat on the stovetop over medium-low heat. Stir frequently to prevent sticking, and add a splash of clam stock or water if it’s too thick.

New England Clam Chowder Variations

Feel free to play with flavors and textures in this classic recipe for a personalized touch!

  • Dairy-Free: Substitute coconut milk for the heavy cream for a creamy, yet dairy-free alternative that adds a hint of sweetness.
  • Spicy Kick: Add diced jalapeños or a dash of cayenne pepper to your chowder for a warm and inviting heat that awakens the senses.
  • Herb-Infused: Experiment with fresh herbs like dill or parsley to introduce a garden-fresh taste that brightens up your chowder.
  • Vegetarian: Replace clams with roasted, cubed zucchini or mushrooms for a satisfying twist that still offers an appealing texture, minus the seafood.
  • Smoky Flavor: Use smoked paprika instead of bacon for a smoky undertone, creating depth without meat while remaining vegetarian-friendly.
  • Creamy Cauliflower: Blend cooked cauliflower into the chowder for a velvety texture that boosts nutrition and adds a new flavor dimension.
  • Seafood Medley: Add shrimp or lobster chunks for an extravagant seafood chowder that’ll impress even the most discerning palates.
  • Citrus Zing: A splash of lemon juice right before serving brightens the flavors and adds a delightful zing to each spoonful, enhancing the overall experience.

Make Ahead Options

These New England Clam Chowder with Fresh Clams are perfect for busy home cooks looking to save time during hectic weeknights! You can scrub and steam the clams, and prepare the sautéed base (salt pork, bacon, vegetables) up to 24 hours in advance; store them separately in the refrigerator to keep everything fresh. The diced potatoes can also be soaked in cold water to prevent browning if you prep them ahead of time. When you’re ready to serve, combine your prepped ingredients with the clam stock and cream, allowing it to heat through for a delicious chowder that’s just as comforting and rich without the last-minute chaos.

What to Serve with New England Clam Chowder?

Warm, creamy, and brimming with ocean flavor, you’ll want to create the perfect meal to complement this comforting chowder.

  • Crusty Artisan Bread: Perfect for dipping, the crunchy exterior and soft interior enhance the chowder experience, soaking up every savory spoonful.
  • Garden Salad: A mix of fresh greens, ripe tomatoes, and a zesty vinaigrette provides a refreshing contrast to the rich, creamy chowder.
  • Corn on the Cob: Sweet, juicy corn pairs beautifully with clam chowder, adding a burst of flavor and a satisfying crunch.
  • Steamed Asparagus: Its tender yet crisp texture and bright green color serve as a delightful side that balances the chowder’s richness.
  • Crispy Bacon-Wrapped Scallops: This is an indulgent treat that echoes the chowder’s smoky notes while offering a luxurious seafood touch.
  • Chardonnay: A glass of chilled Chardonnay makes for a perfect pairing, as its fruity notes and crisp acidity elevate the lavish flavors of the chowder.
  • Oyster Crackers: Essential for serving, these little bites add a delightful crunch that contrasts wonderfully with the creamy base.
  • Fresh Fruit Tart: End the meal on a sweet note; the tartness from the fruit balances the savory chowder beautifully.

Chef's Helpful Tips

  • When making New England Clam Chowder with Fresh Clams, always scrub the clams thoroughly to ensure no grit remains before cooking them.
  • Remember to reserve the clam cooking liquid as it adds essential flavor to the chowder, so don’t discard it.
  • To achieve a creamy texture, allow the flour to cook with the potatoes for a few minutes before adding the stock.
  • Make sure to simmer the chowder gently to prevent the cream from curdling, ideally keeping the heat on medium to low during cooking.

New England Clam Chowder with Fresh Clams Recipe FAQs

How do I choose the best clams for my chowder?
Absolutely! When selecting clams, look for live cherrystone clams with tightly closed shells and a fresh ocean scent. Avoid any clams with broken shells or those that are open and do not close when tapped; these may be dead and unsafe to eat.

How long can I store leftover New England Clam Chowder?
Very well! Store your leftover chowder in an airtight container in the fridge for up to 3 days. Just make sure to reheat it gently on low heat, stirring occasionally to keep that rich, creamy texture intact.

Can I freeze New England Clam Chowder?
Yes! You can freeze this chowder for up to 3 months. However, it’s best to leave out the heavy cream before freezing. To freeze, allow the chowder to cool completely, then transfer it to a freezer-safe container. When you’re ready to eat, thaw it in the fridge overnight, reheat on the stovetop, and stir in the cream just before serving.

What if my chowder turns out too thick?
If your chowder is thicker than desired, don’t worry! Simply add a splash of clam stock or water while reheating to thin it out to your preferred consistency. Stir well and warm over medium-low heat, checking frequently until it’s just right.

Are there any dietary considerations with this recipe?
Definitely! This New England Clam Chowder contains seafood and dairy, making it unsuitable for individuals with shellfish allergies or lactose intolerance. For a dairy-free version, swap heavy cream with plant-based alternatives like coconut cream and use vegetable broth instead of clam stock for added flavor.

Can I use canned clams instead of fresh?
The more the merrier! While fresh clams deliver that unique ocean flavor, you can use canned clams in a pinch. If opting for canned clams, I recommend using about 2 to 3 cans (about 10-12 ounces each). Drain the juice and reserve it, adding it to the chowder for a tasty boost, but do remember to skip the steaming step!

New England Clam Chowder with Fresh Clams

New England Clam Chowder with Fresh Clams

Enjoy a creamy and savory New England Clam Chowder with Fresh Clams, perfect for cozy gatherings.
Print Recipe Pin Recipe
Prep Time 20 minutes mins
Cook Time 45 minutes mins
Total Time 1 hour hr 5 minutes mins
Servings: 6 servings
Course: DINNER RECIPES
Cuisine: New England
Calories: 350
Ingredients Equipment Method Nutrition Notes

Ingredients
  

Chowder Base
  • 5 pounds live cherrystone clams shells scrubbed
  • 1 ounce salt pork diced
  • 1.5 ounces bacon diced fine
  • 2 tablespoons butter
  • 1/4 cup celery minced
  • 1 cup onion chopped
  • 2 teaspoons garlic minced
Chowder Thickness
  • 1.25 pounds russet potatoes peeled and diced into 1/2-inch pieces
  • 2 tablespoons flour
Broth
  • 3 cups clam stock reserved from cooking the clams
  • 1 teaspoon fresh thyme or 1/2 teaspoon dried
  • 1 leaf bay leaf
For Serving
  • 2 cups heavy cream
  • black pepper to taste
  • butter for serving
  • oyster crackers for serving

Equipment

  • Large pot
  • Saucepan

Method
 

Preparation
  1. Scrub the live cherrystone clams under cold water. Place them in a pot over medium-high heat and cover until they open, about 5-7 minutes. Reserve the cooking liquid for later!
  2. In a large pot, add the diced salt pork and bacon. Cook over medium heat until they’re crisp and golden, about 5-6 minutes.
  3. Add the butter along with the minced celery, chopped onion, and minced garlic to the pot. Sauté until softened, roughly 4-5 minutes.
  4. Stir in the diced russet potatoes and flour. Cook for an additional 3-4 minutes.
  5. Carefully pour in the reserved clam stock, then add the fresh thyme and bay leaf. Bring to a gentle simmer, allowing flavors to develop for about 15 minutes.
  6. Continue simmering until the potatoes are tender, about 10-12 minutes.
  7. Gently stir in the heavy cream and the reserved clams. Heat through for another 3-4 minutes.
  8. Taste and season with black pepper to your liking.
  9. Ladle your delicious chowder into bowls, adding a pat of butter on top and crunchy oyster crackers on the side.

Nutrition

Serving: 1cupCalories: 350kcalCarbohydrates: 25gProtein: 15gFat: 22gSaturated Fat: 10gPolyunsaturated Fat: 0.5gMonounsaturated Fat: 10gCholesterol: 80mgSodium: 700mgPotassium: 600mgFiber: 3gSugar: 2gVitamin A: 500IUVitamin C: 3mgCalcium: 100mgIron: 2mg

Notes

Scrub the clams thoroughly. Reserve clam cooking liquid for flavor. Simmer gently to prevent cream from curdling.

Tried this recipe?

Let us know how it was!

Filed Under: DINNER RECIPES

Orange-Rosemary Glazed Salmon

December 11, 2025 by JudyWhite Leave a Comment

There’s something truly invigorating about cooking with fresh ingredients, and nothing embodies that spirit quite like Orange-Rosemary Glazed Salmon. Imagine the bright, zesty aroma of oranges mingling with the earthy fragrance of rosemary wafting through your kitchen; it instantly lifts your mood and makes cooking feel like a celebration. This recipe came to life on a delightful afternoon when I decided to explore new flavors with salmon, and let’s just say, it’s been a staple in my home ever since.

In just 25 minutes, you can serve up a dish that looks and tastes gourmet, yet is incredibly simple to prepare. Not only is the salmon perfectly tender and flaky, but the herb-infused glaze strikes a harmonic balance of sweetness and savory, making it a guaranteed hit at any dinner table. Whether you’re tired of fast food or simply yearning for a touch of elegance in your meals, this Orange-Rosemary Glazed Salmon will leave your taste buds dancing with joy. Let’s dive into this delightful recipe and elevate your weeknight dinners!

Why You'll Love This Orange-Rosemary Glazed Salmon

  • This Orange-Rosemary Glazed Salmon is incredibly easy to make, allowing you to whip up a gourmet meal in just 25 minutes.
  • The vibrant flavors of the orange and rosemary create a deliciously unique glaze that will captivate your taste buds.
  • Its beautiful presentation makes it perfect for impressing guests or enjoying a special family dinner.
  • Plus, this recipe is versatile enough to pair with a variety of sides, making it a great option for any occasion.
  • Lastly, you’ll love how this dish transforms a simple weeknight dinner into an extraordinary culinary experience.

Orange-Rosemary Glazed Salmon Ingredients

• Let’s gather what we need for this delightful dish!

For the Salmon

  • Salmon fillets – Dive into the heart of this dish; 1-inch thick fillets ensure perfect cooking.
  • Olive oil – Essential for achieving that beautiful golden-brown sear on the salmon.
  • Salt and freshly ground black pepper – These staples enhance the natural flavor of the salmon, so season to your taste!

For the Glaze

  • Garlic – A touch of minced garlic elevates the flavor profile and adds depth to the glaze.
  • Fresh rosemary – Minced for a fragrant herb infusion; substitute with dried rosemary if needed, but fresh is best!
  • Chicken broth – This adds savory richness; feel free to use vegetable broth for a lighter option.
  • Orange zest – Packed with citrusy aromas, it brightens the glaze and complements the salmon perfectly.
  • Fresh orange juice – A key ingredient in the glaze, its sweetness pairs wonderfully with the salmon.
  • Lemon juice – A dash of acidity to balance the flavors; fresh is preferred for maximum zest!
  • Honey – This natural sweetener enhances the glaze’s brightness and introduces a subtle caramel note.
  • Cornstarch – It helps thicken the glaze, making sure every bite is coated in that mouthwatering Orange-Rosemary flavor.

How to Make Orange-Rosemary Glazed Salmon

  1. Heat the Oil:
    In a large non-stick sauté pan, warm the olive oil over medium-high heat, letting it shimmer. This step sets the stage for a delightful sear on your salmon.

  2. Sear the Salmon:
    Season both sides of the salmon fillets with salt and pepper. Add them to the pan, cooking for about 3 – 4 minutes per side until they are golden brown and cooked through. Transfer to a plate, keeping that lovely oil in the pan.

  3. Sauté Aromatics:
    Toss in the minced garlic and rosemary to the pan, sautéing for approximately 20 seconds until fragrant. Afterward, pour in 1/4 cup of chicken broth and let it simmer until mostly reduced, infusing the oil with delicious flavors.

  4. Prepare the Glaze:
    Stir in the orange zest, orange juice, lemon juice, and honey. In a small bowl, mix the remaining 1 Tbsp chicken broth with cornstarch until smooth and add it to the pan.

  5. Thicken the Sauce:
    Season the sauce with salt and pepper, then bring it to a boil, stirring constantly for about 1 minute until it thickens to a luscious glaze.

  6. Return the Salmon:
    Add the salmon back into the pan, spooning that wonderful sauce over each fillet. This last step ensures each bite is bursting with flavor!

Optional: Garnish with additional fresh rosemary for a fragrant touch.
Exact quantities are listed in the recipe card below.

How to Store and Freeze Orange-Rosemary Glazed Salmon

Fridge: Store any leftover Orange-Rosemary Glazed Salmon in an airtight container in the refrigerator for up to 3 days. This will help retain its delicious flavor and moisture.

Freezer: For longer storage, you can freeze the glazed salmon for up to 3 months. Wrap each fillet tightly in plastic wrap and then place in a freezer-safe bag to prevent freezer burn.

Thawing: When ready to enjoy, thaw the salmon overnight in the fridge. This preserves the texture and taste much better than microwaving.

Reheating: To reheat, gently warm the salmon in a skillet over low heat, spooning any remaining glaze over the top to revive its flavor and moisture.

Orange-Rosemary Glazed Salmon Variations

Feel free to get creative with this recipe and make it your own in delightful ways!

  • Herb Swap: Use fresh thyme or dill instead of rosemary for a different flavor profile that complements the salmon beautifully.

  • Citrus Fusion: Mix in lime or grapefruit juice alongside the orange for a zesty citrus kick that brightens the dish.

  • Spicy Kick: Add a pinch of red pepper flakes to the glaze for a subtle heat that awakens your taste buds with every bite.

  • Sweet Twist: Substitute maple syrup or agave for honey to create a distinct sweetness that adds a unique layer of flavor.

  • Nutty Crunch: Sprinkle slivered almonds or toasted pecans on top of the finished dish for a wonderful texture contrast and nutty flavor.

  • Vegetarian Option: Replace salmon with firm tofu, ensuring it’s pressed and marinated to soak up all the delicious flavors of the glaze.

  • Extra Veggies: Toss in seasonal vegetables such as asparagus or bell peppers in the last few minutes of cooking for a colorful, nutritious addition.

  • Infused Broth: Use vegetable broth or even coconut milk instead of chicken broth for a lighter, creamier sauce that appeals to various dietary preferences.

Make Ahead Options

These Orange-Rosemary Glazed Salmon fillets are perfect for meal prep enthusiasts! You can season and refrigerate the salmon (covered) up to 24 hours in advance, allowing the flavors to deepen beautifully. Additionally, the glaze can be prepared ahead of time and stored in an airtight container for up to 3 days in the refrigerator. Just remember to reheat it gently over low heat before serving. When you’re ready to enjoy your dish, simply cook the salmon in the hot pan as directed and drizzle the warmed glaze over it. This method not only saves time but ensures your salmon remains just as delicious and flavorful, transforming busy weeknights into extraordinary dining experiences!

What to Serve with Orange-Rosemary Glazed Salmon?

Imagine the delight of a full meal that elevates the freshness of your Orange-Rosemary Glazed Salmon with complementary companions that sing in harmony.

  • Creamy Mashed Potatoes: The velvety texture provides a comforting contrast to the flaky salmon while soaking up the glaze perfectly.

  • Lemon-Dill Quinoa: This fresh, zesty side brings a nutty flavor that pairs well with the citrus notes in the salmon, offering a light and bright element to the meal.

  • Steamed Asparagus: Tender asparagus spears add a crisp, vibrant green that complements the salmon beautifully; their earthy flavor balances the sweetness of the glaze.

  • Roasted Brussels Sprouts: Caramelized Brussels sprouts add a delightful crunch and a slightly bitter note that balances the citrusy sweetness of the salmon.

  • Cucumber and Tomato Salad: Refreshing and light, this salad offers a crisp bite and acidity that cuts through the richness of the fish, making every mouthful a pleasure.

  • Garlic Bread: The buttery, garlicky goodness of toasted bread is perfect for mopping up any leftover glaze, ensuring none of that delicious flavor goes to waste.

  • Chilled White Wine: A glass of chilled Sauvignon Blanc or Pinot Grigio enhances the dish, bringing out the herbal and citrus accents in the salmon.

  • Pineapple Upside-Down Cake: Finish off your meal with a slice of this sweet and tangy dessert; its vibrant flavors work beautifully alongside the salmon’s glaze.

Each of these pairings enhances your dining experience, making your meal feel complete and utterly satisfying!

Chef's Helpful Tips

  • For the Orange-Rosemary Glazed Salmon, ensure your salmon fillets are similar in size for even cooking.
  • Avoid overcrowding the pan when searing the salmon to prevent steaming; give them enough space to brown beautifully.
  • When incorporating the garlic and rosemary, cook them just until fragrant to avoid burning, which can introduce bitterness.
  • Finally, monitor the sauce closely as it thickens to prevent overcooking and maintain that luscious glaze consistency.

Orange-Rosemary Glazed Salmon Recipe FAQs

How do I choose the best salmon fillets?
Absolutely! When selecting your salmon fillets, look for bright, vibrant flesh with minimal dark spots. The skin should appear shiny, and the fillets should feel firm to the touch. Fresh salmon will have a mild, ocean-like scent, not a strong fishy odor. If possible, try to buy wild-caught salmon for the best flavor and texture!

How should I store leftover Orange-Rosemary Glazed Salmon?
For optimal freshness, place your leftover Orange-Rosemary Glazed Salmon in an airtight container and refrigerate for up to 3 days. This method will keep the salmon moist and flavorful. When you’re ready to enjoy it again, simply reheat it gently to maintain its delicate texture.

Can I freeze Orange-Rosemary Glazed Salmon?
Very! You can easily freeze your Orange-Rosemary Glazed Salmon for up to 3 months. Wrap each fillet tightly in plastic wrap, then place it in a freezer-safe bag to protect against freezer burn. When it’s time to enjoy, thaw the salmon overnight in the refrigerator, ensuring it retains its flavor and consistency.

What should I do if the glaze is too thin?
If you find your glaze isn’t thickening as you’d like, don’t worry! Simply mix another teaspoon of cornstarch with a tablespoon of cold water until smooth, then stir it back into the sauce while it’s simmering. Continue cooking until it thickens to your desired consistency. Remember to keep stirring frequently to prevent lumps!

Are there any dietary considerations I should be aware of?
Certainly! While this Orange-Rosemary Glazed Salmon is healthy and delicious, if you have allergies, be aware that the dish contains fish, chicken broth, and honey. For a vegetarian option, you can substitute the salmon with firm tofu or a vegetable of your choice, utilizing the glaze for flavor. Just ensure any substitute is equally flavorful and well-seasoned!

Orange-Rosemary Glazed Salmon

Orange-Rosemary Glazed Salmon

This Orange-Rosemary Glazed Salmon combines vibrant flavors and a gourmet presentation, perfect for weeknight dinners or special occasions.
Print Recipe Pin Recipe
Prep Time 10 minutes mins
Cook Time 15 minutes mins
Total Time 25 minutes mins
Servings: 4 fillets
Course: DINNER RECIPES
Cuisine: American
Calories: 250
Ingredients Equipment Method Nutrition Notes

Ingredients
  

For the Salmon
  • 4 fillets Salmon 1-inch thick for perfect cooking
  • 2 tablespoons Olive oil For searing
  • to taste Salt Enhances flavor
  • to taste Freshly ground black pepper Enhances flavor
For the Glaze
  • 2 cloves Garlic Minced
  • 2 tablespoons Fresh rosemary Minced, dried can be substituted
  • 1/4 cup Chicken broth Or vegetable broth for lighter option
  • 1 tablespoon Orange zest Freshly grated
  • 1/4 cup Fresh orange juice Key ingredient
  • 1 tablespoon Lemon juice Fresh preferred
  • 1 tablespoon Honey Natural sweetener
  • 1 tablespoon Cornstarch For thickening glaze

Equipment

  • Large non-stick sauté pan

Method
 

How to Make Orange-Rosemary Glazed Salmon
  1. In a large non-stick sauté pan, warm the olive oil over medium-high heat until shimmering.
  2. Season both sides of the salmon fillets with salt and pepper. Add to the pan and cook for 3-4 minutes per side until golden brown and cooked through. Transfer to a plate.
  3. Add minced garlic and rosemary to the pan and sauté for about 20 seconds until fragrant. Pour in 1/4 cup of chicken broth and let simmer until mostly reduced.
  4. Stir in orange zest, orange juice, lemon juice, and honey. Mix remaining 1 Tbsp chicken broth with cornstarch and add it to the pan.
  5. Season sauce with salt and pepper. Bring to a boil, stirring constantly for about 1 minute until thickened.
  6. Add salmon back into the pan, spooning sauce over each fillet.

Nutrition

Serving: 1filletCalories: 250kcalCarbohydrates: 10gProtein: 30gFat: 10gSaturated Fat: 2gPolyunsaturated Fat: 2gMonounsaturated Fat: 6gCholesterol: 70mgSodium: 200mgPotassium: 400mgSugar: 5gVitamin A: 200IUVitamin C: 10mgCalcium: 20mgIron: 1mg

Notes

Garnish with additional fresh rosemary if desired. Store leftovers in an airtight container in the fridge for up to 3 days, or freeze for up to 3 months. Thaw overnight in the fridge and reheat gently in a skillet.

Tried this recipe?

Let us know how it was!

Filed Under: DINNER RECIPES

Sheet Pan Garlic Roasted Salmon & Brussels Sprouts

December 11, 2025 by JudyWhite Leave a Comment

The moment I opened my oven door, the inviting scent of garlic mingling with roasted Brussels sprouts enveloped my kitchen, instantly lifting my spirits. There’s something remarkably satisfying about serving a meal that truly hits all the right notes—comforting yet healthy, simple yet impressive. Enter my Sheet Pan Garlic Roasted Salmon & Brussels Sprouts. This dish is the answer to those chaos-filled evenings when the last thing I want to do is spend hours at the stove.

This recipe has quickly become a weeknight favorite in our home, effortlessly combining tender, flaky salmon with perfectly caramelized Brussels sprouts. It requires only one pan—an absolute game-changer for both cleanup and flavor retention. In just 35 minutes, you can deliver a nutritious and delicious feast that will have everyone at the table feeling cherished. Join me in elevating dinner with this delightful combination of ease, taste, and wholesome ingredients!

Why You'll Love This Sheet Pan Garlic Roasted Salmon & Brussels Sprouts

  • This recipe is incredibly easy to prepare, allowing you to whip up a delicious meal with minimal effort and just one pan to clean.
  • The flavors of the garlic and roasted Brussels sprouts perfectly complement the tender salmon, creating a satisfying dish that is both healthy and comforting.
  • Its versatility makes it an ideal choice for weeknight dinners or special occasions alike, as it pleases even the pickiest eaters.
  • The vibrant colors and appealing aroma not only make for a visually stunning plate but also fill your kitchen with irresistible scents, making mealtime feel extra special.

Sheet Pan Garlic Roasted Salmon & Brussels Sprouts Ingredients

• To create this flavorful dish, you’ll need just the right ingredients to ensure the salmon and Brussels sprouts shine.

For the Brussels Sprouts

  • 2 pounds Brussels sprouts – trim the ends for the best texture.
  • 3 tablespoons olive oil – helps to caramelize the Brussels sprouts beautifully.
  • 1 clove garlic, finely minced – infuses a delicious aroma and flavor.
  • ½ teaspoon salt – enhances the natural sweetness of the sprouts.
  • ¼ teaspoon freshly ground black pepper – adds a hint of warmth and spice.

For the Salmon

  • 6 to 8 fillets salmon – aim for 3 to 4 ounces each for even cooking.
  • 1 tablespoon olive oil – keeps the salmon moist while roasting.
  • 4 cloves garlic, finely minced – provides a wonderful garlic flavor throughout the dish.
  • 1 tablespoon dried oregano – adds a fragrant herbal note to the salmon.
  • ¾ teaspoon salt (to taste) – season according to your preference for flavor.
  • ¼ teaspoon freshly ground black pepper (to taste) – balances the flavors beautifully.

With these fresh and simple ingredients, you’re well on your way to impressing your family with this mouthwatering Sheet Pan Garlic Roasted Salmon & Brussels Sprouts dish!

How to Make Sheet Pan Garlic Roasted Salmon & Brussels Sprouts

  1. Preheat the oven to 400°F (200°C). Spread a clean sheet pan with a light coat of cooking spray or line it with parchment paper for easy cleanup.

  2. Trim the ends of the Brussels sprouts, ensuring they are fresh and ready. Place them neatly on the sheet pan, giving them room to roast evenly.

  3. Drizzle with 3 tablespoons of olive oil, add 1 clove of minced garlic, sprinkle with ½ teaspoon salt, and ¼ teaspoon black pepper. Toss everything gently, making sure the sprouts are well-coated!

  4. Arrange the Brussels sprouts in a single layer on the sheet pan, and pop them into the oven to roast for 20 minutes, until they start to turn golden brown and crisp.

  5. Season the salmon fillets with 1 tablespoon of olive oil, 4 cloves of minced garlic, 1 tablespoon of dried oregano, ¾ teaspoon salt, and ¼ teaspoon black pepper. Ensure every little piece is covered in that delicious mixture.

  6. Add the salmon fillets to the sheet pan after the Brussels sprouts have roasted for 20 minutes, and continue roasting everything together for an additional 10–12 minutes or until the salmon flakes easily with a fork and the Brussels sprouts are tender.

Optional: Garnish with fresh lemon wedges for an extra zing of flavor!

Exact quantities are listed in the recipe card below.

How to Store and Freeze Sheet Pan Garlic Roasted Salmon & Brussels Sprouts

Fridge: Store leftover salmon and Brussels sprouts in an airtight container for up to 3 days. Reheat in the microwave or oven until warmed through for best flavor.

Freezer: Freeze cooked salmon and Brussels sprouts in a freezer-safe container for up to 2 months. Thaw in the refrigerator overnight before reheating.

Reheating: When ready to enjoy, reheat in the oven at 350°F (175°C) for about 15 minutes. This will help restore the texture, especially for the Brussels sprouts.

Room Temperature: Avoid leaving the dish out for more than 2 hours to maintain food safety and quality.

What to Serve with Sheet Pan Garlic Roasted Salmon & Brussels Sprouts?

Creating the perfect meal is all about balancing flavors and textures, making every bite a pleasure to savor.

  • Creamy Mashed Potatoes: The rich, buttery potatoes create a comforting contrast to the lightness of the salmon.

  • Citrusy Quinoa Salad: This refreshing salad adds a burst of flavor and lovely crunch, enhancing your meal’s freshness.

Indulging in a colorful salad brings brightness to your plate while providing a nutritious sidekick.

  • Garlic Bread: A toasty loaf slathered in garlic butter is perfect for soaking up those delicious juices.

  • Roasted Carrots: Sweet, caramelized carrots offer a delightful crunch that pairs beautifully with the tender fish.

  • Steamed Asparagus: Crisp-tender asparagus brings a gourmet touch and complements the salmon’s flavor beautifully.

  • Chilled White Wine: A glass of dry Sauvignon Blanc elevates the meal with its crisp acidity and refreshing notes.

  • Lemon Sorbet: End on a light note with this zesty dessert, cleansing your palate after the savory feast.

Each of these delightful pairings serves to elevate your Sheet Pan Garlic Roasted Salmon & Brussels Sprouts, making your dinner a cozy, memorable occasion.

Sheet Pan Garlic Roasted Salmon & Brussels Sprouts Variations

Feel free to get creative with this dish—there are so many delicious ways to put your unique spin on it!

  • Lemon Zest: Add the zest of one lemon to the salmon for a bright, fresh flavor that complements the garlic beautifully. The citrus will elevate the entire dish!

  • Maple Glaze: Drizzle a little maple syrup over the Brussels sprouts before roasting. This will caramelize perfectly, adding a delightful sweetness that contrasts the savory garlic.

  • Spicy Kick: Sprinkle red pepper flakes over the salmon before baking for a little heat. The spice will awaken your taste buds and bring an exciting twist to the meal.

  • Herbs de Provence: Swap dried oregano for herbs de Provence for a fragrant twist. The blend of dried herbs will add a sophisticated flavor profile to your salmon.

  • Honey Garlic Brussels: Toss the Brussels sprouts in a mixture of honey and minced garlic before roasting. This sweetness will create a glossy finish that’s simply irresistible.

  • Vegetable Medley: Mix in some cherry tomatoes and sliced bell peppers for a colorful addition. They’ll roast perfectly on the sheet pan and add extra vitamins!

  • Mustard Glaze: Brush a little Dijon mustard on the salmon fillets before seasoning. This adds a tangy depth that pairs beautifully with the salmon’s richness.

  • Nutty Topping: Top the roasted Brussels sprouts with toasted almonds or crushed walnuts just before serving for a delightful crunch and nutty flavor.

Use these variations to make the dish your own and enjoy the wonderful aromas and flavors that fill your home!

Make Ahead Options

These Sheet Pan Garlic Roasted Salmon & Brussels Sprouts are perfect for meal prep enthusiasts! You can wash and trim the Brussels sprouts, then toss them with olive oil, minced garlic, salt, and pepper up to 24 hours in advance. Store them in an airtight container in the fridge to maintain their freshness. The salmon can be seasoned ahead too; just wrap the marinated fillets in plastic wrap and refrigerate for up to 3 days. When you’re ready to cook, simply preheat the oven and roast the Brussels sprouts for 20 minutes before adding the salmon for another 10-12 minutes, ensuring everything remains just as delicious with minimal effort!

Chef's Helpful Tips

  • For the Sheet Pan Garlic Roasted Salmon & Brussels Sprouts, evenly trim the ends of the Brussels sprouts to ensure they cook uniformly.
  • Avoid overcrowding the sheet pan as this can lead to steaming rather than roasting, which prevents the vegetables from achieving that crispy texture.
  • When seasoning the salmon, make sure to coat each fillet generously to enhance flavor during the roasting process.
  • Keep a close eye on the salmon as it cooks; it should reach an internal temperature of 145°F for perfect doneness.

Sheet Pan Garlic Roasted Salmon & Brussels Sprouts Recipe FAQs

How do I choose fresh Brussels sprouts?
Absolutely! When selecting Brussels sprouts, look for firm, compact heads that are bright green. Avoid any with yellowing leaves or dark spots all over, as these indicate they may be past their prime. If possible, choose smaller sprouts, as they’re often sweeter and more tender.

What’s the best way to store leftover salmon and Brussels sprouts?
Very! Store any leftovers in an airtight container in the refrigerator for up to 3 days. If you’re reheating, you can pop them back into the microwave or oven until they’re warmed through. For best flavor, remember to keep the heat gentle!

Can I freeze the cooked salmon and Brussels sprouts?
Definitely! To freeze your Sheet Pan Garlic Roasted Salmon & Brussels Sprouts, place them in a freezer-safe container, leaving a bit of space to allow for expansion, and freeze for up to 2 months. When you’re ready to enjoy, thaw in the refrigerator overnight and then reheat in the oven at 350°F (175°C) for about 15 minutes to maintain texture.

What should I do if my salmon is overcooked?
Oh no! If your salmon comes out a bit dry, there are a couple of tricks to salvage it. Consider serving it with a drizzle of olive oil or a sauce—like a lemon dill sauce—to help add moisture back. In the future, be sure to check for doneness around the 10-minute mark after adding the salmon to the oven; it should flake easily with a fork at 145°F internally.

Can my pet eat salmon?
Yes, however, it’s crucial to prepare the salmon without any seasonings or oils. Plain cooked salmon can be a tasty treat for dogs, but always consult your vet for dietary questions, especially regarding allergies, as some pets may have sensitivities.

What if I have a garlic allergy?
If you’re allergic to garlic, I recommend substituting it with a different herb like lemon zest or a blend of fresh herbs like rosemary or thyme for flavor without the garlic. This substitution brings a fresh brightness to the dish without compromising on taste!

Sheet Pan Garlic Roasted Salmon & Brussels Sprouts

Sheet Pan Garlic Roasted Salmon & Brussels Sprouts

A comforting yet healthy sheet pan dish featuring succulent salmon and caramelized Brussels sprouts, seasoned with garlic and spices.
Print Recipe Pin Recipe
Prep Time 10 minutes mins
Cook Time 25 minutes mins
Total Time 35 minutes mins
Servings: 4 servings
Course: DINNER RECIPES
Cuisine: American
Calories: 350
Ingredients Equipment Method Nutrition Notes

Ingredients
  

For the Brussels Sprouts
  • 2 pounds Brussels sprouts trim the ends for the best texture
  • 3 tablespoons olive oil helps to caramelize the Brussels sprouts beautifully
  • 1 clove garlic finely minced
  • ½ teaspoon salt enhances the natural sweetness of the sprouts
  • ¼ teaspoon freshly ground black pepper adds a hint of warmth and spice
For the Salmon
  • 6 to 8 fillets salmon aim for 3 to 4 ounces each for even cooking
  • 1 tablespoon olive oil keeps the salmon moist while roasting
  • 4 cloves garlic finely minced
  • 1 tablespoon dried oregano adds a fragrant herbal note to the salmon
  • ¾ teaspoon salt to taste
  • ¼ teaspoon freshly ground black pepper to taste

Equipment

  • sheet pan
  • Oven
  • cooking spray
  • parchment paper

Method
 

Instructions
  1. Preheat the oven to 400°F (200°C). Spread a clean sheet pan with a light coat of cooking spray or line it with parchment paper for easy cleanup.
  2. Trim the ends of the Brussels sprouts, ensuring they are fresh and ready. Place them neatly on the sheet pan, giving them room to roast evenly.
  3. Drizzle with 3 tablespoons of olive oil, add 1 clove of minced garlic, sprinkle with ½ teaspoon salt, and ¼ teaspoon black pepper. Toss everything gently, making sure the sprouts are well-coated!
  4. Arrange the Brussels sprouts in a single layer on the sheet pan, and pop them into the oven to roast for 20 minutes, until they start to turn golden brown and crisp.
  5. Season the salmon fillets with 1 tablespoon of olive oil, 4 cloves of minced garlic, 1 tablespoon of dried oregano, ¾ teaspoon salt, and ¼ teaspoon black pepper. Ensure every little piece is covered in that delicious mixture.
  6. Add the salmon fillets to the sheet pan after the Brussels sprouts have roasted for 20 minutes, and continue roasting everything together for an additional 10–12 minutes or until the salmon flakes easily with a fork and the Brussels sprouts are tender.
  7. Optional: Garnish with fresh lemon wedges for an extra zing of flavor!

Nutrition

Serving: 1servingCalories: 350kcalCarbohydrates: 12gProtein: 30gFat: 20gSaturated Fat: 3gPolyunsaturated Fat: 2gMonounsaturated Fat: 12gCholesterol: 70mgSodium: 480mgPotassium: 800mgFiber: 4gSugar: 2gVitamin A: 400IUVitamin C: 90mgCalcium: 50mgIron: 2mg

Notes

Evenly trim the ends of the Brussels sprouts for uniform cooking. Avoid overcrowding the sheet pan to achieve crispy texture. Salmon should reach an internal temperature of 145°F for perfect doneness.

Tried this recipe?

Let us know how it was!

Filed Under: DINNER RECIPES

Beef Barley Soup

December 10, 2025 by JudyWhite Leave a Comment

As the cold weather starts to settle in, I often find myself reaching for hearty recipes that warm both my kitchen and my heart. One dish that absolutely fits the bill is my Beef Barley Soup. The moment the beef hits the hot oil, it releases an enticing aroma that wraps around you like a cozy blanket.

This recipe isn’t just about sustenance; it’s a beautiful blend of tender beef, fresh vegetables, and satisfying pearled barley that creates a comforting bowl of goodness. On a particularly chilly evening, I found a few leftover ingredients in my pantry, and that’s how this rich, flavorful soup was born — a true testament to the magic of home-cooked meals when you’re craving something special yet easy to whip up.

With minimal effort and a little time on the stovetop, you’ll be rewarded with a dish that’s perfect for gatherings or a quiet night in. So pull out your favorite Dutch oven and let’s get cooking — trust me, your taste buds will thank you!

Why You'll Love This Beef Barley Soup

  • This Beef Barley Soup is an easy and satisfying option for those busy weeknights, requiring minimal prep and simple steps.
  • Each bowl is packed with flavor, thanks to the tender beef and aromatic vegetables that create a delightful blend in every spoonful.
  • Versatility is another star feature; you can easily customize it with your favorite veggies or whatever you have on hand to suit your taste.
  • Visually, this soup is as inviting as it is delicious, with vibrant colors that make it a feast for the eyes as well.

Beef Barley Soup Ingredients

Elevate your dinner with these simple ingredients!

For the Soup Base
• Boneless beef chuck roast – a tender cut that adds rich flavor to your Beef Barley Soup.
• Canola oil – perfect for searing the beef and developing deep flavors.
• Carrots – sweet and earthy, they provide a pop of color and nutrition.
• Yellow onion – an aromatic base that enhances the soup’s depth.
• Celery – adds a nice crunch and balances the flavors beautifully.
• Garlic – infuses the soup with aromatic goodness you won’t want to miss.

For the Soup Additions
• Chicken stock – the flavorful liquid that forms the heart of this hearty soup.
• Pearled barley – its chewy texture is essential, soaking up all the delicious flavors.
• Asian fish sauce (optional) – a dash adds a subtle umami punch if you dare!

Seasoning and Garnish
• Kosher salt – adjust to taste for seasoning the dish perfectly.
• Freshly ground black pepper – to enhance flavors with a hint of spice.
• Minced fresh parsley – a vibrant garnish that brings freshness to each bowl.
• Bone-in beef short ribs (optional) – for added richness and flavor, if you’re feeling indulgent!

How to Make Beef Barley Soup

  1. Season the Beef: Sprinkle kosher salt and freshly ground black pepper over the beef chuck roast, ensuring an even coating. This step adds essential flavor to your Beef Barley Soup, making every bite delightful.

  2. Sear the Beef: In a large pot or Dutch oven, heat canola oil over high heat until it’s lightly smoking. Add the seasoned beef and sear it, turning occasionally, until well browned on all sides, about 5 minutes per side. Transfer the beef to a large platter once done.

  3. Cook the Aromatics: Add the chopped carrots, diced onion, sliced celery, and minced garlic to the pot. Stir and scrape up the flavorful browned bits from the bottom, cooking until the vegetables are lightly browned, about 6 minutes. Scrape them into a heatproof bowl and set aside.

  4. Add the Stock: Pour chicken stock into the pot, returning it to heat while scraping the bottom to incorporate those delicious bits. This step creates a flavorful base for your soup.

  5. Combine and Simmer: Cut the seared beef into chunks and add them back to the pot, along with reserved bones if you’re using them. Bring the mixture to a simmer, then reduce the heat and maintain a low simmer for 1 to 2 hours, until the beef is tender. Skim any foam that rises to the top during cooking.

  6. Finish the Soup: Discard the bones if using. Stir in the pearled barley, reserved vegetables, and Asian fish sauce (if desired). Simmer for about 30 minutes, or until the barley and vegetables are tender. Adjust the seasoning with kosher salt and freshly ground black pepper, and if the soup appears too dry, add a bit of water to reach your preferred consistency.

  7. Serve and Garnish: Ladle the soup into bowls, making sure each serving is garnished with minced fresh parsley for a splash of color and freshness.

Optional: A sprinkle of Parmesan cheese adds a deliciously nutty flavor!

Exact quantities are listed in the recipe card below.

How to Store and Freeze Beef Barley Soup

Room Temperature: Enjoy your Beef Barley Soup fresh for up to 2 hours after cooking. If left out longer, refrigerate to keep it safe.

Fridge: Store leftover soup in an airtight container for up to 3 days. Allow it to cool slightly before refrigerating, and reheat on the stove for best flavors.

Freezer: Freeze your Beef Barley Soup in portioned containers for up to 3 months. Ensure it’s fully cooled and labeled with the date for easy tracking.

Reheating: Thaw soup overnight in the fridge before reheating. Reheat on the stove over medium heat, adding a splash of water if it appears too thick.

What to Serve with Beef Barley Soup?

As you savor each comforting spoonful of this delicious soup, consider these perfect pairings to create a well-rounded meal.

  • Crusty Bread: Nothing beats a warm, crusty loaf to soak up the rich broth, adding a delightful texture to each bite.

  • Garden Salad: A fresh salad, bursting with vibrant greens and a zesty vinaigrette, lightens the meal and adds a refreshing crunch.

  • Roasted Brussels Sprouts: Their earthy flavor and crispy edges beautifully contrast the soup’s tender ingredients, creating a delightful balance on your plate.

  • Baked Apples: For dessert, warm baked apples topped with cinnamon create a cozy ending to your meal, with sweetness to complement the savory soup.

  • Cheesy Garlic Toast: Golden-brown toast smothered in garlic and cheese is a scrumptious side that adds richness, perfect for dipping.

  • Herbed Rice: Fluffy rice seasoned with herbs enhances the heartiness of the soup, making it comforting and satisfying.

  • Red Wine: A glass of robust red wine pairs wonderfully, enriching the flavors of the beef and deepening the overall dining experience.

  • Crispy Potato Wedges: Serve these on the side for a crunchy, indulgent treat that echoes the comforts of home.

  • Lemon Sorbet: For a palate-cleansing element after the soup, light lemon sorbet offers a refreshing, tart contrast that keeps things balanced.

Beef Barley Soup Variations

Get ready to make this dish truly your own with some fun twists and substitutions!

  • Vegetable Boost: Add in diced potatoes or mushrooms for an earthy depth. They absorb the flavors beautifully while adding heartiness to each bowl.

  • Spicy Kick: Toss in a pinch of red pepper flakes or diced jalapeños for a warmth that dances on the palate. It’s an easy way to turn the cozy factor up a notch!

  • Grain Swap: Try quinoa or farro instead of pearled barley for a different texture and a boost in nutrients. Each lends its unique flavor to the soup experience.

  • Herb Infusion: Fresh thyme or rosemary can be added while simmering, offering an aromatic lift that complements the beef beautifully. You’ll love the fragrant touch they bring!

  • Lentil Addition: Substitute half of the barley with lentils for an extra protein punch and a delightful twist in texture. The lentils cook quickly and blend seamlessly into the soup.

  • Lemon Zest: Brighten the flavors with a sprinkle of fresh lemon juice or zest right before serving. It adds a refreshing note that balances the richness perfectly.

  • Creamy Texture: Stir in a dash of heavy cream or coconut milk at the end for a rich and velvety finish. For those chilly nights, it feels like a warm hug in a bowl!

  • Vegetarian Version: Replace beef with mushrooms and use vegetable stock as a base for a hearty, plant-based option that retains the soul of this beloved dish. You’ll discover new layers of flavor that are equally satisfying.

Make Ahead Options

Beef Barley Soup is a fantastic meal prep option that can save you precious time during busy weeknights! You can chop the vegetables and sear the beef up to 24 hours in advance, storing them separately in the refrigerator. To maintain the quality, ensure the beef is cooled properly before sealing it in an airtight container to avoid any moisture buildup. When you’re ready to enjoy your delicious soup, simply combine the prepped ingredients, add the chicken stock, and follow the remaining cooking steps. This way, your Beef Barley Soup will be just as hearty and flavorful as if you made it on the spot!

Chef's Helpful Tips

  • When making Beef Barley Soup, ensure you season the beef generously with salt and pepper to enhance its rich flavor.
  • Avoid overcrowding the pot when searing the beef to achieve a beautifully browned crust; work in batches if necessary.
  • Stirring the vegetables and scraping the bottom of the pot will help release those delicious browned bits, adding depth to your soup.
  • Monitor the simmering process closely, keeping the heat low to prevent the beef from becoming tough, and aim for a tender texture after 1 to 2 hours of cooking.

Beef Barley Soup Recipe FAQs

What type of beef should I use for the best flavor in Beef Barley Soup?
Absolutely! I recommend using boneless beef chuck roast because it’s tender and rich in flavor. If you’re feeling indulgent, you can also incorporate bone-in beef short ribs for added depth and richness in the broth.

How should I properly store leftover Beef Barley Soup?
Very! Store your leftover soup in an airtight container in the fridge for up to 3 days. Allow the soup to cool slightly before sealing it, and give it a good stir when you reheat it on the stove to make sure the flavors come back together beautifully.

Can I freeze Beef Barley Soup?
Definitely! To freeze, first let your soup cool completely. Then, portion it into freezer-safe containers and label them with the date. It will keep well for up to 3 months. When you’re ready to enjoy, thaw it overnight in the refrigerator before reheating on the stove. If it’s too thick after thawing, just add a splash of water to bring it back to the perfect consistency.

What should I do if my soup turns out too thick?
No need to worry! If your Beef Barley Soup is too thick, simply add a bit of water or chicken stock while reheating until you reach your desired consistency. This should immediately relieve any dryness while keeping the flavors intact, just like I often do when making leftovers.

Are there any dietary considerations I should be aware of?
Absolutely! If you’re cooking for someone with allergies, be sure to check if they have sensitivities to beef, garlic, or fish sauce, if used. You can easily omit the fish sauce to make it suitable for those avoiding seafood. Additionally, if you’re serving this soup to pets, remember that ingredients like onions and garlic can be harmful to them, so it’s best to keep it human-only!

How can I select the best vegetables for my Beef Barley Soup?
When choosing vegetables, look for fresh, vibrant colors. Carrots should be firm without any soft spots, and celery should be crunchy. Onions should have dry, papery skins with no dark spots. For a fun twist, feel free to experiment with seasonal veggies like peas or potatoes to make the soup uniquely yours!

Beef Barley Soup

Beef Barley Soup

This Beef Barley Soup is a hearty and comforting dish perfect for cold weather.
Print Recipe Pin Recipe
Prep Time 20 minutes mins
Cook Time 2 hours hrs
Total Time 2 hours hrs 20 minutes mins
Servings: 6 bowls
Course: DINNER RECIPES
Cuisine: American
Calories: 350
Ingredients Equipment Method Nutrition Notes

Ingredients
  

Soup Base
  • 2 pounds Boneless beef chuck roast a tender cut that adds rich flavor
  • 2 tablespoons Canola oil for searing the beef
  • 2 large Carrots chopped
  • 1 large Yellow onion diced
  • 2 stalks Celery sliced
  • 3 cloves Garlic minced
Soup Additions
  • 6 cups Chicken stock flavorful liquid base
  • 1 cup Pearled barley soaks up flavors
  • 1 tablespoon Asian fish sauce optional for umami flavor
Seasoning and Garnish
  • 1 teaspoon Kosher salt adjust to taste
  • 1 teaspoon Freshly ground black pepper to taste
  • 1/4 cup Minced fresh parsley for garnish
  • 1 pound Bone-in beef short ribs optional for added richness

Equipment

  • Dutch oven

Method
 

How to Make Beef Barley Soup
  1. Season the beef with kosher salt and black pepper for flavor.
  2. Sear the beef in heated canola oil until browned on all sides.
  3. Cook the carrots, onion, celery, and garlic until lightly browned.
  4. Add chicken stock and scrape the bottom of the pot for flavor.
  5. Combine seared beef and bring to a simmer, cook for 1-2 hours.
  6. Stir in pearled barley and cook for 30 minutes until tender.
  7. Serve garnished with minced parsley.

Nutrition

Serving: 1bowlCalories: 350kcalCarbohydrates: 40gProtein: 25gFat: 10gSaturated Fat: 3gPolyunsaturated Fat: 1gMonounsaturated Fat: 5gCholesterol: 80mgSodium: 800mgPotassium: 800mgFiber: 5gSugar: 4gVitamin A: 450IUVitamin C: 15mgCalcium: 30mgIron: 3mg

Notes

A sprinkle of Parmesan cheese adds a deliciously nutty flavor if desired.

Tried this recipe?

Let us know how it was!

Filed Under: DINNER RECIPES

Dumpling Ramen Bowl With Soft-Boiled Eggs

December 10, 2025 by JudyWhite Leave a Comment

The deep, savory aroma of chicken broth simmering on the stove instantly warms my kitchen and lifts my spirits. This Dumpling Ramen Bowl with Soft-Boiled Eggs has become my cherished go-to on cozy evenings or when I simply crave comfort in a bowl. One of my favorite parts? It’s incredibly easy to whip up, coming together in just 25 minutes—perfect for those hectic weeknights when fast food simply won’t do.

As the frozen dumplings dance around in the bubbling broth, I can’t help but feel a wave of excitement; it’s like an edible hug that embraces every taste bud. The vibrant green spinach leaves and hearty ramen noodles not only add color but also elevate this dish into a wholesome meal. Topped off with perfectly soft-boiled eggs and a sprinkle of black sesame seeds, this bowl is both a feast for the eyes and a delightful burst of flavor.

Let’s dive into the simplicity and joy of making this flavorful Dumpling Ramen Bowl that will surely impress friends or family—goodbye, tedious takeout!

Why You'll Love This Dumpling Ramen Bowl With Soft-Boiled Eggs

  • This Dumpling Ramen Bowl comes together in just 25 minutes, making it a perfect choice for those busy weeknights when you crave something delicious without spending hours in the kitchen.
  • The combination of savory broth, tender dumplings, and fresh vegetables creates a symphony of flavors that will tantalize your taste buds with every spoonful.
  • Its vibrant colors and appealing presentation mean you can impress your guests or enjoy a beautiful meal all by yourself.
  • Finally, this recipe is incredibly versatile; feel free to swap in your favorite veggies or proteins to make it your own.

Dumpling Ramen Bowl Ingredients

For the Broth
• Frozen Dumplings – 12 pieces – for that delightful, chewy bite that complements the ramen.
• Chicken Broth – 4 cups – the flavorful base that adds warmth and comfort to your Dumpling Ramen Bowl.
• Soy Sauce – 3 tablespoons – enhances the umami flavor and adds a savory depth to the broth.
• Sesame Oil – 1 tablespoon – adds a nutty aroma that elevates the dish’s flavor profile.

For the Noodles and Toppings
• Instant Ramen Noodles – 2 packs – a quick-cooking option that gives you that satisfying slurp.
• Eggs – 4 large (soft-boiled) – they add creaminess and richness, balancing the broth nicely.
• Fresh Spinach Leaves – 2 cups – a vibrant green addition that’s packed with nutrients.
• Green Onions – 1 bunch – for a fresh, oniony crunch that brightens your bowl.
• Black Sesame Seeds – 2 tablespoons – sprinkled on top for a nutty flavor and stunning presentation.

How to Make Dumpling Ramen Bowl With Soft-Boiled Eggs

  1. Boil the Broth: In a large pot, bring the chicken broth to a rolling boil over medium-high heat. This step provides a warm, flavorful base for your delicious Dumpling Ramen Bowl.

  2. Add the Dumplings: Gently drop in the frozen dumplings and cook them according to the package instructions, usually about 6-8 minutes, until they are tender and heated through.

  3. Flavor the Broth: Stir in the soy sauce and sesame oil into the pot. This will enhance the broth’s umami flavor, adding that rich, satisfying taste that makes this dish special.

  4. Cook the Noodles: In a separate pot, boil water and cook the instant ramen noodles according to package instructions, usually about 3-4 minutes, until they’re just tender and ready to soak up all that delightful broth.

  5. Soft-Boil the Eggs: Place the eggs in boiling water and cook for about 6-7 minutes for a perfectly soft yolk. Remove them from the water and let them cool before peeling.

  6. Add Greens: Once the dumplings are cooked, stir in the fresh spinach leaves and chopped green onions into the broth. Cook for another 2 minutes until the spinach wilts and brightens in color.

  7. Assemble the Bowls: Divide the cooked ramen noodles among serving bowls. Ladle the broth with dumplings and vegetables over the noodles, creating layers of flavor.

  8. Garnish with Eggs: Carefully halve the soft-boiled eggs and place them atop each bowl for that wonderful creamy touch that balances out the broth and adds charm.

  9. Finish with Seeds: Finally, sprinkle black sesame seeds over each bowl for a nutty crunch and an elegant touch.

Optional: Serve with a drizzle of chili oil for an added kick of spice!

Exact quantities are listed in the recipe card below.

What to Serve with Dumpling Ramen Bowl With Soft-Boiled Eggs?

The perfect meal isn’t just about the main dish; it’s about crafting a harmonious dining experience that leaves everyone satisfied.

  • Crispy Tempura Vegetables: A light and crispy side that brings texture and adds a lovely contrast to the tender dumplings.

  • Garlic Edamame: Lightly seasoned edamame pods with a punch of garlic provide a protein-packed snack that complements the umami notes of the ramen.

  • Fresh Salad with Sesame Dressing: A crisp salad with a tangy sesame dressing brings a fresh crunch, balancing the richness of the ramen.

  • Spicy Kimchi: This fermented side dish adds a unique zing that elevates the entire meal with its heat and tang, pairing wonderfully with the soft-boiled eggs.

Indulging in this combination not only delights the palate but also creates a sensory feast, perfect for sharing or enjoying solo.

  • Chilled Green Tea: A refreshing drink that cleanses the palate, enhancing every rich, savory bite while providing a soothing finish to the meal.

  • Mochi Ice Cream: A delightful dessert that offers a sweet and chewy contrast, making the perfect ending to a savory experience.

How to Store and Freeze Dumpling Ramen Bowl With Soft-Boiled Eggs

Fridge: Keep any leftover Dumpling Ramen Bowl in an airtight container for up to 3 days. Store noodles and broth separately if possible to maintain texture.

Freezer: If you want to freeze the dish, store the broth and cooked dumplings in a freezer-safe container for up to 3 months. Freeze noodles separately as they don’t thaw well.

Reheating: To reheat, thaw in the fridge overnight. Warm the broth on the stove or in the microwave until steaming and add the dumplings back to heat through. Cook fresh ramen noodles if needed.

Freshness Tip: For the best flavor, add fresh spinach and green onions after reheating the broth to keep them vibrant and crisp.

Dumpling Ramen Bowl Variations

Embrace the opportunity to tailor this comforting Dumpling Ramen Bowl to your heart’s desire!

  • Vegan: Swap the chicken broth for vegetable broth and use vegan dumplings for a plant-based delight. This version is just as hearty and satisfying!

  • Spicy Kick: Add sliced jalapeños or a dash of sriracha to the broth for a fiery twist. This will thrill those who love a bit of heat in their comfort food.

  • Gluten-Free: Use rice noodles instead of instant ramen and check that your dumplings are gluten-free. Everyone deserves a tasty meal, regardless of dietary restrictions!

  • Flavor Boost: Toss in a splash of fish sauce or a teaspoon of miso paste for an umami punch. These additions can elevate the broth, offering a rich and savory base.

  • Extra Crunch: Top with crispy fried onions or crushed peanuts to add a delightful texture. This brings a satisfying crunch to each spoonful of splendor.

  • Chicken Add-In: For additional protein, add shredded rotisserie chicken to the broth before serving. It’s a great way to amp up the heartiness of this dish!

  • Mood-Boosting Greens: Swap spinach for kale or bok choy, which not only enhance the nutritional content but also offer a different texture and flavor profile.

  • Herb-Love: Garnish with fresh cilantro or basil for a fragrant finish. These herbs will introduce freshness and brightness that can completely transform the dish.

Make Ahead Options

These Dumpling Ramen Bowls are perfect for meal prep enthusiasts! You can cook the dumplings and broth up to 3 days in advance, storing them separately in the refrigerator to maintain their quality. Prepare the ramen noodles and soft-boil the eggs up to 24 hours ahead, keeping them in an airtight container. When you’re ready to serve, simply reheat the broth and dumplings over medium heat until warmed through, cook the noodles for a quick 2-3 minutes, and assemble your bowls with the spinach, green onions, and soft-boiled eggs. This thoughtful prep ensures that your Dumpling Ramen Bowl remains just as delicious and comforting, saving you time on those busy weeknights!

Chef's Helpful Tips

  • When making the Dumpling Ramen Bowl, ensure that the chicken broth is at a rolling boil before adding the dumplings for perfectly cooked dumplings with a delightful, tender texture.
  • Avoid overcrowding the pot; this can cause the dumplings to stick together, so cook them in batches if necessary.
  • To achieve the ideal soft-boiled eggs, start timing as soon as the eggs hit the boiling water, and use a timer for consistent results.
  • Always add the fresh spinach and green onions towards the end of cooking to maintain their vibrant colors and nutrients, ensuring they remain fresh and lively in your bowl.

Dumpling Ramen Bowl With Soft-Boiled Eggs Recipe FAQs

What type of dumplings should I use for the Dumpling Ramen Bowl?
Absolutely! I recommend using frozen dumplings, as they are convenient and come in various flavors. Options like chicken, pork, or vegetable dumplings all add a delightful touch to your ramen bowl, allowing you to choose based on your flavor preferences.

How should I store the leftover Dumpling Ramen Bowl?
For sure! Keep any leftover Dumpling Ramen Bowl in an airtight container in the fridge for up to 3 days. It’s best to store the noodles and broth separately, as this will help maintain their textures, keeping the noodles from getting soggy.

Can I freeze the Dumpling Ramen Bowl?
Yes, you can! To freeze the dish, store the chicken broth and cooked dumplings in a freezer-safe container for up to 3 months. However, it’s best to freeze the noodles separately, as they don’t thaw well. When ready to enjoy, thaw everything overnight in the fridge and reheat for a comforting meal.

How do I reheat the dumplings and broth for the best results?
Great question! After thawing in the fridge overnight, warm the chicken broth on the stove or in the microwave until it’s steaming. Add the frozen dumplings back into the hot broth for a couple of minutes to heat through. If you’re using fresh ramen noodles, cook them separately as needed. I often add fresh spinach and green onions right before serving to maintain their crispness.

Can I customize this recipe for dietary restrictions?
Very much so! If you have dietary restrictions, feel free to swap in gluten-free noodles or alternative broths (like vegetable broth for a vegetarian option). Make sure to check labels for allergens, especially with dumplings, as some may contain gluten, soy, or other allergens. Always verify for your dietary needs, and personalize your bowl to suit your tastes!

Dumpling Ramen Bowl With Soft-Boiled Eggs

Dumpling Ramen Bowl With Soft-Boiled Eggs

This Dumpling Ramen Bowl with Soft-Boiled Eggs is a comforting dish that combines savory flavors and easy preparation in just 25 minutes.
Print Recipe Pin Recipe
Prep Time 10 minutes mins
Cook Time 15 minutes mins
Total Time 25 minutes mins
Servings: 4 bowls
Course: DINNER RECIPES
Cuisine: Asian
Calories: 450
Ingredients Equipment Method Nutrition Notes

Ingredients
  

Broth
  • 12 pieces Frozen Dumplings for that delightful, chewy bite that complements the ramen.
  • 4 cups Chicken Broth the flavorful base that adds warmth and comfort.
  • 3 tablespoons Soy Sauce enhances the umami flavor.
  • 1 tablespoon Sesame Oil adds a nutty aroma.
Noodles and Toppings
  • 2 packs Instant Ramen Noodles quick-cooking option.
  • 4 large Eggs soft-boiled for creaminess.
  • 2 cups Fresh Spinach Leaves packed with nutrients.
  • 1 bunch Green Onions for a fresh, oniony crunch.
  • 2 tablespoons Black Sesame Seeds for garnish.

Equipment

  • Large pot
  • separate pot
  • timer

Method
 

Preparation
  1. In a large pot, bring the chicken broth to a rolling boil over medium-high heat.
  2. Gently drop in the frozen dumplings and cook according to the package instructions, usually about 6-8 minutes.
  3. Stir in the soy sauce and sesame oil into the pot.
  4. In a separate pot, boil water and cook the instant ramen noodles according to package instructions, usually about 3-4 minutes.
  5. Place the eggs in boiling water and cook for about 6-7 minutes for a perfectly soft yolk.
  6. Stir in the fresh spinach leaves and chopped green onions into the broth.
  7. Divide the cooked ramen noodles among serving bowls, ladle the broth with dumplings and vegetables over them.
  8. Carefully halve the soft-boiled eggs and place them atop each bowl.
  9. Sprinkle black sesame seeds over each bowl.

Nutrition

Serving: 1bowlCalories: 450kcalCarbohydrates: 60gProtein: 20gFat: 15gSaturated Fat: 3gPolyunsaturated Fat: 2gMonounsaturated Fat: 5gCholesterol: 210mgSodium: 1000mgPotassium: 600mgFiber: 4gSugar: 1gVitamin A: 2500IUVitamin C: 15mgCalcium: 100mgIron: 2mg

Notes

Optionally serve with a drizzle of chili oil for added spice. Store leftovers in an airtight container for up to 3 days.

Tried this recipe?

Let us know how it was!

Filed Under: DINNER RECIPES

  • « Previous Page
  • 1
  • …
  • 13
  • 14
  • 15
  • 16
  • Next Page »

Recent Posts

  • Crispy Potatoes in Oven
  • Lucky Charms Pancakes
  • Cheeseburger
  • Boiled Corn on the Cob
  • St. Patrick’s Day Dessert Parfaits

Recent Comments

No comments to show.

Footer

  • Contact
  • Privacy Policy
  • About Us
  • Terms
  • ↑ back to top

Copyright © 2024 www.Forkono.com

Table Of Content