Forkono

  • BREAKFAST & BRUNCH
  • DESSERT RECIPES
  • DINNER RECIPES
  • LUNCH RECIPES
  • About uS
  • SNACKS & APPETIZERS
menu icon
go to homepage
  • BREAKFAST & BRUNCH
  • DESSERT RECIPES
  • DINNER RECIPES
  • LUNCH RECIPES
  • About uS
  • SNACKS & APPETIZERS
search icon
Homepage link
  • BREAKFAST & BRUNCH
  • DESSERT RECIPES
  • DINNER RECIPES
  • LUNCH RECIPES
  • About uS
  • SNACKS & APPETIZERS
×

Frozen Jalapeno Poppers In Air Fryer

January 6, 2026 by JudyWhite Leave a Comment

If you’re anything like me, the smell of spicy, cheesy treats wafting through the air strikes a nostalgic chord. I vividly recall hosting gatherings where frozen jalapeno poppers always became the star of the table—crispy and bursting with flavor. Since I discovered the magic of the air fryer, making these delicious snacks has transformed from a guilty pleasure into a weekly ritual.

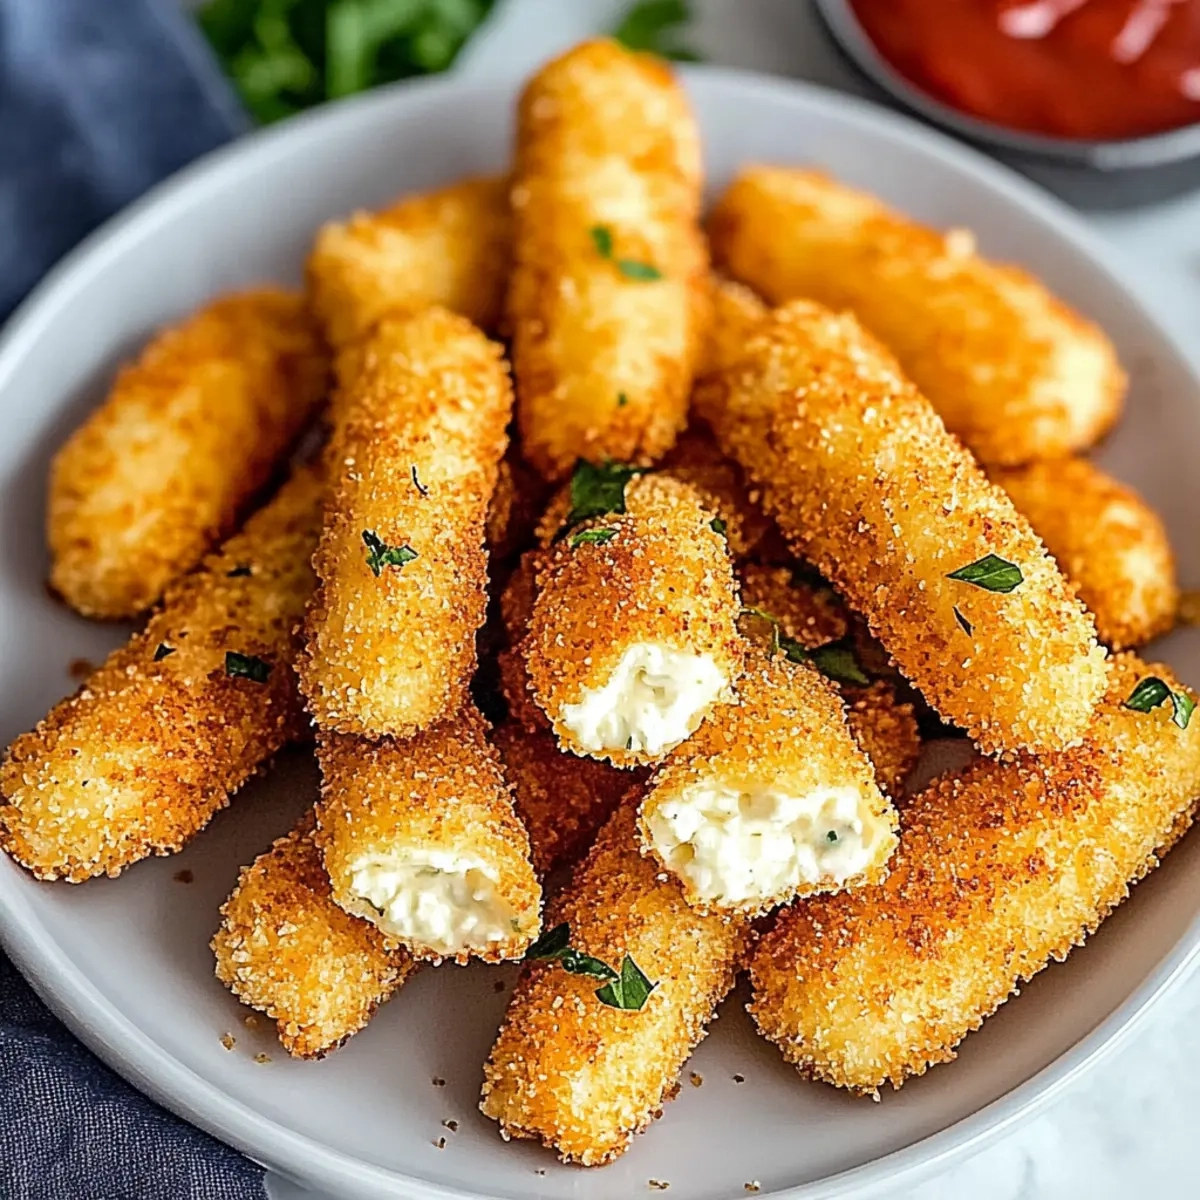
Imagine preparing a delightful appetizer in just 17 minutes, with a tantalizing crunch that rivals your favorite pub. These Frozen Jalapeno Poppers in the Air Fryer are not only easy to whip up but will also convert any fast-food fan into a believer in homemade delights. Paired with a zesty dipping sauce like ranch or blue cheese, they’ll have your friends and family asking for seconds (or thirds)! Let’s dive into this simple yet scrumptious recipe that promises to liven up any snack time or game day gathering.

Why You'll Love This Frozen Jalapeno Poppers In Air Fryer

  • This recipe is incredibly easy to prepare, taking just 5 minutes of prep and 12 minutes of cooking time, making it a perfect snack for any occasion.
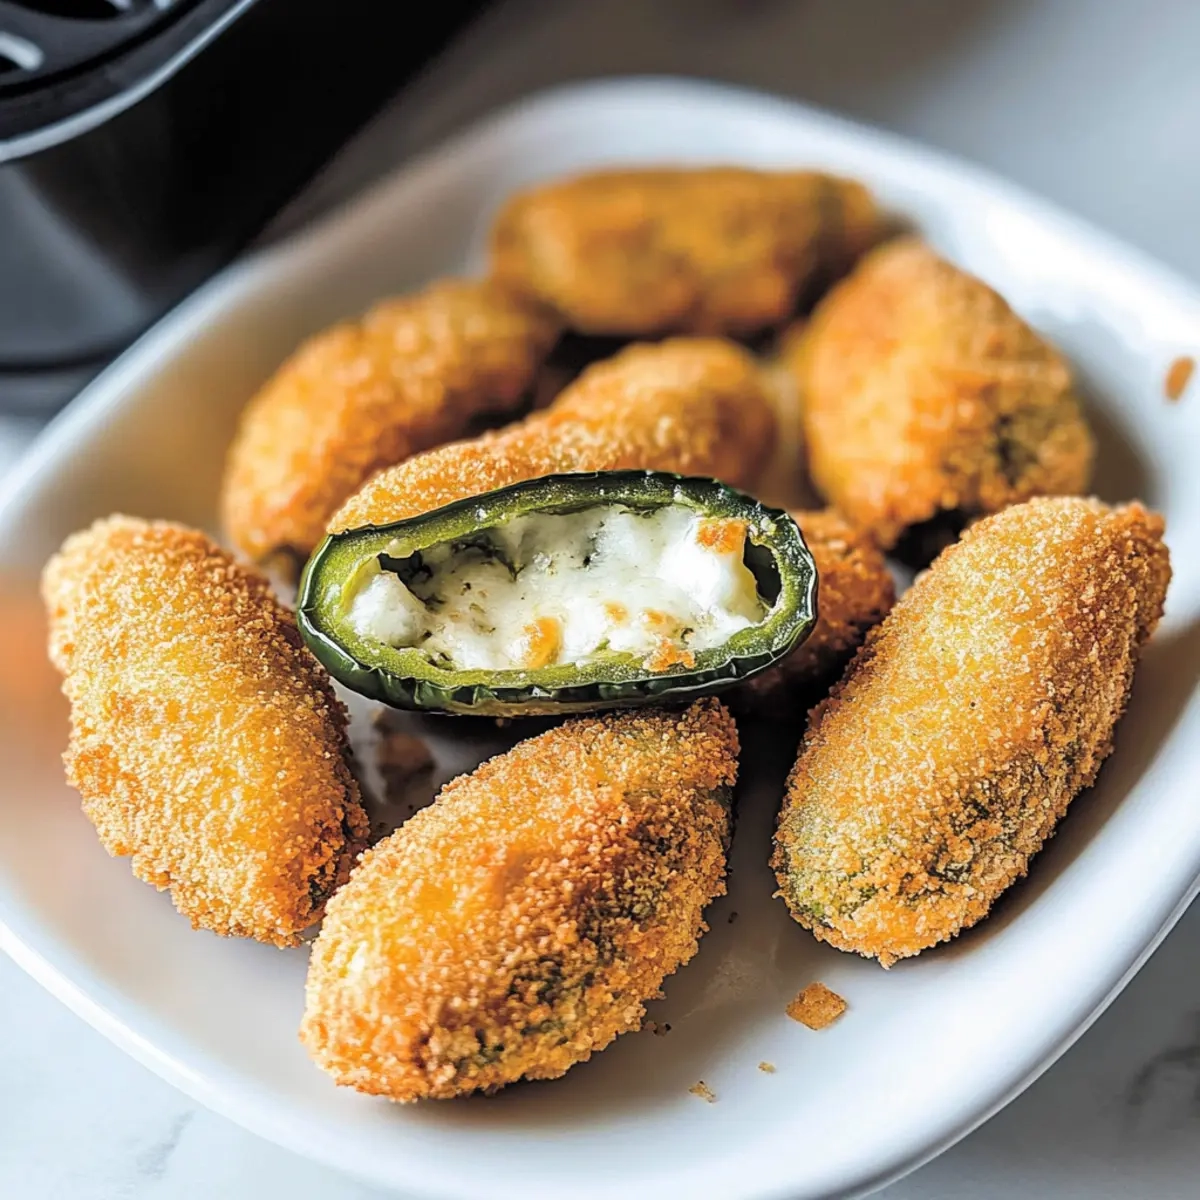
  • The air fryer gives these poppers a crispy texture without the need for deep frying, offering a healthier alternative that doesn’t compromise on flavor.
  • Not only are they a crowd-pleaser that your friends and family will rave about, but they’re also versatile enough to serve as an appetizer or a game day treat.
  • The vibrant colors and golden-brown finish create an appealing visual presentation that will make your gathering even more inviting.

Frozen Jalapeno Poppers Ingredients

• Perfect for your air fryer adventures!

For the Poppers

  • Frozen jalapeno poppers – ensure they’re well-frozen for optimal crispiness when cooked.
  • Cooking spray – helps achieve that crunchy, golden exterior without the oils of traditional frying.

For Dipping

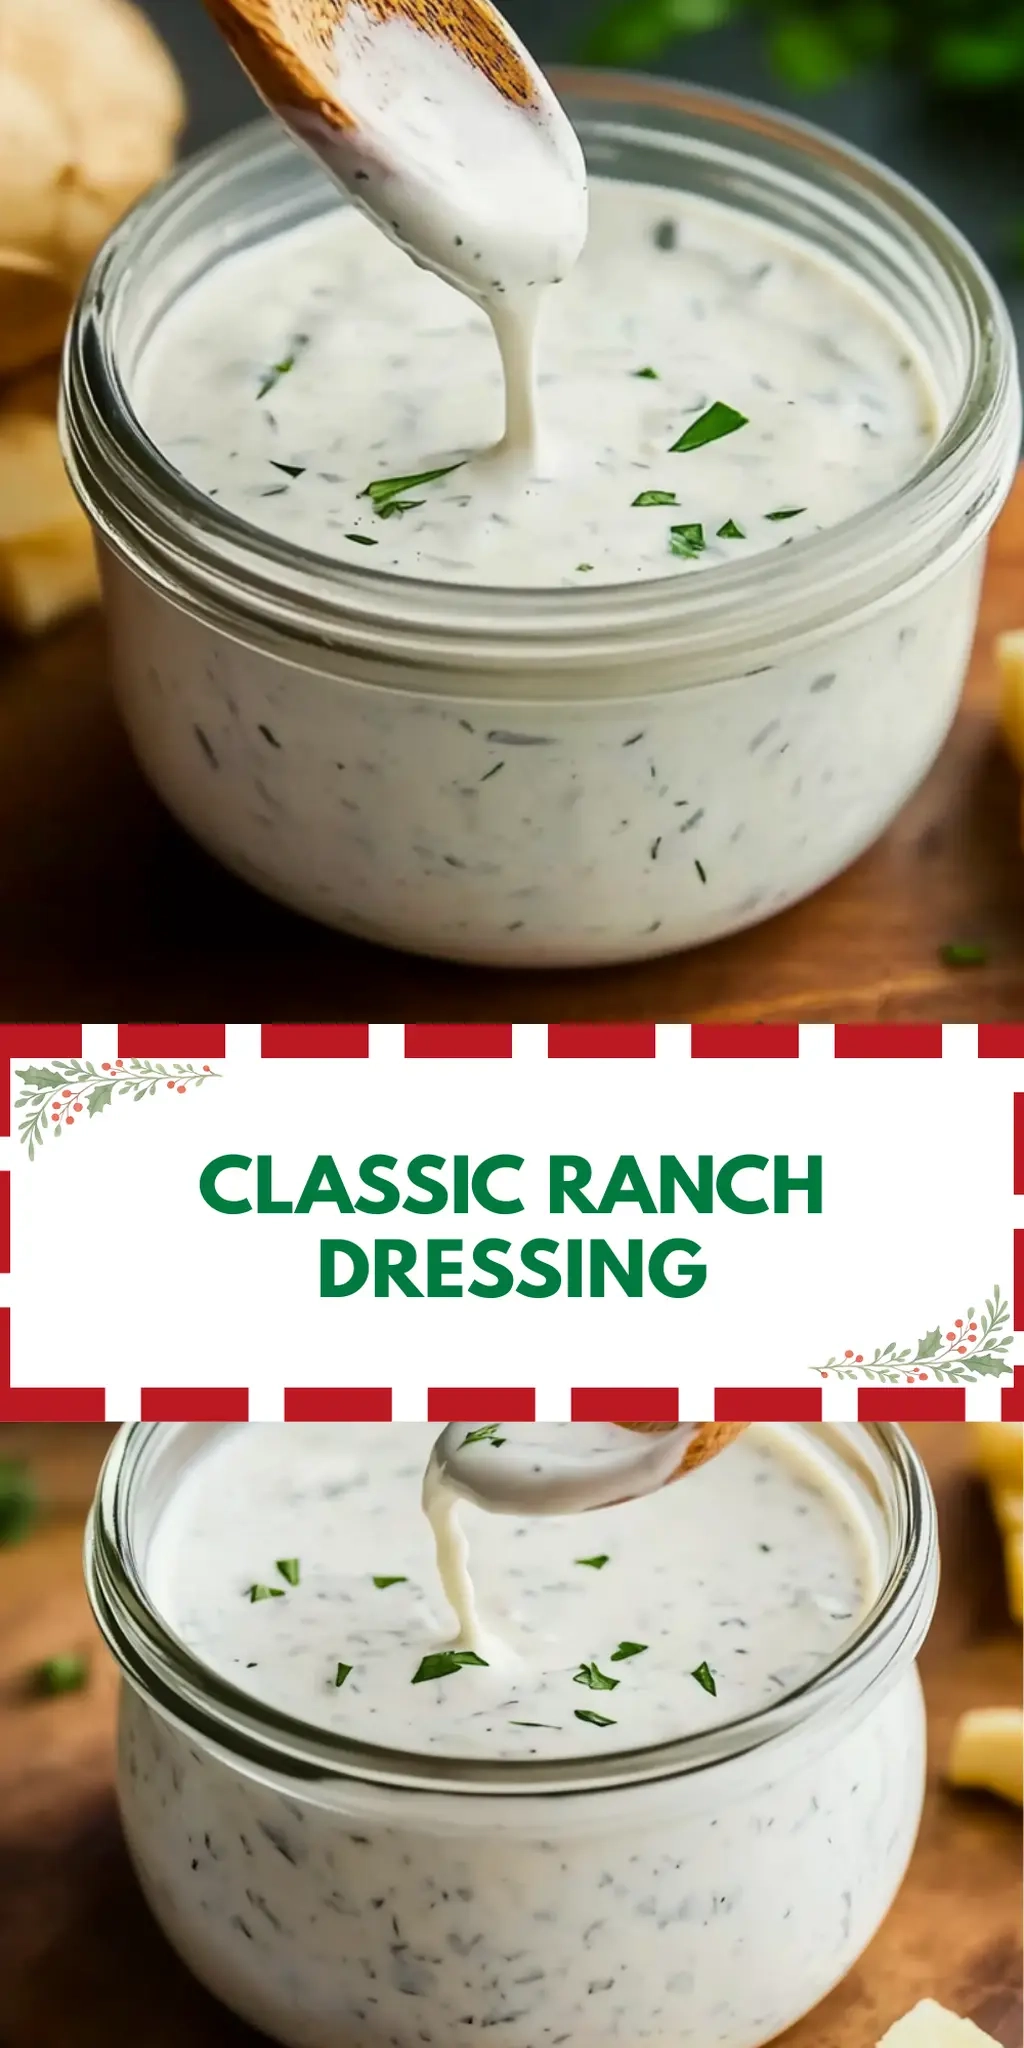
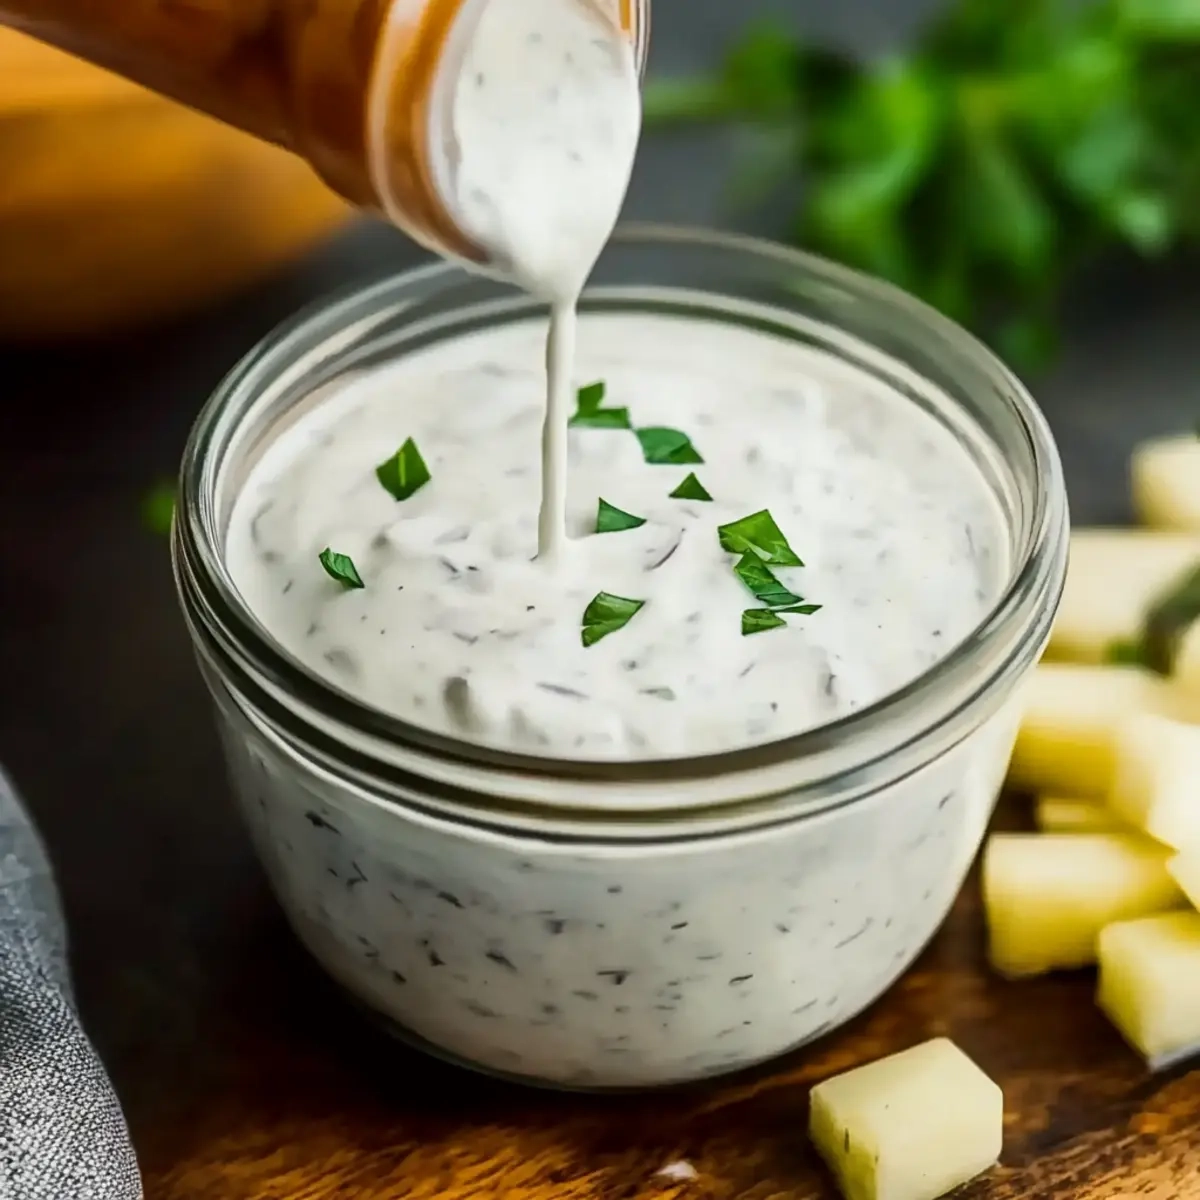
  • Ranch dressing – pairs wonderfully with the spicy poppers for a cooling element.
  • Blue cheese dressing – adds a rich, tangy flavor that complements the heat of the jalapenos; try it for a bold kick!

How to Make Frozen Jalapeno Poppers in Air Fryer

  1. Preheat the air fryer to 400°F (200°C). This ensures your poppers get that perfect golden crunch as they cook.

  2. Spray the air fryer basket lightly with cooking spray. This step prevents sticking and enhances that crispy texture we all adore.

  3. Arrange frozen jalapeno poppers in a single, even layer within the basket. This spacing is key to achieving uniform cooking and that irresistible crunch.

  4. Cook for 10-12 minutes, shaking the basket halfway through. This helps them cook evenly, ensuring each bite is deliciously crispy.

  5. Check for a golden brown color. If they need a little more time, feel free to add an extra minute or two until they reach that perfect hue.

  6. Transfer the poppers to a serving platter. Enjoy them with your favorite dipping sauce for that extra burst of flavor!

Optional: Drizzle with a bit of ranch or blue cheese for added zest!

Exact quantities are listed in the recipe card below.

How to Store and Freeze Frozen Jalapeno Poppers

Room Temperature: Store leftover crispy poppers in a covered container for up to 2 hours to maintain their crunchy texture.

Fridge: If you have any poppers left, keep them in an airtight container in the fridge for up to 3 days. Reheat in the air fryer for best results.

Freezer: For longer storage, freeze any uncooked poppers for up to 2 months. To cook from frozen, simply follow the same air frying instructions without thawing.

Reheating: Reheat leftover poppers in the air fryer at 375°F (190°C) for 5-7 minutes, allowing you to enjoy that delightful crispness once again.

Frozen Jalapeno Poppers Variations

Feel free to play around with your poppers, elevating flavors and textures to match your cravings!

  • Cheese-filled: Swap in cream cheese or cheddar for a gooey, rich center that complements the jalapeno heat.

  • Spicy Kick: Blend in some diced serrano or habanero peppers for an extra fiery experience that even spice lovers will adore.

  • Herb-infused: Add fresh chopped cilantro or parsley into your cream filling for a vibrant herbal freshness that brightens every bite.

  • Vegan Option: Use a plant-based version of jalapeno poppers and diary-free ranch dressing, making this a delicious treat for everyone.

  • Crunchier Coating: Double-dip your poppers in breadcrumbs or crushed tortilla chips before air frying for an added crunch that packs a flavor punch.

  • Air Fried Bacon: Wrap your poppers in turkey or regular bacon for a decadent twist; the crispy bacon enhances the poppers’ flavor, making them irresistible.

  • Sweet & Spicy: Drizzle some honey or maple syrup over your poppers post-cooking for a tantalizing sweet contrast that surprises the palate.

  • Zesty Salsa: Serve with a vibrant fruit salsa, combining fresh mango or pineapple, to bring a refreshing zest alongside the spicy poppers.

What to Serve with Frozen Jalapeno Poppers in Air Fryer?

Get ready to create a delightful spread that complements the spicy, cheesy goodness of these poppers!

  • Creamy Coleslaw: The cool, crunchy texture of coleslaw offers a refreshing contrast to the heat of the poppers, making each bite even more enjoyable.

  • Guacamole: This creamy avocado dip brings a smooth, rich flavor, balancing the spiciness while adding a vibrant green touch to your table.

  • Spicy Nachos: Layered with melted cheese and jalapeños, nachos elevate the munching experience, creating an irresistible party atmosphere.

  • Chilled Cucumber Salad: A light, zesty salad with cucumbers and herbs cools down the palate, enhancing the overall flavor experience with its fresh crispness.

  • Margaritas: These frosty drinks bring a fun, festive feel to your gathering, complementing the savory flavors while providing a delightful citrus kick.

  • Mini Quesadillas: Cut into bite-sized pieces, these cheesy bundles are easy to share and match beautifully, adding texture and melty goodness to your feast.

  • Rustic Bread and Dips: Serve with hummus or tzatziki for a warm, inviting option. The hearty bread balances the poppers wonderfully, making it perfect for dipping.

  • Chocolate Covered Pretzels: For a sweet twist, these treats add just the right amount of sweetness to offset the heat of the poppers, keeping your guests coming back for more!

Make Ahead Options

These Frozen Jalapeno Poppers in Air Fryer are perfect for meal prep enthusiasts! You can prep the poppers by arranging them in the air fryer basket and covering them with plastic wrap, then refrigerating for up to 24 hours before cooking. This ensures they stay fresh and ready to go for any impromptu gatherings or busy weeknights. When you’re ready to enjoy, simply remove the wrap and cook directly from the fridge as you normally would, extending the cooking time by a minute or two if needed. This makes for a deliciously crispy snack with minimal effort, allowing you to savor those golden-brown bites just like fresh out of the fryer!

Chef's Helpful Tips

  • For the best results with Frozen Jalapeno Poppers in Air Fryer, ensure that the poppers are completely frozen before cooking to achieve that perfect crispiness.
  • A light spray of cooking oil not only prevents sticking but also helps create a delightful golden-brown exterior.
  • When arranging the poppers in the air fryer, leave enough space between them so that hot air can circulate effectively for even cooking.
  • Remember to shake the basket halfway through the cooking time to promote uniform crispiness; this small step can make a major difference in texture.

Frozen Jalapeno Poppers in Air Fryer Recipe FAQs

How do I select the best frozen jalapeno poppers?
Absolutely! Look for frozen jalapeno poppers that are bright in color with no visible freezer burn or ice crystals. Avoid any packages with dark spots or excessive ice as these may indicate aging and could affect the poppers’ flavor and texture.

How should I store leftover jalapeno poppers?
After indulging, store leftover crispy poppers in an airtight container in the fridge for up to 3 days. This keeps them fresh and tasty. When you’re ready to enjoy them again, reheat them in the air fryer at 375°F (190°C) for about 5-7 minutes to restore their delightful crunch.

Can I freeze homemade jalapeno poppers?
Very! If you’ve made your jalapeno poppers from scratch and want to extend their shelf life, simply freeze them before cooking. Lay them on a baking sheet in a single layer until solid, then transfer them to a freezer-safe bag or container. They can be stored in the freezer for up to 2 months. When ready to cook, there’s no need to thaw; just follow the same air frying instructions.

What should I do if my poppers aren’t crispy after cooking?
If you find your poppers aren’t achieving that desired crunchy texture, check a few things: Firstly, ensure they’re arranged in a single layer with space between each popper to allow for air circulation. Also, make sure you’re using enough cooking spray for that golden finish. If needed, shake the basket midway through cooking and add an extra minute or two if they aren’t golden brown.

Are jalapeno poppers safe for pets?
Not really. While jalapenos themselves may not harm pets, the spicy heat could upset their stomachs. It’s best to keep these poppers as a treat for your friends and family. Always check labels for common allergens if serving at gatherings, especially for those with allergies to dairy or gluten.

Can I use a different dipping sauce?
The more, the merrier! While ranch and blue cheese are classic choices, feel free to get creative. Try serving the poppers with guacamole, salsa, or even a spicy Sriracha mayo for a fun twist. Enjoy experimenting with different flavors!

Frozen Jalapeno Poppers In Air Fryer

Frozen Jalapeno Poppers In Air Fryer

Enjoy crispy, flavorful Frozen Jalapeno Poppers in Air Fryer in just 17 minutes.
Print Recipe Pin Recipe
Prep Time 5 minutes mins
Cook Time 12 minutes mins
Total Time 17 minutes mins
Servings: 4 poppers
Course: Snacks & Appetizers
Calories: 150
Ingredients Equipment Method Nutrition Notes

Ingredients
  

For the Poppers
  • 1 package Frozen jalapeno poppers ensure they're well-frozen for optimal crispiness
  • 1 spray Cooking spray helps achieve a crispy, golden exterior
For Dipping
  • 1/2 cup Ranch dressing pairs wonderfully with the spicy poppers
  • 1/2 cup Blue cheese dressing adds a rich, tangy flavor

Equipment

  • Air fryer

Method
 

How to Make Frozen Jalapeno Poppers in Air Fryer
  1. Preheat the air fryer to 400°F (200°C).
  2. Spray the air fryer basket lightly with cooking spray.
  3. Arrange frozen jalapeno poppers in a single, even layer within the basket.
  4. Cook for 10-12 minutes, shaking the basket halfway through.
  5. Check for a golden brown color; cook longer if needed.
  6. Transfer the poppers to a serving platter.

Nutrition

Serving: 1popperCalories: 150kcalCarbohydrates: 10gProtein: 3gFat: 10gSaturated Fat: 5gPolyunsaturated Fat: 1gMonounsaturated Fat: 3gCholesterol: 15mgSodium: 300mgPotassium: 150mgFiber: 1gSugar: 1gVitamin A: 400IUVitamin C: 5mgCalcium: 50mgIron: 1mg

Notes

Enjoy with ranch or blue cheese dressing for added zest.

Tried this recipe?

Let us know how it was!

Filed Under: SNACKS & APPETIZERS

Air Fryer Mozzarella Sticks

January 6, 2026 by JudyWhite Leave a Comment

There’s something undeniably satisfying about biting into a perfectly crispy mozzarella stick, its gooey interior stretching as you pull it away. I discovered air frying as my go-to cooking method for this classic snack—a delicious blend of crunch and melt that feels indulgent without the guilt. One crisp evening when I was craving a comforting snack, I knew I needed to whip up something a little special, and these Air Fryer Mozzarella Sticks were born.

As I gathered my ingredients, the anticipation of that first cheesy bite built. The beauty of this recipe is not just the flavors but how easy it is to make! With minimal prep and less than 30 minutes from start to finish, it beats any fast-food version by a mile. Plus, dipping them in warm marinara sauce takes them to another level of yum. Say goodbye to greasy takeout and hello to homemade bliss—your taste buds will thank you!

Why You'll Love This Air Fryer Mozzarella Sticks

  • You will love how easy it is to whip up these delicious snacks in under 30 minutes, making them perfect for any occasion.
  • The air frying method gives you that satisfying crunch while keeping the cheese melty inside without the excess oil.
  • These mozzarella sticks are incredibly versatile, allowing you to adjust seasonings or try different dipping sauces to suit your taste.
  • Their golden-brown appearance makes for an irresistible dish that impresses family and friends alike.

Air Fryer Mozzarella Sticks Ingredients

Discover the perfect balance of crunch and gooey cheesiness!

For the Breading
• Low-moisture mozzarella string cheese sticks – These are ideal for frying as they melt beautifully without becoming too watery.
• All-purpose flour – Coats the cheese sticks to help the egg and breadcrumbs adhere better.
• Large eggs, beaten – Acts as a binding agent, ensuring the breadcrumbs stick properly for a crisp exterior.
• Seasoned breadcrumbs – Adds texture and flavor; feel free to use panko for extra crunch!
• Italian seasoning – This infusion of herbs gives your Air Fryer Mozzarella Sticks that extra flavorful kick.

For Cooking
• Cooking spray – A light mist prevents sticking and helps achieve a golden finish in the air fryer.

For Dipping (Optional)
• Marinara sauce – The perfect tangy companion that elevates the cheesy goodness to new heights.

How to Make Air Fryer Mozzarella Sticks

  1. Prepare your workspace. Create a cozy breading station with three bowls: one filled with flour, another with beaten eggs, and the last with seasoned breadcrumbs mixed with Italian seasoning. This setup will make the process smooth and enjoyable!

  2. Coat the cheese. Take each mozzarella stick and lightly coat it in flour. Then, dip it into the egg wash, ensuring it’s well-covered, before rolling it in the breadcrumb mixture until it’s completely coated. Get ready for that crispy perfection!

  3. Chill for success. Lay the breaded mozzarella sticks on a baking sheet and pop them in the freezer for 30 minutes. This step helps maintain their shape during cooking, resulting in beautifully formed sticks.

  4. Preheat your air fryer. Set your air fryer to 390°F (200°C). While it heats up, give the basket a light spray with cooking spray to prevent sticking and promote browning.

  5. Arrange and cook. Place the chilled mozzarella sticks in a single layer in the air fryer basket. Mist them with a little more cooking spray and cook for 6-8 minutes until they are golden brown and crispy. Keep an eye on them for that perfect crunch!

  6. Serve and enjoy! Carefully remove the mozzarella sticks from the air fryer and let them cool slightly. Serve with warm marinara sauce for dipping, and watch everyone dive in!

Optional: Sprinkle fresh herbs as a garnish for an extra pop of flavor.
Exact quantities are listed in the recipe card below.

What to Serve with Air Fryer Mozzarella Sticks?

Elevate your snack time by pairing these cheesy delights with delicious complementary dishes that will make your meal irresistible.

  • Crispy Garlic Bread: The buttery, garlicky flavor of this bread provides a delightful contrast to the cheesy mozzarella sticks, making every bite a savory experience.

  • Fresh Garden Salad: A light salad with mixed greens, cherry tomatoes, and a refreshing vinaigrette balances the richness of the cheese and adds a vibrant crunch.

  • Zesty Marinara Sauce: This classic dipping sauce is essential for bringing out the flavor of the cheese, enhancing each cheesy bite with its tangy goodness. It’s a must-have!

  • Creamy Ranch Dressing: The cool, herbaceous notes of ranch provide a rich and creamy counterpoint, turning your air-fried snack into a luscious treat.

  • Spicy Buffalo Sauce: For those who like a kick, pairing mozzarella sticks with spicy buffalo sauce adds an exciting contrast that elevates your taste experience.

  • Homemade Coleslaw: Crunchy and tangy, coleslaw offers both texture and freshness, making it an excellent side that perfectly complements the crispy mozzarella sticks.

  • Fizzy Lemonade: A chilled glass of lemonade or sparkling water cuts through the richness of the mozzarella and refreshes your palate with its bubbly and zesty notes.

  • Chocolate Silk Pie: End your meal on a sweet note with a velvety slice of chocolate silk pie. Its rich flavor creates a delectable sweet-and-savory contrast to the salty mozzarella sticks.

How to Store and Freeze Air Fryer Mozzarella Sticks

Fridge: Store leftover mozzarella sticks in an airtight container for up to 3 days. Reheat in the air fryer at 360°F (180°C) for about 4 minutes to restore crispiness.

Freezer: Place cooked cheddar sticks in a single layer on a baking sheet and freeze until solid. Transfer to a freezer bag, where they can stay fresh for up to 3 months.

Reheating: You can reheat frozen Air Fryer Mozzarella Sticks directly from the freezer. Air fry at 370°F (190°C) for approximately 6-8 minutes, ensuring they become hot and crispy again.

Serving tip: Pair with fresh marinara sauce for dipping when serving leftovers to elevate the flavor experience!

Air Fryer Mozzarella Sticks Variations

Get ready to make these sticks your own with delightful twists that will surprise your taste buds!

  • Gluten-Free: Swap the all-purpose flour for almond flour and use gluten-free breadcrumbs for a similar crunch. Perfect for those avoiding gluten without sacrificing flavor!

  • Spicy Kick: Add 1/2 teaspoon of cayenne pepper to the breadcrumb mixture for a fiery twist. Feel the heat blend in with the gooey cheese for a delightful kick!

  • Herbed Delight: Incorporate fresh herbs like chopped basil or parsley into the breadcrumbs to elevate the flavor profile. The aromatic herbs provide a refreshing twist that adds depth.

  • Cheesy Blend: Use a mix of mozzarella and sharp cheddar for a richer flavor. The combination creates layers of cheesy goodness that will have everyone reaching for more!

  • Bacon-Wrapped: Wrap each cheese stick in a slice of cooked bacon before breading for a savory snack. The smokiness of bacon pairs perfectly with the melted cheese for an indulgent treat.

  • Loaded Style: Top the breaded sticks with crumbled seasoned sausage for a heartier version. Each bite bursts with flavor, making these a great party appetizer.

  • Sweet Heat: Drizzle with honey and a sprinkle of crushed red pepper flakes before serving for a sweet-spicy contrast. It’s an unexpectedly delicious treat that balances savory and sweet!

  • Pesto Twist: Before dipping in the egg wash, coat the sticks lightly in pesto for an herbaceous flavor. Each cheesy bite will be punctuated with vibrant and rich pesto goodness!

Make Ahead Options

These Air Fryer Mozzarella Sticks are perfect for meal prep enthusiasts looking to save time on busy weeknights! You can bread the cheese sticks and place them on a baking sheet to freeze for up to 3 days in advance. Simply ensure they are tightly wrapped with plastic wrap or stored in an airtight container to maintain their quality. When you’re ready to enjoy your cheesy goodness, just pop them directly from the freezer into the preheated air fryer, adding an extra minute or two to the cooking time for best results. With these make-ahead options, you’ll have delectable snacks waiting for you anytime!

Chef's Helpful Tips

  • For the best Air Fryer Mozzarella Sticks, be sure to coat the cheese sticks lightly with flour to create a better grip for the egg wash.
  • Avoid common mistakes by ensuring your egg wash is generous enough to fully coat the sticks for optimal breadcrumb adhesion.
  • To achieve extra crispiness, consider using panko breadcrumbs instead of regular ones.
  • Remember to preheat your air fryer to 390°F (200°C) to ensure that the sticks cook evenly and achieve that golden brown finish you desire.

Air Fryer Mozzarella Sticks Recipe FAQs

What type of mozzarella sticks should I use?
I recommend using low-moisture mozzarella string cheese sticks, as they melt beautifully in the air fryer without becoming too watery. This will give you that perfect stretchy cheese pull!

How long can I store leftover mozzarella sticks?
Store any leftover Air Fryer Mozzarella Sticks in an airtight container in the fridge for up to 3 days. When you’re ready to enjoy them again, simply reheat in the air fryer at 360°F (180°C) for about 4 minutes to bring back that delightful crunch!

Can I freeze mozzarella sticks and how?
Absolutely! To freeze, first, arrange your cooked mozzarella sticks in a single layer on a baking sheet and freeze them until solid—about 1 to 2 hours. Once frozen, transfer them to a freezer bag or airtight container. They can stay fresh for up to 3 months.

How do I reheat frozen mozzarella sticks?
You can reheat frozen Air Fryer Mozzarella Sticks directly from the freezer. Preheat your air fryer to 370°F (190°C) and cook for approximately 6-8 minutes. This method ensures they become hot and crispy again, just like when they were first made!

Are these mozzarella sticks suitable for everyone?
Keep in mind that this recipe contains gluten from the breadcrumbs and eggs, so it’s not suitable for those with gluten or egg allergies. If you’re looking for alternatives, consider using gluten-free breadcrumbs and an egg substitute like flaxseed meal mixed with water.

What can I do if my mozzarella sticks aren’t crispy?
If your Air Fryer Mozzarella Sticks aren’t coming out as crispy as you’d like, check that you’re properly coating them with flour, egg, and breadcrumbs. Additionally, ensure your air fryer is preheated to the correct temperature before cooking. If they’re still lacking crunch, try increasing the cooking time in 1-minute increments until you achieve your desired crispiness.

Air Fryer Mozzarella Sticks

Air Fryer Mozzarella Sticks

These Air Fryer Mozzarella Sticks are a delicious blend of crunch and melt, easy to make, and healthier than takeout.
Print Recipe Pin Recipe
Prep Time 15 minutes mins
Cook Time 8 minutes mins
Chilling Time 30 minutes mins
Total Time 53 minutes mins
Servings: 4 sticks
Course: Snacks & Appetizers
Cuisine: Italian
Calories: 250
Ingredients Equipment Method Nutrition Notes

Ingredients
  

For the Breading
  • 12 sticks Low-moisture mozzarella string cheese
  • 1 cup All-purpose flour
  • 2 large Eggs, beaten
  • 1 cup Seasoned breadcrumbs Panko can be used for extra crunch
  • 1 teaspoon Italian seasoning For added flavor
For Cooking
  • 1 spray Cooking spray To prevent sticking
For Dipping (Optional)
  • 1 cup Marinara sauce For dipping

Equipment

  • Air fryer
  • Baking sheet
  • bowls

Method
 

Preparation
  1. Prepare your workspace by setting up three bowls: one with flour, one with beaten eggs, and one with seasoned breadcrumbs and Italian seasoning.
  2. Coat each mozzarella stick in flour, then dip in egg wash, and finally roll in the breadcrumb mixture.
  3. Chill the breaded mozzarella sticks on a baking sheet in the freezer for 30 minutes.
  4. Preheat the air fryer to 390°F (200°C) and spray the basket with cooking spray.
  5. Arrange the chilled mozzarella sticks in the air fryer basket, mist with cooking spray, and cook for 6-8 minutes until golden brown.
  6. Remove from the air fryer, let cool slightly, and serve with warm marinara sauce.

Nutrition

Serving: 3sticksCalories: 250kcalCarbohydrates: 20gProtein: 15gFat: 14gSaturated Fat: 7gPolyunsaturated Fat: 0.5gMonounsaturated Fat: 6gCholesterol: 70mgSodium: 500mgPotassium: 200mgFiber: 1gVitamin A: 300IUCalcium: 300mgIron: 1mg

Notes

Optional: Sprinkle fresh herbs on top for added flavor.

Tried this recipe?

Let us know how it was!

Filed Under: SNACKS & APPETIZERS

Valentine’s Day Snack Board

January 3, 2026 by JudyWhite Leave a Comment

As I was flipping through my recipe collection in preparation for Valentine’s Day, a burst of inspiration hit me like a sweet surprise. There’s something wonderfully romantic about sharing a beautifully arranged snack board—especially one that showcases vibrant colors and a mix of delightful textures. Picture this: a spread loaded with creamy brie, juicy strawberries, and a pop of exotic dragonfruit, all nestled among crunchy rice crackers and decadent white chocolate pretzels.

This Valentine’s Day Snack Board isn’t just easy to prepare in just 15 minutes; it’s also designed to dazzle any palate. Whether you’re planning a cozy night in with your partner, a vibrant gathering with friends, or an indulgent treat for yourself, this charming platter has got you covered. So let’s dive into this recipe that promises to elevate your Valentine’s Day celebrations, bringing joy with every bite!

Why You'll Love This Valentine’s Day Snack Board

  • This Valentine’s Day Snack Board is incredibly easy to prepare, taking just 15 minutes to assemble, making it perfect for even the busiest schedules.
  • The vibrant colors and elegant presentation are sure to impress anyone, making it a visual delight that enhances the atmosphere of your celebration.
  • With a variety of flavors from creamy brie to fresh fruits and sweet treats, this board caters to diverse tastes and ensures that everyone will find something they love.
  • It’s versatile enough for a romantic evening at home or a lively gathering with friends, making it a truly crowd-pleasing treat for any Valentine’s Day occasion.

Valentine’s Day Snack Board Ingredients

For the Base

  • Rice Crackers – 16 pieces provide a crunchy contrast to the creamy brie and sweet fruits.

For the Sweet Treats

  • White Chocolate Pretzels – 4 ounces add a delightful sweet-salty flavor that pairs beautifully with fresh fruit.

For the Cheese

  • Brie Cheese – 3 ounces offers a rich, creamy element that balances the board perfectly.

For the Fruits

  • Strawberries – 2 cups bring vibrant color and a juicy sweetness that everyone loves.
  • Raspberries – 1 cup adds a tartness that beautifully complements the sweeter elements.
  • Dragonfruit – 1 whole, sliced for a stunning visual appeal and mild flavor.
  • Pomegranate Arils – 1/4 cup provides juicy bursts of flavor and an extra touch of elegance.

For the Garnish

  • Toasted Coconut – 1/4 cup adds a crunchy texture and tropical flavor, making this Valentine’s Day Snack Board truly special.

Get ready to create a gorgeous display that will not only tantalize the taste buds but also provide a feast for the eyes!

How to Make a Valentine’s Day Snack Board

  1. Gather Ingredients: Start by collecting all your beautiful ingredients. Having everything on hand will make assembly a breeze, ensuring a smooth and enjoyable preparation experience.

  2. Arrange the Base: Lay out your rice crackers evenly across the large cutting board or serving tray. Feel free to overlap them slightly to create a visually interesting starting point for your snack board.

  3. Add the Cheese: Next, place your brie cheese in the center or at one end of the board. Its creamy texture will draw the eye and, trust me, it pairs wonderfully with everything else!

  4. Incorporate Fresh Fruits: Scatter the strawberries and raspberries around the cheese, and don’t forget to slice and artfully arrange the dragonfruit. Create a vibrant tapestry of colors—this is what makes your board truly eye-catching!

  5. Sprinkle the Sweet Treats: Now, add the white chocolate pretzels around the fruits, allowing the sweet and salty combo to shine. Their whimsical shape will add a fun touch to your board.

  6. Finish with Garnishes: Complete your masterpiece by sprinkling the toasted coconut and pomegranate arils over the board. These little accents add a delightful crunch and burst of flavor, ensuring each bite is flavorful and fresh.

Optional: Drizzle with honey for an extra touch of sweetness!

Exact quantities are listed in the recipe card below.

Make Ahead Options

This Valentine’s Day Snack Board is perfect for busy home cooks who love the convenience of prepping in advance! You can slice the dragonfruit and prepare the strawberries and raspberries up to 24 hours ahead to maintain their freshness. Simply store them in airtight containers in the refrigerator to keep them vibrant and juicy. You can also assemble the cheese and crackers the night before; just keep them covered to prevent the crackers from getting soggy. When you’re ready to serve, all you need to do is scatter the white chocolate pretzels, sprinkle with toasted coconut and pomegranate arils, and voilà—your charming board is ready to impress with minimal effort!

What to Serve with Valentine’s Day Snack Board?

Imagine the joy of pairing delicious snacks with enticing sides that elevate your celebration.

  • Chilled White Wine: A crisp Sauvignon Blanc pairs beautifully, complementing the creamy brie and fresh fruit flavors with its refreshing notes.

  • Sparkling Water with Lime: This bubbly choice adds a refreshing, zesty touch that keeps the palate invigorated between the rich bites.

  • Chocolate-Dipped Strawberries: A decadent addition, these sweet treats enhance the romance of your snack board and create a dreamy pairing with white chocolate pretzels.

  • Nuts and Dried Fruits: A mixed bowl of almonds and apricots adds crunchiness and natural sweetness, balancing the flavors while introducing a delightful texture contrast.

  • Cheese Platter: Adding a variety of cheeses like feta or gouda can offer complexity, catering to everyone’s cheese cravings and adding to the presentation.

  • Heart-Shaped Cookies: These charming treats provide a playful element to your display, appealing to the festive spirit of Valentine’s Day.

  • Chocolate Lava Cake: For an indulgent touch, this warm dessert can be an irresistible ending to your romantic gathering, offering a rich contrast to the fresh elements.

How to Store and Freeze Valentine’s Day Snack Board

Fridge: Store any leftover items in an airtight container. The fruits and brie cheese will stay fresh for up to 3 days.

Room Temperature: If serving at a gathering, keep the snack board at room temperature for no longer than 2 hours, ensuring safety and freshness.

Freezer: It’s not recommended to freeze this Valentine’s Day Snack Board, as the textures of the cheese and fruits will be compromised upon thawing.

Reheating: If enjoyed chilled, there’s no need to reheat. However, if you prefer a warm brie, gently heat in the microwave for 10–15 seconds before serving.

Valentine’s Day Snack Board Variations

Feel free to mix things up and make this snack board uniquely yours with these enticing variations!

  • Gluten-Free: Substitute rice crackers with gluten-free options like almond flour crackers for a crispy base everyone can enjoy.

  • Vegan Delight: Swap out the brie cheese for a plant-based cream cheese alternative, maintaining that creamy texture without dairy.

  • Flavor Boost: Sprinkle some cinnamon or nutmeg over the fruit for a warm spice twist that adds unexpected depth to your snack board.

  • Add Nuts: Toss on a handful of mixed nuts for a crunchy texture and added protein, bringing a satisfying bite to each piece.

  • Heat It Up: Drizzle a light touch of sriracha or chili honey over the fruit and cheese for a sweet and spicy flavor explosion that will surprise your taste buds.

  • Chocolate Lover’s Dream: Swap white chocolate pretzels for dark chocolate-covered pretzels, elevating the flavor and richness.

  • Nostalgic Touch: Include some favorite childhood candies alongside the fruit for a fun and playful twist that brings back fond memories.

  • Seasonal Fruits: Depending on the season, replace strawberries and raspberries with cherries or peaches to discover new flavor profiles that shine.

With these variations, your Valentine’s Day Snack Board will not only be visually stunning, but also bursting with personalized flavors that cater to every palate!

Chef's Helpful Tips

  • When assembling your Valentine’s Day Snack Board, ensure that you have all ingredients prepped and ready to go for an efficient assembly process.
  • Avoid overcrowding the board by strategically placing items to maintain a beautiful presentation and accessibility.
  • Use a variety of colors and shapes to enhance visual appeal, making sure to position the brie cheese prominently as it acts as a centerpiece.
  • To keep fruits fresh, prepare them just before serving to prevent any oxidation and loss of vibrant color.

Valentine’s Day Snack Board Recipe FAQs

How do I choose ripe strawberries for my Valentine’s Day Snack Board?
Absolutely! Look for strawberries that are bright red without any white spots or dark spots all over. The strawberry should feel firm but slightly soft to the touch, indicating that it’s juicy and ready to enjoy. Avoid any that appear overly soft or have blemishes.

What’s the best way to store leftover brie cheese?
I often wrap leftover brie cheese in wax paper or parchment paper, followed by a loose layer of plastic wrap. This keeps it from drying out while allowing it to breathe. Stored this way, it can last in the fridge for up to 5 days.

Can I freeze dragonfruit or other fruits for my snack board?
While I don’t recommend freezing your entire Valentine’s Day Snack Board, you can freeze dragonfruit for future use. Just peel and cut it into cubes, then spread the pieces on a baking sheet lined with parchment paper. Freeze for about 2 hours, then transfer to an airtight container. It will keep well for up to 3 months, but the texture may change when thawed. Use thawed pieces in smoothies or fruit salads!

What should I do if my brie cheese doesn’t melt properly?
If you hope to enjoy melty brie, make sure to keep it at room temperature for about 30 minutes before serving. This allows it to soften. If it doesn’t melt in the microwave as expected, try microwaving it for an additional 5–10 seconds. Keep an eye on it, as you don’t want it to overheat and separate!

Can I replace any ingredients for dietary restrictions?
Very! If you’re looking to accommodate allergies, consider using rice crackers made without gluten for a gluten-free option. For a nut-free diet, ensure your toasted coconut doesn’t come from a facility that processes nuts. You can also swap out the fruits according to seasonal availability or personal preference—kiwis or melons make great alternatives!

How long can I leave my snack board out at a party?
I recommend serving your Valentine’s Day Snack Board at room temperature for no more than 2 hours to ensure freshness and food safety. If you notice the fruits starting to wilt or the cheese losing its charm, it’s time to wrap it up!

Valentine’s Day Snack Board

Valentine’s Day Snack Board

A vibrant and delightful Valentine’s Day Snack Board perfect for sharing, featuring fruits, brie, and sweet treats.
Print Recipe Pin Recipe
Prep Time 15 minutes mins
Total Time 15 minutes mins
Servings: 4 servings
Course: Snacks & Appetizers
Calories: 350
Ingredients Equipment Method Nutrition Notes

Ingredients
  

For the Base
  • 16 pieces Rice Crackers Provides a crunchy contrast to the creamy brie and sweet fruits.
For the Sweet Treats
  • 4 ounces White Chocolate Pretzels Add a delightful sweet-salty flavor.
For the Cheese
  • 3 ounces Brie Cheese Offers a rich, creamy element.
For the Fruits
  • 2 cups Strawberries Brings vibrant color and juicy sweetness.
  • 1 cup Raspberries Adds a tartness that complements sweeter elements.
  • 1 whole Dragonfruit Sliced for visual appeal.
  • 1/4 cup Pomegranate Arils Provides juicy bursts and elegance.
For the Garnish
  • 1/4 cup Toasted Coconut Adds a crunchy texture and tropical flavor.

Equipment

  • Cutting Board
  • serving tray

Method
 

How to Make a Valentine’s Day Snack Board
  1. Gather Ingredients: Start by collecting all your beautiful ingredients.
  2. Arrange the Base: Lay out your rice crackers evenly across the large cutting board or serving tray.
  3. Add the Cheese: Place your brie cheese in the center or at one end of the board.
  4. Incorporate Fresh Fruits: Scatter the strawberries and raspberries around the cheese, and slice the dragonfruit.
  5. Sprinkle the Sweet Treats: Add the white chocolate pretzels around the fruits.
  6. Finish with Garnishes: Sprinkle the toasted coconut and pomegranate arils over the board.

Nutrition

Serving: 1boardCalories: 350kcalCarbohydrates: 45gProtein: 5gFat: 15gSaturated Fat: 10gPolyunsaturated Fat: 1gMonounsaturated Fat: 3gCholesterol: 20mgSodium: 350mgPotassium: 150mgFiber: 5gSugar: 20gVitamin A: 200IUVitamin C: 70mgCalcium: 150mgIron: 1mg

Notes

Optional: Drizzle with honey for an extra touch of sweetness.

Tried this recipe?

Let us know how it was!

Filed Under: SNACKS & APPETIZERS

Valentine’s Day Snack Board

January 3, 2026 by JudyWhite Leave a Comment

As I was flipping through my recipe collection in preparation for Valentine’s Day, a burst of inspiration hit me like a sweet surprise. There’s something wonderfully romantic about sharing a beautifully arranged snack board—especially one that showcases vibrant colors and a mix of delightful textures. Picture this: a spread loaded with creamy brie, juicy strawberries, and a pop of exotic dragonfruit, all nestled among crunchy rice crackers and decadent white chocolate pretzels.

This Valentine’s Day Snack Board isn’t just easy to prepare in just 15 minutes; it’s also designed to dazzle any palate. Whether you’re planning a cozy night in with your partner, a vibrant gathering with friends, or an indulgent treat for yourself, this charming platter has got you covered. So let’s dive into this recipe that promises to elevate your Valentine’s Day celebrations, bringing joy with every bite!

Why You'll Love This Valentine’s Day Snack Board

  • This Valentine’s Day Snack Board is incredibly easy to prepare, taking just 15 minutes to assemble, making it perfect for even the busiest schedules.
  • The vibrant colors and elegant presentation are sure to impress anyone, making it a visual delight that enhances the atmosphere of your celebration.
  • With a variety of flavors from creamy brie to fresh fruits and sweet treats, this board caters to diverse tastes and ensures that everyone will find something they love.
  • It’s versatile enough for a romantic evening at home or a lively gathering with friends, making it a truly crowd-pleasing treat for any Valentine’s Day occasion.

Valentine’s Day Snack Board Ingredients

For the Base

  • Rice Crackers – 16 pieces provide a crunchy contrast to the creamy brie and sweet fruits.

For the Sweet Treats

  • White Chocolate Pretzels – 4 ounces add a delightful sweet-salty flavor that pairs beautifully with fresh fruit.

For the Cheese

  • Brie Cheese – 3 ounces offers a rich, creamy element that balances the board perfectly.

For the Fruits

  • Strawberries – 2 cups bring vibrant color and a juicy sweetness that everyone loves.
  • Raspberries – 1 cup adds a tartness that beautifully complements the sweeter elements.
  • Dragonfruit – 1 whole, sliced for a stunning visual appeal and mild flavor.
  • Pomegranate Arils – 1/4 cup provides juicy bursts of flavor and an extra touch of elegance.

For the Garnish

  • Toasted Coconut – 1/4 cup adds a crunchy texture and tropical flavor, making this Valentine’s Day Snack Board truly special.

Get ready to create a gorgeous display that will not only tantalize the taste buds but also provide a feast for the eyes!

How to Make a Valentine’s Day Snack Board

  1. Gather Ingredients: Start by collecting all your beautiful ingredients. Having everything on hand will make assembly a breeze, ensuring a smooth and enjoyable preparation experience.

  2. Arrange the Base: Lay out your rice crackers evenly across the large cutting board or serving tray. Feel free to overlap them slightly to create a visually interesting starting point for your snack board.

  3. Add the Cheese: Next, place your brie cheese in the center or at one end of the board. Its creamy texture will draw the eye and, trust me, it pairs wonderfully with everything else!

  4. Incorporate Fresh Fruits: Scatter the strawberries and raspberries around the cheese, and don’t forget to slice and artfully arrange the dragonfruit. Create a vibrant tapestry of colors—this is what makes your board truly eye-catching!

  5. Sprinkle the Sweet Treats: Now, add the white chocolate pretzels around the fruits, allowing the sweet and salty combo to shine. Their whimsical shape will add a fun touch to your board.

  6. Finish with Garnishes: Complete your masterpiece by sprinkling the toasted coconut and pomegranate arils over the board. These little accents add a delightful crunch and burst of flavor, ensuring each bite is flavorful and fresh.

Optional: Drizzle with honey for an extra touch of sweetness!

Exact quantities are listed in the recipe card below.

How to Store and Freeze Valentine’s Day Snack Board

Fridge: Store any leftover items in an airtight container. The fruits and brie cheese will stay fresh for up to 3 days.

Room Temperature: If serving at a gathering, keep the snack board at room temperature for no longer than 2 hours, ensuring safety and freshness.

Freezer: It’s not recommended to freeze this Valentine’s Day Snack Board, as the textures of the cheese and fruits will be compromised upon thawing.

Reheating: If enjoyed chilled, there’s no need to reheat. However, if you prefer a warm brie, gently heat in the microwave for 10–15 seconds before serving.

What to Serve with Valentine’s Day Snack Board?

Imagine the joy of pairing delicious snacks with enticing sides that elevate your celebration.

  • Chilled White Wine: A crisp Sauvignon Blanc pairs beautifully, complementing the creamy brie and fresh fruit flavors with its refreshing notes.

  • Sparkling Water with Lime: This bubbly choice adds a refreshing, zesty touch that keeps the palate invigorated between the rich bites.

  • Chocolate-Dipped Strawberries: A decadent addition, these sweet treats enhance the romance of your snack board and create a dreamy pairing with white chocolate pretzels.

  • Nuts and Dried Fruits: A mixed bowl of almonds and apricots adds crunchiness and natural sweetness, balancing the flavors while introducing a delightful texture contrast.

  • Cheese Platter: Adding a variety of cheeses like feta or gouda can offer complexity, catering to everyone’s cheese cravings and adding to the presentation.

  • Heart-Shaped Cookies: These charming treats provide a playful element to your display, appealing to the festive spirit of Valentine’s Day.

  • Chocolate Lava Cake: For an indulgent touch, this warm dessert can be an irresistible ending to your romantic gathering, offering a rich contrast to the fresh elements.

Make Ahead Options

This Valentine’s Day Snack Board is perfect for busy home cooks who love the convenience of prepping in advance! You can slice the dragonfruit and prepare the strawberries and raspberries up to 24 hours ahead to maintain their freshness. Simply store them in airtight containers in the refrigerator to keep them vibrant and juicy. You can also assemble the cheese and crackers the night before; just keep them covered to prevent the crackers from getting soggy. When you’re ready to serve, all you need to do is scatter the white chocolate pretzels, sprinkle with toasted coconut and pomegranate arils, and voilà—your charming board is ready to impress with minimal effort!

Valentine’s Day Snack Board Variations

Feel free to mix things up and make this snack board uniquely yours with these enticing variations!

  • Gluten-Free: Substitute rice crackers with gluten-free options like almond flour crackers for a crispy base everyone can enjoy.

  • Vegan Delight: Swap out the brie cheese for a plant-based cream cheese alternative, maintaining that creamy texture without dairy.

  • Flavor Boost: Sprinkle some cinnamon or nutmeg over the fruit for a warm spice twist that adds unexpected depth to your snack board.

  • Add Nuts: Toss on a handful of mixed nuts for a crunchy texture and added protein, bringing a satisfying bite to each piece.

  • Heat It Up: Drizzle a light touch of sriracha or chili honey over the fruit and cheese for a sweet and spicy flavor explosion that will surprise your taste buds.

  • Chocolate Lover’s Dream: Swap white chocolate pretzels for dark chocolate-covered pretzels, elevating the flavor and richness.

  • Nostalgic Touch: Include some favorite childhood candies alongside the fruit for a fun and playful twist that brings back fond memories.

  • Seasonal Fruits: Depending on the season, replace strawberries and raspberries with cherries or peaches to discover new flavor profiles that shine.

With these variations, your Valentine’s Day Snack Board will not only be visually stunning, but also bursting with personalized flavors that cater to every palate!

Chef's Helpful Tips

  • When assembling your Valentine’s Day Snack Board, ensure that you have all ingredients prepped and ready to go for an efficient assembly process.
  • Avoid overcrowding the board by strategically placing items to maintain a beautiful presentation and accessibility.
  • Use a variety of colors and shapes to enhance visual appeal, making sure to position the brie cheese prominently as it acts as a centerpiece.
  • To keep fruits fresh, prepare them just before serving to prevent any oxidation and loss of vibrant color.

Valentine’s Day Snack Board Recipe FAQs

How do I choose ripe strawberries for my Valentine’s Day Snack Board?
Absolutely! Look for strawberries that are bright red without any white spots or dark spots all over. The strawberry should feel firm but slightly soft to the touch, indicating that it’s juicy and ready to enjoy. Avoid any that appear overly soft or have blemishes.

What’s the best way to store leftover brie cheese?
I often wrap leftover brie cheese in wax paper or parchment paper, followed by a loose layer of plastic wrap. This keeps it from drying out while allowing it to breathe. Stored this way, it can last in the fridge for up to 5 days.

Can I freeze dragonfruit or other fruits for my snack board?
While I don’t recommend freezing your entire Valentine’s Day Snack Board, you can freeze dragonfruit for future use. Just peel and cut it into cubes, then spread the pieces on a baking sheet lined with parchment paper. Freeze for about 2 hours, then transfer to an airtight container. It will keep well for up to 3 months, but the texture may change when thawed. Use thawed pieces in smoothies or fruit salads!

What should I do if my brie cheese doesn’t melt properly?
If you hope to enjoy melty brie, make sure to keep it at room temperature for about 30 minutes before serving. This allows it to soften. If it doesn’t melt in the microwave as expected, try microwaving it for an additional 5–10 seconds. Keep an eye on it, as you don’t want it to overheat and separate!

Can I replace any ingredients for dietary restrictions?
Very! If you’re looking to accommodate allergies, consider using rice crackers made without gluten for a gluten-free option. For a nut-free diet, ensure your toasted coconut doesn’t come from a facility that processes nuts. You can also swap out the fruits according to seasonal availability or personal preference—kiwis or melons make great alternatives!

How long can I leave my snack board out at a party?
I recommend serving your Valentine’s Day Snack Board at room temperature for no more than 2 hours to ensure freshness and food safety. If you notice the fruits starting to wilt or the cheese losing its charm, it’s time to wrap it up!

Valentine’s Day Snack Board

Valentine’s Day Snack Board

A vibrant and delightful Valentine’s Day Snack Board perfect for sharing, featuring fruits, brie, and sweet treats.
Print Recipe Pin Recipe
Prep Time 15 minutes mins
Total Time 15 minutes mins
Servings: 4 servings
Course: Snacks & Appetizers
Calories: 350
Ingredients Equipment Method Nutrition Notes

Ingredients
  

For the Base
  • 16 pieces Rice Crackers Provides a crunchy contrast to the creamy brie and sweet fruits.
For the Sweet Treats
  • 4 ounces White Chocolate Pretzels Add a delightful sweet-salty flavor.
For the Cheese
  • 3 ounces Brie Cheese Offers a rich, creamy element.
For the Fruits
  • 2 cups Strawberries Brings vibrant color and juicy sweetness.
  • 1 cup Raspberries Adds a tartness that complements sweeter elements.
  • 1 whole Dragonfruit Sliced for visual appeal.
  • 1/4 cup Pomegranate Arils Provides juicy bursts and elegance.
For the Garnish
  • 1/4 cup Toasted Coconut Adds a crunchy texture and tropical flavor.

Equipment

  • Cutting Board
  • serving tray

Method
 

How to Make a Valentine’s Day Snack Board
  1. Gather Ingredients: Start by collecting all your beautiful ingredients.
  2. Arrange the Base: Lay out your rice crackers evenly across the large cutting board or serving tray.
  3. Add the Cheese: Place your brie cheese in the center or at one end of the board.
  4. Incorporate Fresh Fruits: Scatter the strawberries and raspberries around the cheese, and slice the dragonfruit.
  5. Sprinkle the Sweet Treats: Add the white chocolate pretzels around the fruits.
  6. Finish with Garnishes: Sprinkle the toasted coconut and pomegranate arils over the board.

Nutrition

Serving: 1boardCalories: 350kcalCarbohydrates: 45gProtein: 5gFat: 15gSaturated Fat: 10gPolyunsaturated Fat: 1gMonounsaturated Fat: 3gCholesterol: 20mgSodium: 350mgPotassium: 150mgFiber: 5gSugar: 20gVitamin A: 200IUVitamin C: 70mgCalcium: 150mgIron: 1mg

Notes

Optional: Drizzle with honey for an extra touch of sweetness.

Tried this recipe?

Let us know how it was!

Filed Under: SNACKS & APPETIZERS

Whipped Feta Crostini

January 2, 2026 by JudyWhite Leave a Comment

There’s something undeniably delightful about transforming simple ingredients into a show-stopping appetizer, and that’s exactly what Whipped Feta Crostini with Hot Honey delivers! Picture this: you’ve just come home from a long day, your stomach growling, and the rebellious craving for something gourmet hits. In just 20 minutes, you can whip up these delicious bites that perfectly balance creamy, salty feta with the unexpected heat of hot honey.

The secret lies in the combination of whipped feta and the subtly sweet, spicy glaze drizzling down the crostini, creating a symphony of flavors that will have your taste buds dancing. This dish not only impresses guests with its sophisticated taste but also ensures you’ll enjoy every moment spent preparing it. Plus, whether it’s a cozy night in or a lively gathering, these crostinis cater to every occasion. So, let’s dive in and elevate your appetizer game with this easy-to-make, flavor-packed recipe!

Why You'll Love This Whipped Feta Crostini

  • This Whipped Feta Crostini is incredibly easy to make, requiring just 20 minutes from start to finish.
  • The combination of creamy whipped feta and spicy hot honey creates a flavor explosion that will tantalize your taste buds.
  • These crostinis are versatile enough to serve at any gathering, whether it’s an intimate dinner or a vibrant party.
  • Their beautiful presentation with fresh rosemary and toasted baguette slices makes them a feast for the eyes as well as the palate.

Whipped Feta Crostini Ingredients

For the Hot Honey
• Honey – a key ingredient that gives sweetness and serves as the base for your delightful drizzle.
• Apple cider vinegar – adds a tangy kick that perfectly balances the sweetness of the honey.
• Garlic – infuses the honey with robust flavor; feel free to add more for extra zing!
• Red pepper flakes – bring a touch of heat to your honey for that spicy-sweet fusion.

For the Whipped Feta
• Feta cheese crumbles – essential for creating that creamy, salty base; opt for high-quality feta for the best flavor.
• Cream cheese – contributes to the smooth texture and richness of the spread; can be replaced with Greek yogurt for a lighter version.
• Cottage cheese – adds extra creaminess while making the spread lighter; it’s a great way to sneak in some protein!

For the Crostini
• Baguettes – the perfect base; toasting enhances their flavor and provides a satisfying crunch.
• Pecans – chopped nuts add a delightful crunch and nuttiness to each bite; walnuts can be a fun substitution.
• Fresh rosemary – torn sprigs provide an aromatic finish; feel free to experiment with other herbs like thyme or parsley for different flavors.

Enjoy making these Whipped Feta Crostini and let each bite take you on a wonderful culinary journey!

How to Make Whipped Feta Crostini

  1. Simmer the Hot Honey: In a small saucepan over medium heat, combine honey, apple cider vinegar, minced garlic, and red pepper flakes. Simmer for about 5 minutes until the mixture becomes fragrant and slightly thickened.

  2. Blend the Ingredients: In a food processor, add the feta cheese crumbles, cream cheese, and cottage cheese. Blend them together until the mixture is creamy and smooth, ensuring a luscious texture for your crostini.

  3. Prepare the Baguette Slices: Toast the sliced baguettes until they are golden and crunchy, perfect for holding the whipped feta and toppings. You want them to be crispy but not too hard!

  4. Spread the Mixture: Generously spread the whipped feta mixture onto each toasted baguette slice. The creaminess of the feta will create a wonderful base for the toppings.

  5. Drizzle with Hot Honey: Carefully drizzle the hot honey glaze over the whipped feta crostini, allowing it to soak in slightly for an irresistible sweet-spicy flavor combination.

  6. Garnish and Serve: Top each crostini with chopped pecans for a delightful crunch and finish with torn fresh rosemary sprigs. This adds a lovely touch of color and aroma!

Optional: Serve with a sprinkle of extra red pepper flakes for added heat.

Exact quantities are listed in the recipe card below.

How to Store and Freeze Whipped Feta Crostini

Fridge: Store leftover whipped feta crostini in an airtight container in the fridge for up to 3 days. Keep toppings separate to maintain crispness.

Freezer: For best quality, freeze the whipped feta mixture (without baguettes) for up to 1 month in a freezer-safe container. Thaw before use and rewhip if necessary.

Reheating: If you have leftover crostini, reheat them in the oven at 350°F (175°C) for about 5-7 minutes to restore their crunchiness. Enjoy the flavors of your whipped feta crostini!

Assembly: If preparing in advance, assemble the crostini just before serving to keep the baguettes crispy; drizzle with hot honey when ready to enjoy.

Whipped Feta Crostini Variations

Feel free to mix things up and create your perfect version of this enticing crostini!

  • Gluten-Free: Use gluten-free baguettes or substitute with your favorite gluten-free crackers for a delightful crunch.
  • Spicy Kick: Add more red pepper flakes or a dash of hot sauce to the hot honey for an extra level of heat that tantalizes your palate.
  • Nut-Free: Replace pecans with sunflower seeds or pumpkin seeds to maintain that delightful crunch without any nuts.
  • Herb Infusion: Swap fresh rosemary for other herbs like basil or chives for a refreshing twist in flavor and presentation.
  • Vegan Option: Use vegan cream cheese and plant-based feta to keep the creamy texture while making it completely dairy-free.
  • Roasted Garlic: Instead of raw garlic in the hot honey, use roasted garlic for a sweeter, mellower flavor that complements the feta wonderfully.
  • Fruit Sweetness: Top with diced figs or a drizzle of balsamic reduction for a sweet contrast that beautifully balances the savory elements.
  • Creamier Base: Mix in a bit of Greek yogurt with the whipped feta for an even creamier texture and a tangy taste that complements hot honey superbly.

Embrace these variations to make each batch uniquely yours, and let your culinary creativity shine!

What to Serve with Whipped Feta Crostini?

Elevate your appetizer spread with delightful pairings that complement the creamy, spicy essence of these crostini!

  • Refreshing Arugula Salad: A simple arugula salad dressed with lemon vinaigrette adds a peppery freshness that balances the rich flavors beautifully.

  • Roasted Cherry Tomatoes: Warm, caramelized cherry tomatoes bring a hint of sweetness, tying in perfectly with the hot honey drizzle.

  • Crispy Bacon-Wrapped Asparagus: The saltiness of crispy bacon complements the feta and adds a perfect crunchy texture to your meal, creating a savory contrast.

  • Garlic Herb Cheese Dip: Serve alongside a herbed cheese dip for another creamy option, perfect for those who enjoy enhancing their appetizers with an extra cheesy touch.

  • Savory Meat Platter: A selection of cured meats offers salty notes and various textures, which harmonizes with the creamy texture of the feta crostini.

  • White Wine Spritzer: A light and refreshing drink, this fizzy delight enhances the flavors while keeping the meal light, making it easy to enjoy multiple crostini.

  • Honey Drizzled Fig Tart: For dessert, a sweet fig tart drizzled with honey echoes the hot honey while finishing your meal on a sweet note. Enjoy each bite!

  • Crisp Sparkling Water: For a refreshing non-alcoholic option, sparkling water with lemon is fantastic to cleanse the palate and keep you feeling refreshed.

Make Ahead Options

These Whipped Feta Crostini are fantastic for meal prep, allowing you to enjoy gourmet flavors with minimal effort on busy weeknights! You can prepare the whipped feta mixture and hot honey up to 24 hours in advance. Simply blend the feta, cream cheese, and cottage cheese, and store it in an airtight container in the refrigerator to maintain its creamy texture. For the hot honey, cool it completely before transferring to a jar and refrigerating. When you’re ready to serve, toast the baguette slices and then spread the chilled whipped feta on top. Drizzle with the hot honey, garnish with pecans and rosemary, and you’ll have a delightful appetizer that tastes just as fresh as when you made it!

Chef's Helpful Tips

  • For the Whipped Feta Crostini, using high-quality feta cheese will elevate the flavor of your spread, so choose carefully for the best results.
  • When blending the cheeses, make sure to scrape down the sides of the food processor a couple of times to ensure a smooth and creamy mixture without any lumps.
  • To avoid burning the garlic in the hot honey, add it toward the end of the cooking time to infuse its flavor without overpowering the dish.
  • Remember to toast the baguette slices just until golden to ensure they stay crisp and do not become too hard to bite into.

Whipped Feta Crostini Recipe FAQs

What should I look for when selecting ingredients?
Absolutely! When choosing feta cheese, look for a fresh, creamy texture without any dark spots, which can indicate spoilage. For the honey, a high-quality, natural honey will enhance the overall flavor profile. The baguettes should be crisp and fresh; aim for ones with a nice crust that will hold up to the creamy toppings.

How should I store leftovers?
Very importantly, store any leftover whipped feta crostini in an airtight container in the fridge for up to 3 days. To keep the bread from becoming soggy, it’s best to store the whipped feta and toppings separately, then assemble them right before serving for that desirable crunch!

Can I freeze the whipped feta crostini?
Certainly! For the best results, freeze the whipped feta mixture in a freezer-safe container for up to 1 month. When you’re ready to use it, simply thaw it in the fridge overnight, and then you can rewhip it if needed. The baguette slices, however, are best fresh, so I recommend toasting them right before serving.

What if my hot honey is too spicy or not sweet enough?
If you find your hot honey is a touch too spicy, you can balance it out by adding more honey or a bit of sugar to mellow out the heat. Conversely, if it’s too sweet, try adding a little more apple cider vinegar for a sharper contrast. Taste and adjust as you go—cooking should be fun!

Are there any dietary considerations I should keep in mind for this recipe?
Absolutely! This recipe contains dairy from the feta, cream cheese, and cottage cheese, so it may not be suitable for those with lactose intolerance or dairy allergies. For a dairy-free option, you might consider using a vegan cream cheese in combination with crumbled tofu to mimic the whipped feta texture. Always double-check ingredient labels to ensure they meet dietary needs.

How do I avoid burning the garlic while making the hot honey?
To avoid that, add the minced garlic during the last minute of simmering the honey, just until fragrant. Cooking it for too long can lead to a bitter taste, so keep an eye on it! Follow these simple steps and your hot honey will be perfectly balanced, complementing the whipped feta beautifully.

Whipped Feta Crostini

Whipped Feta Crostini

Whipped Feta Crostini is a delightful appetizer combining creamy feta and spicy hot honey, perfect for any gathering.
Print Recipe Pin Recipe
Prep Time 20 minutes mins
Cook Time 5 minutes mins
Total Time 25 minutes mins
Servings: 8 crostinis
Course: Snacks & Appetizers
Calories: 150
Ingredients Equipment Method Nutrition Notes

Ingredients
  

Hot Honey
  • 1 cup honey
  • 2 tbsp apple cider vinegar
  • 2 cloves garlic minced
  • 1 tsp red pepper flakes
Whipped Feta
  • 1 cup feta cheese crumbles high-quality
  • 4 oz cream cheese
  • 1/2 cup cottage cheese
Crostini
  • 1 loaf baguette sliced
  • 1/2 cup pecans chopped
  • 1 tbsp fresh rosemary torn sprigs

Equipment

  • small saucepan
  • Food processor
  • toaster

Method
 

How to Make Whipped Feta Crostini
  1. In a small saucepan over medium heat, combine honey, apple cider vinegar, minced garlic, and red pepper flakes. Simmer for about 5 minutes until the mixture becomes fragrant and slightly thickened.
  2. In a food processor, add the feta cheese crumbles, cream cheese, and cottage cheese. Blend them together until the mixture is creamy and smooth.
  3. Toast the sliced baguettes until they are golden and crunchy.
  4. Generously spread the whipped feta mixture onto each toasted baguette slice.
  5. Carefully drizzle the hot honey glaze over the whipped feta crostini.
  6. Top each crostini with chopped pecans and finish with torn fresh rosemary sprigs.

Nutrition

Serving: 1crostiniCalories: 150kcalCarbohydrates: 15gProtein: 4gFat: 8gSaturated Fat: 4gPolyunsaturated Fat: 1gMonounsaturated Fat: 3gCholesterol: 20mgSodium: 300mgPotassium: 120mgFiber: 1gSugar: 3gVitamin A: 200IUVitamin C: 1mgCalcium: 130mgIron: 1mg

Notes

Using high-quality feta cheese will elevate the flavor. Remember to toast the baguette slices just until golden to ensure they stay crisp.

Tried this recipe?

Let us know how it was!

Filed Under: SNACKS & APPETIZERS

Healthy Oatmeal Protein Cookies

January 1, 2026 by JudyWhite Leave a Comment

The first bite of a warm cookie should feel like a cozy hug, and that’s exactly what these Healthy Oatmeal Protein Cookies deliver! Picture this: the rich aroma of peanut butter mingling with sweet banana and a hint of cinnamon fills your kitchen as they bake, igniting memories of childhood treats with a nutritious twist.

I originally concocted this recipe out of sheer curiosity while attempting to create a guilt-free indulgence that wouldn’t derail my healthy eating goals. With just a handful of wholesome ingredients—like ripe bananas, rolled oats, and protein-packed whey powder—these cookies not only satisfy your sweet tooth but also double as a post-workout snack.

Ideal for anyone tired of the same old fast food routine, they’re a delightful way to nourish your body without sacrificing flavor. Trust me, whether you’re a busy parent, a health enthusiast, or just someone who loves delicious homemade snacks, these cookies will have you coming back for more. Let’s dive into how you can whip up this scrumptious treat in no time!

Why You'll Love This Healthy Oatmeal Protein Cookies

  • These Healthy Oatmeal Protein Cookies are incredibly easy to make, allowing you to whip up a batch in just 20 minutes.
  • Packed with flavor from ripe bananas and rich peanut butter, these cookies are a delicious guilt-free treat that satisfies your cravings.
  • Their versatility means you can easily swap in your favorite mix-ins, making them perfect for everyone in the family.
  • With their irresistible aroma and delightful texture, these cookies are sure to impress anyone who takes a bite.

Healthy Oatmeal Protein Cookies Ingredients

Get ready to bake up a storm with these nutritious cookies!

For the Batter
• 2 large ripe bananas – the key to natural sweetness and moisture in your cookies.
• ⅓ cup natural peanut butter – adds creaminess and a protein boost to each bite.
• 2 cups rolled oats – the wholesome base that gives these cookies their chewy texture.
• 2 scoops Naked Whey Protein Powder – elevates the protein content, making them a perfect post-workout snack.
• 1 tablespoon chia seeds – a fantastic source of omega-3s and helps bind the batter.
• ⅛ cup coconut oil – enhances richness and is great for healthy fats.
• ⅛ cup honey – naturally sweetens the cookies while keeping them moist.
• ¼ cup chocolate chips – for a delightful indulgence that your taste buds will love.
• ¼ cup raisins – adds a fruity sweetness that balances the richness of peanut butter.
• 1 teaspoon vanilla extract – elevates flavors with a warm, aromatic touch.
• ½ teaspoon ground cinnamon – brings a cozy spice that complements the bananas beautifully.
• ¼ teaspoon sea salt – enhances all the flavors for a more rounded taste.

Enjoy making these Healthy Oatmeal Protein Cookies—they’re not just delicious, they’re a guilt-free treat everyone will adore!

How to Make Healthy Oatmeal Protein Cookies

  1. Preheat the oven to 325°F/160°C. Line a large cookie sheet with parchment paper or a silicone baking mat. This ensures easy cleanup and perfect cookies every time!

  2. Mash the ripe bananas in a large bowl until very smooth. Their natural sweetness will keep the cookies moist and flavorful, so take your time here.

  3. Add the peanut butter, rolled oats, and protein powder to the mashed bananas. Mix well to combine everything into a thick batter, ensuring that the oats and protein powder are fully incorporated.

  4. Stir in the chia seeds, melted coconut oil, honey, chocolate chips, raisins, vanilla extract, cinnamon, and salt. Mix everything together until well combined, creating a rich and aromatic dough.

  5. Shape the mixture into 20 cookies and place them on the prepared baking sheet. Flatten each cookie to about ½ inch thick for a perfect texture, giving them a little space to expand as they bake.

  6. Bake the cookies for about 10-12 minutes, or until they are set and the bottoms start to brown. You’ll know they’re ready when the kitchen fills with their inviting aroma!

  7. Cool the cookies completely on a wire rack before transferring them to an airtight container. This step is essential for maintaining their delightful chewy texture.

Optional: Drizzle with melted dark chocolate for an extra indulgent touch.

Exact quantities are listed in the recipe card below.

Make Ahead Options

These Healthy Oatmeal Protein Cookies are perfect for meal prep enthusiasts! You can mash the ripe bananas and combine them with the peanut butter, rolled oats, and protein powder up to 24 hours in advance, storing the mixture in an airtight container in the refrigerator to keep it fresh. Additionally, you can measure and whisk together the dry ingredients (chia seeds, coconut oil, honey, chocolate chips, raisins, vanilla extract, cinnamon, and salt) a day ahead, ensuring convenience when you’re ready to bake. When it’s time to enjoy, simply form the batter into cookies, bake, and allow them to cool completely for that irresistible chewy texture—resulting in delicious cookies with minimal last-minute effort!

Healthy Oatmeal Protein Cookies Variations

Feel free to put your own spin on these delightful cookies and create a unique treat your family will adore!

  • Nut-Free: Substitute peanut butter with sunflower seed butter for a safe, nut-free alternative that maintains creaminess. You’ll still enjoy that satisfying texture and taste!

  • Vegan: Swap honey for maple syrup and coconut oil for a plant-based butter to make these cookies vegan-friendly. They will still be irresistibly delicious!

  • Dairy-Free: Use dairy-free chocolate chips instead of regular ones for a wholesome option that everyone can enjoy. Your cookies will still shine with mouthwatering flavor!

  • Oat-Free: Replace rolled oats with almond flour for a gluten-free version. This swap offers a different texture while keeping the cookies scrumptious.

  • Add Extra Fiber: Throw in ¼ cup of shredded carrots or zucchini to sneak in some veggies for extra moisture and fiber. It’s a delightful surprise in each bite!

  • Choco-Mint: Add ¼ teaspoon of peppermint extract along with chocolate chips for a refreshing minty twist. The combination will bring you a nostalgic flavor experience!

  • Spicy Kick: Incorporate a dash of cayenne pepper or chili powder for those who love a little heat. This unexpected zest will awaken your taste buds.

  • Fruit Fusion: Instead of raisins, try adding chopped dried apricots or cranberries for a fruity burst that elevates the flavor profile to new heights.

With these variations, you can keep your Healthy Oatmeal Protein Cookies fresh and exciting every time you bake!

What to Serve with Healthy Oatmeal Protein Cookies?

The perfect accompaniment to these scrumptious cookies can elevate your snack time to a whole new level.

  • Fresh Fruit Salad: A vibrant mix of seasonal fruits brings brightness and a refreshing contrast to the cookies’ rich flavors. The natural sweetness of fruits pairs wonderfully, making every bite satisfying.

  • Greek Yogurt Parfait: Layering yogurt with granola and berries offers creamy textures and tangy flavors, complementing the hearty cookies. This hearty treat doubles as a delectable breakfast or an afternoon snack.

  • Nutty Trail Mix: A handful of trail mix adds crunch and a variety of textures to your snack spread. Choose a mix with nuts, seeds, and dried fruits for an extra nutrient boost, creating a satisfying contrast to the cookies.

  • Dark Chocolate Dipped Strawberries: The rich notes of dark chocolate and sweet strawberries create a sophisticated pairing. This delightful treat adds a touch of indulgence and romance to your healthy cookie experience.

  • Chai Spiced Tea: A warm cup of chai infused with spices brings a cozy, aromatic element. The spiciness of the tea complements the cinnamon in your cookies for a beautifully rounded flavor profile.

  • Almond Milk: Cool and creamy almond milk perfectly balances the dense cookies. This dairy-free option is refreshing and light, making it a lovely accompaniment for any time of the day.

  • Peanut Butter Smoothie: Blend up a delicious peanut butter smoothie for a creamy, protein-packed drink. It enhances the flavors of your cookies and provides an energy boost for your busy day.

Enjoy these delightful pairings with your Healthy Oatmeal Protein Cookies, and transform snack time into a feast of flavors!

How to Store and Freeze Healthy Oatmeal Protein Cookies

Room Temperature: Store cooled cookies in an airtight container at room temperature for up to 3 days to maintain their chewy texture.

Fridge: For longer freshness, keep your Healthy Oatmeal Protein Cookies in the fridge, where they can last up to a week. Just be sure to seal them tightly!

Freezer: Freeze cookies in a single layer on a baking sheet, then transfer to a freezer bag for up to 3 months. Thaw them at room temperature when ready to enjoy!

Reheating: To warm your cookies, place them in the microwave for 10-15 seconds or in the oven at 350°F for 5-7 minutes until heated through.

Chef's Helpful Tips

  • When making Healthy Oatmeal Protein Cookies, ensure the bananas are really ripe for maximum sweetness and moisture in the dough.
  • Pay attention to mixing; overmixing can lead to tough cookies, so combine the ingredients until just incorporated.
  • Use a cookie scoop for uniform size to ensure even baking throughout the batch.
  • For the best results, keep an eye on the cookies during the last few minutes of baking, as they can quickly go from perfect to overbaked.

Healthy Oatmeal Protein Cookies Recipe FAQs

What kind of bananas are best for this recipe?
Absolutely, you’ll want to use large, ripe bananas for the best results. They should have a few brown spots, which indicates that they’re sweet and soft. The riper the bananas, the more moisture and sweetness they will provide to your cookies!

How should I store leftover cookies?
For optimal freshness, store your Healthy Oatmeal Protein Cookies in an airtight container at room temperature for up to 3 days. If you want to extend their life a bit, keep them in the fridge for up to a week. Just make sure they’re tightly sealed to preserve their delightful chewy texture!

Can I freeze these cookies?
Of course! Freezing is a great way to save some for later. Start by placing the shaped, unbaked cookies on a baking sheet in a single layer. Once frozen, transfer them to a freezer bag for up to 3 months. When you’re ready to enjoy, let them thaw at room temperature for about an hour before baking them at 325°F/160°C for 10-12 minutes.

Why are my cookies turning out dry or crumbly?
Oh no, nobody wants that! If your cookies come out dry, it could be due to overmixing the batter, which can lead to tough cookies. Be sure to mix just until everything is combined. Also, make sure your bananas are truly ripe and have enough moisture to keep the cookies chewy.

Can I use alternatives for allergens?
Very! If you’re dealing with allergies or dietary restrictions, consider swapping peanut butter for almond or sunflower seed butter. For a vegan option, you can replace honey with maple syrup. Just be mindful that these changes might slightly alter the final taste and texture.

How can I enhance the flavor of my cookies?
I often recommend adding a pinch of nutmeg or substituting some of the chocolate chips with dried fruit or nuts to give your Healthy Oatmeal Protein Cookies an exciting twist. The more the merrier when it comes to flavor!

Healthy Oatmeal Protein Cookies

Healthy Oatmeal Protein Cookies

These Healthy Oatmeal Protein Cookies offer a delicious guilt-free treat packed with protein and natural sweetness from bananas and peanut butter.
Print Recipe Pin Recipe
Prep Time 10 minutes mins
Cook Time 12 minutes mins
Cooling Time 10 minutes mins
Total Time 32 minutes mins
Servings: 20 cookies
Course: Snacks & Appetizers
Calories: 150
Ingredients Equipment Method Nutrition Notes

Ingredients
  

For the Batter
  • 2 large ripe bananas the key to natural sweetness and moisture in your cookies
  • ⅓ cup natural peanut butter adds creaminess and a protein boost
  • 2 cups rolled oats the wholesome base for chewy texture
  • 2 scoops Naked Whey Protein Powder elevates protein content
  • 1 tablespoon chia seeds source of omega-3s and helps bind the batter
  • ⅛ cup coconut oil enhances richness
  • ⅛ cup honey naturally sweetens the cookies
  • ¼ cup chocolate chips for delightful indulgence
  • ¼ cup raisins adds fruity sweetness
  • 1 teaspoon vanilla extract elevates flavors
  • ½ teaspoon ground cinnamon brings cozy spice
  • ¼ teaspoon sea salt enhances flavors

Equipment

  • Baking sheet
  • Mixing bowl
  • parchment paper
  • cookie scoop

Method
 

How to Make Healthy Oatmeal Protein Cookies
  1. Preheat the oven to 325°F/160°C. Line a large cookie sheet with parchment paper or a silicone baking mat.
  2. Mash the ripe bananas in a large bowl until very smooth.
  3. Add the peanut butter, rolled oats, and protein powder to the mashed bananas. Mix well to combine.
  4. Stir in the chia seeds, melted coconut oil, honey, chocolate chips, raisins, vanilla extract, cinnamon, and salt. Mix everything together until well combined.
  5. Shape the mixture into 20 cookies and place them on the prepared baking sheet.
  6. Bake the cookies for about 10-12 minutes, or until they are set and the bottoms start to brown.
  7. Cool the cookies completely on a wire rack before transferring them to an airtight container.

Nutrition

Serving: 1cookieCalories: 150kcalCarbohydrates: 18gProtein: 5gFat: 7gSaturated Fat: 2gPolyunsaturated Fat: 1gMonounsaturated Fat: 3gSodium: 50mgPotassium: 150mgFiber: 2gSugar: 5gVitamin C: 2mgCalcium: 2mgIron: 4mg

Notes

Drizzle with melted dark chocolate for an extra indulgent touch. Use ripe bananas for maximum sweetness and moisture. Avoid overmixing to keep cookies tender.

Tried this recipe?

Let us know how it was!

Filed Under: SNACKS & APPETIZERS

Pumpkin Protein Balls

January 1, 2026 by JudyWhite Leave a Comment

When the crisp autumn air first whispers through my window, my thoughts inevitably turn to cozy flavors and warm comforts. Pumpkin spice and the idea of a quick, energizing treat combine in my mind, leading me to create these delightful Pumpkin Protein Balls. Not only do they embrace the essence of the season, but they also add a wholesome twist to snack time. Imagine biting into a soft, chewy ball packed with nutritious oats, chia seeds, and just the right amount of vegan chocolate chips—a perfect blend of health and indulgence!

I was initially skeptical about how energy bites could fill the void of my usual sweet cravings. However, one taste of these protein-packed gems, and I was convinced. Perfectly portable for those hectic days or as a post-workout snack, they’re so simple to whip up that you’ll find yourself making them again and again. Who knew something so delicious could be this easy? Let’s dive into this satisfying recipe that’s destined to become a favorite in your homemade snack repertoire!

Why You'll Love This Pumpkin Protein Balls

  • These Pumpkin Protein Balls are incredibly easy to make, requiring just 10 minutes of prep time.
  • Packed with wholesome ingredients, each bite bursts with delightful pumpkin spice flavor and a hint of sweetness from the maple syrup.
  • Their versatility allows you to enjoy them as a nutritious snack, a post-workout boost, or even a quick breakfast on the go.
  • With their vibrant color and appealing texture, these bites are sure to impress friends and family at any gathering.
  • They are a time-saving treat that can be prepped ahead and enjoyed throughout the week.
  • You will absolutely love how these protein-packed goodies turn snacking into a guilt-free indulgence!

Pumpkin Protein Balls Ingredients

• Dive into a flavorful experience with these nutritious bites!

For the Base

  • Old fashioned or rolled quick oats – These provide a hearty texture and serve as the main energy source in your Pumpkin Protein Balls.
  • Fine sea salt – Just a pinch enhances the sweetness and balances all the flavors beautifully.
  • Pumpkin spice – This warming spice blend infuses each bite with comforting autumn vibes.
  • Chia seeds – Packed with omega-3s, they add crunch and boost the health quotient of your snack.
  • Pumpkin puree – This ingredient not only adds moisture but is also rich in vitamins and a key component in your Pumpkin Protein Balls.

For the Sweetness

  • Organic peanut butter – A creamy delight that binds everything together while adding protein and healthy fats.
  • Maple syrup – This natural sweetener complements the pumpkin flavor and provides a touch of indulgence.

For a Sweet Finish

  • Vegan chocolate chips – These little morsels of joy add a decadent twist to your energy bites, making them irresistible!

How to Make Pumpkin Protein Balls

  1. Grind the Oats:
    In a food processor, grind the oats for about 1 minute until they’re almost a fine powder. This creates a great base for your Pumpkin Protein Balls.

  2. Combine Ingredients:
    Add in the pumpkin puree, chia seeds, peanut butter, maple syrup, salt, and pumpkin spice. Mix everything together until incorporated, creating a sticky and thick dough.

  3. Incorporate Chocolate Chips:
    Toss in the vegan chocolate chips and pulse the mixture about 15 times. This ensures that the chips are chopped smaller and mixed evenly throughout the dough.

  4. Shape the Bites:
    Using a tablespoon measurer, scoop out the mixture and roll it into round balls. Aim to create about 20-22 bites, ensuring they’re uniform in size.

  5. Chill and Enjoy:
    Place your rolled Pumpkin Protein Balls in the fridge for at least an hour to set. Once chilled, they’re ready to be enjoyed!

Optional: Drizzle with a little extra maple syrup for added sweetness!
Exact quantities are listed in the recipe card below.

What to Serve with Pumpkin Protein Balls?

When creating a wholesome snack experience, consider delightful pairings that enhance the earthy sweetness of your protein balls.

  • Chai Tea: A warming, spiced drink that complements pumpkin flavors beautifully, providing a cozy yet invigorating sip.
  • Greek Yogurt: The creaminess of yogurt adds a tangy contrast, perfect for dipping or spreading on the side.
  • Apple Slices: Crisp and fresh, the juicy sweetness of apples balances the rich notes of the protein balls, making for a vibrant snack option.
  • Carrot Sticks: Crunchy and refreshing, they offer a garden-fresh element, making your snack time feel balanced and wholesome.
  • Nuts and Seeds Mix: A crunchy trail mix with almonds, walnuts, and pumpkin seeds can elevate the texture profile while adding a nutritious boost.
  • Coconut Water: Hydrating and subtly sweet, this natural beverage refreshes your palate, enhancing the overall snacking experience.
  • Dark Chocolate Squares: Rich dark chocolate pairs perfectly with the sweetness of pumpkin and chocolate chips, satisfying any sweet tooth.
  • Trail Mix Bars: A chewy, energy-packed option that echoes the flavors of your Pumpkin Protein Balls for a cohesive snacking theme.

Make Ahead Options

These Pumpkin Protein Balls are perfect for meal prep enthusiasts! You can prepare the dough and roll it into balls up to 24 hours in advance. To do this, follow all the steps until rolling the mixture into bites, then place them on a parchment-lined baking sheet and refrigerate. Cover the tray with plastic wrap to ensure they stay fresh. On the day you plan to enjoy them, simply take them out of the fridge and let them sit for a few minutes at room temperature before devouring. This makes for a quick and nutritious snack that’s just as delicious, offering you delightful pumpkin spice flavors with minimal effort when you have a busy week ahead!

Pumpkin Protein Balls Variations

Feel free to let your creative side shine as you adapt this recipe to suit your preferences and the season!

  • Nut-Free: Substitute organic peanut butter with sun butter or tahini for a nut-free option.

  • Gluten-Free: Use certified gluten-free oats to make your Pumpkin Protein Balls safe for gluten-sensitive eaters.

  • Sweetener Swap: Replace maple syrup with agave nectar or honey for an alternative sweetness that changes the flavor profile slightly.

  • Flavor Boost: Add 1/2 teaspoon of vanilla extract to the mixture to enhance the overall flavor with a warm touch.

  • Protein Punch: Incorporate protein powder (vanilla or unflavored) into the base for an extra protein boost—perfect for pre- or post-workout snacks.

  • Add-Ins: Toss in some dried cranberries, coconut flakes, or nuts for additional texture and flavor dimensions; these additions will make each bite even more delightful!

  • Spice It Up: Experiment by adding a pinch of cayenne pepper for a surprising kick that balances with the sweetness of the pumpkin.

  • Chocolate Lovers: Swap in dark chocolate chips or white chocolate chunks instead of vegan chocolate chips for a different sweet twist.

How to Store and Freeze Pumpkin Protein Balls

Fridge: Store your Pumpkin Protein Balls in an airtight container for up to 1 week. This keeps them fresh and ready for snacking anytime!

Freezer: For longer storage, place the protein balls in a single layer on a baking sheet, freeze until solid, then transfer to a freezer bag. They’ll last up to 3 months.

Reheating: When you’re ready to enjoy, thaw in the fridge overnight or simply let sit at room temperature for about 30 minutes before savoring.

Tip: You can grab them straight from the fridge or freezer for a quick, on-the-go snack without any waiting!

Chef's Helpful Tips

  • When preparing Pumpkin Protein Balls, ensure that you grind the oats just to the right consistency for a smoother texture—too coarse will lead to a grainy bite.
  • While mixing the ingredients, don’t rush this step; allowing the mixture to become thoroughly sticky is key in shaping the balls later.
  • If you prefer a more subtle sweetness, you can reduce the amount of maple syrup without sacrificing the flavor profile of your Pumpkin Protein Balls.
  • Lastly, chilling the bites for a full hour is recommended as it helps them firm up perfectly for easy handling and enhanced flavor.

Pumpkin Protein Balls Recipe FAQs

How should I select pumpkin puree for my Pumpkin Protein Balls?
Look for pure pumpkin puree in your grocery store, not pumpkin pie filling, as the latter contains added sugars and spices. A good rule of thumb is to choose a brand that lists “100% pumpkin” on the label. It should have a bright orange color and a smooth consistency, avoiding any that appear watery or have dark spots.

How do I store Pumpkin Protein Balls, and how long do they last?
Store your Pumpkin Protein Balls in an airtight container in the refrigerator for up to 1 week. Make sure they’re separated by parchment paper if you stack them to prevent sticking. They taste wonderful chilled and are perfect for a quick snack anytime!

Can I freeze Pumpkin Protein Balls, and how do I do that?
Absolutely! To freeze your Pumpkin Protein Balls, place them in a single layer on a baking sheet and freeze until they are solid, which usually takes about 1-2 hours. Once frozen, transfer them to a resealable freezer bag, removing as much air as possible. They can last up to 3 months in the freezer. When you’re ready to enjoy them, simply thaw them in the fridge overnight or let them sit at room temperature for about 30 minutes.

What should I do if my Pumpkin Protein Balls are too sticky?
If your mixture feels too sticky to mold into balls, this might be due to the peanut butter or pumpkin puree. You can add a tablespoon of oats or a sprinkle of chia seeds to absorb excess moisture, making it easier to roll. If the mix is still too sticky, place it in the refrigerator for about 15-30 minutes to firm up before shaping them into balls.

Are Pumpkin Protein Balls suitable for those with nut allergies?
If you’re looking for a nut-free alternative, simply substitute the organic peanut butter with sunflower seed butter or tahini. These options maintain the creamy texture and binding properties without the nuts, so everyone can enjoy these protein-packed treats!

Can I make other flavor variations of Pumpkin Protein Balls?
Absolutely! For a twist on the classic Pumpkin Protein Balls, try swapping the pumpkin spice with cinnamon and adding chopped nuts or seeds for extra crunch. You could also experiment by using almond butter in place of peanut butter or adding dried fruit like cranberries or raisins for a hint of tartness!

Pumpkin Protein Balls

Pumpkin Protein Balls

Delightful Pumpkin Protein Balls combine oats, chia seeds, and vegan chocolate chips for a nutritious autumn snack.
Print Recipe Pin Recipe
Prep Time 10 minutes mins
Chilling Time 1 hour hr
Total Time 1 hour hr 10 minutes mins
Servings: 22 balls
Course: Snacks & Appetizers
Cuisine: American
Calories: 100
Ingredients Equipment Method Nutrition Notes

Ingredients
  

For the Base
  • 2 cups old fashioned or rolled quick oats
  • 1/4 teaspoon fine sea salt
  • 1 tablespoon pumpkin spice
  • 1/4 cup chia seeds
  • 1 cup pumpkin puree
For the Sweetness
  • 1/2 cup organic peanut butter
  • 1/4 cup maple syrup
For a Sweet Finish
  • 1/2 cup vegan chocolate chips

Equipment

  • Food processor

Method
 

Directions
  1. Grind the oats in a food processor for about 1 minute until they’re almost a fine powder.
  2. Add in the pumpkin puree, chia seeds, peanut butter, maple syrup, salt, and pumpkin spice. Mix until incorporated, creating a sticky thick dough.
  3. Toss in the vegan chocolate chips and pulse the mixture about 15 times for even distribution.
  4. Using a tablespoon measurer, scoop and roll the mixture into round balls, aiming for about 20-22 bites.
  5. Place the rolled Pumpkin Protein Balls in the fridge for at least an hour to set before enjoying.

Nutrition

Serving: 1ballCalories: 100kcalCarbohydrates: 12gProtein: 3gFat: 5gSaturated Fat: 1gPolyunsaturated Fat: 2gMonounsaturated Fat: 2gSodium: 50mgPotassium: 100mgFiber: 2gSugar: 3gVitamin A: 500IUVitamin C: 2mgCalcium: 30mgIron: 0.5mg

Notes

Optional: Drizzle with a little extra maple syrup for added sweetness.

Tried this recipe?

Let us know how it was!

Filed Under: SNACKS & APPETIZERS

Healthy Oatmeal Protein Cookies

January 1, 2026 by JudyWhite Leave a Comment

The first bite of a warm cookie should feel like a cozy hug, and that’s exactly what these Healthy Oatmeal Protein Cookies deliver! Picture this: the rich aroma of peanut butter mingling with sweet banana and a hint of cinnamon fills your kitchen as they bake, igniting memories of childhood treats with a nutritious twist.

I originally concocted this recipe out of sheer curiosity while attempting to create a guilt-free indulgence that wouldn’t derail my healthy eating goals. With just a handful of wholesome ingredients—like ripe bananas, rolled oats, and protein-packed whey powder—these cookies not only satisfy your sweet tooth but also double as a post-workout snack.

Ideal for anyone tired of the same old fast food routine, they’re a delightful way to nourish your body without sacrificing flavor. Trust me, whether you’re a busy parent, a health enthusiast, or just someone who loves delicious homemade snacks, these cookies will have you coming back for more. Let’s dive into how you can whip up this scrumptious treat in no time!

Why You'll Love This Healthy Oatmeal Protein Cookies

  • These Healthy Oatmeal Protein Cookies are incredibly easy to make, allowing you to whip up a batch in just 20 minutes.
  • Packed with flavor from ripe bananas and rich peanut butter, these cookies are a delicious guilt-free treat that satisfies your cravings.
  • Their versatility means you can easily swap in your favorite mix-ins, making them perfect for everyone in the family.
  • With their irresistible aroma and delightful texture, these cookies are sure to impress anyone who takes a bite.

Healthy Oatmeal Protein Cookies Ingredients

Get ready to bake up a storm with these nutritious cookies!

For the Batter
• 2 large ripe bananas – the key to natural sweetness and moisture in your cookies.
• ⅓ cup natural peanut butter – adds creaminess and a protein boost to each bite.
• 2 cups rolled oats – the wholesome base that gives these cookies their chewy texture.
• 2 scoops Naked Whey Protein Powder – elevates the protein content, making them a perfect post-workout snack.
• 1 tablespoon chia seeds – a fantastic source of omega-3s and helps bind the batter.
• ⅛ cup coconut oil – enhances richness and is great for healthy fats.
• ⅛ cup honey – naturally sweetens the cookies while keeping them moist.
• ¼ cup chocolate chips – for a delightful indulgence that your taste buds will love.
• ¼ cup raisins – adds a fruity sweetness that balances the richness of peanut butter.
• 1 teaspoon vanilla extract – elevates flavors with a warm, aromatic touch.
• ½ teaspoon ground cinnamon – brings a cozy spice that complements the bananas beautifully.
• ¼ teaspoon sea salt – enhances all the flavors for a more rounded taste.

Enjoy making these Healthy Oatmeal Protein Cookies—they’re not just delicious, they’re a guilt-free treat everyone will adore!

How to Make Healthy Oatmeal Protein Cookies

  1. Preheat the oven to 325°F/160°C. Line a large cookie sheet with parchment paper or a silicone baking mat. This ensures easy cleanup and perfect cookies every time!

  2. Mash the ripe bananas in a large bowl until very smooth. Their natural sweetness will keep the cookies moist and flavorful, so take your time here.

  3. Add the peanut butter, rolled oats, and protein powder to the mashed bananas. Mix well to combine everything into a thick batter, ensuring that the oats and protein powder are fully incorporated.

  4. Stir in the chia seeds, melted coconut oil, honey, chocolate chips, raisins, vanilla extract, cinnamon, and salt. Mix everything together until well combined, creating a rich and aromatic dough.

  5. Shape the mixture into 20 cookies and place them on the prepared baking sheet. Flatten each cookie to about ½ inch thick for a perfect texture, giving them a little space to expand as they bake.

  6. Bake the cookies for about 10-12 minutes, or until they are set and the bottoms start to brown. You’ll know they’re ready when the kitchen fills with their inviting aroma!

  7. Cool the cookies completely on a wire rack before transferring them to an airtight container. This step is essential for maintaining their delightful chewy texture.

Optional: Drizzle with melted dark chocolate for an extra indulgent touch.

Exact quantities are listed in the recipe card below.

How to Store and Freeze Healthy Oatmeal Protein Cookies

Room Temperature: Store cooled cookies in an airtight container at room temperature for up to 3 days to maintain their chewy texture.

Fridge: For longer freshness, keep your Healthy Oatmeal Protein Cookies in the fridge, where they can last up to a week. Just be sure to seal them tightly!

Freezer: Freeze cookies in a single layer on a baking sheet, then transfer to a freezer bag for up to 3 months. Thaw them at room temperature when ready to enjoy!

Reheating: To warm your cookies, place them in the microwave for 10-15 seconds or in the oven at 350°F for 5-7 minutes until heated through.

Healthy Oatmeal Protein Cookies Variations

Feel free to put your own spin on these delightful cookies and create a unique treat your family will adore!

  • Nut-Free: Substitute peanut butter with sunflower seed butter for a safe, nut-free alternative that maintains creaminess. You’ll still enjoy that satisfying texture and taste!

  • Vegan: Swap honey for maple syrup and coconut oil for a plant-based butter to make these cookies vegan-friendly. They will still be irresistibly delicious!

  • Dairy-Free: Use dairy-free chocolate chips instead of regular ones for a wholesome option that everyone can enjoy. Your cookies will still shine with mouthwatering flavor!

  • Oat-Free: Replace rolled oats with almond flour for a gluten-free version. This swap offers a different texture while keeping the cookies scrumptious.

  • Add Extra Fiber: Throw in ¼ cup of shredded carrots or zucchini to sneak in some veggies for extra moisture and fiber. It’s a delightful surprise in each bite!

  • Choco-Mint: Add ¼ teaspoon of peppermint extract along with chocolate chips for a refreshing minty twist. The combination will bring you a nostalgic flavor experience!

  • Spicy Kick: Incorporate a dash of cayenne pepper or chili powder for those who love a little heat. This unexpected zest will awaken your taste buds.

  • Fruit Fusion: Instead of raisins, try adding chopped dried apricots or cranberries for a fruity burst that elevates the flavor profile to new heights.

With these variations, you can keep your Healthy Oatmeal Protein Cookies fresh and exciting every time you bake!

What to Serve with Healthy Oatmeal Protein Cookies?

The perfect accompaniment to these scrumptious cookies can elevate your snack time to a whole new level.

  • Fresh Fruit Salad: A vibrant mix of seasonal fruits brings brightness and a refreshing contrast to the cookies’ rich flavors. The natural sweetness of fruits pairs wonderfully, making every bite satisfying.

  • Greek Yogurt Parfait: Layering yogurt with granola and berries offers creamy textures and tangy flavors, complementing the hearty cookies. This hearty treat doubles as a delectable breakfast or an afternoon snack.

  • Nutty Trail Mix: A handful of trail mix adds crunch and a variety of textures to your snack spread. Choose a mix with nuts, seeds, and dried fruits for an extra nutrient boost, creating a satisfying contrast to the cookies.

  • Dark Chocolate Dipped Strawberries: The rich notes of dark chocolate and sweet strawberries create a sophisticated pairing. This delightful treat adds a touch of indulgence and romance to your healthy cookie experience.

  • Chai Spiced Tea: A warm cup of chai infused with spices brings a cozy, aromatic element. The spiciness of the tea complements the cinnamon in your cookies for a beautifully rounded flavor profile.

  • Almond Milk: Cool and creamy almond milk perfectly balances the dense cookies. This dairy-free option is refreshing and light, making it a lovely accompaniment for any time of the day.

  • Peanut Butter Smoothie: Blend up a delicious peanut butter smoothie for a creamy, protein-packed drink. It enhances the flavors of your cookies and provides an energy boost for your busy day.

Enjoy these delightful pairings with your Healthy Oatmeal Protein Cookies, and transform snack time into a feast of flavors!

Make Ahead Options

These Healthy Oatmeal Protein Cookies are perfect for meal prep enthusiasts! You can mash the ripe bananas and combine them with the peanut butter, rolled oats, and protein powder up to 24 hours in advance, storing the mixture in an airtight container in the refrigerator to keep it fresh. Additionally, you can measure and whisk together the dry ingredients (chia seeds, coconut oil, honey, chocolate chips, raisins, vanilla extract, cinnamon, and salt) a day ahead, ensuring convenience when you’re ready to bake. When it’s time to enjoy, simply form the batter into cookies, bake, and allow them to cool completely for that irresistible chewy texture—resulting in delicious cookies with minimal last-minute effort!

Chef's Helpful Tips

  • When making Healthy Oatmeal Protein Cookies, ensure the bananas are really ripe for maximum sweetness and moisture in the dough.
  • Pay attention to mixing; overmixing can lead to tough cookies, so combine the ingredients until just incorporated.
  • Use a cookie scoop for uniform size to ensure even baking throughout the batch.
  • For the best results, keep an eye on the cookies during the last few minutes of baking, as they can quickly go from perfect to overbaked.

Healthy Oatmeal Protein Cookies Recipe FAQs

How do I choose ripe bananas for this recipe?
Absolutely! Look for bananas that are heavily speckled with brown spots; this indicates maximum sweetness and ripeness. Avoid green or hard bananas, as they won’t provide the necessary moisture or flavor for your cookies.

How long can I store the Healthy Oatmeal Protein Cookies?
Very! You can keep these cookies at room temperature in an airtight container for up to 3 days. For a longer shelf life, store them in the refrigerator for up to a week. Just make sure they’re in a sealed container to prevent them from drying out!

Can I freeze Healthy Oatmeal Protein Cookies?
Of course! To freeze, place the cookies in a single layer in an airtight container, making sure to separate the layers with parchment paper for easy access. They can be stored in the freezer for up to 3 months. When you’re ready to enjoy them, just thaw in the fridge overnight or microwave them for about 10-15 seconds until warm.

What should I do if my cookies come out too dry?
If your cookies feel dry, it could be due to overmixing or overbaking. Ensure you mix until just combined and keep an eye on the baking time—every oven is different. If they still seem dry after baking, consider adding a splash more coconut oil or a couple of extra chocolate chips in your next batch for added moisture.

Are these cookies suitable for people with nut allergies?
Very! If nut allergies are a concern, you can substitute the peanut butter with sunbutter or any seed butter of your choice. Just keep in mind that this will alter the flavor slightly, but you’ll still have a delicious, protein-packed cookie! Always double-check your other ingredients to ensure they’re nut-free as well.

Healthy Oatmeal Protein Cookies

Healthy Oatmeal Protein Cookies

Healthy Oatmeal Protein Cookies are delicious guilt-free treats packed with protein, making them perfect for any snack time.
Print Recipe Pin Recipe
Prep Time 10 minutes mins
Cook Time 12 minutes mins
Total Time 22 minutes mins
Servings: 20 cookies
Course: Snacks & Appetizers
Cuisine: American
Calories: 120
Ingredients Equipment Method Nutrition Notes

Ingredients
  

For the Batter
  • 2 large ripe bananas the key to natural sweetness and moisture
  • ⅓ cup natural peanut butter adds creaminess and protein boost
  • 2 cups rolled oats the wholesome base for chewy texture
  • 2 scoops Naked Whey Protein Powder elevates protein content
  • 1 tablespoon chia seeds source of omega-3s and helps bind
  • ⅛ cup coconut oil enhances richness and healthy fats
  • ⅛ cup honey naturally sweetens and keeps moist
  • ¼ cup chocolate chips for delightful indulgence
  • ¼ cup raisins adds fruity sweetness
  • 1 teaspoon vanilla extract elevates flavors
  • ½ teaspoon ground cinnamon cozy spice
  • ¼ teaspoon sea salt enhances all flavors

Equipment

  • Baking sheet
  • parchment paper
  • Mixing bowl
  • Spatula

Method
 

How to Make Healthy Oatmeal Protein Cookies
  1. Preheat the oven to 325°F/160°C. Line a large cookie sheet with parchment paper or a silicone baking mat.
  2. Mash the ripe bananas in a large bowl until very smooth.
  3. Add the peanut butter, rolled oats, and protein powder to the mashed bananas. Mix well.
  4. Stir in the chia seeds, melted coconut oil, honey, chocolate chips, raisins, vanilla extract, cinnamon, and salt. Mix until well combined.
  5. Shape the mixture into 20 cookies and place them on the prepared baking sheet.
  6. Bake the cookies for about 10-12 minutes, or until they are set and the bottoms start to brown.
  7. Cool the cookies completely on a wire rack before transferring to an airtight container.

Nutrition

Serving: 1cookieCalories: 120kcalCarbohydrates: 15gProtein: 4gFat: 5gSaturated Fat: 2gPolyunsaturated Fat: 0.5gMonounsaturated Fat: 3gSodium: 80mgPotassium: 150mgFiber: 2gSugar: 5gVitamin C: 2mgCalcium: 2mgIron: 4mg

Notes

For an extra indulgent touch, drizzle with melted dark chocolate.

Tried this recipe?

Let us know how it was!

Filed Under: SNACKS & APPETIZERS

Pumpkin Protein Balls

January 1, 2026 by JudyWhite Leave a Comment

When the crisp autumn air first whispers through my window, my thoughts inevitably turn to cozy flavors and warm comforts. Pumpkin spice and the idea of a quick, energizing treat combine in my mind, leading me to create these delightful Pumpkin Protein Balls. Not only do they embrace the essence of the season, but they also add a wholesome twist to snack time. Imagine biting into a soft, chewy ball packed with nutritious oats, chia seeds, and just the right amount of vegan chocolate chips—a perfect blend of health and indulgence!

I was initially skeptical about how energy bites could fill the void of my usual sweet cravings. However, one taste of these protein-packed gems, and I was convinced. Perfectly portable for those hectic days or as a post-workout snack, they’re so simple to whip up that you’ll find yourself making them again and again. Who knew something so delicious could be this easy? Let’s dive into this satisfying recipe that’s destined to become a favorite in your homemade snack repertoire!

Why You'll Love This Pumpkin Protein Balls

  • These Pumpkin Protein Balls are incredibly easy to make, requiring just 10 minutes of prep time.
  • Packed with wholesome ingredients, each bite bursts with delightful pumpkin spice flavor and a hint of sweetness from the maple syrup.
  • Their versatility allows you to enjoy them as a nutritious snack, a post-workout boost, or even a quick breakfast on the go.
  • With their vibrant color and appealing texture, these bites are sure to impress friends and family at any gathering.
  • They are a time-saving treat that can be prepped ahead and enjoyed throughout the week.
  • You will absolutely love how these protein-packed goodies turn snacking into a guilt-free indulgence!

Pumpkin Protein Balls Ingredients

• Dive into a flavorful experience with these nutritious bites!

For the Base

  • Old fashioned or rolled quick oats – These provide a hearty texture and serve as the main energy source in your Pumpkin Protein Balls.
  • Fine sea salt – Just a pinch enhances the sweetness and balances all the flavors beautifully.
  • Pumpkin spice – This warming spice blend infuses each bite with comforting autumn vibes.
  • Chia seeds – Packed with omega-3s, they add crunch and boost the health quotient of your snack.
  • Pumpkin puree – This ingredient not only adds moisture but is also rich in vitamins and a key component in your Pumpkin Protein Balls.

For the Sweetness

  • Organic peanut butter – A creamy delight that binds everything together while adding protein and healthy fats.
  • Maple syrup – This natural sweetener complements the pumpkin flavor and provides a touch of indulgence.

For a Sweet Finish

  • Vegan chocolate chips – These little morsels of joy add a decadent twist to your energy bites, making them irresistible!

How to Make Pumpkin Protein Balls

  1. Grind the Oats:
    In a food processor, grind the oats for about 1 minute until they’re almost a fine powder. This creates a great base for your Pumpkin Protein Balls.

  2. Combine Ingredients:
    Add in the pumpkin puree, chia seeds, peanut butter, maple syrup, salt, and pumpkin spice. Mix everything together until incorporated, creating a sticky and thick dough.

  3. Incorporate Chocolate Chips:
    Toss in the vegan chocolate chips and pulse the mixture about 15 times. This ensures that the chips are chopped smaller and mixed evenly throughout the dough.

  4. Shape the Bites:
    Using a tablespoon measurer, scoop out the mixture and roll it into round balls. Aim to create about 20-22 bites, ensuring they’re uniform in size.

  5. Chill and Enjoy:
    Place your rolled Pumpkin Protein Balls in the fridge for at least an hour to set. Once chilled, they’re ready to be enjoyed!

Optional: Drizzle with a little extra maple syrup for added sweetness!
Exact quantities are listed in the recipe card below.

Pumpkin Protein Balls Variations

Feel free to make these delightful bites your own and surprise your taste buds with various twists!

  • Nut-Free: Replace peanut butter with sunflower seed butter for a nut-free option that still packs plenty of flavor.

  • Sweetener Swap: Use agave syrup instead of maple syrup for a lighter sweetness that complements the pumpkin.

  • Protein Boost: Mix in a scoop of your favorite protein powder to supercharge these snacks and make them even more satisfying.

  • Spicy Kick: Add a pinch of cayenne pepper to the mixture for a warm, spicy twist that will make these protein balls stand out.

  • Autumn Medley: Incorporate chopped pecans or walnuts to give your bites an extra crunchy texture and a delightful nutty flavor that evokes cozy autumn vibes.

  • Dried Fruit: Toss in some chopped dried cranberries or apricots for a chewy surprise that adds a burst of sweetness in each bite.

  • Chocolate Lovers: Swap regular chocolate chips for dark chocolate chunks for a richer, more intense chocolate experience.

  • Flavor Extracts: A splash of vanilla or almond extract can elevate the flavor profile, giving these bites a delightful aromatic quality that enhances the overall taste.

Explore these variations and let your creativity shine, adapting the recipe to fit your preferences and cravings!

Make Ahead Options

These Pumpkin Protein Balls are perfect for meal prep and make life much easier during busy weeknights! You can mix and shape the energy bites up to 24 hours in advance. Just follow the recipe instructions through rolling the balls, then store them in an airtight container in the refrigerator. This helps maintain their freshness and prevents them from becoming too sticky. When you’re ready to enjoy them, simply pull out the desired portion and let them sit at room temperature for a few minutes for the best texture. With this make-ahead option, you’ll have nutritious snacks ready at a moment’s notice, keeping your cravings at bay while saving you precious time during the week!

How to Store and Freeze Pumpkin Protein Balls

Fridge: Store your Pumpkin Protein Balls in an airtight container for up to 1 week. This keeps them fresh and ready for snacking anytime!

Freezer: For longer storage, place the protein balls in a single layer on a baking sheet, freeze until solid, then transfer to a freezer bag. They’ll last up to 3 months.

Reheating: When you’re ready to enjoy, thaw in the fridge overnight or simply let sit at room temperature for about 30 minutes before savoring.

Tip: You can grab them straight from the fridge or freezer for a quick, on-the-go snack without any waiting!

What to Serve with Pumpkin Protein Balls?

When creating a wholesome snack experience, consider delightful pairings that enhance the earthy sweetness of your protein balls.

  • Chai Tea: A warming, spiced drink that complements pumpkin flavors beautifully, providing a cozy yet invigorating sip.
  • Greek Yogurt: The creaminess of yogurt adds a tangy contrast, perfect for dipping or spreading on the side.
  • Apple Slices: Crisp and fresh, the juicy sweetness of apples balances the rich notes of the protein balls, making for a vibrant snack option.
  • Carrot Sticks: Crunchy and refreshing, they offer a garden-fresh element, making your snack time feel balanced and wholesome.
  • Nuts and Seeds Mix: A crunchy trail mix with almonds, walnuts, and pumpkin seeds can elevate the texture profile while adding a nutritious boost.
  • Coconut Water: Hydrating and subtly sweet, this natural beverage refreshes your palate, enhancing the overall snacking experience.
  • Dark Chocolate Squares: Rich dark chocolate pairs perfectly with the sweetness of pumpkin and chocolate chips, satisfying any sweet tooth.
  • Trail Mix Bars: A chewy, energy-packed option that echoes the flavors of your Pumpkin Protein Balls for a cohesive snacking theme.

Chef's Helpful Tips

  • When preparing Pumpkin Protein Balls, ensure that you grind the oats just to the right consistency for a smoother texture—too coarse will lead to a grainy bite.
  • While mixing the ingredients, don’t rush this step; allowing the mixture to become thoroughly sticky is key in shaping the balls later.
  • If you prefer a more subtle sweetness, you can reduce the amount of maple syrup without sacrificing the flavor profile of your Pumpkin Protein Balls.
  • Lastly, chilling the bites for a full hour is recommended as it helps them firm up perfectly for easy handling and enhanced flavor.

Pumpkin Protein Balls Recipe FAQs

How do I choose the right pumpkin puree for my Pumpkin Protein Balls?
Absolutely! When selecting pumpkin puree, look for 100% pure pumpkin without any added sugar or spices. Canned options are usually convenient and consistent, but you can also roast and puree fresh pumpkin if you prefer a homemade touch. Just ensure it’s well-pureed and free of excess water for the best results.

What’s the best way to store Pumpkin Protein Balls?
For sure! Keep your Pumpkin Protein Balls stored in an airtight container in the fridge, where they’ll stay fresh for up to 1 week. If you want to enjoy them longer, freeze them in a single layer on a baking sheet until firm. Transfer them into a freezer-safe container for up to 3 months. Just remember to label it for easy access!

Can I freeze my Pumpkin Protein Balls? How?
Yes, you can definitely freeze your Pumpkin Protein Balls! Here’s how:

  1. Place the rolled balls in a single layer on a baking sheet.
  2. Pop them in the freezer for about 1-2 hours or until firm.
  3. Once frozen, transfer them to a freezer-safe container or a zip-lock bag and store for up to 3 months.
  4. When you’re ready to enjoy, just thaw them in the fridge overnight or at room temperature for a couple of hours. Easy peasy!

What if my mixture is too dry when making Pumpkin Protein Balls?
No worries! If your mixture feels too dry, you can add more moisture by incorporating a little extra pumpkin puree or peanut butter, one tablespoon at a time. Mix well and check the texture after each addition until it reaches that slightly sticky and thick consistency that you want for your balls.

Are there any dietary considerations to keep in mind?
Very! These Pumpkin Protein Balls are vegan-friendly, thanks to the use of plant-based ingredients. If you’re concerned about allergies, check for peanut allergies if using peanut butter and opt for a sunflower seed butter instead. Additionally, if you want to make them gluten-free, use certified gluten-free oats. Always double-check ingredient labels to ensure they align with dietary needs.

Pumpkin Protein Balls

Pumpkin Protein Balls

These Pumpkin Protein Balls are a quick, healthy snack filled with wholesome ingredients and delightful flavors.
Print Recipe Pin Recipe
Prep Time 10 minutes mins
Chilling Time 1 hour hr
Total Time 1 hour hr 10 minutes mins
Servings: 22 balls
Course: Snacks & Appetizers
Calories: 100
Ingredients Equipment Method Nutrition Notes

Ingredients
  

For the Base
  • 2 cups Old fashioned or rolled quick oats
  • 1/4 teaspoon Fine sea salt
  • 2 teaspoons Pumpkin spice
  • 1/4 cup Chia seeds
  • 1 cup Pumpkin puree
For the Sweetness
  • 1/2 cup Organic peanut butter
  • 1/4 cup Maple syrup
For a Sweet Finish
  • 1/2 cup Vegan chocolate chips

Equipment

  • Food processor

Method
 

How to Make Pumpkin Protein Balls
  1. In a food processor, grind the oats for about 1 minute until they’re almost a fine powder.
  2. Add in the pumpkin puree, chia seeds, peanut butter, maple syrup, salt, and pumpkin spice. Mix everything together until incorporated, creating a sticky and thick dough.
  3. Toss in the vegan chocolate chips and pulse the mixture about 15 times.
  4. Using a tablespoon measurer, scoop out the mixture and roll it into round balls, aiming for about 20-22 bites.
  5. Place your rolled Pumpkin Protein Balls in the fridge for at least an hour to set.

Nutrition

Serving: 1ballCalories: 100kcalCarbohydrates: 15gProtein: 4gFat: 4gSaturated Fat: 1gPolyunsaturated Fat: 1gMonounsaturated Fat: 2gSodium: 50mgPotassium: 200mgFiber: 3gSugar: 5gVitamin A: 1000IUCalcium: 30mgIron: 1mg

Notes

Optional: Drizzle with a little extra maple syrup for added sweetness. Can be stored in an airtight container for up to 1 week in the fridge or frozen for up to 3 months.

Tried this recipe?

Let us know how it was!

Filed Under: SNACKS & APPETIZERS

Classic Ranch Dressing

December 31, 2025 by JudyWhite Leave a Comment

The moment I whisk together creaminess with the tang of buttermilk, I’m transported back to backyard barbecues and family gatherings where salads were always drenched in homemade goodness. There’s something satisfying about preparing a dressing that elevates even the simplest dish into a crowd-pleaser.

When boredom starts to creep in from fast food runs, it’s the homemade sauces that bring joy back to the table. Cue Classic Ranch Dressing — a versatile and beloved staple, perfect for salads, dunking veggies, or simply bringing your favorite dishes to life. In just five quick minutes, you can whip up this creamy delight using ingredients you probably already have on hand.

So, if you’re ready to swap store-bought bottles for a richer, fresher flavor, let’s dive into this easy recipe that’s bound to impress both family and friends alike. Trust me, once you taste this Classic Ranch Dressing, you’ll never go back!

Why You'll Love This Classic Ranch Dressing

  • This Classic Ranch Dressing is incredibly easy to make, taking just five minutes to whip up.
  • The flavor is rich and tangy, adding a delicious twist to salads and veggies.
  • Its versatility allows you to use it not only in salads but also as a dip or drizzle over your favorite dishes.
  • The visual appeal of this creamy dressing makes everything on your plate look more inviting and appetizing.

Classic Ranch Dressing Ingredients

For the Base

  • Buttermilk or regular milk – adds a creamy texture; buttermilk gives extra tangy flavor.
  • Sour cream – contributes to the rich creaminess and complements the tang of the dressing.
  • Mayonnaise – enhances the creaminess and helps to bind all flavors together.

For the Herbs and Spices

  • Fresh dill weed – infuses a fresh, earthy flavor; dried dill can replace if fresh isn’t handy.
  • Fresh parsley – adds a pop of freshness and color; dried parsley is a good substitute in a pinch.
  • Fresh chives – offers a subtle onion flavor; you can use onion powder for a sharper taste.
  • Garlic powder – provides a punch of flavor without the hassle of fresh garlic.
  • Fine sea salt – enhances all the flavors; adjust to your taste preference.
  • Onion powder – adds depth to the dressing’s flavor profile.
  • Ground black pepper – provides a touch of heat to balance the creaminess.

For the Acidity

  • Lemon juice – adds brightness and acidity that elevate the entire flavor of the Classic Ranch Dressing.

With these ingredients on hand, you’ll be well on your way to creating a delightful dressing that transforms any meal into a culinary celebration!

How to Make Classic Ranch Dressing

  1. Gather Ingredients: Collect all your ingredients in a mixing bowl. This ensures you have everything at your fingertips, making the process smoother and more enjoyable.

  2. Whisk Together: Using a whisk, blend the buttermilk, sour cream, mayonnaise, and all the spices until the mixture is completely smooth and well combined. Aim for a creamy texture; it should look luscious and inviting!

  3. Adjust Consistency: If you prefer a thinner dressing for salads, simply stir in a little extra buttermilk, regular milk, or even a splash of water until you reach your desired consistency.

  4. Taste and Adjust: Give your dressing a quick taste. If you think it needs a little more zing, add an extra dash of lemon juice or salt to enhance the flavor. Adjust according to your personal preference!

  5. Chill (Optional): For the best flavor, allow the dressing to chill in the fridge for about 30 minutes before serving. This lets the flavors meld beautifully.

Optional: Serve with a sprinkle of fresh herbs on top for added color and appeal!

Exact quantities are listed in the recipe card below.

What to Serve with Classic Ranch Dressing?

Elevate your meal experience with a delightful spread that complements the creamy flavor of your homemade ranch.

  • Crispy Chicken Wings: The rich ranch dressing is the perfect dip for these flavorful wings, balancing their savory, smoky notes.

  • Fresh Veggie Platter: A rainbow of fresh vegetables paired with ranch provides a crunchy, refreshing bite that revitalizes your taste buds.

  • Loaded Baked Potatoes: Generously drizzle ranch over baked potatoes for a creamy addition that enhances the rich toppings for an indulgent treat.

  • Classic Garden Salad: Toss your favorite greens with ranch for a vibrant salad, transforming simple ingredients into a beautiful, flavorsome dish.

  • Deviled Eggs: Pipe a bit of ranch into deviled eggs for an unexpected twist that adds creaminess and a light herby flavor.

  • Grilled Cheese Sandwich: Serve ranch alongside this melty staple as a dip, offering a delightful contrast of textures and flavors.

  • Roasted Vegetables: Drizzle your cooked favorites with ranch for an extra layer of flavor, transforming everyday veggies into a scrumptious side.

  • Beer or Cider: Pair your meal with a light, crisp beer or fruity cider to enhance the flavors of your ranch dressing perfectly.

  • Chocolate Chip Cookies: For dessert, a sweet finish pairs beautifully with savory dishes, creating a lovely balance to end your meal on a high note.

Classic Ranch Dressing Variations

Feel free to put your own spin on this Classic Ranch Dressing for a delicious twist that suits your taste buds!

  • Greek Yogurt: Substitute sour cream with Greek yogurt for a tangy twist and added protein. It maintains that creamy texture while keeping things lighter.

  • Vegan: Swap the mayonnaise with avocado and use plant-based milk instead of buttermilk for an entirely vegan delight. This offers a rich, creamy flavor that everyone will love!

  • Spicy: Add a teaspoon of hot sauce or a pinch of cayenne pepper for a kick of heat. This simple addition brings an exciting zing that elevates your ranch experience.

  • Herbed: Experiment with fresh herbs like basil or cilantro instead of dill and parsley. This leads you to a garden-fresh flavor that is perfect for summer salads.

  • Smoky: Incorporate smoked paprika or bacon bits for a smokey depth. This variation transforms the dressing into a flavorful accompaniment to grilled meats.

  • Sweet: Mix in a drizzle of honey or maple syrup to balance out the tanginess. This sweet twist creates a delightful contrast that’s wonderful with crispy veggies.

  • Zesty Citrus: Swap lemon juice with lime juice for a zesty note, or try adding a touch of orange zest for a refreshing burst of flavor. This twist will brighten up your salads!

  • Creamy Avocado: Blend in half a ripe avocado for a richer and thicker dressing. This not only boosts creaminess but also adds a lovely green color that’s appealing and healthy.

Make Ahead Options

These Classic Ranch Dressing preparations are perfect for meal prep enthusiasts looking to save time on busy weeknights! You can whip up the dressing and refrigerate it for up to 3 days in advance, allowing the flavors to develop beautifully. Simply whisk together all the ingredients as per the recipe and store it in an airtight container in the fridge. If you find the dressing has thickened upon chilling, stir in a tablespoon of buttermilk or regular milk before serving to achieve that creamy consistency once again. By prepping this Classic Ranch Dressing ahead of time, you’ll have a delicious homemade condiment ready to elevate your meals with minimal effort!

How to Store and Freeze Classic Ranch Dressing

Fridge: Keep your Classic Ranch Dressing in an airtight container for up to 1 week. This ensures it stays fresh and retains its delightful flavors.

Freezer: While ranch dressing can be frozen, it’s best to do so for up to 2 months. Store in small, airtight containers to make thawing easier.

Reheating: If you froze it, thaw in the fridge overnight before use. Give it a good stir after thawing to bring back its creamy texture.

Note: If the dressing thickens after refrigeration, simply stir in a little milk or buttermilk to achieve your desired consistency.

Chef's Helpful Tips

  • When making Classic Ranch Dressing, ensure all your ingredients are at room temperature for easier blending and better emulsification.
  • A common mistake is not whisking thoroughly, which can result in a lumpy texture; whisk until completely smooth for the best results.
  • If using dried herbs instead of fresh, remember that dried herbs are more concentrated, so use about one-third the amount.
  • For optimal flavor, let your dressing chill in the fridge for at least 30 minutes before serving to allow the flavors to blend.

Classic Ranch Dressing Recipe FAQs

How do I choose ripe ingredients for Classic Ranch Dressing?
Absolutely! For the best flavor in your Classic Ranch Dressing, select fresh herbs. Look for vibrant green colors in your dill, parsley, and chives, avoiding any with dark spots or wilting. If you’re opting for buttermilk, check the expiration date to ensure it’s still fresh for that delightful tang!

How should I store my Classic Ranch Dressing?
Very simple! Keep your Classic Ranch Dressing in an airtight container in the fridge. It will stay fresh for about 1 week. Make sure to label it with the date, so you always know when it was made, and enjoy its deliciousness while it’s at its best!

Can I freeze Classic Ranch Dressing?
Yes, you can! To freeze your dressing, pour it into small, airtight containers or ice cube trays for easy portioning. It can be frozen for up to 2 months. When you’re ready to use it, thaw it in the fridge overnight and stir it well before serving to restore its creamy texture.

What should I do if my dressing is too thick?
If your Classic Ranch Dressing turns out thicker than expected, don’t worry! Just add a splash of buttermilk or regular milk, stirring gradually until you reach your desired consistency. This will bring it back to that luscious, pourable texture we all love.

Can my pets consume Classic Ranch Dressing?
No, it’s not safe for pets. While ranch dressing may be delicious for us, the garlic and onion powder in the recipe can be harmful to pets, especially dogs. Always stick to pet-safe sauces and treats, and keep this homemade delight just for yourself!

What if I have allergies to certain ingredients?
If you have dietary restrictions, feel free to customize! You can substitute sour cream with Greek yogurt for a lighter option, or mayonnaise with an egg-free alternative if you’re vegan. Just ensure to check all ingredient labels to avoid allergens. Enjoy creating your perfect version of Classic Ranch Dressing!

Classic Ranch Dressing

Classic Ranch Dressing

Classic Ranch Dressing is a creamy, tangy dressing perfect for salads and dipping.
Print Recipe Pin Recipe
Prep Time 5 minutes mins
Chilling Time 30 minutes mins
Total Time 35 minutes mins
Servings: 4 servings
Course: Snacks & Appetizers
Calories: 70
Ingredients Equipment Method Nutrition Notes

Ingredients
  

For the Base
  • 1 cup buttermilk or regular milk
  • 1/2 cup sour cream
  • 1/2 cup mayonnaise
For the Herbs and Spices
  • 1 tablespoon fresh dill weed or dried dill
  • 1 tablespoon fresh parsley or dried parsley
  • 1 tablespoon fresh chives or onion powder
  • 1 teaspoon garlic powder
  • 1/2 teaspoon fine sea salt
  • 1/2 teaspoon onion powder
  • 1/4 teaspoon ground black pepper
For the Acidity
  • 2 tablespoons lemon juice

Equipment

  • Mixing bowl
  • Whisk

Method
 

Instructions
  1. Gather all ingredients in a mixing bowl.
  2. Whisk together buttermilk, sour cream, mayonnaise, and all the spices until smooth.
  3. Adjust consistency by stirring in extra buttermilk or water if desired.
  4. Taste and adjust flavor with extra lemon juice or salt.
  5. Chill in the fridge for about 30 minutes before serving.

Nutrition

Serving: 2tablespoonsCalories: 70kcalCarbohydrates: 1gProtein: 1gFat: 7gSaturated Fat: 2gMonounsaturated Fat: 4gCholesterol: 10mgSodium: 160mgPotassium: 20mgSugar: 1gVitamin A: 100IUVitamin C: 1mgCalcium: 30mg

Notes

For optimal flavor, let the dressing chill in the fridge for at least 30 minutes. Stir in milk or buttermilk if the dressing thickens after refrigeration.

Tried this recipe?

Let us know how it was!

Filed Under: SNACKS & APPETIZERS

  • « Previous Page
  • 1
  • 2
  • 3
  • 4
  • 5
  • …
  • 8
  • Next Page »

Recent Posts

  • Crispy Potatoes in Oven
  • Lucky Charms Pancakes
  • Cheeseburger
  • Boiled Corn on the Cob
  • St. Patrick’s Day Dessert Parfaits

Recent Comments

No comments to show.

Footer

  • Contact
  • Privacy Policy
  • About Us
  • Terms
  • ↑ back to top

Copyright © 2024 www.Forkono.com

Table Of Content