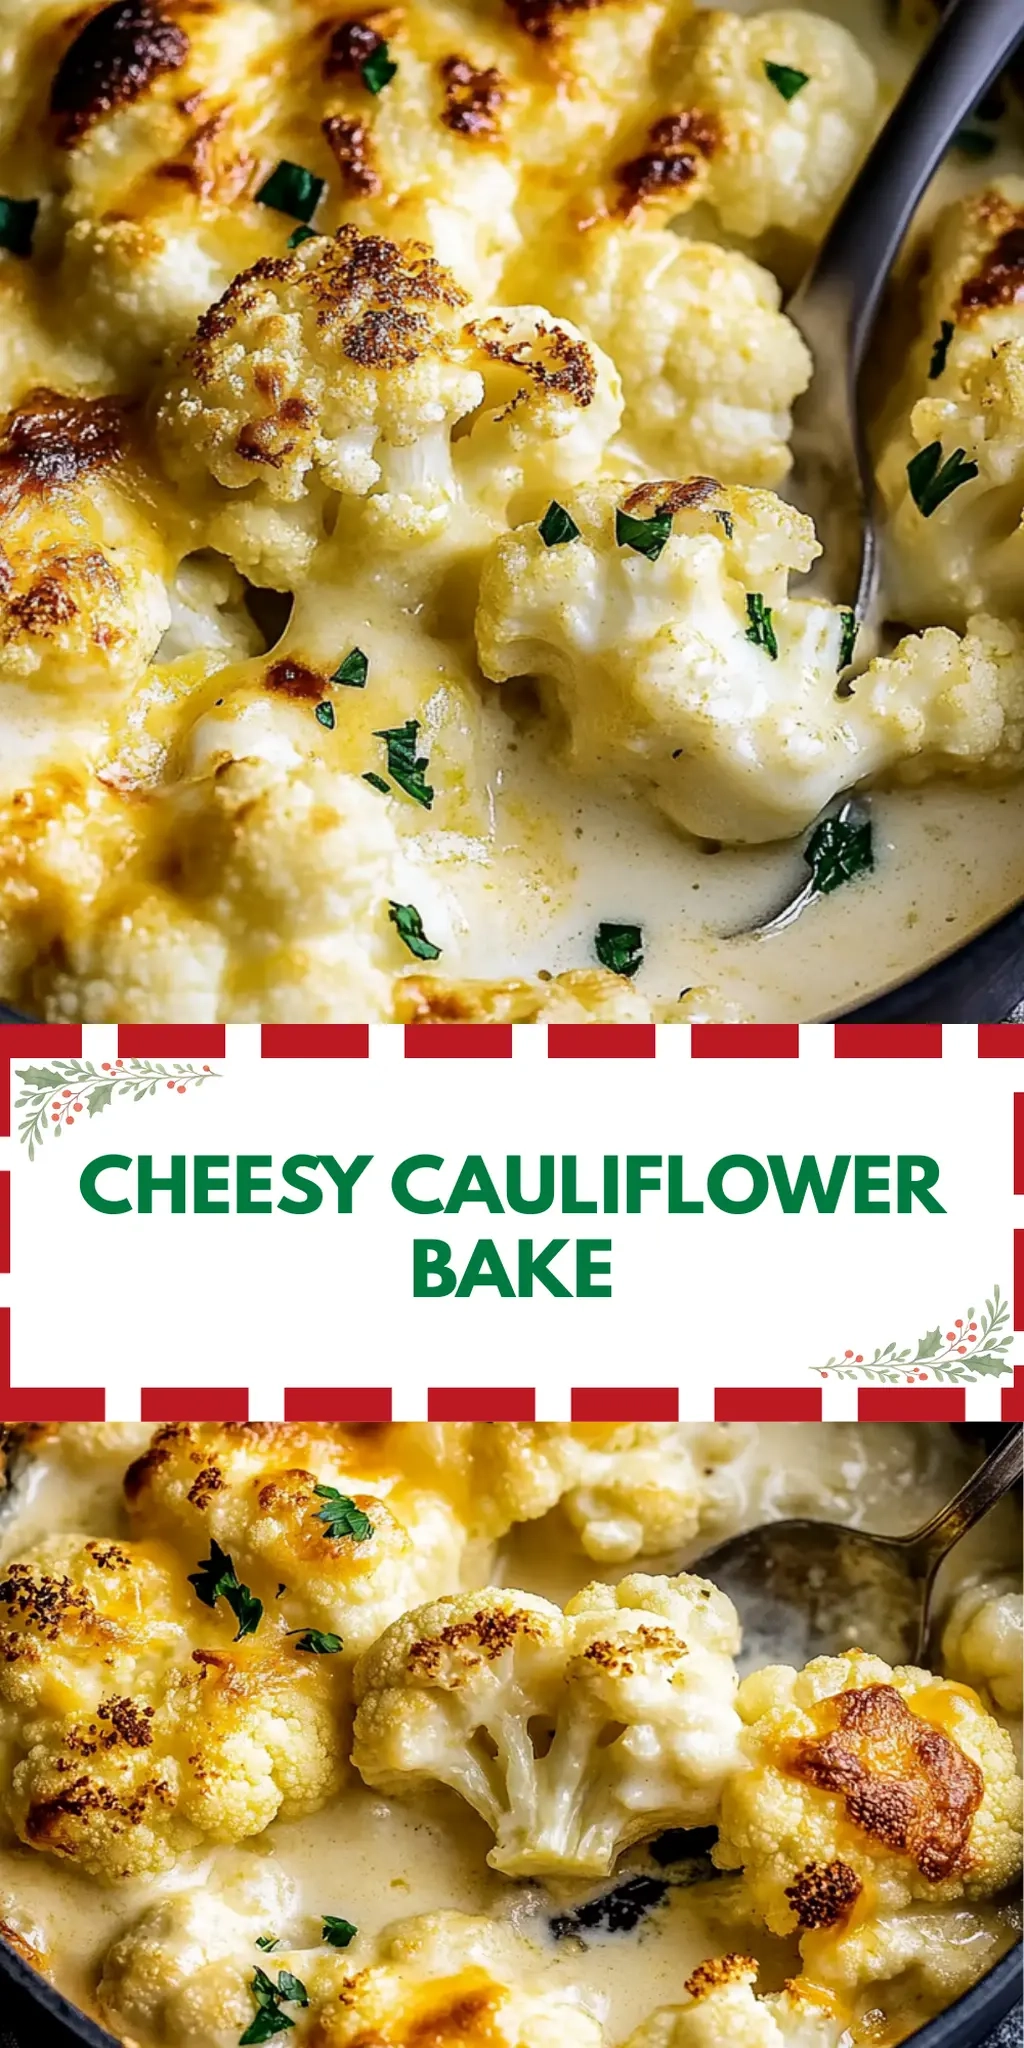
There’s nothing quite like the moment your kitchen fills with the creamy, cheesy aroma of baking cauliflower—that’s when I know I’m in for a delicious treat. This Cheesy Cauliflower Bake has been my go-to recipe for cozy dinners and easy weeknight meals, transforming what could be a mundane vegetable into a tantalizing dish that even my pickiest eaters can’t resist.
Imagine perfectly tender cauliflower enveloped in a rich combination of double cream and sharp Cheddar cheese, all baked to golden perfection. It’s a dish that feels indulgent yet manages to sneak in a healthy twist. Whether you’re hosting friends or just looking to spice up your family meals, this recipe delivers on every front. Plus, it comes together in just 35 minutes, allowing ample time to sit back and enjoy good company while the oven does its magic. Let’s dive into the delightful world of cheesy goodness!
Why You'll Love This Cheesy Cauliflower Bake
- This Cheesy Cauliflower Bake is incredibly easy to prepare, making it perfect for busy weeknights or last-minute gatherings.
- Packed with rich flavors from double cream and sharp Cheddar cheese, it transforms simple vegetables into a crowd-pleasing delight.
- The versatility of this dish allows you to serve it as a side or a main course, adapting it to fit any meal occasion.
- Visually appealing with its golden-brown top and fresh parsley garnish, it’s sure to impress anyone at your table.
Cheesy Cauliflower Bake Ingredients
• Get ready to create a deliciously creamy dish!
For the Bake
- 1 medium cauliflower – a great low-carb vegetable that bakes to tender perfection.
- 240 ml double (heavy) cream – provides the rich, velvety texture that makes this dish irresistible.
- 150 g strong Cheddar cheese, grated – adds bold flavor and that cheesy goodness you crave.
- ¼ tsp salt – enhances all the flavors in your Cheesy Cauliflower Bake.
- ½ tsp black pepper – introduces a warm spice, elevating the dish to new heights.
- 1 tbsp fresh parsley, finely chopped – adds a pop of color and a hint of freshness to finish.
This collection of ingredients is all you’ll need for a delightful Cheesy Cauliflower Bake that your family will love!
How to Make Cheesy Cauliflower Bake
-
Preheat the oven to 375°F (190°C). This ensures that your Cheesy Cauliflower Bake cooks evenly and reaches that golden, bubbly perfection everyone enjoys.
-
Cut the cauliflower into florets and steam them until tender, about 8-10 minutes. You want them soft enough to absorb the creamy mixture but not mushy—aim for a bright white color!
-
Mix together the double cream, grated strong Cheddar cheese, salt, and black pepper in a bowl. Whisk until combined and melty, creating that irresistible cheesy goodness.
-
Combine the steamed cauliflower florets with the creamy mixture. Stir gently to coat the florets, ensuring every bite is filled with cheesy delight.
-
Transfer the mixture to a baking dish. Spread it evenly and pop it in the oven for 20-25 minutes, or until it’s golden brown and bubbly. The aroma will be heavenly!
-
Garnish with fresh parsley just before serving. This adds a touch of color and a fresh flavor that beautifully complements the richness of the bake.
Optional: For added crunch, sprinkle some breadcrumbs on top before baking.
Exact quantities are listed in the recipe card below.
Make Ahead Options
These Cheesy Cauliflower Bake preparations are a game changer for busy weeknights! You can steam the cauliflower and mix it with the creamy cheese mixture up to 24 hours in advance. After preparing your cauliflower mixture, simply transfer it to the baking dish and cover it tightly with plastic wrap before refrigerating. This prevents any browning and keeps every bit tasty. When you’re ready to serve, just pop it in a preheated oven (375°F/190°C) for about 25-30 minutes until golden and bubbly. Your dish will be just as delicious, with minimal effort, allowing you more time to relax with family or guests!
What to Serve with Cheesy Cauliflower Bake?
There’s nothing quite like the joy of curating a full, satisfying meal that complements your delectable bake.
-
Garlic Bread: The crunchy, buttery texture of garlic bread perfectly contrasts the creamy bake, making each bite delightful. Enjoy it dipped into the cheesy goodness for a truly indulgent experience.
-
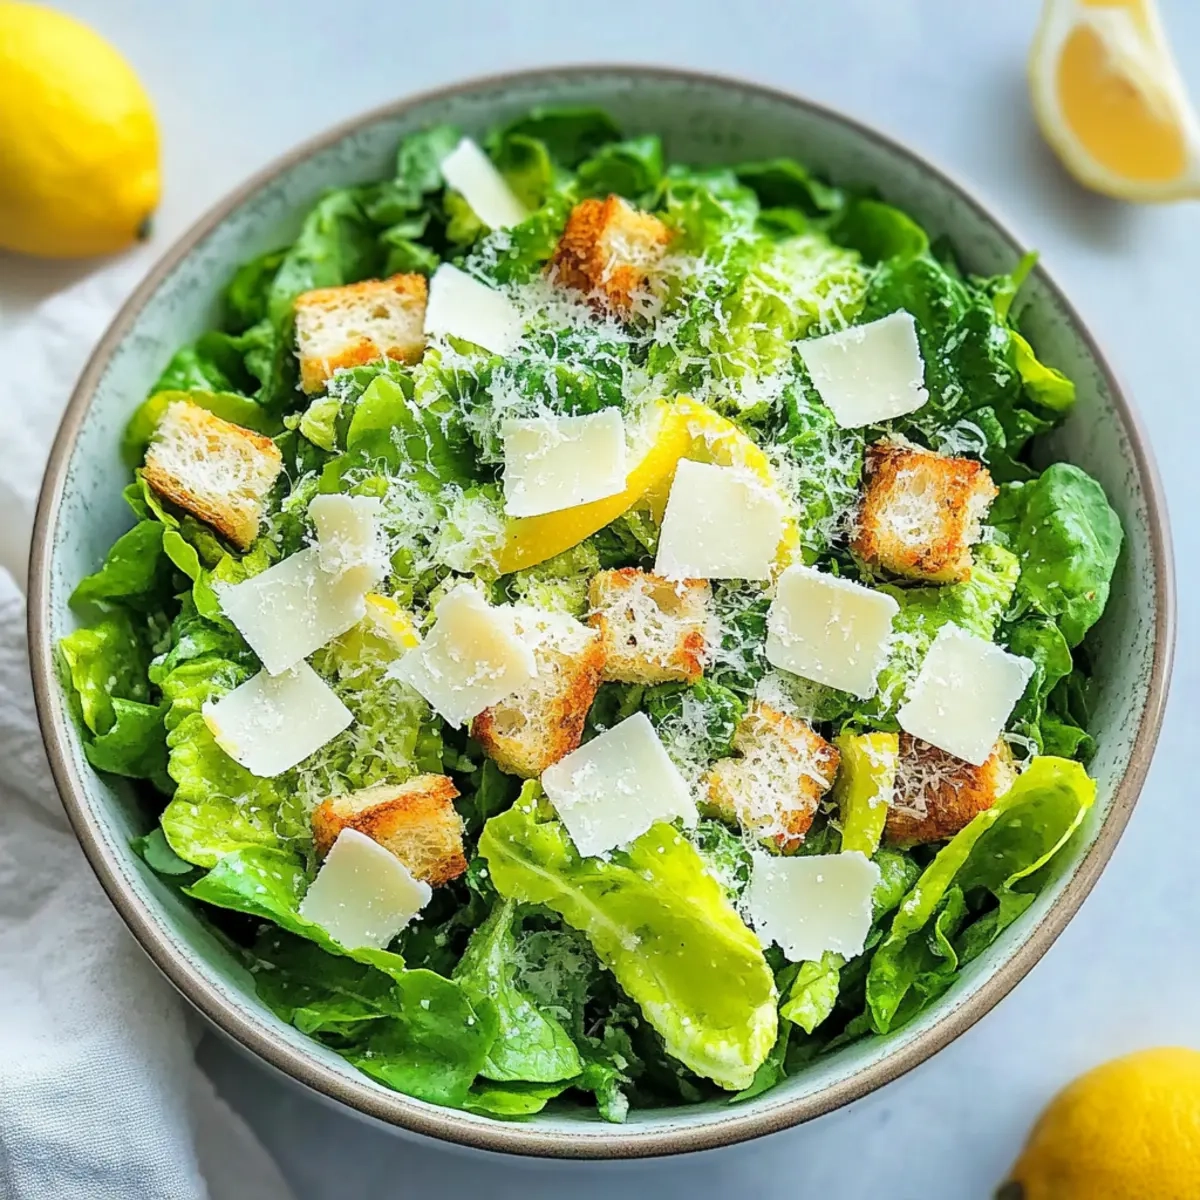
Simple Green Salad: A fresh salad dressed in lemon vinaigrette adds a crisp, refreshing contrast to the rich flavors of the baked cauliflower. This light dish balances the meal beautifully, keeping everything in harmony.
-
Roasted Chicken: Juicy roasted chicken offers a savory protein that pairs beautifully with the creamy cauliflower bake. The combination creates a comforting, hearty dinner that warms the soul.
-
Steamed Broccoli: Its vibrant green hue and mild flavor provide a nutritious counterpart that enhances the dish’s visual appeal. This pairing introduces a bit of crunch to every meal.
-
Mashed Potatoes: Creamy mashed potatoes add another layer of comforting texture to your dining experience. They can soak up the delicious cheesy sauce, making each mouthful even more satisfying.
-
Chardonnay: A chilled glass of Chardonnay can elevate your meal with its crisp acidity and fruity notes, which cleanse the palate harmoniously. This pairing is perfect for a leisurely evening with loved ones.
-
Apple Crisp: For dessert, a warm apple crisp brings a hint of sweetness to round off your meal. Its crunchy topping and warm spice make for an inviting finish after your savory feast.
How to Store and Freeze Cheesy Cauliflower Bake
Fridge: Store leftovers in an airtight container for up to 3 days. Make sure to cool it completely before sealing to maintain freshness.
Freezer: If you want to save the Cheesy Cauliflower Bake for later, freeze it in a tightly wrapped dish for up to 2 months. Label it with the date for easy reference.
Reheating: To reheat, thaw in the fridge overnight, then warm in the oven at 350°F (175°C) until heated through. You can also microwave individual portions if you’re short on time.
Room Temperature: It’s best to avoid leaving the bake out at room temperature for more than 2 hours to ensure food safety.
Cheesy Cauliflower Bake Variations
Customize your Cheesy Cauliflower Bake to suit your family’s taste buds or dietary needs with these delightful tweaks!
-
Dairy-Free: Substitute double cream with coconut cream and use vegan cheese for a rich, dairy-free experience that doesn’t compromise on flavor.
-
Spicy Twist: Add a pinch of cayenne pepper or crushed red pepper flakes to the cheese mixture for a comforting, warm heat that enlivens each bite.
-
Herb Infusion: Swap fresh parsley for chopped chives or thyme to create an aromatic experience, adding a lovely herbal sophistication to your bake.
-
Vegetable Boost: Mix in steamed broccoli or spinach along with cauliflower for added nutrition and a colorful veggie medley in each serving.
-
Texture Crunch: Top the bake with panko breadcrumbs mixed with grated Parmesan before baking, creating a delightful crunchy crust that’s simply irresistible.
-
Cheese Variety: Experiment with different cheeses such as Gruyère or Gouda for a unique flavor profile—each option adds its own character to the dish.
-
Protein Power: Stir in some cooked bacon or shredded chicken into the creamy mix for a heartier main dish that satisfies every appetite.
-
Nutty Flavor: Incorporate a handful of toasted pecans or almonds on top before serving for an unexpected crunch and nutty flavor that elevates the whole dish.
Feel free to get creative and find the perfect combination that your loved ones will adore!
Chef's Helpful Tips
- When making the Cheesy Cauliflower Bake, ensure to cut the cauliflower into uniform florets for even cooking.
- Avoid overcooking the florets while steaming; they should be tender but still firm to hold their shape.
- Mix the cream and cheese thoroughly until smooth to prevent lumps and achieve a creamy texture.
- Bake the dish until it’s golden and bubbly, which typically takes about 20-25 minutes at 375°F (190°C) for the best results.
Cheesy Cauliflower Bake Recipe FAQs
How do I select the best cauliflower for my Cheesy Cauliflower Bake?
Absolutely! Look for a cauliflower head that feels solid and heavy, with tightly packed florets and vibrant green leaves. Avoid any heads with dark spots or blemishes—those can signify age or spoilage. The fresher the cauliflower, the better your bake will taste!
How should I store leftovers of the Cheesy Cauliflower Bake?
To keep your leftovers fresh, transfer them to an airtight container and store them in the fridge for up to 3 days. Make sure the bake has cooled down to room temperature before sealing it. This helps retain its creaminess and prevents any sogginess.
Can I freeze Cheesy Cauliflower Bake for later use?
Very! You can indeed freeze your Cheesy Cauliflower Bake. Just let it cool completely, then wrap it tightly in plastic wrap or aluminum foil and store it in a freezer-safe container or bag. It can last up to 2 months in the freezer. When you’re ready to eat, thaw it in the fridge overnight and reheat it gently in the oven to retain its cheesy goodness.
What should I do if my Cheesy Cauliflower Bake seems too watery?
Great question! If you find your bake is too watery, it might be due to overcooking the cauliflower initially. To troubleshoot, you can try mixing in a tablespoon of cornstarch with the cream and cheese mixture next time, which helps thicken it up. Alternatively, bake it a little longer at a lower temperature to allow some moisture to evaporate.
Is this Cheesy Cauliflower Bake suitable for people with dairy allergies?
While this delicious bake features dairy, there are alternatives! You can use dairy-free cream and vegan cheese substitutes instead. Just be mindful to check the labels for any added allergens, especially if you’re preparing for guests with specific dietary restrictions. It’s important to adjust the recipe based on the alternative products, as they can vary in consistency and flavor.

Cheesy Cauliflower Bake
Ingredients
Equipment
Method
- Preheat the oven to 375°F (190°C).
- Cut the cauliflower into florets and steam them until tender, about 8-10 minutes.
- Mix together the double cream, grated strong Cheddar cheese, salt, and black pepper in a bowl.
- Combine the steamed cauliflower florets with the creamy mixture.
- Transfer the mixture to a baking dish and spread it evenly.
- Bake for 20-25 minutes, or until it’s golden brown and bubbly.
- Garnish with fresh parsley just before serving.