Forkono

  • BREAKFAST & BRUNCH
  • DESSERT RECIPES
  • DINNER RECIPES
  • LUNCH RECIPES
  • About uS
  • SNACKS & APPETIZERS
menu icon
go to homepage
  • BREAKFAST & BRUNCH
  • DESSERT RECIPES
  • DINNER RECIPES
  • LUNCH RECIPES
  • About uS
  • SNACKS & APPETIZERS
search icon
Homepage link
  • BREAKFAST & BRUNCH
  • DESSERT RECIPES
  • DINNER RECIPES
  • LUNCH RECIPES
  • About uS
  • SNACKS & APPETIZERS
×

Classic Waffles with Strawberries

December 24, 2025 by JudyWhite Leave a Comment

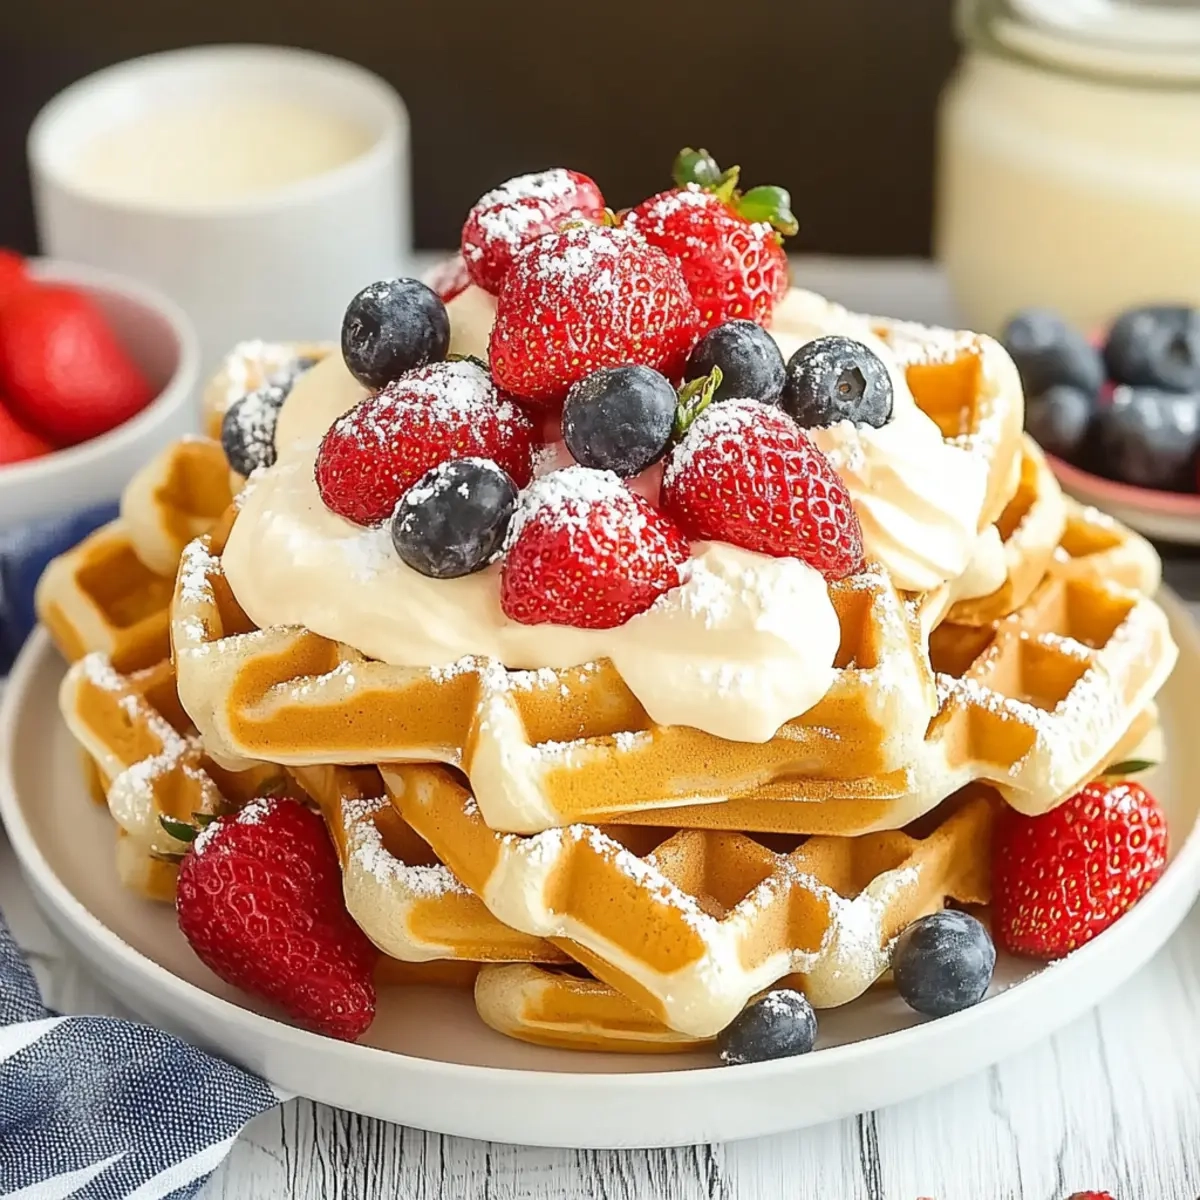
As I flipped the last golden waffle off the iron, a wave of nostalgia washed over me. There’s something so comforting about the scent of freshly baked waffles wafting through the kitchen, especially when paired with sweet, sun-kissed strawberries. On a lazy weekend morning, this classic breakfast staple transforms a simple family gathering into a memorable feast.

These Classic Waffles with Strawberries aren’t just easy to whip up; they offer a warm embrace with every bite. The joy of drizzling syrup over a fluffy waffle and layering it with whipped cream or tangy berries is unmatched. Plus, you’ll only need about 20 minutes from start to finish! Whether you’re looking to impress your loved ones or simply indulge yourself, this recipe will soon become your go-to. So grab those eggs and flour, and let’s create a breakfast that’s bound to make your heart—and taste buds—sing!

Why You'll Love This Classic Waffles with Strawberries

  • These Classic Waffles with Strawberries are incredibly easy to make, allowing you to serve a delicious breakfast in just 20 minutes.
  • The delightful combination of fluffy waffles and fresh strawberries creates a flavor explosion that will have everyone coming back for seconds.
  • Versatile enough to accommodate various toppings like whipped cream or maple syrup, you can customize each serving to suit individual preferences.
  • Not only do these waffles look beautifully golden and inviting, but they also serve as a fantastic crowd-pleaser that will impress family and friends alike.

Classic Waffles with Strawberries Ingredients

• Get ready to make delicious waffles!

For the Waffle Batter

  • 2 large eggs – provides richness and helps bind the ingredients for a fluffy texture.
  • 2 cups all-purpose flour – the base that creates the waffle’s structure; can substitute with whole wheat flour for added fiber.
  • 1.75 cups milk – adds moisture; try almond milk for a dairy-free version!
  • 0.5 cups vegetable oil – keeps the waffles moist and adds a light crispiness.
  • 1 tablespoon granulated sugar – enhances sweetness, balancing the flavors perfectly.
  • 4 teaspoons baking powder – this leavening agent creates that delightful fluffiness in each waffle.
  • 0.25 teaspoon salt – enhances all the flavors, making the sweet notes pop.

For Optional Toppings

  • Butter – a classic choice for richness that melts into the warm waffles.
  • Maple syrup – drizzled on top, this adds a sweet, syrupy layer that complements the strawberries.
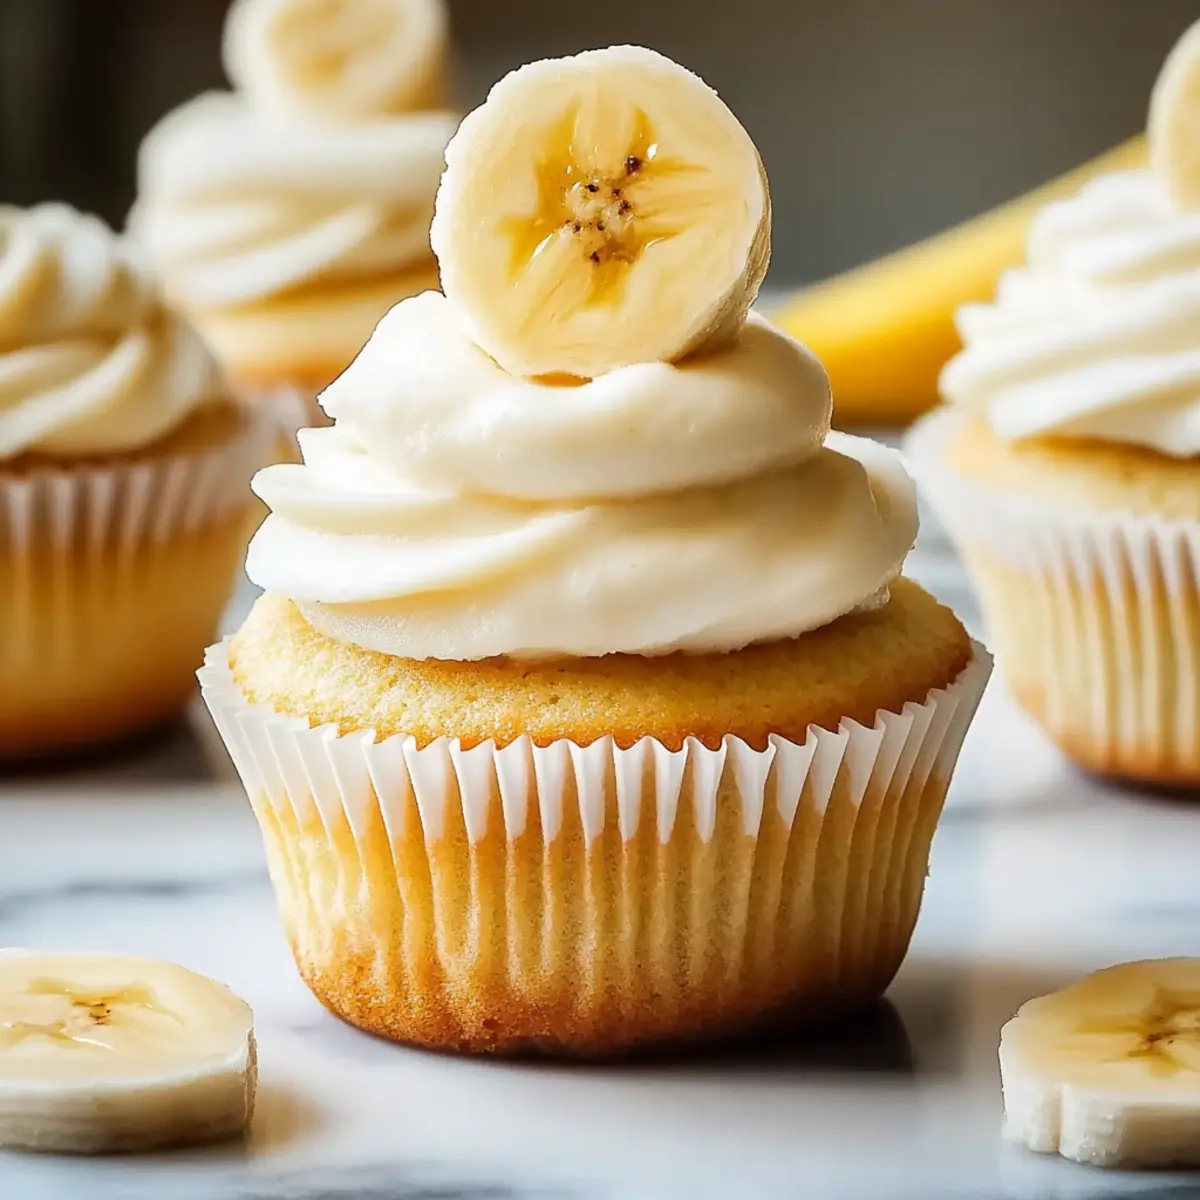
  • Fresh fruit – strawberries are a favorite, but feel free to mix in blueberries or bananas for variety.
  • Whipped cream – adds a luxurious touch that makes every bite feel like a special treat!

These ingredients come together beautifully to create Classic Waffles with Strawberries, a dish that infuses love and warmth into your kitchen!

How to Make Classic Waffles with Strawberries

  1. Heat the waffle iron to your desired setting. Preheating is essential; a properly heated iron ensures a crispy exterior and soft, airy interior for your Classic Waffles with Strawberries.

  2. Beat the eggs in a large bowl using a hand mixer until fluffy. This will create a light base for your batter. Then, mix in the remaining ingredients—flour, milk, oil, sugar, baking powder, and salt—just until everything is smooth. Avoid overmixing to keep the waffles airy!

  3. Pour a scant 2/3 cup of batter onto the center of the hot waffle iron. This amount helps create the perfect-sized waffle without overflow. Close the lid and allow it to cook.

  4. Bake for about 5 minutes, checking when the steaming has ceased. This is a good indicator that your waffle is ready. Carefully remove the waffle using a fork or silicone tongs.

  5. Repeat steps 3-4 with the remaining batter, ensuring you allow the iron to reheat briefly if needed for each new waffle.

  6. Serve the waffles warm, topped with butter, maple syrup, fresh berries, whipped cream, or your favorite toppings. Get creative with the presentation!

Optional: Top with a sprinkle of powdered sugar for an extra sweet touch.

Exact quantities are listed in the recipe card below.

What to Serve with Classic Waffles with Strawberries?

There’s nothing quite like the symphony of flavors and textures that accompany a warm, fluffy waffle served with fresh strawberries.

  • Crispy Bacon: The salty crunch of bacon brings a savory contrast to the sweetness of the waffles, creating a delightful balance on your plate. Just imagine the perfect bite, where sweet meets savory!

  • Scrambled Eggs: Soft and creamy scrambled eggs are an ideal protein-packed side that adds richness and a comforting touch to your breakfast spread.

  • Fresh Berry Salad: A medley of fresh berries not only adds vibrant color but also a refreshing tang that enhances the sweetness of the strawberries on the waffles. It’s a light, tasty addition that brings excitement to your meal.

  • Greek Yogurt: A dollop of creamy Greek yogurt can add a lovely tartness that complements the sweetness of the waffles. Plus, it adds a nutritious twist!

  • Maple Syrup Cocktail: Pair your meal with a sparkling maple syrup cocktail for a fun and festive drink. The sweetness pairs perfectly with the waffles and makes every bite feel like a special occasion.

  • Cinnamon Sugar Toast: Sweet and crunchy, this toast will give your breakfast an extra kick. A sprinkle of cinnamon enhances the flavors of the syrup and strawberries, creating pure bliss.

  • Whipped Cream: For those who want a decadent touch, don’t forget the whipped cream! It adds a light, airy sweetness that pairs beautifully with the waffles and strawberries.

  • Coffee or Tea: A warm cup of your favorite coffee or tea can provide that perfect caffeinated lift to your breakfast experience. Choose flavors like vanilla or cinnamon to enhance your meal’s aromatic palette.

Your Classic Waffles with Strawberries will shine even brighter with these delightful pairings!

How to Store and Freeze Classic Waffles with Strawberries

Room Temperature: Keep leftover waffles in a covered container for up to 1 day. Enjoy them fresh, but for longer storage, move to the fridge or freezer.

Fridge: Store classic waffles in an airtight container for up to 3 days. Reheat in a toaster or microwave for a quick, tasty breakfast option.

Freezer: Freeze classic waffles individually wrapped in plastic wrap and placed in a freezer bag for up to 2 months. Reheat straight from the freezer in the toaster or oven for a crispy texture.

Reheating: To reheat, pop waffles in a toaster, or warm them in an oven at 350°F for about 5-7 minutes until heated through. Enjoy your delicious, fluffy waffles!

Make Ahead Options

These Classic Waffles with Strawberries are perfect for busy mornings! You can prepare the batter up to 24 hours in advance by mixing all the ingredients together and storing it in an airtight container in the refrigerator. For the best results, give the batter a gentle stir before pouring it onto the waffle iron to ensure consistency. Alternatively, you can cook the waffles ahead of time and store them in the refrigerator for up to 3 days or freeze them for longer storage. To reheat, simply pop the waffles in a toaster or oven until warmed through. By prepping ahead, you’ll save precious time and still enjoy fluffy, delicious waffles that taste just as delightful as when they were freshly made!

Classic Waffles with Strawberries Variations

Feel free to explore delightful twists on your classic breakfast! You’ll love how each variation brings its own unique charm to the table.

  • Whole Wheat: Swap all-purpose flour for whole wheat flour to add nutty flavor and extra fiber.

  • Almond Milk: Use almond milk instead of regular milk for a dairy-free option that adds a subtle sweetness.

  • Cinnamon Spice: Stir in 1 teaspoon of cinnamon or a dash of nutmeg for a warm, cozy flavor that pairs perfectly with strawberries.

  • Greek Yogurt: Replace some milk with Greek yogurt for added creaminess and protein—your waffles will feel indulgently rich!

  • Cocoa Twist: Add 1/4 cup cocoa powder to the batter for a chocolatey treat—serve with whipped cream and strawberries for a decadent dessert.

  • Berry Medley: Mix in other berries like blueberries or raspberries to the batter for a colorful, fruity explosion. Enjoy every juicy bite!

  • Spicy Kick: Add a pinch of cayenne pepper to the batter for a surprising heat that perfectly balances the sweetness of syrup and strawberries.

  • Zesty Citrus: Incorporate the zest of one lemon or orange into the batter for a bright, refreshing flavor that wakes up your palate!

Chef's Helpful Tips

  • For perfectly crispy Classic Waffles with Strawberries, always preheat your waffle iron to the appropriate setting before pouring in the batter.
  • To achieve a light and fluffy texture, beat the eggs until they are very fluffy and mix the batter just until combined, avoiding overmixing.
  • If you find your waffles sticking, try lightly greasing the iron with cooking spray or melted butter before each batch.
  • Keep an eye on the cooking time; most waffle irons signal when they’re done, but checking for a cessation of steam is a reliable indicator, usually around 5 minutes.

Classic Waffles with Strawberries Recipe FAQs

How do I choose the right ripeness of strawberries for my waffles?
Absolutely! When selecting strawberries, look for fruits that are bright red and firm, avoiding any with dark spots or softness. If you can, choose strawberries that are slightly fragrant, as this indicates ripeness and sweetness. The best season for strawberries typically runs from late spring to early summer, so keep an eye out for these gems during that time!

How should I store leftover Classic Waffles with Strawberries?
I often recommend storing leftover waffles in an airtight container in the fridge, where they’ll stay good for up to 3 days. You can easily reheat them in a toaster or microwave. Just ensure they are cool before sealing them up, as this helps prevent sogginess!

Can I freeze my Classic Waffles with Strawberries?
Absolutely! To freeze, wrap each waffle individually in plastic wrap, then place them in a freezer bag. This method helps maintain freshness and prevents freezer burn. They can last for up to 2 months in the freezer. When you’re ready to enjoy them, simply reheat straight from the freezer in your toaster or warmed in an oven at 350°F for about 5-7 minutes until crispy and warm.

What can I do if my waffles stick to the waffle iron?
Very occasionally, waffles might stick! If you run into this, first make sure your waffle iron is properly preheated. I also recommend lightly greasing the iron with cooking spray or melted butter before pouring in the batter. If sticking continues, check the consistency of your batter—you may want to tweak the oil content slightly for better results.

Are there any dietary considerations I should keep in mind when making this recipe?
Of course! If you’re cooking for someone with dietary restrictions, it’s great to know that this recipe can easily be adapted. For a dairy-free version, substitute the milk with almond or oat milk, and you can use a non-dairy oil like coconut oil. Additionally, if you’re accommodating gluten sensitivities, try using a gluten-free all-purpose flour mix instead of regular flour for equally delicious results.

Can I add other fruits or toppings besides strawberries?
The more the merrier! While strawberries are a delightful classic, feel free to mix things up. Blueberries, raspberries, or even sliced bananas work wonderfully as toppings. You can also get creative with toppings like chocolate chips, nuts, or flavored syrups. The possibilities are endless, making this waffle recipe versatile for everyone’s taste!

Classic Waffles with Strawberries

Classic Waffles with Strawberries

Enjoy Classic Waffles with Strawberries, a delightful breakfast treat that blends nostalgia and flavor, perfect for family gatherings.
Print Recipe Pin Recipe
Prep Time 10 minutes mins
Cook Time 10 minutes mins
Total Time 20 minutes mins
Servings: 4 waffles
Course: BREAKFAST & BRUNCH
Cuisine: American
Calories: 250
Ingredients Equipment Method Nutrition Notes

Ingredients
  

Waffle Batter
  • 2 large eggs provides richness and helps bind the ingredients for a fluffy texture.
  • 2 cups all-purpose flour the base that creates the waffle's structure; can substitute with whole wheat flour for added fiber.
  • 1.75 cups milk adds moisture; try almond milk for a dairy-free version!
  • 0.5 cups vegetable oil keeps the waffles moist and adds a light crispiness.
  • 1 tablespoon granulated sugar enhances sweetness, balancing the flavors perfectly.
  • 4 teaspoons baking powder this leavening agent creates that delightful fluffiness in each waffle.
  • 0.25 teaspoon salt enhances all the flavors, making the sweet notes pop.
Optional Toppings
  • Butter a classic choice for richness that melts into the warm waffles.
  • Maple syrup drizzled on top, this adds a sweet, syrupy layer that complements the strawberries.
  • Fresh fruit strawberries are a favorite, but feel free to mix in blueberries or bananas for variety.
  • Whipped cream adds a luxurious touch that makes every bite feel like a special treat!

Equipment

  • waffle iron

Method
 

Preparation
  1. Heat the waffle iron to your desired setting. Preheating is essential; a properly heated iron ensures a crispy exterior and soft, airy interior for your Classic Waffles with Strawberries.
  2. Beat the eggs in a large bowl using a hand mixer until fluffy. Mix in the remaining ingredients—flour, milk, oil, sugar, baking powder, and salt—just until everything is smooth, avoiding overmixing to keep the waffles airy!
  3. Pour a scant 2/3 cup of batter onto the center of the hot waffle iron. Close the lid and allow it to cook.
  4. Bake for about 5 minutes, checking when the steaming has ceased. This is a good indicator that your waffle is ready. Carefully remove the waffle using a fork or silicone tongs.
  5. Repeat steps 3-4 with the remaining batter, allowing the iron to reheat briefly if needed for each new waffle.
  6. Serve the waffles warm, topped with butter, maple syrup, fresh berries, whipped cream, or your favorite toppings. Get creative with the presentation!

Nutrition

Serving: 1waffleCalories: 250kcalCarbohydrates: 30gProtein: 6gFat: 12gSaturated Fat: 2gPolyunsaturated Fat: 0.5gMonounsaturated Fat: 9gCholesterol: 40mgSodium: 350mgPotassium: 100mgFiber: 1gSugar: 2gVitamin A: 200IUCalcium: 100mgIron: 1.5mg

Notes

For perfectly crispy Classic Waffles with Strawberries, always preheat your waffle iron to the appropriate setting before pouring in the batter. To achieve a light and fluffy texture, beat the eggs until they are very fluffy and mix the batter just until combined, avoiding overmixing. If you find your waffles sticking, try lightly greasing the iron with cooking spray or melted butter before each batch. Keep an eye on the cooking time; most waffle irons signal when they're done, but checking for a cessation of steam is a reliable indicator, usually around 5 minutes.

Tried this recipe?

Let us know how it was!

Filed Under: BREAKFAST & BRUNCH

Banana Pudding Cupcakes

December 24, 2025 by JudyWhite Leave a Comment

There’s nothing quite like the sweet, comforting flavor of banana pudding, is there? Growing up, I used to watch my grandmother whip up her signature dessert, the whole kitchen filled with the delightful scent of vanilla and ripe bananas. In a delightful twist to a classic, I’ve created these Banana Pudding Cupcakes that not only capture that nostalgic essence but also add a pinch of whimsy to your dessert table.

If you’ve been searching for a way to impress your guests without spending hours in the kitchen, this recipe is your answer. Each cupcake is a moist, tender bite, layered with rich pudding and topped with a swirl of decadent whipped cream, making them perfect for family gatherings, potlucks, or simply satisfying that afternoon sweet tooth. Trust me, these cupcakes are more than just a treat; they’re a sweet escape into comfort, simplicity, and the joy of homemade goodness. Let’s dive into the delightful world of baking with these Banana Pudding Cupcakes!

Why You'll Love This Banana Pudding Cupcakes

  • These Banana Pudding Cupcakes are incredibly easy to make, allowing you to whip up a delightful dessert without any hassle.
  • The flavor is a delightful blend of banana and vanilla, providing a taste that is both comforting and nostalgic.
  • Their versatility means they are perfect for any occasion, whether it’s a casual family dinner or a festive celebration.
  • The visual appeal of these cupcakes is off the charts, with their luscious frosting and charming banana slices, making them a showstopper on any dessert table.

Banana Pudding Cupcakes Ingredients

• Get ready to bake some deliciousness!

For the Pudding
• Egg yolks – they provide richness and a golden hue to the pudding.
• Granulated sugar – sweetens the pudding, balancing out the flavors perfectly.
• Cornstarch – thickens the pudding for that creamy, irresistible texture.
• Fine sea salt – enhances the overall flavor of the pudding.
• Whole milk – delivers a rich, creamy base that makes the pudding lush.
• Salted butter – adds a delicious buttery flavor that complements the sweetness.
• Vanilla bean paste – infuses a delightful vanilla flavor that’s simply aromatic.

For the Cupcake Batter
• Cake flour – keeps the cupcakes light and tender for a perfect bite.
• Baking powder – helps the cupcakes rise, giving them a fluffy texture.
• Granulated sugar – added sweetness to the batter for a decadent treat.
• Salted butter – ensures a rich flavor that elevates your cupcakes.
• Canola oil – keeps the cupcakes moist and tender.
• Large egg – binds the ingredients together and adds structure.
• Vanilla extract – complements the banana flavor beautifully.
• Sour cream – adds moisture and a touch of tanginess.
• Milk – keeps the batter smooth and easy to work with.

For the Toppings
• Vanilla wafers – classic crunch that ties the pudding theme together.
• Heavy whipping cream – perfect for a rich and fluffy frosting experience.
• Powdered sugar – sweetens the whipped cream to perfection.
• Vanilla bean paste – adds a final touch of luxurious vanilla flavor.
• Fine sea salt – balances the sweetness of the whipped topping.
• Large banana (sliced) – fresh banana slices for that nostalgic touch.
• Lemon juice – prevents the banana from browning and adds brightness.
• Vanilla wafers (crushed) – a delightful garnish that brings a fun crunch.

Enjoy every blissful bite of these Banana Pudding Cupcakes, as they bring together the beloved flavors of banana pudding in a charming cupcake form!

How to Make Banana Pudding Cupcakes

  1. Prepare the Pudding: In a saucepan, whisk together egg yolks, sugar, cornstarch, and a pinch of salt. Gradually whisk in whole milk. Cook over medium heat, stirring continuously until thickened, about 5-7 minutes.

  2. Mix in Butter: Remove the pudding from heat and stir in butter and vanilla bean paste until smooth. Allow it to cool for about 30 minutes, then cover with plastic wrap directly on the surface to prevent a skin from forming.

  3. Make the Cupcake Batter: In a mixing bowl, combine cake flour, baking powder, and salt. In another bowl, cream butter and sugar, then add canola oil, egg, vanilla extract, sour cream, and milk until well combined.

  4. Combine Mixtures: Gradually mix the dry ingredients into the wet batter until just combined. Be careful not to overmix; the batter should be light and fluffy.

  5. Bake the Cupcakes: Preheat your oven to 350°F (175°C). Line a cupcake pan with liners, and fill each about two-thirds full with the batter. Bake for 18 minutes, or until a toothpick comes out clean.

  6. Cool the Cupcakes: Once baked, remove from the oven and allow to cool in the pan for 5 minutes before transferring to a wire rack to cool completely.

  7. Whip the Cream: In a chilled bowl, beat the heavy whipping cream with powdered sugar and vanilla bean paste until stiff peaks form, creating a fluffy frosting.

  8. Assemble the Cupcakes: Cut a small hole in the center of each cupcake and fill it with the cooled pudding. It’s okay to be generous!

  9. Frost and Garnish: Pipe or spread the whipped cream on top of each cupcake. Add sliced banana and sprinkle with crushed vanilla wafers for that perfect crunch!

  10. Serve and Enjoy: Drizzle any excess pudding over the top if desired. Serve these delightful banana pudding cupcakes to family and friends and enjoy their delight!

Optional: Top with extra crushed vanilla wafers for a tasty crunch!

Exact quantities are listed in the recipe card below.

Banana Pudding Cupcakes Variations

Feel free to take these delightful Banana Pudding Cupcakes to new heights with your own creativity!

  • Gluten-Free: Substitute cake flour with a gluten-free blend to enjoy these cupcakes without gluten.

  • Dairy-Free: Use almond milk and dairy-free butter to make these cupcakes a comfortable choice for lactose-intolerant loved ones.

  • Caramel Drizzle: Drizzle warm caramel sauce over the whipped cream for an extra layer of sweetness and a rich, indulgent touch.

  • Nutty Twist: Fold in chopped pecans or walnuts into the batter for a delightful crunch that complements the banana flavor beautifully.

  • Banana Foster Style: Add a splash of rum to the pudding for a grown-up twist that brings a touch of festivity to your dessert.

  • Chocolate Lovers: Incorporate cocoa powder into the cupcake batter for a chocolate-banana fusion that will satisfy any sweet tooth.

  • Coconut Flake Topping: Sprinkle toasted coconut flakes on top of the whipped cream for a tropical vibe that brightens up each bite.

  • Spicy Kick: Add a pinch of cinnamon or nutmeg to the cupcake batter for an unexpected, cozy flavor that warms the heart.

Each variation offers a unique spin on the classic recipe, inviting you to enjoy the comfort of homemade cupcakes in exciting ways!

Storage Tips for Banana Pudding Cupcakes

  • Room Temperature: Store Banana Pudding Cupcakes at room temperature for up to 1 day in a covered container to maintain their moisture and flavor.

  • Fridge: If you have leftovers, refrigerate the cupcakes for up to 3 days. Make sure to place them in an airtight container to prevent them from drying out.

  • Freezer: For longer storage, freeze the cupcakes (without frosting) for up to 3 months. Wrap them tightly in plastic wrap and place them in a freezer-safe container.

  • Reheating: To enjoy your frozen cupcakes, thaw them in the refrigerator overnight. You can re-warm them briefly in the microwave, but be careful not to overheat; frost after reheating for the best experience!

What to Serve with Banana Pudding Cupcakes?

These cupcakes are a delicious treat that can elevate any meal or gathering into a joyful celebration.

  • Classic Vanilla Ice Cream: The creamy richness of vanilla ice cream pairs beautifully with the banana flavors, adding a cool, refreshing contrast. Imagine a warm cupcake topped with a scoop of melting ice cream for a dreamy dessert experience.

  • Strawberry Shortcake: With its light and fruity notes, strawberry shortcake complements the decadence of the cupcakes while keeping the dessert table vibrant and colorful. The fresh strawberries provide a lovely tartness that balances the sweetness of banana.

  • Decadent Chocolate Milkshake: A thick, indulgent chocolate milkshake offers a delightful juxtaposition of flavors, making each bite of the cupcake even sweeter. This pairing creates a nostalgic diner dessert experience that’s hard to resist!

  • Lemonade Spritzers: Light and bubbly, a refreshing lemonade spritzer maintains a bright flavor profile that cleanses the palate. Its citrus notes contrast the richness of the cupcakes, making it a perfect beverage choice for sunny days.

  • Caramel Drizzle: A warm caramel sauce drizzled over your cupcakes adds an extra layer of sweetness that all dessert lovers will adore. This small addition can transform your cupcakes into a gourmet treat that leaves everyone swooning.

  • Fruit Salad: A colorful medley of seasonal fruits adds a fresh, vibrant touch to your dessert spread. The natural sweetness of fruits like strawberries and kiwis complements the cupcakes while providing a lighter option to balance the indulgence.

  • Whipped Cream: A dollop of flavored whipped cream, like lemon or cinnamon, can elevate your cupcakes even further. It adds a light, airy texture alongside the rich custard and keeps the taste light and inviting.

  • Coffee or Tea: A warm cuppa coffee or fragrant tea brings out the flavors of the bananas and vanilla while providing that comforting familiarity. It’s the perfect ending to a cozy family meal or a chat-filled catch-up with friends.

Savory or sweet, these pairings will not only enhance your Banana Pudding Cupcakes experience but also create lasting memories around your dining table.

Make Ahead Options

These Banana Pudding Cupcakes are a fantastic choice for meal prep, allowing you to enjoy their delightful flavors with minimal effort during busy days! You can make the pudding up to 24 hours in advance and store it in the refrigerator; just be sure to cover the surface with plastic wrap to prevent a skin from forming. The cupcake batter can also be mixed in advance and stored in the fridge for up to 3 days. When you’re ready to bake, simply scoop it into liners and bake as directed. For the whipped cream, prepare it fresh right before serving for that fluffy texture, ensuring these cupcakes remain just as delicious as when first made. Enjoy the time-saving benefits and the comfort of homemade treats!

Chef's Helpful Tips

  • When making Banana Pudding Cupcakes, ensure your ingredients are at room temperature for better incorporation and a smoother batter.
  • A common mistake is overmixing the cupcake batter; remember to mix until just combined for a light texture.
  • For even baking, use an oven thermometer to confirm that your oven is at the correct temperature of 350°F (175°C) before placing the cupcakes inside.
  • To prevent the bananas from browning, toss them in lemon juice just before garnishing your cupcakes for that fresh look and flavor.

Banana Pudding Cupcakes Recipe FAQs

How can I choose ripe bananas for the cupcakes?
Absolutely! For the best flavor in your Banana Pudding Cupcakes, select bananas that are speckled with brown spots. These bananas are sweeter and have a softer texture, perfect for baking. Avoid using bananas with dark spots all over, as they might be overripe and could taste off in your sweet treats.

How should I store leftovers of the Banana Pudding Cupcakes?
Very! Store any leftover Banana Pudding Cupcakes in an airtight container at room temperature for up to 1 day, or refrigerate them for up to 3 days. When refrigerated, make sure they’re well covered to keep their moisture intact. They’re best enjoyed fresh but can last a bit longer with proper care.

Can I freeze Banana Pudding Cupcakes?
Certainly! To freeze these delicious cupcakes, remove the frosting and wrap the cupcakes tightly in plastic wrap. Place them in a freezer-safe container, and they can be stored for up to 3 months. When you’re ready to enjoy them, thaw them in the refrigerator overnight. After thawing, you can frost them with fresh whipped cream to restore that delightful taste.

What should I do if my cupcakes turn out dry?
If you find your cupcakes are a bit dry, it could be due to overbaking or not measuring your ingredients accurately. Always check for doneness with a toothpick at the 18-minute mark. For a light texture, ensure your butter and eggs are at room temperature before mixing, as this will help to incorporate air and moisture into the batter. If you’re still worried, adding a drizzle of simple syrup made from equal parts sugar and water can help revive them!

Are there any dietary considerations I should keep in mind?
Definitely! If you’re making Banana Pudding Cupcakes for guests or family with dietary restrictions, consider using gluten-free flour as a substitute for the cake flour. You can also replace sour cream with a dairy-free alternative to cater to lactose intolerance. Just be sure to double-check all your ingredients for any allergens if you have someone sensitive to certain foods!

Banana Pudding Cupcakes

Banana Pudding Cupcakes

Delight in these Banana Pudding Cupcakes that combine the classic flavors of banana pudding into a charming cupcake form.
Print Recipe Pin Recipe
Prep Time 30 minutes mins
Cook Time 18 minutes mins
Cooling Time 30 minutes mins
Total Time 1 hour hr 18 minutes mins
Servings: 12 cupcakes
Course: DESSERT RECIPES
Cuisine: American
Calories: 250
Ingredients Equipment Method Nutrition Notes

Ingredients
  

For the Pudding
  • 4 large Egg yolks
  • 3/4 cup Granulated sugar
  • 1/3 cup Cornstarch
  • 1/4 teaspoon Fine sea salt
  • 2 cups Whole milk
  • 2 tablespoons Salted butter
  • 1 teaspoon Vanilla bean paste
For the Cupcake Batter
  • 1 1/2 cups Cake flour
  • 1 1/2 teaspoons Baking powder
  • 1 cup Granulated sugar
  • 1/2 cup Salted butter softened
  • 1/4 cup Canola oil
  • 1 large Egg
  • 1 teaspoon Vanilla extract
  • 1/2 cup Sour cream
  • 1/2 cup Milk
For the Toppings
  • 1 cup Vanilla wafers
  • 1 cup Heavy whipping cream
  • 2 tablespoons Powdered sugar
  • 1 teaspoon Vanilla bean paste
  • 1/4 teaspoon Fine sea salt
  • 1 large Banana (sliced)
  • 1 tablespoon Lemon juice
  • 1/2 cup Vanilla wafers (crushed)

Equipment

  • Mixing bowl
  • Saucepan
  • Whisk
  • Cupcake pan
  • Spatula
  • mixer

Method
 

Making Banana Pudding Cupcakes
  1. Prepare the Pudding: In a saucepan, whisk together egg yolks, sugar, cornstarch, and a pinch of salt. Gradually whisk in whole milk. Cook over medium heat, stirring continuously until thickened, about 5-7 minutes.
  2. Mix in Butter: Remove the pudding from heat and stir in butter and vanilla bean paste until smooth. Allow it to cool for about 30 minutes, then cover with plastic wrap directly on the surface to prevent a skin from forming.
  3. Make the Cupcake Batter: In a mixing bowl, combine cake flour, baking powder, and salt. In another bowl, cream butter and sugar, then add canola oil, egg, vanilla extract, sour cream, and milk until well combined.
  4. Combine Mixtures: Gradually mix the dry ingredients into the wet batter until just combined. Be careful not to overmix; the batter should be light and fluffy.
  5. Bake the Cupcakes: Preheat your oven to 350°F (175°C). Line a cupcake pan with liners, and fill each about two-thirds full with the batter. Bake for 18 minutes, or until a toothpick comes out clean.
  6. Cool the Cupcakes: Once baked, remove from the oven and allow to cool in the pan for 5 minutes before transferring to a wire rack to cool completely.
  7. Whip the Cream: In a chilled bowl, beat the heavy whipping cream with powdered sugar and vanilla bean paste until stiff peaks form, creating a fluffy frosting.
  8. Assemble the Cupcakes: Cut a small hole in the center of each cupcake and fill it with the cooled pudding. It’s okay to be generous!
  9. Frost and Garnish: Pipe or spread the whipped cream on top of each cupcake. Add sliced banana and sprinkle with crushed vanilla wafers for that perfect crunch!
  10. Serve and Enjoy: Drizzle any excess pudding over the top if desired. Serve these delightful banana pudding cupcakes to family and friends and enjoy their delight!

Nutrition

Serving: 1cupcakeCalories: 250kcalCarbohydrates: 35gProtein: 2gFat: 12gSaturated Fat: 7gPolyunsaturated Fat: 1gMonounsaturated Fat: 4gCholesterol: 40mgSodium: 200mgPotassium: 90mgFiber: 1gSugar: 18gVitamin A: 3IUVitamin C: 5mgCalcium: 2mgIron: 3mg

Notes

Optional: Top with extra crushed vanilla wafers for a tasty crunch!

Tried this recipe?

Let us know how it was!

Filed Under: DESSERT RECIPES

Strawberry Cheesecake Cookies

December 24, 2025 by JudyWhite Leave a Comment

When summer’s vibrant hues start to emerge, nothing satisfies quite like the sweet allure of strawberries. I was searching for a creative twist on classic desserts when a delightful idea struck me: Strawberry Cheesecake Cookies. These little treats encapsulate the essence of a creamy cheesecake in a cookie form, making them a perfect indulgence for any occasion.

Imagine biting into a soft, buttery cookie, where the flavors of vanilla and strawberries mingle with the rich creaminess of cream cheese – it’s a symphony of taste that simply dances on your palate. Whether you’re planning a dessert for a sunny picnic or a sweet finish for a cozy family dinner, these cookies bring together nostalgia and freshness in every bite.

Join me as we whip up these extraordinary Strawberry Cheesecake Cookies that are sure to become a new favorite in your home!

Why You'll Love This Strawberry Cheesecake Cookies

  • These Strawberry Cheesecake Cookies are incredibly easy to make, ensuring that even novice bakers can whip them up with confidence.
  • The delightful combination of creamy cheesecake flavor and the sweetness of strawberries elevates each bite to pure bliss.
  • Versatile enough for any occasion, these cookies can be enjoyed at gatherings, parties, or even as a sweet treat for yourself.
  • Their eye-catching pink color and the sprinkling of freeze-dried strawberries make them visually appealing, perfect for impressing your friends and family.

Strawberry Cheesecake Cookies Ingredients

Dive into the delightful components that make these cookies so special!

For the Creamy Base

  • 4 ounces full fat cream cheese – adds that essential creamy cheesecake flavor.
  • 0.25 cup powdered sugar – sweetens the mix and keeps the dough soft.
  • 0.5 teaspoon vanilla extract – enhances the overall flavor profile beautifully.

For the Dough

  • 3 cups all purpose flour – provides the structure for these delightful cookies.
  • 1 teaspoon baking soda – helps the cookies rise and achieve their soft texture.
  • 1 teaspoon salt – balances sweetness and enhances the flavors.
  • 1 cup unsalted butter (softened) – contributes to the rich, buttery taste and chewy texture.
  • 1 cup packed light brown sugar – adds a deep, caramel-like sweetness.
  • 0.25 cup granulated sugar – gives an extra touch of sweetness.
  • 1 large egg – binds the ingredients together for perfect texture.
  • 1 large egg yolk – enriches the cookies for a softer bite.
  • 2 teaspoons vanilla extract – intensifies the flavor and aroma of the cookies.

For the Strawberry Twist

  • 0.5 cup white chocolate chips – brings sweetness and a creamy texture.
  • 0.5 teaspoon strawberry extract – packs a fruity punch into each bite.
  • 1 ounce freeze dried strawberries – adds a delightful crunch and bursts of strawberry flavor.
  • pink food coloring (optional) – makes them extra fun and eye-catching!

These Strawberry Cheesecake Cookies are more than just a treat; they’re a flavorful experience waiting to happen! Enjoy baking these delectable delights!

How to Make Strawberry Cheesecake Cookies

  1. Preheat the oven to 350°F (175°C) to create the perfect baking environment for your cookies. It’s essential to have the oven ready before you start mixing!

  2. Beat together the cream cheese, powdered sugar, and 0.5 teaspoon vanilla extract in a mixing bowl until smooth and creamy. This will serve as the heavenly cheesecake base for your cookies.

  3. Mix the dry ingredients by combining the flour, baking soda, and salt in another bowl. Whisk them together to ensure an even distribution of flavors and textures throughout your cookie dough.

  4. Cream the softened butter, light brown sugar, and granulated sugar together in a separate bowl. Mix until the mixture is fluffy and light, infusing your cookies with a rich buttery flavor.

  5. Add the egg, egg yolk, and 2 teaspoons of vanilla extract to the creamed butter mixture. Mix well until fully combined, achieving a smooth, cohesive batter.

  6. Blend in the dry ingredients from step 3 gradually, mixing until just incorporated. Avoid over-mixing to keep your cookies soft and tender.

  7. Fold in the white chocolate chips, strawberry extract, and freeze-dried strawberries. If desired, add a few drops of pink food coloring for an extra burst of fun color!

  8. Drop rounded tablespoons of dough onto a baking sheet lined with parchment paper, making sure to leave space between each cookie for spreading.

  9. Bake for 12-15 minutes, or until the edges are lightly golden. Your kitchen will be filled with a delightful aroma as they bake!

  10. Cool the cookies on the baking sheet for a few minutes before transferring them to a wire rack. This step allows them to firm up just a bit for perfect texture.

Optional: Drizzle with white chocolate for an extra indulgent touch!

Exact quantities are listed in the recipe card below.

What to Serve with Strawberry Cheesecake Cookies?

Indulge in a delightful symphony of flavors and textures that perfectly complement your sweet treats.

  • Fresh Strawberries: Their natural sweetness and juiciness enhance the strawberry notes, making each bite even more refreshing.

  • Lemon Sorbet: This light and zesty dessert pairs beautifully, offering a cool contrast to the rich creaminess of the cookies.

  • Whipped Cream: A dollop of freshly whipped cream adds a velvety smooth texture, enriching the cheesecake essence in the cookies.

  • Iced Coffee: The rich coffee flavor cuts through the sweetness, creating a balanced and satisfying experience for your palate.

  • Vanilla Ice Cream: The creamy vanilla notes melt beautifully alongside the cookies, echoing the flavors of the white chocolate and strawberry.

  • Chocolate Drizzle: A warm drizzle of chocolate over the cookies adds a luscious touch, creating a beautiful visual and flavor contrast.

  • Sparkling Water with Lime: The crispness and citrusy zip cleanse the palate, making it an ideal bubbly companion to your cookies.

Whichever pairing you choose, these Strawberry Cheesecake Cookies are sure to shine!

Strawberry Cheesecake Cookies Variations

Get ready to unleash your creativity in the kitchen as you customize these delicious cookies!

  • Gluten-Free: Substitute all-purpose flour with a 1:1 gluten-free flour blend to keep it light and airy.

  • Dairy-Free: Use a dairy-free cream cheese alternative and coconut oil instead of butter for a completely dairy-free delight.

  • Nutty Twist: Add 1/2 cup of finely chopped pistachios or almonds for a delightful crunch and a unique flavor profile.

  • Choco-Strawberry: Fold in 1/2 cup of dark chocolate chips for a rich, decadent twist that beautifully compliments the strawberries.

  • Lemon Zest: Brighten the flavors by adding 1-2 teaspoons of fresh lemon zest, giving your cookies a refreshing citrusy note.

  • Spicy Kick: Add a pinch of cayenne pepper or cinnamon to the dough for a surprising warmth that elevates the strawberries’ natural sweetness.

  • Berry Blend: Mix in a combination of freeze-dried strawberries and raspberries for a colorful, tangy explosion in every bite.

  • Holiday Magic: During festive seasons, add a dash of nutmeg and swap rose pink food coloring for vibrant red to make them even more special and inviting.

Each variation opens up a world of delectable possibilities that can transform a beloved recipe into something uniquely yours!

How to Store and Freeze Strawberry Cheesecake Cookies

Room Temperature: Store cookies in an airtight container at room temperature for up to 3 days to maintain freshness and taste.

Fridge: For longer storage, place them in the fridge for up to a week; just make sure to keep them covered to prevent drying out.

Freezer: Freeze Strawberry Cheesecake Cookies individually wrapped or in a freezer-safe container for up to 3 months. Thaw on the counter before enjoying!

Reheating: To restore softness, microwave cookies for about 10-15 seconds before serving. They’ll taste freshly baked every time!

Make Ahead Options

These Strawberry Cheesecake Cookies are perfect for busy home cooks looking to save time without sacrificing flavor! You can prepare the cookie dough up to 24 hours in advance by mixing all the ingredients and then refrigerating the dough (this helps to enhance the flavors and maintain the perfect texture). Before baking, simply scoop the dough onto a baking sheet lined with parchment paper and let it come to room temperature for about 15-30 minutes. Bake as directed, and you’ll enjoy freshly baked cookies that are just as delightful as if you had made them from scratch that day! This make-ahead trick ensures you can indulge in these delicious treats whenever you need a sweet pick-me-up.

Chef's Helpful Tips

  • When making Strawberry Cheesecake Cookies, ensure your butter is softened to room temperature for easy creaming with the sugars, which helps achieve a light and fluffy texture.
  • Be cautious not to over-mix the dough after adding the dry ingredients, as this can lead to tough cookies instead of the desired softness.
  • For a balanced flavor, consider using a higher quality vanilla extract, as it greatly enhances the overall taste of your cookies.
  • Finally, always check your cookies a minute or two before the suggested bake time to prevent over-baking and maintain their chewy center.

Strawberry Cheesecake Cookies Recipe FAQs

How do I choose ripe strawberries for my cookie dough?
Absolutely! When selecting strawberries, look for bright red berries with a natural shine and no dark spots all over. The berries should be plump and firm to the touch, indicating freshness. If you’re using freeze-dried strawberries, ensure they are vibrant in color and free from any moisture for the best flavor and texture.

What’s the best way to store Strawberry Cheesecake Cookies?
Very! Store your cookies in an airtight container at room temperature for up to 3 days. If you want them to last longer, you can refrigerate them for up to a week, just make sure they’re well-covered to prevent drying out.

Can I freeze Strawberry Cheesecake Cookies and how?
Yes, you can! To freeze your cookies, just let them cool completely, and then wrap each one tightly in plastic wrap or place them in a freezer-safe container. You can freeze them for up to 3 months. When you’re ready to enjoy, simply thaw them on the counter for a few minutes, and they’re good to go!

What should I do if my cookies are too soft to eat?
If your cookies turn out too soft, it may be due to underbaking or too much moisture in the dough. To fix overly soft cookies, try baking them for an extra minute or two. If they’re already baked, you can gently place them in the fridge for about 30 minutes to help firm them up, or offer them with a spoon for a delightful dessert!

Are Strawberry Cheesecake Cookies safe for pets?
No, it’s best to avoid sharing these cookies with your pets. The cream cheese and sugar content can upset their stomachs, and while small amounts may not be harmful, it’s safest to stick to treats designed for pets.

Can I make these cookies gluten-free?
Absolutely! For a gluten-free version of Strawberry Cheesecake Cookies, you can replace all-purpose flour with a gluten-free baking blend. Just make sure your blend includes xanthan gum, which helps to achieve the right texture. Also, check the other ingredients for gluten sources to ensure the cookies remain gluten-free!

Strawberry Cheesecake Cookies

Strawberry Cheesecake Cookies

Delight in Strawberry Cheesecake Cookies, a sweet twist on a classic dessert that embodies summer's flavors.
Print Recipe Pin Recipe
Prep Time 15 minutes mins
Cook Time 15 minutes mins
Cooling Time 10 minutes mins
Total Time 40 minutes mins
Servings: 24 cookies
Course: DESSERT RECIPES
Cuisine: American
Calories: 150
Ingredients Equipment Method Nutrition Notes

Ingredients
  

For the Creamy Base
  • 4 ounces full fat cream cheese adds that essential creamy cheesecake flavor
  • 0.25 cup powdered sugar sweetens the mix and keeps the dough soft
  • 0.5 teaspoon vanilla extract enhances the overall flavor profile beautifully
For the Dough
  • 3 cups all purpose flour provides the structure for these delightful cookies
  • 1 teaspoon baking soda helps the cookies rise and achieve their soft texture
  • 1 teaspoon salt balances sweetness and enhances the flavors
  • 1 cup unsalted butter contributes to the rich, buttery taste and chewy texture
  • 1 cup packed light brown sugar adds a deep, caramel-like sweetness
  • 0.25 cup granulated sugar gives an extra touch of sweetness
  • 1 large egg binds the ingredients together for perfect texture
  • 1 large egg yolk enriches the cookies for a softer bite
  • 2 teaspoons vanilla extract intensifies the flavor and aroma of the cookies
For the Strawberry Twist
  • 0.5 cup white chocolate chips brings sweetness and a creamy texture
  • 0.5 teaspoon strawberry extract packs a fruity punch into each bite
  • 1 ounce freeze dried strawberries adds a delightful crunch and bursts of strawberry flavor
  • pink food coloring optional, makes them extra fun and eye-catching

Equipment

  • Mixing bowl
  • Electric mixer
  • Baking sheet
  • parchment paper

Method
 

Instructions
  1. Preheat the oven to 350°F (175°C).
  2. Beat together the cream cheese, powdered sugar, and 0.5 teaspoon vanilla extract until smooth and creamy.
  3. Mix the dry ingredients (flour, baking soda, and salt) in another bowl.
  4. Cream the softened butter, light brown sugar, and granulated sugar until fluffy.
  5. Add the egg, egg yolk, and 2 teaspoons of vanilla extract to the mixture and mix well.
  6. Blend in the dry ingredients gradually, mixing until just incorporated.
  7. Fold in the white chocolate chips, strawberry extract, and freeze-dried strawberries.
  8. Drop rounded tablespoons of dough onto a baking sheet lined with parchment paper.
  9. Bake for 12-15 minutes, or until the edges are lightly golden.
  10. Cool the cookies on the baking sheet for a few minutes before transferring them to a wire rack.

Nutrition

Serving: 1cookieCalories: 150kcalCarbohydrates: 20gProtein: 2gFat: 7gSaturated Fat: 4gPolyunsaturated Fat: 0.5gMonounsaturated Fat: 2gCholesterol: 25mgSodium: 100mgPotassium: 60mgSugar: 10gVitamin A: 150IUVitamin C: 1mgCalcium: 20mgIron: 0.5mg

Notes

Drizzle with white chocolate for an extra indulgent touch.

Tried this recipe?

Let us know how it was!

Filed Under: BREAKFAST & BRUNCH

Mediterranean Brunch Board

December 24, 2025 by JudyWhite Leave a Comment

There’s something enchanting about gathering a group of friends for a leisurely brunch, where flavors mingle and laughter fills the air. Recently, while preparing for a sunny weekend get-together, I wanted to create a spread that would impress without a hefty time commitment. Enter my Mediterranean Brunch Board!

With creamy hummus and zesty tzatziki as the stars of the show, I was surprised at how quickly a vibrant array of colors and textures came together on my countertop. The olives, figs, and feta cheese not only add a burst of flavor but also transport your taste buds straight to the sun-kissed coasts of Greece.

Whether you’re seeking a crowd-pleasing option for brunch or a quick, satisfying meal that veers away from the usual fast food, this board has you covered. Let’s dive into this 20-minute adventure of assembly, where the only thing you need to worry about is how to keep your guests’ hands off before the feast begins!

Why You'll Love This Mediterranean Brunch Board

  • This Mediterranean Brunch Board is a breeze to assemble, taking just 20 minutes from start to finish.
  • The vibrant colors and fresh ingredients make it visually stunning, perfect for impressing guests or brightening your own brunch table.
  • With its flavorful components like creamy hummus, zesty tzatziki, and a variety of delicious toppings, every bite is a delightful experience for your taste buds.
  • It’s a versatile dish that can serve as a light meal, appetizer, or shareable centerpiece for any gathering, making it a fantastic choice for any occasion.

Mediterranean Brunch Board Ingredients

If you’re ready to create this delightful spread, here’s what you need:

For the Dips
• Hummus – a creamy base that adds a rich, nutty flavor to your board.
• Tzatziki – a refreshing yogurt dip that perfectly complements the Mediterranean theme.

For the Fresh Components
• Olives – a classic addition that brings a briny punch to each bite.
• Cucumber spears – crisp and cooling, these add a refreshing crunch.
• Cherry tomatoes – sweet bursts of flavor that brighten up the platter.
• Radishes – add a peppery bite and vibrant color for visual appeal.
• Stuffed peppadews – unique and sweet, they offer a delightful surprise.
• Figs – their natural sweetness enhances the board’s flavor complexity.
• Feta cheese – crumbly and salty, it’s essential for that Mediterranean twist.
• Pita bread – perfect for dipping into the hummus and tzatziki.

For the Garnishes
• Olive oil – a drizzle brings richness, enhancing the flavors of the dips.
• Roasted chickpeas – crunchy and nutritious, adding texture and protein.
• Fresh parsley – brightens up the dishes with color and herbaceous notes.
• Ribbon cucumber – a creative garnish that adds elegance and flair.

For the Sides
• Dolmas – vine leaves stuffed with rice and spices, perfect for a savory touch.
• Marinated artichokes – tangy and tender, they add a depth of flavor.
• Tabbouleh – a light, herb-infused salad that completes the Mediterranean experience.

Now you’re all set to assemble your Mediterranean Brunch Board and delight your guests with these fresh and vibrant ingredients!

How to Make Mediterranean Brunch Board

  1. Gather your bowls: Start by placing your hummus and tzatziki in small bowls at the center of your serving board. This creates a delicious focal point for your colorful spread.

  2. Add fresh ingredients: Next, artfully arrange the olives, cucumber spears, cherry tomatoes, radishes, stuffed peppadews, figs, and feta cheese around the bowls. Think of this as creating a beautiful garden on your board!

  3. Pour olive oil: Drizzle olive oil over the hummus for a touch of richness. This not only enhances the flavor but also adds a lovely sheen.

  4. Garnish creatively: Garnish the hummus with roasted chickpeas for crunch and sprinkle chopped fresh parsley on the tzatziki. Add a ribbon of cucumber for a fancy touch!

  5. Serve with pita: Finally, present your board with warm pita bread on the side. Encourage guests to dive in and create their perfect bites.

Optional: For a touch of extra flavor, sprinkle some chili flakes over the feta cheese.

Exact quantities are listed in the recipe card below.

Mediterranean Brunch Board Variations

Feel free to get creative and customize this delightful spread to suit your taste buds and dietary preferences!

  • Vegan: Swap out the hummus for a chickpea spread and skip the feta for a delicious plant-based treat.
    Use spices like smoked paprika for a flavor boost that complements the fresh ingredients.

  • Gluten-Free: Replace traditional pita bread with gluten-free crackers or veggie sticks for dipping.
    This keeps the vibrant flavors intact while catering to gluten sensitivities.

  • Spicy: Add a sprinkle of crushed red pepper flakes to the hummus or tzatziki for a fiery kick.
    The heat pairs beautifully with the creamy dips, enhancing the overall experience.

  • Herbed: Mix fresh dill or mint into your tzatziki for an extra layer of flavor.
    The fresh herbs not only brighten the dish but also enhance the Mediterranean vibe.

  • Sweet: Use honey or a drizzle of balsamic glaze over the figs to amplify their natural sweetness.
    This contrasts wonderfully with the savory elements and brings balance to the board.

  • Cheesy: Replace feta with a creamy goat cheese for a tangy twist that really elevates the dish.
    The flavor of goat cheese complements the sweetness of figs and peppadews beautifully.

  • Nutty: Sprinkle a handful of toasted pine nuts or slivered almonds over the salad and dips for added crunch.
    Their delightful texture and nutty flavor create a satisfying contrast to the creamy components.

  • Fruity: Add slices of seasonal fruits like peaches or berries for a refreshing, colorful addition.
    Their juiciness brightens up the board, making it even more inviting for your guests.

What to Serve with Mediterranean Brunch Board?

Imagine the delightful mingling of flavors and aromas that accompany a sunny brunch gathering as you share joyful moments—and delicious bites—with loved ones.

  • Crisp Green Salad: A fresh salad with a light lemon vinaigrette adds a refreshing contrast, balancing the rich and creamy dips splendidly.
  • Mediterranean Quinoa Salad: This hearty salad brings additional textures with nutty grains and vibrant veggies, enhancing the Mediterranean flair of your board.
  • Sliced Avocado: Creamy avocado slices lend a luscious bite, perfectly complementing the hummus and feta cheese for extra indulgence.
  • Grilled Chicken Skewers: Juicy, spiced chicken skewers add protein and a smoky flavor that pairs beautifully with the bright, fresh components of your brunch board.
  • Roasted Vegetable Platter: A variety of roasted vegetables with herbs harmonizes with the dips, bringing warm earthy flavors that delight the palate.
  • Sparkling Water with Mint: Light and refreshing, this drink enhances the overall experience, cleansing the palate between bites on your Mediterranean Brunch Board.
  • Baklava for Dessert: Sweet, flaky, and nutty, baklava provides a decadent end to your meal while weaving in the traditional Mediterranean sweetness.
  • Olive Tapenade Crostinis: Rich olive tapenade on toasted bread gives a savory bite, making for a delightful starter that echoes the Mediterranean theme.
  • Chilled White Wine: A crisp, chilled white wine works wonders, enhancing the flavors of the dish and keeping the atmosphere relaxed and joyful.

Make Ahead Options

These Mediterranean Brunch Board components are perfect for meal prep! You can prepare the dips, hummus and tzatziki, up to 3 days in advance; simply store them in airtight containers in the refrigerator. Additionally, you can chop the cucumber spears, radishes, and prepare the tabbouleh 24 hours before serving, ensuring they stay fresh and vibrant. To prevent any browning, keep the cucumber and radishes in water until you’re ready to assemble. When it’s time to impress your guests, just assemble the board with the marinated items, drizzle the olive oil, and garnish the dips. With these make-ahead tips, your Mediterranean Brunch Board will taste just as delightful as if you’d made it fresh that day!

How to Store and Freeze Mediterranean Brunch Board

Fridge: Store any leftover dips like hummus and tzatziki in airtight containers for up to 5 days to maintain freshness.

Room Temperature: Keep assembled components on the brunch board at room temperature for up to 2 hours. After that, refrigerate any leftovers to ensure safety.

Freezer: While it’s best to enjoy the Mediterranean Brunch Board fresh, you can freeze extra hummus in freezer-safe containers for up to 3 months. Thaw in the fridge before serving.

Reheating: Warm pita bread briefly in the oven or toaster just before serving to enjoy a fresh, toasty flavor that pairs perfectly with your dips!

Chef's Helpful Tips

  • When assembling your Mediterranean Brunch Board, ensure to use smaller bowls for the dips to create a visually appealing focal point.
  • Avoid overloading each section with ingredients to maintain a clean presentation and allow each component to shine.
  • For garnishes, consider using both roasted chickpeas and fresh herbs to elevate the flavor and texture.
  • Lastly, serve the pita warm to enhance its taste and make it more inviting for dipping into the delicious hummus and tzatziki.

Mediterranean Brunch Board Recipe FAQs

What is the best way to select ripe cucumbers for my Mediterranean Brunch Board?
Absolutely! Look for cucumbers that are firm and dark green, avoiding those with dark spots all over or soft patches, as they indicate overripeness. Smaller cucumbers are often sweeter and crisper, making them perfect for your board!

How should I store leftovers from the Mediterranean Brunch Board?
To keep things fresh, store leftover dips like hummus and tzatziki in airtight containers in the fridge for up to 5 days. For the other components, wrap them tightly or place them in containers as well, and they should stay fresh for about 3 days.

Can I freeze the hummus or tzatziki from the Mediterranean Brunch Board?
Absolutely! You can freeze leftover hummus in freezer-safe containers for up to 3 months. Make sure to leave some space at the top of the container, as it may expand when frozen. When you’re ready to enjoy it again, just thaw it overnight in the fridge and give it a good stir before serving.

What if my pita bread gets stale? Can I reuse it for the Mediterranean Brunch Board?
Very! If your pita bread becomes a bit stale, you can revive it by wrapping it in a damp paper towel and microwaving it for 10-15 seconds. Alternatively, place it in a 350°F (175°C) oven wrapped in foil for about 5-7 minutes. This will make it warm and soft, perfect for dipping!

Are there any dietary considerations I should be aware of when serving the Mediterranean Brunch Board?
Yes, definitely! Be mindful of common allergies like dairy for the feta cheese and gluten for the pita. You can easily substitute with dairy-free feta and gluten-free pita options, ensuring everyone can enjoy this delightful spread without worries.

Mediterranean Brunch Board

Mediterranean Brunch Board

Create a stunning Mediterranean Brunch Board in just 20 minutes, featuring delicious dips, fresh ingredients, and vibrant flavors to bring your brunch to life.
Print Recipe Pin Recipe
Prep Time 20 minutes mins
Total Time 20 minutes mins
Servings: 6 people
Course: BREAKFAST & BRUNCH
Cuisine: Mediterranean
Calories: 350
Ingredients Equipment Method Nutrition Notes

Ingredients
  

Dips
  • 1 cup Hummus
  • 1 cup Tzatziki
Fresh Components
  • 1 cup Olives mixed varieties
  • 1 cup Cucumber spears cut into spears
  • 1 cup Cherry tomatoes halved
  • 1 cup Radishes halved
  • 1 cup Stuffed peppadews
  • 4 pieces Figs halved
  • 1 cup Feta cheese crumbled
  • 1 pack Pita bread warmed
Garnishes
  • 2 tablespoons Olive oil for drizzling
  • 1 cup Roasted chickpeas
  • 1/4 cup Fresh parsley chopped
  • 1 piece Ribbon cucumber for garnish
Sides
  • 1 cup Dolmas vine leaves stuffed with rice
  • 1 cup Marinated artichokes
  • 1 cup Tabbouleh herb-infused salad

Equipment

  • Serving board
  • Small bowls

Method
 

Assembly
  1. Gather your bowls: Start by placing your hummus and tzatziki in small bowls at the center of your serving board.
  2. Add fresh ingredients: Artfully arrange the olives, cucumber spears, cherry tomatoes, radishes, stuffed peppadews, figs, and feta cheese around the bowls.
  3. Pour olive oil: Drizzle olive oil over the hummus to enhance the flavor.
  4. Garnish creatively: Garnish the hummus with roasted chickpeas and sprinkle chopped parsley on the tzatziki.
  5. Serve with pita: Present your board with warm pita bread on the side for dipping.

Nutrition

Serving: 1plateCalories: 350kcalCarbohydrates: 40gProtein: 10gFat: 15gSaturated Fat: 3gPolyunsaturated Fat: 2gMonounsaturated Fat: 8gCholesterol: 10mgSodium: 600mgPotassium: 500mgFiber: 8gSugar: 5gVitamin A: 10IUVitamin C: 20mgCalcium: 15mgIron: 10mg

Notes

Use smaller bowls for dips to create a visually appealing focal point. Serve pita warm for better flavor.

Tried this recipe?

Let us know how it was!

Filed Under: BREAKFAST & BRUNCH

Garlic Butter Green Beans

December 24, 2025 by JudyWhite Leave a Comment

There’s a certain joy that comes from the simple act of cooking, especially when freshness is at the forefront of your dish. Picture this: the vibrant green of fresh green beans, their crispness brought to life by a sizzling touch of garlic and a rich, velvety garlic butter sauce. That’s the magic I experienced when I first prepared Garlic Butter Green Beans. It’s a delightful side that not only elevates any meal but also takes mere minutes to whip up.

After a week filled with takeout and frozen dinners, I found myself craving something vibrant and wholesome. This recipe is the perfect remedy—quick, easy, and undeniably delicious. Whether you’re looking to prepare a healthy dish for your family or sprinkle some gourmet flair on your dinner table, these green beans will not disappoint. Trust me, once you taste the harmonious blend of garlic and lemon zest, you’ll wonder how you ever settled for anything less. Let’s dive into this sensational side that deserves a spot at every table!

Why You'll Love This Garlic Butter Green Beans

  • This recipe is incredibly easy to prepare, taking just 15 minutes from start to finish.
  • The flavor combination of garlic and buttery richness truly elevates the humble green bean to new heights of deliciousness.
  • Its versatility means it pairs beautifully with any main dish, making it a go-to side for every meal.
  • Plus, the vibrant colors and aroma make it a feast for the eyes and nose, ensuring it will impress your guests every time.

Garlic Butter Green Beans Ingredients

Let’s gather what you need for these delightful and vibrant garlic butter green beans!

For the Green Beans
• 1 pound fresh green beans – opt for bright green beans for the best taste and texture.
• 1 teaspoon olive oil – a splash of healthy fat to help the beans cook beautifully.
• 1/4 teaspoon fine sea salt – enhances flavor; adjust to your taste!
• 1/4 cup water or stock – adds moisture for steaming, enhancing the beans’ natural flavor.

For the Flavor
• 1 tablespoon butter or vegan butter – brings richness; choose vegan for a dairy-free option!
• 3 medium garlic cloves, minced – the star of our dish, providing that wonderful aroma.
• 1/2 teaspoon lemon zest – brightens the dish with a fresh citrusy kick.
• 1/4 teaspoon fresh ground black pepper – adds a hint of warmth and flavor depth.

For Serving
• Lemon wedges – perfect for squeezing over the finished dish for an extra zing.

Now that we have our ingredients lined up, you’re just a few steps away from enjoying a delicious plate of garlic butter green beans that will impress everyone at your table!

How to Make Garlic Butter Green Beans

  1. Heat the Skillet: Start by adding the olive oil to a wide skillet over medium-high heat. This will give your green beans a lovely crispness when you add them in!

  2. Sauté the Beans: Toss in the fresh green beans along with 1/4 teaspoon of fine sea salt. Cook for about 5 minutes until they are lightly blistered; remember to toss them around for even cooking!

  3. Steam the Beans: Pour in 1/4 cup of water or stock and cover the skillet. Let them cook for 2 minutes, allowing the green beans to steam and soften while retaining their vibrant color.

  4. Reduce Liquid: Uncover the skillet and reduce the heat to medium-low. Cook until the remaining liquid evaporates completely, concentrating the flavors of your beans!

  5. Finish with Flavor: Stir in the butter, minced garlic, lemon zest, and black pepper. Cook for another minute, stirring the garlic to prevent burning. When it’s fragrant, it’s time to serve!

Optional: Serve with lemon wedges for an extra burst of freshness!

Exact quantities are listed in the recipe card below.

How to Store and Freeze Garlic Butter Green Beans

Fridge: Store leftovers in an airtight container for up to 3 days. This way, you can enjoy your flavorful Garlic Butter Green Beans again without sacrificing freshness!

Freezer: If you wish to freeze, place the cooled green beans in a freezer-safe bag or container. They’ll maintain good quality for up to 2 months.

Reheating: When ready to enjoy, reheat in a skillet over medium heat with a splash of water or stock to restore moisture. You can also microwave it in short intervals, stirring occasionally.

Garlic Butter Green Beans Variations

Feel free to customize your Garlic Butter Green Beans with these delightful twists that can take your dish to a whole new level!

  • Spicy Kick: Add a pinch of red pepper flakes while sautéing for a delightful heat that contrasts perfectly with the buttery richness.

  • Nutty Flavor: Stir in toasted slivered almonds or walnuts just before serving to add a wonderful crunch and earthy undertones.

  • Herb Infusion: Experiment with fresh herbs like thyme or parsley instead of lemon zest for a fragrant, aromatic flavor twist. It adds a garden-fresh touch that’s simply irresistible!

  • Cheesy Goodness: Sprinkle grated Parmesan cheese over the finished dish for a savory, creamy finish that complements the garlic beautifully.

  • Citrus Swap: Use lime zest instead of lemon for a zesty twist that brings a refreshing brightness to each bite. The lime pairs superbly with the garlic!

  • Vegan Delight: Use coconut oil instead of butter for a dairy-free version that still delivers rich flavor while being completely plant-based. It gives a subtle sweetness!

  • Mushroom Medley: Add sliced mushrooms during the sautéing step for an earthy depth and hearty texture, making the dish more substantial.

  • Savory Mustard: Incorporate a teaspoon of Dijon mustard along with the garlic for a tangy, sophisticated flavor that elevates the overall taste experience beautifully.

Make Ahead Options

Garlic Butter Green Beans are perfect for busy weeknights, allowing you to prep in advance and save precious time. You can wash and trim the green beans up to 24 hours ahead, storing them in a sealed bag in the refrigerator to maintain their freshness. Additionally, you can mince the garlic and zest the lemon up to 3 days in advance, keeping them in separate airtight containers to preserve their flavors. When you’re ready to serve, simply sauté the prepped green beans, steam them with water (or stock), and finish with the butter, garlic, and lemon zest as directed. This way, your delicious Garlic Butter Green Beans will be just as vibrant and flavorful with minimal effort!

What to Serve with Garlic Butter Green Beans?

Elevate your meal with complementary dishes that enhance the vibrant flavors of your delicious green beans.

  • Lemon Herb Chicken: The zesty flavors of herb-marinated chicken bring out the brightness of the lemon in the green beans. This pairing creates a harmonious taste explosion that’s sure to delight!

  • Creamy Mashed Potatoes: Their rich, velvety texture contrasts beautifully with the crisp green beans. This classic combo adds comfort to your meal, ensuring every bite is heavenly.

  • Grilled Salmon: The smoky flavor of grilled salmon perfectly balances the garlic buttered green beans. Drizzle with a touch of lemon for an extra refreshing touch!

  • Quinoa Salad: A light, refreshing quinoa salad with cucumbers, tomatoes, and feta cheese complements the buttery beans. This adds a nice crunch and a burst of flavor to your plate.

  • Crispy Garlic Bread: Perfect for soaking up the buttery juices from your green beans, garlic bread offers a delightful crunch and flavor lift. It’s an easy addition that everyone will love!

  • Chardonnay: A chilled glass of Chardonnay pairs wonderfully with garlic butter green beans. The crisp acidity and fruity notes elevate the entire dining experience.

  • Chocolate Mousse: For a sweet ending, indulge in a rich chocolate mousse. Its luxurious texture provides a lovely finish to your wholesome meal.

These pairings will transform your garlic butter green beans into a star of a truly memorable dining experience!

Chef's Helpful Tips

  • For the best Garlic Butter Green Beans, always choose bright green beans to ensure optimal flavor and crunch.
  • A common mistake is overcooking the garlic; make sure to stir it in just before serving to keep its aromatic qualities intact.
  • When adding the water or stock, use a wide skillet to create a larger surface area for steaming and cooking evenly.
  • Finally, allow the liquid to evaporate completely for the most concentrated flavor before adding the butter and seasonings.

Garlic Butter Green Beans Recipe FAQs

How do I choose the best green beans?
Absolutely! Look for fresh green beans that are bright in color, firm to the touch, and have no dark spots or blemishes. The best beans should snap easily when bent. Aim for beans that are similar in size for even cooking.

How should I store leftover Garlic Butter Green Beans?
You can store the leftovers in an airtight container in the fridge for up to 3 days. Make sure they are completely cooled before sealing to prevent moisture buildup. When you’re ready to eat, reheating them in a skillet is the quickest way to freshen them up!

Can I freeze Garlic Butter Green Beans?
Very! To freeze, let the cooked green beans cool down completely. Then, place them in a freezer-safe bag or container, ensuring you remove as much air as possible. They can be stored for up to 2 months. When ready to eat, thaw in the fridge overnight or sauté straight from the freezer for a quick meal!

What should I do if my green beans are overcooked?
Oh no! If your green beans are overcooked and mushy, one way to revive them is to toss them in a hot skillet with a splash of olive oil, a squeeze of fresh lemon juice, and perhaps a little more garlic. This can help reintroduce flavors, giving them a brighter profile!

Can I make this recipe vegan?
Absolutely! Just substitute the butter with a tablespoon of vegan butter or olive oil, and you’re all set! The flavors will still be vibrant and delicious, allowing you to enjoy this Garlic Butter Green Beans dish without any dairy.

Are there any allergens in Garlic Butter Green Beans?
This recipe is quite simple and doesn’t include common allergens, but always check labels for your specific products, especially if you’re using vegan butter. For those with garlic allergies, you could try substituting with shallots or omit it entirely, increasing the lemon zest or seasoning to keep the dish flavorful!

Garlic Butter Green Beans

Garlic Butter Green Beans

A delightful side of Garlic Butter Green Beans combining vibrant greens with garlic and butter, ready in under 15 minutes.
Print Recipe Pin Recipe
Prep Time 5 minutes mins
Cook Time 10 minutes mins
Total Time 15 minutes mins
Servings: 4 servings
Course: DINNER RECIPES
Cuisine: American
Calories: 100
Ingredients Equipment Method Nutrition Notes

Ingredients
  

For the Green Beans
  • 1 pound fresh green beans opt for bright green beans for the best taste and texture
  • 1 teaspoon olive oil a splash of healthy fat to help the beans cook beautifully
  • 1/4 teaspoon fine sea salt enhances flavor; adjust to your taste
  • 1/4 cup water or stock adds moisture for steaming, enhancing the beans’ natural flavor
For the Flavor
  • 1 tablespoon butter or vegan butter brings richness; choose vegan for a dairy-free option
  • 3 medium garlic cloves, minced the star of our dish, providing that wonderful aroma
  • 1/2 teaspoon lemon zest brightens the dish with a fresh citrusy kick
  • 1/4 teaspoon fresh ground black pepper adds a hint of warmth and flavor depth
For Serving
  • lemon wedges perfect for squeezing over the finished dish for an extra zing

Equipment

  • Skillet

Method
 

Step by Step Directions
  1. Start by adding the olive oil to a wide skillet over medium-high heat.
  2. Toss in the fresh green beans along with 1/4 teaspoon of fine sea salt. Cook for about 5 minutes until they are lightly blistered; remember to toss them around for even cooking!
  3. Pour in 1/4 cup of water or stock and cover the skillet. Let them cook for 2 minutes, allowing the green beans to steam and soften while retaining their vibrant color.
  4. Uncover the skillet and reduce the heat to medium-low. Cook until the remaining liquid evaporates completely, concentrating the flavors of your beans!
  5. Stir in the butter, minced garlic, lemon zest, and black pepper. Cook for another minute, stirring the garlic to prevent burning. When it's fragrant, it’s time to serve!

Nutrition

Serving: 1servingCalories: 100kcalCarbohydrates: 10gProtein: 2gFat: 7gSaturated Fat: 4gMonounsaturated Fat: 3gCholesterol: 15mgSodium: 100mgPotassium: 400mgFiber: 3gSugar: 3gVitamin A: 500IUVitamin C: 20mgCalcium: 50mgIron: 1mg

Notes

For the best Garlic Butter Green Beans, always choose bright green beans to ensure optimal flavor and crunch. A common mistake is overcooking the garlic; make sure to stir it in just before serving to keep its aromatic qualities intact. When adding the water or stock, use a wide skillet to create a larger surface area for steaming and cooking evenly. Finally, allow the liquid to evaporate completely for the most concentrated flavor before adding the butter and seasonings.

Tried this recipe?

Let us know how it was!

Filed Under: DINNER RECIPES

Roasted Garlic Mashed Potatoes

December 24, 2025 by JudyWhite Leave a Comment

When a cozy evening calls for comfort food, nothing beats the warmth of Roasted Garlic Mashed Potatoes. Picture this: the enticing aroma of slow-roasted garlic mingles with the rich, buttery scent of potatoes simmering away on the stove. It’s a symphony of flavors that beckons friends and family to gather around the table.

I discovered this recipe on one of those chilly nights when my craving for something hearty outweighed my desire to cook. What started as a simple quest for mashed potatoes transformed into a delightful culinary adventure that even turned skeptical guests into loyal fans. With just a handful of ingredients and a few easy steps, you’ll achieve a creamy, garlicky masterpiece that elevates any meal, making it feel special.

Get ready to swap out fast food for this creamy indulgence that not only satisfies but also brings a smile to everyone’s face. Trust me; these Roasted Garlic Mashed Potatoes will become a staple in your kitchen, proving that simple comforts can be downright extraordinary.

Why You'll Love This Roasted Garlic Mashed Potatoes

  • These Roasted Garlic Mashed Potatoes are incredibly easy to make, requiring just a handful of ingredients and straightforward steps.
  • The flavor is simply irresistible, with the roasted garlic adding a rich depth that elevates traditional mashed potatoes to a new level.
  • Their versatility means they pair perfectly with any main dish, from hearty meats to hearty vegetarian options.
  • Plus, their creamy texture and beautiful presentation make them a fantastic crowd-pleaser that will impress your guests and bring everyone back for seconds.

Roasted Garlic Mashed Potatoes Ingredients

• Dive into the delightful flavors of homemade comfort food!

For the Potatoes

  • 3 pounds russet potatoes – these starchy potatoes create the ideal creamy texture for your Roasted Garlic Mashed Potatoes.
  • 3 leaves dried bay leaves – infuse your potatoes with subtle herbal notes that enhance their flavor.
  • 4 teaspoons sea salt – use this for boiling the potatoes to elevate their natural taste.

For the Garlic

  • 2 heads garlic – roasting turns this pungent bulb sweet and mellow, adding depth to your mash.

For the Creaminess

  • 1 cup unsalted butter – this rich ingredient ensures your potatoes are luxuriously creamy and luscious.
  • 1 cup whole milk – helps achieve a smooth consistency and adds welcome richness.

For the Finishing Touches

  • freshly cracked black pepper – adds a delightful hint of spice to balance the flavors.
  • 1 tablespoon extra-virgin olive oil – a drizzle gives a beautiful sheen and rounds out the taste perfectly.

How to Make Roasted Garlic Mashed Potatoes

  1. Roast the Garlic: Start by preheating your oven to 400°F. Wrap the garlic heads in aluminum foil and roast for about 30-35 minutes until they’re soft and caramelized.

  2. Cook the Potatoes: In a large pot, combine the diced russet potatoes with bay leaves and 4 teaspoons of sea salt. Cover with water, bring to a boil, and cook until tender, about 15-20 minutes.

  3. Drain and Remove: Once the potatoes are tender, drain and discard the bay leaves. Let the potatoes sit in the pot for a minute to allow excess moisture to evaporate.

  4. Combine Ingredients: Add the roasted garlic, unsalted butter, whole milk, and freshly cracked black pepper to the drained potatoes. The roasted garlic should easily squeeze out of its skin—mix it well into the mash!

  5. Mash to Perfection: Use a potato masher or a hand mixer to mash the mixture until creamy and smooth. You want it to have a velvety texture without any lumps.

  6. Adjust Seasoning: Taste your masterpiece and adjust with additional salt and black pepper as needed. A final sprinkle of cracked pepper enhances the flavor beautifully!

Optional: Drizzle with a touch of extra-virgin olive oil for a delightful finish.

Exact quantities are listed in the recipe card below.

How to Store and Freeze Roasted Garlic Mashed Potatoes

Fridge: Store your Roasted Garlic Mashed Potatoes in an airtight container for up to 3 days. Reheat gently on the stove or in the microwave, adding a splash of milk as needed to restore creaminess.

Freezer: For longer storage, freeze mashed potatoes in a freezer-safe container or bag, ensuring you remove as much air as possible. They can last up to 2 months.

Reheating: When ready to enjoy, thaw in the fridge overnight, then reheat over low heat, again adding a touch of milk or butter for a creamy texture.

Serving Tips: For best flavor, re-season with salt and pepper before serving, as freezing can sometimes dull the taste of your delicious Roasted Garlic Mashed Potatoes.

What to Serve with Roasted Garlic Mashed Potatoes?

When it’s time to gather around the dinner table, this creamy indulgence deserves delightful companions that enhance its flavors.

  • Savory Herb Grilled Chicken: Tender chicken marinated with fresh herbs complements the garlicky mash wonderfully, creating a balanced meal full of flavor.

  • Roasted Brussels Sprouts: The crisp-tender texture and nutty flavor of roasted Brussels sprouts provide a delightfully fresh contrast to the creamy potatoes.

  • Steak with Mushroom Sauce: Juicy steak drenched in a savory mushroom sauce brings robust flavors that pair beautifully with the richness of the mashed potatoes.

  • Honey Glazed Carrots: Their natural sweetness and vibrant color brighten up the plate, making for a visually appealing and delicious addition to your meal.

  • Creamy Spinach Salad: A salad with creamy dressing and fresh greens adds a refreshing crunch that perfectly offsets the smoothness of the mash.

  • Grilled Salmon: The deliciously flaky fish, paired with a squeeze of lemon, adds a zesty brightness that enhances the garlic flavors in your potatoes.

  • Perfectly Baked Biscuits: Soft, flaky biscuits are ideal for soaking up those creamy mashed potatoes, amplifying the comforting experience of your meal.

  • Chilled White Wine: A crisp Sauvignon Blanc or a lightly oaked Chardonnay can elevate your dining experience, balancing the richness of the mashed potatoes with a refreshing sip.

  • Chocolate Lava Cake: For dessert, nothing beats a warm, gooey chocolate lava cake that provides a decadent finish to your comforting meal.

Roasted Garlic Mashed Potatoes Variations

Feel free to explore your culinary creativity—these delightful twists will enhance the flavor and texture of your mashed potatoes!

  • Dairy-Free: Swap butter with vegan butter and use almond or coconut milk for a creamy, plant-based option that everyone will enjoy. The rich flavors remain, accommodating those with dietary restrictions.

  • Herb Infusion: Add fresh herbs like rosemary, thyme, or chives to the mix for an aromatic touch that elevates the classic flavor profile. These herbs add a delightful freshness that complements the roasted garlic beautifully.

  • Spicy Kick: Mix in a pinch of cayenne pepper or crushed red pepper flakes for a zesty surprise that awakens your taste buds. Just a little heat can transform this creamy dish into something extraordinary.

  • Cheesy Goodness: Stir in a cup of shredded cheddar or Parmesan cheese once your mash is creamy for added richness and a savory depth. This melty addition turns the dish into pure comfort bliss.

  • Roasted Veggie Twist: Incorporate roasted cauliflower or sweet potatoes into your mix for a unique flavor twist and added nutrients. The earthy sweetness layers wonderfully with the garlic.

  • Sour Cream Creaminess: To amplify the tangy flavor and creaminess, fold in a dollop of sour cream or Greek yogurt. This simple change creates a luxurious mouthfeel where each bite feels indulgent.

  • Smoky Flavor: Add a teaspoon of smoked paprika or a few drops of liquid smoke for a surprising twist that provides a complex flavor profile. The smokiness adds depth and warmth to the traditional mash.

  • Nutty Texture: Try adding some toasted nuts like hazelnuts or walnuts for a delightful crunch and a rich, nutty flavor. This unexpected texture contrasts beautifully with the creamy potatoes, making every bite exciting.

Make Ahead Options

These Roasted Garlic Mashed Potatoes are perfect for meal prep enthusiasts! You can roast the garlic and prepare the potatoes up to 24 hours in advance, which saves you valuable time on busy weeknights. Simply follow steps 1 and 2, then let your cooked potatoes cool before transferring them to an airtight container in the refrigerator. When you’re ready to serve, reheat the potatoes in a pot with a splash of milk to revive their creamy texture, then add the roasted garlic, butter, and seasoning as described in the final steps. This way, your mashed potatoes will be just as delicious, allowing you to enjoy a comforting meal with minimal effort!

Chef's Helpful Tips

  • For your Roasted Garlic Mashed Potatoes, always choose russet potatoes for the best creamy texture due to their high starch content.
  • When boiling the potatoes, be sure to add salt to the water to enhance their flavor from within.
  • To achieve a super smooth mash, try using a ricer instead of a traditional masher for an ultra-fluffy result.
  • Finally, allow the potatoes to sit for a minute after draining to ensure all excess moisture evaporates before mashing for the perfect consistency.

Roasted Garlic Mashed Potatoes Recipe FAQs

What type of potatoes are best for Roasted Garlic Mashed Potatoes?
Absolutely! I recommend using russet potatoes for their high starch content, which creates the ideal creamy texture. Their natural sweetness complements the roasted garlic beautifully, ensuring a mouthwatering result.

How should I store leftover Roasted Garlic Mashed Potatoes?
You can store your Roasted Garlic Mashed Potatoes in an airtight container in the fridge for up to 3 days. When reheating, I suggest adding a splash of milk to restore their creamy consistency, and warm them gently on the stove or in the microwave.

Can I freeze Roasted Garlic Mashed Potatoes?
Very! If you want to store them for longer, you can freeze your mashed potatoes for up to 2 months. To freeze, place them in a freezer-safe container or bag, removing as much air as possible. When you’re ready to eat, just thaw them overnight in the fridge and reheat slowly, adding a little milk or butter for creaminess.

What if my mashed potatoes turn out lumpy?
No worries! If you find your mashed potatoes are lumpy, it could be due to under-mashing or using the wrong utensil. For a smoother consistency, try using a ricer instead of a traditional masher. If they’ve already been served, you can use an immersion blender to blend them to your desired smoothness without overworking the potatoes.

Are Roasted Garlic Mashed Potatoes suitable for a gluten-free diet?
Absolutely! All the ingredients in Roasted Garlic Mashed Potatoes are naturally gluten-free, making them a wonderful option for anyone avoiding gluten. Just be sure to double-check any added ingredients, like broth or seasoning blends, to ensure they meet your dietary needs.

How long should I roast the garlic?
Great question! You should roast the garlic at 400°F for about 30-35 minutes, wrapped in aluminum foil. You’ll know it’s ready when it’s soft and caramelized, and you can easily squeeze the sweet, mellow cloves out of their skins. Enjoy the heavenly aroma while it cooks!

Roasted Garlic Mashed Potatoes

Roasted Garlic Mashed Potatoes

Indulge in creamy Roasted Garlic Mashed Potatoes, a comforting side that enhances any meal.
Print Recipe Pin Recipe
Prep Time 10 minutes mins
Cook Time 1 hour hr
Total Time 1 hour hr 10 minutes mins
Servings: 6 servings
Course: DINNER RECIPES
Cuisine: American
Calories: 250
Ingredients Equipment Method Nutrition Notes

Ingredients
  

For the Potatoes
  • 3 pounds russet potatoes these starchy potatoes create the ideal creamy texture for your Roasted Garlic Mashed Potatoes
  • 3 leaves dried bay leaves infuse your potatoes with subtle herbal notes that enhance their flavor
  • 4 teaspoons sea salt use this for boiling the potatoes to elevate their natural taste
For the Garlic
  • 2 heads garlic roasting turns this pungent bulb sweet and mellow, adding depth to your mash
For the Creaminess
  • 1 cup unsalted butter this rich ingredient ensures your potatoes are luxuriously creamy and luscious
  • 1 cup whole milk helps achieve a smooth consistency and adds welcome richness
For the Finishing Touches
  • freshly cracked black pepper adds a delightful hint of spice to balance the flavors
  • 1 tablespoon extra-virgin olive oil a drizzle gives a beautiful sheen and rounds out the taste perfectly

Equipment

  • Oven
  • Large pot
  • potato masher
  • aluminum foil

Method
 

How to Make Roasted Garlic Mashed Potatoes
  1. Preheat your oven to 400°F. Wrap the garlic heads in aluminum foil and roast for about 30-35 minutes until soft and caramelized.
  2. In a large pot, combine the diced russet potatoes with bay leaves and 4 teaspoons of sea salt. Cover with water, bring to a boil, and cook until tender, about 15-20 minutes.
  3. Once the potatoes are tender, drain and discard the bay leaves. Let the potatoes sit in the pot for a minute to allow excess moisture to evaporate.
  4. Add the roasted garlic, unsalted butter, whole milk, and freshly cracked black pepper to the drained potatoes. Mix it well into the mash.
  5. Use a potato masher or a hand mixer to mash the mixture until creamy and smooth, ensuring a velvety texture without lumps.
  6. Taste your masterpiece and adjust with additional salt and black pepper as needed. A final sprinkle of cracked pepper enhances the flavor beautifully!

Nutrition

Serving: 1cupCalories: 250kcalCarbohydrates: 30gProtein: 4gFat: 13gSaturated Fat: 8gPolyunsaturated Fat: 1gMonounsaturated Fat: 4gCholesterol: 30mgSodium: 450mgPotassium: 600mgFiber: 3gSugar: 1gVitamin A: 500IUVitamin C: 20mgCalcium: 50mgIron: 2mg

Notes

Optional: Drizzle with a touch of extra-virgin olive oil for a delightful finish.

Tried this recipe?

Let us know how it was!

Filed Under: DINNER RECIPES

Jalapeño Popper Cheese Ball

December 24, 2025 by JudyWhite Leave a Comment

When game day rolls around, I’m always on the lookout for that special dish that can elevate the snacks to a whole new level of deliciousness. Enter the Jalapeño Popper Cheese Ball, a crowd-pleaser that’s not only irresistible but also turns heads with its playful football shape. Picture this: a creamy, cheesy blend packed with zesty jalapeños and crispy bacon, all surrounded by a crunchy pecan coating. The first bite transports you to savory bliss, evoking the excitement of a tailgate party or a cozy get-together with friends.

I discovered this recipe after a leisurely Saturday afternoon spent rummaging through my fridge, inspired to create something fun and unique. Best of all? It’s deceptively simple to make! With just a few fresh ingredients and minimal prep time, you’ll be ready to impress your guests well before the kickoff. So, let’s dive into this quick, tasty, and visually entertaining Jalapeño Popper Cheese Ball that’s sure to steal the show!

Why You'll Love This Jalapeño Popper Cheese Ball

  • This Jalapeño Popper Cheese Ball is incredibly easy to make and comes together in just 36 minutes, making it a perfect choice for any gathering.
  • Bursting with flavor from the zesty jalapeños, creamy cheeses, and crispy bacon, it promises to delight everyone at your party.
  • Its fun football shape adds a playful visual appeal that will impress your guests and make for great Instagram photos.
  • Versatile enough to be served with crackers or chips, this dish can complement any spread and is guaranteed to be a crowd-pleaser at your next event.

Jalapeño Popper Cheese Ball Ingredients

For the Cheese Mixture
• 16 oz cream cheese – perfect for a rich and creamy base.
• 1 cup cheddar cheese (shredded) – adds a sharp, tangy flavor that complements the spice.
• ½ cup Monterey jack cheese (shredded) – brings a mild creaminess and is great for stretching.
• ½ cup pickled jalapeños (chopped) – infuses the mixture with zesty heat and tang.
• 1 pcs fresh jalapeño (deseeded & finely diced) – adds a fresh crunch and extra spice.
• ¼ cup green onion (sliced) – introduces a mild onion flavor that brightens the mix.
• ½ tsp garlic powder – enhances the depth of the cheese flavors.
• 8-10 slices bacon (cooked & cooled) – provides a crispy, savory crunch that balances the creaminess.

For the Coating
• ¼ cup pecans (finely chopped) – gives a crunchy and nutty outer layer that contrasts beautifully with the creamy inside.

For the Laces
• Extra Monterey jack cheese – use this to create realistic-looking laces on your football-shaped cheese ball.

How to Make Jalapeño Popper Cheese Ball

  1. Combine chopped pecans, fresh jalapeño, and half of the cooked bacon in a bowl. This mixture adds a fantastic crunch and kick, so set it aside to let the flavors meld.

  2. Blend cream cheese, cheddar cheese, Monterey jack cheese, pickled jalapeños, green onion, garlic powder, and the rest of the bacon in a larger bowl. Ensure everything is well combined until creamy and flavorful.

  3. Form the mixture into a ball, placing it on a tray. Use your hands to shape the cheese mixture into a football shape, adding to the fun presentation right from the start.

  4. Coat the ball by sprinkling the chopped pecan mixture all around. Press gently to help it adhere well—this creates a beautiful contrast with the creamy center.

  5. Create the ‘laces’ by cutting one long strip and four smaller strips from leftover Monterey jack cheese. Lay these across the top of the cheese ball for a realistic football touch.

  6. Serve immediately with your favorite crackers or chips for a delightful snack. Your guests will love diving into this fun and flavorful treat right away!

Optional: Garnish with additional sliced green onions for a fresh touch.

Exact quantities are listed in the recipe card below.

What to Serve with Jalapeño Popper Football Cheese Ball?

When you’re planning a gathering, pairing the delightful flavors of this cheesy creation can elevate your entire spread.

  • Crunchy Tortilla Chips: The crispy texture of chips provides the perfect contrast to the creamy cheese ball, creating a satisfying crunch in every bite.

  • Fresh Veggies Platter: Carrot sticks, cucumber slices, and bell pepper strips offer a refreshing crunch and a wholesome touch to balance the richness.

  • Sweet and Tangy Pickles: Dill or bread-and-butter pickles enhance the flavor profile with their acidity, cutting through the cheese’s creaminess beautifully.

  • Creamy Dips: Serve with a side of guacamole or salsa for an extra layer of flavor and freshness. The bright, vibrant tastes blend wonderfully.

  • Chilled Beer or Cider: A light lager or crisp apple cider pairs perfectly, refreshing the palate between bites of the cheesy indulgence.

  • Savory Sausage Rolls: Their flaky pastry and spiced sausage complement the cheese ball, creating a robust flavor experience that’s bound to impress.

  • Chocolate Brownies: To finish your spread with a sweet note, serve fudgy brownies for dessert. Their rich taste contrasts beautifully with savory bites.

Unleash the joy of sharing and savoring delightful combinations that make each moment memorable!

Make Ahead Options

These Jalapeño Popper Cheese Balls are an excellent choice for meal prep, allowing you to enjoy tasty snacking without the last-minute hustle! You can prepare the cheese mixture up to 24 hours in advance by blending all the ingredients except for the pecan coating and the laces. Simply shape the mixture into a ball, wrap it tightly in plastic wrap, and refrigerate until you’re ready to serve. To maintain that creamy texture, do not coat it with pecans until right before serving; this way, they’ll stay crunchy! When it’s time to impress your guests, just coat the cheese ball and add the Monterey jack cheese laces for a playful presentation. You’ll have a glorious snack ready to go with minimal effort, perfect for busy game days!

How to Store and Freeze Jalapeño Popper Cheese Ball

Fridge: Store any leftover Jalapeño Popper Cheese Ball wrapped tightly in plastic wrap or placed in an airtight container for up to 3 days to maintain freshness.

Freezer: For longer storage, you can freeze the cheese ball for up to 2 months. Wrap it tightly in plastic wrap and then in aluminum foil to prevent freezer burn.

Thawing: When ready to serve, transfer the frozen cheese ball to the fridge and allow it to thaw overnight. Re-chill it before serving for the best texture.

Reheating: This dish is best served cold, so there’s no need for reheating. Enjoy it straight from the fridge with your favorite snacks!

Jalapeño Popper Cheese Ball Variations

Embrace your creativity and customize this dish to delight your taste buds with every bite!

  • Spicy Kick: Add more fresh jalapeños or a splash of hot sauce to amp up the heat. Your guests will be reaching for that extra flavor!

  • Herb Infusion: Mix in chopped fresh herbs like cilantro or parsley for a fresh burst of flavor that brightens the entire cheese ball.

  • Smoky Flavor: Swap out the regular bacon for smoked bacon or add smoked paprika for a deep, savory twist to every creamy bite.

  • Nut-Free Option: Replace pecans with crushed tortilla chips or sunflower seeds for a delightful crunch without the nuts. This keeps the texture while catering to nut allergies.

  • Cheese Swap: Try different cheeses, like pepper jack or gouda, for a unique flavor profile and a twist on the classic recipe.

  • Creamy Avocado: Fold in mashed avocado for a creamy texture and a hint of freshness that perfectly complements the spicy elements. It’s a delicious surprise!

  • Sweet Surprise: For a touch of sweetness, incorporate some diced pineapple or chopped dried cranberries. This sweet and spicy combo will have everyone asking for your secret!

  • Vegan Delight: Use dairy-free cream cheese and a plant-based bacon substitute for a vegan-friendly version that doesn’t skimp on taste. Everyone can enjoy this crowd-pleaser!

Chef's Helpful Tips

  • For the Jalapeño Popper Cheese Ball, make sure the cream cheese is at room temperature for easier mixing and a smoother texture.
  • Be careful when adding fresh jalapeños; if you’re sensitive to spice, consider using fewer or remove the seeds entirely.
  • When shaping the cheese ball, wet your hands slightly to prevent sticking and achieve a neat football shape.
  • Allow the cheese ball to chill in the refrigerator for about 30 minutes before serving to help it hold its shape and enhance the flavors.

Jalapeño Popper Cheese Ball Recipe FAQs

What type of jalapeños should I use for the Jalapeño Popper Cheese Ball?
Absolutely! I recommend using a mix of pickled jalapeños for that tangy flavor, combined with fresh jalapeños for an added crunch. Ensure the fresh ones are firm and brightly colored for the best taste.

How long can I store the Jalapeño Popper Cheese Ball in the fridge?
Leftover Jalapeño Popper Cheese Ball can be stored in the fridge for up to 3 days. Wrap it tightly in plastic wrap or place it in an airtight container to keep it fresh and prevent it from absorbing other odors.

Can I freeze the Jalapeño Popper Cheese Ball?
Very! You can freeze the cheese ball for up to 2 months. Just wrap it tightly in plastic wrap, then in aluminum foil to avoid freezer burn. When you’re ready to enjoy it, thaw it in the refrigerator overnight and serve chilled.

What can I do if my Jalapeño Popper Cheese Ball is too soft?
If your cheese ball mixture is too soft to hold its shape, I suggest chilling it in the refrigerator for about 30 minutes. You can also mix in a little extra cream cheese or shredded cheese until you achieve the desired consistency.

Are there any allergy considerations for this recipe?
Yes, if you’re serving guests with dietary restrictions, be mindful of common allergens like dairy, bacon, and nuts in the pecan coating. You can easily substitute the bacon with a plant-based alternative and use sunflower seeds instead of pecans for those with nut allergies.

How can I enhance the flavor of my Jalapeño Popper Cheese Ball?
To add extra flavor, you can mix in some smoked paprika or diced sun-dried tomatoes into the cheese mixture. Another great tip is to let the cheese ball sit at room temperature for about 15 minutes before serving; this allows the flavors to meld and become even more delicious!

Jalapeño Popper Cheese Ball

Jalapeño Popper Cheese Ball

Jalapeño Popper Cheese Ball is an irresistible snack that combines creamy cheese, zesty jalapeños, and crispy bacon in a playful football shape.
Print Recipe Pin Recipe
Prep Time 15 minutes mins
Cook Time 21 minutes mins
Chilling Time 30 minutes mins
Total Time 36 minutes mins
Servings: 8 servings
Course: Snacks & Appetizers
Cuisine: American
Calories: 220
Ingredients Equipment Method Nutrition Notes

Ingredients
  

Cheese Mixture
  • 16 oz cream cheese perfect for a rich and creamy base.
  • 1 cup cheddar cheese (shredded) adds a sharp, tangy flavor that complements the spice.
  • ½ cup Monterey jack cheese (shredded) brings a mild creaminess and is great for stretching.
  • ½ cup pickled jalapeños (chopped) infuses the mixture with zesty heat and tang.
  • 1 pcs fresh jalapeño (deseeded & finely diced) adds a fresh crunch and extra spice.
  • ¼ cup green onion (sliced) introduces a mild onion flavor that brightens the mix.
  • ½ tsp garlic powder enhances the depth of the cheese flavors.
  • 8-10 slices bacon (cooked & cooled) provides a crispy, savory crunch that balances the creaminess.
Coating
  • ¼ cup pecans (finely chopped) gives a crunchy and nutty outer layer that contrasts beautifully with the creamy inside.
Laces
  • Extra Monterey jack cheese use this to create realistic-looking laces on your football-shaped cheese ball.

Equipment

  • Mixing bowl
  • Tray

Method
 

Preparation
  1. Combine chopped pecans, fresh jalapeño, and half of the cooked bacon in a bowl. This mixture adds a fantastic crunch and kick, so set it aside to let the flavors meld.
  2. Blend cream cheese, cheddar cheese, Monterey jack cheese, pickled jalapeños, green onion, garlic powder, and the rest of the bacon in a larger bowl. Ensure everything is well combined until creamy and flavorful.
  3. Form the mixture into a ball, placing it on a tray. Use your hands to shape the cheese mixture into a football shape, adding to the fun presentation right from the start.
  4. Coat the ball by sprinkling the chopped pecan mixture all around. Press gently to help it adhere well—this creates a beautiful contrast with the creamy center.
  5. Create the 'laces' by cutting one long strip and four smaller strips from leftover Monterey jack cheese. Lay these across the top of the cheese ball for a realistic football touch.
  6. Serve immediately with your favorite crackers or chips for a delightful snack. Your guests will love diving into this fun and flavorful treat right away!

Nutrition

Serving: 1servingCalories: 220kcalCarbohydrates: 4gProtein: 6gFat: 20gSaturated Fat: 10gPolyunsaturated Fat: 2gMonounsaturated Fat: 7gCholesterol: 40mgSodium: 400mgPotassium: 150mgFiber: 1gSugar: 1gVitamin A: 500IUVitamin C: 5mgCalcium: 200mgIron: 1mg

Notes

For best texture, ensure the cream cheese is at room temperature and chill the cheese ball for 30 minutes before serving.

Tried this recipe?

Let us know how it was!

Filed Under: SNACKS & APPETIZERS

Apple Fritter Focaccia

December 24, 2025 by JudyWhite Leave a Comment

There’s something deeply comforting about the sweet aroma of apples and cinnamon wafting through my kitchen, inviting everyone to gather ’round. One crisp fall afternoon, as I sought a way to marry the beloved flavors of apple fritters with the warmth of homemade bread, inspiration struck—Apple Fritter Focaccia. This delightful creation brings the essence of a classic apple fritter into a tender, fluffy focaccia that’s incredibly easy to make and perfect for sharing with friends and family.

With a mere 15 minutes of prep and a delightful transformation in the oven, you’ll find yourself indulging in a treat that impresses at any gathering. Ideal for lazy Sunday brunches or as a special dessert after dinner, this recipe is a fantastic way to break free from the monotony of takeout and fast food. So let’s dive into the deliciousness of apple fritter focaccia, and I promise, you won’t be able to resist a second slice!

Why You'll Love This Apple Fritter Focaccia

  • This Apple Fritter Focaccia is incredibly easy to make, requiring just 15 minutes of prep time to get you started.
  • The delightful combination of warm apples and cinnamon creates a flavor profile that feels both comforting and indulgent.
  • Its versatility allows it to shine at brunches, dessert tables, or simply as a cozy treat any time of day.
  • Plus, the visual appeal of the glazed, dimpled focaccia will make it a centerpiece that impresses your guests and makes your kitchen smell irresistible.

Apple Fritter Focaccia Ingredients

Get ready to create a flavorful masterpiece!

For the Dough

  • Water – 1 cup; essential for activating the yeast and creating a light texture.
  • Granulated Sugar – 2 tablespoons; helps feed the yeast for optimal rise.
  • Active Dry Yeast – 1 teaspoon; the magic that makes your focaccia fluffy.
  • Vegetable Oil – ⅓ cup, divided; gives moisture and richness to the dough.
  • All-Purpose Flour – 2 ½ cups; the base for your delightful bread.
  • Kosher Salt – ½ teaspoon; enhances flavor and strengthens the dough.

For the Filling

  • Unsalted Butter – ½ cup, melted; adds richness and a gorgeous glaze.
  • Light Brown Sugar – ½ cup, packed; caramelizes beautifully with the apples.
  • Ground Cinnamon – 2 tablespoons; infuses warmth and spice into the focaccia.
  • Vanilla Extract – ½ teaspoon; a hint of sweetness that complements the apples.
  • Granny Smith Apples – 3 medium, cored, peeled, finely diced; provide a tartness that balances the sweetness.

For the Glaze

  • Confectioners’ Sugar – 1 cup; creates a sweet, decadent finish.
  • Whole Milk – 2-3 tablespoons; used to achieve your desired glaze consistency.

This Apple Fritter Focaccia combines the comforts of homemade bread with the deliciousness of a classic dessert, making it an irresistible treat for any occasion!

How to Make Apple Fritter Focaccia

  1. Combine Ingredients: In a large bowl, mix together the water, sugar, and yeast. Allow the mixture to rest for about 5 minutes, until the yeast starts to bloom and becomes frothy.

  2. Incorporate Oil: Pour half of the vegetable oil into the yeast mixture. Set aside the remaining oil for later use.

  3. Mix Dry and Wet: Gradually add the all-purpose flour and kosher salt to the yeast mixture. Stir gently until everything is well combined.

  4. Let it Rise: Place the dough into a greased bowl and cover it with a clean cloth. Allow it to rise in a warm location for about 1 hour, or until it has doubled in size.

  5. Preheat Oven: While the dough is rising, preheat your oven to 450°F (232°C) to get it ready for baking.

  6. Prepare Baking Pan: Pour the remaining vegetable oil into a 9×11-inch baking pan. Use a pastry brush to spread the oil evenly across the bottom of the pan.

  7. Shape the Dough: Once the dough has risen, transfer it to the prepared baking pan, spreading it out gently to reach the edges.

  8. Make the Filling: In a medium bowl, combine the melted butter, brown sugar, ground cinnamon, and vanilla extract. Stir until everything is fully blended.

  9. Add Apples: Fold in the diced Granny Smith apples into the butter mixture, ensuring they are well coated for even flavor distribution.

  10. Layer the Dough: Spoon ⅓ of the apple mixture over the dough. Gently fold the edges of the dough towards the center over the filling, creating a cozy pocket.

  11. Reform the Dough: Carefully flip the dough over so the seam side is facing down. Gently press and stretch the dough back out to the edges of the baking pan.

  12. Make Dimples: Use your fingertips to create deep dimples across the surface of the dough, allowing for a beautiful texture.

  13. Top with Apples: Spread the remaining apple mixture evenly on top of the dough, allowing those lovely flavors to infuse while baking.

  14. Bake: Place the pan in the preheated oven and bake for 28-30 minutes, or until the focaccia is golden brown and the apples appear bubbly and caramelized.

  15. Prepare the Glaze: While the focaccia is baking, whisk together the confectioners’ sugar and milk in a small bowl, adding milk one tablespoon at a time until the glaze reaches your desired consistency.

  16. Drizzle Glaze: Once the focaccia is out of the oven, drizzle the prepared glaze over it while it’s still warm, creating an irresistible shine.

Optional: Serve warm with an extra sprinkle of cinnamon for added flavor.
Exact quantities are listed in the recipe card below.

Make Ahead Options

These Apple Fritter Focaccia are perfect for meal prep enthusiasts! You can prepare the dough up to 24 hours in advance by following the initial steps, then place it in a greased bowl, cover it tightly, and refrigerate. The apple filling can also be mixed and stored in an airtight container up to 3 days ahead. When you’re ready to bake, simply take the dough out of the fridge, allow it to come to room temperature for about 30 minutes, then continue with shaping and baking as directed. This technique not only saves time, but it also ensures that your focaccia remains just as delicious and fluffy!

How to Store and Freeze Apple Fritter Focaccia

Room Temperature: Store leftover Apple Fritter Focaccia in an airtight container at room temperature for up to 3 days to maintain its softness and flavor.

Fridge: If you prefer, you can refrigerate the focaccia wrapped tightly in plastic wrap or foil for up to 5 days; however, it may lose some of its tenderness.

Freezer: For longer storage, wrap slices of the focaccia in plastic wrap and place them in a freezer-safe bag. It can be frozen for up to 3 months, allowing you to enjoy this delectable treat anytime.

Reheating: To enjoy it warm again, reheat in the oven at 350°F (175°C) for about 10-15 minutes, or until heated through. Drizzle with a little extra glaze for a fresh touch!

Apple Fritter Focaccia Variations

Feel free to explore delightful twists that will make this Apple Fritter Focaccia even more personalized and tasty!

  • Gluten-Free: Substitute all-purpose flour with a gluten-free flour blend to accommodate gluten sensitivities while still indulging in the flavors you love. Be sure to check the blend’s ratio depending on package instructions for best baking results.

  • Nutty Crunch: Add ½ cup of chopped walnuts or pecans to the apple filling for an irresistible crunch and a lovely nutty flavor that complements the sweetness of the apples beautifully.

  • Dairy-Free: Replace the unsalted butter and whole milk with coconut oil and almond milk to make this recipe dairy-free, without sacrificing that delicious moist texture.

  • Spiced Up: For a kick of flavor, include a pinch of cayenne pepper or some finely grated ginger in the apple mixture, introducing a surprising warmth that balances the sweetness of the apples exquisitely.

  • Caramel Sauce: Drizzle warm caramel sauce over the baked focaccia in addition to or instead of the glaze for an extra indulgent treat that will send your taste buds soaring!

  • Chocolaty Delight: Fold in ½ cup of chocolate chips into the dough or sprinkle over the top with the apple mixture, bringing a decadent chocolate twist that will appeal to every chocoholic at the table.

  • Apple Varieties: Experiment with different apple varieties like Honeycrisp or Fuji for alternative flavor profiles. Each type brings its unique sweetness and texture, allowing you to create your signature version.

  • Fruit Fusion: Substitute apples with other fruits like pears or peaches for a seasonal twist, embracing the freshness of whatever fruit is on hand while keeping that warm, comforting nature of the focaccia.

These variations invite you to make the recipe your own and elevate your culinary experience, ensuring every bite is a lovely new surprise!

What to Serve with Apple Fritter Focaccia?

There’s nothing quite like the sweet, spiced goodness of apple fritter focaccia inviting friends and family to gather around the table.

  • Warm Vanilla Ice Cream: A scoop of creamy vanilla ice cream melts warmly over the focaccia, creating a luscious contrast to the soft bread.

  • Maple Syrup Drizzle: A touch of maple syrup enhances the warm flavors of cinnamon and apples, adding a sweet finish that feels like comfort.

  • Fresh Fruit Salad: A refreshing salad of berries and citrus balances the indulgence of the focaccia, providing a contrast of textures and brightness.

  • Cinnamon Sugar Dusting: A light sprinkle of cinnamon sugar adds an extra sweet crunch, elevating each bite with additional texture and flavor.

  • Autumn Spiced Chai: The warming spices of chai tea complement the cinnamon and apples perfectly, creating a cozy drink pairing for any occasion.

  • Toasted Nuts: Chopped walnuts or pecans add a delightful crunch and a nutty richness that complements the sweet and spiced focaccia beautifully.

  • Cream Cheese Frosting: For those with a sweet tooth, a dollop of cream cheese frosting brings a tangy sweetness that enhances the flavors and adds creaminess.

  • Pumpkin Spice Latte: This seasonal favorite pairs exquisitely with apple fritter focaccia, celebrating the flavors of fall in every sip and bite.

Chef's Helpful Tips

  • For the Apple Fritter Focaccia, always ensure your yeast is fresh by checking the expiration date before use.
  • When adding flour to the yeast mixture, do so gradually to prevent clumping and ensure a smooth dough.
  • Instead of just folding the edges of the dough over the filling, make sure to pinch the seams well to avoid any escaping flavors during baking.
  • Remember to keep an eye on the baking time as ovens can vary, and check for a golden-brown color and bubbly apples to know it’s perfectly done.

Apple Fritter Focaccia Recipe FAQs

What type of apples should I use for Apple Fritter Focaccia?
For this recipe, I recommend using Granny Smith apples. Their tartness balances the sweetness of the sugar and cinnamon perfectly. You could also experiment with Honeycrisp or Fuji apples for a sweeter alternative, but stick with varieties that hold up well during baking.

How should I store leftover Apple Fritter Focaccia?
Absolutely! Leftover focaccia should be stored in an airtight container at room temperature for up to 3 days. If you want to keep it longer, wrap it in plastic wrap and refrigerate for up to 5 days, although some tenderness may be sacrificed with refrigeration.

Can I freeze Apple Fritter Focaccia?
Yes, you can! To freeze your delicious focaccia, wrap slices tightly in plastic wrap and then place them in a freezer-safe bag. This way, you can enjoy the delightful treat for up to 3 months. Just make sure to label the bag with the date you froze it for reference.

What’s the best way to reheat Apple Fritter Focaccia?
To reheat your focaccia, preheat your oven to 350°F (175°C). Place the focaccia on a baking sheet and bake for 10-15 minutes, or until it’s heated through. For an extra touch, drizzle a little bit of the glaze over it before serving—it’ll make it feel fresh out of the oven!

What can I do if my dough doesn’t rise properly?
Very! If your dough isn’t rising, it could be due to inactive yeast. Make sure your yeast is fresh and check if your water is warm but not too hot (around 110°F or 43°C is ideal). If you keep your dough in a warm environment (like an oven with just the light on), it should rise beautifully within an hour. If all else fails, you can mix a packet of fresh yeast with a bit of sugar and warm water, and wait for it to bloom before adding it back into the original mix.

Is this recipe suitable for people with nut allergies?
Indeed! The Apple Fritter Focaccia does not contain nuts, making it suitable for those with nut allergies. However, always ensure that your kitchen and it’s equipment are nut-free to avoid cross-contamination. If you’re unsure, you can check with your guests about their allergies before serving.

Apple Fritter Focaccia

Apple Fritter Focaccia

Experience the warm flavors of apple fritters in a fluffy focaccia with this easy recipe for Apple Fritter Focaccia.
Print Recipe Pin Recipe
Prep Time 15 minutes mins
Cook Time 30 minutes mins
Rising Time 1 hour hr
Total Time 1 hour hr 45 minutes mins
Servings: 8 slices
Course: DESSERT RECIPES
Cuisine: American
Calories: 250
Ingredients Equipment Method Nutrition Notes

Ingredients
  

For the Dough
  • 1 cup Water essential for activating the yeast and creating a light texture.
  • 2 tablespoons Granulated Sugar helps feed the yeast for optimal rise.
  • 1 teaspoon Active Dry Yeast the magic that makes your focaccia fluffy.
  • ⅓ cup Vegetable Oil divided; gives moisture and richness to the dough.
  • 2 ½ cups All-Purpose Flour the base for your delightful bread.
  • ½ teaspoon Kosher Salt enhances flavor and strengthens the dough.
For the Filling
  • ½ cup Unsalted Butter melted; adds richness and a gorgeous glaze.
  • ½ cup Light Brown Sugar packed; caramelizes beautifully with the apples.
  • 2 tablespoons Ground Cinnamon infuses warmth and spice into the focaccia.
  • ½ teaspoon Vanilla Extract a hint of sweetness that complements the apples.
  • 3 medium Granny Smith Apples cored, peeled, finely diced; provide a tartness that balances the sweetness.
For the Glaze
  • 1 cup Confectioners' Sugar creates a sweet, decadent finish.
  • 2-3 tablespoons Whole Milk used to achieve your desired glaze consistency.

Equipment

  • Large Bowl
  • 9×11-inch baking pan
  • pastry brush
  • medium bowl

Method
 

Directions
  1. In a large bowl, mix together the water, sugar, and yeast. Allow the mixture to rest for about 5 minutes, until the yeast starts to bloom and becomes frothy.
  2. Pour half of the vegetable oil into the yeast mixture. Set aside the remaining oil for later use.
  3. Gradually add the all-purpose flour and kosher salt to the yeast mixture. Stir gently until everything is well combined.
  4. Place the dough into a greased bowl and cover it with a clean cloth. Allow it to rise in a warm location for about 1 hour, or until it has doubled in size.
  5. While the dough is rising, preheat your oven to 450°F (232°C) to get it ready for baking.
  6. Pour the remaining vegetable oil into a 9×11-inch baking pan. Use a pastry brush to spread the oil evenly across the bottom of the pan.
  7. Once the dough has risen, transfer it to the prepared baking pan, spreading it out gently to reach the edges.
  8. In a medium bowl, combine the melted butter, brown sugar, ground cinnamon, and vanilla extract. Stir until everything is fully blended.
  9. Fold in the diced Granny Smith apples into the butter mixture, ensuring they are well coated for even flavor distribution.
  10. Spoon ⅓ of the apple mixture over the dough. Gently fold the edges of the dough towards the center over the filling, creating a cozy pocket.
  11. Carefully flip the dough over so the seam side is facing down. Gently press and stretch the dough back out to the edges of the baking pan.
  12. Use your fingertips to create deep dimples across the surface of the dough, allowing for a beautiful texture.
  13. Spread the remaining apple mixture evenly on top of the dough, allowing those lovely flavors to infuse while baking.
  14. Place the pan in the preheated oven and bake for 28-30 minutes, or until the focaccia is golden brown and the apples appear bubbly and caramelized.
  15. While the focaccia is baking, whisk together the confectioners' sugar and milk in a small bowl, adding milk one tablespoon at a time until the glaze reaches your desired consistency.
  16. Once the focaccia is out of the oven, drizzle the prepared glaze over it while it’s still warm, creating an irresistible shine.

Nutrition

Serving: 1sliceCalories: 250kcalCarbohydrates: 35gProtein: 3gFat: 12gSaturated Fat: 7gMonounsaturated Fat: 4gCholesterol: 30mgSodium: 150mgPotassium: 100mgFiber: 1gSugar: 10gVitamin A: 200IUVitamin C: 2mgCalcium: 30mgIron: 1mg

Notes

For optimal flavor, serve warm with an extra sprinkle of cinnamon and enjoy its delightful texture.

Tried this recipe?

Let us know how it was!

Filed Under: DESSERT RECIPES

4-Ingredient Date Caramels Recipe

December 24, 2025 by JudyWhite Leave a Comment

Have you ever had a moment when something simple transforms into something spectacular? That’s exactly how I felt when I experimented with these 4-Ingredient Date Caramels. While rummaging through my pantry, I came across a bag of medjool dates just waiting to shine. The sweet, caramel-like flavor of dates combined with creamy almond butter and a silky chocolate topping created a treat that stole my heart—and my taste buds!

What I love most about this recipe is its effortless charm. With only four ingredients and minimal prep time, these date caramels come together in a flash. Perfect for satisfying cravings without the guilt, they’re not just a healthier alternative to store-bought candy; they also boast a rich flavor profile that will leave everyone asking for more.

Whether it’s date night, a casual coffee gathering, or just a sweet tooth craving, I guarantee that this delightful recipe will become a staple in your kitchen. Are you ready to elevate your dessert game with these magical bites? Let’s dive into the recipe!

Why You'll Love This 4-Ingredient Date Caramels Recipe

  • This 4-Ingredient Date Caramels Recipe is incredibly easy to make, requiring just a few ingredients and minimal prep time.
  • The rich, decadent flavor of dates and chocolate creates a dessert that feels indulgent without the guilt.
  • These caramels are versatile enough to enjoy on various occasions, whether you’re hosting a party or just treating yourself.
  • Plus, their beautiful appearance makes them a visually stunning addition to any dessert table, guaranteed to impress your guests.

4-Ingredient Date Caramels Ingredients

• Discover the sweetness behind these delights!

For the Base
• Medjool dates – pitted and packed, these are the star of the show, giving a caramel-like flavor that’s simply irresistible.
• Almond butter – this adds creaminess and a nutty undertone; feel free to substitute with any nut or seed butter you have on hand.
• Coconut oil – the melted oil helps bind the ingredients, providing a rich texture; you can swap this for another oil if desired.

For the Topping
• Chocolate chips – choose semi-sweet or dark for a decadent layer that perfectly complements the date base; an 8-ounce chocolate bar works beautifully too.
• Coconut oil – melted and mixed with the chocolate, it creates a silky smooth finish that makes these 4-Ingredient Date Caramels extra luscious!

How to Make 4-Ingredient Date Caramels

  1. Combine Ingredients: Begin by adding the pitted medjool dates, almond butter, and melted coconut oil into a food processor. Blend everything until smooth and creamy, which should take about 1-2 minutes.

  2. Spread Mixture: Once blended, pour the luscious date mixture into a lined dish. Use a spatula to spread it evenly, making sure it reaches all corners for uniform thickness.

  3. Melt Chocolate: In a microwave-safe bowl, melt the chocolate chips or chocolate bar together with the additional coconut oil. Heat in 30-second increments, stirring each time, until it’s smooth and silky.

  4. Top the Base: Carefully pour the melted chocolate over your date mixture. Use a spatula to spread it evenly, ensuring that it fully covers the base for a decadent finish.

  5. Chill to Set: Place the dish in the refrigerator for several hours, or until the mixture is set firm. Once chilled, remove from the fridge and cut into squares for serving.

Optional: Drizzle some extra melted chocolate on top for a beautiful garnish.

Exact quantities are listed in the recipe card below.

What to Serve with 4-Ingredient Date Caramels?

Elevate your dessert table with delightful pairings that complement these luscious treats beautifully!

  • Fresh Berries: The tartness of strawberries, raspberries, or blueberries adds a refreshing contrast to the rich sweetness of the caramels.
  • Vanilla Ice Cream: Serve with a scoop of creamy vanilla ice cream for an indulgent dessert experience that marries textures perfectly.
  • Nutty Granola: Sprinkle some crunchy granola on top for added texture and a wholesome twist that balances sweetness with nuttiness.
  • Herbal Tea: A calming cup of chamomile or mint tea pairs beautifully, cleansing the palate while enhancing the dessert’s rich flavors.
  • Dark Chocolate Drizzle: Elevate each bite further with a warm drizzle of dark chocolate, enhancing the depth of flavor for true chocolate lovers.
  • Coffee: A strong espresso or smooth latte makes a fantastic accompaniment, bringing out the caramel-like flavors in the dates.
  • Almonds: Roasted almonds can add a delightful crunch and flavor contrast, making each bite even more satisfying.
  • Sea Salt Flakes: A sprinkle of flaky sea salt on top brings balance to the sweetness, highlighting the rich flavors of your date caramels.
  • Coconut Whipped Cream: This adds a light, tropical touch that contrasts beautifully with the richness of the caramels.

4-Ingredient Date Caramels Variations

Feel free to sprinkle your own personal touch on these delightful treats for an extra layer of goodness.

  • Nut-Free: Swap almond butter for sunflower seed butter to make this a nut-free delight; it still brings in that creamy texture with a unique taste.

  • Vegan: Ensure your chocolate chips are dairy-free, and you’ve got a fully vegan treat that’s bursting with flavor!

  • Spicy Kick: Add a dash of cayenne pepper or chili powder to your date mixture for a surprising heat that contrasts beautifully with the sweetness.

  • Coconut Delight: Mix shredded coconut into the date mixture before spreading it in the dish, yielding a tropical twist that’s oh-so-irresistible.

  • Chocolate Variation: Use white chocolate instead of dark to create a sweeter, creamier topping that pairs beautifully with the caramel-like dates.

  • Fruit Fusion: Stir in chopped dried fruits like apricots or figs into the date mixture for additional texture and bursts of flavor.

  • Peanut Butter Pleasure: Feel free to substitute almond butter with peanut butter for a deliciously rich and comforting flavor that’s hard to resist.

  • Salted Caramel Touch: Sprinkle a pinch of sea salt over the chocolate layer before it sets to create an indulgent salted caramel taste that will have everyone coming back for more.

Make Ahead Options

These 4-Ingredient Date Caramels are perfect for meal prep enthusiasts! You can make the date and almond butter base up to 24 hours in advance. Simply blend the pitted medjool dates, almond butter, and melted coconut oil, then spread it into the lined dish. Cover it tightly with plastic wrap and refrigerate. The chocolate topping can also be prepared in advance but is best added right before serving for optimum freshness and flavor. When ready to indulge, melt the chocolate and coconut oil, pour it over the chilled base, and let it set. With these make-ahead options, you’ll have delicious date caramels ready to enjoy with minimal effort during busy weeknights.

How to Store and Freeze 4-Ingredient Date Caramels

Fridge: Store the cut squares in an airtight container in the refrigerator for up to 1 week. This keeps the date caramels fresh and ready to enjoy at a moment’s notice.

Freezer: For longer storage, freeze the caramels in a single layer on a baking sheet, then transfer to a freezer-safe container or bag for up to 3 months. Thaw in the fridge when ready to indulge.

Reheating: Reheating isn’t necessary, but if desired, let the caramels sit at room temperature for about 10-15 minutes before serving for the best texture.

Wrap Well: If planning to freeze, wrap each piece separately in wax paper or parchment to prevent sticking, ensuring you can enjoy these delightful 4-Ingredient Date Caramels anytime!

Chef's Helpful Tips

  • When making 4-Ingredient Date Caramels, ensure your medjool dates are soft and fresh for the best flavor and texture; soaking them in warm water for a few minutes can help if they are dry.
  • If you want a richer taste, toast your almond butter lightly before mixing it with the dates, as this enhances the nutty flavor.
  • When melting chocolate, be careful not to overheat it; stirring at short intervals will help prevent scorching and ensure a perfect silky texture.
  • Allow the caramels to chill in the refrigerator for at least four hours, as this will help them firm up nicely and make cutting into squares much easier.

4-Ingredient Date Caramels Recipe FAQs

How do I choose the best medjool dates?
Absolutely! When selecting medjool dates, look for ones that are plump and shiny, not dried out. Avoid dates with dark spots all over, which can indicate spoilage. Fresh dates should feel soft and have a caramel-like sweetness. If your dates feel firm, you might want to soak them in warm water for about 10 minutes to soften them for blending.

How should I store my 4-Ingredient Date Caramels?
Very simple! Store the cut squares in an airtight container in the refrigerator for up to 1 week. This keeps them fresh and ready to enjoy whenever you have a sweet craving. Just make sure to separate layers with parchment paper to prevent sticking!

Can I freeze these caramels and how long do they last?
Absolutely! For longer storage, place the cut squares in a single layer on a baking sheet and freeze until firm. After that, transfer them to a freezer-safe container or bag and they can last for up to 3 months. When you’re ready to enjoy, just thaw them in the fridge overnight or leave them at room temperature for about 10-15 minutes before serving to regain their lovely texture.

What if the chocolate topping isn’t melting smoothly?
No worries! If you find your chocolate isn’t melting smoothly, it may have been overheated. Try lowering the microwave power setting and heat in 15-second increments, stirring after each until you have a silky-smooth texture. If it’s too thick, add a tiny splash more coconut oil to help it melt down perfectly.

Are these date caramels safe for those with nut allergies?
Very much so! You can easily substitute the almond butter with sunbutter or another seed-based alternative to make these caramels nut-free. This way, you can still indulge in these delicious treats without worrying about allergies, making them suitable for everyone at the table.

Can I add other ingredients to this recipe?
Of course! The more, the merrier! Feel free to add a pinch of sea salt on top for that sweet-salty combination, or swirl in some nutmeg or cinnamon for a warm spice. You could even mix in some chopped nuts or dried fruit into the date base for added texture and flavor goodness. Experimenting is part of the fun!

4-Ingredient Date Caramels Recipe

4-Ingredient Date Caramels Recipe

Delight in these 4-Ingredient Date Caramels that combine medjool dates, almond butter, and chocolate for a guilt-free treat.
Print Recipe Pin Recipe
Prep Time 15 minutes mins
Cook Time 5 minutes mins
Chilling Time 4 hours hrs
Total Time 6 hours hrs
Servings: 16 squares
Course: DESSERT RECIPES
Cuisine: American
Calories: 120
Ingredients Equipment Method Nutrition Notes

Ingredients
  

For the Base
  • 2 cups medjool dates pitted and packed
  • 1/2 cup almond butter can substitute with any nut or seed butter
  • 2 tablespoons coconut oil melted
For the Topping
  • 1 cup chocolate chips semi-sweet or dark
  • 1 tablespoon coconut oil melted

Equipment

  • Food processor
  • microwave-safe bowl
  • Spatula
  • lined dish

Method
 

How to Make 4-Ingredient Date Caramels
  1. Begin by adding the pitted medjool dates, almond butter, and melted coconut oil into a food processor. Blend everything until smooth and creamy, which should take about 1-2 minutes.
  2. Once blended, pour the luscious date mixture into a lined dish. Use a spatula to spread it evenly, making sure it reaches all corners for uniform thickness.
  3. In a microwave-safe bowl, melt the chocolate chips or chocolate bar together with the additional coconut oil. Heat in 30-second increments, stirring each time, until it's smooth and silky.
  4. Carefully pour the melted chocolate over your date mixture. Use a spatula to spread it evenly, ensuring that it fully covers the base for a decadent finish.
  5. Place the dish in the refrigerator for several hours, or until the mixture is set firm. Once chilled, remove from the fridge and cut into squares for serving.

Nutrition

Serving: 1squareCalories: 120kcalCarbohydrates: 15gProtein: 3gFat: 6gSaturated Fat: 2gPolyunsaturated Fat: 1gMonounsaturated Fat: 3gSodium: 10mgPotassium: 150mgFiber: 2gSugar: 8gCalcium: 20mgIron: 1mg

Notes

If desired, drizzle some extra melted chocolate on top for a beautiful garnish. Ensure medjool dates are soft and fresh for better flavor and texture; soak in warm water if they're dry. Allow caramels to chill in the refrigerator for at least four hours for easier cutting.

Tried this recipe?

Let us know how it was!

Filed Under: DESSERT RECIPES

Strawberry Shortcake Puppy Chow Recipe

December 24, 2025 by JudyWhite Leave a Comment

There’s something utterly delightful about the combination of strawberries and cream that just brings a smile to your face. When I created this Strawberry Shortcake Puppy Chow Recipe, I knew I was onto something special—a sweet snack that captures all the essence of a classic dessert while keeping things incredibly simple.

One afternoon, as I was dreaming of summer’s sweet treat, I found my pantry overflowing with Chex cereal and a lone bag of freeze-dried strawberries. A lightbulb moment sparked; why not blend these pantry staples into a delightful snack that screams indulgence without the fuss?

In just 17 minutes, you can whip up this crunchy, chocolatey concoction that’s perfect for movie nights, road trips, or even just when lounging around at home. The best part? It’s ridiculously easy to make and will keep everyone coming back for more. Trust me, once you taste this fruity twist on the traditional puppy chow, you’ll want to share it with everyone in your life!

Why You'll Love This Strawberry Shortcake Puppy Chow

  • This Strawberry Shortcake Puppy Chow is incredibly easy to make, allowing you to whip it up in just 17 minutes.
  • The flavor is a delightful blend of sweet strawberries and creamy white chocolate that will have your taste buds dancing with joy.
  • Its versatility makes it perfect for any occasion, whether it’s a movie night, a picnic, or a casual get-together with friends.
  • Plus, its vibrant colors and playful textures create an eye-catching treat that is sure to impress everyone you serve it to.

Strawberry Shortcake Puppy Chow Ingredients

• Here’s everything you need for the perfect Strawberry Shortcake Puppy Chow recipe.

For the Cereal Mix

  • Freeze-dried strawberries – These provide a powerful burst of strawberry flavor and a beautiful hue.
  • Rice or corn Chex cereal – They offer the perfect crunch and act as the base for your puppy chow.

For the Coating

  • White chocolate chips – Melt these to create a creamy, sweet coating that binds everything together.
  • Powdered sugar – This adds sweetness and helps to coat the mixture for that classic puppy chow texture.

Get ready to make an irresistible snack that everyone will love!

How to Make Strawberry Shortcake Puppy Chow

  1. Process Strawberries: Begin by placing the freeze-dried strawberries in a food processor. Pulse until they transform into a fine powder, adding fantastic flavor to your puppy chow.

  2. Mix Dry Ingredients: In a bowl, combine the strawberry powder and powdered sugar, stirring until the mixture is evenly colored. Transfer this vibrant blend into a 1-gallon freezer bag and seal it tightly.

  3. Melt Chocolate: Grab your white chocolate chips and melt them in the microwave. Use 30-second intervals, stirring in between until smooth and completely melted—be careful not to overheat!

  4. Coat the Cereal: In a large bowl, gently fold the melted chocolate into the Chex cereal. Stir until every piece is coated, being sure not to crush them. Once coated, pour the mixture into the freezer bag and toss it gently to ensure an even coat.

  5. Set the Treats: Spread the chocolate-covered cereal mix onto a baking sheet. Chill it in the refrigerator for about 15 minutes to let the chocolate set, then store in an airtight container for you to enjoy!

Optional: Serve with a sprinkle of extra powdered sugar for a beautiful presentation!

Exact quantities are listed in the recipe card below.

Make Ahead Options

You can easily prepare this Strawberry Shortcake Puppy Chow Recipe in advance, saving you precious time during busy days! The strawberry powder and powdered sugar mixture can be made up to 3 days ahead; just keep it sealed in the freezer bag to preserve freshness. Additionally, you can melt the white chocolate and coat the cereal up to 24 hours in advance—simply store the chocolate-covered mix in an airtight container. When you’re ready to serve, just lay the mixture out on a baking sheet, refrigerate for 15 minutes if needed, and voila! You’ll have a delectable snack that’s just as delicious even after prepping ahead!

How to Store and Freeze Strawberry Shortcake Puppy Chow

Airtight Container: Store your Strawberry Shortcake Puppy Chow in an airtight container at room temperature for up to 5 days. This keeps it crunchy and prevents moisture from ruining the texture.

Refrigerator: If you’re looking to extend its freshness, pop it in the fridge where it can last for up to 2 weeks. Just make sure it’s in an airtight container to avoid any odors.

Freezing: For long-term storage, you can freeze your Strawberry Shortcake Puppy Chow for up to 3 months. Place it in a freezer-safe bag, squeezing out as much air as possible before sealing.

Reheating: When you’re ready to enjoy it, simply let it thaw at room temperature. There’s no need to reheat—it’s delicious as is!

What to Serve with Strawberry Shortcake Puppy Chow?

Are you ready to elevate your snack game and create a memorable experience with this delightful treat?

  • Fresh Fruit Salad: Bursting with seasonal fruits, this refreshing dish adds a bright and tangy contrast to the sweet puppy chow. A blend of berries will perfectly complement the strawberry flavor.

  • Vanilla Ice Cream: Serve a scoop alongside for a luscious and creamy pairing that echoes the flavors of strawberry shortcake. The cool creaminess enhances the sweet crunch of your creation.

  • Chocolate-Dipped Pretzels: With a perfect crunch and salty-sweet balance, these elevate the texture experience while providing a delightful contrast to the puppy chow. Enjoy them together for a fun snack platter!

  • Sparkling Lemonade: A fizzy drink with a hint of tartness will cleanse your palate beautifully between bites of the sweet snack. It’s a refreshing accompaniment that brings a joyful sparkle to any occasion.

  • White Chocolate Mocha: This cozy beverage mimics the flavors in your dessert, with creamy white chocolate and a hint of coffee warmth. It makes for a comforting pairing during chilly evenings.

  • Mini Cheesecakes: These bite-sized delights lend a rich and creamy texture that beautifully balances the crunch of the puppy chow. Create a delightful spread of flavors that will impress everyone at your gathering.

  • Choconut Pops: Chocolate-covered strawberries on a stick will visually mirror the essence of your treat while offering an extra layer of indulgence. Perfect for sharing or enjoying on your own!

  • Fruit-Infused Water: Keep it simple with refreshing infusions like cucumber and mint or berries for a tasteful drink that complements the sweetness of the puppy chow. It’s hydrating and elegant!

With these delightful pairings, you’ll create a dessert experience that is not only sweet but filled with inviting textures and flavors!

Strawberry Shortcake Puppy Chow Variations

Feel free to get creative and make this delightful recipe your own with these fun variations!

  • Dark Chocolate: Swap out white chocolate chips for dark chocolate for a richer, more intense flavor. The bittersweet notes will balance beautifully with the sweet strawberries.

  • Nut Butter: Drizzle in your favorite nut butter, like almond or peanut butter, before coating, adding a creamy texture and nutty flavor that perfectly complements the sweetness.

  • Gluten-Free: Use gluten-free Chex cereal to make this treat suitable for those with gluten sensitivities. Everyone can join in the fun without sacrificing taste!

  • Coconut Flakes: Stir in unsweetened coconut flakes for a tropical twist. This will not only enhance the flavor but will also add a delightful chewiness to your mix.

  • Spicy Kick: Add a pinch of cayenne or chili powder to the strawberry-powdered sugar mix for a surprising spicy element. A little heat makes a sweet treat even more exciting!

  • Dried Fruit Mix: Incorporate other freeze-dried fruits like raspberries or blueberries for added flavor complexity and a beautiful burst of color in every bite.

  • Cereal Fusion: Mix in other cereals like Fruity Pebbles or Cheerios for a fun textural variety and a hit of extra sweetness that turns up the joy dial!

  • Presentation Twist: To elevate your treats, drizzle melted chocolate on top or sprinkle them with colorful sprinkles before serving, creating a visually stunning surprise that appeals to all ages.

Chef's Helpful Tips

  • For the Strawberry Shortcake Puppy Chow, using freeze-dried strawberries instead of fresh will give you a more concentrated flavor and vibrant color.
  • When melting the white chocolate chips, make sure to stir them frequently to prevent scorching and ensure a silky texture.
  • Remember to fold the chocolate gently with the cereal to keep the pieces intact and crunchy.
  • Refrigerating the mixture for the full 15 minutes allows the chocolate to set properly, giving you the best texture for your finished snack.

Strawberry Shortcake Puppy Chow Recipe FAQs

What type of freeze-dried strawberries should I use?
Absolutely! When selecting freeze-dried strawberries, look for brands that show bright red, whole pieces with no added sugar or preservatives. This ensures that you’ll get the pure, delicious strawberry flavor that shines through in your Strawberry Shortcake Puppy Chow recipe.

How should I store the Strawberry Shortcake Puppy Chow?
For the best texture, keep your Strawberry Shortcake Puppy Chow in an airtight container at room temperature for up to 5 days. If you’re looking to extend its life even further, store it in the refrigerator, where it can last up to 2 weeks. Just remember to keep it sealed tight to avoid any odor absorption!

Can I freeze Strawberry Shortcake Puppy Chow, and how?
Yes! To freeze your Strawberry Shortcake Puppy Chow, start by placing it into a freezer-safe plastic bag. Be sure to squeeze out as much air as you can before sealing the bag to prevent freezer burn. It will keep well for up to 3 months. When you’re ready to enjoy it, simply let it thaw at room temperature—there’s no need to reheat, as it’s scrumptious even straight from the freezer!

What to do if my chocolate is too thick?
Very! If you find that your melted white chocolate is too thick, it could be due to overheating. To rescue it, try adding a teaspoon of vegetable oil or coconut oil while stirring to thin it out and achieve a smoother consistency. Be sure to melt gently next time, using the 30-second intervals for the best results.

Is this recipe safe for dogs?
No, this Strawberry Shortcake Puppy Chow is not suitable for dogs. It contains chocolate, which is toxic to dogs. If you have a furry friend and want to share snack time, consider making a dog-friendly treat using peanut butter and oats instead!

Strawberry Shortcake Puppy Chow Recipe

Strawberry Shortcake Puppy Chow Recipe

Enjoy the delightful Strawberry Shortcake Puppy Chow Recipe, a sweet and simple snack that captures the essence of strawberries and cream.
Print Recipe Pin Recipe
Prep Time 17 minutes mins
Total Time 17 minutes mins
Servings: 4 cups
Course: Snacks & Appetizers
Cuisine: American
Calories: 380
Ingredients Equipment Method Nutrition Notes

Ingredients
  

For the Cereal Mix
  • 1 cup Freeze-dried strawberries Provides powerful strawberry flavor.
  • 4 cups Rice or corn Chex cereal Acts as the base for the puppy chow.
For the Coating
  • 2 cups White chocolate chips Melted to create the coating.
  • 1 cup Powdered sugar Adds sweetness and coats the mixture.

Equipment

  • Food processor
  • Microwave
  • Large Bowl
  • Baking sheet
  • 1-gallon freezer bag

Method
 

How to Make Strawberry Shortcake Puppy Chow
  1. Begin by placing the freeze-dried strawberries in a food processor. Pulse until they transform into a fine powder.
  2. In a bowl, combine the strawberry powder and powdered sugar, stirring until the mixture is evenly colored. Transfer this blend into a 1-gallon freezer bag and seal tightly.
  3. Melt the white chocolate chips in the microwave using 30-second intervals, stirring until smooth.
  4. In a large bowl, gently fold the melted chocolate into the Chex cereal until every piece is coated. Pour the mixture into the freezer bag and toss gently.
  5. Spread the chocolate-covered cereal mix onto a baking sheet. Chill in the refrigerator for about 15 minutes to let the chocolate set, then store in an airtight container.

Nutrition

Serving: 1cupCalories: 380kcalCarbohydrates: 50gProtein: 5gFat: 18gSaturated Fat: 10gPolyunsaturated Fat: 2gMonounsaturated Fat: 4gCholesterol: 5mgSodium: 50mgPotassium: 120mgFiber: 2gSugar: 30gVitamin A: 100IUVitamin C: 2mgCalcium: 50mgIron: 1mg

Notes

For best flavor, use freeze-dried strawberries. Stir chocolate frequently while melting to avoid scorching.

Tried this recipe?

Let us know how it was!

Filed Under: SNACKS & APPETIZERS

  • « Previous Page
  • 1
  • …
  • 29
  • 30
  • 31
  • 32
  • 33
  • …
  • 49
  • Next Page »

Recent Posts

  • Crispy Potatoes in Oven
  • Lucky Charms Pancakes
  • Cheeseburger
  • Boiled Corn on the Cob
  • St. Patrick’s Day Dessert Parfaits

Recent Comments

No comments to show.

Footer

  • Contact
  • Privacy Policy
  • About Us
  • Terms
  • ↑ back to top

Copyright © 2024 www.Forkono.com

Table Of Content