The first time I bit into a crispy cauliflower wing, I was pleasantly surprised by the explosion of flavors and satisfying crunch. Who knew something so simple could rival even my favorite deep-fried treats? This Crispy Vegan Bang Bang Cauliflower Wings Recipe is a delightful way to bring a little excitement to your dinner table, especially when you’re craving a vibrant alternative to fast food.
Picture this: a cozy evening with friends, laughter filling the air, and the spicy aroma of sambal oelek and maple syrup wafting from the oven. These cauliflower wings not only impress with their golden-brown perfection but also pack a punch of flavor that even the most ardent meat-lover won’t be able to resist. Whether it’s game night or a casual family dinner, this dish comes together in just 35 minutes, making it an effortless showstopper. Trust me, you’ll want to keep this recipe in your back pocket for when that snack craving hits!
Why You'll Love This Crispy Vegan Bang Bang Cauliflower Wings Recipe
- These wings are incredibly easy to prepare, making them perfect for a quick snack or a fun meal.
- The explosion of flavors from the sambal oelek and maple syrup creates a mouthwatering experience that everyone will enjoy.
- Their versatility allows them to shine as an appetizer or main dish at any gathering.
- With just 35 minutes from start to finish, you’ll satisfy your cravings without spending all day in the kitchen.
Crispy Vegan Bang Bang Cauliflower Wings Ingredients
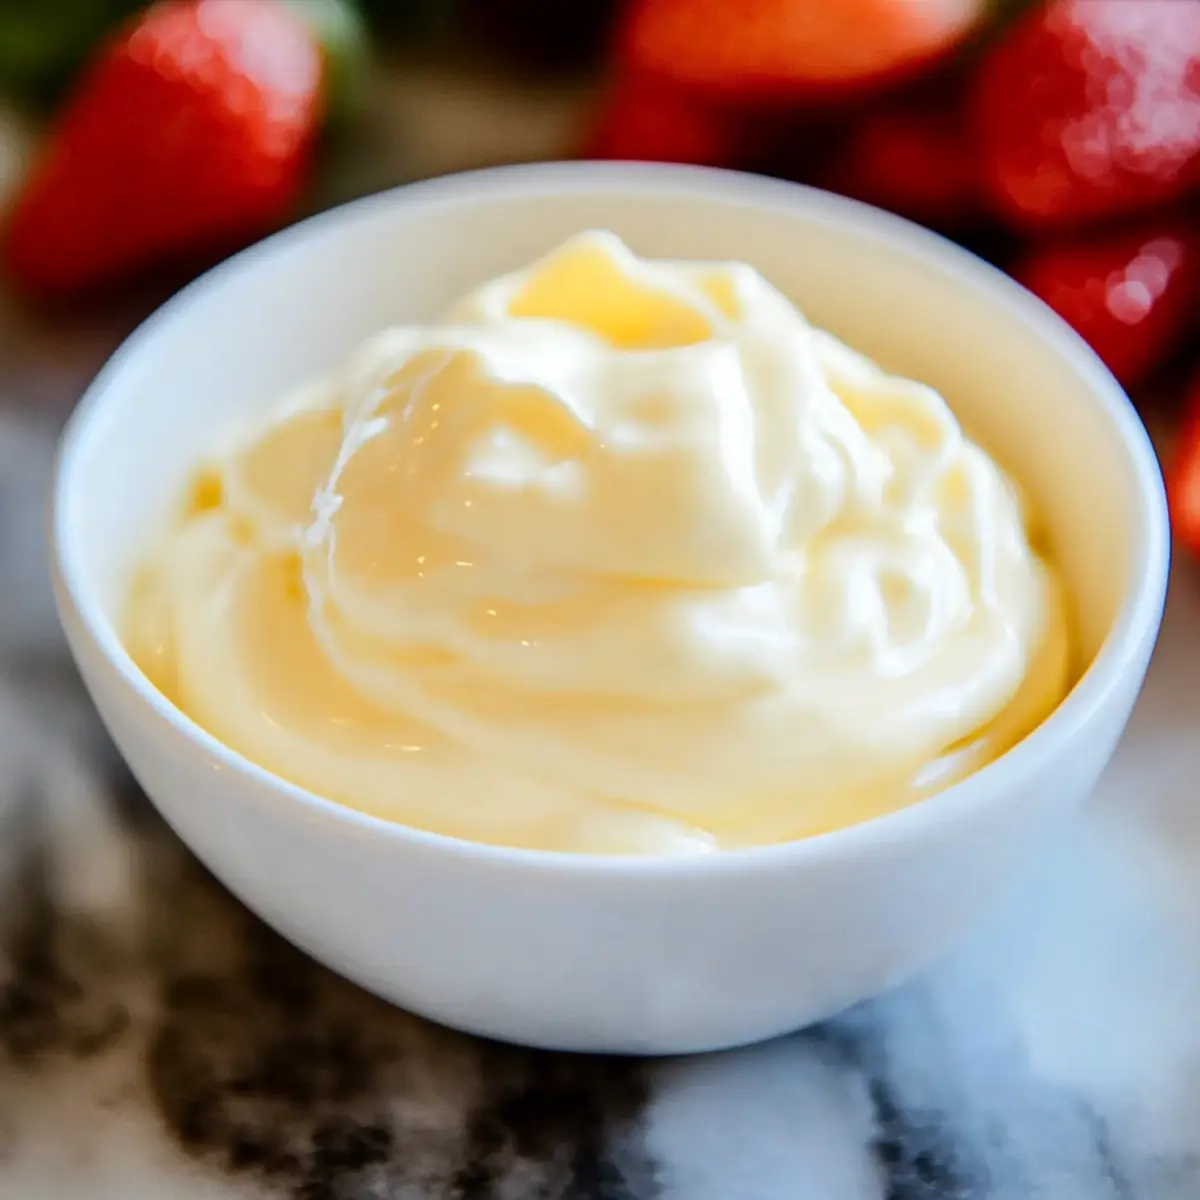
For the Sauce
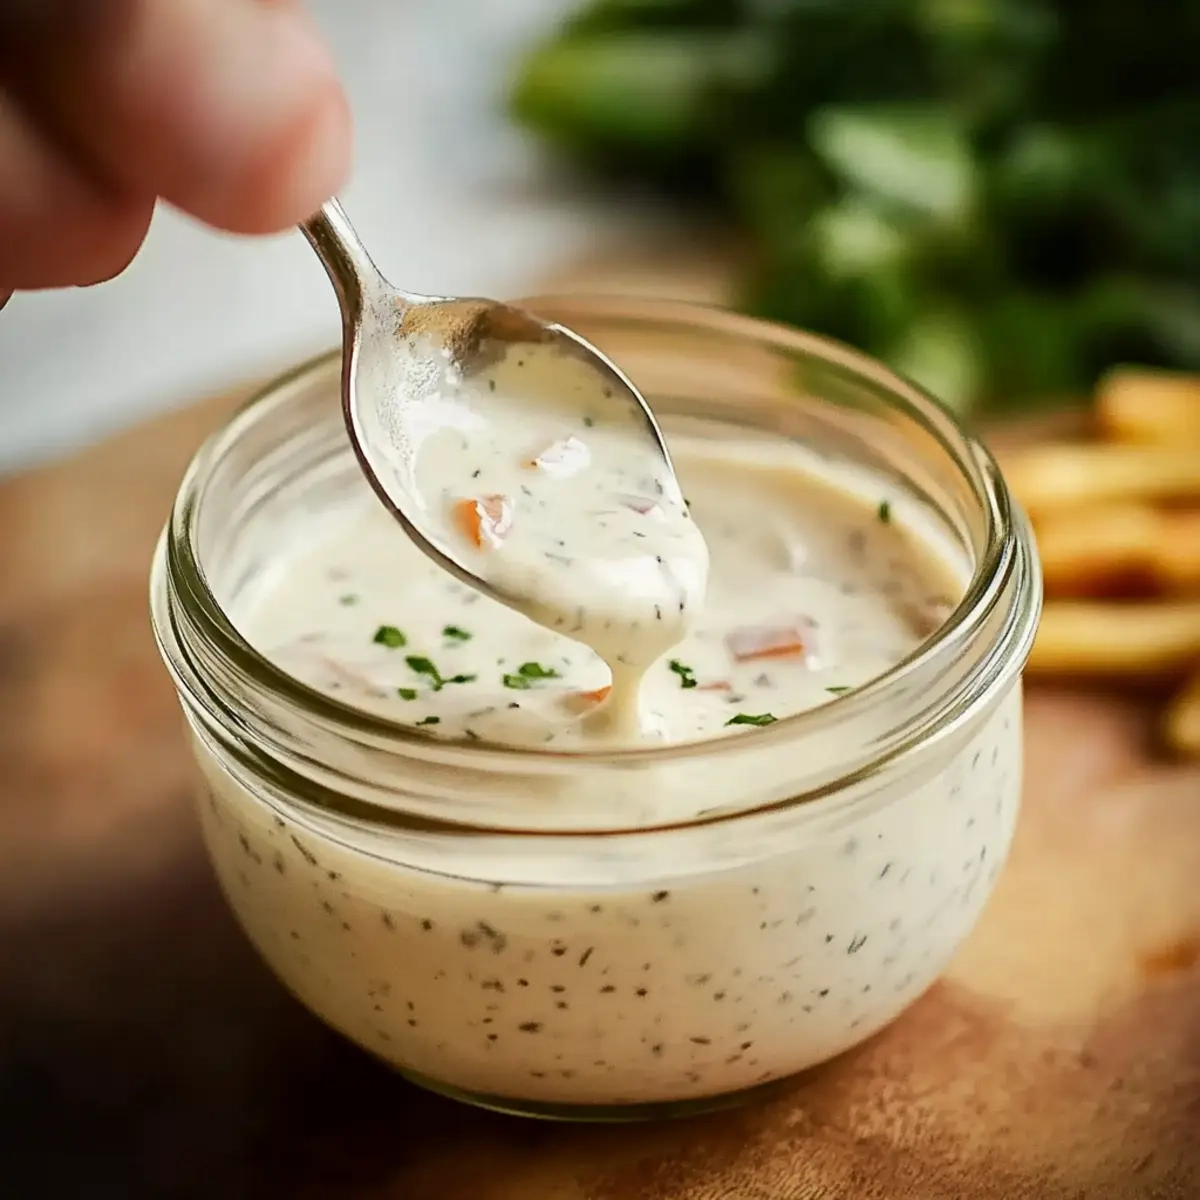
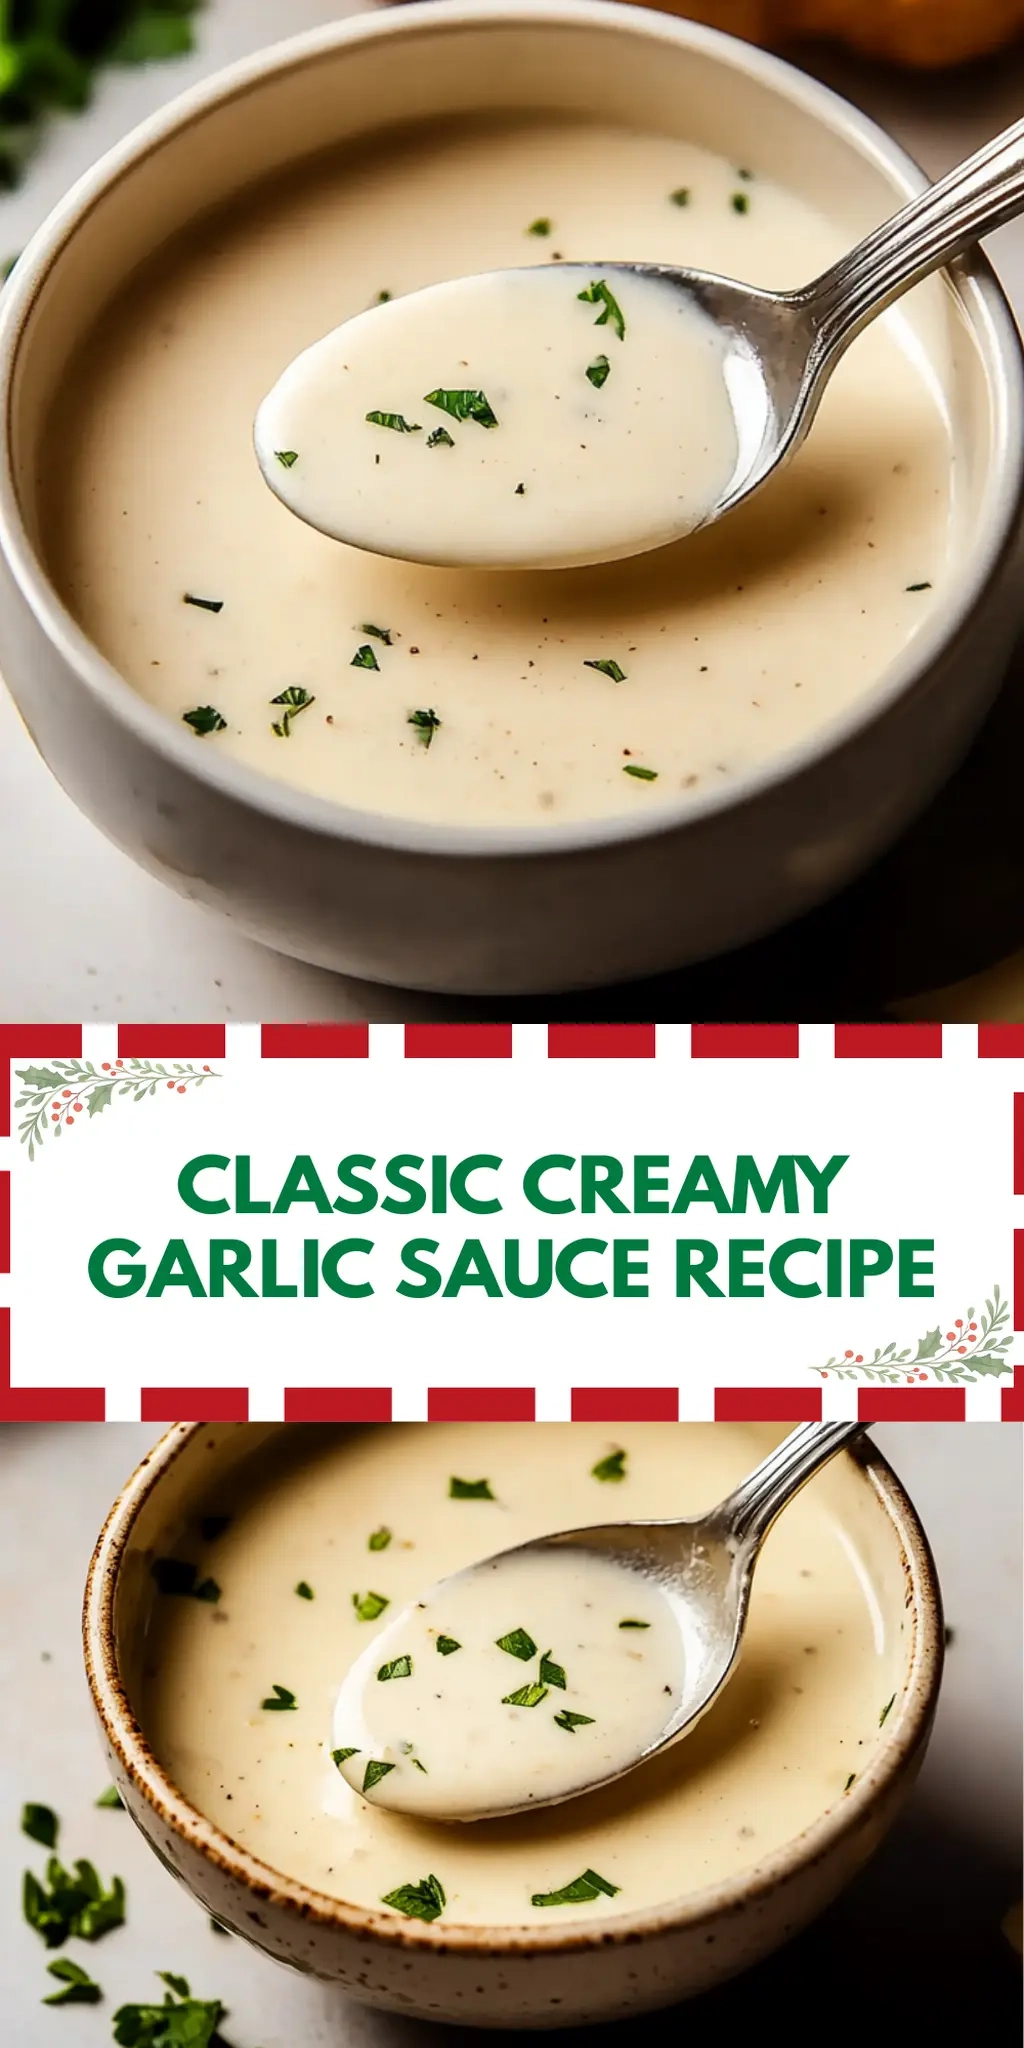
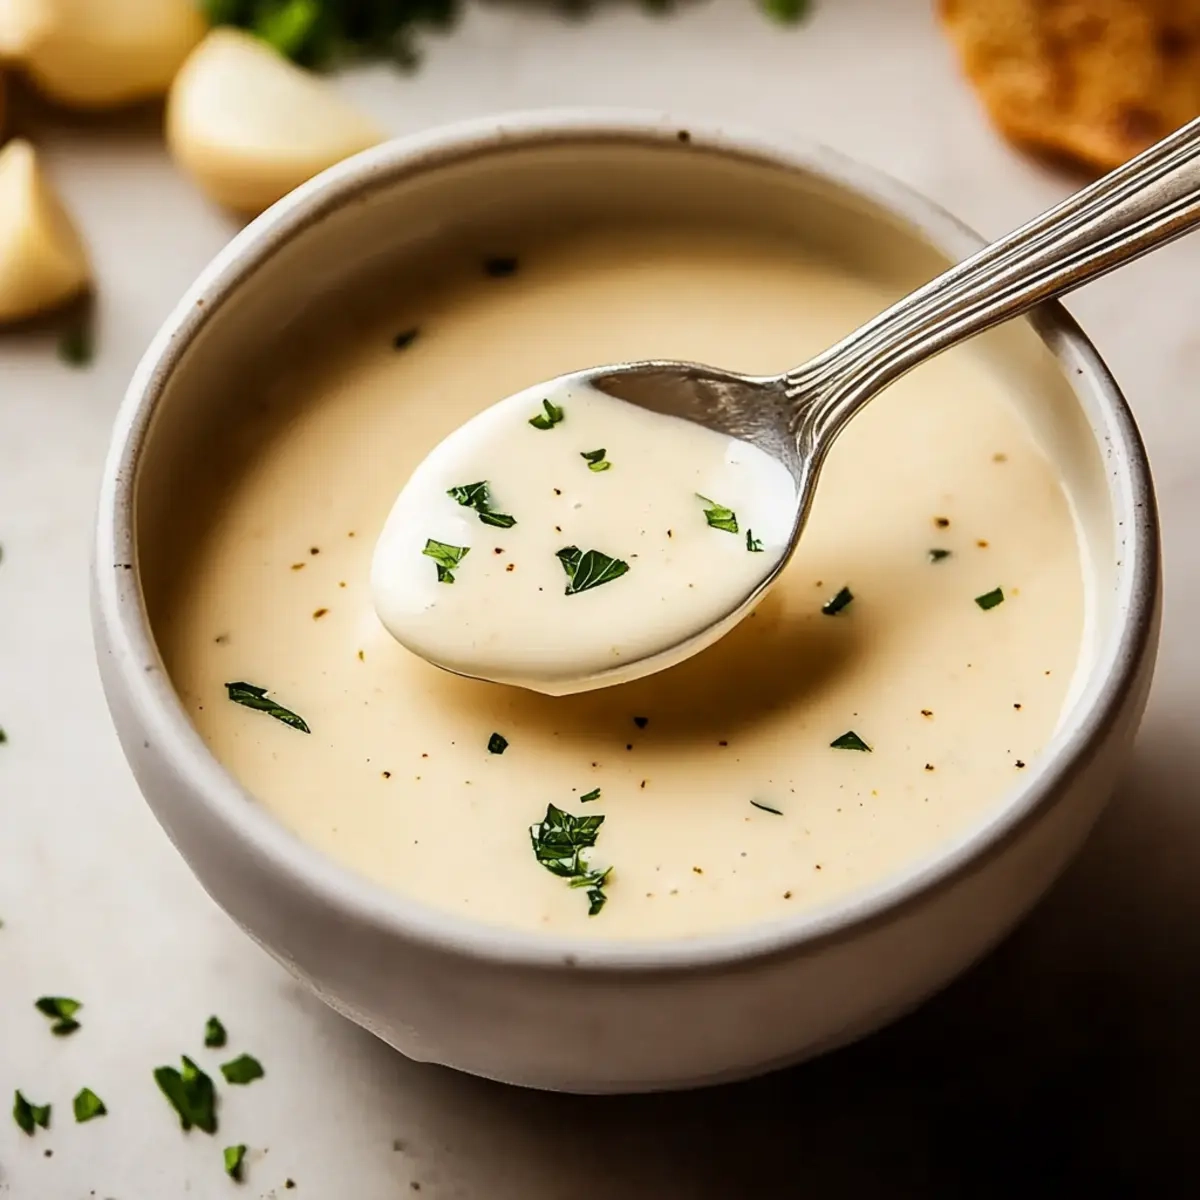
• Vegan mayonnaise – adds a creamy base for the perfect tangy flavor.
• Sambal oelek – this chili paste gives a spicy kick; feel free to substitute with your favorite hot sauce.
• Maple syrup – balances the heat with a touch of sweetness; agave nectar works as a great substitute.
For the Cauliflower Wings
• Cauliflower – the star of the dish, chopped into florets for that perfect wing shape.
• All-purpose flour – provides a light coating for the batter; for gluten-free, try using chickpea flour.
• Cornstarch – helps achieve the ultimate crispiness; don’t skip this ingredient!
• Almond milk – keeps the batter smooth and dairy-free; any plant-based milk can do the trick.
• Lemon juice – adds a zesty brightness; apple cider vinegar is a fine substitute.
• Sea salt – enhances all the flavors; use Himalayan salt for an extra touch.
• Ground black pepper – adds depth to the flavor profile.
• Garlic powder – infuses the batter with savory goodness.
• Onion powder – mellows the garlic flavor and rounds out the spices.
• Crispy Panko breadcrumbs – provides a satisfying crunch; season them with salt, pepper, onion powder, and garlic powder for extra flavor.
These Crispy Vegan Bang Bang Cauliflower Wings Recipe will be your new go-to for a fun and flavorful meal!

How to Make Crispy Vegan Bang Bang Cauliflower Wings
-
Preheat the oven to 425°F (220°C) to ensure that your wings will bake up crispy and golden brown. This is a crucial step that gets the cooking started right!
-
Whisk together the vegan mayonnaise, sambal oelek, and maple syrup or agave nectar in a mixing bowl until the mixture is smooth and well combined. This zesty sauce will elevate your wings to new flavorful heights.
-
Combine the all-purpose flour, cornstarch, almond milk, lemon juice, sea salt, ground black pepper, garlic powder, and onion powder in a separate bowl. Stir until you achieve a smooth batter—this consistency is key for coating.
-
Dip each cauliflower floret into the batter, ensuring it is fully coated. Then, roll it in the crispy Panko breadcrumbs, pressing lightly to help the crumbs adhere. This double-coating will give your wings a glorious crunch!
-
Arrange the coated cauliflower on a baking sheet lined with parchment paper. Bake for 15 minutes or until they turn a beautiful golden brown and are nice and crispy. Halfway through, check and turn them for even baking!
-
Serve your crispy cauliflower wings with the sauce from step 2 for dipping. Enjoy the explosion of flavors with every crunchy bite!
Optional: Sprinkle with fresh herbs or serve with lime wedges for an extra splash of freshness.
Exact quantities are listed in the recipe card below.
What to Serve with Crispy Vegan Bang Bang Cauliflower Wings?
Elevate your dining experience with delightful pairings that complement the bold flavors of your crispy, crunchy creation.
-
Zesty Coleslaw: A crunchy, tangy coleslaw made with cabbage and a hint of lime adds a refreshing contrast to the spicy wings.
-
Sweet Potato Fries: The sweetness and soft texture of sweet potato fries create an irresistible balance with the crispy cauliflower. Perfect for dipping!
-
Creamy Avocado Dip: A smooth avocado dip brings a rich creaminess that perfectly soothes the heat of sambal oelek in the wings.
-
Chilled Cucumber Salad: This light salad with a vinegar dressing provides a cooling refreshment that complements the savory textures of the cauliflower wings.
-
Garlic Noodles: Serve with buttery garlic noodles; their rich flavor pairs beautifully with the spice of the wings, creating a comforting bite.
-
Lemonade or Iced Tea: A tangy lemonade or refreshing iced tea balances the bold flavors while keeping things light and enjoyable.
Unleash the joy of these pairings and watch your dinner transform into a feast that everyone will remember!
Make Ahead Options
These Crispy Vegan Bang Bang Cauliflower Wings are perfect for meal prep enthusiasts! You can chop the cauliflower florets and prepare the sauce up to 24 hours in advance. Simply store the cauliflower in an airtight container in the refrigerator to keep it fresh. The sauce can also be blended and refrigerated until you’re ready to cook. When you’re ready to enjoy your wings, just whip up the batter, dip the cauliflower, and coat it with Panko breadcrumbs before baking. This way, you can serve up delicious, restaurant-quality results with minimal effort, making your busy weeknights a little brighter!
How to Store and Freeze Crispy Vegan Bang Bang Cauliflower Wings
Fridge: Store any leftover wings in an airtight container for up to 3 days. Reheat them in the oven to restore their crispiness.
Freezer: Freeze the baked cauliflower wings in a single layer on a baking sheet. Once frozen, transfer them to a zip-top bag for up to 3 months.
Reheating: To enjoy your frozen Crispy Vegan Bang Bang Cauliflower Wings, bake them at 400°F (200°C) for about 15 minutes or until heated through and crispy.
Crispy Vegan Bang Bang Cauliflower Wings Variations
Feel free to get creative and make this recipe your own, bringing out different flavors and textures to enjoy!
-
Gluten-Free: Substitute all-purpose flour with gluten-free all-purpose flour or chickpea flour for a deliciously crisp coating.
-
Spicy Kick: Add extra sambal oelek or your favorite hot sauce directly into the batter for a fiery flavor boost. The more heat, the merrier!
-
Smoky Flavor: Incorporate smoked paprika into the batter for a delightful smoky twist that complements the flavors perfectly.
-
Herb-Infused: Add fresh herbs like chopped cilantro or parsley to the Panko breadcrumbs for a fragrant and vibrant crunch. It adds a lovely freshness with every bite!
-
Tender Texture: For more tender wings, steam the cauliflower florets for just a few minutes before the battering step. They’ll still crisp up nicely in the oven!
-
Sweet and Savory: Replace maple syrup with coconut nectar or honey for an alternative sweetness that pairs wonderfully with the spicy sauce.
-
Nut-Free: Use oat milk instead of almond milk to keep it nut-free while still maintaining a creamy texture in the batter.
-
Baked or Fried: For a different texture, consider frying the coated cauliflower in a small pan of oil until golden brown instead of baking. Just watch closely for that perfect crispiness!
Chef's Helpful Tips
- For your Crispy Vegan Bang Bang Cauliflower Wings, preheating your oven to the right temperature ensures they become perfectly crispy and golden.
- Avoid common mistakes by fully coating the cauliflower florets in the batter before rolling them in Panko breadcrumbs for the best crunch.
- Consider using chickpea flour as a gluten-free alternative to all-purpose flour without compromising texture.
- Remember to flip your cauliflower wings halfway through baking to achieve even crispness on all sides.
Crispy Vegan Bang Bang Cauliflower Wings Recipe FAQs
How do I select the best cauliflower for this recipe?
Absolutely! Look for a head of cauliflower that feels firm and has a bright, white color. Avoid any florets with dark spots or browning; they indicate age. Fresh cauliflower should also have tight, compact florets and a nice green stem.
What is the best way to store leftovers?
Leftover Crispy Vegan Bang Bang Cauliflower Wings can be stored in an airtight container in the fridge for up to 3 days. When ready to reheat, place them in a preheated oven at 375°F (190°C) for about 10 minutes to regain their crispiness. You can also microwave them, but they won’t be as crunchy.
Can I freeze these cauliflower wings?
Very much so! To freeze, bake the wings first, allow them to cool completely, then arrange them in a single layer on a baking sheet. Freeze for about 2 hours, then transfer the wings to a zip-top freezer bag. They’ll be good for up to 3 months! When you’re ready to eat, bake them at 400°F (200°C) for about 15 minutes, or until heated through and crispy.
What if my batter is too thick or too thin?
Not to worry! If your batter is too thick, add a little more almond milk, one tablespoon at a time, until you reach a smooth, pourable consistency. Conversely, if it’s too thin, add a bit more flour or cornstarch to thicken it up. The right consistency should coat the cauliflower without dripping excessively.
Can my pets have any of these ingredients?
It’s wise to check! The main ingredients in this recipe are safe for dogs (like cauliflower), but sauces with spices could upset their stomach. If you have a dog, feel free to give them plain, unseasoned cauliflower as a treat. Always consult your veterinarian for concerns about specific ingredients and your pet’s dietary needs.
Are these wings gluten-free?
Yes, they can be! Simply substitute the all-purpose flour with chickpea flour or any gluten-free flour blend. Ensure your Panko breadcrumbs are also gluten-free or opt for certified gluten-free breadcrumbs. Your wings will not only be delicious but accommodating for all your guests!

Crispy Vegan Bang Bang Cauliflower Wings Recipe
Ingredients
Equipment
Method
- Preheat the oven to 425°F (220°C) to ensure that your wings will bake up crispy and golden brown.
- Whisk together the vegan mayonnaise, sambal oelek, and maple syrup or agave nectar until smooth and well combined.
- Combine the all-purpose flour, cornstarch, almond milk, lemon juice, sea salt, ground black pepper, garlic powder, and onion powder in a bowl. Stir until you achieve a smooth batter.
- Dip each cauliflower floret into the batter, ensuring it is fully coated, then roll it in the crispy Panko breadcrumbs.
- Arrange the coated cauliflower on a baking sheet lined with parchment paper. Bake for 15 minutes or until golden brown and crispy.
- Serve your crispy cauliflower wings with the sauce for dipping. Enjoy!