Forkono

  • BREAKFAST & BRUNCH
  • DESSERT RECIPES
  • DINNER RECIPES
  • LUNCH RECIPES
  • About uS
  • SNACKS & APPETIZERS
menu icon
go to homepage
  • BREAKFAST & BRUNCH
  • DESSERT RECIPES
  • DINNER RECIPES
  • LUNCH RECIPES
  • About uS
  • SNACKS & APPETIZERS
search icon
Homepage link
  • BREAKFAST & BRUNCH
  • DESSERT RECIPES
  • DINNER RECIPES
  • LUNCH RECIPES
  • About uS
  • SNACKS & APPETIZERS
×

Chicken Caesar Wrap

January 14, 2026 by JudyWhite Leave a Comment

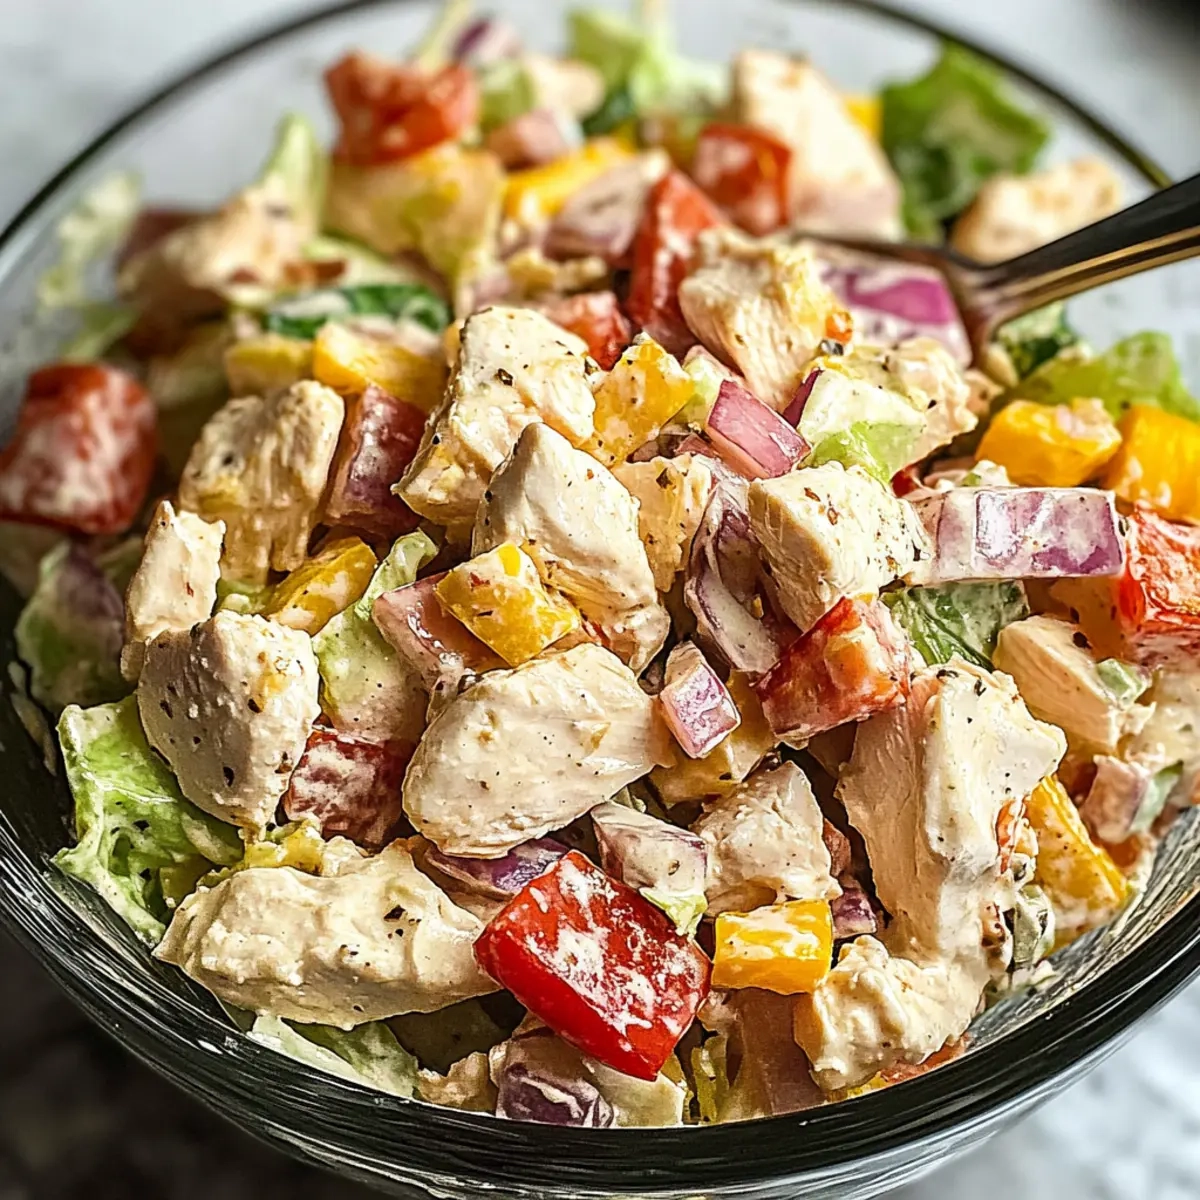
There’s something truly satisfying about wrapping up a meal that’s both fresh and hearty, and my Chicken Caesar Wrap does just that! Picture this: tender, baked chicken, mingling with crisp romaine lettuce and a splash of creamy Caesar dressing, all snugly tucked into a warm tortilla. This isn’t just another weekday meal; it’s a delicious escape from the monotony of takeout, bursting with flavors that remind you of restaurant-quality dishes—made right at home.

Just the other day, I found myself craving something light yet satisfying after a stretch of indulgent fast food. I quickly realized a quick Chicken Caesar Wrap might be exactly what I needed. With just a handful of ingredients, you’ll have the power to whip up a delightful dish that’s perfect for lunch or a casual dinner. Trust me, your taste buds will thank you! Let’s dive into this simple yet nutritious recipe that can elevate your everyday meals without sacrificing flavor or time.

Why You'll Love This Chicken Caesar Wrap

  • This Chicken Caesar Wrap is incredibly easy to make, perfect for those busy weeknights when you need a delicious meal without the fuss.
  • The combination of tender chicken, fresh romaine, and creamy dressing creates a burst of flavor that will impress your taste buds and keep you coming back for more.
  • Not only is this dish crowd-pleasing, but it also offers a great way to enjoy healthy ingredients all wrapped up in a tortilla.
  • Visually, these wraps are a feast for the eyes, with vibrant greens and a satisfying texture that make them as appealing as they are tasty.
  • Enjoy a satisfying and nutritious meal that can easily be customized with your favorite add-ins or substitutions.

Chicken Caesar Wrap Ingredients

For the Chicken
• Boneless, skinless chicken breasts – a juicy choice that stays tender during baking, perfect for your Chicken Caesar Wrap.
• Low-sodium soy sauce – enhances the flavor and acts as a marinade to elevate the chicken’s taste.

For the Wrap Filling
• Fresh garlic – minced for an aromatic kick that perfectly complements the Caesar dressing.
• Romaine lettuce – adds a refreshing crunch and essential nutrients to your wrap.
• Caesar dressing – use homemade or store-bought to suit your taste; it’s the creamy element that ties all the flavors together.

For the Wrap
• Large flour tortillas – soft and pliable, making it easy to wrap up your delicious filling.

How to Make Chicken Caesar Wrap

  1. Preheat your oven to 375°F (190°C). This warm environment is essential for cooking the chicken breasts evenly, ensuring they remain juicy and flavorful.

  2. Season the chicken breasts with salt and pepper. Place them in a baking dish lined with parchment paper for easy cleanup, ready to transform into tender bites.

  3. Bake for 25-30 minutes until the internal temperature reaches 165°F (74°C). Let them cool slightly afterward so you can handle them comfortably.

  4. Chop the romaine lettuce and mince the garlic while your chicken cools. This step ensures your veggies are fresh and ready to add that crunch to your wrap.

  5. Slice the cooled chicken into strips. In a large bowl, combine these delicious strips with chopped romaine, minced garlic, and Caesar dressing; mix well until everything is well-coated and flavorful.

  6. Scoop a generous amount of the mixture onto each tortilla. Roll tightly, enclosing all that goodness, then slice the wraps in half diagonally to showcase the beautiful filling!

Optional: Serve with extra Caesar dressing for dipping.
Exact quantities are listed in the recipe card below.

How to Store and Freeze Chicken Caesar Wrap

Fridge: Store the Chicken Caesar Wrap in an airtight container for up to 3 days. This keeps the ingredients fresh and prevents sogginess from the dressing.

Freezer: Wrap individual Chicken Caesar Wraps tightly in aluminum foil or plastic wrap, then place them in a freezer-safe bag. They can be frozen for up to 3 months.

Reheating: To reheat, thaw in the fridge overnight and warm in a preheated oven at 350°F (175°C) for 10-15 minutes, or until heated through.

Serving Suggestions: If you prefer, enjoy your Chicken Caesar Wrap cold for a refreshing take, especially on warm days!

Make Ahead Options

These Chicken Caesar Wraps are perfect for meal prep enthusiasts! You can prepare the chicken and the filling up to 3 days in advance. Simply bake the chicken, then allow it to cool and slice it into strips. Combine the sliced chicken with chopped romaine, minced garlic, and Caesar dressing (store in an airtight container to keep fresh). To maintain quality and prevent soggy tortillas, wrap the filling separately and assemble the wraps just before serving. When you’re ready to enjoy, grab a tortilla, fill it with the mixture, roll it up, and dig into a quick, delicious meal that feels just as fresh as if it were made that day!

Chicken Caesar Wrap Variations

Feel free to let your creativity shine as you customize this delightful wrap with a few simple twists!

  • Grilled Chicken: Swap baked chicken for grilled marinated chicken for a smoky flavor that enhances the wrap’s overall taste.

  • Gluten-Free Option: Use corn or gluten-free tortillas to accommodate dietary restrictions while retaining the delicious flavors.

  • Add Protein: Sprinkle in some chickpeas or black beans for an extra boost of protein and texture that creates satisfaction in every bite.

  • Kale Replacement: Substitute romaine with kale for a nutrient-dense alternative that offers a distinctive taste and vibrant color.

  • Spicy Kick: Add sliced jalapeños or a drizzle of sriracha to introduce a zesty heat that complements the coolness of the Caesar dressing.

  • Creamy Upgrade: Experiment with avocado or add a creamy layer of tzatziki for a delightful twist that introduces freshness and extra richness.

  • Cheesy Goodness: Mix in some grated Parmesan or crumbled feta cheese for added tanginess that enhances the classic Caesar flavor profile.

  • Herb Infusion: Toss in some fresh herbs, like basil or cilantro, for a fragrant twist that brings a burst of freshness to your Chicken Caesar Wrap.

What to Serve with Chicken Caesar Wrap?

Elevate your meal experience with delightful sides that perfectly complement this fresh and filling wrap.

  • Crispy Sweet Potato Fries: Their sweetness and crunch balance the savory chicken and rich dressing beautifully.

  • Garlic Parmesan Roasted Asparagus: The subtle garlic flavor enhances the wrap while providing a nutritious, vibrant side.

  • Mediterranean Quinoa Salad: This refreshing salad boasts colorful veggies and herbs, offering a bright contrast to the creamy Caesar wrap.

  • Classic Caesar Salad: Enhance your meal with a side of this iconic salad for an extra dose of crunch and Caesar flavor.

  • Zesty Coleslaw: Its tangy, creamy crunch will add a delightful texture and a refreshing palate cleanser.

  • Lemonade or Iced Tea: A chilled drink adds a refreshing touch to your meal, perfectly balancing the flavors of the wrap.

  • Chocolate Chip Cookies: Indulge your sweet tooth with these warm, gooey treats, ensuring a satisfying end to your meal.

Chef's Helpful Tips

  • For the Chicken Caesar Wrap, ensure that the chicken is seasoned well with salt and pepper before baking to enhance its flavor.
  • A common mistake is overcooking the chicken; use a meat thermometer to check for an internal temperature of 165°F for perfectly tender results.
  • When mixing the filling, make sure the Caesar dressing evenly coats the ingredients for a balanced flavor in every bite.
  • Lastly, allow the baked chicken to cool slightly before slicing to retain its juices and prevent dryness.

Chicken Caesar Wrap Recipe FAQs

What type of chicken should I use for my Chicken Caesar Wrap?
I recommend using boneless, skinless chicken breasts for their tenderness and ease of cooking. They bake beautifully and absorb flavors well, especially when marinated with low-sodium soy sauce. If you’re looking for a quick option, grilled chicken or even rotisserie chicken can also work wonderfully!

How long can I store Chicken Caesar Wraps in the fridge?
Absolutely! You can store your Chicken Caesar Wrap in an airtight container in the fridge for up to 3 days. Just be sure to keep the wraps wrapped tightly, as this helps maintain freshness and prevents the dressing from making the tortilla soggy.

Can I freeze Chicken Caesar Wraps, and how do I do it?
Yes, you can! To freeze Chicken Caesar Wraps, wrap each one tightly in aluminum foil or plastic wrap, making sure there are no air pockets. Then, place them in a freezer-safe bag to avoid freezer burn. They can be stored for up to 3 months. When you want to enjoy them, simply thaw in the fridge overnight and reheat in a 350°F (175°C) oven for about 10-15 minutes.

Why is my Chicken Caesar Wrap filling too soggy?
Very good question! If your filling is soggy, it might be due to using too much Caesar dressing or not cooling the chicken sufficiently before mixing. Try adding less dressing next time or let the chicken cool down for a little longer. You could also consider adding extra crunchy ingredients, like croutons or nuts, to enhance the texture!

Are there any dietary considerations for the Chicken Caesar Wrap?
Indeed! If you’re preparing for someone with allergies, be mindful of the ingredients, especially the Caesar dressing, as it often contains dairy and may include anchovies. For a gluten-free option, you can use corn tortillas and ensure the dressing is gluten-free too. As for pets, it’s best to avoid giving them any wrapped dishes with dressing; plain chicken without spices is a much safer choice!

Chicken Caesar Wrap

Chicken Caesar Wrap

Enjoy a delicious Chicken Caesar Wrap that’s both fresh and hearty, featuring tender chicken, crisp romaine, and creamy Caesar dressing.
Print Recipe Pin Recipe
Prep Time 15 minutes mins
Cook Time 30 minutes mins
Cooling Time 5 minutes mins
Total Time 50 minutes mins
Servings: 2 wraps
Course: LUNCH RECIPES
Cuisine: American
Calories: 450
Ingredients Equipment Method Nutrition Notes

Ingredients
  

For the Chicken
  • 2 pieces Boneless, skinless chicken breasts
  • 2 tablespoons Low-sodium soy sauce for marinade
For the Wrap Filling
  • 2 cloves Fresh garlic minced
  • 2 cups Romaine lettuce chopped
  • 1/2 cup Caesar dressing store-bought or homemade
For the Wrap
  • 2 large Flour tortillas

Equipment

  • Oven
  • Baking dish
  • parchment paper
  • Mixing bowl

Method
 

How to Make Chicken Caesar Wrap
  1. Preheat your oven to 375°F (190°C).
  2. Season the chicken breasts with salt and pepper and place them in a baking dish lined with parchment paper.
  3. Bake for 25-30 minutes until the internal temperature reaches 165°F (74°C). Let them cool slightly.
  4. Chop the romaine lettuce and mince the garlic while your chicken cools.
  5. Slice the cooled chicken into strips. In a large bowl, combine these strips with chopped romaine, minced garlic, and Caesar dressing; mix well.
  6. Scoop a generous amount of the mixture onto each tortilla. Roll tightly and slice the wraps in half diagonally.

Nutrition

Serving: 1wrapCalories: 450kcalCarbohydrates: 50gProtein: 30gFat: 15gSaturated Fat: 4gPolyunsaturated Fat: 2gMonounsaturated Fat: 8gCholesterol: 70mgSodium: 900mgPotassium: 700mgFiber: 4gSugar: 2gVitamin A: 450IUVitamin C: 15mgCalcium: 150mgIron: 2mg

Notes

Store in an airtight container for up to 3 days in the fridge. Wraps can be frozen for up to 3 months.

Tried this recipe?

Let us know how it was!

Filed Under: LUNCH RECIPES

Banana Bread

January 11, 2026 by JudyWhite Leave a Comment

When the kitchen feels a little too quiet, there’s nothing like the warm, inviting smell of freshly baked banana bread to lift the spirits. The moment I mashed those overripe bananas, each squish brought back memories of lazy Sunday mornings, filled with laughter and the simple joy of home-cooked goodness. This banana bread recipe is a delightful fusion of sweet and buttery flavors, yet it comes together in no time at all, making it perfect for busy weekdays or spontaneous baking sessions.

Picture yourself slicing into that golden loaf, warm steam wafting through the air, and each bite offering a moist, tender crumb. Not only is this banana bread a fantastic way to use up those neglected bananas, but it’s also incredibly versatile. Add a handful of walnuts, throw in some chocolate chips, or swirl in a dash of cinnamon for an extra kick. Whether you’re a seasoned chef or just someone craving a taste of home, this easy, crowd-pleasing recipe is sure to become a staple in your kitchen. Let’s dive in!

Why You'll Love This Banana Bread

  • This banana bread recipe is incredibly easy to make, perfect for both beginner bakers and those with more experience.
  • You’ll love how quickly it comes together, saving you precious time in the kitchen.
  • Its deliciously sweet and buttery flavor will have everyone reaching for seconds, making it a crowd-pleaser at any gathering.
  • Plus, the visual appeal of that golden brown crust and tender crumb is simply mouthwatering, inviting you to dig in.
  • The versatility allows for endless variations, so feel free to personalize it with your favorite mix-ins for a fun twist.
  • Enjoy a slice of warm banana bread and experience the joy of homemade goodness!

Banana Bread Ingredients

Unlock the secrets of making the perfect banana bread!

For the Batter

  • 3 overripe bananas – the riper, the sweeter; they’ll give your banana bread that delightful moisture.
  • 1 cup all-purpose flour – a versatile staple that creates the perfect base for your bread.
  • 1/2 cup granulated sugar – brings sweetness and helps achieve that lovely golden crust.
  • 1/2 cup brown sugar – adds depth and a hint of caramel flavor, enhancing the banana taste.
  • 1/2 tsp baking soda – ensures your banana bread rises beautifully for a light texture.
  • 1/4 tsp salt – a small yet essential component that enhances all the flavors.
  • 2 large eggs – helps bind the ingredients and adds richness to the bread.
  • 1/3 cup unsalted butter – melted for a luscious, buttery flavor that makes every bite melt in your mouth.

Feel free to mix in some chocolate chips or nuts for an extra touch!

How to Make Banana Bread

  1. Preheat your oven to 350°F (175°C) and grease a standard loaf pan. This ensures your banana bread bakes evenly and comes out effortlessly!

  2. Mash the bananas in a mixing bowl until smooth. Use a fork or a potato masher; the more mashed they are, the creamier your bread will turn out.

  3. Combine melted butter, granulated sugar, brown sugar, and eggs into the mashed bananas. Stir gently until all ingredients are well mixed and invitingly blended together.

  4. Whisk together all-purpose flour, baking soda, and salt in another bowl until well combined. This step helps distribute the leavening agent for an even rise in your banana bread.

  5. Fold the dry ingredients into the wet mixture gradually, mixing until just combined. Be careful not to overmix; you want a tender loaf, not a tough one!

  6. Pour the batter into your prepared loaf pan, smoothing the top. Bake it in the oven for approximately 60 minutes or until a toothpick inserted comes out clean—golden perfection!

  7. Cool the banana bread for at least 10 minutes in the pan before transferring it to a wire rack. This allows the flavors to set and makes slicing much easier!

Optional: Top it with a smear of butter for an indulgent treat!

Exact quantities are listed in the recipe card below.

How to Store and Freeze Banana Bread

Room Temperature: Store banana bread at room temperature in an airtight container for up to 3 days to maintain its moist texture and delicious flavor.

Fridge: If you’re looking to keep it fresh longer, banana bread can be refrigerated in an airtight container for up to 1 week. Just remember that this may alter the texture slightly.

Freezer: For longer storage, freeze banana bread slices wrapped tightly in plastic wrap and then in aluminum foil for up to 3 months. Thaw at room temperature before serving.

Reheating: To enjoy warm banana bread, simply reheat slices in the microwave for 15-20 seconds or toast them lightly for a crispy exterior.

What to Serve with Banana Bread?

There’s nothing quite like the feeling of crafting a delicious meal around the delightful warmth of banana bread.

  • Creamy Yogurt: Smooth and tangy, it balances the sweetness of banana bread and adds a refreshing element to your slice.

  • Fresh Berries: Strawberries, blueberries, or raspberries introduce a pop of vibrant color and a juicy burst of flavor, enhancing every bite of your banana bread.

  • Nutty Granola: The crunchy texture of granola gives a satisfying contrast to the soft bread, creating a delightful breakfast or snack experience.

  • Honey Drizzle: A touch of golden honey complements the sweetness perfectly, adding a hint of floral flavor that brightens the dish.

  • Savory Bacon: The salty, savory goodness of crispy bacon makes for an unexpected yet delightful pairing that beautifully offsets the sweet banana bread.

  • Chai Tea: A warm cup of chai brings comforting spices that harmonize wonderfully with the banana flavor, perfect for a cozy afternoon.

  • Vanilla Ice Cream: For a decadent dessert twist, a scoop of creamy vanilla ice cream melds beautifully with warm banana bread, transforming it into a delightful sundae.

  • Peanut Butter Spread: A rich layer of peanut butter offers a nutty contrast, making your banana bread even more indulgent and satisfying.

These pairings not only elevate the enjoyment of banana bread but also create a heartwarming dining experience for friends and family.

Make Ahead Options

These delightful banana bread recipes are perfect for meal prep enthusiasts! You can mash the overripe bananas and combine them with sugar, butter, and eggs up to 24 hours in advance. Simply refrigerate this mixture in an airtight container to maintain its freshness. The dry ingredients can also be prepared beforehand; whisk the flour, baking soda, and salt and store them separately until you’re ready to bake. When you’re all set to make your banana bread, just fold the dry ingredients into the wet mixture, pour it into your loaf pan, and bake as directed. This way, you’ll enjoy warm, homemade banana bread without the last-minute rush!

Banana Bread Variations

Feel free to explore and make this banana bread your own by adding exciting twists and substitutions!

  • Gluten-Free: Substitute all-purpose flour with a 1:1 gluten-free baking blend for a delicious alternative without gluten.

  • Nutty Delight: Add 1/2 cup of chopped walnuts or pecans for a delightful crunch and an extra layer of flavor in each bite.

  • Chocolate Lovers: Incorporate 1/2 cup of chocolate chips into the batter to satisfy those sweet cravings with gooey chocolate goodness.

  • Spiced Up: Stir in 1 teaspoon of ground cinnamon or a pinch of nutmeg to add a warm, fragrant twist that enhances the banana flavor perfectly.

  • Maple Sweetness: Replace granulated sugar with 1/2 cup of pure maple syrup for a natural sweetness that elevates the flavor profile of your banana bread.

  • Vegan Option: Use flax eggs (1 tablespoon ground flaxseed mixed with 3 tablespoons water for each egg) and coconut oil instead of butter for a plant-based version.

  • Coconut Flavor: Add 1/2 cup of shredded coconut for a tropical twist that brings an extra layer of texture and flavor—perfect for sunny days!

  • Berry Burst: Fold in 1/2 cup of fresh blueberries or raspberries for a bright, fruity addition that complements the sweetness of the bananas wonderfully.

Chef's Helpful Tips

  • For the best banana bread, make sure your bananas are very ripe, as the sugars will intensify the flavor and moisture.
  • When mixing your ingredients, stir gently to combine; overmixing can lead to a dense loaf.
  • Always use a toothpick to check doneness, as different ovens may vary slightly in baking time; your banana bread is ready when it comes out clean with no batter attached.
  • Lastly, allowing the bread to cool for at least 10 minutes before slicing will prevent it from crumbling and let the flavors meld beautifully.

Banana Bread Recipe FAQs

What should I look for when selecting overripe bananas?
Absolutely! When choosing bananas, look for ones with dark brown or black peels, as they are not only sweeter but also softer, providing the perfect moisture for your banana bread. Avoid bananas with large dark spots or significant bruising, as this can affect the overall flavor and texture.

How should I store leftover banana bread for freshness?
Very! Store your banana bread in an airtight container at room temperature for up to 3 days. If you plan to keep it longer, refrigerating it will extend its life to about a week. Just be aware that refrigeration may slightly change the texture, making it a bit denser.

Can I freeze banana bread, and how do I do it correctly?
Absolutely! To freeze banana bread, first slice it into individual pieces for easy serving. Wrap each slice tightly in plastic wrap, followed by aluminum foil to protect against freezer burn, and place them in a freezer-safe bag. It can last for up to 3 months. When you’re ready to enjoy, simply let the slices thaw at room temperature.

What if my banana bread comes out too dense or dry?
Oh no, that can happen sometimes! If your banana bread is dense, it’s likely due to overmixing your batter. Mix gently until just combined to retain airiness. If it turns out dry, ensure you’re using the right amount of bananas and melted butter. Add a touch of milk or yogurt next time for added moisture. Always check for doneness a few minutes before the timer goes off using a toothpick.

Is this banana bread recipe suitable for those with nut allergies?
Very! This banana bread recipe is nut-free, making it a great option for those with nut allergies. However, if you want to customize it with mix-ins like nuts or chocolate chips, feel free! Just be mindful to choose allergy-safe ingredients depending on your needs.

How can I tell when my banana bread is fully baked?
Great question! Insert a toothpick into the center of the bread; if it comes out clean or with a few crumbs but no wet batter, your banana bread is perfectly baked. Keep an eye on it during the last 10-15 minutes and use the toothpick test to ensure a golden, moist loaf!

Banana Bread

Banana Bread

This delicious banana bread recipe combines sweet and buttery flavors, perfect for breakfast or brunch.
Print Recipe Pin Recipe
Prep Time 15 minutes mins
Cook Time 1 hour hr
Cooling Time 10 minutes mins
Total Time 1 hour hr 25 minutes mins
Servings: 10 slices
Course: BREAKFAST & BRUNCH
Cuisine: American
Calories: 200
Ingredients Equipment Method Nutrition Notes

Ingredients
  

For the Batter
  • 3 overripe bananas bananas the riper, the sweeter
  • 1 cup all-purpose flour a versatile staple
  • 1/2 cup granulated sugar brings sweetness
  • 1/2 cup brown sugar adds depth
  • 1/2 tsp baking soda ensures bread rises beautifully
  • 1/4 tsp salt enhances all flavors
  • 2 large eggs binds ingredients
  • 1/3 cup unsalted butter melted for flavor

Equipment

  • loaf pan
  • Mixing bowl
  • Whisk
  • Fork

Method
 

Preparation
  1. Preheat your oven to 350°F (175°C) and grease a standard loaf pan.
  2. Mash the bananas in a mixing bowl until smooth.
  3. Combine melted butter, granulated sugar, brown sugar, and eggs into the mashed bananas.
  4. Whisk together all-purpose flour, baking soda, and salt in another bowl.
  5. Fold the dry ingredients into the wet mixture gradually.
  6. Pour the batter into your prepared loaf pan.
  7. Bake it in the oven for approximately 60 minutes or until a toothpick inserted comes out clean.
  8. Cool the banana bread for at least 10 minutes in the pan before transferring it to a wire rack.

Nutrition

Serving: 1sliceCalories: 200kcalCarbohydrates: 30gProtein: 3gFat: 8gSaturated Fat: 5gPolyunsaturated Fat: 1gMonounsaturated Fat: 2gCholesterol: 50mgSodium: 150mgPotassium: 180mgFiber: 1gSugar: 12gVitamin A: 5IUVitamin C: 10mgCalcium: 1mgIron: 5mg

Notes

Feel free to mix in some chocolate chips or nuts for an extra touch!

Tried this recipe?

Let us know how it was!

Filed Under: BREAKFAST & BRUNCH

Italian Grinder Chicken Salad

January 11, 2026 by JudyWhite Leave a Comment

There’s nothing quite like the rush of flavors in an Italian Grinder Chicken Salad, especially on a warm summer day. Picture this: the sun shining, with the mouthwatering aroma of grilled chicken wafting through the air as it sizzles on the grill. When heirloom tomatoes and fresh peppers from the farmers’ market catch my eye, I can’t help but dream of creating a vibrant, satisfying dish that showcases them.

With simple ingredients like juicy chicken, tangy balsamic vinegar, and a medley of colorful veggies, this salad offers the perfect balance—delicious enough to serve at a gathering yet easy enough for a weeknight meal. Plus, it’s a fantastic way to break free from the mundane fast food routine.

In just 30 minutes, you can have a nutritious masterpiece that not only delights the taste buds but is sure to impress anyone at your table. Join me as we dive into making this scrumptious Italian Grinder Chicken Salad—your taste buds are in for a treat!

Why You'll Love This Italian Grinder Chicken Salad

  • This Italian Grinder Chicken Salad is incredibly easy to prepare, making it the perfect dish for both busy weeknights and relaxed gatherings.
  • The vibrant colors and fresh ingredients create a visually stunning salad that is sure to impress your guests.
  • With a harmonious blend of flavors from the grilled chicken and zesty dressing, every bite is a delightful burst of taste.
  • Plus, this recipe is versatile enough to allow for ingredient swaps based on your preferences or what you have on hand.
  • You’ll save time too, as this salad can be ready in just 30 minutes while still being healthy and satisfying.

Italian Grinder Chicken Salad Ingredients

For the Chicken
• Boneless, skinless chicken breasts – about 1.5 lbs will keep your salad lean and satisfying.
• Fresh garlic – 2 cloves, minced, for that aromatic kick that elevates the dish.

For the Veggies
• Red bell pepper – 1 cup, diced, adds a sweet crunch and vibrant color.
• Yellow bell pepper – 1 cup, diced, for a beautiful palette and extra nutrients.
• Red onion – 1 small, thinly sliced, provides a sharp flavor that complements the salad.

For the Dressing
• Extra virgin olive oil – 4 tbsp, the heart-healthy base that brings all the flavors together.
• Balsamic vinegar – 2 tbsp, lending a tangy sweetness that enhances the salad’s richness.
• Dijon mustard – 1 tsp, for a subtle depth of flavor that ties the dressing together.
• Salt and pepper – to taste, always adjust for the best flavor in your Italian Grinder Chicken Salad.

How to Make Italian Grinder Chicken Salad

  1. Grill the chicken: Preheat your grill over medium-high heat. Generously season the chicken breasts with salt, pepper, and minced garlic. Grill for 6-7 minutes per side until fully cooked and juicy. Let rest before slicing to retain moisture.

  2. Chop the vegetables: While the chicken is resting, dice the red and yellow bell peppers. Slice the red onion into thin strips for that perfect crunch and flavor balance in each bite.

  3. Make the dressing: In a bowl, whisk together the extra virgin olive oil, balsamic vinegar, Dijon mustard, and salt and pepper until smooth. This zesty dressing will bring everything together beautifully.

  4. Combine: In a large serving bowl, mix the sliced grilled chicken with the chopped vegetables. Pour the dressing over the salad and toss gently to ensure everything is coated evenly.

  5. Chill: Refrigerate for about 30 minutes. This step is essential as it allows the flavors to meld together, enhancing each bite of your Italian Grinder Chicken Salad.

  6. Serve: Garnish your salad with fresh herbs if desired, and enjoy the colorful, flavorful dish that will brighten up your meal!

Optional: Drizzle a little extra balsamic vinegar before serving for an added flavor boost.

Exact quantities are listed in the recipe card below.

How to Store and Freeze Italian Grinder Chicken Salad

Fridge: Store your Italian Grinder Chicken Salad in an airtight container in the fridge for up to 3 days. This keeps the flavors fresh while preventing sogginess.

Freezer: For longer storage, you can freeze the grilled chicken separately for up to 3 months. Store it in a freezer bag, removing excess air to prevent freezer burn.

Reheating: If you’ve frozen the chicken, thaw it overnight in the fridge and reheat in a skillet over low heat until warmed through. Toss with fresh veggies and dressing just before serving for optimal taste.

Chilling: If you’re prepping ahead for a gathering, chilling the salad before serving not only enhances the flavors but also keeps the ingredients crisp and enjoyable.

Italian Grinder Chicken Salad Variations

Feel free to get creative and make this scrumptious salad your own with these delightful twists!

  • Dairy-Free: Use avocado oil or any preferred oil in the dressing for a rich, creamy flavor without dairy.

  • Add Heat: Toss in diced jalapeños or crushed red pepper flakes for a spicy kick that complements the tangy dressing beautifully.

  • Herb-Infused: Mix in fresh herbs like basil or parsley for a vibrant herbal aroma that brightens each bite.

  • Crunchy Texture: Swap out the bell peppers for diced cucumbers or celery for an extra crunchy element that refreshes the palate.

  • Mediterranean Twist: Add kalamata olives and feta cheese to transport your taste buds to the Mediterranean with every mouthful.

  • Protein Boost: Substitute grilled chicken with chickpeas or tofu for a hearty vegetarian version that still packs a protein punch.

  • Zesty Flavor: Incorporate lemon juice or zest into the dressing for a bright, citrusy touch that elevates flavors wonderfully.

  • Savory Additions: Mix in roasted red peppers or artichoke hearts to introduce rich, savory flavors that will entice your taste buds.

Make Ahead Options

Preparing your Italian Grinder Chicken Salad ahead of time is a fantastic way to save valuable minutes during a busy week! You can grill the chicken and slice it up to 24 hours in advance, storing it in an airtight container in the refrigerator to keep it juicy. Chop your bell peppers and slice the onion a day ahead as well—just be sure to refrigerate them separately to maintain their crunch. The dressing can be whisked together and kept in the fridge for up to 3 days. When it’s time to serve, simply combine the prepped chicken and veggies, pour over the dressing, toss gently, and enjoy a fresh, delicious salad that feels effortless!

What to Serve with Italian Grinder Chicken Salad?

Elevate your dining experience with delightful sides that perfectly complement the brightness of this salad.

  • Crusty Garlic Bread: The warm, buttery flavor of garlic bread offers the perfect contrast to the fresh ingredients, inviting everyone to dig in. Pairing it with the salad creates a satisfying experience that feels both comforting and indulgent.

  • Tangy Cucumber Salad: This refreshing, crunchy side brings a cool contrast to the grilled chicken, enhancing the overall meal with a zesty flair. The slight acidity and crisp texture balance beautifully with the rich flavors of the Italian Grinder Chicken Salad.

  • Quinoa Pilaf: Light and fluffy, this nutritious grain provides an additional layer of texture and nutty flavor. It serves as a great base that absorbs the dressing’s tang, making each bite harmonious and filling.

  • Roasted Vegetables: Their caramelized sweetness adds depth and heartiness, complementing the grilled chicken and fresh salad beautifully. The colorful presentation also mirrors the salad’s vibrant hues, making it a feast for the eyes.

  • Iced Lemonade: A glass of frosty lemonade will elevate the meal with its refreshing tartness, cleansing the palate between bites. It’s a delightful way to embrace the sunny, summery vibes that this salad inspires.

  • Chocolate Mousse: For a sweet finish, this indulgent dessert offers a rich, creamy texture that contrasts nicely with the salad’s lightness. Its luxurious flavor makes for a satisfying conclusion to a warm-weather meal, perfect for gatherings or family dinners.

Chef's Helpful Tips

  • When grilling the chicken for your Italian Grinder Chicken Salad, make sure to keep the grill at medium-high heat for the best results to ensure it cooks evenly.
  • A common mistake is slicing the chicken too soon after grilling; let it rest for a few minutes to retain its juices and prevent dryness.
  • For the dressing, whisking the ingredients together vigorously will help emulsify the olive oil and vinegar, creating a smoother texture.
  • Lastly, chilling the salad for at least 30 minutes allows the flavors to meld beautifully, so don’t rush this important step.

Italian Grinder Chicken Salad Recipe FAQs

How do I choose ripe vegetables for this salad?
Absolutely! When selecting your bell peppers, look for ones that are firm and glossy with no dark spots or wrinkles. They should feel heavy for their size, indicating juiciness. For the red onion, choose one that is firm and free from soft spots. Freshness is key for a vibrant Italian Grinder Chicken Salad!

How long can I store the Italian Grinder Chicken Salad in the fridge?
You can keep your Italian Grinder Chicken Salad in an airtight container in the fridge for up to 3 days. To maintain its freshness, avoid mixing in the dressing until you’re ready to enjoy it. This helps keep the veggies crisp and the flavors vibrant!

Can I freeze leftover grilled chicken for this recipe?
Absolutely! To freeze the grilled chicken, let it cool completely, then place in a freezer bag, removing as much air as possible to prevent freezer burn. It will stay good for up to 3 months. When you’re ready to use it, thaw it overnight in the fridge, then reheat in a skillet on low heat until warmed through.

What if I have leftovers? Can I use them later?
Yes, but it’s ideal to store leftovers separately—keep the salad ingredients and the dressing apart. If you’re packing for a meal later, toss fresh veggies with thawed chicken and dressing just before eating. This way, you avoid sogginess and keep a delightful crunch!

Are there any common issues I should watch for when making this salad?
Very! A common mistake is not letting the grilled chicken rest before slicing, which can lead to dryness. Also, make sure to chill the salad for at least 30 minutes after mixing; this step is crucial for the flavors to meld together beautifully. If you find the dressing too tart, you can balance it by adding a touch of honey or extra olive oil.

Can I make this salad vegetarian or vegan?
Yes, you can! Swap out the grilled chicken for grilled or roasted tofu, tempeh, or even chickpeas for added protein. For the dressing, use a plant-based mustard, and ensure your olive oil and balsamic vinegar are vegan-friendly. This will still provide a tasty and satisfying Italian Grinder Chicken Salad alternative!

Italian Grinder Chicken Salad

Italian Grinder Chicken Salad

Enjoy a vibrant Italian Grinder Chicken Salad, bursting with flavors, ideal for a refreshing lunch.
Print Recipe Pin Recipe
Prep Time 15 minutes mins
Cook Time 15 minutes mins
Chill Time 30 minutes mins
Total Time 1 hour hr
Servings: 4 servings
Course: LUNCH RECIPES
Cuisine: Italian
Calories: 350
Ingredients Equipment Method Nutrition Notes

Ingredients
  

For the Chicken
  • 1.5 lbs boneless, skinless chicken breasts
  • 2 cloves fresh garlic minced
For the Veggies
  • 1 cup red bell pepper diced
  • 1 cup yellow bell pepper diced
  • 1 small red onion thinly sliced
For the Dressing
  • 4 tbsp extra virgin olive oil
  • 2 tbsp balsamic vinegar
  • 1 tsp Dijon mustard
  • salt and pepper to taste

Equipment

  • Grill
  • Mixing bowl
  • Cutting Board
  • Knife

Method
 

Instructions
  1. Preheat your grill over medium-high heat. Generously season the chicken breasts with salt, pepper, and minced garlic. Grill for 6-7 minutes per side until fully cooked and juicy. Let rest before slicing to retain moisture.
  2. While the chicken is resting, dice the red and yellow bell peppers. Slice the red onion into thin strips for that perfect crunch and flavor balance in each bite.
  3. In a bowl, whisk together the extra virgin olive oil, balsamic vinegar, Dijon mustard, and salt and pepper until smooth.
  4. In a large serving bowl, mix the sliced grilled chicken with the chopped vegetables. Pour the dressing over the salad and toss gently to ensure everything is coated evenly.
  5. Refrigerate for about 30 minutes to allow the flavors to meld together.
  6. Garnish your salad with fresh herbs if desired, and enjoy the colorful, flavorful dish.

Nutrition

Serving: 1servingCalories: 350kcalCarbohydrates: 20gProtein: 30gFat: 20gSaturated Fat: 3gPolyunsaturated Fat: 1gMonounsaturated Fat: 15gCholesterol: 85mgSodium: 350mgPotassium: 700mgFiber: 3gSugar: 5gVitamin A: 20IUVitamin C: 90mgCalcium: 40mgIron: 2mg

Notes

Drizzle a little extra balsamic vinegar before serving for an added flavor boost.

Tried this recipe?

Let us know how it was!

Filed Under: LUNCH RECIPES

Strawberry Cheesecake Bars

January 11, 2026 by JudyWhite Leave a Comment

The mere sight of luscious strawberries brightening a creamy cheesecake filling brings back a wave of nostalgia. I can’t help but smile as I think of sunny afternoons spent in my grandmother’s kitchen, where her famous Strawberry Cheesecake Bars made every gathering feel special. The simplicity of this dessert is its secret weapon—it’s an elegant treat that’s surprisingly easy to whip up, making it a perfect solution for those moments when you want to impress without the fuss.

Whether I’m preparing for a potluck or simply indulging my sweet tooth on a cozy evening, these bars always deliver. Picture creamy layers studded with fresh strawberries, all perched atop a buttery graham cracker crust that provides the perfect crunch. In just over an hour, you can transform humble ingredients into a show-stopping dessert that both family and friends will relish. Join me in creating this delightful recipe and experience the joy of homemade desserts once again!

Why You'll Love This Strawberry Cheesecake Bars

  • These Strawberry Cheesecake Bars are incredibly easy to make, allowing you to impress your guests without spending hours in the kitchen.
  • The vibrant strawberry flavor shines through the creamy cheesecake, creating a delightful balance that’s sure to please any palate.
  • Their versatility makes them perfect for any occasion, whether it’s a summer picnic or a holiday gathering.
  • Plus, the beautiful layers and bright colors make these bars a visually stunning addition to your dessert table.

Strawberry Cheesecake Bars Ingredients

Get ready to create a dessert masterpiece!

For the Crust

  • Graham cracker crumbs – the foundation of your bars, adding that sweet crunch!
  • Unsalted butter – melted for binding the crumbs nicely together.
  • Granulated sugar – a touch of sweetness to enhance the crust flavor.

For the Filling

  • Cream cheese – soften it well for that smooth, velvety texture.
  • Sour cream – adds a tangy depth that balances perfectly with sweetness.
  • Large eggs – they help achieve a rich and creamy consistency.
  • Fresh strawberries – chop them carefully; their bright flavor is the heart of these Strawberry Cheesecake Bars!

Each ingredient plays a vital role, making this dessert a delightful treat you won’t forget. Happy baking!

How to Make Strawberry Cheesecake Bars

  1. Preheat your oven to 325°F (160°C), and line a 9×9-inch baking dish with parchment paper for easy removal later. This step ensures a smooth baking experience and helps your bars hold their shape!

  2. Combine graham cracker crumbs, melted butter, and ¼ cup of granulated sugar in a bowl. Stir until everything is evenly mixed, then press the mixture firmly into the bottom of your prepared dish to create a sturdy crust.

  3. Beat the cream cheese in another bowl until it’s wonderfully smooth and creamy. Gradually incorporate the remaining ½ cup of sugar and sour cream, mixing well. Add the eggs one at a time, blending until just combined to keep your filling light.

  4. Fold in the chopped strawberries gently so that they maintain their lovely shape and flavor. Carefully pour the creamy filling over the crust, spreading it evenly for that perfect balance in every bite.

  5. Bake in the preheated oven for 40-45 minutes. You’ll know it’s ready when the edges are set, but the center still jiggles slightly. This will give you that lovely creamy texture!

  6. Cool the bars at room temperature for a bit, then transfer them to the fridge to chill for at least two hours or overnight. This allows the flavors to meld beautifully and makes slicing a breeze!

  7. Slice into squares and serve as desired, sharing these delicious Strawberry Cheesecake Bars with family and friends.

Optional: Garnish with additional fresh strawberries for an extra burst of color and flavor.

Exact quantities are listed in the recipe card below.

What to Serve with Strawberry Cheesecake Bars?

Creating the perfect meal experience around these delightful bars will elevate any gathering or cozy evening in.

  • Fresh Whipped Cream: A dollop of lightly sweetened whipped cream adds a luxurious touch, enhancing the creamy goodness of the cheesecake.

  • Basil-Infused Lemonade: This refreshing drink offers a zesty contrast, quenching your thirst while complementing the strawberry flavor beautifully.

  • Chocolate Dipped Strawberries: Indulge in a sweet treat tandem, as the rich chocolate perfectly pairs with the tartness of strawberries, echoing your dessert.

  • Minty Fruit Salad: Bright, fresh fruit with a hint of mint offers a refreshing bite, clearing your palate and highlighting the cheesecake’s sweetness.

  • Coffee or Espresso: The rich, bold flavors of brewed coffee or a shot of espresso provide a delightful counterpoint to the luscious bars—perfect for any gathering!

  • Graham Cracker Crumbles: Serve alongside for added crunch! Sprinkle some on top for extra texture, echoing the crust in your dessert.

  • Vanilla Ice Cream: A scoop of creamy vanilla ice cream adds indulgence, balancing the rich cheesecake with a cool, smooth complement.

  • Sparkling Water with Lime: For a bubbly refreshment, the sparkling water with a twist of lime adds a light sparkling note without overwhelming the sweetness, offering a delightful contrast.

How to Store and Freeze Strawberry Cheesecake Bars

Room Temperature: Keep the bars wrapped in plastic wrap for up to 2 hours if serving at a gathering. For longer storage, refrigerate.

Fridge: Store leftover Strawberry Cheesecake Bars in an airtight container for up to 3 days. Chilling enhances their flavors, making each bite even more delightful!

Freezer: For longer storage, freeze the bars for up to 2 months. Wrap them individually in plastic wrap and then place in a freezer-safe bag. Thaw in the fridge before serving.

Reheating: If preferred, let the bars sit at room temperature for about 30 minutes before enjoying, allowing them to soften slightly after freezing.

Strawberry Cheesecake Bars Variations

Feel free to get creative with these delicious Strawberry Cheesecake Bars and make them your own!

  • Gluten-Free: Substitute graham cracker crumbs with finely ground almond flour or gluten-free cookies to cater to gluten sensitivities.

  • Low-Sugar: Use a sugar substitute like erythritol or a natural sweetener like honey to reduce sugar content without sacrificing flavor.

  • Dairy-Free: Replace cream cheese with a dairy-free cream cheese alternative, and use coconut yogurt instead of sour cream for a creamy texture.

  • Berry Mix: Swap fresh strawberries for a mixture of berries like blueberries or raspberries, creating a colorful and flavorful twist.

  • Chocolate Drizzle: Melt dark chocolate and drizzle it over the top of your bars after chilling for an indulgent chocolatey surprise.

  • Nutty Crunch: Add crushed nuts like walnuts or pecans to the crust for an added crunch and unique flavor pairing.

  • Citrus Zing: Mix in some lemon or lime zest into the filling for a refreshing zing that pairs beautifully with strawberries.

  • Spicy Kick: Add a pinch of cayenne pepper or a dash of cinnamon to the filling for an unexpected twist that enhances the flavors.

Let your culinary creativity shine as you try these variations! Each one promises to add a delightful twist to this classic dessert.

Make Ahead Options

These Strawberry Cheesecake Bars are perfect for busy home cooks looking to save time! You can prepare the graham cracker crust up to 24 hours in advance by storing it tightly wrapped in the refrigerator. Additionally, the creamy filling can be made ahead of time; simply mix and refrigerate it for up to 3 days in an airtight container. To maintain optimal flavor and texture, cover the filling tightly to prevent it from absorbing any odors. When you’re ready to bake, pour the prepared filling over the crust and follow the baking instructions. This way, you’ll have delicious, fresh Strawberry Cheesecake Bars ready to impress your family and friends without the last-minute rush!

Chef's Helpful Tips

  • To achieve the perfect crust for your Strawberry Cheesecake Bars, make sure to press the graham cracker mixture firmly into the bottom of the baking dish so it holds together well.
  • When beating the cream cheese, ensure it is fully softened to avoid lumps and create a smooth filling that incorporates easily with other ingredients.
  • Be gentle when folding the strawberries into the filling as this will help preserve their shape and make your bars visually appealing.
  • After baking, allow the bars to cool at room temperature for about 15-20 minutes before chilling them in the fridge, which helps enhance their flavors and makes them easier to slice later.

Strawberry Cheesecake Bars Recipe FAQs

How do I choose ripe strawberries for this recipe?
Absolutely! Look for strawberries that are bright red and firm. Avoid any with dark spots or mushy areas, as they may not taste sweet and fresh. I recommend using strawberries that are in season for the best flavor!

What’s the best way to store leftover Strawberry Cheesecake Bars?
Very! Store your leftover bars in an airtight container in the fridge for up to 3 days. The flavors only get better after chilling! Make sure they are completely set and cooled to room temperature before sealing them away.

Can I freeze Strawberry Cheesecake Bars?
Yes, you can! To freeze, wrap the bars individually in plastic wrap, ensuring there’s no air to avoid freezer burn. Then place them in a freezer-safe bag. They’ll stay delicious in the freezer for up to 2 months. Thaw in the fridge overnight before serving.

What should I do if my crust is too crumbly?
If your crust falls apart, it’s often a sign you may need more melted butter or to press it more firmly into the pan. If it’s too crumbly, melt a tablespoon or two more of butter and mix it in, then press the mixture in tightly again for a sturdier base.

Are these bars suitable for pets or those with lactose intolerance?
Not at all! The bars contain dairy ingredients which may upset pets’ stomachs. For those who are lactose intolerant, consider trying a dairy-free cream cheese alternative and lactose-free sour cream. Always check the labels for hidden dairy ingredients!

Strawberry Cheesecake Bars

Strawberry Cheesecake Bars

Strawberry Cheesecake Bars are an elegant dessert that's easy to make and perfect for impressing guests.
Print Recipe Pin Recipe
Prep Time 15 minutes mins
Cook Time 45 minutes mins
Chilling Time 2 hours hrs
Total Time 3 hours hrs
Servings: 12 slices
Course: DESSERT RECIPES
Cuisine: American
Calories: 250
Ingredients Equipment Method Nutrition Notes

Ingredients
  

For the Crust
  • 1 cup Graham cracker crumbs
  • 1/2 cup Unsalted butter melted
  • 1/4 cup Granulated sugar
For the Filling
  • 16 oz Cream cheese softened
  • 1/2 cup Sour cream
  • 2 large Large eggs
  • 2 cups Fresh strawberries chopped

Equipment

  • 9x9-inch baking dish
  • Mixing bowls
  • Electric mixer

Method
 

How to Make Strawberry Cheesecake Bars
  1. Preheat your oven to 325°F (160°C), and line a 9x9-inch baking dish with parchment paper.
  2. Combine graham cracker crumbs, melted butter, and 1/4 cup of granulated sugar in a bowl. Press into the bottom of the dish.
  3. Beat the cream cheese until smooth. Gradually add the remaining 1/2 cup of sugar and sour cream; mix well. Add the eggs one at a time.
  4. Fold in the chopped strawberries gently. Pour the filling over the crust, spreading it evenly.
  5. Bake for 40-45 minutes until edges are set and center jiggles slightly.
  6. Cool at room temperature for a bit, then refrigerate for at least 2 hours or overnight.
  7. Slice into squares and serve, garnishing with additional strawberries if desired.

Nutrition

Serving: 1sliceCalories: 250kcalCarbohydrates: 30gProtein: 4gFat: 12gSaturated Fat: 7gMonounsaturated Fat: 5gCholesterol: 50mgSodium: 180mgPotassium: 120mgFiber: 1gSugar: 15gVitamin A: 400IUVitamin C: 5mgCalcium: 50mgIron: 0.5mg

Notes

Press the graham cracker mixture firmly for the best crust. Ensure cream cheese is softened to avoid lumps. Cool bars before slicing for easier portions.

Tried this recipe?

Let us know how it was!

Filed Under: DESSERT RECIPES

Lasagna

January 11, 2026 by JudyWhite Leave a Comment

When my cravings for comfort food strike, there’s one dish that never fails to satisfy: lasagna. But as I embarked on a low-carb journey, I wanted to strip away the heavy pasta without sacrificing that warm, cheesy goodness I adore. That’s when I stumbled upon the idea of using zucchini as the backbone of a scrumptious Low Carb Keto Lasagna.

Imagine layers of tender zucchini enveloped in a rich, hearty marinara, paired perfectly with seasoned ground beef and creamy ricotta – it feels indulgent yet guilt-free! Just the thought of it makes my mouth water. Whether you’re a busy parent racing against the clock or a home chef looking to impress, this recipe will shake up your dinner routine and become a family favorite. Plus, it’s so simple and quick to whip up, you’ll wonder why you ever settled for takeout. Let’s dive into this delightful dish that brings all the flavors of traditional lasagna without the extra carbs!

Why You'll Love This Low Carb Keto Lasagna

  • This Low Carb Keto Lasagna is incredibly easy to make, allowing you to enjoy a delicious, homemade meal without spending hours in the kitchen.
  • The flavors are out of this world, with layers of savory ground beef and tangy marinara perfectly complementing the creamy ricotta and melty mozzarella.
  • Not only is it healthy, but it’s also versatile; you can customize it with your favorite veggies or spices for a personal touch.
  • Visually, the vibrant green zucchini layers make it a stunning dish that will wow your guests and family alike.

Lasagna Ingredients

For the Zucchini Layers
• Zucchini – The star of our low-carb lasagna, it replaces traditional pasta while adding a fresh taste.

For the Meat Filling
• Lean ground beef – Adds protein and hearty flavor; you can substitute with ground turkey for a leaner option.
• Garlic powder – Enhances the dish with aromatic undertones; fresh minced garlic can also be used for an extra punch.
• Dried oregano – A classic herb for Italian dishes that brings warmth and depth to the flavors.
• Salt and pepper – Essential for seasoning; always adjust to your taste for a perfectly balanced flavor.

For the Cheese Mixture
• Whole milk ricotta cheese – Gives a creamy texture to your lasagna; cottage cheese is a great low-fat alternative if desired.
• Shredded mozzarella cheese – Melts beautifully on top, providing that irresistible gooeyness that pairs perfectly with the zucchini and marinara.

For the Sauce
• Sugar-free marinara sauce – Keeps the dish low in carbs while providing that rich, hearty flavor every lasagna craves.

How to Make Low Carb Keto Lasagna

  1. Preheat your oven to 375°F (190°C). This step is crucial for achieving a beautifully cooked lasagna. As it heats up, prepare the zucchini noodles.

  2. Slice the zucchini lengthwise into thin strips. Sprinkle them with salt and let them sit on paper towels for about 15 minutes to draw out excess moisture. You’ll want them to absorb the flavors without making the dish watery.

  3. Cook the ground beef in a skillet over medium heat for about 7-10 minutes until browned. Don’t forget to drain the excess fat! Stir in the garlic powder and dried oregano for that aromatic flavor boost.

  4. Layer half of the marinara sauce in a greased baking dish. Next, add half of the zucchini noodles, followed by half of the ricotta mixture (seasoned with salt and pepper) and half of the cooked beef. Repeat these layers, creating a delicious medley!

  5. Top your masterpiece with the remaining marinara sauce and lovingly cover it with mozzarella cheese. This is where it gets cheesy—literally!

  6. Cover with foil and bake for 25 minutes. Then, remove the foil and continue baking for another 10-15 minutes until it’s golden brown and bubbling with delight.

  7. Cool for 5 minutes before diving in. This waiting period allows the flavors to meld beautifully, enhancing your first bite!

Optional: Garnish with fresh basil for an extra touch of flavor.
Exact quantities are listed in the recipe card below.

Lasagna Variations

Feel free to explore these flavorful twists and make this lasagna your own masterpiece!

  • Vegetarian: Replace ground beef with sautéed mushrooms, spinach, and bell peppers for a hearty veggie option that’s packed with flavor.

  • Spicy: Add red pepper flakes or chopped jalapeños to the meat mixture for a kick of heat that balances beautifully with the creamy ricotta.

  • Dairy-Free: Swap ricotta and mozzarella for nut-based cheeses or tofu blended with nutritional yeast for a creamy alternative without dairy.

  • Herb-Infused: Mix in fresh basil or parsley into the ricotta layer for an aromatic touch that brightens the dish and adds vibrant flavors.

  • Cheesy Twist: Incorporate a blend of cheeses like provolone or fontina alongside mozzarella for a richer, more complex cheesy experience.

  • Pesto Infusion: Spread a layer of basil pesto over the zucchini before adding the meat for a fresh, herby flavor that elevates the entire dish.

  • Low-Carb Noodles: Experiment with egg-based or almond flour noodles as low-carb substitutes for zucchini, offering different textures while keeping it keto-friendly.

  • Beef Alternatives: Use ground turkey, chicken, or even plant-based meat substitutes for an equally satisfying filling that caters to your dietary preference.

What to Serve with Low Carb Keto Lasagna?

Elevate your dining experience with delightful sides and drinks that perfectly complement this hearty dish.

  • Garlic Breadsticks: These warm, buttery delights add a comforting crunch that balances the creamy lasagna layers beautifully. Perfect for dipping into leftover marinara!

  • Side Salad: A fresh mix of greens tossed with balsamic vinaigrette brings a zesty contrast to the rich flavors of the lasagna. The crunchy textures will make every bite refreshing.

  • Steamed Broccoli: Lightly seasoned broccoli adds vibrancy and nutrition to your meal. Its mild flavor provides a lovely, earthy balance to the richness of the cheese.

  • Zesty Coleslaw: The crispness and tang of coleslaw offer a refreshing brightness amidst the warmth of the lasagna. Plus, it’s a fun, crunchy side that everyone will love!

  • Roasted Cauliflower: This savory dish enhances the meal with its nutty flavor and satisfying texture. Roasting elevates its natural sweetness, making it a harmonious side dish.

  • Red Wine: A glass of full-bodied red wine enhances the flavors beautifully, making your dining experience even more indulgent. It perfectly pairs with the savory notes of the lasagna.

  • Chocolate Mousse: For dessert, a light and airy chocolate mousse serves as the perfect sweet ending. The richness of chocolate balances the savory main with a touch of elegance.

How to Store and Freeze Lasagna

Fridge: Store leftover lasagna in an airtight container for up to 3 days. Allow it to cool completely before sealing to maintain freshness.

Freezer: For longer storage, freeze individual portions wrapped tightly in plastic wrap or foil, then place in a freezer-safe bag for up to 3 months.

Reheating: Thaw frozen lasagna overnight in the fridge. To reheat, cover with foil and warm in the oven at 350°F (175°C) for about 25-30 minutes or until heated through.

Freshness Check: Always check for signs of spoilage before consuming leftovers; if in doubt, it’s best to discard!

Make Ahead Options

These delicious Low Carb Keto Lasagna layers are perfect for meal prep enthusiasts! You can prepare the zucchini noodles and the ground beef filling up to 24 hours in advance; simply slice the zucchini and season, then store in an airtight container in the refrigerator to prevent browning. The beef can be cooked and refrigerated as well, allowing you to assemble your lasagna quickly when ready to bake. When you’re ready to enjoy your meal, just layer the prepped ingredients in your baking dish, top with sauce and cheese, and bake as directed. This way, you’ll have a comforting, homemade dinner with minimal effort on busy nights!

Chef's Helpful Tips

  • When making low carb keto lasagna, be sure to slice the zucchini as thinly as possible to achieve the best noodle-like texture.
  • It’s important to sprinkle the zucchini with salt and let it sit to draw out moisture, preventing a watery dish.
  • For a richer flavor in the meat filling, consider using fresh minced garlic instead of garlic powder for added depth.
  • Ensure your oven is fully preheated to 375°F to guarantee even cooking and browning of the cheese on top.
  • Allow the lasagna to cool for 5 minutes before serving; this resting time helps the layers set and improves the overall presentation.

Low Carb Keto Lasagna Recipe FAQs

How do I choose the right zucchini for my lasagna?
Absolutely! When selecting zucchini, look for firm, vibrant green ones with no dark spots. Opt for medium-sized zucchini, as they have a perfect balance of flesh and skin, making them ideal for those noodles. Overripe zucchinis may be too seedy and watery, so steer clear of those!

What’s the best way to store leftover lasagna?
To store your leftover low carb keto lasagna, allow it to cool completely before transferring it to an airtight container. It can be kept in the fridge for up to 3 days. If you want to enjoy it beyond that, I recommend freezing! Just wrap individual portions tightly and place them in a freezer-safe bag.

Can I freeze low carb keto lasagna? How should I do it?
Yes, you can definitely freeze it! I often make extra to enjoy later. First, slice it into individual portions and let them cool. Wrap each portion tightly in plastic wrap or foil, then place them in a freezer-safe bag labeled with the date. It should keep well for up to 3 months. When you’re ready to eat, thaw it overnight in the fridge and reheat to perfection!

What if my lasagna turned out watery?
Very good question! If your lasagna turned out watery, it might be due to excess moisture in the zucchini. Ensure to slice your zucchini thinly and sprinkle it with salt, letting it sit on paper towels to draw out moisture beforehand. If it happens despite this, you could try adding more cheese to absorb the liquid next time.

Are there any dietary considerations I should keep in mind?
It’s always a good idea to consider dietary restrictions! This low carb keto lasagna is gluten-free and perfect for those looking to reduce carbs. However, if you’re serving guests, check for allergies—particularly to dairy or any specific ingredients in your marinara sauce. You can easily customize ingredients to fit various dietary needs, like using dairy-free cheese or swapping ground beef for turkey or a vegetarian option!

How long does it take for the flavors to meld after baking?
I recommend allowing your low carb keto lasagna to cool for about 5-10 minutes after baking. This resting time lets the layers set and enhances the overall flavor experience. It may feel tempting to dive right in, but patience pays off with the perfect slice!

Lasagna

Lasagna

This Low Carb Keto Lasagna offers all the flavors of traditional lasagna without the extra carbs, featuring zucchini, ground beef, and creamy cheese.
Print Recipe Pin Recipe
Prep Time 15 minutes mins
Cook Time 40 minutes mins
Cooling Time 5 minutes mins
Total Time 1 hour hr
Servings: 6 slices
Course: DINNER RECIPES
Cuisine: Italian
Calories: 350
Ingredients Equipment Method Nutrition Notes

Ingredients
  

For the Zucchini Layers
  • 3 medium Zucchini Thinly sliced
For the Meat Filling
  • 1 lb Lean ground beef Can substitute with ground turkey
  • 1 tsp Garlic powder Or use fresh minced garlic
  • 1 tsp Dried oregano
  • to taste Salt Essential for seasoning
  • to taste Pepper Essential for seasoning
For the Cheese Mixture
  • 15 oz Whole milk ricotta cheese Can substitute with cottage cheese
  • 2 cups Shredded mozzarella cheese
For the Sauce
  • 24 oz Sugar-free marinara sauce

Equipment

  • Oven
  • Skillet
  • Baking dish

Method
 

How to Make Low Carb Keto Lasagna
  1. Preheat your oven to 375°F (190°C).
  2. Slice the zucchini lengthwise into thin strips. Sprinkle them with salt and let them sit on paper towels for about 15 minutes to draw out excess moisture.
  3. Cook the ground beef in a skillet over medium heat for about 7-10 minutes until browned. Drain the excess fat and stir in garlic powder and dried oregano.
  4. Layer half of the marinara sauce in a greased baking dish. Add half of the zucchini noodles, half of the ricotta mixture, and half of the cooked beef. Repeat the layers.
  5. Top with the remaining marinara sauce and cover with mozzarella cheese.
  6. Cover with foil and bake for 25 minutes. Remove the foil and continue baking for another 10-15 minutes until golden brown.
  7. Cool for 5 minutes before serving.

Nutrition

Serving: 1sliceCalories: 350kcalCarbohydrates: 10gProtein: 25gFat: 20gSaturated Fat: 10gPolyunsaturated Fat: 1gMonounsaturated Fat: 3gCholesterol: 90mgSodium: 500mgPotassium: 600mgFiber: 3gSugar: 5gVitamin A: 500IUVitamin C: 10mgCalcium: 250mgIron: 2mg

Notes

Optional: Garnish with fresh basil for added flavor.

Tried this recipe?

Let us know how it was!

Filed Under: DINNER RECIPES

Cheesy Ground Beef and Potato Casserole

January 11, 2026 by JudyWhite Leave a Comment

There’s something truly comforting about the aroma of ground beef mingling with garlic, wafting through your kitchen as you prepare a meal for loved ones. I stumbled upon this Cheesy Ground Beef and Potato Casserole during one of those busy weeknights where takeout just didn’t cut it. I wanted something hearty and satisfying, yet easy enough to whip up without a fuss.

This casserole quickly became a family favorite, combining tender layers of russet potatoes, savory beef, and gooey cheddar cheese into a dish that’s not only delicious but also incredibly simple to make. With just a handful of ingredients and minimal prep time, you’ll create a warm, filling dinner that pleases both kids and adults alike.

So, if you’re tired of the same old fast food routine and hungry for something home-cooked, grab your apron and let’s dive into this cozy, cheesy delight!

Why You'll Love This Cheesy Ground Beef and Potato Casserole

  • This Cheesy Ground Beef and Potato Casserole is incredibly easy to prepare, making it perfect for busy weeknights.
  • The delightful combination of flavors from the savory beef, creamy soup, and sharp cheddar cheese will have everyone asking for seconds.
  • Its versatility allows you to customize it with your favorite veggies or additional toppings, ensuring it suits every palate.
  • Visually, the golden, bubbly cheese on top creates an inviting presentation that’s sure to impress your family and guests.
  • With minimal prep time and a single dish to clean, you’ll save precious time in the kitchen while still serving up a comforting meal.
  • This casserole is bound to become a crowd-pleaser at any dinner table.

Cheesy Ground Beef and Potato Casserole Ingredients

• Perfect for cozy family dinners!

For the Casserole

  • 1 lb lean ground beef – provides a savory base and adds protein to the dish.
  • 4 medium Russet potatoes – thinly sliced for tender layers that soak up flavors.
  • 1 medium onion – finely chopped to enhance the dish with a sweet, aromatic depth.
  • 3 cloves garlic – minced to bring a robust flavor that elevates the overall taste.
  • 2 cups shredded sharp cheddar cheese – adds that gooey, cheesy goodness that everyone loves.
  • 1 cup whole milk – creates a creamy texture, helping to bind all the ingredients together.
  • 1 can (10.5 oz) cream of mushroom soup – adds richness and moisture, making the casserole incredibly comforting.
  • Salt and pepper – to taste, ensuring all flavors come together beautifully.

With these simple ingredients, you’ll be able to whip up a delightful Cheesy Ground Beef and Potato Casserole that brings warmth and satisfaction to every dinner!

How to Make Cheesy Ground Beef and Potato Casserole

  1. Preheat your oven to 375°F (190°C) and generously grease a baking dish with nonstick spray. This step ensures your casserole doesn’t stick and comes out perfectly golden.

  2. Cook the ground beef in a skillet over medium heat with the chopped onion and minced garlic until browned, about 7–10 minutes. Drain off any excess fat to keep your dish light and flavorful.

  3. Mix together the cooked beef, cream of mushroom soup, whole milk, salt, and pepper in a bowl until well combined. This creamy mixture will be the heart of your casserole.

  4. Layer half of the sliced potatoes in the greased baking dish. Add half of the meat mixture followed by half of the shredded cheese. Repeat the layering process, finishing with cheese on top for that irresistible gooey finish.

  5. Cover the dish with foil and bake for 45 minutes. Then, remove the foil and bake for an additional 15 minutes until the cheese is bubbly and golden brown—just the way you want it!

  6. Cool the casserole for a few minutes before serving. This allows the layers to set and makes it easier to serve.

Optional: Sprinkle fresh parsley on top for a pop of color and freshness.
Exact quantities are listed in the recipe card below.

Make Ahead Options

These Cheesy Ground Beef and Potato Casserole layers are perfect for meal prep enthusiasts! You can prepare the entire casserole up to 24 hours in advance, assembling it and then covering it tightly with foil. To maintain quality, be sure to refrigerate it immediately after prepping. When you’re ready to enjoy your cozy meal, simply pop it in the oven straight from the fridge—the baking time may increase by a few minutes. If you’d like to prep components instead, you can slice the potatoes and store them in cold water to prevent browning for up to 3 days. With these make ahead options, you’ll have a delicious home-cooked dish ready for busy weeknights with minimal effort!

How to Store and Freeze Cheesy Ground Beef and Potato Casserole

Fridge: Keep the casserole in an airtight container for up to 3 days. This ensures it stays fresh and maintains its delicious cheesy goodness.

Freezer: You can freeze leftovers by wrapping them tightly in plastic wrap and placing them in a freezer-safe container. Store for up to 3 months for best flavor.

Thawing: To enjoy your frozen Cheesy Ground Beef and Potato Casserole, thaw it overnight in the fridge before reheating.

Reheating: Warm individual servings in the microwave until heated through, or cover with foil and reheat in the oven at 350°F (175°C) for about 20 minutes. Enjoy every cheesy bite!

Cheesy Ground Beef and Potato Casserole Variations

Get creative with your casserole by exploring these mouthwatering twists that elevate every bite.

  • Vegetarian: Substitute ground beef with lentils or chickpeas for a plant-based delight that’s just as hearty.
  • Spicy Kick: Add diced jalapeños or a sprinkle of red pepper flakes to the meat mixture for an exciting heat that dances on the palate.
  • Loaded Version: Top with crispy bacon bits and green onions before serving, adding a bit of crunch and flavor to each luscious bite.
  • Cheese Variety: Mix cheddar with pepper jack or mozzarella for a meltingly smooth texture and an extra hint of zest.
  • Herbed Delight: Incorporate fresh herbs like thyme or rosemary into the layers for a fragrant twist that brightens the dish beautifully.
  • Creamy Swap: Use cream of chicken or a homemade white sauce instead of cream of mushroom for a deliciously different flavor profile.
  • Root Veggie Boost: Layer in thinly sliced carrots or sweet potatoes alongside the regular potatoes for added sweetness and nutrition.
  • Lighter Option: Replace whole milk with almond or cashew milk and use reduced-fat cheese to indulge without the extra calories.

With these variations, you can craft a true masterpiece that reflects your culinary personality while still enjoying the familiar comfort of a hearty casserole!

What to Serve with Cheesy Ground Beef and Potato Casserole?

Creating the ultimate cozy family dinner is easy when you know what to pair with this homey dish.

  • Garlic Bread: The crispy and buttery garlic bread makes for a delightful contrast to the creamy casserole, perfect for soaking up those rich flavors. It’s almost a must-have to balance the meal.

  • Steamed Broccoli: This vibrant, crunchy veggie adds freshness and color to your plate. Its mild flavor pairs beautifully with the rich, hearty casserole, rounding out a wholesome dinner experience.

  • Mixed Green Salad: A light salad with crisp greens can help cleanse the palate. Toss in some cherry tomatoes and a tangy vinaigrette for extra zing, making every bite of casserole feel even more satisfying.

  • Apple Sauce: The sweet and tangy notes of apple sauce complement the savory elements of the casserole. It’s a nostalgic pairing that harkens back to classic home-cooked meals.

  • Homemade Coleslaw: The crunch of coleslaw adds texture while the creamy dressing provides a nice contrast. It can be a fun, colorful addition that everyone’s sure to enjoy.

  • Red Wine: Complement the savory richness of the casserole with a glass of medium-bodied red wine, which enhances the meaty flavors and brings an extra layer of enjoyment to your meal.

  • Lemon Tart: For dessert, a refreshing lemon tart can cut through the richness of the casserole. Its bright and zesty flavor will leave your guests feeling satisfied and delighted.

  • Herbed Rice: A light, fluffy herbed rice will soak up any leftover sauce from your casserole while providing a pleasant, earthy flavor that ties the meal together.

With these delightful pairings, you can create an unforgettable dining experience that transforms your Cheesy Ground Beef and Potato Casserole into a feast!

Chef's Helpful Tips

  • When making Cheesy Ground Beef and Potato Casserole, try to slice the potatoes as uniformly as possible to ensure even cooking.
  • A common mistake is overcooking the beef, so aim for a lightly browned color without excess crispness.
  • For a creamier texture, consider using a mix of cheddar and mozzarella cheese.
  • Remember to let the casserole rest for about 10 minutes after baking to help the layers set for easier serving.

Cheesy Ground Beef and Potato Casserole Recipe FAQs

How can I choose the right potatoes for this casserole?
Absolutely! When selecting potatoes, go for medium-sized Russets that are firm with no dark spots or blemishes. They should feel heavy for their size and have a smooth skin, which ensures they hold their shape when baked and provide the perfect creamy texture.

How do I store leftovers from the casserole?
Very easy! Simply let the casserole cool completely, then transfer it to an airtight container. It will stay fresh in the fridge for up to 3 days. Make sure to store it at or below 40°F (4°C) to prevent spoilage. If you want to enjoy it later, freezing is a great option!

Can I freeze Cheesy Ground Beef and Potato Casserole?
Definitely! To freeze your casserole, wrap it tightly in plastic wrap and place it in a freezer-safe container or use a heavy-duty freezer bag, squeezing out as much air as possible. It will maintain its best flavor for up to 3 months. When you’re ready to enjoy it, thaw it overnight in the fridge before reheating.

What’s the best way to reheat the casserole?
For the best results, preheat your oven to 350°F (175°C). Remove the casserole from any plastic wrapping and cover it with foil to keep it moist. Bake for about 20 minutes, or until heated through. If microwaving, portion out servings and heat on high for 1-2 minutes, checking and stirring halfway for even heating.

What can I do if the casserole is too watery after baking?
If you find that your casserole is too watery, it may be due to excess moisture from the potatoes or not mixing the ingredients thoroughly. For the next time, consider draining excess liquid before layering. If it happens again, simply sprinkle a bit of breadcrumbs or additional cheese on top and bake it for a few extra minutes to help absorb some moisture.

Is this casserole safe for my pets?
While your furry friends may be curious about what you’re cooking, it’s essential to keep this casserole away from them. Ingredients like onions and garlic can be harmful to dogs and cats, so stick to pet-friendly treats for them while you enjoy this delicious Cheesy Ground Beef and Potato Casserole!

Cheesy Ground Beef and Potato Casserole

Cheesy Ground Beef and Potato Casserole

This Cheesy Ground Beef and Potato Casserole is a comforting dish combining layers of potatoes, beef, and gooey cheese, perfect for busy weeknights.
Print Recipe Pin Recipe
Prep Time 15 minutes mins
Cook Time 1 hour hr
Cooling Time 10 minutes mins
Total Time 1 hour hr 25 minutes mins
Servings: 6 servings
Course: DINNER RECIPES
Cuisine: American
Calories: 450
Ingredients Equipment Method Nutrition Notes

Ingredients
  

For the Casserole
  • 1 lb lean ground beef provides a savory base and adds protein to the dish.
  • 4 medium Russet potatoes thinly sliced for tender layers that soak up flavors.
  • 1 medium onion finely chopped to enhance the dish with a sweet, aromatic depth.
  • 3 cloves garlic minced to bring a robust flavor that elevates the overall taste.
  • 2 cups shredded sharp cheddar cheese adds that gooey, cheesy goodness that everyone loves.
  • 1 cup whole milk creates a creamy texture, helping to bind all the ingredients together.
  • 1 can (10.5 oz) cream of mushroom soup adds richness and moisture, making the casserole incredibly comforting.
  • Salt and pepper to taste, ensuring all flavors come together beautifully.

Equipment

  • Baking dish
  • Skillet

Method
 

How to Make Cheesy Ground Beef and Potato Casserole
  1. Preheat your oven to 375°F (190°C) and generously grease a baking dish with nonstick spray.
  2. Cook the ground beef in a skillet over medium heat with the chopped onion and minced garlic until browned, about 7–10 minutes.
  3. Mix together the cooked beef, cream of mushroom soup, whole milk, salt, and pepper in a bowl until well combined.
  4. Layer half of the sliced potatoes in the greased baking dish. Add half of the meat mixture followed by half of the shredded cheese. Repeat the layering process.
  5. Cover the dish with foil and bake for 45 minutes. Then remove the foil and bake for an additional 15 minutes until the cheese is bubbly and golden brown.
  6. Cool the casserole for a few minutes before serving.

Nutrition

Serving: 1servingCalories: 450kcalCarbohydrates: 35gProtein: 25gFat: 25gSaturated Fat: 12gPolyunsaturated Fat: 1gMonounsaturated Fat: 10gCholesterol: 75mgSodium: 800mgPotassium: 800mgFiber: 4gSugar: 2gVitamin A: 500IUVitamin C: 15mgCalcium: 300mgIron: 3mg

Notes

Optional: Sprinkle fresh parsley on top for a pop of color and freshness.

Tried this recipe?

Let us know how it was!

Filed Under: DINNER RECIPES

Cowboy Butter Steak

January 11, 2026 by JudyWhite Leave a Comment

There’s a certain thrill that comes from cooking a steak perfectly, and this Cowboy Butter Steak is a game changer in my culinary repertoire. Picture this: the moment I placed a seasoned ribeye on a screaming hot cast-iron skillet, the sizzling sound filled my kitchen, mingling with the rich aroma of garlic and melted butter. It was as if the ordinary was transformed into something magical right before my eyes.

The simplicity of this dish is what makes it so appealing. You don’t need extensive culinary skills; just a few quality ingredients and the right techniques to create a mouthwatering masterpiece. With every bite, the combination of the buttery sauce, fresh herbs, and that perfect sear satisfies even the deepest craving for a hearty meal. It’s versatile enough for a cozy dinner at home or impressing guests on special occasions.

Ready to take your taste buds on a journey? Let’s dive into this captivating Cowboy Butter Steak recipe that’s sure to become a favorite at your table!

Why You'll Love This Cowboy Butter Steak

  • This Cowboy Butter Steak is incredibly easy to prepare, making it perfect for both beginners and seasoned cooks.
  • The explosion of flavors from the buttery garlic sauce and fresh herbs will have your taste buds dancing with each bite.
  • It’s versatile enough to elevate any dinner, whether for a casual night in or a festive gathering with friends.
  • Plus, it looks stunning on the plate, ensuring that it’s not just a meal, but an experience to savor.
  • The best part is that it only takes about 25 minutes from start to finish, saving you precious time in the kitchen while still delivering a restaurant-quality dish.
  • Get ready to fall in love with this mouthwatering steak!

Cowboy Butter Steak Ingredients

For this Cowboy Butter Steak, gather a few essential ingredients that will elevate your culinary experience!

For the Steak

  • Ribeye steak – a flavorful cut that remains tender and juicy when cooked.
  • Sea salt – enhances the natural flavor of the steak, so season generously.
  • Freshly cracked black pepper – provides a spicy kick that complements the meat beautifully.

For the Cowboy Butter Sauce

  • Unsalted butter – rich and creamy, it creates the base for the luscious sauce.
  • Garlic – minced for an aromatic punch that elevates the overall flavor profile.
  • Fresh parsley – adds a touch of color and a fresh, vibrant taste to the sauce.
  • Fresh chives – a mild onion flavor that contributes to the herbaceous notes of the dish.
  • Lemon juice – freshly squeezed to add a zesty brightness that cuts through the richness.
  • Worcestershire sauce – brings umami depth and complexity to the cowboy butter.

Now that you have all the ingredients ready, you’re one step closer to indulging in the mouthwatering experience that is Cowboy Butter Steak!

How to Make Cowboy Butter Steak

  1. Prepare the Steak: Allow the ribeye steak to rest at room temperature for 30 minutes. This ensures even cooking and helps achieve that juicy tenderness we all crave.

  2. Season Generously: Sprinkle sea salt and freshly cracked black pepper on both sides of the steak. Don’t be shy; this will elevate the rich flavor of the meat.

  3. Heat the Skillet: Preheat a cast-iron skillet over medium-high heat until it’s smoking hot, then add 1 tablespoon of oil. You want that sizzling sound when the steak touches the pan!

  4. Sear the Steak: Place the ribeye in the hot skillet and sear for about 4-5 minutes on each side until a brown crust forms. Look for a deep golden color to ensure it’s perfectly cooked.

  5. Make the Cowboy Butter Sauce: In the last minute of cooking, turn down the heat and add unsalted butter, minced garlic, Worcestershire sauce, fresh parsley, chives, and lemon juice to the pan. Baste the steak with this flavorful mixture for an extra kick.

  6. Rest and Slice: Remove the steak from heat and let it rest for five minutes. Slicing against the grain will enhance tenderness, plus drizzling it with the remaining cowboy butter sauce gives it a glorious finish.

Optional: Serve with a sprinkle of extra parsley for added freshness.

Exact quantities are listed in the recipe card below.

Make Ahead Options

These Cowboy Butter Steaks are fantastic for meal prep lovers! You can season the ribeye steak with sea salt and freshly cracked black pepper up to 24 hours in advance, allowing the flavors to penetrate deeply. Store the seasoned steak in the refrigerator to maintain quality. Additionally, you can prepare the cowboy butter sauce (butter, garlic, Worcestershire sauce, parsley, chives, lemon juice) up to 3 days in advance; just remember to refrigerate it in an airtight container. When you’re ready to cook, simply sear the steak as directed and warm the sauce briefly before drizzling it over the finished steak for that harmonious blend of flavors. Enjoy the convenience of a delicious meal with minimal effort!

How to Store and Freeze Cowboy Butter Steak

Fridge: Keep any leftover Cowboy Butter Steak wrapped tightly in aluminum foil or in an airtight container for up to 3 days. This helps retain its flavor and moisture.

Freezer: For longer storage, freeze the steak in an airtight container or freezer bag for up to 3 months. Thaw overnight in the fridge before reheating.

Reheating: To reheat, place the steak in a skillet over low heat, adding a splash of broth or water to maintain moisture, and cover with a lid. Heat until warmed through.

Room Temperature: Avoid leaving the Cowboy Butter Steak at room temperature for more than 2 hours, as this can promote bacterial growth. Enjoy it fresh for the safest and tastiest experience!

Cowboy Butter Steak Variations

Feel free to mix things up and make this Cowboy Butter Steak your own with these creative twists!

  • Herb-Infused: Add fresh rosemary or thyme to the butter for an aromatic kick, enhancing the savory profile of the steak. The heater complements the richness beautifully.

  • Spicy Kick: Toss in a pinch of cayenne pepper or red pepper flakes to the cowboy butter for a delightful heat that lingers. Just a little will make your taste buds sing!

  • Balsamic Glaze: Drizzle a balsamic reduction over the steak before serving for a sweet and tangy contrast that elevates the flavors. It adds a gourmet touch that’s magnificent!

  • Garlic Lovers: Increase the garlic to six cloves and roast them before adding to the butter sauce for a sweeter, caramelized flavor. This adds a depth that’s simply irresistible.

  • Citrus Zing: Swap out the lemon juice for lime or orange juice to give a fresh citrus twist that brightens the dish. Each variation contributes its own vibrant personality!

  • Smoky Flavor: Mix in a dash of smoked paprika for a subtle hint of smokiness that will transport you to a backyard cookout. It’s like capturing summer on your plate.

  • Cheesy Delight: Sprinkle crumbled blue cheese or aged cheddar on top of the steak just before serving for an indulgent, creamy addition that takes it to another level.

  • Umami Boost: Add a splash of soy sauce in addition to the Worcestershire for an extra umami depth that complements the steak’s richness beautifully. It’s a savory explosion in every bite!

What to Serve with Cowboy Butter Steak?

To make your meal truly unforgettable, consider these delightful pairings that will enhance the flavors of your ribeye steak.

  • Creamy Mashed Potatoes: These buttery, smooth potatoes soak up the luscious cowboy butter sauce, providing an indulgent contrast to the steak’s richness.
  • Garlic Roasted Asparagus: The crispness of the asparagus, seasoned with garlic and olive oil, adds a fresh, vibrant crunch that complements the tender steak beautifully.
  • Charred Corn Salad: Sweet, smoky corn tossed with lime and cilantro offers a bright, zesty element, balancing the savory notes of the steak perfectly.
  • Balsamic Glazed Brussels Sprouts: Caramelized sprouts with a tangy balsamic glaze introduce an earthy flavor that pairs superbly with the Cowboy Butter Steak.
  • Caesar Salad: The crisp romaine, creamy dressing, and crunchy croutons create a refreshing side that contrasts the richness of the steak without overwhelming its flavor.
  • Red Wine: A full-bodied red wine, such as a Cabernet Sauvignon, enhances the meaty notes and provides a sophisticated touch to your dining experience.
  • Chocolate Lava Cake: For dessert, this rich molten cake surprises with its gooey center, rounding off the meal with a satisfying indulgence.
  • Grilled Garlic Bread: Crispy on the outside and soft on the inside, this bread serves as the perfect vessel for sopping up any leftover cowboy butter sauce.
  • Sweet Potato Fries: Lightly seasoned and crispy, the natural sweetness of the fries contrasts beautifully with the savory flavors of the steak, creating a delightful balance.

Chef's Helpful Tips

  • Always let the ribeye steak sit at room temperature for at least 30 minutes before cooking to ensure even doneness.When seasoning, use a generous amount of sea salt and freshly cracked black pepper to enhance the steak’s natural flavors.Searing the steak in a preheated cast-iron skillet creates that coveted brown crust, so make sure the pan is smoking hot before adding the meat.Finally, rest the steak for five minutes after cooking to allow the juices to redistribute, which will result in a more tender and juicy Cowboy Butter Steak.

Cowboy Butter Steak Recipe FAQs

How do I choose the perfect ribeye steak?
Absolutely! When selecting a ribeye steak, look for ones with good marbling—those beautiful white flecks of fat within the meat. This marbling ensures that your steak remains juicy and flavorful as it cooks. The color should be a bright red, indicating freshness, and avoid any cuts with dark spots. Don’t hesitate to ask your butcher for advice; they can often guide you to the best cuts.

How should I store leftover Cowboy Butter Steak?
To keep your leftover Cowboy Butter Steak fresh, wrap it tightly in aluminum foil or store it in an airtight container. In the fridge, it will last for up to 3 days. If you want to save it for longer, consider freezing it to maintain its flavor and moisture.

Can I freeze Cowboy Butter Steak?
Certainly! For freezing, place the steak in an airtight container or a freezer-safe bag. Be sure to remove as much air as possible to prevent freezer burn. Your Cowboy Butter Steak can stay good in the freezer for up to 3 months. To thaw, simply move it to the fridge overnight, and it will be ready for reheating.

What’s the best way to reheat Cowboy Butter Steak?
Reheating your Cowboy Butter Steak should be done carefully to maintain its tenderness. Heat a skillet over low heat and add a splash of broth or water to help keep it moist. Place the steak in the skillet and cover it with a lid to prevent drying out. Heat until warmed through, usually about 5-7 minutes. This method keeps the steak flavorful without overcooking it.

Are there any dietary considerations for this steak recipe?
Very! If you’re cooking for someone with allergies, be mindful that the Cowboy Butter contains butter and Worcestershire sauce, which may contain gluten and anchovies. Additionally, while the ribeye steak is a delicious source of protein, vegans and vegetarians will need to look for a plant-based alternative. Always check ingredient labels if you’re unsure about specific dietary restrictions.

What should I do if my steak is too tough?
If you find that your Cowboy Butter Steak ends up tough, it may have been overcooked or cut against the grain. To fix this, try slicing the steak thinner, as this breaks up the muscle fibers. For the next attempt, ensure the steak rests adequately before cooking, and aim for a perfect medium-rare for optimum tenderness. Always remember, practice makes perfect!

Cowboy Butter Steak

Cowboy Butter Steak

This Cowboy Butter Steak is a delicious dish featuring a seasoned ribeye and a rich butter sauce that creates a mouthwatering experience.
Print Recipe Pin Recipe
Prep Time 25 minutes mins
Cook Time 15 minutes mins
Resting Time 5 minutes mins
Total Time 45 minutes mins
Servings: 2 steaks
Course: DINNER RECIPES
Cuisine: American
Calories: 650
Ingredients Equipment Method Nutrition Notes

Ingredients
  

For the Steak
  • 1 piece Ribeye steak a flavorful cut that remains tender and juicy when cooked
  • 1 teaspoon Sea salt enhances the natural flavor of the steak
  • 1 teaspoon Freshly cracked black pepper provides a spicy kick
For the Cowboy Butter Sauce
  • 4 tablespoons Unsalted butter rich and creamy, creates the base for the sauce
  • 2 cloves Garlic minced for an aromatic punch
  • 2 tablespoons Fresh parsley adds freshness
  • 1 tablespoon Fresh chives adds mild onion flavor
  • 1 tablespoon Lemon juice freshly squeezed for brightness
  • 1 teaspoon Worcestershire sauce adds umami depth

Equipment

  • cast-iron skillet
  • Knife
  • Cutting Board

Method
 

Cooking Instructions
  1. Allow the ribeye steak to rest at room temperature for 30 minutes.
  2. Sprinkle sea salt and freshly cracked black pepper on both sides of the steak.
  3. Preheat a cast-iron skillet over medium-high heat until it's smoking hot, then add 1 tablespoon of oil.
  4. Place the ribeye in the hot skillet and sear for about 4-5 minutes on each side until a brown crust forms.
  5. In the last minute of cooking, add unsalted butter, minced garlic, Worcestershire sauce, fresh parsley, chives, and lemon juice to the pan and baste the steak with this mixture.
  6. Remove the steak from heat and let it rest for five minutes before slicing against the grain.

Nutrition

Serving: 1steakCalories: 650kcalCarbohydrates: 3gProtein: 50gFat: 50gSaturated Fat: 20gPolyunsaturated Fat: 2gMonounsaturated Fat: 24gCholesterol: 150mgSodium: 800mgPotassium: 800mgSugar: 1gVitamin A: 500IUVitamin C: 2mgCalcium: 20mgIron: 3mg

Notes

Serve with a sprinkle of extra parsley for added freshness.

Tried this recipe?

Let us know how it was!

Filed Under: DINNER RECIPES

Crockpot Italian Chicken

January 11, 2026 by JudyWhite Leave a Comment

As the sun sets and the day’s rush fades away, there’s nothing quite like the soothing aroma of something delicious cooking away in the kitchen. That familiar scent of garlic mingling with tomatoes takes me back to family dinners where stories were shared and laughter filled the air. Enter my secret weapon for those busy days: Crockpot Italian Chicken! This dish not only transforms just a few ingredients into a heartwarming meal but also turns your slow cooker into a magic pot of flavors.

Imagine coming home after a long day to the welcoming smell of tender chicken, effortlessly infused with Italian herbs, waiting to be devoured. With minimal prep time and the promise of a satisfying dish, this recipe brings comfort without the fuss—perfect for anyone yearning for homemade goodness over fast food. The beauty of Crockpot Italian Chicken is in its versatility; enjoy it over fluffy rice or nestled among pasta, and let each bite remind you of why you love cooking from scratch. Let’s dive in and create something truly special!

Why You'll Love This Crockpot Italian Chicken

  • This Crockpot Italian Chicken is a breeze to prepare, taking just 15 minutes of your time before it does all the work for you.
  • The rich and savory flavors from the garlic and Italian seasoning create a mouthwatering dish that will have everyone asking for seconds.
  • Its versatility means you can serve it over pasta, rice, or even enjoy it in sandwiches, making it suitable for any meal occasion.
  • Plus, the delightful aroma filling your home as it cooks is sure to be a crowd-pleaser, bringing warmth and comfort to your dinner table.

Crockpot Italian Chicken Ingredients

• Perfect for busy weeknights!

For the Chicken

  • Boneless, skinless chicken breasts – ideal for a tender, juicy texture that soaks up the flavors.

For the Sauce

  • Fresh garlic – brings a delightful aroma and depth of flavor; feel free to add more for extra oomph.
  • Low-sodium soy sauce – adds a savory element and enhances the flavor profile, making your Crockpot Italian Chicken even better!
  • Diced tomatoes – use fire-roasted for a hint of smokiness, adding a delicious base for the sauce.
  • Italian seasoning – a blend of herbs that delivers that classic Italian taste; consider fresh herbs for a brighter flavor.

Now you’re ready to transform simple ingredients into a warm, comforting meal that will bring your loved ones to the table!

How to Make Crockpot Italian Chicken

  1. Rinse the chicken breasts under cold water and pat them dry with paper towels. This ensures a clean start and helps the seasonings adhere better to the chicken.

  2. Place the chicken in your crockpot, laying it flat. Then, add the diced tomatoes, soy sauce, minced garlic, and Italian seasoning. This combination will infuse the chicken with amazing flavors as it cooks.

  3. Cover your crockpot with the lid and cook on low for 6-8 hours, or on high for 3-4 hours. The chicken is ready when it’s tender and easy to shred with a fork—look for that melt-in-your-mouth texture!

  4. Shred the chicken directly in the pot using two forks, mixing it well with the sauce to fully incorporate those rich flavors. This creates a delicious coating that’ll be perfect for serving.

  5. Serve your Crockpot Italian Chicken over pasta or rice, letting the sauce drizzle down beautifully. Enjoy your home-cooked meal with family or friends—every bite will remind you of the love put into it!

Optional: Garnish with fresh basil for a pop of color and added flavor.

Exact quantities are listed in the recipe card below.

Crockpot Italian Chicken Variations

Feel free to get creative and make this dish your own—it’s all about enhancing those comforting flavors!

  • Herb-Infused: Substitute Italian seasoning with fresh herbs like rosemary or thyme for a fragrant twist. Fresh herbs brighten up the dish and add a garden-fresh flavor.

  • Spicy Kick: Add crushed red pepper flakes or diced jalapeños for some heat. If you enjoy a bit of spice, it transforms the dish into a delightful adventure for your taste buds.

  • Vegetable Boost: Throw in some chopped bell peppers, zucchini, or spinach. This not only adds color but also enhances the nutritional value of your meal while being deliciously satisfying.

  • Creamy Variation: Stir in a splash of heavy cream or a dollop of cream cheese before serving for a rich and creamy sauce. This twist takes your chicken to a whole new level of comfort food!

  • Gluten-Free Option: Use tamari instead of soy sauce to keep it gluten-free without sacrificing flavor. It’s an easy swap that ensures everyone can enjoy this dish.

  • Citrus Zing: Squeeze in some fresh lemon juice or add zest for a refreshing citrus flavor. This adds a delightful brightness that complements the savory elements beautifully.

  • Balsamic Twist: Replace soy sauce with balsamic vinegar for a sweet and tangy glaze. This small twist adds a delightful depth that elevates your Crockpot Italian Chicken.

  • Slow-Roasted Garlic: Roast whole garlic bulbs and mash them into the sauce for a sweet, caramelized flavor. This makes every bite richer, enveloping the chicken in an irresistible sweetness.

Make Ahead Options

Crockpot Italian Chicken is a fantastic choice for meal prep aficionados! You can marinate the chicken with garlic, soy sauce, diced tomatoes, and Italian seasoning up to 24 hours in advance. Simply place the seasoned chicken in an airtight container and refrigerate it overnight to enhance the flavors. If you prefer, you can also shred the cooked chicken and store it in the sauce for up to 3 days in the fridge, ensuring it remains juicy and flavorful. When it’s time to serve, just reheat the chicken in the crockpot for a couple of hours on low or in the microwave until warmed through, and you’re all set for a quick, comforting dinner that feels just as special as if you made it fresh!

How to Store and Freeze Crockpot Italian Chicken

Fridge: Store your Crockpot Italian Chicken in an airtight container for up to 3 days. This allows flavors to meld even more deliciously as it cools.

Freezer: For longer storage, freeze the shredded chicken in a freezer-safe container for up to 3 months. Label the container with the date for easy reference.

Reheating: Thaw overnight in the fridge before reheating. Warm it on the stovetop over low heat, adding a splash of water or broth to maintain moisture.

What to Serve with Crockpot Italian Chicken?

With a comforting aroma filling your home, it’s time to complete this delightful meal with a few perfect pairings.

  • Creamy Mashed Potatoes: The buttery richness complements the savory chicken beautifully, creating a comforting contrast in texture.

  • Garlic Bread: Crunchy and warm, it’s perfect for soaking up extra sauce and enhancing the Italian flavor experience.

  • Steamed Green Beans: The crisp, fresh taste balances the richness of the chicken, adding a pop of color to your plate.

  • Caesar Salad: A fresh side that brings zesty flavors and crunchy romaine, making it a refreshing counterpart to the warm chicken.

  • Pasta Primavera: Tossed with seasonal veggies, this light pasta dish enhances the meal with vibrant flavors and lovely textures.

  • Red Wine: A glass of Chianti or Merlot beautifully pairs with the savory notes of the chicken, rounding out your dining experience.

  • Tiramisu for Dessert: This indulgent coffee-flavored treat adds a sweet ending, perfect for contrasting the savory main course.

Each pairing works together to make your dinner a symphony of flavors, perfect for sharing with the ones you love!

Chef's Helpful Tips

  • Always rinse and pat dry your chicken breasts before seasoning to ensure the flavors cling well during cooking.
  • When layering ingredients in your crockpot for the Crockpot Italian Chicken, place the chicken at the bottom to prevent it from drying out, allowing the tomatoes and sauce to infuse moisture as it cooks.
  • To avoid overcooking, check for doneness a little earlier than the recommended times, especially if your crockpot heats quickly.
  • If you prefer a thicker sauce, consider removing the lid for the last 30 minutes of cooking to allow some evaporation.

Crockpot Italian Chicken Recipe FAQs

How do I select the best chicken breasts for this recipe?
Absolutely! Look for chicken breasts that are plump and have a pink hue. Avoid any that appear discolored or have dark spots. Fresh chicken generally has a pleasant smell, so trust your nose!

How long can I store leftovers in the fridge?
Your Crockpot Italian Chicken can be stored in an airtight container for up to 3 days. I often enjoy it as leftovers, as the flavors deepen and become even more delightful with time!

Can I freeze Crockpot Italian Chicken?
Very! To freeze, let the shredded chicken cool completely, then transfer it to a freezer-safe container. It will stay fresh for up to 3 months. Don’t forget to label the container with the date for easy organization!

What is the best way to reheat my frozen chicken?
To reheat, thaw your frozen Crockpot Italian Chicken overnight in the refrigerator. Then, warm it on the stovetop over low heat, adding a splash of water or broth to keep it moist and tender. Stir occasionally until heated through, usually about 10-15 minutes.

Is this recipe suitable for my dog?
Indeed! While the Crockpot Italian Chicken is safe for dogs, avoid adding any seasonings or soy sauce. Simply cook the chicken plain, and your furry friend will enjoy a delightful, healthy treat.

What if my chicken is too dry after cooking?
Oh no! If you find your chicken is dry, it may have cooked too long. Next time, check it a bit earlier than the recommended times for your specific crockpot. If dryness occurs, you can mix in a bit of broth or olive oil before serving to moisten it up.

Crockpot Italian Chicken

Crockpot Italian Chicken

Crockpot Italian Chicken is a comforting dish with rich flavors, perfect for busy weeknights.
Print Recipe Pin Recipe
Prep Time 15 minutes mins
Cook Time 6 hours hrs
Total Time 6 hours hrs 15 minutes mins
Servings: 4 servings
Course: DINNER RECIPES
Cuisine: Italian
Calories: 280
Ingredients Equipment Method Nutrition Notes

Ingredients
  

For the Chicken
  • 2 pounds boneless, skinless chicken breasts ideal for a tender, juicy texture
For the Sauce
  • 4 cloves fresh garlic minced, feel free to add more for extra oomph
  • ¼ cup low-sodium soy sauce adds savory flavor
  • 14.5 ounces diced tomatoes fire-roasted recommended for smokiness
  • 2 tablespoons Italian seasoning consider fresh herbs for a brighter flavor

Equipment

  • Crockpot

Method
 

Steps
  1. Rinse the chicken breasts under cold water and pat them dry with paper towels.
  2. Place the chicken in your crockpot, laying it flat. Then, add the diced tomatoes, soy sauce, minced garlic, and Italian seasoning.
  3. Cover your crockpot with the lid and cook on low for 6-8 hours, or on high for 3-4 hours.
  4. Shred the chicken directly in the pot using two forks, mixing it well with the sauce.
  5. Serve your Crockpot Italian Chicken over pasta or rice.

Nutrition

Serving: 1servingCalories: 280kcalCarbohydrates: 10gProtein: 35gFat: 10gSaturated Fat: 2gPolyunsaturated Fat: 1gMonounsaturated Fat: 2gCholesterol: 90mgSodium: 600mgPotassium: 750mgFiber: 2gSugar: 4gVitamin A: 500IUVitamin C: 5mgCalcium: 50mgIron: 2mg

Notes

Optional: Garnish with fresh basil for added flavor.

Tried this recipe?

Let us know how it was!

Filed Under: DINNER RECIPES

2 Ingredient Healthier Brownies

January 11, 2026 by JudyWhite Leave a Comment

There’s something incredibly satisfying about transforming simple ingredients into a delightful dessert. Recently, I rediscovered the joy of banana-based baking when I had a couple of overripe bananas sitting on my counter, each one begging for attention. With a little creativity and just one magic ingredient—unsweetened cocoa powder—I whipped up these 2 Ingredient Healthier Brownies that are not just guilt-free, but also a breeze to make!

Picture this: fudgy, rich brownies made without the extra sugar or butter that usually weigh down homemade treats. In just 30 minutes, you can pivot away from takeout and indulge in a dessert that feels luxurious while being fortifying. These brownies are perfect for satisfying chocolate cravings, whether you’re entertaining friends, needing a weekday pick-me-up, or simply looking to treat yourself without derailing your healthy eating goals. Trust me, your taste buds will thank you, and so will your waistline! Let’s dive into this effortless recipe that promises chocolatey bliss with every bite.

Why You'll Love This 2 Ingredient Healthier Brownies

  • These 2 Ingredient Healthier Brownies are a breeze to whip up, taking only 5 minutes of prep time and 25 minutes to bake.
  • With just two wholesome ingredients, they offer a guilt-free treat without compromising on flavor or satisfaction.
  • Their fudgy texture and rich chocolate taste will surely impress your friends and family, making them a perfect crowd-pleaser for any occasion.
  • Plus, they’re visually appealing, with a glossy top that will make everyone excited to dive in.

2 Ingredient Healthier Brownies Ingredients

For the Brownies
• 2 ripe bananas – these add natural sweetness and moisture to your brownies.
• 1/2 cup unsweetened cocoa powder – for that rich chocolate flavor that makes these brownies irresistible.

Enjoy making these delightful brownies with just these two nutritious ingredients, and treat yourself without the guilt!

How to Make 2 Ingredient Healthier Brownies

  1. Preheat your oven to 350°F (175°C) and grease an 8×8-inch baking dish. This sets the stage for baking perfectly fudgy brownies that won’t stick!

  2. Mash the ripe bananas in a mixing bowl until they’re smooth. Aim for a creamy consistency as this will create a delightful base for your brownies.

  3. Stir in the unsweetened cocoa powder, blending until fully combined. The mixture should resemble thick pudding, giving you an indication that it’s ready for the next step.

  4. Pour the brownie batter into the prepared baking dish and spread it evenly. Make sure to fill the corners, so every bite is chocolatey and delicious!

  5. Bake in the preheated oven for 20-25 minutes, or until the brownies are set and slightly springy to the touch. You’ll know they’re done when they have a lovely cracked surface.

  6. Cool the brownies for 10 minutes before slicing them into squares. This allows them to firm up a bit, making for easier serving and biting!

Optional: Top with a sprinkle of sea salt for an extra flavor boost!

Exact quantities are listed in the recipe card below.

2 Ingredient Healthier Brownies Variations

Feel free to experiment with these tasty ideas to make your brownies even more delightful and tailored to your taste!

  • Nutty Twist: Add 1/4 cup of chopped walnuts or almonds for a crunchy texture that perfectly balances the fudginess.

  • Coconut Delight: Mix in 1/4 cup shredded unsweetened coconut for a tropical vibe. It adds a hint of sweetness and chewiness to every bite.

  • Spiced Up: Incorporate 1 teaspoon of cinnamon or a pinch of cayenne pepper for a warm, spicy note that elevates the rich chocolate flavor.

  • Peanut Butter Swirl: Before baking, swirl in 2 tablespoons of creamy peanut butter into the batter. This creates delightful ribbons of flavor in every square.

  • Berry Blast: Fold in 1/2 cup of fresh raspberries or chopped strawberries. This fruity addition brightens the brownies beautifully!

  • Vegan Version: Swap the bananas for 1/2 cup of applesauce for a vegan twist that keeps these brownies moist and scrumptious.

  • Chocolate Chip Boost: Sprinkle a handful of dairy-free chocolate chips on top before baking for extra gooeyness in every bite. Who can resist more chocolate?

  • Decadent Frosting: Once cooled, drizzle the brownies with a simple glaze made from powdered sugar and almond milk for a sweet finishing touch. This small step adds a special elegance!

What to Serve with 2 Ingredient Healthier Brownies?

Looking to create a heartwarming feast around your delicious brownies? Let’s explore a selection of delightful pairings that elevate your dessert experience.

  • Vanilla Ice Cream: The creamy, cold sensation of vanilla ice cream perfectly contrasts the fudgy texture of brownies, creating an irresistible combination.

  • Fresh Berries: Plump, juicy strawberries or raspberries add a vibrant pop of color and tartness that balances out the rich chocolate flavor beautifully.

  • Whipped Coconut Cream: Light and fluffy, this dairy-free option adds a luscious touch that enhances the brownies’ chocolatey goodness without making them feel heavy.

  • Espresso or Coffee: A cup of robust espresso or freshly brewed coffee brings out the deep chocolate notes, making each bite even more enjoyable.

  • Chopped Nuts: Sprinkle some toasted walnuts or almonds on top for a crunchy texture that adds an exciting contrast to the softness of the brownies.

  • Mint Leaves: Add fresh mint leaves for an invigorating touch that brightens up the flavors, making every bite feel refreshing.

  • Chocolate Sauce Drizzle: A warm drizzle of chocolate sauce over the top elevates the dessert to new levels of indulgence, truly satisfying any sweet tooth.

  • Caramel Sauce: Drizzling a bit of caramel adds a sweet, buttery depth that pairs wonderfully with the chocolatey rich fudge of the brownies.

  • Raspberry Sauce: A tart raspberry sauce can create a delectable sweet-and-sour experience, making your dessert feel like a gourmet treat.

  • Herbal Tea: A delicate chamomile or mint herbal tea serves as a subtle palate cleanser, perfect for rounding off your dessert adventure.

How to Store and Freeze 2 Ingredient Healthier Brownies

Room Temperature: Enjoy your brownies fresh for up to 3 days by storing them in an airtight container at room temperature, keeping them moist and delicious.

Fridge: If you prefer your brownies chilled, they can be stored in the fridge for up to 5 days. Just ensure they’re in a sealed container to maintain their fudgy texture.

Freezer: For longer storage, freeze your brownies for up to 3 months. Wrap them individually in plastic wrap and place them in a freezer bag before sealing tightly.

Reheating: When you’re ready to enjoy a brownie from the freezer, let it thaw in the fridge overnight. You can warm it in the microwave for 10-15 seconds for that fresh-out-of-the-oven experience!

Make Ahead Options

These 2 Ingredient Healthier Brownies are perfect for meal prep enthusiasts! You can mash the ripe bananas and combine them with the cocoa powder up to 24 hours in advance, storing the mixture in the refrigerator to maintain freshness. This not only saves you time but also ensures you have a quick sweet treat ready when cravings strike. When you’re ready to bake, simply pour the chilled batter into the greased baking dish and follow the original baking instructions. This way, you’ll have fudgy brownies just as delicious as if they were made on the spot, making it a wonderful treat for busy weeknights or unexpected guests!

Chef's Helpful Tips

  • When making 2 Ingredient Healthier Brownies, ensure your bananas are fully ripe for maximum sweetness and moisture.
  • Avoid overmixing once you add the cocoa powder to maintain a fudgy texture in your brownies.
  • Use a rubber spatula to spread the batter evenly in the baking dish, reaching all corners for consistent baking.
  • Keep an eye on your brownies in the last few minutes of baking to avoid overcooking, as they should be set but still slightly springy.

2 Ingredient Healthier Brownies Recipe FAQs

How do I know if my bananas are ripe enough for the brownies?
Absolutely! The best bananas for this recipe should be overripe, with a few dark spots or even slightly brown peel. They should feel soft to the touch. This ripeness ensures they provide optimal sweetness and moisture for your brownies.

How should I store leftover brownies?
You can keep your brownies fresh at room temperature in an airtight container for up to 3 days. If you want them to stay moist longer, store them in the fridge where they can last up to 5 days. Just remember to seal them well to preserve their fudgy texture!

Can I freeze these brownies?
Very! To freeze your 2 Ingredient Healthier Brownies, wrap each square individually in plastic wrap, then place them in a freezer bag. You can store them in the freezer for up to 3 months. When you’re ready to enjoy, simply let them thaw in the fridge overnight, then warm in the microwave for 10-15 seconds.

What should I do if my brownies are too dry?
If you find your brownies are turning out dry, consider a couple of things. First, ensure your bananas are very ripe, as they add necessary moisture. Second, avoid overbaking; keep a close eye on them in the last few minutes to ensure they stay slightly springy. If they do end up a bit dry, consider serving them warm with a dollop of yogurt or a drizzle of melted dark chocolate for extra indulgence!

Are these brownies safe for people with dietary restrictions?
These 2 Ingredient Healthier Brownies are naturally gluten-free, dairy-free, and suitable for many diets. However, always double-check your cocoa powder is gluten-free if that’s a concern. If allergies are present, especially bananas, you may want to look for alternatives or consult with a physician before indulging!

2 Ingredient Healthier Brownies

2 Ingredient Healthier Brownies

Satisfy cravings with these 2 Ingredient Healthier Brownies, rich in flavor yet guilt-free!
Print Recipe Pin Recipe
Prep Time 5 minutes mins
Cook Time 25 minutes mins
Cooling Time 10 minutes mins
Total Time 40 minutes mins
Servings: 16 squares
Course: DESSERT RECIPES
Calories: 120
Ingredients Equipment Method Nutrition Notes

Ingredients
  

  • 2 ripe bananas these add natural sweetness and moisture to your brownies
  • 1/2 cup unsweetened cocoa powder for that rich chocolate flavor

Equipment

  • 8×8-inch baking dish
  • Mixing bowl
  • rubber spatula

Method
 

  1. Preheat your oven to 350°F (175°C) and grease an 8×8-inch baking dish.
  2. Mash the ripe bananas in a mixing bowl until they’re smooth.
  3. Stir in the unsweetened cocoa powder, blending until fully combined.
  4. Pour the brownie batter into the prepared baking dish and spread it evenly.
  5. Bake in the preheated oven for 20-25 minutes, or until the brownies are set and slightly springy to the touch.
  6. Cool the brownies for 10 minutes before slicing them into squares.

Nutrition

Serving: 1squareCalories: 120kcalCarbohydrates: 28gProtein: 2gFat: 0.5gSaturated Fat: 0.1gSodium: 2mgPotassium: 200mgFiber: 4gSugar: 5gVitamin C: 10mgCalcium: 2mgIron: 4mg

Notes

Optionally, top with a sprinkle of sea salt for extra flavor.

Tried this recipe?

Let us know how it was!

Filed Under: BREAKFAST & BRUNCH

2 Ingredient Healthier Cottage Cheese Candy Bars

January 11, 2026 by JudyWhite Leave a Comment

Have you ever found yourself rummaging through the pantry, wishing for a sweet treat that doesn’t feel like a guilty pleasure? I stumbled upon this delightful creation, the 2 Ingredient Healthier Cottage Cheese Candy Bars, during one of those late-night snack cravings. With just two simple ingredients—a cup of creamy low-fat cottage cheese and a touch of honey or maple syrup—what emerges is a surprisingly decadent dessert that feels indulgent yet nourishing.

Picture this: You open the fridge, the coolness hits you, and a treat awaits that’s not just good for the waistline but packed with protein as well. Whether you’re looking to make a quick snack after a long day or wanting to impress friends with an unexpected dessert, these candy bars are incredibly fun to prepare, taking only 10 minutes of your time before they chill and set. Get ready to experience a delightful twist on dessert that’s both easy to whip up and sure to become a staple in your home!

Why You'll Love This 2 Ingredient Healthier Cottage Cheese Candy Bars

  • This recipe is a breeze to make, requiring just 10 minutes of prep time and minimal effort.
  • The flavor combination of creamy cottage cheese and sweet honey or maple syrup creates a deliciously satisfying treat without the guilt.
  • These bars are incredibly versatile, making them perfect for a quick snack, a healthy dessert, or even a protein boost post-workout.
  • Their charming appearance and unique texture will impress your friends and family, turning any gathering into a fun and sweet experience.

2 Ingredient Healthier Cottage Cheese Candy Bars

For the Base
• Low-Fat Cottage Cheese – A creamy base that adds protein, making these candy bars a guilt-free indulgence.
• Honey or Maple Syrup – Choose your sweetener to add natural sweetness; both options work beautifully in this recipe!

These quick and delightful 2 Ingredient Healthier Cottage Cheese Candy Bars are not only easy to make but also a fun way to enjoy a sweet treat without the extra calories.

How to Make 2 Ingredient Healthier Cottage Cheese Candy Bars

  1. Measure 1 cup of low-fat cottage cheese and 1/2 cup of honey or maple syrup. Gather your ingredients and have them ready, ensuring they’re at room temperature for easier blending.

  2. Blend the cottage cheese and sweetener together until smooth. Use a blender or food processor, which will create a silky texture that’s perfectly suitable for candy bars, around 1-2 minutes.

  3. Pour the mixture into a lined baking dish. Use a spatula to smooth the top evenly, ensuring the bars will have a nice, flat surface once set.

  4. Refrigerate for at least 2 hours until firm. This chilling time is essential for the bars to set properly, so resist the temptation to dive in too early!

  5. Cut into bars and enjoy chilled. Once set, slice them into bars of your desired size. Take a moment to admire your creation before enjoying a sweet treat that feels indulgent yet healthy.

Optional: Top with fresh berries before serving for an extra touch of sweetness.

Exact quantities are listed in the recipe card below.

How to Store and Freeze 2 Ingredient Healthier Cottage Cheese Candy Bars

Fridge: Store the bars in an airtight container in the fridge for up to 5 days. This keeps them fresh and ready for snacking.

Freezer: For longer storage, freeze the candy bars in a sealed container or freezer bag for up to 2 months. Just remember to label them!

Thawing: When ready to enjoy, thaw in the fridge overnight or at room temperature for a few hours before serving for the best texture.

Reheating: These bars are best enjoyed chilled; however, you can gently warm them in the microwave for a few seconds if desired.

Cottage Cheese Candy Variations

Feel free to get creative with this recipe and add your own personal touch!

  • Fruit-Infused: Mix in 1/4 cup of pureed fruit like berries or banana for a fruity sweetness that brings a pop of color and flavor.

  • Nutty Crunch: Add 1/4 cup of chopped nuts, such as almonds or walnuts, for a delightful crunch that complements the creamy bars beautifully.

  • Chocolate Swirl: Fold in 2 tablespoons of cocoa powder into the mixture before blending for a rich chocolate version that feels decadent yet healthy.

  • Spiced Delight: Sprinkle in a teaspoon of cinnamon or nutmeg for a warm, comforting flavor that will remind you of cozy desserts.

  • Almond Joy: Stir in a tablespoon of almond extract and a handful of shredded coconut for a tropical twist reminiscent of a classic candy bar.

  • Peanut Butter Bliss: Swirl in 1/4 cup of creamy peanut butter for an irresistibly nutty flavor that pairs perfectly with the sweetness.

  • Zesty Surprise: Add the zest of one lemon or lime to the blend for a refreshing citrus element that brightens up each bite.

  • Chili Chocolate: For those who like it spicy, sprinkle a pinch of cayenne or chili powder into the mixture for an unexpected kick against the sweetness.

Make Ahead Options

These 2 Ingredient Healthier Cottage Cheese Candy Bars are fantastic for meal prep, making them an ideal choice for busy home cooks! You can prepare the mixture and pour it into the lined baking dish up to 24 hours in advance. Simply blend the cottage cheese and honey or maple syrup, then refrigerate, allowing the bars to set overnight. To maintain their quality, ensure they are properly covered in the fridge to prevent moisture from forming. When you’re ready to serve, slice them into bars and enjoy chilled for a delicious treat that’s just as satisfying as when freshly made!

What to Serve with 2 Ingredient Healthier Cottage Cheese Candy Bars?

Imagine a delightful addition to your dessert table that dances between indulgence and health, making every bite a delightful experience.

  • Fresh Berries: Juicy strawberries, blueberries, or raspberries add vibrant color and a refreshing tartness that balances the sweetness of the bars.

  • Greek Yogurt: A dollop of creamy Greek yogurt enhances the dessert’s protein content and adds a tangy contrast to the sweet candy bars.

  • Nut Butter Drizzle: A warm drizzle of almond or peanut butter brings a rich, nutty flavor that complements the creaminess, creating a delightful texture.

  • Granola: A sprinkle of granola adds a satisfying crunch and a wholesome touch, making each bite of your bars a fun adventure in texture.

  • Chilled Herbal Tea: Serve with a refreshing glass of herbal iced tea for a light, soothing drink that elevates your sweet experience.

  • Dark Chocolate Shavings: A sprinkle of dark chocolate adds an elegant touch and a hint of bittersweet richness that perfectly balances the candy’s sweetness.

  • Almond Milk: This nutty, creamy beverage offers a lovely contrast to the dessert while keeping things light and flavorful.

  • Coconut Whipped Cream: For a luscious finish, a scoop of coconut whipped cream adds creaminess and tropical flair, turning your treat into a mini celebration.

  • Fruit Salad: A fresh fruit salad brings in bright, seasonal flavors, enhancing the overall light and healthy theme of your dessert selection.

Chef's Helpful Tips

  • When making 2 Ingredient Healthier Cottage Cheese Candy Bars, ensure that your cottage cheese is at room temperature for easier blending, which helps achieve a smoother texture.
  • A common mistake is over-blending; aim for a silky consistency without turning the mixture too runny.
  • To create even bars, use a spatula to smooth the top of the mixture before refrigerating, making sure it is evenly distributed in the dish.
  • Allow the bars to chill for at least 2 hours, as this will ensure they firm up properly and hold their shape when cut.

2 Ingredient Healthier Cottage Cheese Candy Bars Recipe FAQs

What type of cottage cheese should I use?
Absolutely! It’s best to use low-fat cottage cheese for this recipe to keep the bars healthy, but you can also use regular cottage cheese if you prefer a richer flavor. Just make sure it’s smooth and not overly grainy for the best texture.

How should I store these candy bars?
Very good question! Store your candy bars in an airtight container in the fridge for up to 5 days. This way, they’ll stay fresh and ready for snacking whenever you crave a sweet treat.

Can I freeze 2 Ingredient Healthier Cottage Cheese Candy Bars?
Yes! For longer storage, feel free to freeze the bars in a sealed container or freezer bag for up to 2 months. Just make sure to label them with the date. When you’re ready to enjoy, simply thaw them in the fridge overnight or at room temperature for a few hours to regain that delightful texture.

What can I do if my mixture is too runny?
No worries! If your mixture ends up a bit too runny, you can add a tablespoon of almond flour or oats to help thicken it. Blend well until you reach a creamy consistency that will hold its shape. Just be cautious not to over-blend; aim for a silky texture, not a watery one!

Are these bars safe for kids and those with dietary restrictions?
Definitely! These candy bars are a fantastic option for kids and can even fit into various dietary needs. With only two ingredients, they are free from added preservatives and can easily be made gluten-free by choosing a suitable sweetener. However, be mindful of honey if you’re serving younger children under one year, as it’s not recommended for them.

Can I add extras like nuts or chocolate chips?
The more the merrier! Feel free to customize your bars by mixing in some crushed nuts, mini chocolate chips, or dried fruits. Adding these extras will enhance flavor and texture—just remember to adjust the sweetness if necessary!

2 Ingredient Healthier Cottage Cheese Candy Bars

2 Ingredient Healthier Cottage Cheese Candy Bars

Discover the delight of 2 Ingredient Healthier Cottage Cheese Candy Bars, a nourishing sweet treat.
Print Recipe Pin Recipe
Prep Time 10 minutes mins
Chilling Time 2 hours hrs
Total Time 2 hours hrs 10 minutes mins
Servings: 8 bars
Course: DESSERT RECIPES
Calories: 120
Ingredients Equipment Method Nutrition Notes

Ingredients
  

For the Base
  • 1 cup low-fat cottage cheese
  • 1/2 cup honey or maple syrup choose your sweetener

Equipment

  • blender
  • Spatula
  • Baking dish

Method
 

How to Make
  1. Measure 1 cup of low-fat cottage cheese and 1/2 cup of honey or maple syrup. Gather your ingredients and have them ready, ensuring they’re at room temperature for easier blending.
  2. Blend the cottage cheese and sweetener together until smooth. Use a blender or food processor, which will create a silky texture that’s perfectly suitable for candy bars, around 1-2 minutes.
  3. Pour the mixture into a lined baking dish. Use a spatula to smooth the top evenly, ensuring the bars will have a nice, flat surface once set.
  4. Refrigerate for at least 2 hours until firm. This chilling time is essential for the bars to set properly.
  5. Cut into bars and enjoy chilled. Once set, slice them into bars of your desired size.

Nutrition

Serving: 1barCalories: 120kcalCarbohydrates: 15gProtein: 8gFat: 2gSaturated Fat: 1gCholesterol: 10mgSodium: 50mgPotassium: 150mgFiber: 1gSugar: 8gVitamin A: 500IUCalcium: 100mgIron: 0.5mg

Notes

For an extra touch of sweetness, top with fresh berries before serving.

Tried this recipe?

Let us know how it was!

Filed Under: DESSERT RECIPES

  • « Previous Page
  • 1
  • …
  • 12
  • 13
  • 14
  • 15
  • 16
  • …
  • 49
  • Next Page »

Recent Posts

  • Crispy Potatoes in Oven
  • Lucky Charms Pancakes
  • Cheeseburger
  • Boiled Corn on the Cob
  • St. Patrick’s Day Dessert Parfaits

Recent Comments

No comments to show.

Footer

  • Contact
  • Privacy Policy
  • About Us
  • Terms
  • ↑ back to top

Copyright © 2024 www.Forkono.com

Table Of Content