Forkono

  • BREAKFAST & BRUNCH
  • DESSERT RECIPES
  • DINNER RECIPES
  • LUNCH RECIPES
  • About uS
  • SNACKS & APPETIZERS
menu icon
go to homepage
  • BREAKFAST & BRUNCH
  • DESSERT RECIPES
  • DINNER RECIPES
  • LUNCH RECIPES
  • About uS
  • SNACKS & APPETIZERS
search icon
Homepage link
  • BREAKFAST & BRUNCH
  • DESSERT RECIPES
  • DINNER RECIPES
  • LUNCH RECIPES
  • About uS
  • SNACKS & APPETIZERS
×

Italian Sushi

December 24, 2025 by JudyWhite Leave a Comment

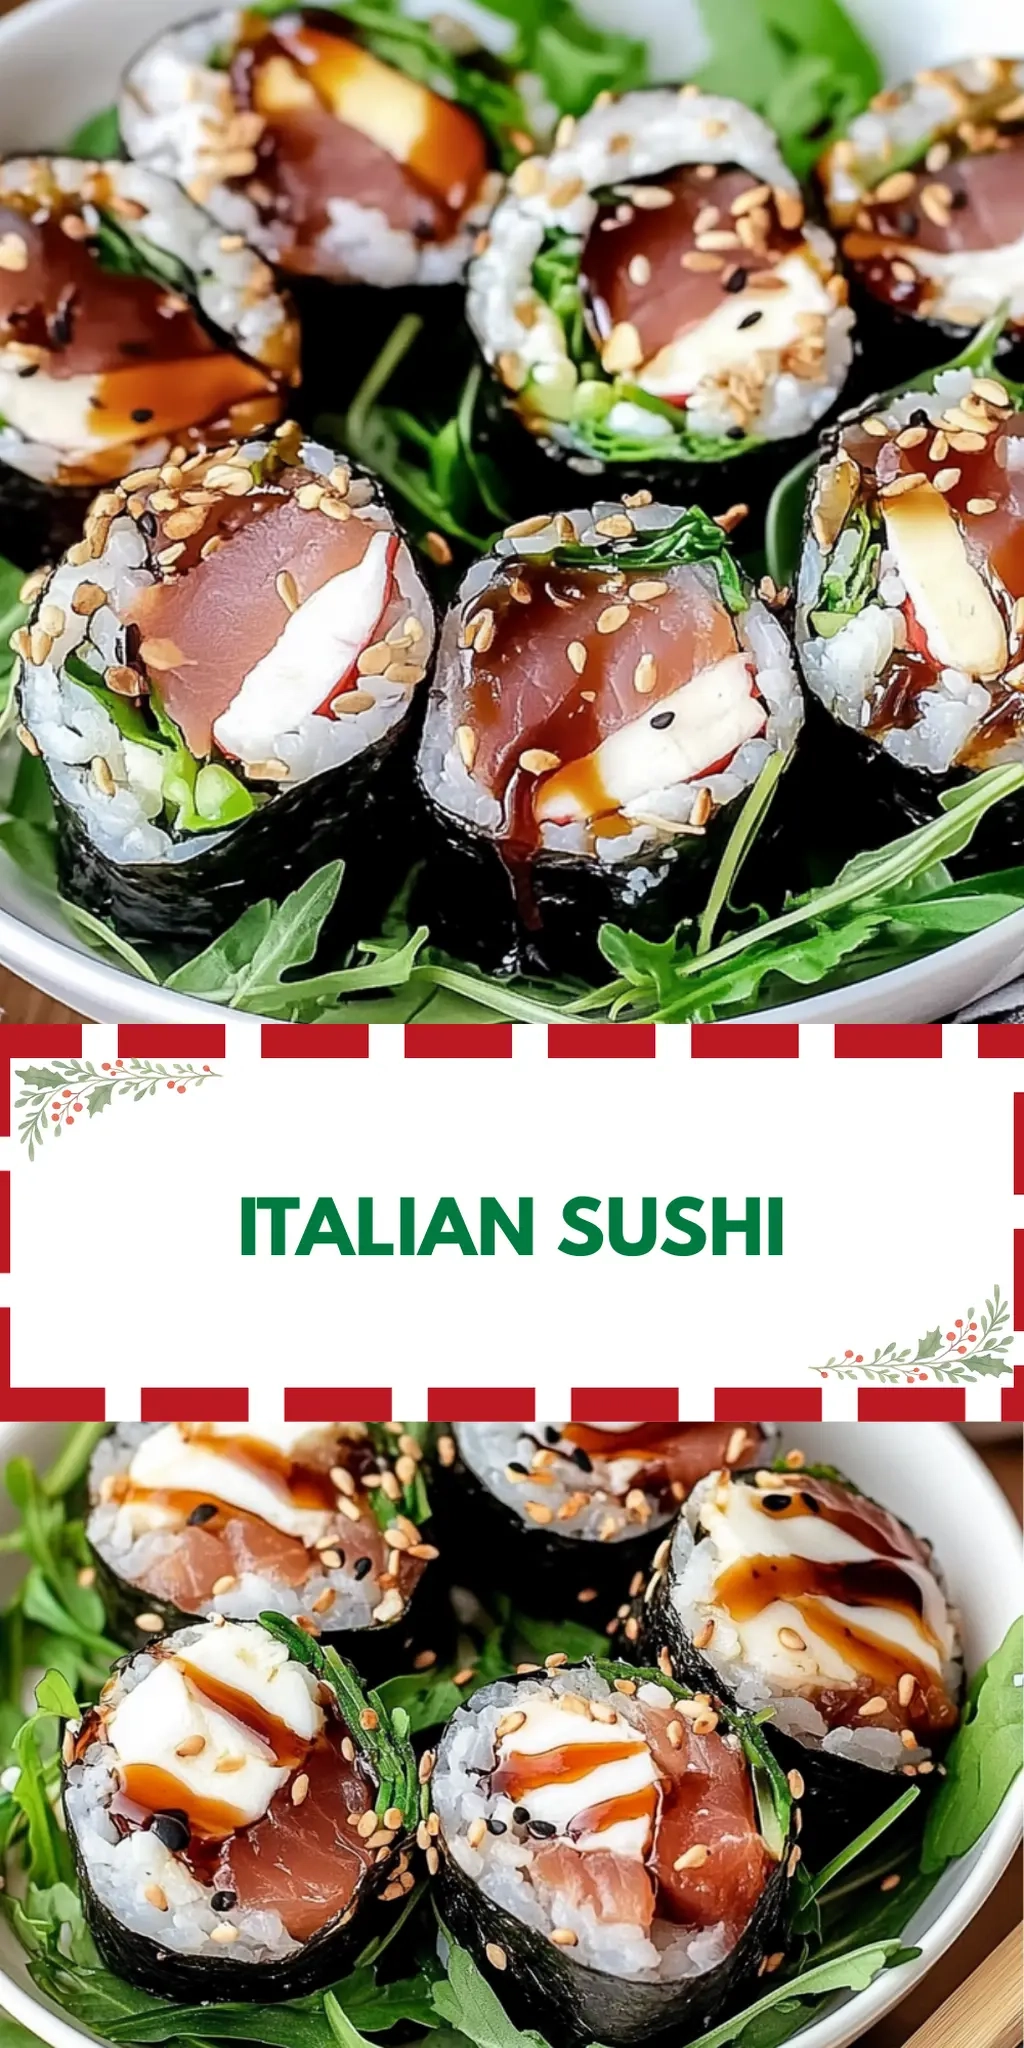
When I first encountered the notion of Italian Sushi, I was taken aback by the delightful surprise it offered. Imagine the lusciousness of homemade sushi but without the daunting task of rolling rice—this dish combines the savory essence of Italy with the simplicity of a quick appetizer. Picture a vibrant platter adorned with layers of prosciutto, salami, and creamy burrata, all wrapped up in a burst of fresh basil and peppery arugula. Each bite is an explosion of flavor that is sure to wow your friends and family.

In a world where fast food often overshadows homemade cooking, this elegant yet effortless recipe stands out as a perfect remedy for your craving for something fresh and nutritious. With just 10 minutes of your time, you’ll elevate your kitchen game and delight your taste buds, regardless of whether it’s a casual weeknight dinner or a gathering. Join me in creating this flavorful fusion that redefines snacking—your palate will thank you!

Why You'll Love This Italian Sushi

  • This Italian Sushi is incredibly easy to make, requiring just 10 minutes of prep time for a delightful appetizer.
  • The combination of savory prosciutto, salami, and creamy burrata creates a flavor explosion that will impress your friends and family.
  • Its versatility allows you to customize the ingredients to suit your taste, making it perfect for any occasion.
  • With its vibrant colors and stylish presentation, this dish will add a stunning visual appeal to your table, making it an instant crowd-pleaser.<br />

Italian Sushi Ingredients

For the Base
• 7 slices prosciutto – adds a rich, salty flavor and beautiful texture.
• 5-7 slices Italian salami – provides a savory kick that complements the prosciutto perfectly.

For the Freshness
• 3-4 leaves fresh basil – imparts a fragrant aroma and vibrant color to your rolls.
• 1-2 cups arugula or spinach – gives a peppery punch while boosting the nutrition of your Italian sushi.

For the Creaminess
• 1 ball burrata – brings a luscious, creamy element that ties all the flavors together.

For the Flavor Boosters
• Kosher salt (to taste) – enhances the overall flavor profile of your Italian sushi.
• Black pepper (to taste) – adds a touch of warmth and depth to each bite.
• Oregano (to taste) – introduces a hint of herbal zest that complements the meats.

For the Finishing Touches
• Extra virgin olive oil (to taste) – drizzles beautifully and adds a smooth, rich layer to the dish.
• Balsamic glaze (to taste) – delivers a sweet and tangy contrast, elevating the entire flavor experience.

With these Italian sushi ingredients, you’re all set to create a dish that reimagines how we snack at home!

How to Make Italian Sushi

  1. Layer the prosciutto and salami on a flat surface. Start by overlapping the slices slightly, creating a sturdy base filled with salty goodness. Aim for a nice, even layer to hold your fillings well.

  2. Add fresh basil leaves and arugula or spinach on top. Pile them on generously, their vibrant colors and fresh flavors will elevate your rolls and add a delightful crunch!

  3. Place sun-dried tomatoes and burrata in the center. Make sure the burrata is positioned in a way that when you roll, the creamy goodness bursts out with every bite.

  4. Season with kosher salt, black pepper, oregano, and drizzle with olive oil and balsamic glaze. This step ties all the flavors together—don’t be shy with your seasonings!

  5. Roll tightly and slice into logs. Start from one end and roll gently but firmly, then cut into bite-sized pieces to serve. Each slice should be a colorful, appetizing delight!

Optional: Serve with extra balsamic glaze for dipping.

Exact quantities are listed in the recipe card below.

Make Ahead Options

These Italian Sushi rolls are a fantastic option for meal prep! You can prepare the filling components—layers of prosciutto, salami, fresh basil, arugula, and sun-dried tomatoes—up to 24 hours in advance. Just ensure you tightly cover them with plastic wrap to maintain freshness and prevent wilting. When you’re ready to serve, simply assemble your rolls by laying the prepared fillings on a flat surface, adding the burrata and necessary seasonings, then rolling them up and slicing. This way, you’ll enjoy restaurant-quality Italian Sushi with minimal effort, perfect for busy weeknights or entertaining guests!

How to Store and Freeze Italian Sushi

Fridge: Keep leftover Italian Sushi wrapped tightly in plastic wrap or in an airtight container. It will stay fresh for up to 3 days in the refrigerator.

Freezer: While freezing isn’t ideal for this fresh dish, if necessary, you can freeze individual rolls in a freezer-safe container for up to 1 month. Thaw in the fridge before serving.

Reheating: For the best taste, enjoy Italian Sushi cold. If you prefer, let it sit at room temperature for about 30 minutes before eating to enhance the flavors.

Serving Tips: Slice just before serving to maintain freshness, and consider drizzling a tad more balsamic glaze on top for that extra touch of flavor!

What to Serve with Italian Sushi?

Elevate your dining experience with vibrant sides and delightful pairings that complement this easy and flavorful dish.

  • Crispy Caprese Salad: Juicy tomatoes and fresh mozzarella paired with basil create a refreshing contrast to the savory sushi.

  • Garlic Breadsticks: These warm, buttery sticks offer a delightful crunch, adding an inviting textural element to your meal.

  • Herbed Quinoa: Nutty quinoa infused with herbs brings a wholesome, filling option that balances the richness of the sushi.

  • Olive Tapenade: A spread bursting with robust flavors that enhances the salty meats, perfect for a zesty match on the palate.

  • Sparkling Lemonade: This refreshing drink provided a citrusy brightness and effervescence, making it a fun complement to your meal.

  • Lemon Sorbet: A light dessert with lively lemon notes serves as a refreshing finish, cleansing your palate after the savory sushi.

With these mouthwatering pairings, your Italian sushi experience will be nothing short of unforgettable!

Italian Sushi Variations

Feel free to get creative with this recipe and make it your own with these delightful twists!

  • Veggie Delight: Substitute the meat with roasted vegetables like zucchini and bell peppers for a vibrant plant-based option.

  • Cheese Swap: Replace burrata with fresh mozzarella or ricotta for a slightly different creamy texture and flavor.

  • Spicy Kick: Add sliced jalapeños or a sprinkle of red pepper flakes to the filling for a touch of heat that excites the palate.

  • Herb Boost: Mix in other fresh herbs like parsley or cilantro to add extra layers of flavor and freshness to each roll.

  • Nutty Crunch: Incorporate chopped nuts like pine nuts or walnuts in the filling for a surprising crunch in every bite.

  • Fruit Fusion: Add thin slices of fresh figs or pears for a hint of sweetness that beautifully complements the savory ingredients.

  • Different Greens: Swap arugula for kale or mustard greens for a more robust flavor profile and added nutritional benefits.

  • Savory Spread: Try spreading a layer of pesto or tapenade on the meat before rolling for an added burst of flavor that ties everything together.

Chef's Helpful Tips

  • When making Italian Sushi, ensure you overlap the prosciutto and salami slightly to create a sturdy base for your fillings.
  • A common mistake is to under-season; make sure to taste your dish before rolling to ensure the flavors are well-balanced and bright.
  • When rolling the sushi, start gently and apply even pressure to contain the fillings without squashing them, which helps maintain the beautiful layers.
  • To make slicing easier, use a sharp, wet knife to ensure clean cuts through the delightful ingredients.

Italian Sushi Recipe FAQs

What type of prosciutto is best for Italian Sushi?
Absolutely! When choosing prosciutto for your Italian Sushi, go for high-quality, thinly sliced varieties such as prosciutto di Parma or prosciutto San Daniele. The flavor and texture are key for creating that rich, savory base. Look for prosciutto that has a nice marbling and a slightly pink hue for the best results.

How should I store leftovers of Italian Sushi?
Very! Leftover Italian Sushi can be kept in the refrigerator for up to 3 days. Wrap it tightly in plastic wrap or place it in an airtight container to maintain freshness. This will help keep the ingredients from wilting and ensure you enjoy the flavors as intended.

Can I freeze Italian Sushi?
While freezing is not recommended for this fresh dish, if you must, you can freeze individual rolls. To do this, wrap them tightly in plastic wrap and place them in a freezer-safe container. They will stay good for up to 1 month. When ready to eat, thaw them in the refrigerator overnight for the best texture.

What if my burrata isn’t creamy enough for Italian Sushi?
If you find that your burrata is a bit firmer than expected, don’t worry! You can gently microwave it for about 10-15 seconds. This will soften it, bringing back that creamy, luscious texture that makes Italian Sushi so delightful. Just be careful not to overheat it—you’re aiming for a melt-in-your-mouth experience!

Are there any dietary considerations for this recipe?
Absolutely! If you’re catering to specific dietary needs, consider using gluten-free prosciutto to make sure your Italian Sushi is safe for those with gluten sensitivities. Additionally, if you’re preparing this dish for someone with lactose intolerance, try substituting burrata with a vegan cheese alternative that complements the other flavors without the dairy.

Can I customize the ingredients in my Italian Sushi?
The more the merrier! Feel free to add or substitute ingredients based on what you have on hand. You could include roasted red peppers, olives, or even a dash of pesto for an extra layer of flavor. Just make sure to maintain the balance of savory and fresh ingredients to keep the essence of Italian Sushi intact!

Italian Sushi

Italian Sushi

Experience the delightful fusion of Italian Sushi, combining savory prosciutto, salami, and creamy burrata into a quick and flavorful appetizer.
Print Recipe Pin Recipe
Prep Time 10 minutes mins
Total Time 10 minutes mins
Servings: 4 slices
Course: Snacks & Appetizers
Cuisine: Italian
Calories: 200
Ingredients Equipment Method Nutrition Notes

Ingredients
  

For the Base
  • 7 slices prosciutto adds a rich, salty flavor and beautiful texture.
  • 5-7 slices Italian salami provides a savory kick that complements the prosciutto.
For the Freshness
  • 3-4 leaves fresh basil imparts a fragrant aroma and vibrant color.
  • 1-2 cups arugula or spinach gives a peppery punch.
For the Creaminess
  • 1 ball burrata brings a luscious, creamy element.
For the Flavor Boosters
  • Kosher salt to taste
  • Black pepper to taste
  • Oregano to taste
For the Finishing Touches
  • Extra virgin olive oil to taste
  • Balsamic glaze to taste

Equipment

  • Cutting Board
  • sharp knife

Method
 

How to Make Italian Sushi
  1. Layer the prosciutto and salami on a flat surface, overlapping slightly for a sturdy base.
  2. Add fresh basil leaves and arugula or spinach on top generously.
  3. Place burrata in the center to burst with creamy goodness.
  4. Season with kosher salt, black pepper, oregano, olive oil, and balsamic glaze.
  5. Roll tightly and slice into logs to serve.

Nutrition

Serving: 1sliceCalories: 200kcalCarbohydrates: 2gProtein: 9gFat: 18gSaturated Fat: 8gMonounsaturated Fat: 10gCholesterol: 30mgSodium: 800mgPotassium: 150mgFiber: 1gSugar: 1gVitamin A: 12IUVitamin C: 5mgCalcium: 10mgIron: 4mg

Notes

Slice just before serving to maintain freshness, and consider drizzling more balsamic glaze on top.

Tried this recipe?

Let us know how it was!

Filed Under: SNACKS & APPETIZERS

Quick Snack Board

December 23, 2025 by JudyWhite Leave a Comment

Picture this: it’s late afternoon, and I’m rummaging through the fridge for a satisfying snack. Lately, I’ve been craving something fresh and delightful, steering away from the predictable fast food options. That’s when the idea of a Quick Snack Board popped into my mind. It’s a masterpiece that combines savory deli meats, creamy cheeses, crisp veggies, and a sweet touch of dark chocolate—all whipped up in just 10 minutes!

Whether it’s a cozy night in, a spontaneous get-together with friends, or simply satisfying a late-night craving, this snack board is endlessly versatile and incredibly easy to assemble. The vibrant colors and variety of textures not only make it visually appealing but also allow everyone to pick and choose their favorites.

So let’s dive into how to create this scrumptious feast that’s sure to become your go-to for any occasion!

Why You'll Love This Quick Snack Board

  • This Quick Snack Board is incredibly easy to put together, taking just 10 minutes to assemble, making it perfect for those busy days.
  • The combination of flavors from savory meats, creamy cheeses, and sweet dark chocolate creates a satisfying treat that will please any palate.
  • Its versatility allows you to customize it with seasonal fruits and your favorite dips, ensuring there’s something for everyone.
  • The vibrant colors and appealing presentation make it a stunning centerpiece for any gathering or a delightful solo snack.

Quick Snack Board Ingredients

Dive into the delightful world of flavors with these perfect ingredients for your Quick Snack Board!

For the Meats

  • Deli turkey or ham – a versatile base that pairs beautifully with cheeses.
  • Salami – adds a savory punch that enhances the overall taste profile.

For the Cheese

  • Hard cheese (sharp cheddar or aged gouda) – the rich creaminess provides a lovely contrast to the salty meats.

For the Veggies

  • Carrot sticks – add a crunchy texture and a burst of color.
  • Cucumber slices – refreshing and hydrating, perfect for balancing rich flavors.

For the Fruits

  • Fresh berries or seasonal fruit – a sweet touch that brightens up your board and provides a pop of freshness.

For the Crunch

  • Crackers – choose your favorite for a satisfying crunch and to scoop up cheese or dips.
  • Almonds or other nuts – offer a delightful crunch and healthy fats for a balanced snack.

For the Dips

  • Hummus or ranch – creamy additions that enhance the flavors and make every bite more enjoyable.

For the Sweet Finish

  • Dark chocolate – a decadent treat to satisfy your sweet tooth and complement the savory elements perfectly.

With these ingredients, your Quick Snack Board is not just a snack; it’s an experience that brings joy to any moment!

How to Make Quick Snack Board

  1. Gather Your Ingredients: Start by collecting all the delightful ingredients listed above. Having everything on hand will make assembly a breeze.

  2. Arrange the Meats: Place the deli turkey or ham, salami, and hard cheese aesthetically on your board. Feel free to overlap them slightly for an inviting look.

  3. Add the Veggies: Nestle the carrot sticks and cucumber slices around the meats and cheese. Their bright colors will bring life to the board.

  4. Incorporate Fresh Fruits: Scatter fresh berries or seasonal fruit across the board. They bring a refreshing sweetness that beautifully contrasts with the savory elements.

  5. Include Crunchy Elements: Strategically position the crackers and nuts around the board. This will not only add visual appeal but provide different textures as well.

  6. Offer Dips: Place small bowls of hummus or ranch on the board for dipping. These creamy additions will elevate the flavors and satisfy different taste preferences.

  7. Finish with Chocolate: To add a sweet touch, place pieces of dark chocolate artfully on one side of the board. This delightful treat will satisfy your sweet cravings in the best way!

Optional: Garnish with fresh herbs for an elegant touch.

Exact quantities are listed in the recipe card below.

Make Ahead Options

These Quick Snack Boards are ideal for busy home cooks looking to save time during hectic weeknights! You can prep the meats and cheeses up to 3 days in advance; just arrange them on a plate, cover tightly with plastic wrap, and refrigerate. Additionally, cut your veggies (carrot sticks and cucumber slices) and store them in an airtight container for up to 2 days to keep them crisp and fresh. When it’s time to serve, simply assemble the components on a board, adding fresh fruits, dips, and nuts just before enjoying for the best flavor and texture. This way, you’ll have a deliciously satisfying snack ready in no time, with minimal last-minute effort!

What to Serve with Quick Snack Board?

Imagine gathering around your Quick Snack Board, with flavors and textures enticing everyone to indulge.

  • Charcuterie Spread: A complimentary selection of cured meats adds even more variety for guests to explore, enhancing the social experience.

  • Artisan Bread: Freshly baked slices offer a hearty base for cheese and dips, creating a satisfying contrast to the crunchy elements on your board.

  • Roasted Chickpeas: These crunchy bites are packed with flavor and bring a delightful crunch to the table, perfectly balancing the creamy cheeses.

  • Caprese Skewers: Fresh basil, mozzarella, and tomatoes drizzled with balsamic glaze provide a refreshing brightness that harmonizes beautifully with the savory components.

  • Spiced Nuts: Seasoned with herbs or spices, these nuts elevate the snack experience with added warmth and crunch, perfectly mirroring the delightful flavors in your board.

  • Refreshing Iced Tea: A chilled glass of herbal or fruit-infused iced tea complements the diversity of flavors while helping to cleanse the palate.

This approach invites exploration and satisfaction, ensuring your snack board becomes the star of the gathering!

Quick Snack Board Variations

Feel free to explore these exciting twists and substitutions to elevate your Quick Snack Board experience!

  • Gluten-Free Options: Use gluten-free crackers or fresh veggie sticks instead of traditional crackers for a delightful crunch.

  • Vegan Delight: Swap out meats and cheeses for marinated tofu or nut-based cheese alternatives, and add more fresh fruits and veggies.

  • Spicy Kick: Include spicy salami or add jalapeño slices for a flavorful kick that will awaken your taste buds! Pair this with a zesty dip for an extra layer of heat.

  • Sweet and Savory: Integrate dried fruits like figs or apricots to complement the savory elements and enhance the balance of flavors on your board.

  • Herbed Cheese: Opt for herbed cream cheese instead of hard cheese for a creamy, flavorful twist that adds a gourmet touch. Spread it on crackers for a delightful bite!

  • Seasonal Twist: Customize with seasonal veggies like roasted peppers or zucchini. Not only are they delicious, but they also introduce fresh flavors throughout the year.

  • Nutty Goodness: Experiment with different nuts, such as pistachios or walnuts, to introduce variety in flavor and texture while enhancing the nutritional profile of your board.

  • Charcuterie Adventure: Mix an array of artisanal cured meats, including prosciutto or chorizo, for a refined charcuterie experience that’s rich in flavor and variety.

With these tasty variations, your Quick Snack Board will continually surprise and delight, making each gathering or snack time an exciting culinary adventure!

How to Store and Freeze Quick Snack Board

Fridge: Keep any leftover components of your Quick Snack Board in an airtight container in the fridge for up to 3 days. This helps maintain freshness.

Meats & Cheese: Wrap deli meats and hard cheeses tightly in plastic wrap or parchment paper before placing them in the fridge. This prevents drying out and keeps flavors intact.

Veggies & Dips: Store carrot sticks and cucumber slices in a sealed container with a damp paper towel to retain crispness. Dips should also be kept airtight to maintain their taste.

Reheating: If you’ve included any heated elements like warm dips, gently reheat them in the microwave until warmed through, but avoid overheating to keep the texture pleasing.

Chef's Helpful Tips

  • For the Quick Snack Board, remember to arrange ingredients by color and texture to create an appealing visual contrast.
  • Avoid overloading the board; leave some space for a more organized presentation and easier access to each item.
  • When selecting meats and cheeses, consider pairing salty flavors with sweet fruits or creamy dips for a balanced taste experience.
  • Keep your dips chilled until serving; this enhances their creaminess and makes for a more enjoyable snack.

Quick Snack Board Recipe FAQs

What kind of meats should I use for my Quick Snack Board?
Absolutely! For a vibrant Quick Snack Board, I recommend using deli turkey or ham for a milder flavor, salami for its zesty kick, and perhaps even prosciutto for a touch of elegance. Pick meats that you enjoy to keep everything fresh and delightful!

How should I store leftover components of the Quick Snack Board?
After your snack gathering, any leftovers can be refrigerated. Store meats and cheeses in airtight containers or tightly wrapped in plastic wrap for up to 3 days. As for veggies, keep carrot sticks and cucumber slices in a sealed container with a damp paper towel to maintain their crispness.

Can I freeze any items from the Quick Snack Board?
While the Quick Snack Board is meant to be enjoyed fresh, you can freeze certain items. To freeze sliced deli meats, wrap them tightly in plastic wrap and place them in a freezer bag for up to 3 months. However, avoid freezing fresh vegetables or dips, as they will lose their texture and flavor after thawing.

What if my veggies become limp before serving?
Very! If your carrot sticks or cucumber slices lose their crunch, you can revive them! Simply submerge the limp veggies in ice-cold water for about 30 minutes. This chilling method helps them regain their crispiness. Be sure to drain and dry them thoroughly before placing them back on your board for presentation.

Are there any dietary considerations I should keep in mind?
Definitely! If you’re serving the Quick Snack Board at a gathering, be mindful of allergies. Nuts, dairy, and certain deli meats can be common allergens. Consider offering alternative dips like guacamole or salsa for those who may avoid dairy. Also, be sure to label items for guests with dietary restrictions to ensure they feel included!

Can I customize my Quick Snack Board with different ingredients?
The more the merrier! Feel free to swap out any ingredients based on personal preferences or seasonal availability. Why not include some spicy cheese or pickled vegetables for an extra zing? The key is to balance flavors and textures while ensuring everyone has something they love!

Quick Snack Board

Quick Snack Board

This Quick Snack Board combines savory meats, creamy cheeses, crisp veggies, and sweet dark chocolate, making it a perfect snack or appetizer.
Print Recipe Pin Recipe
Prep Time 10 minutes mins
Total Time 10 minutes mins
Servings: 4 people
Course: Snacks & Appetizers
Calories: 350
Ingredients Equipment Method Nutrition Notes

Ingredients
  

Meats
  • 1 lb Deli turkey or ham
  • 200 g Salami
Cheese
  • 200 g Hard cheese (sharp cheddar or aged gouda)
Veggies
  • 2 cup Carrot sticks
  • 1 cup Cucumber slices
Fruits
  • 1 cup Fresh berries or seasonal fruit
Crunch
  • 1 cup Crackers
  • 1/2 cup Almonds or other nuts
Dips
  • 1 cup Hummus or ranch
Sweet Finish
  • 100 g Dark chocolate

Equipment

  • Serving board

Method
 

How to Make Quick Snack Board
  1. Gather Your Ingredients: Start by collecting all the delightful ingredients listed above. Having everything on hand will make assembly a breeze.
  2. Arrange the Meats: Place the deli turkey or ham, salami, and hard cheese aesthetically on your board. Feel free to overlap them slightly for an inviting look.
  3. Add the Veggies: Nestle the carrot sticks and cucumber slices around the meats and cheese. Their bright colors will bring life to the board.
  4. Incorporate Fresh Fruits: Scatter fresh berries or seasonal fruit across the board. They bring a refreshing sweetness that beautifully contrasts with the savory elements.
  5. Include Crunchy Elements: Strategically position the crackers and nuts around the board. This will not only add visual appeal but provide different textures as well.
  6. Offer Dips: Place small bowls of hummus or ranch on the board for dipping. These creamy additions will elevate the flavors and satisfy different taste preferences.
  7. Finish with Chocolate: To add a sweet touch, place pieces of dark chocolate artfully on one side of the board. This delightful treat will satisfy your sweet cravings in the best way!

Nutrition

Serving: 1boardCalories: 350kcalCarbohydrates: 30gProtein: 20gFat: 15gSaturated Fat: 5gPolyunsaturated Fat: 3gMonounsaturated Fat: 6gCholesterol: 35mgSodium: 600mgPotassium: 300mgFiber: 4gSugar: 5gVitamin A: 600IUVitamin C: 20mgCalcium: 250mgIron: 1.5mg

Notes

Optional: Garnish with fresh herbs for an elegant touch.

Tried this recipe?

Let us know how it was!

Filed Under: SNACKS & APPETIZERS

Raspberry Swirl Brioche Loaf

December 23, 2025 by JudyWhite Leave a Comment

There’s a little magic that happens when the warm scent of freshly baked bread fills your kitchen, and the surprise of vibrant raspberry swirls within makes it even better. Recently, while trying to elevate my weekend baking routine, I came across the idea of combining classic brioche with a tangy fruit twist—enter my Raspberry Swirl Brioche Loaf. This delightful creation not only looks impressive but is surprisingly simple to whip up.

Imagine slicing into a golden loaf, revealing layers of sweet raspberry that celebrate both taste and texture. It’s perfect for lazy Sunday breakfasts or an afternoon treat with tea. And the best part? You’ll be saying goodbye to fast food and hello to the comfort of homemade goodness in no time. Whether you’re an experienced chef or someone looking to impress guests with a crowd-pleasing dish, this recipe is for you. Join me as we dive into crafting a loaf that’s not just bread, but a comforting hug in every slice.

Why You'll Love This Raspberry Swirl Brioche Loaf

  • This Raspberry Swirl Brioche Loaf is incredibly easy to make, allowing even novice bakers to feel like pros in the kitchen.
  • The combination of fluffy brioche and tangy raspberry flavors creates a delightful taste experience that will have everyone coming back for seconds.
  • Its versatility means it can be enjoyed for breakfast, dessert, or a snack, making it a great addition to any meal.
  • Not only does it taste amazing, but the stunning visual of those vibrant raspberry swirls peeking through the golden crust is sure to impress your family and guests alike.

Raspberry Swirl Brioche Loaf Ingredients

• Get ready to create magic!

For the Dough

  • Warm milk – Helps activate the instant yeast for a fluffy texture.
  • Instant yeast – Saves time, as it doesn’t require proofing.
  • Whole wheat flour – Adds nutrition and depth of flavor.
  • All purpose flour – Adjust the quantity for desired dough consistency.
  • Potato flakes – Enhances moisture and tenderness in the loaf.
  • Honey – Provides sweetness and a lovely aroma.
  • Oil – Keeps the bread soft and moist.
  • Large eggs – Contribute to richness and a golden crust.
  • Salt – Balances flavors and strengthens the dough.

For the Raspberry Swirl

  • Raspberry sauce or preserves – Use homemade or store-bought for a vibrant, fruity twist.

With these Raspberry Swirl Brioche Loaf ingredients in hand, you’re just moments away from creating a delicious centerpiece for your kitchen table. Happy baking!

How to Make Raspberry Swirl Brioche Loaf

  1. Combine ingredients: In a bowl, whisk together the warm milk and instant yeast. Allow it to sit for about 5 minutes, or until it becomes foamy and fragrant. This step is vital for a perfect rise!

  2. Mix dry ingredients: In a large mixing bowl, blend the whole wheat flour, potato flakes, honey, oil, eggs, and salt. Make sure everything is well incorporated to create a flavorful base for your dough.

  3. Add yeast mixture: Gradually pour the foamy yeast mixture into the dry ingredients, mixing until combined. This will ensure that your flavors meld seamlessly, giving you a rich dough.

  4. Incorporate all-purpose flour: Begin adding all-purpose flour a cup at a time, stirring until a soft, sticky dough begins to form. You might need up to 3.5 cups for the right texture, so listen to your dough!

  5. Knead the dough: Lightly flour your work surface and knead the dough for about 8-10 minutes until it’s smooth and elastic. Your dough should come together beautifully—trust your hands!

  6. First rise: Place the kneaded dough in a greased bowl, cover with a kitchen towel, and let it rise in a warm place until it’s doubled in size—about 1-2 hours. Patience is key, and it’ll be worth it!

  7. Punch down and roll out: Once risen, gently punch down the dough to release air. Roll it out into a rectangle about ½ inch thick. The dough should be soft and ready to embrace the raspberry swirl!

  8. Spread raspberry sauce: Generously spread the raspberry sauce or preserves over the rolled-out dough. Ensure even coverage for delightful flavors in every bite!

  9. Roll tightly: Carefully roll the dough from one end to the other to create a tight log. This helps form those beautiful swirls that will welcome your guests.

  10. Final rise: Place the rolled dough into greased loaf pans and cover. Let it rise again until puffy and increased in size—another 30-45 minutes. The anticipation is delicious!

  11. Bake until golden: Preheat your oven and bake the loaves until golden brown and cooked through—around 35-40 minutes at 350°F. The aroma will fill your kitchen with warmth and joy!

Optional: Drizzle with a simple glaze for added sweetness.
Exact quantities are listed in the recipe card below.

How to Store and Freeze Raspberry Swirl Brioche Loaf

Room Temperature: Keep the loaf wrapped in plastic wrap or in an airtight container at room temperature for up to 3 days to maintain its freshness.

Fridge: For longer storage, place the loaf in the refrigerator in an airtight container; it can last up to a week, but the texture may change slightly.

Freezer: To freeze, wrap the loaf tightly in plastic wrap and then in aluminum foil; it can be stored in the freezer for up to 3 months. Thaw overnight in the fridge before serving.

Reheating: When ready to enjoy, you can warm slices in the microwave for a few seconds or toast them to restore that lovely softness of the Raspberry Swirl Brioche Loaf.

Make Ahead Options

These Raspberry Swirl Brioche Loafs are perfect for busy home cooks looking to save time on hectic mornings! You can prepare the dough up to 24 hours in advance. Simply complete steps 1 to 6 and let the dough rise; after rising, punch it down, wrap it tightly in plastic wrap, and refrigerate. When you’re ready to enjoy, allow the dough to come to room temperature (about 30 minutes), then proceed with steps 7 to 10 as usual. This way, you can still experience the delightful freshness of your brioche, just as delicious as if baked the same day! Alternatively, you can slice and store the baked loaf, keeping it in an airtight container for up to 3 days to maintain its scrumptious taste.

What to Serve with Raspberry Swirl Brioche Loaf?

There’s nothing quite like the joy of complementing a delightful loaf of bread with perfect pairings for a memorable meal.

  • Fresh Fruit Salad: A medley of seasonal fruits adds a refreshing contrast, enhancing the sweetness of the brioche and making breakfast a colorful feast.

  • Cinnamon Butter: This spread brings warmth and spice, making each slice even more indulgent. The creamy texture beautifully enriches the soft bread.

  • Greek Yogurt Parfait: Layering yogurt with granola and berries creates a satisfying, balanced dish. It’s perfect alongside the rich flavors of the brioche.

  • Nutty Granola: The crunch of granola delivers a delightful textural contrast, while the toasted nuts bring an earthy flavor that complements the sweet notes.

  • Herbal Tea: A warm cup of chamomile or green tea offers a relaxing touch, pairing effortlessly with the light sweetness of the loaf.

  • Vanilla Ice Cream: For a decadent dessert option, serve toasted slices of brioche with a scoop of vanilla ice cream. The melt-in-your-mouth combination is utterly divine!

Savor the lovely layers of flavor and texture as you create meals that celebrate the best of homemade goodness!

Raspberry Swirl Variations

Feel free to experiment with these variations and let your creativity shine through in every loaf you bake!

  • Gluten-Free: Swap the all-purpose flour with a gluten-free blend, ensuring a delightful rise with the same sweet flavor.

  • Berry Blend: Mix in blackberries or blueberries with the raspberry sauce for a vibrant twist bursting with flavors that sing together.

  • Citrus Zest: Add a tablespoon of lemon or orange zest to the dough for a bright, refreshing scent and flavor that dances on your taste buds.

  • Nutty Addition: Incorporate chopped walnuts or almonds into the dough for a satisfying crunch that pairs beautifully with the soft brioche.

  • Spiced Up: Mix in a teaspoon of cinnamon for a warm spice flavor that adds a cozy touch to your delightful raspberry brioche.

  • Vegan-Friendly: Substitute eggs with flaxseed meal and replace honey with maple syrup for a fully plant-based masterpiece that everyone will enjoy.

  • Chocolate Swirls: Drizzle melted dark chocolate over the raspberry before rolling for a decadent dessert that feels indulgent and irresistible.

  • Savory Twist: Replace raspberry sauce with herbed cream cheese for a delightful savory bread perfect for brunches or afternoon gatherings.

Chef's Helpful Tips

  • For the Raspberry Swirl Brioche Loaf, always ensure that your warm milk is not too hot, as this can kill the instant yeast and prevent proper rising.
  • When kneading the dough, be careful not to add too much flour, which can make the loaf dense; aim for a soft, slightly sticky dough.
  • If you want a more pronounced raspberry flavor, consider mixing some fresh berries into the raspberry sauce for an extra burst.
  • During the second rise, make sure to cover the dough properly to retain moisture and encourage a fluffy texture when baked.

Raspberry Swirl Brioche Loaf Recipe FAQs

How do I know if my yeast is fresh?
Absolutely! To check if your instant yeast is still active, combine it with warm milk (around 110°F) and wait for about 5 minutes. If it becomes foamy and bubbly, you’re good to go! If not, it’s best to buy fresh yeast to ensure a perfect rise in your Raspberry Swirl Brioche Loaf.

What’s the best way to store leftover brioche?
To keep your Raspberry Swirl Brioche Loaf fresh, wrap it tightly in plastic wrap or place it in an airtight container at room temperature for up to 3 days. If you prefer to keep it longer, storing it in the refrigerator will extend its life to about a week, though it might become slightly denser.

Can I freeze this brioche?
Yes, indeed! To freeze your Raspberry Swirl Brioche Loaf, first allow it to cool completely, then wrap it tightly in plastic wrap followed by aluminum foil to prevent freezer burn. It can last up to 3 months. When you’re ready to enjoy it, simply thaw it overnight in the fridge, and you’ll be reunited with your delicious creation!

What should I do if my dough isn’t rising?
Very! If your dough isn’t rising, it might be due to inactive yeast. Always make sure your yeast is fresh and that your warm milk isn’t too hot or too cold—aim for about 110°F. If the rise time seems too long, you might be in a cool environment; placing the dough in a warm spot can help. Lastly, be patient; sometimes it just needs a little more time to double in size.

Can I make this recipe allergen-friendly?
Absolutely! To make a gluten-free version, consider using a gluten-free flour blend instead of all-purpose and whole wheat flour. If you’re avoiding eggs, you can substitute with a flax egg (1 tablespoon of ground flaxseed mixed with 2.5 tablespoons of water, let it sit until gelatinous). Adjust other ingredients such as honey if you’re looking for a vegan option, using maple syrup instead. Enjoy customizing it to fit your dietary needs!

How long does the raspberry swirl last in the loaf?
The raspberry swirl in your Raspberry Swirl Brioche Loaf will usually stay fresh and flavorful for about 3-4 days at room temperature. For the best experience, enjoy it fresh but feel free to refrigerate if necessary! Always make sure the raspberry sauce or preserves you use is within its expiration date for the best flavor.

Raspberry Swirl Brioche Loaf

Raspberry Swirl Brioche Loaf

Experience the delight of Raspberry Swirl Brioche Loaf, a simple yet impressive recipe perfect for any occasion.
Print Recipe Pin Recipe
Prep Time 20 minutes mins
Cook Time 40 minutes mins
Rising Time 2 hours hrs
Total Time 3 hours hrs
Servings: 10 slices
Course: DESSERT RECIPES
Cuisine: Baked Goods
Calories: 200
Ingredients Equipment Method Nutrition Notes

Ingredients
  

Dough Ingredients
  • 1 cup Warm milk Helps activate the instant yeast for a fluffy texture.
  • 2 teaspoons Instant yeast Saves time, as it doesn’t require proofing.
  • 1 cup Whole wheat flour Adds nutrition and depth of flavor.
  • 3.5 cups All purpose flour Adjust the quantity for desired dough consistency.
  • 1/2 cup Potato flakes Enhances moisture and tenderness in the loaf.
  • 1/4 cup Honey Provides sweetness and a lovely aroma.
  • 1/4 cup Oil Keeps the bread soft and moist.
  • 3 large Large eggs Contribute to richness and a golden crust.
  • 1 teaspoon Salt Balances flavors and strengthens the dough.
Raspberry Swirl Ingredients
  • 1 cup Raspberry sauce or preserves Use homemade or store-bought for a vibrant, fruity twist.

Equipment

  • Mixing bowls
  • Whisk
  • loaf pans
  • Oven

Method
 

Making the Loaf
  1. In a bowl, whisk together the warm milk and instant yeast. Allow it to sit for about 5 minutes, or until it becomes foamy and fragrant.
  2. In a large mixing bowl, blend the whole wheat flour, potato flakes, honey, oil, eggs, and salt.
  3. Gradually pour the foamy yeast mixture into the dry ingredients, mixing until combined.
  4. Begin adding all-purpose flour a cup at a time, stirring until a soft, sticky dough begins to form.
  5. Lightly flour your work surface and knead the dough for about 8-10 minutes until it’s smooth and elastic.
  6. Place the kneaded dough in a greased bowl, cover with a kitchen towel, and let it rise in a warm place until it’s doubled in size—about 1-2 hours.
  7. Once risen, gently punch down the dough to release air. Roll it out into a rectangle about ½ inch thick.
  8. Generously spread the raspberry sauce or preserves over the rolled-out dough.
  9. Carefully roll the dough from one end to the other to create a tight log.
  10. Place the rolled dough into greased loaf pans and cover. Let it rise again until puffy and increased in size—another 30-45 minutes.
  11. Preheat your oven to 350°F and bake the loaves until golden brown and cooked through—around 35-40 minutes.

Nutrition

Serving: 1sliceCalories: 200kcalCarbohydrates: 30gProtein: 4gFat: 7gSaturated Fat: 1gCholesterol: 35mgSodium: 150mgPotassium: 80mgFiber: 1gSugar: 5gVitamin A: 1IUCalcium: 2mgIron: 6mg

Notes

For added sweetness, optionally drizzle with a simple glaze before serving.

Tried this recipe?

Let us know how it was!

Filed Under: BREAKFAST & BRUNCH

No Bake Peanut Butter Oat Cups

December 23, 2025 by JudyWhite Leave a Comment

When those late-night cravings hit, it’s too easy to reach for the nearest takeout menu or snack bar. This is why I was thrilled to stumble upon my go-to No Bake Peanut Butter Oat Cups—a sweet, satisfying, and guilt-free treat that I can whip up in no time! With the comforting aroma of peanut butter and a hint of vanilla filling my kitchen, it feels like an instant pick-me-up.

These delightful little cups combine wholesome ingredients like quick oats, chia seeds, and your choice of nut butter, making them perfect for a quick breakfast, an energy boost after a workout, or a sweet afternoon snack! Plus, the joy of mixing and melting chocolate has a way of bringing a smile even on the busiest days. The best part? No baking required—just a few simple steps, and you’re on your way to a freezer full of deliciousness. Ready to dive in and discover how easy it is to make these treats? Let’s get started!

Why You'll Love This No Bake Peanut Butter Oat Cups

  • These No Bake Peanut Butter Oat Cups are incredibly easy to make, requiring just 10 minutes of prep time, which makes them perfect for busy lifestyles.
  • The rich, creamy peanut butter combined with sweet chocolate creates a flavor explosion that will satisfy any sweet tooth.
  • Their versatility allows you to enjoy them as a quick breakfast, a post-workout snack, or even a dessert, making them a fantastic addition to any mealtime.
  • With their adorable presentation in mini muffin form, these treats are not only delicious but also visually appealing, making them a crowd-pleaser at any gathering.

No Bake Peanut Butter Oat Cups Ingredients

• Dive into the deliciousness with these simple ingredients!

For the Base

  • 3/4 cup quick oats – a wholesome foundation packed with fiber and texture.
  • 1/2 cup peanut butter or almond butter – choose your favorite for a creamy, nutty flavor.
  • 1/4 cup maple syrup or honey – adds natural sweetness; feel free to swap based on your preference.
  • 2 tbsp chia seeds – boosts the nutritional value and provides a nice crunch.
  • 1/4 cup protein powder, of choice – a great way to add some muscle-building protein to your No Bake Peanut Butter Oat Cups.
  • 1 tsp vanilla extract – elevates the flavor profile with a warm, aromatic essence.
  • 1 pinch sea salt – enhances flavors and balances the sweetness.

For the Chocolate Topping

  • 1 1/4 cups chocolate chips – the star of the show that melts beautifully on top.
  • 2 tsp coconut oil – ensures the chocolate flows smoothly; plus, it adds a hint of tropical flavor!

How to Make No Bake Peanut Butter Oat Cups

  1. Mix Together: In a large bowl, combine the quick oats, nut butter, maple syrup, chia seeds, protein powder, vanilla extract, and sea salt. Stir gently until everything is well blended and the mixture becomes thick and sticky.

  2. Prepare the Pan: Grab your silicone mini muffin tin or a similar tray that can hold small portions. If it’s not silicone, lightly grease it with cooking spray to help with removal later.

  3. Fill the Molds: Scoop the mixture into the prepared tin, filling each cup about 2/3 of the way full. Press down slightly to ensure they’re well packed and won’t fall apart when served.

  4. Melt the Chocolate: In a small bowl, combine the chocolate chips and coconut oil. Heat in the microwave in 30-second increments, stirring every time, until fully melted and silky smooth.

  5. Top with Chocolate: Divide the melted chocolate evenly among the filled cups, filling each one the last 1/3 of the way to create a luscious topping.

  6. Set in the Freezer: Place the tray in the freezer for at least 2-3 hours. Once firm, gently remove the cups from the mold. Sprinkle a pinch of sea salt on top and store them in an air-tight container in the freezer.

Optional: Enjoy with a drizzle of extra melted chocolate for a more indulgent treat!

Exact quantities are listed in the recipe card below.

What to Serve with No Bake Peanut Butter Oat Cups?

Picture a cozy gathering where your friends and family can indulge in delightful flavors and textures. Pairing these sweet treats with complementary options will elevate your entire meal experience!

  • Fresh Fruit Salad: A medley of seasonal fruits adds a refreshing contrast that balances the richness of the oat cups. Juicy berries and crisp apples create a delightful burst of flavor.

  • Creamy Yogurt Parfait: Layered yogurt with granola and fruits enhances the overall texture and provides a perfect dose of protein. The creamy goodness pairs beautifully with the nutty taste of the cups.

  • Iced Coffee or Latte: Enjoy your No Bake Peanut Butter Oat Cups with a chilled cup of coffee for a refreshing pick-me-up. The slight bitterness of the coffee beautifully complements the sweetness of the cups.

  • Nutty Granola: Sprinkle crunchy granola on top of your oat cups or serve it on the side for an enjoyable texture contrast. The healthy fats in the nuts align perfectly with the cups’ flavors.

  • Chocolate Drizzle: For an added touch of indulgence, drizzle some melted chocolate over your oat cups before serving. This not only enhances the flavor but also makes them an eye-catching dessert.

  • Coconut Whipped Cream: A dollop of light and airy coconut cream adds a tropical twist to your treat. It’s a light addition that balances the earthiness of the peanut butter.

  • Smoothie Bowl: Blend your favorite fruits with a splash of almond milk and pour it in a bowl. Topping it with seeds and nuts will make for an energizing breakfast alongside your oat cups.

With these delightful pairings, you’ll turn your No Bake Peanut Butter Oat Cups into a feast of flavors that’s sure to impress!

Make Ahead Options

These No Bake Peanut Butter Oat Cups are a fantastic option for meal prep enthusiasts! You can prepare the base mixture up to 24 hours in advance. Simply combine the oats, nut butter, maple syrup, chia seeds, protein powder, vanilla extract, and sea salt as directed, then store it in an airtight container in the refrigerator. When you’re ready to finish the recipe, fill your muffin tin with the mixture and proceed to melt the chocolate topping. After topping with chocolate, place the cups in the freezer for at least 2-3 hours to set. This way, when those cravings hit, you’ll have delicious homemade treats waiting for you—just as delightful as when freshly made!

How to Store and Freeze No Bake Peanut Butter Oat Cups

Room Temperature: Enjoy your No Bake Peanut Butter Oat Cups immediately after making them, but they’re best stored in the freezer to maintain their texture.

Fridge: If you have leftovers, store them in an airtight container in the fridge for up to 3 days. However, the texture may change slightly, becoming softer than when frozen.

Freezer: For longer storage, keep the cups in an airtight container in the freezer for up to 3 months. This way, you’ll always have a delicious treat on hand!

Reheating: To enjoy, simply remove from the freezer and let sit at room temperature for a few minutes or microwave for about 10-15 seconds for a softer bite.

No Bake Peanut Butter Oat Cups Variations

Feel free to customize your No Bake Peanut Butter Oat Cups with these fun and tasty twists that will elevate your creation!

  • Nut-Free: Substitute the nut butter with sunflower seed butter for a deliciously safe option for those with nut allergies, keeping the creamy texture intact.

  • Vegan: Use maple syrup instead of honey, and opt for dairy-free chocolate chips to create a treat that everyone can enjoy!

  • Protein Boost: Add an extra 1/4 cup of protein powder or mix in some chopped nuts to increase the protein content while adding a delightful crunch.

  • Flavor Fusion: Swap the vanilla extract for almond extract or a pinch of cinnamon for a whole new flavor profile that’s still comforting and delicious.

  • Chocolate Lovers: Double up on the chocolate by mixing in mini chocolate chips into the base for an extra dose of rich flavor.

  • Fruit Delight: Add in dried cranberries, chopped dried apricots, or even fresh banana slices atop the chocolate layer for a fruity explosion in every bite!

  • Crunch Factor: Toss in some toasted coconut flakes or crushed graham crackers for added texture and a hint of tropical sweetness.

  • Spicy Kick: Sprinkle in a dash of cayenne pepper or a few pinches of chili powder to elevate the experience with a surprising heat that complements the sweetness!

Explore these variations and make your No Bake Peanut Butter Oat Cups uniquely yours—because cooking is all about creativity and joy!

Chef's Helpful Tips

  • When making No Bake Peanut Butter Oat Cups, ensure that your ingredients are at room temperature to facilitate blending.
  • A common mistake is overfilling the molds; aim for about 2/3 full to allow space for the chocolate topping.
  • For an even texture, use quick oats instead of rolled oats, as they blend better with the other ingredients.
  • Remember to let the cups freeze for a full 2-3 hours to achieve a firm consistency before removing them from the mold.

No Bake Peanut Butter Oat Cups Recipe FAQs

What type of oats should I use for No Bake Peanut Butter Oat Cups?
I recommend using quick oats for this recipe. They blend seamlessly with the other ingredients, creating a smooth texture. Rolled oats can be used, but they might not blend as well, which could result in a chunkier consistency.

How do I store No Bake Peanut Butter Oat Cups?
You can store the cups in an airtight container in the fridge for up to 3 days. Just keep in mind that they may become softer over time. For long-term storage, place them in an airtight container in the freezer for up to 3 months, which preserves their delicious texture.

Can I freeze No Bake Peanut Butter Oat Cups?
Absolutely! To freeze, place the filled cups in a single layer on a baking sheet until firm, then transfer them to an airtight container or a freezer-safe bag. They stay fresh for up to 3 months. When ready to enjoy, simply take one out and let it sit at room temperature for a few minutes or microwave it for about 10-15 seconds.

What if my mixture is too dry or crumbly?
If your No Bake Peanut Butter Oat Cups mixture seems dry, it’s likely due to insufficient moisture from the nut butter or syrup. You can add a splash more maple syrup or a bit of water to loosen it up a bit. Make sure the mixture is sticky enough to hold together before filling your molds!

Are No Bake Peanut Butter Oat Cups suitable for people with nut allergies?
If you or someone you are serving has a nut allergy, you can substitute the peanut butter with sunflower butter or another seed butter. Always check labels to ensure that the alternative isn’t processed in a facility with nuts, to be safe.

Can I add extra ingredients to my No Bake Peanut Butter Oat Cups?
Absolutely! The more the merrier! You can mix in extras like shredded coconut, chopped nuts, or dried fruit for added flavor and texture. Just be mindful of the ratios to keep the cups from becoming too runny. Adjust the proportions of nut butter and oats accordingly if you add a lot of additional ingredients.

No Bake Peanut Butter Oat Cups

No Bake Peanut Butter Oat Cups

Delicious No Bake Peanut Butter Oat Cups for a guilt-free treat, perfect for cravings.
Print Recipe Pin Recipe
Prep Time 10 minutes mins
Freezing Time 3 hours hrs
Total Time 3 hours hrs 10 minutes mins
Servings: 12 cups
Course: Snacks & Appetizers
Calories: 250
Ingredients Equipment Method Nutrition Notes

Ingredients
  

Base Ingredients
  • 3/4 cup quick oats a wholesome foundation packed with fiber and texture
  • 1/2 cup peanut butter or almond butter choose your favorite for a creamy, nutty flavor
  • 1/4 cup maple syrup or honey adds natural sweetness
  • 2 tbsp chia seeds boosts nutritional value and provides a nice crunch
  • 1/4 cup protein powder of choice to add some muscle-building protein
  • 1 tsp vanilla extract elevates the flavor profile
  • 1 pinch sea salt enhances flavors and balances sweetness
Chocolate Topping Ingredients
  • 1 1/4 cups chocolate chips the star of the show
  • 2 tsp coconut oil ensures the chocolate flows smoothly

Equipment

  • silicone mini muffin tin
  • Large Bowl
  • Small bowl
  • Microwave

Method
 

Instructions
  1. In a large bowl, combine the quick oats, nut butter, maple syrup, chia seeds, protein powder, vanilla extract, and sea salt. Stir gently until well blended and thick.
  2. Grab your silicone mini muffin tin. If it’s not silicone, lightly grease it with cooking spray.
  3. Scoop the mixture into the prepared tin, filling each cup about 2/3 full. Press down slightly to ensure they're well packed.
  4. In a small bowl, combine the chocolate chips and coconut oil. Heat in the microwave in 30-second increments, stirring until fully melted.
  5. Divide the melted chocolate evenly among the filled cups to create a luscious topping.
  6. Place the tray in the freezer for at least 2-3 hours. Once firm, gently remove from the mold and store in an airtight container.

Nutrition

Serving: 1cupCalories: 250kcalCarbohydrates: 30gProtein: 7gFat: 12gSaturated Fat: 3gPolyunsaturated Fat: 4gMonounsaturated Fat: 4gSodium: 50mgPotassium: 200mgFiber: 4gSugar: 10gCalcium: 2mgIron: 6mg

Notes

Ensure that your ingredients are at room temperature for blending. Don’t overfill the molds, and let the cups freeze fully before removing them.

Tried this recipe?

Let us know how it was!

Filed Under: SNACKS & APPETIZERS

Quick Snack Board

December 23, 2025 by JudyWhite Leave a Comment

Picture this: it’s late afternoon, and I’m rummaging through the fridge for a satisfying snack. Lately, I’ve been craving something fresh and delightful, steering away from the predictable fast food options. That’s when the idea of a Quick Snack Board popped into my mind. It’s a masterpiece that combines savory deli meats, creamy cheeses, crisp veggies, and a sweet touch of dark chocolate—all whipped up in just 10 minutes!

Whether it’s a cozy night in, a spontaneous get-together with friends, or simply satisfying a late-night craving, this snack board is endlessly versatile and incredibly easy to assemble. The vibrant colors and variety of textures not only make it visually appealing but also allow everyone to pick and choose their favorites.

So let’s dive into how to create this scrumptious feast that’s sure to become your go-to for any occasion!

Why You'll Love This Quick Snack Board

  • This Quick Snack Board is incredibly easy to put together, taking just 10 minutes to assemble, making it perfect for those busy days.
  • The combination of flavors from savory meats, creamy cheeses, and sweet dark chocolate creates a satisfying treat that will please any palate.
  • Its versatility allows you to customize it with seasonal fruits and your favorite dips, ensuring there’s something for everyone.
  • The vibrant colors and appealing presentation make it a stunning centerpiece for any gathering or a delightful solo snack.

Quick Snack Board Ingredients

Dive into the delightful world of flavors with these perfect ingredients for your Quick Snack Board!

For the Meats

  • Deli turkey or ham – a versatile base that pairs beautifully with cheeses.
  • Salami – adds a savory punch that enhances the overall taste profile.

For the Cheese

  • Hard cheese (sharp cheddar or aged gouda) – the rich creaminess provides a lovely contrast to the salty meats.

For the Veggies

  • Carrot sticks – add a crunchy texture and a burst of color.
  • Cucumber slices – refreshing and hydrating, perfect for balancing rich flavors.

For the Fruits

  • Fresh berries or seasonal fruit – a sweet touch that brightens up your board and provides a pop of freshness.

For the Crunch

  • Crackers – choose your favorite for a satisfying crunch and to scoop up cheese or dips.
  • Almonds or other nuts – offer a delightful crunch and healthy fats for a balanced snack.

For the Dips

  • Hummus or ranch – creamy additions that enhance the flavors and make every bite more enjoyable.

For the Sweet Finish

  • Dark chocolate – a decadent treat to satisfy your sweet tooth and complement the savory elements perfectly.

With these ingredients, your Quick Snack Board is not just a snack; it’s an experience that brings joy to any moment!

How to Make Quick Snack Board

  1. Gather Your Ingredients: Start by collecting all the delightful ingredients listed above. Having everything on hand will make assembly a breeze.

  2. Arrange the Meats: Place the deli turkey or ham, salami, and hard cheese aesthetically on your board. Feel free to overlap them slightly for an inviting look.

  3. Add the Veggies: Nestle the carrot sticks and cucumber slices around the meats and cheese. Their bright colors will bring life to the board.

  4. Incorporate Fresh Fruits: Scatter fresh berries or seasonal fruit across the board. They bring a refreshing sweetness that beautifully contrasts with the savory elements.

  5. Include Crunchy Elements: Strategically position the crackers and nuts around the board. This will not only add visual appeal but provide different textures as well.

  6. Offer Dips: Place small bowls of hummus or ranch on the board for dipping. These creamy additions will elevate the flavors and satisfy different taste preferences.

  7. Finish with Chocolate: To add a sweet touch, place pieces of dark chocolate artfully on one side of the board. This delightful treat will satisfy your sweet cravings in the best way!

Optional: Garnish with fresh herbs for an elegant touch.

Exact quantities are listed in the recipe card below.

How to Store and Freeze Quick Snack Board

Fridge: Keep any leftover components of your Quick Snack Board in an airtight container in the fridge for up to 3 days. This helps maintain freshness.

Meats & Cheese: Wrap deli meats and hard cheeses tightly in plastic wrap or parchment paper before placing them in the fridge. This prevents drying out and keeps flavors intact.

Veggies & Dips: Store carrot sticks and cucumber slices in a sealed container with a damp paper towel to retain crispness. Dips should also be kept airtight to maintain their taste.

Reheating: If you’ve included any heated elements like warm dips, gently reheat them in the microwave until warmed through, but avoid overheating to keep the texture pleasing.

What to Serve with Quick Snack Board?

Imagine gathering around your Quick Snack Board, with flavors and textures enticing everyone to indulge.

  • Charcuterie Spread: A complimentary selection of cured meats adds even more variety for guests to explore, enhancing the social experience.

  • Artisan Bread: Freshly baked slices offer a hearty base for cheese and dips, creating a satisfying contrast to the crunchy elements on your board.

  • Roasted Chickpeas: These crunchy bites are packed with flavor and bring a delightful crunch to the table, perfectly balancing the creamy cheeses.

  • Caprese Skewers: Fresh basil, mozzarella, and tomatoes drizzled with balsamic glaze provide a refreshing brightness that harmonizes beautifully with the savory components.

  • Spiced Nuts: Seasoned with herbs or spices, these nuts elevate the snack experience with added warmth and crunch, perfectly mirroring the delightful flavors in your board.

  • Refreshing Iced Tea: A chilled glass of herbal or fruit-infused iced tea complements the diversity of flavors while helping to cleanse the palate.

This approach invites exploration and satisfaction, ensuring your snack board becomes the star of the gathering!

Make Ahead Options

These Quick Snack Boards are perfect for meal prep enthusiasts! You can slice the meats and cheese up to 24 hours in advance, storing them in airtight containers in the refrigerator to maintain freshness. You can also wash and cut the carrot sticks and cucumber slices ahead of time, placing them in a splash of water to keep them crisp. Just be sure to keep the fruits separate until you’re ready to assemble to prevent browning. When it’s time to serve, simply arrange everything on the board and finish by adding the dips and nuts for a fresh and delightful taste! This way, you’ll enjoy a beautiful snack board in no time, ideal for those busy evenings.

Quick Snack Board Variations

Feel free to explore these exciting twists and substitutions to elevate your Quick Snack Board experience!

  • Gluten-Free Options: Use gluten-free crackers or fresh veggie sticks instead of traditional crackers for a delightful crunch.

  • Vegan Delight: Swap out meats and cheeses for marinated tofu or nut-based cheese alternatives, and add more fresh fruits and veggies.

  • Spicy Kick: Include spicy salami or add jalapeño slices for a flavorful kick that will awaken your taste buds! Pair this with a zesty dip for an extra layer of heat.

  • Sweet and Savory: Integrate dried fruits like figs or apricots to complement the savory elements and enhance the balance of flavors on your board.

  • Herbed Cheese: Opt for herbed cream cheese instead of hard cheese for a creamy, flavorful twist that adds a gourmet touch. Spread it on crackers for a delightful bite!

  • Seasonal Twist: Customize with seasonal veggies like roasted peppers or zucchini. Not only are they delicious, but they also introduce fresh flavors throughout the year.

  • Nutty Goodness: Experiment with different nuts, such as pistachios or walnuts, to introduce variety in flavor and texture while enhancing the nutritional profile of your board.

  • Charcuterie Adventure: Mix an array of artisanal cured meats, including prosciutto or chorizo, for a refined charcuterie experience that’s rich in flavor and variety.

With these tasty variations, your Quick Snack Board will continually surprise and delight, making each gathering or snack time an exciting culinary adventure!

Chef's Helpful Tips

  • For the Quick Snack Board, remember to arrange ingredients by color and texture to create an appealing visual contrast.
  • Avoid overloading the board; leave some space for a more organized presentation and easier access to each item.
  • When selecting meats and cheeses, consider pairing salty flavors with sweet fruits or creamy dips for a balanced taste experience.
  • Keep your dips chilled until serving; this enhances their creaminess and makes for a more enjoyable snack.

Quick Snack Board Recipe FAQs

What kind of deli meats should I use?
Absolutely! You can use any deli meats you enjoy. Turkey or ham create a classic combination, while salami adds a delightful savoriness. Feel free to mix and match based on your preference!

How long can I store left over Quick Snack Board ingredients?
Very! Leftover components should be stored in airtight containers in the fridge for up to 3 days for optimal freshness. Be sure to layer meats with parchment paper to prevent sticking and retain their texture.

Can I freeze any items from the Quick Snack Board?
Absolutely! While the whole board is best enjoyed fresh, you can freeze leftover hard cheeses. Wrap them tightly in plastic wrap, then place them in a freezer-safe bag to prevent freezer burn. They can be frozen for up to 2 months—just thaw them in the fridge before using.

What if my vegetables or fruits are overripe?
No worries! Always select fresh, vibrant vegetables and fruits for your Quick Snack Board. Look for those that are crisp and bright. If you notice dark spots or mushiness, it’s best to opt for fresher options for a satisfying crunch and flavor.

Can I make this Quick Snack Board vegetarian or vegan?
Absolutely! You can easily customize it to suit dietary preferences. Swap out the meats for extra veggies like bell pepper strips or additional fruits, and choose plant-based cheeses or dips to keep things vegan-friendly. The more the merrier when it comes to customization!

Is it safe to serve the Quick Snack Board for a party?
Very! When serving, you can leave the snack board out for about 2 hours, provided that perishables like meats and cheeses are kept under the recommended storage conditions beforehand. Make sure to cover the board if it’s outdoors to protect from pests!

Quick Snack Board

Quick Snack Board

Create a delightful Quick Snack Board with savory meats, creamy cheeses, and sweet treats, perfect for any occasion.
Print Recipe Pin Recipe
Prep Time 10 minutes mins
Total Time 10 minutes mins
Servings: 4 servings
Course: Snacks & Appetizers
Cuisine: American
Calories: 350
Ingredients Equipment Method Nutrition Notes

Ingredients
  

For the Meats
  • 4 slices Deli turkey or ham
  • 4 slices Salami
For the Cheese
  • 100 grams Hard cheese (sharp cheddar or aged gouda)
For the Veggies
  • 1 cup Carrot sticks
  • 1 cup Cucumber slices
For the Fruits
  • 1 cup Fresh berries or seasonal fruit
For the Crunch
  • 1 cup Crackers
  • 1/2 cup Almonds or other nuts
For the Dips
  • 1/2 cup Hummus or ranch
For the Sweet Finish
  • 100 grams Dark chocolate

Equipment

  • Cutting Board
  • Knife

Method
 

How to Make Quick Snack Board
  1. Gather Your Ingredients: Start by collecting all the delightful ingredients listed above. Having everything on hand will make assembly a breeze.
  2. Arrange the Meats: Place the deli turkey or ham, salami, and hard cheese aesthetically on your board. Feel free to overlap them slightly for an inviting look.
  3. Add the Veggies: Nestle the carrot sticks and cucumber slices around the meats and cheese. Their bright colors will bring life to the board.
  4. Incorporate Fresh Fruits: Scatter fresh berries or seasonal fruit across the board. They bring a refreshing sweetness that beautifully contrasts with the savory elements.
  5. Include Crunchy Elements: Strategically position the crackers and nuts around the board. This will not only add visual appeal but provide different textures as well.
  6. Offer Dips: Place small bowls of hummus or ranch on the board for dipping. These creamy additions will elevate the flavors and satisfy different taste preferences.
  7. Finish with Chocolate: To add a sweet touch, place pieces of dark chocolate artfully on one side of the board. This delightful treat will satisfy your sweet cravings in the best way!

Nutrition

Serving: 1boardCalories: 350kcalCarbohydrates: 30gProtein: 15gFat: 20gSaturated Fat: 5gPolyunsaturated Fat: 10gMonounsaturated Fat: 5gCholesterol: 30mgSodium: 500mgPotassium: 400mgFiber: 5gSugar: 10gVitamin A: 500IUVitamin C: 15mgCalcium: 200mgIron: 1.5mg

Notes

Optional: Garnish with fresh herbs for an elegant touch.

Tried this recipe?

Let us know how it was!

Filed Under: SNACKS & APPETIZERS

The Easiest Bread in the World Recipe

December 23, 2025 by JudyWhite Leave a Comment

There’s a distinct joy that fills the room when the scent of freshly baked bread wafts through the air. It’s a simple pleasure that can transform any day, whether it’s a rainy afternoon or a weekend brunch with friends. I discovered this formula for “The Easiest Bread in the World Recipe” during a particularly cozy Sunday, when fast food felt like a distant memory and homemade goodness was calling my name.

This recipe is wonderfully straightforward, making it perfect for both novice bakers and seasoned chefs looking for a quick win. With just a handful of ingredients and minimal hands-on time, you’ll be able to pull off a rustic loaf that boasts a beautifully crisp crust and a soft, airy interior. Trust me when I say, this bread is not just a side dish; it’s a showstopper that can elevate any meal. So grab your flour, and let’s dive into the magic of homemade bread!

Why You'll Love This The Easiest Bread in the World Recipe

  • This recipe is incredibly easy to follow, making it a fantastic choice for both beginners and experienced bakers.
  • The flavor of freshly baked bread is unbeatable, filling your home with a warm and inviting aroma that delights everyone.
  • Its versatility allows you to pair it with nearly any dish or enjoy it on its own with a sprinkle of butter.
  • Plus, the visual appeal of this beautifully crusty loaf will impress your family and friends alike.
  • With minimal prep time, you can bake delicious bread that feels like a special treat without the fuss.

The Easiest Bread in the World Ingredients

• Create the perfect loaf with these simple ingredients!

For the Dough

  • 3 cups flour – the foundation of your bread; consider using bread flour for extra chewiness.
  • 2 tsp instant or rapid rise yeast – no need to activate; just mix it in with the dry ingredients for a quick rise.
  • 2 tsp cooking or kosher salt – essential for flavor; kosher salt is perfect for a more balanced taste.
  • 1.5 cups very warm tap water – helps activate the yeast without scorching it; the right temperature is key.

For Dusting

  • 1.5 tbsp flour – for dusting the work surface; keeps the dough from sticking while you shape it.

How to Make The Easiest Bread in the World

  1. Combine ingredients: In a large mixing bowl, blend the flour, instant yeast, and salt together. Then, pour in the warm tap water and stir until it’s all combined. The dough should appear wet and a bit messy—that’s perfect!

  2. Let it rise: Cover the bowl tightly with cling wrap or a plate and place it on the counter. Allow it to rise for 2 to 3 hours or until the dough has doubled in size—your kitchen will smell like a bakery!

  3. Check the rise: If after one hour it seems stubborn and isn’t rising, don’t worry! Simply find a warm spot for it, like near a sunny window, to help encourage that lift.

  4. Preheat the oven: About 30 minutes before you’re ready to bake, turn your oven to 230°C (450°F) and put a dutch oven inside to heat up. This step gives your bread that perfect crust!

  5. Prepare the work surface: Dust your countertop with 1 tablespoon of flour. Gently scrape the dough out of the bowl using a spatula and sprinkle the top with another ½ tablespoon of flour to help with handling.

  6. Shape the dough: Fold the edges of the dough inward about 6 times to create a round shape. Transfer this shaped dough onto a piece of parchment paper with the seam side down—it’ll make for an easier transfer later!

  7. Transfer to dutch oven: Using the parchment paper, lift the dough and place it directly into the preheated dutch oven. Cover it with the lid to trap all that glorious steam.

  8. Bake your bread: Cook it covered for 30 minutes, then take the lid off and bake for an additional 12 minutes or until the crust is deep golden brown and irresistibly crispy.

  9. Cool and slice: Once out of the oven, let your beautiful loaf cool on a rack for about 10 minutes. This helps it maintain its texture before you dive in with a knife!

Optional: Serve warm with a spread of butter for extra deliciousness!

Exact quantities are listed in the recipe card below.

Bread Variations & Substitutions

Feel free to get creative with this recipe and discover new flavors that dance on your palate!

  • Whole Wheat: Use whole wheat flour for a heartier loaf that adds nutty flavors and extra nutrients.
  • Herb-Infused: Add 1 tablespoon of dried herbs, like rosemary or thyme, for a fragrant twist that enhances the flavor profile.
  • Garlic: Mix in 3-4 minced cloves of garlic for a savory kick that will elevate your bread to a whole new level of deliciousness.
  • Cheesy: Fold in 1 cup of shredded cheese, such as cheddar or Parmesan, to create a rich and savory cheese bread that pairs well with soups.
  • Gluten-Free: Substitute a gluten-free all-purpose flour blend to make this bread suitable for gluten-free diets; ensure it contains xanthan gum for proper structure.
  • Sweet Twist: Add ¼ cup of honey or maple syrup for a touch of sweetness, creating a delightful bread perfect for breakfast or dessert.
  • Spicy: Incorporate 1-2 teaspoons of red pepper flakes or your favorite hot sauce into the dough for a warm, spicy variation that will awaken your taste buds.
  • Nuts & Seeds: Really boost the texture by mixing in ½ cup of sunflower seeds or walnuts; they add a wonderful crunch and deepen the flavor.

How to Store and Freeze The Easiest Bread in the World

Room Temperature: Store your bread at room temperature in a paper bag for up to 3 days to maintain its crusty exterior and soft interior. Avoid plastic bags as they can make the crust soggy.

Fridge: If you live in a particularly humid climate, you can refrigerate the bread for up to a week. Just wrap it tightly to prevent it from drying out too much.

Freezer: For longer storage, wrap slices or the whole loaf tightly in plastic wrap and then in aluminum foil. Freeze for up to 3 months. Thaw at room temperature or toast slices directly from the freezer.

Reheating: To revive your crust, sprinkle a bit of water on the loaf and warm it for 5-10 minutes in a preheated 180°C (350°F) oven. This will restore its delightful crispiness!

What to Serve with The Easiest Bread in the World Recipe?

There’s nothing quite like the experience of enjoying a warm, crusty slice of homemade bread, enhanced by delightful pairings that elevate your dining experience.

  • Homemade Butter: A rich, creamy spread adds a luxurious touch, complementing the warm bread perfectly while enhancing its flavors.

  • Herb-Infused Olive Oil: Drizzling this fragrant oil over your bread brings a burst of flavor, marrying perfectly with its crusty texture.

  • Savory Soups: Pair your bread with a hearty vegetable or tomato soup for a cozy meal that feels like a warm hug on a chilly day.

  • Garlic Roasted Vegetables: These caramelized beauties provide a flavorful contrast, their sweetness enriching each bite of the rustic loaf. Enjoy them as a vibrant side!

  • Cheese Platter: A selection of sharp cheddar, creamy brie, or tangy goat cheese is an irresistible pairing that offers a delightful range of textures and flavors.

  • Bruschetta Toppings: Fresh tomatoes, basil, and a drizzle of balsamic glaze create a refreshing, flavorful topping that enhances the enjoyment of the bread’s simplicity.

  • Light Salad: A fresh arugula salad with a zesty lemon vinaigrette brings a burst of brightness that balances the bread’s hearty nature.

  • Fruit Chutney: A sweet or spicy chutney adds a unique twist, making each bread slice a little adventure for your taste buds.

  • Sparkling Water or Wine: A glass of bubbly water or crisp white wine can elevate the meal, satisfying both thirst and palate perfectly.

  • Chocolate Mousse: Round off your meal with a rich dessert, where the bread’s simple sweetness and mousse’s decadence create a delightful contrast.

Make Ahead Options

These options for “The Easiest Bread in the World Recipe” are perfect for busy home cooks looking to save time. You can mix the dry ingredients (flour, yeast, and salt) up to 3 days in advance and store them in an airtight container at room temperature. When you’re ready to bake, simply add the warm water to the dry mix and follow the rising and baking instructions as usual. To ensure the bread remains just as delicious, it’s best to form the dough and let it rise just 24 hours before baking. If you prefer, you can also shape the dough ahead of time and refrigerate it for better flavor development—just let it come to room temperature before baking. Enjoy fresh bread with minimal effort on busy weeknights!

Chef's Helpful Tips

  • To achieve a perfect crust on The Easiest Bread in the World, make sure to preheat your dutch oven thoroughly before adding the dough, as this helps create that crispy exterior.
  • When mixing the dough, ensure all flour is incorporated to avoid dry spots, which can affect the bread’s texture.
  • If your dough isn’t rising as expected, consider using a proofing box or simply placing it in a warm spot, as temperature is crucial for yeast activation.
  • Lastly, remember to let the bread cool completely on a rack to enhance its flavor and texture before slicing.

The Easiest Bread in the World Recipe FAQs

How do I select the right flour for this bread?
Choosing the right flour can greatly influence your end result. I recommend using bread flour for a chewier texture, as it has a higher protein content. However, all-purpose flour works perfectly well too! Just make sure it’s fresh and stored in a cool, dry place.

How should I store leftover bread?
To keep your bread fresh, store it at room temperature in a paper bag for up to 3 days. This method helps maintain its crusty exterior. For longer storage, wrap it tightly in plastic wrap and then aluminum foil, placing it in the freezer for up to 3 months. Just thaw at room temperature when ready to enjoy!

Can I freeze this Easiest Bread in the World? If so, how?
Absolutely! To freeze, wrap the whole loaf or individual slices tightly in plastic wrap, followed by aluminum foil. This will prevent freezer burn. You can freeze it for up to 3 months. When you’re ready to eat, simply thaw at room temperature or toast slices directly from the freezer for a quick treat!

What should I do if my dough isn’t rising?
If your dough isn’t rising after 1 hour, don’t panic! Here’s what to do: First, check if the water used was warm enough to activate the yeast. If it feels cool, warm your dough gently by placing it near a sunny window or using your oven’s proofing setting. It may also help to cover the bowl with a towel to keep it warm and draft-free. Give it another hour and, with any luck, it should rise beautifully!

Is this recipe suitable for people with gluten allergies?
Unfortunately, this recipe isn’t suitable for those with gluten allergies or celiac disease, as it contains wheat flour. However, you can experiment with gluten-free flour blends available at your local store. Just ensure that the blend contains a binding agent like xanthan gum to mimic the structure gluten provides.

What can I do to enhance the flavor of my bread?
To elevate the flavor, consider adding herbs, garlic powder, or spices into the dry mix before combining with water. You could also top the dough with a sprinkle of sea salt or seeds before baking to add delightful textures. The more the merrier when it comes to flavor!

The Easiest Bread in the World Recipe

The Easiest Bread in the World Recipe

A simple and delightful recipe for The Easiest Bread in the World that creates a rustic loaf with minimal effort.
Print Recipe Pin Recipe
Prep Time 15 minutes mins
Cook Time 42 minutes mins
Rising Time 3 hours hrs
Total Time 3 hours hrs 57 minutes mins
Servings: 1 loaf
Course: DINNER RECIPES
Calories: 150
Ingredients Equipment Method Nutrition Notes

Ingredients
  

For the Dough
  • 3 cups flour consider using bread flour for extra chewiness
  • 2 tsp instant or rapid rise yeast no need to activate; mix with dry ingredients
  • 2 tsp cooking or kosher salt essential for flavor; kosher salt is preferred
  • 1.5 cups very warm tap water helps activate the yeast without scorching
For Dusting
  • 1.5 tbsp flour for dusting the work surface

Equipment

  • large mixing bowl
  • Dutch oven
  • Spatula
  • parchment paper

Method
 

How to Make The Easiest Bread in the World
  1. In a large mixing bowl, blend the flour, instant yeast, and salt together. Then, pour in the warm tap water and stir until it’s all combined. The dough should appear wet and a bit messy—that's perfect!
  2. Cover the bowl tightly with cling wrap or a plate and place it on the counter. Allow it to rise for 2 to 3 hours or until the dough has doubled in size.
  3. If after one hour it seems stubborn and isn't rising, find a warm spot for it to encourage that lift.
  4. About 30 minutes before you’re ready to bake, turn your oven to 230°C (450°F) and put a dutch oven inside to heat up.
  5. Dust your countertop with 1 tablespoon of flour. Gently scrape the dough out of the bowl using a spatula and sprinkle the top with another ½ tablespoon of flour.
  6. Fold the edges of the dough inward about 6 times to create a round shape. Transfer this shaped dough onto a piece of parchment paper with the seam side down.
  7. Using the parchment paper, lift the dough and place it directly into the preheated dutch oven. Cover it with the lid.
  8. Cook it covered for 30 minutes, then take the lid off and bake for an additional 12 minutes or until the crust is deep golden brown.
  9. Once out of the oven, let your beautiful loaf cool on a rack for about 10 minutes.

Nutrition

Serving: 1sliceCalories: 150kcalCarbohydrates: 30gProtein: 4gFat: 1gSodium: 250mgPotassium: 100mgFiber: 1gIron: 1mg

Notes

Serve warm with a spread of butter for extra deliciousness!

Tried this recipe?

Let us know how it was!

Filed Under: DINNER RECIPES

Apple Bread

December 23, 2025 by JudyWhite Leave a Comment

The first crisp bite into a slice of freshly baked apple bread can instantly transport you to a cozy coffee shop on a rainy afternoon. The warm embrace of cinnamon and nutmeg mingles with the sweetness of apple, filling the air with an irresistible aroma that begs you to take just one more piece. I discovered this delightful recipe while sifting through my family’s old cookbooks, its simplicity and comfort striking me like a nostalgic hug.

What I love about this apple bread is its ability to bring people together. Whether you’re enjoying it for breakfast with a cup of tea or serving it up at a gathering, it effortlessly elevates any occasion. It’s a fantastic solution for those busy weeknights when fast food just doesn’t cut it. Plus, the addition of toasted nuts adds a delightful crunch that doesn’t just impress—it invites seconds. So preheat that oven and get ready to indulge in a slice of homemade happiness!

Why You'll Love This Apple Bread

  • This apple bread is incredibly easy to make, requiring only a few simple ingredients and minimal prep time.
  • Bursting with the delicious flavors of cinnamon and nutmeg, each slice offers a warm and inviting experience that is simply irresistible.
  • Its versatility shines through as it can be enjoyed for breakfast, dessert, or any time in between, making it perfect for any occasion.
  • The beautiful golden-brown crust and delectable aroma as it bakes make it a feast for the eyes, guaranteed to impress anyone who catches a whiff.

Apple Bread Ingredients

Here’s what you need to create this delightful apple bread.

For the Batter
• 1 large apple – peeled and cored for a sweet, juicy base that enhances the apple flavor.
• 1.5 cups all-purpose flour – this gives the bread structure and softness.
• 0.5 cups granulated sugar – adds sweetness; sprinkle more on top for a lovely crust.
• 0.5 cups packed light brown sugar – elevates flavor with a hint of caramel.
• 0.75 teaspoon ground cinnamon – infuses that cozy, aromatic spice into every slice.
• 0.5 teaspoon baking soda – helps the bread rise for a fluffy texture.
• 0.25 teaspoon baking powder – gives extra lift, ensuring it’s light and airy.
• 0.25 teaspoon salt – balances sweetness and enhances overall flavor.
• 0.25 teaspoon grated nutmeg – adds a warm, earthy undertone that pairs beautifully with cinnamon.
• 2 large eggs – beaten and at room temperature for a smooth batter consistency.
• 0.5 cups unsalted butter – melted to add richness and moisture; can substitute with oil for a lighter option.
• 0.5 cups chopped toasted walnuts or toasted pecans (optional) – provides a delightful crunch and nutty flavor that complements the apple bread beautifully.

How to Make Apple Bread

  1. Preheat the oven to 350°F (175°C) and grease a loaf pan with butter or non-stick spray to prevent the apple bread from sticking.

  2. Mix the dry ingredients in a large bowl: whisk together the flour, granulated sugar, brown sugar, cinnamon, baking soda, baking powder, salt, and nutmeg until well combined for a fragrant base.

  3. Beat the eggs in a separate bowl, then add the melted butter and chopped apple to incorporate moisture and flavor into the mixture.

  4. Combine the wet and dry ingredients gently, stirring until there are no dry spots left. Fold in the toasted walnuts or pecans if you’re using them to add an extra layer of texture and taste.

  5. Pour the batter into the prepared loaf pan, making sure it’s evenly distributed for consistent baking.

  6. Sprinkle additional granulated sugar on top of the batter if desired, creating a sweet, crispy crust once baked.

  7. Bake in the preheated oven for about 55 minutes, or until a toothpick inserted in the center comes out clean, signaling it’s ready.

  8. Cool the apple bread in the pan for 10 minutes before transferring it to a wire rack to cool completely. This helps retain moisture and enhances flavor.

Optional: Serve warm with a pat of butter for an extra indulgent treat.

Exact quantities are listed in the recipe card below.

Apple Bread Variations

Feel free to get creative and make this delicious apple bread your own with these fun twists!

  • Gluten-Free: Substitute all-purpose flour with a 1:1 gluten-free baking blend to suit your dietary needs without sacrificing taste. You’ll still enjoy that lovely moist texture.

  • Fruit-Filled: Add ½ cup of dried cranberries or raisins for a delightful burst of sweetness that complements the apples perfectly. It’s like a surprise in every bite!

  • Vegan: Replace the eggs with 1/4 cup of unsweetened applesauce and use a plant-based butter alternative to make it vegan-friendly. A swap that keeps the moisture intact!

  • Spicy Kick: Throw in a pinch of cayenne pepper or red pepper flakes if you like a hint of heat to balance the sweetness. Just a touch will elevate the flavors beautifully.

  • Pumpkin Spice: Replace half of the apples with 1 cup of pumpkin puree for a seasonal twist. Enjoy the warmth of pumpkin spice enveloping you in comfort.

  • Chocolate Chip: Fold in ½ cup of dark chocolate or semisweet chocolate chips for a rich chocolatey contrast against the apple and spice. It’s heaven for chocolate lovers!

  • Nut-Free: Omit the walnuts or pecans and add ½ cup of sunflower seeds for a nut-free crunch that’s equally satisfying. It’s perfect for school lunches too!

  • Citrus Zest: Add the zest of one orange or lemon for a bright, refreshing note that enhances the apple’s natural sweetness. It’s like a sunny hug in bread form!

Make Ahead Options

These Homemade Apple Bread slices are perfect for meal prep enthusiasts and can be prepared up to 24 hours in advance! You can mix together the dry ingredients (flour, sugars, and spices) and store them in an airtight container at room temperature. Similarly, you can chop the apple and store it in a sealed bag with a splash of lemon juice to prevent browning. When you’re ready to bake, simply combine the wet ingredients (eggs and melted butter) and incorporate the prepped dry ingredients along with the apple and nuts. Pour the batter into the loaf pan and bake as directed. Your apple bread will be just as delicious with this prepped approach, saving you precious time on busy weeknights!

What to Serve with Apple Bread?

The delightful aroma of freshly baked apple bread invites a variety of delicious pairings to elevate your meal experience.

  • Creamy Butter: A simple touch that enhances every slice, bringing warmth and richness to your taste buds. Just a pat elevates the comfort level.

  • Vanilla Ice Cream: The cool creaminess contrasts beautifully with the bread’s warm spices, creating a cozy yet refreshing dessert. This combination is pure bliss!

  • Cinnamon Tea: This aromatic beverage echoes the spices in the apple bread, complementing its flavors perfectly while wrapping you in a soothing embrace.

  • Fruit Salad: A bright, refreshing mix of summer fruits adds a burst of color and nutrition that balances the sweetness of the apple bread.

  • Maple Syrup: Drizzling this sweet nectar over a warm slice enhances the flavor profile while adding a delightful touch of decadence.

  • Cheese Platter: Pairing with creamy brie or tangy goat cheese creates an intriguing contrast of textures and flavors that guests will adore.

  • Freshly Brewed Coffee: Warm, robust coffee is the perfect companion for apple bread, creating a comforting morning or afternoon treat that’s hard to resist.

  • Chocolate Drizzle: A little melted chocolate over the top can make for an indulgent dessert twist, turning your apple bread into an irresistible treat.

  • Chai Latte: The spicy warmth of chai naturally complements the flavors of cinnamon and nutmeg, making this pairing a cozy choice for any time of day.

How to Store and Freeze Apple Bread

Room Temperature: Keep apple bread tightly wrapped in plastic wrap or stored in an airtight container for up to 3 days. This helps maintain its moist texture and delightful aroma.

Fridge: For longer freshness, store apple bread in the refrigerator for up to 1 week. Make sure it’s well-wrapped to prevent drying out.

Freezer: To freeze, slice the apple bread and wrap individual pieces in plastic wrap, then place them in a freezer-safe bag. It can last for up to 3 months.

Reheating: When you’re ready to enjoy your frozen slices, simply thaw overnight in the fridge and reheat in a toaster or microwave for a few seconds until warm.

Chef's Helpful Tips

  • When making Apple Bread, ensure your eggs are at room temperature for a smoother batter and better incorporation.
  • Avoid overmixing the batter; stir just until the dry ingredients are combined with the wet for a lighter texture.
  • Consider grating your apple instead of dicing for a more even distribution throughout the bread.
  • Always check for doneness a few minutes before the 55-minute mark, as oven temperatures can vary.

Apple Bread Recipe FAQs

What type of apple should I use for apple bread?
Absolutely! For apple bread, I recommend using a sweet and tart variety like Granny Smith or Honeycrisp. These apples hold their shape during baking and provide a nice bite. Avoid apples that are overly soft or mealy, as they won’t give the right texture!

How should I store leftover apple bread?
To keep your apple bread fresh, store it tightly wrapped in plastic wrap or in an airtight container. At room temperature, it will last for up to 3 days; in the fridge, it can stay good for up to 1 week. Remember to wrap it well to prevent drying out!

Can I freeze apple bread? How do I do it?
Very! Freezing apple bread is easy and a great way to prolong its life. Start by slicing the apple bread into individual pieces. Wrap each slice tightly in plastic wrap, and then place them in a freezer-safe bag. It can be stored in the freezer for up to 3 months! When you’re ready for a slice, just thaw it overnight in the fridge, and then reheat in a toaster or microwave for a few seconds.

What should I do if my apple bread is too dry?
If you find your apple bread is a bit too dry, don’t fret! This can often happen if it was overbaked. I recommend checking for doneness a few minutes before the recommended bake time. If it’s already baked but dry, consider serving it with a dollop of whipped cream or a drizzle of warm caramel for extra moisture and flavor!

Is this apple bread safe for pets?
No, it’s best to keep this apple bread away from pets. Although apples themselves are fine in small amounts, ingredients like sugar and spices can be harmful. It’s best to enjoy this delightful treat yourself!

Can I use gluten-free flour in the recipe?
Certainly! If you’re looking for a gluten-free option, you can substitute all-purpose flour with a 1:1 gluten-free flour blend. Just be aware that adjustments in liquid may be needed, as gluten-free flours can absorb moisture differently. Always check the package details for the best results!

Apple Bread

Apple Bread

Delight in this homemade apple bread, infused with cinnamon and nutmeg, perfect for breakfast or a cozy gathering.
Print Recipe Pin Recipe
Prep Time 15 minutes mins
Cook Time 55 minutes mins
Cooling Time 10 minutes mins
Total Time 1 hour hr 20 minutes mins
Servings: 8 slices
Course: BREAKFAST & BRUNCH
Cuisine: American
Calories: 220
Ingredients Equipment Method Nutrition Notes

Ingredients
  

For the Batter
  • 1 large apple peeled and cored
  • 1.5 cups all-purpose flour
  • 0.5 cups granulated sugar sprinkle more on top for a lovely crust
  • 0.5 cups packed light brown sugar
  • 0.75 teaspoon ground cinnamon
  • 0.5 teaspoon baking soda
  • 0.25 teaspoon baking powder
  • 0.25 teaspoon salt
  • 0.25 teaspoon grated nutmeg
  • 2 large eggs beaten and at room temperature
  • 0.5 cups unsalted butter melted
  • 0.5 cups chopped toasted walnuts or toasted pecans optional

Equipment

  • loaf pan
  • Mixing bowls
  • Whisk

Method
 

How to Make Apple Bread
  1. Preheat the oven to 350°F (175°C) and grease a loaf pan with butter or non-stick spray to prevent the apple bread from sticking.
  2. Mix the dry ingredients in a large bowl: whisk together the flour, granulated sugar, brown sugar, cinnamon, baking soda, baking powder, salt, and nutmeg until well combined.
  3. Beat the eggs in a separate bowl, then add the melted butter and chopped apple to incorporate moisture and flavor into the mixture.
  4. Combine the wet and dry ingredients gently, stirring until there are no dry spots left. Fold in the toasted walnuts or pecans if you're using them.
  5. Pour the batter into the prepared loaf pan, making sure it's evenly distributed.
  6. Sprinkle additional granulated sugar on top of the batter if desired.
  7. Bake in the preheated oven for about 55 minutes, or until a toothpick inserted comes out clean.
  8. Cool the apple bread in the pan for 10 minutes before transferring it to a wire rack to cool completely.

Nutrition

Serving: 1sliceCalories: 220kcalCarbohydrates: 30gProtein: 3gFat: 10gSaturated Fat: 6gPolyunsaturated Fat: 1gMonounsaturated Fat: 3gCholesterol: 85mgSodium: 150mgPotassium: 150mgFiber: 1gSugar: 12gVitamin A: 400IUVitamin C: 1mgCalcium: 30mgIron: 1mg

Notes

Serve warm with a pat of butter for an extra indulgent treat.

Tried this recipe?

Let us know how it was!

Filed Under: BREAKFAST & BRUNCH

Peanut Butter and Raspberry Overnight Oats

December 23, 2025 by JudyWhite Leave a Comment

There’s something incredibly refreshing about waking up to a jar of Peanut Butter and Raspberry Overnight Oats waiting for me in the fridge. The first bite brings an explosion of flavor that instantly brightens my morning. As the creaminess of peanut butter intertwines with the tart sweetness of fresh raspberries, I can’t help but feel I’ve given my day the delicious kickstart it deserves.

On busy mornings, I often find myself reaching for quick but uninspired options, but this recipe has transformed my breakfast routine. In just 10 minutes of preparation the night before, I create a nutritious and satisfying meal that keeps me energized all day long. Plus, with a variety of toppings like flaked almonds and toasted pepitas, each serving is an opportunity to mix things up and indulge in some delightful textures.

So, if you’re tired of the monotonous cereal or the dreaded drive-thru runs, join me on this delicious journey to discover how simple and satisfying breakfast can be—because your mornings deserve something special!

Why You'll Love This Peanut Butter and Raspberry Overnight Oats

  • This recipe is incredibly easy to prepare, allowing you to whip up breakfast in just 10 minutes and enjoy it the next morning.
  • The delightful combination of creamy peanut butter and tart raspberries creates an explosion of flavor that will elevate your morning routine.
  • Versatile toppings like flaked almonds and toasted pepitas not only add crunch but also let you customize each jar to your liking.
  • Visually, these overnight oats are stunning, making them an appealing choice to start your day on a vibrant note.

Peanut Butter and Raspberry Overnight Oats Ingredients

Dive into the delicious layers of flavor and nutrition you’ll find in this easy recipe!

For the Base

  • Rolled oats – provide a hearty foundation and are great for a filling breakfast.
  • Chia seeds – add a nutritious boost and help thicken the mixture overnight.
  • Medium ripe banana (mashed) – naturally sweetens the oats while adding creaminess.
  • Oat milk – a perfect dairy-free option that blends beautifully with the other ingredients.
  • Peanut butter – offers a rich, nutty flavor that complements the raspberries so well.
  • Raspberries – bring a tart sweetness that brightens up each spoonful.
  • Coconut sugar – a lovely, low-glycemic sweetener that balances the flavors.

For Toppings

  • Extra raspberries – for a fresh, pop of color and flavor atop your oats.
  • Extra peanut butter – for peanut butter lovers wanting an extra creamy kick!
  • Flaked almonds – add a nice crunch along with healthy fats.
  • Chopped pistachios – provide a vibrant color and delightful crunch.
  • Toasted pepitas – offer a nutty flavor and extra nutrients.
  • Extra chia seeds – sprinkle on for more texture and nutrition.
  • Sesame seeds – add a unique flavor and a delightful crunch.

Embrace the joy of Peanut Butter and Raspberry Overnight Oats as a wholesome breakfast option that you’ll look forward to each morning!

How to Make Peanut Butter and Raspberry Overnight Oats

  1. Mix Ingredients: In a large bowl, combine rolled oats, chia seeds, mashed banana, oat milk, peanut butter, raspberries, and coconut sugar. Stir well until everything is nicely blended.

  2. Portion Out: Divide the mixture evenly into jars or containers, ensuring they’re well sealed. This is the perfect time to think about how many delicious breakfasts you’ll be enjoying!

  3. Chill Overnight: Place the jars in the refrigerator and let them chill overnight. This allows the oats to absorb the liquids and flavors, creating a creamy morning treat.

  4. Serve Toppings: In the morning, take the jars out and top each one with extra raspberries, peanut butter, flaked almonds, chopped pistachios, toasted pepitas, extra chia seeds, and sesame seeds as desired. Get creative and make each jar a delightful work of art!

Optional: A drizzle of honey can add an extra touch of sweetness.

Exact quantities are listed in the recipe card below.

What to Serve with Peanut Butter and Raspberry Overnight Oats?

Elevate your breakfast experience by pairing your oats with complementary flavors and textures that create a satisfying morning spread.

  • Fresh Fruit: A side of sliced bananas or a mix of berries brings vibrant colors and natural sweetness, enhancing the fruity notes of the oats.

  • Greek Yogurt: This creamy addition adds a rich tang and a protein boost, making your breakfast even more satisfying and wholesome.

  • Nutty Granola: Crunchy granola provides a delightful textural contrast and a multi-layered nutty flavor that pairs beautifully with creamy oats.

  • Herbal Tea: Sip on a warm cup of chamomile or peppermint tea for a calming start to your day, balancing the sweetness of the oats.

  • Peanut Butter Banana Smoothie: Blend a quick smoothie with banana, oat milk, and peanut butter for a creamy drink that echoes the delightful flavors of your oats.

  • Cinnamon Apples: Sautéed apples with cinnamon deliver a warm, spice-filled sweetness that complements the peanut butter perfectly.

  • Almond Butter Toast: Spread almond butter on whole-grain toast for a nutritious crunch that pairs well with the creaminess of the overnight oats.

  • Cold Brew Coffee: A refreshing glass of cold brew coffee can add a kick and provide the perfect caffeine boost to match your delicious morning meal.

Make Ahead Options

Peanut Butter and Raspberry Overnight Oats are perfect for busy home cooks looking to save time during hectic mornings! You can prepare your oat mixture up to 24 hours in advance by combining the rolled oats, chia seeds, mashed banana, oat milk, peanut butter, raspberries, and coconut sugar. Simply divide the mixture into sealed jars and refrigerate overnight for optimal flavor and texture. When you’re ready to enjoy, simply take a jar from the fridge, add your desired toppings like extra raspberries and flaked almonds, and you’ll have a nutritious breakfast that tastes just as delicious as if you made it fresh each morning!

How to Store and Freeze Peanut Butter and Raspberry Overnight Oats

Fridge: Keep your jars of Peanut Butter and Raspberry Overnight Oats in the refrigerator for up to 3 days. Ensure they are tightly sealed to maintain freshness.

Freezer: You can freeze individual portions for up to 1 month. Make sure to use airtight containers to prevent freezer burn, and thaw in the fridge overnight before serving.

Reheating: If you prefer warm oats, reheat in the microwave for 30-60 seconds, adding a splash of oat milk to restore creaminess.

Serving Tip: When ready to serve, top with additional fruits, nuts, or seeds to enhance texture and flavor!

Peanut Butter and Raspberry Overnight Oats Variations

Feel free to add your own creative spin to make this breakfast even more delightful!

  • Gluten-Free: Substitute rolled oats with gluten-free oats. Enjoy the same creamy goodness without worry!

  • Nut-Free: Replace peanut butter with sunflower seed butter. You’ll still get that rich texture with a unique twist.

  • Berry Blend: Swap raspberries with mixed berries like blueberries or strawberries for a colorful flavor explosion.

  • Chocolate Twist: Add 1-2 tablespoons of cocoa powder to the mixture. Chocolate and peanut butter—need I say more?

  • Protein Boost: Incorporate a scoop of your favorite protein powder into the oats. It’s a fantastic way to enhance your morning nutrition.

  • Sweetener Swap: Use maple syrup or honey instead of coconut sugar for a different sweetness profile. Each one brings its own charm!

  • Creamy Yogurt: Mix in a dollop of yogurt—Greek or dairy-free—before serving for an extra creamy texture and tangy twist.

  • Spiced Up: Dust in some cinnamon or nutmeg for warming spices that enliven the flavors beautifully. A little sprinkle can go a long way!

Chef's Helpful Tips

  • When making Peanut Butter and Raspberry Overnight Oats, ensure you mash the banana thoroughly to achieve a smooth consistency throughout the mixture.
  • Avoid adding too much liquid at once; it’s best to gradually incorporate the oat milk to prevent the oats from becoming overly soggy.
  • Consider blending the oats and chia seeds first to make sure they are evenly distributed and thicken properly overnight.
  • For the best flavor and texture, refrigerate the jars for at least eight hours to allow them to set perfectly and enjoy them within 3 days for optimal freshness.

Peanut Butter and Raspberry Overnight Oats Recipe FAQs

How do I know if my bananas are ripe enough?
Absolutely! Look for bananas that are mostly yellow with just a few brown spots. This indicates they’re sweet and soft enough for mashing, which will create a lovely creamy base for your overnight oats.

How long can I store Peanut Butter and Raspberry Overnight Oats in the fridge?
You can keep your jars of Peanut Butter and Raspberry Overnight Oats in the refrigerator for up to 3 days. Make sure they are tightly sealed to maintain freshness and avoid any strange odors from other foods.

Can I freeze Peanut Butter and Raspberry Overnight Oats? How do I do that?
Very! Freezing is an excellent option. I recommend portioning them into airtight containers. They’ll stay good in the freezer for up to 1 month. Just remember to thaw them overnight in the fridge before serving. You can also give them a quick reheat in the microwave for 30-60 seconds, adding a splash of oat milk to bring back that creamy texture.

What should I do if my overnight oats turn out too thick?
If your Peanut Butter and Raspberry Overnight Oats are thicker than you’d like, don’t worry! Just stir in a little extra oat milk until you reach your desired consistency. This can happen if the oats absorb more liquid than expected, so feel free to adjust as needed to ensure a delightful, smooth breakfast.

Are these oats suitable for people with nut allergies?
If you or someone you’re serving has a nut allergy, you can absolutely substitute the peanut butter with sun butter or a seed butter like tahini. This way, you’re keeping the flavors intact while making it safe for everyone to enjoy! Always check the ingredient labels for any hidden allergens when you shop.

Can I customize the toppings?
The more the merrier! Feel free to get creative with toppings like sliced bananas, other berries, or granola. Use what you have on hand and serve each jar to suit your personal taste, making every morning a fun new adventure!

Peanut Butter and Raspberry Overnight Oats

Peanut Butter and Raspberry Overnight Oats

Discover refreshing Peanut Butter and Raspberry Overnight Oats for a delicious start to your morning, combining creamy peanut butter with tart raspberries.
Print Recipe Pin Recipe
Prep Time 10 minutes mins
Total Time 10 minutes mins
Servings: 2 jars
Course: BREAKFAST & BRUNCH
Calories: 350
Ingredients Equipment Method Nutrition Notes

Ingredients
  

Base
  • 1 cup Rolled oats provide a hearty foundation for a filling breakfast
  • 2 tablespoons Chia seeds add a nutritious boost and help thicken the mixture
  • 1 medium ripe banana (mashed) naturally sweetens the oats
  • 1 cup Oat milk dairy-free option that mixes well
  • 1/2 cup Peanut butter rich, nutty flavor
  • 1 cup Raspberries bring a tart sweetness
  • 2 tablespoons Coconut sugar low-glycemic sweetener
Toppings
  • 1/2 cup Extra raspberries for freshness on top
  • 2 tablespoons Extra peanut butter for added creaminess
  • 1/4 cup Flaked almonds adds crunch and healthy fats
  • 1/4 cup Chopped pistachios for color and crunch
  • 2 tablespoons Toasted pepitas for nuttiness and extra nutrients
  • 1 tablespoon Extra chia seeds for more texture
  • 1 tablespoon Sesame seeds for flavor and crunch

Equipment

  • bowls
  • jars or containers

Method
 

Preparation Steps
  1. In a large bowl, combine rolled oats, chia seeds, mashed banana, oat milk, peanut butter, raspberries, and coconut sugar. Stir well until everything is nicely blended.
  2. Divide the mixture evenly into jars or containers, ensuring they’re well sealed.
  3. Place the jars in the refrigerator and let them chill overnight.
  4. In the morning, take the jars out and top each one with extra raspberries, peanut butter, flaked almonds, chopped pistachios, toasted pepitas, extra chia seeds, and sesame seeds as desired.

Nutrition

Serving: 1jarCalories: 350kcalCarbohydrates: 45gProtein: 10gFat: 15gSaturated Fat: 3gPolyunsaturated Fat: 2gMonounsaturated Fat: 10gSodium: 150mgPotassium: 450mgFiber: 10gSugar: 10gVitamin A: 5IUVitamin C: 15mgCalcium: 10mgIron: 10mg

Notes

Mash the banana thoroughly for smooth consistency. Gradually add oat milk to avoid sogginess. Refrigerate for at least 8 hours; consume within 3 days for freshness.

Tried this recipe?

Let us know how it was!

Filed Under: BREAKFAST & BRUNCH

Frozen Yogurt Bark

December 23, 2025 by JudyWhite Leave a Comment

When the sun is shining and the heat is on, there’s nothing quite like a refreshing treat to cool down, and that’s where my Frozen Yogurt Bark swoops in like a superhero for your taste buds! Picture this: velvety vanilla yogurt meets vibrant strawberries and crunchy pistachios, all lovingly blended together and frozen into bite-sized pieces of pure joy.

I discovered this delightful snack on a particularly hot summer afternoon when I craved something sweet without the guilt of traditional desserts. With just a few minutes of prep, I was able to create a light and satisfying treat that’s especially perfect for those who are looking to break away from the fast-food rut. Not only is it irresistibly easy to whip up, but it also allows for endless customization—swap in your favorite fruits or nuts for a personalized touch.

Join me as we dive into this quick and nourishing recipe that’s perfect for kids, adults, and everyone in between. Get ready to enjoy a delectable bite of summertime bliss!

Why You'll Love This Frozen Yogurt Bark

  • You’ll adore how easy it is to prepare this Frozen Yogurt Bark, taking just 10 minutes of your time for a delicious treat.
  • The blend of velvety vanilla yogurt, vibrant strawberries, and crunchy pistachios creates an explosion of flavor that will tantalize your taste buds.
  • This recipe is incredibly versatile; feel free to swap in your favorite fruits or nuts to make it uniquely yours every time.
  • Not only does it look stunning when served, but it’s also a crowd-pleaser, making it perfect for gatherings or a simple afternoon snack.

Frozen Yogurt Bark Ingredients

Prepare to create a delicious treat that will have everyone’s taste buds singing!

For the Base

  • Vanilla Yogurt – This creamy base sets the stage for a delightful dessert; opt for Greek yogurt for added protein.

For the Topping

  • Sliced Strawberries – Fresh strawberries not only add a pop of color but also a natural sweetness, perfect for Frozen Yogurt Bark!
  • Pistachios – These add a satisfying crunch; feel free to swap for other nuts or granola for your desired texture.

Customize your toppings based on your cravings and enjoy this refreshing snack year-round!

How to Make Frozen Yogurt Bark

  1. Line the Sheet: Start by lining a baking sheet with parchment paper. This easy step ensures your frozen yogurt bark won’t stick, making it a breeze to remove later.

  2. Spread the Yogurt: Gently place the 2 cups of vanilla yogurt onto the baking sheet and use an offset spatula to spread it into an even layer, about 1/2 inch thick, for optimal freezing results.

  3. Sprinkle Toppings: Evenly scatter the sliced strawberries and pistachios on top of the yogurt, pressing them lightly to ensure they stick. Feel free to get creative with fruit and nut combinations that you love!

  4. Freeze: Pop the baking sheet into the freezer and let it freeze until firm—this usually takes at least 3 hours or can be left overnight for perfect consistency.

  5. Break and Serve: Once fully frozen, carefully remove the yogurt bark from the freezer and break it into large, delightful chunks. Serve immediately for the best experience.

Optional: Enjoy with a drizzle of honey or a sprinkle of coconut flakes for added flavor.

Exact quantities are listed in the recipe card below.

Make Ahead Options

These Frozen Yogurt Bark pieces are ideal for meal prep, making them a perfect treat for busy weeknights! You can prepare the yogurt base up to 24 hours in advance by spreading the yogurt on the baking sheet and adding your toppings right before freezing. To maintain their quality, store the assembled bark in the freezer immediately after preparation. Simply freeze until firm (at least 3 hours or preferably overnight) for the best texture. When you’re ready to serve, break the frozen bark into chunks and enjoy a refreshing, guilt-free treat. With these make-ahead options, you’ll have delicious snacks ready to go with minimal effort!

What to Serve with Frozen Yogurt Bark?

Looking to elevate your dessert experience? Pair this delightful treat with complementary flavors and textures.

  • Fresh Fruit Salad: A mix of seasonal fruits brings brightness and a juicy contrast to the creamy bark. Perfect for adding more color to your table!

  • Granola Clusters: Savory granola with oats and honey adds crunch and complexity, balancing the sweetness of the frozen yogurt bark wonderfully. Imagine munching on these crunchy bites!

  • Coconut Whipped Cream: A dollop of airy coconut cream enhances the tropical vibes while providing a luscious creaminess that melts in your mouth.

  • Chilled Herbal Tea: Sipping on lightly sweetened mint or hibiscus tea refreshes the palate and adds a modern twist that everyone will love.

  • Chocolate Drizzle: Drizzling melted dark chocolate over the bark creates an indulgent touch, mixing rich flavors with the lightness of the yogurt.

  • Honey Dipped Fruit Skewers: Threading fruits like pineapple and kiwi on skewers and dipping them in honey complements the bark’s flavors seamlessly, offering a fun, interactive element.

  • Nutty Trail Mix: A handful of nutty trail mix provides a savory crunch and boosts energy, making it a delightful contrast to the smooth yogurt.

  • Sparkling Water with Lime: A refreshing glass of bubbly water adds fizz and a zesty pop, beautifully balancing out the sweetness of your frozen yogurt bark.

Frozen Yogurt Bark Variations

Feel free to take this delicious Frozen Yogurt Bark recipe and make it truly your own by exploring these fun and tasty variations!

  • Berry Blast: Replace strawberries with a mix of blueberries and raspberries for a vibrant explosion of flavors.

  • Nutty Delight: Use chopped almonds or walnuts instead of pistachios for a different nutty crunch. The variety of flavors will surprise you!

  • Dairy-Free: Swap vanilla yogurt for coconut yogurt to create a luscious dairy-free option that still tastes amazing.

  • Tropical Twist: Add diced mango and shredded coconut to the yogurt for a refreshing tropical vibe. Let your taste buds transport you to a beach paradise!

  • Chocolate Drizzle: Drizzle melted dark chocolate over the frozen bark before freezing for a rich and decadent touch that’s hard to resist. Indulge in that extra layer of sweetness!

  • Spicy Kick: Sprinkle a pinch of cayenne pepper on top before freezing for a surprising hint of heat that complements the sweetness beautifully.

  • Granola Crunch: Mix in some granola right into the yogurt for extra texture and a wholesome crunch. It’s breakfast and dessert all in one!

  • Citrus Zing: Add a splash of orange or lemon zest to the yogurt base for a refreshing citrus burst that brightens the flavor profile.

How to Store and Freeze Frozen Yogurt Bark

Fridge: Keep any leftover Frozen Yogurt Bark in an airtight container in the fridge for up to 3 days. However, it’s best when served fresh!

Freezer: Store Frozen Yogurt Bark in a freezer-safe container or a resealable freezer bag for up to 2 months. Separate layers with parchment paper to prevent sticking.

Reheating: For the best texture, enjoy your frozen yogurt bark directly from the freezer. If it softens, simply refreeze until firm again.

Chef's Helpful Tips

  • When making Frozen Yogurt Bark, ensure your baking sheet is lined well with parchment paper to prevent sticking and make removal easier.
  • For an even, smooth texture, use an offset spatula to spread the yogurt to a consistent thickness of about half an inch, which promotes quicker and more uniform freezing.
  • Remember to press your toppings lightly into the yogurt layer so they adhere well once frozen.
  • For the best results, freeze the yogurt bark for a minimum of three hours or overnight if you prefer a firmer texture that breaks apart more easily.

Frozen Yogurt Bark Recipe FAQs

What type of yogurt should I use for Frozen Yogurt Bark?
Absolutely! I recommend using vanilla yogurt for a rich and creamy base. Greek yogurt can also be a fantastic choice since it adds extra protein and a thicker consistency. Feel free to experiment with flavored yogurts to put a fun twist on this treat!

How do I know if my strawberries are ripe enough?
Very! Select strawberries that are bright red and firm to the touch without any dark spots or mushy areas. Those little green caps should be fresh as well! The ideal strawberries will add natural sweetness to your Frozen Yogurt Bark.

How should I store leftover Frozen Yogurt Bark?
To keep your delish Frozen Yogurt Bark at its best, store any leftovers in an airtight container in the fridge for up to 3 days. However, you’ll find it tastes best when enjoyed fresh! If you want to keep it for longer, opt for freezing.

Can I freeze Frozen Yogurt Bark, and if so, how?
Absolutely! For freezing, place the yogurt bark in a freezer-safe container or resealable freezer bag for up to 2 months. It’s smart to separate layers with parchment paper to prevent sticking. Just pop it back in the freezer, and it will be ready when you are!

Are there any dietary concerns with this recipe?
Very! This recipe is naturally gluten-free unless you add granola that contains gluten. For those with nut allergies, you can substitute pistachios with seeds like pumpkin or sunflower seeds for that perfect crunch. Always check ingredient labels to ensure safety for your dietary needs.

What can I do if my Frozen Yogurt Bark is too soft after freezing?
If you find your Frozen Yogurt Bark is too soft, it may not have been frozen long enough. I suggest leaving it to freeze for a bit longer (up to a few more hours) until it’s firm. If it still seems too soft upon serving, try returning it to the freezer until it hardens to your liking. Enjoy!

Frozen Yogurt Bark

Frozen Yogurt Bark

Frozen Yogurt Bark is a refreshing treat, combining vanilla yogurt, strawberries, and pistachios, perfect for cooling down on hot days.
Print Recipe Pin Recipe
Prep Time 10 minutes mins
Freezing Time 3 hours hrs
Total Time 3 hours hrs 10 minutes mins
Servings: 4 pieces
Course: DESSERT RECIPES
Calories: 150
Ingredients Equipment Method Nutrition Notes

Ingredients
  

For the Base
  • 2 cups Vanilla Yogurt Opt for Greek yogurt for added protein.
For the Topping
  • 1 cup Sliced Strawberries Fresh strawberries add color and sweetness.
  • 1/2 cup Pistachios Add crunch; can swap for other nuts.

Equipment

  • Baking sheet
  • parchment paper
  • Offset spatula

Method
 

How to Make Frozen Yogurt Bark
  1. Line a baking sheet with parchment paper.
  2. Spread 2 cups of vanilla yogurt onto the baking sheet into an even layer, about 1/2 inch thick.
  3. Evenly sprinkle sliced strawberries and pistachios on top of the yogurt, pressing them lightly.
  4. Freeze the baking sheet until firm, at least 3 hours or overnight.
  5. Once frozen, remove the yogurt bark from the freezer and break it into chunks. Serve immediately.

Nutrition

Serving: 1pieceCalories: 150kcalCarbohydrates: 20gProtein: 6gFat: 5gSaturated Fat: 1gPolyunsaturated Fat: 2gMonounsaturated Fat: 2gCholesterol: 5mgSodium: 50mgPotassium: 180mgFiber: 2gSugar: 10gVitamin A: 4IUVitamin C: 25mgCalcium: 15mgIron: 4mg

Notes

Enjoy with a drizzle of honey or sprinkle of coconut flakes for added flavor.

Tried this recipe?

Let us know how it was!

Filed Under: BREAKFAST & BRUNCH

Braided Cinnamon Buns Recipe

December 23, 2025 by JudyWhite Leave a Comment

There’s something undeniably comforting about the tantalizing scent of cinnamon wafting through the kitchen, inviting you to take a moment for yourself. This Braided Cinnamon Buns Recipe is my go-to for weekend mornings, where a touch of indulgence turns an ordinary day into something memorable. With the dough softening and rising, you might find the daily chaos fading away, replaced by the rhythmic kneading of your hands and the joy of creating something from scratch.

I discovered this gem one chilly autumn afternoon, inspired by a craving for sweet, homemade goodness that could rival any bakery. The beauty of these buns lies not just in their impressive braided form, but also in their ability to charm a crowd—perfect for brunch gatherings or to simply spoil your loved ones. And trust me, when they come out of the oven, golden brown and dusted with powdered sugar, smiles are guaranteed all around.

Whether you’re an experienced chef or a beginner in the kitchen, this recipe is as easy as it is delightful. So, gather your ingredients, roll up your sleeves, and let’s dive into the world of warm, cinnamon-tinted bliss!

Why You'll Love This Braided Cinnamon Buns Recipe

  • This Braided Cinnamon Buns Recipe is incredibly easy to follow, making it perfect for bakers of all skill levels.
  • The warm, sweet aroma of cinnamon and sugar fills your kitchen, creating an inviting atmosphere that everyone will appreciate.
  • These buns not only look stunning with their beautiful braided design but also taste utterly divine, ensuring they will be the star of any brunch table.
  • Plus, they can be prepared ahead of time, saving you valuable minutes on busy mornings while still delivering that fresh-baked goodness.

Braided Cinnamon Buns Ingredients

Prepare to immerse yourself in a delightful sensory experience with these lip-smacking Braided Cinnamon Buns!

For the Dough

  • 1 cup warm milk – warms up the yeast, helping it activate for a fluffier bread; make sure it’s not too hot!
  • 3/4 cup unsalted butter, softened – adds richness to the dough, making it tender and flavorful.
  • 2 large eggs – enrich the dough and add structure for a better rise.
  • 4 cups bread flour – gives strength and chewiness to your beautiful buns.
  • 1 tbsp instant dry yeast – essential for that light, fluffy texture; no need to proof it first!
  • 1/4 cup granulated sugar – sweetens the dough while feeding the yeast for a perfect rise.
  • 1 tsp salt – balances out the sweetness and enhances flavor.

For the Filling

  • 1/2 cup unsalted butter, softened – ensures a luscious mouthfeel in every bite.
  • 1 cup light brown sugar, packed – provides that sticky sweetness that pairs wonderfully with cinnamon.
  • 2 tsp ground cinnamon – cinnamon is the star here, giving your buns their distinctive flavor!

For Topping

  • 1 large egg, beaten (for egg wash) – gives a golden finish to your buns when baked.
  • powdered sugar – a light dusting for a touch of sweetness and a pretty presentation.

Now you have all the ingredients at your fingertips! Grab your bowl and start creating these irresistible Braided Cinnamon Buns. Your kitchen is about to smell heavenly!

How to Make Braided Cinnamon Buns

  1. Combine warm milk, softened butter, eggs, and yeast in a large bowl. This initial mixture is crucial as it activates the yeast, setting the stage for your fluffy buns!

  2. Whisk together the bread flour, granulated sugar, and salt in another bowl. Ensure your dry ingredients are well-mixed to allow for even rising and a consistent texture in your dough.

  3. Gradually add the dry mixture to the wet ingredients, stirring gently until everything is combined. The dough will begin to take shape—don’t worry if it’s a bit sticky at first!

  4. Knead the dough on a floured surface for about 5-10 minutes until it turns smooth and elastic. This step builds the gluten, giving your buns that delightful chew!

  5. Place and cover the kneaded dough in a greased bowl. Let it rise for about 1 hour until it has doubled in size—this is where the magic begins!

  6. Punch down the risen dough and roll it out into a rectangle. This process helps release any air bubbles and prepares it for its delicious filling.

  7. Spread 1/2 cup softened butter evenly over the dough. Then, sprinkle with brown sugar and ground cinnamon, creating that irresistible flavor profile we all love.

  8. Roll tightly the dough into a log shape. Once rolled, cut the log into strips, having a little fun while keeping the fillings intact!

  9. Braid the strips together and place them in a greased baking dish. The braiding not only looks stunning but also helps to ensure that every bite is filled with that sweet cinnamon goodness.

  10. Cover and let rise the braided dough again for an additional 30 minutes. This further rise ensures your buns are light and fluffy after baking.

  11. Preheat your oven to 350°F (175°C). Getting your oven ready will guarantee an ideal bake and that golden brown finish we all desire!

  12. Brush the top with the beaten egg, which will give your buns a lovely, shiny crust once baked.

  13. Bake for about 20 minutes, or until they are golden brown and mesmerizingly fragrant. The scent wafting through your kitchen is the best reward!

  14. Allow to cool slightly and then dust with powdered sugar before serving. This finishing touch will add a lovely sweetness and make your buns even more irresistible.

Optional: Serve warm with a drizzle of icing for an extra touch of sweetness.

Exact quantities are listed in the recipe card below.

Braided Cinnamon Buns Variations

Feel free to make this recipe your own with these delightful twists that beckon to your creativity and taste!

  • Gluten-Free: Substitute the bread flour with a gluten-free blend to enjoy fluffy buns without the gluten.

  • Nutty Delight: Add 1/2 cup chopped walnuts or pecans for an earthy crunch that beautifully complements the sweetness of cinnamon.

  • Chocolate Drizzle: Melted chocolate drizzled over the finished buns elevates them into a decadent treat. Who can resist chocolate?

  • Spiced Twist: Incorporate a pinch of nutmeg or cardamom along with the cinnamon for an aromatic, spice-filled delight that dances on the palate.

  • Fruity Filling: Layer in some fresh or dried fruit—like cranberries or apples—before rolling to introduce a tangy contrast.

  • Vegan Friendly: Replace the eggs with flaxseed meal mixed with water and use plant-based milk and butter for a vegan twist!

  • Heat it Up: Add a little cayenne pepper to the filling for a surprising sweet-heat combo that ignites every bite.

  • Maple Glaze: Swap the powdered sugar for a luscious maple glaze to add a rich, maple flavor that takes these buns into breakfast bliss!

How to Store and Freeze Braided Cinnamon Buns

Room Temperature: Keep your Braided Cinnamon Buns in an airtight container at room temperature for up to 3 days to maintain their softness.

Fridge: If you prefer a longer shelf life, store the buns in the fridge for up to 1 week. Make sure they are well-wrapped to prevent them from drying out.

Freezer: For longer storage, freeze the unbaked dough or baked buns. Wrap them tightly in plastic wrap and then foil, which will last up to 2 months.

Reheating: When ready to enjoy, reheat buns in the oven at 350°F (175°C) for about 10-15 minutes until warmed through for that fresh-baked taste!

What to Serve with Braided Cinnamon Buns?

There’s something magical about savoring fluffy, sweet cinnamon goodness that makes you want to elevate your meal experience.

  • Fresh Fruit Salad: The crispness of seasonal fruits provides a refreshing contrast to the soft, sweet buns, balancing flavors wonderfully. Think berries, citrus, and melons for a vibrant touch!

  • Coffee or Tea: A must-have pairing! The warm, comforting notes of your favorite brew enhance the cinnamon aroma and create a cozy atmosphere, perfect for weekend brunch.

  • Maple Glaze: Drizzle a maple glaze over the warm buns for an extra touch of sweetness, harmonizing perfectly with the cinnamon and adding a decadent twist.

  • Cream Cheese Frosting: For a fun dessert experience, top your buns with a tangy cream cheese frosting. The rich flavor complements the sweetness beautifully, creating a delightful indulgence.

  • Yogurt Parfait: Layer your favorite yogurt with granola and fruit beside the buns for a nutritious contrast that adds texture and nutrition to your meal.

  • Savory Sausages: Consider serving a side of savory breakfast sausages. Their hearty flavor offers a wonderful contrast to the sweet and fluffy buns, creating a well-rounded plate.

  • Hot Chocolate: For a cozy treat, pair the buns with a rich cup of hot chocolate, adding a delightful sweetness that will warm you from the inside out!

These combinations not only complement your Braided Cinnamon Buns Recipe but also enhance your dining experience with a beautiful mix of flavors and textures.

Make Ahead Options

These Braided Cinnamon Buns are perfect for meal prep enthusiasts! You can prepare the dough and even braid them up to 24 hours in advance. Just complete steps 1 through 9, then cover the braided buns tightly with plastic wrap and refrigerate. When you’re ready to bake, remove them from the fridge, let them rise for about 30 minutes at room temperature, then brush with the egg wash and bake as directed. This method maintains their soft texture and irresistible flavor, allowing you to serve warm, fresh cinnamon buns with minimal morning effort. Enjoy the delightful aroma filling your home while saving precious time on busy weekends!

Chef's Helpful Tips

  • When making Braided Cinnamon Buns, ensure your milk is warm but not hot to preserve yeast vitality and achieve a perfect rise.
  • Avoid over-kneading the dough as this can lead to a tough texture; aim for smooth and elastic in about 5-10 minutes.
  • Be generous when spreading the butter for your filling, as this adds to the richness and keeps your buns moist.
  • Once baked, allow your buns to cool slightly before dusting with powdered sugar to avoid the sugar melting into the buns and losing its lovely presentation.

Braided Cinnamon Buns Recipe FAQs

What type of milk should I use for the Braided Cinnamon Buns Recipe?
You can use any type of milk you have on hand! Whole milk will provide a richer flavor, but low-fat or non-dairy alternatives work just fine, too. Just remember to warm it up to activate the yeast without cooking it.

How should I store my Braided Cinnamon Buns?
Keep your buns in an airtight container at room temperature for up to 3 days. If you want to extend their freshness, they can be refrigerated for up to a week, ensuring they won’t dry out by wrapping them properly.

Can I freeze Braided Cinnamon Buns?
Absolutely! For the best results, wrap your baked buns tightly in plastic wrap and then in foil. They can be frozen for up to 3 months. If you prefer to freeze the dough, roll it into logs and cut them into strips before wrapping, following the same process.

What if my dough doesn’t rise properly?
If your dough doesn’t rise, it might be due to the yeast being expired or the milk being too hot or too cold. Make sure the milk is around 100°F (38°C) when added. If it doesn’t rise after an hour, try placing it in a warmer spot, like near a sunny window, and give it additional time.

Are there any dietary considerations for your Braided Cinnamon Buns Recipe?
Yes! Ensure your ingredients are allergy-friendly, especially for those with gluten or dairy intolerances. You can use gluten-free flour and non-dairy alternatives for butter and milk. Also, be cautious about the sugar amounts if someone is watching their intake.

How do I achieve a golden crust on my Braided Cinnamon Buns?
For a beautifully golden crust, always brush the tops of your dough with a beaten egg before baking. This not only adds color but also gives a lovely shine to your baked goods, enhancing their visual appeal.

Braided Cinnamon Buns Recipe

Braided Cinnamon Buns Recipe

Discover the delicious and comforting Braided Cinnamon Buns Recipe that's perfect for weekend mornings.
Print Recipe Pin Recipe
Prep Time 45 minutes mins
Cook Time 20 minutes mins
Rising Time 1 hour hr 30 minutes mins
Total Time 2 hours hrs 35 minutes mins
Servings: 12 buns
Course: DESSERT RECIPES
Cuisine: American
Calories: 250
Ingredients Equipment Method Nutrition Notes

Ingredients
  

For the Dough
  • 1 cup warm milk Make sure it's not too hot.
  • 3/4 cup unsalted butter, softened Adds richness to the dough.
  • 2 large eggs Enrich the dough and add structure.
  • 4 cups bread flour Gives strength and chewiness.
  • 1 tbsp instant dry yeast Essential for a light, fluffy texture.
  • 1/4 cup granulated sugar Sweetens the dough.
  • 1 tsp salt Balances sweetness and enhances flavor.
For the Filling
  • 1/2 cup unsalted butter, softened Ensures a luscious mouthfeel.
  • 1 cup light brown sugar, packed Provides sticky sweetness.
  • 2 tsp ground cinnamon Gives distinctive flavor.
For Topping
  • 1 large egg, beaten For egg wash.
  • powdered sugar For dusting.

Equipment

  • Large Bowl
  • Whisk
  • Baking dish
  • Oven
  • plastic wrap

Method
 

How to Make Braided Cinnamon Buns
  1. Combine warm milk, softened butter, eggs, and yeast in a large bowl.
  2. Whisk together the bread flour, granulated sugar, and salt in another bowl.
  3. Gradually add the dry mixture to the wet ingredients, stirring gently until combined.
  4. Knead the dough on a floured surface for about 5-10 minutes until smooth and elastic.
  5. Place and cover the kneaded dough in a greased bowl. Let it rise for about 1 hour.
  6. Punch down the risen dough and roll it out into a rectangle.
  7. Spread 1/2 cup softened butter evenly over the dough, then sprinkle with brown sugar and cinnamon.
  8. Roll tightly the dough into a log shape and cut into strips.
  9. Braid the strips together and place them in a greased baking dish.
  10. Cover and let rise the braided dough again for an additional 30 minutes.
  11. Preheat your oven to 350°F (175°C).
  12. Brush the top with beaten egg.
  13. Bake for about 20 minutes or until golden brown.
  14. Allow to cool slightly and dust with powdered sugar before serving.

Nutrition

Serving: 1bunCalories: 250kcalCarbohydrates: 34gProtein: 3gFat: 12gSaturated Fat: 7gPolyunsaturated Fat: 1gMonounsaturated Fat: 4gCholesterol: 70mgSodium: 170mgPotassium: 80mgFiber: 1gSugar: 10gVitamin A: 300IUCalcium: 20mgIron: 1mg

Notes

Serve warm with a drizzle of icing for an extra touch of sweetness.

Tried this recipe?

Let us know how it was!

Filed Under: DESSERT RECIPES

  • « Previous Page
  • 1
  • …
  • 30
  • 31
  • 32
  • 33
  • 34
  • …
  • 49
  • Next Page »

Recent Posts

  • Crispy Potatoes in Oven
  • Lucky Charms Pancakes
  • Cheeseburger
  • Boiled Corn on the Cob
  • St. Patrick’s Day Dessert Parfaits

Recent Comments

No comments to show.

Footer

  • Contact
  • Privacy Policy
  • About Us
  • Terms
  • ↑ back to top

Copyright © 2024 www.Forkono.com

Table Of Content