Forkono

  • BREAKFAST & BRUNCH
  • DESSERT RECIPES
  • DINNER RECIPES
  • LUNCH RECIPES
  • About uS
  • SNACKS & APPETIZERS
menu icon
go to homepage
  • BREAKFAST & BRUNCH
  • DESSERT RECIPES
  • DINNER RECIPES
  • LUNCH RECIPES
  • About uS
  • SNACKS & APPETIZERS
search icon
Homepage link
  • BREAKFAST & BRUNCH
  • DESSERT RECIPES
  • DINNER RECIPES
  • LUNCH RECIPES
  • About uS
  • SNACKS & APPETIZERS
×

Chocolate Brownie Batter Overnight Oats

December 23, 2025 by JudyWhite Leave a Comment

There’s something incredibly comforting about starting your day with a little indulgence. As I first took a spoonful of my Chocolate Brownie Batter Overnight Oats, the rich, chocolatey goodness immediately transported me back to childhood days filled with sweet treats. Imagine waking up to a creamy blend reminiscent of brownie batter, yet packed with nutrients to fuel your busy morning!

These oats are not just a breakfast; they are a delicious solution for anyone tired of the same old routine and yearning for something fresh and exciting. With minimal prep time and maximum flavor, this recipe is perfect for busy weekdays or a leisurely Sunday morning. Plus, it’s super customizable—swap in your favorite nuts or chocolate varieties to make it your own! Give yourself the gift of a breakfast that delights the senses and nourishes your body; trust me, your mornings will thank you for this chocolaty twist on overnight oats!

Why You'll Love This Chocolate Brownie Batter Overnight Oats

  • This recipe is incredibly easy to make, requiring just five minutes of prep time before you let it work its magic in the fridge overnight.
  • The rich chocolate flavor will make your mornings feel like a treat rather than a chore, giving you the indulgence of brownie batter without the guilt.
  • Versatility is another highlight, as you can easily customize it with your favorite toppings to suit your taste and make each serving unique.
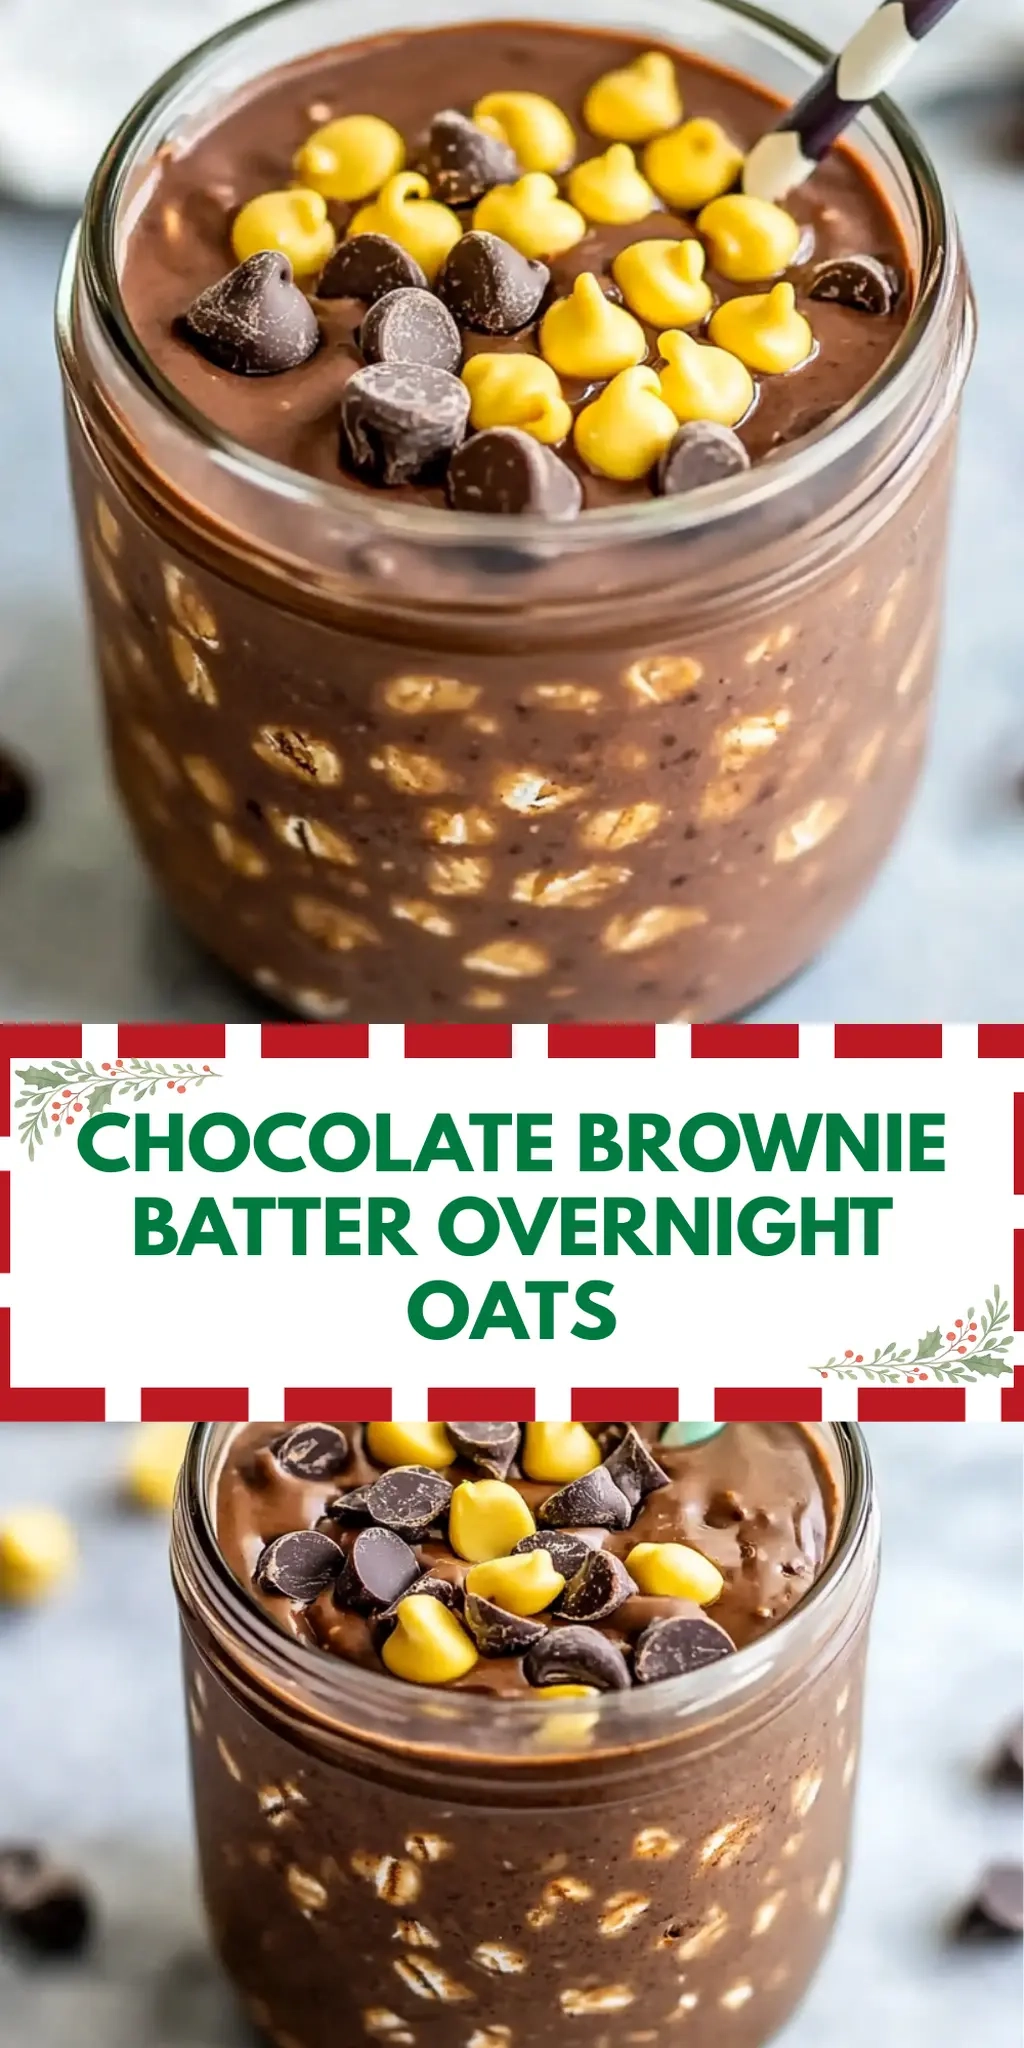
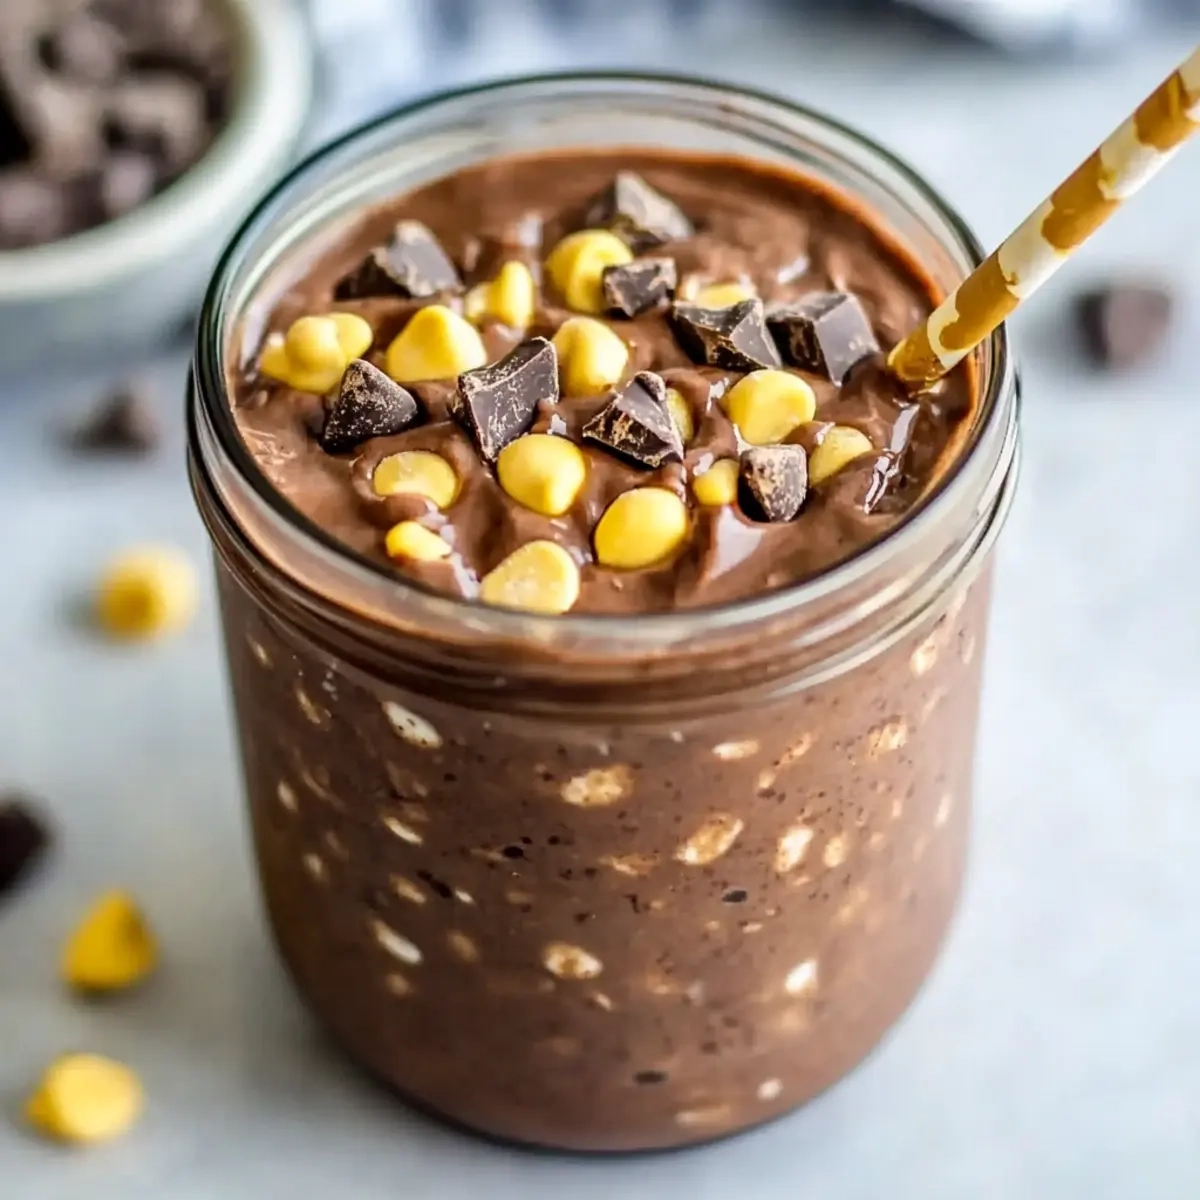
  • Lastly, its eye-catching presentation topped with chocolate chips and walnuts makes it the perfect crowd-pleaser for brunch or a refined breakfast at home.

Chocolate Brownie Batter Overnight Oats Ingredients

Ready to whip up a delightful breakfast?

For the Oats
• Old fashioned rolled oats – a hearty base that soaks up the flavors overnight.
• Protein powder – boosts your energy and keeps you full longer.
• Unsweetened vanilla almond milk – adds creaminess without extra sugar.
• Cocoa powder – brings that rich, chocolatey essence reminiscent of brownie batter.
• Maple syrup – a touch of natural sweetness to balance the cocoa.
• Vanilla extract – enhances the overall flavor, making it even more indulgent.
• Sea salt – a pinch adds depth to the sweetness.

For the Toppings
• Chocolate chips – adds gooey pockets of chocolatey goodness on top.
• Chopped walnuts – provides a satisfying crunch and boosts the nutritional value.
• Peanut butter (optional) – for those who desire an extra layer of richness and protein.

These ingredients work together to create the decadent Chocolate Brownie Batter Overnight Oats that will surely become your new favorite breakfast!

How to Make Chocolate Brownie Batter Overnight Oats

  1. Combine ingredients: In a bowl or jar, add the rolled oats, protein powder, almond milk, cocoa powder, maple syrup, vanilla extract, and a pinch of sea salt. Stir until everything is well mixed and the protein powder dissolves completely, creating a smooth chocolatey base.

  2. Chill overnight: Seal the container with a lid and place it in the fridge overnight. This step allows the oats to soak and absorb the creamy flavors, resulting in a delightful texture come morning.

  3. Stir and serve: The next morning, take your oats out of the fridge and give them a good stir. If the mixture seems too thick, feel free to add a splash more almond milk for that perfect consistency.

  4. Portion and top: Divide the oats into two bowls or containers, and generously top each portion with chocolate chips, chopped walnuts, and peanut butter if desired. This elevates your oats to a new level of deliciousness.

Optional: Drizzle with a little extra maple syrup for added sweetness.

Exact quantities are listed in the recipe card below.

Chocolate Brownie Batter Variations

Feel free to explore these tasty twists that can transform your overnight oats into an entirely new experience!

  • Nut-Free: Substitute almond milk with oat milk and skip the walnuts to keep it allergy-friendly. This allows the chocolate flavor to shine!

  • Vegan: Replace honey or maple syrup with agave nectar and ensure your protein powder is plant-based. You’ll enjoy delicious vegan oats without compromising taste or nutrition.

  • Peanut Butter Lovers: Increase the peanut butter to 2 tablespoons for richer flavor. This turns your oats into a protein-packed treat that’s like dessert for breakfast!

  • Dairy-Free: Use coconut yogurt instead of almond milk for a creamier texture, while still keeping it dairy-free and delightful!

  • Fruit Fusion: Add mashed ripe bananas or a handful of berries before refrigerating. This introduces a natural sweetness and fruity twist that brightens your oats.

  • Spiced Up: Incorporate a teaspoon of cinnamon or a dash of cayenne pepper for a hint of warmth that perfectly complements the chocolate flavor. It’s a delightful surprise!

  • Chunky Texture: Stir in chopped dark chocolate instead of chocolate chips for a more decadent, brownie-like bite. The rich chocolate pieces melt slightly, making every spoonful heavenly.

  • Mocha Delight: Mix in some brewed coffee or espresso powder for a caffeinated kick. This addition elevates the flavors and offers a wonderful morning boost!

Experiment with these variations, and let your creativity shine! Each twist transforms your Chocolate Brownie Batter Overnight Oats, making every batch uniquely yours.

What to Serve with Chocolate Brownie Batter Overnight Oats?

As you prepare to enjoy your rich and decadent oats, consider these delightful pairings that enhance your breakfast experience.

  • Fresh Berries: Bursting with sweetness and acidity, berries elevate the chocolaty flavors while adding a refreshing pop of color to your bowl.

  • Greek Yogurt: Creamy and tangy, a dollop of Greek yogurt adds protein to your meal while balancing the sweetness of the oats beautifully.

  • Chia Seed Pudding: For a delightful textural contrast, serve alongside chia seed pudding; its creamy texture and subtle flavor make it a lovely match.

  • Banana Slices: Ripe banana slices bring natural sweetness and a soft texture that complements the chewy oats, creating a wholesome breakfast harmony.

  • Nut Milk Latte: A warm nut milk latte pairs perfectly, accentuating the chocolate taste and bringing comforting warmth to your morning routine.

  • Coconut Flakes: Sprinkle toasted coconut flakes on top for a nutty, tropical twist that adds crunch and enhances the overall indulgence of your meal.

  • Maple Syrup Drizzle: A light drizzle of maple syrup not only sweetens but also adds a lovely aromatic note that pairs fantastically with the cocoa notes.

  • Dark Chocolate Shavings: For the true chocolate lover, garnish with dark chocolate shavings to amplify the brownie batter experience in every bite!

How to Store and Freeze Chocolate Brownie Batter Overnight Oats

Fridge: Keep your overnight oats in an airtight container in the refrigerator for up to 3 days. This ensures they stay fresh and maintain their delicious chocolatey flavor.

Freezer: For longer storage, you can freeze the mixture for up to 2 months. Portion the oats into freezer-safe containers and thaw overnight in the fridge before serving.

Reheating: If you prefer warm oats, you can microwave the thawed Chocolate Brownie Batter Overnight Oats for about 30-60 seconds, adding a splash of almond milk as needed to regain creaminess.

Toppings: Store toppings like chocolate chips and walnuts separately to maintain their texture and added crunch until you’re ready to dig in!

Make Ahead Options

These Chocolate Brownie Batter Overnight Oats are a fantastic solution for meal prep, saving you precious time during your busy mornings! You can prepare the oat mixture up to 24 hours in advance, simply follow the initial steps of combining the ingredients and sealing them in a container. To maintain the quality and taste, refrigerate your oats without any toppings and add those just before serving to keep them fresh and crunchy. When you wake up, all you’ll need to do is stir, possibly add a splash more almond milk for the perfect consistency, and top with chocolate chips, walnuts, and peanut butter for a delightful treat!

Chef's Helpful Tips

  • To achieve the best consistency in your Chocolate Brownie Batter Overnight Oats, ensure that you stir the mixture thoroughly to dissolve the protein powder completely.
  • Avoid using instant oats as they will not provide the same hearty texture; stick to old fashioned rolled oats for optimal results.
  • When adding toppings like chocolate chips and walnuts, consider toasting the nuts slightly beforehand to enhance their flavor and crunch.
  • If you find the oats too thick in the morning, gradually add almond milk until you reach your desired creaminess.

Chocolate Brownie Batter Overnight Oats Recipe FAQs

What type of oats should I use for this recipe?
Absolutely! For the best texture and flavor, use old fashioned rolled oats. They soak up the almond milk beautifully overnight, giving you that hearty consistency that instant oats simply cannot match.

How long can I store Chocolate Brownie Batter Overnight Oats in the fridge?
Very! These delicious oats can be kept in an airtight container in the refrigerator for up to 3 days. Just remember to stir them before serving to re-disperse any flavors that may have settled.

Can I freeze my overnight oats?
Definitely! To freeze, portion the prepared Chocolate Brownie Batter Overnight Oats into freezer-safe containers. They can last in the freezer for up to 2 months. When you’re ready to eat, simply transfer a container to the fridge the night before to thaw, and then enjoy!

What can I do if my oats are too thick after chilling overnight?
I’ve encountered that before! If your oats turn out a bit thicker than you’d like, simply stir in a splash of almond milk until you reach your desired creaminess. Alternatively, you can use a fork to fluff them up, which often helps too!

Are there any dietary considerations with this recipe?
Very! This recipe is generally allergy-friendly, but it’s important to note that nuts are included with the optional walnuts and peanut butter, so be cautious if you or someone you’re serving has nut allergies. For vegan options, ensure your protein powder and any other additions align with your dietary needs.

Can I make this recipe for my kids?
Absolutely! This hearty breakfast is perfect for kiddos. Not only does it boast a rich chocolate flavor, but it also provides the energy and nutrition they need to kickstart their day. Just be sure to serve it with age-appropriate toppings and adjust the sweetness to their taste!

Chocolate Brownie Batter Overnight Oats

Chocolate Brownie Batter Overnight Oats

Chocolate Brownie Batter Overnight Oats is a deliciously indulgent breakfast option that's nutritious and easy to customize.
Print Recipe Pin Recipe
Prep Time 5 minutes mins
Chill Time 8 hours hrs
Total Time 8 hours hrs 5 minutes mins
Servings: 2 bowls
Course: BREAKFAST & BRUNCH
Calories: 350
Ingredients Equipment Method Nutrition Notes

Ingredients
  

For the Oats
  • 1 cup old fashioned rolled oats a hearty base that soaks up the flavors overnight.
  • 1 scoop protein powder boosts your energy and keeps you full longer.
  • 1 cup unsweetened vanilla almond milk adds creaminess without extra sugar.
  • 2 tablespoons cocoa powder brings rich, chocolatey essence.
  • 1 tablespoon maple syrup natural sweetness to balance the cocoa.
  • 1 teaspoon vanilla extract enhances overall flavor.
  • a pinch sea salt adds depth to the sweetness.
For the Toppings
  • 1 handful chocolate chips adds gooey pockets of chocolatey goodness.
  • 1/4 cup chopped walnuts provides crunch and boosts nutritional value.
  • 2 tablespoons peanut butter optional for an extra layer of richness and protein.

Equipment

  • bowl or jar

Method
 

How to Make Chocolate Brownie Batter Overnight Oats
  1. Combine ingredients: In a bowl or jar, add the rolled oats, protein powder, almond milk, cocoa powder, maple syrup, vanilla extract, and a pinch of sea salt. Stir until everything is well mixed and the protein powder dissolves completely.
  2. Chill overnight: Seal the container with a lid and place it in the fridge overnight.
  3. Stir and serve: The next morning, stir the oats. Add more almond milk if too thick.
  4. Portion and top: Divide the oats into bowls and top with chocolate chips, walnuts, and peanut butter if desired.

Nutrition

Serving: 1bowlCalories: 350kcalCarbohydrates: 50gProtein: 15gFat: 10gSaturated Fat: 2gPolyunsaturated Fat: 3gMonounsaturated Fat: 4gSodium: 200mgPotassium: 300mgFiber: 8gSugar: 10gCalcium: 15mgIron: 10mg

Notes

For best consistency, ensure that you stir the mixture thoroughly to dissolve the protein powder completely. Avoid using instant oats; stick to old fashioned rolled oats for optimal results. Store toppings separately to maintain texture until ready to serve.

Tried this recipe?

Let us know how it was!

Filed Under: BREAKFAST & BRUNCH

Apple Cider Mashed Sweet Potatoes with Crispy Onions

December 23, 2025 by JudyWhite Leave a Comment

As the leaves turn golden and the air grows crisp, my kitchen transforms into a warm haven filled with the most delightful scents. One such wonder that takes me right back to those cozy autumn nights is my Apple Cider Mashed Sweet Potatoes with Crispy Onions. Imagine spooning up creamy, sweet goodness infused with the rich flavors of apple cider and topped with a satisfying crunch—this dish is not just a side; it’s an experience!

I discovered this recipe when I yearned for something heartwarming after a long day, and it quickly became a family favorite. It’s the perfect way to elevate your holiday meals or simply to add a touch of fall to your weeknight dinner. With minimal effort and ingredients you probably already have on hand, you can create a dish that will impress everyone at your table. Let’s dive into how to make these delightful mashed sweet potatoes that are sure to warm your heart and please your palate!

Why You'll Love This Apple Cider Mashed Sweet Potatoes with Crispy Onions

  • This recipe is a breeze to whip up, making it a go-to for busy weeknights and festive gatherings alike.
  • The blend of sweet potatoes and apple cider delivers a unique flavor combination that dances on your taste buds, making each bite delightful.
  • Not only is it delicious, but its striking visual appeal topped with crispy onions and fresh parsley will impress your guests and elevate any meal.
  • Plus, it’s highly versatile; serve it as a side dish for holiday feasts or as a comforting addition to your everyday dinner menu.

Apple Cider Mashed Sweet Potatoes Ingredients

• Get ready to create a deliciously comforting dish!

For the Mashed Sweet Potatoes
• 3 lb sweet potatoes – peel and cut them into chunks for quick cooking.
• 2 cups apple cider – use organic cider for a richer flavor.
• 1 teaspoon kosher salt – enhances the natural sweetness of the potatoes.
• 1 cinnamon stick – adds a warm, aromatic touch during cooking.

For the Creamy Mixture
• 2 tablespoons butter – for a rich, velvety texture.
• ¼ cup sour cream – gives a delightful tanginess to the mash.
• Freshly ground black pepper – season to taste, adding a little kick.

For Serving
• Fresh parsley – a pop of color and freshness to your dish.
• Crispy onion strings – gives a satisfying crunch and elevates the flavor profile.

These Apple Cider Mashed Sweet Potatoes with Crispy Onions will surely become a new favorite in your home!

How to Make Apple Cider Mashed Sweet Potatoes

  1. Combine ingredients: In a large pot, bring together the sweet potatoes, 1½ cups of apple cider, kosher salt, and the cinnamon stick. Add enough water to cover the potatoes completely.

  2. Boil and simmer: Heat the pot over medium-high until it reaches a boil. Then, reduce to a simmer and let it cook for 20-30 minutes, or until the sweet potatoes are fork-tender.

  3. Drain and discard: Once tender, drain the sweet potatoes and return them to the pot, discarding the cinnamon stick that has infused its warm flavor.

  4. Prepare the creamy mixture: Add the remaining ½ cup apple cider, butter, sour cream, and an additional pinch of salt to the sweet potatoes.

  5. Mash until smooth: Use a potato masher or fork to mash until creamy and smooth. Taste and adjust seasoning with more salt and freshly ground black pepper as desired.

  6. Serve and garnish: Transfer the mashed sweet potatoes to a large serving bowl. Top generously with crispy onion strings and sprinkle with fresh parsley for a delightful finish. Enjoy them warm!

Optional: Drizzle with a bit of extra apple cider for added flavor!
Exact quantities are listed in the recipe card below.

Make Ahead Options

These Apple Cider Mashed Sweet Potatoes with Crispy Onions are perfect for busy weeknights or preparing for festive gatherings! You can prepare the mashed sweet potatoes up to 3 days in advance; simply follow the recipe through to mashing (steps 1-5) and then let them cool completely before refrigerating in an airtight container. To maintain their creamy texture, add an extra splash of apple cider before reheating. When you’re ready to serve, gently reheat on the stove or in the microwave, then top with crispy onion strings and fresh parsley before your meal. This way, you can enjoy a delightful side dish in no time, making your meal planning a breeze!

What to Serve with Apple Cider Mashed Sweet Potatoes?

Transform your meal into a festive feast with these delightful pairings that will beautifully complement your creamy dish.

  • Savory Herb Roasted Chicken: Juicy chicken infused with herbs makes a savory counterpart to the sweet flavors of the potatoes.
  • Garlic Green Beans: Tender green beans sautéed with garlic add a vibrant crunch that brightens up your plate.
  • Cranberry Sauce: The tartness of cranberry sauce cuts through the sweetness, creating a delightful balance.
  • Maple-Glazed Brussels Sprouts: Sautéed with a touch of maple syrup, they enhance the autumnal flavors of the sweet potatoes.
  • Stuffed Pork Tenderloin: A juicy, herb-stuffed pork tenderloin pairs wonderfully, bringing savory depth to the meal.
  • Herbed Dinner Rolls: Soft, buttery rolls invite you to scoop up all those delicious flavors, making each bite memorable.
  • Apple Cider Mimosa: Celebrate with a refreshing twist on brunch, combining apple cider with sparkling wine for a festive fizz!
  • Pumpkin Pie: End your meal on a sweet note with a classic pumpkin pie, complementing the fall-inspired flavors beautifully.

Apple Cider Mashed Sweet Potatoes Variations

Feel free to get creative and make this dish your own while keeping that comforting warmth!

  • Maple Syrup: Add a splash of maple syrup to the mash for an extra layer of sweetness that complements the apple cider beautifully.

  • Nutmeg Twist: Incorporate a pinch of nutmeg for a warm, fragrant note that enhances the fall flavors in the sweet potatoes.

  • Vegan Delight: Swap the butter and sour cream for vegan alternatives like coconut oil and cashew cream to keep it entirely plant-based and equally creamy.

  • Cheesy Goodness: Stir in some shredded sharp cheddar cheese during mashing for a savory twist that adds richness and depth.

  • Spicy Kick: Add a dash of cayenne pepper or chili flakes for a surprise heat that elevates the flavor profile from comforting to exciting.

  • Cranberry Surprise: Fold in some dried cranberries for a sweet-tart burst of flavor and a pop of color, making it festive for the holidays.

  • Garlic Infusion: Roast garlic and mash it into the potatoes for a savory depth that transforms this dish into a gourmet experience.

  • Herb Blend: Experiment with fresh herbs like thyme or rosemary to infuse your mashed sweet potatoes with aromatic notes, adding a garden-fresh essence.

These variations not only give this recipe a personal touch but also create delightful new flavor experiences each time you serve them!

How to Store and Freeze Apple Cider Mashed Sweet Potatoes

Fridge: Store leftover Apple Cider Mashed Sweet Potatoes in an airtight container for up to 3 days. Reheat gently on the stovetop or in the microwave for the best texture.

Freezer: For longer storage, freeze the mashed sweet potatoes in a tightly sealed freezer bag for up to 3 months. Thaw in the fridge overnight before reheating.

Reheating: When ready to enjoy, add a splash of apple cider while reheating to restore creaminess and enhance flavor.

Chef's Helpful Tips

  • When preparing the Apple Cider Mashed Sweet Potatoes, ensure your sweet potatoes are cut into uniform chunks for even cooking.
  • Avoid overcooking the potatoes to prevent them from becoming watery; they should be fork-tender but not falling apart.
  • For an extra creamy texture, mash the potatoes while they are still hot, and consider using a ricer for the smoothest results.
  • Be careful not to skimp on seasoning; the combination of salt and freshly ground black pepper enhances the flavors beautifully.

Apple Cider Mashed Sweet Potatoes with Crispy Onions Recipe FAQs

What kind of sweet potatoes should I use for this recipe?
Absolutely! Look for sweet potatoes that are firm with smooth skin and no dark spots or blemishes. If you’re lucky enough to find organic ones, they often have richer flavors, which will elevate your Apple Cider Mashed Sweet Potatoes with Crispy Onions even further.

How should I store leftovers?
Very simply! Store your leftover Apple Cider Mashed Sweet Potatoes in an airtight container in the refrigerator for up to 3 days. When reheating, I recommend adding a splash of apple cider to bring back that creamy texture and flavor.

Can I freeze mashed sweet potatoes?
Yes, you can! To freeze, place your Apple Cider Mashed Sweet Potatoes into a tightly sealed freezer bag or container. They will keep well for up to 3 months. When you’re ready to enjoy, thaw them overnight in the fridge, then reheat gently on the stovetop or in the microwave, adding a bit of cider for that creamy goodness.

What if my mashed sweet potatoes turn out too watery?
No worries at all! If you find your mashed sweet potatoes are too watery, it might be due to overcooking. To fix this, you can drain excess moisture by letting them sit in a fine mesh strainer for a few minutes. Once they’re drained, return them to the pot and mix in a little extra sour cream or butter to maintain creaminess without adding water.

Are there any dietary considerations I should keep in mind?
Certainly! If you’re preparing this dish for someone with dietary restrictions, feel free to substitute the butter with a dairy-free alternative and the sour cream with a plant-based option. Always double-check ingredients for any allergies, especially with the crispy onion strings, as they may contain allergens like gluten.

Can I customize the flavor profile?
Absolutely! For a twist, you could add nutmeg along with the salt and pepper, or throw in some maple syrup for an extra zing of sweetness. This dish is wonderfully versatile; feel free to adjust it to suit your family’s taste buds!

Apple Cider Mashed Sweet Potatoes with Crispy Onions

Apple Cider Mashed Sweet Potatoes with Crispy Onions

Enjoy the delightful Apple Cider Mashed Sweet Potatoes with Crispy Onions, a perfect autumn side dish infused with apple cider flavors.
Print Recipe Pin Recipe
Prep Time 15 minutes mins
Cook Time 30 minutes mins
Total Time 45 minutes mins
Servings: 6 servings
Course: DINNER RECIPES
Cuisine: American
Calories: 200
Ingredients Equipment Method Nutrition Notes

Ingredients
  

For the Mashed Sweet Potatoes
  • 3 lb sweet potatoes peeled and cut into chunks
  • 2 cups apple cider use organic cider for better flavor
  • 1 teaspoon kosher salt enhances the natural sweetness
  • 1 stick cinnamon adds an aromatic touch
For the Creamy Mixture
  • 2 tablespoons butter for a rich texture
  • 0.25 cup sour cream adds tanginess
  • freshly ground black pepper season to taste
For Serving
  • fresh parsley for garnish
  • crispy onion strings for added crunch

Equipment

  • Large pot
  • potato masher

Method
 

Preparation
  1. In a large pot, bring together the sweet potatoes, 1½ cups of apple cider, kosher salt, and the cinnamon stick. Add enough water to cover the potatoes completely.
  2. Heat the pot over medium-high until it reaches a boil. Then, reduce to a simmer and let it cook for 20-30 minutes, or until the sweet potatoes are fork-tender.
  3. Once tender, drain the sweet potatoes and return them to the pot, discarding the cinnamon stick.
  4. Add the remaining ½ cup apple cider, butter, sour cream, and an additional pinch of salt to the sweet potatoes.
  5. Use a potato masher or fork to mash until creamy and smooth. Adjust seasoning with more salt and freshly ground black pepper as desired.
  6. Transfer the mashed sweet potatoes to a serving bowl. Top with crispy onion strings and sprinkle with fresh parsley. Enjoy warm!

Nutrition

Serving: 1cupCalories: 200kcalCarbohydrates: 30gProtein: 3gFat: 8gSaturated Fat: 5gPolyunsaturated Fat: 0.5gMonounsaturated Fat: 2gCholesterol: 15mgSodium: 300mgPotassium: 400mgFiber: 4gSugar: 6gVitamin A: 12000IUVitamin C: 20mgCalcium: 50mgIron: 1mg

Notes

For added flavor, drizzle with a bit of extra apple cider while serving.

Tried this recipe?

Let us know how it was!

Filed Under: DINNER RECIPES

Apple Cider Mashed Sweet Potatoes with Crispy Onions

December 23, 2025 by JudyWhite Leave a Comment

As autumn rolls in and the days grow cooler, there’s nothing quite like the comforting embrace of a warm, hearty dish. I whipped up these Apple Cider Mashed Sweet Potatoes with Crispy Onions during a recent Sunday dinner, and the delightful aroma filled my kitchen, wrapping around me like a cozy blanket. The hint of cinnamon mixed with the sweet, tangy apple cider transforms ordinary mashed potatoes into an extraordinary side that you’ll eagerly anticipate on any dinner table.

What truly sets this recipe apart is its perfect blend of simplicity and flavor. With just a handful of ingredients, you’ll create a creamy, decadent mash that pairs beautifully with everything from roasted meats to vegetarian feasts. And let’s not forget those crispy onion strings—just a small touch that adds a satisfying crunch and elevates the dish to star-status. If you’re tired of the same old fast-food failings or looking for a fresh twist on a classic, this recipe is a must-try. Let’s get cooking!

Why You'll Love This Apple Cider Mashed Sweet Potatoes with Crispy Onions

  • This recipe is incredibly easy to prepare, making it perfect for both novice cooks and experienced chefs alike.
  • The vibrant flavors of sweet potatoes and apple cider blend harmoniously, creating a deliciously unique dish that will impress your family and friends.
  • It’s versatile enough to complement a variety of main courses, from savory roasts to delightful vegetarian options.
  • Plus, the visual appeal of crispy onions on top adds a gourmet touch that will make your serving dish stand out at any table.

Apple Cider Mashed Sweet Potatoes Ingredients

• Elevate your meal with this unique blend!

For the Mashed Sweet Potatoes
• 3 lb sweet potatoes – make sure to choose firm ones for the best texture.
• 2 cups apple cider – use freshly pressed cider for a more vibrant flavor.
• 1 teaspoon kosher salt – enhances the natural sweetness of the potatoes.
• 1 stick cinnamon – adds a warm, aromatic quality to the dish.

For the Creaminess
• 2 tablespoons butter – provides a rich, silky texture to the mash.
• 1/4 cup sour cream – gives a tangy note that balances the sweetness.
• Freshly ground black pepper (to taste) – adds depth and a bit of spice.

For Garnishing
• Fresh parsley (for serving) – offers a refreshing pop of color and flavor.
• Crispy onion strings (for serving) – add a delightful crunch to your Apple Cider Mashed Sweet Potatoes!

How to Make Apple Cider Mashed Sweet Potatoes

  1. Combine ingredients: In a large pot, mix the sweet potatoes, 1½ cups of apple cider, kosher salt, and the cinnamon stick. Add enough water to cover the potatoes completely.

  2. Cook until tender: Bring the mixture to a boil and then reduce to a simmer. Let it cook for 20-30 minutes, or until the sweet potatoes are very tender when pierced with a fork.

  3. Drain and discard: Once the potatoes are tender, drain them well and return them to the pot. Don’t forget to discard the cinnamon stick at this point!

  4. Mash it up: Add the remaining ½ cup apple cider, butter, sour cream, and a pinch of salt to the potatoes. Mash everything together until creamy and smooth, ensuring there are no lumps.

  5. Season to taste: Taste your mashed potatoes and season with additional salt and freshly ground black pepper as desired. You want them perfectly balanced and flavorful!

  6. Serve warm: Transfer the luscious mashed sweet potatoes to a serving bowl. Top with crispy onion strings and fresh parsley for a beautiful presentation. Enjoy this heartwarming dish warm.

Optional: For an extra touch, drizzle a little more apple cider over the top before serving.

Exact quantities are listed in the recipe card below.

What to Serve with Apple Cider Mashed Sweet Potatoes with Crispy Onions?

Creating a cozy, inviting meal around these creamy delights makes any gathering feel special.

  • Roasted Chicken: A succulent, herb-marinated roasted chicken provides a savory contrast that enhances the sweetness of the potatoes.

  • Maple-Glazed Brussels Sprouts: Crisp and slightly caramelized, these Brussels sprouts add vibrant color and a touch of bitterness, perfectly balancing the rich mash.

  • Grilled Maple-Orange Salmon: The sweet, citrusy glaze on the salmon complements the apple cider notes, creating a harmonious flavor explosion for your taste buds.

  • Herbed Pork Tenderloin: Juicy and tender, this pork dish brings a warm, herby flavor that pairs beautifully with the sweet and tangy mashed potatoes.

  • Garlic Green Beans: Crunchy green beans sautéed with garlic offer a fresh, zesty bite, providing a light, refreshing counterpoint to the heavier mash.

  • Cranberry Salad: A tangy salad bursting with cranberries and nuts adds a refreshing element, cutting through the richness of the sweet potatoes and providing a delightful crunch.

  • Rosemary Focaccia: Soft, warm focaccia with a hint of rosemary is perfect for sopping up any leftover apple cider mash, making every last bite memorable.

  • Sparkling Apple Cider: For a delightful drink pairing, sparkling apple cider echoes the flavors in your dish, adding a festive touch to your table.

  • Pumpkin Spice Cupcakes: End the meal on a sweet note with these cupcakes, their spice echoing your mash’s cinnamon undertones. Perfect for autumn!

Apple Cider Mashed Sweet Potatoes Variations

Feel free to explore these delightful twists to make your dish even more unique and delicious!

  • Maple Syrup: Replace some apple cider with maple syrup for an extra layer of sweetness that perfectly complements the sweet potatoes.

  • Vegan Delight: Substitute butter and sour cream with coconut oil and coconut cream for a creamy, dairy-free mash that’s bursting with flavor.

  • Spiced Up: Add a pinch of nutmeg or a dash of cayenne pepper to bring a warm kick and deepen the flavor profile.

  • Herbed Twist: Mix in fresh herbs like thyme or rosemary for a fragrant twist that elevates the entire dish to gourmet status.

  • Cheesy Goodness: Stir in shredded cheddar cheese while mashing for a savory, cheesy variation that takes comfort food to a whole new level.

  • Nutty Crunch: Top the mashed sweet potatoes with crushed walnuts or pecans for an added crunch and rich, nutty flavor.

  • Creamy Garlic: Roast a few cloves of garlic and mash them in for a deliciously garlicky version that pairs wonderfully with savory mains.

  • Zesty Citrus: Add a splash of orange juice or some zest to brighten the flavors and offer a refreshing contrast to the sweet potatoes.

How to Store and Freeze Apple Cider Mashed Sweet Potatoes

Fridge: Store leftovers in an airtight container in the fridge for up to 3 days. Reheat gently in the microwave or on the stovetop, adding a splash of apple cider if needed.

Freezer: Freeze the mashed sweet potatoes in a freezer-safe container for up to 2 months. Thaw overnight in the fridge before reheating.

Reheating: When ready to serve, reheat the Apple Cider Mashed Sweet Potatoes in a saucepan over low heat or in the microwave until warmed through, stirring occasionally.

Serving Tip: For an extra touch of flavor, consider garnishing with fresh parsley and crispy onion strings right before serving!

Make Ahead Options

These Apple Cider Mashed Sweet Potatoes with Crispy Onions are perfect for meal prep enthusiasts! You can prepare the sweet potatoes up to 24 hours in advance by cooking and mashing them as directed, then refrigerate them in an airtight container. When you’re ready to serve, simply reheat the mash on the stovetop over low heat or in the microwave, adding a splash of apple cider to restore creaminess. For the best flavor and texture, be sure to top them with the crispy onions and fresh parsley just before serving. This way, you’ll enjoy a delicious homemade dish with minimal effort, making busy weeknights a breeze!

Chef's Helpful Tips

  • For your Apple Cider Mashed Sweet Potatoes, ensure to pick sweet potatoes that feel firm to the touch to avoid any mealy texture in your mash.
  • When simmering the sweet potatoes, remember to adjust the heat to maintain a gentle boil to prevent them from breaking apart during cooking.
  • For a creamy finish, utilize a potato ricer instead of a traditional masher, which will help avoid lumps and create a silky texture.
  • Lastly, to keep your mashed potatoes warm until serving, place them in a bowl over a pot of simmering water, which will maintain the ideal temperature without cooking them further.

Apple Cider Mashed Sweet Potatoes with Crispy Onions Recipe FAQs

What type of sweet potatoes should I choose for the best texture?
Absolutely! Look for sweet potatoes that are firm and smooth without any dark spots or blemishes. Avoid overly soft or shriveled sweet potatoes, which can indicate they’re past their prime. Firm, vibrant sweet potatoes will yield the best texture for your Apple Cider Mashed Sweet Potatoes.

How should I store leftover Apple Cider Mashed Sweet Potatoes?
You’ll want to store your leftovers in an airtight container in the fridge for up to 3 days. Just remember to let them cool completely before sealing them. When you’re ready to enjoy them again, reheat gently in the microwave or on the stovetop. Adding a splash of apple cider can help revive their creamy consistency!

Can I freeze the mashed sweet potatoes, and if so, how?
Certainly! To freeze your Apple Cider Mashed Sweet Potatoes, first, allow them to cool completely. Then, transfer them to a freezer-safe container, ensuring to leave some space at the top for expansion. They can be kept frozen for up to 2 months. When you’re ready to serve, simply thaw them overnight in the fridge and reheat on the stovetop over low heat, stirring occasionally until warmed through.

What if my mashed potatoes come out too lumpy?
Very often, lumpy mashed potatoes can be a nuisance. If this happens, don’t worry! You can use a hand mixer or a potato ricer to smooth them out. Just mix them gently to avoid overworking the potatoes, which can make them gummy. Adding a bit more sour cream or butter can also help return creaminess to the mash.

Are these mashed sweet potatoes safe for people with dietary restrictions?
Yes, but it’s always wise to be cautious! The recipe contains butter and sour cream, which may not be suitable for those with lactose intolerance or dairy allergies. You can easily substitute vegan butter and dairy-free sour cream to make this recipe suitable for vegan diets as well. Also, ensure any garnishes used are free from allergens specific to your guests. Always best to check in with them first!

Apple Cider Mashed Sweet Potatoes with Crispy Onions

Apple Cider Mashed Sweet Potatoes with Crispy Onions

Delicious Apple Cider Mashed Sweet Potatoes with Crispy Onions, a perfect autumn side dish.
Print Recipe Pin Recipe
Prep Time 15 minutes mins
Cook Time 30 minutes mins
Total Time 45 minutes mins
Servings: 4 servings
Course: SIDE DISHES
Cuisine: American
Calories: 250
Ingredients Equipment Method Nutrition Notes

Ingredients
  

Mashed Sweet Potatoes
  • 3 lb sweet potatoes make sure to choose firm ones for the best texture.
  • 2 cups apple cider use freshly pressed cider for a more vibrant flavor.
  • 1 teaspoon kosher salt enhances the natural sweetness of the potatoes.
  • 1 stick cinnamon adds a warm, aromatic quality to the dish.
Creaminess
  • 2 tablespoons butter provides a rich, silky texture to the mash.
  • 1/4 cup sour cream gives a tangy note that balances the sweetness.
  • freshly ground black pepper to taste
Garnishing
  • fresh parsley for serving
  • crispy onion strings for serving

Equipment

  • Large pot
  • potato masher

Method
 

Preparation Steps
  1. In a large pot, mix the sweet potatoes, 1½ cups of apple cider, kosher salt, and the cinnamon stick. Add enough water to cover the potatoes completely.
  2. Bring the mixture to a boil and then reduce to a simmer. Let it cook for 20-30 minutes, or until the sweet potatoes are very tender when pierced with a fork.
  3. Once the potatoes are tender, drain them well and return them to the pot. Don’t forget to discard the cinnamon stick at this point!
  4. Add the remaining ½ cup apple cider, butter, sour cream, and a pinch of salt to the potatoes. Mash everything together until creamy and smooth, ensuring there are no lumps.
  5. Taste your mashed potatoes and season with additional salt and freshly ground black pepper as desired.
  6. Transfer the luscious mashed sweet potatoes to a serving bowl. Top with crispy onion strings and fresh parsley for a beautiful presentation. Enjoy this heartwarming dish warm.

Nutrition

Serving: 1cupCalories: 250kcalCarbohydrates: 35gProtein: 3gFat: 12gSaturated Fat: 7gPolyunsaturated Fat: 0.5gMonounsaturated Fat: 5gCholesterol: 30mgSodium: 150mgPotassium: 500mgFiber: 4gSugar: 6gVitamin A: 5000IUVitamin C: 20mgCalcium: 60mgIron: 1mg

Notes

For an extra touch, drizzle a little more apple cider over the top before serving.

Tried this recipe?

Let us know how it was!

Filed Under: BREAKFAST & BRUNCH

Apple Cider Sweet Potatoes with Crispy Onions

December 23, 2025 by JudyWhite Leave a Comment

The scent of simmering apple cider drifts through my kitchen, wrapping me in a warm, comforting hug. It’s a mood-lifter for grey days and the secret to a beloved side dish that has become a family favorite: Apple Cider Sweet Potatoes with Crispy Onions. Who knew that such simple ingredients could transform into a symphony of flavor and texture?

With the sweetness of roasted sweet potatoes perfectly balanced by a hint of cider’s tang and the crunch of crispy onions, this dish effortlessly elevates any meal—from cozy weeknight dinners to festive gatherings.

After a long day, when the last thing on my mind is dinner but the desire for homemade goodness is strong, I turn to this recipe. It comes together in just 45 minutes, making it an easy choice to impress guests or satisfy my cravings for hearty, wholesome food. Join me in discovering how this delightful dish can brighten your table and fulfill your longing for comfort food with a twist!

Why You'll Love This Apple Cider Sweet Potatoes with Crispy Onions

  • This recipe is incredibly easy to make, allowing you to enjoy a delicious meal without spending hours in the kitchen.
  • The combination of sweet potatoes and apple cider creates a unique flavor profile that will delight your taste buds with every bite.
  • Its versatility means it pairs wonderfully with a variety of main dishes, making it perfect for any occasion from casual dinners to festive celebrations.
  • The visual appeal of the crispy onions and fresh parsley garnish adds a stunning touch to your table, making this dish as beautiful as it is tasty.

Apple Cider Sweet Potatoes Ingredients

For the Sweet Potatoes
• 3 lb sweet potatoes – peel and dice them for a creamy texture that soaks up the apple cider beautifully.
• 1 teaspoon kosher salt – enhances the flavor of the sweet potatoes while they boil.
• 1 stick cinnamon – adds a warm and comforting aroma, infusing the potatoes with a subtle spicy note.

For the Apple Cider Mixture
• 2 cups apple cider, divided – the star ingredient that gives these Apple Cider Sweet Potatoes their unique flavor, so don’t skip adding the right amount!
• 2 tablespoons butter – makes the mashed sweet potatoes irresistibly creamy.
• ¼ cup sour cream – adds a tangy richness for a perfect balance of sweetness.
• freshly ground black pepper – sprinkle to taste for a gentle kick that complements the sweetness.

For Garnishing
• fresh parsley – adds a pop of color and fresh flavor when sprinkled on top.
• crispy onion strings – bring in a delightful crunch that contrasts with the creamy mash, elevating the experience of the dish.

How to Make Apple Cider Sweet Potatoes

  1. Combine Ingredients: In a large pot, mix the sweet potatoes, 1½ cups of apple cider, kosher salt, and the cinnamon stick. Pour in enough water to cover the potatoes, creating a cozy mix.

  2. Cook: Bring the water and cider blend to a boil, then reduce to a simmer for 20-30 minutes. Check for tenderness; the potatoes should be soft and easily pierced with a fork.

  3. Drain: Once tender, carefully drain the sweet potatoes and return them to the pot. Make sure to discard the cinnamon stick—it’s done its job adding warmth!

  4. Mash Together: Add the remaining ½ cup of apple cider, butter, and sour cream to the pot. Use a masher or fork to mix until smooth and creamy, adding a pinch of salt as needed.

  5. Season: Taste your creamy mixture and season with freshly ground black pepper, adjusting to your preferred flavor. You want that sweet, tangy, and subtly spicy blend.

  6. Serve: Transfer the luscious mash into a large serving dish. Top generously with crispy onion strings and a sprinkle of fresh parsley, then serve warm and enjoy every bite!

Optional: Drizzle a little extra apple cider for added flavor.

Exact quantities are listed in the recipe card below.

Make Ahead Options

These Apple Cider Sweet Potatoes with Crispy Onions are a fantastic make-ahead option for busy home cooks! You can prepare the sweet potatoes up to 24 hours in advance by following the first four steps of the recipe—just be sure to let them cool completely before refrigerating in an airtight container. When you’re ready to serve, simply reheat them gently on the stovetop or microwave, adding a splash of the remaining apple cider to restore creaminess. Finish by stirring in the butter, sour cream, and seasoning to taste. With this prep technique, you’ll enjoy all the deliciousness with minimal effort on your busy weeknights!

What to Serve with Apple Cider Sweet Potatoes with Crispy Onions?

A warm meal comes together beautifully when you know just what to pair alongside those creamy, sumptuous sweet potatoes.

  • Savory Roast Chicken: The juicy, herb-infused flavors harmonize perfectly with the sweet, tangy profile of the sweet potatoes.

  • Grilled Pork Chops: The meaty richness brings a delightful contrast to the sweet and creamy elements in the dish, creating a well-rounded plate.

  • Steamed Green Beans: Their fresh, crisp texture provides a bright counterpoint to the creamy sweetness, balancing the meal.

  • Wild Rice Pilaf: The nutty flavor and chewy texture enrich the dining experience, adding depth alongside the sweet potatoes.

  • Cranberry Sauce: This tart accompaniment elevates the sweetness of the dish, making it a festive pairing that’s festive and flavorful.

  • Homemade Biscuits: Flaky and buttery, they offer a comforting side that’s perfect for soaking up all those delightful flavors.

  • Apple Cider Mimosa: A refreshing, bubbly drink with a hint of sweetness complements the overall autumn-inspired theme of your meal.

  • Pumpkin Pie: For dessert, the smooth, spiced filling will complete your fall dinner, echoing the warm flavors of your sweet potato dish.

Apple Cider Sweet Potatoes Variations

Feel free to let your creativity flow and make this dish your own with these delightful twists!

  • Vegan: Substitute butter with coconut oil and sour cream with coconut yogurt for a creamy, plant-based option.
  • Nutty Flavor: Add ¼ cup of chopped pecans or walnuts to the mashed sweet potatoes for a crunchy texture and added taste.
  • Spicy Kick: Mix in a pinch of cayenne pepper or red pepper flakes to introduce a delicious heat that complements the sweetness.

For a more intense flavor, consider folding in caramelized onions. It adds depth and an inviting scent that fills your kitchen with warmth.

  • Apple Compote Topping: Top with a warm apple compote for an extra layer of sweetness that pairs beautifully with the savory elements.
  • Maple Sweetness: Drizzle maple syrup into the mash instead of using all the apple cider, creating a wonderfully sweet and earthy flavor.
  • Sweet Potato Variants: Mix in or swap with other root vegetables like parsnips or carrots for a different flavor profile and added nutrition.

Experimenting with these variations will keep your meals exciting and cater to a variety of tastes in your household!

Storage Tips for Apple Cider Sweet Potatoes

Fridge: Store leftovers in an airtight container for up to 3 days. This helps maintain their creamy texture without drying out.

Freezer: You can freeze the mashed Apple Cider Sweet Potatoes for up to 2 months. Use a freezer-safe container, leaving some space for expansion as they freeze.

Reheating: Thaw overnight in the fridge before reheating. Warm gently on the stovetop or in the microwave, adding a splash of apple cider for extra moisture if needed.

Serving: Fresh toppings, like crispy onion strings and parsley, should be added just before serving to maintain their crunch and vibrant color.

Chef's Helpful Tips

  • For the Apple Cider Sweet Potatoes, peel and dice the sweet potatoes into uniform pieces to ensure even cooking.
  • When boiling, avoid overcrowding the pot; if needed, cook in batches for perfectly tender potatoes.
  • When mashing, use a potato ricer for an extra smooth texture or a traditional masher for a bit of chunkiness depending on your preference.
  • Remember to check the consistency of the mash before serving; if it seems dry, a splash of additional apple cider can enhance flavor and creaminess.

Apple Cider Sweet Potatoes with Crispy Onions Recipe FAQs

How do I select ripe sweet potatoes?
Absolutely! Look for sweet potatoes that are firm and smooth, with no dark spots or blemishes. The skin should be a vibrant color. Avoid soft or wrinkled potatoes, as they might be past their prime.

How should I store leftover Apple Cider Sweet Potatoes?
For optimal freshness, store your leftovers in an airtight container in the fridge for up to 3 days. Ensure they’re cooled completely before sealing to maintain their creamy texture and prevent moisture buildup.

Can I freeze the mashed Apple Cider Sweet Potatoes?
Yes, you can freeze them! Use a freezer-safe container, leaving about an inch of space at the top for expansion. They can be stored for up to 2 months. To reheat, simply thaw overnight in the fridge and warm gently, adding a splash of apple cider if they seem dry.

What should I do if my sweet potatoes are too watery after mashing?
Very! If your mash ends up too watery, you can fix it by cooking it on low heat in a saucepan for a few minutes to evaporate some moisture. Stir constantly to avoid burning. Optionally, add a bit more sour cream or even mashed potatoes from another batch to thicken the texture.

Are Apple Cider Sweet Potatoes safe for my dog to eat?
While sweet potatoes are safe in moderation, the added butter, sour cream, and spices might not be suitable for dogs. It’s best to offer plain, unseasoned sweet potatoes if you’re sharing with your furry friend.

Can I use a different type of apple cider?
Absolutely! While apple cider is the star here, any non-alcoholic cider or even a flavored cider (like spiced or cranberry) can give a different but delightful twist to your Apple Cider Sweet Potatoes. Just make sure it’s not too sweet—balance is key!

Apple Cider Sweet Potatoes with Crispy Onions

Apple Cider Sweet Potatoes with Crispy Onions

Delight in the comforting flavors of Apple Cider Sweet Potatoes with Crispy Onions, an easy side dish perfect for any occasion.
Print Recipe Pin Recipe
Prep Time 15 minutes mins
Cook Time 30 minutes mins
Total Time 45 minutes mins
Servings: 6 servings
Course: DINNER RECIPES
Cuisine: American
Calories: 250
Ingredients Equipment Method Nutrition Notes

Ingredients
  

For the Sweet Potatoes
  • 3 lb sweet potatoes peel and dice for a creamy texture
  • 1 teaspoon kosher salt enhances the flavor while boiling
  • 1 stick cinnamon adds warm aroma and flavor
For the Apple Cider Mixture
  • 2 cups apple cider divided
  • 2 tablespoons butter for creaminess
  • ¼ cup sour cream adds tangy richness
  • freshly ground black pepper to taste
For Garnishing
  • fresh parsley for color and flavor
  • crispy onion strings for crunch

Equipment

  • Large pot

Method
 

How to Make Apple Cider Sweet Potatoes
  1. In a large pot, mix the sweet potatoes, 1½ cups of apple cider, kosher salt, and the cinnamon stick. Pour in enough water to cover the potatoes.
  2. Bring the water and cider blend to a boil, then reduce to a simmer for 20-30 minutes. Check for tenderness.
  3. Once tender, carefully drain the sweet potatoes and return them to the pot. Discard the cinnamon stick.
  4. Add the remaining ½ cup of apple cider, butter, and sour cream. Mash until smooth and creamy.
  5. Season with freshly ground black pepper to taste.
  6. Transfer to a serving dish. Top with crispy onion strings and parsley.

Nutrition

Serving: 1cupCalories: 250kcalCarbohydrates: 42gProtein: 3gFat: 10gSaturated Fat: 5gPolyunsaturated Fat: 0.5gMonounsaturated Fat: 4gCholesterol: 20mgSodium: 300mgPotassium: 800mgFiber: 5gSugar: 10gVitamin A: 200IUVitamin C: 30mgCalcium: 4mgIron: 6mg

Notes

For a richer flavor, drizzle extra apple cider before serving. Store leftovers in an airtight container for up to 3 days.

Tried this recipe?

Let us know how it was!

Filed Under: DINNER RECIPES

Malasadas Recipe

December 22, 2025 by JudyWhite Leave a Comment

There’s an undeniable joy in turning simple ingredients into something divine. As I watched the dough rise, I could already imagine the glorious cloud-like texture of freshly fried malasadas, each one waiting to be filled with luscious pastry cream. It all began when I realized that quick snacks from the drive-thru just couldn’t compete with the warmth of homemade treats. So, I decided to dive into crafting this classic Hawaiian delight that’s both easy to make and impossible to resist.

With the aroma of sizzling dough and the sweet tang of passion fruit filling the kitchen, this malasadas recipe is sure to elevate your snacking game. With just a few hours of patience—and a promise of warmth and sweetness—you’ll have a batch of treats that are perfect for sharing with loved ones or keeping all to yourself. Let’s dive into the delightful world of malasadas, where every bite feels like a warm hug!

Why You'll Love This Malasadas Recipe

  • This malasadas recipe is incredibly easy to follow, making it perfect for bakers of all skill levels.
  • The rich flavors of the dough combined with the creamy passion fruit filling will leave your taste buds dancing with delight.
  • You’ll love how versatile this recipe is, allowing you to experiment with different fillings and toppings to suit your preference.
  • Plus, the visual appeal of these golden-brown treats will impress anyone who sees them, making them a great addition to any gathering.

Malasadas Recipe Ingredients

• Get ready to create delicious malasadas with these essential ingredients!

For the Dough
• Bread flour – A must for that fluffy texture; more might be needed for assembly.
• Granulated sugar – Just a teaspoon to boost the yeast’s power for a perfect rise.
• Instant yeast – This magic ingredient helps the dough to rise quickly and beautifully.
• Kosher salt – Enhances the flavors and balances the sweetness.
• Whole milk – Warm it to 120° to 130°F to activate the yeast effectively.
• Large egg – Brings richness to the dough; make sure it’s at room temperature.
• Large egg yolk – Adds extra moisture and a lovely yellow hue.
• Unsalted butter – Melted and slightly cooled, it gives a rich flavor to the dough.

For the Passion Fruit Cream
• Granulated sugar – Mix this with the milk to create a sweet base for your cream.
• Whole milk – Provides creaminess; use more for delicious filling.
• Large egg – Needed to thicken the pastry cream.
• Cornstarch – Acts as a thickener for a silky smooth texture.
• Kosher salt – A pinch helps enhance and balance flavors in the pastry cream.
• Unsalted butter – Added for richness in your creamy filling.
• Passion fruit puree – Gives a vibrant, tropical flavor that’s unbeatable!
• Pure vanilla extract – A hint of vanilla elevates the cream’s taste beautifully.

For Frying & Assembly
• Vegetable oil – Use for frying the malasadas until golden brown and crispy.
• Granulated sugar – Toss the warm malasadas in sugar for a delightful sweetness.

With these ingredients in hand, you’re one step closer to mastering an unforgettable malasadas recipe!

How to Make Malasadas

  1. Combine dry ingredients. In your stand mixer bowl, mix together the bread flour, granulated sugar, instant yeast, and kosher salt. Knead on low speed for about 30 seconds to ensure everything is well mixed.

  2. Whisk wet ingredients. In a large liquid measuring cup, combine the warmed milk, large egg, egg yolk, and melted butter. Whisk until blended, and let those ingredients meld together nicely.

  3. Knead the dough. Gradually pour the wet mixture into the dry ingredients while kneading on medium-low speed for 10 minutes. The dough should become smooth and elastic—just right for fluffiness!

  4. Chill the dough. Cover the bowl with plastic wrap and refrigerate overnight. This slow rise allows for the perfect texture when you’re ready to fry.

  5. Prepare the pastry cream. In a medium saucepan, whisk together ¼ cup of granulated sugar and whole milk. Heat on medium-low until steaming, then lower the heat.

  6. Whisk egg mixture. In a bowl, mix the large egg, cornstarch, and remaining sugar until smooth. Temper this by slowly adding the hot milk mixture, whisking continuously to prevent curdling.

  7. Cook the cream. Pour the egg mixture back into the saucepan and cook over medium heat, whisking as it thickens. Once it boils, remove from heat promptly.

  8. Flavor the cream. Whisk in the unsalted butter, passion fruit puree, and vanilla extract until smooth and luscious. Your pastry cream should now be a delightful tropical treat!

  9. Cool the cream. Strain the mixture through a fine-mesh sieve into an airtight container. Press plastic wrap against the surface and refrigerate overnight to set.

  10. Shape the dough. Once the dough has chilled, roll it out on a floured surface to about ½-inch thick. Use a 3-inch round cookie cutter to cut out 6 circles.

  11. Let rise. Arrange the dough circles on a floured sheet pan, cover loosely with plastic wrap, and let them rise for 1 hour until puffy.

  12. Heat the oil. While the dough rises, fill a heavy pot or deep fryer with vegetable oil and heat to 365°F. It’s about to get deliciously messy!

  13. Prepare for frying. Line a wire rack with paper towels and place sugar in a shallow bowl for tossing the warm malasadas.

  14. Pipe the cream. Transfer your chilled pastry cream into a piping bag fitted with a Bismark tip to fill each donut perfectly.

  15. Fry the malasadas. Carefully fry 2 donuts at a time for about 2 minutes per side until they turn golden brown. Use a slotted spoon to move them to the wire rack.

  16. Add sweetness. While still warm, toss each donut in granulated sugar to create a glossy, sweet coating.

  17. Fill with cream. After letting them cool for about 15 minutes, use a skewer to poke a hole in the side of each malasada, filling them generously with the pastry cream.

  18. Serve and enjoy! These treats are best enjoyed warm or at room temperature, offering a sweet, creamy indulgence in every bite.

Optional: Serve with a dusting of extra powdered sugar for an enchanting presentation!

Exact quantities are listed in the recipe card below.

What to Serve with Malasadas?

There’s nothing quite like pairing these fluffy, filled delights with perfect accompaniments that enhance their irresistible sweetness.

  • Fresh Fruit Salad: A vibrant mix of tropical fruits like pineapple, mango, and kiwi brings freshness that balances the sweetness of the malasadas. The juicy textures create a delightful contrast!
  • Coconut Whipped Cream: Light and airy with a hint of coconut flavor, this creamy topping complements the passion fruit filling perfectly. It adds a decadent touch to every bite.
  • Vanilla Ice Cream: Serve warm malasadas with a scoop of vanilla ice cream for a heavenly dessert experience. The contrasting temperatures create a satisfying indulgence.
  • Coffee or Espresso: A strong coffee provides a delightful balance to the sweetness, making it the perfect beverage to sip alongside your malasadas.
  • Chocolate Sauce: Drizzle warm malasadas with rich chocolate sauce for an indulgent treat that will please any chocolate lover. The sweetness of both creates a delicious harmony!
  • Dulce de Leche: This caramel-like sauce adds an extra layer of richness when drizzled over filled malasadas. It’s a sweet affair you won’t want to miss!
  • Mint Tea: A refreshing cup of mint tea clears the palate after indulging and complements the tropical flavors of the malasadas beautifully.

With these lovely pairings, your malasadas are sure to shine at any gathering or cozy afternoon treat!

Malasadas Recipe Variations

Feel free to get creative with this malasadas recipe and customize it to your heart’s content!

  • Dairy-Free: Substitute whole milk with almond or oat milk for a lactose-free delight. Your malasadas will still turn out fluffy and flavorful!

  • Gluten-Free: Swap bread flour for a gluten-free flour blend, continuing to enjoy these scrumptious treats without the gluten. The texture may vary slightly, but the joy will remain the same!

  • Filled Delights: Experiment with different fillings like Nutella or raspberry jam. Each bite will surprise you with delightful flavors of your choice.

  • Cinnamon Sugar Topping: Mix cinnamon with sugar for a warm, spiced toss after frying. It adds a cozy aroma and sweetness that dances on your palate!

  • Zesty Twist: Incorporate lemon or orange zest into your dough or filling. This refreshing burst of citrus will brighten each malasada!

  • Chocolate Lovers: Add cocoa powder to the dough for a deep chocolate flavor, or fill them with a rich chocolate ganache. A chocolatey version is definitely a crowd-pleaser!

  • Spicy Kick: Infuse your pastry cream with a touch of chili powder or cayenne for an unexpected heat. The contrast between sweet and spicy is utterly tantalizing!

  • Decadent Toppings: Drizzle with a warm caramel or chocolate sauce after frying for an indulgent twist that your family and friends won’t forget.

With these variations and substitutions, your malasadas will take on a whole new life, reflecting your unique tastes and creativity! Enjoy the journey of creating your perfect batch.

How to Store and Freeze Malasadas

Room Temperature: Keep the malasadas in an airtight container for up to 2 days to maintain their fluffy texture. Lightly dust them with powdered sugar to prevent sticking.

Fridge: For longer storage, place the malasadas in the fridge in an airtight container. They can last for up to 5 days, but may lose some of their freshness.

Freezer: Freeze malasadas individually wrapped in plastic wrap and then in a freezer bag for up to 2 months. Thaw at room temperature before serving, and consider reheating for extra warmth!

Reheating: To refresh your malasadas, pop them in the microwave for about 10-15 seconds, or warm them gently in the oven at 350°F for 5-7 minutes for that freshly fried taste again.

Make Ahead Options

These malasadas are perfect for meal prep enthusiasts! You can make the dough up to 24 hours in advance by refrigerating it after kneading. Additionally, the luscious passion fruit pastry cream can be prepared ahead as well, and it will stay fresh in the refrigerator for up to 3 days. When you’re ready to enjoy, simply follow the remaining steps: shape the dough, let it rise, fry until golden, and fill with cream. To maintain quality, ensure the dough is well-covered to prevent drying out, and pipe the cream just before serving for that fresh, creamy burst. With this prep strategy, you’ll have delicious malasadas ready to impress with minimal effort!

Chef's Helpful Tips

  • When making your malasadas, ensure your milk is warmed to the precise temperature of 120° to 130°F as this activates the yeast effectively for a fluffy dough.
  • Avoid over-kneading by stopping once the dough is smooth and elastic after about 10 minutes of kneading, as too much can lead to dense donuts.
  • For a desirable golden-brown finish, ensure your oil temperature is at 365°F before frying, as this helps achieve a crispy exterior without greasiness.
  • Lastly, remember to chill your dough overnight to enhance its flavor and texture, as this slow rise contributes to the perfect malasadas recipe.

Malasadas Recipe FAQs

How do I know if my ingredients are ripe or suitable for this malasadas recipe?
Absolutely! For the best malasadas, use fresh ingredients—particularly the milk and eggs. The milk should be warm (120° to 130°F) to properly activate the yeast, while eggs should be at room temperature for better incorporation. If your yeast is old, it may not rise well; perform a “proofing test” by dissolving it in warm water with a pinch of sugar—if it bubbles, it’s fresh!

What is the best way to store malasadas and how long do they last?
If you’re lucky enough to have leftovers, keep the malasadas in an airtight container at room temperature for up to 2 days. For fridge storage, they can last about 5 days, but do note that they may lose some of their delightful fluffiness. Always layer them with parchment paper to prevent sticking!

Can I freeze malasadas for later enjoyment?
Very! Freezing is a great option. Wrap each malasada individually in plastic wrap, then place them in a freezer-safe bag. They can stay good for up to 2 months. When you’re ready to enjoy them, let them thaw at room temperature, and consider reheating them in the oven at 350°F for about 5-7 minutes—this brings back that just-fried warmth!

What should I do if my malasadas don’t rise properly?
If your malasadas don’t rise well, double-check that your yeast is fresh and that your dough was kept in a warm environment to rise. A common mistake is kneading too much or too little—stop kneading once the dough is smooth and elastic after about 10 minutes. If your dough feels too dry, a bit more milk can help. Patience is key; sometimes it just needs more time to rise!

Are these malasadas recipe safe for people with allergies, especially to eggs?
If you’re catering to egg allergies, consider trying egg substitutes like applesauce (1/4 cup per egg), but keep in mind that results may not be identical. The dough’s texture may change slightly, but it’s worth experimenting for those who need egg-free options. Always check your other ingredients too for potential allergens, especially since frying oil can absorb flavors and residues from previous batches.

What can I use instead of passion fruit puree in the filling?
The more the merrier when it comes to flavors! If passion fruit isn’t available, consider substituting with guava puree or even a blend of mango and a hint of lime juice for a tropical twist. Just remember to adjust the sugar in your pastry cream to balance any additional sweetness or tartness from the fruit you choose to use.

Malasadas Recipe

Malasadas Recipe

This Malasadas recipe transforms simple ingredients into a delectable Hawaiian treat, perfect for any occasion.
Print Recipe Pin Recipe
Prep Time 2 hours hrs
Cook Time 30 minutes mins
Chilling Time 12 hours hrs
Total Time 14 hours hrs 30 minutes mins
Servings: 6 malasadas
Course: DESSERT RECIPES
Cuisine: Hawaiian
Calories: 250
Ingredients Equipment Method Nutrition Notes

Ingredients
  

For the Dough
  • 3 cups bread flour More might be needed for assembly.
  • 1 tablespoon granulated sugar To boost the yeast's power.
  • 2 teaspoons instant yeast Helps the dough rise quickly.
  • 1 teaspoon kosher salt Enhances flavors.
  • 1 cup whole milk Warm it to 120° to 130°F.
  • 1 large egg At room temperature.
  • 1 large egg yolk Adds extra moisture.
  • 2 tablespoons unsalted butter Melted and slightly cooled.
For the Passion Fruit Cream
  • ¼ cup granulated sugar Mix with milk.
  • 1 cup whole milk Provides creaminess.
  • 1 large egg Needed for thickening.
  • 2 tablespoons cornstarch Acts as a thickener.
  • 1 pinch kosher salt Enhances flavors.
  • 2 tablespoons unsalted butter Added for richness.
  • ½ cup passion fruit puree Gives tropical flavor.
  • 1 teaspoon pure vanilla extract Elevates the cream's taste.
For Frying & Assembly
  • 4 cups vegetable oil For frying.
  • 1 cup granulated sugar For tossing after frying.

Equipment

  • stand mixer
  • medium saucepan
  • piping bag
  • cookie cutter
  • Deep fryer
  • Wire Rack

Method
 

Making the Dough and Filling
  1. Combine dry ingredients. In your stand mixer bowl, mix together the bread flour, granulated sugar, instant yeast, and kosher salt. Knead on low speed for about 30 seconds to ensure everything is well mixed.
  2. Whisk wet ingredients. In a large liquid measuring cup, combine the warmed milk, large egg, egg yolk, and melted butter. Whisk until blended, and let those ingredients meld together nicely.
  3. Knead the dough. Gradually pour the wet mixture into the dry ingredients while kneading on medium-low speed for 10 minutes. The dough should become smooth and elastic.
  4. Chill the dough. Cover the bowl with plastic wrap and refrigerate overnight.
  5. Prepare the pastry cream. In a medium saucepan, whisk together ¼ cup of granulated sugar and whole milk. Heat on medium-low until steaming.
  6. Whisk egg mixture. In a bowl, mix the large egg, cornstarch, and remaining sugar until smooth. Temper by slowly adding the hot milk mixture.
  7. Cook the cream. Pour the egg mixture back into the saucepan and cook over medium heat, whisking as it thickens.
  8. Flavor the cream. Whisk in the unsalted butter, passion fruit puree, and vanilla extract until smooth.
  9. Cool the cream. Strain the mixture through a fine-mesh sieve into an airtight container. Refrigerate overnight.
Frying and Assembly
  1. Shape the dough. Once the dough has chilled, roll it out on a floured surface to about ½-inch thick and cut out 6 circles.
  2. Let rise. Arrange the dough circles on a floured sheet pan, cover loosely, and let them rise for 1 hour.
  3. Heat the oil. Fill a heavy pot or deep fryer with vegetable oil and heat to 365°F.
  4. Prepare for frying. Line a wire rack with paper towels and place sugar in a shallow bowl.
  5. Pipe the cream. Transfer your chilled pastry cream into a piping bag fitted with a Bismark tip.
  6. Fry the malasadas. Fry 2 donuts at a time for about 2 minutes per side until golden brown.
  7. Add sweetness. While still warm, toss each donut in granulated sugar.
  8. Fill with cream. After cooling for 15 minutes, poke a hole in each malasada, filling them with cream.
  9. Serve and enjoy! These treats are best enjoyed warm or at room temperature.

Nutrition

Serving: 1malasadaCalories: 250kcalCarbohydrates: 32gProtein: 3gFat: 12gSaturated Fat: 7gPolyunsaturated Fat: 1gMonounsaturated Fat: 3gCholesterol: 48mgSodium: 150mgPotassium: 80mgFiber: 1gSugar: 15gVitamin A: 400IUCalcium: 100mgIron: 0.5mg

Notes

For an extra touch, dust with powdered sugar before serving.

Tried this recipe?

Let us know how it was!

Filed Under: BREAKFAST & BRUNCH

Sesame Chicken Salad

December 22, 2025 by JudyWhite Leave a Comment

There’s nothing quite like the freshness of a homemade salad to lift your spirits, especially when the weather starts warming up. Recently, I found myself craving something vibrant and filling after a week of too many takeout dinners. That’s when I decided to whip up this delightful Sesame Chicken Salad, bursting with crunchy cabbage, colorful veggies, and a satisfying mix of nuts.

The moment the sesame ginger dressing hits the crisp greens, it’s pure culinary magic—it adds a tangy yet savory touch that’ll make you rethink your old salad habits. Plus, assembling this all-star salad is a breeze, making it perfect for busy weeknights or a relaxed weekend gathering. With added layers of flavor and texture from toasted almonds and roasted cashews, it’s no wonder this dish has become a favorite in my kitchen. Whether you’re looking to impress guests or just want a deliciously healthy meal, this salad is sure to become a go-to in your repertoire. Let’s dive into the recipe!

Why You'll Love This Sesame Chicken Salad

  • This Sesame Chicken Salad is incredibly easy to prepare, making it a perfect option for those busy weeknights.
  • The vibrant colors and fresh ingredients create a visually stunning dish that will impress your guests.
  • With a delightful balance of flavors and textures from the crunchy cabbage and mixed nuts, each bite is a treat for your taste buds.
  • Plus, it’s a versatile recipe that can be easily customized with your favorite proteins or veggies, making it suitable for any occasion.

Sesame Chicken Salad Ingredients

• Everything you need for freshness!

For the Salad
• 4 cups shredded green cabbage – this forms a crisp base packed with nutrients.
• 2 cups shredded red cabbage – adds a pop of color and a slightly sweeter taste.
• 1/2 cup diced green onion – for a mild onion flavor that brightens the dish.
• 3/4 cup freshly diced cilantro – gives an aromatic freshness that pairs beautifully with sesame.
• 1 cup shredded carrots – adds sweetness and crunch, making the salad more filling.
• 1 piece red bell pepper, thinly julienned – contributes a crunchy texture and vibrant color.
• 1 piece jalapeno, seeded and diced – provides a hint of heat to kick things up a notch.

For the Dressing
• 1 batch Sesame Ginger Dressing – the star of this salad, infusing it with a tangy zing.

For the Toppings
• 1/3 cup toasted sliced almonds – adds a nutty crunch that elevates the overall flavor.
• 1/3 cup roasted cashew halves – contributes creaminess and richness in every bite.
• Sesame seeds – for an extra bit of crunch and a touch of tradition in sesame chicken salad.
• Extra cilantro – a handful for garnish, enhancing the freshness just before serving.
• Extra green onion – to sprinkle on top for additional flavor and visual appeal.
• A few jalapeno slices – for those who crave a little extra heat.
• Optional: Crispy wonton strips – for a delightful crunch that makes this salad even more irresistible.

How to Make Sesame Chicken Salad

  1. Combine the shredded green cabbage, shredded red cabbage, diced green onion, diced cilantro, shredded carrots, red bell pepper, and jalapeno in a large bowl. Mix well until all veggies are evenly distributed and vibrant colors pop.

  2. Drizzle the Sesame Ginger Dressing over the salad and toss to combine. Ensure every bite is coated with that zesty dressing for the perfect flavor balance.

  3. Top with toasted sliced almonds, roasted cashew halves, sesame seeds, extra cilantro, extra green onion, and jalapeno slices as desired. This adds delightful crunch and bursts of flavor!

  4. Serve immediately or chill before serving if preferred. Chilling allows the flavors to meld beautifully, making each bite even more delicious!

Optional: Add crispy wonton strips for an extra delightful crunch!

Exact quantities are listed in the recipe card below.

What to Serve with Sesame Chicken Salad?

There’s nothing quite like a colorful, fresh salad to brighten up mealtime and elevate your dining experience.

  • Grilled Chicken Breast: A succulent addition that complements the salad’s freshness, providing protein and a satisfying bite.

  • Steamed Jasmine Rice: Light and fragrant, this side perfectly balances the crunchy salad, soaking up any leftover dressing for added flavor.

  • Fresh Fruit Salad: Bursting with sweetness, it’s the perfect contrast to the savory flavors of the sesame chicken salad, keeping the meal light and refreshing.

  • Spring Rolls: These crisp, non-fried rolls filled with veggies add an extra layer of crunch while echoing the vibrant flavors of your salad.

  • Sesame Ginger Quinoa: A nutty complement that continues the sesame theme, this grain brings a delightful texture and enhances the overall flavors.

  • Cucumber Mint Salad: Refreshing and crisp, it provides a cool contrast that brightens every bite while adding a fragrant note to your meal.

Elevate your dining experience by pairing these vibrant options with your delicious Sesame Chicken Salad!

Make Ahead Options

These Sesame Chicken Salad components are perfect for meal prep, allowing for easy assembly during a busy week! You can chop and mix all the salad vegetables (cabbage, carrots, bell pepper, and onions) up to 3 days in advance, storing them in an airtight container in the refrigerator to keep them crisp and fresh. The Sesame Ginger Dressing can also be prepared up to 1 week ahead; just give it a good shake before using to recombine any separated ingredients. When you’re ready to serve, toss the salad with the dressing and top with nuts and garnishes. This makes for a quick assembly that retains its delicious quality!

Sesame Chicken Salad Variations

Feel free to explore these tasty tweaks to make this salad your own, enhancing its flavor and texture in delightful ways!

  • Protein Boost: Add grilled chicken or tofu for a heartier salad that’s filling enough for a main dish. This not only introduces more flavor but also makes it incredibly satisfying.

  • Vegan-Friendly: Swap the Sesame Ginger Dressing for a homemade tahini dressing to keep it plant-based. It adds a rich creaminess while maintaining that delightful nutty flavor.

  • Nut-Free: Replace almonds and cashews with roasted pumpkin seeds or sunflower seeds for a crunchy texture without nuts. This keeps it wholesome and accessible for anyone with allergies.

  • Extra Crunch: Toss in some crushed crispy wonton strips or water chestnuts for additional crunch and fun in every bite. They elevate the textural experience and make it more playful!

  • Herb Variation: Replace cilantro with fresh mint or parsley for a refreshing twist that changes the flavor profile entirely. This might just become your new favorite herb!

  • Sweet Spice: Mix in diced mango or pineapple for a sweet tropical element that dances on the palate, adding a touch of sweetness against the savory backdrop.

  • Heat Level: Adjust the jalapeno amount or add sliced Thai bird chilies for an extra spicy kick, catering to those who love a fiery punch in their salads.

  • Dressing Twist: Experiment with flavored oils (like chili oil) or citrus vinaigrettes instead of the sesame dressing for an entirely new zing. The possibilities are endless as you explore different flavors!

How to Store and Freeze Sesame Chicken Salad

Fridge: Store any leftover Sesame Chicken Salad in an airtight container in the refrigerator for up to 3 days. This keeps the veggies crisp and the flavors fresh.

Freezer: It’s not recommended to freeze this salad as the dressing and fresh vegetables may lose their texture upon thawing. Enjoy it fresh!

Reheating: If you’ve added protein that needs reheating, gently warm it in the microwave before serving, but serve the salad fresh to maintain its crunch.

Assembly Tip: Consider keeping the dressing separate until you’re ready to enjoy, ensuring your salad remains crisp and vibrant for longer.

Chef's Helpful Tips

  • When preparing Sesame Chicken Salad, ensure your vegetables are freshly shredded for the best texture and flavor.
  • Avoid over-mixing the salad after adding the dressing to keep the ingredients crisp and vibrant.
  • For an added depth of flavor, consider toasting your nuts lightly before topping the salad.
  • When serving, the salad is best enjoyed immediately, but if you chill it for about 30 minutes, the flavors will harmonize beautifully to enhance the overall taste.

Sesame Chicken Salad Recipe FAQs

How do I choose ripe ingredients for the Sesame Chicken Salad?
Absolutely! When selecting your cabbages, look for vibrant, crisp leaves without dark spots or wilting—these indicate freshness. For the bell pepper, choose one that feels firm and has shiny skin. If you’re picking jalapenos, they should be smooth and deep green, without wrinkles. Fresh cilantro should smell fragrant and have bright green leaves. The more vibrant, the better!

What’s the best way to store leftover Sesame Chicken Salad?
Very! To store your leftovers, transfer the salad to an airtight container and place it in the refrigerator. It’ll stay fresh for up to 3 days. Just remember that the longer it sits, the softer the veggies will become, so it’s best enjoyed fresh!

Can I freeze the Sesame Chicken Salad?
Not really! Freezing is not recommended for this salad since the fresh veggies and dressing can lose their crisp texture upon thawing. It’s best to savor it fresh! However, if you have leftover components—like the nuts or dressing—those can be stored separately and placed on fresh veggies later.

What should I do if my salad dressing tastes too strong?
If you find your dressed salad turning out overly tangy or strong, don’t fret! Simply add a splash of water or a bit more shredded cabbage to dilute it. Toss gently until you reach the desired flavor. If it’s really potent, sometimes a sprinkle of sugar can balance out the seasoning beautifully!

Are there any dietary concerns I should consider for Sesame Chicken Salad?
Certainly! This salad contains nuts, which are common allergens. If serving to guests, it’s considerate to let them know. You could also offer an alternative dressing for a nut-free option, such as a simple olive oil and vinegar mix or a creamy tahini dressing. If making it for pets, avoid the onions and nuts since they can be harmful to dogs and cats.

How can I make this salad more filling?
For a heartier version, feel free to add protein! Grilled chicken or tofu works wonderfully—just shred it in and combine. You can also mix in cooked quinoa or chickpeas to enhance the salad’s flavor and nutritional profile. With these additions, you’re looking at a complete meal that’ll leave you feeling satisfied!

Sesame Chicken Salad

Sesame Chicken Salad

This vibrant Sesame Chicken Salad is a fresh and filling dish, perfect for warm weather and busy weeknights, packed with crunchy veggies and a tangy dressing.
Print Recipe Pin Recipe
Prep Time 20 minutes mins
Total Time 20 minutes mins
Servings: 4 servings
Course: LUNCH RECIPES
Cuisine: Asian
Calories: 200
Ingredients Equipment Method Nutrition Notes

Ingredients
  

For the Salad
  • 4 cups shredded green cabbage this forms a crisp base packed with nutrients
  • 2 cups shredded red cabbage adds a pop of color and a slightly sweeter taste
  • 1/2 cup diced green onion for a mild onion flavor that brightens the dish
  • 3/4 cup freshly diced cilantro gives an aromatic freshness that pairs beautifully with sesame
  • 1 cup shredded carrots adds sweetness and crunch, making the salad more filling
  • 1 piece red bell pepper, thinly julienned contributes a crunchy texture and vibrant color
  • 1 piece jalapeno, seeded and diced provides a hint of heat
For the Dressing
  • 1 batch Sesame Ginger Dressing the star of this salad, infusing it with a tangy zing
For the Toppings
  • 1/3 cup toasted sliced almonds adds a nutty crunch
  • 1/3 cup roasted cashew halves contributes creaminess and richness
  • sesame seeds for an extra bit of crunch
  • extra cilantro a handful for garnish
  • extra green onion to sprinkle on top
  • a few jalapeno slices for those who crave a little extra heat
  • crispy wonton strips optional for a delightful crunch

Equipment

  • Large Bowl

Method
 

How to Make Sesame Chicken Salad
  1. Combine the shredded green cabbage, shredded red cabbage, diced green onion, diced cilantro, shredded carrots, red bell pepper, and jalapeno in a large bowl. Mix well until all veggies are evenly distributed and vibrant colors pop.
  2. Drizzle the Sesame Ginger Dressing over the salad and toss to combine. Ensure every bite is coated with that zesty dressing.
  3. Top with toasted sliced almonds, roasted cashew halves, sesame seeds, extra cilantro, extra green onion, and jalapeno slices as desired.
  4. Serve immediately or chill before serving if preferred.

Nutrition

Serving: 1saladCalories: 200kcalCarbohydrates: 15gProtein: 5gFat: 12gSaturated Fat: 1gPolyunsaturated Fat: 2gMonounsaturated Fat: 8gSodium: 200mgPotassium: 400mgFiber: 4gSugar: 3gVitamin A: 3000IUVitamin C: 30mgCalcium: 60mgIron: 1mg

Notes

When preparing Sesame Chicken Salad, ensure your vegetables are freshly shredded for the best texture and flavor. Avoid over-mixing the salad after adding the dressing to keep the ingredients crisp and vibrant. Consider toasting your nuts lightly for added depth of flavor. The salad is best enjoyed immediately, but if you chill it for about 30 minutes, the flavors will harmonize beautifully.

Tried this recipe?

Let us know how it was!

Filed Under: LUNCH RECIPES

Spicy Yogurt Marinated Chicken

December 22, 2025 by JudyWhite Leave a Comment

After a long day filled with the chaos of life, nothing beats the comfort of homemade food that warms the soul. Recently, I found myself craving something that combined bold flavors with simplicity, and that’s when this Spicy Yogurt Marinated Chicken entered my kitchen scene. With just a handful of ingredients, I transformed chicken thighs into a succulent dish that bursts with spices, all while the oven does the heavy lifting.

As the chicken marinated in creamy Greek yogurt, aromatic garlic, and a kick of chili flakes, the entire space filled with a tantalizing aroma that made my mouth water. What truly elevates this meal is the rich dill feta cream—an unexpected, crowd-pleasing companion that takes every bite to the next level.

Whether you’re looking to impress your family or simply want to enjoy a satisfying dinner after a busy day, this recipe offers a delightful escape from fast food and delivers freshness and flavor straight from your kitchen. Let’s dive into making this irresistible dish!

Why You'll Love This Spicy Yogurt Marinated Chicken

  • This recipe is incredibly easy to prepare, allowing you to spend minimal time in the kitchen while still serving a fantastic meal.
  • The blend of spicy yogurt and aromatic spices infuses the chicken with vibrant flavors that are sure to impress your taste buds.
  • Versatility is key, as you can easily pair this dish with a variety of sides to suit any occasion, from family dinners to gatherings with friends.
  • The visual appeal of the plated chicken drizzled with dill feta cream garnished with fresh herbs will have everyone eagerly reaching for their plates.

Spicy Yogurt Marinated Chicken Ingredients

• Get ready to elevate your dinner!

For the Marinade

  • Plain Greek yogurt – provides a creamy base while tenderizing the chicken.
  • Olive oil – adds richness and helps the spices adhere to the chicken.
  • Lemon juice – brightens the flavors and enhances the marinade’s effectiveness.
  • Garlic – minced for that aromatic kick, essential for flavor depth.
  • Paprika – contributes an earthy sweetness and vibrant color to the dish.
  • Chili flakes – adds that desirable spicy heat; adjust to your taste!
  • Ground cumin – offers a warm, nutty flavor profile to the chicken.
  • Ground black pepper – enhances overall seasoning with a subtle bite.
  • Salt – essential for bringing out the full flavor of the chicken.

For the Chicken and Potatoes

  • Boneless skinless chicken thighs – the star of the dish, juicy and flavorful.
  • Baby potatoes – their firm texture holds up beautifully during baking.
  • Garlic powder – provides a boost of garlicky goodness in the potato mix.
  • Dried oregano – offers a hint of herbaceous earthiness to the potatoes.
  • Salt – season to taste, ensuring a well-balanced flavor.
  • Black pepper – adds warmth and complements the spices perfectly.

For the Dill Feta Cream

  • Crumbled feta cheese – gives a tangy depth that pairs wonderfully with the chicken.
  • Plain Greek yogurt – adds creaminess and a refreshing taste to the dip.
  • Mayonnaise – enriches the cream, contributing to its luxurious texture.
  • Fresh dill – elevates the cream with a burst of herbal freshness; don’t skip it!
  • Lemon juice – brightens the flavor, tying together all the ingredients beautifully.
  • Garlic – similarly minced for that consistent flavor throughout the cream.
  • Salt – a pinch to elevate the flavors in the creamy dip.
  • Black pepper – for added warmth in each delicious spoonful.
  • Optional milk or water – use to thin the cream to your desired consistency.

For Garnish

  • Fresh parsley or dill – sprinkle on top for an added pop of color and freshness!

Experience the delightful combination of these ingredients coming together to create the ultimate Spicy Yogurt Marinated Chicken—your taste buds won’t regret it!

How to Make Spicy Yogurt Marinated Chicken

  1. Combine the marinade by mixing Greek yogurt, olive oil, lemon juice, minced garlic, paprika, chili flakes, ground cumin, black pepper, and salt in a bowl. Stir until smooth and well combined.

  2. Marinate the chicken thighs by adding them to the marinade, ensuring each piece is generously coated. Cover the bowl and let it marinate in the refrigerator for at least 30 minutes or up to 24 hours for deeper flavor.

  3. Preheat your oven to 400°F (200°C) while the chicken marinates, allowing the flavors to soak in. This also helps with even cooking!

  4. Prepare the baby potatoes by tossing them with olive oil, garlic powder, dried oregano, salt, and black pepper in a large bowl. Make sure they’re well coated and then spread them out on a baking sheet.

  5. Arrange the marinated chicken thighs on the same baking sheet with the potatoes, ensuring they are evenly spaced to promote even cooking.

  6. Bake in the preheated oven for about 35 minutes, or until the chicken is golden brown and cooked through, with crispy edges, and the potatoes are tender and slightly crispy.

  7. Mix together the dill feta cream by blending crumbled feta cheese, Greek yogurt, mayonnaise, chopped fresh dill, lemon juice, minced garlic, salt, and black pepper in a separate bowl. If a thinner consistency is preferred, add a splash of milk or water.

  8. Serve the cooked chicken and potatoes hot, drizzled with the creamy dill feta sauce and garnished with fresh parsley or dill for a vibrant finish.

Optional: Add a squeeze of fresh lemon juice over the chicken for an extra burst of flavor.

Exact quantities are listed in the recipe card below.

What to Serve with Spicy Yogurt Marinated Chicken?

To create a memorable meal that balances flavors and textures, consider these delightful pairings that will make your dining experience truly special.

  • Creamy Mashed Potatoes: The silky texture of mashed potatoes complements the spicy chicken beautifully, making each bite comforting and satisfying.
  • Roasted Seasonal Vegetables: Colorful veggies like carrots, bell peppers, and zucchini add a fresh crunch, enhancing the meal with vibrant flavors.
  • Quinoa Salad with Cucumbers: The lightness of quinoa mixed with crisp cucumbers offers a refreshing contrast to the rich chicken and creamy sauce.
  • Garlicky Green Beans: Sautéed green beans tossed with garlic provide a delightful crunch and blend seamlessly with the robust flavors of the dish.
  • Herbed Couscous: Fluffy and fragrant couscous infused with herbs brings an aromatic touch, ensuring your plate feels complete and inviting.
  • Chilled White Wine: A glass of chilled Sauvignon Blanc or Pinot Grigio can amplify your meal’s refreshing quality, offering a fruity counterpart to the spices.
  • Lemon Sorbet: For dessert, a light lemon sorbet cleanses the palate perfectly after the spicy main course, leaving a delightful citrus finish.

These pairings will transform your dinner into a full feast, offering a range of flavors and textures that everyone will love!

How to Store and Freeze Spicy Yogurt Marinated Chicken

Fridge: Store any leftover Spicy Yogurt Marinated Chicken in an airtight container for up to 3 days, ensuring it remains moist and flavorful.

Freezer: You can freeze the marinated chicken before cooking for up to 3 months. Thaw in the refrigerator overnight before baking.

Reheating: To enjoy leftovers, reheat in the oven at 350°F (175°C) for about 15-20 minutes, or until heated through to preserve texture.

Dill Feta Cream: Store the dill feta cream in an airtight container in the fridge for up to 5 days. Stir before serving to rejuvenate its creamy texture.

Make Ahead Options

These Spicy Yogurt Marinated Chicken thighs are perfect for meal prep enthusiasts looking to save time during busy weeknights! You can prepare the marinade and lovingly coat the chicken up to 24 hours in advance—just remember to keep it refrigerated to maintain the chicken’s juiciness and flavor. Additionally, you can soak up the rich taste by prepping the potatoes ahead (seasoned and ready to go) and storing them in the fridge for up to 3 days. When you’re ready to serve, simply preheat the oven and bake both the chicken and potatoes as instructed, creating a fresh, delicious dinner that feels effortless and still tastes just as incredible!

Spicy Yogurt Marinated Chicken Variations

Feel free to play with this recipe and make it your own with these fun variations!

  • Citrus Zest: Add the zest of an orange or lime to the marinade for an extra burst of freshness that brightens the flavors.
  • Herb Infusion: Swap the dill for fresh basil or cilantro in the dill feta cream to create a herbaceous twist that complements the spices beautifully.
  • Creamy Vegan: Replace the Greek yogurt with a dairy-free yogurt alternative and omit mayonnaise for a vegan-friendly meal that’s still rich.
  • Spicy Kick: If you crave more heat, add a dash of hot sauce to the marinade or include diced jalapeños into the mix!
  • Sweet Notes: Include a tablespoon of honey or maple syrup in the marinade for a sweet and spicy flavor profile that dancers on your palate!
  • Crunchy Topping: Before serving, sprinkle some toasted pine nuts or chopped almonds over the dish for a delightful crunch that elevates the texture.
  • Change the Protein: Swap the chicken thighs for boneless chicken breasts, shrimp, or even firm tofu to cater to different dietary preferences, all while keeping the marinade intact.
  • Veggie Roast: Toss your favorite seasonal vegetables, like bell peppers and zucchini, alongside the potatoes for a colorful and nutritious addition to your meal!

Chef's Helpful Tips

  • When making Spicy Yogurt Marinated Chicken, always let the chicken marinate for at least 30 minutes, but ideally up to 24 hours for maximum flavor and tenderness.
  • Ensure that the chicken is completely coated with the marinade to avoid dry spots during cooking.
  • For an even bake, spread the baby potatoes and chicken thighs in a single layer on the baking sheet without overcrowding them.
  • Remember to check the internal temperature of the chicken, which should reach 165°F (75°C) for safe consumption.

Spicy Yogurt Marinated Chicken Recipe FAQs

What is the best way to select ripe ingredients for this recipe?
Absolutely! When choosing your ingredients, look for firm baby potatoes without any dark spots or soft areas, as these indicate spoilage. For the chicken thighs, ensure they are fresh, with no unpleasant odor—this guarantees the best texture and flavor in your dish. Opt for vibrant, aromatic garlic bulbs; they should have tight, dry skins.

How should I store leftover Spicy Yogurt Marinated Chicken?
After enjoying your meal, store any leftovers in an airtight container in the refrigerator. They should be consumed within 3 days for the best taste and quality. Make sure the container is sealed well to prevent moisture loss or the absorption of other refrigerator odors.

Can I freeze the Spicy Yogurt Marinated Chicken?
Absolutely! To freeze, marinate the chicken as directed, then transfer it to a freezer-safe bag or container before cooking. You can freeze it for up to 3 months. When ready to use, just thaw it in the refrigerator overnight—it’ll soak up even more flavor as it defrosts, making it a tasty meal option any night of the week!

How can I reheat the chicken without drying it out?
To reheat the chicken, I recommend preheating your oven to 350°F (175°C). Place the chicken in an oven-safe dish with a splash of broth or water to maintain moisture. Cover it with foil to retain heat, and bake for about 15-20 minutes or until heated through. This method helps to preserve the juicy texture of the chicken!

Are there any dietary considerations for the Spicy Yogurt Marinated Chicken?
Very! If you’re serving this dish to someone with dairy allergies, you can substitute the Greek yogurt and feta with dairy-free alternatives. Look for non-dairy yogurts made from almond or coconut milk and consider a plant-based feta for added creaminess. If anyone has gluten sensitivities or prefers gluten-free options, rest assured that this recipe is naturally gluten-free!

What if my chicken marinated for too long?
Don’t worry! If your chicken has been marinated for more than 24 hours, it may become too tender and mushy due to the acid in the yogurt. If this happens, rinse the marinade off gently and then season lightly before cooking. The flavor might not be as strong, but it will still be delicious!

Spicy Yogurt Marinated Chicken

Spicy Yogurt Marinated Chicken

This Spicy Yogurt Marinated Chicken combines bold flavors and simplicity for a deliciously comforting dinner option.
Print Recipe Pin Recipe
Prep Time 30 minutes mins
Cook Time 35 minutes mins
Total Time 1 hour hr 5 minutes mins
Servings: 4 servings
Course: DINNER RECIPES
Cuisine: Mediterranean
Calories: 450
Ingredients Equipment Method Nutrition Notes

Ingredients
  

For the Marinade
  • 1 cup Plain Greek yogurt provides a creamy base while tenderizing the chicken.
  • 2 tablespoons Olive oil adds richness and helps the spices adhere to the chicken.
  • 1 tablespoon Lemon juice brightens the flavors and enhances the marinade’s effectiveness.
  • 4 cloves Garlic minced for that aromatic kick, essential for flavor depth.
  • 1 teaspoon Paprika contributes an earthy sweetness and vibrant color to the dish.
  • 1 teaspoon Chili flakes adds that desirable spicy heat; adjust to your taste!
  • 1 teaspoon Ground cumin offers a warm, nutty flavor profile to the chicken.
  • 1 teaspoon Ground black pepper enhances overall seasoning with a subtle bite.
  • 1 teaspoon Salt essential for bringing out the full flavor of the chicken.
For the Chicken and Potatoes
  • 1 pound Boneless skinless chicken thighs the star of the dish, juicy and flavorful.
  • 1 pound Baby potatoes their firm texture holds up beautifully during baking.
  • 1 teaspoon Garlic powder provides a boost of garlicky goodness in the potato mix.
  • 1 teaspoon Dried oregano offers a hint of herbaceous earthiness to the potatoes.
  • 1 teaspoon Salt season to taste, ensuring a well-balanced flavor.
  • 1 teaspoon Black pepper adds warmth and complements the spices perfectly.
For the Dill Feta Cream
  • 1 cup Crumbled feta cheese gives a tangy depth that pairs wonderfully with the chicken.
  • 1 cup Plain Greek yogurt adds creaminess and a refreshing taste to the dip.
  • 1/2 cup Mayonnaise enriches the cream, contributing to its luxurious texture.
  • 1 tablespoon Fresh dill elevates the cream with a burst of herbal freshness.
  • 1 tablespoon Lemon juice brightens the flavor, tying together all the ingredients beautifully.
  • 2 cloves Garlic minced for that consistent flavor throughout the cream.
  • 1 pinch Salt to elevate the flavors in the creamy dip.
  • 1 pinch Black pepper for added warmth in each delicious spoonful.
  • optional splash Milk or water to thin the cream to your desired consistency.
For Garnish
  • to taste Fresh parsley or dill sprinkle on top for an added pop of color and freshness!

Equipment

  • Mixing bowl
  • Baking sheet
  • Oven

Method
 

Preparation
  1. Combine the marinade by mixing Greek yogurt, olive oil, lemon juice, minced garlic, paprika, chili flakes, ground cumin, black pepper, and salt in a bowl. Stir until smooth and well combined.
  2. Marinate the chicken thighs by adding them to the marinade, ensuring each piece is generously coated. Cover the bowl and let it marinate in the refrigerator for at least 30 minutes or up to 24 hours for deeper flavor.
  3. Preheat your oven to 400°F (200°C) while the chicken marinates.
  4. Prepare the baby potatoes by tossing them with olive oil, garlic powder, dried oregano, salt, and black pepper in a large bowl.
  5. Arrange the marinated chicken thighs on the same baking sheet with the potatoes, ensuring they are evenly spaced.
  6. Bake in the preheated oven for about 35 minutes, or until the chicken is golden brown and cooked through.
  7. Mix together the dill feta cream by blending crumbled feta cheese, Greek yogurt, mayonnaise, chopped fresh dill, lemon juice, minced garlic, salt, and black pepper in a separate bowl.
  8. Serve the cooked chicken and potatoes hot, drizzled with the creamy dill feta sauce and garnished with fresh parsley or dill.

Nutrition

Serving: 1servingCalories: 450kcalCarbohydrates: 30gProtein: 35gFat: 22gSaturated Fat: 8gPolyunsaturated Fat: 2gMonounsaturated Fat: 8gCholesterol: 100mgSodium: 800mgPotassium: 950mgFiber: 4gSugar: 2gVitamin A: 500IUVitamin C: 15mgCalcium: 150mgIron: 3mg

Notes

For maximum flavor, marinate for at least 30 minutes, ideally up to 24 hours. Ensure chicken is completely coated to avoid dry spots during cooking. Serve with a squeeze of fresh lemon juice for an extra burst of flavor.

Tried this recipe?

Let us know how it was!

Filed Under: DINNER RECIPES

White Bean Sausage Skillet

December 22, 2025 by JudyWhite Leave a Comment

After a long week of facing the same old fast-food options, I found myself yearning for something hearty yet comforting—and that’s when this White Bean Sausage Skillet came to life. Imagine the aroma of sizzling sausage mingling with fragrant garlic, filling your kitchen with warmth and inviting all to gather around. This dish combines creamy white beans, vibrant kale, and just the right hint of smoky flavor, all topped with a generous sprinkle of Parmesan cheese.

With just 30 minutes from start to finish, this skillet meal not only satisfies your cravings but also transforms your evening into a delightful culinary experience. It’s versatile enough to serve as a cozy weeknight dinner or as the centerpiece for a casual gathering with friends. Believe me, once you try this recipe, you’ll be reimagining your meal prep routine and rediscovering the joy of homemade food. So, let’s dive into the simple yet flavorful world of the White Bean Sausage Skillet—your taste buds will thank you!

Why You'll Love This White Bean Sausage Skillet

  • This White Bean Sausage Skillet is a quick and easy meal that can be ready in just 30 minutes, making it perfect for busy weeknights.
  • Bursting with flavor from the smoky sausage and fresh ingredients, each bite is a delicious taste experience that will leave you craving more.
  • Its versatility allows you to customize the ingredients based on your preferences or what you have on hand, ensuring every meal is unique.
  • Not only is it visually appealing with its vibrant colors, but it also makes for an impressive dish to serve when entertaining guests, guaranteeing that everyone will be asking for seconds.

White Bean Sausage Skillet Ingredients

Discover the essential components for your flavorful dish!

For the Skillet
• Extra-virgin olive oil – essential for a rich base, bringing together all flavors.
• Smoked or Italian sausage – provides a delightful, smoky flavor that elevates the dish.
• Garlic – adds aromatic depth; it’s best when minced fresh.
• White beans – use great northern, butter, or cannellini for that creamy texture you crave.
• Chicken stock – this adds moisture and flavor; feel free to use low-sodium for a healthier option.
• Kosher salt – enhances all flavors; adjust to taste.
• Freshly cracked black pepper – brings a subtle kick; freshly cracked gives the best flavor.
• Minced fresh thyme leaves – infuses the dish with earthy notes that pair perfectly with sausage.

For the Greens
• Curly kale – rich in vitamins and fiber, wilt it down for the perfect texture; choose tender leaves.

For the Finish
• Fresh lemon juice – balances the richness with a zesty brightness; use freshly squeezed for the best taste.
• Freshly grated Parmesan cheese – generous topping adds creamy goodness and umami; extra for serving is a must!
• Red pepper flakes (optional) – sprinkle for an extra kick if you like heat.
• Crusty bread (optional) – perfect for soaking up all the delicious sauce.

Dive into the world of flavors with this White Bean Sausage Skillet and enjoy every comforting bite!

How to Make White Bean Sausage Skillet

  1. Heat the oil
    In a 12-inch skillet, warm the olive oil over medium-high heat until it shimmers. Add the sliced sausage and cook until beautifully browned on both sides, about 4 to 5 minutes.

  2. Add garlic and beans
    Toss in the minced garlic and cook for about 30 seconds until it releases a fragrant aroma. Then, stir in two-thirds of the white beans along with 1 cup of chicken stock, seasoning with salt, pepper, and thyme. Bring this to a gentle simmer.

  3. Mash remaining beans
    In a medium bowl, mash the leftover beans with a fork until you achieve a thick paste. Stir this into the skillet mixture and let it simmer for 2 to 3 minutes until everything is heated through and the stock is bubbling.

  4. Incorporate the kale
    Add the kale to the skillet, reducing the heat to medium-low. Cook it, stirring often, until the sauce thickens and the kale wilts down, which should take about 2 more minutes.

  5. Finish with cheese and lemon
    Stir in the freshly grated Parmesan cheese and lemon juice along with the sausage. If you’re seeking creaminess, gradually add the remaining chicken stock. Tweak the seasoning to your liking.

  6. Serve it up
    Dish out your delectable skillet meal with extra Parmesan and a sprinkle of red pepper flakes if you’re in the mood for spice. Pair it with crusty bread to soak up the savory juices.

Optional: Garnish with fresh herbs for an added burst of flavor.
Exact quantities are listed in the recipe card below.

Make Ahead Options

These White Bean Sausage Skillets are perfect for meal prep, allowing busy home cooks to enjoy a hearty, homemade dinner with ease! You can slice the sausage and prep the beans up to 24 hours in advance by storing them in an airtight container in the refrigerator to maintain freshness. Additionally, you can wash and tear the kale, keeping it ready to go. When you’re ready to serve, simply heat the oil in the skillet, add the sausage, garlic, and prepped ingredients, and follow the remaining cooking steps. This advanced prep not only saves time but ensures that your dish remains just as delicious and satisfying at the end of a long day!

What to Serve with White Bean Sausage Skillet?

Elevate your dining experience with delightful sides that enhance the heartiness of this dish.

  • Creamy Mashed Potatoes: Their buttery richness complements the savory flavors of the skillet perfectly. The smooth texture creates a comforting balance amidst the hearty beans.

  • Garlic Roasted Asparagus: Bright and vibrant, the earthy flavor adds a nice contrast to the dish. These tender spears add a splash of color and crunch to your plate, making every bite exciting.

  • Zesty Coleslaw: A fresh and crunchy side helps cut through the richness and adds a tangy zest to every mouthful. The pairing of flavors and textures will keep your meal interesting and delightful.

  • Crusty Bread: This is an essential addition for soaking up the delicious sauce. The crunchy exterior gives way to soft, warm bread, creating a satisfying mouthfeel with every bite of the skillet.

  • Simple Green Salad: A mix of greens with a light vinaigrette will refresh your palate. The crisp textures and bright flavors offer a delightful contrast, making your meal feel lighter.

  • White Wine: A chilled glass of Sauvignon Blanc enhances the comforting flavors of the dish. The wine’s acidity complements the richness, elevating your dining experience to a new level of enjoyment.

  • Tiramisu: For dessert, indulge in this classic Italian treat. Its creamy layers and hint of coffee provide a lovely end to your meal, leaving everyone with sweet memories.

White Bean Sausage Skillet Variations

Feel free to add your own twist to this heartwarming dish and make it uniquely yours!

  • Spicy Sausage: Swap in spicy Italian sausage for an extra kick that enhances the whole dish.
  • Vegetarian: Use plant-based sausage or mushrooms for a satisfying meatless option, while still keeping the flavors rich and hearty.
  • White Bean Mix: Combine different beans such as chickpeas or black beans for a varied texture and flavor profile that surprises the palate.
  • Herb Infusion: Experiment with different fresh herbs like rosemary or basil to refresh the taste; each herb brings its personality to the dish!
  • Creamy Texture: Stir in a splash of heavy cream or coconut milk in place of some chicken stock for a luscious, creamy version that feels indulgent yet comforting.
  • Zesty Citrus: Add orange or lime juice instead of lemon for a bright twist that brings a new level of flavor—citrus does wonders!
  • Nutty Elements: Toss in toasted pine nuts or walnuts for a delightful crunch and an earthy flavor that complements the creaminess beautifully.
  • Roasted Veggies: Include roasted bell peppers or zucchini for added color and nutrition, making every bite a wholesome goodness bomb.

Embrace your culinary creativity and watch how each variation creates its own special charm!

How to Store and Freeze White Bean Sausage Skillet

Room Temperature: Store leftovers covered at room temperature for up to 2 hours. This keeps them safe from bacterial growth.

Fridge: Keep the White Bean Sausage Skillet in an airtight container in the fridge for up to 3 days. Reheat in the skillet or microwave until warmed through.

Freezer: For longer storage, freeze the skillet in a freezer-safe container for up to 3 months. Thaw in the fridge overnight before reheating.

Reheating: When reheating, add a splash of chicken stock to restore creaminess and prevent it from drying out as you warm it up.

Chef's Helpful Tips

  • When making the White Bean Sausage Skillet, always ensure your olive oil is hot before adding the sausage to achieve a perfect golden-brown sear.
  • Avoid overcrowding the skillet as this can lower the temperature and lead to uneven cooking; if necessary, brown the sausage in batches.
  • For a creamier texture, don’t skip mashing some of the beans before mixing them in, as it helps to thicken the sauce beautifully.
  • Keep an eye on the kale as it cooks; it only needs a few minutes to wilt and combine well with the other ingredients to avoid overcooking.

White Bean Sausage Skillet Recipe FAQs

What kind of sausage should I use?
Absolutely! You can use either smoked sausage or Italian sausage for this recipe. The smoked sausage provides a delightful, rich flavor while Italian sausage offers more savory and herbal notes. Choose according to your preference or what you have on hand!

How should I store leftovers of the White Bean Sausage Skillet?
For sure! Store the White Bean Sausage Skillet in an airtight container in the fridge for up to 3 days. If you want to keep it longer, you can freeze it in a freezer-safe container for up to 3 months. Just be sure to let it cool completely before packing it away.

Can I freeze the White Bean Sausage Skillet?
Definitely! To freeze, allow the skillet to cool, then transfer it to a freezer-safe container. You can store it for up to 3 months. When you’re ready to enjoy it again, thaw it in the fridge overnight, then reheat and add a splash of chicken stock to restore its creamy texture.

How do I prevent the kale from becoming overcooked?
Very good question! To avoid overcooking the kale, cook it for only about 2 minutes after adding it to the skillet. Keep stirring often until it’s wilted. Remember, kale should retain some of its bright green color to maintain its nutrients and texture, so don’t leave it on the heat for too long!

Is this dish suitable for people with dietary restrictions?
Absolutely! This White Bean Sausage Skillet is naturally free from gluten as long as you use gluten-free sausage and chicken stock. It’s packed with protein and fiber thanks to the beans and kale. However, if you or your guests have specific allergies, it’s always best to double-check the labels of the sausage and stock you choose!

White Bean Sausage Skillet

White Bean Sausage Skillet

This White Bean Sausage Skillet is a comforting and flavorful dish that combines creamy beans, smoky sausage, and vibrant kale.
Print Recipe Pin Recipe
Prep Time 10 minutes mins
Cook Time 20 minutes mins
Total Time 30 minutes mins
Servings: 4 servings
Course: DINNER RECIPES
Cuisine: American
Calories: 450
Ingredients Equipment Method Nutrition Notes

Ingredients
  

For the Skillet
  • 2 tablespoons extra-virgin olive oil essential for a rich base
  • 12 ounces smoked or Italian sausage provides smoky flavor
  • 4 cloves garlic minced fresh
  • 3 cups white beans great northern, butter, or cannellini
  • 1 cup chicken stock low-sodium for a healthier option
  • 1 teaspoon kosher salt adjust to taste
  • 1/2 teaspoon freshly cracked black pepper brings a subtle kick
  • 1 teaspoon minced fresh thyme leaves earthy notes
For the Greens
  • 4 cups curly kale rich in vitamins and fiber
For the Finish
  • 2 tablespoons fresh lemon juice freshly squeezed for best taste
  • 1 cup freshly grated Parmesan cheese extra for serving
  • 1/4 teaspoon red pepper flakes optional for extra kick
  • 1 loaf crusty bread optional for soaking up sauce

Equipment

  • 12-inch skillet

Method
 

Cooking Steps
  1. In a 12-inch skillet, warm the olive oil over medium-high heat until it shimmers. Add the sliced sausage and cook until beautifully browned on both sides, about 4 to 5 minutes.
  2. Toss in the minced garlic and cook for about 30 seconds until it releases a fragrant aroma. Then, stir in two-thirds of the white beans along with 1 cup of chicken stock, seasoning with salt, pepper, and thyme. Bring this to a gentle simmer.
  3. In a medium bowl, mash the leftover beans with a fork until you achieve a thick paste. Stir this into the skillet mixture and let it simmer for 2 to 3 minutes until everything is heated through and the stock is bubbling.
  4. Add the kale to the skillet, reducing the heat to medium-low. Cook it, stirring often, until the sauce thickens and the kale wilts down, which should take about 2 more minutes.
  5. Stir in the freshly grated Parmesan cheese and lemon juice along with the sausage. If you're seeking creaminess, gradually add the remaining chicken stock. Tweak the seasoning to your liking.
  6. Dish out your delectable skillet meal with extra Parmesan and a sprinkle of red pepper flakes. Pair it with crusty bread to soak up the savory juices.

Nutrition

Serving: 1servingCalories: 450kcalCarbohydrates: 40gProtein: 25gFat: 20gSaturated Fat: 7gPolyunsaturated Fat: 3gMonounsaturated Fat: 8gCholesterol: 60mgSodium: 800mgPotassium: 900mgFiber: 10gSugar: 2gVitamin A: 200IUVitamin C: 50mgCalcium: 250mgIron: 4mg

Notes

For an added burst of flavor, garnish with fresh herbs if desired.

Tried this recipe?

Let us know how it was!

Filed Under: DINNER RECIPES

Glazed Applesauce Donuts

December 22, 2025 by JudyWhite Leave a Comment

There’s something truly special about the moment you take the first bite of a warm donut, especially when it’s drizzled in a sweet, glossy glaze. I found myself in the kitchen one rainy afternoon, craving something delightful to pair with my coffee, when the idea for these Glazed Applesauce Donuts struck me. With the comforting, subtle sweetness of applesauce and a hint of cinnamon, this recipe transforms a simple ingredient into an indulgent treat that feels both homey and sophisticated.

These donuts are not only effortless to whip up but also perfect for sharing! Whether you’re planning a cozy brunch with friends or looking to sweeten your family’s morning routine, these donuts are a crowd-pleaser that will have everyone eagerly reaching for seconds. Join me as we dive into this easy recipe and bring the warm, inviting aroma of freshly baked donuts into your home—no frying required! Ready to savor the goodness? Let’s get started!

Why You'll Love This Glazed Applesauce Donuts

  • These Glazed Applesauce Donuts are incredibly easy to make, ensuring you can whip up a batch in no time.
  • The flavor is absolutely delightful, with the perfect balance of sweetness from the applesauce and a warm hint of cinnamon that makes each bite a cozy experience.
  • Their versatility means they can be enjoyed for breakfast, dessert, or even as an afternoon snack, making them a great addition to any occasion.
  • Plus, their beautiful glaze makes them visually appealing, ensuring they will impress guests and family alike.

Glazed Applesauce Donuts Ingredients

Creating these delightful donuts is easier than you think, and the ingredients are likely already in your pantry!

For the Donuts

  • 1 large egg – adds richness and helps bind the ingredients.
  • 1 cup milk – keeps the donuts moist; feel free to use any milk alternative!
  • 1/2 cup unsweetened applesauce – provides natural sweetness and moisture; use extra for the glaze.
  • 2/3 cup sugar – balances out the flavors; consider reducing for a less sweet donut.
  • 1 teaspoon vanilla extract – enhances the overall flavor with a lovely aromatic note.
  • 2 cups all-purpose flour – the base for your donuts; you can swap with whole wheat for added nutrition.
  • 2 teaspoons baking powder – essential for making the donuts fluffy.
  • 1 teaspoon ground cinnamon – brings warmth and spice; a must-have in this recipe!
  • 1/2 teaspoon kosher salt – enhances the sweetness and balances the flavors.

For the Glaze

  • 1 cup powdered sugar – gives the glaze its sweet and smooth texture.
  • 1/2 teaspoon ground cinnamon – adds an extra layer of flavor to the glaze.
  • 2 teaspoons unsweetened applesauce – complements the powdered sugar and gives the glaze a subtle fruitiness.
  • 4 teaspoons water – helps to achieve the perfect glaze consistency; feel free to add more for a thinner glaze.

These Glazed Applesauce Donuts are not just a treat for your taste buds, but a fun recipe to create together with loved ones!

How to Make Glazed Applesauce Donuts

  1. Preheat the oven to 350°F (175°C) and give your donut pan a light spray with cooking spray to ensure easy removal after baking.

  2. Whisk together in a mixing bowl the egg, milk, applesauce, sugar, and vanilla. Aim for a smooth and cohesive mixture that’s filled with delightful flavors.

  3. Combine the dry ingredients: gradually add the flour, baking powder, ground cinnamon, and salt into the mixing bowl. Stir until the batter is completely smooth, creating a thick yet pourable consistency.

  4. Spoon the batter into each cavity of the prepared donut pan, filling each almost to the top. Bake for 12-15 minutes, or until a toothpick inserted comes out clean—look for a light golden color.

  5. Cool the donuts in the pan for a few minutes, then carefully transfer them to a baking sheet lined with parchment paper to cool completely, allowing them to maintain their fluffy texture.

  6. Prepare the glaze by whisking together powdered sugar, ground cinnamon, applesauce, and water in a separate bowl. Mix until smooth, adding more water if necessary to reach the desired consistency.

  7. Dip the tops of each cooled donut into the glaze, twisting gently to ensure an even coating. Let any excess drip off before placing them glaze-side up on the lined baking sheet.

  8. Rest the glazed donuts for about 15 minutes, allowing the glaze to set and create a beautiful shine before serving.

Optional: Top with a sprinkle of cinnamon for an extra touch of flavor.

Exact quantities are listed in the recipe card below.

How to Store and Freeze Glazed Applesauce Donuts

  • Room Temperature: Keep the donuts in an airtight container at room temperature for up to 2 days. This way, they stay soft and delicious for your morning coffee.

  • Fridge: If you want them to last a bit longer, you can store the Glazed Applesauce Donuts in the refrigerator for up to a week. Just make sure they’re in an airtight container to prevent them from drying out.

  • Freezer: These donuts freeze beautifully! Wrap them individually in plastic wrap and then place them in a freezer bag. They can be frozen for up to 3 months. Thaw in the fridge overnight before enjoying.

  • Reheating: To warm up the donuts, simply microwave them for about 10-15 seconds. This will revive their soft texture and warm the glaze back up!

Make Ahead Options

These Glazed Applesauce Donuts are fantastic for meal prep, making your busy mornings a breeze! You can prepare the donut batter up to 24 hours in advance—just combine all the wet and dry ingredients but hold off on baking. Store the mixed batter in an airtight container in the refrigerator. Additionally, you can also glaze the donuts and store them in the fridge for up to 3 days; simply rewarm them in the oven for a few minutes before serving to regain that fresh-baked taste. This way, you’ll enjoy delightful, homemade donuts with minimal morning effort, just as delicious and fluffy as if they were baked fresh!

What to Serve with Glazed Applesauce Donuts?

These delightful treats are perfect for indulging your taste buds while sharing cozy moments with family and friends.

  • Fresh Brewed Coffee: The perfect pairing for sugary donuts, a cup of coffee enhances their flavors and provides a comforting morning ritual.

  • Warm Milk: A sweet and comforting option, warm milk complements the cinnamon notes in the donuts and balances their sweetness.

  • Fruit Salad: A zesty, fresh fruit salad brings a refreshing contrast to the fluffy sweetness of the donuts, adding both color and flavor to your brunch table.

Bright, juicy berries, crisp apples, and succulent oranges can all create a vibrant plate that perfectly harmonizes with your Glazed Applesauce Donuts.

  • Cinnamon Tea: A warm cup of cinnamon tea offers a soothing sip that draws out the spices in the donuts while making the meal feel even more indulgent.

  • Maple Syrup: Drizzle a little maple syrup over your donuts for an additional layer of sweetness and a touch of classic flavor that everyone loves.

  • Vanilla Yogurt Parfait: Layering yogurt with granola and fruit provides a lovely texture contrast while making a deliciously creamy treat beside your donuts.

  • Chai Latte: The spiced, creamy goodness of a chai latte beautifully complements the flavors of your donuts, making every bite feel like a warm hug.

  • Nutty Trail Mix: A crunchy blend of nuts and dried fruits adds a hearty texture contrast, balancing the sweet softness of your donuts for a satisfying snack across the board.

With these delicious pairings, your Glazed Applesauce Donuts will shine bright and bring smiles to every gathering!

Glazed Applesauce Donuts Variations

Feel free to get creative and make these delicious donuts your own with these fun twists!

  • Gluten-Free: Substitute all-purpose flour with a gluten-free blend to enjoy these treats without the gluten.

  • Maple Infusion: Replace sugar with maple syrup for a delightful and unique flavor that adds a cozy twist.

  • Spiced Up: Add a pinch of nutmeg or cardamom to the dry ingredients for an aromatic kick that will tantalize your taste buds.

  • Berry Boost: Fold in a cup of fresh blueberries or chopped strawberries into the batter for a fruity burst in every bite!

  • Nutty Delight: Stir in 1/2 cup of chopped nuts like walnuts or pecans for added crunch and depth; it’s a delightful surprise!

  • Cacao Kick: Mix in a few tablespoons of cocoa powder to create chocolate-glazed donuts that will surely please chocolate lovers.

  • Zesty Touch: Add the zest of one orange or lemon to the batter for a fresh citrus twist; it brightens up the flavor beautifully.

  • Chili Heat: For those who love a bit of spice, incorporate a pinch of cayenne pepper into the glaze for a sweet and spicy treat that’s unforgettable!

Chef's Helpful Tips

  • When making Glazed Applesauce Donuts, be sure to properly whisk the wet ingredients first to achieve a smooth and cohesive batter, which helps combine flavors effectively.
  • Avoid over-mixing your batter once you add the dry ingredients, as this can lead to dense donuts instead of light and fluffy ones.
  • For the glaze, start with a smaller amount of water and gradually add more until you reach the desired consistency, giving you the perfect coating for your donuts.
  • Remember to let your donuts cool for a few minutes in the pan before transferring them to avoid breaking them apart.

Glazed Applesauce Donuts Recipe FAQs

How do I choose the right applesauce?
Absolutely! For the best flavor, opt for unsweetened applesauce made from one hundred percent apples. You can also choose a brand that has no added sugars or preservatives. If you’re feeling adventurous, consider trying flavored applesauces, such as cinnamon or caramel, for a fun twist!

How should I store leftover donuts?
To keep your Glazed Applesauce Donuts fresh, store them in an airtight container at room temperature for up to 2 days. If you need them to last longer, pop them in the fridge for up to a week. Just make sure to check if they’re covered well so they don’t dry out!

Can I freeze these donuts for later?
Absolutely! Freezing Glazed Applesauce Donuts is an excellent way to save them for future enjoyment. First, allow the donuts to cool completely. Then, wrap each one tightly in plastic wrap, followed by placing them in a freezer-safe zip-top bag. They can stay fresh in the freezer for up to 3 months. When you’re ready to enjoy, simply thaw them in the fridge overnight.

What should I do if my donuts come out dense?
Very! If you find your donuts are denser than expected, it’s often due to overmixing the batter after adding the flour. To avoid this, mix just until the dry ingredients are incorporated. Also, ensure that your baking powder is fresh, as expired leavening agents can lead to undesired textures in baked goods.

Are these donuts safe for pets or those with allergies?
Good question! While these donuts are delicious for humans, they’re not suitable for pets due to high sugar content and certain ingredients like cinnamon. Additionally, be cautious if preparing for anyone with allergies; common allergens in this recipe include egg, milk, and wheat. Always substitute with allergy-friendly alternatives if necessary, and check with your guests for dietary restrictions!

Glazed Applesauce Donuts

Glazed Applesauce Donuts

Delight in these Glazed Applesauce Donuts, a perfect treat for breakfast or dessert with a touch of cinnamon.
Print Recipe Pin Recipe
Prep Time 10 minutes mins
Cook Time 15 minutes mins
Resting Time 15 minutes mins
Total Time 40 minutes mins
Servings: 12 donuts
Course: DESSERT RECIPES
Cuisine: American
Calories: 180
Ingredients Equipment Method Nutrition Notes

Ingredients
  

For the Donuts
  • 1 large egg adds richness and helps bind the ingredients.
  • 1 cup milk keeps the donuts moist; feel free to use any milk alternative!
  • 1/2 cup unsweetened applesauce provides natural sweetness and moisture; use extra for the glaze.
  • 2/3 cup sugar balances out the flavors; consider reducing for a less sweet donut.
  • 1 teaspoon vanilla extract enhances the overall flavor with a lovely aromatic note.
  • 2 cups all-purpose flour the base for your donuts; you can swap with whole wheat for added nutrition.
  • 2 teaspoons baking powder essential for making the donuts fluffy.
  • 1 teaspoon ground cinnamon brings warmth and spice; a must-have in this recipe!
  • 1/2 teaspoon kosher salt enhances the sweetness and balances the flavors.
For the Glaze
  • 1 cup powdered sugar gives the glaze its sweet and smooth texture.
  • 1/2 teaspoon ground cinnamon adds an extra layer of flavor to the glaze.
  • 2 teaspoons unsweetened applesauce complements the powdered sugar and gives the glaze a subtle fruitiness.
  • 4 teaspoons water helps to achieve the perfect glaze consistency; feel free to add more for a thinner glaze.

Equipment

  • Donut pan
  • Mixing bowl
  • Whisk

Method
 

How to Make Glazed Applesauce Donuts
  1. Preheat the oven to 350°F (175°C) and give your donut pan a light spray with cooking spray to ensure easy removal after baking.
  2. Whisk together in a mixing bowl the egg, milk, applesauce, sugar, and vanilla. Aim for a smooth and cohesive mixture that’s filled with delightful flavors.
  3. Combine the dry ingredients: gradually add the flour, baking powder, ground cinnamon, and salt into the mixing bowl. Stir until the batter is completely smooth, creating a thick yet pourable consistency.
  4. Spoon the batter into each cavity of the prepared donut pan, filling each almost to the top. Bake for 12-15 minutes, or until a toothpick inserted comes out clean—look for a light golden color.
  5. Cool the donuts in the pan for a few minutes, then carefully transfer them to a baking sheet lined with parchment paper to cool completely, allowing them to maintain their fluffy texture.
  6. Prepare the glaze by whisking together powdered sugar, ground cinnamon, applesauce, and water in a separate bowl. Mix until smooth, adding more water if necessary to reach the desired consistency.
  7. Dip the tops of each cooled donut into the glaze, twisting gently to ensure an even coating. Let any excess drip off before placing them glaze-side up on the lined baking sheet.
  8. Rest the glazed donuts for about 15 minutes, allowing the glaze to set and create a beautiful shine before serving.

Nutrition

Serving: 1donutCalories: 180kcalCarbohydrates: 26gProtein: 2gFat: 7gSaturated Fat: 1gPolyunsaturated Fat: 0.5gMonounsaturated Fat: 1gCholesterol: 30mgSodium: 150mgPotassium: 50mgFiber: 1gSugar: 10gVitamin A: 100IUCalcium: 50mgIron: 0.5mg

Notes

Optional: Top with a sprinkle of cinnamon for an extra touch of flavor. Be sure to let your donuts cool for a few minutes in the pan before transferring them to avoid breaking them apart.

Tried this recipe?

Let us know how it was!

Filed Under: BREAKFAST & BRUNCH

Cinnamon Roll Cupcakes

December 22, 2025 by JudyWhite Leave a Comment

There’s an undeniable warmth that fills the kitchen when you’re crafting something decadent from scratch. The delightful scent of cinnamon mingling with the sweet notes of vanilla brings back those cozy afternoons spent indulging in comforting treats. On a rainy afternoon, I decided to put a fun twist on a favorite classic, creating these delightful Cinnamon Roll Cupcakes.

Imagine biting into a fluffy cupcake, met with the gooey richness of cinnamon roll filling, all topped off with a luscious frosting that beckons for just one more bite. These cupcakes are perfect for a cozy weekend brunch or a delightful afternoon snack. Better yet, they take the familiar pleasure of cinnamon rolls and wrap them in a fun, portable form—no rolling mat required!

Let’s dive into this delicious recipe that’s surprisingly easy and practically foolproof, guaranteed to turn any hum-drum day into a sweet celebration!

Why You'll Love This Cinnamon Roll Cupcakes

  • These Cinnamon Roll Cupcakes combine the best of both worlds, offering the classic flavors of cinnamon rolls in a convenient cupcake form.
  • The recipe is surprisingly easy, making it perfect for both novice bakers and seasoned pros alike.
  • With their gooey filling and decadent frosting, these cupcakes are sure to impress and satisfy any sweet tooth.
  • They are versatile enough to serve at brunch, as an afternoon treat, or even at special occasions, bringing joy to every gathering.

Cinnamon Roll Cupcake Ingredients

Get ready to bring the magic of homemade cinnamon roll cupcakes into your kitchen!

For the Cupcake Base

  • All-purpose flour – A key ingredient for structure, providing the perfect base for your cupcakes.
  • Baking powder – Helps the cupcakes rise, giving them a light and fluffy texture.
  • Baking soda – Works in tandem with the baking powder for a beautifully airy result.
  • Table salt – Enhances the flavors and balances the sweetness of the cupcakes.
  • Cinnamon – The star spice that gives these cupcakes their enchanting aroma and flavor.
  • Large eggs – Helps bind the ingredients together while adding moisture.
  • Canola oil – Keeps the cupcakes moist and tender, so they stay fresh longer.
  • Sugar – Sweetens the batter, creating that wonderful indulgent taste.
  • Vanilla extract – Adds depth and a lovely vanilla essence to the cupcakes.
  • Sour cream – Contributes moisture and a slight tang, making cupcakes luxuriously rich.
  • Warm water (90-100°F) – Activates the yeast, creating a wonderfully fluffy texture in the cupcakes.
  • Instant yeast – Provides the light and airy lift that transforms these into delightful treats.

For the Cinnamon Roll Filling

  • Ground cinnamon – Adds that delightful, comforting warmth that makes cinnamon rolls irresistible.
  • Brown sugar – Sweetens and deepens the flavors in the filling, creating a gooey texture.
  • White sugar – Balances the filling sweetness for a deliciously sweet bite.
  • Olive oil – A surprise twist that can be used as a substitute for butter if you’re looking for a healthier option.

For the Topping

  • Unsalted butter (room temperature) – Creates a perfect crumble for topping, ensuring the filling stays soft and delicious.
  • Granulated sugar – Sweetens the topping with a slightly crunchy texture.
  • Brown sugar – Complements the crumble with a rich caramel flavor.
  • Powdered sugar (sifted) – Ideal for making a smooth, velvety frosting that pairs perfectly with the cupcakes.
  • Milk – Helps achieve the perfect consistency for a luscious frosting that holds its shape.

These amazing ingredients are what make each bite of these cinnamon roll cupcakes a delightful experience, replete with all the love of homemade treats!

How to Make Cinnamon Roll Cupcakes

  1. Mix Dry Ingredients: In a bowl, whisk together 1.25 cups all-purpose flour, 1.25 tsp baking powder, 0.5 tsp baking soda, 0.5 tsp table salt, and 1 tsp cinnamon until well combined.

  2. Whisk Wet Ingredients: In another bowl, combine 2 large eggs, 0.5 cups canola oil, 0.75 cups sugar, 2 tsp vanilla extract, 0.5 cups sour cream, and 0.5 cups warm water. Whisk until smooth and creamy.

  3. Combine Mixtures: Gently fold the wet mixture into the dry ingredients, stirring in 2.25 tsp instant yeast. Let the batter rise in a warm place for about 1 hour until it has doubled in size.

  4. Preheat and Prepare: Preheat your oven to 350°F (175°C) and line a cupcake pan with liners, ensuring they are ready for your delicious batter.

  5. Prepare Filling Mixture: In a separate bowl, combine 1.5 cups all-purpose flour, 0.5 tsp fine sea salt, 0.25 cups granulated sugar, 2 tbsp brown sugar, and 1 tbsp cinnamon.

  6. Add Butter: Mix in 0.25 cups room temperature unsalted butter until the mixture resembles a crumbly texture, then spread this topping over the risen dough evenly.

  7. Roll and Cut: Roll the dough tightly into a log. Cut the log into equal pieces with a sharp knife and gently place them in the cupcake liners.

  8. Bake: Bake for 20-25 minutes, or until the tops are golden brown and a toothpick inserted comes out clean.

  9. Prepare Frosting: In a mixing bowl, combine 1 cup sifted powdered sugar with 2 tbsp milk until smooth and creamy, creating a luscious frosting for your cupcakes.

  10. Frost and Enjoy: Once the cupcakes have cooled, generously frost each one with the prepared frosting, adding a delightful touch to these treats.

Optional: Sprinkle a dash of cinnamon on top for an extra flavorful garnish.

Exact quantities are listed in the recipe card below.

How to Store and Freeze Cinnamon Roll Cupcakes

Room Temperature: Keep your cupcakes in an airtight container at room temperature for up to 3 days. This will help maintain their moist texture and flavor.

Fridge: If you’re looking to prolong freshness, store them in the fridge for up to 1 week. Make sure they’re in an airtight container to prevent them from drying out.

Freezer: For longer storage, freeze the cupcakes in an airtight container for up to 3 months. Thaw them in the fridge overnight when you’re ready to enjoy.

Reheating: To enjoy warm, pop them in the microwave for about 10-15 seconds. This will revive the gooey texture of the filling, making your cinnamon roll cupcakes even more delightful!

What to Serve with Cinnamon Roll Cupcakes?

These delightful treats are not just a sweet indulgence; they can be part of a fully fabulous meal experience.

  • Fresh Fruit Salad: A medley of juicy fruits adds a refreshing contrast, perfectly balancing the sweetness while cleansing the palate.

  • Scrambled Eggs: Fluffy scrambled eggs bring a savory touch to your brunch spread, enriching the meal with protein-rich goodness.

  • Cream Cheese Glaze: Drizzling a tangy cream cheese glaze over the cupcakes enhances their richness and elevates the flavor profile beautifully.

  • Coffee or Tea: A warm cup of coffee or a fragrant tea complements the spices in the cupcakes, enhancing the cozy vibe of your gathering.

  • Vanilla Ice Cream: For an indulgent dessert experience, serve a scoop of vanilla ice cream alongside to contrast with the warm cupcakes.

  • Bacon or Sausage: The crispy, salty crunch of bacon or savory sausage adds a delightful textural contrast and heartiness to your meal.

  • Whipped Cream: A light dollop of whipped cream on top of the cupcakes makes for an extra creamy layer, enhancing the overall dessert experience.

Feel free to mix and match these ideas to craft a delightful brunch or afternoon treat with your Cinnamon Roll Cupcakes!

Cinnamon Roll Cupcake Variations

Embrace your creativity and customize these delightful cupcakes to suit your taste buds!

  • Gluten-Free: Substitute all-purpose flour with a 1:1 gluten-free baking blend for a fluffy gluten-free treat.
  • Dairy-Free: Swap sour cream with almond milk yogurt and use coconut oil instead of butter for a delicious, dairy-free version.
  • Nutty Twist: Add chopped pecans or walnuts to the filling for texture and a heartier flavor that enhances each bite.
  • Add Chocolate: Fold in mini chocolate chips to the batter or sprinkle on top of the frosting for a sweet chocolate surprise.
  • Spiced Variation: Introduce a pinch of nutmeg or pumpkin spice to the dough for a warm, spiced flavor that dances on your palate.
  • Maple Glaze: Use maple syrup instead of milk in the frosting for a maple-infused topping that takes these cupcakes to another level of delight.
  • Heath Bar Crunch: Crush Heath bars and sprinkle them on the frosting for a crunchy, toffee-like addition that provides a sweet contrast.
  • Cinnamon Roll Bites: Turn the filling into small bites by shaping dough into balls and baking them for a bite-sized version of your favorite treat.

No matter how you choose to personalize these cupcakes, each variation is sure to spread joy and deliciousness in every bite!

Make Ahead Options

These Cinnamon Roll Cupcakes are perfect for meal prep enthusiasts! You can prepare the batter and let it rise up to 24 hours in advance. Simply mix the dry and wet ingredients, combine them, and then store the mixture in the refrigerator to prevent over-proofing. For the filling, you can mix the crumble topping and keep it in an airtight container for up to 3 days. When you’re ready to bake, bring the batter to room temperature, roll it into a log with the filling, and bake as directed. This way, you’ll enjoy fresh cupcakes with minimal effort, saving you precious time on busy mornings!

Chef's Helpful Tips

  • When making cinnamon roll cupcakes, ensure your ingredients are at room temperature for a smoother batter.
  • A common mistake is overmixing; gently fold the wet and dry ingredients together to keep the batter light and airy.
  • Use a sharp knife to cut the dough into even pieces, allowing them to bake uniformly for the best texture.
  • Remember to bake until golden brown, checking around the 20-minute mark to avoid overbaking and losing that soft consistency.

Cinnamon Roll Cupcakes Recipe FAQs

How do I select the right cinnamon?
When selecting cinnamon for your cupcakes, look for ground cinnamon that has a rich aroma and a vibrant color. The best quality cinnamon should have a warm, sweet scent without any stale odor. If you can, try to find Ceylon cinnamon (true cinnamon) which has a delicate flavor, compared to Cassia cinnamon that is commonly found in stores.

How should I store leftover Cinnamon Roll Cupcakes?
Absolutely! Store your leftover Cinnamon Roll Cupcakes in an airtight container at room temperature for up to 3 days to keep their magical moisture. If you want them to last longer, you can refrigerate them for up to 1 week. Just ensure they are in an airtight container to avoid drying out.

Can I freeze Cinnamon Roll Cupcakes?
Yes! For longer storage, you can freeze the cupcakes for up to 3 months. To do this, allow them to cool completely after baking. Next, place them in an airtight container or wrap them individually in plastic wrap followed by aluminum foil. When you’re ready to indulge, thaw them in the fridge overnight and warm them in the microwave for 10-15 seconds to revive that delightful gooey texture.

What should I do if my cupcakes don’t rise?
If your cupcakes don’t rise, it’s likely due to inactive yeast. Ensure that the water you use to activate your instant yeast is warm (around 90-100°F). Also, always check the expiration date on the yeast. Additionally, remember to let the batter rise in a warm environment—too cool a place can hinder growth. If issues persist, try substituting with fresh yeast.

Are there any dietary considerations to keep in mind?
Definitely! If you’re cooking for someone with diet restrictions, consider using gluten-free flour as a substitute for all-purpose flour. You can also replace sugar with coconut sugar or use a sugar substitute suitable for baking. For a dairy-free version, substitute sour cream with a non-dairy yogurt. Always ensure your topping and ingredients are free from allergens if necessary.

How can I ensure my cupcakes don’t dry out while baking?
To keep your Cinnamon Roll Cupcakes delightful and moist, do not overbake them. Start checking around the 20-minute mark. Look for a golden-brown color on top and use a toothpick to check for doneness; it should come out clean or with a few moist crumbs—this keeps that soft texture intact.

Cinnamon Roll Cupcakes

Cinnamon Roll Cupcakes

Cinnamon Roll Cupcakes blend the classic flavors of cinnamon rolls in a fun, portable cupcake form, perfect for any occasion.
Print Recipe Pin Recipe
Prep Time 30 minutes mins
Cook Time 25 minutes mins
Rising Time 1 hour hr
Total Time 1 hour hr 55 minutes mins
Servings: 12 cupcakes
Course: DESSERT RECIPES
Cuisine: American
Calories: 250
Ingredients Equipment Method Nutrition Notes

Ingredients
  

Cupcake Base
  • 1.25 cups all-purpose flour
  • 1.25 tsp baking powder
  • 0.5 tsp baking soda
  • 0.5 tsp table salt
  • 1 tsp cinnamon
  • 2 large eggs
  • 0.5 cups canola oil
  • 0.75 cups sugar
  • 2 tsp vanilla extract
  • 0.5 cups sour cream
  • 0.5 cups warm water (90-100°F)
  • 2.25 tsp instant yeast
Cinnamon Roll Filling
  • 1 tbsp ground cinnamon
  • 0.25 cups brown sugar
  • 0.25 cups white sugar
  • 0.25 cups olive oil
Topping
  • 0.25 cups unsalted butter (room temperature)
  • 0.25 cups granulated sugar
  • 0.25 cups brown sugar
  • 1 cups powdered sugar (sifted)
  • 2 tbsp milk

Equipment

  • Mixing bowls
  • Whisk
  • Cupcake pan
  • Cupcake liners
  • Oven

Method
 

Preparation
  1. In a bowl, whisk together all-purpose flour, baking powder, baking soda, table salt, and cinnamon until well combined.
  2. In another bowl, combine eggs, canola oil, sugar, vanilla extract, sour cream, and warm water. Whisk until smooth and creamy.
  3. Gently fold the wet mixture into the dry ingredients, stirring in instant yeast. Let the batter rise in a warm place for about 1 hour until it has doubled in size.
  4. Preheat your oven to 350°F (175°C) and line a cupcake pan with liners.
  5. In a separate bowl, combine all-purpose flour, fine sea salt, granulated sugar, brown sugar, and cinnamon.
  6. Mix in unsalted butter until the mixture resembles a crumbly texture, then spread this topping over the risen dough evenly.
  7. Roll the dough tightly into a log. Cut the log into equal pieces and gently place them in the cupcake liners.
  8. Bake for 20-25 minutes, or until the tops are golden brown and a toothpick inserted comes out clean.
  9. In a mixing bowl, combine sifted powdered sugar with milk until smooth and creamy.
  10. Once the cupcakes have cooled, generously frost each one with the prepared frosting.

Nutrition

Serving: 1cupcakeCalories: 250kcalCarbohydrates: 35gProtein: 3gFat: 12gSaturated Fat: 7gPolyunsaturated Fat: 0.5gMonounsaturated Fat: 4gCholesterol: 50mgSodium: 150mgPotassium: 100mgFiber: 1gSugar: 15gVitamin A: 300IUCalcium: 50mgIron: 1mg

Notes

Optional: Sprinkle a dash of cinnamon on top for an extra flavorful garnish.

Tried this recipe?

Let us know how it was!

Filed Under: BREAKFAST & BRUNCH

  • « Previous Page
  • 1
  • …
  • 31
  • 32
  • 33
  • 34
  • 35
  • …
  • 49
  • Next Page »

Recent Posts

  • Crispy Potatoes in Oven
  • Lucky Charms Pancakes
  • Cheeseburger
  • Boiled Corn on the Cob
  • St. Patrick’s Day Dessert Parfaits

Recent Comments

No comments to show.

Footer

  • Contact
  • Privacy Policy
  • About Us
  • Terms
  • ↑ back to top

Copyright © 2024 www.Forkono.com

Table Of Content