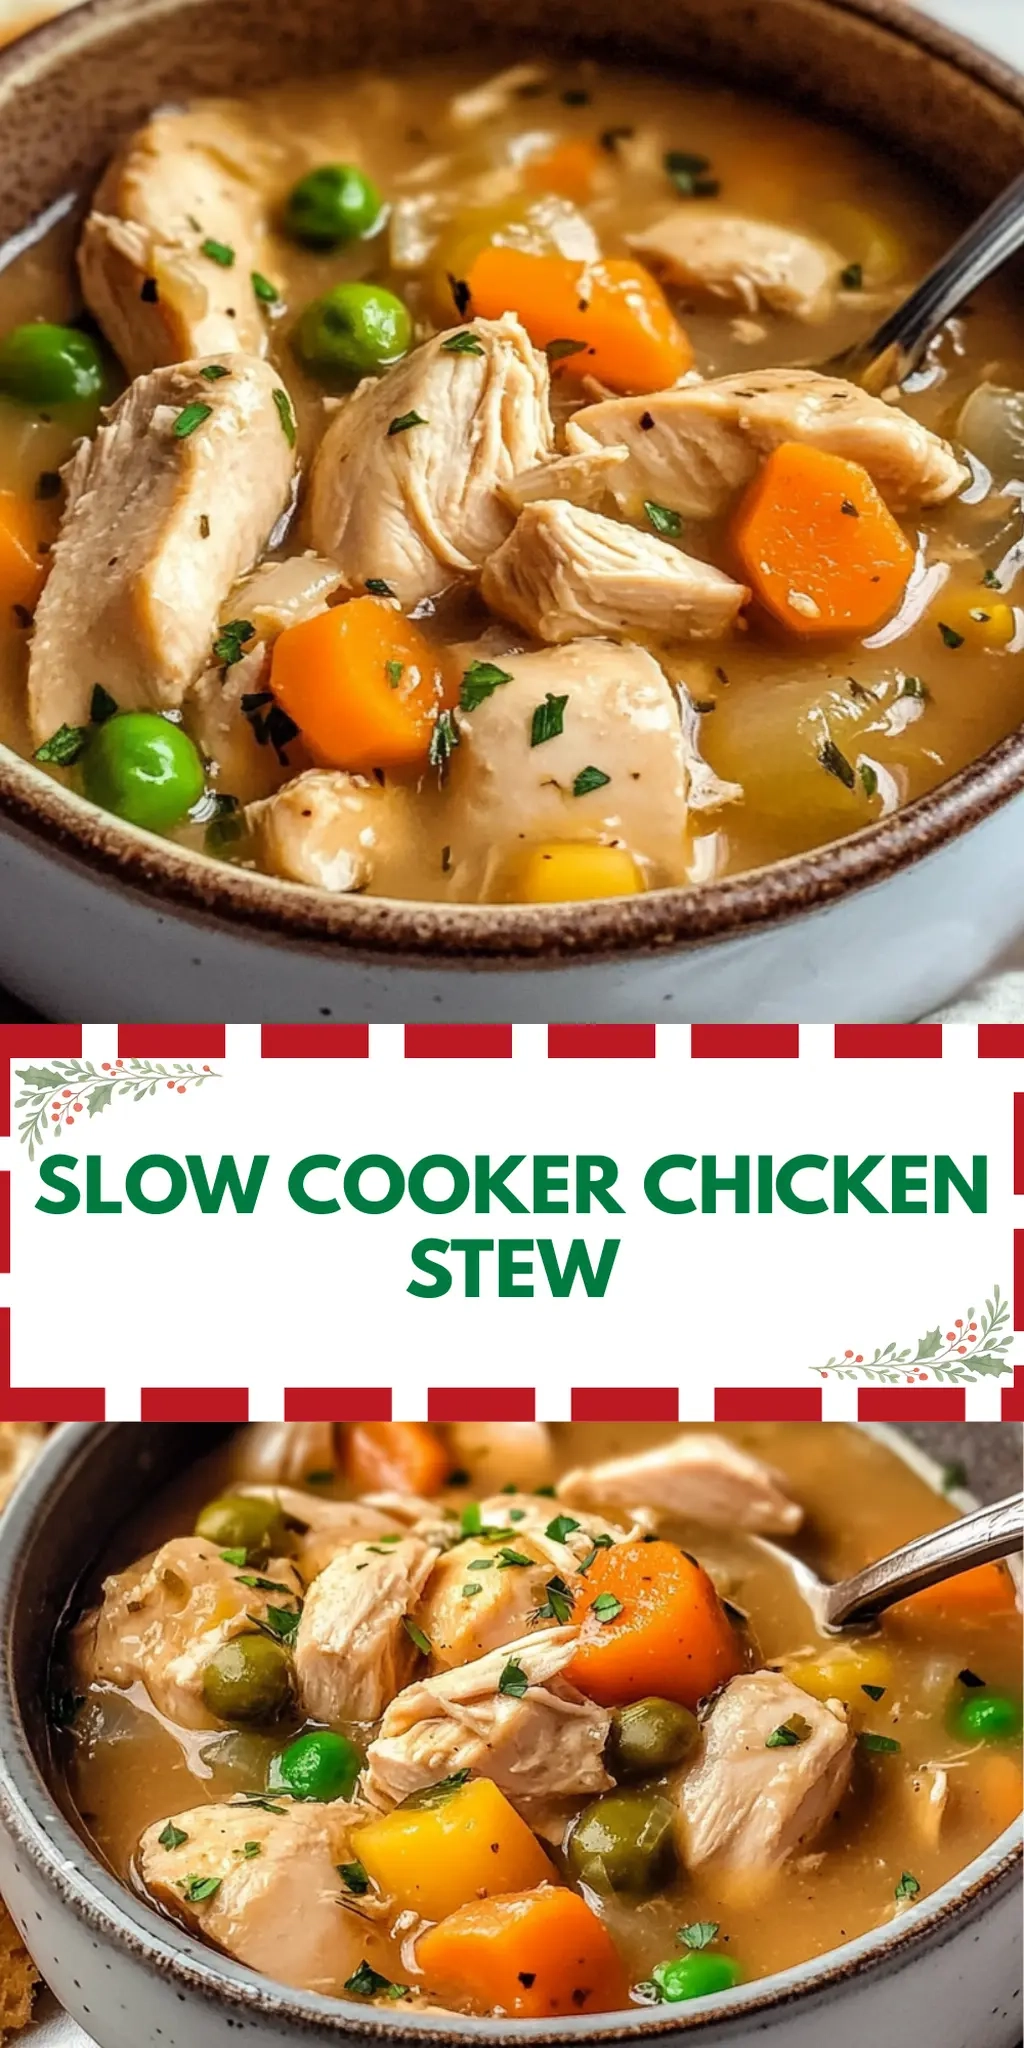
There’s something incredibly comforting about coming home to the warm embrace of a home-cooked meal, especially on those chilly evenings when time seems to slip away. Picture this: the rich aroma of a slow-cooked chicken stew wafting through your living space, mingling with hints of fragrant rosemary and thyme. It’s a scene that invites both warmth and hunger!
I discovered this Slow Cooker Chicken Stew with White Wine and Veggies on one such gray afternoon, where I found myself yearning for something hearty yet effortless. All it took was a handful of ingredients, and a trusty slow cooker, to transform simple chicken thighs and vibrant vegetables into a culinary delight that would have anyone forgetting fast food forever.
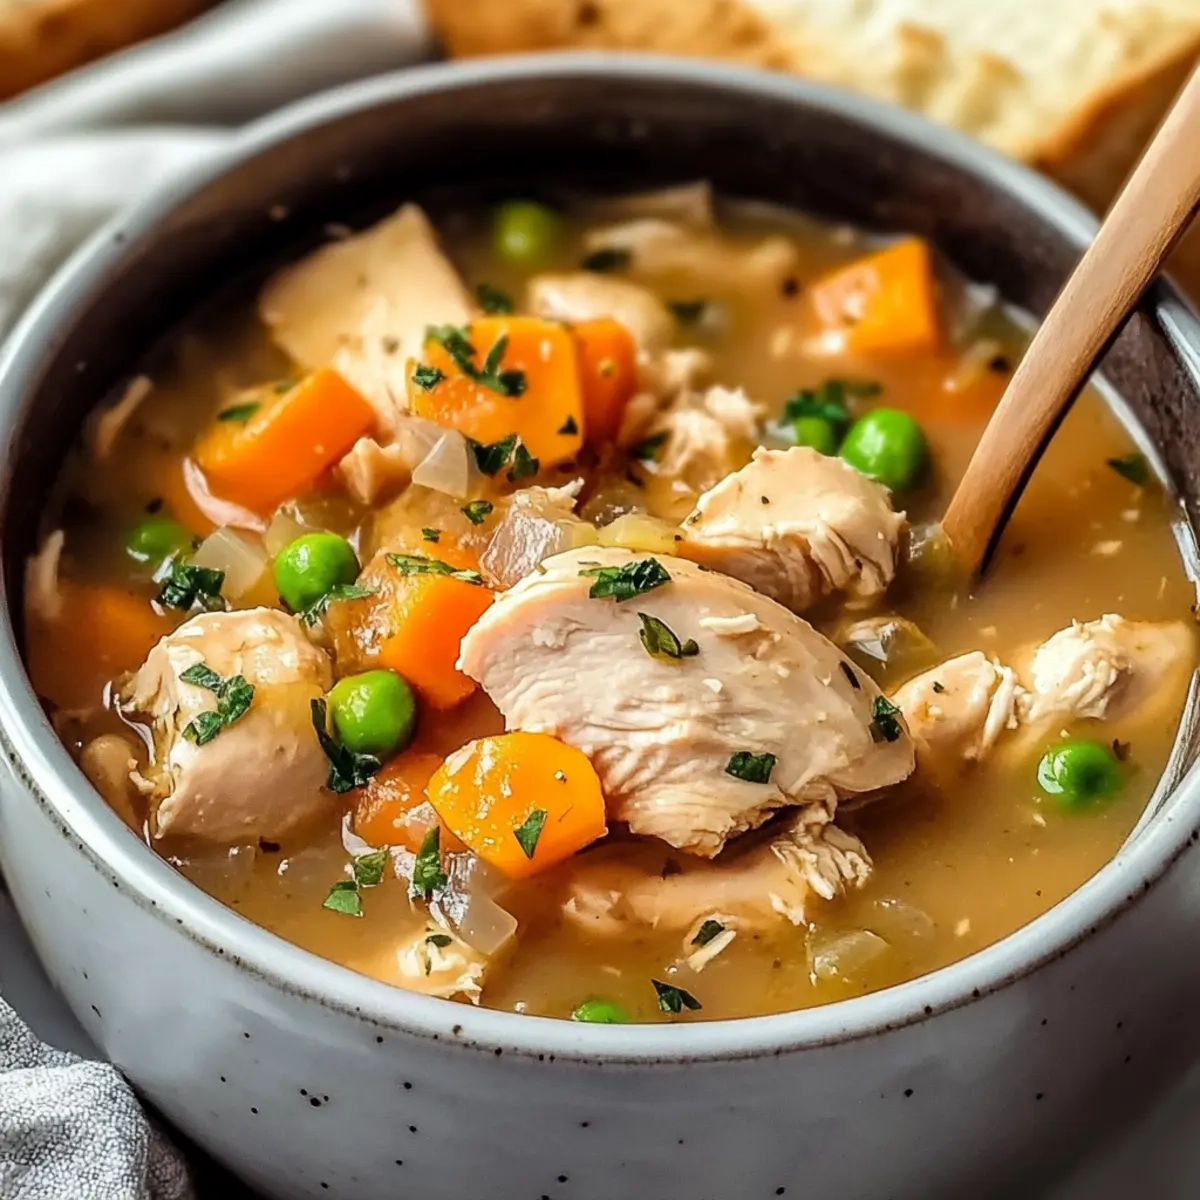
Perfect for busy weeknights or cozy gatherings, this stew isn’t just about ease—it’s a celebration of flavors, with tender chicken and veggies that lure everyone to the table. So, if you’re tired of the same old dinner routine and want to impress without the stress, let’s dive into this delightful recipe!
Why You'll Love This Slow Cooker Chicken Stew
- This Slow Cooker Chicken Stew is a dream come true for busy cooks since it requires minimal prep and allows the slow cooker to do all the work for you.
- The combination of white wine and fresh herbs brings an incredible depth of flavor that elevates this dish to comfort food perfection.
- Its versatility means you can easily adapt the ingredients based on what you have on hand, making it a great option for any day of the week.
- With its inviting aroma and hearty ingredients, this stew is guaranteed to impress your family and friends, turning any meal into a memorable gathering.
Slow Cooker Chicken Stew Ingredients
• Get ready to savor every spoonful!
For the Stew
- 1 tablespoon olive oil – a heart-healthy fat that helps to brown the chicken perfectly.
- 1.5 pounds boneless skinless chicken thighs – these provide a juicy texture and rich flavor to the stew.
- freshly ground salt – enhances all the flavors; adjust to your taste.
- freshly ground black pepper – add to taste for a nice kick of heat.
- 2 cups chicken broth – the base of your stew, lending savory depth.
- 0.5 cup dry white wine – adds a wonderful acidity and richness; think of it as a secret ingredient!
- 1 tablespoon worcestershire sauce – brings umami goodness and a delightful complexity.
- 1 teaspoon balsamic vinegar – this cuts through the richness, adding just the right touch of sweetness.
For the Herbs and Aromatics
- 2 teaspoons chopped fresh rosemary – this aromatic herb brings a pine-like freshness to the stew.
- 2 teaspoons chopped fresh thyme – adds an earthy, grounding flavor that complements the chicken beautifully.
- 0.5 teaspoon dried oregano – a classic herb that enhances the overall flavor profile.
- 6 garlic cloves – these pack a flavorful punch and should never be skimped on!
- 1 large yellow onion – it adds sweetness and depth when caramelized.
For the Vegetables
- 3 large carrots – these lend a natural sweetness and vibrant color.
- 1 pound yukon gold potatoes – creamy and buttery, they make the stew hearty and satisfying.
- 0.67 cup frozen peas – for a pop of color and sweetness to balance the dish.
For Thickening the Stew
- 0.25 cup all purpose flour – helps to thicken the stew and create a luscious consistency.
- 0.5 cup unsweetened almond milk – this adds creaminess without dairy; perfect for those with dietary restrictions.
Feel the excitement build as you gather these ingredients for your Slow Cooker Chicken Stew!
How to Make Slow Cooker Chicken Stew
-
Sauté the chicken: Add 1 tablespoon olive oil to a large skillet and place over high heat. Season the chicken thighs with salt and pepper, and brown them for about 5-6 minutes until golden. Transfer to a large slow cooker.
-
Combine the liquids and seasonings: In the slow cooker, add chicken broth, dry white wine, Worcestershire sauce, balsamic vinegar, thyme, rosemary, oregano, salt, and pepper. Stir well to blend all the flavors.
-
Add the vegetables: Toss in minced garlic, diced onion, sliced carrots, and cubed potatoes. Cover and cook on low for 7-8 hours or on high for 4-5 hours, until everything is tender and fragrant.
-
Thicken the stew: Remove 1/2 cup of broth from the slow cooker and combine it in a medium bowl with ½ cup almond milk and ¼ cup flour, whisking until completely smooth. Stir this mixture back into the slow cooker and mix gently.
-
Finish with peas: Stir in frozen peas and cook uncovered on HIGH for 15-20 minutes until the stew thickens up beautifully. Taste and adjust seasoning with extra salt and pepper as necessary.
Optional: Garnish with fresh parsley for an extra splash of color and flavor!
Exact quantities are listed in the recipe card below.
Slow Cooker Chicken Stew Variations
Feel free to get creative with this stew and make it your own, enhancing flavors and personalizing ingredients to suit your taste!
-
Dairy-Free: Substitute almond milk with coconut milk for a creamy, tropical twist that adds a hint of sweetness.
-
Vegetable-Loaded: Add more veggies like bell peppers, zucchini, or celery for extra nutrition and colors that make every bowl a feast.
-
Spicy Kick: Toss in a teaspoon of red pepper flakes or diced jalapeños to bring some heat, warming you from the inside out.
-
Herb Medley: Experiment with different herbs like parsley, dill, or tarragon for unique flavor profiles that take your stew to new heights.
-
Protein Swap: If you’re not a fan of chicken, try using turkey, beef, or even mushrooms for a hearty, satisfying alternative that’s equally delicious.
-
Wine Flavor Boost: Replace dry white wine with a splash of sherry or add a hint of lemon juice for a zesty and bright twist.
-
Root Veggie Variation: Replace Yukon gold potatoes with sweet potatoes or parsnips for a sweet, earthy flavor that pairs beautifully with the spices.
-
Global Twist: Stir in a tablespoon of curry powder or harissa for an exotic flavor journey that makes this dish truly memorable.
Each variation invites you to savor new experiences, enriching the joyful ritual of preparing a home-cooked meal. Happy cooking!
How to Store and Freeze Slow Cooker Chicken Stew
Room Temperature: Store any leftovers at room temperature for no more than 2 hours to prevent bacterial growth.
Fridge: Place cooled stew in an airtight container and refrigerate for up to 3 days. When reheating, make sure it is heated thoroughly.
Freezer: Freeze Slow Cooker Chicken Stew in a freezer-safe container for up to 3 months. Thaw overnight in the fridge before reheating.
Reheating: Reheat on the stovetop or in the microwave until heated through. Stir well to ensure even heating.
What to Serve with Slow Cooker Chicken Stew?
Set the stage for a cozy dinner with delicious side dishes that will complement every warm spoonful of your savory stew.
-
Crusty Bread: A slice of freshly baked bread is perfect for soaking up the rich broth, creating a delightful textural contrast. There’s nothing quite like tearing off a piece and diving into the stew.
-
Garlic Green Beans: Steamed green beans tossed with garlic offer a bright, fresh crunch, balancing the heartiness with a touch of vibrancy. Their crispness makes for the ideal pairing!
-
Simple Salad: A light mixed greens salad with a vinaigrette can brighten the meal, adding freshness and a pop of color to counter the rich flavors of the stew.
-
Creamy Polenta: Velvety polenta serves as a comforting base, soaking up all the delicious juices and adding a creamy dimension to your dinner. It’s an unexpected twist that will impress your loved ones!
-
Roasted Brussels Sprouts: Crispy, caramelized sprouts with a sprinkle of parmesan offer an earthy side, enhancing the wholesome nature of the stew. Their nutty flavors will echo those of the herbs in the dish.
-
Chardonnay: A chilled glass of chardonnay would mirror the wine used in cooking, providing smooth notes that lift the meal while enhancing its flavors.
-
Apple Crisp: For dessert, a warm apple crisp drizzled in caramel adds a sweet finishing touch, making the evening feel complete and oh so satisfying. It’s the perfect sweet closure to a heartwarming meal!
Make Ahead Options
Preparing this Slow Cooker Chicken Stew ahead of time is a fantastic way to streamline your meal planning and save precious time on busy days! You can chop the vegetables (carrots, onions, and potatoes) and marinate the chicken in the seasonings up to 24 hours in advance; just be sure to refrigerate them tightly sealed to maintain freshness. Additionally, you can combine the broth, white wine, and thickening ingredients in a separate container to make the cooking process even smoother. When you’re ready to serve, simply transfer everything into your slow cooker, set it to cook, and let the flavors develop beautifully—enjoy a comforting meal that tastes like you’ve slaved away in the kitchen but is ready with minimal effort!
Chef's Helpful Tips
- When making Slow Cooker Chicken Stew, always brown the chicken in the skillet first to develop a rich flavor before adding it to the slow cooker.
- Don’t rush the cooking time; low and slow allows the ingredients to meld beautifully, creating a stew that’s bursting with flavor.
- To ensure the perfect consistency, remove a portion of broth to mix with flour and almond milk before adding it back into the slow cooker for thickening.
- Remember that different slow cookers may vary in temperature, so check for doneness and adjust the cooking time if necessary to prevent overcooking.
Slow Cooker Chicken Stew with White Wine and Veggies Recipe FAQs
How do I select the best chicken thighs for my stew?
Absolutely! When choosing chicken thighs, look for pieces that are plump and have a nice, pink hue. Avoid any thighs with dark spots or a dull appearance, as they might be past their prime. Fresh chicken should feel moist but not sticky.
What are the best storage methods for my Slow Cooker Chicken Stew?
You can store your leftover stew in an airtight container in the fridge for up to 3 days. Make sure it cools completely before sealing it up. When reheating, do so gently on the stovetop until heated through to maintain flavor and texture.
Can I freeze my Slow Cooker Chicken Stew?
Yes, you can! To freeze your stew, transfer it to a freezer-safe container once it has cooled. It’s best to freeze it in individual portions for easy reheating later. It should be consumed within 3 months for optimal quality. When you’re ready to enjoy it again, simply thaw overnight in the fridge and reheat on the stovetop or in the microwave until steaming hot.
What should I do if my stew is too thin after cooking?
If you find your stew isn’t thickening as you’d like, don’t worry! You can create a simple slurry by mixing equal parts of flour and cold water, then whisking it into your stew about 15-20 minutes before serving. Stir well and let it cook uncovered; this will help it reach the desired consistency.
Is this recipe safe for someone with dairy allergies?
Very! This Slow Cooker Chicken Stew is made with unsweetened almond milk instead of traditional dairy milk, making it a suitable option for those with lactose intolerance or dairy allergies. Always double-check the labels of your ingredients to ensure they’re allergy-friendly, and feel free to customize further based on specific dietary needs!
Slow Cooker Chicken Stew
Ingredients
Equipment
Method
- Sauté the chicken: Add 1 tablespoon olive oil to a large skillet and place over high heat. Season the chicken thighs with salt and pepper, and brown them for about 5-6 minutes until golden. Transfer to a large slow cooker.
- Combine the liquids and seasonings: In the slow cooker, add chicken broth, dry white wine, Worcestershire sauce, balsamic vinegar, thyme, rosemary, oregano, salt, and pepper. Stir well to blend all the flavors.
- Add the vegetables: Toss in minced garlic, diced onion, sliced carrots, and cubed potatoes. Cover and cook on low for 7-8 hours or on high for 4-5 hours, until everything is tender and fragrant.
- Thicken the stew: Remove 1/2 cup of broth from the slow cooker and combine it in a medium bowl with ½ cup almond milk and ¼ cup flour, whisking until completely smooth. Stir this mixture back into the slow cooker and mix gently.
- Finish with peas: Stir in frozen peas and cook uncovered on HIGH for 15-20 minutes until the stew thickens up beautifully. Taste and adjust seasoning with extra salt and pepper as necessary.