Forkono

  • BREAKFAST & BRUNCH
  • DESSERT RECIPES
  • DINNER RECIPES
  • LUNCH RECIPES
  • About uS
  • SNACKS & APPETIZERS
menu icon
go to homepage
  • BREAKFAST & BRUNCH
  • DESSERT RECIPES
  • DINNER RECIPES
  • LUNCH RECIPES
  • About uS
  • SNACKS & APPETIZERS
search icon
Homepage link
  • BREAKFAST & BRUNCH
  • DESSERT RECIPES
  • DINNER RECIPES
  • LUNCH RECIPES
  • About uS
  • SNACKS & APPETIZERS
×

Meat Pie

December 3, 2025 by JudyWhite Leave a Comment

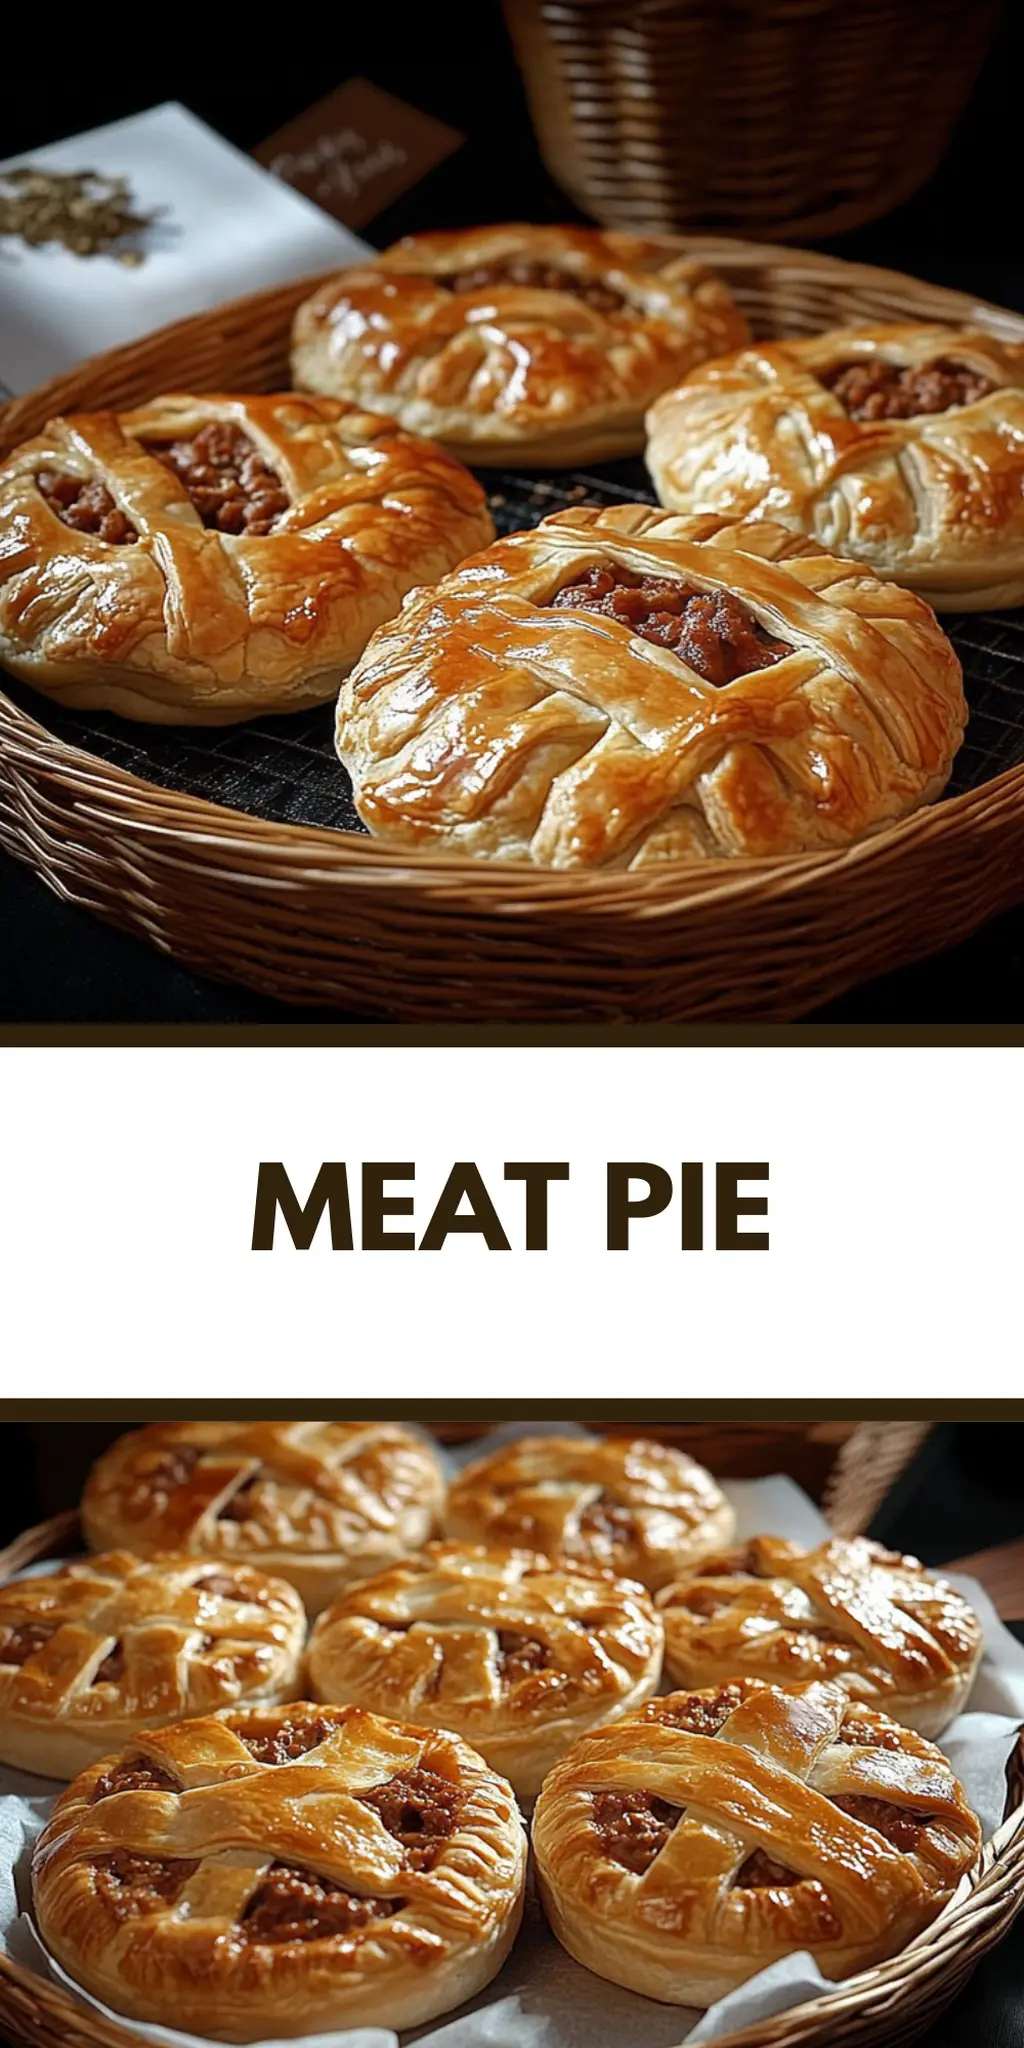
There’s something undeniably comforting about the delightful scent of a freshly baked Meat Pie filling the kitchen. I remember the first time I decided to put my own twist on this classic dish; I had been looking for a way to impress my friends during a cozy gathering. The warm, seasoned goodness tucked inside flaky puff pastry is pure bliss, and it quickly became a favorite among my loved ones.

What I adore about this recipe is its versatility—you can easily swap in your favorite vegetables or tweak the seasonings to match any craving. In just 45 minutes, you can whip up a batch of delicious meat pies that not only satisfy but also evoke those nostalgic feelings of home cooking. Whether you’re a busy professional seeking a gourmet touch at dinner or a weekend cook wanting to experiment, this Meat Pie is the answer to your culinary dreams. Let’s dive into the steps to create this crowd-pleaser that’s perfect for any occasion!

Why You'll Love This Meat Pie

  • This Meat Pie is incredibly easy to make, allowing you to impress your family and friends without spending hours in the kitchen.
  • The combination of savory meat and fresh vegetables creates a flavor explosion that’s sure to delight every palate.
  • One of the best things about this recipe is its versatility; you can customize it with your favorite ingredients, making it perfect for any occasion.
  • Plus, the golden, flaky crust makes for a visually appealing dish that’s as satisfying to look at as it is to eat.

Meat Pie Ingredients

For the Filling

  • Ground beef – a hearty base that provides robust flavor and ample protein.
  • Onion – adds sweetness and depth; finely diced to cook evenly and blend into the filling.
  • Garlic – enhances the savory goodness; feel free to use more if you’re a garlic lover!
  • Carrot – brings a touch of sweetness and color; finely chop for better texture.
  • Celery – adds freshness and crunch to the filling; don’t skip this for a well-rounded flavor!
  • Tomato paste – thickens and enriches the meat filling; try substituting with tomato sauce if needed.
  • Beef broth – infuses moisture and enhances the meaty taste; feel free to use vegetable broth for a lighter option.
  • Worcestershire sauce – adds umami depth to the mixture; a little goes a long way!
  • Dried thyme – lends an earthy aroma; fresh thyme can also be used for a brighter flavor.
  • Black pepper – gives a gentle kick; adjust according to your spice preference.

For the Pastry

  • Puff pastry – forms a flaky and golden crust that encases the delicious filling; ensure it’s well-thawed before use.
  • Egg – for egg wash, providing a beautiful golden color; try substituting with milk for a vegan option.

With these Meat Pie ingredients, you’re on your way to creating a dish that’s not only delicious but also filled with love and warmth. Enjoy every moment of your cooking adventure!

How to Make Meat Pie

  1. Sauté the Veggies: In a skillet, heat a splash of oil over medium heat. Cook the onion, garlic, carrot, and celery for about 5 minutes until they soften and release their aromas.

  2. Brown the Beef: Add the ground beef to the skillet. Cook, breaking it apart, until it’s browned and no longer pink. This should take about 7–10 minutes.

  3. Simmer the Filling: Stir in the tomato paste, Worcestershire sauce, thyme, black pepper, and beef broth. Let the mixture simmer, stirring occasionally, until it’s thickened—around 8–10 minutes. Allow the filling to cool afterward.

  4. Prepare the Pastry: Roll out the thawed puff pastry on a floured surface and cut it into your desired shapes, either circles or rectangles, for the pie bases and tops.

  5. Assemble the Pies: Spoon a generous amount of the cooled filling onto half of your pastry pieces. Top with the other half and use a fork to seal the edges tightly, ensuring a good closure.

  6. Vent the Pies: Cut a small slit in the top of each pie to allow steam to escape during baking. This keeps your pie from becoming soggy!

  7. Brush with Egg Wash: Using a pastry brush, coat the tops of the pies with the beaten egg, creating a glossy finish as they bake.

  8. Bake to Perfection: Preheat your oven to 400°F (200°C), and bake the pies for 20–25 minutes or until they turn a beautiful golden brown and the pastry is crisp.

Optional: Serve with a dollop of your favorite sauce for an extra flavor boost!

Exact quantities are listed in the recipe card below.

What to Serve with Meat Pie?

There’s nothing quite like sharing a warm, hearty meal surrounded by loved ones. The delightful aroma of meat pie wafts through the air, inviting everyone to gather around the table.

  • Creamy Mashed Potatoes: Piping hot and buttery, these mashed potatoes add a velvety texture that perfectly complements the flaky pastry of the meat pie. A drizzle of gravy takes it over the top!

  • Steamed Green Beans: Fresh, crisp green beans bring a burst of color and crunch to your plate, balancing the richness of the pie beautifully. Plus, they’re quick to prepare!

  • Garden Salad: A light salad with mixed greens, fresh tomatoes, and a tangy vinaigrette brightens the meal, offering a fresh contrast to the savory filling. It’s the perfect way to make your dinner feel more complete.

  • Roasted Root Vegetables: Carrots, parsnips, and potatoes caramelized to perfection create a sweet, earthy side that pairs wonderfully with the meaty goodness of the pie. The natural sweetness enhances every bite.

  • Red Wine: A glass of medium-bodied red wine accentuates the rich flavors in the meat pie, making for a truly comforting dining experience. Choose a blend like Merlot or a fruity Pinot Noir for best results.

  • Apple Crisp: Finish on a sweet note with warm apple crisp topped with vanilla ice cream. The warm, cinnamon-spiced apples complement the savory pie, creating a delightful ending to a cozy meal.

How to Store and Freeze Meat Pie

Fridge: Keep leftover Meat Pie in an airtight container for up to 3 days. Reheat in the oven for best results, restoring its crisp texture.

Freezer: Meat Pies can be frozen before or after baking. Wrap tightly in plastic wrap and foil, storing for up to 3 months. Bake straight from frozen, adding a little extra time.

Reheating: To reheat cooked Meat Pie, place it in a preheated oven at 350°F (175°C) for about 15-20 minutes, or until heated through and the pastry is crisp.

Cooling: Allow freshly baked Meat Pie to cool completely before transferring it to the fridge or freezer to prevent moisture buildup.

Meat Pie Variations

Feel free to unleash your creativity and personalize this Meat Pie recipe according to your taste and dietary preferences!

  • Vegetarian: Substitute ground beef with lentils or mushrooms for a plant-based twist that’s just as hearty and satisfying.
  • Spicy: Add chopped jalapeños or a pinch of cayenne pepper to the filling for a delightful kick that awakens the taste buds.
  • Herby: Swap dried thyme for fresh herbs like rosemary or parsley to elevate the flavor profile with a burst of freshness.
  • Cheesy: Mix in shredded cheddar or mozzarella with the filling for a deliciously gooey surprise that enhances every bite.
  • Seasoned: Experiment with different spices like cumin or paprika to create a unique flavor fusion that can take the meat pie in exciting new directions.
  • Sweet Potato: Replace carrots with mashed sweet potatoes for a subtle sweetness and extra nutrients that blend beautifully with savory flavors.
  • Meat Mixture: Combine different meats such as ground turkey or sausage for added depth and complexity in flavor while keeping the heartiness intact.
  • Puff Pastry Alternative: Use a homemade shortcrust or biscuit dough instead of puff pastry for a deliciously different texture that is equally delightful.

Each variation invites you to dive deeper into your culinary creativity, ensuring there’s a Meat Pie for everyone at the table!

Make Ahead Options

These Meat Pies are a fantastic option for meal prep lovers! To streamline your cooking, you can prepare the filling up to 3 days in advance. Simply follow the filling steps, allow it to cool, and store it in an airtight container in the refrigerator. You can also cut and prepare the puff pastry ahead of time; just keep it covered in plastic wrap to prevent drying out. When you’re ready to serve, fill the pastry with the chilled meat mixture, seal the edges, and brush with the egg wash before baking. This way, you’ll have piping hot, restaurant-quality Meat Pies with minimal effort on busy weeknights!

Chef's Helpful Tips

  • When making Meat Pie, be sure to cook the vegetables until they are soft, as this will enhance the overall flavor and texture of the filling.
  • Avoid overcrowding the skillet when browning the beef, as this can make it steam instead of brown, resulting in a less flavorful filling.
  • For a perfectly flaky crust, roll your puff pastry to about 1/8 inch thick, ensuring even cooking and a delicious texture.
  • Remember to preheat your oven to 400°F (200°C) in advance so that the pies bake evenly and achieve that gorgeous golden brown color.

Meat Pie Recipe FAQs

What is the best way to select ripe ingredients for my Meat Pie?
Absolutely! When selecting your ingredients, look for fresh vegetables without any dark spots or blemishes. For ground beef, ensure it’s bright red with a fine texture; avoid any that appear dull or discolored. Fresh onions should feel firm and have tight skin, while garlic cloves should be dry and free of sprouting. A good carrot will be firm with a bright orange color; choose crisp celery for that perfect crunch in your filling.

How should I store leftover Meat Pie, and how long will it last?
Very! Store your leftover Meat Pie in an airtight container in the fridge for up to 3 days. If you want to keep it longer, you can freeze it. Just ensure it’s wrapped tightly in plastic wrap and then foil to avoid freezer burn. Make sure to reheat it in the oven for a perfectly crisp texture!

Can I freeze Meat Pie, and if so, how?
Absolutely! You can freeze Meat Pies either before or after baking. To freeze unbaked pies, wrap them individually in plastic wrap followed by foil, storing them in the freezer for up to 3 months. When ready to bake, take them out straight from the freezer—just add about 10-15 minutes to the baking time. If you’re freezing baked pies, ensure they cool completely, then follow the same wrapping method!

What if my Meat Pie filling turns out too watery?
No worries! If your filling is too watery, simmer it longer to evaporate some of the liquid. To create a thicker filling in the first place, add a bit more tomato paste or a cornstarch slurry to help bind everything together. If you notice unnecessary moisture when assembling, drain off some of the liquid before spooning the filling onto your pastry. It also helps to let the filling cool completely before using it!

Are there any dietary considerations for making Meat Pie?
Very! For those with dietary restrictions, you can make this Meat Pie gluten-free by using gluten-free puff pastry or by opting for a mashed potato topping instead. If you’re making it for someone with allergies, be cautious with Worcestershire sauce, as it often contains fish sauce. To make it pet-friendly, remember to exclude onions and garlic; these can be harmful to dogs!

Meat Pie

Meat Pie

This comforting Meat Pie features a savory filling of seasoned ground beef and vegetables, wrapped in a flaky crust, making it a delightful dinner choice.
Print Recipe Pin Recipe
Prep Time 15 minutes mins
Cook Time 30 minutes mins
Total Time 45 minutes mins
Servings: 4 pies
Course: Dinner
Cuisine: British
Calories: 350
Ingredients Equipment Method Nutrition Notes

Ingredients
  

For the Filling
  • 1 lb Ground beef a hearty base that provides robust flavor and ample protein.
  • 1 medium Onion adds sweetness and depth; finely diced.
  • 2 cloves Garlic enhances the savory goodness.
  • 1 medium Carrot brings a touch of sweetness and color; finely chopped.
  • 1 stalk Celery adds freshness and crunch.
  • 2 tbsp Tomato paste thickens and enriches the meat filling.
  • 1 cup Beef broth infuses moisture and enhances the meaty taste.
  • 1 tbsp Worcestershire sauce adds umami depth.
  • 1 tsp Dried thyme lends an earthy aroma.
  • 1 tsp Black pepper for a gentle kick.
For the Pastry
  • 1 sheet Puff pastry forms a flaky and golden crust; ensure it’s well-thawed.
  • 1 large Egg for egg wash.

Equipment

  • Skillet
  • pastry brush
  • Oven
  • Cutting Board
  • Knife

Method
 

How to Make Meat Pie
  1. Sauté the Veggies: In a skillet, heat a splash of oil over medium heat. Cook the onion, garlic, carrot, and celery for about 5 minutes until they soften and release their aromas.
  2. Brown the Beef: Add the ground beef to the skillet. Cook, breaking it apart, until it’s browned and no longer pink. This should take about 7–10 minutes.
  3. Simmer the Filling: Stir in the tomato paste, Worcestershire sauce, thyme, black pepper, and beef broth. Let the mixture simmer, stirring occasionally, until it's thickened—around 8–10 minutes. Allow the filling to cool afterward.
  4. Prepare the Pastry: Roll out the thawed puff pastry on a floured surface and cut it into your desired shapes, either circles or rectangles, for the pie bases and tops.
  5. Assemble the Pies: Spoon a generous amount of the cooled filling onto half of your pastry pieces. Top with the other half and use a fork to seal the edges tightly.
  6. Vent the Pies: Cut a small slit in the top of each pie to allow steam to escape during baking.
  7. Brush with Egg Wash: Using a pastry brush, coat the tops of the pies with the beaten egg.
  8. Bake to Perfection: Preheat your oven to 400°F (200°C), and bake the pies for 20–25 minutes or until they turn a beautiful golden brown.

Nutrition

Serving: 1pieCalories: 350kcalCarbohydrates: 30gProtein: 20gFat: 15gSaturated Fat: 5gPolyunsaturated Fat: 2gMonounsaturated Fat: 8gCholesterol: 70mgSodium: 800mgPotassium: 400mgFiber: 2gSugar: 3gVitamin A: 1000IUVitamin C: 5mgCalcium: 20mgIron: 2mg

Notes

This Meat Pie is versatile; you can customize it with your favorite ingredients. Serve with a dollop of your favorite sauce for an extra flavor boost!

Tried this recipe?

Let us know how it was!

Filed Under: DINNER RECIPES

Immune Boosting Sunshine Citrus Smoothie

December 3, 2025 by JudyWhite Leave a Comment

As the vibrant colors of the season brighten my kitchen, I can’t help but think about the refreshing power of a good smoothie. The Immune Boosting Sunshine Citrus Smoothie has become my go-to remedy for those days when I need a little extra pep in my step. Picture this: the zesty aroma of freshly peeled oranges mingling with the tangy burst of lemon, all blended into a creamy delight with just a hint of sweetness.

This recipe came about on a particularly sunny afternoon when I was searching for something quick yet nourishing to help boost my immune system. With minimal effort—just ten minutes from start to finish—I crafted a smoothie that not only tastes divine but also delivers a punch of protein and vitamins with every sip. It’s perfect for busy mornings or an energizing snack in the afternoon. Grab your blender, and let’s bring some sunshine into your day!

Why You'll Love This Immune Boosting Sunshine Citrus Smoothie

  • This smoothie is a breeze to make, taking just ten minutes from start to finish, making it perfect for busy mornings or quick snacks.
  • You’ll love the bright and refreshing flavors that come from the combination of oranges and lemon, giving you a delicious boost of nutrition.
  • Its versatility means you can easily adjust the sweetness or add additional fruits according to your preference.
  • Plus, the vibrant colors and garnishing options make it an eye-catching treat that will impress anyone you serve it to.

Immune Boosting Sunshine Citrus Smoothie Ingredients

For the Smoothie

  • Fresh oranges – peel them for a zesty, vibrant base full of vitamin C.
  • Lemon juice – adds a tangy kick and enhances the immune-boosting powers of the smoothie.
  • Ripe banana – for natural sweetness and creaminess, making your smoothie smooth and delightful.
  • Plain Greek yogurt – introduces a protein punch that keeps you satisfied longer.
  • Honey or maple syrup – sweeten to taste; they’re great alternative sweeteners if you’re looking for a natural option.
  • Ice cubes – chill your smoothie to perfection for that refreshing, slushy texture.

Enjoy this Immune Boosting Sunshine Citrus Smoothie as a delicious way to brighten your day!

How to Make Immune Boosting Sunshine Citrus Smoothie

  1. Gather your ingredients. Start by assembling 2 fresh oranges, 1 lemon, 1 ripe banana, Greek yogurt, honey or maple syrup, and ice cubes. This will ensure a smooth and easy blending process!

  2. Peel the oranges and banana. Make sure to remove any seeds from the oranges, as they may affect the texture of your smoothie. You’ll want everything nice and ready for blending!

  3. Combine in a blender. Add the peeled oranges, freshly squeezed lemon juice, ripe banana, Greek yogurt, honey or maple syrup, and ice cubes to your blender. This mix is the heart of your Immune Boosting Sunshine Citrus Smoothie.

  4. Blend on high. Pulse the mixture until it’s smooth and creamy, about 30-60 seconds. If it’s too thick, feel free to adjust the consistency by adding a splash of water!

  5. Taste your smoothie. Before serving, take a moment to savor the flavors. Add more sweetener if desired—everyone loves a personalized touch to their delightful drink.

  6. Pour into glasses. Serve your gorgeous smoothie in tall glasses, and for a beautiful presentation, you can garnish with fresh orange slices or mint leaves on top.

Optional: For an extra nutrient boost, sprinkle some chia seeds on top!

Exact quantities are listed in the recipe card below.

How to Store and Freeze Immune Boosting Sunshine Citrus Smoothie

Refrigerator: Store any leftover smoothie in an airtight container for up to 2 days. Give it a good shake or stir before serving, as separation may occur.

Freezer: For longer storage, portion out the smoothie into freezer-safe bags or containers. It can be kept frozen for up to 3 months. Thaw in the fridge overnight before enjoying.

Preparation for Freezing: Pour the smoothie into ice cube trays for single-serving sizes. Once frozen, transfer the cubes to a freezer bag. Blend a few cubes with a splash of juice or water for a quick and refreshing treat.

Reheating: To enjoy, blend the thawed smoothie with more ice if you prefer it chilled. Adjust sweetness as needed for the best flavor experience.

What to Serve with Immune Boosting Sunshine Citrus Smoothie?

Brighten your meal table with delightful pairings that enhance the refreshing essence of this smoothie.

  • Avocado Toast: Creamy avocado on crispy bread complements the smoothie’s zesty notes, creating a balanced, satisfying breakfast.

  • Granola Parfait: Layered with yogurt, granola, and fresh berries, this delectable dish brings crunch and sweetness, perfect alongside your smoothie.

  • Chia Pudding: The subtle nuttiness of chia pudding adds a delightful textural contrast, enhancing the overall health benefits of your meal.

  • Oatmeal Bowl: A warm bowl of oatmeal topped with fruit echoes the smoothie’s flavors and provides lasting energy, ideal for powering through your day.

  • Coconut Water: Refreshing coconut water hydrates while introducing a tropical twist that pairs seamlessly with the smoothie’s citrus base, making it a perfect drink option.

  • Fruit Salad: A bright mix of seasonal fruits not only complements the smoothie but also adds vitamin variety and a splash of color to your plate.

Each pairing enhances the invigorating, healthful qualities of the Immune Boosting Sunshine Citrus Smoothie, ensuring a well-rounded, vibrant meal experience!

Make Ahead Options

These Immune Boosting Sunshine Citrus Smoothie components are perfect for meal prep enthusiasts! You can peel the oranges and banana, then store them in an airtight container in the refrigerator for up to 24 hours to retain their freshness. Additionally, you can prepare and combine the Greek yogurt, lemon juice, and sweetener in advance, refrigerating this mixture for up to 3 days. When you’re ready to enjoy the smoothie, simply blend the prepped fruits with the yogurt mixture and ice cubes until smooth. This way, you get a delightful smoothie that saves you time during busy mornings while still tasting just as refreshing and vibrant as when made fresh!

Immune Boosting Sunshine Citrus Smoothie Variations

Feel free to personalize this smoothie and make it your own with these delightful twists!

  • Dairy-Free: Swap Greek yogurt for coconut yogurt or almond milk for a creamy, plant-based option. The tropical flavor of coconut will transport you to a sunny beach paradise!

  • Extra Protein: Add a scoop of your favorite protein powder. Not only does this boost the nutrition, but it also makes the smoothie filling enough for a meal replacement.

  • Sweetness Swap: Use agave nectar or stevia instead of honey or maple syrup for a lower-calorie alternative. This small change can make a big difference for those watching their sugar intake.

  • Berry Blast: Blend in a handful of frozen berries for a fruity twist and added antioxidants. The pop of color from berries will not only enhance the visual appeal but also deepen the flavor profile.

  • Spicy Kick: Toss in a pinch of cayenne pepper for an unexpected warm spice that elevates the citrus notes. Just a little heat will awaken your taste buds in the most delightful way!

  • Nutty Texture: Throw in a tablespoon of almond butter or peanut butter. It’ll create a velvety consistency and a rich flavor that makes this smoothie even more satisfying.

  • Herb Infusion: Add a handful of fresh spinach or kale for an extra nutrient boost without sacrificing taste. With the bright citrus, you won’t even notice the greens!

  • Choco Citrus: Incorporate a tablespoon of cocoa powder for a chocolatey twist. Chocolate and citrus create a beautifully balanced and indulgent experience that’ll satisfy your sweet tooth perfectly!

Chef's Helpful Tips

  • When making the Immune Boosting Sunshine Citrus Smoothie, ensure that your fruits are ripe to maximize sweetness and flavor.
  • Avoid using overly ripe bananas, as they can affect the texture if too mushy.
  • For an extra creamy consistency, blend the yogurt and fruits first before adding ice cubes to avoid clumps.
  • Always taste the smoothie before serving; this allows you to adjust sweetness and tanginess to your liking, making every sip truly refreshing.

Immune Boosting Sunshine Citrus Smoothie Recipe FAQs

What should I look for when selecting oranges and lemons?
Absolutely! When choosing oranges, look for ones that are firm and heavy for their size, which indicates juiciness. Their skin should be bright and smooth, without any dark spots. For lemons, opt for those that have a vibrant yellow color and feel slightly soft to the touch—both signs of ripeness. If they are too hard, they might not be juicy enough for your smoothie.

How should I store leftover smoothie?
Very simple! Store any leftover Immune Boosting Sunshine Citrus Smoothie in an airtight container in the refrigerator for up to 2 days. Always give it a good shake or stir before serving, as separation will happen. If you notice a watery layer on top, it’s perfectly okay; just mix it back in!

Can I freeze the Immune Boosting Sunshine Citrus Smoothie?
Sure thing! To freeze, pour the smoothie into freezer-safe bags or containers. You can keep it frozen for up to 3 months. For convenience, consider pouring the smoothie into ice cube trays first. Then, transfer the frozen cubes to a freezer bag for easy portioning. To enjoy, simply thaw overnight in the fridge or blend a few cubes with a splash of juice for a refreshing boost!

What are some common troubleshooting tips if my smoothie is too thick?
If you find your smoothie too thick, no worries! Simply add a little water or your choice of juice—start with a tablespoon at a time, blending in between until you reach your desired consistency. If it ends up being too thin, try adding more Greek yogurt or a banana to thicken it back up, and give it another blend. Everyone’s taste is different, so feel free to adjust until it suits you!

Can I make this smoothie if I have allergies?
Absolutely! If you have allergies to dairy, you can substitute the plain Greek yogurt with a non-dairy yogurt like coconut or almond yogurt. For those allergic to citrus, consider blending fruits like strawberries or mangoes instead, while still keeping it refreshing with a yogurt base. Always read labels to ensure safety, and feel free to make this recipe yours!

Can my pet drink this smoothie?
Be cautious! While some ingredients may not be harmful in small amounts, the citrus in this smoothie isn’t great for pets, especially dogs and cats. If you want to treat your furry friend, consider making a pet-friendly smoothie using banana and yogurt without any citrus. Always check with your vet for safe snack options!

Immune Boosting Sunshine Citrus Smoothie

Immune Boosting Sunshine Citrus Smoothie

Enjoy this Immune Boosting Sunshine Citrus Smoothie packed with refreshing flavors and immune-boosting nutrients.
Print Recipe Pin Recipe
Prep Time 10 minutes mins
Total Time 10 minutes mins
Servings: 2 cups
Course: BREAKFAST & BRUNCH
Cuisine: American
Calories: 250
Ingredients Equipment Method Nutrition Notes

Ingredients
  

For the Smoothie
  • 2 fresh oranges peeled
  • 1 tablespoon lemon juice
  • 1 medium ripe banana
  • 1 cup plain Greek yogurt
  • to taste honey or maple syrup natural sweeteners
  • 1 cup ice cubes for chilling

Equipment

  • blender

Method
 

How to Make Immune Boosting Sunshine Citrus Smoothie
  1. Gather your ingredients: 2 fresh oranges, 1 lemon, 1 ripe banana, Greek yogurt, honey or maple syrup, and ice cubes.
  2. Peel the oranges and banana, removing any seeds from the oranges.
  3. Combine the peeled oranges, lemon juice, banana, Greek yogurt, sweetener, and ice in a blender.
  4. Blend on high until smooth and creamy, about 30-60 seconds.
  5. Taste and adjust sweetness if needed.
  6. Pour into glasses and garnish with fresh orange slices or mint leaves if desired.

Nutrition

Serving: 1cupCalories: 250kcalCarbohydrates: 40gProtein: 10gFat: 3gSaturated Fat: 1gMonounsaturated Fat: 1gCholesterol: 5mgSodium: 50mgPotassium: 400mgFiber: 5gSugar: 20gVitamin A: 500IUVitamin C: 120mgCalcium: 150mgIron: 1mg

Notes

For extra nutrients, top with chia seeds.

Tried this recipe?

Let us know how it was!

Filed Under: BREAKFAST & BRUNCH

Chili Garlic Pasta

December 3, 2025 by JudyWhite Leave a Comment

There’s something invigorating about the spicy, garlicky aroma that fills the kitchen when I whip up a batch of Chili Garlic Pasta. Just the thought of it transports me to those cozy evenings when a simple meal transforms into sheer comfort. One evening, after a long day of juggling work and life, I opened my pantry to find a few basic ingredients that seemed to be crying out for adventure. This dish came to life in under 30 minutes, proving that a homemade meal doesn’t have to be complicated to be spectacular.

Imagine twirling long strands of spaghetti around your fork, all while savoring the zing from fresh chili and the warmth of garlic. It’s a gorgeous blend of flavor that can easily turn weeknight dinners into culinary celebrations. Perfect for both solo meals and cozy gatherings, this Chili Garlic Pasta not only satisfies the taste buds but is also a delightful nod to the joy of home cooking. Ready to add a bit of flair to your dinner routine? Let’s dive in!

Why You'll Love This Chili Garlic Pasta

  • This Chili Garlic Pasta is incredibly easy to whip up, making it perfect for busy weeknights when time is of the essence.
  • The bold flavors of garlic and chili create an appetizing experience that is sure to please your palate.
  • Not only is this dish versatile, but it can also be customized with your favorite vegetables or proteins to suit any dietary preference.
  • Plus, its vibrant colors and enticing aroma will make it a visual star at your dinner table.

Chili Garlic Pasta Ingredients

For the Pasta
• 12 oz spaghetti – the perfect base for soaking up that flavorful chili garlic goodness.

For the Sauce
• 5 cloves fresh garlic, minced – a must for that aromatic kick that enhances the dish.
• 1 red chili pepper, finely chopped – adjust the quantity to match your spice tolerance.
• 1/4 cup olive oil – a luscious carrier for all the other flavors that binds the dish together.

For the Flavor Boost
• 2 tbsp low-sodium soy sauce – adds a savory depth without overpowering the dish.
• 1 tbsp lemon juice – brings brightness that balances the richness perfectly.

For Garnish
• 1/4 cup fresh parsley, chopped – not just for color, it adds a fresh herbal note that completes the pasta.

This Chili Garlic Pasta brings out the best in simple ingredients while making each bite a flavorful adventure!

How to Make Chili Garlic Pasta

  1. Cook Spaghetti: Bring a pot of salted water to a boil and cook the spaghetti until al dente, which should take about 8-10 minutes. Don’t forget to reserve 1/2 cup of the pasta water before draining!

  2. Sauté Aromatics: In a skillet, heat the olive oil over medium heat. Add the minced garlic and chopped chili pepper, sautéing for about 2 minutes until the garlic is fragrant and slightly golden.

  3. Combine Pasta and Sauce: Add the drained spaghetti to the skillet, tossing it with the garlic and chili mixture. This is where the magic happens, as the spaghetti absorbs all those delightful flavors!

  4. Add Flavors: Stir in the soy sauce and lemon juice, adding reserved pasta water a little at a time until you achieve your desired consistency. The sauce should be glossy and stick beautifully to the noodles.

  5. Garnish and Serve: Before serving, top with the freshly chopped parsley for a burst of color and freshness. This elevates your dish both visually and in flavor!

Optional: Serve with grated Parmesan for an extra layer of flavor.

Exact quantities are listed in the recipe card below.

How to Store and Freeze Chili Garlic Pasta

Fridge: Store leftover Chili Garlic Pasta in an airtight container for up to 3 days. Reheat in a skillet with a splash of olive oil to regain its original flavor and texture.

Freezer: For longer storage, freeze portions of Chili Garlic Pasta in freezer-safe bags for up to 2 months. Thaw overnight in the fridge before reheating.

Reheating: When ready to serve, reheat in a saucepan over medium heat, adding a little reserved pasta water or olive oil to help separate the noodles and revive the sauce.

Room Temperature: If leaving out for a short period, consume within 2 hours to avoid any food safety issues.

Make Ahead Options

These Chili Garlic Pasta preparations are a real time-saver for busy weeknights! You can cook the spaghetti and prepare the garlic-chili oil mixture up to 24 hours in advance. Just store the cooked spaghetti in an airtight container in the refrigerator, and for the oil mixture, allow it to cool before covering. When you’re ready to enjoy your meal, simply reheat the oil mixture in a skillet, toss in the spaghetti, and stir in the soy sauce, lemon juice, and reserved pasta water as needed. This method ensures your flavorful pasta is just as delicious and ready to serve with minimal effort!

What to Serve with Chili Garlic Pasta?

Indulge in a culinary adventure that perfectly complements the vivid flavors of a spicy, garlicky pasta dish.

  • Garlic Bread: This classic side adds a crunchy texture and pairs beautifully with the delicate aromas of Chili Garlic Pasta.

  • Caprese Salad: The freshness of tomatoes, basil, and mozzarella provides a lovely contrast to the warm pasta, enhancing the meal’s overall vibrance.

  • Roasted Vegetables: A medley of seasonal veggies brings earthy flavors and a hearty element that balances the dish beautifully.

  • Crispy Brussels Sprouts: Tossed with lemon and seasoning, these offer a crispy bite that echoes the garlic’s warmth while adding a satisfying crunch.

  • Lemon Zest Martini: A refreshing drink with citrus notes that mirrors the brightness of the lemon juice in your pasta, enhancing the dining experience.

  • Cheesy Garlic Mashed Potatoes: Light and fluffy with a creamy consistency, these add a comforting element to your meal, making it a perfect family feast.

  • Dark Chocolate Mousse: A rich dessert that contrasts the spiciness of the pasta, ending the meal on a beautifully indulgent note.

Feel free to mix and match these pairings to create your ideal dining experience!

Chili Garlic Pasta Variations

Feel free to get creative with this recipe and make it your own with these exciting twists!

  • Plant-Based: Swap spaghetti for whole wheat or gluten-free pasta and use tamari instead of soy sauce for a vegan option.
    It’s a wholesome change that doesn’t sacrifice flavor while being friendly to your plant-based diet.

  • Extra Veggies: Add sautéed bell peppers or spinach for a vibrant boost of color and nutrition.
    Not only do they bring freshness, but they also complement the dish’s heat beautifully.

  • Protein-Packed: Toss in cooked shrimp or grilled chicken to transform this into a hearty meal.
    The added protein makes it satisfying while elevating the overall flavor profile.

  • Creamy Twist: Stir in a splash of heavy cream or a dollop of crème fraîche for a richer, creamier sauce.
    This indulgent variation is perfect for those chilly evenings when you need a cozy comfort food fix.

  • Spice Levels: Adjust the chili pepper according to your heat preference, or add crushed red pepper flakes for an extra kick.
    Finding your ideal spice level makes this dish even more enjoyable every time you prepare it.

  • Herb Infusion: Experiment with different herbs like basil or cilantro for an aromatic twist that enhances the dish’s character.
    Each herb brings its unique charm, inviting new dimensions to your pasta experience.

  • Citrus Flair: Incorporate lime juice instead of lemon for a zesty twist that pairs beautifully with the chili flavors.
    This bright and zippy variation can awaken your palate and refresh your dining experience.

Chef's Helpful Tips

  • When making Chili Garlic Pasta, remember to salt your pasta water generously to enhance the flavor of the noodles.
  • Avoid overcooking the garlic, as it can turn bitter; sauté just until fragrant and lightly golden.
  • For a creamier sauce, gradually add the reserved pasta water until you reach your preferred consistency without making it too watery.
  • Finally, serve the dish immediately for the best texture, as the noodles can become gummy if left to sit too long.

Chili Garlic Pasta Recipe FAQs

What kind of spaghetti should I use for Chili Garlic Pasta?
Absolutely! You can use any long pasta like linguine or fettuccine if you prefer. Just make sure it’s dried, as fresh pasta might require a different cooking time. I often stick with classic spaghetti for its ability to hold onto the sauce beautifully!

How long can I store leftover Chili Garlic Pasta in the fridge?
Store your delicious leftovers in an airtight container for up to 3 days. When reheating, I recommend adding a splash of olive oil to help bring back that lovely flavor and moisture. This way, you can enjoy a delightful meal without losing the original taste!

Can I freeze Chili Garlic Pasta? If so, how?
Yes, you can freeze Chili Garlic Pasta! To do this, divide the pasta into portions and pack each portion into freezer-safe bags, squeezing out as much air as possible. It can be stored for up to 2 months. When you’re ready to enjoy it again, simply thaw overnight in the fridge and reheat in a saucepan, adding a bit of reserved pasta water or olive oil to restore its luscious texture.

What should I do if my pasta sauce turns out too watery?
Very! If your sauce is too runny, it’s an easy fix! Simply simmer the pasta in the skillet over medium heat for a few minutes until it reduces to your desired consistency. Alternatively, you can mix in a little cornstarch dissolved in water to thicken it up. Just be careful not to overcook the garlic at this stage, as its flavor can easily become bitter.

Are there any dietary considerations I should be aware of for Chili Garlic Pasta?
Definitely! For gluten-free options, you can swap traditional spaghetti with gluten-free pasta; just keep an eye on the cooking time. If you have soy allergies, consider using coconut aminos or a homemade sauce with low-sodium broth and spices to achieve a similar flavor profile. And for those watching their sodium intake, I always suggest tasting as you go and adjusting soy sauce to your dietary needs.

Chili Garlic Pasta

Chili Garlic Pasta

Chili Garlic Pasta is a quick and flavorful weeknight dinner option that's easy to prepare.
Print Recipe Pin Recipe
Prep Time 10 minutes mins
Cook Time 20 minutes mins
Total Time 30 minutes mins
Servings: 2 plates
Course: Dinner
Cuisine: Italian
Calories: 550
Ingredients Equipment Method Nutrition Notes

Ingredients
  

For the Pasta
  • 12 oz spaghetti
For the Sauce
  • 5 cloves fresh garlic, minced
  • 1 red chili pepper, finely chopped adjust to spice tolerance
  • 1/4 cup olive oil
For the Flavor Boost
  • 2 tbsp low-sodium soy sauce
  • 1 tbsp lemon juice
For Garnish
  • 1/4 cup fresh parsley, chopped

Equipment

  • Pot
  • Skillet
  • measuring cups
  • measuring spoons
  • Cutting Board
  • Knife

Method
 

How to Make Chili Garlic Pasta
  1. Bring a pot of salted water to a boil and cook the spaghetti until al dente, about 8-10 minutes, reserving 1/2 cup of pasta water before draining.
  2. In a skillet, heat olive oil over medium heat. Add minced garlic and chopped chili pepper, sauté for about 2 minutes until garlic is fragrant and slightly golden.
  3. Add the drained spaghetti to the skillet, tossing with the garlic and chili mixture to absorb the flavors.
  4. Stir in soy sauce and lemon juice, adding reserved pasta water gradually until reaching desired consistency.
  5. Top with freshly chopped parsley before serving for added color and freshness.

Nutrition

Serving: 1plateCalories: 550kcalCarbohydrates: 75gProtein: 12gFat: 25gSaturated Fat: 4gPolyunsaturated Fat: 1gMonounsaturated Fat: 17gSodium: 300mgPotassium: 300mgFiber: 4gSugar: 1gVitamin A: 10IUVitamin C: 30mgCalcium: 2mgIron: 10mg

Notes

For extra flavor, serve with grated Parmesan on top.

Tried this recipe?

Let us know how it was!

Filed Under: DINNER RECIPES

Nutella Croissants

December 3, 2025 by JudyWhite Leave a Comment

There’s something undeniably indulgent about sinking your teeth into a warm, flaky Nutella croissant. As the buttery layers split open, rich chocolate hazelnut goodness spills out, creating a moment of pure bliss. I discovered this delightful treat one quiet weekend afternoon when I wanted to transform a simple sheet of puff pastry into something extraordinary.

With just three ingredients and barely 30 minutes of your time, you can elevate your breakfast or brunch game from ordinary to unforgettable. Whether you’re hosting friends or simply indulging on your own, these Nutella croissants are sure to impress and satisfy even the most discerning sweet tooth.

In a world that sometimes feels rushed, this recipe is a reminder that you can enjoy homemade decadence with minimal effort. Let’s dive into the magic of these flaky pastries that will fill your kitchen with warmth and the irresistible aroma of freshly baked goodness!

Why You'll Love This Nutella Croissants

  • These Nutella croissants are incredibly easy to make, requiring just three simple ingredients and minimal prep time.
  • The rich and creamy Nutella filling creates a flavor explosion that will delight any chocolate lover.
  • Their versatility allows you to enjoy them as a luxurious breakfast, an afternoon snack, or a stunning dessert at gatherings.
  • Plus, the visual appeal of these golden, flaky pastries makes them a showstopper that will impress your guests and leave them wanting more.

Nutella Croissants Ingredients

• Irresistible layers of flavor await!

For the Pastry
• Puff pastry – a store-bought sheet makes this recipe a breeze, ensuring flaky layers without the fuss.

For the Filling
• Nutella – this creamy, chocolatey hazelnut spread is the star of the show, delivering that dreamy flavor in every bite.

For the Finish
• Egg – use one large egg for an egg wash to achieve that mouthwatering golden-brown hue that makes these croissants irresistible.

How to Make Nutella Croissants

  1. Preheat your oven to 400°F (200°C) and prepare a baking sheet by lining it with parchment paper. This helps your croissants bake evenly and makes cleanup a breeze.

  2. Roll out the thawed puff pastry on a lightly floured surface. Cut it into 6 equal triangles, ensuring each piece is ready to be filled with Nutella goodness.

  3. Spread about 1 tablespoon of Nutella at the base of each triangle, leaving a small space around the edges. This ensures the gooey filling doesn’t overflow while baking.

  4. Roll each triangle tightly from the base to the tip. Place the rolled croissants seam-side down on the prepared baking sheet to keep them from unraveling.

  5. Brush the tops with the beaten egg. This will give your croissants that delightful golden finish that makes them even more tempting.

  6. Bake for 15-20 minutes until they are puffed and golden brown, filling your kitchen with an irresistible aroma that signals deliciousness is on the way!

Optional: For added flair, dust with powdered sugar before serving.
Exact quantities are listed in the recipe card below.

Make Ahead Options

These Nutella Croissants are a fantastic choice for those busy mornings when you crave homemade indulgence without the hassle! You can prepare the croissants up to 24 hours in advance by rolling them and placing them on a lined baking sheet. Cover with plastic wrap and refrigerate to keep them fresh and ready to bake. When you’re ready to enjoy them, just preheat your oven and brush them with the egg wash before baking as instructed. This method ensures the croissants are just as flaky and delicious, giving you that warm, gooey Nutella experience in no time. Say goodbye to fast food cravings and hello to an effortless, delightful treat!

Nutella Croissants Variations

Feel free to get creative with these Nutella croissants; the possibilities will make your taste buds dance with joy!

  • Nut-Free: Swap Nutella for sunflower seed butter or almond butter for a nut-free alternative that still offers a delightful spread.

  • Fruit-Filled: Add sliced strawberries or bananas alongside Nutella for a fresh, fruity twist that complements the creamy chocolate-hazelnut flavor.

  • Spicy Kick: Sprinkle a pinch of cayenne pepper into the Nutella before spreading for a surprising and delightful heat that tantalizes the senses.

  • Cheesy Delight: Add a layer of cream cheese with a sprinkle of sugar inside the croissant for a sweet and savory combination that will leave you asking for more.

  • Coconut Lover: Mix shredded coconut into the Nutella before filling the pastry for a tropical flavor explosion that brings a taste of paradise to your morning.

  • Vegan Option: Use dairy-free puff pastry and replace the egg wash with almond milk for a plant-based version that everyone can enjoy.

  • Chocolate Dip: Melt chocolate chips or dark chocolate for dipping after baking for enhanced chocolatey goodness that takes these croissants to the next level.

  • Herbed Variation: Add finely chopped fresh herbs like rosemary or thyme into the Nutella for a uniquely sophisticated flavor profile that will intrigue your guests.

Unleash your creativity and let these delicious variations inspire your next baking adventure!

What to Serve with Nutella Croissants?

Elevate your breakfast or brunch experience with delightful pairings that complement the rich, sweet flavors of these pastries.

  • Fresh Berries: Plump, juicy strawberries, raspberries, or blueberries add a burst of tartness that beautifully contrasts the sweetness of Nutella.
  • Vanilla Ice Cream: A scoop of creamy vanilla ice cream alongside these croissants creates a stunning dessert that melts in your mouth.
  • Whipped Cream: Light and airy homemade whipped cream adds a lovely texture, perfect for dipping or dolloping on top of your croissant.
  • Coffee or Espresso: A strong cup of coffee or a shot of espresso offers a rich, bold flavor that balances the sweetness of the croissants.
  • Hot Chocolate: For the ultimate indulgent experience, enjoy these treats with a steaming cup of hot chocolate – a chocolate lover’s dream come true.
  • Creme Brulee: Serve these croissants as an elegant touch to a brunch with a creamy, caramelized dessert that complements their flaky texture.

These pleasing pairings are sure to make anyone’s day a little sweeter and can turn an ordinary meal into a delightful occasion!

How to Store and Freeze Nutella Croissants

Room Temperature: Keep freshly baked Nutella croissants at room temperature for up to 2 days in an airtight container to maintain their flaky texture.

Fridge: If you need to store them longer, place the croissants in the refrigerator for up to 5 days. Make sure they are properly sealed to prevent them from drying out.

Freezer: To freeze, wrap the cooled Nutella croissants individually in plastic wrap and then in aluminum foil. They can be stored in the freezer for up to 2 months.

Reheating: When ready to enjoy, reheat in a preheated oven at 350°F (175°C) for about 10 minutes to achieve that warm, flaky delight.

Chef's Helpful Tips

  • When making Nutella Croissants, ensure your puff pastry is fully thawed for optimal rolling.
  • Avoid overfilling by sticking to about 1 tablespoon of Nutella per triangle to prevent mess while baking.
  • For an extra flaky texture, handle the pastry as gently as possible during both rolling and filling.
  • Keep an eye on the croissants during the last few minutes of baking to achieve that perfect golden brown color without burning.

Nutella Croissants Recipe FAQs

What type of puff pastry should I use?
Absolutely! For the best results, I recommend using a high-quality store-bought puff pastry that is fully thawed. Brands may vary, but look for something that is buttery and flaky. This will ensure that your Nutella croissants achieve that light and airy texture we all love.

How should I store leftover Nutella croissants?
You can keep freshly baked Nutella croissants at room temperature for up to 2 days in an airtight container. If you want them to last a bit longer, refrigerate them for up to 5 days; just ensure they’re sealed well to avoid drying out.

Can I freeze Nutella croissants? If so, how?
Very! To freeze your Nutella croissants, first allow them to cool completely. Then, wrap each croissant individually in plastic wrap, followed by aluminum foil for maximum protection. You can keep them in the freezer for up to 2 months. When you’re ready to enjoy, reheat them in a preheated oven at 350°F (175°C) for about 10 minutes until warm and flaky.

My croissants didn’t puff up as expected. What might have gone wrong?
No worries – this can happen! For the perfect puff, make sure your puff pastry is cold but not frozen when baking. Soggy or overly warm pastry can yield disappointing results. Also, ensure you’re not overfilling them with Nutella, as this can weigh them down. It’s all about balance, so be mindful of those filling amounts!

Are there any dietary considerations for Nutella croissants?
If you’re considering dietary restrictions, keep in mind that Nutella contains hazelnuts, dairy, and gluten, which can be an issue for those with allergies. For a nut-free option, you could try substituting the Nutella with a chocolate hazelnut alternative that is allergy-friendly. If you want them to be dairy-free, look for puff pastry made without butter and a dairy-free chocolate spread.

Can I make these croissants ahead of time?
Absolutely! You can prepare the croissants up to the point of baking and store them in the fridge. Just make sure to cover them well. When you’re ready, bake them straight from the fridge for a quick and delicious fresh pastry experience. Enjoy the wonderful aroma filling your kitchen while they bake!

Nutella Croissants

Nutella Croissants

Indulge in warm, flaky Nutella croissants made with just three ingredients for a decadent breakfast treat.
Print Recipe Pin Recipe
Prep Time 10 minutes mins
Cook Time 20 minutes mins
Total Time 30 minutes mins
Servings: 6 croissants
Course: Dessert
Cuisine: French
Calories: 250
Ingredients Equipment Method Nutrition Notes

Ingredients
  

For the Pastry
  • 1 sheet Puff pastry Store-bought, thawed
For the Filling
  • 1 tablespoon Nutella Per croissant
For the Finish
  • 1 large Egg For egg wash

Equipment

  • Oven
  • Baking sheet
  • parchment paper
  • Rolling pin

Method
 

How to Make Nutella Croissants
  1. Preheat your oven to 400°F (200°C) and prepare a baking sheet by lining it with parchment paper.
  2. Roll out the thawed puff pastry on a lightly floured surface. Cut it into 6 equal triangles.
  3. Spread about 1 tablespoon of Nutella at the base of each triangle, leaving a small space around the edges.
  4. Roll each triangle tightly from the base to the tip. Place the rolled croissants seam-side down on the prepared baking sheet.
  5. Brush the tops with the beaten egg for a delightful golden finish.
  6. Bake for 15-20 minutes until they are puffed and golden brown.

Nutrition

Serving: 1croissantCalories: 250kcalCarbohydrates: 30gProtein: 3gFat: 14gSaturated Fat: 7gPolyunsaturated Fat: 1gMonounsaturated Fat: 5gCholesterol: 30mgSodium: 200mgPotassium: 100mgFiber: 1gSugar: 8gVitamin A: 300IUCalcium: 10mgIron: 1mg

Notes

For added flair, dust with powdered sugar before serving. Store at room temperature for up to 2 days in an airtight container.

Tried this recipe?

Let us know how it was!

Filed Under: DESSERT RECIPES

Salmon Pesto Pasta

December 3, 2025 by JudyWhite Leave a Comment

There’s something truly exhilarating about creating a dish that blends simplicity with gourmet flair. Picture this: tender pasta swirled with vibrant pesto, juicy cherry tomatoes bursting with flavor, and flaky salmon that simply melts in your mouth. This Salmon Pesto Pasta is not just a meal; it’s an invitation to indulge your senses after a long day.

Not long ago, I found myself in the midst of another mundane weeknight dinner struggle. With a fridge full of fresh ingredients and a craving for something delicious, I turned to this quick and satisfying recipe that has since become a family favorite. In just 30 minutes, you can whip up this luxurious yet approachable dish, perfect for impressing guests or treating yourself on a cozy night in.

Whether you’re new to cooking or a seasoned pro looking to add a delightful twist to your repertoire, this Salmon Pesto Pasta checks all the boxes: it’s flavorful, nutritious, and incredibly versatile. Plus, it’s an amazing way to utilize pantry staples while showcasing fresh ingredients. Ready to dive in? Let’s make this iconic dish together!

Why You'll Love This Salmon Pesto Pasta

  • This recipe is a breeze to prepare, allowing you to whip up a delicious meal in just 30 minutes.
  • The vibrant flavors of pesto and fresh cherry tomatoes perfectly complement the flaky salmon for a delightful combination.
  • Its versatility means you can easily adapt it with your favorite vegetables or pasta types.
  • Not only is it visually appealing with its bright colors, but it’s also a crowd-pleaser sure to impress family and friends.

Salmon Pesto Pasta Ingredients

Discover everything you need to create this vibrant dish!

For the Pasta

  • Spaghetti or fettuccine – 8 oz of your choice for a delightful base that holds the sauce perfectly.

For the Salmon

  • Skinless salmon fillets – 2 fillets (about 5 oz each) add rich protein and a buttery flavor to your Salmon Pesto Pasta.

For the Pesto Sauce

  • Basil pesto – 1 cup, either store-bought or homemade, to bring that aromatic herbal essence that ties all ingredients together.

For the Vegetables

  • Cherry tomatoes – 1 cup, halved, adding a burst of juiciness and freshness to each bite.

For the Cheese

  • Freshly grated Parmesan cheese – ½ cup, providing a savory kick that beautifully complements the dish.

For Cooking

  • Olive oil – 2 tbsp, used for pan-frying the salmon and enhancing its rich flavor.
  • Salt and pepper – to taste, essential for seasoning the salmon to perfection.

For Garnish

  • Fresh basil leaves – to sprinkle on top for a touch of color and an extra layer of flavor.

How to Make Salmon Pesto Pasta

  1. Boil: In a large pot of salted boiling water, cook your spaghetti or fettuccine according to package directions until al dente. Remember to reserve 1 cup of pasta water before draining to adjust the sauce later!

  2. Season: While the pasta cooks, season the skinless salmon fillets with salt and pepper. Heat 2 tablespoons of olive oil in a skillet over medium heat, and add the salmon skin-side down. Cook for about 4-5 minutes on each side until flaky and golden brown, then remove from heat and flake into bite-sized pieces.

  3. Mix: In a large bowl, combine the cooked pasta, flaked salmon, halved cherry tomatoes, and your fragrant basil pesto. Toss everything gently to ensure even coating of the ingredients—you want that beautiful flavor in every bite!

  4. Adjust: If the pasta seems too dry, gradually add the reserved pasta water until you find your desired level of sauciness. This step is key to ensuring each strand is sufficiently coated without being too soggy.

  5. Plate: Serve the delightful pasta mixture on plates, and sprinkle generously with grated Parmesan cheese and fresh basil leaves for that extra pop of flavor and color.

  6. Enjoy: Dig in immediately for a delightful meal that combines comfort and gourmet flair!

Optional: Drizzle a little extra olive oil on top before serving for added richness.

Exact quantities are listed in the recipe card below.

Make Ahead Options

These Salmon Pesto Pasta preparations are perfect for busy weeknights! You can cook the spaghetti or fettuccine up to 24 hours in advance; just drizzle a bit of olive oil to prevent sticking. Flake the seasoned salmon and store it in an airtight container in the fridge for up to 3 days. Meanwhile, prepare your basil pesto and slice the cherry tomatoes, keeping them stored separately until ready to assemble. When you’re set to enjoy your meal, simply reheat the pasta in a skillet, add the flaked salmon, cherry tomatoes, and pesto (along with a splash of reserved pasta water if needed), for a quick, gourmet-worthy dinner that tastes just as delicious as if it were freshly made!

How to Store and Freeze Salmon Pesto Pasta

Fridge: Store leftover Salmon Pesto Pasta in an airtight container for up to 3 days. Make sure to let it cool before sealing to maintain freshness.

Freezer: You can freeze the pasta for up to 2 months. Portion it into freezer-safe bags, removing as much air as possible before sealing.

Reheating: Thaw in the fridge overnight, then reheat gently in a skillet over low heat, adding a splash of water or olive oil to restore moisture and flavor.

Add-Ons: If you’d like to mix it up, consider adding fresh ingredients like spinach or arugula during reheating to brighten the flavor of your Salmon Pesto Pasta.

Salmon Pesto Pasta Variations

Feel free to get creative and make this delightful dish your own!

  • Gluten-Free: Substitute traditional pasta with gluten-free spaghetti or fettuccine for a gluten-free meal that everyone can enjoy.

  • Veggie Boost: Add a mix of sautéed spinach and zucchini for extra nutrition and a pop of color. The freshness will enliven the entire dish!

  • Lemon Zest: Incorporate freshly grated lemon zest for a bright burst of citrus that balances the richness of the salmon and pesto perfectly.

  • Spicy Kick: Introduce a pinch of red pepper flakes or diced jalapeños for a spicy twist. Just a little can heat things up and excite your palate!

  • Herb Upgrade: Use arugula or kale instead of basil for a unique twist that adds complexity. They provide a robust depth of flavor that’s wonderfully refreshing.

  • Creamy Addition: For an extra indulgent experience, mix in a splash of heavy cream or crème fraîche to the pesto sauce. This creamy twist makes your dish luxuriously rich!

  • Nutty Flavor: Sprinkle in toasted pine nuts or walnuts for a crunchy texture and nutty flavor that enhances your Salmon Pesto Pasta.

  • Citrus Herb: Try swapping basil with cilantro for a new flavor profile, or add fresh dill to the pesto for a soothing, aromatic touch.

What to Serve with Salmon Pesto Pasta?

Looking to charmingly elevate your Salmon Pesto Pasta experience? Here are a few delightful pairings that will round out your meal beautifully.

  • Garlic Bread: Crispy and buttery, it complements the pesto sauce perfectly and makes for a cozy side choice. A bite of warm garlic bread with every forkful of pasta is pure bliss.

  • Steamed Asparagus: Tender and vibrant, these add a fresh crunch and fantastic contrast to the creamy pasta. The bright green color enhances your plate’s presentation while providing essential nutrients!

  • Mixed Green Salad: A simple salad with a zesty vinaigrette refreshes the palate and balances the richness of the pesto. Toss in some nuts for added crunch and sweetness!

  • Lemonade Spritzers: A refreshing blend of lemonade and sparkling water, this drink brightens the dish and adds a delightful zesty note. It’s a fizzy treat that complements the flavors of your meal!

  • Roasted Brussels Sprouts: Caramelized and crispy, these tiny cabbages introduce an earthy flavor that works beautifully with the salmon. They offer a great texture contrast while being super nutritious.

  • Chocolate Mousse: For dessert, this rich, airy treat is the perfect sweet finale. Its silky texture and dark chocolate flavor create a lovely balance after the savory pasta dish.

  • Chardonnay: A chilled glass pairs beautifully, enhancing the flaky salmon’s flavors without overpowering the pesto’s herbal notes. It’s a classic choice that adds elegance to your dining experience.

Each of these offerings brings something unique, ensuring a well-rounded meal that truly satisfies all senses. Enjoy!

Chef's Helpful Tips

  • When making Salmon Pesto Pasta, ensure that your pasta is perfectly al dente for the best texture; overcooked pasta can become mushy and ruin the dish.
  • For the salmon, remember to avoid crowding the pan as it prevents even cooking and that beautiful golden sear; a hot skillet is essential.
  • Mixing the pasta with the pesto while it is still warm helps the flavors meld better, so aim to combine ingredients as soon as the pasta is drained.
  • Lastly, use reserved pasta water to adjust the consistency; adding it slowly allows you to achieve the perfect level of creaminess without overpowering the dish.

Salmon Pesto Pasta Recipe FAQs

What type of salmon should I use for Salmon Pesto Pasta?
Absolutely! For this dish, I recommend using fresh skinless salmon fillets if possible, as they cook quickly and flake beautifully. If fresh isn’t available, you can opt for frozen fillets, ensuring they’re fully thawed before cooking for the best texture.

How should I store leftover Salmon Pesto Pasta?
Great question! To keep your Salmon Pesto Pasta fresh, store it in an airtight container in the fridge for up to 3 days. Make sure to let it cool down to room temperature before sealing the container to prevent moisture buildup, which can affect the texture.

Can I freeze Salmon Pesto Pasta?
Yes, you can! To freeze this dish, portion it into freezer-safe bags, pressing out excess air before sealing. It will stay fresh for up to 2 months. When you’re ready to enjoy it again, thaw it overnight in the fridge and reheat gently in a skillet with a splash of water or olive oil to bring back the original creaminess.

What should I do if my pasta is too dry after combining it with the pesto?
Very! If you find that your pasta is too dry, no worries. Just add the reserved pasta water gradually, about a tablespoon at a time, until you achieve your desired level of sauciness. This is a fantastic way to make sure every bite is perfectly coated without being overly wet.

Are there any dietary considerations for Salmon Pesto Pasta?
Certainly! If you’re concerned about allergies, be mindful that this dish contains fish (salmon) and dairy (Parmesan cheese), which are common allergens. For those avoiding gluten, you can easily substitute spaghetti or fettuccine with gluten-free pasta, and for a dairy-free option, look for plant-based cheeses that can stand in place of Parmesan.

How can I enhance the flavor of my Salmon Pesto Pasta?
Yes, absolutely! To elevate the flavor, consider adding some sautéed garlic or red pepper flakes while cooking the salmon, or toss in some fresh spinach or arugula before serving for an extra burst of color and nutrients. Fresh lemon zest or a squeeze of lemon juice can also brighten the dish beautifully!

Salmon Pesto Pasta

Salmon Pesto Pasta

Indulge in this Salmon Pesto Pasta, a gourmet dish combining tender pasta, vibrant pesto, and flaky salmon.
Print Recipe Pin Recipe
Prep Time 10 minutes mins
Cook Time 20 minutes mins
Total Time 30 minutes mins
Servings: 4 servings
Course: Dinner
Cuisine: Italian
Calories: 450
Ingredients Equipment Method Nutrition Notes

Ingredients
  

For the Pasta
  • 8 oz Spaghetti or fettuccine your choice for a delightful base that holds the sauce perfectly.
For the Salmon
  • 2 fillets Skinless salmon fillets about 5 oz each, add rich protein and a buttery flavor.
For the Pesto Sauce
  • 1 cup Basil pesto either store-bought or homemade, to bring aromatic herbal essence.
For the Vegetables
  • 1 cup Cherry tomatoes halved, adding a burst of juiciness and freshness.
For the Cheese
  • 0.5 cup Freshly grated Parmesan cheese providing a savory kick.
For Cooking
  • 2 tbsp Olive oil for pan-frying the salmon.
  • Salt and pepper to taste, essential for seasoning.
For Garnish
  • Fresh basil leaves to sprinkle on top for extra flavor.

Equipment

  • Large pot
  • Skillet
  • Mixing bowl

Method
 

How to Make Salmon Pesto Pasta
  1. In a large pot of salted boiling water, cook your spaghetti or fettuccine according to package directions until al dente. Reserve 1 cup of pasta water before draining.
  2. While the pasta cooks, season the skinless salmon fillets with salt and pepper. Heat olive oil in a skillet over medium heat, add salmon skin-side down, cooking for about 4-5 minutes on each side until flaky.
  3. In a large bowl, combine the cooked pasta, flaked salmon, halved cherry tomatoes, and basil pesto. Toss gently to coat.
  4. If the pasta seems too dry, gradually add reserved pasta water until desired sauciness is achieved.
  5. Serve the pasta mixture on plates, and sprinkle with grated Parmesan cheese and fresh basil leaves.
  6. Enjoy immediately for a delightful meal that combines comfort and gourmet flair!

Nutrition

Serving: 1servingCalories: 450kcalCarbohydrates: 40gProtein: 30gFat: 20gSaturated Fat: 4gPolyunsaturated Fat: 2gMonounsaturated Fat: 10gCholesterol: 70mgSodium: 600mgPotassium: 800mgFiber: 3gSugar: 2gVitamin A: 600IUVitamin C: 10mgCalcium: 200mgIron: 2mg

Notes

Optional: Drizzle a little extra olive oil on top before serving for added richness.

Tried this recipe?

Let us know how it was!

Filed Under: DINNER RECIPES

Little Debbie Christmas Tree Cake Dip

December 3, 2025 by JudyWhite Leave a Comment

The holiday season has a way of bringing out our inner child, and nothing embodies that spirit quite like this Little Debbie Christmas Tree Cake Dip. While decorating the house and selecting gifts can be delightful, there’s something uniquely satisfying about whipping up a treat that transports you back to simpler times. Just imagine the creamy goodness of softened cream cheese blended with the nostalgic flavors of those iconic Little Debbie Christmas Tree Cakes, all topped off with festive sprinkles.

I stumbled upon this recipe while searching for ways to elevate my usual holiday snack offerings, and let me tell you—it’s a game changer! Perfect for cozy gatherings or as a festive centerpiece for your holiday table, this dip comes together in just five minutes. It’s a combination of fun and flavor that will impress your guests without the fuss of elaborate baking. So grab a bowl, let’s get mixing, and create a sweet moment that everyone will remember!

Why You'll Love This Little Debbie Christmas Tree Cake Dip

  • This Little Debbie Christmas Tree Cake Dip is incredibly easy to make, taking just five minutes from start to finish.
  • The delightful combination of cream cheese and nostalgic Little Debbie cakes creates a flavor that will have everyone coming back for more.
  • Its versatility means you can serve it at any holiday gathering, making it a perfect treat for parties or cozy family nights.
  • Visually, the dip is adorned with festive sprinkles, adding a cheerful touch to your holiday spread that will surely impress your guests.

Little Debbie Christmas Tree Cake Dip Ingredients

For the Dip
• Cream Cheese – 1 (8 oz) package, softened for a smooth, creamy base.
• Little Debbie Christmas Tree Cakes – 5 cakes, the star ingredient that adds nostalgia and sweetness.
• Vanilla – 1/2 tsp, enhances the overall flavor profile.
• Cool Whip – 1 (8 oz) container, thawed to create a light and airy texture.

For the Topping
• Christmas Sprinkles – 1/4 cup, to bring a festive flair and a pop of color to your dip, making your Little Debbie Christmas Tree Cake Dip a visual delight.

How to Make Little Debbie Christmas Tree Cake Dip

  1. Mix Cream Cheese: In a medium-sized bowl, add your softened cream cheese and give it a good stir until smooth and creamy. This forms the delicious base of your dip!

  2. Add Cakes: Unwrap the Little Debbie Christmas Tree Cakes and break them into small pieces, then toss them into the bowl with the cream cheese. They’ll add that nostalgic sweetness everyone loves.

  3. Combine Well: Beat the mixture together using a hand mixer or spatula until everything is well combined. Aim for a velvety texture that’s evenly mixed for the best flavor.

  4. Incorporate Vanilla and Cool Whip: Pour in the vanilla and Cool Whip. Mix gently until the dip forms, creating a light and fluffy consistency that’s perfect for dipping.

  5. Fold in Sprinkles: Carefully fold in those cheerful Christmas sprinkles until they’re evenly distributed throughout the dip, enhancing both flavor and appearance.

  6. Chill and Serve: Transfer your festive dip to a serving bowl. Cover and refrigerate it until you’re ready to serve, allowing the flavors to blend beautifully.

Optional: Serve with graham crackers or fruit for a delightful dipping experience!
Exact quantities are listed in the recipe card below.

Make Ahead Options

These Little Debbie Christmas Tree Cake Dip is perfect for busy home cooks looking to save time during the holiday hustle! You can prepare the dip up to 24 hours in advance and simply refrigerate it. To make ahead, follow the recipe steps until you’ve folded in the sprinkles. After that, cover the bowl with plastic wrap or transfer the dip to an airtight container to keep it fresh. This method helps the flavors meld beautifully, ensuring it’s just as delicious when served. When you’re ready to enjoy, give it a quick stir, add a few extra sprinkles on top for that festive touch, and serve with your favorite dippers for an effortless treat!

What to Serve with Little Debbie Christmas Tree Cake Dip?

Prepare to create a delightful spread that will have your guests buzzing with joy and nostalgia.

  • Graham Crackers: The crunchy texture of graham crackers contrasts beautifully with the creamy dip, making each bite a delightful treat.
  • Fresh Fruit Skewers: Juicy strawberries and pineapple chunks provide a refreshing burst of flavor that complements the sweetness of the dip. The natural acidity of the fruit also balances the richness, making for a perfect pairing.
  • Chocolate-Covered Pretzels: The salty crunch of pretzels draped in chocolate gives a sweet-salty combination that enhances the festive flavors of this treat.
  • Vanilla Wafers: These cookies are the perfect vehicle for scooping up the dip, adding a simple, classic sweetness that echoes the nostalgic vibes.
  • Cupcakes: Mini cupcakes, particularly with vanilla or chocolate frosting, create a whimsical dessert tableau that your guests will love. This pairing can elevate any gathering into a mini celebration!
  • Holiday Punch: A refreshing drink with hints of cranberry or ginger complements the sweet flavors of the dip while keeping your guests hydrated.
  • Sugar Cookies: The buttery softness of sugar cookies paired with the dip will delight the tastebuds, evoking warm holiday memories in every bite.

Gather these treats to create a charming, delightful experience around your Little Debbie Christmas Tree Cake Dip!

How to Store and Freeze Little Debbie Christmas Tree Cake Dip

Fridge: Keep any leftover Little Debbie Christmas Tree Cake Dip tightly covered in the refrigerator for up to 3 days.

Freezer: This dip can be frozen for up to 1 month. Place it in an airtight container; thaw in the fridge overnight before serving.

Reheating: For best results, let it come to room temperature after thawing, then give it a gentle stir to refresh its creamy texture.

Little Debbie Christmas Tree Cake Dip Variations

Feel free to get creative with this dip to match your taste preferences and dietary needs.

  • Gluten-Free: Substitute with gluten-free cookies or cakes to accommodate gluten sensitivities while maintaining the festive flavors.

  • Vegan: Use dairy-free cream cheese and whipped topping made from coconut or almond milk for a delicious plant-based option.

  • Chocolate Lovers: Fold in mini chocolate chips or use chocolate-flavored whipped cream for a rich and indulgent twist that satisfies any sweet tooth.

  • Nutty Addition: Add finely chopped pecans or walnuts for a delightful crunch and a touch of earthy flavor that complements the sweetness.

  • Minty Fresh: Introduce a few drops of peppermint extract instead of vanilla for a refreshing, holiday-inspired flavor that will brighten your taste buds.

  • Fruit Infusion: Mix in chopped strawberries or crushed pineapple for a burst of fruity goodness. This addition brings both freshness and color to the dip.

  • Caramel Drizzle: Garnish the top with a drizzle of caramel sauce for a sweet finish that beautifully contrasts the creaminess of the dip.

  • Spicy Kick: A pinch of cayenne pepper or crushed red pepper flakes can provide a surprising kick, enhancing the sweetness with a little heat for adventurous palates.

Chef's Helpful Tips

  • For making your Little Debbie Christmas Tree Cake Dip extra smooth, ensure your cream cheese is fully softened before mixing.
  • When breaking up the cakes, aim for small, even pieces for better incorporation into the dip.
  • Use a hand mixer on low speed to avoid splattering while combining the ingredients, which helps achieve a uniform texture.
  • For the best flavor development, allow the dip to chill for at least an hour before serving.

Little Debbie Christmas Tree Cake Dip Recipe FAQs

How do I choose the right cream cheese for this dip?
Absolutely! When selecting cream cheese, look for a block variety rather than spreadable cream cheese. Ensure it’s fresh—check the expiration date on the package. A softened cream cheese will result in a smoother dip, so don’t forget to take it out of the fridge about 30 minutes before you start mixing.

How long can I store my Little Debbie Christmas Tree Cake Dip?
Very! You can keep any leftover dip tightly covered in the refrigerator for up to 3 days. Just make sure to use an airtight container to retain the flavor and texture. If you notice any dark spots or changes in smell, it’s best to discard it to be safe!

Can I freeze Little Debbie Christmas Tree Cake Dip?
Definitely! This dip can be frozen for up to 1 month. To freeze, place the dip in an airtight container. Make sure to leave some space at the top since it may expand slightly as it freezes. When you’re ready to enjoy it again, thaw it overnight in the fridge. Once thawed, let it sit at room temperature for about 15-20 minutes and give it a gentle stir for the best texture.

What should I do if my dip turns out too thick?
No problem! If you find your Little Debbie Christmas Tree Cake Dip is too thick, just add a splash of milk or a bit more Cool Whip, one tablespoon at a time, until you reach your desired consistency. This will help lighten it and make it easier for dipping without losing that creamy goodness.

Is this dip safe for pets or individuals with allergies?
Good question! This dip contains cream cheese and Cool Whip, which are not suitable for pets. If you have guests with dairy allergies, you might want to consider using dairy-free cream cheese alternatives and whipped toppings. Always check ingredient labels to make sure everyone can enjoy the festive flavors safely!

Little Debbie Christmas Tree Cake Dip

Little Debbie Christmas Tree Cake Dip

Enjoy a nostalgic Little Debbie Christmas Tree Cake Dip, a creamy and festive treat perfect for your holiday gatherings.
Print Recipe Pin Recipe
Prep Time 5 minutes mins
Total Time 5 minutes mins
Servings: 8 g servings
Course: Dessert
Calories: 150
Ingredients Equipment Method Nutrition Notes

Ingredients
  

For the Dip
  • 1 package Cream Cheese softened
  • 5 cakes Little Debbie Christmas Tree Cakes the star ingredient
  • 1/2 tsp Vanilla enhances flavor
  • 1 container Cool Whip thawed
For the Topping
  • 1/4 cup Christmas Sprinkles for a festive touch

Equipment

  • Mixing bowl
  • hand mixer

Method
 

How to Make Little Debbie Christmas Tree Cake Dip
  1. In a medium-sized bowl, add your softened cream cheese and give it a good stir until smooth and creamy.
  2. Unwrap the Little Debbie Christmas Tree Cakes and break them into small pieces, then toss them into the bowl with the cream cheese.
  3. Beat the mixture together using a hand mixer or spatula until everything is well combined.
  4. Pour in the vanilla and Cool Whip. Mix gently until the dip forms.
  5. Carefully fold in those cheerful Christmas sprinkles until they’re evenly distributed throughout the dip.
  6. Transfer your festive dip to a serving bowl. Cover and refrigerate it until you’re ready to serve.

Nutrition

Serving: 1g servingCalories: 150kcalCarbohydrates: 18gProtein: 2gFat: 8gSaturated Fat: 5gCholesterol: 30mgSodium: 100mgPotassium: 100mgSugar: 10gVitamin A: 10IUCalcium: 2mg

Notes

For best flavor development, chill the dip for at least an hour before serving.

Tried this recipe?

Let us know how it was!

Filed Under: DESSERT RECIPES

No Bake Avalanche Cookies

December 3, 2025 by JudyWhite Leave a Comment

There’s something incredibly comforting about a sweet treat that requires no baking—especially on those busy afternoons when I just want to whip up something quick yet delicious. Enter No Bake Avalanche Cookies! These delightful bites come together in just 15 minutes, transforming simple pantry staples into a crowd-pleasing dessert.

The moment I mixed the crunchy Rice Krispies with the creamy, velvety white chocolate and peanut butter, I was transported back to my childhood, where every day felt like a sweet adventure. Add a sprinkle of mini-marshmallows, and you’ve got a chewy, crispy indulgence that’s perfect for any occasion—or simply to satisfy a sweet tooth crisis!

Whether you’re hosting a gathering, wanting a quick snack for the kids, or just treating yourself after a long day, these cookies check every box. Plus, they’re customizable! Toss in some mini chocolate chips or even your favorite nuts for a personal twist. Let’s dive into this easy recipe that’s sure to become a staple in your kitchen!

Why You'll Love This No Bake Avalanche Cookies

  • These No Bake Avalanche Cookies are a breeze to make, coming together in just 15 minutes without any baking required.
  • The combination of crunchy Rice Krispies, creamy white chocolate, and peanut butter creates an irresistible flavor that will have everyone coming back for more.
  • Their versatility allows you to customize them easily by adding mini chocolate chips or nuts to fit your taste.
  • Visually appealing and fun to make, these cookies are guaranteed to impress at any gathering or serve as a delightful treat for yourself.

No Bake Avalanche Cookies Ingredients

Get ready to whip up some delightful treats with these simple ingredients!

For the Cookie Base
• Rice Krispies Cereal – gives these cookies a satisfying crunch that contrasts beautifully with the creamy elements.
• Mini-Marshmallows – add chewy sweetness that complements the crispy rice.
• White Chocolate Chips – melt into a smooth, creamy layer that binds everything together delightfully.
• Creamy Peanut Butter – enhances flavor and texture, making these No Bake Avalanche Cookies truly indulgent.

Optional Toppings
• Mini-Chocolate Chips – sprinkle on top for a sweet chocolatey burst and extra visual appeal.

Now that we’ve gathered our ingredients, let’s dive into creating these mouthwatering No Bake Avalanche Cookies that are sure to bring smiles all around!

How to Make No Bake Avalanche Cookies

  1. Prepare the Baking Sheet: Line a baking sheet with parchment paper. This prevents sticking and makes clean-up a breeze, ensuring your treats come off perfectly without fuss.

  2. Combine Ingredients: In a large bowl, mix the Rice Krispies and mini-marshmallows. Set aside as you’ll soon envelop them in sweet, creamy goodness!

  3. Melt the Chocolate Mixture: Over low heat, melt the white chocolate chips and creamy peanut butter together in a saucepan. Stir constantly until the mixture is smooth and well-combined—this should take about 5 minutes.

  4. Combine Everything: Once melted, pour the chocolate and peanut butter mixture over the Rice Krispies and marshmallow mixture. Stir gently until everything is uniformly coated, creating a gooey, delicious blend.

  5. Shape the Cookies: Drop spoonfuls of the mixture onto the prepared baking sheet. Each dollop should hold its shape, creating lovely little mounds that will soon be cookies!

  6. Optional Topping: If you like, sprinkle mini chocolate chips on top of the wet cookie mounds for that extra touch of chocolatey goodness and visual appeal.

  7. Let Set: Allow the cookies to sit until firm. This usually takes about 30 minutes at room temperature, or you can chill them in the fridge for quicker results.

Optional: Drizzle with melted chocolate for an extra indulgent touch.

Exact quantities are listed in the recipe card below.

How to Store and Freeze No Bake Avalanche Cookies

Room Temperature: Store No Bake Avalanche Cookies in an airtight container for up to 3 days. They’ll remain deliciously chewy; just keep them away from heat and humidity.

Fridge: For a firmer texture, refrigerate the cookies in a sealed container for up to a week. They taste delightful when chilled, offering a nice contrast to their sweetness!

Freezer: To extend their life, freeze the cookies for up to 2 months. Place them in a single layer on a baking sheet until solid, then transfer to a freezer bag.

Reheating: Enjoy them straight from the fridge or freezer! If desired, let thaw at room temperature or warm briefly in the microwave for 5-10 seconds for that fresh-out-of-the-mixing-bowl sensation.

Make Ahead Options

These No Bake Avalanche Cookies are perfect for busy cooks looking to save time without sacrificing flavor! You can prepare the base mixture—Rice Krispies, mini-marshmallows, white chocolate chips, and peanut butter—up to 24 hours in advance. Simply store it in an airtight container in the refrigerator. When you’re ready to finish the cookies, take the mixture out, drop spoonfuls onto a lined baking sheet, and allow them to set at room temperature for about 30 minutes. For optimal quality, be sure to refrigerate them after they’ve set if not serving immediately, and feel free to add your favorite toppings right before serving for that fresh, delightful touch. Enjoy the convenience of these sweet treats without the last-minute rush!

What to Serve with No Bake Avalanche Cookies?

Imagine gathering around the table with loved ones, sharing joyful bites of sweet, crunchy treats that create lasting memories.

  • Milkshakes: A creamy vanilla or chocolate milkshake pairs beautifully, complementing those sweet flavors while adding a nostalgic touch.
  • Fruit Platter: A colorful array of fresh fruits like strawberries and apples adds a refreshing contrast, balancing the richness of the cookies.
  • Hot Chocolate: Cozy up with a warm cup of rich hot chocolate for that delightful sweet treat combination that elevates your dessert moment.
  • Ice Cream: Vanilla bean or chocolate ice cream makes a delightful indulgence; the creamy texture pairs perfectly with crunchy cookies.
  • Chocolate Dipped Pretzels: The salty-sweet combo creates a lovely contrast; their crunchy exterior and sweetness echo the cookies’ satisfying crunch.
  • Coffee: A warm cup of coffee or espresso offers a warm finish, enhancing the flavors while balancing the sweetness of the cookies.
  • Whipped Cream Topping: For an extra decadent touch, serve the cookies drizzled with whipped cream; it adds lightness and a luxurious feel to each bite.
  • Trail Mix: A small bowl of trail mix on the side brings in 🥜 nutty flavors and crisp textures that perfectly complement the cookies, making them even more fun to enjoy.

These pairings not only enhance the experience but also elevate your dessert feast into something truly special!

No Bake Avalanche Cookies Variations

Feel free to let your creativity shine by personalizing these delightful cookies with some tasty twists!

  • Nut-Free: Substitute peanut butter with sunflower seed butter for a nut-free option that still packs a creamy punch.

  • Dark Chocolate: Swap white chocolate chips for dark chocolate chips for a richer, slightly bitter flavor that contrasts beautifully with the sweetness.

  • Vegan: Use dairy-free chocolate chips and maple syrup instead of peanut butter for a completely vegan-friendly treat that doesn’t skimp on taste.

  • Crunchy Element: Fold in chopped nuts like almonds or pecans for an added crunch that complements the chewy marshmallows and soft chocolate.

  • Flavor Boost: Add a teaspoon of vanilla extract or a pinch of sea salt to enhance the flavor and elevate the overall taste experience.

  • Coconut Twist: Incorporate shredded coconut into the mixture for a sweet, tropical flavor that transforms these cookies into a beachy delight.

  • Spicy Kick: Sprinkle in a dash of cayenne or cinnamon for an unexpected kick that will surprise and exhilarate your taste buds.

  • Dried Fruits: Throw in some dried cranberries or chopped apricots for a burst of tartness that balances the sweetness of the cookies.

Chef's Helpful Tips

  • To make your No Bake Avalanche Cookies extra special, ensure your white chocolate and peanut butter are combined over low heat while stirring constantly to avoid burning.
  • A common mistake is not mixing the cereal and marshmallows thoroughly, so take your time to coat each piece evenly with the chocolate mixture.
  • For a smoother texture, consider using a double boiler instead of a saucepan, as it provides gentle heat.
  • Allowing the cookies to sit at room temperature for at least 30 minutes helps them firm up perfectly, but if you’re short on time, refrigerate them for about 15 minutes for faster results.

No Bake Avalanche Cookies Recipe FAQs

How do I choose the right Rice Krispies for this recipe?
Absolutely! When selecting Rice Krispies for your No Bake Avalanche Cookies, look for fresh, crisp cereal without any signs of staleness. Check the packaging for a recent expiration date and ensure the cereal is free from any unusual clumps or breakage.

What’s the best way to store No Bake Avalanche Cookies?
For short-term storage, you can keep your No Bake Avalanche Cookies in an airtight container at room temperature for up to 3 days. For longer-lasting freshness, refrigerate them in a sealed container for up to a week, or freeze for up to 2 months to preserve their delightful texture.

Can I freeze No Bake Avalanche Cookies? How do I do it?
Yes, you can absolutely freeze No Bake Avalanche Cookies! To do this, first lay them in a single layer on a baking sheet and freeze until solid. This usually takes about 1-2 hours. After that, transfer them to a freezer-safe bag or container, layering them with parchment paper if needed to prevent sticking. They can stay frozen for up to 2 months! When you’re ready to enjoy, simply thaw them at room temperature.

Are there any common issues I should be aware of when making these cookies?
Very! A common issue is the mixture being too sticky or crumbly. If you find that it’s not holding together well after chilling, it may be due to an imbalance in the chocolate and peanut butter ratio. A good tip is to ensure you melt the white chocolate and peanut butter completely, stirring until smooth, before combining with the Rice Krispies and marshmallows. If the cookies turn out too hard, it might be due to over-chilling; simply allow them to come to room temperature to soften.

Are these cookies safe for children and pets?
Great question! No Bake Avalanche Cookies are generally safe for children, but they do contain ingredients like peanut butter and chocolate, which can be allergens for some. Always check for allergies before serving. However, they are not suitable for pets, particularly dogs, as chocolate can be harmful to them. Always keep these sweet treats out of paw’s reach!

No Bake Avalanche Cookies

No Bake Avalanche Cookies

Indulge in No Bake Avalanche Cookies, a quick and delicious treat made with Rice Krispies, white chocolate, and peanut butter.
Print Recipe Pin Recipe
Prep Time 15 minutes mins
Setting Time 30 minutes mins
Total Time 45 minutes mins
Servings: 12 cookies
Course: Dessert
Cuisine: American
Calories: 160
Ingredients Equipment Method Nutrition Notes

Ingredients
  

For the Cookie Base
  • 4 cups Rice Krispies Cereal for crunch
  • 2 cups Mini-Marshmallows for chewiness
  • 1 cup White Chocolate Chips to melt
  • 1 cup Creamy Peanut Butter for richness
Optional Toppings
  • 1/2 cup Mini-Chocolate Chips for sprinkling on top

Equipment

  • Mixing bowl
  • Saucepan
  • Baking sheet
  • parchment paper

Method
 

How to Make No Bake Avalanche Cookies
  1. Prepare the Baking Sheet: Line a baking sheet with parchment paper.
  2. Combine Ingredients: In a large bowl, mix the Rice Krispies and mini-marshmallows.
  3. Melt the Chocolate Mixture: Over low heat, melt the white chocolate chips and creamy peanut butter together in a saucepan.
  4. Combine Everything: Once melted, pour the chocolate and peanut butter mixture over the Rice Krispies and marshmallow mixture.
  5. Shape the Cookies: Drop spoonfuls of the mixture onto the prepared baking sheet.
  6. Optional Topping: Sprinkle mini chocolate chips on top of the wet cookie mounds.
  7. Let Set: Allow the cookies to sit until firm, about 30 minutes at room temperature.

Nutrition

Serving: 1cookieCalories: 160kcalCarbohydrates: 24gProtein: 3gFat: 7gSaturated Fat: 3.5gPolyunsaturated Fat: 0.5gMonounsaturated Fat: 2gSodium: 50mgPotassium: 50mgFiber: 1gSugar: 10gCalcium: 2mgIron: 2mg

Notes

For enhanced flavor, consider drizzling melted chocolate over the cookies before they set.

Tried this recipe?

Let us know how it was!

Filed Under: DESSERT RECIPES

Little Debbie Christmas Tree Cake Dip

December 2, 2025 by JudyWhite Leave a Comment

There’s a certain warmth that fills the air when the holiday season rolls around, and nothing captures that essence quite like a dessert that brings back childhood memories. Picture this: a festive gathering where laughter fills the room, and you unveil a bowl of Little Debbie Christmas Tree Cake Dip, instantly drawing delighted gasps from your friends and family. As they take their first dip, the creamy, sweet blend of cream cheese and whipped topping swirls with the iconic flavors of those beloved holiday cakes.

I stumbled upon this delightful recipe on a chilly December afternoon, desperate to bring something unique to our annual potluck. With just five simple ingredients and a mere five minutes of prep time, this dip has become my secret weapon for impressing guests. It’s a crowd-pleaser, combining nostalgia with a modern twist, and garnished with festive sprinkles that make every serving a little party of its own. So roll up your sleeves and get ready to dip—this dessert is simplicity and joy wrapped in one delicious package!

Why You'll Love This Little Debbie Christmas Tree Cake Dip

  • This Little Debbie Christmas Tree Cake Dip is incredibly easy to make, requiring just five minutes of prep time, so you can whip it up at the last minute without any stress.
  • The flavor profile is a delightful combination of creamy sweetness that perfectly captures the essence of the iconic holiday cakes we all know and love.
  • Its versatility shines through as it can be served at any festive gathering, making it suitable for parties, potlucks, or cozy family nights.
  • Visually, the vibrant sprinkles add a festive touch to your dessert table, ensuring that it not only tastes good but also looks amazing.

Little Debbie Christmas Tree Cake Dip Ingredients

• Here’s what you’ll need to create this delightful dip!

For the Dip

  • Cream Cheese – 1 (8 oz) block, softened; this adds a rich, creamy base that complements the sweetness.
  • Little Debbie Christmas Tree Cakes – 5 cakes, broken into pieces; they provide that nostalgic flavor we all crave during the holidays.
  • Vanilla Extract – 1/2 tsp; a touch of vanilla enhances the overall flavor profile beautifully.
  • Cool Whip – 1 (8 oz) container, thawed; this ingredient creates a light and airy texture in your dip.

For the Garnish

  • Christmas Sprinkles – 1/4 cup; sprinkle these on top for a festive look that adds a pop of color and fun!

How to Make Little Debbie Christmas Tree Cake Dip

  1. Soften the cream cheese: Start by placing your 8 oz block of cream cheese in a medium-sized bowl. It should be softened at room temperature for about 15-20 minutes, making it easier to mix.

  2. Break the cakes: Unwrap your five Little Debbie Christmas Tree Cakes and break them into small bite-sized pieces. Add these delightful morsels to the bowl with the cream cheese, infusing the dip with that familiar, nostalgic flavor.

  3. Beat together: Using a hand mixer or a sturdy spatula, combine the cream cheese and cake pieces until they are well incorporated. Aim for a smooth consistency that still has a few visible bits of cake, which adds texture.

  4. Mix in flavors: Pour in 1/2 teaspoon of vanilla and your thawed 8 oz of Cool Whip into the bowl. Gently blend these ingredients until they form a creamy dip that captures the joy of holiday baking.

  5. Fold in sprinkles: Carefully fold in your 1/4 cup of Christmas sprinkles to add a festive touch. This step is crucial as it not only beautifies the dip but also adds a lovely crunch!

  6. Transfer to serve: Scoop the dip into a festive serving bowl. Cover it with plastic wrap and refrigerate until you’re ready to serve, allowing the flavors to meld beautifully.

Optional: Serve with graham crackers or fresh fruit for a delightful dipping experience.

Exact quantities are listed in the recipe card below.

What to Serve with Little Debbie Christmas Tree Cake Dip?

A delightful dip deserves a vibrant spread to accompany it, amplifying the joy of holiday gatherings.

  • Graham Crackers: Their crunchy texture perfectly balances the creamy dip, making for a classic pairing that’s always a hit.

  • Fresh Fruit: Slices of strawberries or apples provide a refreshing contrast, adding a burst of natural sweetness that complements the dip beautifully.

  • Pretzel Crisps: The salty crunch of pretzels creates a delicious contrast to the rich sweetness of the dip, resulting in a satisfying flavor combination.

  • Vanilla Wafers: With their delicate vanilla flavor, these cookies harmonize wonderfully with the dip’s sweetness, offering just the right amount of crunch.

  • Mini Marshmallows: Fluffy and light, marshmallows add an extra layer of treat-like fun and a nostalgic element reminiscent of holiday desserts.

  • Chocolate Fondue: For a decadent twist, serve a bowl of warm chocolate alongside the dip for fans of chocolate-covered everything—a luxurious indulgence!

  • Sparkling Cider: A festive drink option, the effervescence and fruity notes of sparkling cider beautifully complement the sweet dip and enhance the holiday spirit.

  • Eggnog: As a classic holiday beverage, its creamy, spiced flavor pairs perfectly with the sweet and tangy attributes of the dip, transporting you straight to a holiday wonderland.

  • Christmas Cookies: A platter of decorated cookies not only adds color to your spread, but also offers contrasting flavors and textures to enhance your dessert experience.

Little Debbie Christmas Tree Cake Dip Variations

Feel free to get creative and personalize your dip with these fun twists that will tickle your taste buds and spark joy in every bite!

  • Dairy-Free: Substitute cream cheese with a dairy-free alternative and use coconut whipped cream for a deliciously rich and creamy experience.

  • Chocolate Lovers: Mix in 1/4 cup of mini chocolate chips to deepen the sweetness and create a delightful crunchy surprise in every dip!

  • Nutty Addition: Fold in 1/4 cup of crushed pecans or walnuts for a delightful crunch that complements the creamy texture.

  • Festive Flavor Boost: Add 1 tsp of almond extract for a refreshing twist that will make your taste buds sing this holiday season.

  • Spicy Kick: Stir in a pinch of cinnamon or nutmeg to bring a warm spice element to the creamy dip, adding delightful seasonal notes.

  • Fruit Fusion: Incorporate finely chopped strawberries or raspberries to enhance the dip with a burst of freshness and a fruity zing.

  • Different Cakes: Swap the Little Debbie Christmas Tree Cakes for other seasonal treats, like peppermint or gingerbread cookies, to create a new nostalgic flavor.

  • Vegan Delight: Use vegan cream cheese and whipped topping as substitutes to create a completely plant-based version that everyone can enjoy!

These variations not only enhance the flavor but also allow you to tailor the dish to your guests’ preferences, making the holiday gathering even more special!

Make Ahead Options

This Little Debbie Christmas Tree Cake Dip is a perfect candidate for meal prep, allowing you to enjoy it with minimal effort on busy days! You can prepare the dip up to 24 hours in advance. Simply follow the recipe up to the transfer step, then cover the bowl tightly with plastic wrap and refrigerate. To maintain the dip’s delightful texture and freshness, be sure to keep it chilled until serving. When you’re ready to impress, simply transfer the dip to a festive serving bowl, add a sprinkle of additional Christmas sprinkles, and it’s ready to be enjoyed. This way, you can focus on enjoying the company of your loved ones while savoring this delightful treat!

How to Store and Freeze Little Debbie Christmas Tree Cake Dip

Fridge: Keep the Little Debbie Christmas Tree Cake Dip covered in an airtight container; it will stay fresh for up to 3 days.

Freezer: This dip can be frozen for up to 1 month. To freeze, portion it into smaller containers or bags, ensuring they’re well-sealed to prevent freezer burn.

Thawing: When you’re ready to enjoy, thaw in the fridge overnight. Rewhip briefly with a spatula to restore its creamy texture before serving.

Serving: For the best experience, serve chilled or at room temperature. Adding a sprinkle of fresh Christmas sprinkles before serving can refresh its festive look!

Chef's Helpful Tips

  • For the Little Debbie Christmas Tree Cake Dip, make sure your cream cheese is fully softened at room temperature to avoid lumps in your dip.
  • When breaking the cake pieces, aim for uniform sizes to ensure even mixing and texture in the final product.
  • Use a hand mixer for a smoother consistency, but be careful not to over-mix; some cake pieces should remain visible for a delightful bite.
  • Refrigerate the dip for at least an hour before serving to let the flavors meld and enhance the overall taste experience.

Little Debbie Christmas Tree Cake Dip Recipe FAQs

What kind of Little Debbie Christmas Tree Cakes should I use?
Absolutely! For the best flavor, use the classic Little Debbie Christmas Tree Cakes, as they provide that iconic taste we all cherish during the holidays. If they aren’t available, you can substitute with any other similar frosted cakes or snack cakes, but keep in mind that the nostalgic flavor will slightly differ.

How long can I store Little Debbie Christmas Tree Cake Dip in the fridge?
Very! You can keep the Little Debbie Christmas Tree Cake Dip covered in an airtight container for up to 3 days. For optimal flavor, I recommend enjoying it within the first day or two, as it may begin to lose its creaminess if stored too long.

Can I freeze Little Debbie Christmas Tree Cake Dip? If so, how?
Certainly! To freeze this dip, portion it into smaller airtight containers or resealable bags, leaving some space for expansion. It can be frozen for up to 1 month. When you’re ready to enjoy it, simply thaw it in the fridge overnight. For a smoother texture, whip it briefly with a spatula before serving, and consider adding a few fresh Christmas sprinkles on top for garnish!

What should I do if my dip is too thick or lumpy?
If your dip seems too thick or has lumps, don’t fret! Simply add a dollop of Cool Whip or a splash of milk to the mixture and gently mix until you achieve your desired consistency. If you used cold cream cheese, it may not have mixed well, so be sure it’s soft enough next time for a smooth blend.

Are there any allergy concerns with this dip?
Absolutely, it’s essential to note that this recipe may not be suitable for those with dairy allergies due to the cream cheese and Cool Whip content. If you’re making this for someone with allergies, consider using dairy-free cream cheese or whipped topping alternatives. Also, check the Little Debbie cake ingredient list to ensure it aligns with any dietary needs!

What can I serve with Little Debbie Christmas Tree Cake Dip?
When it comes to serving, I often recommend pairing it with graham crackers, fresh fruit slices, or mini pretzels for a delightful contrast in flavors and textures. The sweetness of the dip complements these options beautifully and makes for an engaging presentation at any gathering!

Little Debbie Christmas Tree Cake Dip

Little Debbie Christmas Tree Cake Dip

A delightful dip capturing the essence of Little Debbie Christmas Tree Cakes, perfect for festive gatherings.
Print Recipe Pin Recipe
Prep Time 5 minutes mins
Total Time 5 minutes mins
Servings: 8 servings
Course: Dessert
Calories: 140
Ingredients Equipment Method Nutrition Notes

Ingredients
  

For the Dip
  • 1 block Cream Cheese 8 oz, softened
  • 5 cakes Little Debbie Christmas Tree Cakes broken into pieces
  • 1/2 tsp Vanilla Extract
  • 1 container Cool Whip 8 oz, thawed
For the Garnish
  • 1/4 cup Christmas Sprinkles

Equipment

  • medium-sized bowl
  • hand mixer

Method
 

How to Make Little Debbie Christmas Tree Cake Dip
  1. Soften the cream cheese by placing the 8 oz block in a medium-sized bowl at room temperature for about 15-20 minutes.
  2. Break the five Little Debbie Christmas Tree Cakes into bite-sized pieces and add them to the bowl with the cream cheese.
  3. Using a hand mixer or a spatula, combine the cream cheese and cake pieces until well incorporated and smooth, with some visible bits of cake.
  4. Pour in the 1/2 tsp of vanilla and the thawed 8 oz of Cool Whip, blending gently until it forms a creamy dip.
  5. Fold in the 1/4 cup of Christmas sprinkles to add a festive touch.
  6. Transfer the dip into a festive serving bowl and refrigerate until ready to serve.

Nutrition

Serving: 1servingCalories: 140kcalCarbohydrates: 12gProtein: 1gFat: 10gSaturated Fat: 6gCholesterol: 20mgSodium: 90mgPotassium: 40mgSugar: 11gVitamin A: 300IUCalcium: 20mg

Notes

For a delightful dipping experience, serve with graham crackers or fresh fruit.

Tried this recipe?

Let us know how it was!

Filed Under: DESSERT RECIPES

No Bake Avalanche Cookies

December 2, 2025 by JudyWhite Leave a Comment

There’s something truly exhilarating about whipping up a sweet treat in practically no time at all. Enter No Bake Avalanche Cookies—my delightful concoction that balances crunchy Rice Krispies, gooey marshmallows, and creamy white chocolate in a whimsical, no-bake wonder. I stumbled upon this recipe during a spontaneous afternoon dessert craving, and oh, what a delicious discovery it turned out to be!

Perfect for gatherings or simply a cozy night in, these cookies are not your ordinary snacks. In just 15 minutes, you can transform simple ingredients into a decadent masterpiece that looks and tastes like you spent hours in the kitchen. The best part? You can customize them with mini chocolate chips for an extra layer of indulgence. As I watch my family dive into these treats, I can’t help but feel a warm glow knowing they’re enjoying something homemade and utterly delightful. So, let’s dive into this easy recipe that’s sure to please both young and old alike!

Why You'll Love This No Bake Avalanche Cookies

  • These No Bake Avalanche Cookies are incredibly easy to make, allowing you to whip them up in just 15 minutes without turning on the oven.
  • Their delightful flavor combination of crunchy Rice Krispies, gooey marshmallows, and creamy white chocolate is sure to satisfy any sweet tooth.
  • Versatile and customizable, you can add mini chocolate chips or experiment with other mix-ins to create your perfect treat.
  • Not only are they visually appealing with their generous dollops and inviting textures, but they’re also a guaranteed crowd-pleaser at any gathering.

No Bake Avalanche Cookies Ingredients

• Get ready for a sweet adventure!

For the Base

  • Rice Krispies Cereal – 2 cups for that perfect crunch and lightness in each bite.
  • Mini-Marshmallows – 1 cup to add gooey sweetness and delightful texture.
  • White Chocolate Chips – 2 cups (1 bag) for its creamy richness that brings everything together.
  • Creamy Peanut Butter – 1/2 cup for a nutty flavor that balances the sweetness beautifully.

Optional Topping

  • Mini-Chocolate Chips – Sprinkle on top for an extra chocolatey crunch and visual appeal.

These No Bake Avalanche Cookies are a sweet treat you won’t want to miss!

How to Make No Bake Avalanche Cookies

  1. Prepare the Baking Sheet:
    Start by lining a baking sheet with parchment paper to prevent sticking. This will also make cleanup a breeze!

  2. Combine the Crunch:
    In a large bowl, mix together the Rice Krispies and mini-marshmallows until they are evenly distributed. Set this mixture aside while you prepare the next step.

  3. Melt the Chocolate Bliss:
    Over low heat, melt the white chocolate chips and creamy peanut butter together. Stir constantly until the mixture is smooth and creamy, ensuring that it doesn’t burn.

  4. Mix it All Together:
    Once melted, pour this luscious chocolate-peanut butter blend over the Rice Krispies and marshmallow mixture. Stir until everything is well combined and covered in that delicious mixture.

  5. Spoon the Mixture:
    Using a spoon, drop the mixture in generous spoonfuls onto your prepared baking sheet. This will create little cookie clusters that are just waiting to set!

  6. Add a Chocolatey Touch (Optional):
    If you’re feeling adventurous, sprinkle mini chocolate chips on top of your cookie clusters for an extra indulgent touch.

  7. Allow to Firm Up:
    Let the cookies sit at room temperature until they are firm to the touch. This usually takes about 30 minutes.

Optional: Drizzle with melted chocolate for an extra special finishing touch.
Exact quantities are listed in the recipe card below.

Make Ahead Options

These No Bake Avalanche Cookies are a fantastic time-saver for busy cooks! You can prepare the mixture up to 24 hours in advance—just follow the first five steps and then store the mixture in an airtight container in the refrigerator. This keeps everything fresh and prevents the marshmallows from melting. When you’re ready to serve, simply scoop the mixture onto a baking sheet, add any optional mini chocolate chips, and allow them to set for about 30 minutes at room temperature. By prepping ahead, you can easily surprise your family with these sweet, homemade treats without the last-minute rush!

How to Store and Freeze No Bake Avalanche Cookies

Room Temperature: Keep the cookies in an airtight container at room temperature for up to 3 days. This keeps them fresh and chewy.

Fridge: Store in the fridge for about a week if you prefer a firmer texture. Just ensure they’re covered to prevent drying out!

Freezer: For longer storage, freeze the cookies in an airtight container for up to 2 months. To enjoy, simply thaw them at room temperature.

Reheating: If you like them warm, microwave individual cookies for about 10-15 seconds. This brings back that gooey goodness!

No Bake Avalanche Cookies Variations

Feel free to unleash your creativity and customize these cookies to suit your tastes and dietary preferences!

  • Nut-Free: Substitute peanut butter with sunflower seed butter for a nut-free option that maintains creaminess and richness.

  • Dark Chocolate Switch: Use dark chocolate chips instead of white for a deeper, more intense flavor that pairs beautifully with the sweetness.

  • Gluten-Free Delight: Replace Rice Krispies with gluten-free cereal to whip up a deliciously satisfying treat that everyone can enjoy.

  • Add Some Crunch: Fold in a cup of chopped nuts, like almonds or pecans, to add a delightful crunch and heartiness to each bite.

  • Coconut Flake Twist: Mix in shredded coconut for a tropical flair, elevating the flavors to create a chewy, sweet sensation.

  • Minty Fresh: Stir in some peppermint extract, or add crushed peppermint candies for a refreshing minty version, perfect for the holidays!

  • Fruit Fusion: Toss in dried cranberries or raisins for a fruity twist that adds a pop of color and texture to your cookies.

  • Spicy Kick: Sprinkle in a pinch of cinnamon or chili powder for a surprising heat that enhances the sweetness and flavor complexity.

Exploring these variations can turn the simple No Bake Avalanche Cookies into a personalized treat that delights everyone!

What to Serve with No Bake Avalanche Cookies?

Imagine a cozy gathering filled with laughter and delightful treats that perfectly complement the sweet and crunchy bliss of your No Bake Avalanche Cookies.

  • Tall Glass of Milk: A classic pairing, milk enhances the flavors of the cookies while smoothing out the sweetness in every bite.
  • Creamy Vanilla Ice Cream: Scoop some vanilla ice cream alongside the cookies for an irresistible contrast—creamy versus crunchy that your guests will love!
  • Fresh Fruit Salad: The refreshing burst of berries and tropical fruit adds a bright, zesty note that balances the sweetness of the cookies beautifully.
  • Chocolate Dipped Strawberries: Coat some fresh strawberries with chocolate for an elegant treat that ties in with the chocolatey goodness of the cookies.
  • Caramel Sauce Drizzle: Offer a versatile drizzle of warm caramel for guests to pour on top, creating an indulgent experience. Who could resist that?
  • Coffee or Hot Chocolate: Serve alongside a rich coffee or a comforting cup of hot chocolate—perfect for those sweet tooth moments!
  • Mini Cheesecake Bites: Pair these delightful little cakes as a secondary dessert; their creamy texture offers a lovely contrast to the crunchy cookies.
  • Nutty Snack Mix: Creating a sweet and salty contrast, this mix makes for an enjoyable, crunchy side and a fun way for guests to nibble.
  • Sparkling Lemonade: A refreshing drink to cleanse the palate between bites; the citrusy notes uplift each sweet morsel of the cookies!

Chef's Helpful Tips

  • For the No Bake Avalanche Cookies, ensure your white chocolate chips and peanut butter are fully melted and combined over low heat to prevent burning.
  • Avoid using large marshmallows, as mini-marshmallows blend more easily into the cereal mixture, providing a better texture.
  • When mixing the chocolate blend with the Rice Krispies and marshmallows, work quickly to ensure every piece is coated before it begins to set.
  • Finally, allow the cookie clusters to firm up at room temperature for at least 30 minutes for the best texture before serving.

No Bake Avalanche Cookies Recipe FAQs

What type of Rice Krispies cereal should I use?
Absolutely! Regular Rice Krispies cereal is best for this recipe, as it provides that signature crunch. I recommend avoiding flavored or sweetened versions, as they may alter the overall taste of these No Bake Avalanche Cookies.

How long can I store No Bake Avalanche Cookies?
You can keep these delightful cookies stored in an airtight container at room temperature for up to 3 days. If you prefer a firmer texture, they can be stored in the fridge for about a week—just make sure they’re well covered to avoid drying out!

Can I freeze No Bake Avalanche Cookies?
Yes, you can freeze these cookies! Place them in a single layer on a baking sheet to freeze for about 1 hour, then transfer them to an airtight container and freeze for up to 2 months. To enjoy, simply thaw at room temperature for about 15-30 minutes.

My cookies are too crumbly; what should I do?
Very! If your cookies turn out crumbly, it’s often due to not mixing everything thoroughly. Make sure when you combine the melted white chocolate and peanut butter with the Rice Krispies and marshmallows, you’re mixing until everything is well coated. Alternatively, you can add a bit more peanut butter or melted chocolate to help bind them better.

Are there any dietary considerations I need to keep in mind?
Absolutely! Since this recipe includes peanut butter, those with nut allergies should avoid these cookies or consider using sunflower seed butter as a nut-free alternative. For those with dairy restrictions, a dairy-free white chocolate option can be used to keep the treat deliciously enjoyable without triggering allergies.

Can I use different types of chocolate chips?
Very! You can definitely swap white chocolate chips with milk chocolate or dark chocolate chips for a different flavor profile. If you decide to do this, keep in mind that the cookies will have a richer taste, which many chocolate lovers absolutely adore!

No Bake Avalanche Cookies

No Bake Avalanche Cookies

Enjoy these delightful No Bake Avalanche Cookies made with Rice Krispies, marshmallows, and white chocolate in just 15 minutes!
Print Recipe Pin Recipe
Prep Time 15 minutes mins
Setting Time 30 minutes mins
Total Time 45 minutes mins
Servings: 12 cookies
Course: Dessert
Cuisine: American
Calories: 150
Ingredients Equipment Method Nutrition Notes

Ingredients
  

Base
  • 2 cups Rice Krispies Cereal for that perfect crunch and lightness
  • 1 cup Mini-Marshmallows to add gooey sweetness
  • 2 cups White Chocolate Chips for creamy richness
  • 1/2 cup Creamy Peanut Butter for nutty flavor
Optional Topping
  • Mini-Chocolate Chips for extra chocolatey crunch

Equipment

  • Large Bowl
  • Baking sheet
  • parchment paper
  • Spoon

Method
 

Preparation Steps
  1. Prepare the Baking Sheet: Line a baking sheet with parchment paper to prevent sticking.
  2. Combine the Crunch: In a large bowl, mix together the Rice Krispies and mini-marshmallows.
  3. Melt the Chocolate Bliss: Melt white chocolate chips and creamy peanut butter together over low heat until smooth.
  4. Mix it All Together: Pour the chocolate-peanut butter blend over the Rice Krispies and marshmallow mixture, and stir.
  5. Spoon the Mixture: Drop the mixture in spoonfuls onto the prepared baking sheet.
  6. Add a Chocolatey Touch (Optional): Sprinkle mini chocolate chips on top of the cookie clusters.
  7. Allow to Firm Up: Let the cookies sit at room temperature until firm, about 30 minutes.

Nutrition

Serving: 1cookieCalories: 150kcalCarbohydrates: 20gProtein: 2gFat: 7gSaturated Fat: 3gPolyunsaturated Fat: 1gMonounsaturated Fat: 2gSodium: 50mgPotassium: 50mgSugar: 10gCalcium: 1mgIron: 2mg

Notes

For best texture, use mini-marshmallows and ensure the chocolate blend is fully melted before mixing.

Tried this recipe?

Let us know how it was!

Filed Under: DESSERT RECIPES

Apple Slab Pie

November 30, 2025 by JudyWhite Leave a Comment

Every now and then, there’s a recipe that feels like a warm embrace, and this Apple Slab Pie is undoubtedly one of them. As I stood in my kitchen, the sweet scent of cinnamon and baked apples drifting through the air, I realized just how much joy this dessert brings. Perfect for gatherings or family dinners, the best part? It’s surprisingly easy to make!

I stumbled upon this delightful recipe during a weekend baking spree, searching for something to elevate my usual dessert game. With just a handful of ingredients—think sweet apples, crispy crust, and a dreamy vanilla icing—this slab pie comes together quickly and feeds a crowd. Unlike traditional pies, the slab format means no fussing with pie plates or individual servings; just cut, serve, and watch it disappear!

So, if you’re ready to impress your friends and family with a stunning homemade treat that has an irresistible flavor, this is the recipe for you! Let’s dive into how to create your own mouthwatering Apple Slab Pie that will have everyone begging for seconds.

Why You'll Love This Apple Slab Pie

  • This Apple Slab Pie is incredibly easy to make, allowing you to enjoy delicious homemade dessert without the fuss.
  • The combination of sweet apples and warm cinnamon creates a flavor that will remind you of cozy fall days.
  • Its slab format is not only time-saving, but it also makes serving a breeze, which is perfect for gatherings.
  • Plus, the beautiful glaze on top adds a stunning visual appeal that will wow your guests and make this dessert the star of the table.

Apple Slab Pie Ingredients

Get ready to create a delightful masterpiece!

For the Icing
• Powdered Sugar – adds a sweet finishing touch to your Apple Slab Pie.
• Vanilla – enhances the icing with a lovely flavor that complements the pie.
• Milk – use as needed to achieve your desired icing consistency.

For the Crust
• Flour – the base of the crust; all-purpose works best for a tender texture.
• Crisco – helps create a flaky crust; you can substitute with unsalted butter if preferred.
• Sugar – adds a hint of sweetness to the crust.
• Salt – balances the flavors and enhances sweetness.
• Egg Yolk – enriches the dough, making it more tender and flavorful.
• Milk – brings the dough together and adds moisture.

For the Filling
• Apples (Peeled, Cored & Sliced) – choose your favorite variety for sweetness and tartness; Granny Smith or Honeycrisp are great options!
• Sugar – sweetens the apple filling perfectly.
• Cinnamon – infuses the filling with warm, comforting spice.

For the Bottom Layer
• Cornflake Crumbs – gives a delightful crunch that keeps the crust from getting soggy.

For the Top Crust
• Egg – brush on top for a golden finish.

Gather these ingredients, and you’ll be on your way to baking a scrumptious Apple Slab Pie that your loved ones will adore!

How to Make Apple Slab Pie

  1. Preheat Oven: Begin by preheating your oven to 400°F. Spray your 10 x 15 x 1 pan with non-stick spray, ensuring it’s ready for that delicious pie crust to come!

  2. Mix Dry Ingredients: In a medium bowl, combine the flour, Crisco, sugar, and salt. This mixture will form the heart of your crust, so mix it well until combined.

  3. Incorporate Wet Ingredients: In a small bowl, whisk together the egg yolk and milk. Pour this into your flour mixture and stir until a dough begins to form. It should be cohesive and slightly sticky.

  4. Divide Dough: Take your dough and divide it, keeping a little more than half for the bottom crust. This helps create a solid foundation for your delicious filling!

  5. Roll Out Crust: On a floured surface, roll out the larger half of the dough until it fits the size of your prepared pan, leaving a little overhang for crimping. This will create a lovely crust layer.

  6. Add Cornflake Crumbs: Sprinkle the cornflake crumbs evenly over the bottom crust layer. This will help absorb excess moisture from the apples, keeping your pie crust crisp.

  7. Prepare Apples: Peel, core, and slice the apples, then transfer them to a large mixing bowl. Toss the apple slices with sugar and cinnamon until they’re well coated. This will ensure every bite is bursting with flavor!

  8. Layer Apples: Carefully layer the cinnamon-sugar apples over the cornflake crumbs. Make sure to spread them evenly for consistent flavor in every piece.

  9. Top Crust: Roll out the remaining dough on a floured surface and lay it over the apple filling. Don’t forget to make slits in the top crust to allow steam to escape while baking!

  10. Bake: Place the pie in the preheated oven and bake for 30 minutes. You’ll know it’s ready when the crust is golden brown and the apple filling is bubbling.

  11. Cool Down: Remove the pie from the oven and let it cool for 15 minutes. This will help set the filling and make it easier to slice.

  12. Make Icing: In a bowl, whisk together the powdered sugar, vanilla, and enough milk to achieve your desired icing consistency. Drizzle this sweet glaze over your warm pie before serving!

Optional: Serve warm with a scoop of vanilla ice cream for an extra special touch.

Exact quantities are listed in the recipe card below.

Make Ahead Options

Perfect for busy home cooks, this Apple Slab Pie can be prepped in advance to save you time on those hectic days! You can prepare the crust and apple filling up to 24 hours ahead of time. Simply mix the crust ingredients, form the dough, and wrap it tightly in plastic wrap. For the filling, slice your apples and toss them with sugar and cinnamon, then refrigerate in an airtight container. When you’re ready to bake, roll out the dough, layer the cornflake crumbs and apple filling, add the top crust, and bake. This means you can serve a delightful homemade dessert with minimal effort, just as delicious as if you made it fresh!

How to Store and Freeze Apple Slab Pie

Room Temperature: Store uncovered at room temperature for up to 2 days. This allows the crust to maintain its crispness while keeping the filling fresh.

Fridge: If you plan to enjoy your Apple Slab Pie for up to a week, cover it with plastic wrap and chill in the fridge. This helps preserve its flavor and prevents spoilage.

Freezer: For longer storage, freeze the pie either whole or in individual slices. Wrap tightly in plastic wrap and then in aluminum foil for up to 3 months. Thaw overnight in the fridge before serving.

Reheating: To reheat, place slices in a 350°F oven for about 10-15 minutes until warmed through. This will revive that delightful crispy crust and delicious, gooey apple filling!

What to Serve with Apple Slab Pie?

Every slice of this delightful dessert deserves the perfect companions to enhance its flavors and make your gathering truly special.

  • Vanilla Ice Cream: The creamy, rich ice cream melts beautifully over warm pie, adding a delightful contrast to the warm, spiced apples.

  • Caramel Sauce: Drizzling warm caramel over your slice takes the caramel flavor to the next level, adding extra indulgence to every bite.

  • Fresh Whipped Cream: Light and airy, whipped cream provides a luscious topping that balances the pie’s sweetness while adding a delightful fluffiness.

  • Coffee: A piping hot cup of coffee complements the sweetness of the pie, making it the perfect pairing for an afternoon treat.

  • Cinnamon Sugar Dust: Sprinkling a mix of cinnamon and sugar on top before serving adds an extra layer of warmth that perfectly complements the apples.

  • Chai Tea: The spicy notes of chai will mingle beautifully with the flavors of your pie, providing a warm and inviting beverage that enhances the cozy vibe.

  • Berry Compote: A tangy berry sauce adds a fresh burst of flavor alongside the rich, sweet pie, balancing the sweetness beautifully.

  • Cheese Platter: A selection of sharp cheese works surprisingly well with the sweetness of the pie, creating a sophisticated flavor combination that’s always a hit.

  • Sparkling Cider: For a festive feel, serve chilled sparkling cider that refreshes your palate between sweet bites of pie.

Apple Slab Pie Variations

Feel free to unleash your creativity and put your own twist on this delightful dessert!

  • Gluten-Free: Substitute all-purpose flour with a gluten-free flour blend for a deliciously inclusive version that everyone can enjoy.

  • Alternative Sweeteners: Use honey or maple syrup instead of sugar for a natural, caramel-like sweetness that enhances the apple flavors beautifully.

  • Spiced Up: Add a dash of nutmeg or cardamom along with the cinnamon for a warm, complex flavor profile that teases the senses.

  • Berry Blast: Mix in a handful of fresh or frozen berries with the apples for a delightful tartness that adds vibrant color and texture.

  • Nutty Crunch: Fold in chopped pecans or walnuts into the apple mixture for a satisfying crunch that complements the tender filling perfectly.

  • Caramel Drizzle: Drizzle with store-bought or homemade caramel sauce right before serving to elevate the sweetness and give an indulgent finish.

  • Cheese Topping: Sprinkle some crumbled blue cheese or goat cheese over the apples before adding the top crust for a surprising savory element that balances the sweetness.

  • Coconut Flakes: Incorporate unsweetened coconut flakes into the crust or filling for a tropical twist that adds flavor and chewiness to each bite.

These variations not only explore new flavor horizons but also invite you to tailor the recipe to your taste and dietary needs, ensuring each pie is a reflection of your creativity!

Chef's Helpful Tips

  • When making Apple Slab Pie, ensure that your crust is not overworked as this can make it tough; mix just until combined for a tender texture.
  • Use cold Crisco or butter for the crust to achieve a flaky finish, and remember to keep your dough chilled before rolling it out.
  • To prevent a soggy bottom, the cornflake crumbs should be evenly distributed and act as a moisture barrier between the crust and the apple filling.
  • Check for doneness at the 25-minute mark, as oven temperatures can vary, and you want a golden crust and bubbling filling for the perfect pie.

Apple Slab Pie Recipe FAQs

What kind of apples should I use for my Apple Slab Pie?
Absolutely! For a balanced flavor in your Apple Slab Pie, opt for a mix of sweet and tart apples, such as Granny Smith and Honeycrisp. This combination will give you a deliciously complex taste, enhancing the sweetness of the sugar and the warmth of the cinnamon. You can even try adding a touch of Golden Delicious for added sweetness!

How do I store leftover Apple Slab Pie?
Very easy! If you’re enjoying your pie within 2 days, simply cover it with a clean kitchen towel and store it at room temperature. For up to a week of freshness, wrap it tightly with plastic wrap and pop it in the fridge. This will keep the flavors fresh while maintaining the pie’s crisp crust.

Can I freeze Apple Slab Pie?
Yes, indeed! To freeze your Apple Slab Pie, wrap it tightly in plastic wrap and then in aluminum foil to prevent freezer burn. It can be stored for up to 3 months. When you’re ready to enjoy a slice, thaw it overnight in the fridge, then warm it up in a 350°F oven for about 10-15 minutes to bring back that fresh-out-of-the-oven taste.

What is the best way to prevent a soggy bottom crust?
To keep your crust crisp, sprinkle a layer of cornflake crumbs before adding the apple filling. These crumbs act as a barrier, absorbing excess moisture from the apples. Also, ensure you layer the apples evenly, as this helps distribute the juices during baking, keeping the bottom crispier for longer!

Can I adapt this Apple Slab Pie recipe for allergies or dietary restrictions?
Absolutely! If you’re concerned about allergies, consider using dairy-free alternatives like coconut oil instead of Crisco and almond milk in your icing. For gluten-free needs, you can substitute the all-purpose flour with a gluten-free flour blend; just ensure it contains xanthan gum for better texture. Enjoy the flexibility of making this delicious pie suitable for everyone!

Apple Slab Pie

Apple Slab Pie

This Apple Slab Pie is a warm embrace of sweet apples and cinnamon, perfect for gatherings and remarkably easy to make.
Print Recipe Pin Recipe
Prep Time 20 minutes mins
Cook Time 30 minutes mins
Cooling Time 15 minutes mins
Total Time 1 hour hr 5 minutes mins
Servings: 12 slices
Course: Dessert
Cuisine: American
Calories: 320
Ingredients Equipment Method Nutrition Notes

Ingredients
  

Icing
  • 2 cups Powdered Sugar adds a sweet finishing touch
  • 1 teaspoon Vanilla enhances flavor of icing
  • as needed cups Milk use to achieve desired consistency
Crust
  • 3 cups Flour all-purpose works best for a tender texture
  • 1 cup Crisco substitute with unsalted butter if preferred
  • 1 cup Sugar adds sweetness to the crust
  • 1 teaspoon Salt balances sweetness
  • 1 large Egg Yolk enriches the dough
  • 1/2 cup Milk adds moisture to the dough
Filling
  • 6 cups Apples Peeled, Cored & Sliced; Granny Smith or Honeycrisp are great options!
  • 1/2 cup Sugar sweetens apple filling perfectly
  • 1 teaspoon Cinnamon infuses filling with warm spice
Bottom Layer
  • 1 cup Cornflake Crumbs gives a delightful crunch
Top Crust
  • 1 large Egg brush on top for a golden finish

Equipment

  • 10 x 15 x 1 pan
  • Mixing bowls
  • Whisk
  • Rolling pin

Method
 

Preparation Steps
  1. Preheat your oven to 400°F. Spray your 10 x 15 x 1 pan with non-stick spray.
  2. In a medium bowl, combine the flour, Crisco, sugar, and salt.
  3. In a small bowl, whisk together the egg yolk and milk. Pour into the flour mixture and stir until a cohesive dough forms.
  4. Divide the dough, keeping a little more than half for the bottom crust.
  5. On a floured surface, roll out the larger half of the dough to fit your prepared pan.
  6. Sprinkle the cornflake crumbs evenly over the bottom crust layer.
  7. Prepare the apples by peeling, coring, and slicing them. Toss with sugar and cinnamon.
  8. Layer the cinnamon-sugar apples over the cornflake crumbs evenly.
  9. Roll out the remaining dough and lay it over the apple filling, making slits to allow steam to escape.
  10. Bake in the preheated oven for 30 minutes until the crust is golden browned and filling is bubbling.
  11. Remove from the oven and let it cool for 15 minutes.
  12. Whisk together the powdered sugar, vanilla, and enough milk for icing consistency. Drizzle over warm pie before serving.

Nutrition

Serving: 1sliceCalories: 320kcalCarbohydrates: 45gProtein: 2gFat: 15gSaturated Fat: 5gCholesterol: 35mgSodium: 150mgPotassium: 100mgFiber: 2gSugar: 20gVitamin A: 200IUVitamin C: 5mgCalcium: 30mgIron: 1mg

Notes

Serve warm with a scoop of vanilla ice cream for an extra special touch.

Tried this recipe?

Let us know how it was!

Filed Under: DESSERT RECIPES

  • « Previous Page
  • 1
  • …
  • 46
  • 47
  • 48
  • 49
  • Next Page »

Recent Posts

  • Crispy Potatoes in Oven
  • Lucky Charms Pancakes
  • Cheeseburger
  • Boiled Corn on the Cob
  • St. Patrick’s Day Dessert Parfaits

Recent Comments

No comments to show.

Footer

  • Contact
  • Privacy Policy
  • About Us
  • Terms
  • ↑ back to top

Copyright © 2024 www.Forkono.com

Table Of Content