Forkono

  • BREAKFAST & BRUNCH
  • DESSERT RECIPES
  • DINNER RECIPES
  • LUNCH RECIPES
  • About uS
  • SNACKS & APPETIZERS
menu icon
go to homepage
  • BREAKFAST & BRUNCH
  • DESSERT RECIPES
  • DINNER RECIPES
  • LUNCH RECIPES
  • About uS
  • SNACKS & APPETIZERS
search icon
Homepage link
  • BREAKFAST & BRUNCH
  • DESSERT RECIPES
  • DINNER RECIPES
  • LUNCH RECIPES
  • About uS
  • SNACKS & APPETIZERS
×

Red Velvet Molten Lava Cupcakes

December 30, 2025 by JudyWhite Leave a Comment

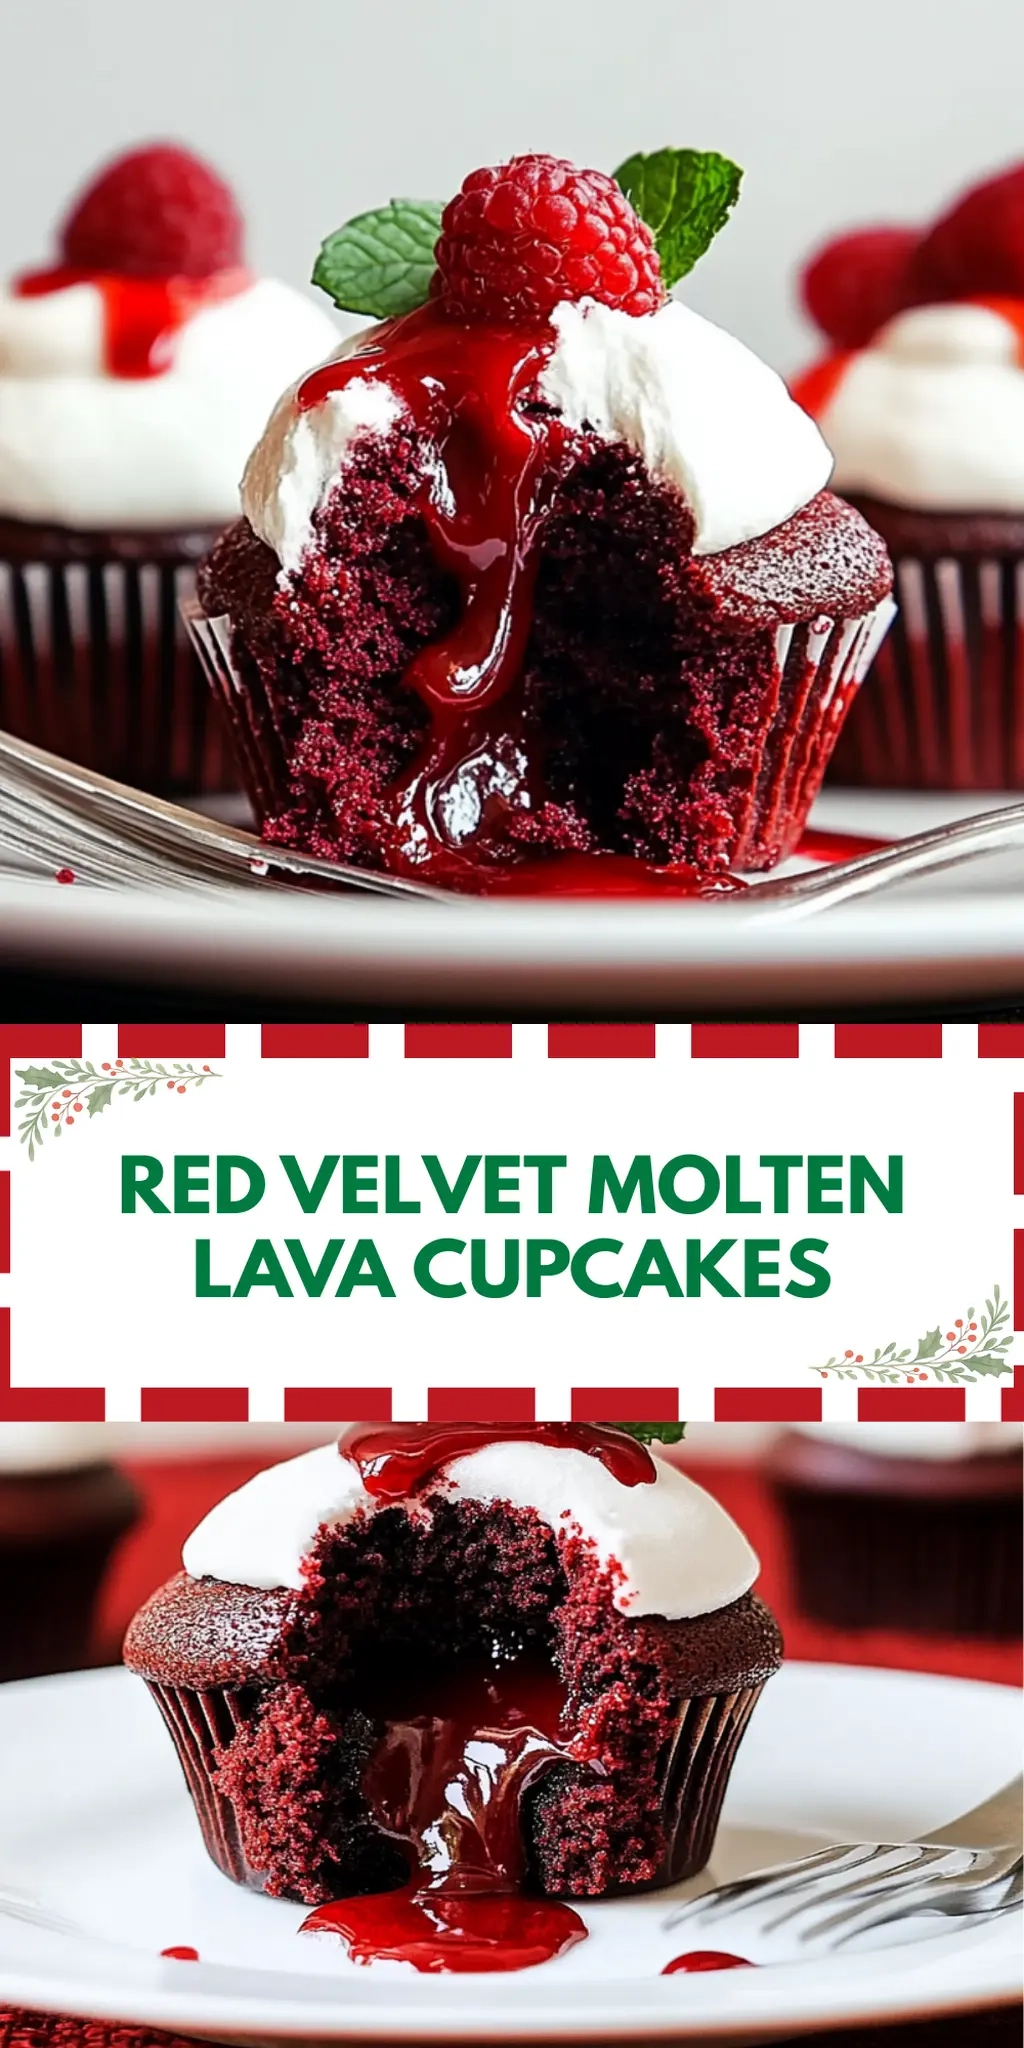
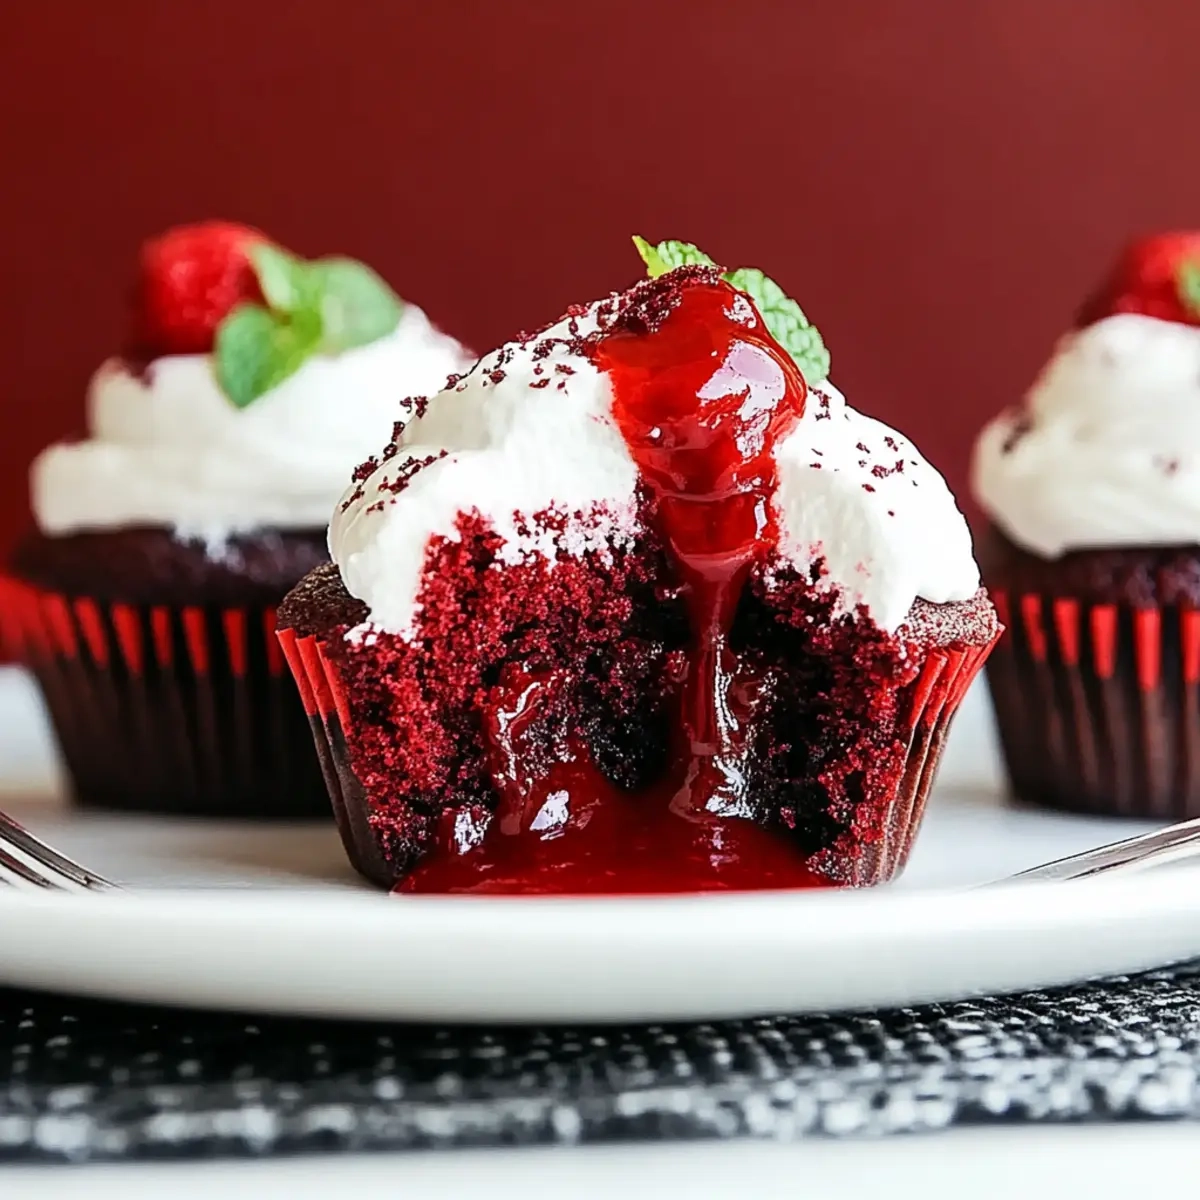
There’s nothing quite like the thrill of breaking into a cupcake only to find a luscious chocolate center waiting to surprise you. That moment of indulgence, where rich red velvet meets gooey molten lava, is pure bliss. I discovered this delightful recipe for Red Velvet Molten Lava Cupcakes during a cozy afternoon in the kitchen, and let me tell you—it quickly became a favorite.

These little beauties are perfect for impressing guests at dinner parties or simply treating yourself after a long day. With just a handful of ingredients and a mere 15 minutes in the oven, you’re on your way to creating a dessert that feels decadent yet is astonishingly easy to whip up. Topped with a creamy dollop of cream cheese whipped cream, they’re the ultimate sweet escape that banishes boring fast food desserts to the past. Let’s dive into the recipe and make some magic happen in your kitchen!

Why You'll Love This Red Velvet Molten Lava Cupcakes

  • These Red Velvet Molten Lava Cupcakes are incredibly easy to make, requiring just 10 minutes of prep and 15 minutes of baking time.
  • The combination of rich red velvet and a gooey chocolate center creates a flavor experience that is truly unforgettable.
  • Their stunning appearance makes them a showstopper for any gathering, sure to impress your guests.
  • With their warm, molten center, these cupcakes serve as the perfect comfort dessert for any occasion.

Red Velvet Molten Lava Cupcakes Ingredients

For the Cupcake Batter

  • Semisweet or bittersweet chocolate – adds a rich, deep flavor; opt for high-quality chocolate for best results.
  • Heavy whipping cream – ensures the chocolate melts smoothly and creates a luscious center.
  • All-purpose flour – forms the cupcake structure; make sure it’s properly measured for fluffy results.
  • Unsweetened cocoa powder – enhances the chocolate flavor; don’t skip it, as it complements the red velvet perfectly.
  • Baking soda – helps the cupcakes rise; make sure it’s fresh for the best lift.
  • Table salt – balances sweetness; just a pinch goes a long way in enhancing flavor.
  • Large egg yolk – enriches the batter; use room temperature for the best emulsion.
  • Unsalted butter – provides moisture and flavor; cool it for 15 minutes after melting to avoid cooking the egg.
  • Granulated sugar – sweetens the cupcakes; a fine sugar will blend better for a smooth texture.
  • Full-fat buttermilk – adds moisture and ensures tenderness; use room temperature for better mixing.
  • Vanilla extract – infuses a warmth in flavor; always choose pure vanilla for the best taste.
  • Red food coloring – gives the cupcakes their vibrant hue; gel food coloring works best for intensity.
  • White distilled vinegar – helps activate the baking soda for a perfect rise; don’t skip this for fluffy cupcakes.

For the Topping

  • Cream Cheese Whipped Cream – adds a rich, tangy contrast to the sweet cupcakes; whip it until fluffy for the best texture.

How to Make Red Velvet Molten Lava Cupcakes

  1. Preheat your oven to 350°F (175°C) and prepare your cupcake molds by greasing them lightly. This crucial step ensures your cupcakes release easily once baked, leading to a perfect presentation.

  2. Melt the chopped chocolate with the heavy whipping cream over a double boiler or in the microwave until smooth and glossy. This indulgent mixture will serve as the gooey center of your cupcakes.

  3. Combine the dry ingredients in a mixing bowl: flour, cocoa powder, baking soda, and salt. Whisk them together thoroughly, ensuring there are no lumps, to create a light cupcake batter.

  4. Whisk together the egg yolk, melted butter, granulated sugar, buttermilk, vanilla extract, red food coloring, and vinegar in a separate bowl. This wet mixture is essential for the vibrant color and moist texture of your cupcakes!

  5. Mix the wet and dry ingredients gently until just combined. Avoid over-mixing; the batter should be slightly lumpy for the best texture.

  6. Divide the batter evenly into the prepared cupcake molds, filling each about two-thirds full. This will give your cupcakes room to rise beautifully without overflowing.

  7. Spoon a generous dollop of the melted chocolate mixture into the center of each cupcake. This step is what makes them molten lava cupcakes, promising a delicious, gooey surprise!

  8. Bake in the preheated oven until just set, about 15 minutes. They should be firm on the edges but still soft in the middle—trust your senses!

  9. Cool slightly before serving. Let them rest in the molds for a few minutes for ease of removal, and then top with a swirl of cream cheese whipped cream for added richness.

Optional: Drizzle with chocolate sauce for an extra layer of indulgence!

Exact quantities are listed in the recipe card below.

How to Store and Freeze Red Velvet Molten Lava Cupcakes

Fridge: Store any leftovers in an airtight container for up to 3 days. This keeps the cupcakes moist while preserving their luxurious texture and flavor.

Freezer: You can freeze unbaked cupcake batter for up to 2 months. Portion the batter into cupcake molds, cover tightly with plastic wrap, and freeze until you’re ready to bake fresh cupcakes.

Reheating: To revive day-old cupcakes, microwave them for about 10-15 seconds. This warms the cake and softens the center slightly, keeping that delightful molten quality intact.

Serving Tips: When serving, top with fresh cream cheese whipped cream right before indulging for the best flavor experience!

Red Velvet Molten Lava Cupcakes Variations

Feel free to get creative with these delicious cupcakes and make them your own!

  • Gluten-Free: Substitute all-purpose flour with a gluten-free blend for a similar texture sans gluten.
  • Vegan: Replace the egg yolk with a flaxseed egg and use coconut cream instead of heavy whipping cream. These adjustments still deliver that rich flavor you crave!
  • Flavor Twist: Add a teaspoon of almond extract to the wet mixture for a delightful twist on the classic red velvet flavor. It’s a small swap that makes a big difference!
  • Decadent Additions: Sprinkle in chocolate chips or crushed nuts into the cupcake batter for a delightful crunch and added chocolatey goodness. These textures turn a simple treat into an indulgence!
  • Spicy Surprise: Mix in a pinch of cayenne pepper into the chocolate mixture for an unexpected but delightful heat that complements the sweetness perfectly.
  • Fruit-Filled: Substitute some of the melted chocolate in the center with raspberry or cherry preserves for a fruity surprise beneath the cake. The luscious fruit layer elevates the overall flavor!
  • Dairy-Free: Swap heavy cream for coconut cream and use a dairy-free butter substitute for a delightful rich flavor without the dairy.
  • Caramel Center: Instead of chocolate, fill the cupcakes with caramel sauce for a sweet and gooey center that’ll leave your taste buds dancing.

Make Ahead Options

These Red Velvet Molten Lava Cupcakes are perfect for busy weeknights or last-minute gatherings! You can prepare the cupcake batter up to 24 hours in advance; simply store it in an airtight container in the refrigerator to maintain freshness. If you prefer, the chocolate filling can also be made ahead and refrigerated for a couple of days. When you’re ready to bake, fill the cupcake molds, insert the chocolate center, and pop them into a preheated oven. They’ll be just as delicious as when made fresh, providing you with an elegant dessert with minimal effort! Enjoy the time-saving benefits of meal prep while delighting your family and friends!

What to Serve with Red Velvet Molten Lava Cupcakes?

Delight in a full dining experience that perfectly complements your heavenly dessert.

  • Rich Coffee: The robust flavors of coffee enhance the chocolate richness, creating a comforting harmony with each bite.
  • Vanilla Ice Cream: A scoop of creamy vanilla ice cream adds a cool contrast to the warm, molten cupcakes, elevating the indulgence.
  • Fresh Berries: Juicy raspberries or strawberries bring a refreshing tartness, beautifully balancing the sweetness of the cupcakes.
  • Chocolate Sauce: Drizzling extra chocolate sauce over the cupcakes intensifies the chocolate experience, satisfying any sweet tooth.
  • Mint Tea: The calming herbal notes of mint tea cleanse the palate and provide a refreshing finish after the decadent dessert.
  • Caramel Sauce: Adding a drizzle of rich caramel sauce enhances flavors and introduces a new layer of sweetness that’s hard to resist.
  • Whipped Cream: A dollop of lightly sweetened whipped cream pairs perfectly, providing a fluffy texture that complements the molten center.
  • Sparkling Water: A fizzy sparkling water with a hint of lemon helps cleanse the palate, creating a delightful contrast to the rich cupcakes.
  • Crème Fraîche: The tangy taste of crème fraîche makes a lovely contrast to the sweetness, offering a sophisticated twist.

Chef's Helpful Tips

  • When making Red Velvet Molten Lava Cupcakes, make sure to measure your flour accurately by spooning it into the measuring cup and leveling it off for a light texture.
  • Remember to cool the melted butter for at least 15 minutes before adding it to the egg yolk mixture; this prevents cooking the yolk and ensures a smooth batter.
  • To achieve a perfectly gooey center, be careful not to overbake; check your cupcakes at the 15-minute mark and remove them when the edges are set but the centers are still soft.
  • Using room temperature ingredients like buttermilk and egg yolk will help everything incorporate smoothly and create a tender cupcake.

Red Velvet Molten Lava Cupcakes Recipe FAQs

What is the best way to select ripe ingredients for this recipe?
Absolutely! For the best results, ensure your egg yolk is fresh and at room temperature for smooth blending. Choose high-quality semisweet or bittersweet chocolate to create a rich molten center. If using buttermilk, pick full-fat versions, which guarantee a creamy texture and richer flavor.

How should I store leftover Red Velvet Molten Lava Cupcakes?
Very easy! Store any uneaten cupcakes in an airtight container in the fridge for up to 3 days. This keeps them fresh and preserves their moist texture. Just remember to keep them cool and wrapped to prevent drying out!

Can I freeze the batter or baked cupcakes?
Absolutely! You can freeze unbaked cupcake batter for up to 2 months. Portion the batter into cupcake molds, cover with plastic wrap, and then freeze. When you’re ready to bake, simply pop them in the oven without thawing—just add a couple of extra minutes to the baking time. For baked cupcakes, allow them to cool completely, then wrap individually in plastic wrap and store in a freezer bag for up to 3 months.

What if my cupcakes are overbaked?
No worries! If you accidentally overbake your cupcakes and they turn out dry, the creamy cream cheese whipped cream helps bring some moisture back. For future batches, make sure to keep an eye on them and pull them out of the oven as soon as the edges are set but the center remains soft. Remember, practice makes perfect!

Are these cupcakes suitable for people with allergies?
I recommend caution! These Red Velvet Molten Lava Cupcakes contain gluten (from flour), dairy (in the buttermilk and cream), and eggs. If you have food allergies, consider using gluten-free flour, a dairy-free milk alternative, or an egg substitute like flaxseed meal mixed with water. Always double-check ingredient labels to ensure safety!

How do I achieve the perfect molten center?
To get that gooey chocolate center, it’s key to bake the cupcakes just until the edges are set—about 15 minutes. If you poke a toothpick into a cupcake, it should come out with some moist crumbs. For an even more reliable result, you can bake a test cupcake before serving your guests to ensure you hit that sweet spot!

Red Velvet Molten Lava Cupcakes

Red Velvet Molten Lava Cupcakes

Experience the indulgent delight of Red Velvet Molten Lava Cupcakes with a gooey chocolate center, perfect for impressing guests or treating yourself.
Print Recipe Pin Recipe
Prep Time 10 minutes mins
Cook Time 15 minutes mins
Cooling Time 5 minutes mins
Total Time 30 minutes mins
Servings: 12 cupcakes
Course: DESSERT RECIPES
Cuisine: American
Calories: 250
Ingredients Equipment Method Nutrition Notes

Ingredients
  

For the Cupcake Batter
  • 4 oz Semisweet or bittersweet chocolate opt for high-quality chocolate for best results
  • 1/2 cup Heavy whipping cream ensures the chocolate melts smoothly
  • 1 cup All-purpose flour measure accurately for fluffy results
  • 1/4 cup Unsweetened cocoa powder enhances chocolate flavor
  • 1 tsp Baking soda ensure freshness for best lift
  • 1/4 tsp Table salt balances sweetness
  • 1 large Egg yolk use room temperature
  • 1/4 cup Unsalted butter cool for 15 minutes after melting
  • 1/2 cup Granulated sugar a fine sugar for better blending
  • 1/2 cup Full-fat buttermilk use room temperature
  • 1 tsp Vanilla extract choose pure for best taste
  • 1 tbsp Red food coloring gel works best for intensity
  • 1 tsp White distilled vinegar activates baking soda
For the Topping
  • 1 cup Cream Cheese Whipped Cream whip until fluffy for best texture

Equipment

  • Cupcake molds
  • Mixing bowls
  • Whisk
  • double boiler or microwave

Method
 

How to Make Red Velvet Molten Lava Cupcakes
  1. Preheat your oven to 350°F (175°C) and prepare your cupcake molds by greasing them lightly.
  2. Melt the chopped chocolate with the heavy whipping cream over a double boiler or in the microwave until smooth and glossy.
  3. Combine the dry ingredients in a mixing bowl: flour, cocoa powder, baking soda, and salt.
  4. Whisk together the egg yolk, melted butter, granulated sugar, buttermilk, vanilla extract, red food coloring, and vinegar in a separate bowl.
  5. Mix the wet and dry ingredients gently until just combined.
  6. Divide the batter evenly into the prepared cupcake molds, filling each about two-thirds full.
  7. Spoon a generous dollop of the melted chocolate mixture into the center of each cupcake.
  8. Bake in the preheated oven until just set, about 15 minutes.
  9. Cool slightly before serving. Top with a swirl of cream cheese whipped cream.

Nutrition

Serving: 1cupcakeCalories: 250kcalCarbohydrates: 30gProtein: 3gFat: 14gSaturated Fat: 8gCholesterol: 40mgSodium: 200mgPotassium: 100mgFiber: 1gSugar: 20gVitamin A: 500IUCalcium: 50mgIron: 1mg

Notes

Store leftovers in an airtight container for up to 3 days. You can freeze unbaked batter for up to 2 months.

Tried this recipe?

Let us know how it was!

Filed Under: BREAKFAST & BRUNCH

Cheese Danish

December 29, 2025 by JudyWhite Leave a Comment

Imagine the delightful aroma of freshly baked pastries wafting through your kitchen, pulling you into a realm of warmth and sweet indulgence. I recently found myself in the midst of a baking frenzy one evening, craving something both special and easy to whip up. That’s when I stumbled upon this irresistible Valentine’s Day Cheese Danish with Strawberry Hearts—a treat that effortlessly combines elegance and simplicity.

Whether you’re planning a romantic breakfast or simply want to impress your family, these charming danishes will have everyone swooning. With buttery puff pastry cradling a luscious cream cheese filling and vibrant strawberry accents, each heart-shaped delight is a joy to make and devour. Plus, they come together in just 35 minutes, making them the perfect antidote to fast food fatigue. Let’s embark on this delightful journey together and create these scrumptious heart-shaped pastries that are sure to lift spirits and satisfy sweet cravings!

Why You'll Love This Cheese Danish

  • This Cheese Danish is incredibly easy to prepare, making it a perfect choice for both novice and experienced bakers.
  • The delightful combination of creamy cheese and juicy strawberries creates an irresistible flavor that your taste buds will adore.
  • Its charming heart shape adds a beautiful visual appeal that will impress anyone you share it with, making it ideal for romantic occasions or family gatherings.
  • Plus, with a total preparation time of just 35 minutes, you can whip up these treats in no time and leave fast food behind.

Cheese Danish Ingredients

Whether you’re a baking pro or just starting out, gathering these ingredients will set you on the path to creating delightful Cheese Danish!

For the Pastry
• 1 sheet puff pastry – an easy-to-use base that provides a flaky, buttery texture.

For the Cream Cheese Filling
• 4 oz cream cheese – the star of the filling, providing a smooth and creamy contrast to the pastry.
• 2 tbsp white sugar – enhances sweetness and balances the tanginess of cream cheese.
• 1/2 tsp vanilla extract – infuses a warm, fragrant flavor that elevates the entire dish.
• red food coloring – to give your filling a vibrant hue, perfect for those charming strawberry hearts!

For the Strawberry Topping
• 1/2 C diced strawberries – adds a fresh, fruity burst that complements the creamy filling perfectly.

For the Egg Wash
• 1 large egg – provides a golden finish to the pastry.
• 1 tbsp cold water – helps dilute the egg for a smoother application.

Gather these ingredients, and get ready to make this heartwarming Cheese Danish that will leave everyone asking for seconds!

How to Make Cheese Danish

  1. Thaw the puff pastry sheet as per package directions, allowing it to become flexible for easy handling. This typically takes about 20-30 minutes; patience is key for perfect results!

  2. Preheat your oven to 400°F (200°C) and line a large baking sheet with parchment paper. This sets the stage for a beautifully baked Cheese Danish that won’t stick!

  3. Mix cream cheese, sugar, and vanilla together in a medium-sized bowl until light and fluffy. Add in a few drops of red food coloring to achieve that lovely, vibrant hue. Set this aside while we shape the pastry.

  4. Unfold the thawed puff pastry and using a 3-inch heart cookie cutter, cut out 7 hearts. Place them on the prepared baking sheet, ensuring they’re about 1 inch apart for even baking.

  5. Score a border around each heart using a sharp knife or smaller heart-shaped cookie cutter. Ensure it’s about 1/4 inch from the edge, but don’t cut all the way through; this will hold in the filling beautifully!

  6. Spoon about 1/2 tbsp of the cream cheese mixture onto each heart and spread it within the outlined border, creating a luscious filling that sets the tone for each bite.

  7. Divide the diced strawberries evenly among the danishes, sprinkling them on top of the cream cheese while keeping them inside the outlined border. This adds a fresh, fruity flair!

  8. Mix the egg and cold water together in a small bowl to create an egg wash. Gently apply this wash around the outside border of the pastry for a beautiful golden finish upon baking.

  9. Bake for 15-17 minutes, or until the edges start to turn a golden brown and the house fills with the heavenly aroma of baked pastries.

  10. Cool on the pan for 5 minutes before enjoying, allowing the flavors to meld and making them perfect for savoring!

Optional: Dust with powdered sugar before serving for an elegant touch.

Exact quantities are listed in the recipe card below.

What to Serve with Valentine’s Day Cheese Danish with Strawberry Hearts?

Imagine a lovely breakfast table set with warmth and sweet delights, perfectly complemented by these charming pastries.

  • Fresh Fruit Salad: A mix of your favorite seasonal fruits adds a burst of color and sweetness that balances the creamy richness of the Cheese Danish.

  • Sparkling Lemonade: This refreshing drink offers a zesty accompaniment, enhancing the flavors of the danish while adding a festive touch to your brunch.

  • Coffee or Tea: A warm cup of coffee or a soothing herbal tea rounds out the experience, creating a comforting atmosphere to enjoy your pasteries.

  • Yogurt Parfait: Layered yogurt with granola and berries provides a creamy, crunchy texture that contrasts wonderfully with the soft danish, making it a delightful addition to your meal.

  • Scrambled Eggs: Fluffy, lightly seasoned scrambled eggs add a savory element to your table, giving a beautiful balance to the sweetness of the Cheese Danish.

  • Chocolate-Covered Strawberries: For a touch of indulgence, these sweet treats echo the strawberry flavors in the danish and add an extra romantic flair to your Valentine’s Day spread!

Remember, the key to a memorable meal lies in the variety of textures and flavors that come together harmoniously. Enjoy!

Make Ahead Options

These Valentine’s Day Cheese Danish are a fantastic choice for busy cooks looking to save time without compromising on taste! You can prepare the cream cheese filling and assemble the pastries up to 24 hours in advance. Simply mix the cream cheese, sugar, vanilla, and food coloring, then refrigerate the mixture in an airtight container. Cut out the heart shapes from the puff pastry and keep them in the fridge covered with plastic wrap to prevent drying out. When you’re ready to bake, just spoon the filling onto the hearts, top with strawberries, apply the egg wash, and bake as directed. This ensures you’ll have fresh, delightful danishes with minimal effort!

How to Store and Freeze Cheese Danish

Room Temperature: Cheese Danish can be kept at room temperature for up to 2 days, ideally in an airtight container to maintain their freshness and flakiness.

Fridge: Store leftover Cheese Danish in the fridge, wrapped tightly in plastic wrap or in an airtight container, for up to 4 days. This helps preserve the creamy filling and keeps the pastry from getting soggy.

Freezer: To freeze, place cooled Cheese Danish in a single layer on a baking sheet until firm, then transfer them to a freezer-safe bag or container. They can last up to 2 months in the freezer.

Reheating: For the best texture, reheat frozen Cheese Danish in a 350°F (175°C) oven for about 10-15 minutes until warmed through. This brings back the delightful crispness of the pastry!

Cheese Danish Variations

Feel free to explore the endless possibilities with these delightful adaptations to personalize your Cheese Danish experience!

  • Fruit Medley: Swap strawberries for raspberries or blueberries for a bursting flavor twist! The tartness of these fruits adds a zingy contrast to the creamy filling.

  • Nutty Crunch: Add finely chopped almonds or pecans to the cream cheese mixture for some nutty undertones. This extra texture elevates the whole dish.

  • Chocolate Delight: Mix in some mini chocolate chips with the cream cheese for a delightful sweet surprise. Chocolate and cream cheese create a rich, indulgent pairing that satisfies every sweet tooth.

  • Spicy Kick: Drizzle a hint of chili honey over the finished danishes for a surprising kick that amplifies the sweetness of the strawberries. The heat combined with the creaminess makes for a unique flavor experience.

  • Vegan Option: Use plant-based cream cheese and a store-bought vegan puff pastry for a dairy-free alternative. These options still deliver that flaky texture and creamy filling without sacrificing taste.

  • Herbed Bliss: Incorporate fresh herbs like basil or thyme into the cream cheese filling for an unexpected, savory twist. The aromatic notes pair beautifully with the strawberries!

  • Caramel Swirl: Add a swirl of caramel sauce to the cream cheese before baking for a sweet, gooey addition that creates a lovely presentation and flavor profile.

  • Cinnamon Sugar Top: After brushing with egg wash, sprinkle a blend of cinnamon and sugar on top of the pastry for an extra sweet and aromatic touch. This addition makes every bite even more enjoyable!

Chef's Helpful Tips

  • When making Cheese Danish, always ensure your puff pastry is completely thawed for easier handling and better layering.
  • Avoid overmixing the cream cheese filling; a light and fluffy texture will enhance the overall taste and mouthfeel.
  • Use a sharp knife to score the border gently without cutting all the way through to maximize the filling capacity.
  • Keep a close eye on the baking time; start checking at 15 minutes to ensure a perfectly golden hue without burning the edges.

Valentine’s Day Cheese Danish with Strawberry Hearts Recipe FAQs

How do I choose ripe strawberries for the topping?
Absolutely! When selecting strawberries, look for ones that are bright red in color, firm to the touch, and free from any dark spots or blemishes. The sweet fragrance and glossy skin are good indicators of ripeness. I often prefer organic strawberries, which tend to be fresher and more flavorful!

How should I store leftover Cheese Danish?
To keep your Cheese Danish fresh, store them in the fridge wrapped tightly in plastic wrap or in an airtight container. This way, they’ll last up to 4 days! It’s crucial to seal them properly to maintain the creamy filling and to prevent the pastry from becoming soggy.

Can I freeze Cheese Danish for later?
Very much so! To freeze, cool the Cheese Danish completely first. Then, place them in a single layer on a baking sheet and freeze until firm. After that, transfer them to a freezer-safe bag or container. They can last up to 2 months in the freezer! When you’re ready to enjoy, simply reheat in a 350°F (175°C) oven for about 10-15 minutes until warmed through.

What should I do if my puff pastry doesn’t rise?
If your puff pastry isn’t rising as expected, it could be due to a few factors. First, ensure your oven is preheated to the right temperature—400°F (200°C) is ideal. Also, make sure you’re not overcrowding the baking sheet. Each piece needs space to expand. Lastly, check the freshness of your puff pastry; if it’s past its expiration date, it might not puff properly.

Can I use different fillings or toppings in this recipe?
The more the merrier! You can absolutely experiment with different fillings. For instance, using mascarpone cheese with lemon zest instead of cream cheese offers a delightful twist. You can also try other fruits like blueberries or raspberries for a different taste. Just adjust the sugar in the filling to balance the tartness!

Are there any allergies to consider with this Cheese Danish?
Yes! This recipe contains dairy (cream cheese and egg), so be cautious if anyone has lactose intolerance or an egg allergy. For a dairy-free version, you can substitute cream cheese with a plant-based alternative like cashew cheese, and use an egg replacement, such as a flax egg (1 tablespoon ground flaxseed mixed with 3 tablespoons water). Always check labels for cross-contamination, especially with store-bought puff pastry!

Cheese Danish

Cheese Danish

Enjoy the delightful Cheese Danish, a perfect blend of flaky pastry and creamy filling, ideal for any occasion.
Print Recipe Pin Recipe
Prep Time 15 minutes mins
Cook Time 17 minutes mins
Cooling Time 5 minutes mins
Total Time 35 minutes mins
Servings: 7 pieces
Course: DESSERT RECIPES
Cuisine: French
Calories: 230
Ingredients Equipment Method Nutrition Notes

Ingredients
  

For the Pastry
  • 1 sheet puff pastry an easy-to-use base that provides a flaky, buttery texture.
For the Cream Cheese Filling
  • 4 oz cream cheese the star of the filling, providing a smooth and creamy contrast to the pastry.
  • 2 tbsp white sugar enhances sweetness and balances the tanginess of cream cheese.
  • 1/2 tsp vanilla extract infuses a warm, fragrant flavor that elevates the entire dish.
  • red food coloring to give your filling a vibrant hue.
For the Strawberry Topping
  • 1/2 C diced strawberries adds a fresh, fruity burst that complements the creamy filling perfectly.
For the Egg Wash
  • 1 large egg provides a golden finish to the pastry.
  • 1 tbsp cold water helps dilute the egg for a smoother application.

Equipment

  • Oven
  • Baking sheet
  • parchment paper
  • Mixing bowl
  • cookie cutter
  • Knife

Method
 

How to Make Cheese Danish
  1. Thaw the puff pastry sheet as per package directions, allowing it to become flexible for easy handling.
  2. Preheat your oven to 400°F (200°C) and line a large baking sheet with parchment paper.
  3. Mix cream cheese, sugar, and vanilla together in a medium-sized bowl until light and fluffy. Add in a few drops of red food coloring.
  4. Unfold the thawed puff pastry and using a 3-inch heart cookie cutter, cut out 7 hearts.
  5. Score a border around each heart using a sharp knife or smaller heart-shaped cookie cutter.
  6. Spoon about 1/2 tbsp of the cream cheese mixture onto each heart and spread it within the outlined border.
  7. Divide the diced strawberries evenly among the danishes, sprinkling them on top of the cream cheese.
  8. Mix the egg and cold water together in a small bowl to create an egg wash. Apply this wash around the outside border of the pastry.
  9. Bake for 15-17 minutes, or until the edges start to turn a golden brown.
  10. Cool on the pan for 5 minutes before enjoying.

Nutrition

Serving: 1pieceCalories: 230kcalCarbohydrates: 26gProtein: 3gFat: 12gSaturated Fat: 6gPolyunsaturated Fat: 0.5gMonounsaturated Fat: 4.5gCholesterol: 80mgSodium: 200mgPotassium: 100mgFiber: 1gSugar: 5gVitamin A: 300IUVitamin C: 5mgCalcium: 50mgIron: 1mg

Notes

Dust with powdered sugar before serving for an elegant touch.

Tried this recipe?

Let us know how it was!

Filed Under: BREAKFAST & BRUNCH

Shamrock Swirl Pie

December 29, 2025 by JudyWhite Leave a Comment

The moment I took my first bite of Shamrock Swirl Pie, I was transported to a whimsical world of flavor—a delightful fusion of minty freshness and rich chocolatey goodness. This enchanting dessert is a game-changer for anyone tired of the same old fast food; its vibrant green swirls and luscious textures create a joyous centerpiece for any gathering.

I’ll never forget when I decided to whip this up for a last-minute celebration. With just a handful of ingredients, including creamy, dreamy peppermint filling nestled in a chocolate cookie crust, it turned a simple evening into something truly special. Whether you’re looking to impress guests or simply treat yourself, this pie is incredibly versatile. Plus, the easy preparation means you can spend less time in the kitchen and more time enjoying the sweet moments that matter.

Get ready to indulge in a dessert that not only pleases the palate but also sparks joy with its colorful presentation. Let’s dive right into making your own Shamrock Swirl Pie!

Why You'll Love This Shamrock Swirl Pie

  • This Shamrock Swirl Pie is incredibly easy to make, allowing even beginner bakers to impress their friends and family without stress.
  • The delightful combination of creamy peppermint and rich chocolate flavors will leave everyone coming back for seconds.
  • Its vibrant green swirls make it a visually stunning addition to any dessert table, perfect for celebrations.
  • Plus, with minimal prep time, you can whip this up quickly and enjoy more time with your loved ones while they rave about your delicious creation.

Shamrock Swirl Pie Ingredients

• To create your dreamy dessert, gather these sweet essentials!

For the Crust
• Chocolate cookie crumbs – the foundation of flavor; choose your favorite brand for the best taste.
• Unsalted butter – helps bind the crumbs together for a perfectly crispy crust.

For the Filling
• Cream cheese – provides a rich, creamy texture that perfectly balances the chocolate.
• Powdered sugar – adds sweetness and helps achieve that smooth, decadent filling.
• Peppermint extract – gives the Shamrock Swirl Pie its signature minty flavor; adjust to taste if needed.
• Green food coloring – a few drops create that happy, festive hue for this delightful pie.
• Heavy whipping cream (or whipped topping) – adds fluffiness to the filling; whip it until soft peaks form for best results.

For the Topping
• Melted chocolate – drizzled on top for an irresistible finish, adding rich flavor and visual appeal.
• Whipped cream – a luscious garnish that adds a creamy touch along with extra sweetness.
• Chocolate shavings or chips – sprinkle on top for an extra layer of chocolate goodness.
• Green sprinkles or edible glitter – to add a festive flair and a bit of fun to your dessert!

Get ready to enchant your taste buds and those of your loved ones with this Shamrock Swirl Pie!

How to Make Shamrock Swirl Pie

  1. Combine chocolate cookie crumbs and melted butter in a mixing bowl. Press the mixture firmly into the bottom of a pie pan to form a flavorful crust that’s just waiting to hold your filling.

  2. Mix cream cheese, powdered sugar, peppermint extract, and a few drops of green food coloring in a separate mixing bowl. Beat until smooth and creamy, ensuring there are no lumps for that velvety texture everyone loves.

  3. Fold in the whipped heavy cream (or whipped topping) gently. This step is crucial for maintaining that light, airy texture you’re aiming for, blending well yet keeping the filling fluffy.

  4. Pour the delightful peppermint filling into your prepared chocolate crust. Smooth the top with a spatula to create an inviting surface for your chocolate drizzle.

  5. Drizzle melted chocolate over the top of the pie in a whimsical swirl pattern. This not only adds rich flavor but also enhances the visual appeal of your dessert masterpiece.

  6. Chill the pie in the refrigerator for at least 4 hours, or until it’s set. Patience is key—this allows all the flavors to meld beautifully together.

  7. Garnish your pie with whipped cream, chocolate shavings or chips, and a sprinkle of green sprinkles or edible glitter. This final touch transforms your Shamrock Swirl Pie into a festive celebration.

Optional: Add a mint leaf on top for an extra pop of color and freshness.

Exact quantities are listed in the recipe card below.

What to Serve with Shamrock Swirl Pie?

Imagine gathering with friends and family, sharing delightful bites of this stunning dessert that hints at the joy of springtime.

  • Mint Chocolate Chip Ice Cream: A creamy scoop that echoes the mint flavor in the pie, creating a luscious pairing of textures. A bit of cold ice cream against the rich pie makes each bite irresistible.

  • Fresh Berry Salad: Ripe strawberries, blueberries, and raspberries drizzled with a hint of honey offer a tart contrast to the sweet pie. The vibrant colors add a fresh and festive touch!

  • Chocolate-Dipped Strawberries: These sweet, juicy treats bring a touch of elegance to your dessert spread. The leafy freshness of the berries beautifully complements the rich chocolate of the pie.

  • Coffee or Espresso: A strong cup of coffee provides a perfect contrast to the sweetness of Shamrock Swirl Pie. The robust flavors help balance the dessert’s richness, enhancing the overall dining experience.

  • Lemon Sorbet: This refreshing, zesty treat can cleanse the palate between bites of the indulgent pie. Its bright flavor adds a delightful twist that dances on the taste buds.

  • Chocolate Mint Shake: For those who love a silky drink, this shake combines chocolate and mint to echo flavors in the pie, making it a delightful indulgence. The creamy texture ties everything together wonderfully.

  • Pistachio Baklava: The nutty sweetness and flaky layers of baklava provide a delicious contrast to the creamy pie. Served alongside, it offers an exciting texture variation for your guests to enjoy.

  • Lemonade Sparklers: Sparkling lemonade adds a refreshing zest that brightens up the table. It offers a light and fizzy element that perfectly balances the richness of the Shamrock Swirl Pie.

  • Chocolate Mousse: A light yet rich dessert that echoes the pie’s chocolate notes, creating a flawless ending to your meal. Its airy texture complements the creamy pie beautifully, making it a dreamy duo!

  • Mint Tea: The soothing warmth of mint tea pairs wonderfully, enhancing the peppermint flavors in the pie and providing a lovely finish to your meal. Its fragrant qualities offer a calming experience.

How to Store and Freeze Shamrock Swirl Pie

Fridge: Store any leftovers in an airtight container for up to 3 days. This keeps the pie fresh and prevents it from absorbing odors from the fridge.

Freezer: If you want to make the Shamrock Swirl Pie ahead of time, freeze it whole, wrapped tightly in plastic wrap and aluminum foil, for up to 1 month. Thaw in the fridge overnight before serving.

Reheating: While this pie is best served cold, if you prefer it slightly softer, let it sit at room temperature for about 15-20 minutes before slicing.

Serving: Cut into slices and garnish just before serving for that fresh, delightful finish.

Make Ahead Options

Make your Shamrock Swirl Pie even more convenient by prepping some components ahead of time! You can prepare the chocolate cookie crust up to 24 hours in advance—just press the mixture into the pie pan and store it covered in the refrigerator to keep it fresh. Additionally, mix the cream cheese filling (cream cheese, powdered sugar, peppermint extract, and food coloring) and store it separately in an airtight container for up to 3 days. When you’re ready to serve, simply whip the heavy cream and fold it into the creamy filling, pour it into the crust, and let the pie set in the fridge for at least 4 hours. This way, you’ll be able to create a stunning dessert with minimal effort on the day of your gathering!

Shamrock Swirl Pie Variations

Feel free to customize your Shamrock Swirl Pie with these exciting twists!

  • Gluten-Free Base: Use gluten-free chocolate cookie crumbs to accommodate dietary needs while maintaining that delicious chocolate flavor.

  • Nutty crust: Swap out chocolate cookie crumbs for crushed almond cookies or graham crackers mixed with some almond butter for added depth and crunch.

  • Vegan Delight: Replace cream cheese with silken tofu and use coconut cream in place of heavy whipping cream for a lush vegan version.

  • Mint Chocolate Chip: Stir in mini chocolate chips into the filling for delightful bursts of chocolatey goodness with every bite; it adds a lovely texture too!

  • Syrupy Sweetness: Drizzle caramel sauce atop the pie before garnishing for a rich, sweet twist that pairs beautifully with peppermint.

  • Choco-Mint Madness: Mix 1-2 tablespoons of chocolate syrup into the filling for deeper chocolate notes in every luscious scoop.

  • Spicy Kick: Add a pinch of cayenne pepper to the filling for a surprising, spicy contrast to the refreshing mint flavor.

  • Fruit Fusion: For a fruity twist, blend in some crushed raspberries or strawberries to the filling for a delightful blend of flavors and a splash of color!

Chef's Helpful Tips

  • When making the Shamrock Swirl Pie, ensure your cream cheese is fully softened before mixing to avoid lumps in your filling.
  • Use a spatula to gently fold in the whipped cream; overmixing can deflate the airy texture you want.
  • For a more vibrant green color, start with just a drop or two of food coloring and gradually add more until you achieve your desired shade.
  • Remember to chill the pie for a full 4 hours to allow it to set properly, which is crucial for the perfect slice presentation.

Shamrock Swirl Pie Recipe FAQs

How can I select the best ingredients for my Shamrock Swirl Pie?
Absolutely! For the best results, choose chocolate cookie crumbs that you love; a slightly bittersweet cookie will enhance the flavors. Ensure your cream cheese is at room temperature; this allows for easy blending, leading to a smooth filling. As for fresh mint, if you’re using it instead of peppermint extract, pick vibrant green leaves with no dark spots or wilting.

How should I store my Shamrock Swirl Pie?
I recommend storing any leftovers in an airtight container in the fridge for up to 3 days. This method keeps the pie fresh and prevents it from absorbing any unwanted odors. Always use parchment paper below the pie when sealing to make removal easier later!

Can I freeze Shamrock Swirl Pie?
Yes, indeed! To freeze, wrap the pie tightly in plastic wrap, then in aluminum foil, and place it in the freezer for up to 1 month. When you’re ready to enjoy it, transfer the pie to the fridge to thaw overnight. This helps preserve the texture and flavor, making for a delightful dessert when you’re ready to serve!

What should I do if my filling is too runny?
Very! If your filling turns out too runny, you might not have whipped the cream thoroughly or mixed it too aggressively. To troubleshoot, consider adding a bit of additional cream cheese, softened, to thicken the filling while gently folding it in. If you’ve already mixed in the whipped cream and it feels too loose, chill the pie a bit longer; it often firms up beautifully as it sets.

Are there any dietary considerations for this Shamrock Swirl Pie?
Absolutely! If you have guests with allergies, you can make some substitutions. For dairy-free options, use vegan cream cheese and whipped coconut cream. If you’re looking for a nut-free version, ensure your whipped topping is almond-free. Always check ingredient labels for cross-contamination if allergies are a concern.

Can I customize the flavors of my Shamrock Swirl Pie?
Very much so! You can play with the flavors by swapping peppermint extract for another extract, such as vanilla or almond. If you want to add a twist, consider adding some crushed candy canes for a crunch or a hint of espresso powder to the crust for a mocha flavor. Get creative—the more, the merrier!

Shamrock Swirl Pie

Shamrock Swirl Pie

Indulge in the Shamrock Swirl Pie, a delightful blend of minty freshness and rich chocolatey goodness that brings joy to any gathering.
Print Recipe Pin Recipe
Prep Time 15 minutes mins
Chilling Time 4 hours hrs
Total Time 4 hours hrs 15 minutes mins
Servings: 8 slices
Course: DESSERT RECIPES
Cuisine: American
Calories: 350
Ingredients Equipment Method Nutrition Notes

Ingredients
  

For the Crust
  • 1 ½ cups chocolate cookie crumbs choose your favorite brand for the best taste
  • ½ cups unsalted butter melted
For the Filling
  • 8 oz cream cheese softened
  • 1 cup powdered sugar
  • 1 teaspoon peppermint extract adjust to taste
  • a few drops green food coloring for coloring
  • 1 cup heavy whipping cream whipped until soft peaks form
For the Topping
  • ½ cup melted chocolate for drizzling
  • 1 cup whipped cream for garnish
  • ¼ cup chocolate shavings or chips for garnish
  • 2 tablespoons green sprinkles or edible glitter for garnish

Equipment

  • Mixing bowl
  • pie pan
  • Spatula

Method
 

Preparation
  1. Combine chocolate cookie crumbs and melted butter in a mixing bowl. Press firmly into the bottom of a pie pan to form a crust.
  2. Mix cream cheese, powdered sugar, peppermint extract, and a few drops of green food coloring in a separate bowl. Beat until smooth and creamy.
  3. Fold in the whipped heavy cream gently to maintain a light, airy texture.
  4. Pour the peppermint filling into the prepared chocolate crust and smooth the top with a spatula.
  5. Drizzle melted chocolate over the top in a whimsical swirl pattern.
  6. Chill the pie in the refrigerator for at least 4 hours or until set.
  7. Garnish with whipped cream, chocolate shavings, and a sprinkle of green sprinkles or edible glitter.

Nutrition

Serving: 1sliceCalories: 350kcalCarbohydrates: 30gProtein: 3gFat: 24gSaturated Fat: 14gPolyunsaturated Fat: 2gMonounsaturated Fat: 6gCholesterol: 45mgSodium: 250mgPotassium: 100mgFiber: 1gSugar: 18gVitamin A: 500IUCalcium: 50mgIron: 1mg

Notes

Ensure cream cheese is softened before mixing. Chill for a full 4 hours for best results.

Tried this recipe?

Let us know how it was!

Filed Under: BREAKFAST & BRUNCH

Shamrock Swirl Pie

December 29, 2025 by JudyWhite Leave a Comment

The moment I took my first bite of Shamrock Swirl Pie, I was transported to a whimsical world of flavor—a delightful fusion of minty freshness and rich chocolatey goodness. This enchanting dessert is a game-changer for anyone tired of the same old fast food; its vibrant green swirls and luscious textures create a joyous centerpiece for any gathering.

I’ll never forget when I decided to whip this up for a last-minute celebration. With just a handful of ingredients, including creamy, dreamy peppermint filling nestled in a chocolate cookie crust, it turned a simple evening into something truly special. Whether you’re looking to impress guests or simply treat yourself, this pie is incredibly versatile. Plus, the easy preparation means you can spend less time in the kitchen and more time enjoying the sweet moments that matter.

Get ready to indulge in a dessert that not only pleases the palate but also sparks joy with its colorful presentation. Let’s dive right into making your own Shamrock Swirl Pie!

Why You'll Love This Shamrock Swirl Pie

  • This Shamrock Swirl Pie is incredibly easy to make, allowing even beginner bakers to impress their friends and family without stress.
  • The delightful combination of creamy peppermint and rich chocolate flavors will leave everyone coming back for seconds.
  • Its vibrant green swirls make it a visually stunning addition to any dessert table, perfect for celebrations.
  • Plus, with minimal prep time, you can whip this up quickly and enjoy more time with your loved ones while they rave about your delicious creation.

Shamrock Swirl Pie Ingredients

• To create your dreamy dessert, gather these sweet essentials!

For the Crust
• Chocolate cookie crumbs – the foundation of flavor; choose your favorite brand for the best taste.
• Unsalted butter – helps bind the crumbs together for a perfectly crispy crust.

For the Filling
• Cream cheese – provides a rich, creamy texture that perfectly balances the chocolate.
• Powdered sugar – adds sweetness and helps achieve that smooth, decadent filling.
• Peppermint extract – gives the Shamrock Swirl Pie its signature minty flavor; adjust to taste if needed.
• Green food coloring – a few drops create that happy, festive hue for this delightful pie.
• Heavy whipping cream (or whipped topping) – adds fluffiness to the filling; whip it until soft peaks form for best results.

For the Topping
• Melted chocolate – drizzled on top for an irresistible finish, adding rich flavor and visual appeal.
• Whipped cream – a luscious garnish that adds a creamy touch along with extra sweetness.
• Chocolate shavings or chips – sprinkle on top for an extra layer of chocolate goodness.
• Green sprinkles or edible glitter – to add a festive flair and a bit of fun to your dessert!

Get ready to enchant your taste buds and those of your loved ones with this Shamrock Swirl Pie!

How to Make Shamrock Swirl Pie

  1. Combine chocolate cookie crumbs and melted butter in a mixing bowl. Press the mixture firmly into the bottom of a pie pan to form a flavorful crust that’s just waiting to hold your filling.

  2. Mix cream cheese, powdered sugar, peppermint extract, and a few drops of green food coloring in a separate mixing bowl. Beat until smooth and creamy, ensuring there are no lumps for that velvety texture everyone loves.

  3. Fold in the whipped heavy cream (or whipped topping) gently. This step is crucial for maintaining that light, airy texture you’re aiming for, blending well yet keeping the filling fluffy.

  4. Pour the delightful peppermint filling into your prepared chocolate crust. Smooth the top with a spatula to create an inviting surface for your chocolate drizzle.

  5. Drizzle melted chocolate over the top of the pie in a whimsical swirl pattern. This not only adds rich flavor but also enhances the visual appeal of your dessert masterpiece.

  6. Chill the pie in the refrigerator for at least 4 hours, or until it’s set. Patience is key—this allows all the flavors to meld beautifully together.

  7. Garnish your pie with whipped cream, chocolate shavings or chips, and a sprinkle of green sprinkles or edible glitter. This final touch transforms your Shamrock Swirl Pie into a festive celebration.

Optional: Add a mint leaf on top for an extra pop of color and freshness.

Exact quantities are listed in the recipe card below.

Shamrock Swirl Pie Variations

Feel free to customize your Shamrock Swirl Pie with these exciting twists!

  • Gluten-Free Base: Use gluten-free chocolate cookie crumbs to accommodate dietary needs while maintaining that delicious chocolate flavor.

  • Nutty crust: Swap out chocolate cookie crumbs for crushed almond cookies or graham crackers mixed with some almond butter for added depth and crunch.

  • Vegan Delight: Replace cream cheese with silken tofu and use coconut cream in place of heavy whipping cream for a lush vegan version.

  • Mint Chocolate Chip: Stir in mini chocolate chips into the filling for delightful bursts of chocolatey goodness with every bite; it adds a lovely texture too!

  • Syrupy Sweetness: Drizzle caramel sauce atop the pie before garnishing for a rich, sweet twist that pairs beautifully with peppermint.

  • Choco-Mint Madness: Mix 1-2 tablespoons of chocolate syrup into the filling for deeper chocolate notes in every luscious scoop.

  • Spicy Kick: Add a pinch of cayenne pepper to the filling for a surprising, spicy contrast to the refreshing mint flavor.

  • Fruit Fusion: For a fruity twist, blend in some crushed raspberries or strawberries to the filling for a delightful blend of flavors and a splash of color!

What to Serve with Shamrock Swirl Pie?

Imagine gathering with friends and family, sharing delightful bites of this stunning dessert that hints at the joy of springtime.

  • Mint Chocolate Chip Ice Cream: A creamy scoop that echoes the mint flavor in the pie, creating a luscious pairing of textures. A bit of cold ice cream against the rich pie makes each bite irresistible.

  • Fresh Berry Salad: Ripe strawberries, blueberries, and raspberries drizzled with a hint of honey offer a tart contrast to the sweet pie. The vibrant colors add a fresh and festive touch!

  • Chocolate-Dipped Strawberries: These sweet, juicy treats bring a touch of elegance to your dessert spread. The leafy freshness of the berries beautifully complements the rich chocolate of the pie.

  • Coffee or Espresso: A strong cup of coffee provides a perfect contrast to the sweetness of Shamrock Swirl Pie. The robust flavors help balance the dessert’s richness, enhancing the overall dining experience.

  • Lemon Sorbet: This refreshing, zesty treat can cleanse the palate between bites of the indulgent pie. Its bright flavor adds a delightful twist that dances on the taste buds.

  • Chocolate Mint Shake: For those who love a silky drink, this shake combines chocolate and mint to echo flavors in the pie, making it a delightful indulgence. The creamy texture ties everything together wonderfully.

  • Pistachio Baklava: The nutty sweetness and flaky layers of baklava provide a delicious contrast to the creamy pie. Served alongside, it offers an exciting texture variation for your guests to enjoy.

  • Lemonade Sparklers: Sparkling lemonade adds a refreshing zest that brightens up the table. It offers a light and fizzy element that perfectly balances the richness of the Shamrock Swirl Pie.

  • Chocolate Mousse: A light yet rich dessert that echoes the pie’s chocolate notes, creating a flawless ending to your meal. Its airy texture complements the creamy pie beautifully, making it a dreamy duo!

  • Mint Tea: The soothing warmth of mint tea pairs wonderfully, enhancing the peppermint flavors in the pie and providing a lovely finish to your meal. Its fragrant qualities offer a calming experience.

How to Store and Freeze Shamrock Swirl Pie

Fridge: Store any leftovers in an airtight container for up to 3 days. This keeps the pie fresh and prevents it from absorbing odors from the fridge.

Freezer: If you want to make the Shamrock Swirl Pie ahead of time, freeze it whole, wrapped tightly in plastic wrap and aluminum foil, for up to 1 month. Thaw in the fridge overnight before serving.

Reheating: While this pie is best served cold, if you prefer it slightly softer, let it sit at room temperature for about 15-20 minutes before slicing.

Serving: Cut into slices and garnish just before serving for that fresh, delightful finish.

Make Ahead Options

Make your Shamrock Swirl Pie even more convenient by prepping some components ahead of time! You can prepare the chocolate cookie crust up to 24 hours in advance—just press the mixture into the pie pan and store it covered in the refrigerator to keep it fresh. Additionally, mix the cream cheese filling (cream cheese, powdered sugar, peppermint extract, and food coloring) and store it separately in an airtight container for up to 3 days. When you’re ready to serve, simply whip the heavy cream and fold it into the creamy filling, pour it into the crust, and let the pie set in the fridge for at least 4 hours. This way, you’ll be able to create a stunning dessert with minimal effort on the day of your gathering!

Chef's Helpful Tips

  • When making the Shamrock Swirl Pie, ensure your cream cheese is fully softened before mixing to avoid lumps in your filling.
  • Use a spatula to gently fold in the whipped cream; overmixing can deflate the airy texture you want.
  • For a more vibrant green color, start with just a drop or two of food coloring and gradually add more until you achieve your desired shade.
  • Remember to chill the pie for a full 4 hours to allow it to set properly, which is crucial for the perfect slice presentation.

Shamrock Swirl Pie Recipe FAQs

How can I select the best ingredients for my Shamrock Swirl Pie?
Absolutely! For the best results, choose chocolate cookie crumbs that you love; a slightly bittersweet cookie will enhance the flavors. Ensure your cream cheese is at room temperature; this allows for easy blending, leading to a smooth filling. As for fresh mint, if you’re using it instead of peppermint extract, pick vibrant green leaves with no dark spots or wilting.

How should I store my Shamrock Swirl Pie?
I recommend storing any leftovers in an airtight container in the fridge for up to 3 days. This method keeps the pie fresh and prevents it from absorbing any unwanted odors. Always use parchment paper below the pie when sealing to make removal easier later!

Can I freeze Shamrock Swirl Pie?
Yes, indeed! To freeze, wrap the pie tightly in plastic wrap, then in aluminum foil, and place it in the freezer for up to 1 month. When you’re ready to enjoy it, transfer the pie to the fridge to thaw overnight. This helps preserve the texture and flavor, making for a delightful dessert when you’re ready to serve!

What should I do if my filling is too runny?
Very! If your filling turns out too runny, you might not have whipped the cream thoroughly or mixed it too aggressively. To troubleshoot, consider adding a bit of additional cream cheese, softened, to thicken the filling while gently folding it in. If you’ve already mixed in the whipped cream and it feels too loose, chill the pie a bit longer; it often firms up beautifully as it sets.

Are there any dietary considerations for this Shamrock Swirl Pie?
Absolutely! If you have guests with allergies, you can make some substitutions. For dairy-free options, use vegan cream cheese and whipped coconut cream. If you’re looking for a nut-free version, ensure your whipped topping is almond-free. Always check ingredient labels for cross-contamination if allergies are a concern.

Can I customize the flavors of my Shamrock Swirl Pie?
Very much so! You can play with the flavors by swapping peppermint extract for another extract, such as vanilla or almond. If you want to add a twist, consider adding some crushed candy canes for a crunch or a hint of espresso powder to the crust for a mocha flavor. Get creative—the more, the merrier!

Shamrock Swirl Pie

Shamrock Swirl Pie

Shamrock Swirl Pie is a delightful dessert with a fusion of minty freshness and rich chocolate goodness, perfect for any celebration.
Print Recipe Pin Recipe
Prep Time 20 minutes mins
Chilling Time 4 hours hrs
Total Time 4 hours hrs 20 minutes mins
Servings: 8 slices
Course: DESSERT RECIPES
Cuisine: American
Calories: 350
Ingredients Equipment Method Nutrition Notes

Ingredients
  

Crust
  • 2 cups chocolate cookie crumbs choose your favorite brand
  • 1/2 cup unsalted butter melted
Filling
  • 8 oz cream cheese softened
  • 1 cup powdered sugar
  • 1 tsp peppermint extract adjust to taste
  • a few drops green food coloring for desired hue
  • 1 cup heavy whipping cream or whipped topping
Topping
  • 1/2 cup melted chocolate for drizzling
  • 1 cup whipped cream for garnish
  • 1/4 cup chocolate shavings or chips for sprinkling
  • 1 tbsp green sprinkles or edible glitter for decoration

Equipment

  • Mixing bowl
  • pie pan
  • Spatula

Method
 

Crust Preparation
  1. Combine chocolate cookie crumbs and melted butter in a mixing bowl. Press firmly into the bottom of a pie pan.
Filling Preparation
  1. Mix cream cheese, powdered sugar, peppermint extract, and a few drops of green food coloring until smooth.
  2. Fold in the whipped heavy cream gently.
Assembly
  1. Pour the peppermint filling into the chocolate crust and smooth the top.
  2. Drizzle melted chocolate over the top in a swirling pattern.
  3. Chill the pie in the refrigerator for at least 4 hours.
  4. Garnish with whipped cream, chocolate shavings or chips, and green sprinkles.

Nutrition

Serving: 1sliceCalories: 350kcalCarbohydrates: 30gProtein: 4gFat: 24gSaturated Fat: 15gPolyunsaturated Fat: 1gMonounsaturated Fat: 6gCholesterol: 60mgSodium: 250mgPotassium: 150mgFiber: 1gSugar: 20gVitamin A: 300IUCalcium: 40mgIron: 1mg

Notes

Ensure cream cheese is softened to avoid lumps. Use gentle folding for whipped cream to maintain airiness. For vibrant color, add food coloring gradually. Chill for at least 4 hours before serving.

Tried this recipe?

Let us know how it was!

Filed Under: BREAKFAST & BRUNCH

Shamrock Swirl Pie

December 29, 2025 by JudyWhite Leave a Comment

The moment I took my first bite of Shamrock Swirl Pie, I was transported to a whimsical world of flavor—a delightful fusion of minty freshness and rich chocolatey goodness. This enchanting dessert is a game-changer for anyone tired of the same old fast food; its vibrant green swirls and luscious textures create a joyous centerpiece for any gathering.

I’ll never forget when I decided to whip this up for a last-minute celebration. With just a handful of ingredients, including creamy, dreamy peppermint filling nestled in a chocolate cookie crust, it turned a simple evening into something truly special. Whether you’re looking to impress guests or simply treat yourself, this pie is incredibly versatile. Plus, the easy preparation means you can spend less time in the kitchen and more time enjoying the sweet moments that matter.

Get ready to indulge in a dessert that not only pleases the palate but also sparks joy with its colorful presentation. Let’s dive right into making your own Shamrock Swirl Pie!

Why You'll Love This Shamrock Swirl Pie

  • This Shamrock Swirl Pie is incredibly easy to make, allowing even beginner bakers to impress their friends and family without stress.
  • The delightful combination of creamy peppermint and rich chocolate flavors will leave everyone coming back for seconds.
  • Its vibrant green swirls make it a visually stunning addition to any dessert table, perfect for celebrations.
  • Plus, with minimal prep time, you can whip this up quickly and enjoy more time with your loved ones while they rave about your delicious creation.

Shamrock Swirl Pie Ingredients

• To create your dreamy dessert, gather these sweet essentials!

For the Crust
• Chocolate cookie crumbs – the foundation of flavor; choose your favorite brand for the best taste.
• Unsalted butter – helps bind the crumbs together for a perfectly crispy crust.

For the Filling
• Cream cheese – provides a rich, creamy texture that perfectly balances the chocolate.
• Powdered sugar – adds sweetness and helps achieve that smooth, decadent filling.
• Peppermint extract – gives the Shamrock Swirl Pie its signature minty flavor; adjust to taste if needed.
• Green food coloring – a few drops create that happy, festive hue for this delightful pie.
• Heavy whipping cream (or whipped topping) – adds fluffiness to the filling; whip it until soft peaks form for best results.

For the Topping
• Melted chocolate – drizzled on top for an irresistible finish, adding rich flavor and visual appeal.
• Whipped cream – a luscious garnish that adds a creamy touch along with extra sweetness.
• Chocolate shavings or chips – sprinkle on top for an extra layer of chocolate goodness.
• Green sprinkles or edible glitter – to add a festive flair and a bit of fun to your dessert!

Get ready to enchant your taste buds and those of your loved ones with this Shamrock Swirl Pie!

How to Make Shamrock Swirl Pie

  1. Combine chocolate cookie crumbs and melted butter in a mixing bowl. Press the mixture firmly into the bottom of a pie pan to form a flavorful crust that’s just waiting to hold your filling.

  2. Mix cream cheese, powdered sugar, peppermint extract, and a few drops of green food coloring in a separate mixing bowl. Beat until smooth and creamy, ensuring there are no lumps for that velvety texture everyone loves.

  3. Fold in the whipped heavy cream (or whipped topping) gently. This step is crucial for maintaining that light, airy texture you’re aiming for, blending well yet keeping the filling fluffy.

  4. Pour the delightful peppermint filling into your prepared chocolate crust. Smooth the top with a spatula to create an inviting surface for your chocolate drizzle.

  5. Drizzle melted chocolate over the top of the pie in a whimsical swirl pattern. This not only adds rich flavor but also enhances the visual appeal of your dessert masterpiece.

  6. Chill the pie in the refrigerator for at least 4 hours, or until it’s set. Patience is key—this allows all the flavors to meld beautifully together.

  7. Garnish your pie with whipped cream, chocolate shavings or chips, and a sprinkle of green sprinkles or edible glitter. This final touch transforms your Shamrock Swirl Pie into a festive celebration.

Optional: Add a mint leaf on top for an extra pop of color and freshness.

Exact quantities are listed in the recipe card below.

Make Ahead Options

Make your Shamrock Swirl Pie even more convenient by prepping some components ahead of time! You can prepare the chocolate cookie crust up to 24 hours in advance—just press the mixture into the pie pan and store it covered in the refrigerator to keep it fresh. Additionally, mix the cream cheese filling (cream cheese, powdered sugar, peppermint extract, and food coloring) and store it separately in an airtight container for up to 3 days. When you’re ready to serve, simply whip the heavy cream and fold it into the creamy filling, pour it into the crust, and let the pie set in the fridge for at least 4 hours. This way, you’ll be able to create a stunning dessert with minimal effort on the day of your gathering!

Shamrock Swirl Pie Variations

Feel free to customize your Shamrock Swirl Pie with these exciting twists!

  • Gluten-Free Base: Use gluten-free chocolate cookie crumbs to accommodate dietary needs while maintaining that delicious chocolate flavor.

  • Nutty crust: Swap out chocolate cookie crumbs for crushed almond cookies or graham crackers mixed with some almond butter for added depth and crunch.

  • Vegan Delight: Replace cream cheese with silken tofu and use coconut cream in place of heavy whipping cream for a lush vegan version.

  • Mint Chocolate Chip: Stir in mini chocolate chips into the filling for delightful bursts of chocolatey goodness with every bite; it adds a lovely texture too!

  • Syrupy Sweetness: Drizzle caramel sauce atop the pie before garnishing for a rich, sweet twist that pairs beautifully with peppermint.

  • Choco-Mint Madness: Mix 1-2 tablespoons of chocolate syrup into the filling for deeper chocolate notes in every luscious scoop.

  • Spicy Kick: Add a pinch of cayenne pepper to the filling for a surprising, spicy contrast to the refreshing mint flavor.

  • Fruit Fusion: For a fruity twist, blend in some crushed raspberries or strawberries to the filling for a delightful blend of flavors and a splash of color!

How to Store and Freeze Shamrock Swirl Pie

Fridge: Store any leftovers in an airtight container for up to 3 days. This keeps the pie fresh and prevents it from absorbing odors from the fridge.

Freezer: If you want to make the Shamrock Swirl Pie ahead of time, freeze it whole, wrapped tightly in plastic wrap and aluminum foil, for up to 1 month. Thaw in the fridge overnight before serving.

Reheating: While this pie is best served cold, if you prefer it slightly softer, let it sit at room temperature for about 15-20 minutes before slicing.

Serving: Cut into slices and garnish just before serving for that fresh, delightful finish.

What to Serve with Shamrock Swirl Pie?

Imagine gathering with friends and family, sharing delightful bites of this stunning dessert that hints at the joy of springtime.

  • Mint Chocolate Chip Ice Cream: A creamy scoop that echoes the mint flavor in the pie, creating a luscious pairing of textures. A bit of cold ice cream against the rich pie makes each bite irresistible.

  • Fresh Berry Salad: Ripe strawberries, blueberries, and raspberries drizzled with a hint of honey offer a tart contrast to the sweet pie. The vibrant colors add a fresh and festive touch!

  • Chocolate-Dipped Strawberries: These sweet, juicy treats bring a touch of elegance to your dessert spread. The leafy freshness of the berries beautifully complements the rich chocolate of the pie.

  • Coffee or Espresso: A strong cup of coffee provides a perfect contrast to the sweetness of Shamrock Swirl Pie. The robust flavors help balance the dessert’s richness, enhancing the overall dining experience.

  • Lemon Sorbet: This refreshing, zesty treat can cleanse the palate between bites of the indulgent pie. Its bright flavor adds a delightful twist that dances on the taste buds.

  • Chocolate Mint Shake: For those who love a silky drink, this shake combines chocolate and mint to echo flavors in the pie, making it a delightful indulgence. The creamy texture ties everything together wonderfully.

  • Pistachio Baklava: The nutty sweetness and flaky layers of baklava provide a delicious contrast to the creamy pie. Served alongside, it offers an exciting texture variation for your guests to enjoy.

  • Lemonade Sparklers: Sparkling lemonade adds a refreshing zest that brightens up the table. It offers a light and fizzy element that perfectly balances the richness of the Shamrock Swirl Pie.

  • Chocolate Mousse: A light yet rich dessert that echoes the pie’s chocolate notes, creating a flawless ending to your meal. Its airy texture complements the creamy pie beautifully, making it a dreamy duo!

  • Mint Tea: The soothing warmth of mint tea pairs wonderfully, enhancing the peppermint flavors in the pie and providing a lovely finish to your meal. Its fragrant qualities offer a calming experience.

Chef's Helpful Tips

  • When making the Shamrock Swirl Pie, ensure your cream cheese is fully softened before mixing to avoid lumps in your filling.
  • Use a spatula to gently fold in the whipped cream; overmixing can deflate the airy texture you want.
  • For a more vibrant green color, start with just a drop or two of food coloring and gradually add more until you achieve your desired shade.
  • Remember to chill the pie for a full 4 hours to allow it to set properly, which is crucial for the perfect slice presentation.

Shamrock Swirl Pie Recipe FAQs

How can I select the best ingredients for my Shamrock Swirl Pie?
Absolutely! For the best results, choose chocolate cookie crumbs that you love; a slightly bittersweet cookie will enhance the flavors. Ensure your cream cheese is at room temperature; this allows for easy blending, leading to a smooth filling. As for fresh mint, if you’re using it instead of peppermint extract, pick vibrant green leaves with no dark spots or wilting.

How should I store my Shamrock Swirl Pie?
I recommend storing any leftovers in an airtight container in the fridge for up to 3 days. This method keeps the pie fresh and prevents it from absorbing any unwanted odors. Always use parchment paper below the pie when sealing to make removal easier later!

Can I freeze Shamrock Swirl Pie?
Yes, indeed! To freeze, wrap the pie tightly in plastic wrap, then in aluminum foil, and place it in the freezer for up to 1 month. When you’re ready to enjoy it, transfer the pie to the fridge to thaw overnight. This helps preserve the texture and flavor, making for a delightful dessert when you’re ready to serve!

What should I do if my filling is too runny?
Very! If your filling turns out too runny, you might not have whipped the cream thoroughly or mixed it too aggressively. To troubleshoot, consider adding a bit of additional cream cheese, softened, to thicken the filling while gently folding it in. If you’ve already mixed in the whipped cream and it feels too loose, chill the pie a bit longer; it often firms up beautifully as it sets.

Are there any dietary considerations for this Shamrock Swirl Pie?
Absolutely! If you have guests with allergies, you can make some substitutions. For dairy-free options, use vegan cream cheese and whipped coconut cream. If you’re looking for a nut-free version, ensure your whipped topping is almond-free. Always check ingredient labels for cross-contamination if allergies are a concern.

Can I customize the flavors of my Shamrock Swirl Pie?
Very much so! You can play with the flavors by swapping peppermint extract for another extract, such as vanilla or almond. If you want to add a twist, consider adding some crushed candy canes for a crunch or a hint of espresso powder to the crust for a mocha flavor. Get creative—the more, the merrier!

Shamrock Swirl Pie

Shamrock Swirl Pie

Shamrock Swirl Pie is a delightful dessert with a fusion of minty freshness and rich chocolate goodness, perfect for any celebration.
Print Recipe Pin Recipe
Prep Time 20 minutes mins
Chilling Time 4 hours hrs
Total Time 4 hours hrs 20 minutes mins
Servings: 8 slices
Course: DESSERT RECIPES
Cuisine: American
Calories: 350
Ingredients Equipment Method Nutrition Notes

Ingredients
  

Crust
  • 2 cups chocolate cookie crumbs choose your favorite brand
  • 1/2 cup unsalted butter melted
Filling
  • 8 oz cream cheese softened
  • 1 cup powdered sugar
  • 1 tsp peppermint extract adjust to taste
  • a few drops green food coloring for desired hue
  • 1 cup heavy whipping cream or whipped topping
Topping
  • 1/2 cup melted chocolate for drizzling
  • 1 cup whipped cream for garnish
  • 1/4 cup chocolate shavings or chips for sprinkling
  • 1 tbsp green sprinkles or edible glitter for decoration

Equipment

  • Mixing bowl
  • pie pan
  • Spatula

Method
 

Crust Preparation
  1. Combine chocolate cookie crumbs and melted butter in a mixing bowl. Press firmly into the bottom of a pie pan.
Filling Preparation
  1. Mix cream cheese, powdered sugar, peppermint extract, and a few drops of green food coloring until smooth.
  2. Fold in the whipped heavy cream gently.
Assembly
  1. Pour the peppermint filling into the chocolate crust and smooth the top.
  2. Drizzle melted chocolate over the top in a swirling pattern.
  3. Chill the pie in the refrigerator for at least 4 hours.
  4. Garnish with whipped cream, chocolate shavings or chips, and green sprinkles.

Nutrition

Serving: 1sliceCalories: 350kcalCarbohydrates: 30gProtein: 4gFat: 24gSaturated Fat: 15gPolyunsaturated Fat: 1gMonounsaturated Fat: 6gCholesterol: 60mgSodium: 250mgPotassium: 150mgFiber: 1gSugar: 20gVitamin A: 300IUCalcium: 40mgIron: 1mg

Notes

Ensure cream cheese is softened to avoid lumps. Use gentle folding for whipped cream to maintain airiness. For vibrant color, add food coloring gradually. Chill for at least 4 hours before serving.

Tried this recipe?

Let us know how it was!

Filed Under: BREAKFAST & BRUNCH

Shamrock Swirl Pie

December 29, 2025 by JudyWhite Leave a Comment

The moment I took my first bite of Shamrock Swirl Pie, I was transported to a whimsical world of flavor—a delightful fusion of minty freshness and rich chocolatey goodness. This enchanting dessert is a game-changer for anyone tired of the same old fast food; its vibrant green swirls and luscious textures create a joyous centerpiece for any gathering.

I’ll never forget when I decided to whip this up for a last-minute celebration. With just a handful of ingredients, including creamy, dreamy peppermint filling nestled in a chocolate cookie crust, it turned a simple evening into something truly special. Whether you’re looking to impress guests or simply treat yourself, this pie is incredibly versatile. Plus, the easy preparation means you can spend less time in the kitchen and more time enjoying the sweet moments that matter.

Get ready to indulge in a dessert that not only pleases the palate but also sparks joy with its colorful presentation. Let’s dive right into making your own Shamrock Swirl Pie!

Why You'll Love This Shamrock Swirl Pie

  • This Shamrock Swirl Pie is incredibly easy to make, allowing even beginner bakers to impress their friends and family without stress.
  • The delightful combination of creamy peppermint and rich chocolate flavors will leave everyone coming back for seconds.
  • Its vibrant green swirls make it a visually stunning addition to any dessert table, perfect for celebrations.
  • Plus, with minimal prep time, you can whip this up quickly and enjoy more time with your loved ones while they rave about your delicious creation.

Shamrock Swirl Pie Ingredients

• To create your dreamy dessert, gather these sweet essentials!

For the Crust
• Chocolate cookie crumbs – the foundation of flavor; choose your favorite brand for the best taste.
• Unsalted butter – helps bind the crumbs together for a perfectly crispy crust.

For the Filling
• Cream cheese – provides a rich, creamy texture that perfectly balances the chocolate.
• Powdered sugar – adds sweetness and helps achieve that smooth, decadent filling.
• Peppermint extract – gives the Shamrock Swirl Pie its signature minty flavor; adjust to taste if needed.
• Green food coloring – a few drops create that happy, festive hue for this delightful pie.
• Heavy whipping cream (or whipped topping) – adds fluffiness to the filling; whip it until soft peaks form for best results.

For the Topping
• Melted chocolate – drizzled on top for an irresistible finish, adding rich flavor and visual appeal.
• Whipped cream – a luscious garnish that adds a creamy touch along with extra sweetness.
• Chocolate shavings or chips – sprinkle on top for an extra layer of chocolate goodness.
• Green sprinkles or edible glitter – to add a festive flair and a bit of fun to your dessert!

Get ready to enchant your taste buds and those of your loved ones with this Shamrock Swirl Pie!

How to Make Shamrock Swirl Pie

  1. Combine chocolate cookie crumbs and melted butter in a mixing bowl. Press the mixture firmly into the bottom of a pie pan to form a flavorful crust that’s just waiting to hold your filling.

  2. Mix cream cheese, powdered sugar, peppermint extract, and a few drops of green food coloring in a separate mixing bowl. Beat until smooth and creamy, ensuring there are no lumps for that velvety texture everyone loves.

  3. Fold in the whipped heavy cream (or whipped topping) gently. This step is crucial for maintaining that light, airy texture you’re aiming for, blending well yet keeping the filling fluffy.

  4. Pour the delightful peppermint filling into your prepared chocolate crust. Smooth the top with a spatula to create an inviting surface for your chocolate drizzle.

  5. Drizzle melted chocolate over the top of the pie in a whimsical swirl pattern. This not only adds rich flavor but also enhances the visual appeal of your dessert masterpiece.

  6. Chill the pie in the refrigerator for at least 4 hours, or until it’s set. Patience is key—this allows all the flavors to meld beautifully together.

  7. Garnish your pie with whipped cream, chocolate shavings or chips, and a sprinkle of green sprinkles or edible glitter. This final touch transforms your Shamrock Swirl Pie into a festive celebration.

Optional: Add a mint leaf on top for an extra pop of color and freshness.

Exact quantities are listed in the recipe card below.

What to Serve with Shamrock Swirl Pie?

Imagine gathering with friends and family, sharing delightful bites of this stunning dessert that hints at the joy of springtime.

  • Mint Chocolate Chip Ice Cream: A creamy scoop that echoes the mint flavor in the pie, creating a luscious pairing of textures. A bit of cold ice cream against the rich pie makes each bite irresistible.

  • Fresh Berry Salad: Ripe strawberries, blueberries, and raspberries drizzled with a hint of honey offer a tart contrast to the sweet pie. The vibrant colors add a fresh and festive touch!

  • Chocolate-Dipped Strawberries: These sweet, juicy treats bring a touch of elegance to your dessert spread. The leafy freshness of the berries beautifully complements the rich chocolate of the pie.

  • Coffee or Espresso: A strong cup of coffee provides a perfect contrast to the sweetness of Shamrock Swirl Pie. The robust flavors help balance the dessert’s richness, enhancing the overall dining experience.

  • Lemon Sorbet: This refreshing, zesty treat can cleanse the palate between bites of the indulgent pie. Its bright flavor adds a delightful twist that dances on the taste buds.

  • Chocolate Mint Shake: For those who love a silky drink, this shake combines chocolate and mint to echo flavors in the pie, making it a delightful indulgence. The creamy texture ties everything together wonderfully.

  • Pistachio Baklava: The nutty sweetness and flaky layers of baklava provide a delicious contrast to the creamy pie. Served alongside, it offers an exciting texture variation for your guests to enjoy.

  • Lemonade Sparklers: Sparkling lemonade adds a refreshing zest that brightens up the table. It offers a light and fizzy element that perfectly balances the richness of the Shamrock Swirl Pie.

  • Chocolate Mousse: A light yet rich dessert that echoes the pie’s chocolate notes, creating a flawless ending to your meal. Its airy texture complements the creamy pie beautifully, making it a dreamy duo!

  • Mint Tea: The soothing warmth of mint tea pairs wonderfully, enhancing the peppermint flavors in the pie and providing a lovely finish to your meal. Its fragrant qualities offer a calming experience.

How to Store and Freeze Shamrock Swirl Pie

Fridge: Store any leftovers in an airtight container for up to 3 days. This keeps the pie fresh and prevents it from absorbing odors from the fridge.

Freezer: If you want to make the Shamrock Swirl Pie ahead of time, freeze it whole, wrapped tightly in plastic wrap and aluminum foil, for up to 1 month. Thaw in the fridge overnight before serving.

Reheating: While this pie is best served cold, if you prefer it slightly softer, let it sit at room temperature for about 15-20 minutes before slicing.

Serving: Cut into slices and garnish just before serving for that fresh, delightful finish.

Make Ahead Options

Make your Shamrock Swirl Pie even more convenient by prepping some components ahead of time! You can prepare the chocolate cookie crust up to 24 hours in advance—just press the mixture into the pie pan and store it covered in the refrigerator to keep it fresh. Additionally, mix the cream cheese filling (cream cheese, powdered sugar, peppermint extract, and food coloring) and store it separately in an airtight container for up to 3 days. When you’re ready to serve, simply whip the heavy cream and fold it into the creamy filling, pour it into the crust, and let the pie set in the fridge for at least 4 hours. This way, you’ll be able to create a stunning dessert with minimal effort on the day of your gathering!

Shamrock Swirl Pie Variations

Feel free to customize your Shamrock Swirl Pie with these exciting twists!

  • Gluten-Free Base: Use gluten-free chocolate cookie crumbs to accommodate dietary needs while maintaining that delicious chocolate flavor.

  • Nutty crust: Swap out chocolate cookie crumbs for crushed almond cookies or graham crackers mixed with some almond butter for added depth and crunch.

  • Vegan Delight: Replace cream cheese with silken tofu and use coconut cream in place of heavy whipping cream for a lush vegan version.

  • Mint Chocolate Chip: Stir in mini chocolate chips into the filling for delightful bursts of chocolatey goodness with every bite; it adds a lovely texture too!

  • Syrupy Sweetness: Drizzle caramel sauce atop the pie before garnishing for a rich, sweet twist that pairs beautifully with peppermint.

  • Choco-Mint Madness: Mix 1-2 tablespoons of chocolate syrup into the filling for deeper chocolate notes in every luscious scoop.

  • Spicy Kick: Add a pinch of cayenne pepper to the filling for a surprising, spicy contrast to the refreshing mint flavor.

  • Fruit Fusion: For a fruity twist, blend in some crushed raspberries or strawberries to the filling for a delightful blend of flavors and a splash of color!

Chef's Helpful Tips

  • When making the Shamrock Swirl Pie, ensure your cream cheese is fully softened before mixing to avoid lumps in your filling.
  • Use a spatula to gently fold in the whipped cream; overmixing can deflate the airy texture you want.
  • For a more vibrant green color, start with just a drop or two of food coloring and gradually add more until you achieve your desired shade.
  • Remember to chill the pie for a full 4 hours to allow it to set properly, which is crucial for the perfect slice presentation.

Shamrock Swirl Pie Recipe FAQs

How can I select the best ingredients for my Shamrock Swirl Pie?
Absolutely! For the best results, choose chocolate cookie crumbs that you love; a slightly bittersweet cookie will enhance the flavors. Ensure your cream cheese is at room temperature; this allows for easy blending, leading to a smooth filling. As for fresh mint, if you’re using it instead of peppermint extract, pick vibrant green leaves with no dark spots or wilting.

How should I store my Shamrock Swirl Pie?
I recommend storing any leftovers in an airtight container in the fridge for up to 3 days. This method keeps the pie fresh and prevents it from absorbing any unwanted odors. Always use parchment paper below the pie when sealing to make removal easier later!

Can I freeze Shamrock Swirl Pie?
Yes, indeed! To freeze, wrap the pie tightly in plastic wrap, then in aluminum foil, and place it in the freezer for up to 1 month. When you’re ready to enjoy it, transfer the pie to the fridge to thaw overnight. This helps preserve the texture and flavor, making for a delightful dessert when you’re ready to serve!

What should I do if my filling is too runny?
Very! If your filling turns out too runny, you might not have whipped the cream thoroughly or mixed it too aggressively. To troubleshoot, consider adding a bit of additional cream cheese, softened, to thicken the filling while gently folding it in. If you’ve already mixed in the whipped cream and it feels too loose, chill the pie a bit longer; it often firms up beautifully as it sets.

Are there any dietary considerations for this Shamrock Swirl Pie?
Absolutely! If you have guests with allergies, you can make some substitutions. For dairy-free options, use vegan cream cheese and whipped coconut cream. If you’re looking for a nut-free version, ensure your whipped topping is almond-free. Always check ingredient labels for cross-contamination if allergies are a concern.

Can I customize the flavors of my Shamrock Swirl Pie?
Very much so! You can play with the flavors by swapping peppermint extract for another extract, such as vanilla or almond. If you want to add a twist, consider adding some crushed candy canes for a crunch or a hint of espresso powder to the crust for a mocha flavor. Get creative—the more, the merrier!

Shamrock Swirl Pie

Shamrock Swirl Pie

Shamrock Swirl Pie is a delightful fusion of minty freshness and rich chocolate, perfect for any gathering.
Print Recipe Pin Recipe
Prep Time 20 minutes mins
Chilling Time 4 hours hrs
Total Time 4 hours hrs 20 minutes mins
Servings: 8 slices
Course: DESSERT RECIPES
Calories: 400
Ingredients Equipment Method Nutrition Notes

Ingredients
  

For the Crust
  • 1 cup chocolate cookie crumbs
  • 1/2 cup unsalted butter melted
For the Filling
  • 8 oz cream cheese softened
  • 1 cup powdered sugar
  • 1 tsp peppermint extract adjust to taste
  • 2 drops green food coloring more for vibrant color
  • 1 cup heavy whipping cream whipped until soft peaks form
For the Topping
  • 1/2 cup melted chocolate for drizzling
  • 1 cup whipped cream for garnish
  • 1/4 cup chocolate shavings or chips for garnish
  • 1 tbsp green sprinkles or edible glitter for garnish

Equipment

  • Mixing bowl
  • pie pan
  • Spatula

Method
 

Instructions
  1. Combine chocolate cookie crumbs and melted butter in a mixing bowl. Press the mixture firmly into the bottom of a pie pan to form a flavorful crust.
  2. Mix cream cheese, powdered sugar, peppermint extract, and a few drops of green food coloring in a separate mixing bowl. Beat until smooth and creamy.
  3. Fold in the whipped heavy cream gently to maintain light, airy texture.
  4. Pour the peppermint filling into your prepared chocolate crust. Smooth the top with a spatula.
  5. Drizzle melted chocolate over the top of the pie in a whimsical swirl pattern.
  6. Chill the pie in the refrigerator for at least 4 hours, or until set.
  7. Garnish with whipped cream, chocolate shavings or chips, and a sprinkle of green sprinkles or edible glitter.

Nutrition

Serving: 1sliceCalories: 400kcalCarbohydrates: 45gProtein: 4gFat: 25gSaturated Fat: 15gPolyunsaturated Fat: 2gMonounsaturated Fat: 7gCholesterol: 50mgSodium: 150mgPotassium: 200mgFiber: 2gSugar: 25gVitamin A: 500IUCalcium: 50mgIron: 1mg

Notes

Ensure your cream cheese is fully softened and avoid overmixing the whipped cream to maintain fluffiness.

Tried this recipe?

Let us know how it was!

Filed Under: BREAKFAST & BRUNCH

Cheese Danish

December 29, 2025 by JudyWhite Leave a Comment

Imagine the delightful aroma of freshly baked pastries wafting through your kitchen, pulling you into a realm of warmth and sweet indulgence. I recently found myself in the midst of a baking frenzy one evening, craving something both special and easy to whip up. That’s when I stumbled upon this irresistible Valentine’s Day Cheese Danish with Strawberry Hearts—a treat that effortlessly combines elegance and simplicity.

Whether you’re planning a romantic breakfast or simply want to impress your family, these charming danishes will have everyone swooning. With buttery puff pastry cradling a luscious cream cheese filling and vibrant strawberry accents, each heart-shaped delight is a joy to make and devour. Plus, they come together in just 35 minutes, making them the perfect antidote to fast food fatigue. Let’s embark on this delightful journey together and create these scrumptious heart-shaped pastries that are sure to lift spirits and satisfy sweet cravings!

Why You'll Love This Cheese Danish

  • This Cheese Danish is incredibly easy to prepare, making it a perfect choice for both novice and experienced bakers.
  • The delightful combination of creamy cheese and juicy strawberries creates an irresistible flavor that your taste buds will adore.
  • Its charming heart shape adds a beautiful visual appeal that will impress anyone you share it with, making it ideal for romantic occasions or family gatherings.
  • Plus, with a total preparation time of just 35 minutes, you can whip up these treats in no time and leave fast food behind.

Cheese Danish Ingredients

Whether you’re a baking pro or just starting out, gathering these ingredients will set you on the path to creating delightful Cheese Danish!

For the Pastry
• 1 sheet puff pastry – an easy-to-use base that provides a flaky, buttery texture.

For the Cream Cheese Filling
• 4 oz cream cheese – the star of the filling, providing a smooth and creamy contrast to the pastry.
• 2 tbsp white sugar – enhances sweetness and balances the tanginess of cream cheese.
• 1/2 tsp vanilla extract – infuses a warm, fragrant flavor that elevates the entire dish.
• red food coloring – to give your filling a vibrant hue, perfect for those charming strawberry hearts!

For the Strawberry Topping
• 1/2 C diced strawberries – adds a fresh, fruity burst that complements the creamy filling perfectly.

For the Egg Wash
• 1 large egg – provides a golden finish to the pastry.
• 1 tbsp cold water – helps dilute the egg for a smoother application.

Gather these ingredients, and get ready to make this heartwarming Cheese Danish that will leave everyone asking for seconds!

How to Make Cheese Danish

  1. Thaw the puff pastry sheet as per package directions, allowing it to become flexible for easy handling. This typically takes about 20-30 minutes; patience is key for perfect results!

  2. Preheat your oven to 400°F (200°C) and line a large baking sheet with parchment paper. This sets the stage for a beautifully baked Cheese Danish that won’t stick!

  3. Mix cream cheese, sugar, and vanilla together in a medium-sized bowl until light and fluffy. Add in a few drops of red food coloring to achieve that lovely, vibrant hue. Set this aside while we shape the pastry.

  4. Unfold the thawed puff pastry and using a 3-inch heart cookie cutter, cut out 7 hearts. Place them on the prepared baking sheet, ensuring they’re about 1 inch apart for even baking.

  5. Score a border around each heart using a sharp knife or smaller heart-shaped cookie cutter. Ensure it’s about 1/4 inch from the edge, but don’t cut all the way through; this will hold in the filling beautifully!

  6. Spoon about 1/2 tbsp of the cream cheese mixture onto each heart and spread it within the outlined border, creating a luscious filling that sets the tone for each bite.

  7. Divide the diced strawberries evenly among the danishes, sprinkling them on top of the cream cheese while keeping them inside the outlined border. This adds a fresh, fruity flair!

  8. Mix the egg and cold water together in a small bowl to create an egg wash. Gently apply this wash around the outside border of the pastry for a beautiful golden finish upon baking.

  9. Bake for 15-17 minutes, or until the edges start to turn a golden brown and the house fills with the heavenly aroma of baked pastries.

  10. Cool on the pan for 5 minutes before enjoying, allowing the flavors to meld and making them perfect for savoring!

Optional: Dust with powdered sugar before serving for an elegant touch.

Exact quantities are listed in the recipe card below.

How to Store and Freeze Cheese Danish

Room Temperature: Store leftover cheese danishes at room temperature for up to 1 day in an airtight container to maintain their freshness.

Fridge: If you plan to keep them longer, refrigerate the cheese danishes for up to 3 days in an airtight container. Reheat in the oven for 5-10 minutes to restore crispiness.

Freezer: For longer storage, freeze the unbaked cheese danishes for up to 2 months. Bake them directly from the freezer, adding a few extra minutes to the cooking time.

Reheating: To reheat previously baked danishes, place them in a preheated oven at 350°F for 10 minutes, ensuring they stay delicious and fluffy.

Cheese Danish Variations

Feel free to get creative and make this cheese danish your own with these delightful twists!

  • Fruit Medley: Substitute diced strawberries with other fresh fruits like blueberries or raspberries for a colorful and flavorful mix.

  • Chocolate Chip Add-In: Fold in mini chocolate chips into the cream cheese mixture for a decadently sweet surprise that melts in your mouth.

  • Nutty Texture: Add some chopped nuts, like pecans or almonds, to the filling for an added crunch that contrasts beautifully with the softness.

  • Cinnamon Swirl: Sprinkle a bit of cinnamon into the cream cheese mixture for a warm, comforting spice that elevates the overall flavor profile.

  • Maple Sweetness: Use maple syrup instead of white sugar in the cream cheese for a rich, autumn-inspired sweetness that makes every bite cozy.

  • Lemon Zing: Mix the juice and zest of a lemon into the cream cheese for a refreshing, tangy kick that brightens the palate.

  • Savory Variation: Swap out the strawberries with sautéed spinach and feta cheese for a deliciously unexpected savory version that’s perfect any time of day.

  • Heat Up: Add a pinch of cayenne pepper to the cream cheese mixture for a playful kick that’ll have your taste buds dancing!

Each of these variations invites you to explore new flavors and textures, ensuring that your cheese danish is always a delightful adventure!

Make Ahead Options

These delightful Cheese Danish are perfect for busy home cooks looking to save time without compromising on taste! You can prepare the cream cheese filling and cut the puff pastry hearts up to 24 hours in advance. Simply store the filling in an airtight container in the refrigerator to maintain its creamy texture and flavor. When you’re ready to bake, follow the final steps by spooning the filling onto the pastry hearts, adding the strawberry topping, and applying your egg wash. This approach makes it easy to whip up these sweet treats for an impromptu gathering or a cozy family breakfast, delivering delicious results with minimal effort!

What to Serve with Valentine’s Day Cheese Danish with Strawberry Hearts?

Creating a delightful spread around your enchanting danish will amplify the magic of any occasion.

  • Fresh Fruit Salad: A medley of seasonal fruits adds a burst of color and freshness, perfectly complementing the rich cheese filling.

  • Vanilla Yogurt Parfait: Creamy yogurt layered with granola and berries makes for a wholesome breakfast or snack that pairs beautifully with the pastry’s sweetness.

  • Sparkling Water with Lime: The crisp effervescence of sparkling water, brightened with a hint of lime, refreshes the palate between bites.

  • Chocolate-Covered Strawberries: These indulgent treats echo the fruity topping on the danish while offering a luxurious touch that’s ideal for a romantic meal.

  • Whipped Cream Topping: A dollop of freshly whipped cream adds richness and elegance, enhancing the creamy texture of the danish.

  • Coffee or Espresso: The bitter notes of coffee create a lovely contrast to the sweet danish, making it a perfect pairing for brunch or dessert.

  • Raspberry Sauce Drizzle: A tangy raspberry sauce not only adds visual appeal but also gives a tart counterbalance to the sweet cream cheese filling.

With these thoughtfully chosen pairings, your Cheese Danish will shine as the centerpiece of a warm and loving gathering.

Chef's Helpful Tips

  • When making Cheese Danish, always ensure your puff pastry is completely thawed for easier handling and better layering.
  • Avoid overmixing the cream cheese filling; a light and fluffy texture will enhance the overall taste and mouthfeel.
  • Use a sharp knife to score the border gently without cutting all the way through to maximize the filling capacity.
  • Keep a close eye on the baking time; start checking at 15 minutes to ensure a perfectly golden hue without burning the edges.

Valentine’s Day Cheese Danish with Strawberry Hearts Recipe FAQs

What type of strawberries should I use?
Absolutely, using fresh, ripe strawberries is key! Look for berries that are bright red, firm, and plump. Avoid any that have dark spots or appear soft, as they won’t have the optimal sweetness or texture.

How should I store leftover cheese danishes?
You can store leftover cheese danishes at room temperature for up to 1 day in an airtight container. If you’re hoping to keep them for longer, refrigerate them for up to 3 days, and remember to reheat them in the oven for about 5-10 minutes to regain their crispy texture.

Can I freeze the cheese danishes?
Yes, you can freeze them! I recommend freezing the unbaked danishes for up to 2 months. Simply assemble the danishes, place them on a baking sheet, and then freeze individually. Once frozen, transfer them to a zip-top bag. When you’re ready to bake, you can bake them directly from the freezer—just add a few extra minutes to the cooking time.

What if my puff pastry tears while I’m working with it?
Very common! If you find that your puff pastry tears, don’t worry. Simply pluck a small piece of dough from the scraps and gently patch it over the tear. You can use a little water to help adhere it, and the baking process will usually hide any imperfections!

Is this recipe suitable for pets?
I don’t recommend sharing this cheese danish with pets, as ingredients like cream cheese and egg can upset their stomachs. It’s always best to keep human treats away from furry friends.

Can I substitute any ingredients for allergies?
Certainly! If you’re allergic to dairy, you could try using a non-dairy cream cheese alternative. For egg substitutes in the wash, consider using almond milk or a dairy-free yogurt rubbed along the edges, though this may slightly alter the final appearance. Always check packaging labels for potential allergens!

Cheese Danish

Cheese Danish

This Cheese Danish is a delightful blend of flaky pastry and creamy filling, perfect for impressing loved ones.
Print Recipe Pin Recipe
Prep Time 20 minutes mins
Cook Time 15 minutes mins
Cooling Time 5 minutes mins
Total Time 35 minutes mins
Servings: 7 pieces
Course: DESSERT RECIPES
Cuisine: American
Calories: 180
Ingredients Equipment Method Nutrition Notes

Ingredients
  

For the Pastry
  • 1 sheet puff pastry an easy-to-use base that provides a flaky, buttery texture.
For the Cream Cheese Filling
  • 4 oz cream cheese the star of the filling, providing a smooth and creamy contrast to the pastry.
  • 2 tbsp white sugar enhances sweetness and balances the tanginess of cream cheese.
  • 1/2 tsp vanilla extract infuses a warm, fragrant flavor that elevates the entire dish.
  • red food coloring to give your filling a vibrant hue, perfect for those charming strawberry hearts!
For the Strawberry Topping
  • 1/2 cup diced strawberries adds a fresh, fruity burst that complements the creamy filling perfectly.
For the Egg Wash
  • 1 large egg provides a golden finish to the pastry.
  • 1 tbsp cold water helps dilute the egg for a smoother application.

Equipment

  • Oven
  • Baking sheet
  • parchment paper
  • Mixing bowl
  • cookie cutter
  • Knife

Method
 

How to Make Cheese Danish
  1. Thaw the puff pastry sheet according to the package directions, allowing it to become pliable and easy to work with.
  2. Preheat your oven to 400°F and line a large baking sheet with parchment paper to prevent sticking while baking.
  3. Mix cream cheese, white sugar, and vanilla extract in a medium-sized bowl until light and fluffy. Add a few drops of red food coloring for a delightful hue.
  4. Unfold the thawed puff pastry and, using a 3-inch heart cookie cutter, cut out 7 hearts. Place them on the baking sheet about 1 inch apart to allow for rising.
  5. Score a border by gently running a sharp knife or smaller heart-shaped cookie cutter about 1/4 inch from the edge of each heart, creating a frame without cutting all the way through.
  6. Spoon about 1/2 tablespoon of the cream cheese mixture onto each heart, spreading it gently within the scored border for a beautiful filling.
  7. Sprinkle the diced strawberries evenly on top of the cream cheese, ensuring they stay within the outline for an elegant presentation.
  8. Combine the egg and cold water in a small bowl to create an egg wash. Brush this mixture onto the outer border of the pastries for a shiny finish.
  9. Bake for 15-17 minutes, or until the edges turn a lovely golden brown and the pastry becomes beautifully puffed.
  10. Cool on the pan for about 5 minutes before indulging in these delightful treats.

Nutrition

Serving: 1pieceCalories: 180kcalCarbohydrates: 22gProtein: 4gFat: 8gSaturated Fat: 4gPolyunsaturated Fat: 1gMonounsaturated Fat: 3gCholesterol: 45mgSodium: 200mgPotassium: 120mgFiber: 1gSugar: 5gVitamin A: 500IUVitamin C: 3mgCalcium: 50mgIron: 1mg

Notes

Optional: Drizzle with melted chocolate for an extra layer of sweetness.

Tried this recipe?

Let us know how it was!

Filed Under: BREAKFAST & BRUNCH

Apple Roses Recipe

December 29, 2025 by JudyWhite Leave a Comment

The first bite into these delicate Apple Roses transports me to my grandmother’s kitchen, where the scent of fresh pastries mingled with the warm, comforting aroma of spiced apples. There’s something enchanting about the way these gorgeous blooms transform a simple mix of puff pastry and fruit into a stunning dessert that dazzles both the eyes and the palate.

I discovered this Apple Roses Recipe during a search for ways to elevate my baking game, and boy, was it a delightful find! With just a handful of ingredients that I always have on hand, I can impress guests or simply enjoy a treat that feels indulgent without all the fuss. The versatility of this recipe shines, making it perfect for dinner parties, cozy nights in, or even as a sweet surprise for someone special.

So, roll up your sleeves, and let’s bring a bit of elegance to your kitchen with these charming Apple Roses!

Why You'll Love This Apple Roses Recipe

  • This Apple Roses Recipe is incredibly easy to make, even for beginner bakers, with simple steps and minimal ingredients.
  • The delightful combination of sweet apples and flaky puff pastry creates a flavor experience that is simply irresistible.
  • Not only do they taste amazing, but these beautiful apple creations also serve as a stunning centerpiece that is sure to wow your guests.
  • This recipe is versatile enough for any occasion, whether you want to impress at a dinner party or enjoy a cozy night in.

Apple Roses Recipe Ingredients

Here’s everything you need to create these stunning Apple Roses!

For the Roses
• 3 whole Apples – choose your favorite variety for the best flavor and sweetness.
• 1 roll Puff pastry – ensure it’s thawed for easy handling.

For the Flavoring
• 2 tablespoon Lemon juice – prevents the apple slices from browning and adds a hint of brightness.
• 2 teaspoon Ground Cinnamon – enhances the warm, cozy notes of the apples.
• 2 tablespoon Light brown sugar – adds sweetness and a lovely caramel-like flavor.

For the Glaze
• 2 tablespoon Jam – use your favorite fruit jam to give the pastries an additional layer of sweetness.

Gather these ingredients, and you’re all set to create beautiful and delicious Apple Roses!

How to Make Apple Roses

  1. Thaw the puff pastry fully in the refrigerator before starting. This allows it to become pliable and easy to work with, ensuring a perfect crust every time.

  2. Prepare the lemon water by pouring the lemon juice into a medium bowl filled with cold water. This will help prevent your apple slices from browning while you work.

  3. Mix the brown sugar with the ground cinnamon in a small bowl until well combined. This enticing mixture will add a delightful sweetness and warmth to your apple roses.

  4. Spray a muffin pan with non-stick spray to prevent sticking and ensure easy removal of your beautiful creations once they’re baked.

  5. Core the apples and cut them in half lengthwise for easy slicing. Then, slice each half into very thin slices that will beautifully create the rose petals.

  6. Soak the apple slices in the lemon water, making sure they are fully submerged to keep them fresh and vibrant. Allow them to soak while you prepare the pastry.

  7. Roll out the puff pastry on a lightly floured surface to avoid sticking. Aim for an even thickness, about 1/8 inch, to ensure consistent baking.

  8. Slice the puff pastry into 6 even strips, each about 2 inches wide. Space them apart on your work surface for easy assembly.

  9. Brush each pastry strip with a thin layer of jam, mixed with a splash of hot water for spreadability. This sweet layer will enhance flavor and provide a beautiful glaze.

  10. Sprinkle the cinnamon brown sugar mixture generously over each strip, allowing the sweet warmth to infuse into the pastry and apples.

  11. Microwave the bowl of apple slices for 2 minutes to soften them slightly, making them easier to bend and shape into roses. Drain any excess water afterward.

  12. Arrange apple slices along the top edge of one pastry strip, overlapping them slightly to form petals. Imagine how lovely they will look once baked!

  13. Fold the bottom of the pastry strip upward and roll it gently to form a beautiful rose shape, encasing your apple slices with the pastry.

  14. Place each puff pastry rose in a muffin pan cavity, ensuring they hold their shape. Repeat the process with all your pastry strips.

  15. Chill the formed roses in the refrigerator while you preheat your oven to 400°F / 200°C. This helps the pastry maintain its shape during baking.

  16. Bake the roses on the middle rack for 40-45 minutes, or until golden brown and the apples are tender. Tent with foil if the tops brown too quickly.

  17. Cool the apple roses on a rack to prevent any sticking. Delight in the aroma as they cool—the anticipation will be worth it!

Optional: Dust with powdered sugar before serving for an elegant touch.
Exact quantities are listed in the recipe card below.

Make Ahead Options

These delightful Apple Roses are perfect for busy home cooks looking to save time! You can prep the pastry and apple filling up to 24 hours in advance. Start by slicing and soaking the apples in lemon water, then store them in a covered container in the refrigerator to maintain their freshness and prevent browning. You can also prepare the pastry strips and layer them with jam and cinnamon sugar, placing them in the muffin pan, then simply cover and refrigerate overnight. When you’re ready to bake, take them out, let them chill for a few minutes, and pop them into the oven for those restaurant-quality results with minimal effort!

What to Serve with Apple Roses?

Creating a memorable meal means pairing delightful desserts with the right accompaniments—here are some ideas to elevate your dining experience.

  • Vanilla Ice Cream: The creamy texture and sweet vanilla perfectly contrast the warm, flaky pastry, creating a blissful bite of heaven.
  • Whipped Cream: Light and airy, a dollop of freshly whipped cream adds an elegant touch that pairs beautifully with the sweetness of the apples.
  • Caramel Sauce: Drizzling warm caramel over the apple roses enhances their sweetness and adds a rich, gooey element that’s simply irresistible.
  • Coffee or Espresso: The bold flavors of a rich brew will beautifully counterbalance the sweetness of the roses, making for a perfect end to a meal.
  • Cinnamon Sugar Doughnuts: For those who adore cinnamon, serving these soft, sugary treats alongside your apple roses enhances the cozy, spiced theme.
  • Berry Compote: A tart berry compote brings vibrant color and a contrasting zing, cutting through the richness of the pastry while adding freshness to the plate.
  • Tea: Choose a floral or chai tea to complement the sweet and spicy aromas of the apple roses, creating a warm and inviting experience.
  • Chocolate Sauce: A drizzle of chocolate adds an indulgent twist, pairing well with the spiced apples for an extra layer of decadence.

These suggestions not only enhance your Apple Roses Recipe but create a lovely symphony of flavors that will delight your guests, making every bite an unforgettable moment!

How to Store and Freeze Apple Roses

Fridge: Keep any leftover Apple Roses wrapped in plastic wrap or in an airtight container for up to 3 days to maintain their freshness and flaky texture.

Freezer: Freeze fully cooled Apple Roses in a single layer on a baking sheet, then transfer to a freezer-safe container for up to 2 months.

Reheating: To reheat, place frozen Apple Roses directly in a preheated oven at 350°F (175°C) for about 15-20 minutes, until warmed through. Enjoy them as if they were just baked!

Apple Roses Recipe Variations

Feel free to let your creativity shine and customize this recipe into something uniquely yours!

  • Nutty Surprise: Add chopped walnuts or pecans to the cinnamon sugar mixture for a delightful crunch and nutty flavor twist. Just imagine the additional texture!

  • Berry Blast: Incorporate thinly sliced strawberries or raspberries between the apple layers for a burst of tartness that beautifully contrasts the sweetness.

  • Chocolaty Delight: Drizzle melted chocolate over the finished roses for an indulgent touch that elevates these pastries into the realm of dessert heaven.

  • Spiced Up: Add a pinch of nutmeg or ginger to the cinnamon sugar for extra warmth and spice. It adds a cozy note that will beckon everyone to the table!

  • Caramel Drizzle: After baking, drizzle warm caramel sauce over the top of each rose for an added layer of sweetness and elegance. Your guests will be swooning!

  • Citrus Zest: Mix some lemon or orange zest into the cinnamon sugar for a bright, zesty flavor that enhances the apples without overpowering them.

  • Savory Twist: Try replacing apples with sliced savory veggies like zucchini and bell peppers for an equally stunning appetizer that takes a different flavor direction.

  • Vegan Option: Substitute the puff pastry with a vegan alternative and use maple syrup instead of jam for a delightful and plant-based variation everyone will enjoy.

Chef's Helpful Tips

  • For making the Apple Roses, ensure you slice the apples as thinly as possible to achieve delicate, petal-like shapes that bake beautifully.
  • Remember to soak the apple slices in lemon water immediately after cutting to prevent browning, which will keep their color vibrant.
  • When rolling out the puff pastry, try to maintain even thickness for consistent results, as uneven pastry can lead to uneven baking.
  • Finally, keep an eye on baking time; if the apples start to brown too much, tent them with foil to protect them while the pastry finishes cooking.

Apple Roses Recipe FAQs

What type of apples should I choose for this Apple Roses Recipe?
Absolutely! For the best flavor, I recommend using a mix of sweet and tart apples, like Granny Smith and Honeycrisp. This combination adds depth and complexity to your roses, making each bite more delightful.

How should I store leftover Apple Roses?
Keep any leftover Apple Roses wrapped in plastic wrap or in an airtight container in the refrigerator for up to 3 days. This will maintain their delightful flaky texture and prevent them from drying out.

Can I freeze Apple Roses, and if so, how?
Very! To freeze your Apple Roses, allow them to cool completely after baking. Then, lay them in a single layer on a baking sheet and place in the freezer until solid. Once frozen, transfer them to a freezer-safe container or bag. They can be stored for up to 2 months. When you’re ready to enjoy, simply reheat them in a preheated oven at 350°F (175°C) for about 15-20 minutes until warmed through.

What if my apple slices turn brown while I’m preparing the recipe?
It happens! If you notice that some apple slices are browning, simply toss them back into the bowl of lemon water if you have a bit left. The acidity in the lemon juice will help brighten their color. Make sure to keep them submerged while you work on the pastry to prevent browning.

Are there any dietary considerations I should be aware of when making these Apple Roses?
Absolutely! If you’re cooking for someone with dietary restrictions, consider that puff pastry often contains gluten. You can look for gluten-free puff pastry options or make your own at home. Additionally, check that the jam you use doesn’t contain any allergens, especially if you’re serving these to children or guests with sensitivities. Always feel free to adjust ingredients according to your needs!

How can I make my Apple Roses more visually appealing?
I often make my Apple Roses pop by dusting them with powdered sugar just before serving. This simple touch adds elegance and a slight sweetness! You can also experiment with different jams for a variety of flavors and colors. Get creative with your presentation—your guests will be impressed!

Apple Roses Recipe

Apple Roses Recipe

This Apple Roses Recipe transforms simple ingredients into a stunning dessert, perfect for any occasion.
Print Recipe Pin Recipe
Prep Time 30 minutes mins
Cook Time 45 minutes mins
Chilling Time 10 minutes mins
Total Time 1 hour hr 25 minutes mins
Servings: 6 roses
Course: DESSERT RECIPES
Cuisine: American
Calories: 150
Ingredients Equipment Method Nutrition Notes

Ingredients
  

For the Roses
  • 3 whole Apples choose your favorite variety
  • 1 roll Puff pastry ensure it’s thawed
For the Flavoring
  • 2 tablespoon Lemon juice prevents browning
  • 2 teaspoon Ground Cinnamon enhances warm notes
  • 2 tablespoon Light brown sugar adds sweetness
For the Glaze
  • 2 tablespoon Jam use your favorite fruit jam

Equipment

  • muffin pan
  • medium bowl
  • Small bowl
  • Microwave

Method
 

How to Make Apple Roses
  1. Thaw the puff pastry fully in the refrigerator before starting.
  2. Prepare the lemon water by pouring the lemon juice into a medium bowl filled with cold water.
  3. Mix the brown sugar with the ground cinnamon in a small bowl until well combined.
  4. Spray a muffin pan with non-stick spray.
  5. Core the apples and cut them in half lengthwise for easy slicing.
  6. Soak the apple slices in the lemon water.
  7. Roll out the puff pastry on a lightly floured surface to avoid sticking.
  8. Slice the puff pastry into 6 even strips, each about 2 inches wide.
  9. Brush each pastry strip with a thin layer of jam.
  10. Sprinkle the cinnamon brown sugar mixture generously over each strip.
  11. Microwave the bowl of apple slices for 2 minutes to soften them slightly.
  12. Arrange apple slices along the top edge of one pastry strip, overlapping them slightly.
  13. Fold the bottom of the pastry strip upward and roll it gently.
  14. Place each puff pastry rose in a muffin pan cavity.
  15. Chill the formed roses in the refrigerator while you preheat your oven to 400°F / 200°C.
  16. Bake the roses on the middle rack for 40-45 minutes.
  17. Cool the apple roses on a rack before serving.
  18. Dust with powdered sugar before serving, if desired.

Nutrition

Serving: 1roseCalories: 150kcalCarbohydrates: 25gProtein: 1gFat: 6gSaturated Fat: 2gSodium: 100mgPotassium: 150mgFiber: 2gSugar: 10gVitamin A: 2IUVitamin C: 5mgCalcium: 1mgIron: 2mg

Notes

For best results, slice apples thinly and soak immediately in lemon water to prevent browning.

Tried this recipe?

Let us know how it was!

Filed Under: BREAKFAST & BRUNCH

Cheese Danish

December 29, 2025 by JudyWhite Leave a Comment

As the days grow longer and the air turns sweeter, I find myself dreaming of delightful treats that capture the essence of love and joy. That’s where my Valentine’s Day Cheese Danish with Strawberry Hearts comes in. Picture this: the delicate layers of crisp puff pastry cradling a luscious cream cheese filling, all adorned with vibrant strawberry pieces that evoke a sense of celebration. When I first made these charming danishes, I was thrilled to discover how effortlessly they combine artistry and indulgence.

Perfect for impressing loved ones or simply indulging yourself, this recipe offers a playful twist on a classic favorite. The best part? It comes together in just 35 minutes! Whether you’re treating yourself after a long week or surprising someone special, these cheese danishes promise to elevate any occasion. So, let’s get ready to create something truly magical and delicious that’s sure to steal hearts!

Why You'll Love This Cheese Danish

  • This Cheese Danish is incredibly easy to make, allowing you to whip up a stunning treat in just 35 minutes.
  • The combination of cream cheese and fresh strawberries offers a delightful burst of flavor that will leave everyone wanting more.
  • Its versatile nature makes it perfect for any occasion, whether it’s a cozy breakfast or a festive dessert.
  • Not to mention, the visual appeal of these heart-shaped pastries adds a romantic touch that is sure to impress your loved ones.

Cheese Danish Ingredients

For the Danish
• 1 sheet puff pastry – a flaky base that provides the perfect contrast to the creamy filling.
• 4 oz cream cheese – this creates a rich, smooth filling that pairs beautifully with strawberries.
• 2 tbsp white sugar – sweetness that balances the tanginess of the cream cheese, enhancing the overall flavor.
• 1/2 tsp vanilla extract – adds a warm, aromatic note that elevates the overall taste of the cheese danish.

For the Toppings
• red food colouring – just a few drops bring a playful vibrancy to the cream cheese mixture, making it visually appealing.
• 1/2 C diced strawberries – fresh, juicy bites that add a delightful fruity contrast to the creamy filling.

For the Egg Wash
• 1 large egg – this helps achieve a beautiful golden-brown color on the pastry edges.
• 1 tbsp cold water – mixing with the egg creates a smooth wash that enhances the shine of your baked cheese danishes.

With these delicious cheese danish ingredients, you can create an indulgent treat that showcases love—perfect for Valentine’s Day or any sweet occasion!

How to Make Cheese Danish

  1. Thaw the puff pastry sheet according to the package directions, allowing it to become pliable and easy to work with.

  2. Preheat your oven to 400°F and line a large baking sheet with parchment paper to prevent sticking while baking.

  3. Mix cream cheese, white sugar, and vanilla extract in a medium-sized bowl until light and fluffy. Add a few drops of red food coloring for a delightful hue.

  4. Unfold the thawed puff pastry and, using a 3-inch heart cookie cutter, cut out 7 hearts. Place them on the baking sheet about 1 inch apart to allow for rising.

  5. Score a border by gently running a sharp knife or smaller heart-shaped cookie cutter about 1/4 inch from the edge of each heart, creating a frame without cutting all the way through.

  6. Spoon about 1/2 tablespoon of the cream cheese mixture onto each heart, spreading it gently within the scored border for a beautiful filling.

  7. Sprinkle the diced strawberries evenly on top of the cream cheese, ensuring they stay within the outline for an elegant presentation.

  8. Combine the egg and cold water in a small bowl to create an egg wash. Brush this mixture onto the outer border of the pastries for a shiny finish.

  9. Bake for 15-17 minutes, or until the edges turn a lovely golden brown and the pastry becomes beautifully puffed.

  10. Cool on the pan for about 5 minutes before indulging in these delightful treats.

Optional: Drizzle with melted chocolate for an extra layer of sweetness.

Exact quantities are listed in the recipe card below.

Cheese Danish Variations

Feel free to get creative and make this cheese danish your own with these delightful twists!

  • Fruit Medley: Substitute diced strawberries with other fresh fruits like blueberries or raspberries for a colorful and flavorful mix.

  • Chocolate Chip Add-In: Fold in mini chocolate chips into the cream cheese mixture for a decadently sweet surprise that melts in your mouth.

  • Nutty Texture: Add some chopped nuts, like pecans or almonds, to the filling for an added crunch that contrasts beautifully with the softness.

  • Cinnamon Swirl: Sprinkle a bit of cinnamon into the cream cheese mixture for a warm, comforting spice that elevates the overall flavor profile.

  • Maple Sweetness: Use maple syrup instead of white sugar in the cream cheese for a rich, autumn-inspired sweetness that makes every bite cozy.

  • Lemon Zing: Mix the juice and zest of a lemon into the cream cheese for a refreshing, tangy kick that brightens the palate.

  • Savory Variation: Swap out the strawberries with sautéed spinach and feta cheese for a deliciously unexpected savory version that’s perfect any time of day.

  • Heat Up: Add a pinch of cayenne pepper to the cream cheese mixture for a playful kick that’ll have your taste buds dancing!

Each of these variations invites you to explore new flavors and textures, ensuring that your cheese danish is always a delightful adventure!

What to Serve with Valentine’s Day Cheese Danish with Strawberry Hearts?

Creating a delightful spread around your enchanting danish will amplify the magic of any occasion.

  • Fresh Fruit Salad: A medley of seasonal fruits adds a burst of color and freshness, perfectly complementing the rich cheese filling.

  • Vanilla Yogurt Parfait: Creamy yogurt layered with granola and berries makes for a wholesome breakfast or snack that pairs beautifully with the pastry’s sweetness.

  • Sparkling Water with Lime: The crisp effervescence of sparkling water, brightened with a hint of lime, refreshes the palate between bites.

  • Chocolate-Covered Strawberries: These indulgent treats echo the fruity topping on the danish while offering a luxurious touch that’s ideal for a romantic meal.

  • Whipped Cream Topping: A dollop of freshly whipped cream adds richness and elegance, enhancing the creamy texture of the danish.

  • Coffee or Espresso: The bitter notes of coffee create a lovely contrast to the sweet danish, making it a perfect pairing for brunch or dessert.

  • Raspberry Sauce Drizzle: A tangy raspberry sauce not only adds visual appeal but also gives a tart counterbalance to the sweet cream cheese filling.

With these thoughtfully chosen pairings, your Cheese Danish will shine as the centerpiece of a warm and loving gathering.

How to Store and Freeze Cheese Danish

Room Temperature: Store leftover cheese danishes at room temperature for up to 1 day in an airtight container to maintain their freshness.

Fridge: If you plan to keep them longer, refrigerate the cheese danishes for up to 3 days in an airtight container. Reheat in the oven for 5-10 minutes to restore crispiness.

Freezer: For longer storage, freeze the unbaked cheese danishes for up to 2 months. Bake them directly from the freezer, adding a few extra minutes to the cooking time.

Reheating: To reheat previously baked danishes, place them in a preheated oven at 350°F for 10 minutes, ensuring they stay delicious and fluffy.

Make Ahead Options

These Valentine’s Day Cheese Danish are perfect for busy home cooks who want to prepare ahead of time! You can mix the cream cheese filling and refrigerate it for up to 3 days, just keep it in an airtight container to maintain its creamy texture. Additionally, you can cut out the heart shapes from the puff pastry and store them on the baking sheet, covered with plastic wrap for up to 24 hours in the fridge. When you’re ready to bake, simply add the filling and strawberries, brush with the egg wash, and pop them in the preheated oven. This way, you’ll enjoy the same delightful flavor and fresh quality while saving precious time during your special breakfast or celebration!

Chef's Helpful Tips

  • When working with puff pastry for the Cheese Danish, ensure it is fully thawed before handling to achieve the perfect flaky texture.
  • Avoid overmixing the cream cheese filling to keep it light and airy, which will enhance the overall creaminess.
  • To make scoring the pastry easier, use a very sharp knife to create a clean border without tearing through the dough.
  • Baking the pastries until they are golden brown not only improves their appearance but also ensures a deliciously crispy texture that contrasts beautifully with the creamy filling.

Valentine’s Day Cheese Danish with Strawberry Hearts Recipe FAQs

What type of strawberries should I use for the Cheese Danish?
I recommend using fresh, ripe strawberries for the best flavor and texture. Look for strawberries that are vibrant red with no dark spots or mushy areas. If they’re in season, they are naturally sweeter and will enhance the overall taste of your danish.

How should I store leftover Cheese Danish?
For the best freshness, store your leftover Cheese Danish at room temperature in an airtight container for up to 2 days. If you’d like to keep them for longer, transfer them to the fridge where they can last up to 4 days. Just be sure to wrap them tightly to maintain their delightful flaky texture.

Can I freeze Cheese Danish, and if so, how?
Absolutely! Freezing Cheese Danish is a great way to enjoy them later. To do this, wrap each individual danish in plastic wrap, then place them in a labeled freezer bag. They should keep well for up to 2 months. When you’re ready to enjoy, simply thaw them in the fridge overnight, then reheat in a 350°F oven for about 10 minutes to restore that crispy goodness.

What if my puff pastry isn’t rising properly?
If your puff pastry isn’t rising as it should, ensure that it’s fully thawed and at room temperature before baking. The key is to avoid pressing down on the pastry while scoring or assembling your danishes. Also, an oven that’s not hot enough can affect puffing, so always preheat to the right temperature! If in doubt, you can check with an oven thermometer.

Are these Cheese Danish safe for my pet?
While the ingredients in this Cheese Danish are safe for humans, you should keep them away from pets. In particular, cream cheese is high in fat and could upset your pet’s stomach, while sugar isn’t recommended for animals. Always opt for pet-friendly treats made specifically for them!

Cheese Danish

Cheese Danish

Delight in this Cheese Danish, a perfect blend of cream cheese and strawberries encapsulated in flaky pastry, ideal for any occasion.
Print Recipe Pin Recipe
Prep Time 20 minutes mins
Cook Time 15 minutes mins
Total Time 35 minutes mins
Servings: 7 danishes
Course: DESSERT RECIPES
Calories: 240
Ingredients Equipment Method Nutrition Notes

Ingredients
  

For the Danish
  • 1 sheet puff pastry a flaky base that provides the perfect contrast to the creamy filling.
  • 4 oz cream cheese this creates a rich, smooth filling that pairs beautifully with strawberries.
  • 2 tbsp white sugar sweetness that balances the tanginess of the cream cheese.
  • 1/2 tsp vanilla extract adds a warm, aromatic note.
For the Toppings
  • red food colouring just a few drops bring a playful vibrancy to the cream cheese mixture.
  • 1/2 C diced strawberries fresh, juicy bites that add a delightful fruity contrast.
For the Egg Wash
  • 1 large egg this helps achieve a beautiful golden-brown color.
  • 1 tbsp cold water mixing with the egg creates a smooth wash.

Equipment

  • Oven
  • Baking sheet
  • parchment paper
  • Mixing bowl
  • cookie cutter

Method
 

How to Make Cheese Danish
  1. Thaw the puff pastry sheet according to the package directions.
  2. Preheat your oven to 400°F and line a large baking sheet with parchment paper.
  3. Mix cream cheese, white sugar, and vanilla extract in a medium-sized bowl until light and fluffy. Add red food coloring.
  4. Unfold the thawed puff pastry and cut out 7 hearts using a 3-inch heart cookie cutter.
  5. Score a border about 1/4 inch from the edge of each heart.
  6. Spoon about 1/2 tablespoon of the cream cheese mixture onto each heart.
  7. Sprinkle the diced strawberries evenly on top of the cream cheese.
  8. Combine the egg and cold water in a small bowl to create an egg wash. Brush this mixture onto the outer border.
  9. Bake for 15-17 minutes, until the edges turn golden brown.
  10. Cool on the pan for about 5 minutes before serving.

Nutrition

Serving: 1danishCalories: 240kcalCarbohydrates: 30gProtein: 4gFat: 12gSaturated Fat: 7gCholesterol: 70mgSodium: 120mgPotassium: 90mgFiber: 1gSugar: 10gVitamin A: 500IUVitamin C: 2mgCalcium: 30mgIron: 1mg

Notes

Optional: Drizzle with melted chocolate for an extra layer of sweetness.

Tried this recipe?

Let us know how it was!

Filed Under: BREAKFAST & BRUNCH

  • « Previous Page
  • 1
  • …
  • 6
  • 7
  • 8
  • 9
  • 10
  • …
  • 14
  • Next Page »

Recent Posts

  • Crispy Potatoes in Oven
  • Lucky Charms Pancakes
  • Cheeseburger
  • Boiled Corn on the Cob
  • St. Patrick’s Day Dessert Parfaits

Recent Comments

No comments to show.

Footer

  • Contact
  • Privacy Policy
  • About Us
  • Terms
  • ↑ back to top

Copyright © 2024 www.Forkono.com

Table Of Content