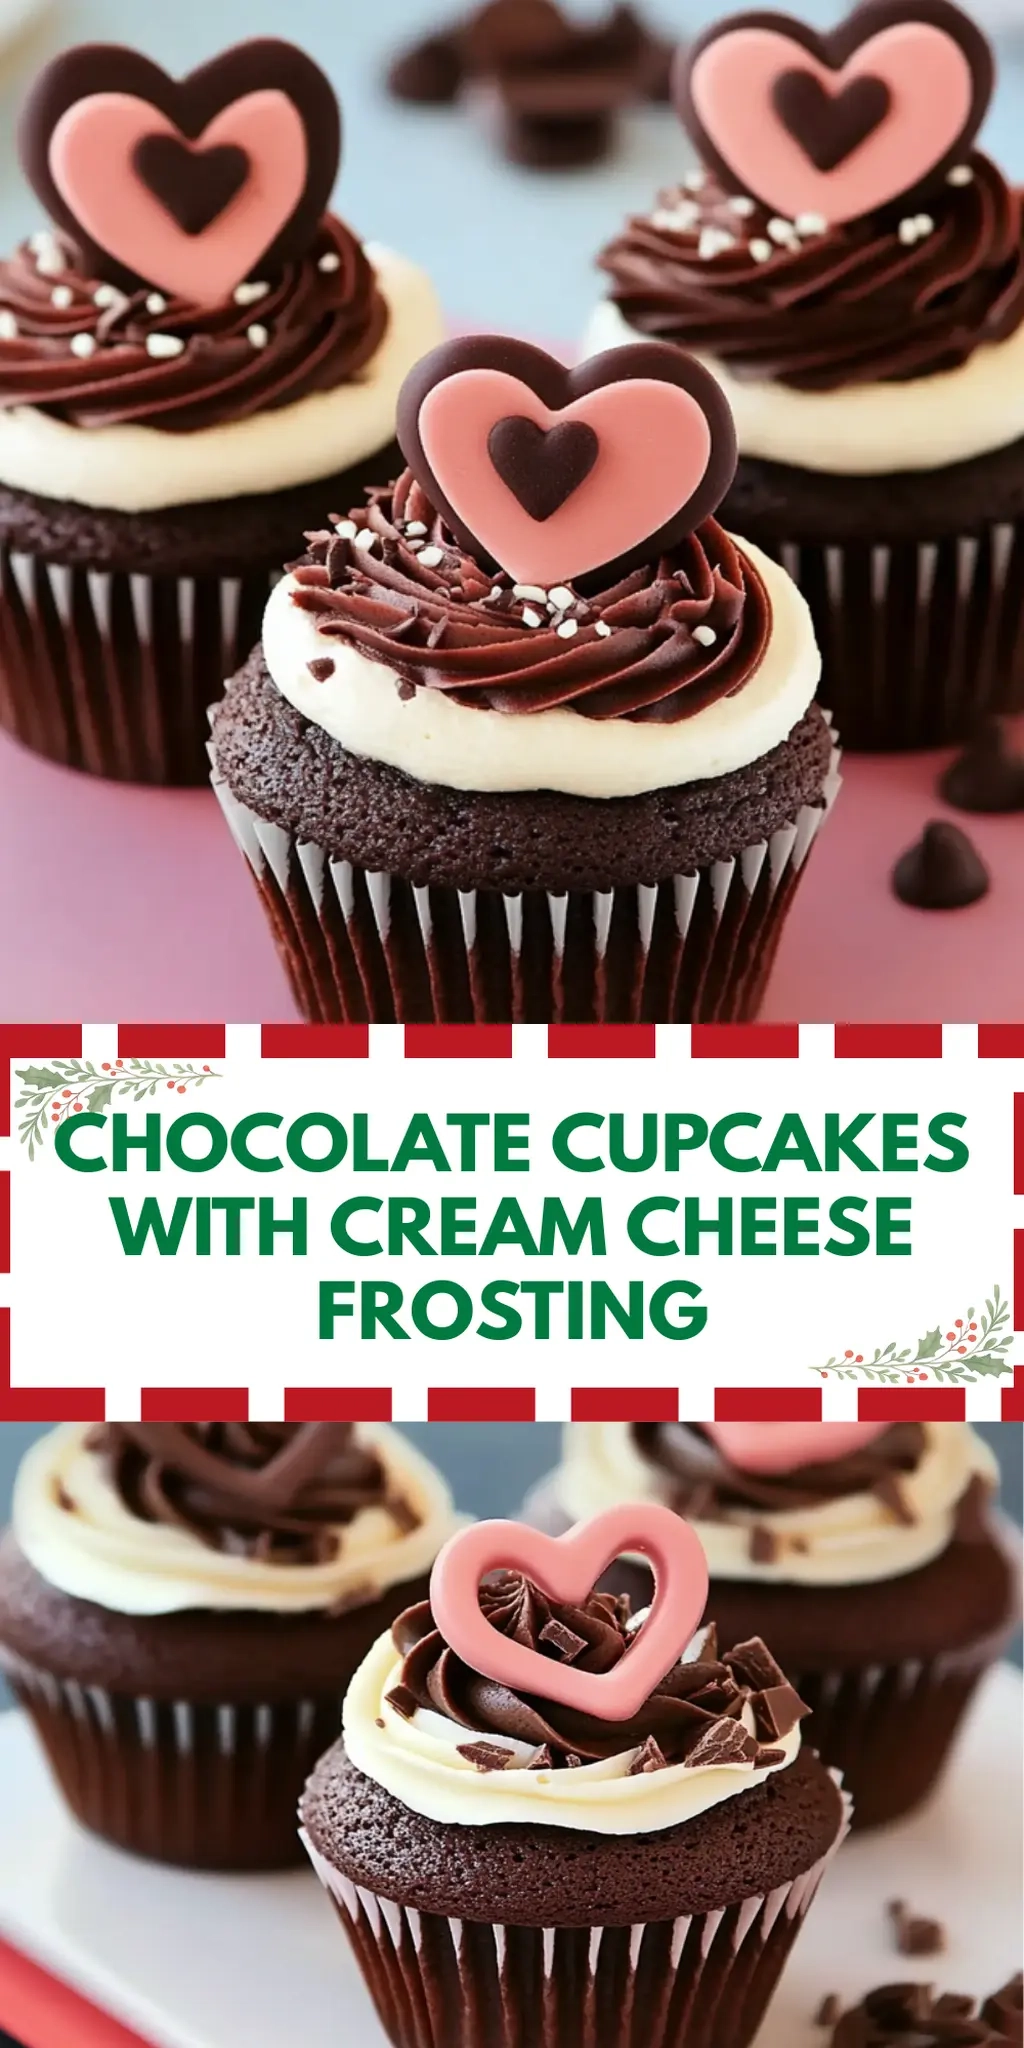
Forkono

  • BREAKFAST & BRUNCH
  • DESSERT RECIPES
  • DINNER RECIPES
  • LUNCH RECIPES
  • About uS
  • SNACKS & APPETIZERS
menu icon
go to homepage
  • BREAKFAST & BRUNCH
  • DESSERT RECIPES
  • DINNER RECIPES
  • LUNCH RECIPES
  • About uS
  • SNACKS & APPETIZERS
search icon
Homepage link
  • BREAKFAST & BRUNCH
  • DESSERT RECIPES
  • DINNER RECIPES
  • LUNCH RECIPES
  • About uS
  • SNACKS & APPETIZERS
×

Fudgy Brownies

December 20, 2025 by JudyWhite Leave a Comment

There’s a certain joy that washes over me when I pull a batch of fudgy brownies out of the oven. The rich, chocolatey aroma fills the kitchen, wrapping me in a warm embrace that’s impossible to resist. You know that moment when you take your first bite and it’s as if the world fades away, one fudgy layer at a time? That’s the magic of these brownies—a simple concoction of semi-sweet chocolate chips and just the right amount of espresso powder that elevates the experience to pure bliss.

After a long day, when the allure of fast food calls but I crave something heartwarming, these fudgy brownies come to the rescue. Not only do they satisfy that sweet tooth, but they also prove to be an easy, crowd-pleasing treat that makes everyone feel special. With just a handful of ingredients and a few steps, you’re on your way to creating your new go-to dessert. Grab your apron and let’s dive into this deliciously simple recipe that promises comfort in every bite!

Why You'll Love This Fudgy Brownies

  • These fudgy brownies are incredibly easy to make, requiring just a handful of simple ingredients.
  • The rich and decadent chocolate flavor will have you swooning with every bite, making them impossible to resist.
  • Their versatility means you can add your favorite nuts or toppings to customize them just the way you like.
  • Visually appealing with their shiny top and fudgy texture, they are sure to impress anyone lucky enough to taste them.

Fudgy Brownie Ingredients

Unleash the chocolatey magic!

For the Batter
• 1.5 cups semi sweet chocolate chips – perfect for achieving that ooey-gooey texture.
• 3/4 cup salted butter – adds richness and enhances flavor.
• 1/2 cup all purpose flour – helps bind the brownies together without making them cakey.
• 3/4 cup cocoa powder, Dutch process – intensifies the chocolate flavor for deeper fudginess.
• 1 tsp espresso powder – boosts the chocolate flavor; don’t skip it if you love rich taste!
• 1/2 tsp salt – enhances sweetness and balances the overall flavor.
• 1.75 cups granulated white sugar – provides sweetness and contributes to chewiness.
• 4 eggs – adds moisture and creates that signature fudgy texture.
• 1 tbsp vanilla (15 ml) – infuses warmth and enhances the chocolatey taste.

Feel free to play with these ingredients in your own way, because every twist can lead to a new favorite in your fudgy brownie repertoire!

How to Make Fudgy Brownies

  1. Preheat Oven: Begin by preheating your oven to 350°F (175°C), prepping a cozy environment for those fudgy brownies to bake perfectly.

  2. Prepare Pan: Lightly spray a 9×9″ metal baking pan with non-stick spray. This will ensure your brownies come out easily and stay perfectly moist.

  3. Melt Chocolate: In a microwave-safe bowl, melt the semi-sweet chocolate chips and salted butter together. Stir occasionally until smooth, then let it cool slightly.

  4. Sift Dry Ingredients: In a small bowl, sift together the all-purpose flour, cocoa powder, espresso powder, and salt. This helps mix and aerate, giving you that dreamy texture.

  5. Mix Wet Ingredients: In a large bowl, combine the eggs, granulated sugar, and vanilla. Mix with an electric mixer on medium speed for about three minutes, until the mixture becomes pale in color.

  6. Combine Chocolate: Gently fold the cooled chocolate and butter mixture into the egg mixture. Make sure they’re combined without over-mixing; you want fudgy brownies, not cake!

  7. Add Dry Ingredients: Tip in the dry ingredients and gently fold until just combined, ensuring not to overwork the batter to keep it fudgy.

  8. Bake the Brownies: Pour the batter into the prepared pan, spreading it evenly. Bake in the preheated oven for 34-40 minutes. The center should wobble just slightly when shaken; that’s the sweet spot!

  9. Cool Completely: After baking, let your brownies cool completely in the pan for at least three hours. This wait is essential for that perfect fudgy texture.

  10. Slice and Enjoy: Once cooled, remove the brownies from the pan and cut them into 16 squares. Get ready to experience pure bliss with each bite!

Optional: Top with a sprinkle of sea salt for a delightful contrast.

Exact quantities are listed in the recipe card below.

How to Store and Freeze Fudgy Brownies

Room Temperature: Keep fudgy brownies in an airtight container at room temperature for up to 3 days to maintain their deliciously moist texture.

Fridge: If you’d like them to last a bit longer, store brownies in the refrigerator for up to 1 week, but be mindful they may dry out slightly.

Freezer: For longer storage, wrap individual brownies tightly in plastic wrap, then place them in a freezer-safe bag. They’ll stay fresh in the freezer for 3 months—just thaw at room temperature before indulging!

Reheating: To enjoy warmed fudgy brownies, pop them in the microwave for about 10-15 seconds, or until just warmed through—enjoy that gooey goodness!

Make Ahead Options

These fudgy brownies are perfect for meal prep, saving you time on busy weeknights! You can prepare the brownie batter up to 24 hours in advance by mixing all the ingredients and storing the batter in an airtight container in the refrigerator. Be sure to bring it to room temperature before baking to maintain that luscious fudgy texture. Alternatively, baked brownies can be stored in an airtight container at room temperature for up to 3 days or frozen for up to 3 months. When it’s time to serve, simply reheat the brownies in the oven for a few minutes if needed, and you’ll enjoy their rich, chocolatey goodness just as if they were freshly baked!

What to Serve with Fudgy Brownies?

Indulging in fudgy brownies is just the beginning; let’s create the perfect spread of delightful accompaniments that elevate this experience.

  • Vanilla Ice Cream: Creamy and cool, it balances the rich chocolate, creating a heavenly contrast that’s irresistible. A scoop nestled beside warm brownies is pure magic—a classic pairing for any dessert lover.

  • Fresh Berries: Tart raspberries or sweet strawberries brighten up the plate, adding a pop of color and a refreshing bite. Their natural acidity cuts through the chocolate richness, enhancing every velvety bite.

  • Chocolate Sauce: Drizzle on a rich chocolate sauce for an extra hit of decadence. It takes your fudgy brownies into the realm of indulgence, perfect for those who crave an even more intense chocolate experience.

  • Whipped Cream: Light and airy, whipped cream provides a delightful textural contrast. Top your brownies for an elegant twist; maybe even add a sprinkle of cocoa for a touch of sophistication.

  • Espresso: A warm cup of espresso makes for a fantastic pairing, enhancing the brownie’s chocolatey flavor. The bitterness of the coffee perfectly complements the sweetness of your treat, creating harmony in every sip and bite.

  • Caramel Drizzle: Sweet and salty caramel adds an indulgent touch. Drizzling it over your brownies transforms this dessert into an unforgettable treat with layers of flavor.

  • Peanut Butter Cream: A rich peanut butter frosting takes your brownies to the next level. The nutty flavor pairs beautifully with chocolate; every bite feels like a cozy hug!

  • Milk or Plant-based Milks: A cold glass of milk is a classic accompaniment that washes down the sweet richness beautifully. Choose almond or oat milk for a dairy-free option; both complement the fudgy goodness!

  • Chocolate Mousse: For an elegant finish, serve a small dollop of chocolate mousse beside your brownies. The airy texture provides a delightful contrast that adds sophistication to your dessert table.

Fudgy Brownie Variations

Let your creativity shine as you customize these fudgy brownies to suit your taste and dietary needs!

  • Nutty Delight: Stir in 1 cup of chopped walnuts or pecans for added crunch and a toasty flavor. They bring delightful texture and rich nuttiness that beautifully complements the chocolate.

  • Minty Fresh: Add 1 teaspoon of peppermint extract for a refreshing twist that makes every bite feel like a summer breeze. Chocolate and mint are an iconic pairing that never fails to delight!

  • Gluten-Free: Substitute all-purpose flour with a gluten-free blend or almond flour to accommodate gluten sensitivities without compromising flavor. Your fudgy goodness will still shine through deliciously!

  • Spicy Kick: Incorporate 1/2 teaspoon of cayenne pepper or chili powder to introduce a mild heat that beautifully contrasts the sweetness. The warmth adds a unique layer to your brownies that will surprise and delight.

  • Dairy-Free: Opt for coconut or vegan butter to replace the salted butter and use dairy-free chocolate chips. Enjoy a rich and fudgy experience that’s suitable for a dairy-free lifestyle!

  • Add-Ins Galore: Fold in 1/2 cup of your favorite chocolate chunks or caramel pieces for bursts of flavor in each bite. These tasty surprises make every brownie a little adventure.

  • Fruit Fusion: Mix in 1/2 cup of dried cherries or raspberries for a tart contrast that balances the sweetness perfectly. This twist adds a juicy, fruity surprise that’s simply irresistible!

  • Cheesecake Swirl: Top your brownie batter with dollops of cream cheese mixture and swirl gently before baking for a decadent cheesecake fudge brownie. The creamy tang of cheese brings a heavenly richness to this classic dessert!

Chef's Helpful Tips

  • When making fudgy brownies, be sure to melt the chocolate and butter gently to avoid burning, which can ruin the flavor.
  • A common mistake is over-mixing the batter once the dry ingredients are added; fold just until combined to preserve the fudgy texture.
  • If you want an even richer chocolate flavor, consider using a higher percentage of cocoa in your chocolate chips.
  • Baking time is crucial, so keep an eye on your brownies around the 34-minute mark; they should wobble slightly in the center but not be liquid.

Fudgy Brownies Recipe FAQs

How do I select the best chocolate for my fudgy brownies?
Absolutely! For the rich, chocolate flavor that fudgy brownies require, I recommend using semi-sweet chocolate chips. Look for high-quality brands that have a cacao content of at least 60%. Avoid chocolate that has a shiny surface with dark spots, as this could indicate it’s past its prime. Fresh chocolate bars or chips should be glossy and firmly packaged.

What’s the best way to store leftover fudgy brownies?
You can store fudgy brownies in an airtight container at room temperature for up to 3 days. If you’d like to extend their shelf life, refrigerate them for up to 1 week. Just keep in mind that refrigeration can slightly dry them out, so if you want to enjoy them warm, heat them in the microwave for 10-15 seconds for that just-baked feel!

Can I freeze fudgy brownies, and if so, how?
Yes, you can! To freeze fudgy brownies, first let them cool completely. Then, wrap them individually in plastic wrap to prevent freezer burn. Place those wrapped brownies in a freezer-safe bag and store them for up to 3 months. When you’re ready to enjoy one, simply thaw at room temperature for about 30 minutes. If you prefer, you can warm them up in the microwave for a few seconds.

What should I do if my brownies turn out too cakey?
Very good question! If your brownies end up being too cakey, this often happens due to overmixing the batter or baking for too long. To fix this for future attempts, mix the dry ingredients in gently and only until combined when adding to the wet mix. Also, be sure to take them out of the oven when the center is still slightly wobbly—it ensures that fudgy texture we’re aiming for!

Are these fudgy brownies suitable for people with nut allergies?
Absolutely! This fudgy brownies recipe is nut-free, making it suitable for those with nut allergies. However, always double-check ingredients to ensure there are no nut traces, as some chocolate products may be processed in facilities that handle nuts. Enjoy worry-free deliciousness!

How can I enhance the flavor of my fudgy brownies?
For a flavor elevation, consider adding a pinch of sea salt on top before baking, or a couple of tablespoons of your favorite nuts or chocolate chunks in the batter. For those who love a coffee kick, a tiny espresso shot can deepen the chocolate’s richness. The more, the merrier!

Fudgy Brownies

Fudgy Brownies

Enjoy decadent fudgy brownies with rich chocolate flavor and a hint of espresso for blissful bites.
Print Recipe Pin Recipe
Prep Time 15 minutes mins
Cook Time 40 minutes mins
Cooling Time 3 hours hrs
Total Time 3 hours hrs 55 minutes mins
Servings: 16 squares
Course: DESSERT RECIPES
Calories: 200
Ingredients Equipment Method Nutrition Notes

Ingredients
  

For the Batter
  • 1.5 cups semi sweet chocolate chips perfect for achieving that ooey-gooey texture
  • 3/4 cup salted butter adds richness and enhances flavor
  • 1/2 cup all purpose flour helps bind the brownies together without making them cakey
  • 3/4 cup cocoa powder, Dutch process intensifies the chocolate flavor for deeper fudginess
  • 1 tsp espresso powder boosts the chocolate flavor; don’t skip it if you love rich taste
  • 1/2 tsp salt enhances sweetness and balances the overall flavor
  • 1.75 cups granulated white sugar provides sweetness and contributes to chewiness
  • 4 pieces eggs adds moisture and creates that signature fudgy texture
  • 1 tbsp vanilla infuses warmth and enhances the chocolatey taste

Equipment

  • 9x9 inch metal baking pan
  • microwave-safe bowl
  • Electric mixer
  • Mixing bowls
  • measuring cups
  • measuring spoons

Method
 

How to Make Fudgy Brownies
  1. Preheat your oven to 350°F (175°C), prepping a cozy environment for those fudgy brownies to bake perfectly.
  2. Lightly spray a 9×9" metal baking pan with non-stick spray.
  3. In a microwave-safe bowl, melt the semi-sweet chocolate chips and salted butter together. Stir occasionally until smooth, then let it cool slightly.
  4. In a small bowl, sift together the all-purpose flour, cocoa powder, espresso powder, and salt.
  5. In a large bowl, combine the eggs, granulated sugar, and vanilla. Mix with an electric mixer on medium speed for about three minutes.
  6. Gently fold the cooled chocolate and butter mixture into the egg mixture.
  7. Tip in the dry ingredients and gently fold until just combined.
  8. Pour the batter into the prepared pan, spreading it evenly. Bake in the preheated oven for 34-40 minutes.
  9. Let your brownies cool completely in the pan for at least three hours.
  10. Once cooled, remove the brownies from the pan and cut them into 16 squares.

Nutrition

Serving: 1squareCalories: 200kcalCarbohydrates: 26gProtein: 3gFat: 10gSaturated Fat: 6gPolyunsaturated Fat: 1gMonounsaturated Fat: 3gCholesterol: 50mgSodium: 150mgPotassium: 150mgFiber: 1gSugar: 15gVitamin A: 500IUCalcium: 20mgIron: 1.5mg

Notes

Optional: Top with a sprinkle of sea salt for a delightful contrast.

Tried this recipe?

Let us know how it was!

Filed Under: DESSERT RECIPES

Cinnamon-Spiced Eggnog White Russian

December 20, 2025 by JudyWhite Leave a Comment

There’s something enchanting about sipping a cozy cocktail that warms your soul, especially as the days grow shorter. Picture this: the rich aroma of cinnamon mingling with the smoothness of Kahlúa, all while the festive spirit of homemade eggnog adds a delightful creaminess. This is not just any drink; this is my go-to Cinnamon-Spiced Eggnog White Russian, a cheerful twist on a classic that I reach for again and again during those frosty evenings.

Recently, I found myself craving a unique cocktail to share with friends at a holiday gathering. In just 20 minutes, I crafted this indulgent beverage that transformed a casual get-together into a memorable event. It’s incredibly easy to make and requires just a handful of ingredients. Plus, the sprinkle of cinnamon and the option to garnish with a star anise or cinnamon stick? Pure magic. Whether you’re winding down after a long day, hosting a festive party, or simply treating yourself, this cocktail is sure to impress. Let’s dive into this delightful recipe that will not only satisfy your taste buds but also bring an extra touch of warmth to your winter nights!

Why You'll Love This Cinnamon-Spiced Eggnog White Russian

  • This recipe is incredibly easy to prepare, taking just 20 minutes from start to finish.
  • The unique combination of flavors creates a delightful experience that elevates your holiday gatherings.
  • Its visual appeal, enhanced by a sprinkle of cinnamon and optional garnishes, makes it perfect for impressing your guests.
  • This cocktail is a true crowd-pleaser that will have everyone clamoring for seconds.

Cinnamon-Spiced Eggnog White Russian Ingredients

For the Base
• Granulated sugar – enhances sweetness and balances the spices.
• Ground cinnamon – adds a warm, aromatic flavor that’s perfect for the holiday season.
• Kahlúa – brings a rich coffee liqueur base, complementing the eggnog beautifully.
• Homemade eggnog or store brand – choose homemade for a creamier texture, or opt for store brand for convenience.
• Vodka – provides a smooth backbone to the cocktail that elevates the flavor.

For the Sweet Touch
• Cinnamon syrup – offers a delicious cinnamon kick; adjust the amount to taste for a personalized touch.

For Garnishing
• Ground cinnamon – for a finishing sprinkle that enhances the drink’s visual appeal.
• Cinnamon sticks (optional) – adds a lovely touch of presentation and an extra hint of cinnamon flavor.
• Star anise (optional) – elevates the aesthetic and contributes a sweet, licorice-like note.

Embrace the cozy sensation of this Cinnamon-Spiced Eggnog White Russian and let your taste buds dance with joy!

How to Make Cinnamon-Spiced Eggnog White Russian

  1. Combine Ingredients
    In a mixing glass, combine the granulated sugar and ground cinnamon. This will create a sweet-spiced base for your cocktail that perfectly complements the other flavors.

  2. Pour the Liquids
    Add the Kahlúa, homemade or store-bought eggnog, vodka, and cinnamon syrup into the glass. Stir gently to ensure everything is mixed well and the flavors meld together.

  3. Mix Thoroughly
    Stir the mixture until it’s well combined and the sugar dissolves. You want a smooth texture, which should take about 30 seconds.

  4. Serve Over Ice
    Fill a glass with ice and pour the mixture over it. The ice will chill the cocktail and keep it refreshing.

  5. Finish with Cinnamon
    Sprinkle ground cinnamon on top for extra flavor and a delightful presentation. If you’re feeling fancy, add a cinnamon stick or a star anise as a garnish.

Optional: For a festive touch, rim your glass with sugar before pouring in the cocktail.
Exact quantities are listed in the recipe card below.

Make Ahead Options

These Cinnamon-Spiced Eggnog White Russians are perfect for busy home cooks looking to save time while still serving up a delightful drink! You can prepare the cocktail base (sugar, cinnamon, Kahlúa, eggnog, vodka, and cinnamon syrup) up to 24 hours in advance; simply mix these ingredients in a sealable glass container and refrigerate to maintain the creamy texture. When it’s time to serve, simply pour the mixture over ice, stir, and sprinkle with ground cinnamon, adding optional garnishes to elevate the presentation. This way, you can craft an impressive cocktail without the last-minute stress, ensuring your festive gatherings feel effortless and enjoyable!

What to Serve with Cinnamon-Spiced Eggnog White Russian?

As you indulge in this delightful cocktail, think about adding a few tasty accompaniments that will elevate your cozy gathering.

  • Gingerbread Cookies: Their spice and sweetness balance the rich cocktail beautifully, making every sip even sweeter. These festive treats will delight your guests and pair perfectly with the warming notes of the drink.

  • Spiced Pecans: Crunchy and comforting, a handful of spiced pecans adds just the right amount of texture and flavor contrast, enhancing the holiday spirit. The nuttiness complements the drink’s cinnamon essence.

  • Roasted Sweet Potatoes: These creamy, caramelized bites offer a warm, savory balance to the sweetness of the cocktail. The slight earthy flavor beautifully complements the fall spices.

  • Vanilla Ice Cream: A scoop of vanilla ice cream can transform your drink into a decadent dessert. The creaminess mirrors the eggnog while letting the cinnamon flavors shine.

  • Mulled Wine: If you’re in the mood for another drink, a cup of warm mulled wine brings cozy, fruity flavors to your gathering, creating a delightful pairing experience. It’s a perfect choice for an unforgettable holiday toast.

  • Cranberry Brie Bites: The tartness of cranberries paired with creamy brie brings a gourmet touch to your celebration. These elegant bites contrast wonderfully with the indulgent nature of your cocktail, appealing to those who appreciate fine dining at home.

Invite your friends and family to relax and relish the warmth of your delightful flavors, making your time together truly unforgettable!

Cinnamon-Spiced Eggnog White Russian Variations

Feel free to unleash your creativity and make this cocktail truly yours with these exciting twists!

  • Vegan: Replace eggnog with coconut milk and adjust sweetness with maple syrup for a creamy, plant-based delight.

  • Spiced Rum: Swap vodka for spiced rum to introduce a deeper, warm flavor that pairs beautifully with cinnamon.

  • Extra Creamy: Use heavy cream or half-and-half instead of eggnog for a luscious and rich texture that’s indulgently smooth.

  • Choco-Cinnamon Twist: Add a splash of chocolate liqueur for a luscious chocolatey depth that complements the cinnamon perfectly.

  • Fruity Infusion: Incorporate a dash of orange liqueur to add a citrusy zing, balancing the richness of the eggnog.

  • Low-Calorie: Use sugar substitutes and light eggnog to enjoy a lighter version of this festive cocktail without sacrificing taste.

  • Heat It Up: Stir in a pinch of cayenne pepper for a spicy kick that will warm you from the inside out on those chilly nights.

  • Herbal Garnish: Top off with fresh mint leaves or a sprig of rosemary for a fragrant, herbal touch that contrasts beautifully with the spices.

How to Store and Freeze Cinnamon-Spiced Eggnog White Russian

Room Temperature: Stir the cocktail ingredients only prior to serving; do not store at room temperature as the eggnog can spoil easily.

Fridge: Store any leftover prepared Cinnamon-Spiced Eggnog White Russian in an airtight container for up to 2 days. Make sure to stir gently before serving again.

Freezer: For freezing, mix ingredients without the eggnog. Store the mixture in a freezer-safe container for up to 2 months. Thaw in the refrigerator overnight before adding eggnog and serving.

Reheating: This cocktail is best enjoyed chilled; avoid reheating it, as it should be served on ice to maintain freshness and flavor.

Chef's Helpful Tips

  • When preparing the Cinnamon-Spiced Eggnog White Russian, ensure that your mixing glass is clean to avoid any unwanted flavors.
  • Use fresh granulated sugar to achieve the best sweetness as older sugar can have clumps that don’t dissolve well.
  • Stir the mixture thoroughly for about 30 seconds to ensure the sugar is completely dissolved, which will enhance the overall smoothness of the cocktail.
  • Serve your drink immediately over ice to keep it chilled and refreshing, as letting it sit too long can dilute the flavors.

Cinnamon-Spiced Eggnog White Russian Recipe FAQs

How do I choose the best eggnog for my cocktail?
Absolutely! If you opt for homemade eggnog, it can elevate your Cinnamon-Spiced Eggnog White Russian with its creamy texture and fresh flavor. Just make sure it’s well-chilled before mixing. If you’re short on time, a quality store-bought eggnog will do the trick; look for options without additives or preservatives for a more natural taste.

How should I store leftover Cinnamon-Spiced Eggnog White Russian?
Very! If you have any leftover, place your prepared Cinnamon-Spiced Eggnog White Russian in an airtight container and refrigerate. It can be stored for up to 2 days. Just remember to give it a gentle stir before serving, as ingredients may separate.

Can I freeze this cocktail for later?
Certainly! To freeze your Cinnamon-Spiced Eggnog White Russian, prepare the mixture without the eggnog included. Transfer it to a freezer-safe container, making sure it’s sealed tightly, and it will stay fresh for up to 2 months. When you’re ready to enjoy it, thaw the mixture in the refrigerator overnight, then stir in the eggnog and serve over ice.

What should I do if my cocktail seems too sweet?
If you find your Cinnamon-Spiced Eggnog White Russian too sweet for your palate, you can balance it by adding a splash of milk or cream to mellow out the flavors. Alternatively, consider reducing the amount of cinnamon syrup next time you make it, or even try using unsweetened eggnog to cut back the sweetness.

Are there any dietary considerations for this cocktail?
Absolutely! If you’re concerned about allergies, always check the labels of your Kahlúa and eggnog, as they can contain common allergens like dairy or gluten. For a non-alcoholic version, simply omit the vodka and Kahlúa, replacing them with a bit of extra eggnog, cream, and a splash of coffee flavoring. While it may not have the same kick, it will still be delicious!

Cinnamon-Spiced Eggnog White Russian

Cinnamon-Spiced Eggnog White Russian

Savor the delightful flavors of this Cinnamon-Spiced Eggnog White Russian, a cozy cocktail perfect for holiday gatherings.
Print Recipe Pin Recipe
Prep Time 20 minutes mins
Total Time 20 minutes mins
Servings: 2 cocktails
Course: DESSERT RECIPES
Cuisine: American
Calories: 300
Ingredients Equipment Method Nutrition Notes

Ingredients
  

For the Base
  • 2 tablespoons granulated sugar enhances sweetness and balances the spices
  • 1 teaspoon ground cinnamon adds a warm, aromatic flavor
  • 2 ounces Kahlúa rich coffee liqueur base
  • 4 ounces homemade eggnog or store brand choose homemade for creaminess or store brand for convenience
  • 2 ounces vodka provides a smooth backbone
For the Sweet Touch
  • 1 ounce cinnamon syrup adjust the amount to taste
For Garnishing
  • 1 teaspoon ground cinnamon for a finishing sprinkle
  • 1 piece cinnamon stick optional, for garnish
  • 1 piece star anise optional, for garnish

Equipment

  • mixing glass

Method
 

How to Make Cinnamon-Spiced Eggnog White Russian
  1. In a mixing glass, combine the granulated sugar and ground cinnamon.
  2. Add the Kahlúa, homemade or store-bought eggnog, vodka, and cinnamon syrup into the glass. Stir gently.
  3. Stir the mixture until it's well combined and the sugar dissolves.
  4. Fill a glass with ice and pour the mixture over it.
  5. Sprinkle ground cinnamon on top and optionally garnish with a cinnamon stick or star anise.

Nutrition

Serving: 8ouncesCalories: 300kcalCarbohydrates: 30gProtein: 2gFat: 11gSaturated Fat: 7gCholesterol: 40mgSodium: 50mgPotassium: 100mgFiber: 1gSugar: 20gVitamin A: 500IUCalcium: 80mgIron: 0.5mg

Notes

For a festive touch, rim your glass with sugar before pouring in the cocktail.

Tried this recipe?

Let us know how it was!

Filed Under: DESSERT RECIPES

Baked Pumpkin Donuts

December 19, 2025 by JudyWhite Leave a Comment

As the crisp autumn air embraces the senses, it’s the perfect time to dive into the world of comfort food. I discovered the joy of these Baked Pumpkin Donuts while searching for a sweet treat that captures all the warmth of the season without the fuss of frying. With delightful hints of cinnamon and a soft, moist texture, these donuts are not just easy to make; they’re a celebration of fall in every bite.

Imagine pulling a batch of golden-brown donuts from the oven, the aroma of spices wafting through your kitchen, instantly lifting your spirits. They’re perfect for a cozy brunch with friends or a quiet morning at home, warming up the space with their sweet, inviting scent. Plus, with just 30 minutes from start to finish, you can whip up a crowd-pleasing treat that is as tempting as it is simple to make—no more dreary fast food cravings in sight! Join me as we transform everyday ingredients into these irresistible baked goodies, perfect for making memories, one delicious bite at a time.

Why You'll Love This Baked Pumpkin Donuts

  • These baked pumpkin donuts are incredibly easy to make, allowing you to enjoy freshly baked treats without spending hours in the kitchen.
  • The delightful combination of pumpkin and warm spices creates a flavor that perfectly captures the essence of fall, making them a seasonal favorite.
  • With just 30 minutes of total prep and cooking time, these donuts are perfect for busy mornings or impromptu gatherings.
  • They not only taste amazing but also look visually stunning, making them an impressive addition to any brunch table.

Baked Pumpkin Donuts Ingredients

For the Batter
• Canned pure pumpkin puree – adds moisture and a natural sweetness, making your baked pumpkin donuts irresistibly fluffy.
• White granulated sugar – provides the primary sweetness, balancing the spices perfectly.
• Packed light brown sugar – enhances the flavor with a hint of caramel, giving depth to your donuts.
• Canola oil – keeps the donuts moist and tender without overpowering the flavor.
• Large eggs – bind the ingredients together while adding richness to the batter.
• Vanilla extract – elevates the overall flavor, making every bite comforting and warm.
• All-purpose flour – serves as the base, creating that classic donut texture.
• Pumpkin pie spice – infuses seasonal warmth with hints of nutmeg and ginger, essential for the perfect baked pumpkin donuts.
• Ground cinnamon – adds a cozy aroma and flavor that complements the pumpkin beautifully.
• Salt – enhances the sweetness and balances the flavors.
• Baking soda – helps the donuts rise, keeping them light and fluffy.
• Baking powder – works together with baking soda for a perfect rise in your donuts.
• Melted butter – provides flavor and richness, contributing to a delightful mouthfeel.

For the Topping
• Granulated sugar – adds a sweet crunch that perfectly contrasts with the soft donuts.
• Ground cinnamon – creates a fragrant topping that wraps each donut in cozy warmth, making them even more irresistible.

How to Make Baked Pumpkin Donuts

  1. Preheat your oven to 350°F (175°C) to ensure it’s hot and ready for your donuts. This step is crucial for achieving that perfect, fluffy texture that we’re after!

  2. Mix together the canned pumpkin puree, white granulated sugar, light brown sugar, canola oil, eggs, and vanilla extract in a large bowl. Blend them well until the mixture is smooth and inviting.

  3. Combine the dry ingredients: in another bowl, whisk together all-purpose flour, pumpkin pie spice, ground cinnamon, salt, baking soda, and baking powder. This will create the perfect base for our delicious donuts.

  4. Combine slowly! Gradually add the dry ingredients to the wet mixture, mixing until just combined. Be gentle here; we want to keep the donuts light and fluffy!

  5. Fold in the melted butter to add richness and flavor. Stir gently until the butter is incorporated, and the batter is smooth and ready for the pan.

  6. Pour the batter into a prepared donut pan, filling each cavity about two-thirds full. This ensures they rise beautifully and have enough space to grow.

  7. Bake in the preheated oven for about 10-12 minutes or until a toothpick inserted into the center comes out clean. You’ll know they’re done when they’re golden brown!

  8. Whisk together the granulated sugar and ground cinnamon for the topping in a small bowl while your donuts are baking. This mixture will add a sweet and spicy crunch to your warm treats!

  9. Coat the baked donuts: Once they’re cooled for a few minutes, remove them from the pan and dip them into the sugar-cinnamon mix, ensuring each donut is beautifully and evenly coated.

Optional: Drizzle with a simple glaze for an extra touch of sweetness.

Exact quantities are listed in the recipe card below.

How to Store and Freeze Baked Pumpkin Donuts

Room Temperature: Store room temperature Baked Pumpkin Donuts in an airtight container for up to 2 days to maintain freshness.

Fridge: If keeping longer, place them in the fridge in a sealed container for up to 1 week. Just reheat them for a few seconds in the microwave before enjoying!

Freezer: For longer storage, freeze them in a single layer on a baking sheet, then transfer to an airtight freezer-safe container. They’ll last up to 3 months and still taste delicious!

Reheating: When ready to enjoy, simply thaw at room temperature or heat gently in the microwave for about 15 seconds. Enjoy those warm, cozy flavors again!

Baked Pumpkin Donuts Variations

Feel free to give these baked pumpkin donuts your personal touch with some fun and delicious variations!

  • Gluten-Free: Substitute all-purpose flour with a 1:1 gluten-free baking blend for a fluffy, gluten-free treat.

  • Dairy-Free: Use coconut oil rather than butter and almond milk instead of eggs for a dairy-free option that still tastes indulgent!

  • Spiced Up: Add a pinch of cayenne pepper or ground ginger for an unexpected spicy twist that kicks these donuts up a notch.

  • Nutty Crunch: Fold in chopped pecans or walnuts into the batter for a delightful crunch that complements the soft texture of the donuts.

  • Chocolate Lover’s Delight: Incorporate mini chocolate chips into the batter for a decadent chocolate-infused pumpkin donut experience.

  • Maple Glaze: Instead of a sugar topping, drizzle with a warm maple glaze made from powdered sugar, maple syrup, and a dash of vanilla for a sweetly sophisticated finish.

  • Citrus Zest: Brighten up the flavor by adding a teaspoon of orange or lemon zest to the batter, giving a fresh, zesty burst to every bite.

  • Apple Cider: Swap out some pumpkin puree for apple cider to create a delightful apple-pumpkin fusion that screams autumn in every bite.

Make Ahead Options

These Baked Pumpkin Donuts are a fantastic option for meal prep, allowing you to enjoy the seasonal treat any day of the week! You can prepare the batter up to 24 hours in advance by mixing all the wet and dry ingredients separately, storing them in the refrigerator until you’re ready to bake. To maintain the donuts’ fluffiness, cover the batter tightly. When you’re ready to bake, simply preheat the oven and pour the batter into your donut pan, then bake as instructed. For an effortless treat, you can even coat the baked donuts in the sugar-cinnamon mixture and keep them in an airtight container for up to 3 days; they’ll still taste just as delicious and fresh!

What to Serve with Baked Pumpkin Donuts?

Warm up your fall mornings with delightful accompaniments that enhance the experience of these cozy treats.

  • Spiced Apple Cider: A hot mug of spiced apple cider brings out the warm flavors of cinnamon and nutmeg, making each bite of donut even more inviting.

  • Maple Bacon: The sweet and savory elements of crispy maple bacon create a perfect balance, leaving a delightful contrast with the sugary donuts.

  • Chai Tea: The aromatic blend of spices in chai tea complements the pumpkin pie spice in the donuts, enhancing your fall-themed breakfast.

  • Whipped Cream: A dollop of freshly whipped cream adds a creamy, light texture, making these donuts feel even more indulgent and luxurious.

  • Fresh Fruit Salad: A mix of vibrant, juicy fruits such as pears and pomegranates refreshes the palate, providing a bright contrast to your warm, spiced donuts.

  • Nutty Granola Parfait: Layer your baked pumpkin donuts with creamy yogurt and nutty granola for a delicious and textural breakfast treat that feels totally gourmet.

  • Sweet Cream Cheese Spread: A spread of sweetened cream cheese adds a tangy, rich layer of flavor to each bite, making for a delightful brunch option.

  • Caramel Latte: Pairing your donuts with a rich, velvety caramel latte enhances their sweetness, creating a stunning breakfast experience everyone will adore.

  • Pumpkin Spice Muffins: Serve alongside moist, flavorful pumpkin spice muffins for a cozy, themed breakfast gathering that celebrates fall in style.

These delightful additions will surely elevate your Baked Pumpkin Donuts experience into a memorable gathering full of warmth and flavor!

Chef's Helpful Tips

  • When making baked pumpkin donuts, ensure your wet ingredients are at room temperature for better incorporation into the batter.
  • Avoid overmixing the batter once you combine the wet and dry ingredients, as this can lead to dense donuts instead of the desired fluffy texture.
  • For an extra flavor kick, consider adding a pinch of nutmeg along with the pumpkin pie spice.
  • Bake the donuts until they’re golden brown and a toothpick inserted in the center comes out clean, usually around 10-12 minutes at 350°F (175°C).

Baked Pumpkin Donuts Recipe FAQs

How do I select the best pumpkin puree?
Absolutely! When choosing pumpkin puree, look for 100% pure pumpkin in a can—avoid those with added sugars or spices. You want a rich, deep orange color and a smooth texture. Quality brands will have minimal ingredients, ensuring you’re baking with the best!

How should I store leftover baked pumpkin donuts?
You can store leftover Baked Pumpkin Donuts at room temperature in an airtight container for up to 2 days. If you’re planning to keep them longer, move them to the fridge, where they’ll last about a week. Just pop them in the microwave for a few seconds to warm them up!

Can I freeze pumpkin donuts, and if so, how?
Very! To freeze your Baked Pumpkin Donuts, first let them cool completely. Then, arrange them in a single layer on a baking sheet and place them in the freezer for about 1 hour. Once frozen, transfer them to an airtight freezer-safe container or a freezer bag, layering parchment paper between donuts if desired. They can stay frozen for up to 3 months. When you’re ready to enjoy, just thaw at room temperature or heat in the microwave for about 15 seconds.

What should I do if my donuts turn out dense?
If your Baked Pumpkin Donuts are dense, it might be due to overmixing the batter after combining the wet and dry ingredients. I suggest mixing just until incorporated, as overworking the batter activates the gluten, which can create a tougher texture. Also, check your baking powder and baking soda for freshness—expired leavening agents can lead to dense results!

Are these donuts suitable for a gluten-free diet?
The Baked Pumpkin Donuts recipe uses all-purpose flour, but you can easily make them gluten-free by substituting it with a 1:1 gluten-free flour blend. Ensure the blend includes xanthan gum or another binding agent to mimic the structure of wheat flour. This way, everyone can enjoy a delicious treat!

Can I make these donuts dairy-free?
Absolutely! To make the Baked Pumpkin Donuts dairy-free, simply substitute the butter with a dairy-free alternative like coconut oil or a plant-based butter. Additionally, ensure that the milk, if any used in a glaze, is also non-dairy. Enjoy these treats with confidence!

Baked Pumpkin Donuts

Baked Pumpkin Donuts

Delight in the flavors of fall with these easy and fluffy baked pumpkin donuts, perfect for any occasion.
Print Recipe Pin Recipe
Prep Time 15 minutes mins
Cook Time 12 minutes mins
Total Time 30 minutes mins
Servings: 12 donuts
Course: DESSERT RECIPES
Cuisine: American
Calories: 150
Ingredients Equipment Method Nutrition Notes

Ingredients
  

For the Batter
  • 1 cup canned pure pumpkin puree
  • 1 cup white granulated sugar
  • 1/2 cup packed light brown sugar
  • 1/2 cup canola oil
  • 2 large eggs
  • 1 teaspoon vanilla extract
  • 2 cups all-purpose flour
  • 2 teaspoons pumpkin pie spice
  • 1 teaspoon ground cinnamon
  • 1/2 teaspoon salt
  • 1 teaspoon baking soda
  • 1 teaspoon baking powder
  • 1/4 cup melted butter
For the Topping
  • 1/4 cup granulated sugar
  • 1 teaspoon ground cinnamon

Equipment

  • Donut pan
  • Mixing bowls
  • Whisk

Method
 

How to Make Baked Pumpkin Donuts
  1. Preheat your oven to 350°F (175°C) to ensure it's hot and ready for your donuts.
  2. Mix together the canned pumpkin puree, white granulated sugar, light brown sugar, canola oil, eggs, and vanilla extract in a large bowl until smooth.
  3. In another bowl, whisk together all-purpose flour, pumpkin pie spice, ground cinnamon, salt, baking soda, and baking powder.
  4. Gradually add the dry ingredients to the wet mixture, mixing until just combined.
  5. Fold in the melted butter until incorporated and the batter is smooth.
  6. Pour the batter into a prepared donut pan, filling each cavity about two-thirds full.
  7. Bake for about 10-12 minutes or until a toothpick inserted comes out clean and the donuts are golden brown.
  8. Whisk together the granulated sugar and ground cinnamon for the topping in a small bowl.
  9. Once cooled, dip the donuts into the sugar-cinnamon mix, coating evenly.

Nutrition

Serving: 1donutCalories: 150kcalCarbohydrates: 20gProtein: 2gFat: 7gSaturated Fat: 2gMonounsaturated Fat: 4gCholesterol: 30mgSodium: 150mgPotassium: 100mgFiber: 1gSugar: 8gVitamin A: 500IUCalcium: 20mgIron: 1mg

Notes

For extra flavor, add a pinch of nutmeg along with the pumpkin pie spice. Ensure wet ingredients are at room temperature for better incorporation.

Tried this recipe?

Let us know how it was!

Filed Under: DESSERT RECIPES

Oreo Cake Donuts Recipe Using Chocolate Cake Mix

December 16, 2025 by JudyWhite Leave a Comment

There’s something irresistibly fun about combining two beloved treats into one delightful creation. Imagine sinking your teeth into a soft, fluffy donut infused with rich chocolate cake, topped with creamy vanilla frosting and a sprinkle of crunchy Oreo goodness. This isn’t just dessert; it’s a celebration of flavors and textures you won’t want to miss!

What I love most about this Oreo Cake Donuts Recipe Using Chocolate Cake Mix is how effortlessly it transforms a simple box mix into an indulgent treat. Perfect for a weekend brunch or a surprise dessert for movie night, these donuts are a nod to nostalgia while creating new memories.

The best part? You don’t need to be a baking expert to whip these up. With just a handful of ingredients and minimal time, you’ll have a batch of delicious donuts that are sure to impress family and friends. So let’s dive in and bring some sweet joy to your kitchen!

Why You'll Love This Oreo Cake Donuts Recipe Using Chocolate Cake Mix

  • This Oreo Cake Donuts recipe takes convenience to a whole new level, transforming a simple chocolate cake mix into a decadent delight with little effort.
  • You’ll love how quick and easy it is to whip up a batch, making them the perfect treat for any occasion, from breakfast to dessert.
  • The combination of chocolate cake, creamy frosting, and crunchy Oreo toppings creates a flavor explosion that will have everyone coming back for more.
  • Visually, these donuts are a feast for the eyes, making them an impressive centerpiece for your table that looks as good as they taste.
  • Every bite is not just delicious but also fun, blending two beloved treats into one amazing donut experience.

Oreo Cake Donuts Ingredients

For the Donuts
• Chocolate cake mix – this forms the base of your Oreo Cake Donuts, delivering rich chocolate flavor.
• Non-stick cooking spray – ensures your donuts pop out easily without any sticking.

For the Frosting
• Vanilla frosting – the creamy topping adds a delightful sweetness that complements the chocolate.

For the Topping
• OREO cookies – crumbled on top, they add a crunchy texture and iconic flavor to the dish.

How to Make Oreo Cake Donuts

  1. Prepare chocolate cake mix according to the instructions on the box. This creamy batter will be the foundation of your delectable donuts, so ensure it’s mixed well.

  2. Spray your donut pan with non-stick cooking spray to prevent any sticking. A light coating will ensure your donuts pop out beautifully and maintain their shape.

  3. Fill each donut mold with the prepared cake batter, about three-quarters full. This allows room for the donuts to rise while baking, creating that fluffy texture we all love.

  4. Bake in the oven at 350°F for 15 minutes or until cooked through. The donuts should spring back when lightly touched and have a lovely, dark chocolate color.

  5. Cool the donuts on a wire rack before frosting. Allowing them to cool completely ensures that your creamy vanilla frosting won’t melt away when applied.

  6. Frost each cooled donut generously with vanilla frosting, creating an inviting, creamy layer on top.

  7. Crumble OREO cookies and sprinkle them on top of the frosted donuts for that final touch of crunchy goodness. This adds an extra layer of flavor that your guests will love!

Optional: Drizzle with chocolate syrup for an extra indulgent treat.

Exact quantities are listed in the recipe card below.

Oreo Cake Donuts Variations

Explore the delightful ways to customize these Oreo Cake Donuts and make them your own!

  • Dairy-Free: Substitute the vanilla frosting with coconut or almond-based frosting for a creamy, dairy-free option. Celebrate the rich flavors without compromise!

  • Gluten-Free: Use a gluten-free chocolate cake mix instead of regular to cater to gluten sensitivities while keeping the taste just as divine.

  • Healthier Option: Replace the frosting with Greek yogurt to lighten things up; it adds tang and creaminess without all the sugar.

  • Nutty Twist: Mix in some finely chopped nuts like walnuts or pecans into the batter for an unexpected crunchy texture; they add a lovely depth of flavor too.

  • Spicy Kick: Add a pinch of cayenne pepper or cinnamon to the cake batter for a hint of warmth that perfectly contrasts the sweetness.

  • Flavor Infusion: Stir in a teaspoon of mint extract to the frosting for a refreshing twist. This will elevate your chocolate donuts to a whole new level of deliciousness!

  • Cereal Crush: Instead of OREO cookies, use crushed chocolate cereal for a fun twist on texture and crunch. It brings a nostalgic feel with every bite.

  • Drizzle Delight: Top with a chocolate or caramel drizzle along with the crumbled OREOs for a perfect touch of indulgence. This adds allure to every donut!

How to Store and Freeze Oreo Cake Donuts

Room Temperature: Keep the Oreo Cake Donuts at room temperature for up to 2 days in an airtight container to maintain freshness and softness.

Fridge: For longer-lasting donuts, store them in the fridge for up to a week. Make sure they are tightly wrapped to avoid drying out.

Freezer: You can freeze the donuts for up to 3 months. Place them in an airtight container or freezer bag, separating layers with parchment paper to prevent sticking.

Reheating: To reheat, place them in a microwave for 10-15 seconds or warm them in the oven at 350°F for a few minutes until heated through, bringing back that fresh-baked taste.

What to Serve with Oreo Cake Donuts?

Delight in the perfect pairing for your sweet treats, creating a joyful occasion for friends and family.

  • Fresh Fruit Salad: A colorful medley of seasonal fruits adds refreshing brightness, balancing the sweetness of the donuts. Each bite of juicy fruit cleanses the palate beautifully.

  • Coffee or Espresso: A rich cup of coffee enhances the chocolate flavors, providing a delightful contrast. The warmth of the beverage complements the soft, fluffy donuts perfectly.

  • Chocolate Milkshake: Indulge in a creamy chocolate milkshake that mirrors the donut flavors. This makes for a fun and nostalgic combination, evoking childhood memories.

  • Vanilla Ice Cream: A scoop of velvety vanilla ice cream creates a lovely creaminess that pairs well with the chocolatey treats. The cold and warm contrasts make every bite an experience.

  • Whipped Cream: Light and airy whipped cream adds a dreamy element to each bite, enhancing the overall indulgence. It’s a delightful way to elevate those sweet flavors even further.

  • Mini Cheesecakes: Serve up mini cheesecakes for a rich, creamy dessert that complements the donut’s crunch. Their sweetness contrasts beautifully with the donut’s texture, offering a variety of flavors.

  • Sparkling Water with Lemon: Quench your thirst with a refreshing glass of sparkling water. The brightness of lemon adds zest and complements the sweet donut flavors, making each bite even more enjoyable.

Make Ahead Options

These Oreo Cake Donuts Recipe Using Chocolate Cake Mix are perfect for busy home cooks looking to save time during hectic weekdays! You can prepare the cake batter up to 24 hours in advance; simply mix as instructed and refrigerate in an airtight container. On the day you want to serve them, just spray your donut pan and fill the molds with the chilled batter—no need for bringing it to room temperature. Additionally, you can frost and top the donuts with crumbled Oreos up to 3 days in advance; store them in a single layer in an airtight container to prevent sogginess. When you’re ready to indulge, just pull them out from the fridge, and enjoy your deliciously made-ahead treats without any hassle!

Chef's Helpful Tips

  • When making Oreo Cake Donuts, be sure to mix the chocolate cake batter just until combined to avoid overmixing, which can lead to dense donuts.
  • Using a light, even coating of non-stick cooking spray will help your donuts release easily from the mold without any damage.
  • Fill the donut molds about three-quarters full to allow for proper rising while baking.
  • Keep an eye on the baking time; if the donuts spring back when touched, they are done, ensuring a perfect texture.
  • Allow the donuts to cool completely before frosting them to prevent the frosting from melting.
  • Lastly, crumbling the OREO cookies just before sprinkling them on the donuts will keep them crunchy.

Oreo Cake Donuts Recipe FAQs

How do I choose the right chocolate cake mix for the Oreo Cake Donuts?
Absolutely! Any standard chocolate cake mix works well for this recipe. You can choose from classic, dark chocolate, or even a gluten-free option if you’re accommodating dietary preferences. Just make sure to read the back of the box for any specific preparation guidelines.

What’s the best method for storing leftover Oreo Cake Donuts?
Very! Store your Oreo Cake Donuts in an airtight container at room temperature for up to 2 days. For extended freshness, keep them in the fridge for up to a week, ensuring they’re tightly wrapped to prevent drying out. If you’re really looking to keep them longer, freezing is a great option.

Can I freeze Oreo Cake Donuts? What’s the best way to do it?
You certainly can! To freeze your Oreo Cake Donuts, first let them cool completely. Then, place them in an airtight container or freezer bag. It’s best to separate the layers with parchment paper to avoid sticking. They’ll stay good for up to 3 months. When you’re ready to enjoy them, just pop them in the microwave for 10-15 seconds or warm them in the oven at 350°F for a few minutes.

What should I do if my donuts come out dense or dry?
If your donuts turn out dense, it could be due to overmixing the batter. Mix just until combined for light, fluffy donuts. Make sure to follow the baking time closely, as baking too long can dry them out. If they’re still dry, try adding a bit of milk or yogurt to the batter next time to keep them moist.

Can I use other toppings or dietary substitutes on my Oreo Cake Donuts?
Absolutely! If you’re looking for alternatives, consider using crushed nuts or sprinkles instead of OREO cookies. For a healthier twist, you can use a light cream cheese frosting or a yogurt-based frosting. Just be cautious of any allergies, especially with nuts or dairy, if serving to guests.

Oreo Cake Donuts Recipe Using Chocolate Cake Mix

Oreo Cake Donuts Recipe Using Chocolate Cake Mix

Delight in this Oreo Cake Donuts Recipe Using Chocolate Cake Mix - a fun fusion of chocolate donuts topped with creamy frosting and crunchy Oreos.
Print Recipe Pin Recipe
Prep Time 10 minutes mins
Cook Time 15 minutes mins
Cooling Time 10 minutes mins
Total Time 35 minutes mins
Servings: 12 donuts
Course: DESSERT RECIPES
Calories: 180
Ingredients Equipment Method Nutrition Notes

Ingredients
  

For the Donuts
  • 1 box chocolate cake mix
  • 1 spray non-stick cooking spray
For the Frosting
  • 1 container vanilla frosting
For the Topping
  • 6 cookies OREO cookies crumbled on top

Equipment

  • Donut pan
  • Mixing bowl
  • Wire Rack

Method
 

How to Make Oreo Cake Donuts
  1. Prepare chocolate cake mix according to the instructions on the box.
  2. Spray your donut pan with non-stick cooking spray.
  3. Fill each donut mold with the prepared cake batter, about three-quarters full.
  4. Bake in the oven at 350°F for 15 minutes or until cooked through.
  5. Cool the donuts on a wire rack before frosting.
  6. Frost each cooled donut generously with vanilla frosting.
  7. Crumble OREO cookies and sprinkle them on top of the frosted donuts.

Nutrition

Serving: 1donutCalories: 180kcalCarbohydrates: 25gProtein: 2gFat: 8gSaturated Fat: 3gPolyunsaturated Fat: 1gMonounsaturated Fat: 2gCholesterol: 10mgSodium: 150mgPotassium: 80mgFiber: 1gSugar: 10gVitamin A: 100IUCalcium: 20mgIron: 1mg

Notes

Optional: Drizzle with chocolate syrup for an extra indulgent treat. Mix chocolate cake batter just until combined to avoid dense donuts.

Tried this recipe?

Let us know how it was!

Filed Under: DESSERT RECIPES

Gingerbread Simple Syrup Cocktail

December 12, 2025 by JudyWhite Leave a Comment

There’s something irresistibly comforting about the combination of ginger, cinnamon, and cloves that instantly transports me to cozy winter evenings by the fireplace. When the holiday season rolls around, I find myself craving flavors that evoke warmth and nostalgia, and that’s exactly what this Gingerbread Simple Syrup Cocktail delivers. Imagine the rich aroma wafting through your kitchen as those spices simmer gently on the stove, creating a simple syrup that’s not only sweet but bursting with festive flair.

I first stumbled upon this cocktail during a gathering when I decided to switch up my usual drink offerings. It was a delightful surprise! The blend of Baileys, vodka, and sweet gingerbread flavors made for an unforgettable concoction that quickly became the star of the evening. Perfect for entertaining or to simply treat yourself after a long day, this luxurious cocktail is surprisingly easy to whip up. So, if you’re looking for a delicious way to impress your guests or just need a little holiday cheer in a glass, let’s dive into this delightful recipe together!

Why You'll Love This Gingerbread Simple Syrup Cocktail

  • This Gingerbread Simple Syrup Cocktail is incredibly easy to make, taking just 40 minutes from start to finish.
  • The delightful blend of flavors, featuring ginger, cinnamon, and creamy liqueurs, creates a taste that feels like a warm hug in a glass.
  • Its versatility means you can serve it at holiday parties, cozy nights in, or as a special treat any time of year.
  • The stunning presentation topped with whipped cream and gingerbread people will wow your guests and make it the highlight of any gathering.

Gingerbread Simple Syrup Cocktail Ingredients

Indulge your senses with this warm and festive drink!

For the Syrup

  • Coarsely grated peeled ginger – adds a fresh, zesty kick that complements the sweetness.
  • Cinnamon sticks – infuses lovely, warm spice notes throughout the syrup.
  • Whole cloves – bring depth and a subtle earthiness to the mixture.
  • Granulated sugar – sweetens the syrup and helps create that luscious texture.

For the Cocktail

  • Crushed gingerbread cookies – enhance the flavor and provide a delightful texture.
  • Vanilla ice cream – creates a creamy layer that balances the spices.
  • Baileys Irish Cream – adds a rich, velvety sweetness that elevates each sip.
  • Vodka – provides a smooth base that allows the other flavors to shine.
  • Kahlúa – brings a hint of coffee that rounds out the cocktail beautifully.

For Serving

  • Whipped cream – adds a luxurious and airy touch on top.
  • Ground cinnamon – sprinkle for an extra flavor burst and eye-catching presentation.
  • Gingerbread people – a fun and festive garnish that delights both kids and adults!

Get ready to savor your homemade Gingerbread Simple Syrup Cocktail, perfect for cozy gatherings!

How to Make Gingerbread Simple Syrup Cocktail

  1. Combine ingredients: In a saucepan, mix coarsely grated ginger, cinnamon sticks, whole cloves, and granulated sugar. This delightful blend sets the foundation for your warm, spicy syrup.

  2. Add water: Pour in 1 cup of water, then bring the mixture to a gentle boil over medium heat. Keep stirring until the sugar fully dissolves, creating a sweet, fragrant base.

  3. Simmer: Reduce the heat and let your syrup simmer for 20 minutes. During this time, your kitchen will smell heavenly as the spices infuse the syrup with rich flavors.

  4. Strain the mixture: After simmering, carefully remove the saucepan from the heat. Strain the mixture into a bowl to catch all the spice solids, leaving behind a fragrant syrup.

  5. Stir in gingerbread cookies: Add crushed gingerbread cookies to the warm syrup, mixing until well combined. This will enhance the gingerbread flavor and add a delightful texture.

  6. Layer the cocktail: In a glass, start with a scoop of vanilla ice cream, followed by your homemade gingerbread syrup. Then, pour in the Baileys Irish Cream, vodka, and Kahlúa, treating your taste buds to a holiday-inspired delight.

  7. Top and serve: Finish off your cocktail with a generous dollop of whipped cream, a sprinkle of ground cinnamon, and adorn with playful gingerbread people. It’s now ready to impress!

Optional: For a festive twist, add a drizzle of chocolate syrup on top!

Exact quantities are listed in the recipe card below.

Gingerbread Simple Syrup Cocktail Variations

Feel free to let your creativity shine as you customize this festive cocktail to suit your taste!

  • Spiced Rum: Swap vodka for spiced rum to add a rich depth with warm, aromatic notes.

  • Non-Alcoholic: Omit the alcohol and use extra gingerbread syrup and ginger beer for a cozy, festive mocktail.

  • Creamy Coconut: Replace Baileys with coconut cream for a tropical twist that still delivers that creamy texture.

  • Extra Heat: Add a pinch of cayenne pepper to your mixture for a surprising kick that complements the spice.

  • Different Spirits: Try swapping Kahlúa with amaretto or hazelnut liqueur for a nutty, sweet flavor.

  • Chocolate Infusion: Drizzle chocolate syrup into the glass for a delightful fusion of flavors that enhances the richness.

  • Nut Milk: Use almond or oat milk instead of ice cream for a dairy-free option that stays creamy.

  • Herbal Twist: Fresh mint leaves can be muddled into the drink for a refreshing contrast to the warming spices.

Remember that the best part of this cocktail is the joy of experimenting, so have fun and find your favorite variation!

How to Store and Freeze Gingerbread Simple Syrup Cocktail

Fridge: Store any leftover gingerbread syrup in an airtight container for up to 1 week. Keep it chilled to maintain its delicious flavor.

Freezer: For longer storage, pour the syrup into ice cube trays and freeze. Once frozen, transfer the cubes to a sealed bag for up to 3 months. Perfect for future cocktails!

Reheating: If you prefer your syrup warm, simply heat it gently on the stove or in the microwave, being careful not to boil. This will bring back that cozy aroma!

Cocktail Assembly: It’s best to assemble your Gingerbread Simple Syrup Cocktail fresh. Layer the ingredients right before serving for the ultimate creamy texture and flavor explosion.

What to Serve with Gingerbread Simple Syrup Cocktail?

Elevate your cozy gatherings with delicious pairings that harmonize beautifully with this festive drink.

  • Spiced Apple Pie: A warm slice of spiced apple pie offers a delightful contrast to the cocktail’s creamy sweetness and spices. The comforting aroma and flavors make it an ideal comfort food.

  • Cheese Platter: A variety of cheeses, including sharp cheddar and creamy brie, provide a perfect savory counterpart. The creamy cocktails and tangy cheese will set off delightful bursts on your palate.

  • Gingerbread Cookies: Nothing complements this drink better than classic gingerbread cookies! Their flavors echo the cocktail, making every sip and bite a seamless experience of holiday bliss.

  • Pecan Pie: This rich, nutty dessert enhances the warm notes of cinnamon and ginger in the cocktail. Each bite offers that nostalgic sweet finish, perfect for indulgent moments.

  • Hot Chocolate: A warm cup of rich hot chocolate with a sprinkle of cinnamon rounds out the experience. Its luxurious texture and sweetness beautifully complement the cocktail’s creamy character.

  • Creamy Pumpkin Soup: A bowl of creamy pumpkin soup adds a savory, smooth texture and a spicy touch that pairs excellently with the ginger and cinnamon flavors in your drink. It’s comfort in a bowl!

  • Mulled Wine: This festive beverage offers warm spices and fruity notes to match the ginger and cloves of the cocktail. Sip them together for a cozy gathering vibe.

  • Chocolate-Dipped Strawberries: The sweetness of ripe strawberries dipped in chocolate adds a refreshing, fruity element that balances the rich flavors of the cocktail. Their contrast is simply heavenly!

Serve these delightful pairings alongside your Gingerbread Simple Syrup Cocktail for a memorable holiday experience that warms the heart and soul.

Make Ahead Options

This Gingerbread Simple Syrup Cocktail is perfect for those busy nights when you want a festive drink ready to go! You can prepare the gingerbread simple syrup up to 3 days in advance—just follow the first five steps of the recipe and refrigerate the syrup in an airtight container. This ensures that the flavors develop beautifully while maintaining quality. When you’re ready to serve, simply layer the vanilla ice cream, gingerbread syrup, Baileys Irish Cream, vodka, and Kahlúa in a glass. Finish with whipped cream, ground cinnamon, and gingerbread people for a crowd-pleasing presentation. Enjoy delightful sips of this indulgent cocktail with minimal effort!

Chef's Helpful Tips

  • When making the Gingerbread Simple Syrup Cocktail, make sure to grate your ginger finely to release its essential oils and flavor more effectively.
  • Avoid letting the syrup boil too vigorously, as this can result in a caramelized sugar taste rather than a sweet, spicy infusion.
  • For the crushed gingerbread cookies, pulse them in a food processor for a finer texture that will blend more seamlessly into your syrup.
  • Remember to serve the cocktail immediately after layering to keep the ice cream from melting too quickly and losing its creamy texture.

Gingerbread Simple Syrup Cocktail Recipe FAQs

How do I choose the right ginger for my Gingerbread Simple Syrup Cocktail?
When selecting ginger, look for firm roots with smooth skin and a fresh aroma. Avoid any that have dark spots or wrinkles, as these indicate age or spoilage. Choosing fresh, vibrant ginger will ensure your cocktail has that zingy kick!

What is the best way to store leftover gingerbread syrup?
Store any leftover gingerbread syrup in an airtight container in the refrigerator for up to 1 week. Make sure it’s sealed tightly to maintain its delightful flavor and aroma. If you notice any separation, just give it a little stir, and it will be as good as new!

Can I freeze the gingerbread syrup for future use?
Absolutely! To freeze, pour the syrup into ice cube trays and place them in the freezer. Once the syrup is frozen solid, transfer the cubes to a sealed freezer bag. The gingerbread syrup can be stored this way for up to 3 months. This makes it super easy to whip up a Gingerbread Simple Syrup Cocktail whenever you crave a festive treat!

What should I do if my syrup is too thick?
If your syrup turns out thicker than you’d like, simply add a bit of warm water, a tablespoon at a time, while stirring. This will help achieve your desired consistency. Remember, the more ginger and spices you infuse, the thicker it could become, so adjusting to your taste is totally fine!

Is there a way to make this Gingerbread Simple Syrup Cocktail dairy-free?
Absolutely! You can easily swap the vanilla ice cream for a dairy-free alternative, like coconut or almond milk ice cream. Additionally, check that your Baileys Irish Cream is non-dairy, or consider using a dairy-free cream liqueur to keep the rich flavor without dairy. Your cocktail will still be creamy and delicious!

Gingerbread Simple Syrup Cocktail

Gingerbread Simple Syrup Cocktail

Indulge in the festive flavors of Gingerbread Simple Syrup Cocktail, a warm and sweet holiday delight.
Print Recipe Pin Recipe
Prep Time 10 minutes mins
Cook Time 30 minutes mins
Total Time 40 minutes mins
Servings: 1 cocktail
Course: DESSERT RECIPES
Cuisine: American
Calories: 300
Ingredients Equipment Method Nutrition Notes

Ingredients
  

For the Syrup
  • 1 cup coarsely grated peeled ginger adds a fresh, zesty kick
  • 2 sticks cinnamon sticks infuses lovely, warm spice notes
  • 6 whole cloves bring depth and earthiness
  • 1 cup granulated sugar sweetens the syrup
For the Cocktail
  • 2 cookies crushed gingerbread cookies enhance flavor and provide texture
  • 1 scoop vanilla ice cream creates a creamy layer
  • 2 oz Baileys Irish Cream adds rich sweetness
  • 1 oz vodka provides a smooth base
  • 1 oz Kahlúa adds a hint of coffee
For Serving
  • 1 dollop whipped cream adds luxurious touch
  • 1 pinch ground cinnamon for extra flavor burst
  • 2 pieces gingerbread people festive garnish

Equipment

  • Saucepan
  • mixing glass
  • strainer
  • Food processor

Method
 

Making the Syrup
  1. In a saucepan, mix coarsely grated ginger, cinnamon sticks, whole cloves, and granulated sugar.
  2. Pour in 1 cup of water, then bring to a gentle boil over medium heat, stirring until sugar dissolves.
  3. Reduce heat and let syrup simmer for 20 minutes until flavors infuse.
  4. Strain the mixture into a bowl to catch spice solids, leaving fragrant syrup.
  5. Add crushed gingerbread cookies to warm syrup, mixing until well combined.
Assembling the Cocktail
  1. In a glass, start with a scoop of vanilla ice cream, add gingerbread syrup, Baileys, vodka, and Kahlúa.
  2. Top with whipped cream, a sprinkle of ground cinnamon, and gingerbread people.

Nutrition

Serving: 1cocktailCalories: 300kcalCarbohydrates: 35gProtein: 4gFat: 15gSaturated Fat: 8gCholesterol: 40mgSodium: 50mgPotassium: 190mgFiber: 1gSugar: 20gVitamin A: 200IUVitamin C: 1mgCalcium: 100mgIron: 1mg

Notes

Serve immediately to maintain creamy texture of the ice cream. Optional: add a drizzle of chocolate syrup on top for extra indulgence.

Tried this recipe?

Let us know how it was!

Filed Under: DESSERT RECIPES

Mint Brownie Swirl Fudge

December 11, 2025 by JudyWhite Leave a Comment

Picture this: a cozy afternoon spent in the kitchen, the air filled with the irresistible fragrance of chocolate and mint dancing together. If you’ve ever craved a decadent treat that’s both rich and refreshing, then get ready to indulge in my Mint Brownie Swirl Fudge! This delightful creation is not just a dessert; it’s an experience that will awaken your taste buds and bring a bit of joy to your day.

I remember the first time I decided to combine my love for fudgy brownies with the invigorating essence of mint. It was a game-changer! This recipe effortlessly marries gooey chocolate brownies with a luscious mint fudge topping, making it the perfect go-to for any gathering or a special self-treat. Best of all, it requires minimal effort, so you can enjoy the sweet rewards without spending hours in the kitchen. Ready to take your dessert game to the next level? Let’s dive into this delightful recipe!

Why You'll Love This Mint Brownie Swirl Fudge

  • This Mint Brownie Swirl Fudge is an effortless dessert that comes together quickly, making it perfect for any occasion.
  • The combination of rich chocolate and refreshing mint creates a flavor that will leave everyone craving more.
  • Its stunning layers not only taste amazing but also look fantastic on any dessert table, impressing guests with its visual appeal.
  • Plus, this recipe is incredibly versatile; you can easily adjust the mint flavor or add toppings to customize it to your liking.

Mint Brownie Swirl Fudge Ingredients

For the Brownie Base

• Unsweetened cocoa powder – This is the key ingredient that gives your fudge its rich chocolate flavor.
• Granulated sugar – Adds sweetness to balance the rich cocoa.
• Unsalted butter (melted) – Provides a creamy texture; make sure it’s melted for easy mixing.
• All-purpose flour – Helps to bind the brownies together, creating that perfect fudgy texture.
• Large eggs – These add moisture and structure to the brownie base.

For the Fudge Topping

• Semi-sweet chocolate chips – Melting these with butter gives the topping its luscious richness.
• Sweetened condensed milk (14 oz) – This is the secret to a creamy fudge that sets beautifully and adds sweetness.
• Mint extract – Infuses that refreshing minty flavor into the fudge, elevating this Mint Brownie Swirl Fudge to perfection.

With these simple yet vital ingredients, you’ll be on your way to crafting a dessert that truly delights!

How to Make Mint Brownie Swirl Fudge

  1. Preheat your oven to 350°F (175°C). Prepare an 8×8-inch baking pan by greasing it or lining it with parchment paper for easy removal later.

  2. Mix melted butter, granulated sugar, eggs, and mint extract in a mixing bowl until smooth. The mixture should be glossy and well-combined for that perfect brownie texture.

  3. Fold in the all-purpose flour and cocoa powder gently, ensuring everything is just combined. Avoid overmixing to keep your brownies fudgy.

  4. Pour the brownie batter into the prepared pan and spread it evenly. Bake for 20-25 minutes. It’s ready when a toothpick comes out with moist crumbs. Allow it to cool completely in the pan.

  5. Melt butter and semi-sweet chocolate chips together in a saucepan over low heat. Stir in sweetened condensed milk and mint extract until smooth; then take off the heat for a glossy fudge topping.

  6. Pour the mint fudge mixture over the cooled brownies, spreading it evenly for a delightful finish. Chill in the fridge for at least two hours, allowing it to set completely.

  7. Slice into squares and serve! Enjoy these minty, chocolatey bites with family and friends.

Optional: Garnish with a sprinkle of sea salt for an extra flavor pop.

Exact quantities are listed in the recipe card below.

How to Store and Freeze Mint Brownie Swirl Fudge

Room Temperature: Store the Mint Brownie Swirl Fudge in an airtight container, and it will last for up to 3 days. Enjoy it at room temperature for the best texture!

Fridge: For longer freshness, keep the fudge in the fridge, where it can remain delicious for up to a week. Just make sure it’s well-wrapped to prevent it from drying out.

Freezer: Freeze the fudge for up to 3 months! Cut it into squares, layer with parchment paper, and store in an airtight container. Thaw in the fridge before serving.

Reheating: If you’d like to enjoy warm fudge, microwave individual pieces for about 10-15 seconds. Enjoy the melted chocolatey goodness!

What to Serve with Mint Brownie Swirl Fudge?

Imagine enjoying a heavenly dessert experience that harmonizes perfectly with your Mint Brownie Swirl Fudge!

  • Vanilla Ice Cream: The creamy vanilla balances the rich chocolate and mint, creating a delicious contrast that melts in your mouth.

  • Fresh Berries: A burst of juicy berries adds a refreshing and tangy note, enhancing the overall flavor profile of your sweet treat.

  • Mint Chocolate Chip Cookies: Elevate your dessert spread with these cookies for a delightful minty theme; the textures blend beautifully.

  • Espresso or Coffee: A bold mug of espresso complements the sweet and rich fudge, awakening your taste buds with every delightful bite.

Indulge your palate with a warm cup of cocoa; it offers a cozy embrace to your Mint Brownie Swirl Fudge, making it feel like a hug in a mug.

  • Whipped Cream: Light and fluffy whipped cream brings an airy texture to the dense fudge, making each bite a delightful experience.

  • Chocolate Drizzle: An extra touch of melted chocolate on top invites a luxurious, gooey experience, intensifying the chocolatey goodness.

Make Ahead Options

These Mint Brownie Swirl Fudge treats are a fantastic choice for meal prep and can make your busy weeknights sweeter! You can prepare the brownie base up to 24 hours in advance; simply bake and then let it cool completely before covering it tightly in plastic wrap and refrigerating. The fudge topping can also be made ahead of time; just melt and combine your ingredients, let it cool, and then refrigerate for up to 3 days. When you’re ready to finish, reheat the fudge topping gently if it has thickened, pour it over the brownie base, and let it set in the fridge for a couple of hours. This way, you’ll have delicious, homemade Mint Brownie Swirl Fudge ready to indulge in with minimal effort!

Mint Brownie Swirl Fudge Variations

Feel free to get creative with this recipe and tweak it to suit your taste!

  • Gluten-Free: Substitute all-purpose flour with a 1:1 gluten-free flour blend for a deliciously fudgy treat.

  • Nutty Crunch: Add 1/2 cup of chopped walnuts or pecans to the brownie mix for a delightful crunch and added depth of flavor.

  • Extra Minty: Increase the mint extract to 1.5 teaspoons for a more pronounced mint flavor that will leave your taste buds tingling with joy.

  • Peanut Butter Swirl: Swirl in 1/2 cup of creamy peanut butter into the brownie batter before baking for a deliciously rich twist.

  • Spicy Kick: Mix in a pinch of cayenne pepper or chili powder into the brownie batter for an unexpected yet delightful hint of heat.

  • Sea Salt Caramel: Drizzle your favorite salted caramel sauce over the fudge topping before chilling for a delectable sweet and salty pairing.

  • Dark Chocolate: Swap semi-sweet chocolate chips with dark chocolate chips for a richer and more intense fudge experience.

  • Berry Bliss: Top your fudge with fresh raspberries or chopped strawberries after cutting for a burst of fruity freshness that perfectly complements the chocolatey goodness.

Chef's Helpful Tips

  • To ensure a fudgy texture in your Mint Brownie Swirl Fudge, avoid overmixing when incorporating the flour and cocoa powder.
  • Use room temperature eggs for better emulsification with melted butter, which helps create a smooth batter.
  • When melting the chocolate, keep the heat low and stir constantly to prevent burning.
  • After refrigerating the fudge, let it sit at room temperature for a few minutes before cutting for cleaner edges.

Mint Brownie Swirl Fudge Recipe FAQs

What should I look for when selecting ingredients for the Mint Brownie Swirl Fudge?
Always choose fresh, high-quality ingredients! For cocoa powder, look for one that’s rich and dark. When picking mint extract, opt for pure extract over imitation for the best flavor; a good brand will make a noticeable difference! Also, ensure your butter is unsalted to keep the fudge balanced.

How should I store leftover Mint Brownie Swirl Fudge?
Absolutely! You can store your Mint Brownie Swirl Fudge in an airtight container. At room temperature, it will stay fresh for up to 3 days. If you’d like it to last longer, refrigerate the fudge where it can remain delightful for up to a week, just be sure it’s well-wrapped to prevent it from drying out.

Can I freeze Mint Brownie Swirl Fudge?
Yes, you can! To freeze your fudge, first cut it into squares. Layer these pieces with parchment paper to prevent sticking, and then store them in an airtight container. It can stay in the freezer for up to 3 months. When you’re ready to enjoy some, simply thaw it in the fridge overnight.

What can I do if my fudge topping is too runny?
In case you find your fudge topping too runny, don’t worry! Try placing it back on low heat, stirring continuously, until it thickens. If it’s still too loose, you can add a little more chocolate (melted) and mix it in until you reach your desired consistency. This will help stabilize the fudge while maintaining that delicious minty flavor.

Are there any dietary considerations for Mint Brownie Swirl Fudge?
Yes, indeed! This recipe contains common allergens like eggs and dairy. If you are cooking for someone with allergies or special dietary needs, you can substitute the eggs with flaxseed meal or applesauce. For a dairy-free option, use coconut milk in place of sweetened condensed milk, and opt for dairy-free chocolate chips. Always make sure to check ingredient labels for potential allergens!

How do I know when the brownies are done baking?
To tell if your brownies are perfectly baked, start checking around the 20-minute mark. Insert a toothpick into the center; it should come out with moist crumbs, not wet batter. If it comes out too dry, they may be overbaked, which can lead to a less fudgy consistency. Remember, they will continue to set a bit as they cool in the pan!

Mint Brownie Swirl Fudge

Mint Brownie Swirl Fudge

Indulge in Mint Brownie Swirl Fudge, a rich and refreshing chocolate treat that combines fudgy brownies and luscious mint fudge.
Print Recipe Pin Recipe
Prep Time 15 minutes mins
Cook Time 25 minutes mins
Chilling Time 2 hours hrs
Total Time 2 hours hrs 40 minutes mins
Servings: 16 squares
Course: DESSERT RECIPES
Cuisine: American
Calories: 150
Ingredients Equipment Method Nutrition Notes

Ingredients
  

For the Brownie Base
  • 1 cup Unsweetened cocoa powder Key ingredient for rich flavor
  • 1 cup Granulated sugar Balances the cocoa
  • 1/2 cup Unsalted butter (melted) Provides creamy texture
  • 1 cup All-purpose flour Binds the brownies
  • 2 large Large eggs Adds moisture and structure
For the Fudge Topping
  • 1 cup Semi-sweet chocolate chips Adds richness to the topping
  • 14 oz Sweetened condensed milk Secret to creamy fudge
  • 1 teaspoon Mint extract Infuses refreshing mint flavor

Equipment

  • 8x8-inch baking pan
  • Mixing bowl
  • Saucepan

Method
 

How to Make Mint Brownie Swirl Fudge
  1. Preheat your oven to 350°F (175°C). Prepare an 8×8-inch baking pan by greasing it or lining it with parchment paper.
  2. Mix melted butter, granulated sugar, eggs, and mint extract in a mixing bowl until smooth.
  3. Fold in the all-purpose flour and cocoa powder gently.
  4. Pour the brownie batter into the prepared pan and spread it evenly. Bake for 20-25 minutes.
  5. Melt butter and semi-sweet chocolate chips together in a saucepan over low heat. Stir in sweetened condensed milk and mint extract until smooth.
  6. Pour the mint fudge mixture over the cooled brownies and spread it evenly. Chill in the fridge for at least two hours.
  7. Slice into squares and serve.

Nutrition

Serving: 1squareCalories: 150kcalCarbohydrates: 20gProtein: 2gFat: 7gSaturated Fat: 4gMonounsaturated Fat: 2gCholesterol: 30mgSodium: 50mgPotassium: 90mgFiber: 1gSugar: 15gVitamin A: 100IUCalcium: 20mgIron: 1mg

Notes

Garnish with a sprinkle of sea salt for extra flavor.

Tried this recipe?

Let us know how it was!

Filed Under: DESSERT RECIPES

Delicious Orange Jelly Candy

December 11, 2025 by JudyWhite Leave a Comment

The first time I tasted homemade orange jelly candy, I was transported back to my childhood summers spent under the warm sun, the only sound being the gentle rustle of leaves. This delightful treat captures that essence, combining the tartness of sour oranges with just the right amount of sweetness, resulting in a chewy, zesty candy that is simply irresistible.

When I stumbled upon some forgotten sour oranges in my fridge, I knew I had to put them to good use. The result? A vibrant, flavorful candy that not only satisfies my sweet tooth but also adds a touch of sunshine to any day. This delicious orange jelly candy is the perfect antidote to those mundane fast-food cravings—refreshing, fun to make, and a guaranteed crowd-pleaser for friends and family alike.

If you’re looking for a delightful way to bring nostalgia back into your kitchen, look no further. With just a handful of ingredients and a bit of patience, you’ll be creating these orange-flavored bites of joy in no time. Let’s dive into this simple recipe that will leave you and your loved ones smiling!

Why You'll Love This Delicious Orange Jelly Candy

  • This recipe is incredibly easy to make, requiring just a few simple ingredients and minimal cooking time.
  • The vibrant flavor of sour oranges combined with the sweetness makes each bite a delightful explosion of taste.
  • You’ll love how versatile this candy is, as it can be enjoyed as a snack, a party treat, or even a thoughtful homemade gift.
  • Plus, its eye-catching color and unique shape give it an appealing visual that impresses everyone at the table.

Delicious Orange Jelly Candy Ingredients

• These fantastic ingredients create a delightful treat that’s sure to impress!

For the Jelly Mixture

  • Sour orange juice – this adds a vibrant tartness to balance the sweetness.
  • Sugar – granulated sugar is key for sweetness; you can use coconut sugar for a healthier alternative.
  • Agar agar – a plant-based gelling agent that helps firm up the jelly, making it vegan-friendly.

Optional Coatings

  • Powdered sugar – for sprinkling; it prevents sticking and adds a sweet finish.
  • Food coloring – a few drops can brighten up your jelly candy, making it even more visually appealing.

These ingredients come together to create the delicious orange jelly candy that’s bound to brighten your day!

How to Make Delicious Orange Jelly Candy

  1. Combine Ingredients: In a large saucepan, mix together the sugar, sour orange juice, and agar agar powder. If you’d like, add a few drops of orange or yellow food coloring to enhance the candy’s brightness.

  2. Cook Mixture: Stir the mixture CONSTANTLY over medium-high heat until it reaches a rolling boil. Lower the heat to medium-low and cook for about 4-5 minutes until the mixture thickens and bubbles.

  3. Pour and Chill: Pour the hot mixture into a rimmed 10×10-inch pan lined with parchment paper, making sure it’s evenly distributed. Allow it to chill in the fridge for at least two hours until set.

  4. Prepare for Cutting: Once chilled, take the pan out and cover about 1/2 inch at one edge with new parchment paper. Sprinkle powdered sugar over the remaining jelly surface to prevent sticking.

  5. Cut the Candy: Dip a sharp knife in warm water to loosen the jelly. Carefully slice the jelly into two blocks, running the knife across the middle for even portions.

  6. Roll into Logs: Gently roll each piece into a tight log, ensuring you don’t get powdered sugar on the sticky edge where the parchment paper was; this is crucial for keeping your log intact!

  7. Slice and Serve: Use a sharp knife to cut each log into 1/2-inch pieces. Serve and enjoy these delightful bites of homemade candy!

Optional: Dust the candy pieces with extra powdered sugar for a sweet finish.

Exact quantities are listed in the recipe card below.

How to Store and Freeze Delicious Orange Jelly Candy

Fridge: Keep your delicious orange jelly candy stored in an airtight container in the fridge for up to 1 week. This ensures it remains fresh and chewy.

Freezer: If you want to extend its shelf life, freeze the candy in a single layer on a baking sheet for about 2 hours, then transfer to an airtight bag. It can last up to 3 months.

Reheating: To enjoy the frozen candy, let it thaw in the fridge overnight or at room temperature for a couple of hours. There’s no need to reheat; it’s delightful served cold!

Serving: For best taste, roll the thawed candy in powdered sugar just before serving to bring back that fresh look and texture.

Delicious Orange Jelly Candy Variations

Feel free to let your creativity flow and personalize this delightful treat with these fun, delicious twists!

  • Citrus Medley: Use a blend of lemon and lime juices along with the sour orange juice for an extra tart kick. It adds layers of flavor that will surprise and delight every taste bud.

  • Spicy Kick: Add a pinch of cayenne pepper or chili powder to the mixture for a hint of heat. This unexpected twist can turn your candy into an exciting treat that tantalizes the senses.

  • Herb Infusion: Incorporate a few sprigs of fresh mint or basil while cooking. Strain the mixture before cooling to infuse it with refreshing herbal notes that make it truly unique.

  • Fruit Flavors: Substitute sour orange juice with other citrus juices like grapefruit or tangerine for different taste profiles. Each fruit brings its own character, making it fun to explore new flavors!

  • Colorful Layers: Create a layered candy by dividing the mixture into two bowls, tinting each with different food colorings, and then carefully pouring them in layers. The visual appeal will impress anyone who has the pleasure of enjoying this candy!

  • Nutty Crunch: Mix in finely chopped nuts or seeds, such as pistachios or sesame seeds, before pouring into the pan. This adds a delightful crunch that contrasts beautifully with the chewy candy.

  • Sweet Chocolate Dip: Melt dark or milk chocolate and dip the finished candy pieces for a luxurious touch. The rich chocolate pairs exquisitely with the vibrant orange flavor, creating a decadent treat.

  • Zesty Glaze: Brush finished candy pieces with a light glaze made of orange juice and powdered sugar for a shiny, sweet finish. This not only enhances the look but adds another layer of sweetness that elevates the already delicious candy.

Make Ahead Options

These delicious orange jelly candies are perfect for busy weeknights or last-minute gatherings! You can prep the jelly mixture up to 24 hours in advance by following steps 1 through 3, allowing you to save time when you’re ready to serve. Simply pour the hot mixture into the pan and let it chill in the fridge overnight. When you’re ready to roll and cut the candy, take it out of the fridge and proceed with steps 4 to 7. To maintain quality, ensure that the candy is tightly wrapped in parchment paper before refrigerating, preventing moisture from affecting the texture. Enjoy making the process easier with these make-ahead tips for your delicious orange jelly candy!

What to Serve with Delicious Orange Jelly Candy?

Looking to complement your sweet and zesty orange jelly candy experience? Here are some delightful pairings to elevate your treat!

  • Fresh Fruit Salad: A mix of juicy berries and tart apples enhances the candy’s citrus notes and adds a refreshing crunch.

  • Dark Chocolate Dipping Sauce: Rich, melted chocolate provides a luscious contrast that beautifully balances the candy’s tangy sweetness.

  • Mint Tea: This aromatic herbal tea offers a mild, soothing flavor that cools the palate while highlighting the candy’s brightness.

  • Cheese Platter: A selection of sharp cheeses contrasts well with the sweetness of the jelly, creating a sophisticated flavor combination.

  • Vanilla Ice Cream: Creamy ice cream balances the chewy texture of the candy, creating a delightful and indulgent treat.

  • Sparkling Water with Citrus: The fizz and brightness of citrus-enhanced sparkling water refreshes your taste buds, making each bite of candy even more enjoyable.

These pairings will create a delightful spread that everyone will love to savor alongside your delicious orange jelly candy!

Chef's Helpful Tips

  • To enhance the flavor of your Delicious Orange Jelly Candy, opt for freshly squeezed sour orange juice for a brighter and more complex taste.
  • Be sure to stir your mixture continuously while cooking to prevent the agar agar from clumping, which can lead to uneven texture.
  • For best results, allow your jelly to chill for a full two hours; this ensures it sets properly and can be easily cut.
  • When cutting your jelly, dipping the knife in warm water not only aids in slicing but also helps achieve clean edges, making for a professional-looking finish.

Delicious Orange Jelly Candy Recipe FAQs

How do I choose the right sour orange juice?
Absolutely! For the best flavor, opt for fresh or freshly squeezed sour oranges. Look for oranges that are firm and heavy for their size, with a vibrant color. Avoid any fruit with dark spots or an overly dull appearance, as that can indicate overripeness or spoilage.

What’s the best way to store leftover orange jelly candy?
Very! To keep your delicious orange jelly candy fresh, store it in an airtight container in the fridge. It will remain chewy and tasty for up to 1 week. If you notice any signs of moisture or it’s getting too sticky, simply dust it with a little extra powdered sugar before sealing.

Can I freeze this orange jelly candy?
Indeed! To freeze your jelly candy, first, place it in a single layer on a baking sheet and freeze for about 2 hours. Once frozen, transfer the pieces to an airtight bag, ensuring to remove as much air as possible. It’ll keep well in the freezer for up to 3 months. When you’re ready to enjoy it, thaw it in the fridge overnight or at room temperature for about two hours.

What if my jelly candy doesn’t set properly?
No worries! If your delicious orange jelly candy doesn’t set, it might be due to insufficient cooking time or too little agar agar. First, you can try briefly reheating the mixture until it comes to a rolling boil again, ensuring you stir constantly. If needed, add more agar agar (1/2 teaspoon, dissolved in a little water) and allow it to boil for an extra minute. Pour it back into the mold and chill again. If your jelly sets too hard, you can add a little water and gently reheat, mixing until it reaches your desired texture.

Are there any dietary concerns with this recipe?
Absolutely! This delicious orange jelly candy is naturally vegan, thanks to the agar agar. However, if you or your loved ones have specific allergies, be cautious about the sugar option. Granulated sugar is generally safe but always check labels if you’re using specialty sugars. If you’re making this candy for pets, remember that sugar is not advisable for animal diets, so it’s best for people only!

Delicious Orange Jelly Candy

Delicious Orange Jelly Candy

This delicious orange jelly candy combines the tartness of sour oranges with just the right amount of sweetness for a chewy, zesty treat.
Print Recipe Pin Recipe
Prep Time 10 minutes mins
Cook Time 5 minutes mins
Chilling Time 2 hours hrs
Total Time 2 hours hrs 15 minutes mins
Servings: 12 pieces
Course: DESSERT RECIPES
Cuisine: American
Calories: 50
Ingredients Equipment Method Nutrition Notes

Ingredients
  

Jelly Mixture
  • 1 cup sour orange juice freshly squeezed for best flavor
  • 1 cup sugar granulated or coconut sugar
  • 2 tablespoons agar agar powder form
Optional Coatings
  • 1/4 cup powdered sugar for sprinkling
  • 5 drops food coloring orange or yellow for enhancement

Equipment

  • large saucepan
  • rimmed 10x10 inch pan
  • sharp knife
  • parchment paper

Method
 

Making the Candy
  1. In a large saucepan, mix together the sugar, sour orange juice, and agar agar powder. If you'd like, add a few drops of food coloring.
  2. Stir the mixture CONSTANTLY over medium-high heat until it reaches a rolling boil. Lower the heat to medium-low and cook for about 4-5 minutes until it thickens.
  3. Pour the hot mixture into a lined pan and chill in the fridge for at least two hours until set.
  4. Take the pan out, cover an edge with new parchment paper, and sprinkle powdered sugar over the jelly surface.
  5. Dip a knife in warm water to loosen the jelly. Slice it into two blocks.
  6. Gently roll each piece into a tight log.
  7. Cut each log into 1/2-inch pieces. Serve and enjoy!

Nutrition

Serving: 1pieceCalories: 50kcalCarbohydrates: 13gPotassium: 30mgSugar: 12gVitamin C: 10mg

Notes

For best results, use freshly squeezed sour orange juice and allow the jelly to chill fully before cutting.

Tried this recipe?

Let us know how it was!

Filed Under: DESSERT RECIPES

Delicious Orange Jelly Candy

December 11, 2025 by JudyWhite Leave a Comment

The first time I tasted homemade orange jelly candy, I was transported back to my childhood summers spent under the warm sun, the only sound being the gentle rustle of leaves. This delightful treat captures that essence, combining the tartness of sour oranges with just the right amount of sweetness, resulting in a chewy, zesty candy that is simply irresistible.

When I stumbled upon some forgotten sour oranges in my fridge, I knew I had to put them to good use. The result? A vibrant, flavorful candy that not only satisfies my sweet tooth but also adds a touch of sunshine to any day. This delicious orange jelly candy is the perfect antidote to those mundane fast-food cravings—refreshing, fun to make, and a guaranteed crowd-pleaser for friends and family alike.

If you’re looking for a delightful way to bring nostalgia back into your kitchen, look no further. With just a handful of ingredients and a bit of patience, you’ll be creating these orange-flavored bites of joy in no time. Let’s dive into this simple recipe that will leave you and your loved ones smiling!

Why You'll Love This Delicious Orange Jelly Candy

  • This recipe is incredibly easy to make, requiring just a few simple ingredients and minimal cooking time.
  • The vibrant flavor of sour oranges combined with the sweetness makes each bite a delightful explosion of taste.
  • You’ll love how versatile this candy is, as it can be enjoyed as a snack, a party treat, or even a thoughtful homemade gift.
  • Plus, its eye-catching color and unique shape give it an appealing visual that impresses everyone at the table.

Delicious Orange Jelly Candy Ingredients

• These fantastic ingredients create a delightful treat that’s sure to impress!

For the Jelly Mixture

  • Sour orange juice – this adds a vibrant tartness to balance the sweetness.
  • Sugar – granulated sugar is key for sweetness; you can use coconut sugar for a healthier alternative.
  • Agar agar – a plant-based gelling agent that helps firm up the jelly, making it vegan-friendly.

Optional Coatings

  • Powdered sugar – for sprinkling; it prevents sticking and adds a sweet finish.
  • Food coloring – a few drops can brighten up your jelly candy, making it even more visually appealing.

These ingredients come together to create the delicious orange jelly candy that’s bound to brighten your day!

How to Make Delicious Orange Jelly Candy

  1. Combine Ingredients: In a large saucepan, mix together the sugar, sour orange juice, and agar agar powder. If you’d like, add a few drops of orange or yellow food coloring to enhance the candy’s brightness.

  2. Cook Mixture: Stir the mixture CONSTANTLY over medium-high heat until it reaches a rolling boil. Lower the heat to medium-low and cook for about 4-5 minutes until the mixture thickens and bubbles.

  3. Pour and Chill: Pour the hot mixture into a rimmed 10×10-inch pan lined with parchment paper, making sure it’s evenly distributed. Allow it to chill in the fridge for at least two hours until set.

  4. Prepare for Cutting: Once chilled, take the pan out and cover about 1/2 inch at one edge with new parchment paper. Sprinkle powdered sugar over the remaining jelly surface to prevent sticking.

  5. Cut the Candy: Dip a sharp knife in warm water to loosen the jelly. Carefully slice the jelly into two blocks, running the knife across the middle for even portions.

  6. Roll into Logs: Gently roll each piece into a tight log, ensuring you don’t get powdered sugar on the sticky edge where the parchment paper was; this is crucial for keeping your log intact!

  7. Slice and Serve: Use a sharp knife to cut each log into 1/2-inch pieces. Serve and enjoy these delightful bites of homemade candy!

Optional: Dust the candy pieces with extra powdered sugar for a sweet finish.

Exact quantities are listed in the recipe card below.

How to Store and Freeze Delicious Orange Jelly Candy

Fridge: Keep your delicious orange jelly candy stored in an airtight container in the fridge for up to 1 week. This ensures it remains fresh and chewy.

Freezer: If you want to extend its shelf life, freeze the candy in a single layer on a baking sheet for about 2 hours, then transfer to an airtight bag. It can last up to 3 months.

Reheating: To enjoy the frozen candy, let it thaw in the fridge overnight or at room temperature for a couple of hours. There’s no need to reheat; it’s delightful served cold!

Serving: For best taste, roll the thawed candy in powdered sugar just before serving to bring back that fresh look and texture.

What to Serve with Delicious Orange Jelly Candy?

Looking to complement your sweet and zesty orange jelly candy experience? Here are some delightful pairings to elevate your treat!

  • Fresh Fruit Salad: A mix of juicy berries and tart apples enhances the candy’s citrus notes and adds a refreshing crunch.

  • Dark Chocolate Dipping Sauce: Rich, melted chocolate provides a luscious contrast that beautifully balances the candy’s tangy sweetness.

  • Mint Tea: This aromatic herbal tea offers a mild, soothing flavor that cools the palate while highlighting the candy’s brightness.

  • Cheese Platter: A selection of sharp cheeses contrasts well with the sweetness of the jelly, creating a sophisticated flavor combination.

  • Vanilla Ice Cream: Creamy ice cream balances the chewy texture of the candy, creating a delightful and indulgent treat.

  • Sparkling Water with Citrus: The fizz and brightness of citrus-enhanced sparkling water refreshes your taste buds, making each bite of candy even more enjoyable.

These pairings will create a delightful spread that everyone will love to savor alongside your delicious orange jelly candy!

Delicious Orange Jelly Candy Variations

Feel free to let your creativity flow and personalize this delightful treat with these fun, delicious twists!

  • Citrus Medley: Use a blend of lemon and lime juices along with the sour orange juice for an extra tart kick. It adds layers of flavor that will surprise and delight every taste bud.

  • Spicy Kick: Add a pinch of cayenne pepper or chili powder to the mixture for a hint of heat. This unexpected twist can turn your candy into an exciting treat that tantalizes the senses.

  • Herb Infusion: Incorporate a few sprigs of fresh mint or basil while cooking. Strain the mixture before cooling to infuse it with refreshing herbal notes that make it truly unique.

  • Fruit Flavors: Substitute sour orange juice with other citrus juices like grapefruit or tangerine for different taste profiles. Each fruit brings its own character, making it fun to explore new flavors!

  • Colorful Layers: Create a layered candy by dividing the mixture into two bowls, tinting each with different food colorings, and then carefully pouring them in layers. The visual appeal will impress anyone who has the pleasure of enjoying this candy!

  • Nutty Crunch: Mix in finely chopped nuts or seeds, such as pistachios or sesame seeds, before pouring into the pan. This adds a delightful crunch that contrasts beautifully with the chewy candy.

  • Sweet Chocolate Dip: Melt dark or milk chocolate and dip the finished candy pieces for a luxurious touch. The rich chocolate pairs exquisitely with the vibrant orange flavor, creating a decadent treat.

  • Zesty Glaze: Brush finished candy pieces with a light glaze made of orange juice and powdered sugar for a shiny, sweet finish. This not only enhances the look but adds another layer of sweetness that elevates the already delicious candy.

Make Ahead Options

These delicious orange jelly candies are perfect for busy weeknights or last-minute gatherings! You can prep the jelly mixture up to 24 hours in advance by following steps 1 through 3, allowing you to save time when you’re ready to serve. Simply pour the hot mixture into the pan and let it chill in the fridge overnight. When you’re ready to roll and cut the candy, take it out of the fridge and proceed with steps 4 to 7. To maintain quality, ensure that the candy is tightly wrapped in parchment paper before refrigerating, preventing moisture from affecting the texture. Enjoy making the process easier with these make-ahead tips for your delicious orange jelly candy!

Chef's Helpful Tips

  • To enhance the flavor of your Delicious Orange Jelly Candy, opt for freshly squeezed sour orange juice for a brighter and more complex taste.
  • Be sure to stir your mixture continuously while cooking to prevent the agar agar from clumping, which can lead to uneven texture.
  • For best results, allow your jelly to chill for a full two hours; this ensures it sets properly and can be easily cut.
  • When cutting your jelly, dipping the knife in warm water not only aids in slicing but also helps achieve clean edges, making for a professional-looking finish.

Delicious Orange Jelly Candy Recipe FAQs

How do I choose the right sour orange juice?
Absolutely! For the best flavor, opt for fresh or freshly squeezed sour oranges. Look for oranges that are firm and heavy for their size, with a vibrant color. Avoid any fruit with dark spots or an overly dull appearance, as that can indicate overripeness or spoilage.

What’s the best way to store leftover orange jelly candy?
Very! To keep your delicious orange jelly candy fresh, store it in an airtight container in the fridge. It will remain chewy and tasty for up to 1 week. If you notice any signs of moisture or it’s getting too sticky, simply dust it with a little extra powdered sugar before sealing.

Can I freeze this orange jelly candy?
Indeed! To freeze your jelly candy, first, place it in a single layer on a baking sheet and freeze for about 2 hours. Once frozen, transfer the pieces to an airtight bag, ensuring to remove as much air as possible. It’ll keep well in the freezer for up to 3 months. When you’re ready to enjoy it, thaw it in the fridge overnight or at room temperature for about two hours.

What if my jelly candy doesn’t set properly?
No worries! If your delicious orange jelly candy doesn’t set, it might be due to insufficient cooking time or too little agar agar. First, you can try briefly reheating the mixture until it comes to a rolling boil again, ensuring you stir constantly. If needed, add more agar agar (1/2 teaspoon, dissolved in a little water) and allow it to boil for an extra minute. Pour it back into the mold and chill again. If your jelly sets too hard, you can add a little water and gently reheat, mixing until it reaches your desired texture.

Are there any dietary concerns with this recipe?
Absolutely! This delicious orange jelly candy is naturally vegan, thanks to the agar agar. However, if you or your loved ones have specific allergies, be cautious about the sugar option. Granulated sugar is generally safe but always check labels if you’re using specialty sugars. If you’re making this candy for pets, remember that sugar is not advisable for animal diets, so it’s best for people only!

Delicious Orange Jelly Candy

Delicious Orange Jelly Candy

This delicious orange jelly candy combines the tartness of sour oranges with just the right amount of sweetness for a chewy, zesty treat.
Print Recipe Pin Recipe
Prep Time 10 minutes mins
Cook Time 5 minutes mins
Chilling Time 2 hours hrs
Total Time 2 hours hrs 15 minutes mins
Servings: 12 pieces
Course: DESSERT RECIPES
Cuisine: American
Calories: 50
Ingredients Equipment Method Nutrition Notes

Ingredients
  

Jelly Mixture
  • 1 cup sour orange juice freshly squeezed for best flavor
  • 1 cup sugar granulated or coconut sugar
  • 2 tablespoons agar agar powder form
Optional Coatings
  • 1/4 cup powdered sugar for sprinkling
  • 5 drops food coloring orange or yellow for enhancement

Equipment

  • large saucepan
  • rimmed 10x10 inch pan
  • sharp knife
  • parchment paper

Method
 

Making the Candy
  1. In a large saucepan, mix together the sugar, sour orange juice, and agar agar powder. If you'd like, add a few drops of food coloring.
  2. Stir the mixture CONSTANTLY over medium-high heat until it reaches a rolling boil. Lower the heat to medium-low and cook for about 4-5 minutes until it thickens.
  3. Pour the hot mixture into a lined pan and chill in the fridge for at least two hours until set.
  4. Take the pan out, cover an edge with new parchment paper, and sprinkle powdered sugar over the jelly surface.
  5. Dip a knife in warm water to loosen the jelly. Slice it into two blocks.
  6. Gently roll each piece into a tight log.
  7. Cut each log into 1/2-inch pieces. Serve and enjoy!

Nutrition

Serving: 1pieceCalories: 50kcalCarbohydrates: 13gPotassium: 30mgSugar: 12gVitamin C: 10mg

Notes

For best results, use freshly squeezed sour orange juice and allow the jelly to chill fully before cutting.

Tried this recipe?

Let us know how it was!

Filed Under: DESSERT RECIPES

Delicious Orange Jelly Candy

December 11, 2025 by JudyWhite Leave a Comment

The first time I tasted homemade orange jelly candy, I was transported back to my childhood summers spent under the warm sun, the only sound being the gentle rustle of leaves. This delightful treat captures that essence, combining the tartness of sour oranges with just the right amount of sweetness, resulting in a chewy, zesty candy that is simply irresistible.

When I stumbled upon some forgotten sour oranges in my fridge, I knew I had to put them to good use. The result? A vibrant, flavorful candy that not only satisfies my sweet tooth but also adds a touch of sunshine to any day. This delicious orange jelly candy is the perfect antidote to those mundane fast-food cravings—refreshing, fun to make, and a guaranteed crowd-pleaser for friends and family alike.

If you’re looking for a delightful way to bring nostalgia back into your kitchen, look no further. With just a handful of ingredients and a bit of patience, you’ll be creating these orange-flavored bites of joy in no time. Let’s dive into this simple recipe that will leave you and your loved ones smiling!

Why You'll Love This Delicious Orange Jelly Candy

  • This recipe is incredibly easy to make, requiring just a few simple ingredients and minimal cooking time.
  • The vibrant flavor of sour oranges combined with the sweetness makes each bite a delightful explosion of taste.
  • You’ll love how versatile this candy is, as it can be enjoyed as a snack, a party treat, or even a thoughtful homemade gift.
  • Plus, its eye-catching color and unique shape give it an appealing visual that impresses everyone at the table.

Delicious Orange Jelly Candy Ingredients

• These fantastic ingredients create a delightful treat that’s sure to impress!

For the Jelly Mixture

  • Sour orange juice – this adds a vibrant tartness to balance the sweetness.
  • Sugar – granulated sugar is key for sweetness; you can use coconut sugar for a healthier alternative.
  • Agar agar – a plant-based gelling agent that helps firm up the jelly, making it vegan-friendly.

Optional Coatings

  • Powdered sugar – for sprinkling; it prevents sticking and adds a sweet finish.
  • Food coloring – a few drops can brighten up your jelly candy, making it even more visually appealing.

These ingredients come together to create the delicious orange jelly candy that’s bound to brighten your day!

How to Make Delicious Orange Jelly Candy

  1. Combine Ingredients: In a large saucepan, mix together the sugar, sour orange juice, and agar agar powder. If you’d like, add a few drops of orange or yellow food coloring to enhance the candy’s brightness.

  2. Cook Mixture: Stir the mixture CONSTANTLY over medium-high heat until it reaches a rolling boil. Lower the heat to medium-low and cook for about 4-5 minutes until the mixture thickens and bubbles.

  3. Pour and Chill: Pour the hot mixture into a rimmed 10×10-inch pan lined with parchment paper, making sure it’s evenly distributed. Allow it to chill in the fridge for at least two hours until set.

  4. Prepare for Cutting: Once chilled, take the pan out and cover about 1/2 inch at one edge with new parchment paper. Sprinkle powdered sugar over the remaining jelly surface to prevent sticking.

  5. Cut the Candy: Dip a sharp knife in warm water to loosen the jelly. Carefully slice the jelly into two blocks, running the knife across the middle for even portions.

  6. Roll into Logs: Gently roll each piece into a tight log, ensuring you don’t get powdered sugar on the sticky edge where the parchment paper was; this is crucial for keeping your log intact!

  7. Slice and Serve: Use a sharp knife to cut each log into 1/2-inch pieces. Serve and enjoy these delightful bites of homemade candy!

Optional: Dust the candy pieces with extra powdered sugar for a sweet finish.

Exact quantities are listed in the recipe card below.

Delicious Orange Jelly Candy Variations

Feel free to let your creativity flow and personalize this delightful treat with these fun, delicious twists!

  • Citrus Medley: Use a blend of lemon and lime juices along with the sour orange juice for an extra tart kick. It adds layers of flavor that will surprise and delight every taste bud.

  • Spicy Kick: Add a pinch of cayenne pepper or chili powder to the mixture for a hint of heat. This unexpected twist can turn your candy into an exciting treat that tantalizes the senses.

  • Herb Infusion: Incorporate a few sprigs of fresh mint or basil while cooking. Strain the mixture before cooling to infuse it with refreshing herbal notes that make it truly unique.

  • Fruit Flavors: Substitute sour orange juice with other citrus juices like grapefruit or tangerine for different taste profiles. Each fruit brings its own character, making it fun to explore new flavors!

  • Colorful Layers: Create a layered candy by dividing the mixture into two bowls, tinting each with different food colorings, and then carefully pouring them in layers. The visual appeal will impress anyone who has the pleasure of enjoying this candy!

  • Nutty Crunch: Mix in finely chopped nuts or seeds, such as pistachios or sesame seeds, before pouring into the pan. This adds a delightful crunch that contrasts beautifully with the chewy candy.

  • Sweet Chocolate Dip: Melt dark or milk chocolate and dip the finished candy pieces for a luxurious touch. The rich chocolate pairs exquisitely with the vibrant orange flavor, creating a decadent treat.

  • Zesty Glaze: Brush finished candy pieces with a light glaze made of orange juice and powdered sugar for a shiny, sweet finish. This not only enhances the look but adds another layer of sweetness that elevates the already delicious candy.

What to Serve with Delicious Orange Jelly Candy?

Looking to complement your sweet and zesty orange jelly candy experience? Here are some delightful pairings to elevate your treat!

  • Fresh Fruit Salad: A mix of juicy berries and tart apples enhances the candy’s citrus notes and adds a refreshing crunch.

  • Dark Chocolate Dipping Sauce: Rich, melted chocolate provides a luscious contrast that beautifully balances the candy’s tangy sweetness.

  • Mint Tea: This aromatic herbal tea offers a mild, soothing flavor that cools the palate while highlighting the candy’s brightness.

  • Cheese Platter: A selection of sharp cheeses contrasts well with the sweetness of the jelly, creating a sophisticated flavor combination.

  • Vanilla Ice Cream: Creamy ice cream balances the chewy texture of the candy, creating a delightful and indulgent treat.

  • Sparkling Water with Citrus: The fizz and brightness of citrus-enhanced sparkling water refreshes your taste buds, making each bite of candy even more enjoyable.

These pairings will create a delightful spread that everyone will love to savor alongside your delicious orange jelly candy!

How to Store and Freeze Delicious Orange Jelly Candy

Fridge: Keep your delicious orange jelly candy stored in an airtight container in the fridge for up to 1 week. This ensures it remains fresh and chewy.

Freezer: If you want to extend its shelf life, freeze the candy in a single layer on a baking sheet for about 2 hours, then transfer to an airtight bag. It can last up to 3 months.

Reheating: To enjoy the frozen candy, let it thaw in the fridge overnight or at room temperature for a couple of hours. There’s no need to reheat; it’s delightful served cold!

Serving: For best taste, roll the thawed candy in powdered sugar just before serving to bring back that fresh look and texture.

Make Ahead Options

These delicious orange jelly candies are perfect for busy weeknights or last-minute gatherings! You can prep the jelly mixture up to 24 hours in advance by following steps 1 through 3, allowing you to save time when you’re ready to serve. Simply pour the hot mixture into the pan and let it chill in the fridge overnight. When you’re ready to roll and cut the candy, take it out of the fridge and proceed with steps 4 to 7. To maintain quality, ensure that the candy is tightly wrapped in parchment paper before refrigerating, preventing moisture from affecting the texture. Enjoy making the process easier with these make-ahead tips for your delicious orange jelly candy!

Chef's Helpful Tips

  • To enhance the flavor of your Delicious Orange Jelly Candy, opt for freshly squeezed sour orange juice for a brighter and more complex taste.
  • Be sure to stir your mixture continuously while cooking to prevent the agar agar from clumping, which can lead to uneven texture.
  • For best results, allow your jelly to chill for a full two hours; this ensures it sets properly and can be easily cut.
  • When cutting your jelly, dipping the knife in warm water not only aids in slicing but also helps achieve clean edges, making for a professional-looking finish.

Delicious Orange Jelly Candy Recipe FAQs

How do I choose the right sour orange juice?
Absolutely! For the best flavor, opt for fresh or freshly squeezed sour oranges. Look for oranges that are firm and heavy for their size, with a vibrant color. Avoid any fruit with dark spots or an overly dull appearance, as that can indicate overripeness or spoilage.

What’s the best way to store leftover orange jelly candy?
Very! To keep your delicious orange jelly candy fresh, store it in an airtight container in the fridge. It will remain chewy and tasty for up to 1 week. If you notice any signs of moisture or it’s getting too sticky, simply dust it with a little extra powdered sugar before sealing.

Can I freeze this orange jelly candy?
Indeed! To freeze your jelly candy, first, place it in a single layer on a baking sheet and freeze for about 2 hours. Once frozen, transfer the pieces to an airtight bag, ensuring to remove as much air as possible. It’ll keep well in the freezer for up to 3 months. When you’re ready to enjoy it, thaw it in the fridge overnight or at room temperature for about two hours.

What if my jelly candy doesn’t set properly?
No worries! If your delicious orange jelly candy doesn’t set, it might be due to insufficient cooking time or too little agar agar. First, you can try briefly reheating the mixture until it comes to a rolling boil again, ensuring you stir constantly. If needed, add more agar agar (1/2 teaspoon, dissolved in a little water) and allow it to boil for an extra minute. Pour it back into the mold and chill again. If your jelly sets too hard, you can add a little water and gently reheat, mixing until it reaches your desired texture.

Are there any dietary concerns with this recipe?
Absolutely! This delicious orange jelly candy is naturally vegan, thanks to the agar agar. However, if you or your loved ones have specific allergies, be cautious about the sugar option. Granulated sugar is generally safe but always check labels if you’re using specialty sugars. If you’re making this candy for pets, remember that sugar is not advisable for animal diets, so it’s best for people only!

Delicious Orange Jelly Candy

Delicious Orange Jelly Candy

This delicious orange jelly candy combines the tartness of sour oranges with just the right amount of sweetness for a chewy, zesty treat.
Print Recipe Pin Recipe
Prep Time 10 minutes mins
Cook Time 5 minutes mins
Chilling Time 2 hours hrs
Total Time 2 hours hrs 15 minutes mins
Servings: 12 pieces
Course: DESSERT RECIPES
Cuisine: American
Calories: 50
Ingredients Equipment Method Nutrition Notes

Ingredients
  

Jelly Mixture
  • 1 cup sour orange juice freshly squeezed for best flavor
  • 1 cup sugar granulated or coconut sugar
  • 2 tablespoons agar agar powder form
Optional Coatings
  • 1/4 cup powdered sugar for sprinkling
  • 5 drops food coloring orange or yellow for enhancement

Equipment

  • large saucepan
  • rimmed 10x10 inch pan
  • sharp knife
  • parchment paper

Method
 

Making the Candy
  1. In a large saucepan, mix together the sugar, sour orange juice, and agar agar powder. If you'd like, add a few drops of food coloring.
  2. Stir the mixture CONSTANTLY over medium-high heat until it reaches a rolling boil. Lower the heat to medium-low and cook for about 4-5 minutes until it thickens.
  3. Pour the hot mixture into a lined pan and chill in the fridge for at least two hours until set.
  4. Take the pan out, cover an edge with new parchment paper, and sprinkle powdered sugar over the jelly surface.
  5. Dip a knife in warm water to loosen the jelly. Slice it into two blocks.
  6. Gently roll each piece into a tight log.
  7. Cut each log into 1/2-inch pieces. Serve and enjoy!

Nutrition

Serving: 1pieceCalories: 50kcalCarbohydrates: 13gPotassium: 30mgSugar: 12gVitamin C: 10mg

Notes

For best results, use freshly squeezed sour orange juice and allow the jelly to chill fully before cutting.

Tried this recipe?

Let us know how it was!

Filed Under: DESSERT RECIPES

Chocolate Orange Truffles

December 11, 2025 by JudyWhite Leave a Comment

There’s something undeniably delightful about the combination of rich chocolate and zesty orange that instantly transports me to a cozy café in Paris. As I whisk together creamy, melted chocolate and the bright essence of fresh orange zest, I can’t help but smile at how effortlessly these Chocolate Orange Truffles come together. Perfect for impressing guests or simply indulging myself, this recipe has a way of turning any ordinary day into a special occasion.

Best of all, these truffles require just a handful of ingredients and a little patience to chill, which means you can whip them up even on a busy weeknight. Imagine sinking your teeth into the smooth, velvety chocolate exterior, only to discover the burst of citrus flavor waiting inside. Whether you serve them at a gathering or enjoy them as an evening treat, these truffles are sure to satisfy your sweet cravings without the heaviness of traditional desserts. Let’s dive into making your new favorite chocolatey delight!

Why You'll Love This Chocolate Orange Truffles

  • These Chocolate Orange Truffles are incredibly easy to make, requiring just a few simple ingredients and minimal effort.
  • The delightful flavor combination of rich chocolate and zesty orange creates a memorable treat that is sure to please everyone.
  • Their versatility means they can be served at any occasion, from casual gatherings to elegant dinner parties.
  • Plus, the striking visual appeal of these truffles makes them a show-stopping dessert that is as stunning as it is delicious.
  • They are perfect for impressing guests while being time-saving, as they can be prepared in advance and chilled until ready to serve.
  • You will find these truffles are a crowd-pleaser that brings joy with every bite!

Chocolate Orange Truffles Ingredients

• Get ready to delight your taste buds!

For the Truffles

  • Semi Sweet or Dark Chocolate – finely chopped to ensure it melts smoothly into a luscious filling.
  • Heavy Whipping Cream – adds a rich, creamy texture that makes these Chocolate Orange Truffles heavenly.
  • Orange – zested to unleash its vibrant, citrusy essence and enhance the flavor profile beautifully.

For Coating

  • Chocolate Sprinkles – for a fun, crunchy texture and an extra touch of sweetness.
  • Cocoa Powder – use for a classic, bittersweet coating that perfectly complements the rich chocolate inside.

How to Make Chocolate Orange Truffles

  1. Chop the chocolate into small pieces and place them in a mixing bowl. This step allows for easier melting, so ensure they’re finely chopped—about the size of chocolate chips works perfectly.

  2. Heat the heavy whipping cream in a saucepan over medium heat until it begins to simmer. Watch closely; you want it hot, but not boiling, to avoid scalding the cream.

  3. Pour the hot cream over the chopped chocolate and let it sit for about 3-5 minutes. This gentle melting time helps create a smooth, silky texture for your truffles.

  4. Stir the mixture until it’s smooth and well combined. You should see a glossy, rich chocolate consistency that’s calling your name!

  5. Add the grated orange zest to the chocolate mixture and stir until fully incorporated. This will infuse your truffles with that delightful citrus burst—don’t skip this step!

  6. Refrigerate the mixture for approximately 120 minutes or until it firms up. You want it to be scoopable, so give it that time to chill well!

  7. Scoop out small amounts of the mixture and roll them into balls, using your hands. Aim for about a tablespoon’s worth for perfect bite-sized truffles.

  8. Roll the truffles in chocolate sprinkles or cocoa powder to coat them. This adds both flavor and a lovely finish—make sure they’re well-coated!

  9. Place the coated truffles on a baking sheet and refrigerate until ready to serve. This final chill helps the coatings set perfectly.

Optional: Dust with extra orange zest before serving for a fresh touch!

Exact quantities are listed in the recipe card below.

How to Store and Freeze Chocolate Orange Truffles

Fridge: Keep your Chocolate Orange Truffles in an airtight container in the fridge for up to 1 week to maintain their freshness and flavor.

Freezer: For longer storage, freeze the truffles in a single layer on a baking sheet, then transfer to an airtight container where they can last for up to 3 months.

Thawing: When you’re ready to enjoy, simply remove the truffles from the freezer and let them thaw in the fridge for a couple of hours—they’ll be just as delicious!

Reheating: No need to reheat; serve these truffles chilled for the best texture and flavor experience!

What to Serve with Chocolate Orange Truffles?

Imagine gathering around a table, laughter in the air, as you savor delightful treats that perfectly complement the zesty richness of these indulgent truffles.

  • Rich Dark Coffee: The deep flavors of a well-brewed dark coffee provide a luscious contrast to the sweet and tangy truffles, enhancing their chocolate notes.

  • Fresh Berries: Brightly colored berries like raspberries or strawberries add a refreshing burst that beautifully balances the richness of the chocolate. Their natural sweetness paired with the citrus notes creates an enchanting flavor experience.

  • Vanilla Ice Cream: The creamy, smooth texture of vanilla ice cream serves as a rich background that allows the truffles to shine. It’s a classic combination that feels like a warm hug on a plate.

  • Sparkling Wine: A chilled glass of sparkling wine or champagne provides a festive touch, highlighting the truffles’ flavors while cleansing the palate with each sip.

  • Chocolate Mousse: Consider serving a light, airy chocolate mousse alongside for a delightful textural contrast. The mousse’s creaminess complements the truffles, making for a decadent dessert pairing.

  • Orange Zest Infused Cheesecake: An orange-infused cheesecake enhances the citrus flavor found in the truffles, creating a delightful harmony of flavors that your guests will adore.

  • Mint Tea: A soothing cup of mint tea helps cleanse the palate and offers a refreshing finish to the chocolate experience. It’s simple yet effective in bringing balance to your dessert table.

  • Almond Biscotti: Provide a crunchy texture with almond biscotti for a delightful dipper. The nutty flavor pairs beautifully with the chocolate and orange, creating an extra layer of enjoyment.

Make Ahead Options

These Chocolate Orange Truffles are ideal for meal prep, making your sweet indulgence even more convenient! You can prepare the truffle mixture up to 3 days in advance. Simply follow the recipe up to step 6, then refrigerate it tightly covered to maintain freshness. When you’re ready to enjoy them, scoop and roll the truffles in your desired coatings just before serving, ensuring they’re as delightful as freshly made. This method not only saves time but also ensures that the flavors have time to meld beautifully, leaving you with consistently rich and zesty truffles that taste just as delicious. Enjoy the satisfaction of having a scrumptious treat ready whenever you need it!

Chocolate Orange Truffles Variations

Feel free to explore a world of flavors and textures with these delightful twists to your truffles!

  • Nutty Add-In: Mix in 1/4 cup of finely chopped hazelnuts or almonds for added texture and flavor. The nutty crunch beautifully complements the creamy chocolate.

  • Spicy Kick: Add a pinch of cayenne pepper or chili powder to the chocolate mixture for an unexpected burst of heat. It creates a delightful contrast to the sweetness!

  • Vegan Friendly: Substitute heavy cream with coconut cream and use dairy-free chocolate to create a luscious vegan treat. You won’t miss the dairy with the rich coconut flavor!

  • Liqueur Infusion: Stir in a tablespoon of orange liqueur, like Grand Marnier or Cointreau, for a sophisticated flavor enhancement. This little touch elevates your truffles to a decadent dessert!

  • Fruit Fusion: Swap the orange zest for lemon or raspberry purée for a refreshing twist. Each variation offers its own unique burst of tanginess that pairs wonderfully with chocolate.

  • Sweet & Salty: Incorporate a sprinkle of flaky sea salt to the chilled truffles before serving to enhance and balance the sweetness. It brings a mouthwatering contrast that everyone will love!

  • Cocoa Roll Variation: Roll the truffles in finely chopped toasted coconut or crushed pistachios for a unique twist on the traditional coating. Each bite becomes an adventure in flavor and texture!

  • Herbal Essence: Experiment by adding a touch of fresh mint or rosemary to the chocolate mixture for an aromatic and refreshing flavor. It’s a unique way to impress your guests with a sweet herbal blend!

Chef's Helpful Tips

  • When making Chocolate Orange Truffles, be sure to finely chop your chocolate to ensure it melts evenly and creates a smooth ganache.
  • Avoid boiling the heavy whipping cream; just bring it to a simmer to prevent curdling or scalding the cream.
  • Allow the mixture to rest for a few minutes after pouring the hot cream over the chocolate to achieve that glossy texture without overmixing.
  • Finally, make sure to refrigerate the mixture long enough to firm up properly, so your truffles hold their shape when rolled.

Chocolate Orange Truffles Recipe FAQs

How do I choose the best chocolate for my truffles?
Absolutely! When selecting chocolate, look for high-quality semi-sweet or dark chocolate with a cocoa content of at least 60-70%. Check for a glossy appearance and a smooth texture. Avoid chocolate chips, as they’re formulated to hold their shape and may not melt as smoothly.

How long do Chocolate Orange Truffles last in the fridge?
Very! If stored in an airtight container, your Chocolate Orange Truffles can last up to 1 week in the fridge. Just make sure to keep them sealed to prevent them from absorbing any unwanted odors from the refrigerator.

Can I freeze Chocolate Orange Truffles, and if so, how?
Yes, you can! To freeze, first lay the truffles in a single layer on a baking sheet and place them in the freezer until they are solid. This usually takes about 1-2 hours. Once they are firm, transfer them to an airtight container or a freezer bag. They can last for up to 3 months. When you’re ready to indulge, thaw them in the fridge for a couple of hours.

What should I do if my chocolate ganache is too runny?
If you find your chocolate ganache is too runny to scoop, don’t worry! Simply place the mixture back in the refrigerator for an additional 30-60 minutes to firm it up, checking periodically. If time is short, consider adding a bit more chopped chocolate or cocoa powder and gently stir until smooth. This can help thicken the texture while maintaining flavor.

Are there any dietary considerations I should think about when making these truffles?
Absolutely! If you’re preparing these truffles for someone with dietary restrictions, consider using dairy-free chocolate and heavy cream to make them vegan. Also, check the specific brands for potential allergens, such as nuts or gluten, as some chocolates may have cross-contamination. Always ensure the ingredients align with personal dietary needs.

Chocolate Orange Truffles

Chocolate Orange Truffles

Delightful Chocolate Orange Truffles combining rich chocolate and zesty orange for an exquisite treat.
Print Recipe Pin Recipe
Prep Time 15 minutes mins
Cook Time 5 minutes mins
Chilling Time 2 hours hrs
Total Time 2 hours hrs 20 minutes mins
Servings: 12 truffles
Course: DESSERT RECIPES
Cuisine: French
Calories: 120
Ingredients Equipment Method Nutrition Notes

Ingredients
  

For the Truffles
  • 8 oz Semi Sweet or Dark Chocolate finely chopped
  • 1 cup Heavy Whipping Cream adds richness
  • 1 medium Orange zested
For Coating
  • 1 cup Chocolate Sprinkles
  • 1/2 cup Cocoa Powder for coating

Equipment

  • Mixing bowl
  • Saucepan
  • Baking sheet

Method
 

Making Truffles
  1. Chop the chocolate into small pieces and place them in a mixing bowl.
  2. Heat the heavy whipping cream in a saucepan over medium heat until it begins to simmer.
  3. Pour the hot cream over the chopped chocolate and let it sit for about 3-5 minutes.
  4. Stir the mixture until it’s smooth and well combined.
  5. Add the grated orange zest to the chocolate mixture and stir until fully incorporated.
  6. Refrigerate the mixture for approximately 120 minutes or until it firms up.
  7. Scoop out small amounts of the mixture and roll them into balls.
  8. Roll the truffles in chocolate sprinkles or cocoa powder to coat them.
  9. Place the coated truffles on a baking sheet and refrigerate until ready to serve.

Nutrition

Serving: 1truffleCalories: 120kcalCarbohydrates: 10gProtein: 1gFat: 9gSaturated Fat: 5gMonounsaturated Fat: 4gCholesterol: 15mgSodium: 5mgPotassium: 60mgFiber: 1gSugar: 8gVitamin A: 200IUVitamin C: 2mgCalcium: 20mgIron: 1mg

Notes

Optional: Dust with extra orange zest before serving for a fresh touch. Store in an airtight container for up to 1 week.

Tried this recipe?

Let us know how it was!

Filed Under: DESSERT RECIPES

  • « Previous Page
  • 1
  • 2
  • 3
  • 4
  • 5
  • Next Page »

Recent Posts

  • One Pot Cheesy Pasta
  • Steak with Mushroom Sauce
  • St. Patrick’s Day Puppy Chow
  • Salmon with Lemon Butter
  • St. Patrick’s Day Puppy Chow

Recent Comments

No comments to show.

Footer

  • Contact
  • Privacy Policy
  • About Us
  • Terms
  • ↑ back to top

Copyright © 2024 www.Forkono.com

Table Of Content