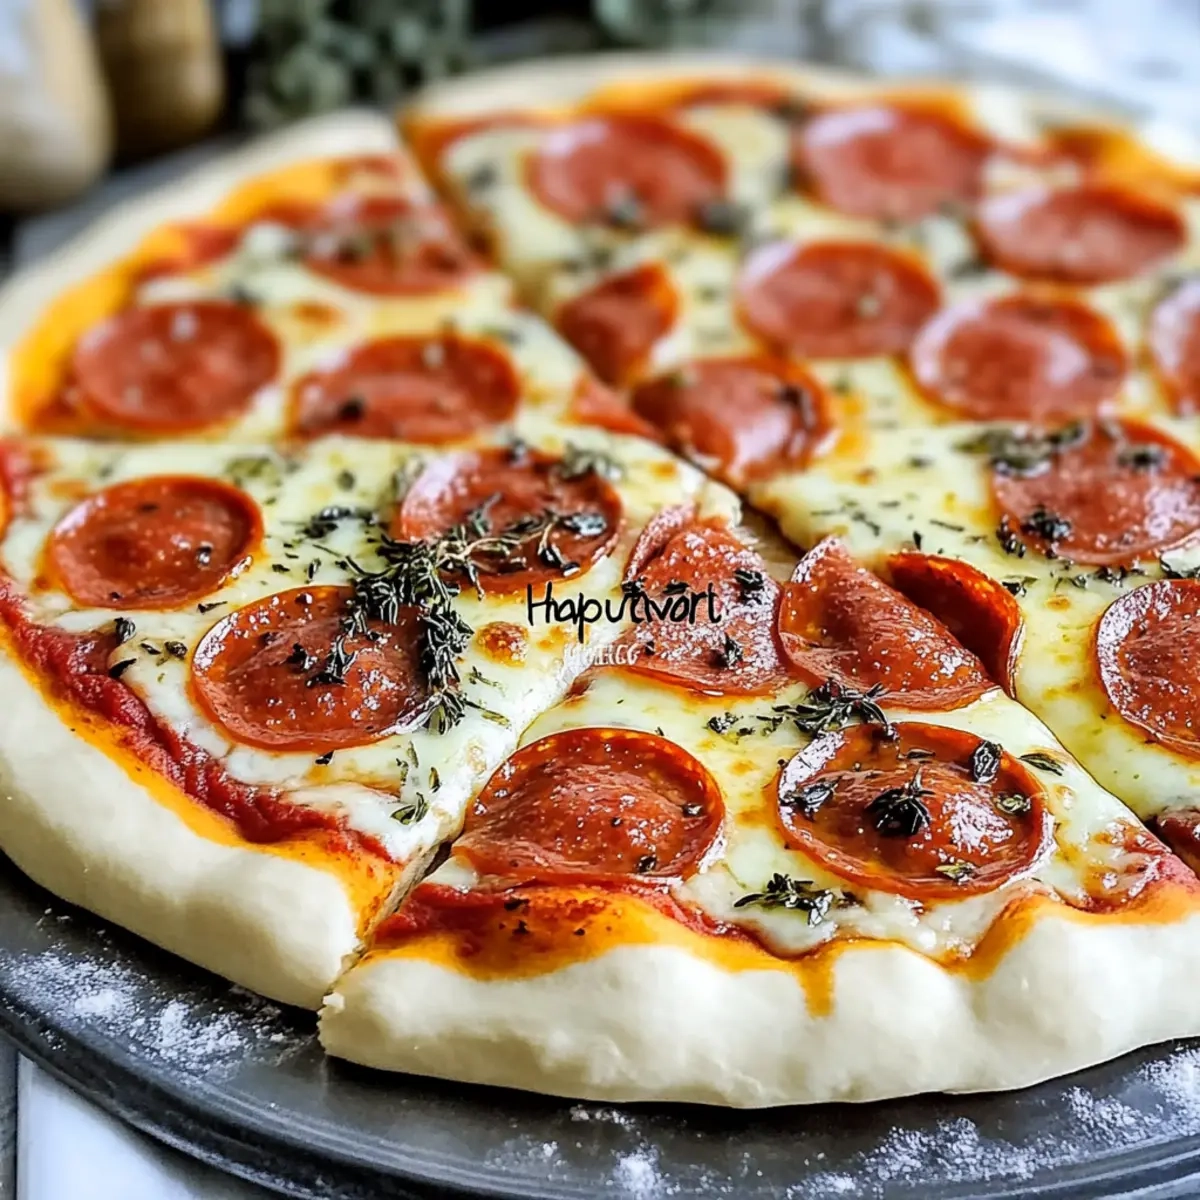
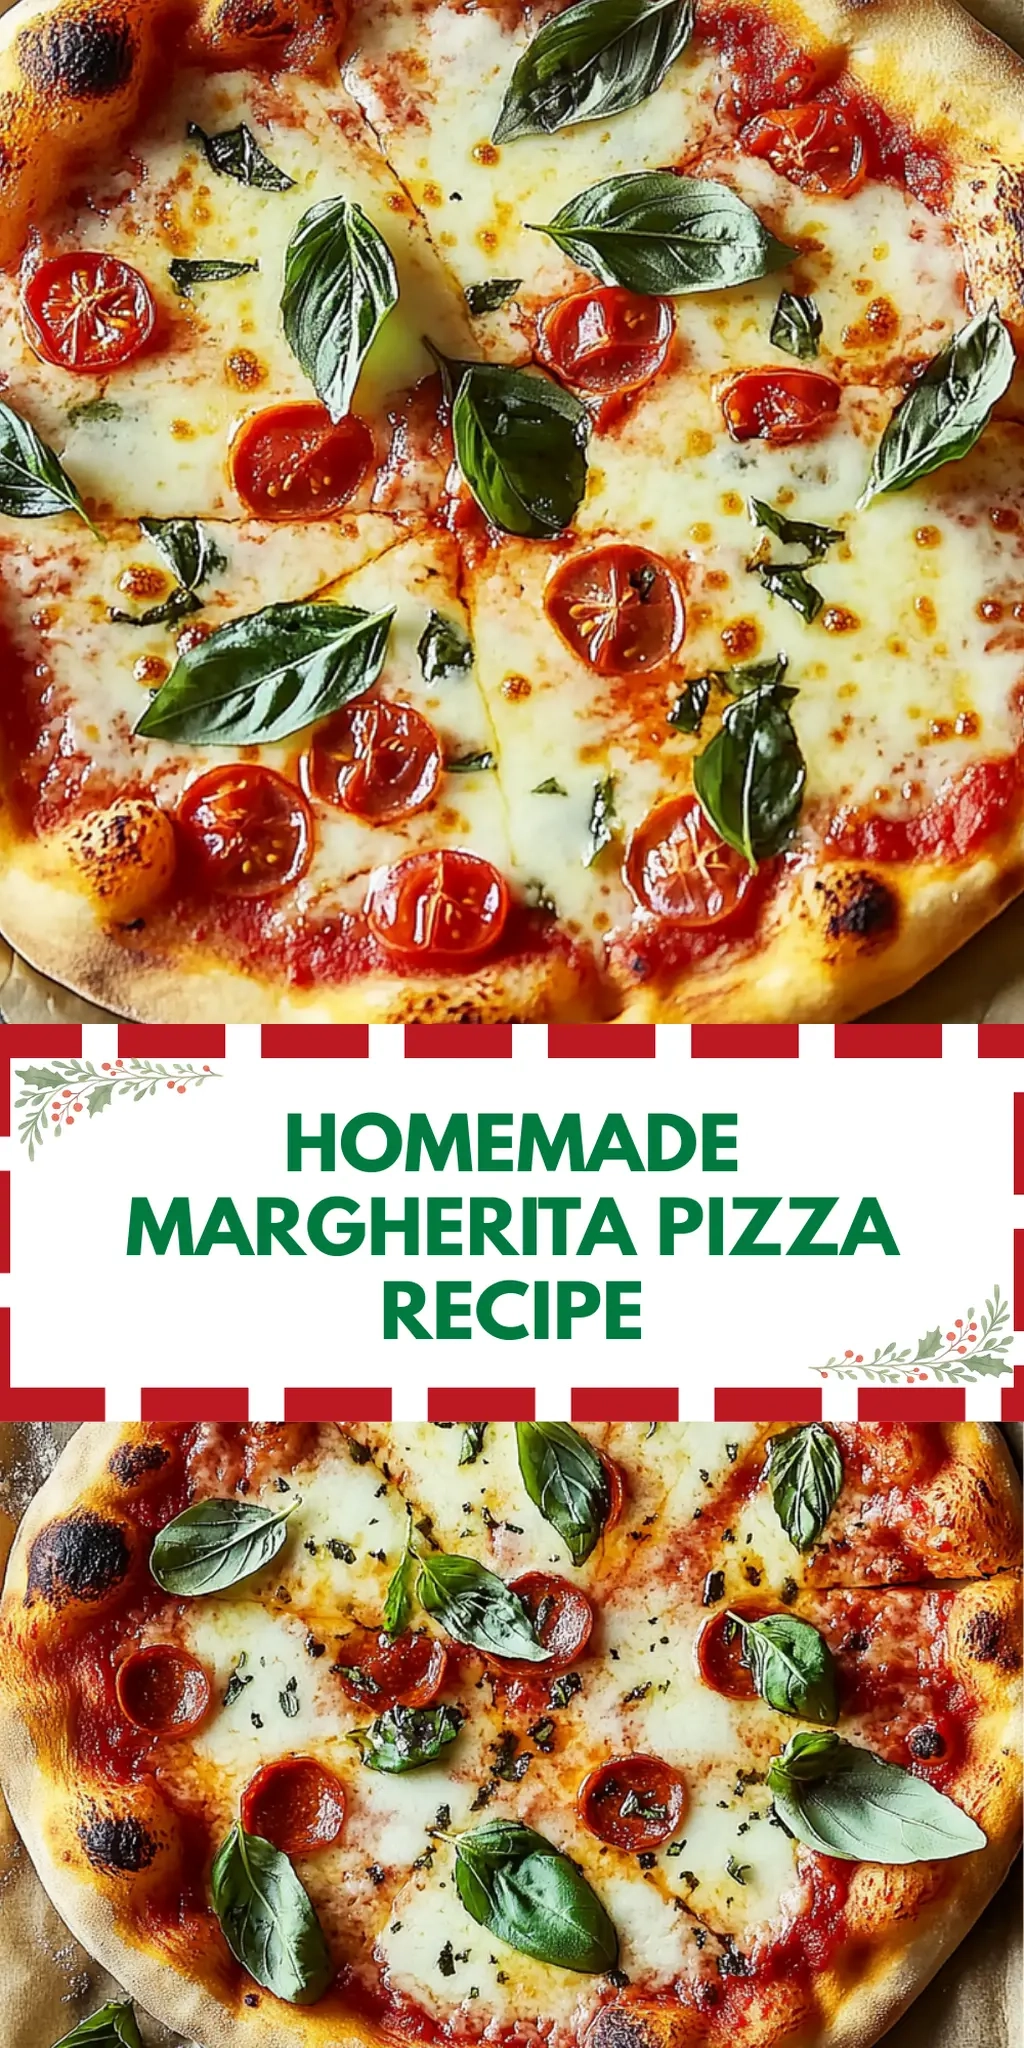
Forkono

  • BREAKFAST & BRUNCH
  • DESSERT RECIPES
  • DINNER RECIPES
  • LUNCH RECIPES
  • About uS
  • SNACKS & APPETIZERS
menu icon
go to homepage
  • BREAKFAST & BRUNCH
  • DESSERT RECIPES
  • DINNER RECIPES
  • LUNCH RECIPES
  • About uS
  • SNACKS & APPETIZERS
search icon
Homepage link
  • BREAKFAST & BRUNCH
  • DESSERT RECIPES
  • DINNER RECIPES
  • LUNCH RECIPES
  • About uS
  • SNACKS & APPETIZERS
×

Crispy Baked Ground Beef Tacos with Creamy Chipotle Sauce

December 16, 2025 by JudyWhite Leave a Comment

There’s a special joy in coming home after a long day, knowing that a plate of crispy baked ground beef tacos with creamy chipotle sauce awaits you. The sound of those golden tortillas crackling in the oven instantly lifts my spirits, and the aroma that fills the kitchen is simply irresistible. I stumbled upon this delectable recipe during one of those cooking experiments where I decided to elevate our go-to taco night, and boy, did I hit the jackpot!

These tacos not only satisfy that comfort food craving but also add a touch of flair to your weeknight routine. With just 25 minutes from start to finish, they are the perfect solution for those evenings when you’re tired of the same boring meals. The combination of seasoned beef, melty cheese, and that creamy chipotle sauce creates a mouthwatering explosion of flavors that keep everyone coming back for seconds. Trust me, when you serve these up, your family and friends will be raving about how a simple meal turned into a fiesta! Let’s dive in and make some magic happen in your kitchen.

Why You'll Love This Crispy Baked Ground Beef Tacos with Creamy Chipotle Sauce

  • These crispy baked ground beef tacos are incredibly easy to make, allowing you to whip up a delicious meal in just 25 minutes.
  • The flavor combination of seasoned beef, melty cheese, and the creamy chipotle sauce is an absolute crowd-pleaser that will keep everyone coming back for more.
  • Not only are they tasty, but they’re also versatile—feel free to customize them with your favorite toppings for a unique twist.
  • Plus, the golden, crispy tortillas offer a delightful visual appeal that makes your dinner look as good as it tastes.

Crispy Baked Ground Beef Tacos Ingredients

Get ready to assemble the delicious crunchy delights!

For the Beef Filling

  • Ground beef – a hearty base that absorbs all the flavors beautifully.
  • Taco seasoning – adds the perfect mix of spices for that authentic taco taste.
  • Water – helps create a luscious beef mixture when combined with seasoning.
  • Garlic – brings a rich aroma and flavor to your filling.
  • Lime juice – freshly squeezed for a zesty kick that brightens the dish.
  • Diced green chiles – adds a mild heat and extra flavor to the beef.
  • Salt – balances all the flavors; season to taste.
  • Pepper – provides a mild heat that complements the spices well.

For the Tacos

  • Colby Jack cheese – provides melty goodness; reserve some for sprinkling on top!
  • Corn tortillas – the perfect vehicle for your crispy baked ground beef tacos.

For the Creamy Chipotle Sauce

  • Mexican crema – rich and creamy base for the sauce; sour cream works too!
  • Chipotle peppers in adobo sauce – adds a smoky flavor with a touch of heat.
  • Honey – balances the spice with sweetness; can use sugar instead.
  • Lime juice – a splash brings acidity to the creamy sauce.
  • Garlic (for crema) – enhances the sauce’s flavor with its fragrant goodness.
  • Salt – to taste, ensuring the sauce is perfectly seasoned.

For Serving

  • Sour cream – a classic topping for extra creaminess.
  • Shredded lettuce – adds a fresh crunch to your tacos.
  • Fresh cilantro – for a burst of freshness and color.
  • Pico de gallo – brings tang and freshness as a topping.
  • Guacamole – for creamy indulgence that complements the crispy tacos.
  • Pickled red onions – add a tangy and slightly sweet crunch for a flavor boost.

These Crispy Baked Ground Beef Tacos with Creamy Chipotle Sauce are packed with layers of flavor that your family will adore!

How to Make Crispy Baked Ground Beef Tacos

  1. Preheat the oven to 425°F. Line 2 baking sheets with nonstick spray or lightly oil them to ensure your tacos come out perfectly crispy.

  2. Cook the beef in a skillet over medium heat with 1 Tbsp. oil until no longer pink, about 5-7 minutes. Drain excess fat for a lean filling.

  3. Mix in the taco seasoning, water, minced garlic, lime juice, diced green chiles, salt, and pepper. Cook, stirring occasionally, until most moisture evaporates (about 5 minutes).

  4. Combine 1 cup of shredded cheese into the beef mixture and stir until fully mixed. Remove from heat and let cool slightly.

  5. Warm the tortillas by wrapping them in a damp paper towel and microwaving for 45-60 seconds. Flip them halfway to achieve pliability.

  6. Fill each tortilla with about ¼ cup of the beef mixture, adding a sprinkle of cheese on top. Fold over to seal, then lightly brush with oil for extra crispness.

  7. Bake the tacos on prepared sheets for 15-20 minutes, or until they are golden brown and crispy, filling your kitchen with tantalizing aromas.

  8. Prepare the creamy chipotle sauce by blending all crema ingredients in a food processor until smooth. Taste and adjust seasoning as needed for perfection.

  9. Serve the crispy baked tacos warm with your favorite toppings and drizzle generous amounts of the creamy chipotle sauce over them.

Optional: Garnish with fresh cilantro for a vibrant touch!

Exact quantities are listed in the recipe card below.

Crispy Baked Ground Beef Tacos Variations

Feel free to get creative and make these tacos truly your own with some delightful twists!

  • Low-Carb: Use lettuce leaves instead of tortillas for a fresh, crunchy wrap that’s perfect for a keto-friendly meal.
  • Vegetarian: Substitute ground beef with black beans or lentils, seasoned just like the original for a hearty plant-based option.
  • Spicy Kick: Add more chipotle peppers or diced jalapeños for extra heat that sends your taste buds on an exhilarating ride.
  • Cheesy Bliss: Incorporate a blend of different cheeses like pepper jack or queso fresco for added flavor and creaminess.
  • Savory Sweet: Drizzle honey or maple syrup over the beef filling before baking to create a tender balance of sweet and savory flavors.
  • Herbaceous Touch: Mix in fresh chopped cilantro or parsley into the beef mixture for a fresh burst of flavor that elevates each bite.
  • Crunchy Texture: Top with crushed tortilla chips before serving for an extra layer of texture that adds a delightful crunch.
  • Fiesta Style: Serve with a variety of toppings like mango salsa or avocado crema to bring a fiesta of flavors to your table!

Let’s celebrate your culinary flair and enjoy these delicious variations together!

Make Ahead Options

These Crispy Baked Ground Beef Tacos with Creamy Chipotle Sauce are perfect for meal prep, making busy weeknights a breeze! You can prepare the beef filling up to 3 days in advance; simply cook it, let it cool, and store it in an airtight container in the refrigerator. The tortillas can be prepped up to 24 hours ahead as well—just wrap them tightly in plastic wrap. When you’re ready to serve, warm the tortillas in the microwave, fill them with the beef mixture and cheese, brush with oil, and bake until crispy, ensuring they taste just as delicious as if made fresh. This way, you can savor homemade goodness with minimal effort!

How to Store and Freeze Crispy Baked Ground Beef Tacos

Room Temperature: Store leftover tacos in an airtight container for up to 2 hours after cooking. They are best enjoyed fresh, but if you need to save them, refrigerate promptly.

Fridge: Keep the tacos refrigerated in a covered container for up to 3 days. To maintain their crispiness, consider reheating in the oven instead of the microwave.

Freezer: Freeze leftover tacos for up to 2 months. Wrap each taco individually in plastic wrap and place them in a freezer-safe bag to prevent freezer burn.

Reheating: When ready to enjoy, thaw overnight in the fridge and reheat in the oven at 350°F for about 10-15 minutes for a crispy finish.

What to Serve with Crispy Baked Ground Beef Tacos with Creamy Chipotle Sauce?

A delightful meal is just a few perfect pairings away, transforming your taco night into a feast for the senses.

  • Zesty Mexican Rice: Fluffy rice cooked with tomatoes, spices, and lime complements the bold flavors of the tacos perfectly.
  • Refried Beans: Creamy and savory, these will add a rich texture that pairs beautifully with the crispy tacos.
  • Fresh Corn Salsa: Provides a refreshing burst of sweetness and crunch that balances the richness of the chipotle sauce.
  • Grilled Veggies: Seasoned zucchini, bell peppers, and onions add a colorful and smoky flavor that enhances the meal.
  • Homemade Guacamole: This creamy dip is perfect for adding a luscious layer of flavor alongside the crispy tacos.
  • Refreshing Lemonade: A sweet and tart beverage that cuts through the richness of the beef and crema, making each bite even more enjoyable.
  • Churros with Chocolate Sauce: Finish off with these cinnamon-sugar treats for a sweet ending that both kids and adults will love!

Chef's Helpful Tips

  • For the Crispy Baked Ground Beef Tacos, ensure that the ground beef is fully cooked and drained of excess fat for a leaner filling.
  • When mixing the taco seasoning with the beef, be sure to let the moisture evaporate for a flavorful and thick mixture.
  • Warm your corn tortillas in the microwave with a damp paper towel to make them pliable and easier to fold without tearing.
  • Bake the tacos until golden brown and crispy, checking at the 15-minute mark to avoid overcooking.

Crispy Baked Ground Beef Tacos with Creamy Chipotle Sauce Recipe FAQs

What should I look for when selecting ground beef?
Absolutely! When choosing ground beef, look for meat that is bright red with minimal browning. Opt for lean ground beef, around 80% lean, which is less greasy and ideal for these tacos. Besides color, check for a moist but not slimy texture and avoid packages with dark spots or a strong odor.

How do I store leftover tacos?
Very! To store leftover crispy baked ground beef tacos, place them in an airtight container and refrigerate right after cooling for up to 3 days. To maintain the best texture, reheat in the oven rather than using the microwave, which can make the tortillas soggy. Heat them at 350°F for about 10-15 minutes until they’ve regained their crispiness.

Can I freeze the tacos, and how?
Of course! Freezing is a great option! After they’ve cooled, individually wrap each taco in plastic wrap, ensuring a tight seal to prevent freezer burn. Then, place them in a freezer-safe bag. They can be frozen for up to 2 months. Just remember to label the bag with the date so you can keep track!

What if my tortillas keep tearing when I fold them?
Oh no! If your tortillas are tearing, they may not be warm enough to be pliable. Try microwaving them a little longer in 10-second intervals until they’re warm and flexible. Alternatively, you can briefly heat them in a dry skillet for about 15-20 seconds on each side, which will also soften them and make them easier to work with.

Are these tacos suitable for people with food allergies?
Definitely! These tacos can be adjusted for various dietary needs. If you have allergies, consider using gluten-free taco seasoning and corn tortillas, which are usually safe. For dairy allergies, you can substitute the cheese and creamy chipotle sauce with a dairy-free alternative. Always check labels for any hidden allergens, especially in pre-packaged items like taco seasoning and Mexican crema.

Can I add other ingredients to the filling?
The more the merrier! You can absolutely customize the filling by incorporating vegetables like diced bell peppers, onions, or even corn for added flavor and nutrition. Just sauté them with the ground beef until tender before adding your seasonings. This creates a delicious explosion of textures and flavors while still keeping the essence of the crispy baked ground beef tacos with creamy chipotle sauce!

Crispy Baked Ground Beef Tacos with Creamy Chipotle Sauce

Crispy Baked Ground Beef Tacos with Creamy Chipotle Sauce

Enjoy Crispy Baked Ground Beef Tacos with Creamy Chipotle Sauce for a delightful meal that satisfies and excites the palate.
Print Recipe Pin Recipe
Prep Time 10 minutes mins
Cook Time 15 minutes mins
Cooling Time 5 minutes mins
Total Time 25 minutes mins
Servings: 6 tacos
Course: DINNER RECIPES
Cuisine: Mexican
Calories: 320
Ingredients Equipment Method Nutrition Notes

Ingredients
  

For the Beef Filling
  • 1 lb Ground beef
  • 1 packet Taco seasoning
  • 1/2 cup Water
  • 2 cloves Garlic minced
  • 1 Tbsp Lime juice freshly squeezed
  • 1/2 cup Diced green chiles
  • to taste Salt
  • to taste Pepper
For the Tacos
  • 2 cups Colby Jack cheese shredded, reserve some for topping
  • 12 small Corn tortillas
For the Creamy Chipotle Sauce
  • 1 cup Mexican crema or sour cream
  • 2 Tbsp Chipotle peppers in adobo sauce
  • 1 Tbsp Honey or sugar
  • 1 Tbsp Lime juice splash
  • 1 clove Garlic for crema, minced
  • to taste Salt
For Serving
  • 1 cup Sour cream for topping
  • 1 cup Shredded lettuce for topping
  • 1/2 cup Fresh cilantro for garnish
  • 1 cup Pico de gallo for topping
  • 1 cup Guacamole for topping
  • 1/2 cup Pickled red onions for topping

Equipment

  • Oven
  • Skillet
  • Food processor
  • baking sheets
  • Microwave

Method
 

Preparation Steps
  1. Preheat the oven to 425°F. Line 2 baking sheets with nonstick spray or lightly oil them to ensure your tacos come out perfectly crispy.
  2. Cook the beef in a skillet over medium heat with 1 Tbsp. oil until no longer pink, about 5-7 minutes. Drain excess fat for a lean filling.
  3. Mix in the taco seasoning, water, minced garlic, lime juice, diced green chiles, salt, and pepper. Cook, stirring occasionally, until most moisture evaporates (about 5 minutes).
  4. Combine 1 cup of shredded cheese into the beef mixture and stir until fully mixed. Remove from heat and let cool slightly.
  5. Warm the tortillas by wrapping them in a damp paper towel and microwaving for 45-60 seconds. Flip them halfway to achieve pliability.
  6. Fill each tortilla with about ¼ cup of the beef mixture, adding a sprinkle of cheese on top. Fold over to seal, then lightly brush with oil for extra crispness.
  7. Bake the tacos on prepared sheets for 15-20 minutes, or until they are golden brown and crispy, filling your kitchen with tantalizing aromas.
  8. Prepare the creamy chipotle sauce by blending all crema ingredients in a food processor until smooth. Taste and adjust seasoning as needed for perfection.
  9. Serve the crispy baked tacos warm with your favorite toppings and drizzle generous amounts of the creamy chipotle sauce over them.

Nutrition

Serving: 1tacoCalories: 320kcalCarbohydrates: 30gProtein: 20gFat: 15gSaturated Fat: 7gPolyunsaturated Fat: 1gMonounsaturated Fat: 6gCholesterol: 50mgSodium: 600mgPotassium: 400mgFiber: 3gSugar: 2gVitamin A: 500IUVitamin C: 5mgCalcium: 250mgIron: 2mg

Notes

Optional: Garnish with fresh cilantro for a vibrant touch!

Tried this recipe?

Let us know how it was!

Filed Under: DINNER RECIPES

Cheesy Ground Beef and Potato Casserole

December 16, 2025 by JudyWhite Leave a Comment

Every kitchen has its go-to comfort dishes, and my Cheesy Ground Beef and Potato Casserole is a treasure that never fails to bring smiles all around the table. There’s something about the blend of savory beef, creamy cheese, and tender potatoes that envelops you like a warm hug. Just imagining the rich aroma wafting through the house is enough to make anyone’s mouth water!

I discovered this recipe during a hectic week when takeout was luring me in like a siren call. Instead, I decided to turn my pantry staples into something heartwarming and satiating. The great news? This casserole comes together in just one skillet, making it a breeze to prepare and clean up. Perfect for busy weeknights or when you’re looking to impress guests without spending all day in the kitchen.

Let me guide you through this simple yet delicious dish that epitomizes homemade goodness—your new family favorite awaits!

Why You'll Love This Cheesy Ground Beef and Potato Casserole

  • This Cheesy Ground Beef and Potato Casserole is incredibly easy to prepare, making it the perfect option for even the busiest of weeknights.
  • The combination of savory ground beef, creamy cheese, and tender potatoes delivers an unbeatable flavor that will have everyone coming back for seconds.
  • Its versatility allows you to customize it with any leftover vegetables or cheeses you have on hand, ensuring that every dish is unique and delightful.
  • Plus, its appealing layers and melty cheese create a visually stunning presentation that will impress guests and family alike.

Cheesy Ground Beef and Potato Casserole Ingredients

• Get ready to create a delightful dish!

For the Casserole

  • Oil – A tablespoon helps prevent sticking while adding flavor.
  • Potatoes (1.5 lbs) – Cut into 1 cm or ½” cubes for even cooking and delightful texture.
  • Onion (0.5 medium) – Finely diced to bring sweetness and depth to the dish.
  • Green Bell Pepper (0.5 medium) – Finely diced to add color and a mild tang.
  • Lean Ground Beef (1 lb) – Choose lean for a healthier casserole without sacrificing flavor.
  • Tomato Paste (2 tablespoons) – Adds a rich depth and umami to balance the flavors.
  • Garlic (2 cloves) – Minced for that aromatic punch that elevates every bite.
  • Seasoning Salt (1.5 teaspoons) – A blend of salts and spices that enhances the overall taste.
  • Italian Seasoning (1 teaspoon) – Infuses your dish with a classic, herby goodness.
  • Ground Mustard (0.5 teaspoon) – Offers a subtle tang that complements the beef beautifully.
  • Black Pepper (0.25 teaspoon) – Adds a mild heat and brings out the flavors.
  • Red Pepper Flakes (0.125 teaspoon) – Optional for those who like a bit of spice!
  • Low Sodium Broth (0.75 cup) – Use beef or chicken for moisture; it helps create a savory base.
  • Tomato Sauce (0.5 cup) – Adds moisture and richness to your casserole.
  • Cream (0.25 cup) – Ensures a luscious, creamy texture that brings everything together.
  • Shredded Cheese (1 cup) – Mozzarella or cheddar for that irresistible melty finish.
  • Fresh Chopped Parsley or Green Onions – For garnish that adds a pop of color and freshness.

This Cheesy Ground Beef and Potato Casserole will surely warm hearts and fill bellies, making it a favorite in your home!

How to Make Cheesy Ground Beef and Potato Casserole

  1. Heat the Oil: In a large skillet, add the oil over medium-high heat. This will create a non-stick surface, ensuring your potatoes cook evenly and don’t stick to the pan.

  2. Cook the Potatoes: Add the 1.5 lbs of cubed potatoes to the pan. Cook for 5-6 minutes, stirring often, until they turn light golden and start to soften. The goal is to achieve that perfect texture for the base!

  3. Sauté the Vegetables: Toss in the finely diced onion and green bell pepper. Sauté for 1-2 minutes, or until the onion becomes translucent. This fragrant mix adds depth and flavor to your casserole.

  4. Brown the Beef: Stir in the 1 lb of lean ground beef. Cook until it’s thoroughly browned, making sure to stir frequently. Drain any excess fat with a paper towel to keep your dish lean and delicious.

  5. Mix the Flavors: Stir in the 2 tablespoons of tomato paste, minced garlic, and seasonings (seasoning salt, Italian seasoning, ground mustard, black pepper, and red pepper flakes). Cook and mix for 1 minute, allowing the spices to awaken and meld beautifully.

  6. Add the Liquids: Pour in the 0.75 cup of broth, 0.5 cup of tomato sauce, and 0.25 cup of cream. Bring everything to a gentle simmer, cover, and reduce the heat to medium-low. Cook until the potatoes are tender, stirring often—this should take about 10-15 minutes.

  7. Melt the Cheese: Once the potatoes are tender, remove the skillet from the heat. Uncover, add the 1 cup of shredded cheese on top, and cover again just until the cheese melts. This final step is where the magic happens—watch for that gooey goodness!

Optional: Garnish with fresh chopped parsley or green onions for a vibrant finish!

Exact quantities are listed in the recipe card below.

Make Ahead Options

These Cheesy Ground Beef and Potato Casseroles are perfect for meal prep, saving you time on hectic weeknights! You can prepare the filling (cooked potatoes, beef, and sauces) up to 3 days in advance. Simply follow the directions until the sauce begins to simmer, then let it cool completely before transferring it to an airtight container in the fridge. When you’re ready to enjoy, just reheat in a skillet over medium heat until warm, top with cheese, cover until melted, and serve! For maintaining quality, be sure to stir occasionally while reheating to prevent sticking. You’ll have comforting, delicious casserole results with little effort!

How to Store and Freeze Cheesy Ground Beef and Potato Casserole

Fridge: Store any leftovers in an airtight container for up to 3 days. Allow it to cool to room temperature before sealing to maintain freshness.

Freezer: For longer storage, freeze the casserole for up to 2 months. Wrap tightly in plastic wrap and then aluminum foil to prevent freezer burn.

Reheating: When ready to enjoy, thaw overnight in the fridge, and reheat in the oven at 350°F (175°C) for about 20-25 minutes, until warmed through and cheesy again.

Room Temperature: Avoid leaving the Cheesy Ground Beef and Potato Casserole out for more than 2 hours to prevent any spoilage; always refrigerate promptly.

What to Serve with Cheesy Ground Beef and Potato Casserole?

Nothing rounds off a comforting casserole quite like the perfect sides that elevate your meal experience.

  • Garlic Bread: The buttery, garlicky flavor and crisp texture of garlic bread are perfect for mopping up the creamy sauce. Each bite transports you to a cozy Italian kitchen, enhancing the meal’s warmth.

  • Steamed Broccoli: Vibrant green broccoli adds a delightful crunch and a fresh palate cleanser. Its mild flavor complements the robust casserole, bringing balance to your plate.

  • Coleslaw: A refreshing and tangy coleslaw can provide a delightful contrast to the hearty dish. The crunch and acidity lighten every mouthful of creamy goodness, making it a balanced choice.

  • Mixed Green Salad: A simple mixed green salad with vinaigrette offers a fresh, crisp contrast. Tossed with seasonal veggies, it adds texture and brightness to the meal.

  • Roasted Carrots: Sweet and tender roasted carrots enhance the casserole’s savory appeal while adding a pop of color to your table. Their caramelized edges create a lovely pairing that feels special.

  • Red Wine: Pairing with a glass of robust red wine, perhaps a Merlot or Cabernet Sauvignon, elevates your dinner experience. The wine’s rich tannins complement the beef’s depth beautifully.

  • Chocolate Cake: For dessert, a slice of rich chocolate cake finishes the meal on a sweet note. Its indulgent flavors provide a delightful contrast to the savory casserole, making for a balanced end to your feast.

Cheesy Ground Beef and Potato Casserole Variations

Feel free to make this dish your own with these fun twists that enhance flavor and cater to dietary preferences!

  • Vegetarian: Substitute 1 lb of cooked lentils or mushrooms for the ground beef, and use vegetable broth for a hearty veggie casserole.

  • Spicy: Add 1 tablespoon of diced jalapeños or increase red pepper flakes for a delightful kick. The additional heat will awaken your taste buds!

  • Herbed: Toss in fresh herbs like thyme or rosemary for an aromatic twist that compliments the savory layers beautifully. Freshly chopped herbs elevate the entire dish.

  • Creamy Dairy-Free: Use coconut cream and dairy-free cheese alternatives to create a luscious consistency that fits a plant-based lifestyle without compromising on flavor.

  • Bacon Lovers: Crisp up 4 to 6 slices of bacon, chop them, and mix them in for a smoky flavor boost that pairs perfectly with the beef and potatoes.

  • Cheese Variety: Experiment with Gouda or Pepper Jack cheese for a unique taste profile. Each cheese brings its own character, transforming every bite.

  • Loaded Casserole: Top the casserole with crispy fried onions, fresh chives, or bacon bits for an extra crunchy, indulgent layer everyone will love.

  • Sweet Potato Swap: Replace regular potatoes with sweet potatoes for a nutritious alternative that adds a hint of natural sweetness and vibrant color to the dish.

Chef's Helpful Tips

  • For the Cheesy Ground Beef and Potato Casserole, ensure your potatoes are cut into uniform 1 cm cubes to promote even cooking and avoid any mushy texture.
  • A common mistake is overcooking the ground beef; cook it just until browned to keep it juicy and flavorful.
  • Next, always drain any excess fat after browning to lighten the dish while still keeping it rich.
  • When adding liquids, bring the mixture to a gentle simmer instead of boiling to allow the flavors to meld perfectly without compromising the potatoes’ texture.

Cheesy Ground Beef and Potato Casserole Recipe FAQs

How do I select the right potatoes for this casserole?
Absolutely! For the best results, choose starchy potatoes like Russets or all-purpose types like Yukon Golds. Look for firm potatoes without dark spots or blemishes—fresh potatoes will cook evenly and give you that delightful texture!

How should I store leftovers of the Cheesy Ground Beef and Potato Casserole?
You can store leftovers in an airtight container in the fridge for up to 3 days. Always let the casserole cool to room temperature before sealing it; this helps keep it fresh and prevents condensation inside the container.

Can I freeze Cheesy Ground Beef and Potato Casserole?
Yes, indeed! To freeze, wrap the casserole tightly with plastic wrap, followed by aluminum foil to avoid freezer burn. It can be kept for up to 2 months. When you’re ready to enjoy it, simply thaw overnight in the fridge, and then reheat in the oven at 350°F (175°C) for about 20-25 minutes or until hot and bubbly!

What if my casserole is too watery after cooking?
Very! If your casserole turns out watery, you might need to reduce the liquid next time. You can also try draining some of the liquid off before topping it with cheese. A thicker tomato paste or adding a small amount of cornstarch mixed with water can also help if you’re looking to fix it while cooking!

Is this casserole suitable for special dietary needs?
It can be! If you’re mindful of allergies, you can easily substitute the ground beef with turkey or a plant-based ground meat. For a dairy-free option, use a non-dairy cream and cheese alternative to make it suitable for lactose intolerance. Just pay attention to the labels for allergens!

How can I include more vegetables in my Cheesy Ground Beef and Potato Casserole?
The more, the merrier! You can add diced carrots, peas, or even spinach for extra nutrition and flavor. If using frozen veggies, toss them in right at the end of cooking to warm them up without overcooking. Don’t be afraid to experiment with your favorites!

Cheesy Ground Beef and Potato Casserole

Cheesy Ground Beef and Potato Casserole

Indulge in the warmth of Cheesy Ground Beef and Potato Casserole, a comforting dish that combines savory beef, creamy cheese, and tender potatoes.
Print Recipe Pin Recipe
Prep Time 15 minutes mins
Cook Time 30 minutes mins
Total Time 45 minutes mins
Servings: 6 servings
Course: DINNER RECIPES
Cuisine: American
Calories: 450
Ingredients Equipment Method Nutrition Notes

Ingredients
  

For the Casserole
  • 1 tbsp Oil
  • 1.5 lbs Potatoes cut into 1 cm cubes
  • 0.5 medium Onion finely diced
  • 0.5 medium Green Bell Pepper finely diced
  • 1 lb Lean Ground Beef
  • 2 tbsp Tomato Paste
  • 2 cloves Garlic minced
  • 1.5 tsp Seasoning Salt
  • 1 tsp Italian Seasoning
  • 0.5 tsp Ground Mustard
  • 0.25 tsp Black Pepper
  • 0.125 tsp Red Pepper Flakes optional
  • 0.75 cup Low Sodium Broth beef or chicken
  • 0.5 cup Tomato Sauce
  • 0.25 cup Cream
  • 1 cup Shredded Cheese Mozzarella or cheddar
  • Fresh Chopped Parsley or Green Onions for garnish

Equipment

  • Large skillet

Method
 

Directions
  1. In a large skillet, add the oil over medium-high heat.
  2. Add the cubed potatoes to the pan. Cook for 5-6 minutes, stirring often, until they turn light golden and start to soften.
  3. Toss in the finely diced onion and green bell pepper. Sauté for 1-2 minutes, or until the onion becomes translucent.
  4. Stir in the lean ground beef. Cook until it’s thoroughly browned, stirring frequently.
  5. Stir in the tomato paste, minced garlic, and seasonings. Cook for 1 minute.
  6. Pour in the broth, tomato sauce, and cream. Bring to a gentle simmer, cover, and reduce to medium-low. Cook until the potatoes are tender.
  7. Remove from heat, add the shredded cheese on top, and cover just until the cheese melts.
  8. Garnish with fresh chopped parsley or green onions.

Nutrition

Serving: 1bowlCalories: 450kcalCarbohydrates: 32gProtein: 28gFat: 24gSaturated Fat: 12gPolyunsaturated Fat: 0.5gMonounsaturated Fat: 9gCholesterol: 80mgSodium: 600mgPotassium: 900mgFiber: 4gSugar: 3gVitamin A: 400IUVitamin C: 30mgCalcium: 200mgIron: 3mg

Notes

Ensure potatoes are cut into uniform cubes for even cooking and avoid mushy texture. Drain excess fat after browning beef for a lighter dish.

Tried this recipe?

Let us know how it was!

Filed Under: DINNER RECIPES

Ground Beef and Chopped Cabbage Skillet Meal

December 16, 2025 by JudyWhite Leave a Comment

Life can get busy, and, let’s be honest, the allure of takeout often calls our name too loudly. But what if I told you that a homemade meal bursting with flavor can come together in just 20 minutes? I discovered this Ground Beef and Chopped Cabbage Skillet Meal during a hectic week when fast food was tempting, but my craving for something wholesome wouldn’t let me settle.

Imagine this: the savory scent of beef sizzling in a hot skillet, mingling with the sweetness of sautéed onions and the crunch of fresh cabbage. With a few simple ingredients that you likely already have in your kitchen, this dish transforms into something extraordinary—a one-pan wonder that’s as easy to make as it is delightful to eat. Whether you’re feeding a hungry family or looking to impress some friends, this hearty meal is sure to bring everyone to the table. Trust me, you won’t want to skip this gem!

Why You'll Love This Ground Beef and Chopped Cabbage Skillet Meal

  • This recipe comes together in just 20 minutes, making it perfect for busy weeknights when you need a delicious meal fast.
  • The incredible flavors of savory beef, sweet onions, and fresh cabbage create a delightful harmony that will tantalize your taste buds.
  • Its versatility allows you to customize the ingredients based on what you have on hand, making it a great option for using up leftovers or seasonal veggies.
  • Plus, being a one-pan dish, clean-up is a breeze, leaving you more time to relax and enjoy your meal with family and friends.

Ground Beef and Chopped Cabbage Skillet Meal Ingredients

For the Beef
• Lean ground beef – a hearty base that provides protein and richness to your meal.

For the Vegetables
• Chopped cabbage – adds crunch and nutrition, making this dish heartier.
• Medium onion – enhances flavor with its sweetness when sautéed.
• Grated or julienned carrot – for a pop of color and a touch of sweetness.

For the Sauce
• Tomato sauce or paste – lends a tangy depth to balance the savory beef.
• Beef broth or vegetable broth – keeps everything moist and adds flavor; it’s vital for the best Ground Beef and Chopped Cabbage Skillet Meal.

Seasoning
• Salt and pepper – essential for enhancing the dish’s overall flavor.
• Paprika – provides warmth; choose between regular or smoked for different depths.

For Cooking
• Vegetable oil – the key to a good sear on your beef and vegetables.

How to Make Ground Beef and Chopped Cabbage Skillet Meal

  1. Heat the Skillet: Place a large skillet over medium heat. Once it’s hot, add the ground beef along with salt and pepper to taste. Cook this savory mixture until the beef is nicely browned and cooked through, about 5-7 minutes. Don’t forget to drain any excess fat if necessary!

  2. Sauté the Onion: In the same skillet, toss in the chopped onion. Sauté until it becomes translucent and fragrant, about 3-4 minutes. Then, stir in the grated or julienned carrot, cooking for another 2-3 minutes until the carrot softens beautifully.

  3. Mix in the Sauce: Add the tomato sauce or paste to the skillet, followed by the broth. If you’re using a bouillon cube, mix it in with some water. Give everything a good stir, letting it simmer together for 2-3 minutes to meld the flavors.

  4. Combine with Cabbage: Now, it’s cabbage time! Add the chopped cabbage, along with extra salt, pepper, and paprika. Stir well to combine all the ingredients. Cover the skillet with a lid and let it simmer for about 5-8 minutes, stirring occasionally, until the cabbage is tender and vibrant.

  5. Final Touches: Return the cooked beef to the skillet, stirring everything together. If you’re feeling fancy, sprinkle some fresh herbs like parsley or chives on top for a lovely garnish. Serve your delicious meal hot and watch smiles light up around the table!

Optional: Serve with crusty bread for a delightful meal experience.
Exact quantities are listed in the recipe card below.

What to Serve with Ground Beef and Chopped Cabbage Skillet Meal?

Looking to elevate your dining experience? Pair this hearty skillet meal with delightful sides that complement its robust flavors.

  • Creamy Mashed Potatoes: Their smooth texture balances the savory beef and crunchy cabbage, creating a cozy comfort food vibe.

  • Garlicky Breadsticks: Freshly baked and warm, garlic breadsticks are perfect for soaking up any leftover sauce and add a delicious garlic kick.

  • Roasted Broccoli: The slight bitterness of roasted broccoli pairs well with the sweetness of cabbage, plus it adds a lovely green touch to your plate.

  • Apple Cider Vinegar Coleslaw: A tangy coleslaw adds bright acidity, cutting through the richness of the beef while providing a refreshing crunch.

  • Savory Cornbread: Moist and slightly sweet, cornbread adds a homey element, making every bite of the skillet meal even more satisfying.

  • Chilled Lettuce Salad: Crisp lettuce, tomatoes, and cucumbers dressed in a light vinaigrette contrast beautifully with the hearty dish, offering freshness and crunch.

  • Soda or Sparkling Water: Pair with a fizzy drink for a refreshing contrast that will refresh your palate between bites.

Indulge your taste buds and transform your meal into a welcome feast!

Ground Beef and Chopped Cabbage Skillet Meal Variations

Feel free to get creative with this recipe and make it your own!

  • Spicy Kick: Add a teaspoon of red pepper flakes or diced jalapeños for some heat. Spice lovers will adore this flavorful twist!

  • Herb Infusion: Incorporate fresh herbs like thyme or oregano during cooking for a fragrant and earthy flavor that elevates the dish. Such additions bring a beautiful aroma as they cook.

  • Add More Veggies: Toss in bell peppers, zucchini, or peas to bulk up the nutritional content and add vibrant colors. The crunch these veggies provide complements the tenderness of the cabbage perfectly.

  • Cheesy Goodness: Mix in some shredded cheese just before serving for a melty layer of goodness. Cheese lovers will find it hard to resist the comforting richness!

  • Whole Grain Twist: Substitute regular tomato sauce with marinara or chunky tomato sauce for added flavor. This swap creates a heartier sauce that pairs excellently with the beef.

  • Gluten-Free Alternative: Use quinoa or riced cauliflower instead of cabbage for a low-carb, gluten-free version. This swap brings a new texture and keeps the flavor intact.

  • Sweet Note: Stir in a dash of honey or a handful of raisins for a hint of sweetness that balances the savory elements beautifully. This touch can create a wonderful harmony of tastes.

  • Veggie Broth Boost: Swap beef broth for a robust vegetable broth for a lighter but still flavorful version that everyone can enjoy. On the health side, it’s a wonderful way to please all palates!

Make Ahead Options

These Ground Beef and Chopped Cabbage Skillet Meal components are perfect for meal prep, making your busy weeknights easier! You can brown the ground beef and sauté the onions, carrots, and spices up to 24 hours in advance. Store them in an airtight container in the refrigerator to maintain freshness. You can also prep the cabbage by chopping it a couple of days ahead, just be sure to keep it in a sealed bag to prevent wilting. When you’re ready to finish the dish, simply reheat the beef mixture in the skillet, add the chopped cabbage, and let everything simmer until it’s heated through and the cabbage is tender. This way, you’ll enjoy a wholesome meal with minimal effort, just as delicious as if made fresh!

How to Store and Freeze Ground Beef and Chopped Cabbage Skillet Meal

Fridge: Store any leftovers in an airtight container for up to 3 days. Allow the dish to cool before sealing to prevent condensation.

Freezer: You can freeze this Ground Beef and Chopped Cabbage Skillet Meal in an airtight container for up to 3 months. Make sure it’s fully cooled before freezing.

Reheating: When ready to enjoy, thaw in the fridge overnight, then reheat on the stovetop or in the microwave, stirring occasionally until heated thoroughly.

Serving Fresh: For the best flavor and texture, enjoy your skillet meal fresh. Only freeze if you have leftovers, as this dish is best served hot!

Chef's Helpful Tips

  • For the Ground Beef and Chopped Cabbage Skillet Meal, always ensure your skillet is preheated to guarantee a good sear on the beef, which enhances flavor and texture.
  • Avoid overcrowding the pan when cooking the ground beef; this will prevent steaming and keep the meat nice and browned.
  • When adding the cabbage, consider chopping it into uniform pieces for even cooking, as this helps ensure that all your ingredients are tender at the same time.
  • Keep an eye on the simmering time for the cabbage; overcooking can lead to a mushy texture, so aim for 5-8 minutes until it’s vibrant and soft yet still holds its shape.

Ground Beef and Chopped Cabbage Skillet Meal Recipe FAQs

What’s the best way to choose ripe cabbage for this dish?
Absolutely! Look for cabbages that feel heavy for their size and have crisp, vibrant leaves. Avoid any with dark spots or wilting, as these can indicate that the cabbage is past its prime. A fresh head should have a firm, compact feel and a bright green color.

How should I store leftovers from the Ground Beef and Chopped Cabbage Skillet Meal?
Store any leftovers in an airtight container in the refrigerator for up to 3 days. Be sure to allow the dish to cool down to room temperature before sealing to prevent condensation inside the container, which can make your meal soggy.

Can I freeze the Ground Beef and Chopped Cabbage Skillet Meal?
Absolutely! To freeze, let the dish cool completely, then transfer it to an airtight container or freezer bag, ensuring to remove as much air as possible. It can be frozen for up to 3 months. For easy reheating, consider portioning it into individual servings.

What is the best way to reheat the dish after freezing?
When you’re ready to enjoy your meal, thaw it in the refrigerator overnight. Then, reheat it on the stovetop over medium heat, stirring occasionally for even warming, or you can use the microwave. Aim for a warm internal temperature of 165°F (74°C) before serving.

Can I modify the recipe to accommodate food allergies?
Very! If you have a gluten allergy, simply make sure your broth is gluten-free. For those who are lactose intolerant or vegan, substituting the beef with plant-based ground meat and using vegetable broth will work beautifully. As always, check labels to ensure all ingredients meet your dietary needs!

What should I do if my cabbage turns out mushy?
It’s a common concern! If your cabbage becomes mushy, you might be simmering it for too long. To prevent this, make sure you monitor the simmering time closely—aim for 5-8 minutes under a closed lid until it becomes tender but still vibrant. If it’s mushy, consider adding a splash of lemon or vinegar to reinvigorate the flavor!

Ground Beef and Chopped Cabbage Skillet Meal

Ground Beef and Chopped Cabbage Skillet Meal

Enjoy a quick and flavorful Ground Beef and Chopped Cabbage Skillet Meal that's ready in just 20 minutes.
Print Recipe Pin Recipe
Prep Time 5 minutes mins
Cook Time 15 minutes mins
Total Time 20 minutes mins
Servings: 4 servings
Course: DINNER RECIPES
Cuisine: American
Calories: 350
Ingredients Equipment Method Nutrition Notes

Ingredients
  

For the Beef
  • 1 pound lean ground beef
For the Vegetables
  • 4 cups chopped cabbage
  • 1 medium onion chopped
  • 1 cup grated or julienned carrot
For the Sauce
  • 1 cup tomato sauce or paste
  • 1 cup beef broth or vegetable broth
Seasoning
  • 1 teaspoon salt
  • 1 teaspoon pepper
  • 1 teaspoon paprika
For Cooking
  • 2 tablespoons vegetable oil

Equipment

  • Large skillet

Method
 

How to Make Ground Beef and Chopped Cabbage Skillet Meal
  1. Heat the Skillet: Place a large skillet over medium heat. Add the ground beef along with salt and pepper. Cook until browned, about 5-7 minutes. Drain excess fat if necessary.
  2. Sauté the Onion: In the same skillet, toss in the chopped onion. Sauté until translucent, about 3-4 minutes. Stir in the carrot, cooking for another 2-3 minutes until softened.
  3. Mix in the Sauce: Add the tomato sauce or paste and the broth. Stir and let it simmer for 2-3 minutes to meld the flavors.
  4. Combine with Cabbage: Add the chopped cabbage, salt, pepper, and paprika. Stir and cover. Simmer for 5-8 minutes until cabbage is tender.
  5. Final Touches: Return cooked beef to the skillet and stir everything together. Optionally, garnish with fresh herbs. Serve hot.

Nutrition

Serving: 1servingCalories: 350kcalCarbohydrates: 20gProtein: 25gFat: 15gSaturated Fat: 5gPolyunsaturated Fat: 1gMonounsaturated Fat: 9gCholesterol: 80mgSodium: 600mgPotassium: 800mgFiber: 5gSugar: 4gVitamin A: 300IUVitamin C: 50mgCalcium: 50mgIron: 3mg

Notes

For the best flavor, serve this meal hot. Optionally serve with crusty bread.

Tried this recipe?

Let us know how it was!

Filed Under: DINNER RECIPES

Lentil Vegetable Stew

December 15, 2025 by JudyWhite Leave a Comment

As the weather turns crisp, I find myself craving hearty meals that warm both the body and soul. One evening, while rummaging through my pantry in search of inspiration, I unearthed a bag of lentils nestled among the spices. It sparked a memory of a comforting Lentil Vegetable Stew my grandmother used to make, filled with fresh veggies and aromatic spices.

In a matter of minutes, I realized that I didn’t need to order takeout; I could create something satisfying at home. This Lentil Vegetable Stew is not only easy to whip up but also bursting with flavor—perfect for cozy nights in or when you simply want to treat yourself and your loved ones to a wonderfully nourishing dish. With just a few staple ingredients, this recipe transforms simple lentils into a delightful bowl of comfort, proving that home-cooked meals can be both healthy and delicious. Ready to join me in reimagining dinner? Let’s get cooking!

Why You'll Love This Lentil Vegetable Stew

  • This Lentil Vegetable Stew is incredibly easy to prepare, making it a perfect option for busy weeknights.
  • The combination of hearty lentils and fresh vegetables delivers a burst of flavor that will leave everyone asking for seconds.
  • Its versatility allows you to customize the ingredients based on what you have on hand, ensuring it fits any meal plan.
  • Visually, this stew is a vibrant medley of colors, making it as appealing to the eyes as it is to the palate.

Lentil Vegetable Stew Ingredients

• Gather these ingredients to create your hearty stew!

For the Base
• 1 cup lentils – packed with protein and fiber, they serve as the perfect base for this comforting dish.
• 2 carrots, diced – they add a natural sweetness and vibrant color to your Lentil Vegetable Stew.
• 1 onion, chopped – this aromatic ingredient enhances the flavor profile, bringing depth to the stew.
• 2 cloves garlic, minced – a must for that rich, savory flavor that complements every bite.
• 1 bell pepper, diced – adds crunch and a pop of color, with a mild sweetness that balances the spices.

For the Liquid Gold
• 2 cups vegetable broth – provides a savory base; feel free to use homemade broth for extra flavor.
• 1 can diced tomatoes – contributes acidity and a juicy texture, elevating the overall taste of your stew.

For the Seasoning
• 1 teaspoon cumin – offers a warm, earthy flavor that enhances the stew’s comfort vibe.
• 1 teaspoon paprika – brings a hint of smokiness and depth to every spoonful.
• Salt and pepper to taste – essential for adjusting the flavor to suit your palate.

With these ingredients, you’ll be well on your way to savoring a delicious and nourishing bowl of Lentil Vegetable Stew. Let’s get cooking!

How to Make Lentil Vegetable Stew

  1. Rinse the lentils under cold water until the water runs clear. This step removes any dust or impurities and ensures your stew will have clean flavors.

  2. Sauté the onion and garlic in a large pot over medium heat until soft, about 3-5 minutes. The aroma of onions and garlic will fill your kitchen with warmth and anticipation.

  3. Add the diced carrots and bell pepper to the pot, cooking for another 5 minutes until they are tender. This step brings out their natural sweetness and brightens your stew’s color.

  4. Stir in the rinsed lentils, vegetable broth, diced tomatoes, cumin, and paprika. Make sure everything is well mixed before moving on to the next step.

  5. Bring the mixture to a boil, then reduce heat and cover to simmer for 30 minutes. You’ll know it’s done when the lentils are tender and the flavors meld beautifully together.

  6. Season with salt and pepper to taste before serving, allowing each bite to be perfectly balanced.

Optional: Garnish with fresh herbs for an added touch of flavor.

Exact quantities are listed in the recipe card below.

Make Ahead Options

These Lentil Vegetable Stew preparations are perfect for busy home cooks looking to save time without sacrificing flavor! You can chop the carrots, onion, and bell pepper up to 3 days in advance and store them in an airtight container in the refrigerator. Likewise, rinse the lentils and keep them ready to go. When it’s time to enjoy your meal, simply sauté the prepped vegetables, stir in the remaining ingredients, and simmer as directed. This approach ensures that your stew will still be just as delicious and comforting. Additionally, if you prepare the entire stew ahead of time, it can be refrigerated for up to 3 days and reheated on the stove to enjoy the rich, evolving flavors.

Lentil Vegetable Stew Variations

Feel free to let your creativity shine and make this dish your own with these tempting ideas!

  • Spicy Kick: Add diced jalapeños or a splash of hot sauce to bring some heat and ignite your taste buds.

  • Herb Infusion: Mix in fresh herbs like thyme or rosemary for an aromatic boost and a garden-fresh flavor intuition.

  • Coconut Cream: For a creamy twist, stir in a can of coconut milk at the end of cooking for richness and sweetness. It’s like a cozy hug in a bowl!

  • Sweet Potato: Substitute diced sweet potato for carrots for added sweetness and a comforting texture that perfectly complements the lentils.

  • Protein Boost: Add a can of chickpeas or black beans for an extra protein punch, creating a heartier stew that leaves you satisfied. The variation not only enhances nutrition but adds delightful texture.

  • Grain Blend: Stir in cooked quinoa or brown rice towards the end for extra heartiness, making this stew even more of a filling meal.

  • Lemon Zing: Finish with a squeeze of fresh lemon juice before serving to bright up the flavors and add a refreshing note.

  • Cheesy Delight: Top with a sprinkle of parmesan or feta cheese for a savory depth that pairs beautifully with the rich flavors of the stew. It’s a delightful finish that adds an extra layer of comfort.

What to Serve with Lentil Vegetable Stew?

Cozy up your meal with these delightful pairings that enhance the comforting flavors of your stew.

  • Crusty Bread: Perfect for sopping up every last drop of stew, a hearty loaf offers a satisfying crunch and warmth.
  • Simple Green Salad: A refreshing mix of greens adds brightness and balances the richness of the stew. Toss in some cherry tomatoes for a pop of sweetness!
  • Steamed Rice: Serve your lentil stew over fluffy rice for a filling meal that marries flavors beautifully. The rice soaks up the stew, creating the perfect bite.
  • Roasted Vegetables: A medley of seasonally roasted veggies enhances the meal with extra texture and deep, caramelized flavors.
  • Creamy Polenta: Smooth polenta provides a rich, comforting base that embraces the stew’s hearty goodness, creating a plate to remember.
  • Herbal Tea: A warm cup of herbal tea perfectly complements your stew, helping to cleanse the palate between bites and add warmth to your meal.
  • Chocolate Cake: End on a sweet note with a slice of rich chocolate cake, offering a delightful contrast to the savory stew—simply divine!

These pairings invite warmth and conviviality to the table, making your dinner truly special.

How to Store and Freeze Lentil Vegetable Stew

Fridge: Store leftover Lentil Vegetable Stew in an airtight container for up to 3 days. This will keep it fresh and maintain the flavors you love.

Freezer: For longer storage, freeze the stew in freezer-safe containers for up to 3 months. Make sure to leave some space at the top for expansion as it freezes.

Reheating: When ready to enjoy, thaw overnight in the fridge if frozen, then reheat on the stovetop over medium heat, adding a splash of broth if needed to loosen it up.

Room Temperature: Avoid leaving the stew out at room temperature for more than 2 hours to ensure food safety and maintain its delicious taste.

Chef's Helpful Tips

  • Always rinse your lentils before cooking to remove any dust and ensure a clean flavor in your Lentil Vegetable Stew.
  • If you find your stew too thick during cooking, simply add a little more vegetable broth or water to reach your desired consistency.
  • For maximum flavor, sauté the onion and garlic until they are golden brown, as this enhances sweetness and depth in the stew.
  • Remember to taste and adjust seasoning towards the end of cooking, as ingredients like vegetable broth and canned tomatoes can vary in saltiness.

Lentil Vegetable Stew Recipe FAQs

What type of lentils should I use for Lentil Vegetable Stew?
Absolutely! I recommend using green or brown lentils for this stew as they hold their shape well during cooking, providing a nice texture. Red lentils can be used as well, but they tend to break down more and create a creamier stew.

How should I store leftover Lentil Vegetable Stew?
Store any leftover Lentil Vegetable Stew in an airtight container in the refrigerator for up to 3 days. It’s best to allow the stew to cool to room temperature before sealing it up. You can warm it gently on the stovetop or in the microwave when you’re ready to enjoy another bowl.

Can I freeze Lentil Vegetable Stew?
Very! To freeze your stew, let it cool completely and then pour it into freezer-safe containers, leaving about an inch of space at the top for expansion. It can be frozen for up to 3 months. When you’re ready to eat it, thaw it overnight in the fridge, and then reheat on the stovetop, adding a splash of vegetable broth if it feels too thick.

What if my stew is too thick or too thin?
No worries! If your Lentil Vegetable Stew turns out too thick, simply stir in a bit of vegetable broth or water, heating it gently until the desired consistency is reached. If it’s too thin, you can let it simmer uncovered for a few extra minutes to allow some of the liquid to evaporate, thickening it up naturally.

Can I add other vegetables to this stew?
The more the merrier! You can definitely customize your Lentil Vegetable Stew with other vegetables based on your preferences. Some great options include spinach, zucchini, or sweet potatoes. Just make sure to adjust cooking times for any harder vegetables to ensure they cook thoroughly.

Is this stew suitable for a gluten-free diet?
Yes, this Lentil Vegetable Stew is naturally gluten-free as long as you use gluten-free vegetable broth and canned tomatoes. It’s a wholesome, nourishing option for anyone looking to enjoy a delicious meal without gluten!

Lentil Vegetable Stew

Lentil Vegetable Stew

A comforting Lentil Vegetable Stew packed with protein and fiber, perfect for cozy nights in.
Print Recipe Pin Recipe
Prep Time 10 minutes mins
Cook Time 30 minutes mins
Total Time 40 minutes mins
Servings: 4 bowls
Course: DINNER RECIPES
Cuisine: Vegetarian
Calories: 250
Ingredients Equipment Method Nutrition Notes

Ingredients
  

For the Base
  • 1 cup lentils packed with protein and fiber
  • 2 pieces carrots diced
  • 1 piece onion chopped
  • 2 cloves garlic minced
  • 1 piece bell pepper diced
For the Liquid Gold
  • 2 cups vegetable broth provides a savory base
  • 1 can diced tomatoes
For the Seasoning
  • 1 teaspoon cumin
  • 1 teaspoon paprika
  • Salt to taste
  • Pepper to taste

Equipment

  • Large pot

Method
 

How to Make Lentil Vegetable Stew
  1. Rinse the lentils under cold water until the water runs clear.
  2. Sauté the onion and garlic in a large pot over medium heat until soft, about 3-5 minutes.
  3. Add the diced carrots and bell pepper to the pot, cooking for another 5 minutes until they are tender.
  4. Stir in the rinsed lentils, vegetable broth, diced tomatoes, cumin, and paprika.
  5. Bring the mixture to a boil, then reduce heat and cover to simmer for 30 minutes.
  6. Season with salt and pepper to taste before serving.

Nutrition

Serving: 1bowlCalories: 250kcalCarbohydrates: 45gProtein: 15gFat: 3gSaturated Fat: 0.5gPolyunsaturated Fat: 1gMonounsaturated Fat: 1gSodium: 400mgPotassium: 800mgFiber: 12gSugar: 6gVitamin A: 5000IUVitamin C: 20mgCalcium: 60mgIron: 4mg

Notes

Garnish with fresh herbs for an added touch of flavor.

Tried this recipe?

Let us know how it was!

Filed Under: DINNER RECIPES

Carrot Ginger Coconut-Free Soup

December 15, 2025 by JudyWhite Leave a Comment

As the crisp air of winter makes its presence felt, there’s nothing quite like warming up with a cozy bowl of soup. One chilly afternoon, while digging through my veggie drawer, I discovered an abundance of vibrant carrots and a piece of ginger begging for attention. That’s when I decided to whip up my Carrot Ginger Coconut-Free Soup—a delightfully simple recipe that packs a punch of flavor while being both wholesome and satisfying.

The creamy texture you’ve always wanted minus the coconut is just a blender away! Not only does this soup warm the soul, but it also brings a delightful sweetness from the carrots and a hint of spice from the ginger. Plus, with just a handful of ingredients and minimal prep time, it’s perfect for those busy evenings when fast food tempts but homemade goodness is the goal. Join me as we journey into this deliciously easy dish that is bound to become a regular feature at your dinner table!

Why You'll Love This Carrot Ginger Coconut-Free Soup

  • This Carrot Ginger Coconut-Free Soup is incredibly easy to make, allowing you to enjoy a homemade meal without spending hours in the kitchen.
  • The delicious blend of sweet carrots and zesty ginger creates a flavor profile that is both comforting and invigorating, making each spoonful a delightful experience.
  • Its versatility means you can serve it as an elegant starter, a hearty main dish, or even a cozy side, perfect for any occasion.
  • Visually, the vibrant orange color of the soup is sure to brighten up your dining table and impress your guests.

Carrot Ginger Coconut-Free Soup Ingredients

For the Soup

  • Carrots – 4 cups, chopped, these root vegetables bring natural sweetness and a beautiful orange hue.
  • Onion – 1 diced, adds a savory depth that enhances the flavor profile.
  • Garlic – 2 cloves, minced, offering a fragrant kick that complements the carrots and ginger.
  • Ginger – 1-inch piece, grated; this spicy root elevates the soup, providing warmth and zest.
  • Vegetable Broth – 4 cups, the base that ties all ingredients together, ensuring a rich and hearty soup.
  • Olive Oil – 1 tablespoon, for sautéing; it adds healthy fats and a lovely flavor to the mix.
  • Salt – to taste, enhances the overall flavors and balances the sweetness of the carrots.
  • Pepper – to taste, a touch of spice to round out the soup’s deliciousness.

This nourishing Carrot Ginger Coconut-Free Soup is not only simple but incredibly satisfying. Get ready to warm your soul with each tasty spoonful!

How to Make Carrot Ginger Coconut-Free Soup

  1. Heat Olive Oil: In a large pot, warm the olive oil over medium heat. You want it shimmering but not smoking—just enough to sauté those aromatic veggies!

  2. Sauté Onions and Garlic: Add the diced onion and minced garlic to the pot. Sauté them for about 3-4 minutes until they become translucent and fragrant, filling your kitchen with a mouth-watering aroma.

  3. Add Carrots and Ginger: Stir in the chopped carrots and grated ginger, letting them cook together for about 5 minutes. This allows the flavors to meld and the carrots to soften slightly.

  4. Pour in Broth: Carefully pour the vegetable broth into the pot, bringing the mixture to a gentle boil. Listen for the bubbling sounds—it’s a cue that your soup is on its way!

  5. Simmer for Tenderness: Reduce the heat to a simmer and let the soup cook for 20 minutes. You’ll know it’s ready when the carrots are fork-tender and the flavors have beautifully developed.

  6. Blend Until Smooth: Using an immersion blender or a regular blender, puree the soup until it reaches a creamy smoothness. You’ll want it velvety—just like a comforting hug in a bowl!

  7. Season to Taste: Once blended, season with salt and pepper to your liking. Don’t be shy—taste as you go to find that perfect balance of flavors!

  8. Serve Hot: Ladle the warm soup into bowls and serve immediately, savoring each luscious bite of your homemade creation.

Optional: Top with a sprinkle of fresh herbs for a vibrant touch.
Exact quantities are listed in the recipe card below.

Make Ahead Options

This Carrot Ginger Coconut-Free Soup is perfect for meal prep enthusiasts looking to save time in the kitchen! You can chop the carrots, onion, and garlic up to 24 hours in advance, storing them in an airtight container in the refrigerator to maintain their freshness. Additionally, the soup itself can be made ahead and refrigerated for up to 3 days. When you’re ready to serve, simply reheat the soup on the stovetop and blend it again for that silky texture. Season with salt and pepper right before serving to keep the flavors vibrant. Enjoy restaurant-quality results with minimal effort, making your busy weeknights a little brighter!

How to Store and Freeze Carrot Ginger Coconut-Free Soup

Fridge: Store in an airtight container for up to 3 days. Be sure to let the soup cool completely before sealing to prevent condensation and sogginess.

Freezer: Freeze in portions using freezer-safe containers or bags for up to 3 months. Allow the soup to cool before packaging to maintain its flavor and texture.

Reheating: Thaw overnight in the fridge before reheating. Gently warm in a saucepan over medium heat, stirring frequently, until heated through. Adjust seasoning as needed.

Serving Tip: For an extra touch, reheat your Carrot Ginger Coconut-Free Soup with a splash of coconut milk or a swirl of olive oil before serving!

Carrot Ginger Coconut-Free Soup Variations

Feel free to embrace your creativity and elevate this comforting soup dish with these fun twists!

  • Spicy Kick: Add a pinch of red pepper flakes during cooking for a subtle heat that warms each spoonful. If you prefer it spicier, include diced jalapeño peppers for a bold flavor upgrade!

  • Creamy Texture: Swap half of the vegetable broth with coconut milk for a luscious creaminess while still keeping the coconut flavor at bay. This will create a richer taste that adds to the overall comfort of the soup.

  • Herb Infusion: Stir in a handful of fresh herbs like thyme or cilantro towards the end of cooking to infuse a fragrant layer of freshness. These herbs brighten the flavor and create a beautiful aromatic experience.

  • Root Veggie Boost: Mix in other root vegetables such as sweet potatoes or parsnips for added depth of flavor and nutrition. They add a lovely sweetness and variation in texture that makes every bite unique.

  • Zesty Citrus: Squeeze in some fresh lemon or lime juice right before serving for a bright, tangy lift. This touch of acidity will enhance all the other flavors in the soup and keep it feeling light.

  • Nutty Crunch: Top with toasted pumpkin seeds or crushed almonds for a delightful crunch and added protein. The nutty flavor complements the sweetness of the carrots and adds a satisfying texture contrast.

  • Creamy Vegan Option: Replace olive oil with avocado oil and blend in some silken tofu for a protein-packed vegan crema. This swap provides a lovely creamy consistency while ensuring all dietary needs are met.

  • Savoury Sauté: Consider sautéing mushrooms along with the onions and garlic for an earthy flavor that adds complexity to the soup. The combination of mushrooms and ginger is truly magical and will entice any mushroom lover!

What to Serve with Carrot Ginger Coconut-Free Soup?

Indulge in a cozy meal that beautifully complements the warm flavors of this delightful soup.

  • Crusty Bread: Perfect for dipping, its texture balances the soup’s creaminess while soaking up all that delicious broth.

  • Fresh Salad: A light, crisp salad with a tangy vinaigrette adds brightness and freshness, contrasting the warmth of the soup.

  • Grilled Cheese Sandwich: The gooey cheese and toasted bread provide a nostalgic comfort, making it a kid-favorite pairing.

  • Roasted Chickpeas: Crunchy and seasoned to perfection, they offer a delightful contrast in texture and are a nutritious addition.

  • Savory Quinoa Bowl: Heap this nutritious grain with your favorite veggies; it adds protein and a hearty base, making your meal complete.

  • Herbal Tea: A warm cup perfumed with hints of chamomile or mint soothes the palate and enhances the overall dining experience.

  • Dark Chocolate Dessert: After the soothing warmth of the soup, a little piece of dark chocolate provides a delightful, sweet finish.

Each of these pairings highlights the comforting nature of your Carrot Ginger Coconut-Free Soup while offering new flavors and textures to enjoy at the table.

Chef's Helpful Tips

  • For the Carrot Ginger Coconut-Free Soup, ensure you cut your carrots evenly to guarantee uniform cooking.
  • When sautéing the onions and garlic, avoid browning them too much as this can add bitterness to the soup.
  • If you prefer a smoother texture, blend the soup in small batches to avoid spillage and achieve a velvety consistency.
  • Remember to taste the soup before serving—it’s crucial for adjusting the seasoning and ensuring perfect flavor balance.

Carrot Ginger Coconut-Free Soup Recipe FAQs

How do I choose the best carrots for the soup?
Absolutely! When selecting carrots, look for firm, smooth ones without any dark spots or blemishes. Ideally, you want vibrant orange carrots, as they are tender and sweet. If possible, visit a local farmer’s market for fresh, in-season produce for the best flavor!

How can I store leftover Carrot Ginger Coconut-Free Soup?
Very easily! Allow the soup to cool completely before transferring it to an airtight container. It can be stored in the refrigerator for up to 3 days. Remember to label the container with the date, so you know when to enjoy it by!

Can I freeze this soup for later use?
Absolutely! To freeze your Carrot Ginger Coconut-Free Soup, first ensure it’s cooled completely. Then, pour it into freezer-safe containers or heavy-duty freezer bags, leaving about an inch of space at the top. It can be stored for up to 3 months. Just remember to defrost it in the fridge before reheating for the best result!

What should I do if my soup turns out too thick?
If your soup is thicker than you’d like, don’t worry! Gradually add more vegetable broth or water until you reach your desired consistency. Stir well and let it simmer for a few minutes to incorporate the added liquid. This can help balance the flavors as well!

Are there any allergy considerations for this recipe?
Good question! This Carrot Ginger Coconut-Free Soup is naturally vegan and gluten-free, making it a great option for many dietary needs. However, if you have specific allergies, always double-check that your vegetable broth doesn’t contain any allergens. Also, if you’re serving it to children or pets, ensure ginger and salt are used in moderation.

Can I adapt this recipe for other dietary preferences?
Absolutely! If you’re looking to make it creamier without using coconut, consider adding a splash of cashew milk or almond milk. For those avoiding alliums, substitute onions and garlic with herbs like thyme or rosemary for a different flavor profile. Feel free to experiment and tweak it to suit everyone’s tastes!

Carrot Ginger Coconut-Free Soup

Carrot Ginger Coconut-Free Soup

This Carrot Ginger Coconut-Free Soup is a warming, flavorful dish perfect for cold days.
Print Recipe Pin Recipe
Prep Time 10 minutes mins
Cook Time 25 minutes mins
Total Time 35 minutes mins
Servings: 4 cups
Course: DINNER RECIPES
Cuisine: American
Calories: 180
Ingredients Equipment Method Nutrition Notes

Ingredients
  

For the Soup
  • 4 cups Carrots chopped
  • 1 Onion diced
  • 2 cloves Garlic minced
  • 1 inch Ginger grated
  • 4 cups Vegetable Broth
  • 1 tablespoon Olive Oil for sautéing
  • Salt to taste
  • Pepper to taste

Equipment

  • Large pot
  • Immersion Blender

Method
 

How to Make Carrot Ginger Coconut-Free Soup
  1. In a large pot, warm the olive oil over medium heat.
  2. Add the diced onion and minced garlic to the pot. Sauté for about 3-4 minutes until translucent and fragrant.
  3. Stir in the chopped carrots and grated ginger, cooking together for about 5 minutes.
  4. Carefully pour in the vegetable broth, bringing the mixture to a gentle boil.
  5. Reduce the heat to a simmer and let the soup cook for 20 minutes.
  6. Using an immersion blender or regular blender, puree the soup until smooth.
  7. Once blended, season with salt and pepper to your liking.
  8. Ladle the warmed soup into bowls and serve immediately.

Nutrition

Serving: 1cupCalories: 180kcalCarbohydrates: 30gProtein: 4gFat: 6gSaturated Fat: 1gPolyunsaturated Fat: 0.5gMonounsaturated Fat: 4gSodium: 400mgPotassium: 800mgFiber: 6gSugar: 8gVitamin A: 12000IUVitamin C: 20mgCalcium: 80mgIron: 1.5mg

Notes

For an extra touch, reheat your soup with a splash of coconut milk or a swirl of olive oil before serving.

Tried this recipe?

Let us know how it was!

Filed Under: DINNER RECIPES

Spicy Moroccan Lentil Soup

December 15, 2025 by JudyWhite Leave a Comment

When the weather starts to cool and the leaves turn, there’s nothing quite like a bowl of warm, hearty soup to brighten up your day. Picture this: the enticing aroma of spices swirling through your kitchen, creating a cozy atmosphere as you prepare a dish that feels like a warm hug. That’s the magic of this Spicy Moroccan Lentil Soup.

I discovered this delightful recipe one afternoon while experimenting with ingredients that had been patiently waiting in my pantry. The combination of tender lentils, vibrant veggies, and zesty spices transports you on a culinary journey straight to Morocco without breaking a sweat.

Not only is this soup a feast for the senses, but it’s also packed with nutrients and can be whipped up in just 40 minutes. Perfect for busy weeknights or a comforting weekend meal, it’s a surefire way to impress family and friends while steering clear of fast food. Let’s dive into how to make this savory delight that’s sure to become a staple in your home!

Why You'll Love This Spicy Moroccan Lentil Soup

  • This Spicy Moroccan Lentil Soup is incredibly easy to make, with just a quick 10-minute prep time that fits perfectly into your busy schedule.
  • The bold and zesty flavors of cumin, coriander, and cayenne pepper will tantalize your taste buds and leave you craving more after each spoonful.
  • It’s a versatile recipe that allows you to add any seasonal vegetables you have on hand, making it perfect for using up pantry staples.
  • With its rich colors and delicious presentation, this soup is not only satisfying but also visually appealing, making it a crowd-pleasing dish for any gathering.

Spicy Moroccan Lentil Soup Ingredients

• Here’s what you need to create this delightful soup!

For the Soup Base

  • Lentils – they provide a hearty texture and are packed with protein.
  • Medium onion, chopped – adds depth and sweetness to the soup.
  • Garlic cloves, minced – brings aromatic flavor that enhances overall taste.
  • Carrot, diced – contributes natural sweetness and vibrant color.
  • Bell pepper, diced – adds crunch and a hint of earthiness.

For the Flavor

  • Olive oil – essential for sautéing and adds richness.
  • Cumin – infuses the soup with a warm, earthy undertone.
  • Coriander – brightens the dish with its citrusy notes.
  • Paprika – delivers a gentle smokiness that enhances the soup’s flavor.
  • Cayenne pepper – adds a spicy kick, just as the name suggests!

For the Liquids

  • Vegetable broth – provides a flavorful base and keeps it vegetarian-friendly.
  • Diced tomatoes – adds acidity and balance to the rich flavors.

To Finish

  • Salt and pepper to taste – enhances all the other flavors beautifully.
  • Fresh cilantro for garnish – adds a burst of freshness and bright color before serving.

How to Make Spicy Moroccan Lentil Soup

  1. Heat the Oil: Begin by heating the olive oil in a large pot over medium heat. The oil should shimmer, signaling it’s ready for the next delicious ingredients.

  2. Sauté the Veggies: Add the chopped onion, minced garlic, diced carrot, and bell pepper to the pot. Sauté these colorful veggies until they soften, about 5-7 minutes, filling your kitchen with wonderful aromas.

  3. Add the Lentils and Spices: Stir in the lentils along with the cumin, coriander, paprika, and cayenne pepper. Mix well to ensure the lentils are completely coated in those fragrant spices, about 2 minutes.

  4. Pour in the Liquids: Carefully pour in the vegetable broth and diced tomatoes. Bring the mixture to a gentle boil, watching as it bubbles and froths with flavor.

  5. Simmer to Perfection: Once boiling, reduce the heat to low and let it simmer uncovered for about 30 minutes, or until the lentils are tender and the soup is thickened to your liking. Stir occasionally for even cooking.

  6. Season to Taste: Once cooked, taste the soup and season it with salt and pepper to your preference. Remember, a little seasoning goes a long way in enhancing those delightful flavors!

  7. Serve and Garnish: Ladle the hot soup into bowls and finish with a sprinkle of fresh cilantro on top. This brightens the dish and adds a touch of freshness that complements the spices beautifully.

Optional: Serve with warm crusty bread for a complete meal.
Exact quantities are listed in the recipe card below.

Spicy Moroccan Lentil Soup Variations

Feel free to mix things up and create your own version of this enticing soup with these delightful ideas!

  • Vegetable Boost: Add extra diced carrots, zucchini, or kale for more nutrition and vibrant color. Double the veggies, double the fun!

  • Creamy Finish: Stir in a splash of coconut milk or a dollop of plain yogurt just before serving. This adds richness and balances the spices beautifully.

  • Protein-Packed: Toss in some cooked chickpeas or diced chicken for added protein. This makes your soup even heartier, perfect for a satisfying meal.

  • Heat It Up: Increase the cayenne pepper or add diced jalapeños for an extra spicy kick. This is for those who love a serious heat challenge!

  • Herb Variations: Swap fresh cilantro for parsley or mint for a different aroma and flavor profile. Each herb brings its unique freshness to the dish.

  • Nutty Addition: Sprinkle in toasted almonds or pine nuts before serving for a delightful crunch. This textural twist takes the soup to the next level.

  • Bulk It Up: Use cooked quinoa or brown rice instead of lentils for a hearty alternative. It creates a different texture and offers a wholesome experience.

  • Smoky Flavor: Mix in a tablespoon of smoked paprika for a deeper, smoky aroma. This gives the soup a unique twist that you’ll absolutely love!

How to Store and Freeze Spicy Moroccan Lentil Soup

Fridge: Store your Spicy Moroccan Lentil Soup in an airtight container in the fridge for up to 3 days. This keeps the flavors vibrant and ready for a quick meal.

Freezer: For longer storage, freeze the soup in individual portions using freezer-safe containers; it will last up to 3 months. Just make sure to leave space for expansion!

Thawing: To reheat, simply thaw overnight in the fridge and warm on the stove over medium heat until heated through. Stir occasionally for even warming.

Reheating: If reheating from frozen, place the soup directly in a pot over medium heat, stirring often until heated thoroughly. Add a splash of water or broth if needed for desired consistency.

Make Ahead Options

These Spicy Moroccan Lentil Soup is perfect for meal prep! You can chop the vegetables (onion, garlic, carrot, and bell pepper) up to 24 hours in advance and store them in an airtight container in the refrigerator to save time on busy weeknights. You can also rinse and soak the lentils, which can help decrease cooking time, though they are fine stored dry as well. When you’re ready to cook, simply heat the olive oil, sauté the prepped veggies, and add the lentils and spices for a quick and comforting meal. This prep will ensure you have a delicious, homemade soup that’s just as hearty and flavorful when you finally serve it!

What to Serve with Spicy Moroccan Lentil Soup?

Warm your heart and home with comforting sides that elevate this spicy, aromatic soup into a full meal experience.

  • Crusty Bread: A must for dipping, it soaks up the rich flavors of the soup and adds a satisfying crunch.
  • Couscous Salad: Light and fluffy, tossed with fresh herbs and lemon juice to balance the soup’s heat.
  • Roasted Vegetables: Caramelized and sweet, they add a delicious contrast to the spicy lentils and showcase earthy flavors.
  • Feta Cheese: Crumbled on top, it provides a creamy, tangy element that beautifully complements the soup’s depth.
  • Greek Yogurt: A dollop of this cool, creamy backdrop rounds out the soup, perfect for balancing heat and adding richness.
  • Hummus with Pita Chips: The velvety texture and nutty taste of hummus make for a delightful contrast alongside the soup.
  • Mint Tea: Its refreshing nature cleanses the palate, creating a perfect beverage pairing with this hearty dish.
  • Cilantro Lime Rice: Bright and zesty, it resonates with the soup’s spices, enhancing each spoonful and balancing flavors harmoniously.
  • Baklava: A sweet finish with flaky layers and honey, it provides the perfect sweet contrast after a spicy meal.

Chef's Helpful Tips

  • To achieve the perfect texture in your Spicy Moroccan Lentil Soup, ensure you rinse the lentils before adding them to the pot to remove any impurities.
  • When sautéing your vegetables, giving them enough time to soften will enhance their flavors, so don’t rush this step.
  • For a more intense flavor, allow the spices to cook with the lentils for a few minutes before adding the liquids, as this helps release their essential oils.
  • Keep an eye on the soup as it simmers; stirring occasionally ensures the lentils cook evenly and prevents them from sticking to the bottom of the pot.

Spicy Moroccan Lentil Soup Recipe FAQs

How do I select the right lentils for this soup?
Absolutely! For this Spicy Moroccan Lentil Soup, I recommend using green or brown lentils as they hold their shape well during cooking. Avoid red lentils if you want a chunkier texture, as they tend to disintegrate and become mushy. When choosing lentils, look for those that are shiny and intact, without any dark spots or debris.

How should I store leftover soup?
Very! To keep your Spicy Moroccan Lentil Soup fresh, store it in an airtight container in the fridge for up to 3 days. This method helps maintain its vibrant flavors and keeps it ready for a quick meal. When reheating, just give it a gentle stir to mix any settled ingredients!

Can I freeze Spicy Moroccan Lentil Soup?
Definitely! For optimal convenience, freeze your soup in individual portions using freezer-safe containers. It can last up to 3 months in the freezer. Be sure to leave some space at the top of your containers to allow for expansion as the soup freezes.

What’s the best way to thaw and reheat the soup?
When you’re ready to enjoy your soup again, simply thaw it overnight in the fridge. To reheat, warm it over medium heat in a pot, stirring occasionally until heated through. If reheating from frozen, you don’t have to thaw first; just place it over medium heat directly from the freezer. Add a splash of water or vegetable broth if the consistency becomes too thick during reheating.

Are there any dietary considerations for this soup?
Absolutely! This Spicy Moroccan Lentil Soup is naturally vegetarian and gluten-free, making it suitable for a variety of diets. If you have allergies, ensure the vegetable broth you use is free from any allergens specific to your needs. Always check ingredient labels, especially for store-bought broth, and be mindful of additional garnishes like cilantro if you have a sensitivity or allergy to herbs.

How can I adjust the spiciness of the soup?
If you prefer a milder flavor, simply reduce or omit the cayenne pepper. For a little extra warmth without overwhelming heat, you can also swap it with a pinch of smoked paprika! The more the merrier; feel free to customize the spice levels according to your taste buds.

Spicy Moroccan Lentil Soup

Spicy Moroccan Lentil Soup

A hearty and nutritious Spicy Moroccan Lentil Soup that tantalizes your taste buds with its vibrant flavors.
Print Recipe Pin Recipe
Prep Time 10 minutes mins
Cook Time 30 minutes mins
Total Time 40 minutes mins
Servings: 4 bowls
Course: DINNER RECIPES
Cuisine: Moroccan
Calories: 250
Ingredients Equipment Method Nutrition Notes

Ingredients
  

Soup Base
  • 1 cup Lentils rinsed
  • 1 medium onion, chopped
  • 2 cloves garlic, minced
  • 1 large carrot, diced
  • 1 medium bell pepper, diced
Flavor
  • 2 tablespoons olive oil
  • 1 teaspoon cumin
  • 1 teaspoon coriander
  • 1 teaspoon paprika
  • 1/2 teaspoon cayenne pepper
Liquids
  • 4 cups vegetable broth
  • 1 can diced tomatoes
To Finish
  • to taste salt
  • to taste pepper
  • 1/4 cup fresh cilantro for garnish

Equipment

  • Large pot

Method
 

Preparation Steps
  1. Heat the olive oil in a large pot over medium heat.
  2. Add the chopped onion, minced garlic, diced carrot, and bell pepper. Sauté until softened, about 5-7 minutes.
  3. Stir in the lentils along with the cumin, coriander, paprika, and cayenne pepper, mixing well.
  4. Pour in the vegetable broth and diced tomatoes. Bring to a gentle boil.
  5. Reduce heat to low and simmer uncovered for about 30 minutes, or until the lentils are tender.
  6. Season with salt and pepper to taste.
  7. Ladle into bowls and garnish with fresh cilantro before serving.

Nutrition

Serving: 1bowlCalories: 250kcalCarbohydrates: 40gProtein: 12gFat: 7gSaturated Fat: 1gPolyunsaturated Fat: 0.5gMonounsaturated Fat: 5gSodium: 500mgPotassium: 700mgFiber: 12gSugar: 4gVitamin A: 5000IUVitamin C: 30mgCalcium: 60mgIron: 3mg

Notes

Serve with warm crusty bread for a more complete meal. Ensure to rinse lentils before adding them to the pot.

Tried this recipe?

Let us know how it was!

Filed Under: DINNER RECIPES

Sweet Potato & Kale Soup

December 15, 2025 by JudyWhite Leave a Comment

As the chilly air settles in, there’s nothing quite like a warm bowl of Sweet Potato & Kale Soup to wrap your hands around and savor. Imagine the enticing aroma of sautéed onions and garlic filling your kitchen—it’s an invitation that beckons you to slow down and relish the moment. I discovered this comforting gem one Sunday afternoon, when a craving for a healthy, hearty meal nudged me into action.

With just a handful of wholesome ingredients, I found not only a dish that warms my soul but also a recipe so effortless that it could become a weekly staple. The natural sweetness of the sweet potatoes pairs beautifully with the earthy, nutritious kale, all brought to life with a dash of cumin and a hint of heat from red pepper flakes. This soup is as versatile as it is delicious—perfect for warming you up on a long day or impressing guests with its rich flavors. Are you ready to reignite your love for homemade meals? Let’s dive into this quick and satisfying recipe!

Why You'll Love This Sweet Potato & Kale Soup

  • This Sweet Potato & Kale Soup is incredibly easy to make, allowing you to whip up a delicious meal in just 45 minutes.
  • The flavor combination of sweet potatoes and kale creates a rich and comforting taste that will leave your taste buds dancing with joy.
  • Not only is it nutritious, but it’s also versatile enough to serve as a cozy dinner or an impressive dish for guests.
  • The vibrant colors and aromatic ingredients make for a visually appealing presentation that is sure to impress everyone at the table.

Sweet Potato & Kale Soup Ingredients

Get ready to gather some wholesome goodies for this delightful dish!

For the Soup

  • Sweet potatoes – a natural sweetness that adds flavor and creaminess to the soup.
  • Onion – provides a savory base that enhances the overall taste.
  • Garlic – infuses the soup with a fragrant punch for a delightful aroma.
  • Vegetable broth – acts as the soul of the soup, adding depth and richness to the flavor.
  • Kale – packs a nutritious punch, making this dish both hearty and healthy.
  • Olive oil – used for sautéing, it adds a touch of healthy fat for richness.
  • Salt – enhances all the natural flavors, bringing the soup to life.
  • Black pepper – adds a gentle warmth without overpowering the other flavors.
  • Cumin – introduces a warm, earthy note, elevating the sweet potato & kale soup’s profile.
  • Red pepper flakes – a hint of heat to make your taste buds tingle!

This comforting bowl is beating the fast-food slump while being loaded with goodness!

How to Make Sweet Potato & Kale Soup

  1. Heat Oil: In a large pot, heat 1 tsp of olive oil over medium heat. This will create a flavorful base for your soup, so let it warm up nicely for a minute.

  2. Sauté Onion: Add the chopped onion to the pot and sauté until it becomes translucent, about 3-4 minutes. The aroma will start to fill your kitchen, making your mouth water!

  3. Add Garlic: Next, introduce 2 minced garlic cloves into the mix and cook for 1 minute. This step adds a fragrant punch that elevates the taste of your soup.

  4. Combine Ingredients: Add the diced sweet potatoes, 4 cups of vegetable broth, 1 tsp salt, 1/2 tsp black pepper, 1/2 tsp cumin, and 1/4 tsp red pepper flakes. Stir them well; the vibrant colors are a feast for the eyes!

  5. Bring to Boil: Increase the heat and bring the mixture to a boil. Once boiling, reduce the heat and let it simmer until the sweet potatoes are tender, roughly 15-20 minutes. You’ll know it’s time when the sweet potatoes are easily pierced with a fork.

  6. Add Kale: Stir in 4 cups of chopped kale and cook for an additional 5 minutes until the kale is tender and bright green. This will give your soup that rich, nourishing quality.

  7. Blend (Optional): If you prefer a smoother texture, use an immersion blender to blend the soup to your desired consistency. It’s a great option if you enjoy a creamy soup!

  8. Serve Hot: Ladle the warm soup into bowls and enjoy it while it’s steaming. This delightful dish is perfect for cozying up on a chilly day!

Optional: Garnish with a sprinkle of fresh black pepper for an extra kick.
Exact quantities are listed in the recipe card below.

Make Ahead Options

These Sweet Potato & Kale Soup ingredients are perfect for meal prep, making your busy weeknights a breeze! You can chop the sweet potatoes, onion, and garlic up to 24 hours ahead and refrigerate them in an airtight container to keep them fresh. Additionally, you can prepare the soup base (steps 1-6) and store it in the fridge for up to 3 days. To maintain quality, cool the soup completely before refrigerating and store the kale separately to prevent it from wilting. When ready to serve, simply reheat the soup on the stove, add the kale, and cook for 5 minutes, offering you a comforting bowl of Sweet Potato & Kale Soup with minimal effort.

Sweet Potato & Kale Soup Variations

Feel free to play around with this recipe and create your own twist on this delightful soup!

  • Spicy Kick: Add diced jalapeños or a few dashes of hot sauce for an extra layer of heat. Spice lovers will rejoice as the warmth dances on their tongues!

  • Creamy Delight: Stir in coconut milk or a splash of cream at the end for a luscious, velvety finish. This variation transforms your soup into a rich and indulgent experience.

  • Herbaceous Boost: Toss in fresh herbs like thyme or rosemary during the cooking process for an aromatic twist. These add a fragrant, earthy complexity that brightens every spoonful.

  • Protein Power: Include white beans or lentils to make the soup more filling and add a protein punch. This hearty addition turns your dish into a satisfying meal that fuels your day.

  • Root Veggie Medley: Swap out half the sweet potatoes with parsnips or carrots for a slightly sweeter flavor profile. This creates a delightful contrast that adds depth to the overall taste.

  • Grainy Goodness: Mix in cooked quinoa or barley to enhance the texture and heartiness of your soup. This twist adds a delightful chewiness that makes each bowl more satisfying.

  • Green Goodness: Replace kale with spinach or Swiss chard for a different leafy green experience. Each option brings its own unique flavor and nutrition, keeping your soup vibrant and delicious.

  • Nutty Flavor: Top with toasted pumpkin or sunflower seeds for a pleasant crunch and nutty flavor. This simple addition provides an irresistible texture contrast that elevates your soup.

How to Store and Freeze Sweet Potato & Kale Soup

Fridge: Store any leftovers in an airtight container for up to 3 days. This keeps your Sweet Potato & Kale Soup fresh and ready to enjoy whenever you need a warm meal.

Freezer: For longer storage, freeze the soup in freezer-safe containers or bags for up to 3 months. Make sure to leave some space for expansion as it freezes.

Reheating: To reheat, thaw overnight in the fridge, then gently warm on the stovetop over low heat, stirring occasionally. Add a splash of vegetable broth to loosen it up if needed. Enjoy your comforting soup!

What to Serve with Sweet Potato & Kale Soup?

As you cozy up with your steaming bowl of sweetness, why not enhance your meal with delightful sides that you’ll savor?

  • Crusty Bread: The perfect match for scooping up that creamy goodness while adding a satisfying crunch to every bite.
    A warm baguette or crunchy artisan loaf will complement the soup’s texture beautifully, transforming your dining experience.

  • Simple Green Salad: A refreshing mix of greens topped with vinaigrette adds brightness to your meal.
    This crisp contrast balances the silky soup, offering a light and invigorating palate cleanser between each comforting spoonful.

  • Roasted Brussels Sprouts: Nutty and caramelized, they elevate the wholesome vibe of your dinner.
    Sprinkle them with a little sea salt or balsamic glaze for an extra zing, making every mouthful a delightful surprise.

  • Quinoa Pilaf: Packed with protein and flavor, this nutty dish pairs wonderfully with the soup.
    The light, fluffy texture of quinoa adds a heartiness that complements the richness of your Sweet Potato & Kale Soup.

  • Apple Crisp: End your meal on a sweet note with this warm dessert.
    The comforting flavors of baked apples and oats create a lovely harmony with the soup, making a perfect seasonal treat.

  • Herbal Tea: A soothing cup of herbal tea pairs elegantly, enhancing the overall comforting experience.
    Choose a flavor like chamomile or peppermint to calm your senses after this nourishing meal.

  • Lemonade: A refreshing glass of lemonade offers a vibrant burst of citrus that brightens your palate between spoonfuls.
    The tangy sweetness beautifully offsets the earthy flavors of the soup, creating a well-balanced meal.

  • Cheese Platter: An assortment of cheeses with different textures and tastes can be a delightful appetizer.
    Add crackers and some dried fruits for a variety that excites the palate before diving into the warm soup you’re about to cherish.

Chef's Helpful Tips

  • When preparing the Sweet Potato & Kale Soup, ensure you cut the sweet potatoes into even-sized pieces for consistent cooking.
  • Avoid adding too much salt at the beginning; you can always adjust the seasoning later for better flavor control.
  • For a more vibrant color and nutrition boost, add the kale towards the end to maintain its bright green hue.
  • Simmer gently to let the flavors meld, but be careful not to overcook the sweet potatoes, as they can become mushy.
  • Incorporating these tips will enhance the overall flavor and texture of your soup.

Sweet Potato & Kale Soup Recipe FAQs

What type of sweet potatoes should I use?
Absolutely! When choosing sweet potatoes, look for ones that are firm, smooth, and free from dark spots or blemishes. The best sweet potatoes for this soup are slightly sweet and tender ones, like the orange-fleshed ones, as they add a lovely creaminess to the soup.

How should I store leftover Sweet Potato & Kale Soup?
Very! Store your delicious leftovers in an airtight container in the fridge for up to 3 days. This way, you can enjoy the comforting flavors again without the hassle of cooking from scratch!

Can I freeze Sweet Potato & Kale Soup?
Definitely! To freeze, pour the cooled soup into freezer-safe containers or bags, ensuring there’s enough space for expansion. It will keep well for up to 3 months. When you’re ready to enjoy it again, simply thaw it overnight in the fridge before reheating.

What if my soup is too thick after cooking?
No worries! If your Sweet Potato & Kale Soup turns out thicker than desired, you can easily fix it. Just add a bit of vegetable broth or water while reheating it on the stovetop until you reach your preferred consistency. Stir well to incorporate!

Is this soup suitable for vegans and those with allergies?
Absolutely! This Sweet Potato & Kale Soup is vegan-friendly, packed with nutritious ingredients. However, always check the labels of your vegetable broth to make sure it’s free from allergens. If you’re allergic to any specific ingredients like garlic, feel free to omit or substitute it with a suitable alternative.

Can I add additional vegetables to the soup?
Very much so! The more the merrier! Feel free to add more vegetables such as carrots, celery, or even bell peppers for additional flavor and nutrients. Just chop them finely and sauté them along with the onion to ensure they cook evenly.

Sweet Potato & Kale Soup

Sweet Potato & Kale Soup

This cozy Sweet Potato & Kale Soup is a wholesome meal perfect for chilly days, combining sweet potatoes and kale in a hearty broth.
Print Recipe Pin Recipe
Prep Time 10 minutes mins
Cook Time 35 minutes mins
Total Time 45 minutes mins
Servings: 4 bowls
Course: DINNER RECIPES
Cuisine: Vegetarian
Calories: 250
Ingredients Equipment Method Nutrition Notes

Ingredients
  

For the Soup
  • 4 cups sweet potatoes diced
  • 1 medium onion chopped
  • 2 cloves garlic minced
  • 4 cups vegetable broth
  • 4 cups kale chopped
  • 1 tbsp olive oil for sautéing
  • 1 tsp salt
  • 1/2 tsp black pepper
  • 1/2 tsp cumin
  • 1/4 tsp red pepper flakes

Equipment

  • Large pot

Method
 

How to Make Sweet Potato & Kale Soup
  1. In a large pot, heat 1 tsp of olive oil over medium heat.
  2. Add the chopped onion to the pot and sauté until it becomes translucent, about 3-4 minutes.
  3. Next, introduce 2 minced garlic cloves into the mix and cook for 1 minute.
  4. Add the diced sweet potatoes, 4 cups of vegetable broth, 1 tsp salt, 1/2 tsp black pepper, 1/2 tsp cumin, and 1/4 tsp red pepper flakes. Stir them well.
  5. Increase the heat and bring the mixture to a boil. Once boiling, reduce the heat and let it simmer until the sweet potatoes are tender, roughly 15-20 minutes.
  6. Stir in 4 cups of chopped kale and cook for an additional 5 minutes until the kale is tender and bright green.
  7. If you prefer a smoother texture, use an immersion blender to blend the soup to your desired consistency.
  8. Ladle the warm soup into bowls and enjoy it while it's steaming.

Nutrition

Serving: 1bowlCalories: 250kcalCarbohydrates: 40gProtein: 6gFat: 8gSaturated Fat: 1gPolyunsaturated Fat: 0.5gMonounsaturated Fat: 5gSodium: 500mgPotassium: 800mgFiber: 8gSugar: 6gVitamin A: 12000IUVitamin C: 45mgCalcium: 150mgIron: 2mg

Notes

Optional: Garnish with a sprinkle of fresh black pepper for an extra kick. Exact quantities are listed in the recipe card below.

Tried this recipe?

Let us know how it was!

Filed Under: DINNER RECIPES

Cranberry-Orange Glazed Turkey

December 14, 2025 by JudyWhite Leave a Comment

As the holiday season approaches, there’s an undeniable excitement in the air—a time when kitchens transform into the heart of the home. Picture this: the rich aroma of herbs mingles with a hint of citrus, while a beautiful turkey basks in a glossy cranberry-orange glaze. This Cranberry-Orange Glazed Turkey isn’t just a dish; it’s an experience that leaves your guests raving and your heart feeling full.

On one particularly cozy November evening, I found myself needing to impress my family with a show-stopping meal. After rummaging through a few tempting recipes, I stumbled upon a combination that had my mouth watering before I’d even taken a single bite. With vibrant cranberries, zesty oranges, and the warmth of rosemary and thyme, this turkey delivers a perfect balance of sweet and savory—not to mention, it’s surprisingly easy to make!

So, if you’re tired of the same old turkey routine or simply want to impress your loved ones, let’s dive into this flavorful adventure that will elevate your dining experience and rekindle the joy of homemade meals. Your next gathering deserves this festive centerpiece!

Why You'll Love This Cranberry-Orange Glazed Turkey

  • This Cranberry-Orange Glazed Turkey is incredibly easy to prepare, making it a stress-free option for your holiday gatherings.
  • The delightful blend of sweet cranberries and zesty oranges creates a flavor explosion that will have your guests coming back for seconds.
  • Its stunning glossy glaze not only enhances the turkey’s appearance but also adds a burst of color to your table.
  • Plus, this dish is sure to impress even the pickiest eaters, making it a true crowd-pleaser that everyone will remember.

Cranberry-Orange Glazed Turkey Ingredients

• Discover the secrets to your perfect turkey!

For the Turkey

  • 12 to 14-pound turkey – Choose the size based on your guest list to ensure everyone gets a delicious serving.
  • Kosher salt – Essential for seasoning, helping to enhance the natural flavors of the turkey.
  • Freshly ground black pepper – Adds a touch of warmth and depth to the turkey’s flavor.

For the Herb Infusion

  • Fresh rosemary – This herb infuses the turkey with a fragrant, aromatic touch.
  • Fresh thyme – Complements the rosemary beautifully, bringing a touch of earthiness.

For the Glaze

  • Unsalted butter – Helps to achieve a golden-brown skin and adds richness to the glaze.
  • Small onion, chopped – Releases sweetness when sautéed, providing a flavorful base for the glaze.
  • Garlic, smashed – Adds an aromatic punch that pairs wonderfully with the sweet and tangy elements.
  • Cranberries – The star of your glaze, bursting with flavor that balances the turkey’s savory notes.
  • Sugar – A key ingredient for sweetness, helping to create that irresistible glossy glaze.
  • Cider vinegar – Adds a tangy kick, balancing the sweetness from the cranberries and sugar.
  • Chipotles in adobo – Introduces a smoky heat that elevates the overall flavor profile.
  • Oranges, zested and juiced – Provides a vibrant citrus flavor that complements the cranberries perfectly.

For The Broth

  • Low-sodium chicken broth – Keeps the turkey moist while roasting and enhances those lovely pan juices.

This Cranberry-Orange Glazed Turkey is not just a meal; it’s the centerpiece of your next celebration!

How to Make Cranberry-Orange Glazed Turkey

  1. Preheat your oven to 325°F (165°C) to ensure an even cook. A well-heated oven creates the perfect environment for roasting your turkey to golden perfection.

  2. Prepare the turkey by rubbing it generously with kosher salt and freshly ground black pepper. This not only seasons the meat but also helps to create a flavorful crust as it roasts.

  3. Stuff the turkey with fresh rosemary and thyme. The herbs will infuse their aromatic goodness into the meat, adding a fragrant depth to every bite.

  4. Melt 5 tablespoons of unsalted butter in a large skillet over medium heat. This will create a luscious base for the glaze, giving it richness and a beautiful color.

  5. Sauté the chopped onion and smashed garlic in the skillet until they become translucent. This typically takes about 3-5 minutes and will fill your kitchen with a delightful aroma.

  6. Stir in cranberries, sugar, cider vinegar, and chipotles in adobo into the skillet. Cook the mixture until you hear the cranberries pop, which should take about 7-10 minutes—watch for that vibrant color!

  7. Thicken the mixture by cooking until it reaches a syrupy consistency. Once it does, remove it from heat and stir in the zest and juice of the oranges to brighten up the glaze with a fresh citrus kick.

  8. Brush the turkey with the remaining melted butter and place it in a roasting pan. This helps the skin become deliciously crisp and golden.

  9. Pour the cranberry-orange glaze over the turkey, generously covering every inch. Aim to spread that flavorful mixture evenly to create a show-stopping presentation.

  10. Add low-sodium chicken broth to the pan as needed to keep the turkey moist during roasting. Start with a cup and adjust based on the size of your pan.

  11. Roast the turkey in the preheated oven for approximately 3 hours, basting occasionally with the pan juices to develop flavor and keep it juicy.

  12. Check the turkey’s internal temperature until it reaches 165°F (75°C) in the thickest part of the breast. This ensures it’s safe to eat and expertly cooked.

  13. Rest the turkey for at least 20 minutes before carving and serving. This allows the juices to redistribute for an incredibly moist result.

Optional: Garnish with additional fresh herbs for a splash of color before serving.

Exact quantities are listed in the recipe card below.

Make Ahead Options

These Cranberry-Orange Glazed Turkey preparations are perfect for busy cooks looking to save time during the holiday rush! You can season and stuff the turkey up to 24 hours in advance, ensuring maximum flavor absorption. Additionally, the cranberry-orange glaze can be made ahead and refrigerated for up to 3 days—just store it in an airtight container to lock in freshness. When you’re ready to roast, simply brush the turkey with melted butter, pour on the chilled glaze, and follow the usual cooking instructions. This way, you’ll enjoy the same delicious taste with minimal effort, transforming your holiday meal into a stress-free celebration!

What to Serve with Cranberry-Orange Glazed Turkey?

Elevate your holiday feast with the perfect complements to this show-stopping turkey.

  • Garlic Mashed Potatoes: Fluffy, buttery potatoes infused with garlic bring comfort and a creamy texture that balances the tart glaze beautifully.

  • Roasted Brussels Sprouts: These caramelized veggies add a delightful crunch and earthy flavor, providing a beautiful contrast to the sweetness of the turkey.

  • Cranberry Sauce: Enhance the flavors with a luxurious homemade cranberry sauce, enriching your meal with more of that beloved tartness.

  • Herbed Stuffing: Savory stuffing packed with herbs pairs perfectly with the turkey, soaking up all those delicious juices and creating a burst of flavor in every bite.

  • Honey-Glazed Carrots: Sweet and tender carrots drizzled with honey offer a juicy, vibrant side that both kids and adults will adore.

  • Apple Pie: Finish your meal on a sweet note with a warm slice of classic apple pie, adding a comforting touch to your festive gathering.

Each of these dishes will harmonize beautifully, creating a memorable dining experience that shines with the spirit of togetherness and joy.

Cranberry-Orange Glazed Turkey Variations

Feel free to customize this turkey to fit your taste and dietary preferences!

  • Herb Swap: Substitute fresh rosemary and thyme with sage or parsley for a completely different flavor profile. The earthiness of sage especially shines in this recipe!

  • Spice it Up: Add extra chipotle peppers or a sprinkle of cayenne for a smoky kick. Adjust the amount based on your heat tolerance; balance is key for maximizing flavor!

  • Fruit Fusion: Incorporate diced apples or pears into the cranberry mixture for a delightful twist. This addition brings natural sweetness and warmth while enhancing each bite’s texture.

  • Vegan Option: Replace the turkey with a large stuffed squash or jackfruit. This creates a similar sweet and savory flavor experience, perfect for plant-based celebrations.

  • Citrus Blend: Use lemon or grapefruit zest and juice instead of orange for a zesty punch. This change adds brightness to the glaze that’s equally refreshing.

  • Nutty Crunch: Fold in toasted pecans or walnuts to the cranberry mixture before glazing. This contrast of textures elevates the dish and adds a delightful crunch.

  • Maple Sweetness: Swap sugar with maple syrup in the glaze for a richer sweetness. It not only complements the tart cranberries but also adds a cozy, autumnal vibe.

  • Low-Carb Alternative: For a keto-friendly version, use erythritol or a sugar substitute in the glaze. You’ll enjoy the same sweet-tart flavor without the carbs.

Embrace your creativity, and let these variations inspire your perfect Cranberry-Orange Glazed Turkey experience!

How to Store and Freeze Cranberry-Orange Glazed Turkey

Room Temperature: Refrigerate leftover turkey within 2 hours of cooking to prevent bacterial growth. Ideally, serve immediately for the best taste and texture.

Fridge: Store leftovers in an airtight container for up to 3 days. If covered well, the turkey will retain its moist texture and flavor, making it great for reheating.

Freezer: If you have more than you can eat, freeze the turkey (sliced or whole) for up to 3 months. Wrap tightly in plastic wrap and foil, or use a vacuum-sealed bag to maintain quality.

Reheating: Thaw frozen turkey overnight in the fridge. Reheat in the oven at 325°F (165°C) covered with foil to retain moisture, warming until the internal temperature reaches 165°F again.

Chef's Helpful Tips

  • To prepare the Cranberry-Orange Glazed Turkey, ensure you rub the turkey generously with kosher salt and black pepper at least an hour before cooking for maximum flavor penetration.
  • Avoid common mistakes by checking the internal temperature with a meat thermometer in the thickest part of the breast to guarantee it’s cooked to 165°F and safe to serve.
  • For an even richer flavor, consider adding more butter to your glaze mixture for a beautifully golden crust.
  • Always let your turkey rest for at least 20 minutes before carving to retain its juices and enhance moisture in each slice.

Cranberry-Orange Glazed Turkey Recipe FAQs

How do I choose the right turkey?
Absolutely! When selecting your turkey, look for one that is between 12 to 14 pounds for the best serving size. Check for fresh ones without any dark spots or bruises, and opt for organic if possible for better flavor and quality.

How long can I store leftovers?
You can store leftover Cranberry-Orange Glazed Turkey in an airtight container in the fridge for up to 3 days. It’s perfect for sandwiches or a quick turkey salad! Just be sure to seal it well to keep the moisture intact.

Can I freeze the turkey after cooking?
Yes, absolutely! To freeze your leftover turkey, slice it or keep it whole, then wrap it tightly in plastic wrap and aluminum foil or use a vacuum-sealed bag. It can be frozen for up to 3 months while maintaining its flavor and texture.

How do I reheat frozen turkey properly?
To reheat your frozen turkey, first, thaw it overnight in the fridge. Once thawed, preheat your oven to 325°F (165°C). Place the turkey in an oven-safe dish, cover it with foil to prevent drying out, and heat it until the internal temperature reaches 165°F again. This should take about 20-30 minutes for sliced turkey.

What should I do if my turkey is dry?
If your turkey happens to be on the dry side, don’t worry—simply slice it and drizzle warm chicken broth over the slices before serving. This helps to add moisture back into the meat, giving it a succulent finish!

Are there any dietary considerations for this recipe?
Definitely! If you’re serving guests with dietary restrictions, be mindful of the chipotles in adobo, as they can be spicy. Also, this recipe contains butter, which may not be suitable for those who are lactose intolerant. You can easily substitute the butter with olive oil or a dairy-free spread for a vegetarian version!

Cranberry-Orange Glazed Turkey

Cranberry-Orange Glazed Turkey

This Cranberry-Orange Glazed Turkey is an experience that captivates your gatherings, featuring a flavorful balance of sweet and savory.
Print Recipe Pin Recipe
Prep Time 20 minutes mins
Cook Time 3 hours hrs
Resting Time 20 minutes mins
Total Time 3 hours hrs 40 minutes mins
Servings: 10 servings
Course: DINNER RECIPES
Cuisine: American
Calories: 350
Ingredients Equipment Method Nutrition Notes

Ingredients
  

For the Turkey
  • 12-14 pounds turkey Choose based on guest list.
  • 2 tablespoons kosher salt Essential for seasoning.
  • 1 teaspoon freshly ground black pepper Adds warmth.
For the Herb Infusion
  • 2 stems fresh rosemary
  • 2 stems fresh thyme
For the Glaze
  • 5 tablespoons unsalted butter For richness.
  • 1 small onion, chopped Releases sweetness when sautéed.
  • 3 cloves garlic, smashed
  • 12 ounces cranberries Star ingredient for the glaze.
  • 1 cup sugar For sweetness.
  • 1/2 cup cider vinegar Adds tang.
  • 1 tablespoon chipotles in adobo For smoky heat.
  • 2 oranges zested and juiced Provides citrus flavor.
For The Broth
  • 1 cup low-sodium chicken broth Keeps turkey moist.

Equipment

  • Oven
  • Roasting pan
  • Skillet
  • meat thermometer

Method
 

How to Make Cranberry-Orange Glazed Turkey
  1. Preheat your oven to 325°F (165°C).
  2. Prepare the turkey by rubbing it generously with kosher salt and freshly ground black pepper.
  3. Stuff the turkey with fresh rosemary and thyme.
  4. Melt 5 tablespoons of unsalted butter in a large skillet over medium heat.
  5. Sauté the chopped onion and smashed garlic until translucent (3-5 minutes).
  6. Stir in cranberries, sugar, cider vinegar, and chipotles in adobo. Cook until cranberries pop (7-10 minutes).
  7. Thicken the mixture to a syrupy consistency, then stir in the zest and juice of oranges.
  8. Brush the turkey with remaining melted butter and place in a roasting pan.
  9. Pour the cranberry-orange glaze over the turkey, covering it evenly.
  10. Add low-sodium chicken broth to the pan as needed.
  11. Roast the turkey for approximately 3 hours, basting occasionally.
  12. Check the internal temperature, aiming for 165°F (75°C).
  13. Rest the turkey for at least 20 minutes before carving and serving.

Nutrition

Serving: 1sliceCalories: 350kcalCarbohydrates: 20gProtein: 40gFat: 15gSaturated Fat: 8gPolyunsaturated Fat: 2gMonounsaturated Fat: 5gCholesterol: 120mgSodium: 800mgPotassium: 600mgFiber: 1gSugar: 5gVitamin A: 400IUVitamin C: 10mgCalcium: 30mgIron: 2mg

Notes

Optional: Garnish with additional fresh herbs before serving.

Tried this recipe?

Let us know how it was!

Filed Under: DINNER RECIPES

Garlic Parmesan Chicken Pasta

December 14, 2025 by JudyWhite Leave a Comment

There’s a certain comfort that comes from a plate of creamy pasta, and when you can add the irresistible flavors of garlic and parmesan to the mix, it’s a game-changer. One evening, after a hectic day, I found myself searching for something special to whip up—something that would feel like a warm embrace after a long week. That’s when I stumbled upon this delightful Garlic Parmesan Chicken Pasta recipe, and it’s been a family favorite ever since.

With juicy chicken coated in savory breadcrumbs and a rich, velvety sauce waiting to envelop tender penne pasta, this dish is both elegant and easy. In just 30 minutes, you can impress friends or satisfy your own craving without any fuss. Say goodbye to lifeless takeout; this homemade meal not only nourishes your body but also lifts your spirits. Let me guide you through each step of creating this delicious masterpiece!

Why You'll Love This Garlic Parmesan Chicken Pasta

  • This Garlic Parmesan Chicken Pasta is an absolute breeze to prepare, taking just 30 minutes from start to finish, making it perfect for busy weeknights.
  • The combination of garlic and parmesan delivers a flavor that is truly irresistible and comfortingly rich.
  • Its versatility allows you to easily customize it with your favorite vegetables or proteins, ensuring that it fits any dining occasion.
  • Plus, the visual appeal of the creamy sauce coating the pasta and the golden chicken on top will impress anyone at your table.

Garlic Parmesan Chicken Pasta Ingredients

Get ready to create a flavorful feast with these scrumptious ingredients!

For the Chicken
• Boneless, skinless chicken breast – the star of your dish; juicy and tender.
• Italian style bread crumbs – adds a crisp, savory coating for that perfect crunch.
• Grated parmesan cheese – for extra flavor boost; a must for this Garlic Parmesan Chicken Pasta.
• Garlic powder – unveils an aromatic layer that enhances the overall taste.
• Salt – essential for amplifying the natural flavors of your ingredients.

For the Pasta
• Penne pasta – its tube-like shape holds onto the creamy sauce beautifully.

For the Sauce
• Butter – provides a luscious base for the sauce, making it rich and velvety.
• Garlic (pressed) – fresh garlic brings a vibrant flavor that elevates the dish.
• Flour – thickens the sauce to a creamy consistency that clings to the pasta.
• Heavy cream – contributes to that indulgently smooth texture everyone loves.
• Chicken broth – infuses the sauce with depth and richness.
• Salt – seasoning to taste; don’t be shy!
• Pepper – adds a subtle warmth and a little kick.

For Garnish
• Chopped parsley (optional) – a splash of color to brighten up your beautiful plate!

How to Make Garlic Parmesan Chicken Pasta

  1. Cook the Pasta: Start by boiling a large pot of salted water. Cook the penne pasta according to the package directions, usually about 10-12 minutes, until al dente. Drain and set aside.

  2. Prepare the Chicken: Slice or pound the chicken breast into thin cutlets for even cooking. In a bowl, combine the bread crumbs, parmesan, garlic powder, and salt to create a flavorful coating.

  3. Coat the Chicken: Generously coat each chicken cutlet in the breadcrumb mixture, ensuring every piece is well-covered for that delightful crunch.

  4. Sear the Chicken: In a large skillet over medium heat, add 2 tablespoons of olive oil. Once hot, add the coated chicken cutlets and let cook for 4-5 minutes without moving them to achieve a golden crust.

  5. Flip and Finish: Carefully flip each cutlet and cook for another 4-5 minutes, until the internal temperature reaches 165˚F. Remove the chicken from the skillet and let it rest on a plate.

  6. Cook in Batches: If needed, cook the chicken in batches to avoid overcrowding the skillet. This ensures each piece gets that perfect sear. Add more olive oil as required to keep it from drying out.

  7. Make the Sauce: With the skillet still warm, add the butter and let it melt. Stir in the pressed garlic and let it cook for about 30 seconds until fragrant.

  8. Thicken the Sauce: Sprinkle in the flour and mix well. Gradually stir in the chicken broth and bring to a simmer, cooking until the sauce thickens—about 60-90 seconds.

  9. Finish the Sauce: Add the remaining salt and pepper, then slowly pour in the heavy cream. Bring the sauce back to a simmer, then stir in the parmesan cheese. Let simmer for 3-5 minutes before tossing in the cooked pasta.

  10. Serve it Up: Plate the pasta in bowls, top with the chicken, and garnish with chopped parsley if desired for a pop of color and freshness.

Optional: Top with extra grated parmesan for an indulgent finish.

Exact quantities are listed in the recipe card below.

Make Ahead Options

These Garlic Parmesan Chicken Pasta ingredients are perfect for meal prep enthusiasts! You can prepare the chicken cutlets by coating them with the breadcrumb mixture up to 24 hours in advance, ensuring they stay flavorful when cooked. Store the coated chicken in the refrigerator to maintain their crispiness. You can also cook the penne pasta ahead and refrigerate it for up to 3 days. When you’re ready to enjoy this dish, simply reheat the pasta and chicken separately for the best texture. Finish by making the creamy sauce, which can be whipped up in about 5 minutes, allowing you to savor a delightful homemade meal with ease.

What to Serve with Garlic Parmesan Chicken Pasta?

Creating the perfect meal isn’t just about one dish; it’s about crafting a harmonious dining experience that delights the senses.

  • Garlic Bread: The crispy, buttery crunch of garlic bread is perfect for dipping into the creamy sauce, enhancing every bite.

  • Caesar Salad: Crisp romaine and a tangy dressing create a refreshing contrast to the richness of the pasta, balancing the meal beautifully.

  • Roasted Vegetables: Seasoned and caramelized, roasted seasonal vegetables add vibrant color and a hint of sweetness to the plate, promoting a wholesome feel.

  • Steamed Asparagus: Tender asparagus spears provide a crisp and bright element that beautifully complements the creamy sauce while adding a nutritional boost.

  • White Wine: A chilled glass of Sauvignon Blanc or Pinot Grigio elevates the dining experience, pairing wonderfully with the savory flavors of garlic and parmesan.

  • Lemon Sorbet: For dessert, the light, refreshing zing of lemon sorbet cleanses the palate after the rich pasta dish, ending your meal on a perfect note.

Storage Tips for Garlic Parmesan Chicken Pasta

Fridge: Store leftover Garlic Parmesan Chicken Pasta in an airtight container for up to 3 days. Be sure to let it cool completely before sealing to preserve freshness.

Freezer: For longer storage, freeze the pasta in a freezer-safe container for up to 2 months. However, avoid freezing if the dish contains cream, as it may separate upon reheating.

Reheating: To reheat, thaw overnight in the fridge and warm gently on the stovetop or microwave. Add a splash of chicken broth or cream to restore the sauce’s smooth texture.

Garlic Parmesan Chicken Pasta Variations

Feel free to spin this recipe to match your taste buds or dietary needs for an even more delightful experience!

  • Gluten-Free: Substitute the penne pasta with gluten-free pasta and use gluten-free bread crumbs for an equally tasty meal.

  • Vegetarian: Replace chicken with sautéed mushrooms or a medley of seasonal veggies, and follow the same coating and cooking process.

  • Creamy Spinach: Stir in fresh spinach during the sauce-making step for a nutritious boost and vibrant color. The spinach wilts beautifully, adding both flavor and elegance.

  • Lemon Zest: Add a teaspoon of lemon zest to the sauce for a refreshing brightness. This simple twist enhances the richness and adds a delightful zing.

  • Extra Protein: For added heartiness, toss in cooked chickpeas or shredded rotisserie chicken, making it a filling dish that’s perfect for any family gathering.

  • Spicy Kick: Incorporate red pepper flakes or a dash of hot sauce into the sauce for a gentle heat that contrasts wonderfully with the creamy texture.

  • Nutty Flavor: Stir in a few tablespoons of toasted pine nuts or walnuts before serving for a satisfying crunch and earthy taste that complements the richness.

  • Herb Infusion: Mix in fresh basil or thyme into the sauce for an aromatic twist, elevating the dish with lush, garden-fresh notes that make every bite memorable.

Let your creativity shine as you customize this comforting dish to create your perfect plate!

Chef's Helpful Tips

  • When making Garlic Parmesan Chicken Pasta, be sure to pound the chicken breast thinly for even cooking and a tender texture.
  • Avoid overcrowding the skillet when searing the chicken to ensure it develops a beautiful golden crust.
  • For a creamier sauce, add the heavy cream gradually and allow it to simmer until thickened, which will help to meld the flavors together.
  • Lastly, remember to cook the pasta al dente so it retains a slight bite, which complements the rich sauce wonderfully.

Garlic Parmesan Chicken Pasta Recipe FAQs

How do I choose the right chicken for my Garlic Parmesan Chicken Pasta?
Absolutely! When selecting chicken breasts, look for those that are plump and have a pinkish hue without any dark spots or a strong odor. Fresh chicken will be firm to the touch. Avoid any packages that seem to have excess liquid, as this can signify the chicken isn’t as fresh. If you have the option, organic or free-range chicken can enhance the flavor and quality of your dish.

How should I store leftover Garlic Parmesan Chicken Pasta?
Very good question! Place any leftovers in an airtight container and refrigerate them within two hours of cooking. This will ensure maximum freshness. The Pasta will stay good for about 3 days. Make sure to let it cool completely before sealing the container for best results!

Can I freeze Garlic Parmesan Chicken Pasta?
Of course! For freezing, I recommend portioning the pasta into freezer-safe containers and storing it for up to 2 months. However, if the dish contains cream, be cautious; it may separate upon thawing. To freeze, first, allow the pasta to cool completely. Then, place it in the containers, leaving a little space at the top for expansion, and seal tightly.

What should I do if my sauce is too thick?
If you encounter a thick sauce, don’t panic! Simply add a little chicken broth or heavy cream to thin it out. Start with a tablespoon at a time, stirring continuously until you reach your desired consistency. This will help keep the flavors balanced while ensuring it clings nicely to the pasta.

Are there any dietary considerations I should be aware of for this recipe?
Yes, indeed! If you’re cooking for someone with dairy sensitivities, you can substitute the heavy cream and parmesan cheese with non-dairy alternatives, like coconut cream and nutritional yeast, respectively. For those with gluten allergies, use gluten-free pasta and gluten-free breadcrumbs. It’s always a good practice to double check ingredient labels for any potential allergens.

What kind of vegetables can I add to the Garlic Parmesan Chicken Pasta?
The more the merrier! You can customize this dish beautifully by adding veggies like sautéed spinach, cherry tomatoes, broccoli, or bell peppers. Just steam or sauté them briefly before mixing them into the pasta. Not only do they add a nutritious boost, but they also elevate the colors and flavors on your plate.

Garlic Parmesan Chicken Pasta

Garlic Parmesan Chicken Pasta

This Garlic Parmesan Chicken Pasta blends creamy pasta with juicy chicken, garlic, and parmesan for a comforting dinner that's ready in just 30 minutes.
Print Recipe Pin Recipe
Prep Time 10 minutes mins
Cook Time 20 minutes mins
Total Time 30 minutes mins
Servings: 4 servings
Course: DINNER RECIPES
Cuisine: Italian
Calories: 600
Ingredients Equipment Method Nutrition Notes

Ingredients
  

For the Chicken
  • 1 pound boneless, skinless chicken breast
  • 1 cup Italian style bread crumbs
  • 1/2 cup grated parmesan cheese
  • 1 teaspoon garlic powder
  • 1 teaspoon salt
For the Pasta
  • 8 ounces penne pasta
For the Sauce
  • 2 tablespoons butter
  • 2 cloves garlic (pressed)
  • 2 tablespoons flour
  • 1 cup heavy cream
  • 1 cup chicken broth
  • 1 teaspoon salt
  • 1/2 teaspoon pepper
For Garnish
  • 1 tablespoon chopped parsley optional

Equipment

  • Large pot
  • Skillet
  • Mixing bowl

Method
 

How to Make Garlic Parmesan Chicken Pasta
  1. Start by boiling a large pot of salted water. Cook the penne pasta according to the package directions, usually about 10-12 minutes, until al dente. Drain and set aside.
  2. Slice or pound the chicken breast into thin cutlets for even cooking. In a bowl, combine the bread crumbs, parmesan, garlic powder, and salt to create a flavorful coating.
  3. Generously coat each chicken cutlet in the breadcrumb mixture, ensuring every piece is well-covered for that delightful crunch.
  4. In a large skillet over medium heat, add 2 tablespoons of olive oil. Once hot, add the coated chicken cutlets and let cook for 4-5 minutes without moving them to achieve a golden crust.
  5. Carefully flip each cutlet and cook for another 4-5 minutes, until the internal temperature reaches 165˚F. Remove the chicken from the skillet and let it rest on a plate.
  6. If needed, cook the chicken in batches to avoid overcrowding the skillet. Add more olive oil as required to keep it from drying out.
  7. With the skillet still warm, add the butter and let it melt. Stir in the pressed garlic and let it cook for about 30 seconds until fragrant.
  8. Sprinkle in the flour and mix well. Gradually stir in the chicken broth and bring to a simmer, cooking until the sauce thickens—about 60-90 seconds.
  9. Add the remaining salt and pepper, then slowly pour in the heavy cream. Bring the sauce back to a simmer, then stir in the parmesan cheese. Let simmer for 3-5 minutes before tossing in the cooked pasta.
  10. Plate the pasta in bowls, top with the chicken, and garnish with chopped parsley if desired for a pop of color and freshness.

Nutrition

Serving: 1servingCalories: 600kcalCarbohydrates: 50gProtein: 35gFat: 35gSaturated Fat: 20gPolyunsaturated Fat: 5gMonounsaturated Fat: 5gCholesterol: 120mgSodium: 900mgPotassium: 600mgFiber: 2gSugar: 2gVitamin A: 15IUVitamin C: 2mgCalcium: 25mgIron: 10mg

Notes

For an indulgent finish, top with extra grated parmesan.

Tried this recipe?

Let us know how it was!

Filed Under: DINNER RECIPES

Monterey Chicken Spaghetti

December 14, 2025 by JudyWhite Leave a Comment

There’s nothing quite like the warmth of a hearty dinner on a chilly evening, is there? Today, I want to share a delightful concoction that has quickly become a family favorite: Monterey Chicken Spaghetti. The first time I prepared this dish, the aroma of creamy cheese mingled with the savory scent of sautéed garlic and bell peppers wafted through my kitchen, drawing everyone in like a siren’s call. What’s truly wonderful about this recipe is how it transforms simple ingredients into a comforting, flavorsome meal that’s ready in just 30 minutes.

Whether you’re looking to impress a crowd or simply want to break away from the monotonous routine of fast food, this Monterey Chicken Spaghetti offers a satisfying solution. With tender pieces of chicken mingling with al dente pasta all enveloped in a rich, creamy sauce, it’s not just a meal—it’s a cozy experience. Get your skillet ready; this dish might just become your new go-to for busy weeknights and memorable gatherings alike!

Why You'll Love This Monterey Chicken Spaghetti

  • This Monterey Chicken Spaghetti is incredibly easy to prepare, making it perfect for busy weeknights.
  • The rich flavors of creamy cheese, tender chicken, and sautéed vegetables create a delightful taste experience that everyone will enjoy.
  • Its versatility allows you to modify the ingredients based on what you have on hand, making it a flexible option for any pantry.
  • Plus, its vibrant colors and cheesy appeal make for a visually stunning dish that’s sure to impress your family and friends.

Monterey Chicken Spaghetti Ingredients

Get ready to create a creamy, flavorful delight!

For the Spaghetti
• 10 oz spaghetti – the star of the dish; cook until al dente for the best texture.

For the Chicken
• 2 cups cooked chicken breast, chopped – using leftovers is a great time-saver, providing a heaping dose of protein.

For the Sauce
• 1 cup shredded Monterey Jack cheese – melts beautifully to create a creamy sauce.
• 3/4 cup heavy cream – adds richness and luscious texture to your Monterey Chicken Spaghetti.
• 1/2 cup chicken broth – enhances the flavor while keeping the sauce juicy.

For the Vegetables
• 1/2 cup chopped bell peppers (mixed colors) – brings vibrant freshness and a crunch to the dish.
• 1/2 small onion, chopped – adds a subtle sweetness that enhances the savory flavors.
• 2 cloves garlic, minced – infuses the dish with an aromatic essence that’s hard to resist.

For Cooking
• 1 tbsp olive oil – perfect for sautéing while adding healthy fats.
• 1 tbsp butter – enriches the dish with flavor and helps to achieve a beautifully browned finish.
• Salt and pepper to taste – essential for enhancing all the flavors in your Monterey Chicken Spaghetti.

For Garnish
• Fresh parsley – provides a pop of color and a fresh herbal note to balance the richness.

How to Make Monterey Chicken Spaghetti

  1. Cook: Bring a large pot of salted water to a boil and cook the spaghetti according to the package instructions until al dente, usually about 8-10 minutes. Drain and set aside.

  2. Heat: In a large skillet, add olive oil and butter over medium heat. Allow them to melt, creating a luscious base for your veggies.

  3. Sauté: Add the onion, garlic, and bell peppers to the skillet. Sauté them until softened and fragrant—this usually takes about 3-5 minutes, making your kitchen smell heavenly.

  4. Combine: Stir in the cooked chicken, heavy cream, and chicken broth. Mix everything well and allow the flavors to marry together, cooking for 2-3 minutes to thicken the sauce slightly.

  5. Mix: Add the cooked spaghetti to the skillet, tossing it gently to combine with the sauce and ingredients evenly. The pasta should be well-coated and vibrant!

  6. Melt: Stir in the Monterey Jack cheese until it’s completely melted and the sauce becomes irresistibly creamy. This is where your dish transforms into a truly comforting meal.

  7. Season: Taste your creation and season it with salt and pepper to your liking. Adjust as necessary to bring out the flavors.

  8. Garnish: Before serving, sprinkle with fresh parsley for a touch of color and a refreshing flavor that cuts through the richness.

Optional: Serve with a sprinkle of chili flakes for a bit of heat!

Exact quantities are listed in the recipe card below.

Make Ahead Options

These Monterey Chicken Spaghetti are perfect for busy home cooks looking to save time during the week! You can cook the spaghetti and prepare the sauce (without the cheese) up to 24 hours in advance; simply refrigerate them separately in airtight containers. Additionally, the chopped vegetables can be prepped ahead and stored in the fridge for up to 3 days. When you’re ready to enjoy this comforting dish, heat the sauce in a skillet, stir in the cooked spaghetti, and then add the cheese until melted. This way, you maintain the creamy texture and flavor, ensuring your meal is just as delicious as if you’d made it fresh!

How to Store and Freeze Monterey Chicken Spaghetti

Fridge: Store leftover Monterey Chicken Spaghetti in an airtight container for up to 3 days. This will keep it fresh and maintain its creamy texture.

Freezer: Freeze individual portions in airtight containers for up to 2 months. Let thaw in the fridge overnight before reheating.

Reheating: Gently reheat in a skillet over medium heat, adding a splash of chicken broth or cream to restore creaminess and avoid drying out.

Room Temperature: Do not leave the spaghetti out at room temperature for more than 2 hours to ensure food safety.

Monterey Chicken Spaghetti Variations

Feel free to put your unique spin on this delicious dish with these fun options!

  • Dairy-Free: Use coconut cream and a dairy-free cheese alternative for a creamy yet lactose-free version. The coconut adds a subtle sweetness that complements the flavors beautifully.

  • Veggie-Packed: Toss in some spinach or kale with the sautéed vegetables for added nutrients and color. Not only will it brighten the dish, but it’ll also help sneak in some healthy greens!

  • Spicy Kick: Add chopped jalapeños or a sprinkle of cayenne pepper to the skillet for an extra layer of heat. This will elevate your dish, making each bite a flavorful adventure.

  • Whole Wheat: Swap out regular spaghetti for whole wheat or gluten-free pasta for a healthier option without sacrificing taste. It brings a nutty flavor and chewy texture that pairs well with the creamy sauce.

  • Pesto Twist: Incorporate a spoonful of pesto into the sauce for a fresh, herbaceous flavor. The vibrant green color will invigorate your dish, while the taste will transport you to Italian gardens.

  • BBQ Chicken: For a smoky flavor, use BBQ sauce mixed in with the cream and broth. This will create a unique blend that reminds you of a summer cookout right in your kitchen.

  • Italian Sausage: Substitute cooked chicken with Italian sausage, removing the casing. The sausage will impart beautiful spices and elevate the dish to a whole new level of savory goodness.

  • Lemon Zest: A teaspoon of fresh lemon zest added before serving can brighten the flavors and cut through the richness of the cheese. It’s a simple touch that makes a big difference!

What to Serve with Monterey Chicken Spaghetti?

Looking to elevate your meal and create a delightful dining experience? Let’s explore some perfect pairings!

  • Garlic Bread: A crunchy, buttery loaf complements the creamy spaghetti while offering a satisfying way to soak up every bit of sauce.

  • Steamed Broccoli: This vibrant, slightly crunchy vegetable adds a fresh, earthy note, balancing the richness of the dish beautifully.

  • Caesar Salad: Crisp romaine adorned with tangy dressing and crunchy croutons offers a refreshing contrast to the warmth of the pasta.

  • Roasted Asparagus: A tender, nutty side that adds elegance, making your meal feel extra special while bringing bright flavors.

  • Wine Pairing – Chardonnay: A chilled glass of oaky Chardonnay enhances the creamy texture of the spaghetti, creating a harmonious balance.

  • Mini Cheesecake Bites: These sweet, creamy treats are a delightful way to round off your meal, leaving a lasting impression of indulgence.

Pair these options with your Monterey Chicken Spaghetti, and watch as your dinner transforms into an unforgettable culinary experience!

Chef's Helpful Tips

  • When preparing Monterey Chicken Spaghetti, always cook your spaghetti until al dente, as it will continue to cook slightly after being added to the sauce.
  • If you have leftover chicken, it saves time and adds great flavor to the dish, making it perfect for a quick weeknight meal.
  • For a creamy sauce, ensure you stir in the Monterey Jack cheese slowly over low heat to prevent it from clumping.
  • Keep an eye on the timing when sautéing the vegetables; they should be soft but not browned to maintain their vibrant color and fresh taste.

Monterey Chicken Spaghetti Recipe FAQs

How do I know if my spaghetti is cooked properly?
Absolutely! The best way to ensure your spaghetti is cooked to perfection is to follow the package instructions closely and test a piece a minute or two before the suggested cooking time. It should be al dente, which means it should have a slight bite but not be hard. If you take a bite and it’s firm but not crunchy, you’re good to go!

Can I store leftovers of Monterey Chicken Spaghetti?
Very! Store any leftover Monterey Chicken Spaghetti in an airtight container in the refrigerator for up to 3 days. To keep that wonderful creamy texture, make sure you seal it tightly before refrigerating. When you’re ready to enjoy it again, just reheat gently!

What’s the best way to freeze Monterey Chicken Spaghetti?
Sure! To freeze this delightful dish, portion it into airtight containers or freezer bags. Make sure to remove as much air as possible to prevent freezer burn. It can be stored for up to 2 months. When you’re ready to indulge again, let it thaw in the refrigerator overnight and reheat gently on the stove, adding a splash of chicken broth to maintain its creaminess.

I’m allergic to dairy; can I modify this recipe?
Of course! If you’re looking to make a dairy-free version of Monterey Chicken Spaghetti, you can substitute the Monterey Jack cheese with a dairy-free cheese alternative that melts well. For the heavy cream, consider using coconut cream or a cashew cream for a luscious thickness. These options allow you to savor the creamy essence while accommodating your dietary needs.

What should I do if my sauce is too thick?
No worries! If you find that your sauce is too thick while cooking, simply add a little more chicken broth or heavy cream, a tablespoon at a time, stirring it in until you reach your desired consistency. Make sure to keep the heat low to allow for even mixing without curdling!

Can I use raw chicken instead of cooked?
Absolutely! If you prefer to use raw chicken breast, you can dice it and add it to the skillet first. Sauté it for about 8-10 minutes until it’s fully cooked before adding the vegetables and continuing with the rest of the recipe. Just make sure the internal temperature reaches 165°F for safe consumption.

Monterey Chicken Spaghetti

Monterey Chicken Spaghetti

Monterey Chicken Spaghetti is a hearty and creamy dish that's perfect for cold evenings, combining chicken, pasta, and a rich cheese sauce.
Print Recipe Pin Recipe
Prep Time 10 minutes mins
Cook Time 20 minutes mins
Total Time 30 minutes mins
Servings: 4 servings
Course: DINNER RECIPES
Cuisine: American
Calories: 550
Ingredients Equipment Method Nutrition Notes

Ingredients
  

For the Spaghetti
  • 10 oz spaghetti cook until al dente
For the Chicken
  • 2 cups cooked chicken breast, chopped using leftovers is a great time-saver
For the Sauce
  • 1 cup shredded Monterey Jack cheese melts beautifully
  • 3/4 cup heavy cream adds richness
  • 1/2 cup chicken broth enhances the flavor
For the Vegetables
  • 1/2 cup chopped bell peppers (mixed colors) brings vibrant freshness
  • 1/2 small onion, chopped adds sweetness
  • 2 cloves garlic, minced infuses aromatic essence
For Cooking
  • 1 tbsp olive oil for sautéing
  • 1 tbsp butter enriches the dish
  • Salt and pepper to taste
For Garnish
  • Fresh parsley for color and fresh flavor

Equipment

  • Large pot
  • Large skillet
  • measuring cups
  • measuring spoons
  • colander

Method
 

How to Make Monterey Chicken Spaghetti
  1. Bring a large pot of salted water to a boil and cook the spaghetti according to the package instructions until al dente, usually about 8-10 minutes. Drain and set aside.
  2. In a large skillet, add olive oil and butter over medium heat. Allow them to melt.
  3. Add the onion, garlic, and bell peppers to the skillet. Sauté until softened and fragrant, about 3-5 minutes.
  4. Stir in the cooked chicken, heavy cream, and chicken broth. Mix well and cook for 2-3 minutes to thicken the sauce slightly.
  5. Add the cooked spaghetti to the skillet, tossing it gently to combine with the sauce and ingredients.
  6. Stir in the Monterey Jack cheese until it's completely melted and the sauce becomes creamy.
  7. Taste and season with salt and pepper to your liking.
  8. Before serving, sprinkle with fresh parsley for a touch of color.

Nutrition

Serving: 1servingCalories: 550kcalCarbohydrates: 45gProtein: 30gFat: 25gSaturated Fat: 15gPolyunsaturated Fat: 2gMonounsaturated Fat: 10gCholesterol: 90mgSodium: 600mgPotassium: 800mgFiber: 3gSugar: 2gVitamin A: 500IUVitamin C: 30mgCalcium: 300mgIron: 2mg

Notes

For a bit of heat, serve with a sprinkle of chili flakes. Store leftovers in an airtight container for up to 3 days in the fridge or freeze for up to 2 months.

Tried this recipe?

Let us know how it was!

Filed Under: DINNER RECIPES

  • « Previous Page
  • 1
  • …
  • 8
  • 9
  • 10
  • 11
  • 12
  • Next Page »

Recent Posts

  • One Pot Cheesy Pasta
  • Steak with Mushroom Sauce
  • St. Patrick’s Day Puppy Chow
  • Salmon with Lemon Butter
  • St. Patrick’s Day Puppy Chow

Recent Comments

No comments to show.

Footer

  • Contact
  • Privacy Policy
  • About Us
  • Terms
  • ↑ back to top

Copyright © 2024 www.Forkono.com

Table Of Content