Forkono

  • BREAKFAST & BRUNCH
  • DESSERT RECIPES
  • DINNER RECIPES
  • LUNCH RECIPES
  • About uS
  • SNACKS & APPETIZERS
menu icon
go to homepage
  • BREAKFAST & BRUNCH
  • DESSERT RECIPES
  • DINNER RECIPES
  • LUNCH RECIPES
  • About uS
  • SNACKS & APPETIZERS
search icon
Homepage link
  • BREAKFAST & BRUNCH
  • DESSERT RECIPES
  • DINNER RECIPES
  • LUNCH RECIPES
  • About uS
  • SNACKS & APPETIZERS
×

Creamy Burrata Dip

December 25, 2025 by JudyWhite Leave a Comment

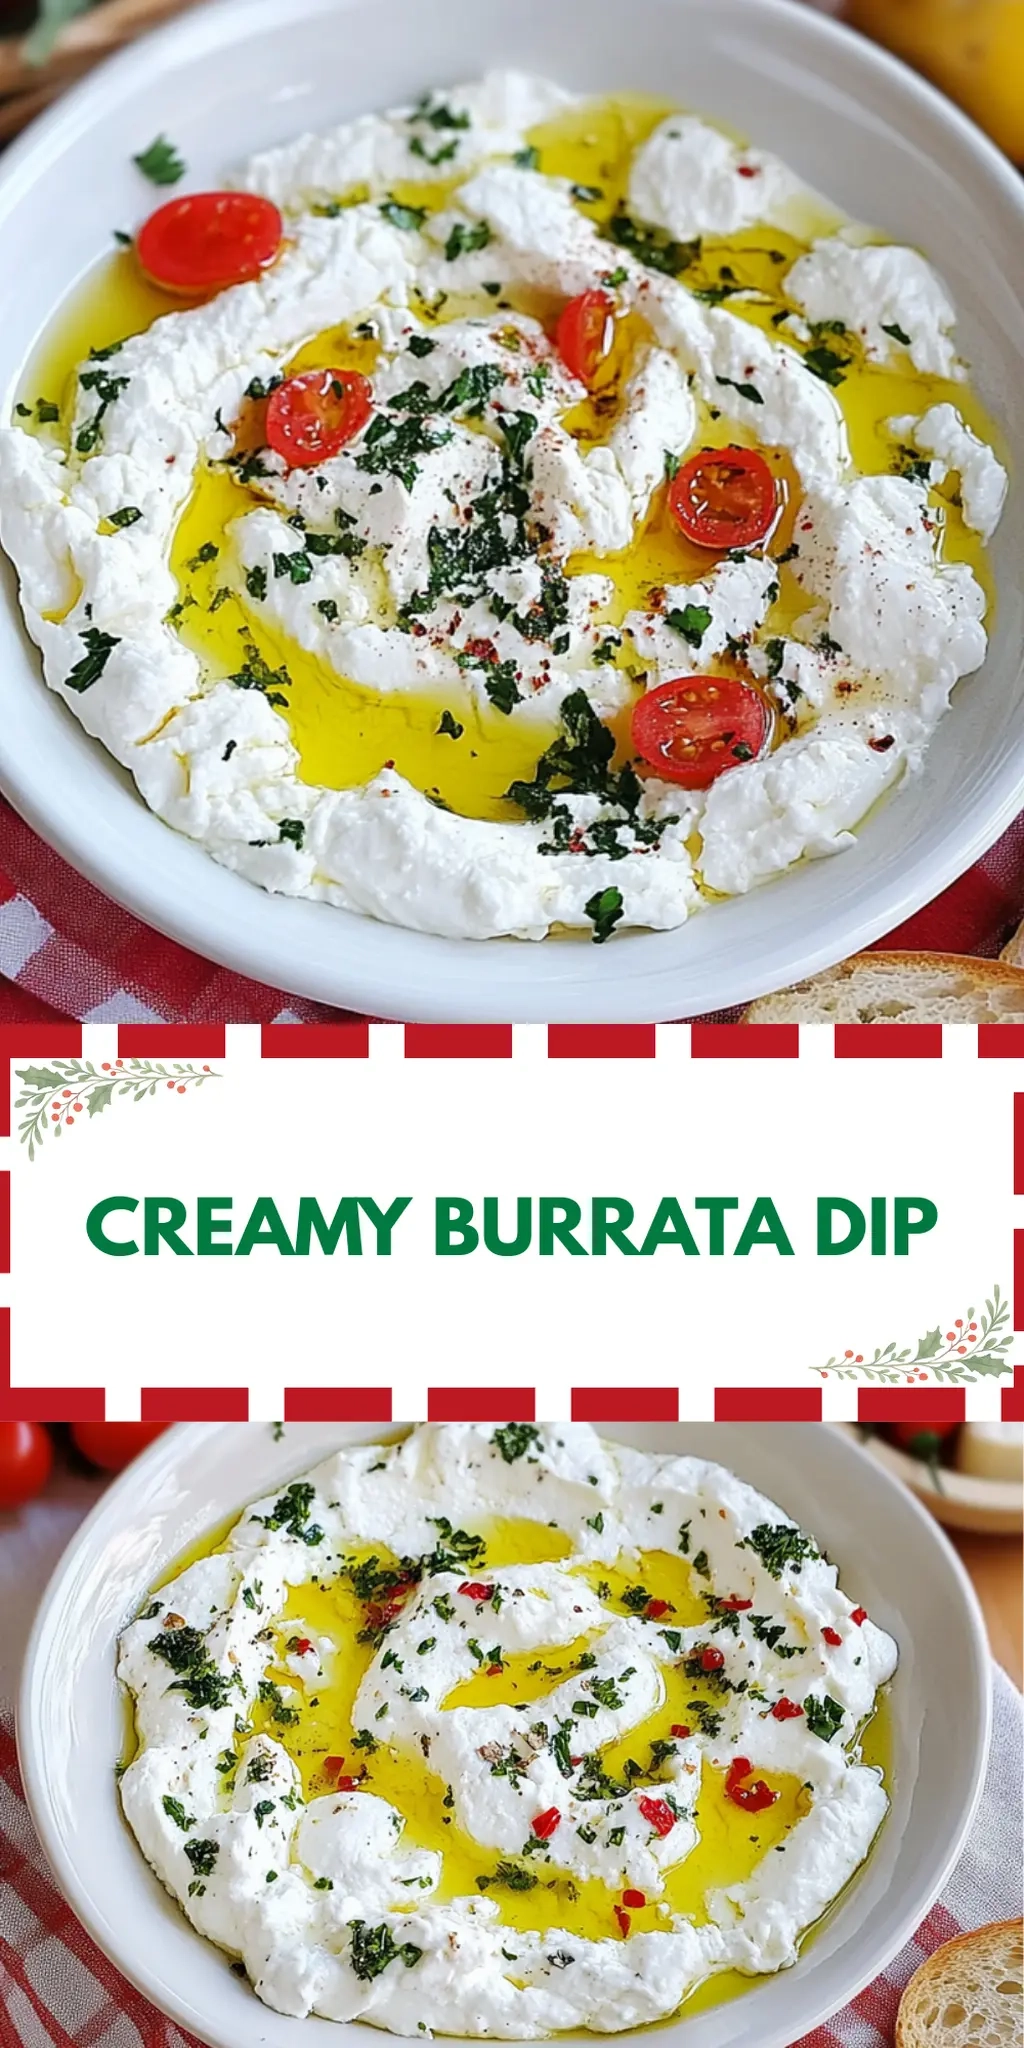
When the sun begins to set and the golden hour casts a warm glow over my kitchen, there’s nothing I love more than preparing a dish that brings everyone together. I recently stumbled upon a creamy burrata dip recipe that transformed my ordinary evenings into delightful gatherings. This isn’t just any dip; the luscious texture of burrata combined with a zesty basil vinaigrette creates a flavor explosion that makes my taste buds dance.

Just imagine sinking a piece of toasted baguette into this heavenly concoction as the rich cheese mingles with fresh herbs. With only 15 minutes of prep time, it’s a breeze to whip up for both casual nights at home and more festive occasions with friends. It’s a versatile appetizer that proves comforting indulgence doesn’t have to come from fast food chains. Join me as we dive into this delightful recipe that effortlessly elevates any meal!

Why You'll Love This Creamy Burrata Dip

  • This creamy burrata dip is incredibly easy to make, taking only 15 minutes of your time, which means you’ll spend less time in the kitchen and more time enjoying the company of your guests.
  • The combination of rich burrata and zesty basil vinaigrette creates a flavor experience that is simply unforgettable, making it a real crowd-pleaser at any gathering.
  • Its versatility allows you to serve it as an appetizer, a party snack, or even a delightful addition to a charcuterie board, showcasing how it fits into any occasion.
  • The visual appeal of this dip is undeniable, with its creamy texture beautifully drizzled with vibrant vinaigrette, making it a centerpiece that’s as stunning as it is delicious.

Creamy Burrata Dip Ingredients

Elevate your gatherings with this delightful dip!

For the Dip
• Burrata – The star of this dish, providing a rich, creamy texture that melts in your mouth.
• Oil from Sundried Tomatoes – Adds a hint of flavor and helps achieve that luscious consistency.
• Basil Chive Vinaigrette or Prepared Pesto – Use whichever you prefer for a herbaceous punch in your creamy burrata dip.
• Flaky Salt – Enhances the flavors; adjust to taste for the perfect balance.
• Pepper – A must for that subtle kick; freshly cracked is best!

For the Basil Vinaigrette
• Basil – Fresh basil is essential for that aromatic freshness, ensuring every bite is vibrant.
• Chives – Adds a mild onion flavor that beautifully complements the dip.
• Red Wine Vinegar – Provides a tangy note that brightens the overall flavor profile.
• Garlic – A small amount goes a long way in adding depth.
• Olive Oil – Helps to blend everything seamlessly into a pourable vinaigrette.
• Salt – Essential for seasoning; don’t forget to taste and adjust!
• Pepper – Just a pinch for added warmth and flavor.

For Serving
• Toasted Baguette – Perfect for dipping, adding a delightful crunch to the creamy dip experience!

How to Make Creamy Burrata Dip

  1. Combine the Dip: In a medium-sized bowl, gently combine the burrata, oil from the sundried tomatoes, basil chive vinaigrette (or prepared pesto), flaky salt, and pepper. Mix until smooth and creamy, ensuring all flavors meld well together.

  2. Prepare the Basil Vinaigrette: In a separate bowl, whisk together the basil, chopped chives, red wine vinegar, smashed garlic, olive oil, ½ tsp salt, and ¼ tsp pepper. Blend until fully incorporated for a refreshing, vibrant vinaigrette.

  3. Serve with Style: Spoon the creamy burrata dip into a serving bowl, then drizzle the basil vinaigrette generously on top. Serve with toasted baguette slices on the side, perfect for dipping into this delightful mixture.

Optional: Garnish with extra fresh basil leaves for a pop of color.

Exact quantities are listed in the recipe card below.

What to Serve with Creamy Burrata Dip?

As you gather around the table, the right accompaniments can elevate this sumptuous dip into a full meal experience that excites your palate.

  • Crispy Crostini: Perfectly toasted bread enhances the dip’s creamy texture while adding a satisfying crunch that contrasts beautifully.

  • Marinated Olives: These briny bites pair wonderfully, cutting through the richness of the burrata with their tangy flavor and vibrant aroma.

  • Fresh Arugula Salad: A simple salad with a lemon vinaigrette adds crispness and brightness, making your meal feel effortless yet gourmet.

Imagine a peppery arugula salad nestled beside the rich dip; it invites a refreshing balance to each taste.

  • Grilled Vegetables: Zucchini, bell peppers, and eggplant bring smoky notes to the table, creating a delightful tasting journey alongside the dip.

  • Wine Pairing: A crisp Sauvignon Blanc or rosé offers a refreshing contrast, accentuating the herbs and creamy goodness of the burrata.

  • Seasonal Fruit Platter: Serve slices of ripe peaches or berries for a sweet touch that complements the dip’s flavors, creating a vibrant, colorful spread.

Adding these thoughtful pairings will turn your creamy burrata dip into a feast that delights the senses and warms the heart!

Make Ahead Options

These Creamy Burrata Dip preparations are a lifesaver for busy weeknights! You can mix the burrata, sundried tomato oil, and spices up to 24 hours in advance, allowing the flavors to deepen. For the basil vinaigrette, prepare it ahead of time and store it in an airtight container in the refrigerator for up to 3 days—this keeps it fresh and vibrant. When you’re ready to serve, simply give the vinaigrette a quick stir, then drizzle it over the dip. This way, you can whip up a delicious appetizer in no time, allowing you to enjoy more moments with your loved ones!

How to Store and Freeze Creamy Burrata Dip

Fridge: Store any leftover creamy burrata dip in an airtight container for up to 3 days. Keep it refrigerated to maintain its fresh flavors.

Freezer: Freezing is not recommended for this dip due to the delicate texture of the burrata, which may become watery upon thawing.

Reheating: If you’ve refrigerated the dip, let it come to room temperature before serving. For a warm twist, gently reheat in a microwave or over low heat on the stove, stirring occasionally.

Serving Tip: Always drizzle the basil vinaigrette on top just before serving for that burst of freshness and color!

Creamy Burrata Dip Variations

Feel free to put your own spin on this creamy delight – there are countless ways to enhance its flavor and texture!

  • Herb-Infused: Add fresh thyme or dill to the dip for a unique herbal flavor. The aromatic twist brings a fragrant bouquet that is simply irresistible.

  • Spicy Kick: Mix in red pepper flakes or a dash of hot sauce for some heat. Just a little goes a long way in elevating that flavor profile!

  • Nutty Addition: Blend in toasted pine nuts or walnuts for a delightful crunch. These will add both flavor and texture, making every dip a surprise.

  • Roasted Garlic: Roast a whole bulb of garlic and blend it into the dip for a sweeter, mellow garlic flavor. It will transform your dip into a heavenly experience!

  • Sun-Dried Tomatoes: Fold in some chopped sun-dried tomatoes to enhance that rich, umami taste. They will give bursts of flavor and a pop of color to your dip!

  • Greek Yogurt Swap: For a lighter option, substitute part of the burrata with Greek yogurt. This will still give creaminess while cutting back on the richness.

  • Zesty Citrus: Incorporate a splash of lemon juice or zest into the vinaigrette for a refreshing brightness. It will elevate the flavor, making it sing!

  • Avocado Creaminess: Add mashed avocado to the dip for an even creamier texture and a lovely flavor boost. This twist will make it extra rich and satisfying!

Chef's Helpful Tips

  • When preparing your Creamy Burrata Dip, be sure to gently mix the ingredients to avoid breaking the burrata too much, which preserves its creamy texture.
  • For an extra flavor boost, consider adding a few chopped sun-dried tomatoes directly into the dip alongside the oil for added depth.
  • To ensure your basil vinaigrette is vibrant and fresh, blend the ingredients just until incorporated without overmixing, as this keeps the basil’s bright color intact.
  • Remember to serve the baguette toasted and warm, as this enhances the overall experience and provides the perfect contrast to the creamy dip.

Creamy Burrata Dip Recipe FAQs

How do I select ripe burrata?
Absolutely! When choosing burrata, look for balls that are firm yet slightly squishy to the touch. They should have a fresh aroma and be free from any dark spots or excess wrinkles on the surface, indicating freshness. Choose burrata with a tighter seal as it’s often fresher and has a better texture.

How should I store leftover creamy burrata dip?
Store any leftover dip in an airtight container in the refrigerator for up to 3 days. For the best taste and texture, ensure it’s sealed properly to avoid it absorbing any unwanted odors from the fridge. Before serving, let it come to room temperature to regain some of its creamy goodness!

Can Creamy Burrata Dip be frozen?
Unfortunately, freezing is not recommended for creamy burrata dip. The delicate nature of burrata may result in a watery texture once thawed. If you’re looking to store it for a later date, I suggest preparing the dip fresh rather than freezing it for optimal taste and texture.

What if my dip is too thick?
If your creamy burrata dip turns out thicker than you’d like, don’t fret! Simply add a teaspoon or two of olive oil or the oil from sundried tomatoes to loosen it. Mix gently until you achieve your desired consistency. A splash of cream or a bit of milk can also work wonders for those wanting an extra creamy dip!

Are there any dietary considerations I should be aware of?
Yes, it’s always good to check with guests about allergies. This creamy burrata dip contains dairy, which might not be suitable for those who are lactose intolerant or have dairy allergies. For a vegan twist, you might consider using a plant-based cheese alternative and adjusting the vinaigrette accordingly for a similar flavor profile.

How do I enhance the flavor of my creamy burrata dip?
To elevate your dip, you can mix in chopped sun-dried tomatoes or olives for an additional layer of flavor. For a kick, add a pinch of red pepper flakes to the dip or drizzle a flavored olive oil on top. It’s all about customizing to match your taste preferences!

Creamy Burrata Dip

Creamy Burrata Dip

This Creamy Burrata Dip is a luscious blend of burrata and zesty basil vinaigrette, perfect for gatherings.
Print Recipe Pin Recipe
Prep Time 15 minutes mins
Total Time 15 minutes mins
Servings: 4 servings
Course: Snacks & Appetizers
Calories: 300
Ingredients Equipment Method Nutrition Notes

Ingredients
  

For the Dip
  • 1 cup Burrata provides a rich, creamy texture
  • 2 tbsp Oil from Sundried Tomatoes adds flavor and helps achieve consistency
  • 1/4 cup Basil Chive Vinaigrette or Prepared Pesto herbaceous punch
  • 1 tsp Flaky Salt enhances flavors; adjust to taste
  • 1/2 tsp Pepper freshly cracked is best
For the Basil Vinaigrette
  • 1 cup Basil fresh for aromatic freshness
  • 2 tbsp Chives mild onion flavor
  • 2 tbsp Red Wine Vinegar provides a tangy note
  • 1 clove Garlic adds depth
  • 1/4 cup Olive Oil blends into a pourable vinaigrette
  • 1/2 tsp Salt essential for seasoning
  • 1/4 tsp Pepper for added warmth
For Serving
  • 1 loaf Toasted Baguette perfect for dipping

Equipment

  • Mixing bowl
  • Whisk
  • serving bowl

Method
 

How to Make Creamy Burrata Dip
  1. In a medium-sized bowl, gently combine the burrata, oil from the sundried tomatoes, basil chive vinaigrette (or prepared pesto), flaky salt, and pepper. Mix until smooth and creamy.
  2. In a separate bowl, whisk together the basil, chopped chives, red wine vinegar, smashed garlic, olive oil, salt, and pepper. Blend until fully incorporated.
  3. Spoon the creamy burrata dip into a serving bowl, then drizzle the basil vinaigrette generously on top. Serve with toasted baguette slices on the side.

Nutrition

Serving: 1cupCalories: 300kcalCarbohydrates: 18gProtein: 8gFat: 25gSaturated Fat: 8gPolyunsaturated Fat: 5gMonounsaturated Fat: 10gCholesterol: 25mgSodium: 500mgPotassium: 200mgFiber: 2gSugar: 1gVitamin A: 500IUVitamin C: 10mgCalcium: 150mgIron: 1mg

Notes

Garnish with extra fresh basil leaves for a pop of color. Store leftovers in an airtight container for up to 3 days.

Tried this recipe?

Let us know how it was!

Filed Under: SNACKS & APPETIZERS

One Pot Creamy Beef and Shells Pasta

December 25, 2025 by JudyWhite Leave a Comment

There’s something incredibly comforting about the rich aroma of a warming pasta dish simmering on the stove, especially on busy weeknights when time is scarce. One evening, as I was trying to escape the relentless cycle of fast food and takeout, I stumbled upon the perfect solution—my One Pot Creamy Beef and Shells Pasta. This dish not only brings together the savory goodness of ground beef, tender pasta, and a luscious creamy sauce, but it does so with minimal effort and cleanup.

With just a single pot required, you can whip up this hearty meal in under 30 minutes, making it the ideal choice for a last-minute dinner that still feels special. Whether you’re cooking for a family, impressing guests, or simply treating yourself, each bite of this creamy delight is sure to satisfy those comforting food cravings. Let’s dive into this quick and satisfying recipe that proves homemade doesn’t have to be time-consuming!

Why You'll Love This One Pot Creamy Beef and Shells Pasta

  • This recipe is incredibly easy to make, requiring just one pot which means less cleanup for you.
  • The flavors are rich and indulgent, perfectly blending ground beef, creamy sauce, and tender pasta for a delicious meal.
  • It’s versatile enough that you can add your favorite vegetables or switch up the cheese to suit your taste.
  • Not only is it a quick dinner option taking less than 30 minutes, but it also pleases the whole family, making it a reliable crowd-pleaser.

One Pot Creamy Beef and Shells Pasta Ingredients

• Discover the key components to create this delicious, comforting meal!

For the Beef Mixture

  • Olive oil – a little fat to sauté the ground beef and vegetables smoothly.
  • Ground beef – the star protein that brings savory depth to your dish.
  • Onion – diced for a sweet and aromatic base; feel free to swap with shallots if desired.
  • Garlic – minced to add a punch of flavor and fragrance.

For the Sauce

  • Tomato sauce – provides a rich and tangy foundation for the creamy sauce.
  • Italian seasoning – enhances the dish with a blend of aromatic herbs for authenticity.
  • Paprika – adds a hint of warmth and color to your pasta.
  • Salt – season to enhance all flavors; adjust to your preference.
  • Freshly cracked black pepper – for a dash of spice that rounds out the taste.

For the Pasta

  • Medium pasta shells – these tender shells cradle the creamy sauce, making every bite delightful!
  • Beef broth – the liquid magic that cooks the pasta to perfection while infusing flavor.

For Creamy Texture

  • Heavy cream or half-and-half – adds richness and a velvety finish to the sauce.
  • Shredded cheddar cheese or a cheese blend – introduces creaminess and a cheesy goodness that’s utterly irresistible.

Optional Extras

  • Vegetables (finely chopped) – enhance nutrition and color; feel free to add your favorites for extra crunch!

Now you’re all set to create this One Pot Creamy Beef and Shells Pasta, leaving you with a delicious dish and minimal cleanup to savor!

How to Make One Pot Creamy Beef and Shells Pasta

  1. Heat your olive oil in a large pot over medium heat until it shimmers gently. This will set the stage for a deliciously browned beef mixture.

  2. Add the ground beef, diced onion, and minced garlic, cooking for about 5 minutes. Stir until the beef is browned and the onions become translucent, releasing that wonderful aroma.

  3. Stir in the tomato sauce, Italian seasoning, paprika, salt, and pepper. Allow these flavors to meld together for a minute, creating a vibrant, savory base.

  4. Combine the uncooked medium pasta shells and beef broth into the pot. Increase the heat and bring this mixture to a boil, inviting the pasta to soak up the rich flavors.

  5. Reduce the heat, cover the pot, and let it simmer for about 10 minutes. This will cook the pasta until it’s tender and delightful, soaking up all the delicious juices.

  6. Incorporate the heavy cream or half-and-half and shredded cheese, stirring until everything melts together beautifully. The sauce should become thick and creamy, turning your dish into pure comfort food.

  7. Mix in the optional vegetables if you’re using them, stirring until heated through. This is a great way to add nutrition and texture to your meal!

Optional: Top with a sprinkle of additional cheese or fresh herbs for extra pizzazz.

Exact quantities are listed in the recipe card below.

Make Ahead Options

These One Pot Creamy Beef and Shells Pasta are perfect for meal prep enthusiasts! You can brown the ground beef along with the onions and garlic up to 24 hours ahead of time. After cooking, simply let the mixture cool, then refrigerate in an airtight container. The pasta can be cooked on the day you plan to serve it; just boil it with the beef broth and follow the rest of the recipe. To maintain quality, reheat gently and add the cream and cheese just before serving to keep that luscious, creamy texture—your family will enjoy a freshly prepared meal with minimal effort!

One Pot Creamy Beef and Shells Pasta Variations

Feel free to get creative with your One Pot Creamy Beef and Shells Pasta, customizing it to your taste preferences!

  • Dairy-Free: Replace heavy cream with coconut milk for a rich, dairy-free alternative that still tastes amazing.
    Embrace the creaminess of coconut while enjoying the traditional flavors of your beloved pasta.

  • Vegetable-Loaded: Toss in chopped spinach, bell peppers, or zucchini during cooking for an extra nutritional boost and vibrant color.
    These veggies not only enhance health but also add delightful texture to every bite.

  • Spicy Kick: Add crushed red pepper flakes or diced jalapeños to the beef mixture for a warming spice level that excites the palate.
    A little heat can transform your comforting dish into an exhilarating culinary adventure!

  • Whole Wheat Pasta: Swap regular pasta shells with whole wheat or gluten-free pasta for a healthier twist.
    This simple change promotes a heartier flavor profile while maintaining the dish’s beloved comfort.

  • Herb Infusion: Sprinkle in fresh herbs like basil or parsley at the end for a refreshing, aromatic lift that brightens each bite.
    Herbs add an elegant touch and elevate the dish from hearty to truly gourmet!

  • Meat Variations: Substitute ground turkey or chicken for a lighter protein option without sacrificing flavor.
    This versatile swap can suit different dietary preferences while keeping the same creamy essence.

  • Cheesy Twist: Experiment with different cheeses like mozzarella or pepper jack for a unique taste and texture surprise.
    A cheesy blend creates layers of flavor that can turn your pasta into a legacy dish everyone will crave!

  • Broth Alternatives: Use vegetable broth or chicken broth instead of beef broth for a lighter, yet flavorful base in your sauce.
    This adjustment maintains the comfort while allowing for delightful reinterpretations of flavor.

Storage Tips for One Pot Creamy Beef and Shells Pasta

Room Temperature: Keep your One Pot Creamy Beef and Shells Pasta out for a maximum of 2 hours after cooking to avoid spoilage.

Fridge: Store any leftovers in an airtight container in the refrigerator for up to 3 days. Reheat in the microwave or on the stovetop with a splash of beef broth for creaminess.

Freezer: For longer storage, freeze this dish in airtight containers for up to 2 months. Let it cool completely before freezing, and thaw in the fridge overnight before reheating.

Reheating: When reheating, add a little cream or broth to restore its creamy texture, and heat gently until warmed through. Enjoy this comforting meal again!

What to Serve with One Pot Creamy Beef and Shells Pasta?

There’s nothing quite like completing your dinner experience with the right sides to complement your meal’s heartiness.

  • Garlic Bread: A classic choice, its buttery crispness and fragrant garlic enhance every bite of the creamy pasta.

  • Caesar Salad: Fresh romaine and zesty dressing add a crunchy contrast that balances the rich flavors of the beef dish.

  • Roasted Vegetables: Caramelized veggies like carrots and bell peppers provide a rustic touch and a burst of color, making your plate more inviting.

  • Steamed Broccoli: This nutritious green adds a healthy crunch and eye-catching color, perfectly rounding out your meal.

  • Savory Herb Rice: A fragrant side that absorbs the delicious sauce making every forkful of pasta even better.

  • Red Wine: Pair your pasta with a glass of Merlot, its berry flavors will elevate the savory notes and scream comfort!

Indulging in these pairings will create a delightful dinner experience, tantalizing your taste buds with every bite!

Chef's Helpful Tips

  • To ensure your One Pot Creamy Beef and Shells Pasta comes out perfectly, make sure to brown the beef thoroughly for enhanced flavor before adding the other ingredients.
  • Avoid overcrowding the pot when cooking the beef and vegetables, as this can cause steaming instead of browning.
  • Stir the mixture occasionally while it’s simmering to prevent the pasta from sticking to the bottom of the pot.
  • Keep an eye on the heat; if it’s too high, you risk overcooking the pasta or burning the sauce.

One Pot Creamy Beef and Shells Pasta Recipe FAQs

What kind of ground beef should I use for this recipe?
Absolutely, lean ground beef (80/20 or 85/15) works wonderfully for this dish, as it gives you the best balance of flavor and moisture without being overly greasy. However, feel free to use ground turkey or chicken if you’re looking for a leaner alternative!

How should I store leftovers of One Pot Creamy Beef and Shells Pasta?
Very! Store your leftovers in an airtight container in the fridge for up to 3 days. Make sure to let the dish cool completely before sealing. When you’re ready to enjoy it again, simply reheat in the microwave or on the stovetop with a splash of beef broth to bring back that creamy texture.

Can I freeze One Pot Creamy Beef and Shells Pasta?
You can indeed! To freeze, allow the dish to cool completely before transferring it to an airtight container. It will keep well in the freezer for up to 2 months. When you’re ready to eat, thaw it in the fridge overnight, then reheat gently. Adding a dash of cream or broth while reheating restores the creaminess that makes this dish so comforting!

What are some common troubleshooting tips for this recipe?
If your pasta seems overcooked or gluey, it’s best to reduce the simmering time to about 8 minutes next time, stirring occasionally to prevent sticking. If you find the sauce too thick, a splash of broth or cream while reheating can help loosen it up. Alternatively, if it feels too watery, allow it to simmer uncovered for a few extra minutes to thicken it up a bit.

Is this dish suitable for people with dietary restrictions?
Yes! While the recipe itself is not gluten-free, you can easily substitute the pasta with a gluten-free variety. For dairy-free needs, try using coconut cream instead of heavy cream, and a plant-based cheese. Always double-check ingredient labels when cooking for individuals with allergies, especially with store-bought sauces!

What vegetables can I add to enhance this dish?
For added nutrition and flavor, consider finely chopping bell peppers, spinach, or zucchini, which blend seamlessly into the dish. I often make it with a mix of whatever I have on hand! Just add them in with the cream and cheese to the pot, giving them enough time to cook through and soak up the flavors.

One Pot Creamy Beef and Shells Pasta

One Pot Creamy Beef and Shells Pasta

This One Pot Creamy Beef and Shells Pasta is a comforting, quick, and delicious dinner option, perfect for busy weeknights.
Print Recipe Pin Recipe
Prep Time 5 minutes mins
Cook Time 20 minutes mins
Total Time 25 minutes mins
Servings: 4 servings
Course: DINNER RECIPES
Cuisine: American
Calories: 550
Ingredients Equipment Method Nutrition Notes

Ingredients
  

For the Beef Mixture
  • 1 tablespoon Olive oil
  • 1 pound Ground beef
  • 1 medium Onion diced
  • 2 cloves Garlic minced
For the Sauce
  • 15 ounces Tomato sauce
  • 1 tablespoon Italian seasoning
  • 1 teaspoon Paprika
  • 1 teaspoon Salt adjust to taste
  • 1 teaspoon Freshly cracked black pepper
For the Pasta
  • 8 ounces Medium pasta shells
  • 2 cups Beef broth
For Creamy Texture
  • 1 cup Heavy cream or half-and-half
  • 1 cup Shredded cheddar cheese or a cheese blend
Optional Extras
  • Vegetables (finely chopped) optional

Equipment

  • Large pot

Method
 

How to Make One Pot Creamy Beef and Shells Pasta
  1. Heat your olive oil in a large pot over medium heat until it shimmers gently.
  2. Add the ground beef, diced onion, and minced garlic, cooking for about 5 minutes.
  3. Stir in the tomato sauce, Italian seasoning, paprika, salt, and pepper.
  4. Combine the uncooked medium pasta shells and beef broth into the pot.
  5. Reduce the heat, cover the pot, and let it simmer for about 10 minutes.
  6. Incorporate the heavy cream or half-and-half and shredded cheese, stirring until melted.
  7. Mix in the optional vegetables if you're using them.

Nutrition

Serving: 1servingCalories: 550kcalCarbohydrates: 40gProtein: 30gFat: 30gSaturated Fat: 15gCholesterol: 90mgSodium: 700mgPotassium: 600mgFiber: 2gSugar: 5gVitamin A: 500IUVitamin C: 2mgCalcium: 200mgIron: 3mg

Notes

For best results, brown the beef thoroughly and avoid overcrowding the pot.

Tried this recipe?

Let us know how it was!

Filed Under: DINNER RECIPES

Holiday Honeycrisp Salad with Blue Cheese and Walnuts

December 25, 2025 by JudyWhite Leave a Comment

There’s something truly invigorating about the crisp bite of a freshly tossed salad, especially when the flavors of the season come together in perfect harmony. As the holidays approach, I find myself craving vibrant dishes that not only satisfy but also celebrate the bounty of autumn. Enter my Holiday Honeycrisp Salad with Blue Cheese and Walnuts—a delightful medley that adds a splash of color and flavor to any festive table.

This salad is a testament to how simple ingredients can create a stunning dish. Imagine the crunch of Frisée and wild arugula combined with the sweetness of Honeycrisp apples, all kissed by a light, tangy dressing. The candied walnuts add a satisfying crunch, while the blue cheese offers a luxurious creaminess that takes this salad over the top. Whether you’re looking for a standout side at your holiday feast or a refreshing meal to break free from the monotony of takeout, this salad is sure to impress with its irresistible flavors and elegant presentation. Let’s dive into this recipe that brings the essence of the season right to your plate!

Why You'll Love This Holiday Honeycrisp Salad with Blue Cheese and Walnuts

  • This salad is incredibly quick and easy to prepare, making it a perfect choice for busy holiday gatherings.
  • Its vibrant colors and textures make it not just delicious but visually stunning, ensuring it stands out on any table.
  • The combination of crisp apples, creamy blue cheese, and crunchy walnuts provides a delightful explosion of flavors that everyone will enjoy.
  • Plus, it’s versatile enough to be served as a side dish or a main course, catering to different preferences and dietary needs.
  • Whether you’re hosting a crowd or just treating yourself, this salad will undoubtedly be a favorite.

Holiday Honeycrisp Salad Ingredients

For the Greens
• Frisée lettuce – adds a crisp, slightly bitter contrast that balances the sweetness in the salad.
• Wild arugula – brings a peppery bite, enhancing the flavor profile with freshness.

For the Salad
• Candied walnuts – provide a delightful crunch and sweetness that complements the apples perfectly.
• Honeycrisp apples – their juicy sweetness is the star of the show, creating a refreshing crunch.
• Blue cheese – delivers a rich creaminess that elevates the entire dish and rounds out the flavors.

For the Dressing
• Apple cider vinegar – adds a tangy note that brightens up the salad.
• Honey – brings additional sweetness, tying all the ingredients together beautifully; a perfect match for the Holiday Honeycrisp Salad.
• Cinnamon – introduces warmth and a hint of spice, enhancing the autumn vibe.
• Black pepper – lends a subtle kick that balances the sweetness of the salad.
• Cumin powder – offers a unique earthiness, deepening the flavor complexity.
• Salt – enhances all the flavors and brings harmony to the salad.
• Olive oil – adds richness and helps to emulsify the dressing, making it all come together beautifully.

How to Make Holiday Honeycrisp Salad

  1. Wash and prepare Start by washing and drying the Frisée lettuce and wild arugula. Once clean, place them gently in a large salad bowl, creating a crisp foundation for your salad.

  2. Slice the apples Carefully slice the Honeycrisp apples into bite-sized pieces. Their bright, juicy sweetness will add a refreshing crunch to the salad. Toss them into the bowl for a festive touch!

  3. Add the toppings Sprinkle the candied walnuts and crumbled blue cheese over the salad greens and apples. This combination of crunchy and creamy ingredients will elevate the flavor profile of your dish beautifully.

  4. Make the dressing In a separate bowl, whisk together the apple cider vinegar, honey, cinnamon, black pepper, cumin powder, salt, and olive oil until well combined. This tangy dressing will enhance the flavors of your Holiday Honeycrisp Salad perfectly.

  5. Combine and serve Drizzle the dressing over the salad, then toss gently to combine all the ingredients. You want everything evenly coated, so take your time to ensure a lovely, flavorful mix!

Optional: Garnish with extra candied walnuts for an added crunch!
Exact quantities are listed in the recipe card below.

Holiday Honeycrisp Salad Variations

Feel free to explore these delightful twists that can make your Holiday Honeycrisp Salad even more exciting!

  • Nut-Free: Swap candied walnuts for toasted sunflower seeds for a similar crunch without the nuts. It’s a great way to keep everyone included!

  • Cheese Alternatives: Replace blue cheese with feta or goat cheese for a different creamy option that adds a tangy flavor to the dish.

  • Vegan: Use maple syrup instead of honey and substitute the blue cheese with avocado or vegan cheese. This keeps everything fresh and plant-based!

  • Spicy Kick: Add a sprinkle of red pepper flakes in the dressing to bring a subtle heat that contrasts beautifully with the sweetness of the apples.

  • Add Protein: Toss in some grilled chicken or chickpeas for extra protein. It transforms the salad into a satisfying main dish perfect for lunch or dinner.

  • Fruit Variations: Swap Honeycrisp apples with slices of pear or even pomegranate seeds for a tart twist that enhances the festive feel.

  • Dressing Changes: Try a citrus vinaigrette made with orange juice instead of apple cider vinegar for a refreshing, zesty alternative that brightens up the salad.

  • Herbal Touch: Adding fresh herbs like mint or basil can provide an unexpected yet lovely aroma, giving the salad a garden-fresh vibe!

Get creative and make this salad your own while delighting your family and guests!

What to Serve with Holiday Honeycrisp Salad?

Elevate your dining experience by pairing this delightful salad with flavors that resonate with its festive charm.

  • Herb-Roasted Chicken: Tender and juicy, it brings a savory depth that complements the salad’s crisp sweetness beautifully.

  • Quinoa Pilaf: This hearty, nutty dish adds a wholesome grain element, creating a balanced and nutritious meal.

  • Garlic Breadsticks: Their warm, buttery flavor and soft texture offer a comforting contrast to the salad’s refreshing crunch.

  • Caramelized Brussels Sprouts: The sweetness of the caramelized sprouts mirrors the candied walnuts, enhancing the overall flavor symphony.

  • Sparkling Cider: A bubbly, sweet drink that refreshes the palate and brightens the festive atmosphere at your table.

  • Apple Crisp: Warm and comforting, this dessert’s warm spices echo the cinnamon in the salad dressing, making for a delightful finish.

Each pairing not only adds to the visual appeal of your spread but also creates a harmonious dining experience filled with vibrant flavors and textures. Enjoy the celebration of tastes!

How to Store and Freeze Holiday Honeycrisp Salad

Fridge: Store any leftover Holiday Honeycrisp Salad in an airtight container for up to 3 days. Keep the dressing separate if possible to maintain freshness.

Room Temperature: Ideally, this salad should not be kept at room temperature for more than 2 hours to ensure food safety and freshness.

Freezer: Freezing is not recommended for this salad due to the texture of the ingredients, especially the apples and lettuce.

Reheating: Since this salad is meant to be served cold, simply enjoy it fresh! If you have leftover dressing, store it separately for future use.

Make Ahead Options

These Holiday Honeycrisp Salad with Blue Cheese and Walnuts are perfect for meal prep enthusiasts looking to save time during the busy holiday season! You can wash and dry the Frisée lettuce and wild arugula up to 24 hours in advance; simply store them in a sealed container in the refrigerator to maintain their crispness. Additionally, slice the Honeycrisp apples and toss them in a bit of lemon juice to prevent browning, which allows you to prep them up to 3 days before serving. The dressing can also be prepared ahead and stored in the fridge for up to 1 week; just give it a good shake before drizzling it over your salad. When ready to serve, combine all the prepared components and toss gently for a fresh, vibrant dish that’s just as delicious as if made on the spot!

Chef's Helpful Tips

  • When preparing your Holiday Honeycrisp Salad, be sure to wash and dry the greens thoroughly to avoid any excess moisture which can make your salad soggy.
  • While slicing the Honeycrisp apples, try to keep the pieces uniform in size to ensure even distribution of flavors in every bite.
  • When making the dressing, whisk the ingredients vigorously to help emulsify the olive oil with the vinegar for a smoother consistency.
  • Serve the salad immediately after dressing it to maintain the crispness of the greens and the freshness of the ingredients.

Holiday Honeycrisp Salad with Blue Cheese and Walnuts Recipe FAQs

What type of Honeycrisp apples should I use?
Absolutely! When selecting Honeycrisp apples, look for firm apples that are free from any dark spots or bruises. The skin should have a vibrant color, and the apples should feel heavy for their size, ensuring they are juicy and fresh.

How should I store leftover Holiday Honeycrisp Salad?
Store any leftover Holiday Honeycrisp Salad in an airtight container in the fridge for up to 3 days. It’s best to keep the dressing separate until you’re ready to serve again to maintain the salad’s freshness and texture.

Can I freeze Holiday Honeycrisp Salad?
Freezing is not recommended for this salad because of the delicate textures of the greens and apples. When thawed, they become mushy and unappetizing. However, any remaining dressing can be stored in the fridge for up to a week, ready for your next salad!

What if my salad gets soggy?
If your salad ends up being too soggy, it may be due to excess moisture on the greens. To avoid this in the future, ensure that you wash and dry the lettuce thoroughly before combining it with other ingredients. You can also add the dressing just before serving to keep the greens crisp.

Is this salad suitable for vegetarians?
Yes, the Holiday Honeycrisp Salad with Blue Cheese and Walnuts is vegetarian-friendly! Just make sure to check if you have any specific dietary needs for your guests, like lactose intolerance, since it contains blue cheese. If needed, you can easily substitute the blue cheese with a dairy-free cheese option!

How do I make this salad gluten-free?
This salad is naturally gluten-free as all the ingredients are free from gluten. However, if you’re using packaged items like candied walnuts, be sure to check the labels for any hidden gluten. If you’re making your own candied walnuts, you’re definitely in the clear!

Holiday Honeycrisp Salad with Blue Cheese and Walnuts

Holiday Honeycrisp Salad with Blue Cheese and Walnuts

Enjoy the delightful combination of crisp Honeycrisp apples, creamy blue cheese, and crunchy walnuts in this vibrant Holiday Honeycrisp Salad with Blue Cheese and Walnuts.
Print Recipe Pin Recipe
Prep Time 15 minutes mins
Total Time 15 minutes mins
Servings: 4 servings
Course: LUNCH RECIPES
Cuisine: American
Calories: 280
Ingredients Equipment Method Nutrition Notes

Ingredients
  

For the Greens
  • 1 head Frisée lettuce adds a crisp, slightly bitter contrast
  • 2 cups Wild arugula brings a peppery bite
For the Salad
  • 1 cup Candied walnuts provides a delightful crunch
  • 2 large Honeycrisp apples the star of the show
  • 4 oz Blue cheese delivers rich creaminess
For the Dressing
  • 3 tbsp Apple cider vinegar adds a tangy note
  • 2 tbsp Honey brings additional sweetness
  • 1 tsp Cinnamon introduces warmth
  • 1/2 tsp Black pepper lends a subtle kick
  • 1/2 tsp Cumin powder offers unique earthiness
  • 1/2 tsp Salt enhances all flavors
  • 1/4 cup Olive oil adds richness

Equipment

  • Salad Bowl
  • Whisk
  • Cutting Board
  • Knife

Method
 

How to Make Holiday Honeycrisp Salad
  1. Wash and dry the Frisée lettuce and wild arugula. Place them in a large salad bowl.
  2. Carefully slice the Honeycrisp apples into bite-sized pieces and add them to the bowl.
  3. Sprinkle the candied walnuts and crumbled blue cheese over the salad.
  4. In a separate bowl, whisk together the apple cider vinegar, honey, cinnamon, black pepper, cumin, salt, and olive oil.
  5. Drizzle the dressing over the salad and toss gently to combine all ingredients.

Nutrition

Serving: 1servingCalories: 280kcalCarbohydrates: 20gProtein: 5gFat: 22gSaturated Fat: 6gPolyunsaturated Fat: 4gMonounsaturated Fat: 14gCholesterol: 20mgSodium: 300mgPotassium: 200mgFiber: 3gSugar: 10gVitamin A: 12IUVitamin C: 15mgCalcium: 150mgIron: 1mg

Notes

Serve immediately after dressing to maintain crispness. Optional: Garnish with extra candied walnuts.

Tried this recipe?

Let us know how it was!

Filed Under: LUNCH RECIPES

Sausage Baked Brie

December 25, 2025 by JudyWhite Leave a Comment

There’s nothing quite like the moment when you crack open a flaky puff pastry and watch as the rich, gooey Brie cheese oozes out, mingling beautifully with savory sausage and aromatic herbs. It takes me back to cozy gatherings with friends, where the laughter flowed as freely as the wine, and the warm, inviting smell of Sausage Baked Brie filled every corner of the room.

This dish is my go-to for impressing guests without the fuss of complicated recipes. With just a handful of simple ingredients, you’re only 40 minutes away from a stunning centerpiece that looks gourmet but is incredibly easy to pull together. Perfect for those times when you want to indulge a little or to elevate your next gathering, this Sausage Baked Brie promises to become a beloved staple in your home. Let’s dive into creating this delicious treat that’s sure to have everyone coming back for more!

Why You'll Love This Sausage Baked Brie

  • This Sausage Baked Brie is incredibly easy to make, allowing you to impress your guests without spending hours in the kitchen.
  • The combination of rich, melty Brie and savory sausage creates a flavor explosion that will delight your taste buds.
  • Its versatility means you can customize the filling with your favorite ingredients or add a touch of sweetness with fig jam.
  • Visually stunning and elegant, this dish is the perfect showstopper for any gathering, ensuring that everyone will be coming back for seconds.

Sausage Baked Brie Ingredients

For the Cheese
• Brie cheese – a round of creamy Brie sliced into ½ inch pieces for that melty perfection.

For the Filling
• Sausage – 0.5 lb of Italian or breakfast style, casings removed; this adds a delicious savory flavor.
• Onion – 0.5 cup finely diced for a sweet and fragrant base.
• Garlic – 1 clove minced gives an aromatic kick that complements the sausage beautifully.
• Fresh thyme – 1 tsp is ideal for a burst of herbal freshness (or substitute with ½ tsp dried).
• Fig jam – 2 tbsp adds a lovely sweet note, but feel free to use apricot preserves for a different twist.

For the Pastry
• Puff pastry – 1 sheet, thawed and ready to encase all the goodies.

For the Finish
• Egg – 1 beaten for an egg wash that gives a beautiful golden color once baked.

For Serving
• Crackers, baguette slices, or apple wedges – select your favorite for dipping into that heavenly Sausage Baked Brie.

How to Make Sausage Baked Brie

  1. Preheat the oven by following the puff pastry package instructions, ensuring it’s hot and ready for that delightful bake.

  2. Cook the sausage in a skillet over medium heat. Stir occasionally until browned, which should take about 5-7 minutes. Drain any excess fat to keep it from becoming greasy.

  3. Sauté the diced onion and minced garlic in the same skillet for 3-4 minutes, until the onion is translucent and fragrant. This will add depth to your filling.

  4. Stir in the fresh thyme and fig jam (if using) into the sausage mixture. Give it a good mix and then remove from heat to let those flavors meld together.

  5. Roll out the thawed puff pastry on a lightly floured surface, creating a nice square. This will be the lovely hug for your cheese and filling!

  6. Layer half of the Brie cheese on the center of the pastry. Then, generously top it with the savory sausage mixture, and place the remaining Brie on top for that gooey goodness.

  7. Fold the pastry over the cheese and sausage, sealing the edges tightly so no filling escapes. You want this to be a cozy little package!

  8. Brush the top with the beaten egg to achieve that gorgeous golden finish once baked. This adds an appetizing sheen that will make your dish irresistible!

  9. Bake according to the puff pastry package instructions, typically around 20-25 minutes, until it turns golden brown and puffs up perfectly.

  10. Serve warm with an array of crackers, baguette slices, or crisp apple wedges for dipping into the rich Sausage Baked Brie.

Optional: Drizzle with a bit more fig jam for an extra touch of sweetness.

Exact quantities are listed in the recipe card below.

Sausage Baked Brie Variations

Feel free to get creative with this irresistible recipe; your kitchen adventures await with these delightful twists!

  • Spicy Kick: Add 1/2 tsp crushed red pepper flakes to the sausage for a zesty heat. It’s a simple way to awaken the flavors!

  • Vegetarian Delight: Substitute sausage with sautéed mushrooms and spinach for a delicious meat-free version that’s equally satisfying.

  • Nutty Flavor: Incorporate 1/4 cup of chopped walnuts or pecans into the filling for a delightful crunch that complements the creamy Brie.

  • Herb Infusion: Swap out thyme for fresh rosemary or basil, lending a new aromatic twist to the dish that will tantalize your taste buds.

  • Fruity Sweetness: Instead of fig jam, use a tart cranberry relish for a vibrant contrast that balances the rich flavors with tangy sweetness.

  • Cheesy Boost: Mix in 1/4 cup of shredded cheddar or gouda with the Brie for an ultra-cheesy experience that’s truly decadent.

  • Zesty Citrus: Add the zest of 1 lemon or orange to the filling for a burst of citrus brightness, enhancing the overall flavor profile splendidly.

  • Mediterranean Flair: Toss in sun-dried tomatoes and feta cheese to the sausage mixture for a vibrant twist that transports you to sun-soaked terraces!

What to Serve with Sausage Baked Brie?

To create a delightful spread that complements the warm, luscious Sausage Baked Brie, consider the following tantalizing pairings.

  • Crispy Crackers: These add a satisfying crunch, perfectly balancing the creamy Brie and savory sausage.
  • Sliced Baguette: Toasted or fresh, it provides a hearty base that’s perfect for scooping up melted cheese.
  • Fresh Apple Wedges: Their crispness and hint of sweetness contrast beautifully with the rich flavors, providing a refreshing palate cleanser.
  • Mixed Greens Salad: Tossed with a light vinaigrette, this offers a fresh, vibrant contrast that lightens up the dish.
  • Deviled Eggs: These can be a fun finger food addition, adding creamy texture and a hint of spice to the spread.
  • Sparkling Wine: A chilled glass brings a celebratory touch, enhancing the overall experience with bubbly effervescence.
  • Herbed Cheese Spread: A soft cheese spread infused with herbs can introduce another layer of flavor alongside the savory dish.
  • Roasted Vegetables: Warm, seasoned veggies bring earthy flavors that complement the richness of the Brie.
  • Chocolate Fondue: A sweet treat to follow, it contrasts beautifully with the savory elements and indulges your guests’ sweet cravings.
  • Chilled Lemonade: A refreshing drink that cuts through the richness, keeping the gathering light and enjoyable.

Imagine gathering around a table adorned with these scrumptious options, where laughter and delicious tastes harmonize, making memories with every bite!

Storage Tips for Sausage Baked Brie

Room Temperature: Allow the Sausage Baked Brie to cool completely before placing it in an airtight container. It can be stored at room temperature for up to 2 hours.

Fridge: For longer storage, keep any leftovers in the fridge in an airtight container for up to 3 days. Reheat in the oven for best results.

Freezer: If you want to store it longer, you can freeze the baked brie wrapped tightly in plastic wrap and then foil for up to 1 month. Thaw in the fridge before reheating.

Reheating: To reheat, place it in a preheated oven at 350°F (175°C) for about 10-15 minutes, until warmed through and the cheese is melty again.

Make Ahead Options

These Sausage Baked Brie are fantastic for busy home cooks looking to save time without sacrificing flavor! You can prepare the sausage mixture and layer the ingredients up to 24 hours in advance; simply refrigerate it in an airtight container to maintain quality. The puff pastry can also be rolled out and stored, but it’s best to wrap it tightly to prevent drying out. When ready to serve, just assemble everything and bake as instructed. For optimal taste, remember to let it rest for about 10 minutes after baking—this ensures every bite is just as delicious and gooey as if made fresh!

Chef's Helpful Tips

  • When making Sausage Baked Brie, ensure that your puff pastry is completely thawed and rolled out to avoid tearing during assembly.
  • To prevent the sausage from becoming greasy, make sure to drain excess fat after browning it in the skillet.
  • Mixing in the thyme and fig jam while the filling is still warm helps to enhance the flavor and ensures even distribution.
  • Keep an eye on the oven and remove the baked Brie once it reaches a golden brown color, as this can vary depending on your oven’s temperature settings.

Sausage Baked Brie Recipe FAQs

What is the best way to choose Brie cheese for this recipe?
Absolutely! When selecting Brie cheese, look for a round that feels soft but not overly squishy. Ideally, it should have a slight bounce when pressed. The rind should appear white and smooth, without any dark spots or mold. It’s best to buy Brie at least a few days before you plan to make the Sausage Baked Brie, allowing it to reach room temperature for optimal melting.

How should I store leftovers of Sausage Baked Brie?
Very simple! Allow your leftover Sausage Baked Brie to cool completely, then transfer it to an airtight container. You can keep it in the fridge for up to 3 days. When you’re ready to enjoy it again, simply reheat in the oven at 350°F (175°C) for about 10-15 minutes to restore its gooey goodness!

Can I freeze Sausage Baked Brie?
Yes, you can! To freeze, wrap the baked Brie tightly in plastic wrap followed by aluminum foil to protect it from freezer burn. It can be stored for up to 1 month. To thaw, place it in the fridge overnight, then reheat as usual. Just be sure to watch it carefully when reheating to ensure it doesn’t overcook.

What if my puff pastry tears while assembling?
No worries at all! If your puff pastry tears, simply use a small piece of extra pastry or a scrap to patch it up. Alternatively, you can use a bit of water or egg wash to seal the tears together. Make sure the edges are tightly sealed to keep the filling from leaking out while it bakes.

Is this recipe suitable for gluten-free diets?
Definitely! If you’re looking for a gluten-free option, consider using gluten-free puff pastry or a gluten-free bread alternative to encase the cheese and sausage mixture. Just check the ingredients carefully to ensure there’s no gluten and it fits any dietary restrictions you might have, but everyone will enjoy the flavor!

What can I use as a substitute for sausage in this recipe?
The more the merrier! If you’re looking to switch it up, you could use ground turkey, chicken, or even a plant-based sausage for a lighter or vegetarian option. Season it well with spices like fennel or paprika to mimic the flavors of the sausage. You could even add mushrooms for extra depth!

Sausage Baked Brie

Sausage Baked Brie

Sausage Baked Brie is an indulgent dish featuring gooey Brie cheese, savory sausage, and aromatic herbs, perfect for impressing guests.
Print Recipe Pin Recipe
Prep Time 15 minutes mins
Cook Time 25 minutes mins
Total Time 40 minutes mins
Servings: 8 servings
Course: Snacks & Appetizers
Cuisine: American
Calories: 300
Ingredients Equipment Method Nutrition Notes

Ingredients
  

For the Cheese
  • 1 round Brie cheese sliced into ½ inch pieces
For the Filling
  • 0.5 lb Sausage Italian or breakfast style, casings removed
  • 0.5 cup Onion finely diced
  • 1 clove Garlic minced
  • 1 tsp Fresh thyme or substitute with ½ tsp dried
  • 2 tbsp Fig jam or apricot preserves for a twist
For the Pastry
  • 1 sheet Puff pastry thawed
For the Finish
  • 1 beaten Egg for egg wash
For Serving
  • Crackers, baguette slices, or apple wedges for dipping

Equipment

  • Skillet
  • Oven
  • Baking sheet

Method
 

How to Make Sausage Baked Brie
  1. Preheat the oven by following the puff pastry package instructions, ensuring it’s hot and ready for that delightful bake.
  2. Cook the sausage in a skillet over medium heat. Stir occasionally until browned, which should take about 5-7 minutes. Drain any excess fat to keep it from becoming greasy.
  3. Sauté the diced onion and minced garlic in the same skillet for 3-4 minutes, until the onion is translucent and fragrant.
  4. Stir in the fresh thyme and fig jam (if using) into the sausage mixture and mix well.
  5. Roll out the thawed puff pastry on a lightly floured surface, creating a nice square.
  6. Layer half of the Brie cheese on the center of the pastry, then top with the sausage mixture, and place the remaining Brie on top.
  7. Fold the pastry over the cheese and sausage, sealing the edges tightly so no filling escapes.
  8. Brush the top with the beaten egg to achieve a golden finish once baked.
  9. Bake according to the puff pastry package instructions, usually around 20-25 minutes, until it turns golden brown.
  10. Serve warm with crackers, baguette slices, or apple wedges for dipping into the rich Sausage Baked Brie.

Nutrition

Serving: 1pieceCalories: 300kcalCarbohydrates: 15gProtein: 10gFat: 22gSaturated Fat: 10gPolyunsaturated Fat: 1gMonounsaturated Fat: 7gCholesterol: 60mgSodium: 500mgPotassium: 200mgFiber: 1gSugar: 3gVitamin A: 500IUVitamin C: 2mgCalcium: 200mgIron: 1mg

Notes

Ensure puff pastry is completely thawed to avoid tearing, drain excess fat from sausage after browning, and keep an eye on baking time.

Tried this recipe?

Let us know how it was!

Filed Under: SNACKS & APPETIZERS

Cinnamon Roll Protein Bites

December 25, 2025 by JudyWhite Leave a Comment

There’s something truly delightful about finding a snack that satisfies both my cravings and my health goals. One day, while rummaging through my pantry, I stumbled upon a mix of almond butter, oats, and a hint of cinnamon. A lightbulb moment happened—I realized I could transform these simple ingredients into an energizing treat that brings the cozy flavors of cinnamon rolls without the guilt.

Enter my Cinnamon Roll Protein Bites! These little gems are not only packed with protein but also sprinkled with bits of white chocolate for an irresistible sweetness. They’re the perfect solution for those busy afternoons when I need a quick pick-me-up or for a post-workout snack that feels like a treat.

Whipping them up takes just 20 minutes, and with minimal cooking (just a chill in the fridge!), they’re ready to fuel my day. Whether you’re a devoted chef or someone who enjoys homemade goodness, these bites are sure to become a staple in your kitchen. Let’s dive in and make some delightful memories with this easy, crowd-pleasing recipe!

Why You'll Love This Cinnamon Roll Protein Bites

  • These Cinnamon Roll Protein Bites are incredibly easy to make, requiring only 20 minutes of prep and no baking involved.
  • They burst with the comforting flavors of cinnamon and white chocolate, making healthy snacking an absolute delight.
  • Their versatility allows you to enjoy them as a quick breakfast, a post-workout treat, or a sweet afternoon pick-me-up.
  • With each bite packed with protein and wholesome ingredients, they are sure to please both your taste buds and your health goals.

Cinnamon Roll Protein Bites Ingredients

For the Base

  • Natural creamy almond butter – a wholesome source of healthy fats that provides a rich, nutty flavor.
  • Pure maple syrup – adds natural sweetness and a hint of caramel flavor to your bites.
  • Vanilla protein powder – boosts the protein content, making these bites an excellent post-workout snack.
  • Vanilla extract – brings out the warm flavors that mimic a classic cinnamon roll.
  • Rolled oats – gives the bites a hearty texture and helps bind the ingredients together.
  • Salt – enhances the overall flavor, balancing the sweetness.
  • Cinnamon – the star spice that infuses your bites with that cozy, inviting aroma.

For the Finish

  • White chocolate chips – add delightful pops of sweetness that perfectly complement the cinnamon flavor.
  • Coconut oil – helps to keep the bites moist and can be substituted with other oils if desired.

How to Make Cinnamon Roll Protein Bites

  1. Combine Ingredients: In a large mixing bowl, combine 1 cup of almond butter, ⅓ cup of maple syrup, ½ cup of vanilla protein powder, and 2 teaspoons of vanilla extract. Stir until everything is well mixed and creamy.

  2. Add Dry Ingredients: Next, incorporate ½ cup of rolled oats, 1 teaspoon of salt, and 1 ½ teaspoons of cinnamon. Mix thoroughly until a cohesive dough forms, exhibiting a thick, slightly sticky texture.

  3. Shape the Bites: With clean hands, pinch off portions of the dough and roll them into bite-sized balls, about 1 inch in diameter. This step is perfect for involving kids or having some fun with friends!

  4. Prepare for Chilling: Line a baking sheet with parchment paper. Place each rolled protein bite on the sheet, ensuring they’re spaced out to allow for easy handling later.

  5. Chill in Fridge: Refrigerate the baking sheet for 60 minutes to allow the bites to firm up. You’ll know they’re ready when they feel solid and hold their shape.

  6. Store Properly: Once set, transfer the protein bites to an airtight container and store them in the refrigerator. They’ll stay fresh and delicious for up to a week!

Optional: Drizzle some extra melted white chocolate on top for an indulgent finish.

Exact quantities are listed in the recipe card below.

How to Store and Freeze Cinnamon Roll Protein Bites

Fridge: Store your Cinnamon Roll Protein Bites in an airtight container in the refrigerator for up to 1 week. This keeps them fresh and ready for snacking anytime!

Freezer: For longer storage, freeze the bites in a single layer on a baking sheet, then transfer to an airtight container. They’ll stay good for up to 3 months.

Reheating: Enjoy the bites straight from the fridge or freezer! If you prefer them slightly softened, let them sit at room temperature for about 10–15 minutes before indulging.

Portion Control: Consider individually wrapping the bites before freezing. This way, you can grab just one or two whenever a craving strikes!

Cinnamon Roll Protein Bites Variations

Feel free to put your own spin on these delightful Cinnamon Roll Protein Bites for an even more personalized touch!

  • Nut-Free: Substitute almond butter with sunbutter or tahini for a different nut-free option that still offers creaminess.

  • Vegan: Replace honey with maple syrup and use a plant-based protein powder for a delicious vegan alternative that everyone can enjoy.

  • Spicy Kick: Add a pinch of cayenne pepper for a surprising, warm twist that gives your bites a little extra heat and excitement!

  • Dried Fruit: Incorporate ¼ cup of chopped dried cranberries or raisins for a touch of chewy sweetness that perfectly complements the cinnamon.

  • Protein Boost: Swap plain protein powder for a flavored version, like chocolate or caramel, to add a new dimension of flavor without extra sugar.

  • Coconut Delight: Mix in shredded coconut for added texture and a hint of tropical flavor that brightens each bite.

  • Nutty Crunch: Fold in chopped walnuts or pecans for a satisfying crunch that also brings a wholesome nutty flavor to the mix.

  • Guilt-Free Coating: Roll the protein bites in ground cinnamon or finely chopped nuts instead of white chocolate for a lighter finish that’s equally tasty.

Each variation opens up a world of possibilities, allowing you to explore flavors and textures that suit your preferences!

What to Serve with Cinnamon Roll Protein Bites?

Elevate your snack game by pairing these delightful bites with complementary treats that make every moment a cozy celebration.

  • Fresh Fruit Salad: A mix of vibrant fruits adds a refreshing contrast, balancing the rich flavors of the protein bites.

  • Nutty Granola: Crunchy granola offers texture and enhances the wholesome vibes, making it a perfect crunch companion to the soft bites.

  • Greek Yogurt Parfait: Layer the protein bites with creamy Greek yogurt and fruit for a satisfying, nutritious breakfast or dessert experience.

  • Hot Herbal Tea: Sipping warm herbal tea not only comforts but also complements the cinnamon notes, creating a soothing afternoon delight.

  • Chocolate Dipped Strawberries: Sweet, juicy strawberries dipped in chocolate offer an indulgent touch, perfect for serving during a cozy gathering.

  • Coconut Chia Pudding: This light, tropical pudding provides a creamy contrast and playful texture that enhances the protein bites’ sweetness.

  • Nut Butter Drizzle: A drizzle of almond or peanut butter takes these bites to another level, amplifying the nutty flavor while maintaining a healthy edge.

  • Milk or Non-Dairy Beverage: Pair with a glass of milk (or your favorite non-dairy option) for a classic combination that’s both nostalgic and delicious.

  • Coffee or Latte: The warmth of coffee or a frothy latte beautifully accompanies the bites, making your snack break a luxurious moment.

Make Ahead Options

These Cinnamon Roll Protein Bites are perfect for meal prep enthusiasts! You can mix all the ingredients and roll the bites into balls up to 24 hours in advance, storing them in an airtight container in the refrigerator. To ensure they remain fresh and tasty, store them away from strong-smelling foods—this prevents any crossover of flavors. When you’re ready to serve, simply chill the bites for at least an hour before enjoying, or you can grab them straight from the fridge for a quick snack. With these make-ahead tips, you’ll have a delightful and nutritious treat at your fingertips, saving you time during those busy weeknights!

Chef's Helpful Tips

  • When making Cinnamon Roll Protein Bites, be sure to properly measure your ingredients for consistent texture and flavor.
  • If your dough feels too sticky while forming the bites, lightly moisten your hands with coconut oil to prevent sticking.
  • Mixing the dry ingredients thoroughly with the wet ingredients helps create a more uniform flavor and texture throughout the bites.
  • Allowing the bites to chill for a full 60 minutes in the refrigerator is crucial for them to hold their shape when you store them.

Cinnamon Roll Protein Bites Recipe FAQs

What type of almond butter should I use for Cinnamon Roll Protein Bites?
I recommend using natural creamy almond butter that contains only almonds and perhaps a little salt. This gives your protein bites a wholesome, nutty flavor without added sugars or oils. Look for a brand that has a smooth texture to make mixing easier!

How should I store my Cinnamon Roll Protein Bites?
These protein bites store wonderfully in an airtight container in the refrigerator. They’ll stay fresh for up to 1 week, making them an ideal snack for those busy days. Be sure to keep them sealed to maintain their delicious flavor and texture!

Can I freeze Cinnamon Roll Protein Bites?
Absolutely! To freeze them, start by placing the bites in a single layer on a baking sheet lined with parchment paper. Freeze them until solid, then transfer to an airtight container or freezer bag. They can be frozen for up to 3 months. Just remember to let them thaw out at room temperature for about 10–15 minutes before enjoying!

What can I do if my mixture is too sticky while forming the bites?
If you find that the mixture is too sticky to handle, try lightly moistening your hands with a bit of coconut oil. This should help you form the bites more easily without creating a mess. A little trick I often use is to dampen my hands slightly with water, too!

Are Cinnamon Roll Protein Bites safe for pets or people with allergies?
While these bites are delicious for humans, they contain ingredients like almond butter and white chocolate that may not be safe for pets. If you have nut allergies, be sure to substitute the almond butter with sunflower seed butter or a similar alternative. Always check labels for potential allergens!

What happens if my protein bites don’t set after chilling?
If your Cinnamon Roll Protein Bites don’t seem to hold their shape after chilling, it could be due to the moisture content in your almond butter or maple syrup. To troubleshoot, you can try adding a little more protein powder or oats to thicken the mixture. Additionally, allow them to chill for a longer period or even place them in the freezer for a short time before serving.

Cinnamon Roll Protein Bites

Cinnamon Roll Protein Bites

Cinnamon Roll Protein Bites are deliciously healthy snacks that satisfy cravings while supporting your fitness goals.
Print Recipe Pin Recipe
Prep Time 20 minutes mins
Chill Time 1 hour hr
Total Time 1 hour hr 20 minutes mins
Servings: 12 bites
Course: Snacks & Appetizers
Calories: 100
Ingredients Equipment Method Nutrition Notes

Ingredients
  

For the Base
  • 1 cup natural creamy almond butter wholesome source of healthy fats
  • ⅓ cup pure maple syrup adds natural sweetness
  • ½ cup vanilla protein powder boosts protein content
  • 2 teaspoons vanilla extract brings out warm flavors
  • ½ cup rolled oats gives hearty texture
  • 1 teaspoon salt enhances flavor
  • 1 ½ teaspoons cinnamon infuses cozy aroma
For the Finish
  • ½ cup white chocolate chips add delightful pops of sweetness
  • 2 tablespoons coconut oil keeps bites moist

Equipment

  • Mixing bowl
  • Baking sheet
  • parchment paper
  • airtight container

Method
 

How to Make Cinnamon Roll Protein Bites
  1. In a large mixing bowl, combine almond butter, maple syrup, vanilla protein powder, and vanilla extract. Stir until creamy.
  2. Incorporate rolled oats, salt, and cinnamon until a cohesive dough forms.
  3. Pinch off portions of dough and roll into 1-inch balls.
  4. Line a baking sheet with parchment paper and place each rolled protein bite on it.
  5. Refrigerate for 60 minutes until firm.
  6. Transfer to an airtight container and store in the refrigerator.

Nutrition

Serving: 1biteCalories: 100kcalCarbohydrates: 10gProtein: 5gFat: 6gSaturated Fat: 2gPolyunsaturated Fat: 2gMonounsaturated Fat: 2gSodium: 75mgPotassium: 150mgFiber: 2gSugar: 4gCalcium: 4mgIron: 6mg

Notes

Optional: Drizzle extra melted white chocolate on top for an indulgent finish.

Tried this recipe?

Let us know how it was!

Filed Under: SNACKS & APPETIZERS

Cinnamon Apple Fritters Recipe

December 25, 2025 by JudyWhite Leave a Comment

As the leaves begin to turn and the air grows crisp, I find myself craving comforting treats that evoke the essence of autumn. That’s when I discovered the magic of homemade Cinnamon Apple Fritters. Picture this: the subtle warmth of cinnamon wafting through the air as tender apple bits mingle in a golden, crispy batter. It’s the perfect solution for those evenings when takeaway options just won’t cut it.

This delightful recipe is a breeze to whip up, taking only 30 minutes from start to finish, making it an ideal choice for both seasoned chefs and home cooks looking for a new favorite. With just a handful of ingredients, including fresh Pink Lady apples and a drizzle of golden syrup over creamy vanilla ice cream, these fritters deliver a burst of flavor that will impress family and friends alike. Join me as we dive into this comforting treat that brings a touch of homemade warmth to any occasion!

Why You'll Love This Cinnamon Apple Fritters Recipe

  • This Cinnamon Apple Fritters Recipe is incredibly easy to make, taking just 30 minutes from start to finish.
  • The warm spices and sweet apples create an irresistible flavor combination that everyone will adore.
  • These fritters are versatile and can be enjoyed as a dessert or a cozy snack at any time of day.
  • The visual appeal of the golden-brown fritters drizzled with golden syrup and served with vanilla ice cream is sure to impress your guests and elevate any gathering.

Cinnamon Apple Fritters Ingredients

For the Batter

  • 1 cup self-raising flour – essential for achieving that fluffy texture in your fritters.
  • 1/4 tsp bicarbonate of soda – boosts the batter’s rise and creates a light crunch.
  • 1 cup soda water, chilled – the bubbles add a delightful crispiness to the fritters.
  • 1/2 cup caster sugar – offers a subtle sweetness that beautifully complements the apples.
  • 1 tsp ground cinnamon – infuses warmth and spice, making this a true cinnamon apple fritters recipe.

For the Apples

  • 2 large pink lady apples – their sweetness and tartness provide the perfect flavor balance, so peel and core them well!

For Frying

  • Vegetable oil – needed for shallow-frying; make sure it’s hot enough to get that golden finish.

For Serving

  • 4 scoops vanilla ice-cream – adds creaminess that pairs perfectly with warm fritters.
  • 1/3 cup golden syrup – a luscious drizzle to enhance the sweetness and presentation.

How to Make Cinnamon Apple Fritters

  1. Combine Ingredients: In a large bowl, mix together the self-raising flour, bicarbonate of soda, chilled soda water, caster sugar, and ground cinnamon until smooth. This mixture forms the base for your delightful fritters!

  2. Fold in Apples: Dice the peeled and cored Pink Lady apples into small pieces. Gently fold them into the batter, ensuring they’re well-coated for that delicious apple flavor in every bite.

  3. Heat Oil: In a frying pan, heat a generous amount of vegetable oil over medium heat. You’ll know it’s ready when a small drop of batter sizzles immediately upon contact—the perfect temperature for frying.

  4. Fry Fritters: Using a spoon, drop dollops of the batter mixed with apple pieces into the hot oil. Fry each fritter for about 3-4 minutes on each side, or until they turn a lovely golden brown and are crispy on the outside.

  5. Drain Excess Oil: Carefully remove the fritters from the oil and place them on paper towels to absorb any excess oil. This keeps them light and fluffy without extra greasiness.

  6. Serve Warm: Plate the fritters warm, adding scoops of vanilla ice cream on the side. Drizzle the fritters with golden syrup for that extra touch of sweetness.

Optional: Dust with powdered sugar for an elegant finish.
Exact quantities are listed in the recipe card below.

What to Serve with Cinnamon Apple Fritters?

Imagine elevating your homemade fritters into a full meal that delights the senses and warms the heart.

  • Maple Bacon: The crispy, savory richness of bacon contrasts beautifully with the sweet, warm spices of the fritters, creating a balance of flavors. It’s a classic pairing that everyone loves!

  • Caramelized Walnuts: These crunchy pieces offer a delightful nutty flavor that complements the soft, sweet apples in the fritters. Toss them over the top for an extra touch of luxury.

  • Whipped Cream: Light and airy, whipped cream adds a fluffy texture that matches the fritters’ warmth. Drizzle it on top for an indulgent treat.

  • Cinnamon Hot Chocolate: A warm, spiced drink pairs perfectly with the cinnamon undertones of your fritters, making every bite even more comforting. It’s a hug in a mug to accompany your sweet snack.

  • Crisp Green Salad: A refreshing salad with mixed greens, cherry tomatoes, and a light vinaigrette can balance the richness of the fritters. The crunchiness adds a delightful contrast, ensuring a well-rounded meal.

  • Warm Apple Cider: Enjoying a mug of warm apple cider alongside your fritters enhances the cozy feel of your snack. Its spiced notes tie in wonderfully with the cinnamon flavor.

  • Vanilla Ice Cream: A scoop of creamy vanilla ice cream provides a luscious contrast to the warm fritters, making it an irresistible dessert choice. The melt-in-your-mouth texture is simply divine!

Make Ahead Options

These Cinnamon Apple Fritters are perfect for busy home cooks looking to save time! You can prepare the batter and fold in the diced Pink Lady apples up to 24 hours in advance. Simply mix the self-raising flour, bicarbonate of soda, chilled soda water, caster sugar, and ground cinnamon in a bowl, then refrigerate the mixture (covering it tightly to avoid any browning). When you’re ready to serve, just heat the vegetable oil and drop spoonfuls of the chilled batter into the hot oil, frying until golden brown. This prep-ahead tip ensures that your fritters are just as delicious while reducing your cooking time significantly during busy weeknights!

Cinnamon Apple Fritters Variations

Get ready to experience the joy of personalizing your fritters with delightful twists and flavor swaps!

  • Gluten-Free: Substitute the self-raising flour with a gluten-free blend to keep this recipe celiac friendly. Just ensure it has a good rising agent for that fluffy texture!

  • Apple Alternatives: Experiment with different apples like Granny Smith or Honeycrisp for varied sweetness and tartness. Each variety brings out a unique flavor profile that can surprise your taste buds.

  • Spiced Up: Add a pinch of nutmeg or cardamom to the batter for an extra spice kick. The warmth of these spices can elevate your fritters to new heights of deliciousness!

  • Sugar Swap: Use coconut sugar or maple syrup instead of caster sugar for a richer, more earthy sweetness. This can enhance both flavor and nutrition!

  • Dairy-Free: Replace vanilla ice cream with coconut or almond milk ice cream for a creamy, dairy-free option that’s just as satisfying. The coconut flavor pairs beautifully with the fritters.

  • Cheesy Goodness: Incorporate small chunks of cream cheese into the batter before frying for a creamy, delicious surprise in every bite. It adds a delightful tang that makes these fritters even more indulgent.

  • Add Some Heat: Sprinkle in some chopped jalapeños for a spicy touch that balances the sweetness of the apples. This surprising twist can turn your fritters into a flavorful adventure!

  • Dust It Up: Finish with a dusting of powdered sugar or a sprinkle of cinnamon-sugar after frying for an elegant touch that adds a sweet crunch. It makes for a visually stunning presentation that will wow your guests!

How to Store and Freeze Cinnamon Apple Fritters

Room Temperature: Keep any leftover fritters in an airtight container for up to 2 days. Enjoy them warm or at room temperature for a delightful treat!

Fridge: To keep your fritters fresh, store them in the refrigerator in an airtight container for up to 3 days. Reheat in a toaster oven for a tasty warm treat.

Freezer: For longer storage, freeze fritters in a single layer on a baking sheet, then transfer to a freezer bag for up to 3 months. Reheat from frozen in the oven or air fryer for crispiness.

Reheating: Reheat fritters in the oven or air fryer at 350°F (175°C) for about 5-7 minutes to restore their delightful crunch before serving.

Chef's Helpful Tips

  • When preparing your Cinnamon Apple Fritters, ensure your soda water is well-chilled as this will help create a light and airy batter.
  • Be careful not to over-mix the batter once you add the apples, as this can lead to dense fritters instead of fluffy ones.
  • Always test the oil temperature before frying by dropping in a small spoonful of batter; if it sizzles and bubbles, you’re ready to go.
  • Fry the fritters in batches to avoid overcrowding the pan, which can lower the oil temperature and result in uneven cooking.

Cinnamon Apple Fritters Recipe FAQs

How do I know if my apples are ripe enough for this recipe?
Absolutely! For the best flavor, pick apples that are firm and vibrant. Look for Pink Lady apples that have a nice balance between sweet and tart. Avoid apples with dark spots or bruises, as they may not provide the desired taste or texture in your fritters.

What’s the best way to store leftover Cinnamon Apple Fritters?
To keep your fritters fresh, store them in an airtight container at room temperature for up to 2 days. If you want them to last longer, refrigerate them in an airtight container for up to 3 days. Just remember to reheat them in a toaster oven or regular oven to maintain that crispy exterior before enjoying!

Can I freeze my Cinnamon Apple Fritters?
Very! To freeze, first place your fritters in a single layer on a baking sheet to freeze them individually for about 1-2 hours. Once frozen, transfer them to a freezer bag for up to 3 months. When you’re ready to enjoy, reheat from frozen in the oven at 350°F (175°C) for 8-10 minutes, and they will come out wonderfully crispy!

What if my batter turns out too thick or too thin?
No worries! If your batter is too thick, simply add a bit more chilled soda water until you reach the desired consistency—you want it to be pourable but not runny. Conversely, if it’s too thin, sprinkle in a little more flour until it thickens up. It’s all about getting that perfect texture for golden, fluffy fritters.

Are Cinnamon Apple Fritters safe for pets?
While these fritters are delicious for humans, it’s best to avoid sharing them with pets. The sugar and fried ingredients can be harmful to dogs and cats. Stick to offering plain apple slices for your furry friends as a special treat instead!

Cinnamon Apple Fritters Recipe

Cinnamon Apple Fritters Recipe

Deliciously warm and crispy homemade cinnamon apple fritters, perfect for autumn cravings.
Print Recipe Pin Recipe
Prep Time 15 minutes mins
Cook Time 15 minutes mins
Total Time 30 minutes mins
Servings: 4 fritters
Course: DESSERT RECIPES
Cuisine: American
Calories: 250
Ingredients Equipment Method Nutrition Notes

Ingredients
  

For the Batter
  • 1 cup self-raising flour essential for achieving fluffy texture
  • 1/4 tsp bicarbonate of soda boosts rise and creates light crunch
  • 1 cup soda water, chilled bubbles add crispiness
  • 1/2 cup caster sugar adds subtle sweetness
  • 1 tsp ground cinnamon infuses warmth and spice
For the Apples
  • 2 large pink lady apples peeled and cored
For Frying
  • vegetable oil for shallow frying
For Serving
  • 4 scoops vanilla ice-cream pairs perfectly with warm fritters
  • 1/3 cup golden syrup for drizzling

Equipment

  • frying pan
  • Mixing bowl
  • measuring cups
  • measuring spoons
  • paper towels

Method
 

How to Make Cinnamon Apple Fritters
  1. In a large bowl, mix together the self-raising flour, bicarbonate of soda, chilled soda water, caster sugar, and ground cinnamon until smooth.
  2. Dice the peeled and cored Pink Lady apples into small pieces and fold them into the batter.
  3. In a frying pan, heat vegetable oil over medium heat until hot.
  4. Drop dollops of the batter mixed with apple pieces into the hot oil and fry for about 3-4 minutes on each side.
  5. Remove the fritters from the oil and place them on paper towels to drain excess oil.
  6. Plate the fritters warm, add scoops of vanilla ice cream on the side, and drizzle with golden syrup.

Nutrition

Serving: 1fritterCalories: 250kcalCarbohydrates: 35gProtein: 2gFat: 12gSaturated Fat: 1.5gSodium: 200mgPotassium: 100mgFiber: 1gSugar: 10gVitamin A: 100IUVitamin C: 5mgCalcium: 10mgIron: 0.5mg

Notes

Optional: Dust with powdered sugar for an elegant finish.

Tried this recipe?

Let us know how it was!

Filed Under: BREAKFAST & BRUNCH

Slice and Bake Cookies

December 25, 2025 by JudyWhite Leave a Comment

There’s something truly special about the ritual of baking, especially when it comes to making Slice and Bake Cookies. Picture this: it’s a quiet afternoon, and I’m in the kitchen, the scent of buttery sweetness enveloping the air as I cream together the ingredients. With each slice of the chilled dough, I feel like a magician, transforming simple ingredients into colorful, bite-sized delights that beckon for a cup of tea or a glass of milk.

This recipe became a go-to for me during busy weeks when a quick treat was a must. It’s so wonderfully easy—mix, chill, slice, and bake! No fuss, just pure cookie joy. Not to mention, the vibrant Nonpareils add that fun twist which always brightens up my cookie platter. Whether for a last-minute gathering or a cozy night at home, these cookies have become a staple that elevates both the everyday and the special occasions. Ready to bring a little sweetness into your life? Let’s dive into making these delightful Slice and Bake Cookies!

Why You'll Love This Slice and Bake Cookies

  • You’ll love this recipe for its incredible ease, allowing you to whip up delicious cookies without any complicated steps.
  • The delightful combination of flavors from the vanilla and almond extracts will leave your taste buds dancing.
  • These cookies are wonderfully versatile, making them perfect for any occasion, whether a festive gathering or a simple afternoon snack.
  • Plus, their eye-catching appearance with colorful Nonpareils makes them an instant crowd-pleaser that will impress family and friends.

Slice and Bake Cookies Ingredients

• Get ready to create a cookie masterpiece!

For the Dough
• 1 cup unsalted butter – This key ingredient brings the rich flavor that makes cookies irresistible.
• 0.5 cup sugar – Adds sweetness, balancing the richness of the butter.
• 0.25 cup light brown sugar – Offers a hint of caramel flavor for added depth.
• 1 large egg yolk – Helps bind the dough while giving it a lovely richness.
• 0.5 teaspoon salt – A pinch enhances all of the flavors in your cookies.
• 1 teaspoon vanilla extract – A classic flavor that sweetly complements the other ingredients.
• 0.5 teaspoon almond extract – Optional but adds a delightful nutty essence to the cookies.
• 2.25 cups all-purpose flour – The foundation of your Slice and Bake Cookies, providing structure.

For Topping (Optional)
• 2.5 tablespoons colorful Nonpareils – These sprinkles not only make your cookies visually enticing but also add a fun crunch!

How to Make Slice and Bake Cookies

  1. Cream Together: In a mixing bowl, cream together the unsalted butter, sugar, and light brown sugar until the mixture is smooth and fluffy. This should take about 2-3 minutes and is key for those airy cookies you crave!

  2. Mix Wet Ingredients: Add in the egg yolk, salt, vanilla extract, and almond extract (if using). Mix well until thoroughly combined and creamy, creating a rich and flavorful base for your cookies.

  3. Incorporate Flour: Gradually add the all-purpose flour to the mixture. Stir until just combined, ensuring you don’t overmix; this will keep your cookies tender and delightful.

  4. Shape into Logs: Divide the dough into two equal portions. Roll each portion into a log, about 2 inches in diameter. Wrap each log tightly in plastic wrap, as this helps them keep their shape during chilling.

  5. Chill the Dough: Place the wrapped dough logs in the refrigerator and chill for at least 1 hour. This step is crucial for achieving those perfectly sliced cookies!

  6. Preheat Oven: When the hour is almost up, preheat your oven to 350°F (175°C) so that it’s ready when you’re done with the dough.

  7. Slice the Cookies: Remove the chilled logs from the refrigerator. Slice them into 1/4 inch thick rounds using a sharp knife, revealing the colorful dough inside.

  8. Arrange on Baking Sheet: Place the cookie slices on a baking sheet lined with parchment paper, spacing them apart to allow for spreading during baking.

  9. Add a Pop of Color: Optional: Before baking, sprinkle colorful Nonpareils over the tops of the cookie slices for that festive touch!

  10. Bake: Bake in the preheated oven for 10-12 minutes, or until they’re lightly golden around the edges. The cookies should have a slight softness in the center when they come out.

  11. Cool Down: Allow the cookies to cool on a wire rack before serving so they can firm up a bit, making them perfect for dipping or enjoying on their own.

Optional: Try adding a drizzle of melted chocolate on top for an extra indulgence!

Exact quantities are listed in the recipe card below.

What to Serve with Slice and Bake Cookies?

Indulging in freshly baked cookies is always a delight, but pairing them with the right accompaniments can elevate the experience even more.

  • Rich Hot Chocolate: A decadent mug of hot chocolate warms the soul and complements the buttery sweetness of the cookies perfectly.

  • Cooling Milk: The classic duo of cookies and milk never disappoints! Whole milk brings out the flavors and balances the cookie’s richness.

  • Fresh Berries: Juicy strawberries or raspberries offer a burst of freshness that cuts through the sweetness, creating a delightful textural contrast.

  • Cheesecake Dip: This creamy dip, made with mascarpone and a hint of vanilla, adds a delicious twist that pairs well with the cookie’s crunchy edges.

  • Ice Cream Sandwiches: Take your Slice and Bake Cookies to the next level by sandwiching your favorite ice cream between two cookies for a fun, retro treat!

  • Coffee or Espresso: The robust flavors in coffee are a superb match for the cookie’s sweetness—a perfect pick-me-up for any time of day.

  • Citrus Sorbet: A refreshing citrus sorbet adds a bright note that cleanses the palate, making each cookie bite even more enjoyable.

  • Chocolate Drizzle: Drizzling a bit of melted chocolate over your cookies creates a wonderfully decadent treat that oozes indulgence and charm.

How to Store and Freeze Slice and Bake Cookies

Fridge: Store freshly baked cookies in an airtight container at room temperature for up to 3 days. They’ll stay soft and delicious, ready for snacking!

Freezer: If you want to keep the unbaked dough, wrap logs tightly in plastic wrap and freeze for up to 3 months. When you’re ready to bake, slice the frozen dough and add a few extra minutes to the baking time.

Reheating: For a warm treat, reheat chilled cookies in the microwave for 10-15 seconds. They’ll melt in your mouth just like they did fresh out of the oven!

Refreshing: If you’ve stored your slice and bake cookies in the fridge, you can let them sit at room temperature for about 15 minutes before serving to regain their original texture and flavor.

Make Ahead Options

These Slice and Bake Cookies are a fantastic option for busy home cooks looking to save time without sacrificing flavor! You can prepare the cookie dough up to 3 days in advance by following the basic steps up until shaping it into logs. Simply wrap the logs tightly in plastic wrap and store them in the refrigerator. For the best results, it’s essential to keep them well-wrapped to prevent drying out. When you’re ready to bake, just remove the logs from the fridge, slice them, and bake as directed. This way, you’ll always have fresh cookies on hand with minimal last-minute effort—perfect for unexpected guests or a cozy night in!

Slice and Bake Cookies Variations

Feel free to mix and match these ideas to create your perfect cookie experience!

  • Gluten-Free: Substitute all-purpose flour with a gluten-free blend for a delightful alternative that everyone can enjoy.
  • Chocolate Chip: Fold in 1 cup of semi-sweet or dark chocolate chips for a classic twist that will have cookie lovers cheering!
  • Nutty Crunch: Add 1/2 cup of chopped nuts, like walnuts or pecans, for an irresistible crunch that enhances both flavor and texture. A sprinkle of chopped nuts adds both heartiness and satisfaction.
  • Citrus Zest: Incorporate the zest of one orange or lemon into the dough for a refreshing, bright flavor that pairs beautifully with the sweet elements.
  • Spicy Kick: Mix in a teaspoon of cinnamon or ginger powder for a warm spice sensation that elevates the cookie to a whole new level. This simple addition makes each bite feel cozy.
  • Dried Fruits: Toss in 1/2 cup of chopped dried fruits like cranberries, cherries, or apricots for a chewy surprise that adds sweetness and a pop of color.
  • Caramel Swirls: Drizzle some caramel sauce on the cookies right before baking for a gooey, decadent finish. The warm caramel transforms each cookie into a sweet delight!
  • Minty Freshness: Add 1/2 teaspoon of peppermint extract for a refreshing twist, especially delightful around the holidays. It creates a festive and invigorating flavor!

Chef's Helpful Tips

  • When making Slice and Bake Cookies, ensure your butter is at room temperature for easy creaming, which will result in a light and airy texture.
  • A common mistake is overmixing the dough after adding the flour; stir just until combined to keep your cookies tender.
  • If you want to achieve uniform slices, use a sharp knife and cut through the chilled dough with a smooth motion, applying even pressure.
  • Remember to preheat your oven fully to 350°F (175°C) so your cookies bake evenly and reach that perfect golden hue.

Slice and Bake Cookies Recipe FAQs

How do I choose ripe ingredients for my Slice and Bake Cookies?
Absolutely! For the best flavor and texture, ensure your butter is at room temperature. It should be soft to the touch but not melted, which allows for the perfect creaming consistency with the sugars. Fresh ingredients lead to delicious cookies, so check that your egg is not past its expiration date and that your baking extracts are aromatic.

How should I store my Slice and Bake Cookies?
Very good question! Store your freshly baked cookies in an airtight container at room temperature for up to 3 days. If you’d like them to last longer, consider refrigerating them, where they can stay fresh for up to 1 week. Just let them come to room temperature before enjoying; they’ll be just as delightful!

Can I freeze the Slice and Bake Cookies dough?
Absolutely! Wrap the unbaked dough logs tightly in plastic wrap and then place them in a freezer-safe bag. They can be stored for up to 3 months. When you’re ready to bake, don’t forget to slice the frozen logs straight from the freezer—just extend the baking time by a couple of minutes for perfectly baked cookies!

What should I do if my cookie dough is crumbly?
If your dough is crumbly, it might need a bit more moisture. Try adding a teaspoon of milk or water and mix gently until it holds together. Also, ensure that your butter is at room temperature to create that smooth texture. If it’s too dry, it may not incorporate well with the flour.

Are there any dietary considerations for Slice and Bake Cookies?
Yes, definitely! If you have guests with dietary restrictions, consider using dairy-free butter or a vegan egg substitute, such as a flax egg (1 tablespoon ground flaxseed mixed with 2.5 tablespoons water). Always check for allergies related to ingredients like almonds if using almond extract, as nuts can trigger allergic reactions in some people.

How can I ensure my cookies come out evenly baked?
To help with even baking, make sure your oven is fully preheated to 350°F (175°C) before placing your cookies inside. Use a baking sheet lined with parchment paper for easy release and even heat distribution. Additionally, position your racks in the center of the oven for optimal airflow. Rotate the baking sheet halfway through baking for even results!

Slice and Bake Cookies

Slice and Bake Cookies

Delight in making Slice and Bake Cookies easily for any occasion with vibrant flavors and colorful Nonpareils.
Print Recipe Pin Recipe
Prep Time 15 minutes mins
Cook Time 12 minutes mins
Chilling Time 1 hour hr
Total Time 1 hour hr 27 minutes mins
Servings: 24 cookies
Course: DESSERT RECIPES
Cuisine: American
Calories: 120
Ingredients Equipment Method Nutrition Notes

Ingredients
  

Dough Ingredients
  • 1 cup unsalted butter at room temperature
  • 0.5 cup sugar
  • 0.25 cup light brown sugar
  • 1 large egg yolk
  • 0.5 teaspoon salt
  • 1 teaspoon vanilla extract
  • 0.5 teaspoon almond extract optional
  • 2.25 cups all-purpose flour
Topping Ingredients
  • 2.5 tablespoons colorful Nonpareils optional

Equipment

  • Mixing bowl
  • sharp knife
  • parchment paper
  • Baking sheet
  • plastic wrap
  • Wire Rack

Method
 

Preparation Steps
  1. In a mixing bowl, cream together the unsalted butter, sugar, and light brown sugar until the mixture is smooth and fluffy.
  2. Add in the egg yolk, salt, vanilla extract, and almond extract (if using). Mix well until thoroughly combined and creamy.
  3. Gradually add the all-purpose flour to the mixture. Stir until just combined.
  4. Divide the dough into two equal portions. Roll each portion into a log, about 2 inches in diameter.
  5. Wrap each log tightly in plastic wrap and chill for at least 1 hour.
  6. Preheat your oven to 350°F (175°C).
  7. Remove the chilled logs from the refrigerator and slice them into 1/4 inch thick rounds.
  8. Place the cookie slices on a baking sheet lined with parchment paper.
  9. Before baking, sprinkle colorful Nonpareils over the tops of the cookie slices for that festive touch!
  10. Bake in the preheated oven for 10-12 minutes, or until lightly golden around the edges.
  11. Allow the cookies to cool on a wire rack before serving.

Nutrition

Serving: 1cookieCalories: 120kcalCarbohydrates: 15gProtein: 1gFat: 6gSaturated Fat: 4gPolyunsaturated Fat: 0.5gMonounsaturated Fat: 1.5gCholesterol: 20mgSodium: 50mgPotassium: 30mgSugar: 7gVitamin A: 200IUCalcium: 10mgIron: 0.5mg

Notes

Use a sharp knife and apply even pressure for uniform slices. Preheat oven fully for even baking.

Tried this recipe?

Let us know how it was!

Filed Under: DESSERT RECIPES

Vanilla French Beignets

December 25, 2025 by JudyWhite Leave a Comment

The moment you take your first bite of a Vanilla French Beignet, it feels like you’ve been transported to a quaint café on the streets of New Orleans. The way these light, fluffy morsels melt in your mouth as they’re enveloped in a dusting of powdered sugar is pure bliss. I remember the first time I decided to make beignets at home; the sizzle of dough hitting hot oil filled my kitchen with a warm, inviting aroma that made my heart race with excitement.

After a long week of fast food and takeout, these homemade delights are a delightful reprieve that not only feeds the soul but also brings a joyful moment of creativity in the kitchen. Whether you’re gathering friends for brunch or simply indulging in a lazy weekend treat, these Vanilla French Beignets are surprisingly easy to whip up and will have everyone asking for seconds. So, roll up your sleeves and let’s dive into this sweet adventure—it may just become your new favorite baking tradition!

Why You'll Love This Vanilla French Beignets

  • These Vanilla French Beignets are incredibly easy to make, requiring minimal effort and yielding delicious results.
  • The rich vanilla flavor combined with the light, fluffy texture makes each bite a delightful experience.
  • With their captivating golden-brown color and a generous dusting of powdered sugar, these beignets are sure to impress anyone who tries them.
  • They are a versatile treat perfect for brunch gatherings, lazy weekends, or even special occasions, making them a crowd-pleaser for any event.

Vanilla French Beignets Ingredients

For the Dough

  • All-purpose flour – Provides the perfect base for fluffy beignets.
  • Granulated sugar – Adds a touch of sweetness to balance the flavor.
  • Active dry yeast – This is the magic ingredient that helps your dough rise.
  • Salt – Enhances the overall flavor of the beignets.
  • Warm milk – Activates the yeast, making your beignets light and airy.
  • Unsalted butter – Contributes to a rich flavor and soft texture.
  • Pure vanilla extract – Infuses the beignets with a delightful vanilla essence.

For Frying

  • Vegetable oil – Essential for achieving that irresistible golden-brown exterior.

For Dusting

  • Powdered sugar – The finishing touch that adds sweetness and a beautiful appearance.

These ingredients come together to create the dreamy Vanilla French Beignets you’re sure to love!

How to Make Vanilla French Beignets

  1. Combine the dry ingredients in a large bowl. Mix the all-purpose flour, granulated sugar, active dry yeast, and salt until well blended, creating the foundation for your delicious beignets.

  2. Whisk together the wet ingredients in a separate bowl. In this step, blend the warm milk, melted unsalted butter, and pure vanilla extract until smooth and inviting.

  3. Pour the wet ingredients into the dry ingredients gradually. Stir gently as the flour mixture incorporates the milk, forming a soft dough.

  4. Knead the dough on a lightly floured surface. Work it for about 8-10 minutes until it feels smooth and elastic, a satisfying sign of perfect dough consistency.

  5. Let rise the kneaded dough in a greased bowl. Cover it and place it in a warm spot for about 1.5 hours, or until it doubles in size—this is where the magic happens!

  6. Punch down the dough to release air. Roll it out to about 1/4 inch thickness, then cut it into squares measuring 2×2 inches—watch as the beignets come to life!

  7. Heat the vegetable oil in your deep fryer or large pot. Aim for 360°F, the perfect temperature for frying beignets, ensuring they puff up beautifully.

  8. Fry the beignets in batches. Cook them for about 1-2 minutes on each side until they’re golden brown and puffed up, then drain them on paper towels to absorb the excess oil.

  9. Dust generously with powdered sugar. The final touch transforms your beignets into a heavenly treat, best enjoyed while they’re still warm and fresh.

  10. Cool the beignets slightly on a wire rack if not serving immediately. This helps maintain their fluffy texture while you prepare to impress your family or friends!

Optional: Serve with a side of hot chocolate or coffee for a delightful pairing.

Exact quantities are listed in the recipe card below.

Vanilla French Beignets Variations

Customize your beignets to discover exciting flavor profiles and dietary adaptations that everyone will love!

  • Gluten-Free: Substitute all-purpose flour with a gluten-free blend for an equally delightful experience. Just ensure the blend includes xanthan gum for texture.

  • Vegan: Replace milk with almond or oat milk, and use melted coconut oil instead of butter for a compassionate treat. These adjustments keep the essence of beignets while being plant-based friendly.

  • Chocolate-Dipped: Once fried, dip half of each beignet in melted chocolate and let cool. This adds a rich decadence that chocolate lovers will adore.

  • Cinnamon Sugar: Instead of powdered sugar, mix granulated sugar with cinnamon for a cozy twist. The warm, aromatic flavor provides a lovely spin on the traditional beignet.

  • Maple Glaze: Drizzle an easy maple glaze on top made with powdered sugar and maple syrup for a sweet, sticky finish that adds a lovely maple essence.

  • Spiced Delight: Add a pinch of nutmeg or cardamom to the dry ingredients for an aromatic depth that elevates the beignet’s flavor profile beyond vanilla.

  • Savory Beignets: Incorporate shredded cheese or finely chopped herbs into the dough for a savory twist, perfect as an appetizer or snack. These variations will surprise your guests in the best way!

  • Fruit-Filled: Before frying, fill each square of dough with a spoonful of fruit preserves or cream cheese mixture. This lightens the beignet and adds a burst of flavor in every bite.

Experimenting with variations not only makes the beignets uniquely yours but also invites endless creativity in the kitchen!

What to Serve with Vanilla French Beignets?

Indulging in warm, fluffy Vanilla French Beignets sets the stage for a delightful meal that beckons for enticing pairings.

  • Rich Hot Chocolate: A steaming cup of hot chocolate offers a cozy contrast to the beignets’ sweetness, perfect for a chilly day.

  • Fresh Berries: Juicy strawberries or raspberries add a tart note, beautifully balancing the rich vanilla flavor of the beignets.

  • Crisp Bacon: The savory, crispy texture of bacon complements the sweetness, creating a harmonious blend in every bite.

  • Maple Syrup: Drizzling warm maple syrup over the beignets enhances their flavor while adding delightful sweetness and moisture.

  • Café au Lait: A classic French coffee with steamed milk elevates the experience, providing a perfect sipper alongside your beignets.

  • Creamy Vanilla Yogurt: The light tang of yogurt contrasts beautifully with the sweet treat, making for an irresistible pairing.

  • Lemon Zest: A sprinkle of lemon zest brightens the flavor profile, giving a refreshing twist that uplifts each bite.

  • Vanilla Ice Cream: For an extra indulgent touch, serve warm beignets alongside a scoop of vanilla ice cream for a delicious dessert surprise.

Make Ahead Options

These Vanilla French Beignets are perfect for busy home cooks looking to save time! You can prepare the dough up to 24 hours in advance. Simply follow the recipe up to the point of letting the dough rise, then cover it tightly with plastic wrap and refrigerate. When you’re ready to fry, let the dough sit at room temperature for about 30 minutes to activate the yeast again. After that, simply punch down, roll out, and cut into squares before frying as instructed. This method not only saves time but also ensures your beignets are just as delicious as if made fresh, letting you enjoy delightful treats without the stress!

How to Store and Freeze Vanilla French Beignets

  • Room Temperature: Enjoy your Vanilla French Beignets fresh for up to 2 days, storing them in an airtight container to keep them from becoming stale.

  • Fridge: If you have leftovers, store them in the refrigerator for up to 5 days. Place them in a container with a lid to maintain moisture and softness.

  • Freezer: For longer storage, freeze your beignets in a single layer on a baking sheet before transferring them to a freezer-safe bag. They can last up to 3 months while preserving their delightful texture.

  • Reheating: To bring back that fresh-out-of-the-fryer taste, reheat frozen beignets directly from the freezer in a 350°F oven for about 10-12 minutes. Dust with powdered sugar before serving for the full experience!

Chef's Helpful Tips

  • When making Vanilla French Beignets, it’s crucial to knead your dough thoroughly for 8-10 minutes to develop gluten, which will give your beignets their signature light and fluffy texture.
  • Avoid using cold milk in the wet mixture, as warm milk activates the yeast effectively for a better rise.
  • Be careful not to overcrowd the fryer; fry the beignets in small batches to maintain consistent oil temperature for even cooking.
  • Finally, remember to let the oil reach exactly 360°F before frying for that perfect golden-brown color and airy interior.

Vanilla French Beignets Recipe FAQs

What type of flour is best for making Vanilla French Beignets?
For the best results, I recommend using all-purpose flour. It strikes the perfect balance of protein and starch to create that fluffy texture we adore. Avoid using cake flour, as it may lead to less structure and dense beignets.

How should I store leftover beignets?
You can store your Vanilla French Beignets at room temperature for up to 2 days in an airtight container. If you have leftovers beyond that, keep them in the refrigerator for up to 5 days. Just ensure they’re covered to preserve moisture!

Can I freeze Vanilla French Beignets?
Absolutely! To freeze your beignets, place them in a single layer on a baking sheet and freeze until solid. Then transfer them to a freezer-safe bag or airtight container. They can be kept for up to 3 months. Just remember, they’ll taste best if you reheat them properly!

How do I reheat frozen beignets to maintain their fluffy texture?
To revitalize frozen Vanilla French Beignets, preheat your oven to 350°F. Bake them directly from the freezer for about 10-12 minutes. This will help them regain their delightful texture. Dust with powdered sugar before serving to recreate that freshly-fried magic!

What if my dough doesn’t rise properly?
If your dough doesn’t rise, it could be due to inactive yeast. Ensure your yeast is fresh and activated by dissolving it in warm milk (around 110°F), not too hot or too cold. If it’s still not rising, the environment might be too cool. Try placing your bowl in a warm spot, like an oven with just the light on, for a bit more warmth.

Are these beignets suitable for gluten-free diets?
While traditional Vanilla French Beignets are made with all-purpose flour, you can experiment with a gluten-free flour blend. Look for one that has a good structure, and consider adding a binding agent like xanthan gum to help bind the mixture together. Just be aware that the texture may differ slightly from the classic version.

Vanilla French Beignets

Vanilla French Beignets

Experience the bliss of Vanilla French Beignets with their light, fluffy texture and rich vanilla flavor, reminiscent of New Orleans cafés.
Print Recipe Pin Recipe
Prep Time 30 minutes mins
Cook Time 10 minutes mins
Rising Time 1 hour hr 30 minutes mins
Total Time 2 hours hrs 10 minutes mins
Servings: 12 beignets
Course: DESSERT RECIPES
Cuisine: French
Calories: 150
Ingredients Equipment Method Nutrition Notes

Ingredients
  

For the Dough
  • 3 cups All-purpose flour Provides the perfect base for fluffy beignets.
  • 1 tablespoon Granulated sugar Adds a touch of sweetness to balance the flavor.
  • 1 packet Active dry yeast This is the magic ingredient that helps your dough rise.
  • 1 teaspoon Salt Enhances the overall flavor of the beignets.
  • 1 cup Warm milk Activates the yeast, making your beignets light and airy.
  • 2 tablespoons Unsalted butter Contributes to a rich flavor and soft texture.
  • 1 tablespoon Pure vanilla extract Infuses the beignets with a delightful vanilla essence.
For Frying
  • 4 cups Vegetable oil Essential for achieving that irresistible golden-brown exterior.
For Dusting
  • 1 cup Powdered sugar The finishing touch that adds sweetness and a beautiful appearance.

Equipment

  • Deep fryer
  • Mixing bowls
  • Whisk
  • Rolling pin
  • Cutting Board
  • Spatula
  • Wire Rack

Method
 

How to Make Vanilla French Beignets
  1. Combine the dry ingredients in a large bowl. Mix the all-purpose flour, granulated sugar, active dry yeast, and salt until well blended.
  2. Whisk together the wet ingredients in a separate bowl. Blend the warm milk, melted unsalted butter, and pure vanilla extract until smooth.
  3. Pour the wet ingredients into the dry ingredients gradually. Stir gently to form a soft dough.
  4. Knead the dough on a lightly floured surface for about 8-10 minutes until smooth and elastic.
  5. Let rise the kneaded dough in a greased bowl for about 1.5 hours, or until it doubles in size.
  6. Punch down the dough to release air. Roll it out to about 1/4 inch thickness, then cut into 2x2 inch squares.
  7. Heat the vegetable oil in your deep fryer or large pot to 360°F.
  8. Fry the beignets in batches for about 1-2 minutes on each side until golden brown.
  9. Dust generously with powdered sugar before serving.
  10. Cool the beignets slightly on a wire rack if not serving immediately.

Nutrition

Serving: 1beignetCalories: 150kcalCarbohydrates: 20gProtein: 2gFat: 8gSaturated Fat: 5gPolyunsaturated Fat: 1gMonounsaturated Fat: 1gCholesterol: 15mgSodium: 90mgPotassium: 60mgFiber: 1gSugar: 4gVitamin A: 300IUCalcium: 10mgIron: 0.5mg

Notes

Serve with a side of hot chocolate or coffee for a delightful pairing. Enjoy fresh for the best taste!

Tried this recipe?

Let us know how it was!

Filed Under: BREAKFAST & BRUNCH

Indian Smashed Tacos

December 25, 2025 by JudyWhite Leave a Comment

There’s a certain comfort that comes from a plate of tacos, but what if I told you that you could take the classic experience to an adventurous new level? On a whim, I decided to transform my favorite weeknight meal by incorporating Indian spices and ingredients, creating these Indian Smashed Tacos that are bursting with flavor.

The first bite of these delightful mini tortillas filled with creamy, spiced potatoes and the crunch of fresh toppings was pure bliss. I love how easy it is to whip these up—perfect for a cozy dinner or an impressive dish at your next gathering. With a medley of spices like garam masala and turmeric, you’ll feel like a culinary explorer without the complicated prep.

So, whether you’re trying to break free from fast food fatigue or simply craving something new and delicious, these Indian Smashed Tacos are exactly what your taste buds need. Let’s dive into this exciting recipe that brings comfort and adventure to your table!

Why You'll Love This Indian Smashed Tacos

  • This recipe is incredibly easy to make, allowing you to enjoy a delicious meal without spending hours in the kitchen.
  • The unique blend of Indian spices creates a flavor explosion that will tantalize your taste buds and impress your guests.
  • These tacos are versatile enough to be served as a fun appetizer or a hearty main dish, making them perfect for any occasion.
  • The vibrant colors of the toppings create a visually appealing dish that is sure to draw everyone in at your next gathering.

Indian Smashed Tacos Ingredients

Get ready to spice up your taco night!

For the Potato Filling
• Sweet potatoes – provides a naturally sweet base and a creamy texture.
• Large potato – adds heartiness to the filling, enhancing the overall consistency.
• Scallions – gives a subtle onion flavor and fresh crunch to every bite.
• Salt – balances the flavors and enhances all the other ingredients.
• Sugar – a hint of sweetness helps to mellow the spices in this Indian Smashed Tacos recipe.
• Garam masala – this aromatic spice blend brings warmth and depth to your filling.
• Ground coriander – adds a citrusy touch that brightens the flavor profile.
• Ground cumin – provides a nutty, earthy essence that’s essential in Indian cuisine.
• Turmeric – gives a beautiful golden color and a warm, slightly bitter taste.
• Smoked paprika – adds a hint of smokiness that elevates the overall flavor.
• Adobo seasoning – introduces a zesty, tangy aspect to the filling.
• Lime juice – freshens up the mix and adds a zippy kick.
• Crumbled paneer – this Indian cheese adds creaminess and a delightful tang.
• Mayo – brings creaminess and a richness that ties the filling together.
• Sour cream – enhances the creaminess and adds a slight tang.
• Minced garlic – infuses the mixture with a bold, aromatic flavor.
• Cilantro – brings a burst of freshness and a hint of brightness.
• Black pepper – adds mild heat and depth to the filling.

For the Toppings
• Mini tortillas – the perfect bite-sized base for your incredible filling.
• Red onions – adds a crisp texture and a bit of sharpness to balance the flavor.
• Jalapeños – for those who crave a spicy kick that complements the creamy filling.

Now that you have all the ingredients ready, let’s get this delicious journey started!

How to Make Indian Smashed Tacos

  1. Mash the cooked sweet potatoes and large potato in a mixing bowl until smooth and creamy. This creates a delightful base for your flavorful filling; ensure there are no lumps.

  2. Mix in the scallions, salt, sugar, garam masala, ground coriander, ground cumin, turmeric, smoked paprika, adobo seasoning, and lime juice until thoroughly combined. The mixture should be aromatic and colorful!

  3. Fold in the crumbled paneer, mayo, sour cream, minced garlic, chopped cilantro, and black pepper until everything is beautifully integrated. The filling will be rich and vibrant!

  4. Warm the mini tortillas by placing them in a dry skillet for a few seconds on each side until they’re soft and pliable. This step will make them easier to fill and eat!

  5. Fill each tortilla generously with the smashed potato mixture, making sure each one is overflowing with flavor. Don’t be shy, let those tasty ingredients shine!

  6. Top with sliced red onions and jalapeños for an extra layer of crunch and spice. The colors will pop, making these tacos even more appealing.

  7. Serve immediately while they’re warm and fresh. Gather your loved ones and enjoy this delightful twist on a taco night!

Optional: Garnish with extra cilantro for a fresh finish.
Exact quantities are listed in the recipe card below.

How to Store and Freeze Indian Smashed Tacos

Fridge: Store any leftover Indian Smashed Tacos in an airtight container for up to 3 days. This keeps them fresh and ready for your next craving!

Freezer: For longer storage, freeze the filling separately from the tortillas. Use a freezer-safe container or bag, and they’ll last for up to 2 months.

Reheating: Thaw filling overnight in the fridge. Reheat gently on the stove or microwave. Warm tortillas in a skillet before serving to keep them soft and delicious.

Indian Smashed Tacos Variations

Feel free to get creative with this recipe and tailor it to your taste preferences!

  • Vegan: Substitute paneer with tofu or avocado for a creamy texture without dairy. Plant-based mayo can replace regular mayo as well.

  • Gluten-Free: Use corn tortillas instead of mini flour tortillas to keep it gluten-free and still delicious. These will hold the flavor-packed filling brilliantly!

  • Spicy: Add more jalapeños, or toss in some crushed red pepper flakes for an extra kick. A little heat can elevate your taco experience even further!

  • Herb Infusion: Swap out cilantro for fresh mint for a lighter flavor twist. Mint adds a refreshing note that pairs beautifully with the spices.

  • Cheesy Delight: Incorporate shredded cheese like cheddar or mozzarella into the filling for a gooey, melty surprise. Who doesn’t love a cheesy taco?

  • Sweet Potato Twist: Go all sweet potato by using only sweet potatoes for the filling or add mashed pumpkin for a seasonal variation.

  • Crunchy Toppings: Toss in some crushed tortilla chips or crispy fried onions on top for added texture. A little crunch makes everything better!

  • Savory Add-ins: Mix in some cooked lentils or black beans into the filling for added protein and texture. It transforms your tacos into a heartier dish!

Make Ahead Options

These Indian Smashed Tacos are a fantastic choice for meal prep, allowing you to enjoy deliciousness with minimal effort on busy weeknights! You can prepare the potato filling up to 3 days in advance—simply mash the sweet and large potatoes, mix in the spices, paneer, and creamy ingredients, and store it in an airtight container in the refrigerator. To maintain freshness, cover the mixture tightly to avoid browning from exposure. The mini tortillas can be warmed just before serving for that fresh taste. When you’re ready to eat, fill the tortillas, top with red onions and jalapeños, and enjoy these vibrant Indian Smashed Tacos that are sure to delight!

What to Serve with Indian Smashed Tacos?

Create a feast that tantalizes your taste buds and delights everyone at the table.

  • Cucumber Raita: A cool, refreshing yogurt-based side that balances the spiciness of the tacos perfectly.

  • Spicy Lentil Soup: This hearty soup adds a warm and comforting element, complementing the rich flavors of the potatoes.

  • Avocado Salad: The creamy texture of ripe avocados and the crunch of fresh cucumbers provide a delightful contrast to the tacos.

  • Mango Chutney: A sweet and tangy chutney adds a burst of tropical flavor, which enhances the overall taste experience.

  • Naan Bread: Soft and warm naan is perfect for scooping up any taco fillings that escape, enhancing the meal’s interactive nature.

  • Masala Chai: Enjoy a soothing cup of spiced tea that rounds off the meal with its aromatic warmth, making it feel complete.

Pairing these sides with your Indian Smashed Tacos not only elevates the meal but brings a delightful medley of flavors and textures to the dining experience.

Chef's Helpful Tips

  • For the Indian Smashed Tacos, ensure that your potatoes are thoroughly cooked and cooled before mashing to achieve a creamy texture without lumps.
  • When mixing in your spices, consider adjusting their amounts to match your personal taste preferences for added flavor.
  • To make folding easier, warm your tortillas just until they are pliable but not crispy, as this prevents tearing when you fill them.
  • Lastly, serve your tacos immediately after assembling to keep the tortillas soft and the flavors fresh and vibrant.

Indian Smashed Tacos Recipe FAQs

How do I select ripe sweet potatoes?
When choosing sweet potatoes, look for those that are smooth, firm, and have no dark spots or bruises. If they feel heavy for their size, that’s a great sign of freshness! Avoid any that have sprouted or have a lot of dark spots all over.

How should I store leftover Indian Smashed Tacos?
Absolutely! Store any leftover Indian Smashed Tacos in an airtight container in the refrigerator. They will stay fresh for up to 3 days. Simply reheat gently in the microwave or on the stovetop to enjoy them again.

Can I freeze the filling for Indian Smashed Tacos?
Yes, you can! To freeze, place the potato filling in a freezer-safe container or a zip-top bag, ensuring you remove as much air as possible. The filling will maintain its flavor and texture for up to 2 months. When you’re ready to enjoy, just thaw it overnight in the fridge before reheating.

What if my filling is too dry or crumbly?
If your filling turns out too dry, don’t worry! Just add a splash of lime juice or a little extra mayo and mix until you reach your desired consistency. You can also include a touch more sour cream for added creaminess. A little experimentation goes a long way!

Are there any dietary considerations for the Indian Smashed Tacos?
If you’re serving these tacos to guests with dietary restrictions, consider that they may contain allergens like dairy from the paneer and mayo. You can substitute crumbled tofu for the paneer for a dairy-free option and use vegan mayo for a completely plant-based delight. Always double-check labels for any hidden allergens!

How long do the mini tortillas stay fresh?
Mini tortillas can be stored in an airtight package at room temperature for about 1 week. Once opened, I recommend using them within 3 days for optimal flavor and texture. Don’t forget to warm them a little before serving to keep them soft and pliable!

Indian Smashed Tacos

Indian Smashed Tacos

Experience a flavor adventure with Indian Smashed Tacos, integrating classic tacos with Indian spices for a delightful twist!
Print Recipe Pin Recipe
Prep Time 20 minutes mins
Cook Time 30 minutes mins
Total Time 50 minutes mins
Servings: 4 tacos
Course: Snacks & Appetizers
Cuisine: Indian
Calories: 250
Ingredients Equipment Method Nutrition Notes

Ingredients
  

For the Potato Filling
  • 2 large sweet potatoes
  • 1 large large potato
  • 2 stalks scallions
  • 1 teaspoon salt
  • 1 teaspoon sugar
  • 1 tablespoon garam masala
  • 1 teaspoon ground coriander
  • 1 teaspoon ground cumin
  • 1 teaspoon turmeric
  • 1 teaspoon smoked paprika
  • 1 teaspoon adobo seasoning
  • 2 tablespoons lime juice
  • 1 cup crumbled paneer
  • 2 tablespoons mayo
  • 2 tablespoons sour cream
  • 2 cloves minced garlic
  • 1/4 cup cilantro
  • 1 teaspoon black pepper
For the Toppings
  • 8 mini tortillas
  • 1/2 cup red onions

Equipment

  • Mixing bowl
  • Skillet

Method
 

Instructions
  1. Mash the cooked sweet potatoes and large potato in a mixing bowl until smooth and creamy.
  2. Mix in the scallions, salt, sugar, garam masala, ground coriander, ground cumin, turmeric, smoked paprika, adobo seasoning, and lime juice until thoroughly combined.
  3. Fold in the crumbled paneer, mayo, sour cream, minced garlic, chopped cilantro, and black pepper until everything is beautifully integrated.
  4. Warm the mini tortillas by placing them in a dry skillet for a few seconds on each side until they're soft and pliable.
  5. Fill each tortilla generously with the smashed potato mixture.
  6. Top with sliced red onions and jalapeños.
  7. Serve immediately while they're warm and fresh.

Nutrition

Serving: 1tacoCalories: 250kcalCarbohydrates: 30gProtein: 6gFat: 10gSaturated Fat: 3gPolyunsaturated Fat: 1gMonounsaturated Fat: 5gCholesterol: 15mgSodium: 300mgPotassium: 550mgFiber: 4gSugar: 3gVitamin A: 1500IUVitamin C: 20mgCalcium: 200mgIron: 2mg

Notes

Optional: Garnish with extra cilantro for a fresh finish. Ensure potatoes are thoroughly cooked before mashing.

Tried this recipe?

Let us know how it was!

Filed Under: SNACKS & APPETIZERS

Toffee Crackers

December 24, 2025 by JudyWhite Leave a Comment

There’s something undeniably delightful about the crunch of a saltine cracker topped with a buttery, caramel-like coating, especially when it’s dressed up with rich chocolate and festive sprinkles. As the holiday season approaches, I find myself drawn to recipes that evoke nostalgia while being incredibly simple to whip up. Enter my Toffee Crackers – a treat I first made with friends during a cozy winter evening that turned into an unexpected tradition.

In just a matter of minutes, you can transform ordinary pantry staples into a spectacular dessert that’s perfect for holiday gatherings or a sweet indulgence at home. The secret lies in the buttery sweetness of the brown sugar toffee paired with that irresistible chocolate-hazelnut drizzle. Not only do these toffee crackers boast an incredible flavor profile, but they also offer endless versatility for topping, making them an absolute crowd-pleaser. So grab your apron and let’s get baking something that’s sure to bring joy to your kitchen and beyond!

Why You'll Love This Toffee Crackers

  • These Toffee Crackers are incredibly easy to make, requiring just a few simple ingredients and minimal prep time.
  • The rich combination of buttery toffee and chocolate creates an irresistible flavor that will leave everyone craving more.
  • They’re incredibly versatile, allowing you to mix and match toppings to suit any occasion or preference.
  • The visual appeal of these festive treats, adorned with sprinkles and chocolate, makes them an eye-catching addition to any dessert table.

Toffee Crackers Ingredients

• Get ready to create a festive treat!

For the Base
• 1 sleeve salted saltine crackers – a perfect crunchy base that adds delightful saltiness.
• 1 cup unsalted butter – provides richness and that signature toffee flavor.
• 1 cup dark brown sugar – packed tightly, it caramelizes for that classic toffee sweetness.
• 1 tsp vanilla extract – a hint of vanilla elevates the flavor beautifully.

For the Toppings
• 2 cups semi-sweet chocolate chips – melt into a luscious layer for a sweet indulgence.
• 1/2 cup chocolate-hazelnut spread – this adds an extra creamy richness, enhancing the toffee crackers.
• 1 cup Christmas sprinkles – festive colors make your toffee crackers pop, perfect for holiday cheer!
• 1/2 cup toasted slivered almonds – adds a lovely crunch and nutty flavor that complements the dish.

These Toffee Crackers are not only easy to prepare but also a delightful way to unleash your creativity with toppings!

How to Make Toffee Crackers

  1. Preheat the oven to 400°F (200°C) and prepare your baking sheet by lining it with parchment paper. This little step ensures that your toffee crackers won’t stick and will come out perfectly crisp!

  2. Arrange the saltine crackers in a single layer on the prepared baking sheet. Cover the entire surface; this will be the delicious base for your sweet topping!

  3. Melt the butter and brown sugar together in a saucepan over medium heat, stirring constantly until it starts to bubble. This caramel-like mixture will become the delightful toffee coating.

  4. Remove from heat and stir in the vanilla extract. The warm vanilla will enhance the overall flavor and bring a fragrant aroma to your kitchen.

  5. Pour the buttery mixture evenly over the crackers, ensuring they’re well coated. Spread it gently with a spatula for an even layer of sweetness!

  6. Bake for 5 minutes, or until the mixture is bubbly and golden. Keep an eye on it—this step enhances the flavor and creates that perfect toffee texture!

  7. Sprinkle the chocolate chips on top right after removing from the oven. Let them sit for a couple of minutes to melt, making it easier to spread later.

  8. Spread the melted chocolate evenly over the crackers using a spatula. Make sure every cracker is generously covered for that heavenly chocolate experience.

  9. Drizzle the chocolate-hazelnut spread over the chocolate layer. This adds an irresistible creaminess that takes your toffee crackers to a new level of yum!

  10. Sprinkle with Christmas sprinkles and toasted slivered almonds, adding both color and crunch. This festive touch makes them even more inviting for your holiday gatherings.

  11. Let cool completely before breaking into pieces—patience really pays off here, as they’ll turn into delightful, crispy bites!

Optional: Serve with a warm cup of cocoa for a cozy treat!
Exact quantities are listed in the recipe card below.

Toffee Crackers Variations

Feel free to unleash your creativity and customize these delightful treats for any occasion!

  • Gluten-Free: Substitute saltine crackers with gluten-free crackers or rice cakes. They’ll still deliver that satisfying crunch!
  • Nut-Free: Omit the toasted slivered almonds and replace with sesame seeds for a nut-free option that still packs a punch.
  • Spicy Twist: Add a sprinkle of cayenne pepper or chili powder to the chocolate layer for a surprising kick that perfectly balances sweetness.
  • Milk Chocolate: Switch the semi-sweet chocolate chips for milk chocolate for a sweeter and creamier flavor profile that kids will love.
  • Toffee Crunch: Add crushed toffee bits to the topping before baking for an extra layer of crunchy, buttery goodness.
  • Fruitful Addition: Toss in some dried fruit like cranberries or cherries as a topping to add a chewy texture and a pop of tartness.
  • Coconut Bliss: Incorporate shredded coconut on top for a tropical twist that adds both flavor and texture.
  • Minty Fresh: Use mint chocolate chips instead of semi-sweet for a refreshing flavor that brings a little holiday spirit to any gathering!

Experiment and enjoy each delicious variation; the possibilities are endless!

How to Store and Freeze Toffee Crackers

Room Temperature: Store your Toffee Crackers in an airtight container at room temperature for up to 5 days to maintain their crunch and flavor.

Fridge: If you prefer, you can refrigerate them for up to 2 weeks. Just ensure they are well-wrapped to prevent moisture.

Freezer: For longer storage, freeze the Toffee Crackers in a single layer in a freezer-safe container for up to 3 months. Thaw in the fridge before enjoying.

Reheating: To refresh the texture, reheat the crackers in an oven at 300°F (150°C) for about 5 minutes to regain their crispiness before serving!

Make Ahead Options

These Toffee Crackers are a fantastic option for meal prep, allowing you to prepare a delightful treat ahead of time! You can make the toffee mixture and coat the crackers up to 24 hours in advance. Simply store the coated crackers in an airtight container in the refrigerator to maintain their crispiness. When you’re ready to serve, just bake them for about 5 minutes to warm them up and melt the chocolate for a few minutes before spreading. Adding the chocolate-hazelnut spread and toppings can also be done right before serving, ensuring they look fresh and festive! This way, you’ll have a delicious, stress-free dessert ready to impress your guests!

What to Serve with Toffee Crackers?

The perfect pairing can elevate your Toffee Crackers from delightful treats to a complete holiday experience.

  • Hot Chocolate: A rich, creamy cup of hot chocolate provides warmth and contrasts beautifully with the sweet crunch of the crackers. Picture cozy sips by the fire, making every bite of your dessert even more comforting.

  • Vanilla Ice Cream: The smooth, cool texture of vanilla ice cream perfectly complements the buttery toffee layered with chocolate. The delightful contrast between warm and cold makes each bite a little celebration for your taste buds!

  • Caramel Sauce: Drizzling a bit more caramel sauce over the top can turn your Toffee Crackers into a river of sweet indulgence. This addition brings an extra layer of richness, just like a warm hug on a chilly day.

  • Fresh Fruit Salad: The tartness of fresh fruits like strawberries or raspberries cuts through the sweetness, creating a lovely balance. This refreshing element adds color and lightness to your snack table, making it visually appealing.

  • Sparkling Cider: A fizzy glass of sparkling cider adds festivity to your gathering, making it the perfect drink alongside your sweet treats. Its crispness pairs well, cleansing the palate between bites.

  • Coffee or Espresso: The strong, bold flavor of coffee brings the perfect contrast to the sweetness of Toffee Crackers. Enjoying a warm cup alongside them creates a delightful afternoon treat while you unwind.

  • Nutty Biscotti: Adding a couple of nutty biscotti can bring extra crunch and variety to your dessert. The flavors harmonize beautifully with the chocolate-hazelnut spread, enhancing the overall experience.

Let your Toffee Crackers shine by pairing them with these delightful options, creating a charming festive feast!

Chef's Helpful Tips

  • For your Toffee Crackers, ensure that the saltine crackers are arranged in a single layer to create a sturdy base that holds everything together.
  • When melting the butter and dark brown sugar, stir constantly to prevent burning and achieve a smooth caramel consistency.
  • Keep a close eye on the baking time; if you notice the mixture bubbling vigorously before the 5 minutes are up, remove it from the oven to avoid overcooking.
  • After adding the chocolate chips, allow them to sit for a few minutes before spreading, as this will help you achieve a nice, even layer of melted chocolate.

Toffee Crackers Recipe FAQs

How do I know if my saltine crackers are fresh enough to use?
Absolutely! Look for saltine crackers that are free from any dark spots or discoloration. If they’re crisp and flaky with a pleasant salty aroma, they’re perfect for this Toffee Crackers recipe!

How should I store my Toffee Crackers to keep them fresh?
For sure! Store your Toffee Crackers in an airtight container at room temperature for up to 5 days. This will help them maintain their delightful crunch. If you want them to last longer, refrigerate for up to 2 weeks, ensuring they’re well-wrapped to prevent moisture.

Can I freeze Toffee Crackers? If so, how?
Very much! To freeze your Toffee Crackers, first lay them in a single layer on a baking sheet and freeze them for about 1-2 hours until hard. Then, transfer them to a freezer-safe container lined with parchment paper to separate layers. They can be frozen for up to 3 months. To enjoy, simply thaw them in the refrigerator before serving!

What if my chocolate chips don’t melt completely?
If your chocolate chips don’t melt after the initial time, no worries! Just pop them back in the oven for an additional 1-2 minutes. Be gentle when spreading the chocolate; using a spatula works best. If they still resist, try heating them in the microwave in 10-second intervals until smooth.

Are there any allergies I should consider with this Toffee Crackers recipe?
Absolutely! Keep in mind that this recipe has dairy and nuts due to the butter and slivered almonds. If you’re making these for a gathering, it’s wise to ask about allergies, especially for guests with nut sensitivities. You can substitute the butter with a dairy-free alternative if needed!

Can I change the toppings for my Toffee Crackers?
The more the merrier! Feel free to get creative with the toppings. You can use crushed pretzels, various nuts, or even dried fruits to suit your taste. Just ensure that whatever you add complements the sweet toffee base. Enjoy customizing this festive dessert!

Toffee Crackers

Toffee Crackers

Toffee Crackers are delightful saltine crackers topped with buttery toffee, rich chocolate, and festive sprinkles for a perfect holiday treat.
Print Recipe Pin Recipe
Prep Time 15 minutes mins
Cook Time 5 minutes mins
Cooling Time 30 minutes mins
Total Time 50 minutes mins
Servings: 12 pieces
Course: DESSERT RECIPES
Cuisine: American
Calories: 150
Ingredients Equipment Method Nutrition Notes

Ingredients
  

Base
  • 1 sleeve salted saltine crackers a perfect crunchy base that adds delightful saltiness
  • 1 cup unsalted butter provides richness and that signature toffee flavor
  • 1 cup dark brown sugar packed tightly for that classic toffee sweetness
  • 1 tsp vanilla extract elevates the flavor beautifully
Toppings
  • 2 cups semi-sweet chocolate chips melt into a luscious layer
  • 1/2 cup chocolate-hazelnut spread adds extra creamy richness
  • 1 cup Christmas sprinkles festive colors for holiday cheer
  • 1/2 cup toasted slivered almonds adds crunch and nutty flavor

Equipment

  • Oven
  • Saucepan
  • Baking sheet
  • parchment paper
  • Spatula

Method
 

Preparation
  1. Preheat the oven to 400°F (200°C) and prepare your baking sheet by lining it with parchment paper.
  2. Arrange the saltine crackers in a single layer on the prepared baking sheet.
  3. Melt the butter and brown sugar together in a saucepan over medium heat, stirring constantly until it starts to bubble.
  4. Remove from heat and stir in the vanilla extract.
  5. Pour the buttery mixture evenly over the crackers.
  6. Bake for 5 minutes, or until the mixture is bubbly and golden.
  7. Sprinkle the chocolate chips on top right after removing from the oven.
  8. Spread the melted chocolate evenly over the crackers using a spatula.
  9. Drizzle the chocolate-hazelnut spread over the chocolate layer.
  10. Sprinkle with Christmas sprinkles and toasted slivered almonds.
  11. Let cool completely before breaking into pieces.

Nutrition

Serving: 1pieceCalories: 150kcalCarbohydrates: 17gProtein: 1gFat: 9gSaturated Fat: 5gPolyunsaturated Fat: 1gMonounsaturated Fat: 2gCholesterol: 30mgSodium: 120mgPotassium: 60mgSugar: 10gVitamin A: 100IUCalcium: 10mgIron: 0.5mg

Notes

Serve with a warm cup of cocoa for a cozy treat.

Tried this recipe?

Let us know how it was!

Filed Under: BREAKFAST & BRUNCH

  • « Previous Page
  • 1
  • …
  • 28
  • 29
  • 30
  • 31
  • 32
  • …
  • 49
  • Next Page »

Recent Posts

  • Crispy Potatoes in Oven
  • Lucky Charms Pancakes
  • Cheeseburger
  • Boiled Corn on the Cob
  • St. Patrick’s Day Dessert Parfaits

Recent Comments

No comments to show.

Footer

  • Contact
  • Privacy Policy
  • About Us
  • Terms
  • ↑ back to top

Copyright © 2024 www.Forkono.com

Table Of Content