There’s something refreshing about a vibrant salad that makes dinner feel special, and that’s exactly what my Pizza Night Salad brings to the table. Picture this: you’ve just finished a long week, and the weekend is ripe for indulgence. Instead of opting for greasy takeout, I discovered this delightful creation that perfectly marries my love for homemade food with the comfort of pizza flavors, minus the carbs.
Chickpeas have always been my go-to for a protein boost, and when paired with crunchy veggies and a tangy dressing, they add such a satisfying texture. It’s amazing how a handful of simple ingredients can come together to create a salad that feels like a celebration.
Whether you’re entertaining friends or just craving something light yet filling, this salad is a crowd-pleaser. Join me in exploring how to make the magic happen with fresh chickpeas, zesty pepperoncini, and a medley of colorful vegetables! Get ready to transform your pizza night into a feast that keeps you coming back for more.
Why You'll Love This Pizza Night Salad Recipe with Chickpeas and Veggies
- This Pizza Night Salad is incredibly easy to whip up, making it a perfect choice for busy weeknights.
- The vibrant flavors dance on your palate, combining the zest of pepperoncini and the creaminess of the dressing for an unforgettable taste experience.
- Its versatility allows you to customize the ingredients based on what you have on hand or your personal preferences, ensuring you never get bored.
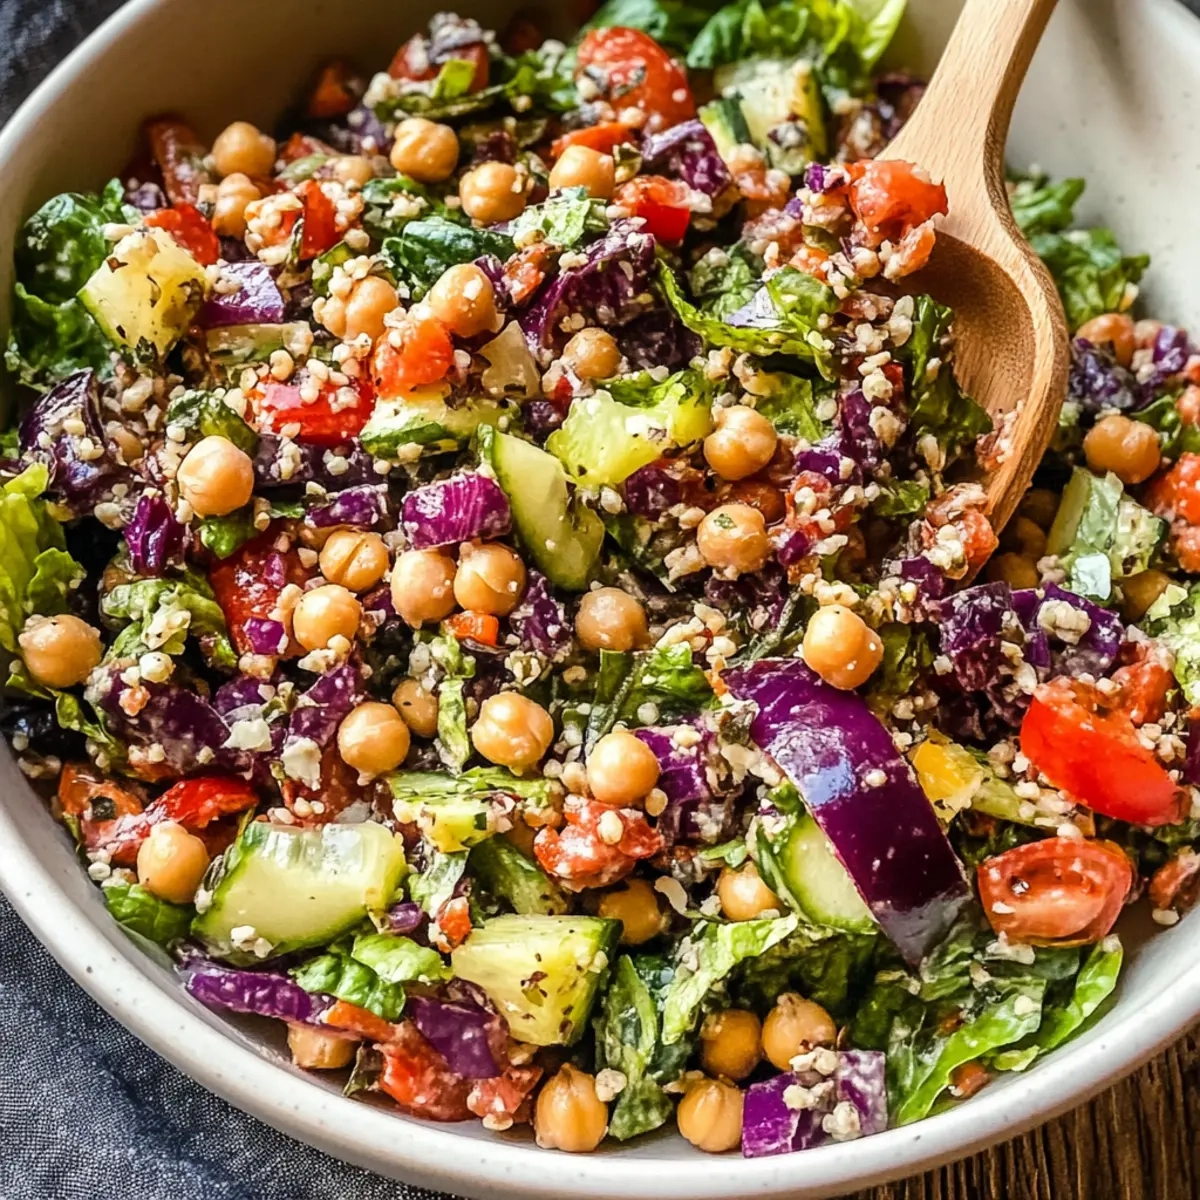
- Visually, this salad is a feast for the eyes, showcasing a rainbow of fresh veggies that will impress your guests and make your dinner table pop.
- This dish comes together in just 30 minutes, saving you time while still delivering a satisfying meal that will leave everyone asking for seconds.
- Lastly, it’s a fantastic crowd-pleaser that brings everyone together over delicious, healthy food without sacrificing the fun of pizza night.
Pizza Night Salad Ingredients
For the Dressing
• ¼ cup red wine vinegar – adds a tangy kick that brightens the salad.
• 1 tablespoon fresh thyme leaves, minced – brings an aromatic flavor that complements the veggies.
• 1 tablespoon pepperoncini pepper brine – infuses a zesty tang reminiscent of pizza night.
• 1 tablespoon vegan mayonnaise – offers a creamy texture without dairy.
• 2-3 teaspoons agave nectar/fine sugar/honey – balances the acidity of the vinegar with a hint of sweetness.
• ½ teaspoon Dijon mustard – adds depth and a subtle spiciness to the dressing.
• ½ teaspoon Tamari soy sauce – enhances the umami flavor while being gluten-free.
• 1 clove garlic, finely minced – introduces a robust flavor that elevates the dressing.
• sea salt (to taste) – essential for amplifying all the flavors.
• ground black pepper (to taste) – brings a bit of warmth and spice.
• 7 tablespoons olive oil – helps to emulsify the dressing and provides richness.
For the Salad
• 1 cup cooked chickpeas – a fantastic source of protein that adds heartiness.
• 1 cup cherry tomatoes, cut into quarters – bursts of sweetness that add color and flavor.
• ½ medium red onion, small dice (about ¾ cup diced red onion) – provides a sharp bite and crunch.
• ½ English cucumber, small dice (about 1 cup diced cucumber) – refreshing and crunchy addition.
• ½ cup pepperoncini peppers, chopped fine (stems removed) – adds a spicy kick reminiscent of pizza flavors.
• ½ cup pitted olives, chopped fine – salty and savory, perfect for a Mediterranean touch.
• 2 sun dried tomatoes packed in oil, minced (about ⅓ cup minced sun dried tomato) – intense flavor that deepens the salad’s taste.
• 2 romaine hearts, finely shredded (about 5-6 cups shredded romaine) – provides a crunchy base that holds everything together.
• 1 small head radicchio, finely shredded (about 2-3 cups shredded radicchio) – adds a beautiful color and a slight bitterness that balances the sweetness of other ingredients.
• vegan “parmesan” (for serving, optional) – sprinkle on top for a cheesy finish without dairy.
This Pizza Night Salad Recipe with Chickpeas and Veggies is sure to be a hit, delighting your taste buds with every bite!

How to Make Pizza Night Salad
-
Combine Ingredients: In a large bowl, mix together red wine vinegar, fresh thyme, pepperoncini brine, vegan mayonnaise, agave nectar (or sugar/honey), Dijon mustard, Tamari soy sauce, minced garlic, sea salt, and black pepper. Whisk until well blended.
-
Emulsify Dressing: Gradually pour in the olive oil while whisking continuously. This will create a beautifully emulsified dressing that’s creamy and smooth.
-
Mix the Salad: In another bowl, toss together the chickpeas, cherry tomatoes, red onion, cucumber, pepperoncini peppers, olives, sun dried tomatoes, romaine hearts, and radicchio until everything is evenly distributed and colorful.
-
Dress the Salad: Drizzle the prepared dressing over the salad mix and gently toss to ensure every bite is coated in that flavorful goodness.
-
Serve Immediately: Transfer to a serving platter and garnish with optional vegan “parmesan” for a delightful finishing touch. Enjoy!
Optional: Serve with crusty bread for a complete pizza-inspired meal.
Exact quantities are listed in the recipe card below.
What to Serve with Pizza Night Salad?
Elevate your dining experience and bring balance to this vibrant and tangy salad with delightful accompaniments.
-
Garlic Bread: Perfectly crunchy and buttery, garlic bread is a comforting pairing that complements the bold flavors of the salad. Plus, who doesn’t love a little dunking action?
-
Roasted Veggie Platter: A warm array of roasted vegetables will add a lovely depth of flavor and texture, enhancing the freshness of your salad while providing a hearty side option.
-
Italian Pasta Salad: This light and zesty pasta salad bursting with Mediterranean flavors brings a delightful contrast to your meal, ensuring every bite tingles your taste buds.
-
Grilled Lemon Herb Chicken: Juicy and perfectly seasoned, this protein addition will harmonize beautifully with the chickpeas, making for a filling and accessible dinner while staying delightfully fresh.
-
Olive Tapenade Crostini: Crispy bread topped with a savory olive tapenade offers an incredible burst of flavor that pairs well with the tangy notes in the salad. A simply irresistible appetizer!
-
Sparkling Water with Lime: Refreshing and light, this drink elevates the whole meal and cleanses the palate between bites, providing a fizzy and zesty touch.
-
Chocolate Mousse: For a sweet finish, indulge in rich, creamy chocolate mousse that offers a decadent contrast to the fresh and zesty salad.
Each of these pairings complements the essence of the Pizza Night Salad Recipe with Chickpeas and Veggies while adding variety and joy to your meal!
Pizza Night Salad Variations
Feel free to make this salad your own with these fun and flavorful twists!
-
Gluten-Free: Switch out Tamari soy sauce for coconut aminos to keep the salad gluten-free without losing flavor.
-
Creamy Avocado: Add sliced or diced avocado for an extra creamy texture that pairs perfectly with the sharp flavors of the dressing.
-
Extra Crunch: Toss in some toasted pine nuts or sunflower seeds for a delightful crunch that enhances the texture even more. The added nuttiness brings a lovely dimension to your salad.
-
Spicy Kick: Sprinkle in some red pepper flakes or diced jalapeños for a hotter version. This twist transforms the salad into a zesty delight that wakes up your taste buds!
-
Herb Explosion: Experiment with fresh basil or parsley in addition to thyme for an aromatic adventure. These herbs can elevate the freshness and flavor profile, creating a garden-fresh taste.
-
Roasted Veggies: For a hearty twist, mix in some roasted bell peppers or zucchini. Roasting brings out their natural sweetness, adding depth and warmth to your salad.
-
Fruit Fusion: Diced apples or pears can bring a delightful sweetness and crunch—balance those savory chickpeas with a touch of fruitiness. It’s a lovely surprise that makes every bite feel more special.
-
Cheesy Addition: Mix in crumbled feta or goat cheese for a salty, creamy richness. This addition enhances that pizza vibe, making it even more indulgent and satisfying!
How to Store and Freeze Pizza Night Salad
Fridge: Store any leftover Pizza Night Salad in an airtight container for up to 3 days. Keep the dressing separate if possible to maintain the crispness of the veggies.
Freezer: It’s not recommended to freeze this salad due to the high water content in fresh vegetables. Freezing might alter the texture when thawed.
Reheating: Since this salad is served cold, there’s no need to reheat. Just give it a good toss before serving to refresh the flavors!
Make Ahead: You can prepare the dressing in advance and store it in the fridge for up to a week. Assemble the salad just before serving for the best taste.
Make Ahead Options
This Pizza Night Salad Recipe with Chickpeas and Veggies is an excellent choice for meal prep, saving you time on busy weeknights! You can prepare the dressing and salad components separately up to 3 days in advance. Simply whisk together the dressing ingredients and store it in an airtight container in the refrigerator. Chop the veggies and combine the chickpeas, cherry tomatoes, red onion, cucumber, pepperoncini peppers, olives, sun dried tomatoes, romaine, and radicchio in another bowl, then refrigerate them in a separate container. When you’re ready to serve, just drizzle the dressing over the salad mix, toss gently, and enjoy a refreshing and satisfying dish that tastes just as delicious as when freshly made!
Chef's Helpful Tips
- For the Pizza Night Salad, ensure you chop your veggies uniformly to allow for even texture and flavor in every bite.
- When whisking your dressing, add the olive oil gradually to create a stable emulsion that won’t separate.
- To enhance flavors, let the salad sit for about 10 minutes after dressing it, allowing the ingredients to marinate slightly.
- For the best flavor, serve your salad immediately after mixing to maintain the crispness of the veggies.
Pizza Night Salad Recipe with Chickpeas and Veggies Recipe FAQs
What type of chickpeas should I use?
Absolutely! You can use canned chickpeas for convenience; just make sure to rinse and drain them well to remove excess sodium. If you have time, cooking dried chickpeas enhances the flavor and texture. Soak them overnight and boil until tender for the best results!
How do I store leftovers of Pizza Night Salad?
Very simple! Keep any leftover Pizza Night Salad in an airtight container for up to 3 days. I recommend storing the dressing separately to maintain the crunchiness of the fresh veggies. Just mix it in right before serving for the best experience!
Can I freeze this salad?
Not really! It’s not recommended to freeze the Pizza Night Salad due to the high water content in fresh vegetables, which can become mushy when thawed. Instead, enjoy it fresh and savor that vibrant crunch!
What should I do if my dressing doesn’t emulsify?
No worries! If the dressing won’t emulsify, try whisking it continuously as you slowly drizzle in the olive oil. If it’s still separating, add a teaspoon of mustard or an extra bit of vegan mayonnaise to help bind it together. You could also blend it in a small food processor for an ultra-smooth consistency!
Is this salad suitable for those with allergies?
Very! Most ingredients in the Pizza Night Salad are plant-based, making it great for vegans and vegetarians. If you have nut allergies, just double-check your vegan mayonnaise to ensure it’s free of nuts. For gluten sensitives, make sure to use tamari and confirm that all ingredients are certified gluten-free.
How can I customize the salad to suit my tastes?
The more the merrier! You can add or substitute ingredients based on your preferences; try adding avocados for creaminess, peppers for an extra crunch, or even grains like quinoa or farro to make it heartier. Enjoy playing with flavors while maintaining the pizza theme!
Pizza Night Salad Recipe with Chickpeas and Veggies
Ingredients
Equipment
Method
- In a large bowl, mix together red wine vinegar, fresh thyme, pepperoncini brine, vegan mayonnaise, agave nectar (or sugar/honey), Dijon mustard, Tamari soy sauce, minced garlic, sea salt, and black pepper. Whisk until well blended.
- Gradually pour in the olive oil while whisking continuously to create a beautifully emulsified dressing that’s creamy and smooth.
- In another bowl, toss together the chickpeas, cherry tomatoes, red onion, cucumber, pepperoncini peppers, olives, sun dried tomatoes, romaine hearts, and radicchio until everything is evenly distributed and colorful.
- Drizzle the prepared dressing over the salad mix and gently toss to ensure every bite is coated in that flavorful goodness.
- Transfer to a serving platter and garnish with optional vegan 'parmesan' for a delightful finishing touch. Enjoy!