Forkono

  • BREAKFAST & BRUNCH
  • DESSERT RECIPES
  • DINNER RECIPES
  • LUNCH RECIPES
  • About uS
  • SNACKS & APPETIZERS
menu icon
go to homepage
  • BREAKFAST & BRUNCH
  • DESSERT RECIPES
  • DINNER RECIPES
  • LUNCH RECIPES
  • About uS
  • SNACKS & APPETIZERS
search icon
Homepage link
  • BREAKFAST & BRUNCH
  • DESSERT RECIPES
  • DINNER RECIPES
  • LUNCH RECIPES
  • About uS
  • SNACKS & APPETIZERS
×

Crispy Chicken Tenders

February 5, 2026 by JudyWhite Leave a Comment

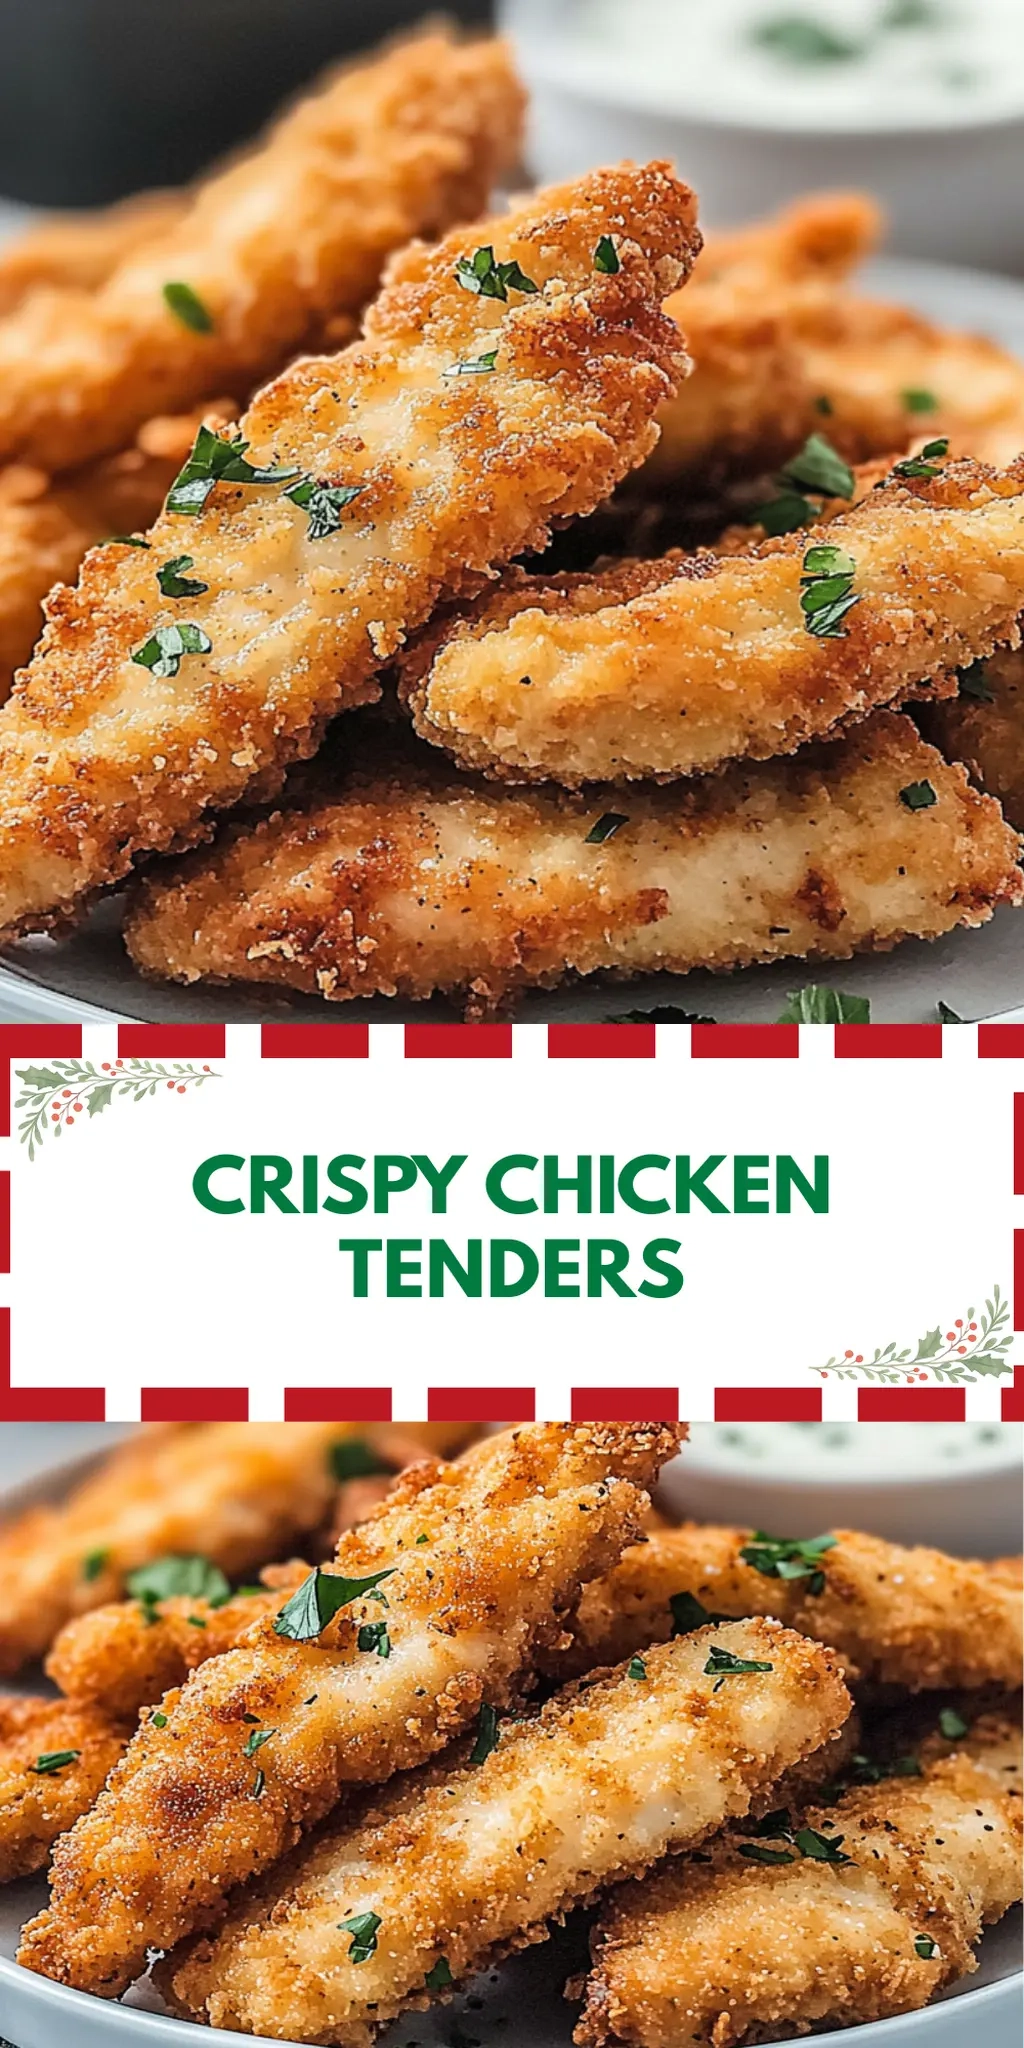
There’s an undeniable joy that comes with a perfectly crispy chicken tender, isn’t there? That satisfying crunch as you take a bite into the golden coating unleashes a rush of nostalgia—reminding me of family gatherings and casual dinners that always ended in laughter. Perfectly seasoned and impossibly tender on the inside, these crispy chicken tenders have become a beloved staple in my kitchen, especially when I’m craving something hearty but simple to make.

After a week of fast food fatigue, I decided to whip up a batch of these homemade delights, and trust me, they completely delivered. Whether you choose to fry them for that extra crunch or bake them for a healthier twist, you’re in for a treat. I love how versatile they are, too—these tenders can be dressed up with your favorite dipping sauces or thrown into wraps and salads. It’s a dish that caters to everyone in the family, and it comes together in just 35 minutes!

Let’s roll up our sleeves and dive into the deliciousness of crafting your very own crispy chicken tenders.

Why You'll Love This Crispy Chicken Tenders

  • These crispy chicken tenders are incredibly easy to make, allowing you to whip up a tasty meal in just 35 minutes.
  • The flavor is absolutely irresistible, with a perfectly seasoned crunchy coating that everyone will adore.
  • Their versatility shines through as you can enjoy them with a variety of dipping sauces or incorporate them into salads and wraps.
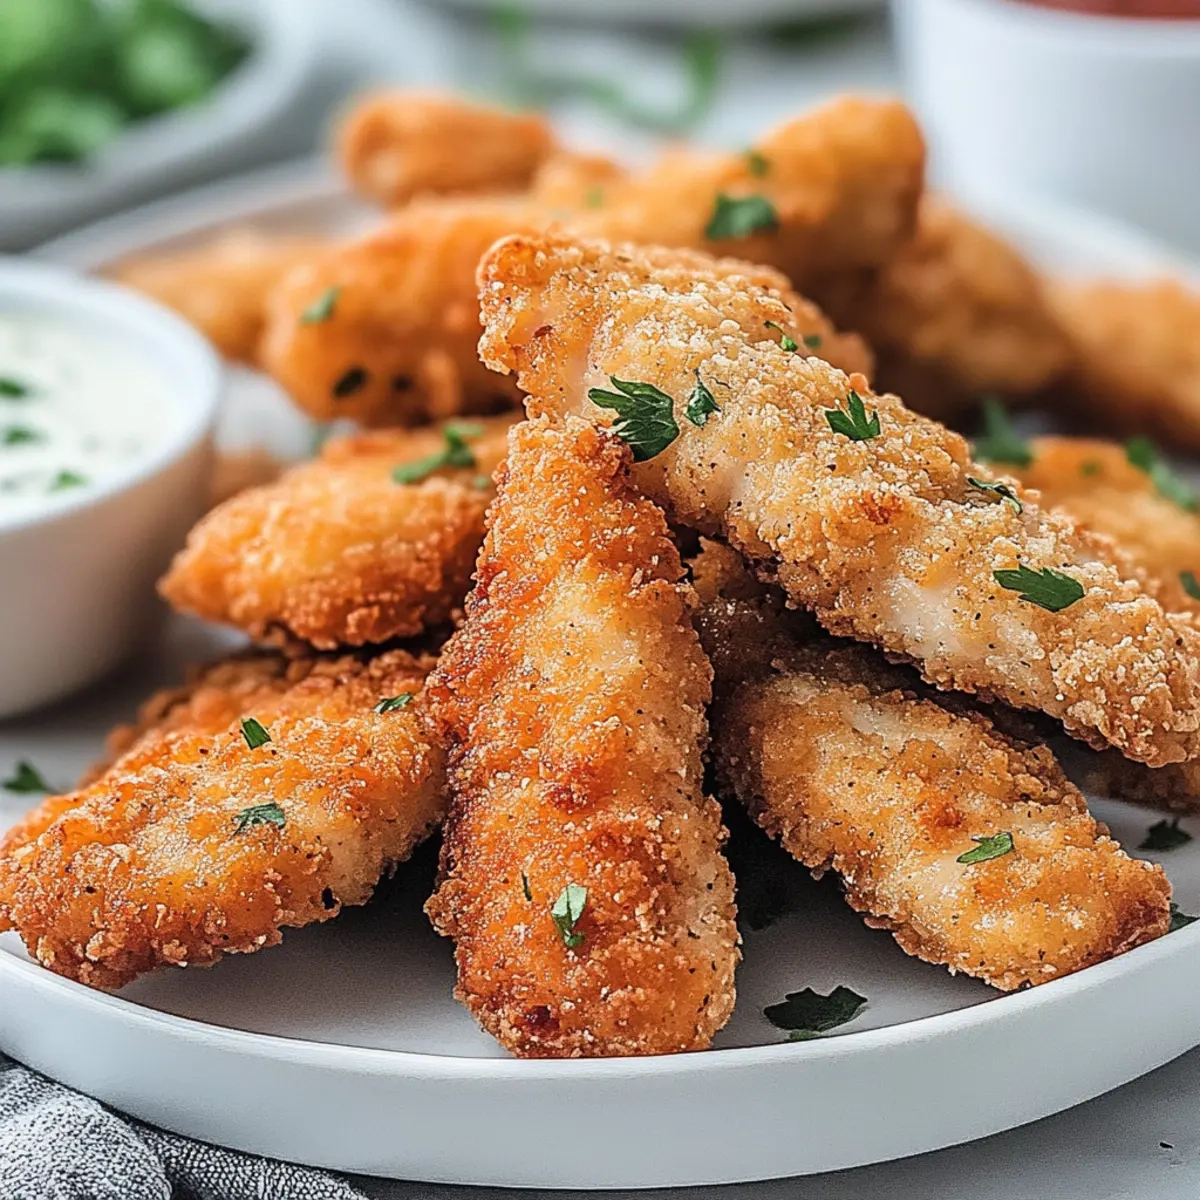
  • Plus, the visual appeal of these golden, crispy tenders is sure to impress family and friends alike.

Crispy Chicken Tenders Ingredients

• Gather your pantry staples for these delightful crispy chicken tenders!

For the Chicken

  • 3 boneless, skinless chicken breasts – cut them into strips for the perfect size and texture.

For the Breading

  • 1 cup all-purpose flour – this helps create that essential crispiness.
  • 2 large eggs – these act as a binder for the breadcrumbs.
  • 1 cup seasoned breadcrumbs – for a flavorful, crunchy coating.

For Seasoning

  • 1 tsp salt – enhances the overall flavor of the tenders.
  • 1/2 tsp black pepper – adds a little kick to your crispy chicken tenders!

For Frying

  • 1/2 cup vegetable oil – necessary for frying to achieve that golden brown perfection.

How to Make Crispy Chicken Tenders

  1. Preheat your oven to 400°F (200°C) if you opt for baking. This ensures even cooking and helps achieve that delightful golden color.

  2. Slice the chicken breasts into strips about 1 inch wide. This size is perfect for ensuring they cook evenly and are easy to handle for dipping!

  3. Arrange a breading station with three separate bowls: one for flour mixed with salt and pepper, one for the beaten eggs, and another for the seasoned breadcrumbs. This setup makes the process seamless and fun!

  4. Coat each chicken strip by first dipping it into the seasoned flour, then into the beaten eggs, and finally into the breadcrumbs for a crispy finish. Make sure each piece is well-coated for maximum crunch!

  5. Fry in a skillet: Heat the vegetable oil over medium heat, then fry each piece until they’re golden brown—about 3-4 minutes per side. If baking, place the strips on a lined baking sheet, spray lightly with cooking spray, and bake for 20-25 minutes until cooked through and beautifully golden.

Optional: Serve with your favorite dipping sauces for an extra flavor boost!

Exact quantities are listed in the recipe card below.

What to Serve with Crispy Chicken Tenders?

Nothing transforms a dish into a delightful feast quite like the perfect pairings alongside it.

  • Creamy Mashed Potatoes: The buttery, smooth texture of mashed potatoes offers a comforting counterpart to the crispy tenders. It’s a classic pairing that pleases palates of all ages!

  • Fresh Garden Salad: A crisp, refreshing salad brimming with colorful vegetables adds a bright balance to the hearty chicken. Think of it as a cool contrast to the warm tenders.

  • Honey Mustard Dipping Sauce: A sweet and tangy sauce that elevates the chicken tenders to new levels. The flavors meld beautifully, creating an irresistible bite that keeps you coming back for more.

  • Sweet Potato Fries: The slight sweetness and crunchy texture of fries complement the salty, savory chicken perfectly. This combination brings a delightful crunch to every bite.

  • Coleslaw: A crunchy, tangy slaw provides a zesty kick that pairs wonderfully with the chicken. It adds great texture and flavor, making every mouthful a perfectly balanced experience.

  • Garlic Bread: The crispy, buttery goodness of garlic bread is great for mopping up any leftover sauce from your tenders. Plus, who doesn’t love a slice of garlic bread with a hearty meal?

  • Sparkling Lemonade: A refreshing drink like sparkling lemonade cuts through the richness of the chicken, cleansing your palate with each sip. It adds a burst of citrus that brightens the entire meal!

  • Chocolate Chip Cookies: Finish off your meal on a sweet note with warm chocolate chip cookies. The combination of the crispy chicken and soft cookies creates a comforting, nostalgic finish to your dining experience.

Make Ahead Options

These Crispy Chicken Tenders are a fantastic option for meal prep enthusiasts! You can prepare the chicken strips and coat them with the flour, egg, and breadcrumb mixture up to 24 hours in advance, keeping them covered in the refrigerator until you’re ready to cook. Just make sure to store them in a single layer to maintain that delightful crunch. When you’re ready to serve, simply heat your oil if frying or preheat your oven if baking, then cook them directly from the fridge—no need to thaw! This way, you’ll enjoy the same deliciousness with minimal effort, perfect for those busy weeknights when you crave homemade comfort.

How to Store and Freeze Crispy Chicken Tenders

Room Temperature: Keep crispy chicken tenders out for no more than 2 hours to prevent spoilage.

Fridge: Store leftovers in an airtight container for up to 3 days. Reheat in the oven for the best texture.

Freezer: For longer storage, freeze cooked chicken tenders in a single layer for up to 3 months. Use freezer-safe bags to prevent freezer burn.

Reheating: Reheat from frozen by baking at 400°F (200°C) for about 20-25 minutes or until heated through to maintain crispiness.

Crispy Chicken Tenders Variations

Feel free to mix and match ingredients to create your perfect version of these delicious crispy chicken tenders!

  • Gluten-Free: Substitute all-purpose flour with gluten-free flour and use gluten-free breadcrumbs for the same satisfying crunch.

  • Spicy: Add 1-2 tsp of cayenne pepper or hot paprika to the flour for a fiery kick that lingers with each bite. The heat elevates the dish and tantalizes the taste buds!

  • Herb-Infused: Mix dried herbs like oregano, thyme, or rosemary into the breadcrumbs for a fresh and aromatic twist. This herb addition enchants every mouthful with a burst of flavor!

  • Parmesan Cheese: Blend grated Parmesan cheese into your breadcrumbs for an extra cheesy crust that boasts a rich, savory note. This cheese infusion takes the crunchiness to new heights!

  • Air-Fryer: For a healthier option, coat your chicken tenders in the same way and place them in an air fryer set to 400°F (200°C) for about 10-12 minutes, flipping halfway. They’ll still be crispy without the extra oil.

  • Asian Flair: Incorporate sesame seeds into the breadcrumb coating and serve with a soy dipping sauce for a fun twist on traditional tender flavors. This unique pairing makes for a delightful culinary adventure!

  • Buttermilk Soak: Soak chicken strips in buttermilk for a few hours before breading to enhance tenderness and flavor. This simple step ensures a moist and succulent bite.

  • Zesty Citrus: Add lemon or lime zest to the breadcrumbs for a refreshing citrusy zing that brightens the overall flavor profile. This unexpected twist will surprise and delight your family and friends!

Chef's Helpful Tips

  • When preparing the Crispy Chicken Tenders, ensure that the oil is hot enough before frying to achieve the perfect golden brown color and prevent the tenders from becoming soggy.
  • Avoid overcrowding the skillet while frying, as this can lower the oil temperature and result in uneven cooking.
  • For extra crunch, consider double-breading the chicken strips by repeating the flour, egg, and breadcrumb process.
  • If baking, remember to flip the tenders halfway through cooking to ensure they brown evenly and get crispy on both sides.

Crispy Chicken Tenders Recipe FAQs

How do I know if my chicken is ripe and ready to use?
Absolutely! When selecting chicken, look for a fresh, pink color without dark spots or a foul smell. The skin should be moist but not slimy, and avoid any packages with excess liquid. Always check the sell-by date too!

How should I store leftover crispy chicken tenders?
Very! Store any leftover crispy chicken tenders in an airtight container in the fridge for up to 3 days. Make sure they are completely cooled down before sealing them. When it’s time to enjoy them again, reheating in the oven is best to restore their crispy texture.

Can I freeze crispy chicken tenders? If so, how?
Absolutely! To freeze, allow the cooked chicken tenders to cool completely. Then, place them in a single layer on a baking sheet to freeze for about 1 hour. Once frozen, transfer them to freezer-safe bags and seal tightly to prevent freezer burn. They can be stored for up to 3 months. When you’re ready to enjoy them, bake straight from frozen!

What can I do if my chicken tenders aren’t crispy?
No worries! If your crispy chicken tenders turn out soggy instead of crispy, it likely means the oil wasn’t hot enough when frying, or they were overcrowded in the pan. Make sure the oil reaches around 350°F (175°C) before adding the chicken, and avoid overcrowding to ensure each piece cooks evenly. If baking, turn them halfway through to promote an even crisp.

Are there any dietary considerations I should keep in mind for this recipe?
Of course! If you’re catering to specific dietary restrictions, consider using gluten-free breadcrumbs and flour for a gluten-free version. Also, ensure your chicken is sourced from a trusted supplier to avoid any allergens. Always check for allergies before serving, especially with those who may have sensitivities to eggs or gluten.

Crispy Chicken Tenders

Crispy Chicken Tenders

Enjoy these Crispy Chicken Tenders with a perfectly seasoned crunchy coating, great for family gatherings or casual dinners.
Print Recipe Pin Recipe
Prep Time 10 minutes mins
Cook Time 25 minutes mins
Total Time 35 minutes mins
Servings: 4 tenders
Course: DINNER RECIPES
Cuisine: American
Calories: 350
Ingredients Equipment Method Nutrition Notes

Ingredients
  

For the Chicken
  • 3 pieces boneless, skinless chicken breasts cut into strips
For the Breading
  • 1 cup all-purpose flour creates essential crispiness
  • 2 large eggs acts as a binder
  • 1 cup seasoned breadcrumbs for crunchy coating
For Seasoning
  • 1 tsp salt enhances flavor
  • 1/2 tsp black pepper adds a little kick
For Frying
  • 1/2 cup vegetable oil for frying

Equipment

  • Skillet
  • Baking sheet
  • bowls

Method
 

How to Make Crispy Chicken Tenders
  1. Preheat your oven to 400°F (200°C) if you opt for baking.
  2. Slice the chicken breasts into strips about 1 inch wide.
  3. Arrange a breading station with one bowl for flour mixed with salt and pepper, one for beaten eggs, and another for seasoned breadcrumbs.
  4. Coat each chicken strip by first dipping it into the seasoned flour, then into the beaten eggs, and finally into the breadcrumbs.
  5. Fry in a skillet over medium heat until golden brown—about 3-4 minutes per side or bake for 20-25 minutes.

Nutrition

Serving: 1tenderCalories: 350kcalCarbohydrates: 20gProtein: 25gFat: 20gSaturated Fat: 3gPolyunsaturated Fat: 2gMonounsaturated Fat: 8gCholesterol: 80mgSodium: 600mgPotassium: 300mgFiber: 1gSugar: 1gVitamin A: 5IUVitamin C: 2mgCalcium: 2mgIron: 8mg

Notes

Serve with your favorite dipping sauces for an extra flavor boost.

Tried this recipe?

Let us know how it was!

Filed Under: DINNER RECIPES

Cuban Sliders

February 5, 2026 by JudyWhite Leave a Comment

When the rich aroma of slow-cooked pork fills my kitchen, it instantly transports me to a sun-kissed street in Havana. It’s amazing how a simple meal can evoke such nostalgia, isn’t it? That’s the beauty of these Cuban Sliders—every bite is a trip to the tropics, blending tender, seasoned pork with gooey Swiss cheese and tangy dill pickles, all nestled in soft slider buns.

I discovered this recipe during a particularly long day craving something hearty yet hassle-free. The slow cooker does all the hard work while you sip on a refreshing beverage and catch up on your favorite show. From game-day gatherings to cozy family dinners, these sliders are the perfect crowd-pleaser, effortlessly elevating any occasion.

So, roll up your sleeves and let’s whip up a batch of these Cuban Sliders, ensuring that your next meal is not just delicious, but also a memorable experience!

Why You'll Love This Cuban Sliders

  • These Cuban Sliders are the epitome of ease, allowing you to enjoy a flavorful meal without spending all day in the kitchen.
  • The combination of tender slow-cooked pork, gooey Swiss cheese, and tangy pickles creates an explosion of flavor that will keep everyone coming back for more.
  • They’re incredibly versatile, perfect for casual family dinners or festive gatherings, making them a go-to choice for any occasion.
  • Not to mention, the visual appeal of these sliders, golden brown and inviting, will surely impress your guests and leave a lasting impression.

Cuban Sliders Ingredients

For the Sliders

  • Slider buns – a perfect soft vessel to hold all the delicious fillings; opt for whole-wheat for a healthier twist.
  • Pork shoulder – this tender cut is ideal for slow cooking, ensuring melt-in-your-mouth bites; feel free to substitute with chicken or jackfruit for a lighter option.
  • Swiss cheese – its creamy texture balances the flavors beautifully; Gouda can be a delightful substitute if you’re looking for a smokier profile.
  • Dill pickles – they add that signature tang that cuts through the richness of the pork; if you prefer a sweeter flavor, try bread-and-butter pickles instead.
  • Yellow mustard – it provides a zesty kick; Dijon mustard adds a touch more sophistication if desired.

For the Butter Mixture

  • Butter – it brings richness and helps achieve that golden-brown crust; feel free to use olive oil for a lighter option.
  • Garlic powder – this adds savory depth to your sliders; fresh minced garlic could be a fantastic substitute if you’re feeling adventurous.

Remember, these ingredients come together to create the delightful Cuban Sliders that will transport your taste buds straight to the beautiful streets of Cuba!

How to Make Cuban Sliders

  1. Preheat your oven to 350°F (175°C) and lightly grease a baking dish with nonstick spray. This prepares a warm, welcoming space for your delicious sliders.

  2. Season the pork shoulder with salt and pepper, and place it in a slow cooker with just a splash of water. Cook it on low for about 8 hours until it’s tender and shreddable, filling your home with mouthwatering aromas.

  3. Shred the cooked pork using two forks, letting it become fluffy and inviting. While you work, slice the slider buns in half horizontally and smother each bottom half with yellow mustard for that tangy base.

  4. Layer the shredded pork on the buns, followed by the velvety Swiss cheese slices and crunchy dill pickles. Gently replace the tops of the slider buns, creating bite-sized treasures filled with flavor.

  5. Mix the melted butter with garlic powder in a small bowl, and then brush this tasty mix over the assembled sliders, ensuring they soak up all that rich flavor.

  6. Cover the baking dish with foil and pop it in the oven for 15 minutes. Then remove the foil and bake for an additional 10 minutes until the sliders are golden brown and calling your name.

Optional: Serve with extra dill pickles on the side for a delightful crunch!

Exact quantities are listed in the recipe card below.

Cuban Sliders Variations

Feel free to get creative with these Cuban Sliders, ensuring they match your tastes and dietary needs!

  • Pulled Chicken: Swap pork shoulder for slow-cooked pulled chicken for a lighter but equally flavorful option. You won’t sacrifice taste here!

  • Vegetarian Delight: Substitute with jackfruit or mushrooms, seasoned and shredded, offering a hearty bite that satisfies without meat.

  • Cheese Swap: Use Gouda or pepper jack cheese to add a smokier or spicier kick, respectively, elevating the flavor profile beautifully.

  • Whole Wheat Buns: Opt for whole wheat slider buns to add a nutritious twist; your sliders will be as wholesome as they are delicious.

  • Spicy Kick: Add sliced jalapeños or a dash of hot sauce in the layering process for those who crave a bit of heat. This will make your sliders sing!

  • Herbed Butter: Mix in fresh herbs like parsley or thyme with the melted butter for a fragrant twist. It enhances the savory notes of the dish beautifully.

  • Sweet Pickles: Try bread-and-butter pickles instead of dill for a sweeter contrast that complements the rich, savory pork.

  • Mustard Variety: Experiment with spicy brown mustard or whole grain mustard for a more complex flavor profile that adds sophistication.

Make Ahead Options

These Cuban Sliders are perfect for busy weeknights or meal prep! You can season and place the pork shoulder in the slow cooker up to 24 hours in advance, allowing those flavors to deepen. Once cooked, shred the pork and layer it on the slider buns with Swiss cheese and dill pickles, then wrap the assembled sliders in plastic wrap and refrigerate for up to 3 days. To maintain quality, avoid adding the butter mixture until you’re ready to bake; this keeps the buns soft. When you’re ready to serve, brush the melted garlic butter over the sliders, cover with foil, and bake at 350°F (175°C) for 15 minutes, then an additional 10 minutes uncovered for a golden finish. Enjoy the delicious ease of these make-ahead Cuban Sliders!

What to Serve with Cuban Sliders?

Imagine a vibrant soirée where plates are filled with flavor and laughter fills the air—these Cuban Sliders are the perfect centerpiece of such a gathering.

  • Crispy French Fries: Their golden crunch complements the tender sliders, making every bite a delightful contrast in texture.

  • Classic Coleslaw: This refreshing side adds a cool, tangy element that cuts through the richness of the pork and cheese.

  • Sweet Potato Fries: The natural sweetness enhances the savory sliders, creating a delicious balance that your guests will love.

  • Garlic Butter Corn On The Cob: Juicy, sweet corn with a buttery garlic finish elevates your meal, bringing a touch of summer to your table.

  • Black Bean Salad: Packed with protein and vibrant flavors, this can add a refreshing crunch alongside the sliders and keep things light.

  • Mojito Mocktail: A minty fizz pairs beautifully with the Cuban flavors, creating a tropical vibe that complements the sliders wonderfully.

  • Mango Salsa: The fruity brightness of mango salsa atop the sliders adds an unexpected twist of flavor and freshness.

  • Chocolate Chip Cookies: End the meal on a sweet note with warm, gooey cookies that everyone will be reaching for.

Tailoring these sides to your Cuban Sliders ensures a delicious harmony of flavors that will make your gathering unforgettable!

Storage Tips for Cuban Sliders

Room Temperature: Allow Cuban Sliders to cool completely before storing, then keep them at room temperature for up to 2 hours.

Fridge: Store leftover sliders in an airtight container for up to 3 days. For best results, separate the sliders and toppings to maintain texture.

Freezer: Wrap sliders tightly in plastic wrap and aluminum foil to freeze for up to 3 months. Thaw overnight in the fridge before reheating.

Reheating: To reheat, warm the sliders in the oven at 350°F (175°C) for about 10-15 minutes, until heated through and the cheese is melty again.

Chef's Helpful Tips

  • When making Cuban Sliders, ensure that you season the pork shoulder generously to enhance its flavor while it cooks.
  • To prevent the buns from becoming soggy, consider toasting them lightly before adding the mustard and fillings.
  • Using two forks to shred the pork can create a fluffier texture, which makes the sliders more delightful to eat.
  • Remember to let the assembled sliders rest for a few minutes after baking; this helps the flavors meld together beautifully.

Cuban Sliders Recipe FAQs

How do I choose the best pork shoulder for my Cuban Sliders?
Absolutely! When selecting a pork shoulder, look for one with evenly distributed marbling and a bright pink color. Avoid cuts that have dark spots or excessive liquid in the packaging, as these can indicate spoilage. A good cut ensures tenderness and richer flavor in your sliders.

How should I store leftover Cuban Sliders?
Very! Allow your Cuban Sliders to cool completely before placing them in an airtight container. They can be stored in the fridge for up to 3 days. For best results, I recommend separating the buns from the fillings to prevent sogginess. Just gently reassemble before reheating!

Can I freeze Cuban Sliders? If so, how?
Yes, you can freeze them! To freeze your Cuban Sliders, wrap each slider tightly in plastic wrap and then in aluminum foil to prevent freezer burn. They can be stored for up to 3 months. When you’re ready to enjoy them again, simply thaw overnight in the fridge before reheating in the oven at 350°F (175°C) for about 10-15 minutes until warmed through.

What if my pork isn’t shredding well?
If your pork shoulder isn’t shredding well after 8 hours, it may need a bit more time in the slow cooker. I suggest checking the internal temperature; it should reach at least 195°F to 205°F for optimal shredding. If it’s not there yet, cover it up and let it cook for another 1-2 hours. Be patient, as the result will be worth the wait!

Are there any dietary considerations with Cuban Sliders?
Absolutely! If you have a gluten intolerance, consider using gluten-free slider buns. For those with dairy sensitivities, swap the Swiss cheese with a dairy-free cheese alternative. As always, make sure to check labels for any ingredients that could trigger allergies. When serving, be mindful of guests’ dietary needs, just to ensure everyone can indulge in these flavorful sliders!

How long will Cuban Sliders stay fresh in the fridge?
Cuban Sliders will remain fresh in the fridge for about 3 days. Be sure they’re in an airtight container, and if possible, store the sliders without toppings, keeping the buns and fillings separate for maximum freshness. If you notice any discoloration or an off smell, it’s best to err on the side of caution and discard them. Enjoy!

Cuban Sliders

Cuban Sliders

Cuban Sliders are delicious bite-sized sandwiches filled with slow-cooked pork, Swiss cheese, and pickles, perfect for any occasion.
Print Recipe Pin Recipe
Prep Time 15 minutes mins
Cook Time 8 hours hrs
Baking Time 25 minutes mins
Total Time 8 hours hrs 40 minutes mins
Servings: 8 sliders
Course: LUNCH RECIPES
Cuisine: Cuban
Calories: 250
Ingredients Equipment Method Nutrition Notes

Ingredients
  

For the Sliders
  • 8 pieces slider buns whole-wheat for a healthier twist
  • 3 pounds pork shoulder substitute with chicken or jackfruit for a lighter option
  • 8 slices Swiss cheese Gouda can be a substitute
  • 1 cup dill pickles bread-and-butter pickles can be used instead
  • 2 tablespoons yellow mustard Dijon mustard can be used for a sophisticated touch
For the Butter Mixture
  • 1/2 cup butter olive oil can be a lighter option
  • 1 teaspoon garlic powder fresh minced garlic can be a substitute

Equipment

  • Slow Cooker
  • Oven
  • Baking dish
  • nonstick spray
  • Mixing bowl

Method
 

How to Make Cuban Sliders
  1. Preheat your oven to 350°F (175°C) and lightly grease a baking dish with nonstick spray.
  2. Season the pork shoulder with salt and pepper. Place it in a slow cooker with a splash of water and cook on low for about 8 hours.
  3. Shred the cooked pork using two forks, while slicing the slider buns in half horizontally and smothering each bottom half with yellow mustard.
  4. Layer the shredded pork on the buns, followed by Swiss cheese slices and dill pickles. Replace the top buns.
  5. Mix melted butter with garlic powder and brush over the assembled sliders.
  6. Cover the baking dish with foil and bake for 15 minutes. Remove the foil and bake for another 10 minutes.

Nutrition

Serving: 1sliderCalories: 250kcalCarbohydrates: 28gProtein: 15gFat: 10gSaturated Fat: 5gPolyunsaturated Fat: 0.5gMonounsaturated Fat: 4gCholesterol: 45mgSodium: 600mgPotassium: 300mgFiber: 2gSugar: 2gVitamin A: 500IUVitamin C: 2mgCalcium: 200mgIron: 1.5mg

Notes

Serve with extra dill pickles on the side for a delightful crunch!

Tried this recipe?

Let us know how it was!

Filed Under: LUNCH RECIPES

Chocolate Mousse Brownies

February 5, 2026 by JudyWhite Leave a Comment

There’s something utterly delightful about indulging in a dessert that blurs the line between cake and mousse, and that’s exactly what you get with these Chocolate Mousse Brownies. Picture this: a rich, fudgy brownie base topped with a velvety layer of chocolate mousse that melts in your mouth. I stumbled upon this irresistible combination while trying to find a sweet treat that would impress my friends during a cozy gathering.

As I pulled my pan from the oven, the warm, inviting aroma of chocolate enveloped my kitchen, instantly lifting spirits and whetting appetites. The best part? Making these brownies requires just a handful of pantry staples and about 40 minutes of your time. Whether you’re looking to treat yourself or surprise loved ones, these brownies are so simple yet remarkably elegant, making them the perfect crowd-pleaser for any occasion. Let’s dive into this luscious recipe that promises to elevate your dessert game!

Why You'll Love This Chocolate Mousse Brownies

  • These Chocolate Mousse Brownies are incredibly easy to make, requiring just a few simple ingredients and minimal effort.
  • The combination of fudgy brownies and rich chocolate mousse creates a flavor explosion that will satisfy any chocolate lover’s cravings.
  • Their versatility makes them perfect for any occasion, whether it’s a casual get-together or a special celebration.
  • Visually appealing and decadent, they will impress your guests and leave them wanting more.
  • These brownies are also a time-saver, taking only about 40 minutes from start to finish, making dessert a breeze.

Chocolate Mousse Brownies Ingredients

  • Here’s what you need to create that luscious dessert!

For the Brownie Base
• Unsalted butter – adds richness and helps create that fudgy texture.
• Granulated sugar – sweetens the brownies and contributes to their moist consistency.
• Unsweetened cocoa powder – provides deep chocolate flavor to the brownies.
• All-purpose flour – acts as the structure-building ingredient for the brownies.
• Large eggs – bind the ingredients together and add moisture.
• High-quality dark chocolate – melts down to create a rich, indulgent chocolate base.

For the Mousse Topping
• Heavy cream – whips up wonderfully to create a light and airy mousse.
• Vanilla extract – enhances the chocolate flavor and adds a delightful aroma.

These ingredients come together for a mouthwatering experience, making your Chocolate Mousse Brownies a delightful treat!

How to Make Chocolate Mousse Brownies

  1. Preheat your oven to 350°F (175°C). Greasing an 8×8 inch baking pan or lining it with parchment paper ensures easy removal of these delectable treats after baking.

  2. Melt the butter and dark chocolate together in a saucepan over low heat until smooth. Stir in the sugar and cocoa powder until well combined. Let the mixture cool slightly before adding eggs, one at a time, and mixing thoroughly after each.

  3. Fold in the flour until just combined to maintain that fudgy texture. Pour the luscious batter into the prepared pan, spreading evenly, and bake for 20-25 minutes. Expect the edges to be firm and the center to have moist crumbs when tested with a toothpick. Allow to cool completely.

  4. Whip the heavy cream in a mixing bowl until soft peaks form. Meanwhile, melt the dark chocolate separately, then gently fold it into the whipped cream along with the vanilla extract for a rich mousse topping.

  5. Spread the mousse evenly over the cooled brownies, creating a luxurious layer. Refrigerate for at least an hour before cutting into squares and serving.

Optional: Garnish with chocolate shavings for an extra touch of elegance.
Exact quantities are listed in the recipe card below.

What to Serve with Chocolate Mousse Brownies?

Indulging in a rich, chocolate dessert invites the perfect array of pairings that enhance every delightful bite.

  • Fresh Berries: The tartness of raspberries or strawberries beautifully balances the sweetness of the brownies, adding a refreshing pop of color and flavor.

  • Vanilla Ice Cream: A scoop of creamy vanilla ice cream creates a luscious contrast, offering a delightful complement to the fudgy texture of chocolate.

  • Salted Caramel Sauce: Drizzling warm, gooey caramel over each brownie adds an irresistible salty-sweet dynamic that visitors won’t resist.

  • Espresso or Coffee: The bold flavor of a freshly brewed cup of coffee elevates the chocolate experience, making each bite even more decadent.

  • Whipped Cream: A dollop of lightly sweetened whipped cream offers a light, airy touch that helps cut through the richness of the mousse.

  • Chocolate Shavings: Adding a sprinkle of fine chocolate shavings not only enhances the presentation but also intensifies the chocolate flavor, making every bite indulgently rich.

Surprise your loved ones with one or a combination of these delightful accompaniments, and watch as they savor the experience of your Chocolate Mousse Brownies even more.

Make Ahead Options

These Chocolate Mousse Brownies are perfect for meal prep, allowing you to enjoy a decadent dessert with ease! You can prepare the brownie base up to 24 hours in advance. Simply follow the baking instructions and allow the brownies to cool completely before wrapping them tightly in plastic wrap or transferring to an airtight container for refrigeration. For the mousse topping, whip the cream and fold in melted chocolate a few hours ahead — this can be made up to 3 days in advance. When it’s time to serve, just spread the mousse over the brownies and let them sit in the fridge for at least an hour to set. This method ensures they retain their delicious flavor and texture, making your dessert just as delightful as when freshly made!

Chocolate Mousse Brownies Variations

Feeling adventurous? There are endless ways to customize your Chocolate Mousse Brownies that will excite your taste buds!

  • Nutty Delight: Add 1/2 cup of chopped walnuts or pecans to the brownie batter for a delightful crunch and added flavor.

  • Minty Fresh: Stir in a teaspoon of peppermint extract into the mousse for a refreshing twist that elevates the chocolate experience.

  • Flourless Option: Replace the all-purpose flour with an equal amount of almond flour or cocoa powder for a gluten-free version that’s just as indulgent.

  • Spicy Kick: Add a pinch of cayenne pepper or espresso powder to the brownie mix to deepen the flavor and give it a surprising heat.

  • Caramel Swirl: Drizzle melted caramel into the brownie batter before baking for gooey pockets of sweetness that contrast beautifully with the chocolate.

  • Fruit Fusion: Fold in 1/2 cup of fresh raspberries or cherries into the mousse for a fruity punch that complements the chocolate decadence. The vibrant color and tang balance the richness perfectly.

  • Vegan Twist: Substitute heavy cream with coconut cream and use a flax egg or applesauce instead of eggs for a dairy-free delight that everyone can savor.

  • Citrus Zest: Add the zest of an orange or lemon to the brownie batter for a bright, zesty flavor that lightens up the rich chocolate. Just a hint will take your dessert to the next level!

With these variations, you can cater to all preferences while enjoying the essence of that luscious Chocolate Mousse Brownies. Happy baking!

How to Store and Freeze Chocolate Mousse Brownies

Fridge: Store the Chocolate Mousse Brownies in an airtight container for up to 3 days. This keeps them fresh and prevents the mousse from absorbing other odors.

Freezer: For longer storage, wrap individual brownies tightly in plastic wrap and place them in a freezer-safe container. They can be frozen for up to 3 months.

Reheating: To enjoy your brownies warm, microwave a single serving for about 10-15 seconds. The mousse will soften beautifully, enhancing the delightful chocolate experience.

Thawing: When ready to enjoy, transfer frozen brownies to the fridge to thaw overnight for the best texture and taste.

Chef's Helpful Tips

  • To achieve the ultimate fudgy texture in your Chocolate Mousse Brownies, be sure not to overmix the batter after adding the flour.
  • When melting the butter and dark chocolate, keep the heat low to prevent scorching, which can compromise the flavor.
  • Remember to let the brownies cool completely before adding the mousse layer, as this will help the mousse to set perfectly without melting.
  • For the best results, chill the mousse-topped brownies in the refrigerator for at least one hour to enhance the flavors and texture before serving.

Chocolate Mousse Brownies Recipe FAQs

How should I choose the perfect dark chocolate for this recipe?
Absolutely! When selecting dark chocolate, aim for one that has at least 70% cocoa content. Look for bars that list minimal ingredients—just cocoa mass, cocoa butter, sugar, and perhaps a touch of vanilla. High-quality chocolate will melt better and provide a more intense flavor that truly elevates your Chocolate Mousse Brownies.

What’s the best way to store leftover brownies?
Very good question! Store your Chocolate Mousse Brownies in an airtight container in the refrigerator for up to 3 days. Make sure they are completely cool before sealing them to keep the mousse from getting too soft and absorbing odors. If you want to enjoy them later, freezing is a great option as well.

Can I freeze Chocolate Mousse Brownies? If so, how?
Yes, you can! To freeze your Chocolate Mousse Brownies, let them cool completely and then wrap each brownie individually in plastic wrap. Place them in a freezer-safe container or a zip-top freezer bag. They will keep well for up to 3 months. When you’re ready to enjoy, simply transfer them to the fridge to thaw overnight for optimal texture—this way, they will retain their delicious mousse topping!

What can I do if my brownies come out too dry?
Don’t fret; it happens to the best of us! If your Chocolate Mousse Brownies turn out dry, here are a few troubleshooting steps: Ensure you’re measuring your flour accurately—too much can lead to dryness. Also, make sure not to overbake them; check for moist crumbs with a toothpick at the 20-minute mark. Finally, adding a drizzle of simple syrup or chocolate glaze on top can add a lovely moisture boost.

Are these brownies suitable for people with allergies?
Great question! These Chocolate Mousse Brownies contain gluten (due to the all-purpose flour) and dairy (from the butter, cream, and chocolate). If you’re looking for alternatives, consider using gluten-free flour blends and dairy-free substitutes like coconut cream or plant-based chocolate products. Always check the specific brands for cross-contamination, especially if making for those with severe allergies.

Chocolate Mousse Brownies

Chocolate Mousse Brownies

Indulge in these Chocolate Mousse Brownies that blend rich brownies with velvety mousse for an irresistible dessert experience.
Print Recipe Pin Recipe
Prep Time 15 minutes mins
Cook Time 25 minutes mins
Cooling Time 1 hour hr
Total Time 1 hour hr 40 minutes mins
Servings: 12 slices
Course: DESSERT RECIPES
Cuisine: American
Calories: 250
Ingredients Equipment Method Nutrition Notes

Ingredients
  

Brownie Base
  • 1 cup Unsalted butter adds richness and helps create that fudgy texture
  • 1 cup Granulated sugar sweetens the brownies and contributes to their moist consistency
  • 1/2 cup Unsweetened cocoa powder provides deep chocolate flavor to the brownies
  • 1 cup All-purpose flour acts as the structure-building ingredient for the brownies
  • 2 large Large eggs bind the ingredients together and add moisture
  • 4 oz High-quality dark chocolate melts down to create a rich, indulgent chocolate base
Mousse Topping
  • 1 cup Heavy cream whips up wonderfully to create a light and airy mousse
  • 1 tsp Vanilla extract enhances the chocolate flavor and adds a delightful aroma

Equipment

  • Oven
  • Mixing bowl
  • Saucepan
  • baking pan

Method
 

How to Make Chocolate Mousse Brownies
  1. Preheat your oven to 350°F (175°C). Grease an 8×8 inch baking pan or line it with parchment paper.
  2. Melt the butter and dark chocolate together in a saucepan over low heat until smooth. Stir in the sugar and cocoa powder until well combined. Let the mixture cool slightly before adding eggs, one at a time, and mixing thoroughly after each.
  3. Fold in the flour until just combined to maintain that fudgy texture. Pour the luscious batter into the prepared pan, spreading evenly, and bake for 20-25 minutes. Expect the edges to be firm and the center to have moist crumbs when tested with a toothpick. Allow to cool completely.
  4. Whip the heavy cream in a mixing bowl until soft peaks form. Melt the dark chocolate separately, then gently fold it into the whipped cream along with the vanilla extract for a rich mousse topping.
  5. Spread the mousse evenly over the cooled brownies, creating a luxurious layer. Refrigerate for at least an hour before cutting into squares and serving.

Nutrition

Serving: 1sliceCalories: 250kcalCarbohydrates: 30gProtein: 3gFat: 14gSaturated Fat: 8gPolyunsaturated Fat: 1gMonounsaturated Fat: 5gCholesterol: 50mgSodium: 150mgPotassium: 150mgFiber: 2gSugar: 20gVitamin A: 500IUCalcium: 20mgIron: 1mg

Notes

Optional: Garnish with chocolate shavings for an extra touch of elegance. For the best results, chill the mousse-topped brownies in the refrigerator for at least one hour to enhance the flavors and texture before serving.

Tried this recipe?

Let us know how it was!

Filed Under: BREAKFAST & BRUNCH

Buffalo Chicken Sliders

February 5, 2026 by JudyWhite Leave a Comment

It’s amazing how the simplest ingredients can create a dish that brings everyone together—especially when you’re preparing a plate of Buffalo Chicken Sliders. Picture this: a gathering of friends, laughter filling the air, and the scent of spicy buffalo chicken wafting through the kitchen, igniting excitement long before the first bite.

I often find myself craving the satisfying heat and creamy tang of buffalo sauce, but I also want something that’s quick and easy to whip up. These sliders are the answer! With tender, shredded chicken coated in a zesty buffalo sauce, nestled between soft slider buns and topped with cooling ranch dressing and crisp lettuce, they’re the perfect antidote to fast food fatigue.

Whether you’re hosting a game day or just looking for a comforting weeknight meal, these sliders promise to be a hit. Plus, they’re simple enough for any home chef to conquer. Let’s dive into this delicious recipe that’s sure to become a staple in your kitchen!

Why You'll Love This Buffalo Chicken Sliders

  • These Buffalo Chicken Sliders are incredibly easy to prepare, making them perfect for a quick weeknight dinner or a last-minute gathering.
  • The flavors are a delicious fusion of spicy buffalo chicken and creamy ranch dressing, ensuring every bite is packed with taste.
  • Their versatility means you can customize them with your favorite toppings, making them suitable for any occasion or palate.
  • Visually, these sliders are a feast for the eyes, with their vibrant colors and appealing presentation that will impress your guests.
  • Overall, these sliders are a guaranteed crowd-pleaser that everyone will flock to at your next party or family meal.

Buffalo Chicken Sliders Ingredients

• Get ready to whip up these mouthwatering sliders!

For the Chicken

  • Boneless, skinless chicken breasts – ensures lean, tender meat that soaks up the spicy buffalo sauce.
  • Buffalo sauce – provides that perfect kick of heat that the sliders are known for!
  • Melted butter – helps to meld the flavors together and keep the chicken moist.

For the Sliders

  • Slider buns – these soft, pillowy buns are ideal for holding all that flavorful filling.
  • Creamy ranch dressing – balances the spiciness of the buffalo sauce, adding a cool contrast.
  • Shredded lettuce – adds a refreshing crunch to each bite.
  • Sliced pickles (optional) – for a tangy twist that brings another layer of flavor to your Buffalo Chicken Sliders.

How to Make Buffalo Chicken Sliders

  1. Preheat your oven to 400°F (200°C) and generously spray a baking dish with nonstick cooking spray. This ensures that your chicken will come out easily and stay juicy.

  2. Season the chicken breasts with salt and pepper, then arrange them neatly in the baking dish. This step adds flavor to your chicken that mingles beautifully with the buffalo sauce.

  3. Mix melted butter with buffalo sauce in a bowl until combined, then pour this zesty mixture over the chicken. Feel free to use more or less buffalo sauce depending on your heat preference!

  4. Bake for 25-30 minutes or until the internal temperature of the chicken reaches 165°F (74°C). The chicken should be tender and easily shred with a fork when it’s done.

  5. Shred the chicken using two forks, mixing it with any remaining sauce in the dish for extra flavor. This will create that irresistible, spicy goodness that everyone loves.

  6. Assemble the sliders by placing shredded chicken on the bottom half of each slider bun. Top with ranch dressing, shredded lettuce, and pickles. Finally, cap them with the top buns and serve warm!

Optional: Garnish with extra buffalo sauce or fresh herbs for a bright finish.

Exact quantities are listed in the recipe card below.

How to Store and Freeze Buffalo Chicken Sliders

Fridge: Store leftover Buffalo Chicken Sliders in an airtight container for up to 3 days. To keep the buns from getting soggy, separate the chicken and toppings until ready to eat.

Freezer: For longer storage, freeze the shredded buffalo chicken in a freezer-safe bag for up to 3 months. Make sure to remove as much air as possible before sealing.

Reheating: When ready to enjoy, thaw the chicken overnight in the fridge and reheat in the microwave or on the stove until warm. Assemble your sliders fresh for the best texture and taste.

Wrap: If you’ve assembled sliders ahead of time, wrap them tightly in plastic wrap or foil before refrigerating or freezing to prevent dryness.

Make Ahead Options

Busy home cooks will love how easy it is to prep Buffalo Chicken Sliders ahead of time! You can marinate the chicken in buffalo sauce and refrigerate it for up to 24 hours to enhance the flavor. After cooking, simply shred the chicken and store it in an airtight container in the fridge for up to 3 days. When you’re ready to serve, reheat the chicken in the microwave or on the stovetop until warmed through. Assemble the sliders right before serving to keep the buns from getting soggy. With these make-ahead tips, you’ll enjoy delicious, hassle-free sliders that are just as tasty as if you made them fresh!

Buffalo Chicken Sliders Variations

Feel free to unleash your creativity and make these sliders your own—it’s all about the flavors that delight your taste buds!

  • Spicy Twist: Add extra diced jalapeños or a dash of cayenne pepper to the buffalo sauce for an added kick.

  • Cheesy Upgrade: Sprinkle shredded cheddar or blue cheese over the chicken before baking to create a rich, gooey topping.

  • Honey BBQ Blend: Mix half buffalo sauce with honey BBQ sauce for a sweeter, tangy flavor that still packs a punch.

  • Caribbean Vibe: Substitute buffalo sauce with jerk sauce for a tropical twist that adds warmth and depth to your sliders. This is perfect for anyone looking to transport their taste buds!

  • Vegetarian Option: Swap out chicken for roasted cauliflower or chickpeas, tossed in buffalo sauce, for a hearty, plant-based version that everyone will love.

  • Low-Carb Buns: Use lettuce wraps or cloud bread instead of slider buns for a keto-friendly meal that’s still full of flavor.

  • Herby Freshness: Add fresh cilantro or green onions to the toppings for a burst of flavor that enhances the overall freshness of your sliders.

  • Sweet and Tangy: Top the finished sliders with caramelized onions or a slice of grilled pineapple for a balance of sweet and savory. This adds an unexpected delight everyone will rave about!

What to Serve with Buffalo Chicken Sliders?

Looking to create a mouthwatering feast that complements your spicy Buffalo Chicken Sliders?

  • Crispy French Fries: The saltiness and crunch of fries make the perfect companion to these tangy sliders, soaking up any leftover sauce. A sprinkle of garlic salt can elevate this classic pairing!

  • Coleslaw: A tangy, crunchy coleslaw adds brightness and a refreshing contrast to the richness of the buffalo chicken, balancing the flavors beautifully. Its creamy dressing can also mellow the heat for those who prefer a milder experience.

  • Sweet Potato Wedges: The natural sweetness of sweet potatoes contrasts delightfully with the spicy sliders, creating a satisfying mix of flavors. Bake them crispy on the outside for a textural delight with every bite!

  • Vegetable Platter: A vibrant platter of fresh vegetables like carrots, bell peppers, and cucumbers with a dip adds a nutritious crunch that complements the sliders well. You’ll love the rainbow of colors on your table!

  • Buffalo Cauliflower Bites: For a fun twist on flavors, these spicy cauliflower bites echo the buffalo sauce’s heat and are a great vegetarian alternative for your guests. They pair perfectly with the cool ranch dressing.

  • Beer or Cider: An ice-cold beer or a refreshing hard cider complements the spicy flavors of your sliders beautifully, enhancing the overall dining experience. A light lager or a fruity cider would be ideal.

  • Chocolate Brownies: For dessert, rich and fudgy brownies add a sweet finish to your meal, balancing out the spicy sliders with their velvety texture. Who could resist that combination?

With these delicious sides, your Buffalo Chicken Sliders will take center stage as the star of a memorable meal!

Chef's Helpful Tips

  • When preparing Buffalo Chicken Sliders, ensure to season the chicken breasts adequately with salt and pepper for optimal flavor.
  • If you prefer a milder heat, consider reducing the amount of buffalo sauce or mixing it with additional melted butter.
  • To shred the chicken effortlessly, allow it to rest for a few minutes after baking to retain its moisture, making shredding easier.
  • Always verify that the internal temperature reaches 165°F to guarantee that the chicken is cooked through and safe to eat.

Buffalo Chicken Sliders Recipe FAQs

How do I select the right chicken breasts?
Absolutely! When choosing chicken breasts, look for those that are plump, white in color without any dark spots or bruises. Fresh chicken should feel firm to the touch, and if possible, opt for organic or free-range chicken for the best flavor and quality.

How should I store leftover Buffalo Chicken Sliders?
To store leftover sliders, place them in an airtight container and keep them in the fridge for up to 3 days. For the best results, I recommend separating the chicken from the buns and toppings to prevent sogginess. Reheat as needed to enjoy them again!

Can I freeze the Buffalo Chicken for later use?
Very! You can freeze the shredded buffalo chicken by placing it in a freezer-safe bag. Make sure to remove as much air as possible before sealing. It can be frozen for up to 3 months. When you’re ready to enjoy, simply thaw it overnight in the fridge before reheating.

What if my chicken doesn’t shred easily?
If your chicken breasts are tough and resist shredding, it may need additional cooking time. Ensure that the internal temperature reaches 165°F (74°C) before removing from the oven. If it’s done but still tough, let it rest for a few minutes before trying to shred again. This resting time helps retain moisture, making shredding easier.

Are there any dietary considerations I should keep in mind?
If you’re serving these to kids or guests with dietary restrictions, it’s always wise to double-check for allergies. Buffalo sauce can be spicy, so consider offering a milder sauce option alongside. For a gluten-free version, look for gluten-free slider buns and ensure that your buffalo sauce is also gluten-free.

Can I customize the toppings for the sliders?
The more the merrier! Feel free to get creative with toppings. You can include additional vegetables like tomatoes, red onions, or jalapeños, or even swap the ranch dressing for blue cheese for an authentic buffalo flavor. Make it your own!

Buffalo Chicken Sliders

Buffalo Chicken Sliders

Enjoy these Buffalo Chicken Sliders, a perfect blend of spicy buffalo chicken and creamy ranch dressing, ideal for any gathering.
Print Recipe Pin Recipe
Prep Time 10 minutes mins
Cook Time 30 minutes mins
Total Time 40 minutes mins
Servings: 4 sliders
Course: LUNCH RECIPES
Cuisine: American
Calories: 250
Ingredients Equipment Method Nutrition Notes

Ingredients
  

For the Chicken
  • 1 pound Boneless, skinless chicken breasts
  • 1/2 cup Buffalo sauce
  • 1/4 cup Melted butter
For the Sliders
  • 8 count Slider buns
  • 1/2 cup Creamy ranch dressing
  • 1 cup Shredded lettuce
  • optional Sliced pickles for a tangy twist

Equipment

  • Baking dish
  • Oven

Method
 

How to Make Buffalo Chicken Sliders
  1. Preheat your oven to 400°F (200°C) and generously spray a baking dish with nonstick cooking spray.
  2. Season the chicken breasts with salt and pepper, then arrange them neatly in the baking dish.
  3. Mix melted butter with buffalo sauce in a bowl until combined, then pour this mixture over the chicken.
  4. Bake for 25-30 minutes or until the internal temperature of the chicken reaches 165°F (74°C).
  5. Shred the chicken using two forks, mixing it with any remaining sauce in the dish.
  6. Assemble the sliders by placing shredded chicken on the bottom half of each slider bun. Top with ranch dressing, shredded lettuce, and pickles, then cap with the top buns.

Nutrition

Serving: 1sliderCalories: 250kcalCarbohydrates: 20gProtein: 18gFat: 14gSaturated Fat: 6gPolyunsaturated Fat: 1gMonounsaturated Fat: 5gCholesterol: 70mgSodium: 800mgPotassium: 350mgFiber: 1gSugar: 2gVitamin A: 20IUVitamin C: 4mgCalcium: 4mgIron: 8mg

Notes

Optional: Garnish with extra buffalo sauce or fresh herbs for a bright finish. Store leftovers in an airtight container.

Tried this recipe?

Let us know how it was!

Filed Under: LUNCH RECIPES

Chocolate Covered Strawberry Cookies

February 5, 2026 by JudyWhite Leave a Comment

There’s something enchanting about the combination of strawberries and chocolate—each bite feels like a mini celebration! I discovered this delightful recipe for Chocolate Covered Strawberry Cookies while rummaging through my pantry, searching for inspiration beyond the usual cookie fare. With the sweetness of fresh strawberries folded into a buttery, chocolate-infused dough, these cookies promise not only to satisfy your sweet tooth but also to elevate your dessert game without much fuss.

Perfect for sharing at a gathering or enjoying with a cozy cup of tea, these cookies come together in just 32 minutes. They strike that elusive balance between chewy and decadent, making them a fantastic alternative to your daily routine of fast food snacks. Plus, who doesn’t love their home filled with the warm scent of freshly baked cookies? Join me as we create these scrumptious treats that everyone will want to nibble on—let’s make some magic in the kitchen!

Why You'll Love This Chocolate Covered Strawberry Cookies

  • These Chocolate Covered Strawberry Cookies are incredibly easy to make, coming together in just 32 minutes for a delectable treat.
  • You’ll fall in love with the delightful flavor combination of sweet strawberries and rich chocolate that creates a taste sensation in every bite.
  • This recipe is versatile enough to serve at casual gatherings or as a sweet surprise for a special occasion, making it perfect for any event.
  • The cookies not only taste amazing but also look beautiful, making them a feast for the eyes as well as the palate.

Chocolate Covered Strawberry Cookies Ingredients

For the Cookies

  • All-purpose flour – 1 ¾ cups for the perfect balance of texture; it’s the foundation of your cookies!
  • Granulated sugar – ½ cup to create a delightful sweetness that complements the strawberries.
  • Brown sugar – ½ cup, packed for a deeper flavor and that chewy texture everyone loves.
  • Baking powder – 1 tsp helps these cookies rise and become wonderfully soft.
  • Salt – ¼ tsp, a pinch enhances all the flavors and balances the sweetness.
  • Unsalted butter – ½ cup, softened, for that rich, creamy base needed in cookie dough.
  • Large egg – 1, at room temperature, acts as a binder and adds moisture to the cookies.
  • Vanilla extract – 1 tsp for a warm, aromatic flavor that makes everything better.
  • Fresh strawberries – 1 cup, finely chopped, to add juicy bursts of flavor in each bite.
  • Semi-sweet chocolate chips – 1 cup, because who can resist the decadence of chocolate in these cookies?

Indulge in these Chocolate Covered Strawberry Cookies that mix fruity freshness with rich chocolate goodness!

How to Make Chocolate Covered Strawberry Cookies

  1. Preheat your oven to 350°F (175°C) and prepare two baking sheets by lining them with parchment paper. This ensures easy removal and clean-up for your delicious cookies.

  2. Whisk together the flour, baking powder, salt, granulated sugar, and brown sugar in a large bowl. This dry mixture lays the foundation for your cookies, ensuring a balanced sweetness and texture.

  3. Cream the softened butter and sugars in another bowl using a hand mixer until light and fluffy. This process introduces air into the mixture, which is essential for a tender cookie.

  4. Beat in the egg and vanilla extract until fully incorporated, creating a rich and buttery dough that invites the delightful flavors of strawberries and chocolate.

  5. Combine the dry ingredients with the wet mixture gradually, folding them together until just combined. Take care not to overmix, as this keeps your cookies tender and chewy.

  6. Fold in the finely chopped strawberries and chocolate chips gently until they’re evenly distributed throughout the dough, ensuring that every bite is bursting with flavor.

  7. Scoop rounded tablespoons of dough onto the prepared baking sheets, placing them about two inches apart. This allows room for the cookies to spread beautifully as they bake.

  8. Bake for 10-12 minutes, or until the edges are golden brown while the centers still appear slightly underbaked. Let them cool on the baking sheets for a few minutes before transferring them to a wire rack.

Optional: Drizzle melted chocolate over the cooled cookies for an extra touch of sweetness!

Exact quantities are listed in the recipe card below.

Make Ahead Options

These Chocolate Covered Strawberry Cookies are ideal for meal prep, allowing you to whip up a delightful batch even on your busiest days! You can prepare the cookie dough up to 24 hours in advance; simply mix all the ingredients as described and store it in an airtight container in the refrigerator. This keeps the flavors fresh and prevents the strawberries from browning. When you’re ready to bake, let the dough sit at room temperature for about 10-15 minutes to soften slightly. Then, scoop and bake as directed. By prepping ahead, you’ll enjoy warm, freshly baked cookies with minimal fuss, perfect for a quick dessert or snack!

What to Serve with Chocolate Covered Strawberry Cookies?

Imagine a cozy afternoon where the delightful aroma of fresh-baked cookies fills your home, making it the perfect setting for friends and family to gather.

  • Fresh Fruit Salad: A mix of seasonal fruits adds vibrancy and refreshing contrast to the sweet richness of the cookies.

  • Vanilla Ice Cream: The creamy texture perfectly complements the chewy cookies, creating a blissful combination with each scoop.

  • Chocolate Milkshake: Indulge your chocolate cravings by pairing these cookies with a thick, velvety milkshake that echoes their flavor profile.

  • Espresso or Coffee: The deep, bold coffee flavors balance the sweetness while providing a cozy pick-me-up during your dessert time.

  • Whipped Cream Topping: Serve with a dollop of light whipped cream to enhance the dessert experience, making each bite feel luxurious.

  • Milk: Often nostalgic, a glass of cold milk with these cookies is a classic pairing that never fails to please!

Enjoy these Chocolate Covered Strawberry Cookies as the star of your dessert table, surrounded by delightful accompaniments that elevate the whole experience!

Chocolate Covered Strawberry Cookies Variations

Feel free to get creative with these recipes and personalize them to suit your taste!

  • Gluten-Free: Substitute all-purpose flour with a 1:1 gluten-free baking blend for a delightful gluten-free treat.

  • Vegan: Replace the egg with a flax egg (1 tbsp flaxseed meal + 2.5 tbsp water) and use plant-based butter for a vegan-friendly cookie.

  • Nutty Twist: Incorporate ½ cup of chopped nuts, like almonds or pecans, into the dough for added crunch and flavor.

  • Spiced Up: Add a teaspoon of cinnamon or nutmeg for warm, comforting spices that complement the fruity strawberries beautifully.

  • Zesty Lemon: Mix in the zest of one lemon to the dough for a refreshing burst of brightness that pairs wonderfully with strawberries.

  • Coconut Delight: Fold in shredded coconut along with the chocolate chips for a tropical flavor that can transport you straight to paradise.

  • Heat It Up: Toss in a pinch of cayenne pepper or chili powder for those who enjoy a savory twist that accentuates the sweetness.

  • Chocolate Lovers: Swap semi-sweet chocolate chips for dark chocolate or even white chocolate for a rich and varied flavor palette.

How to Store and Freeze Chocolate Covered Strawberry Cookies

Room Temperature: Store cooled cookies in an airtight container for up to 3 days to maintain freshness and prevent them from getting stale.

Fridge: If you prefer a longer shelf life, keep the cookies in the refrigerator for up to 1 week. Just ensure they are well-wrapped to avoid absorbing odors.

Freezer: For extended storage, freeze chocolate-covered strawberry cookies in a single layer on a baking sheet. Once frozen, transfer them to a freezer-safe bag for up to 3 months.

Reheating: When you’re ready to enjoy them, simply thaw at room temperature or microwave for a few seconds to bring back that delightful fresh-baked warmth!

Chef's Helpful Tips

  • When making Chocolate Covered Strawberry Cookies, ensure your butter is softened to room temperature for easy creaming with sugars, which helps create a light and fluffy cookie base.
  • Remember to chop your strawberries finely to avoid excess moisture that can affect the cookie dough’s consistency.
  • Fold in your chocolate chips and strawberries gently to maintain the airiness you achieved while creaming the butter and sugars.
  • Lastly, be mindful of your baking time; remove the cookies from the oven when the edges are golden but the centers are still slightly soft to achieve that perfect chewy texture.

Chocolate Covered Strawberry Cookies Recipe FAQs

How do I choose ripe strawberries for this recipe?
Absolutely! Look for strawberries that are bright red, plump, and fragrant, with no signs of bruising or dark spots. They should be firm to the touch but yield slightly when pressed, indicating juiciness. Fresh strawberries not only taste better but also add a lovely texture to your cookies.

How long can I store Chocolate Covered Strawberry Cookies?
Very! You can keep your cooled cookies in an airtight container at room temperature for up to 3 days. If you want them to last a bit longer, store them in the fridge for up to 1 week. This will help maintain their freshness; just be sure they’re wrapped well to prevent absorbing any odors from the fridge.

Can I freeze Chocolate Covered Strawberry Cookies?
Yes, indeed! To freeze your cookies, place them in a single layer on a baking sheet and put them in the freezer until firm. Then, transfer the cookies to a freezer-safe bag or container. They can be kept frozen for up to 3 months. When you’re ready to enjoy, simply remove them from the freezer and let them thaw at room temperature, or microwave for a few seconds for that fresh-baked feel!

What should I do if my cookie dough is too wet?
If your dough seems a little too sticky or wet, don’t worry! You can add an extra tablespoon of flour gradually until you reach a workable consistency. It’s important not to overmix the dough, as that can lead to tougher cookies. Just gently fold in the additional flour until combined.

Are these cookies safe for those with allergies?
This recipe contains common allergens such as wheat (from the flour), dairy (from the butter), and eggs. If you’re preparing these cookies for someone with specific allergies, consider using substitutes: you could replace regular butter with a dairy-free alternative, use a gluten-free flour blend, and even experiment with flax eggs instead of regular eggs. Just keep in mind that substitutions might slightly alter the texture.

Can I add other ingredients to the cookies?
Absolutely! The more the merrier! These cookies are wonderfully versatile; feel free to mix in ingredients like chopped nuts, coconut flakes, or even swirl in some peanut butter for a delightful twist. Just remember to keep the flavor balance in check so the strawberries and chocolate remain the stars of the show.

Chocolate Covered Strawberry Cookies

Chocolate Covered Strawberry Cookies

These Chocolate Covered Strawberry Cookies combine luscious chocolate and fresh strawberries for a delightful treat!
Print Recipe Pin Recipe
Prep Time 15 minutes mins
Cook Time 12 minutes mins
Total Time 32 minutes mins
Servings: 12 cookies
Course: DESSERT RECIPES
Cuisine: American
Calories: 150
Ingredients Equipment Method Nutrition Notes

Ingredients
  

For the Cookies
  • 1.75 cups all-purpose flour for the perfect balance of texture
  • 0.5 cups granulated sugar to create a delightful sweetness
  • 0.5 cups brown sugar packed for a deeper flavor
  • 1 tsp baking powder helps these cookies rise
  • 0.25 tsp salt enhances all the flavors
  • 0.5 cups unsalted butter softened for rich base
  • 1 tsp vanilla extract for warm, aromatic flavor
  • 1 cups fresh strawberries finely chopped for flavor
  • 1 cups semi-sweet chocolate chips for decadence

Equipment

  • Oven
  • baking sheets
  • parchment paper
  • Mixing bowls
  • hand mixer
  • measuring cups
  • measuring spoons

Method
 

Preparation Steps
  1. Preheat your oven to 350°F (175°C) and prepare two baking sheets by lining them with parchment paper.
  2. Whisk together the flour, baking powder, salt, granulated sugar, and brown sugar in a large bowl.
  3. Cream the softened butter and sugars in another bowl using a hand mixer until light and fluffy.
  4. Beat in the egg and vanilla extract until fully incorporated.
  5. Combine the dry ingredients with the wet mixture gradually, folding them together until just combined.
  6. Fold in the finely chopped strawberries and chocolate chips gently.
  7. Scoop rounded tablespoons of dough onto the prepared baking sheets.
  8. Bake for 10-12 minutes, or until the edges are golden brown.

Nutrition

Serving: 1cookieCalories: 150kcalCarbohydrates: 20gProtein: 2gFat: 8gSaturated Fat: 5gPolyunsaturated Fat: 1gMonounsaturated Fat: 2gCholesterol: 25mgSodium: 100mgPotassium: 80mgFiber: 1gSugar: 9gVitamin A: 200IUVitamin C: 3mgCalcium: 20mgIron: 1mg

Notes

Optional: Drizzle melted chocolate over the cooled cookies for an extra touch of sweetness!

Tried this recipe?

Let us know how it was!

Filed Under: BREAKFAST & BRUNCH

Cowboy Queso

February 5, 2026 by JudyWhite Leave a Comment

Finding a recipe that strikes the perfect balance between comfort and simplicity can be quite the challenge. One rainy afternoon, I was scouring my pantry for ingredients when I stumbled upon a block of melted Velveeta cheese, a can of fire-roasted tomatoes, and some leftover ground beef. It hit me—why not whip up a batch of Cowboy Queso? The very thought sparked excitement.

This dish is not only a crowd-pleaser but also incredibly versatile—perfect for game day or a casual get-together with friends. The rich, creamy cheese melds beautifully with the zesty kick of jalapeños and the smoky flavor of tomatoes, creating a dip that embodies warmth and hospitality. In just 30 minutes, you can transform these everyday ingredients into a mouthwatering treat that pairs perfectly with crispy tortilla chips.

Grab your skillet, and let’s dive into making Cowboy Queso, a cheesy delight that will leave everyone asking for more!

Why You'll Love This Cowboy Queso

  • This Cowboy Queso is super easy to whip up, taking only 30 minutes from start to finish.
  • The creamy, cheesy goodness combined with the spicy jalapeños and smoky tomatoes delivers a flavor explosion that will have your taste buds dancing.
  • Its versatility makes it perfect for any occasion, whether you’re hosting a game day party or just enjoying a cozy night in.
  • Visually appealing and inviting, this dip is sure to impress your guests and keep them coming back for more.

Cowboy Queso Ingredients

Get ready to create a creamy, cheesy dip that’s perfect for any occasion!

For the Cheese Base
• 8 oz Velveeta cheese – diced for that ultra-smooth, melt-in-your-mouth texture.
• 1 cup shredded sharp cheddar cheese – adds robust flavor that complements the creaminess.

For the Meat and Veggies
• 1 lb ground beef – cooked and drained, providing a hearty base to the dip.
• 1 medium fresh jalapeño – diced to bring just the right amount of heat, customizing your Cowboy Queso!
• 1 small onion – finely chopped to enhance the overall flavor profile.

For the Saucy Element
• 1 (10 oz) can fire-roasted diced tomatoes with green chilies – combines smoky notes with a zesty kick.
• 1 tsp garlic powder – adds a warm, aromatic undertone that elevates the dish.

How to Make Cowboy Queso

  1. Sauté Veggies: In a skillet over medium heat, sauté the finely chopped onions and diced jalapeños for about 3-4 minutes, until they become fragrant and the onions turn translucent.

  2. Combine Meat: Add the cooked ground beef into the skillet and mix well with the sautéed veggies. Let this cook together for an additional 2 minutes to meld the flavors.

  3. Melt Cheese: In a separate saucepan, combine the diced Velveeta and shredded sharp cheddar cheese over low heat. Stir gently until the cheeses melt and become smooth, about 5-7 minutes, ensuring they don’t stick.

  4. Mix It All: Stir in the beef mixture along with the can of fire-roasted diced tomatoes and garlic powder. Combine thoroughly and let the mixture warm for 2-3 minutes, allowing the flavors to blend beautifully.

  5. Serve Hot: Taste your delightful Cowboy Queso and adjust the seasoning if needed. Serve it hot with crispy tortilla chips, so everyone can enjoy it!

Optional: Garnish with fresh cilantro for an extra burst of flavor.
Exact quantities are listed in the recipe card below.

Make Ahead Options

These Cowboy Queso preparations are perfect for busy home cooks who love to meal prep! You can sauté the onions and jalapeños, as well as cook and drain the ground beef, up to 3 days in advance; simply refrigerate them in airtight containers. In the same vein, you can also shred and measure your cheeses ahead of time, making the final assembly a breeze. When you’re ready to serve, just combine the prepped components in a skillet, melt the cheese mixture, and stir everything together for that creamy dip. This way, you’ll have a delectable Cowboy Queso ready to enjoy with minimal fuss, ensuring that every bite is just as delicious and comforting as you hope!

What to Serve with Cowboy Queso?

Nothing complements this cheesy delight quite like a few delicious sides and drinks that elevate the experience.

  • Crispy Tortilla Chips: These provide the perfect crunchy contrast to the creamy queso, making each dip an explosion of flavor.
  • Guacamole: Creamy avocado goodness enhances the fresh elements and balances the spice of the queso, bringing a delightful richness.
  • Fresh Salsa: A burst of tomatoes, onion, and herbs adds a refreshing brightness that pairs beautifully with the warm, cheesy dip.

To create a full game day experience, serve alongside a refreshing drink.

  • Iced Tea: Sweetened or unsweetened, it’s a classic choice that quenches your thirst while keeping the focus on the queso.
  • Margaritas: The tart notes of a margarita match the zest of jalapeños, creating a festive atmosphere that invites celebration.

For a sweet ending, consider a light dessert.

  • Brownie Bites: These fudgy treats offer a delicious contrast to the savory queso, satisfying your sweet tooth without being overly heavy.
  • Churros: With their cinnamon sugar coating, churros provide a fun and sweet way to delight your guests after enjoying the rich dip.

Cowboy Queso Variations

Feel free to let your culinary creativity shine with these delightful twists on Cowboy Queso!

  • Spicy Kick: Add more fresh jalapeños or incorporate a few dashes of your favorite hot sauce for an extra layer of heat. The more, the merrier when it comes to spice!
  • Smoky Flavor: Swap regular cheddar for smoked cheddar cheese to enhance the flavor with a rich, smoky aroma that will transport your taste buds.
  • Vegetarian Delight: Replace ground beef with black beans or lentils for a satisfying plant-based option that doesn’t skimp on flavor or texture. This version is hearty and packed with protein!
  • Creamy Avocado: Stir in mashed avocado right before serving for a creamy twist that adds richness and a fresh flavor, making every bite feel indulgent.
  • Cheesy Variations: Experiment with different cheese combinations—Monterey Jack or pepper jack cheese can add an exciting twist along with more flavor depth.
  • Herb Infusion: Add fresh chopped cilantro or green onions right before serving to bring a refreshing brightness that complements the rich, cheesy base beautifully.
  • Texture Twist: For a crunchy element, top your Cowboy Queso with crispy bacon bits or crushed tortilla chips before serving to add both flavor and texture.
  • Nutrient Boost: Toss in some chopped spinach or kale during the cooking process for a healthy green addition that melts beautifully into the dip.

Each of these variations adds its own charm, ensuring that this Cowboy Queso will never feel the same twice! Enjoy exploring these tasty options.

How to Store and Freeze Cowboy Queso

Fridge: Store leftover Cowboy Queso in an airtight container for up to 3 days. Reheat in the microwave or on the stovetop, adding a splash of milk for creaminess.

Freezer: For longer storage, freeze Cowboy Queso in a freezer-safe container for up to 2 months. Thaw overnight in the fridge before reheating.

Reheating: When reheating, slowly bring the dip to a gentle simmer over low heat. Stir frequently to maintain that creamy texture, adding milk if necessary.

Chef's Helpful Tips

  • When making Cowboy Queso, always sauté your onions and jalapeños until they are tender and fragrant to enhance their flavors.
  • Avoid cooking the cheese over high heat as this can cause it to become grainy instead of smooth.
  • Stir the cheese mixture gently and continuously to ensure an even melt and prevent it from sticking to the pan.
  • After combining all ingredients, let the dip sit for a few minutes off the heat to allow the flavors to meld beautifully.

Cowboy Queso Recipe FAQs

How do I choose ripe jalapeños for Cowboy Queso?
Absolutely! When selecting jalapeños, look for firm ones that are glossy and have a vibrant green color. Avoid those with dark spots or wrinkles, as those may indicate they are overripe. If you prefer a milder dip, choose jalapeños that are smaller and plumper, as they tend to be less spicy.

How should I store leftover Cowboy Queso?
Very simple! Store any leftover Cowboy Queso in an airtight container in the fridge for up to 3 days. Be sure to let it cool to room temperature first before sealing. Reheat gently in the microwave or on the stove, adding a splash of milk to help regain its creamy consistency.

Can I freeze Cowboy Queso?
Absolutely! To freeze your Cowboy Queso, pour it into a freezer-safe container, leaving some space at the top for expansion. It can be frozen for up to 2 months. When you’re ready to use it, thaw it overnight in the fridge, and then reheat slowly over low heat, stirring frequently. If it looks a bit thick, add a touch of milk or cream to help restore its creamy texture.

What should I do if my cheese sauce separates or becomes grainy?
No worries! If your cheese sauce becomes grainy, this usually occurs because the cheese was heated too quickly or at too high a temperature. To troubleshoot, try adding a bit of milk or cream to the mixture and reheating gently over low heat while stirring continuously. This should help bring it back to a smooth consistency. Always keep the heat low and avoid boiling to prevent this from happening in the future!

Is Cowboy Queso safe for everyone to eat?
While Cowboy Queso is delicious, it’s important to note that it contains dairy and ground beef. If you have lactose intolerance or are cooking for someone with dairy allergies, consider substituting with dairy-free cheese options and a vegetarian protein source like lentils or beans. Always check with your guests about dietary preferences for the best experience!

Cowboy Queso

Cowboy Queso

Cowboy Queso is a creamy, cheesy dip that combines ground beef, spicy jalapeños, and smoky tomatoes for comfort and simplicity.
Print Recipe Pin Recipe
Prep Time 10 minutes mins
Cook Time 20 minutes mins
Total Time 30 minutes mins
Servings: 6 people
Course: Snacks & Appetizers
Cuisine: American
Calories: 400
Ingredients Equipment Method Nutrition Notes

Ingredients
  

For the Cheese Base
  • 8 oz Velveeta cheese diced
  • 1 cup shredded sharp cheddar cheese
For the Meat and Veggies
  • 1 lb ground beef cooked and drained
  • 1 medium fresh jalapeño diced
  • 1 small onion finely chopped
For the Saucy Element
  • 1 10 oz can fire-roasted diced tomatoes with green chilies
  • 1 tsp garlic powder

Equipment

  • Skillet
  • Saucepan

Method
 

How to Make Cowboy Queso
  1. In a skillet over medium heat, sauté the finely chopped onions and diced jalapeños for about 3-4 minutes, until they become fragrant and the onions turn translucent.
  2. Add the cooked ground beef into the skillet and mix well with the sautéed veggies. Let this cook together for an additional 2 minutes to meld the flavors.
  3. In a separate saucepan, combine the diced Velveeta and shredded sharp cheddar cheese over low heat. Stir gently until the cheeses melt and become smooth, about 5-7 minutes.
  4. Stir in the beef mixture along with the can of fire-roasted diced tomatoes and garlic powder. Combine thoroughly and let the mixture warm for 2-3 minutes.
  5. Taste your delightful Cowboy Queso and adjust the seasoning if needed. Serve it hot with crispy tortilla chips.

Nutrition

Serving: 1cupCalories: 400kcalCarbohydrates: 10gProtein: 25gFat: 30gSaturated Fat: 15gPolyunsaturated Fat: 1gMonounsaturated Fat: 8gTrans Fat: 1gCholesterol: 80mgSodium: 950mgPotassium: 500mgFiber: 1gSugar: 2gVitamin A: 500IUVitamin C: 5mgCalcium: 350mgIron: 2mg

Notes

Optional: Garnish with fresh cilantro for an extra burst of flavor.

Tried this recipe?

Let us know how it was!

Filed Under: SNACKS & APPETIZERS

Strawberry White Chocolate Gooey Bars

February 5, 2026 by JudyWhite Leave a Comment

There’s a certain delight that comes from the first taste of these Strawberry White Chocolate Gooey Bars. As the sweet-tart strawberries blend with the creamy richness of white chocolate, your taste buds are treated to a moment of indulgence that feels like pure bliss. Picture this: a lazy afternoon, the sun streaming through the kitchen window, and just the hint of something sweet inching your way as the aroma wafts from the oven.

I discovered this easy recipe during a quest to reinvent traditional desserts, wanting something that could impress without turning my kitchen into a battleground. With just a handful of ingredients and minimal effort, these bars transform into a versatile treat perfect for a picnic, a cozy family evening, or even a fancy soiree. Friends and family rave about that gooey center, and trust me, it’s fancy enough to steal the show but simple enough for every day. Ready to dive into the world of gooey deliciousness? Let’s get baking!

Why You'll Love This Strawberry White Chocolate Gooey Bars

  • These Strawberry White Chocolate Gooey Bars are incredibly easy to make, requiring just a handful of ingredients and minimal effort, making them a perfect choice for any home baker.
  • The delightful combination of sweet strawberries and creamy white chocolate creates a flavor explosion that will leave your taste buds wanting more.
  • Their versatility shines through, as they can be enjoyed at any occasion, from casual family gatherings to elegant parties.
  • Not to mention, the irresistible gooey texture and beautiful presentation will impress your guests and keep them coming back for seconds.

Strawberry White Chocolate Gooey Bars Ingredients

For the Base
• All-purpose flour – This forms the crust that gives your bars structure.
• Granulated sugar – Adds sweetness to the base, balancing the tanginess of strawberries.
• Unsalted butter – Melted for easy mixing and a rich flavor that draws the crust together.

For the Filling
• Eggs – Large eggs are vital for binding the filling and providing a gooey texture.
• Fresh strawberries – Chopped to infuse the filling with natural sweetness and freshness.
• White chocolate chips – These incredible chips add a creamy, sweet richness that complements the strawberries.

Enjoy creating these Strawberry White Chocolate Gooey Bars that will surely become a favorite in your dessert repertoire!

How to Make Strawberry White Chocolate Gooey Bars

  1. Preheat Oven: Begin by preheating your oven to 350°F (175°C). This ensures the bars bake evenly and achieve that delightful golden brown top.

  2. Prepare the Pan: Grab an 8×8-inch baking dish and line it with parchment paper. This will help you easily lift out the bars once they’ve cooled and set.

  3. Mix the Base: In a mixing bowl, combine the melted butter, granulated sugar, and flour until you achieve a crumbly texture. Press this mixture firmly into the bottom of your prepared baking dish, forming a solid crust.

  4. Create the Filling: In another bowl, whisk the large eggs with sugar until the mixture is frothy. Then, stir in the remaining flour, followed by folding in the fresh strawberries and white chocolate chips for that yummy, gooey filling.

  5. Fill the Crust: Pour the luscious filling over the crust and spread it evenly using a spatula to ensure every bite has that heavenly mix of flavors.

  6. Bake: Place the dish in the oven and bake for 25-30 minutes. You’ll know they’re done when the top is beautifully golden brown and the aroma fills your kitchen with sweet anticipation.

  7. Cool and Slice: Once baked, let the bars cool completely in the pan. Once cooled, slice them into squares and get ready to indulge!

Optional: Dust with powdered sugar for an elegant touch before serving.

Exact quantities are listed in the recipe card below.

Strawberry White Chocolate Variations

Feel free to unleash your creativity and customize these bars to suit your taste and preferences!

  • Gluten-Free: Substitute all-purpose flour with a 1:1 gluten-free baking blend for a perfect crust without the gluten.

  • Dairy-Free: Use coconut oil and dairy-free white chocolate chips for a deliciously dairy-free option that still delivers on flavor.

  • Extra Fruity: Replace half of the strawberries with raspberries or blueberries for a delightful mixed berry twist.

  • Nutty Crunch: Add 1/2 cup of chopped almonds or pecans to the filling for added texture and a nutty flavor that complements the strawberries beautifully.

  • Citrus Zing: A tablespoon of lemon or orange zest in the filling elevates the flavor profile, adding a refreshing citrusy kick.

  • Spicy Surprise: Sprinkle in a pinch of cayenne or cinnamon for a warm heat that contrasts the sweetness of the bars.

  • Cheesecake Style: Mix in 1/2 cup of cream cheese into the filling for a rich, creamy cheesecake-inspired version that’s utterly decadent.

  • Layered Delight: Create two layers by adding a layer of chocolate fudge or melted dark chocolate in between the base and filling for a delightful surprise!

Make Ahead Options

These Strawberry White Chocolate Gooey Bars are a fantastic choice for meal prep, allowing you to enjoy their deliciousness without the last-minute rush! You can prepare the base crust up to 24 hours in advance—just keep it tightly wrapped in plastic wrap in the refrigerator. For the filling, mix the strawberries and white chocolate into the egg-sugar mixture and refrigerate that for up to 3 days. When you’re ready to bake, simply pour the chilled filling over the crust, spread it evenly, and bake as directed. This way, you’ll have that sumptuous gooeyness ready to impress your family or guests on busy weeknights, all without sacrificing taste!

How to Store and Freeze Strawberry White Chocolate Gooey Bars

Fridge: Keep the bars in an airtight container for up to 3 days. This helps retain their gooey texture while preventing them from drying out.

Freezer: For longer storage, wrap individual bars tightly in plastic wrap and place them in a freezer-safe bag. They’ll stay fresh for up to 2 months.

Reheating: To enjoy a warm treat, thaw the bars overnight in the fridge, then reheat in the microwave for 10-15 seconds. This brings back that delightful gooeyness!

Room Temperature: If you’re serving them soon, store the bars at room temperature in a covered dish for up to 1 day. Just make sure they’re protected from any moisture.

What to Serve with Strawberry White Chocolate Gooey Bars?

Imagine a delightful spread that complements the sweet and creamy essence of these bars, making your dessert experience even more delightful.

  • Vanilla Ice Cream: The creamy, cool texture of vanilla ice cream beautifully balances the warm, gooey bars, creating a heavenly contrast that will delight your palate.

  • Fresh Whipped Cream: Light and airy, whipped cream adds a touch of elegance and pairs perfectly with the fruity notes of strawberries, enhancing each glorious bite.

  • Chocolate Drizzle: A rich drizzle of melted chocolate adds a decadent touch that elevates the flavors, making the dessert feel indulgently luxurious.

  • Berry Compote: A tangy berry compote brings a burst of freshness that cuts through the sweetness, perfectly highlighting the strawberries in the bars.

  • Lemonade: A refreshing glass of lemonade provides a zesty contrast, balancing the sweetness of the bars while giving you that summertime feel.

  • Mint Tea: The refreshing herbal notes of mint tea lend a cozy warmth, and its subtle sweetness complements the fruity flavors beautifully.

  • Cheese Platter: A selection of soft cheeses, like goat cheese and brie, can be a delightful savory contrast, enhancing the overall sensory experience of your dessert table.

  • Almond Biscotti: Crunchy almond biscotti offers a pleasant textural contrast, and their nutty flavor plays nicely with the sweetness of the bars for a delightful pairing.

Chef's Helpful Tips

  • To ensure your Strawberry White Chocolate Gooey Bars have the perfect crust, press the mixture firmly into the pan to eliminate any air pockets.
  • Avoid over-mixing the filling once you add the strawberries and chocolate chips, as this can lead to a denser texture.
  • When baking, keep an eye on the bars during the last few minutes to prevent over-browning; every oven can be slightly different.
  • Allow the bars to cool completely before slicing to ensure they set properly and maintain their gooey texture.

Strawberry White Chocolate Gooey Bars Recipe FAQs

How do I select ripe strawberries for the bars?
Absolutely! Look for fresh strawberries that are bright red, firm, and have a sweet aroma. Avoid those with dull skins or dark spots all over, as these indicate overripeness. For the best flavor, choose strawberries that are in season!

How should I store leftover Strawberry White Chocolate Gooey Bars?
To keep them fresh, place the bars in an airtight container and store them in the refrigerator for up to 3 days. This helps maintain their delightful gooey texture. If you plan to enjoy them later, follow the freezing instructions below for a longer shelf life.

Can I freeze Strawberry White Chocolate Gooey Bars?
Yes! For freezing, wrap individual squares tightly in plastic wrap and place them in a freezer-safe bag. They will stay fresh for up to 2 months. When you’re ready to indulge, simply thaw them overnight in the fridge and then reheat in the microwave for 10-15 seconds to revive that gooey goodness!

What if my bars turn out too dry?
If your bars are on the dry side, it may be due to overbaking. Every oven behaves differently, so keep a close eye in the last few minutes of baking. If you find they’re not gooey enough, try reducing the baking time by 2-3 minutes during your next attempt.

Are there any dietary considerations I should be aware of?
Certainly! If you have allergies, these bars contain gluten (flour) and dairy (butter, white chocolate). For gluten-free versions, consider using almond or coconut flour along with some binding agents. You can also substitute dark chocolate chips for a dairy-free option, but be sure to choose brands that cater to your dietary needs!

How can I ensure my bars have the right texture?
To achieve that perfect gooey texture, make sure to mix your base ingredients until just combined, then firmly press it into the pan to eliminate air pockets. When making the filling, fold in the strawberries and chocolate chips gently to avoid dense bars. Always allow them to cool completely before slicing to maintain their gooey characteristic!

Strawberry White Chocolate Gooey Bars

Strawberry White Chocolate Gooey Bars

Indulge in these Strawberry White Chocolate Gooey Bars, where sweet-tart strawberries meet creamy white chocolate for a delightful treat.
Print Recipe Pin Recipe
Prep Time 15 minutes mins
Cook Time 30 minutes mins
Cooling Time 30 minutes mins
Total Time 1 hour hr 15 minutes mins
Servings: 16 bars
Course: DESSERT RECIPES
Cuisine: American
Calories: 180
Ingredients Equipment Method Nutrition Notes

Ingredients
  

Base
  • 1 cup all-purpose flour
  • 1/2 cup granulated sugar
  • 1/2 cup unsalted butter melted
Filling
  • 2 large eggs
  • 1 cup fresh strawberries chopped
  • 1 cup white chocolate chips

Equipment

  • 8×8-inch baking dish
  • Mixing bowl
  • Spatula

Method
 

Preparation
  1. Preheat your oven to 350°F (175°C).
  2. Line an 8×8-inch baking dish with parchment paper.
  3. In a mixing bowl, combine the melted butter, granulated sugar, and flour until crumbly. Press into the bottom of the dish.
  4. In another bowl, whisk the eggs with sugar until frothy, then stir in the remaining flour, fresh strawberries, and white chocolate chips.
  5. Pour the filling over the crust and spread evenly.
  6. Bake for 25-30 minutes until golden brown.
  7. Let the bars cool completely in the pan. Slice into squares.

Nutrition

Serving: 1barCalories: 180kcalCarbohydrates: 25gProtein: 2gFat: 8gSaturated Fat: 4gPolyunsaturated Fat: 1gMonounsaturated Fat: 3gCholesterol: 30mgSodium: 90mgPotassium: 80mgFiber: 1gSugar: 12gVitamin A: 250IUVitamin C: 5mgCalcium: 20mgIron: 0.5mg

Notes

Optional: Dust with powdered sugar before serving.

Tried this recipe?

Let us know how it was!

Filed Under: DESSERT RECIPES

Ruffled Heart Sugar Cookies

February 5, 2026 by JudyWhite Leave a Comment

There’s something undeniably heartwarming about baking cookies that make your home smell like a cozy café. The moment I set foot in the kitchen, preparing to create my beloved Ruffled Heart Sugar Cookies, I can already envision the joyous faces of friends and family as they indulge in these delightful treats. Picture this: golden edges, a soft yet slightly crisp texture, and just the right amount of sweetness to brighten up any day.

These cookies have a special place in my heart. They’re not just desserts; they’re a celebration of love, whether it’s for a special occasion or a simple gesture of kindness. Plus, they’re easy enough for anyone, even if you’re new to baking! With just a few pantry staples and a little bit of time, you’ll have a lovely batch of heart-shaped cookies ready to share—or keep all for yourself! Let’s dive into this simple and delicious recipe that’s bound to become a favorite in your kitchen.

Why You'll Love This Ruffled Heart Sugar Cookies

  • These Ruffled Heart Sugar Cookies are incredibly easy to make, making them perfect for bakers of all skill levels.
  • The delightful flavor balances sweetness with a buttery richness that will have everyone asking for seconds.
  • Their charming heart shape and ruffled edges create a visually appealing treat that is sure to impress at any gathering.
  • Plus, with a quick prep and bake time, you’ll have these scrumptious cookies ready to enjoy in just under 30 minutes.
  • Whether you’re celebrating a special occasion or simply indulging in a sweet moment, these cookies are a guaranteed crowd-pleaser.
  • Enjoy the smiles as friends and family savor each lovely bite!

Ruffled Heart Sugar Cookies Ingredients

For the Cookie Dough

  • All-purpose flour – 2 ¾ cups for a perfectly balanced dough that holds its shape when baking.
  • Granulated sugar – 1 cup enhances sweetness while ensuring a delightful texture.
  • Unsalted butter – 1 cup (softened) creates a rich, buttery flavor that melts in your mouth.
  • Large egg – 1 egg helps bind the ingredients together, creating a tender cookie.
  • Vanilla extract – 2 tsp brings a warm, inviting aroma that perfectly complements the sweetness.
  • Baking powder – 1 tsp helps the cookies rise beautifully, giving them a soft, light texture.
  • Salt – ½ tsp balances the sweetness and enhances the overall flavor of the cookies.

These Ruffled Heart Sugar Cookies are not only delicious but also simple to whip up, making them perfect for any occasion!

How to Make Ruffled Heart Sugar Cookies

  1. Preheat your oven to 350°F (175°C) and line two baking sheets with parchment paper. This is an essential step to ensure that your cookies bake evenly and don’t stick to the sheets.

  2. Cream together softened butter and granulated sugar in a large bowl until the mixture is light and fluffy, approximately 3 minutes. Then, mix in the egg and vanilla extract until fully combined for a rich flavor.

  3. Whisk together the all-purpose flour, baking powder, and salt in another bowl. Gradually add this dry mixture to the creamed butter mixture, stirring well until everything is fully incorporated and the dough is smooth.

  4. Scoop tablespoon-sized portions of dough and place them on the prepared baking sheets, pressing down lightly to form charming heart shapes. Aim for uniformity to ensure even baking.

  5. Bake the cookies for 10-12 minutes or until the edges are lightly golden. Once done, allow them to cool on wire racks before decorating or serving, so they maintain their lovely shape.

Optional: Consider sprinkling them with a bit of powdered sugar for an extra touch of sweetness.

Exact quantities are listed in the recipe card below.

Ruffled Heart Sugar Cookies Variations

Feel free to get creative and tailor these Ruffled Heart Sugar Cookies to your taste and dietary needs!

  • Gluten-Free: Substitute all-purpose flour with a gluten-free blend for a tasty alternative. Just ensure your blend includes a binding agent for the best texture.

  • Dairy-Free: Use coconut oil or a dairy-free butter substitute, ensuring your cookies remain rich and delightful without dairy. They’ll still melt in your mouth!

  • Vegan: Replace the egg with a flax egg (1 tbsp ground flaxseed + 2.5 tbsp water) for a plant-based twist that doesn’t compromise on flavor.

  • Flavor Infusion: Add 1 tsp of almond or lemon extract for a sweet surprise kick, enhancing each bite with a unique twist that can brighten your day!

  • Choco-Lover: Mix in ½ cup of chocolate chips or chunks into the dough for those who can’t resist a chocolatey companion amidst the sweet vanilla.

  • Nutty Delight: Fold in ½ cup of finely chopped nuts, such as pecans or walnuts, to add crunch and depth to your cookies, creating a delicious texture contrast.

  • Citrus Zest: Incorporate some grated lemon or orange zest for a refreshing zing, making each bite feel like a sunny treat and lifting spirits instantly!

  • Spiced Up: Add a pinch of cinnamon or nutmeg to the dough for a warm, cozy flavor that’s perfect for any occasion, wrapping your kitchen in a delightful aroma.

Make Ahead Options

These Ruffled Heart Sugar Cookies are fantastic for busy home cooks looking to save time without sacrificing flavor! You can prepare the cookie dough up to 3 days in advance; simply wrap it tightly in plastic wrap and refrigerate it to maintain freshness. When you’re ready to bake, scoop the dough onto baking sheets and allow it to rest at room temperature for about 15-20 minutes. Bake as directed, and you’ll enjoy the same delightful, heart-shaped cookies just as if they were made fresh that day. Alternatively, you can bake and freeze the cookies for up to 3 months; just thaw them overnight in the refrigerator before serving. This way, you can whip up a batch of these charming cookies anytime you need a sweet treat!

What to Serve with Ruffled Heart Sugar Cookies?

Imagine the warmth of freshly baked cookies accompanied by delightful pairs that elevate your home-baked experience to new heights.

  • Milk: A classic pairing that enhances the sweetness of the cookies and provides a rich, creamy contrast.

  • Fresh Berries: Juicy strawberries or raspberries bring a burst of freshness, balancing the sweetness with a delightful tang.

  • Chocolate Fondue: Dip your cookies in warm, melted chocolate for an indulgent treat that adds a luxurious touch.

  • Vanilla Ice Cream: Scoop some creamy vanilla ice cream alongside your cookies for a delightful soft and crunchy texture contrast.

  • Coffee or Tea: Enjoy these sweet treats with a warm cup of coffee or tea, making every bite feel comforting and cozy.

  • Fruit Salad: A vibrant mix of seasonal fruits offers a refreshing contrast to the buttery cookies, perfect for those looking for a lighter touch.

  • Whipped Cream: Top your cookies with a dollop of whipped cream for a pillowy addition that brings a touch of decadence.

  • Lemonade: A zesty glass of lemonade pairs wonderfully, cutting through the sweetness for a refreshing sip in between bites.

How to Store and Freeze Ruffled Heart Sugar Cookies

Room Temperature: Store the cooled cookies in an airtight container at room temperature for up to 3 days to maintain their soft texture and delightful flavor.

Fridge: For extended freshness, you can refrigerate the cookies in an airtight container for up to a week, allowing you to enjoy them longer while keeping them delicious.

Freezer: Freeze the cookies by placing them in a single layer on a baking sheet until firm, then transfer them to an airtight container or freezer bag. They can be frozen for up to 3 months.

Reheating: To enjoy your Ruffled Heart Sugar Cookies warm, simply pop them in the microwave for 10-15 seconds or warm them in the oven at 350°F (175°C) for about 5 minutes.

Chef's Helpful Tips

  • For the perfect Ruffled Heart Sugar Cookies, make sure your butter is softened to room temperature to achieve a light and fluffy texture when creaming with sugar.
  • Avoid overmixing the dough once the flour is added, as this can lead to tough cookies; mix just until combined.
  • To ensure even baking and consistent shapes, use a cookie scoop and gently press the dough down to form the hearts.
  • Keep an eye on them while baking, as the edges should only just turn golden after 10-12 minutes for the best results.

Ruffled Heart Sugar Cookies Recipe FAQs

How do I choose the best ingredients for Ruffled Heart Sugar Cookies?
When selecting ingredients for your Ruffled Heart Sugar Cookies, opt for high-quality unsalted butter and pure vanilla extract. Ensure the butter is softened for easy creaming; it should feel cool but still pliable. For the flour, look for all-purpose flour labeled “bleached” or “unbleached” — both work well, but unbleached might give a slightly denser texture.

How should I store my Ruffled Heart Sugar Cookies?
Store your cooled Ruffled Heart Sugar Cookies in an airtight container at room temperature for up to 3 days. To maintain their soft texture, separate layers of cookies with parchment paper if you’re stacking them in the container. If you want to keep them fresh longer, refrigerate them for up to a week in a similar airtight setup.

What’s the best way to freeze Ruffled Heart Sugar Cookies?
Freezing your Ruffled Heart Sugar Cookies is easy! First, place them in a single layer on a baking sheet and freeze until solid, about 1-2 hours. Once firm, transfer them to an airtight container or a freezer-safe bag, isolating layers with wax paper if you prefer. They can be frozen for up to 3 months, preserving their delightful texture and flavor.

What should I do if my cookie dough turns out too sticky?
If you find your cookie dough is too sticky to handle, don’t worry! Start by dusting your work surface and hands with a little flour to help manage the stickiness. If needed, chill the dough in the refrigerator for about 30 minutes, which can make it much easier to scoop and shape. Just be sure not to add too much flour, as that can alter the cookie’s texture.

Are Ruffled Heart Sugar Cookies safe for pets or those with allergies?
Ruffled Heart Sugar Cookies contain common allergens like wheat (gluten) and dairy (butter), so they are not suitable for individuals with gluten or dairy allergies. Moreover, it’s important to keep these cookies away from pets, especially dogs, as ingredients like chocolate or certain nuts can be toxic for them. Always check your ingredient labels for any allergens if you’re baking for someone with dietary restrictions.

Ruffled Heart Sugar Cookies

Ruffled Heart Sugar Cookies

Delight in the sweet charm of Ruffled Heart Sugar Cookies, perfect for sharing with loved ones.
Print Recipe Pin Recipe
Prep Time 15 minutes mins
Cook Time 12 minutes mins
Cooling Time 10 minutes mins
Total Time 37 minutes mins
Servings: 24 cookies
Course: DESSERT RECIPES
Calories: 150
Ingredients Equipment Method Nutrition Notes

Ingredients
  

For the Cookie Dough
  • 2.75 cups all-purpose flour for a perfectly balanced dough that holds its shape when baking.
  • 1 cup granulated sugar enhances sweetness while ensuring a delightful texture.
  • 1 cup unsalted butter softened, creates a rich, buttery flavor that melts in your mouth.
  • 1 large egg helps bind the ingredients together, creating a tender cookie.
  • 2 tsp vanilla extract brings a warm, inviting aroma that perfectly complements the sweetness.
  • 1 tsp baking powder helps the cookies rise beautifully, giving them a soft, light texture.
  • 0.5 tsp salt balances the sweetness and enhances the overall flavor of the cookies.

Equipment

  • Mixing bowls
  • baking sheets
  • parchment paper
  • Whisk
  • cookie scoop
  • Oven

Method
 

How to Make Ruffled Heart Sugar Cookies
  1. Preheat your oven to 350°F (175°C) and line two baking sheets with parchment paper.
  2. Cream together softened butter and granulated sugar in a large bowl until the mixture is light and fluffy, approximately 3 minutes.
  3. Mix in the egg and vanilla extract until fully combined for a rich flavor.
  4. Whisk together the all-purpose flour, baking powder, and salt in another bowl.
  5. Gradually add this dry mixture to the creamed butter mixture, stirring well until everything is incorporated.
  6. Scoop tablespoon-sized portions of dough onto the prepared baking sheets, pressing down lightly to form heart shapes.
  7. Bake for 10-12 minutes or until the edges are lightly golden. Cool on wire racks before decorating or serving.

Nutrition

Serving: 1cookieCalories: 150kcalCarbohydrates: 20gProtein: 1gFat: 7gSaturated Fat: 4gPolyunsaturated Fat: 0.5gMonounsaturated Fat: 2gCholesterol: 20mgSodium: 100mgPotassium: 30mgFiber: 0.5gSugar: 10gVitamin A: 200IUCalcium: 10mgIron: 0.4mg

Notes

Optional: Consider sprinkling with a bit of powdered sugar for an extra touch of sweetness. Store cookies in an airtight container to maintain freshness.

Tried this recipe?

Let us know how it was!

Filed Under: BREAKFAST & BRUNCH

Chocolate Covered Strawberry Cheesecake

February 3, 2026 by JudyWhite Leave a Comment

There’s a certain allure that comes with the indulgence of a Chocolate Covered Strawberry Cheesecake; it’s a dessert that seems to whisper “celebration” with each creamy, decadent bite. Imagine hosting friends or simply treating yourself after a long week—this cheesecake transforms an ordinary day into something special.

When I first attempted to create a dessert that married my two favorite treats, chocolate and strawberries, the result was pure magic. The way the rich cream cheese filling perfectly complements the nutty notes of the chocolate graham cracker crust is something to rave about. Plus, it’s surprisingly easy to whip up!

Whether it’s a birthday bash or a casual Sunday dinner, this showstopper not only pleases the palate but is also a charming conversation starter. Trust me, your loved ones will be coming back for seconds (and thirds!). Let’s get baking and create a dessert that will leave everyone craving just one more slice!

Why You'll Love This Chocolate Covered Strawberry Cheesecake

  • This Chocolate Covered Strawberry Cheesecake is not only incredibly easy to make, but it’s also a stunning centerpiece for any gathering.
  • You will be amazed at how the rich flavor of the cream cheese filling pairs perfectly with the delightful taste of fresh strawberries and chocolate.
  • Its versatility means it can be dressed up for special occasions or enjoyed casually at home with family.
  • Plus, with a prep time of just 30 minutes, this dessert is perfect for those who want to impress without spending all day in the kitchen.

Chocolate Covered Strawberry Cheesecake Ingredients

Get ready to gather some delightful ingredients for a dessert that truly impresses!

For the Crust

  • Chocolate graham cracker crumbs – these provide a rich, chocolatey foundation for your cheesecake.
  • Unsalted butter – helps to bind the crumbs together for a perfect crust.

For the Filling

  • Cream cheese – the star of the show, bringing creaminess and a tangy flavor to the cheesecake.
  • Granulated sugar – sweetens the filling beautifully, balancing the cream cheese’s tanginess.
  • Vanilla extract – adds a hint of warmth and depth to your cheesecake flavor.
  • Heavy cream – this ingredient is key for achieving a fluffier texture in your cheesecake.
  • Fresh strawberries – they not only add flavor but also brighten up the overall presentation.

For the Drizzle

  • Chocolate chips – melted and drizzled on top for that signature chocolate-covered element that elevates this dessert!

This Chocolate Covered Strawberry Cheesecake is easy to prepare and promises to be a delightful treat for any occasion!

How to Make Chocolate Covered Strawberry Cheesecake

  1. Preheat the oven to 350°F (175°C). This sets the perfect stage for your crust to bake. While your oven warms up, get your ingredients ready for a seamless process!

  2. Mix the chocolate graham cracker crumbs with melted butter in a bowl. Stir until the mixture is evenly moistened, then press it firmly into the bottom of a springform pan to form a solid crust.

  3. Beat the softened cream cheese in another bowl until it’s smoothly whipped. Gradually add sugar and vanilla extract, mixing until everything is well combined and you have a creamy texture.

  4. Add the heavy cream and beat until stiff peaks form. This step ensures your cheesecake filling is light and airy! Gently fold in the chopped strawberries for that delightful pop of freshness.

  5. Pour the cream cheese mixture over your cooled crust. Smooth the top with a spatula. Cover with plastic wrap and place it in the refrigerator for at least four hours, or overnight if you can wait!

  6. Melt the chocolate chips in the microwave or over a double boiler until smooth. Drizzle the melted chocolate over the chilled cheesecake before serving. Garnish with extra fresh strawberries for a beautiful touch!

Optional: Serve with whipped cream on the side for an extra indulgence!
Exact quantities are listed in the recipe card below.

What to Serve with Chocolate Covered Strawberry Cheesecake?

Transform your dessert experience with delightful pairings that enhance the joy of your cheesecake!

  • Fresh Berries: Fresh raspberries or blueberries add a tart contrast, brightening up your dessert with freshness and color.

  • Whipped Cream: Light and airy, a dollop of whipped cream brings a luxurious touch, balancing the creaminess for a delightful bite.

  • Chocolate Sauce: A drizzle of rich chocolate sauce intensifies the chocolate flavor, creating a decadent layer of indulgence.

  • Vanilla Ice Cream: Creamy vanilla ice cream melts against the cheesecake’s richness, offering a soothing and delightful temperature contrast.

  • Coffee or Espresso: The boldness of coffee beautifully complements the sweetness of the cheesecake, making each bite even more satisfying.

  • Mint Leaves: A sprinkle of fresh mint brings a refreshing burst, cutting through the sweetness and adding a lovely touch of color.

  • Sparkling Wine: The bubbly effervescence of sparkling wine enhances the celebratory nature of your dessert, making it perfect for special occasions.

  • Chocolate-Covered Almonds: Adding crunchy chocolate-covered almonds on the side brings delightful texture and a nutty flavor that harmonizes beautifully.

Each of these pairings elevates your delectable Chocolate Covered Strawberry Cheesecake, creating an unforgettable dessert experience!

Make Ahead Options

This Chocolate Covered Strawberry Cheesecake is ideal for busy home cooks looking to save time without sacrificing quality! You can prepare the crust and filling up to 24 hours in advance. Simply mix the chocolate graham cracker crumbs with melted butter and press into your springform pan; store it covered at room temperature. Then, combine and whip the cream cheese mixture (cream cheese, sugar, vanilla, heavy cream, and strawberries) and refrigerate it overnight, ensuring it stays fresh and creamy. When you’re ready to impress, simply pour the filling over the crust and let it chill for at least four hours before serving. Drizzle with melted chocolate before presenting, and you’ll have a delightful dessert ready to wow your guests with minimal last-minute effort!

Chocolate Covered Strawberry Cheesecake Variations

Feel free to personalize your Chocolate Covered Strawberry Cheesecake for a different twist that’s all your own!

  • Nut-Free: Use regular graham cracker crumbs instead of chocolate graham crackers for a simple crust change. You still get that delightful base without the nutty notes.

  • Vegan: Substitute cream cheese and heavy cream with plant-based alternatives. Almond or oat creams work beautifully, making this dessert dairy-free and just as creamy!

  • Sugar-Free: Swap out granulated sugar for a favorite sweetener like erythritol or monk fruit. You won’t lose flavor and can enjoy a guilt-free treat!

  • Chocolate Lovers: Add cocoa powder to the cream cheese mixture for an extra chocolatey flavor. This can make the filling decadently rich and indulgent!

  • Berry Medley: Instead of just strawberries, fold in raspberries or blueberries for a fresh twist. A medley of berries will surprise your taste buds in every bite.

  • Zesty Citrus: Incorporate some finely grated lemon or orange zest into the filling. This brightens up the flavors and adds a refreshing zing to the creamy cheesecake.

  • Spicy Kick: Add a pinch of cayenne pepper or chili powder to the chocolate drizzle. This surprising addition provides a delightful heat that beautifully balances the sweetness!

  • Crunchy Topping: Sprinkle crushed nuts or toffee bits over the top before drizzling chocolate. This adds a delightful crunch and new texture, elevating your dessert even more!

Storage Tips for Chocolate Covered Strawberry Cheesecake

  • Fridge: Store leftover cheesecake in an airtight container in the refrigerator for up to 3 days. This keeps it fresh and the flavors intact.

  • Freezer: You can freeze the cheesecake for up to 2 months. Wrap it tightly in plastic wrap and then in aluminum foil to prevent freezer burn.

  • Thawing: To enjoy a frozen cheesecake, transfer it to the fridge and let it thaw overnight before serving.

  • Reheating: Enjoy this Chocolate Covered Strawberry Cheesecake cold, or let it sit at room temperature for about 30 minutes for the best texture before serving.

Chef's Helpful Tips

  • When making Chocolate Covered Strawberry Cheesecake, ensure your cream cheese is at room temperature for easy blending to avoid lumps in your filling.
  • A common mistake is not incorporating enough air into the heavy cream; whip it until stiff peaks form for a light texture.
  • Use a spatula to gently fold in strawberries to maintain their shape and prevent them from sinking in the batter.
  • For best results, refrigerate the cheesecake overnight so it sets perfectly and flavors meld beautifully before serving.

Chocolate Covered Strawberry Cheesecake Recipe FAQs

How do I select the best strawberries for my cheesecake?
Absolutely! Look for strawberries that are vibrant in color and free from blemishes. They should feel firm and have a sweet aroma, indicating their ripeness. Avoid those with dark spots or that are mushy, as they might be overripe.

How should I store leftover Chocolate Covered Strawberry Cheesecake?
You can store any leftover cheesecake in an airtight container in the refrigerator for up to 3 days. This keeps the cheesecake fresh while maintaining its creamy texture and flavors. Be sure to cover it well to prevent any fridge odors from affecting the taste!

Can I freeze Chocolate Covered Strawberry Cheesecake?
Very! To freeze your cheesecake, first let it cool completely, then carefully wrap it in plastic wrap and again in aluminum foil. This protects it from freezer burn. You can keep it in the freezer for up to 2 months. When you’re ready to enjoy it, transfer the cheesecake to the fridge to thaw overnight.

What should I do if my cheesecake is too runny?
If you find your cheesecake filling is too runny, it could be due to under-whipping the heavy cream. Make sure to whip it until stiff peaks form before folding in strawberries. Alternatively, you can gently heat a bit of cornstarch with water to create a slurry, then stir it into the filling and re-whip until combination becomes thicker.

Is this dessert safe for my pets?
While Chocolate Covered Strawberry Cheesecake is a delightful treat for humans, it’s important to keep it away from pets. Chocolate can be toxic to dogs and cats, so make sure to store any leftovers securely out of their reach.

What can I do if I’m allergic to gluten?
If you have a gluten allergy, you can substitute regular chocolate graham cracker crumbs with gluten-free graham crackers or crushed gluten-free cookies. There are many delicious options available that will provide that same delightful crust without compromising on flavor!

Chocolate Covered Strawberry Cheesecake

Chocolate Covered Strawberry Cheesecake

Indulge in this rich and creamy Chocolate Covered Strawberry Cheesecake, a perfect blend of chocolate and strawberries that promises to elevate any celebration.
Print Recipe Pin Recipe
Prep Time 30 minutes mins
Chilling Time 4 hours hrs
Total Time 4 hours hrs 30 minutes mins
Servings: 8 slices
Course: DESSERT RECIPES
Calories: 400
Ingredients Equipment Method Nutrition Notes

Ingredients
  

Crust
  • 2 cups chocolate graham cracker crumbs
  • 1/2 cup unsalted butter, melted
Filling
  • 16 oz cream cheese, softened
  • 3/4 cup granulated sugar
  • 1 tsp vanilla extract
  • 1 cup heavy cream
  • 2 cups fresh strawberries, chopped
Drizzle
  • 1 cup chocolate chips

Equipment

  • Springform pan
  • Mixing bowls
  • Electric mixer
  • Spatula
  • measuring cups
  • measuring spoons
  • microwave or double boiler

Method
 

Preparation
  1. Preheat the oven to 350°F (175°C).
  2. Mix the chocolate graham cracker crumbs with melted butter in a bowl, then press firmly into the bottom of a springform pan.
  3. Beat the softened cream cheese until whipped, then gradually add sugar and vanilla extract until well combined.
  4. Add heavy cream and beat until stiff peaks form, then gently fold in the chopped strawberries.
  5. Pour cream cheese mixture over the cooled crust and smooth the top. Cover and refrigerate for at least 4 hours or overnight.
  6. Melt the chocolate chips and drizzle over the chilled cheesecake before serving. Garnish with extra fresh strawberries.

Nutrition

Serving: 1sliceCalories: 400kcalCarbohydrates: 34gProtein: 5gFat: 28gSaturated Fat: 17gCholesterol: 80mgSodium: 250mgPotassium: 180mgFiber: 1gSugar: 20gVitamin A: 800IUVitamin C: 5mgCalcium: 60mgIron: 1mg

Notes

For best results, refrigerate overnight and ensure cream cheese is at room temperature before blending.

Tried this recipe?

Let us know how it was!

Filed Under: BREAKFAST & BRUNCH

Breakfast Sandwiches

February 3, 2026 by JudyWhite Leave a Comment

When the weekend rolls around, there’s nothing quite like the promise of a homemade breakfast sandwich to elevate my morning routine. The combination of crispy bacon or savory sausage, fluffy scrambled eggs, and melted cheese nestled between warm, toasted English muffins brings joy to my taste buds like nothing else. Sometimes, the simplest ingredients create the most delightful meals, and trust me, this breakfast sandwich recipe is a perfect example.

After whipping up a batch of these delicious sandwiches in just 25 minutes, you’ll wonder why you ever settled for fast food. With the option to add creamy avocado for extra richness, this dish not only satisfies the palate but also showcases versatility, making it perfect for brunch with friends or a quick morning boost before work. Join me as we dive into this deliciously simple recipe that’s guaranteed to awaken your senses and start your day on the right note!

Why You'll Love This Breakfast Sandwiches

  • This breakfast sandwich recipe is incredibly easy to make, taking just 25 minutes from start to finish.
  • The delightful combination of crispy bacon or savory sausage, fluffy scrambled eggs, and melted cheese creates an explosion of flavor that will leave you craving more.
  • Its versatility means you can customize each sandwich with your favorite ingredients, like creamy avocado or fresh herbs, making it suitable for any occasion.
  • Plus, they look fantastic on a plate, making them a perfect centerpiece for brunch gatherings or a comforting breakfast at home.

Breakfast Sandwich Ingredients

Get ready to whip up a delicious breakfast!

For the Eggs

  • 4 large eggs – the star of the dish, providing protein and creaminess.

For the Protein

  • 4 strips of bacon or 4 sausage patties – choose your favorite for that irresistible savory goodness.

For the Cheese

  • 4 slices of cheddar or American cheese – adds that melty richness to your breakfast sandwiches.

For the Bread

  • 2 English muffins, split in half – the perfect vessel for all your delicious fillings, toasted to perfection.

Optional Topping

  • 1 ripe avocado – a creamy addition that brings extra flavor and heart-healthy fats to your meal.

How to Make Breakfast Sandwiches

  1. Cook the Protein: In a skillet over medium heat, cook the bacon or sausage until crispy, about 5-7 minutes. Remove from the skillet and drain on paper towels to absorb excess grease.

  2. Toast the Muffins: In the same skillet, toast the English muffin halves until they are golden brown, approximately 2-3 minutes per side. This adds delightful crunch to your sandwich!

  3. Scramble the Eggs: In a bowl, whisk the eggs with a pinch of salt and pepper to taste. Pour the mixture into a non-stick skillet over low heat, stirring gently until the eggs are soft and fluffy, around 4-5 minutes.

  4. Assemble the Sandwiches: Layer the cooked meat, fluffy scrambled eggs, cheese, and optional avocado on one half of each muffin. Top with the other half, making a delightful sandwich.

  5. Melt the Cheese: Place the assembled sandwiches back in the skillet for about one minute on each side, just until the cheese melts and everything is warm.

  6. Serve and Enjoy: Serve the sandwiches warm, garnished with optional toppings like chives or alongside a fresh side of fruit to brighten up your plate.

Optional: Add a sprinkle of fresh herbs on top for extra flavor.

Exact quantities are listed in the recipe card below.

Make Ahead Options

These Breakfast Sandwiches are perfect for meal prep enthusiasts looking to save time during busy mornings! You can prepare the bacon or sausage and scrambled eggs up to 24 hours in advance. Simply cook the protein and eggs as directed, then let them cool completely before refrigerating them in an airtight container. The assembled sandwiches can also be made ahead and stored separately for up to 3 days. When you’re ready to enjoy, just toast the muffins and reheat the sandwiches in a skillet or microwave until warm, ensuring they stay just as delicious and satisfying! This makes breakfast effortless and keeps fast food out of the equation.

Breakfast Sandwich Variations

Get ready to mix things up with these tasty twists!

  • Veggie-Packed: Add sautéed spinach, tomatoes, or bell peppers for a fresh crunch and extra nutrients. This version is colorful and bursting with flavor.
  • Spicy Kick: Toss in jalapeños or a dash of hot sauce for those who crave a bit of heat to start their day. It really amps up the excitement!
  • Gluten-Free: Swap the English muffins for gluten-free alternatives like corn tortillas or chickpea flour wraps for a lighter option. Your taste buds won’t even notice!
  • Herb Infusion: Incorporate fresh herbs like basil or cilantro into your scrambled eggs for a fragrant and vibrant flavor boost. It’s a delightful surprise in every bite!
  • Breakfast Burrito: Wrap all your ingredients in a large tortilla instead for a portable breakfast option that’s great for busy mornings. Just roll it up and go!
  • Cheese Switch: Experiment with different cheeses like pepper jack for a little extra zing or feta for a tangy twist. Cheese lovers will rejoice in the variety!
  • Baked Egg Cups: Make mini breakfast sandwiches by baking the egg mixture in muffin tins. It creates a fun, shareable treat that’s perfect for brunch gatherings.
  • Savory Sausage Patties: Use turkey or plant-based sausage for a healthier protein option that still satisfies. You’ll enjoy all the flavor without the extra calories!

How to Store and Freeze Breakfast Sandwiches

Fridge: Store leftover breakfast sandwiches in an airtight container for up to 3 days. Reheat in the microwave for about 30-60 seconds or in the skillet for the best texture.

Freezer: Wrap individual sandwiches tightly in plastic wrap and place them in a freezer bag. They can be frozen for up to 2 months. Reheat directly from frozen in the microwave or a toaster oven.

Reheating: For optimal results, reheat thawed sandwiches in a skillet over low heat for about 5 minutes, flipping halfway through to ensure even warming. Remember, keeping the heat low helps maintain the fluffiness of the eggs.

What to Serve with Breakfast Sandwiches?

Create the perfect weekend breakfast by pairing these delightful sandwiches with sides that enhance their warmth and flavor.

  • Crispy Hash Browns: These golden, crunchy bites will add texture and a satisfying crunch to your meal, perfectly balancing the softness of the sandwich.

  • Fresh Fruit Salad: A vibrant mix of seasonal fruits brightens your plate while providing a refreshing contrast to the savory breakfast sandwiches.

  • Spicy Sriracha Mayo: Spread a bit of spicy mayo on your sandwiches for an extra kick that tantalizes the taste buds and elevates your breakfast experience.

  • Maple Syrup Drizzle: A light drizzle of maple syrup can transform your breakfast sandwiches into a sweet and savory delight, reminiscent of brunches at your favorite diner.

  • Chive and Cream Cheese Spread: This smooth and herby spread adds a rich, tangy layer of flavor that enhances the overall taste, making every bite more indulgent.

  • Iced Coffee: A tall glass of iced coffee offers a refreshing caffeine boost, making it the ideal drink pairing to perk up your morning routine.

  • Yogurt Parfait: Layered with granola and fresh berries, this creamy addition adds a delightful sweetness and contrasting texture, perfect for balancing the richness of your sandwiches.

  • Mimosa: Celebrate the morning with a bubbly mimosa, combining fresh orange juice and champagne for a light, festive drink that complements your brunch spread beautifully.

Chef's Helpful Tips

  • When making breakfast sandwiches, use fresh eggs for the fluffiest scrambled texture; older eggs may not whisk as well and can result in a denser mixture.
  • Avoid overcrowding the skillet when cooking bacon or sausage to ensure they brown evenly and crisp up nicely.
  • For the perfect melted cheese, cover the skillet with a lid for about a minute while the sandwiches are warming, trapping heat and steam.
  • Remember to keep the heat low when scrambling the eggs to avoid overcooking them, which can lead to a rubbery texture.

Breakfast Sandwiches Recipe FAQs

What kind of eggs should I use for the best breakfast sandwiches?
Absolutely! Fresh eggs are essential for creating fluffy scrambled eggs. Older eggs can yield a denser texture, which can detract from the overall enjoyment of your breakfast sandwich. The fresher, the better for crisp, light sandwiches!

How should I store leftover breakfast sandwiches?
Store leftover breakfast sandwiches in an airtight container in the refrigerator. They will stay fresh for up to 3 days! When you’re ready to enjoy them again, reheat each sandwich in the microwave for about 30-60 seconds, or for a delightful texture, warm them up in a skillet.

Can I freeze breakfast sandwiches for later?
Yes, you certainly can! Wrap each sandwich tightly in plastic wrap and then place them in a freezer bag for extra protection from freezer burn. They can be stored for up to 2 months. To reheat, you can cook them directly from frozen in the microwave, or if you prefer, use a toaster oven for that crispy finish.

What should I do if my eggs turn out rubbery?
If your scrambled eggs are rubbery, it may be because they were cooked at too high a temperature. Always use low heat and stir gently, allowing them to cook slowly to retain that fluffy texture. For bonus tips, consider adding a splash of milk or cream to the egg mixture to enhance creaminess and prevent overcooking!

Can I modify this breakfast sandwich recipe for dietary restrictions?
Very much! If you enjoy a meat-free breakfast, feel free to replace the bacon or sausage with sautéed vegetables like spinach, mushrooms, or bell peppers. Additionally, you can use gluten-free English muffins or even a low-carb option by wrapping the fillings in lettuce! Just ensure all ingredient substitutions align with your dietary preferences.

Is avocado good for breakfast sandwiches?
Absolutely! Avocado not only adds a rich, creamy texture but also provides healthy fats that are great for your morning energy levels. Just make sure your avocado is ripe, which means it should yield slightly to gentle pressure when you squeeze it. If you have leftovers, store them with the pit in an airtight container to maintain freshness, although they’re best enjoyed right away!

Breakfast Sandwiches

Breakfast Sandwiches

Elevate your morning routine with these delicious breakfast sandwiches, featuring crispy bacon, fluffy scrambled eggs, and melted cheese.
Print Recipe Pin Recipe
Prep Time 10 minutes mins
Cook Time 15 minutes mins
Total Time 25 minutes mins
Servings: 4 sandwiches
Course: BREAKFAST & BRUNCH
Cuisine: American
Calories: 450
Ingredients Equipment Method Nutrition Notes

Ingredients
  

For the Eggs
  • 4 large eggs the star of the dish, providing protein and creaminess
For the Protein
  • 4 strips bacon choose your favorite for irresistible savory goodness
  • 4 patties sausage for an alternative protein option
For the Cheese
  • 4 slices cheddar cheese adds melty richness
  • 4 slices American cheese adds melty richness
For the Bread
  • 2 English muffins split in half the perfect vessel for your fillings
Optional Topping
  • 1 ripe avocado adds extra flavor and heart-healthy fats

Equipment

  • Skillet
  • Whisk
  • airtight container

Method
 

Preparation
  1. In a skillet over medium heat, cook the bacon or sausage until crispy, about 5-7 minutes. Remove from the skillet and drain on paper towels to absorb excess grease.
  2. In the same skillet, toast the English muffin halves until golden brown, about 2-3 minutes per side.
  3. In a bowl, whisk the eggs with a pinch of salt and pepper. Pour the mixture into a non-stick skillet over low heat, stirring gently until soft and fluffy, 4-5 minutes.
  4. Layer the cooked meat, fluffy scrambled eggs, cheese, and optional avocado on one half of each muffin. Top with the other half.
  5. Place the assembled sandwiches back in the skillet for about one minute on each side, until the cheese melts.
  6. Serve the sandwiches warm, garnished with optional toppings like chives or alongside fresh fruit.

Nutrition

Serving: 1sandwichCalories: 450kcalCarbohydrates: 30gProtein: 25gFat: 28gSaturated Fat: 10gPolyunsaturated Fat: 4gMonounsaturated Fat: 10gCholesterol: 250mgSodium: 800mgPotassium: 400mgFiber: 3gSugar: 2gVitamin A: 200IUVitamin C: 5mgCalcium: 300mgIron: 2mg

Notes

For the perfect melted cheese, cover the skillet with a lid for about a minute while warming the sandwiches. Use fresh eggs for the fluffiest scrambled texture.

Tried this recipe?

Let us know how it was!

Filed Under: BREAKFAST & BRUNCH

  • « Previous Page
  • 1
  • 2
  • 3
  • 4
  • 5
  • 6
  • …
  • 49
  • Next Page »

Recent Posts

  • Crispy Potatoes in Oven
  • Lucky Charms Pancakes
  • Cheeseburger
  • Boiled Corn on the Cob
  • St. Patrick’s Day Dessert Parfaits

Recent Comments

No comments to show.

Footer

  • Contact
  • Privacy Policy
  • About Us
  • Terms
  • ↑ back to top

Copyright © 2024 www.Forkono.com

Table Of Content