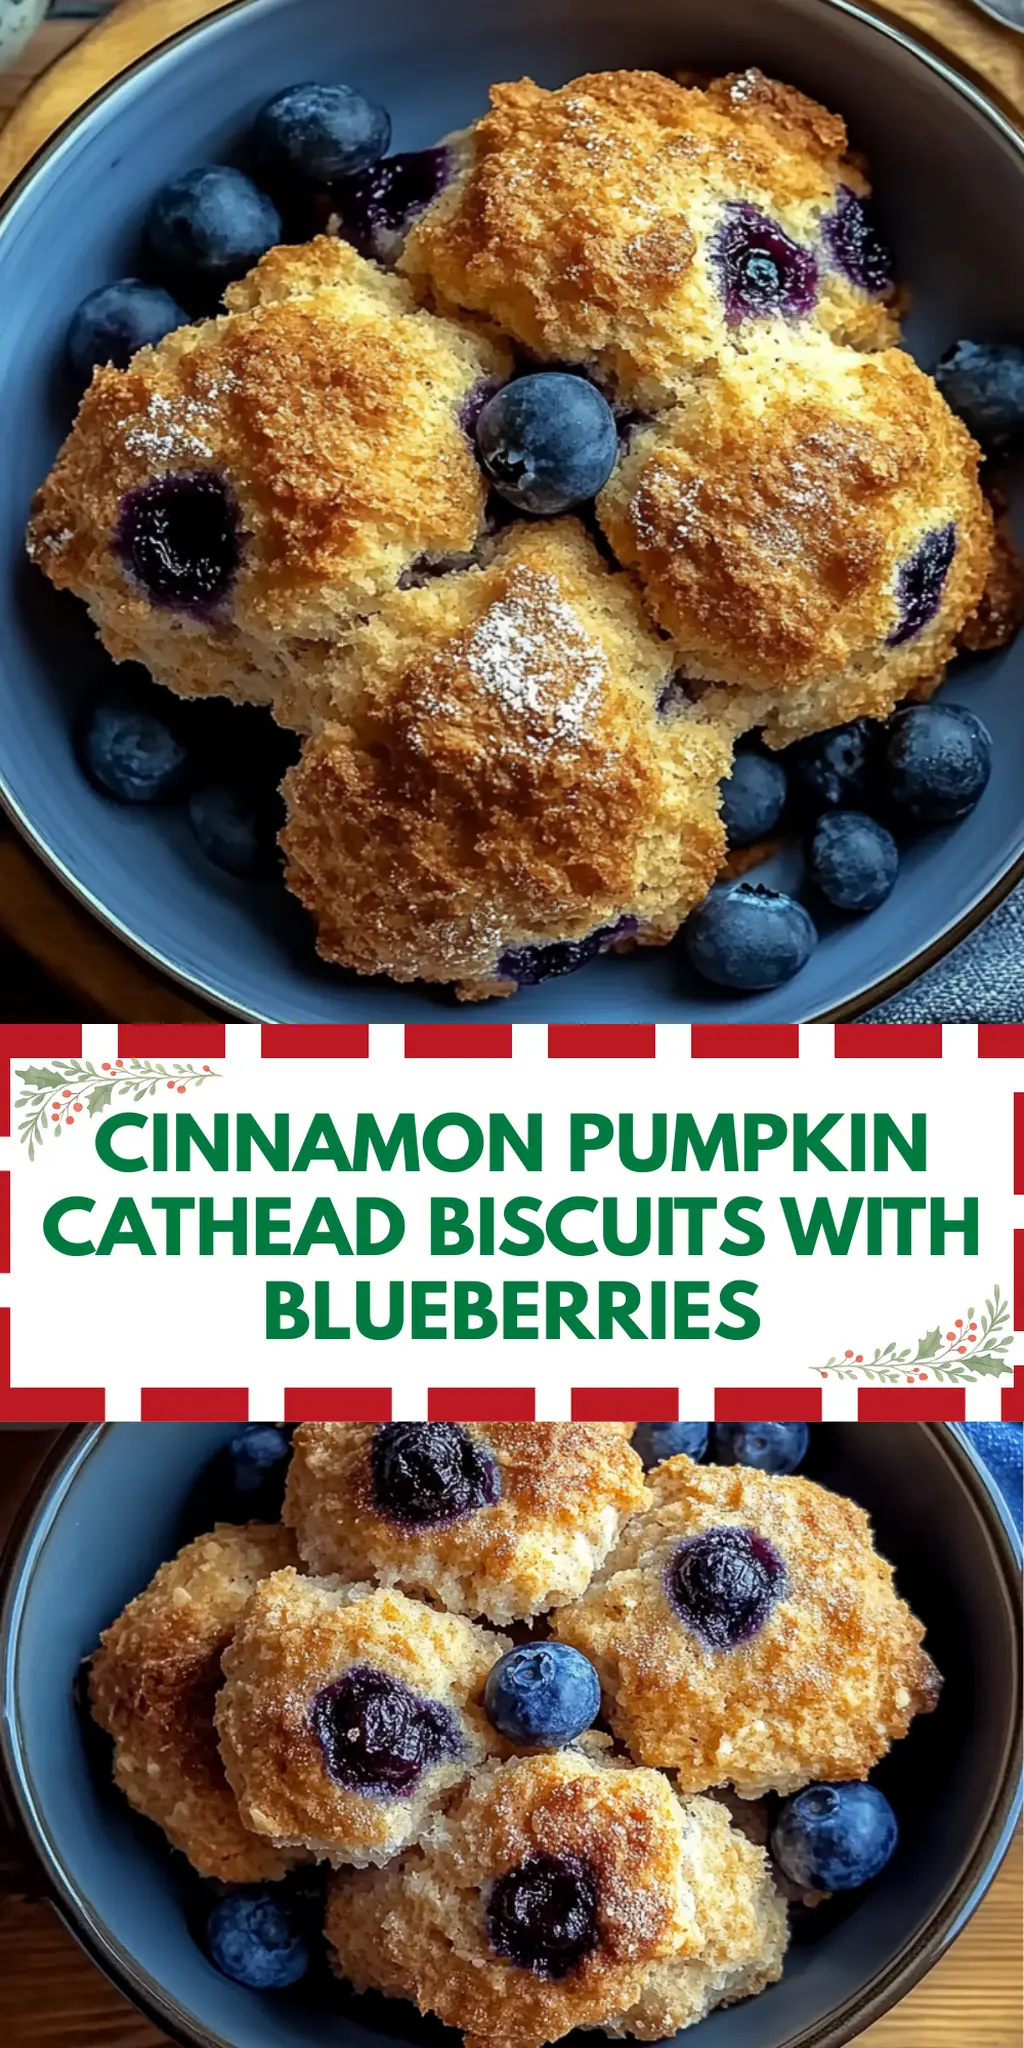
As the first hints of autumn fill the air and leaves crunch underfoot, I find myself yearning for the comforting flavors of fall. That’s when the idea of making Cinnamon Pumpkin Cathead Biscuits with Blueberries struck me. Imagine the warm aroma of cinnamon wafting through your kitchen, mingling with the bold scent of pumpkin and bursts of juicy blueberries. This delightful combination not only fills your home with a cozy vibe but also promises to be an irresistible treat for both family and guests alike.
One unforgettable evening, I had a sudden craving for something that felt both homey and special. I decided to blend the richness of pumpkin with my favorite blues, resulting in biscuits that are truly a feast for the senses. They come together effortlessly, allowing even the busiest of cooks to whip up a batch in no time. Each bite offers a delightful crunch on the outside, followed by a fluffy, tender interior that practically melts in your mouth. Whether you’re enjoying them for breakfast or as a sweet snack, these biscuits are sure to brighten your day and banish any thoughts of fast food. So roll up your sleeves and let’s dive into this delicious fall-inspired recipe!
Why You'll Love This Cinnamon Pumpkin Cathead Biscuits with Blueberries
- These Cinnamon Pumpkin Cathead Biscuits with Blueberries are incredibly easy to make, making them perfect for bakers of all skill levels.
- The warm and inviting flavors of cinnamon, pumpkin, and blueberries create a deliciously unique taste that’s hard to resist.
- Their versatility allows you to enjoy them for breakfast, dessert, or any time in between, adapting to any occasion.
- Visually appealing and perfectly golden, these biscuits will impress your family and guests alike, making them a guaranteed crowd-pleaser.
- Enjoy the delightful aroma and comforting taste of fall with every bite!
Cinnamon Pumpkin Cathead Biscuits Ingredients
Get ready to bake these delightful biscuits!
For the Biscuit Dough
- ⅓ cup light brown sugar (packed) – Adds depth and sweetness, perfectly complementing the pumpkin.
- 1 teaspoon cinnamon – This fragrant spice infuses the biscuits with warmth reminiscent of autumn.
- 1 cup salted butter (grated, cold) – Cold butter ensures flakiness; grating it helps it blend into the dough.
- 4 cups all-purpose flour – The base for these biscuits, providing structure and texture.
- 2 tablespoons granulated sugar – A touch of sweetness that balances the flavors in the dough.
- ½ teaspoon baking soda – Helps the biscuits rise for that perfect fluffy texture.
- 2 tablespoons baking powder – Works with the baking soda for a nice lift in your biscuits.
- 2 cups buttermilk – Adds moisture and a slight tang, making these Cinnamon Pumpkin Cathead Biscuits extra tender.
For the Add-ins
- 1 cup blueberries (fresh or frozen) – Bursting with flavor, they bring a juicy surprise to each bite; don’t thaw if frozen.
For the Topping
- 3 tablespoons heavy cream – Brushed on top before baking for a rich, golden finish.
- 2 tablespoons unsalted butter (melted) – Adds a luscious finish that enhances the warm, comforting flavors.
With these ingredients, you’re just a few simple steps away from baking your very own warm and delightful Cinnamon Pumpkin Cathead Biscuits with Blueberries!
How to Make Cinnamon Pumpkin Cathead Biscuits with Blueberries
-
Preheat your oven to 450°F. This high temperature is essential for those perfectly fluffy biscuits. Spray a 12-inch cast-iron skillet or a large round baking pan with baking spray to prevent sticking.
-
Grate the cold butter using the fine side of a grater onto a piece of parchment paper. Place it in the freezer for about 5 minutes, which will help keep your biscuits tender.
-
Mix the brown sugar and cinnamon in a small bowl. This fragrant mixture will enhance the flavor of your biscuits and will be sprinkled on top for that sweet crunch.
-
Sprinkle 1 tablespoon of the cinnamon sugar mixture evenly into the bottom of the prepared pan. Reserve the remaining mixture for the tops of the biscuits to create a beautiful finish.
-
Whisk together the flour, granulated sugar, baking soda, and baking powder in a large bowl. This will be the dry base for your dough, ensuring a perfectly risen biscuit.
-
Incorporate the grated butter into the dry ingredients using a fork. The goal is to have small, crumbly bits of butter evenly mixed throughout the flour.
-
Pour in the buttermilk and stir until mostly combined. Gently fold the dough over a few times until it’s sticky with no dry bits remaining. If the dough feels too dry, add 1-2 tablespoons of buttermilk.
-
Fold in the blueberries carefully until just incorporated, being gentle to keep them intact. If using frozen blueberries, do not thaw them to maintain their juicy goodness.
-
Divide the dough into 7 equal portions and shape each into a rough ball. This is where the fun begins—make sure they’re not perfect; rustic is the goal!
-
Arrange 6 balls of dough around the edge of the pan, leaving space in the center for the last ball. They should touch, but not be stacked, allowing them to rise beautifully.
-
Brush the tops with heavy cream for a golden finish and sprinkle with the remaining cinnamon sugar mixture. This adds an extra layer of sweetness and crunch.
-
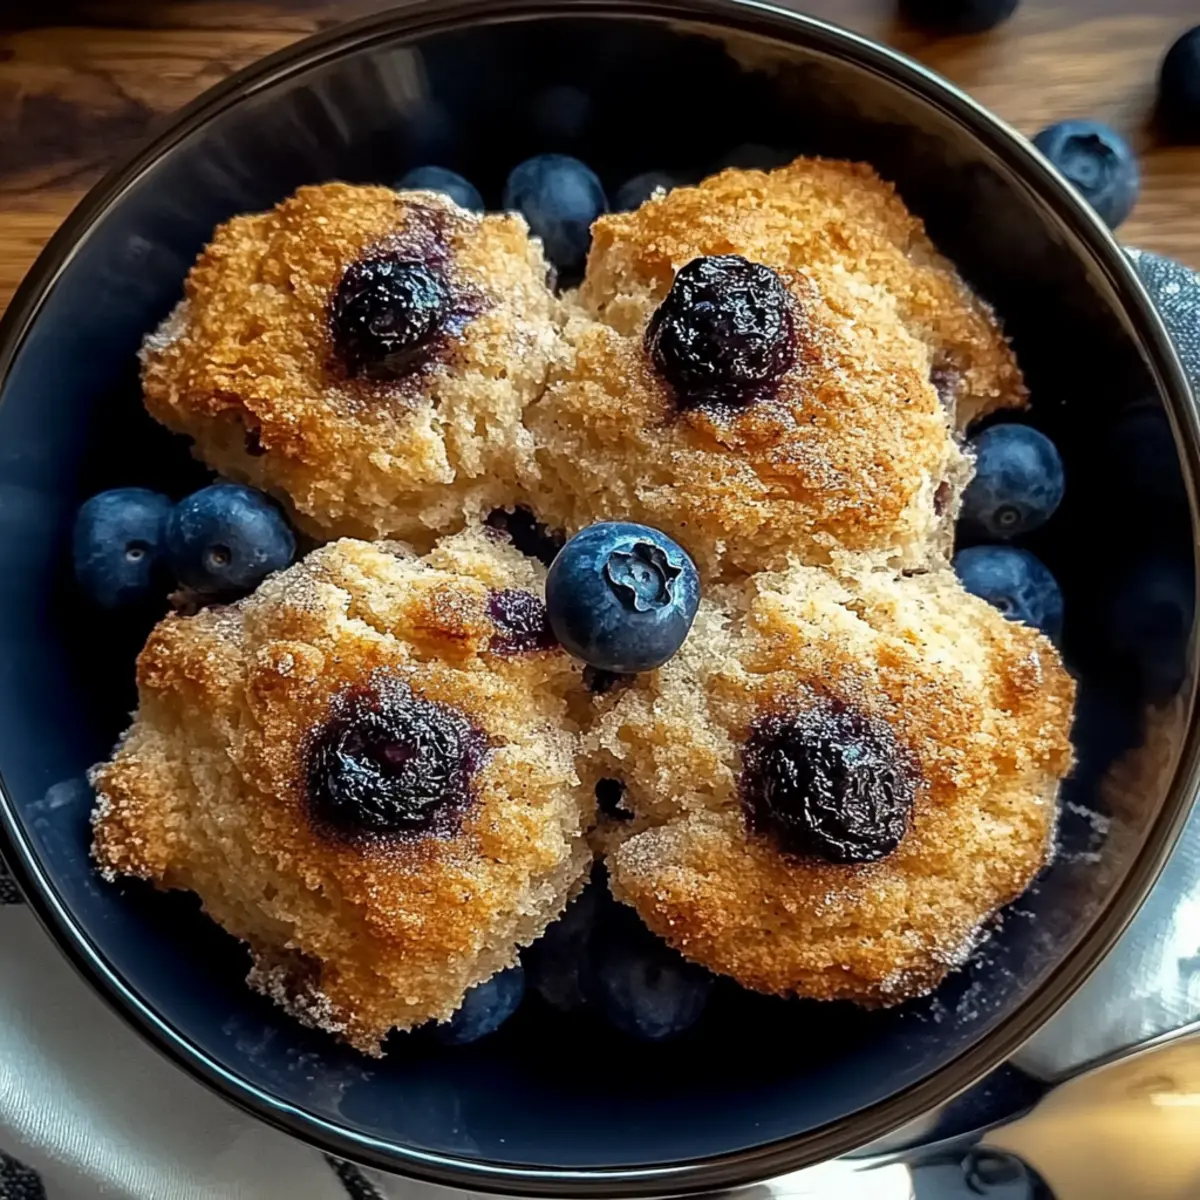
Bake for 22-27 minutes, until the tops are golden brown and the biscuits are puffed up. Enjoy the delightful aroma filling your kitchen!
-
Brush the tops with melted butter right after removing them from the oven. This adds a glossy finish and enhances the comfort of every bite.
-
Serve warm for the best experience, allowing everyone to enjoy that fluffy biscuity goodness while fresh!
Optional: Enjoy these biscuits with a dollop of cream or a drizzle of honey for an extra special treat.
Exact quantities are listed in the recipe card below.
Cinnamon Pumpkin Cathead Biscuit Variations
Feel free to explore these delightful twists on the traditional recipe for an even more personalized treat!
-
Dairy-Free: Substitute buttermilk with almond or oat milk and use plant-based butter for a creamy texture without dairy.
Plant-based options won’t skimp on flavor or fluffiness, so everyone can enjoy a taste of autumn! -
Pumpkin Spice Lovers: Add 1 tablespoon of pumpkin pie spice to the dry ingredients for an extra kick of warm, seasonal flavors.
This twist will intensify the cozy essence of fall, making your biscuits a true celebration of the season! -
Nutty Crunch: Fold in ½ cup of chopped walnuts or pecans to add a satisfying crunch and nutty flavor.
Nuts bring texture and depth, enhancing the delightful bites with added nutrition and earthy nuances. -
Zest It Up: Incorporate 1 teaspoon of orange or lemon zest into the dough for a refreshing citrus note.
Brightening up the flavors, this simple addition creates a harmonious balance with the spices and pumpkin. -
Savory Option: Swap out blueberries for 1 cup of grated cheese (like cheddar) and bacon bits for a savory treat.
These biscuits transform into a delightful appetizer, perfect for parties or brunch, proving versatility in every bite! -
Sweet Swirl: Mix in ¼ cup of caramel or chocolate chips for a sweet, gooey surprise in each biscuit.
This indulgent addition will satisfy any sweet tooth, creating a decadent experience that’s simply unforgettable. -
Herb Infusion: Adding fresh or dried herbs, like rosemary or thyme, to the dough can create a unique twist for a savory version.
The fragrant herbs will make your kitchen smell amazing and elevate the flavor profile beautifully! -
Spicy Kick: Toss in a pinch of cayenne pepper for a gentle heat that complements the sweetness of the blueberries.
This unexpected flavor will intrigue your taste buds, offering a delightful contrast that keeps everyone guessing.
What to Serve with Cinnamon Pumpkin Cathead Biscuits with Blueberries?
These delightful biscuits are the perfect start to a cozy fall meal, inviting comforting flavors to the table.
- Maple Syrup: A drizzle adds a sweet, warm touch that enhances the cinnamon flavor beautifully.
- Spiced Apple Cider: This warm beverage complements the cozy vibes of the biscuits while echoing their autumnal spices.
- Fresh Fruit Salad: A mix of seasonal fruits provides a refreshing contrast to the richness of the biscuits.
- Creamy Yogurt: Adding a dollop of vanilla yogurt adds a tangy creaminess that perfectly balances the sweetness.
- Nutty Granola: Sprinkle some on top for a delightful crunch and texture contrast, elevating your biscuit experience.
- Whipped Cream: Serve with freshly whipped cream for a decadent treat that invites indulgence and warmth.
Pairing your Cinnamon Pumpkin Cathead Biscuits with Blueberries with these delightful choices will create a memorable meal that warms hearts and homes alike!
Make Ahead Options
These Cinnamon Pumpkin Cathead Biscuits with Blueberries are ideal for meal prep, making your busy mornings a breeze! You can prepare the biscuit dough up to 24 hours in advance. Simply follow the recipe until step 8, then wrap the shaped balls of dough tightly in plastic wrap and refrigerate. To maintain quality, avoid adding the blueberries until you’re ready to bake; folding them in just before cooking ensures they remain juicy and prevent discoloration. When you’re ready to enjoy them, preheat the oven, fold in the blueberries, brush with heavy cream, and bake as directed for that fresh-from-the-oven taste that will delight your family!
How to Store and Freeze Cinnamon Pumpkin Cathead Biscuits with Blueberries
Room Temperature: Keep the biscuits in an airtight container for up to 2 days to maintain freshness; perfect for enjoying warm or as a delightful snack.
Fridge: Store in the refrigerator for up to 5 days in an airtight container. Reheat in the oven for about 5-10 minutes at 350°F for that fresh-out-of-the-oven feel.
Freezer: For longer storage, freeze the biscuits in a single layer on a baking sheet, then transfer to a zip-top bag for up to 3 months. Reheat directly from frozen, baking at 350°F for 15-20 minutes.
Reheating: For best results, reheat the biscuits in the oven rather than the microwave to keep them crispy on the outside and soft inside—delicious!
Chef's Helpful Tips
- For the best results with your Cinnamon Pumpkin Cathead Biscuits with Blueberries, it’s crucial to use cold grated butter as it creates a flaky texture.
- Be careful not to overmix the dough after adding buttermilk; you want a sticky dough without dry bits, which helps the biscuits rise beautifully.
- When incorporating blueberries, gently fold them in and avoid thawing if using frozen to keep their burst of flavor intact.
- Always preheat your oven to 450°F for the perfect bake time of 22-27 minutes, ensuring a golden brown top and fluffy interior.
Cinnamon Pumpkin Cathead Biscuits with Blueberries Recipe FAQs
What type of blueberries should I use?
You can use fresh or frozen blueberries in this recipe. If you opt for frozen, there’s no need to thaw them first; they’ll bake up beautifully and add a delicious burst of flavor to each biscuit.
How should I store leftover biscuits?
To keep your Cinnamon Pumpkin Cathead Biscuits with Blueberries fresh, store them in an airtight container at room temperature for up to 2 days. If you’d like to extend their shelf life, refrigerate them for up to 5 days. Just reheat in the oven at 350°F for about 5-10 minutes to enjoy that freshly baked taste again!
Can I freeze these biscuits?
Absolutely! To freeze your biscuits, first place them in a single layer on a baking sheet until they’re frozen firm—this usually takes about 1-2 hours. Once frozen, transfer them to a zip-top freezer bag, and they can stay in the freezer for up to 3 months. To reheat, simply bake them straight from the freezer at 350°F for 15-20 minutes until heated through.
What if my biscuit dough is too dry?
If you find your dough is too dry when mixing, just add in 1-2 tablespoons of buttermilk until it reaches that perfect sticky consistency. The right amount of moisture is essential for fluffy, tender biscuits, so don’t hesitate to adjust!
Can I make these biscuits gluten-free?
Yes, you can! Substitute the all-purpose flour with a 1:1 gluten-free flour blend. Make sure it contains xanthan gum to maintain the right texture. Just follow the same instructions as you would with regular flour; many gluten-free blends work beautifully with biscuit recipes!
Cinnamon Pumpkin Cathead Biscuits with Blueberries
Ingredients
Equipment
Method
- Preheat your oven to 450°F. Spray a 12-inch cast-iron skillet or a large round baking pan with baking spray.
- Grate the cold butter and place it in the freezer for about 5 minutes.
- Mix the brown sugar and cinnamon in a small bowl, then sprinkle 1 tablespoon into the bottom of the prepared pan and reserve the rest.
- Whisk together the flour, granulated sugar, baking soda, and baking powder in a large bowl.
- Incorporate the grated butter into the dry ingredients using a fork.
- Pour in the buttermilk and stir until mostly combined. Gently fold the dough until it's sticky with no dry bits remaining.
- Fold in the blueberries carefully.
- Divide the dough into 7 portions and shape each into a rough ball.
- Arrange 6 balls around the edge of the pan and leave space in the center.
- Brush the tops with heavy cream and sprinkle with the remaining cinnamon sugar mixture.
- Bake for 22-27 minutes until golden brown.
- Brush with melted butter after removing from the oven.
- Serve warm.