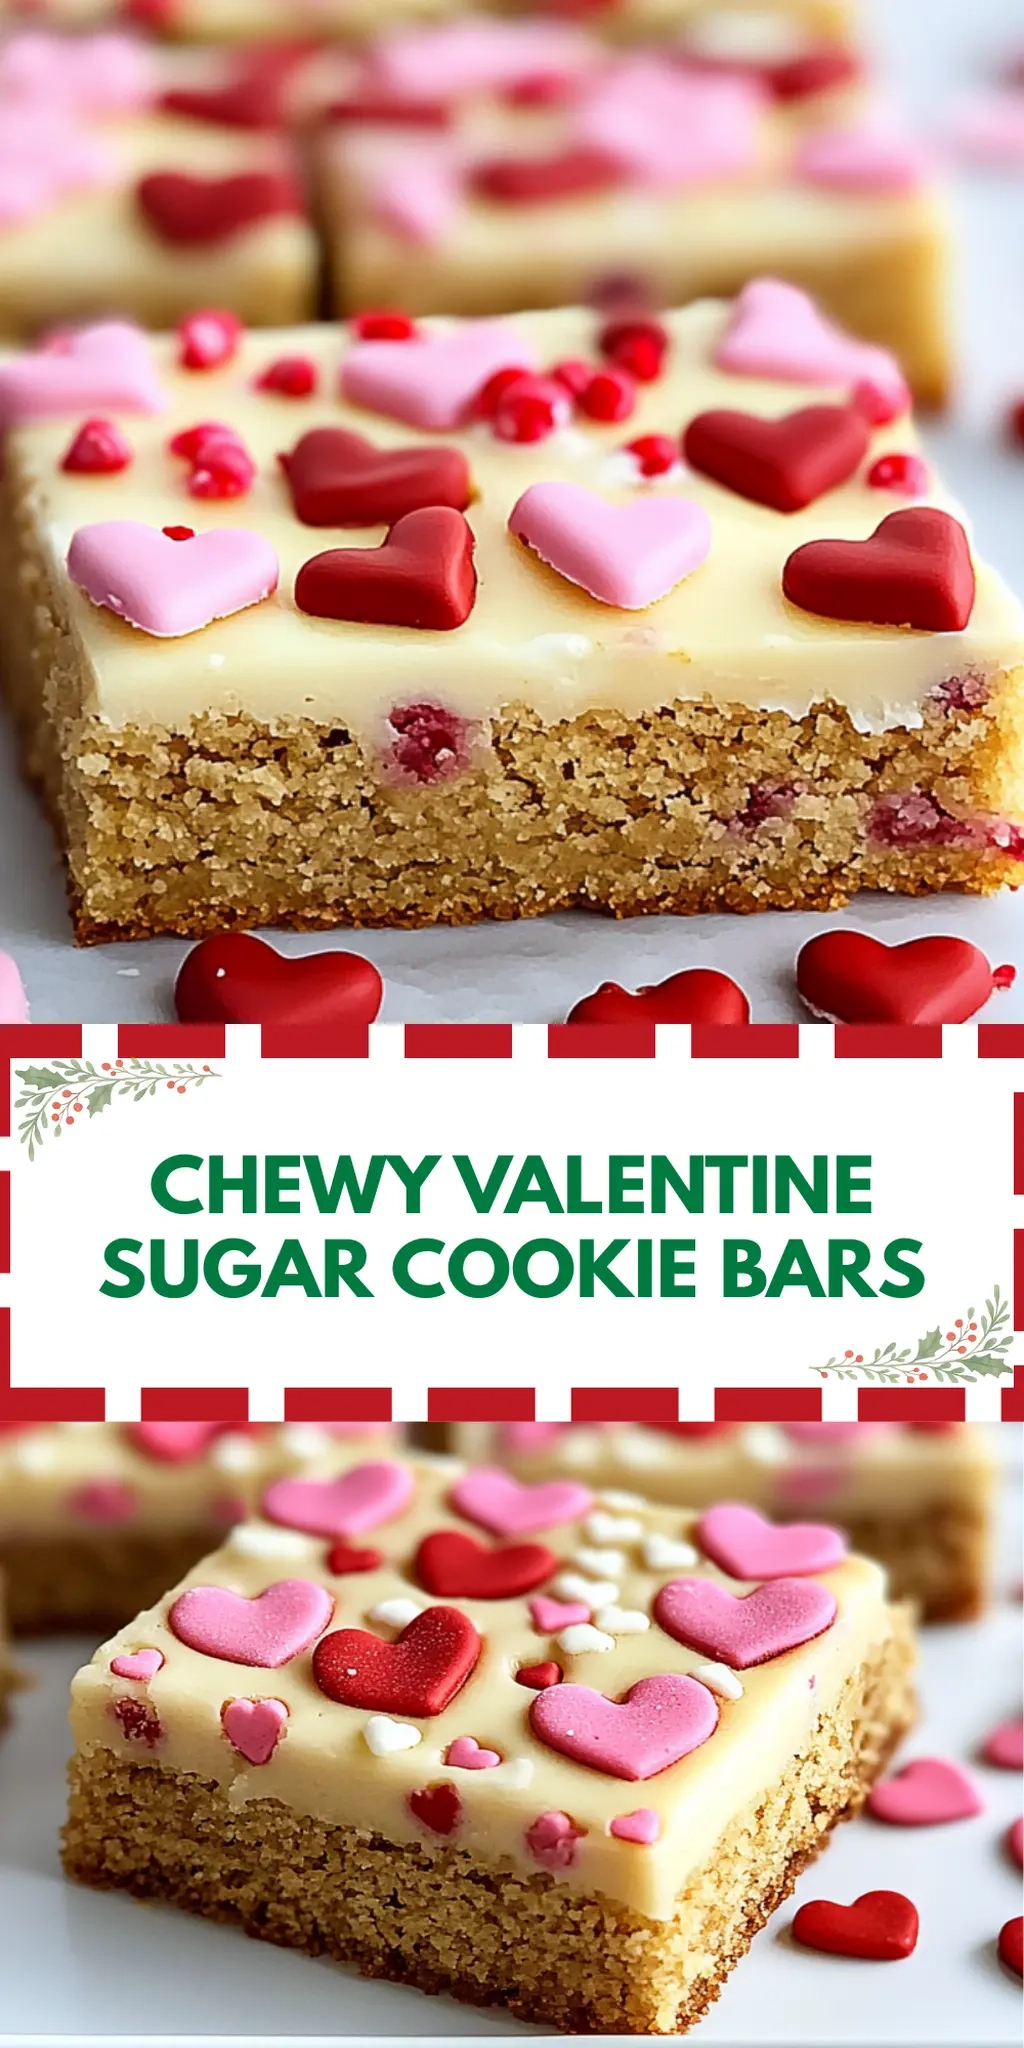
Forkono

  • BREAKFAST & BRUNCH
  • DESSERT RECIPES
  • DINNER RECIPES
  • LUNCH RECIPES
  • About uS
  • SNACKS & APPETIZERS
menu icon
go to homepage
  • BREAKFAST & BRUNCH
  • DESSERT RECIPES
  • DINNER RECIPES
  • LUNCH RECIPES
  • About uS
  • SNACKS & APPETIZERS
search icon
Homepage link
  • BREAKFAST & BRUNCH
  • DESSERT RECIPES
  • DINNER RECIPES
  • LUNCH RECIPES
  • About uS
  • SNACKS & APPETIZERS
×

Chocolate Raspberry Cake

January 3, 2026 by JudyWhite Leave a Comment

There’s a distinct joy that fills the kitchen as the rich scent of cocoa mingles with the tart sweetness of fresh raspberries. The moment I decided to whip up this Chocolate Raspberry Cake, I didn’t just want a dessert; I craved an experience—a delicious fusion that dances on your palate. It all began on a cozy weekend, inspired by the fresh berries from my garden that were begging to be showcased in something special.

Imagine surprising your loved ones with a cake that looks as magnificent as it tastes, yet surprises everyone with how simple it is to make. This cake doesn’t just dazzle the eyes; it’s a delightful blend of moist chocolate, vibrant raspberries, and creamy buttercream that feels luxurious without the fuss. Perfect for birthdays, gatherings, or just because—it effortlessly elevates any occasion.

So, if you’re tired of the mundane and searching for that standout dessert that will make you look like a kitchen superstar, grab your apron and let’s create this Chocolate Raspberry Cake together!

Why You'll Love This Chocolate Raspberry Cake

  • This Chocolate Raspberry Cake is incredibly easy to make, allowing both novice and experienced bakers to shine in the kitchen.
  • The rich, decadent flavors of chocolate paired with the tart raspberries create a delightful taste sensation that will leave everyone wanting more.
  • Its stunning visual appeal makes it the perfect centerpiece for any celebration or special occasion, guaranteed to impress your guests.
  • Plus, the versatility of this recipe means you can customize it with your favorite fillings and decorations to make it truly your own.

Chocolate Raspberry Cake Ingredients

Here’s everything you need to create this delightful Chocolate Raspberry Cake!

For the Cake
• All-purpose flour – perfect for creating a light and fluffy texture.
• Unsweetened cocoa powder – choose high-quality cocoa for a rich chocolate flavor.
• Baking soda – helps the cake rise and achieve that perfect crumb.
• Baking powder – works in tandem with baking soda for an extra lift.
• Salt – enhances the sweetness of the cake, balancing the flavors.
• White granulated sugar – adds sweetness and moisture to the chocolate cake.
• Buttermilk – adds tenderness and helps to achieve a moist cake.
• Oil – for that melt-in-your-mouth texture; can substitute with melted butter if desired.
• Large eggs – binding the ingredients together and helping with the cake’s rise.
• Pure vanilla extract – infuses a warm, aromatic flavor throughout.
• Hot water – steams into the cake for a moist and rich chocolate blend.
• Raspberries – fresh or frozen, these gems add a tangy burst to the cake.

For the Raspberry Mixture
• Water – helps in blending the raspberry puree smoothly.
• Reduced raspberry puree – intensifies the raspberry flavor without excess liquid.
• Ground freeze-dried raspberries – adds a concentrated raspberry kick, perfect for garnishing.

For the Buttercream Frosting
• Unsalted butter – room temperature for a smooth mixing process.
• Powdered sugar – sifted to ensure a creamy, lump-free frosting.
• Salt – enhances the overall taste of the frosting.
• Pure vanilla extract – adds a comforting undertone to the frosting’s flavor.

For the Ganache and Topping
• Semi-sweet chocolate chips – melted down for a rich and decadent ganache.
• Heavy cream – creates a smooth ganache and balances the sweetness of the chocolate.
• Fresh raspberries – for decoration, adding a fresh touch and vibrant colors to the cake.

When you combine these ingredients, magic happens, and trust me, your Chocolate Raspberry Cake will steal the show!

How to Make Chocolate Raspberry Cake

  1. Preheat your oven to 350°F (175°C), allowing it to reach the right temperature for baking your cake evenly. This step ensures that your cake rises perfectly and develops a gooey, delicious texture.

  2. Mix the dry ingredients by whisking together the flour, cocoa powder, baking soda, baking powder, and salt in a large bowl. This step is essential for an even distribution of flavors and leavening agents.

  3. Combine the wet ingredients in a separate bowl, blending the sugar, buttermilk, oil, eggs, and vanilla extract until fully mixed. This step creates a rich and flavorful base for your cake batter.

  4. Pour the wet mixture into the dry ingredients and mix well. Stir until the batter is combined; it should be smooth and slightly thick.

  5. Gradually add the hot water to the batter, mixing continuously until you achieve a silky smooth consistency. The hot water enhances the chocolate flavor and keeps the cake moist.

  6. Fold in the raspberries gently, allowing their flavor to blend into the batter without breaking them apart or over-mixing. This adds delightful bursts of tartness in every bite.

  7. Pour the cake batter into prepared baking pans, filling each about halfway. Bake for 25 minutes, or until a toothpick inserted into the center comes out clean. Your cakes should look puffed and firm.

  8. Cool the cakes in the pans for 10 minutes before transferring them to a cooling rack. This allows them to set perfectly, preventing breakage when you’re ready to assemble.

  9. Beat the room temperature butter with the sifted powdered sugar in a bowl until fluffy. This should take about 3-5 minutes, creating a light and airy buttercream.

  10. Add the salt and vanilla extract to the butter mixture, continue mixing to incorporate fully. This step elevates the overall flavor of your frosting.

  11. Melt the semi-sweet chocolate chips with the heavy cream in a heatproof bowl until smooth. Allow to cool slightly before combining it with the butter mixture for a rich ganache.

  12. Assemble your cake layers with the buttercream and raspberry puree, spreading evenly between layers. For decoration, top with fresh raspberries, creating a stunning centerpiece.

Optional: Drizzle some extra ganache on top for an extra touch of indulgence!

Exact quantities are listed in the recipe card below.

Make Ahead Options

These Chocolate Raspberry Cakes are perfect for busy cooks looking to save time without sacrificing flavor! You can prepare the cake layers up to 24 hours in advance by baking and allowing them to cool completely before wrapping them tightly in plastic wrap and refrigerating to maintain their moistness. The buttercream frosting can also be made and stored in an airtight container in the fridge for up to 3 days. When you’re ready to serve, simply take the cakes and frosting out, allow the frosting to soften at room temperature, then assemble and decorate the cake with fresh raspberries. This prep-ahead approach ensures your Chocolate Raspberry Cake remains just as delicious and delightful to share!

How to Store and Freeze Chocolate Raspberry Cake

Fridge: Store any leftover Chocolate Raspberry Cake in an airtight container for up to 3 days to maintain its moist texture and rich flavor.

Freezer: To freeze, wrap individual slices or the whole cake tightly in plastic wrap, then aluminum foil; it can last for up to 3 months.

Reheating: When ready to enjoy, thaw in the fridge overnight then reheat slices in the microwave for about 10-15 seconds for a delightful warm treat.

Room Temperature: If consuming within a day, you can leave the cake covered at room temperature, keeping it fresh and delicious.

Chocolate Raspberry Variations

Feel free to explore these delightful twists to make your Chocolate Raspberry Cake truly your own!

  • Gluten-Free: Use a 1:1 gluten-free flour blend to replace all-purpose flour for a gluten-free treat that everyone can enjoy.

  • Dairy-Free: Substitute the buttermilk with almond or coconut milk mixed with a tablespoon of vinegar to create a perfect dairy-free version.

  • Sugary Twist: Try substituting half of the granulated sugar with brown sugar for added moisture and a hint of caramel flavor.

  • Nutty Crunch: Fold in 1 cup of chopped walnuts or almonds for a satisfying crunch that complements the tartness of the raspberries beautifully.

  • Extra Berry Goodness: Add a layer of raspberry jam in between the cake layers for an extra burst of berry flavor that elevates every bite.

  • Zesty Kick: Mix in the zest of one orange or lemon into the batter for a bright flavor contrast that pairs wonderfully with the chocolate and raspberries.

  • Spice it Up: A teaspoon of cinnamon or a pinch of cayenne can be added to the dry ingredients for a unique warmth that adds depth to the cake’s flavor.

  • Rich Chocolate Ganache: Swap the semi-sweet chips for dark chocolate for an even richer ganache that enhances the overall chocolate experience.

Feel the excitement as you adjust and create your masterpiece!

What to Serve with Chocolate Raspberry Cake?

Imagine the perfect gathering where your decadent dessert shines alongside equally delightful companions.

  • Fresh Whipped Cream: A dollop of lightly sweetened whipped cream brings a airy contrast to the rich cake, balancing flavors beautifully.

  • Vanilla Ice Cream: The creamy, cool taste of vanilla ice cream complements the chocolate and raspberry pairings, turning every bite into an indulgent experience.

  • Chocolate Ganache: Pouring extra melted chocolate ganache on each slice intensifies the decadence and adds a smooth, luxurious texture.

  • Mint Tea: A fragrant cup of mint tea refreshes the palate between bites, enhancing the fruity notes while adding a floral touch to the experience.

  • Mixed Berry Salad: A fresh salad of mixed berries brightens your dessert table with its vibrant colors and flavors that echo the cake’s raspberry notes.

  • Sparkling Wine: A glass of bubbly sparkling wine pairs perfectly; its lightness cuts through the richness while enhancing the celebratory vibe.

  • Almond Cookies: Crunchy almond cookies can provide a delightful texture contrast alongside the moist cake while adding a hint of nuttiness to your dessert spread.

Indulging in these pairings will elevate your Chocolate Raspberry Cake from a simple dessert to an unforgettable feast for the senses!

Chef's Helpful Tips

  • For the Chocolate Raspberry Cake, be sure to measure your flour correctly by spooning it into the measuring cup and leveling it off to avoid a dense texture.
  • When mixing your wet ingredients, ensure that your buttermilk and eggs are at room temperature to help achieve a smoother batter and better rise.
  • When folding in the raspberries, do so gently to prevent them from breaking apart and turning your batter pink.
  • Lastly, remember to preheat your oven to the specified temperature to ensure even baking, as an oven that is too cool can lead to undercooked centers.

Chocolate Raspberry Cake Recipe FAQs

What type of raspberries should I use in my Chocolate Raspberry Cake?
Absolutely! You can use either fresh or frozen raspberries in this recipe. Fresh raspberries add a juicy burst of flavor, while frozen raspberries are perfectly fine and still provide that lovely tartness. Just ensure that if you’re using frozen, you don’t need to thaw them before folding into the batter.

How should I store leftover Chocolate Raspberry Cake?
To keep your Chocolate Raspberry Cake fresh and delicious, store any leftovers in an airtight container at room temperature for one day. If you have more left, transfer it to the refrigerator, where it will stay tasty for up to 3 days. It’s best to keep it covered to maintain its moisture.

Can I freeze my Chocolate Raspberry Cake?
Yes! Freezing this cake is a great option for preserving any extra slices. Wrap the entire cake, or individual slices, tightly in plastic wrap followed by aluminum foil to avoid freezer burn. It can be frozen for up to 3 months. When you’re ready to enjoy, simply thaw it in the fridge overnight before serving.

What should I do if my cake comes out dry?
If your Chocolate Raspberry Cake turns out dry, it might be due to overbaking or incorrect measuring of flour. To avoid this in the future, make sure to check the cake a few minutes before the recommended time using a toothpick. Additionally, measuring flour by spooning it into the measuring cup rather than scooping can prevent packing it too tightly.

Is this Chocolate Raspberry Cake suitable for people with nut allergies?
Yes, this recipe doesn’t contain nuts; however, it’s always a good idea to check your specific ingredients. Ensure that your baking products are processed in nut-free facilities to avoid cross-contamination, especially if you are serving someone with severe allergies.

How long does the Chocolate Raspberry Cake last in the fridge?
Stored properly in an airtight container, your Chocolate Raspberry Cake can last for up to 3 days in the fridge. This allows you to enjoy the deliciousness for a few days after baking, but I bet it won’t last that long with how delicious it is!

Chocolate Raspberry Cake

Chocolate Raspberry Cake

Experience the rich fusion of chocolate and raspberry in this delightful Chocolate Raspberry Cake, perfect for any occasion.
Print Recipe Pin Recipe
Prep Time 30 minutes mins
Cook Time 25 minutes mins
Cooling Time 10 minutes mins
Total Time 1 hour hr 5 minutes mins
Servings: 12 slices
Course: DESSERT RECIPES
Cuisine: American
Calories: 350
Ingredients Equipment Method Nutrition Notes

Ingredients
  

For the Cake
  • 2 cups All-purpose flour
  • 3/4 cup Unsweetened cocoa powder high-quality
  • 1 teaspoon Baking soda
  • 1/2 teaspoon Baking powder
  • 1/2 teaspoon Salt
  • 2 cups White granulated sugar
  • 1 cup Buttermilk room temperature
  • 1/2 cup Oil or melted butter
  • 2 large Large eggs room temperature
  • 2 teaspoons Pure vanilla extract
  • 1 cup Hot water
  • 1 cup Raspberries fresh or frozen
For the Raspberry Mixture
  • 1/4 cup Water
  • 1 cup Reduced raspberry puree
  • 2 tablespoons Ground freeze-dried raspberries
For the Buttercream Frosting
  • 1 cup Unsalted butter room temperature
  • 4 cups Powdered sugar sifted
  • 1/4 teaspoon Salt
  • 1 teaspoon Pure vanilla extract
For the Ganache and Topping
  • 1 cup Semi-sweet chocolate chips
  • 1/2 cup Heavy cream
  • 1 cup Fresh raspberries

Equipment

  • Oven
  • Mixing bowls
  • Whisk
  • Spatula
  • Baking pans
  • Cooling rack

Method
 

How to Make Chocolate Raspberry Cake
  1. Preheat your oven to 350°F (175°C).
  2. Mix the dry ingredients: whisk together flour, cocoa powder, baking soda, baking powder, and salt in a large bowl.
  3. Combine wet ingredients: blend sugar, buttermilk, oil, eggs, and vanilla extract until mixed in a separate bowl.
  4. Pour the wet mixture into the dry ingredients and mix until combined.
  5. Gradually add hot water to the batter, mixing until smooth.
  6. Fold in raspberries gently, ensuring they stay whole.
  7. Pour the batter into prepared pans, filling each halfway, and bake for 25 minutes.
  8. Cool cakes in pans for 10 minutes before transferring to a cooling rack.
  9. Beat butter with sifted powdered sugar until fluffy, then add salt and vanilla extract.
  10. Melt chocolate chips with heavy cream until smooth, then combine with the butter mixture.
  11. Assemble the cake layers with buttercream and raspberry puree, then top with fresh raspberries.
  12. Optional: Drizzle extra ganache on top for indulgence.

Nutrition

Serving: 1sliceCalories: 350kcalCarbohydrates: 45gProtein: 4gFat: 18gSaturated Fat: 10gPolyunsaturated Fat: 1gMonounsaturated Fat: 5gCholesterol: 70mgSodium: 200mgPotassium: 180mgFiber: 2gSugar: 30gVitamin A: 5IUVitamin C: 7mgCalcium: 3mgIron: 10mg

Notes

Be sure to measure your flour correctly and allow ingredients to reach room temperature for best results.

Tried this recipe?

Let us know how it was!

Filed Under: BREAKFAST & BRUNCH

Chocolate Raspberry Cake

January 3, 2026 by JudyWhite Leave a Comment

There’s a distinct joy that fills the kitchen as the rich scent of cocoa mingles with the tart sweetness of fresh raspberries. The moment I decided to whip up this Chocolate Raspberry Cake, I didn’t just want a dessert; I craved an experience—a delicious fusion that dances on your palate. It all began on a cozy weekend, inspired by the fresh berries from my garden that were begging to be showcased in something special.

Imagine surprising your loved ones with a cake that looks as magnificent as it tastes, yet surprises everyone with how simple it is to make. This cake doesn’t just dazzle the eyes; it’s a delightful blend of moist chocolate, vibrant raspberries, and creamy buttercream that feels luxurious without the fuss. Perfect for birthdays, gatherings, or just because—it effortlessly elevates any occasion.

So, if you’re tired of the mundane and searching for that standout dessert that will make you look like a kitchen superstar, grab your apron and let’s create this Chocolate Raspberry Cake together!

Why You'll Love This Chocolate Raspberry Cake

  • This Chocolate Raspberry Cake is incredibly easy to make, allowing both novice and experienced bakers to shine in the kitchen.
  • The rich, decadent flavors of chocolate paired with the tart raspberries create a delightful taste sensation that will leave everyone wanting more.
  • Its stunning visual appeal makes it the perfect centerpiece for any celebration or special occasion, guaranteed to impress your guests.
  • Plus, the versatility of this recipe means you can customize it with your favorite fillings and decorations to make it truly your own.

Chocolate Raspberry Cake Ingredients

Here’s everything you need to create this delightful Chocolate Raspberry Cake!

For the Cake
• All-purpose flour – perfect for creating a light and fluffy texture.
• Unsweetened cocoa powder – choose high-quality cocoa for a rich chocolate flavor.
• Baking soda – helps the cake rise and achieve that perfect crumb.
• Baking powder – works in tandem with baking soda for an extra lift.
• Salt – enhances the sweetness of the cake, balancing the flavors.
• White granulated sugar – adds sweetness and moisture to the chocolate cake.
• Buttermilk – adds tenderness and helps to achieve a moist cake.
• Oil – for that melt-in-your-mouth texture; can substitute with melted butter if desired.
• Large eggs – binding the ingredients together and helping with the cake’s rise.
• Pure vanilla extract – infuses a warm, aromatic flavor throughout.
• Hot water – steams into the cake for a moist and rich chocolate blend.
• Raspberries – fresh or frozen, these gems add a tangy burst to the cake.

For the Raspberry Mixture
• Water – helps in blending the raspberry puree smoothly.
• Reduced raspberry puree – intensifies the raspberry flavor without excess liquid.
• Ground freeze-dried raspberries – adds a concentrated raspberry kick, perfect for garnishing.

For the Buttercream Frosting
• Unsalted butter – room temperature for a smooth mixing process.
• Powdered sugar – sifted to ensure a creamy, lump-free frosting.
• Salt – enhances the overall taste of the frosting.
• Pure vanilla extract – adds a comforting undertone to the frosting’s flavor.

For the Ganache and Topping
• Semi-sweet chocolate chips – melted down for a rich and decadent ganache.
• Heavy cream – creates a smooth ganache and balances the sweetness of the chocolate.
• Fresh raspberries – for decoration, adding a fresh touch and vibrant colors to the cake.

When you combine these ingredients, magic happens, and trust me, your Chocolate Raspberry Cake will steal the show!

How to Make Chocolate Raspberry Cake

  1. Preheat your oven to 350°F (175°C), allowing it to reach the right temperature for baking your cake evenly. This step ensures that your cake rises perfectly and develops a gooey, delicious texture.

  2. Mix the dry ingredients by whisking together the flour, cocoa powder, baking soda, baking powder, and salt in a large bowl. This step is essential for an even distribution of flavors and leavening agents.

  3. Combine the wet ingredients in a separate bowl, blending the sugar, buttermilk, oil, eggs, and vanilla extract until fully mixed. This step creates a rich and flavorful base for your cake batter.

  4. Pour the wet mixture into the dry ingredients and mix well. Stir until the batter is combined; it should be smooth and slightly thick.

  5. Gradually add the hot water to the batter, mixing continuously until you achieve a silky smooth consistency. The hot water enhances the chocolate flavor and keeps the cake moist.

  6. Fold in the raspberries gently, allowing their flavor to blend into the batter without breaking them apart or over-mixing. This adds delightful bursts of tartness in every bite.

  7. Pour the cake batter into prepared baking pans, filling each about halfway. Bake for 25 minutes, or until a toothpick inserted into the center comes out clean. Your cakes should look puffed and firm.

  8. Cool the cakes in the pans for 10 minutes before transferring them to a cooling rack. This allows them to set perfectly, preventing breakage when you’re ready to assemble.

  9. Beat the room temperature butter with the sifted powdered sugar in a bowl until fluffy. This should take about 3-5 minutes, creating a light and airy buttercream.

  10. Add the salt and vanilla extract to the butter mixture, continue mixing to incorporate fully. This step elevates the overall flavor of your frosting.

  11. Melt the semi-sweet chocolate chips with the heavy cream in a heatproof bowl until smooth. Allow to cool slightly before combining it with the butter mixture for a rich ganache.

  12. Assemble your cake layers with the buttercream and raspberry puree, spreading evenly between layers. For decoration, top with fresh raspberries, creating a stunning centerpiece.

Optional: Drizzle some extra ganache on top for an extra touch of indulgence!

Exact quantities are listed in the recipe card below.

What to Serve with Chocolate Raspberry Cake?

Imagine the perfect gathering where your decadent dessert shines alongside equally delightful companions.

  • Fresh Whipped Cream: A dollop of lightly sweetened whipped cream brings a airy contrast to the rich cake, balancing flavors beautifully.

  • Vanilla Ice Cream: The creamy, cool taste of vanilla ice cream complements the chocolate and raspberry pairings, turning every bite into an indulgent experience.

  • Chocolate Ganache: Pouring extra melted chocolate ganache on each slice intensifies the decadence and adds a smooth, luxurious texture.

  • Mint Tea: A fragrant cup of mint tea refreshes the palate between bites, enhancing the fruity notes while adding a floral touch to the experience.

  • Mixed Berry Salad: A fresh salad of mixed berries brightens your dessert table with its vibrant colors and flavors that echo the cake’s raspberry notes.

  • Sparkling Wine: A glass of bubbly sparkling wine pairs perfectly; its lightness cuts through the richness while enhancing the celebratory vibe.

  • Almond Cookies: Crunchy almond cookies can provide a delightful texture contrast alongside the moist cake while adding a hint of nuttiness to your dessert spread.

Indulging in these pairings will elevate your Chocolate Raspberry Cake from a simple dessert to an unforgettable feast for the senses!

Chocolate Raspberry Variations

Feel free to explore these delightful twists to make your Chocolate Raspberry Cake truly your own!

  • Gluten-Free: Use a 1:1 gluten-free flour blend to replace all-purpose flour for a gluten-free treat that everyone can enjoy.

  • Dairy-Free: Substitute the buttermilk with almond or coconut milk mixed with a tablespoon of vinegar to create a perfect dairy-free version.

  • Sugary Twist: Try substituting half of the granulated sugar with brown sugar for added moisture and a hint of caramel flavor.

  • Nutty Crunch: Fold in 1 cup of chopped walnuts or almonds for a satisfying crunch that complements the tartness of the raspberries beautifully.

  • Extra Berry Goodness: Add a layer of raspberry jam in between the cake layers for an extra burst of berry flavor that elevates every bite.

  • Zesty Kick: Mix in the zest of one orange or lemon into the batter for a bright flavor contrast that pairs wonderfully with the chocolate and raspberries.

  • Spice it Up: A teaspoon of cinnamon or a pinch of cayenne can be added to the dry ingredients for a unique warmth that adds depth to the cake’s flavor.

  • Rich Chocolate Ganache: Swap the semi-sweet chips for dark chocolate for an even richer ganache that enhances the overall chocolate experience.

Feel the excitement as you adjust and create your masterpiece!

How to Store and Freeze Chocolate Raspberry Cake

Fridge: Store any leftover Chocolate Raspberry Cake in an airtight container for up to 3 days to maintain its moist texture and rich flavor.

Freezer: To freeze, wrap individual slices or the whole cake tightly in plastic wrap, then aluminum foil; it can last for up to 3 months.

Reheating: When ready to enjoy, thaw in the fridge overnight then reheat slices in the microwave for about 10-15 seconds for a delightful warm treat.

Room Temperature: If consuming within a day, you can leave the cake covered at room temperature, keeping it fresh and delicious.

Make Ahead Options

These Chocolate Raspberry Cakes are perfect for busy cooks looking to save time without sacrificing flavor! You can prepare the cake layers up to 24 hours in advance by baking and allowing them to cool completely before wrapping them tightly in plastic wrap and refrigerating to maintain their moistness. The buttercream frosting can also be made and stored in an airtight container in the fridge for up to 3 days. When you’re ready to serve, simply take the cakes and frosting out, allow the frosting to soften at room temperature, then assemble and decorate the cake with fresh raspberries. This prep-ahead approach ensures your Chocolate Raspberry Cake remains just as delicious and delightful to share!

Chef's Helpful Tips

  • For the Chocolate Raspberry Cake, be sure to measure your flour correctly by spooning it into the measuring cup and leveling it off to avoid a dense texture.
  • When mixing your wet ingredients, ensure that your buttermilk and eggs are at room temperature to help achieve a smoother batter and better rise.
  • When folding in the raspberries, do so gently to prevent them from breaking apart and turning your batter pink.
  • Lastly, remember to preheat your oven to the specified temperature to ensure even baking, as an oven that is too cool can lead to undercooked centers.

Chocolate Raspberry Cake Recipe FAQs

What type of raspberries should I use?
You can use either fresh or frozen raspberries for this Chocolate Raspberry Cake. Fresh raspberries provide a delightful burst of flavor and vibrant color, while frozen raspberries are a great alternative and can be used year-round. Just make sure to thaw any frozen raspberries before folding them into your batter for even distribution.

How should I store my Chocolate Raspberry Cake?
To keep your Chocolate Raspberry Cake fresh, store it in an airtight container in the fridge for up to 3 days. This helps retain its moisture and rich flavor. If you have leftovers after a family gathering, simply cover the cake tightly to prevent it from drying out.

Can I freeze Chocolate Raspberry Cake?
Absolutely! To freeze your Chocolate Raspberry Cake, wrap it tightly in plastic wrap and then in aluminum foil. This two-step process prevents freezer burn. You can freeze whole cakes or individual slices for up to 3 months. When ready to enjoy, thaw in the fridge overnight, and reheat individual slices in the microwave for a cozy treat.

What if my cake sinks in the middle?
If your Chocolate Raspberry Cake sinks in the middle, it may be due to several factors—perhaps the oven temperature was too low, the cake was underbaked, or the batter was overmixed. To troubleshoot, make sure to preheat your oven correctly and check for doneness with a toothpick. If it comes out clean, the cake is done. Aim to mix just until the batter is combined for the best rise.

Is this Chocolate Raspberry Cake safe for people with allergies?
This cake contains common allergens such as eggs, dairy (buttermilk and butter), and gluten (flour). If you or your guests have allergies, consider substituting with egg replacers, dairy-free butter, and gluten-free flour. It’s always best to inform your guests about the ingredients used, just in case!

How can I enhance the raspberry flavor in the cake?
To impart an even stronger raspberry taste, you can incorporate raspberry extract or additional reduced raspberry puree into the batter. Simply add a teaspoon or two along with the wet ingredients for an intensified flavor. You might also consider topping the cake with a raspberry glaze or sauce for an extra punch!

Chocolate Raspberry Cake

Chocolate Raspberry Cake

Indulge in a delicious Chocolate Raspberry Cake that combines rich chocolate flavors with fresh raspberries—a perfect dessert for any occasion.
Print Recipe Pin Recipe
Prep Time 30 minutes mins
Cook Time 25 minutes mins
Cooling Time 10 minutes mins
Total Time 1 hour hr 5 minutes mins
Servings: 8 slices
Course: DESSERT RECIPES
Cuisine: American
Calories: 350
Ingredients Equipment Method Nutrition Notes

Ingredients
  

For the Cake
  • 2 cups All-purpose flour
  • 3/4 cup Unsweetened cocoa powder choose high-quality
  • 1 teaspoon Baking soda
  • 1 teaspoon Baking powder
  • 1/2 teaspoon Salt
  • 1.5 cups White granulated sugar
  • 1 cup Buttermilk
  • 1/2 cup Oil can substitute with melted butter if desired
  • 2 large Large eggs
  • 1 teaspoon Pure vanilla extract
  • 1 cup Hot water
  • 1 cup Raspberries fresh or frozen
For the Raspberry Mixture
  • 1/4 cup Water
  • 1/2 cup Reduced raspberry puree
  • 1/4 cup Ground freeze-dried raspberries
For the Buttercream Frosting
  • 1 cup Unsalted butter room temperature
  • 4 cups Powdered sugar sifted
  • 1/4 teaspoon Salt
  • 1 teaspoon Pure vanilla extract
For the Ganache and Topping
  • 1 cup Semi-sweet chocolate chips
  • 1/2 cup Heavy cream
  • 1/2 cup Fresh raspberries for decoration

Equipment

  • large mixing bowl
  • Whisk
  • Baking pans
  • Cooling rack
  • Heatproof bowl

Method
 

Steps
  1. Preheat your oven to 350°F (175°C).
  2. Mix the dry ingredients by whisking together the flour, cocoa powder, baking soda, baking powder, and salt in a large bowl.
  3. Combine the wet ingredients in a separate bowl, blending the sugar, buttermilk, oil, eggs, and vanilla extract until fully mixed.
  4. Pour the wet mixture into the dry ingredients and mix well until combined.
  5. Gradually add the hot water to the batter, mixing continuously until smooth.
  6. Fold in the raspberries gently.
  7. Pour the cake batter into prepared baking pans, filling each about halfway. Bake for 25 minutes.
  8. Cool the cakes in the pans for 10 minutes before transferring them to a cooling rack.
  9. Beat the butter with the sifted powdered sugar until fluffy, about 3-5 minutes.
  10. Add the salt and vanilla extract to the butter mixture and mix thoroughly.
  11. Melt the chocolate chips with the heavy cream until smooth, then mix with the butter mixture for ganache.
  12. Assemble your cake layers with the buttercream and raspberry puree, topping with fresh raspberries.

Nutrition

Serving: 1sliceCalories: 350kcalCarbohydrates: 45gProtein: 4gFat: 18gSaturated Fat: 10gPolyunsaturated Fat: 2gMonounsaturated Fat: 4gCholesterol: 55mgSodium: 250mgPotassium: 180mgFiber: 2gSugar: 30gVitamin A: 500IUVitamin C: 5mgCalcium: 40mgIron: 2mg

Notes

Ensure the correct measurement of flour to maintain texture. Use room temperature ingredients for better mixing. Fold raspberries gently to avoid breaking them.

Tried this recipe?

Let us know how it was!

Filed Under: BREAKFAST & BRUNCH

Pink Velvet Cake

January 3, 2026 by JudyWhite Leave a Comment

There’s something especially delightful about a cake that can instantly brighten your day—and my Pink Velvet Cake does just that! The first time I made it, I was in a creative mood, desperate to escape the ordinary chocolate and vanilla options that felt all too familiar. As soon as I pulled the layers from the oven, the warm, inviting fragrance filled my kitchen, and I knew I had stumbled upon a true gem.

With its tender crumb and subtle sweetness, this cake is perfect for any celebration or even a cozy afternoon at home. What makes it truly irresistible, though, is the luscious cream cheese frosting that dances on your taste buds, taking this dessert to a whole new level of indulgence.

Whether you’re impressing friends at a gathering or simply treating yourself, this Pink Velvet Cake promises not just flavor, but also a stunning visual treat. So, let’s dive into the recipe, and soon you’ll have a slice of happiness on your plate!

Why You'll Love This Pink Velvet Cake

  • This Pink Velvet Cake is incredibly easy to make, making it a great choice even for baking beginners.
  • With its delightful flavor and unique pink hue, it’s bound to be a showstopper at any event or gathering.
  • The versatility of this recipe allows you to customize it with different frostings or toppings to suit your taste and occasion.
  • Its beautiful appearance is sure to impress your guests and leave them asking for seconds.
  • Enjoying a slice of this cake not only brings joy but also creates lasting memories with friends and loved ones.
  • Every bite is a celebration of sweetness and creativity, making it truly a treat you’ll adore.

Pink Velvet Cake Ingredients

• Get ready to bake a delicious treat!

For the Cake

  • Cake flour – Essential for a soft, tender crumb in your Pink Velvet Cake.
  • Granulated sugar – Sweetens the cake and helps create that lovely fluffy texture.
  • Baking powder – Acts as a leavening agent, ensuring your cake rises beautifully.
  • Fine salt – Enhances the sweetness and balances flavors perfectly.
  • Unsalted butter – Brings richness and moisture; be sure it’s at room temperature for easy mixing.
  • Egg whites – The base for a light and airy cake; room temperature helps create a better volume.
  • Buttermilk – Adds a subtle tang and keeps the cake moist—don’t substitute with regular milk if possible!
  • Vegetable or canola oil – Keeps the cake ultra moist; you can even use melted coconut oil for a twist.
  • Vanilla extract – Adds warmth and depth to the flavor; vanilla bean paste works just as well!
  • Pink gel food coloring – Gives your cake that gorgeous, eye-catching hue.

For the Frosting

  • Unsalted butter – Use room temperature butter for a creamy and smooth frosting.
  • Cream cheese – Adds a tangy flavor that pairs perfectly with the sweetness of the cake.
  • Vanilla extract – Enhances the overall flavor of the frosting, making it extra delicious.
  • Fine salt – A pinch adds depth to the sweetness—don’t skip this step!
  • Powdered sugar – The base for your frosting, creating that luxurious sweetness.
  • Heavy whipping cream – Helps achieve a silky, spreadable consistency; room temperature is key.
  • Pink gel food coloring – Use to tint your frosting, creating a stunning visual appeal.

Get ready to bring this delightful Pink Velvet Cake to life in your kitchen!

How to Make Pink Velvet Cake

  1. Preheat your oven to 350°F (175°C) and grease or line your cake pans with parchment paper to prevent sticking. This step ensures a perfectly baked cake that’s easy to remove.

  2. Combine in a mixing bowl the cake flour, granulated sugar, baking powder, and fine salt. Whisk together until well blended, ensuring an even distribution of the dry ingredients that will work together for a fluffy texture.

  3. Beat in another bowl the unsalted butter, egg whites, buttermilk, vegetable oil, and vanilla extract until creamy and smooth. This mixture creates a luscious batter, perfect for infusing flavor and moisture into your cake.

  4. Gradually mix the dry ingredients into the wet ingredients, stirring gently until just combined. Avoid over-mixing; you want a batter that’s well-blended but still retains a fluffy texture.

  5. Color your batter by adding a few drops of pink gel food coloring. Stir until you reach your desired hue, creating that beautiful pink that makes this cake so special. The color will be more vibrant once baked!

  6. Pour the batter evenly into your prepared cake pans and smooth the tops with a spatula. Bake for 35 minutes or until a toothpick inserted into the center comes out clean. Keep an eye on your cakes for that perfect golden edge!

  7. Cool the cakes completely on wire racks; this prevents them from becoming soggy and ensures they’re easy to frost. The aroma will fill your kitchen—try not to eat the whole cake while waiting!

  8. Prepare the frosting by beating together the unsalted butter and cream cheese until light and fluffy. This will create the perfect base for your luxurious cream cheese frosting.

  9. Mix in the vanilla extract, fine salt, and powdered sugar until smooth and well combined. Don’t rush this step; the cream cheese adds a delightful tang that balances the sweetness beautifully.

  10. Gradually add the heavy whipping cream to your frosting, mixing until you reach your desired consistency for spreading or piping. It should be creamy and luscious, perfect for dolloping on your cake.

  11. Frost the cooled layers generously, stacking them together as you go, and add any additional decorations to make your Pink Velvet Cake pop. Your creation is now a stunning masterpiece ready to be enjoyed!

Optional: Add fresh berries or edible flowers on top for a touch of elegance.

Exact quantities are listed in the recipe card below.

Make Ahead Options

These Pink Velvet Cake layers are ideal for meal prep, allowing you to save crucial time on busy baking days! You can prepare the cake layers up to 2-3 days ahead of time. Simply bake them, allow them to cool completely, and then tightly wrap each layer in plastic wrap before refrigerating to maintain their moist texture. If you’d like, the frosting can also be made up to 2 days in advance; store it in an airtight container in the fridge—just give it a quick mix to revive its creamy consistency before frosting. When you’re ready to assemble, just layer the chilled cakes with frosting, and your beautiful Pink Velvet Cake is ready to impress with minimal last-minute effort!

What to Serve with Pink Velvet Cake?

The vibrant hues and delightful flavors of this cake are just the beginning; let’s create a full spread that elevates your dessert experience!

  • Fresh Berries: Their tartness beautifully balances the sweetness of the cake, adding a refreshing touch to each bite.

  • Vanilla Ice Cream: A classic pairing, the creamy texture of the ice cream complements the tender layers, creating a heavenly combination. Serve a scoop alongside a slice for a timeless delight!

  • Chocolate Ganache: Drizzling silky ganache over the cake adds rich flavor and decadence that contrasts wonderfully with the pink velvet.

  • Lemonade: The zesty brightness of a fresh lemonade refreshes the palate, making it an ideal pairing for this sweet treat. It’s the perfect sip alongside your cake slice!

  • Coconut Whipped Cream: Light and airy, this alternative topping enhances the cake’s softness while adding a tropical twist that feels indulgent.

  • Coffee: A strong brew provides a delightful contrast to the cake’s sweetness, making for a comforting afternoon treat. The warmth of coffee brings the whole experience to life!

  • Fruit Salad: A mixture of seasonal fruits adds color and a natural sweetness that complements the cake—and it keeps things light and vibrant.

  • Sparkling Water: For a refreshing non-sweet option, sparkling water with a hint of lemon recharges your taste buds between bites. It’s simple, but oh-so-refreshing!

  • Cheesecake Bites: For those who love multiple desserts, serving mini cheesecake bites provides a creamy, tangy contrast to the cake, satisfying any sweet tooth’s cravings!

How to Store and Freeze Pink Velvet Cake

  • Room Temperature: Store the unfrosted Pink Velvet Cake layers at room temperature for up to 2 days, covered in plastic wrap to maintain moisture. Avoid placing it in direct sunlight.

  • Fridge: If frosted, the Pink Velvet Cake can be kept in the refrigerator for up to 5 days. Use an airtight container or cover it loosely with plastic wrap to prevent the frosting from hardening.

  • Freezer: To freeze, wrap the unfrosted cake layers in plastic wrap and then aluminum foil. They can last up to 3 months in the freezer. Frost after thawing for the best texture.

  • Reheating: When ready to enjoy, allow the frozen cake to thaw in the fridge overnight. For a warm slice, microwave it for 10-15 seconds, just enough to take the chill off without melting the frosting.

Pink Velvet Cake Variations

Feel free to get creative with this recipe and make it your own with these delightful twists!

  • Dairy-Free: Substitute buttermilk with almond or coconut milk and use dairy-free butter for a scrumptious vegan option. You’ll still enjoy that light, fluffy texture!

  • Chocolate Swirl: Add 1 cup of cocoa powder to half the batter and create a marble effect by swirling it into the original batter. This chocolatey delight will take your cake to new heights!

  • Nuts: Fold in 1 cup of chopped walnuts or pecans for a satisfying crunch. The nutty flavor complements the sweetness, adding another layer of deliciousness.

  • Fruit Flavor: Replace part of the liquid with pureed strawberries or raspberries for a fruity twist. The natural sweetness intermingles perfectly with the cake base, making it even more irresistible!

  • Layered Delight: Make a multi-layered cake by baking in three cake pans and filling the layers with fruit preserves or chocolate ganache. It’s a treat that turns heads and takes your taste buds on an adventure!

  • Spiced Version: Add a teaspoon of cinnamon and a dash of nutmeg for a warm, spiced flavor profile. This adds depth and warmth, perfect for cozy gatherings or a festive moment.

  • Gluten-Free: Use a 1:1 gluten-free flour blend in place of regular flour. It maintains the texture while being perfect for gluten-sensitive guests, ensuring no one misses out!

  • Zesty Lemon: Infuse the batter with lemon zest or a splash of lemon juice for a refreshing twist. This brightens the flavor and adds a lovely citrus note that pairs beautifully with cream cheese frosting.

Chef's Helpful Tips

  • To ensure a light and airy Pink Velvet Cake, make sure your egg whites are at room temperature before beating them, as this helps achieve better volume.
  • Avoid over-mixing when combining your wet and dry ingredients; mixing just until incorporated will keep the cake tender.
  • For the frosting, it’s crucial to use room temperature butter and cream cheese to achieve a smooth and creamy texture without lumps.
  • When baking, check the cakes at the 30-minute mark to avoid overbaking, ensuring they remain moist and flavorful.

Pink Velvet Cake Recipe FAQs

How do I select the best ingredients for my Pink Velvet Cake?
Absolutely! When choosing ingredients, select high-quality pink gel food coloring for the best visual appeal. For the butter, make sure it’s unsalted and at room temperature for easy mixing and a creamy texture. Use fresh egg whites from large eggs for the best results. The buttermilk should also be fresh, as it contributes to the cake’s moisture and flavor.

What’s the best way to store my Pink Velvet Cake?
Very! If unfrosted, keep the cake layers at room temperature for up to 2 days wrapped in plastic wrap to maintain moisture. For a frosted cake, store it in the fridge in an airtight container for up to 5 days. This protects the frosting while keeping it at a delightful temperature for enjoying!

Can I freeze my Pink Velvet Cake?
Absolutely! To freeze your Pink Velvet Cake, wrap the unfrosted layers tightly in plastic wrap followed by aluminum foil, ensuring there are no air pockets. They can last up to 3 months in the freezer. When you’re ready to enjoy, thaw them in the fridge overnight, then frost them to retain that lovely texture. For a warm slice, microwave it for 10-15 seconds!

What should I do if my cake is too dry?
Oh no! If you find your Pink Velvet Cake has turned out dry, that’s usually because of over-baking. Try to check it 5 minutes before the end of the recommended baking time. If it does happen, you can still revive the cake by brushing the layers lightly with simple syrup (made from equal parts sugar and water boiled until syrupy) before frosting. This adds moisture and sweetness back into the cake!

Are there any allergies I should be aware of when making Pink Velvet Cake?
Very! This recipe contains eggs, dairy, and gluten, so be mindful of those with allergies. For a dairy-free version, you can substitute the buttermilk with almond milk mixed with vinegar or lemon juice for a similar tang. If you need a gluten-free alternative, consider using a 1:1 gluten-free baking flour blend. Always double-check labels to ensure they’re free of allergens suitable for your guests!

Pink Velvet Cake

Pink Velvet Cake

This Pink Velvet Cake features a tender crumb and luscious cream cheese frosting, perfect for celebrations.
Print Recipe Pin Recipe
Prep Time 25 minutes mins
Cook Time 35 minutes mins
Cooling Time 30 minutes mins
Total Time 1 hour hr 30 minutes mins
Servings: 8 slices
Course: DESSERT RECIPES
Cuisine: American
Calories: 350
Ingredients Equipment Method Nutrition Notes

Ingredients
  

For the Cake
  • 2 cups cake flour Essential for a soft, tender crumb.
  • 1.5 cups granulated sugar Helps create a fluffy texture.
  • 1 tbsp baking powder Acts as a leavening agent.
  • 0.5 tsp fine salt Enhances sweetness.
  • 0.5 cups unsalted butter Room temperature.
  • 4 large egg whites Room temperature.
  • 1 cup buttermilk Do not substitute with regular milk.
  • 0.5 cups vegetable or canola oil For ultra moist cake.
  • 2 tsp vanilla extract Adds warmth and depth.
  • 1 tbsp pink gel food coloring For the gorgeous hue.
For the Frosting
  • 0.5 cups unsalted butter Room temperature.
  • 8 oz cream cheese Adds tangy flavor.
  • 2 tsp vanilla extract Enhances flavor.
  • 0.5 tsp fine salt Adds depth to sweetness.
  • 4 cups powdered sugar Base for frosting.
  • 0.5 cups heavy whipping cream For creamy consistency.
  • 1 tbsp pink gel food coloring For tinting frosting.

Equipment

  • Mixing bowl
  • Whisk
  • Spatula
  • Cake Pans
  • Oven
  • wire racks

Method
 

Prepare the Cake
  1. Preheat your oven to 350°F (175°C) and grease or line your cake pans.
  2. Combine cake flour, granulated sugar, baking powder, and fine salt in a mixing bowl.
  3. Beat unsalted butter, egg whites, buttermilk, vegetable oil, and vanilla extract until creamy.
  4. Gradually mix the dry ingredients into the wet ingredients until just combined.
  5. Add pink gel food coloring, stirring until desired hue is reached.
  6. Pour batter into prepared pans and smooth the tops. Bake for 35 minutes or until a toothpick comes out clean.
  7. Cool the cakes completely on wire racks.
Prepare the Frosting
  1. Beat together unsalted butter and cream cheese until light and fluffy.
  2. Mix in vanilla extract, fine salt, and powdered sugar until smooth.
  3. Gradually add heavy whipping cream, mixing until desired consistency is achieved.
  4. Frost the cooled layers generously, adding decorations if desired.

Nutrition

Serving: 1sliceCalories: 350kcalCarbohydrates: 45gProtein: 4gFat: 18gSaturated Fat: 10gMonounsaturated Fat: 5gCholesterol: 50mgSodium: 210mgPotassium: 150mgFiber: 1gSugar: 30gVitamin A: 500IUCalcium: 50mgIron: 0.5mg

Notes

Optional: Add fresh berries or edible flowers on top for a touch of elegance.

Tried this recipe?

Let us know how it was!

Filed Under: BREAKFAST & BRUNCH

Baked Pumpkin Donuts with Brown Sugar Glaze

January 3, 2026 by JudyWhite Leave a Comment

As the chill of autumn sets in and the leaves begin to paint the world in shades of gold and crimson, there’s nothing quite like the cozy sensation of baking fragrant treats in the kitchen. If you’re searching for a delightful way to embrace the season, look no further than these Baked Pumpkin Donuts with Brown Sugar Glaze. Every bite of these soft, spiced donuts is like a warm hug – rich pumpkin flavor complemented by the sweet, buttery glaze that glistens like sunshine on a crisp morning.

What I adore most about this recipe is not just its irresistible taste, but how easily it transforms an ordinary afternoon into a cozy baking adventure. With only 39 minutes from start to finish, you can create a batch of these treats perfectly suited for sharing with friends or savoring solo. So, gather your ingredients and roll up your sleeves—let’s make some autumn magic happen in the kitchen!

Why You'll Love This Baked Pumpkin Donuts with Brown Sugar Glaze

  • These Baked Pumpkin Donuts with Brown Sugar Glaze are incredibly easy to make, allowing you to whip up a delicious treat in just 39 minutes.
  • The flavor profile is simply divine, combining rich pumpkin with warm spices and a sweet, buttery glaze that will have everyone coming back for seconds.
  • Their versatility means they can be enjoyed at breakfast, as a snack, or even at a festive gathering, making them perfect for any occasion.
  • Visually appealing with their glossy glaze, these donuts are sure to impress your friends and family, making them a crowd-pleaser that everyone will love.

Baked Pumpkin Donuts Ingredients

For the Donuts
• Pumpkin puree – adds moisture and a rich, seasonal flavor to your baked pumpkin donuts.
• Granulated sugar – sweetens the batter and helps create a tender crumb.
• Brown sugar – contributes to the deep flavor and adds caramel notes that enhance the pumpkin taste.
• Unsalted butter (melted & cooled) – provides richness and moisture; ensure it’s cooled to prevent cooking the eggs.
• Vegetable oil – keeps the donuts moist and fluffy; can be substituted with applesauce for a lighter option.
• Large eggs (room temperature) – bind ingredients together and add structure; use flax eggs for a vegan version.
• All-purpose flour – the base for your donuts, giving them structure; you can use whole wheat flour for a healthier option.
• Baking powder – ensures your donuts rise to a perfect fluffy consistency.
• Pumpkin spice – adds warm, aromatic flavors that evoke the essence of fall; feel free to use a homemade blend!
• Salt – enhances the sweetness and flavors of the other ingredients.

For the Glaze
• Unsalted butter (for glaze) – adds a glossy finish and richness to your sweet topping.
• Powdered sugar – gives the glaze its sweetness and smooth texture; sift it to prevent lumps.
• Heavy cream – creates a silky glaze that adheres beautifully to the donuts; you can substitute with milk for a lighter glaze.
• Vanilla extract – infuses added warmth and depth into the flavor of the glaze, balancing the sweetness perfectly.

How to Make Baked Pumpkin Donuts with Brown Sugar Glaze

  1. Preheat the oven to 350°F (175°C) and generously grease a donut pan. This ensures your donuts come out perfectly without sticking, ready to shine with their glossy glaze.

  2. Mix together pumpkin puree, granulated sugar, brown sugar, melted butter, vegetable oil, and eggs in a large bowl until smooth and well combined. This creates a wonderfully rich base filled with the flavors of autumn.

  3. Whisk together flour, baking powder, pumpkin spice, and salt in a separate bowl. Mixing these dry ingredients well helps to distribute the baking powder and spices evenly throughout the batter for a perfect rise.

  4. Combine the dry ingredients with the wet ingredients gradually, stirring gently until just combined. Overmixing can lead to denser donuts, so keep it fluffy!

  5. Spoon the batter into the prepared donut pan, filling each cavity about 2/3 full. This gives your donuts room to rise without overflowing—trust me, they’ll be delightful!

  6. Bake for 14 minutes or until a toothpick inserted into a donut comes out clean. This quick bake time ensures a soft texture that’s light and airy, perfect for indulgence.

  7. Cool the donuts in the pan for a few minutes before transferring them to a wire rack. This allows them to set and makes glazing easier without smushing them.

  8. Prepare the glaze by melting 4 tablespoons of butter in a bowl. Then whisk in the powdered sugar, heavy cream, and vanilla extract until smooth. This should be luscious and glossy, ready to elevate your donuts!

  9. Dip the tops of the cooled donuts into the glaze and allow them to set on a wire rack. The glaze will harden slightly, creating a sweet, buttery crown that’s simply irresistible.

Optional: Sprinkle with extra pumpkin spice for an extra pop of flavor.

Exact quantities are listed in the recipe card below.

How to Store and Freeze Baked Pumpkin Donuts with Brown Sugar Glaze

Room Temperature: Store donuts in an airtight container at room temperature for up to 2 days. This keeps them soft and fresh for your enjoyment!

Fridge: If you prefer keeping them longer, store in the fridge for up to 5 days, but let them come to room temperature before enjoying to restore the glaze’s silkiness.

Freezer: For extended storage, freeze the donuts in a single layer on a baking sheet, then transfer to a zip-top bag for up to 3 months. Simply thaw at room temperature when you’re ready to indulge.

Reheating: To reheat, pop the donuts in the microwave for about 10 seconds for a warm treat, bringing back that fresh-baked comfort for your Baked Pumpkin Donuts with Brown Sugar Glaze!

What to Serve with Baked Pumpkin Donuts with Brown Sugar Glaze?

Indulge in the cozy flavors of autumn by pairing these soft, spiced treats with delightful sides that elevate your baking experience.

  • Hot Apple Cider: Warm and aromatic, this classic fall drink complements the pumpkin spice, creating a heartwarming experience. The cider’s sweetness will beautifully enhance every bite of your donuts.

  • Maple Pecan Coffee Cake: A tender, nutty coffee cake brings in crunch and sweetness, perfectly balancing the softness of the donuts. A slice of this cake alongside your donuts creates a dreamy dessert table.

  • Cinnamon Whipped Cream: Light and fluffy, this whipped cream adds a fresh touch to each donut, while a sprinkle of cinnamon enhances the spiced flavors. It’s an easy way to take your treat to the next level!

  • Spiced Tea: A warm cup of spiced tea mingles wonderfully with pumpkin flavors, making for a comforting pairing. The embrace of spices from the tea rounds out the experience beautifully.

  • Cream Cheese Frosting: Rich and tangy, this frosting adds a creamy texture that envelops the donuts in deliciousness. It’s a fun twist for those who want a bit more than just glaze.

  • Roasted Nuts: Crunchy and flavorful, a mix of roasted almonds or pecans adds an earthy note that contrasts beautifully with the sweet glaze. Perfect for snacking alongside or topping the donuts!

With these delightful pairings, your baking adventure will be even more special, inviting family and friends to join in on the flavorful celebration!

Make Ahead Options

These Baked Pumpkin Donuts with Brown Sugar Glaze are fantastic for busy cooks looking to save time! You can prepare the batter up to 24 hours in advance; simply mix the wet and dry ingredients separately, then combine them before filling the donut pan. To maintain quality, store the batter in an airtight container in the refrigerator. Additionally, the baked donuts can be covered and kept at room temperature for up to 3 days or refrigerated for up to a week—they’ll still be just as delicious! When you’re ready to serve, warm the donuts briefly in the microwave for a fluffy texture, glaze them, and enjoy the taste of autumn at your leisure!

Baked Pumpkin Donuts Variations

Feel free to explore these delightful twists and substitutions to make these baked pumpkin donuts uniquely yours!

  • Gluten-Free: Substitute all-purpose flour with a gluten-free flour blend, ensuring a tender yet safe treat for those avoiding gluten. Enjoy the same savory pumpkin deliciousness without the worry!

  • Vegan: Replace eggs with flax eggs (1 tablespoon flaxseed meal + 2.5 tablespoons water per egg) and use coconut oil instead of butter. Your donuts will be just as moist and flavorful!

  • Spiced Up: Add a pinch of cayenne pepper or a dash of ground ginger for a spicy kick that contrasts beautifully with the sweetness of the glaze. This will awaken your taste buds with every bite!

  • Chocolate Drizzle: Swap in a smooth chocolate glaze instead of the brown sugar glaze to offer a rich and decadent dessert experience. This chocolatey twist will have both kids and adults smiling!

  • Maple Glaze: Replace the vanilla extract in the glaze with pure maple syrup for a warm, fall-inspired flavor twist. This gives your donuts an even cozier vibe with earthy undertones.

  • Nutty Flavor: Toss in chopped walnuts or pecans into the batter for an added crunch that elevates both texture and taste. These nutty bits provide a lovely contrast to the soft donut!

  • Dairy-Free: Use almond milk or coconut cream instead of heavy cream for the glaze, and swap butter for a plant-based alternative. You’ll achieve a deliciously creamy texture without any dairy!

  • Pumpkin Chocolate Chip: Fold in mini chocolate chips to the batter before baking for that extra pop of sweetness and surprise. Each bite brings a delightful chocolatey richness that pairs perfectly with pumpkin!

Chef's Helpful Tips

  • Make sure your eggs are at room temperature before mixing; this helps create a smooth batter for the Baked Pumpkin Donuts with Brown Sugar Glaze.
  • Avoid overmixing the batter once you combine the wet and dry ingredients to ensure a light and fluffy texture.
  • When filling the donut pan, use a piping bag or a zip-top bag with the corner snipped off for neat and easy portioning.
  • Bake your donuts until a toothpick inserted comes out clean; this usually takes around 14 minutes, but keep an eye on them to prevent overbaking.

Baked Pumpkin Donuts with Brown Sugar Glaze Recipe FAQs

What type of pumpkin puree should I use?
Absolutely! You want to use 100% pure pumpkin puree, which is often found canned. Avoid the flavored pie fillings, as they contain added sugars and spices that could alter your donut recipe. If you’re feeling adventurous, you can also make your own by roasting and pureeing fresh pumpkin for the most vibrant flavor!

How should I store leftover donuts?
Very simply! Store your Baked Pumpkin Donuts with Brown Sugar Glaze in an airtight container at room temperature for up to 2 days. If you want them to last longer, placing them in the fridge extends their freshness to about 5 days. Just make sure to let them come to room temperature before indulging again to keep that glaze nice and silky.

Can I freeze the baked donuts?
Of course! Freezing these treats is a great way to enjoy them later. First, freeze them in a single layer on a baking sheet until firm. Then, transfer them to a zip-top bag or airtight container and store in the freezer for up to 3 months. When you’re ready to enjoy them, simply let them thaw at room temperature, and you can even warm them up in the microwave for about 10 seconds for that fresh-baked taste!

What should I do if my donuts sink in the middle?
It can be disheartening, but don’t worry! If your Baked Pumpkin Donuts do sink, it usually means the batter may have been overmixed or the oven temperature was too low. Ensure you gently combine the wet and dry ingredients until just combined for a fluffy texture. Also, make sure your oven is properly preheated to 350°F (175°C) for even baking.

Can I make this recipe vegan or gluten-free?
Absolutely! To make these delightful donuts vegan, substitute the eggs with flax eggs (1 tablespoon of ground flaxseed mixed with 3 tablespoons of water for each egg, let it sit until it thickens). You can also replace the butter with coconut oil or a vegan butter alternative. For a gluten-free version, swap the all-purpose flour with a 1:1 gluten-free baking mix, ensuring it includes xanthum gum for structure. Enjoy the versatility!

Baked Pumpkin Donuts with Brown Sugar Glaze

Baked Pumpkin Donuts with Brown Sugar Glaze

These Baked Pumpkin Donuts with Brown Sugar Glaze are soft, spiced donuts with rich pumpkin flavor and a sweet, buttery glaze.
Print Recipe Pin Recipe
Prep Time 25 minutes mins
Cook Time 14 minutes mins
Total Time 39 minutes mins
Servings: 12 donuts
Course: DESSERT RECIPES
Cuisine: American
Calories: 180
Ingredients Equipment Method Nutrition Notes

Ingredients
  

For the Donuts
  • 1 cup Pumpkin puree
  • 1 cup Granulated sugar
  • 1/2 cup Brown sugar
  • 1/4 cup Unsalted butter (melted & cooled)
  • 1/4 cup Vegetable oil
  • 2 large Eggs (room temperature)
  • 2 cups All-purpose flour
  • 1 tbsp Baking powder
  • 2 tsp Pumpkin spice
  • 1/2 tsp Salt
For the Glaze
  • 4 tbsp Unsalted butter
  • 2 cups Powdered sugar sifted to prevent lumps
  • 1/4 cup Heavy cream
  • 1 tsp Vanilla extract

Equipment

  • Donut pan
  • Mixing bowls
  • Whisk
  • Spoon
  • Wire Rack

Method
 

How to Make Baked Pumpkin Donuts with Brown Sugar Glaze
  1. Preheat the oven to 350°F (175°C) and generously grease a donut pan.
  2. Mix together pumpkin puree, granulated sugar, brown sugar, melted butter, vegetable oil, and eggs in a large bowl until smooth and well combined.
  3. Whisk together flour, baking powder, pumpkin spice, and salt in a separate bowl.
  4. Combine the dry ingredients with the wet ingredients gradually, stirring gently until just combined.
  5. Spoon the batter into the prepared donut pan, filling each cavity about 2/3 full.
  6. Bake for 14 minutes or until a toothpick inserted into a donut comes out clean.
  7. Cool the donuts in the pan for a few minutes before transferring them to a wire rack.
  8. Prepare the glaze by melting 4 tablespoons of butter in a bowl. Then whisk in the powdered sugar, heavy cream, and vanilla extract until smooth.
  9. Dip the tops of the cooled donuts into the glaze and allow them to set on a wire rack.
  10. Optional: Sprinkle with extra pumpkin spice for an extra pop of flavor.

Nutrition

Serving: 1donutCalories: 180kcalCarbohydrates: 25gProtein: 2gFat: 8gSaturated Fat: 5gPolyunsaturated Fat: 0.5gMonounsaturated Fat: 2gCholesterol: 35mgSodium: 105mgPotassium: 150mgFiber: 1gSugar: 10gVitamin A: 5000IUCalcium: 15mgIron: 1mg

Notes

Make sure your eggs are at room temperature for a smooth batter. Avoid overmixing to keep the donuts fluffy. Use a piping bag for easy filling of the donut pan.

Tried this recipe?

Let us know how it was!

Filed Under: BREAKFAST & BRUNCH

Southern Peach Cobbler Pound Cake

January 3, 2026 by JudyWhite Leave a Comment

There’s nothing quite like the sweet, sun-kissed essence of summer captured in a slice of Southern Peach Cobbler Pound Cake. Picture this: a warm kitchen, the scent of ripe peaches mingling with the comforting aroma of cinnamon and cream cheese as this delightful cake bakes in the oven. It’s a scene that promises joy, nostalgia, and the kind of dessert that beckons friends and family to gather around the table.

I stumbled upon this recipe after a casual stroll through the local farmer’s market, where fresh peaches practically begged to be taken home. This cake marries the velvety richness of pound cake with the delightful and fruity notes of traditional peach cobbler. It’s simple enough for a weeknight treat yet impressive enough to be the star of any gathering.

Whether you’re looking to impress at a potluck or simply craving a slice of homemade comfort, this Southern Peach Cobbler Pound Cake with Cream Cheese delivers flavor and heart in every bite. Get ready to embrace the warmth of Southern baking—it’s time to roll up your sleeves and transform those fresh peaches into something spectacular!

Why You'll Love This Southern Peach Cobbler Pound Cake

  • This Southern Peach Cobbler Pound Cake is incredibly easy to make, requiring just a few simple steps for a delicious dessert.
  • The combination of cream cheese and fresh peaches creates a rich flavor that will have everyone asking for seconds.
  • Not only is this cake perfect for family gatherings, but it can also serve as a delightful treat for any occasion or potluck.
  • Its stunning presentation topped with a sweet vanilla glaze makes it visually appealing and perfect for impressing your guests.

Southern Peach Cobbler Pound Cake Ingredients

• You’ll need these delicious staples to create a comforting dessert.

For the Cake Batter

  • All-purpose flour – provides the backbone for your cake, giving it structure and stability.
  • Granulated sugar – sweetens the cake and helps create that delightful crust.
  • Salted butter (room temperature) – brings rich flavor and moisture; make sure it’s softened for easy blending.
  • Cream cheese (room temperature) – adds a decadent creaminess that elevates the overall taste.
  • Large eggs (room temperature) – bind all ingredients, contributing to a tender crumb.
  • Pure vanilla extract – enhances the flavor profile with its warm and aromatic notes.
  • Whole milk (room temperature) – helps to achieve a lighter, fluffier texture in the cake.
  • Cake flour – yields a tender, soft cake by reducing gluten formation.
  • Baking soda – provides lift during baking, ensuring a perfectly risen cake.
  • Ground cinnamon – infuses a warm, comforting spice that’s a nod to traditional cobblers.
  • Chopped peaches – not only adds sweetness but also gives the cake its signature fruity flavor.

For the Topping

  • Brown sugar (packed) – deepens the flavor while adding a hint of caramel sweetness.
  • Salted butter (melted) – combines beautifully with brown sugar for a rich topping.
  • Ground cinnamon – complements the fresh peaches, enhancing the cobbler experience.
  • Ground nutmeg – introduces a subtle warmth that elevates the dish’s flavor profile.

For the Glaze

  • Powdered sugar – adds sweetness and a smooth texture for the perfect finishing touch.
  • Milk – thins out the glaze for easy drizzling over the cake.
  • Pure vanilla extract – ties together the glaze with its delicious and fragrant notes.
  • Pinch salt – balances the sweetness, ensuring a harmonious flavor in every bite.

Embrace these essential ingredients to create your own Southern Peach Cobbler Pound Cake that will leave everyone craving more!

How to Make Southern Peach Cobbler Pound Cake

  1. Preheat your oven to 350°F and prepare a bundt pan or a 9×13 inch baking dish by greasing it gently. This step ensures your cake comes out easily and beautifully.

  2. Beat together the cream cheese and salted butter in a mixing bowl until the mixture is smooth and creamy. This will take about 2-3 minutes, ensuring it’s perfectly blended.

  3. Add granulated sugar gradually, continuing to beat until the mix becomes light and fluffy, about 3-5 minutes. This fluffiness is key to a moist cake.

  4. Incorporate the eggs one at a time, mixing well after each addition to ensure a homogenous batter. This helps the eggs fully emulsify for a rich texture.

  5. Stir in the vanilla extract and whole milk until everything is well combined. The mixture should be smooth and creamy at this point—your senses will love the aroma!

  6. Combine the cake flour, baking soda, ground cinnamon, and pinch of salt in a separate bowl. Whisk them together well to blend the dry ingredients evenly.

  7. Gradually add this dry mixture to the wet mixture, mixing until just combined. Avoid over-mixing to keep your cake tender and fluffy.

  8. Fold in the chopped peaches with a spatula gently. This step allows the peach pieces to disperse throughout the batter evenly, giving bursts of flavor.

  9. Pour the batter into the prepared baking pan and spread it evenly. This helps with an even rise and baking.

  10. Mix the brown sugar, melted butter, ground cinnamon, and ground nutmeg in a small bowl. Sprinkle this mixture generously over the top of the batter for a delightful caramelized crust.

  11. Bake in the preheated oven for about 75-90 minutes, or until a toothpick inserted comes out clean. Keep an eye on it—the aroma will be hard to resist!

  12. Cool the cake completely in the pan for about 15-20 minutes before transferring it to a wire rack. This will help maintain its structure while cooling.

  13. Frost the cooled cake with a glaze made from powdered sugar, milk, and vanilla extract for that finishing touch. Drizzle it on for a beautiful effect!

Optional: Top with extra chopped peaches or a sprinkle of cinnamon for an inviting presentation.

Exact quantities are listed in the recipe card below.

Southern Peach Cobbler Pound Cake Variations

Feel free to explore these tasty options to make the Southern Peach Cobbler Pound Cake even more unique and delightful!

  • Gluten-Free: Use a 1:1 gluten-free baking flour blend instead of all-purpose and cake flour for a deliciously gluten-free twist.
  • Peach-Free: Swap in chopped strawberries or blueberries for a berry bliss version, perfect for summer gatherings or a fresh dessert.
  • Nutty Crunch: Add ½ cup of finely chopped pecans or walnuts folded in with the peaches for an extra layer of texture and flavor.
  • Spicy Twist: Mix in 1 teaspoon of ground ginger or cardamom along with the cinnamon for a warming spiced cake that will surprise your taste buds.
  • Coconut-Lover’s: Incorporate 1 cup of shredded coconut to the batter for a tropical flair that pairs beautifully with the peaches. There’s something special about that coconut and peach combo!
  • Extra Sweet: For an added sweet touch, layer fresh peach slices and cinnamon sugar in between the batter layers before baking for fruity surprises.
  • Cream Cheese Frosting: Opt for a cream cheese frosting instead of a glaze—whip together cream cheese, butter, powdered sugar, and vanilla for a richer finish.
  • Savory Touch: Introduce a pinch of sea salt and a hint of rosemary or thyme for a savory contrast that complements the sweetness of the peaches.

Let your creativity lead the way as you transform this cake, making it your own special creation!

How to Store and Freeze Southern Peach Cobbler Pound Cake

Room Temperature: Store the cake in an airtight container at room temperature for up to 3 days to maintain freshness and flavor.

Fridge: If you want to keep the cake longer, refrigerate it in an airtight container for up to a week. This helps preserve the cream cheese frosting.

Freezer: Wrap slices of the Southern Peach Cobbler Pound Cake tightly in plastic wrap, then in aluminum foil. It can be frozen for up to 3 months.

Reheating: To enjoy a warm slice from the freezer, thaw overnight in the fridge, then microwave for 15-30 seconds or warm in the oven at 350°F for about 10 minutes.

What to Serve with Southern Peach Cobbler Pound Cake?

Creating a delightful meal around this luscious cake transforms dessert into a memorable dining experience.

  • Fresh Cream: A dollop of lightly whipped cream adds a luxurious touch that enhances the cake’s fruity flavor.

  • Vanilla Ice Cream: Serve warm slices with a scoop of vanilla ice cream for a classic pairing—think warm and cold sensations!

  • Cinnamon-Spiced Coffee: Pair this cake with a cup of coffee spiced with a hint of cinnamon for a deliciously cozy afternoon treat.

  • Peach Chutney: Elevate your dessert experience with a side of homemade peach chutney for a vibrant, tangy contrast.

  • Mixed Berry Salad: A light and refreshing mixed berry salad offers a burst of juicy freshness, balancing the cake’s richness perfectly.

  • Honeyed Yogurt: Drizzle some honey over Greek yogurt and serve it alongside the cake for a creamy, decadent complement.

  • Sweet Tea: Nothing screams Southern charm quite like a glass of sweet iced tea—it’s the perfect refreshing sip next to your cake.

  • Lemonade: A glass of tart lemonade cleanses the palate and adds a delightful citrus twist!

  • Chocolate Drizzle: For chocolate lovers, a light drizzle of chocolate sauce over the top can elevate each bite into a sweet, rich indulgence.

Indulge in these delightful pairings to create a full experience around the Southern Peach Cobbler Pound Cake, inviting warmth and joy to every gathering!

Make Ahead Options

These Southern Peach Cobbler Pound Cake are perfect for busy weeknights and can save you precious time! You can prepare the batter up to 24 hours in advance by mixing everything (excluding the chopped peaches), then refrigerate it in an airtight container. Just before baking, gently fold in the peaches to keep them fresh and vibrant. Alternatively, bake the cake and let it cool, then store it wrapped in plastic wrap for up to 3 days at room temperature or freeze for a month. When ready to enjoy, simply thaw and glaze the cake before serving. This way, you’ll have a delightful dessert ready with minimal effort, just as delicious as when freshly baked!

Chef's Helpful Tips

  • When making the Southern Peach Cobbler Pound Cake, ensure all your ingredients are at room temperature as this helps achieve a smooth batter and a potentially fluffier cake.
  • Avoid over-mixing the batter once you combine the dry and wet ingredients to keep the cake tender and light.
  • When folding in the chopped peaches, be gentle to maintain the integrity of the fruit pieces for better flavor distribution throughout the cake.
  • Lastly, keep an eye on the baking time; check for doneness around the 75-minute mark to prevent over-baking.

Southern Peach Cobbler Pound Cake Recipe FAQs

What type of peaches are best for this recipe?
Absolutely! For the best flavor, use ripe, sweet peaches that are slightly soft to the touch, which indicates they are juicy. Look for peaches with a warm, golden hue and a fragrant aroma—these are signs of peak ripeness.

How should I store leftover Southern Peach Cobbler Pound Cake?
You can store the cake in an airtight container at room temperature for up to 3 days. It remains delicious and fresh, but if you think you won’t finish it within that time, refrigerate it for up to a week to maximize the freshness of the cream cheese frosting.

Can I freeze Southern Peach Cobbler Pound Cake?
Very! To freeze, cut the cake into slices or keep it whole. Wrap each slice tightly in plastic wrap and then in aluminum foil. It can last in the freezer for up to 3 months. When you’re ready to enjoy, simply thaw in the fridge overnight, then warm it in the microwave for 15-30 seconds or bake at 350°F for about 10 minutes for that fresh-out-of-the-oven taste.

What should I do if my cake sinks in the middle?
Oh no! A sunken cake can happen for a few reasons. It’s usually due to overmixing, which leads to excess air causing the cake to rise too quickly and then fall. Make sure to fold in your dry ingredients gently and avoid overbeating. Additionally, check your oven temperature with a thermometer; it should be around 350°F for proper baking.

Is this cake suitable for those with dairy allergies?
Not exactly. This Southern Peach Cobbler Pound Cake contains cream cheese and butter, making it unsuitable for someone with dairy allergies. However, you can substitute dairy-free cream cheese and margarine in equal amounts to make it more allergy-friendly. Just keep in mind that the flavor and texture may vary slightly!

How can I enhance the flavor of the cake?
Definitely! You can add a splash of bourbon or almond extract for extra depth. Adding a bit of finely grated lemon or orange zest can also elevate the flavor profile, providing a delightful citrusy brightness that complements the peaches beautifully. Enjoy the creative process!

Southern Peach Cobbler Pound Cake

Southern Peach Cobbler Pound Cake

A delightful Southern Peach Cobbler Pound Cake that combines rich flavors of cream cheese and fresh peaches, perfect for gatherings.
Print Recipe Pin Recipe
Prep Time 20 minutes mins
Cook Time 1 hour hr 30 minutes mins
Cooling Time 20 minutes mins
Total Time 2 hours hrs 10 minutes mins
Servings: 12 slices
Course: DESSERT RECIPES
Cuisine: Southern
Calories: 350
Ingredients Equipment Method Nutrition Notes

Ingredients
  

For the Cake Batter
  • 2 cups All-purpose flour
  • 2 cups Granulated sugar
  • 1 cup Salted butter (room temperature)
  • 8 oz Cream cheese (room temperature)
  • 4 large Eggs (room temperature)
  • 1 tsp Pure vanilla extract
  • 1 cup Whole milk (room temperature)
  • 1 cup Cake flour
  • 1 tsp Baking soda
  • 1 tsp Ground cinnamon
  • 2 cups Chopped peaches
For the Topping
  • 1 cup Brown sugar (packed)
  • 1/2 cup Salted butter (melted)
  • 1 tsp Ground cinnamon
  • 1/4 tsp Ground nutmeg
For the Glaze
  • 1 cup Powdered sugar
  • 2 tbsp Milk
  • 1 tsp Pure vanilla extract
  • a pinch Salt

Equipment

  • Bundt pan
  • Mixing bowl
  • Whisk
  • Spatula
  • Oven

Method
 

Preparation
  1. Preheat your oven to 350°F and prepare a bundt pan or a 9x13 inch baking dish by greasing it gently.
  2. Beat together the cream cheese and salted butter in a mixing bowl until smooth and creamy.
  3. Add the granulated sugar gradually, continuing to beat until light and fluffy.
  4. Incorporate the eggs one at a time, mixing well after each addition.
  5. Stir in the vanilla extract and whole milk until well combined.
  6. Combine the cake flour, baking soda, ground cinnamon, and pinch of salt in a separate bowl.
  7. Gradually add the dry mixture to the wet mixture, mixing until just combined.
  8. Fold in the chopped peaches gently.
  9. Pour the batter into the prepared baking pan and spread it evenly.
  10. Mix the brown sugar, melted butter, ground cinnamon, and ground nutmeg in a small bowl.
  11. Sprinkle the mixture generously over the top of the batter.
  12. Bake in the preheated oven for about 75-90 minutes, or until a toothpick comes out clean.
  13. Cool the cake completely in the pan for about 15-20 minutes before transferring it to a wire rack.
  14. Frost the cooled cake with a glaze made from powdered sugar, milk, and vanilla extract.

Nutrition

Serving: 1sliceCalories: 350kcalCarbohydrates: 50gProtein: 4gFat: 16gSaturated Fat: 10gPolyunsaturated Fat: 1gMonounsaturated Fat: 5gCholesterol: 60mgSodium: 200mgPotassium: 200mgFiber: 1gSugar: 35gVitamin A: 500IUVitamin C: 5mgCalcium: 50mgIron: 1mg

Notes

Ensure all ingredients are at room temperature for best results. Avoid over-mixing to maintain tenderness.

Tried this recipe?

Let us know how it was!

Filed Under: BREAKFAST & BRUNCH

French Butter Cake

January 2, 2026 by JudyWhite Leave a Comment

There’s something incredibly satisfying about a slice of cake that melts in your mouth, and my journey with French Butter Cake has brought me just that. The moment you take the first bite, the fragrant notes of vanilla and almond wash over you, invoking a sense of comfort that warms the heart. This lovely cake isn’t just a treat; it’s an experience that transforms any gathering into a celebration, capturing the essence of homely indulgence.

A recent Sunday afternoon, I wandered into my kitchen yearning for a dessert that was uncomplicated yet delicious. With only a handful of ingredients and less than an hour to spare, the allure of this French Butter Cake called to me. The delightful richness combined with the lightness of yogurt makes every slice extra special. Whether you’re hosting a dinner party or simply wishing to elevate your afternoon coffee break, this cake is a crowd-pleasing hero that’s just waiting to be made. Let’s dive into this delicious recipe together!

Why You'll Love This French Butter Cake

  • This French Butter Cake is incredibly easy to make, requiring just a handful of ingredients and minimal preparation time.
  • The delightful flavors of vanilla and almond create a rich, comforting experience that will impress everyone at your gathering.
  • Its versatility makes it perfect for any occasion, whether it’s a casual afternoon snack or a fancy dinner party.
  • The beautiful golden color and glossy glaze elevate its visual appeal, making it as stunning to look at as it is delicious to eat.

French Butter Cake Ingredients

• Delight in the simplicity of this French Butter Cake recipe with these essential ingredients.

For the Cake

  • Plain yogurt or Greek yogurt – A key ingredient that keeps the cake moist and adds a subtle tang.
  • Granulated sugar – Sweetens the cake perfectly; feel free to adjust to your taste!
  • Large eggs – Helps bind the ingredients while contributing to a rich texture.
  • Vanilla extract – The soul of the cake; use pure extract for the best flavor.
  • Almond extract – Just a hint elevates the cake’s aromas; if you’re not a fan, you can omit it!
  • All-purpose flour – Provides structure; sift it for a lighter cake.
  • Baking powder – Ensures your cake rises beautifully; always check the expiration date!
  • Salt – A tiny pinch enhances the sweetness without being detectable.
  • Neutral flavored oil – Adds moistness; opt for canola or sunflower for a neutral taste.

For the Glaze

  • Granulated sugar – Sweeten up your glaze; using finely granulated helps it dissolve easier.
  • Butter (salted) – Adds richness and flavor to the glaze; you can use unsalted butter if preferred.
  • Water – Helps combine the glaze ingredients smoothly; make sure it’s at room temperature for best results.
  • Vanilla extract – A touch in the glaze brings harmony between the cake and glaze flavors.
  • Almond extract – For that extra note of flavor; just a drop goes a long way!

This dreamy French Butter Cake is just waiting to bring a touch of sweetness to your home!

How to Make French Butter Cake

  1. Preheat the oven to 350°F (175°C) and prepare your 9-inch round cake pan by greasing it lightly, ensuring your cake will release easily after baking.

  2. Mix the yogurt, granulated sugar, and eggs in a large bowl until the mixture is smooth and fully combined, creating a delightful, creamy base for the cake.

  3. Stir in the vanilla extract and almond extract, letting the beautiful aroma infuse your batter, promising a rich flavor in every bite.

  4. Combine the all-purpose flour, baking powder, and salt in a separate bowl, ensuring dry ingredients are thoroughly mixed for a perfect rise.

  5. Gradually add the dry mixture to the wet ingredients, mixing gently until just combined. Be careful not to over-mix; we want it tender and fluffy!

  6. Pour in the neutral oil and mix until the batter is completely smooth, which adds a luscious lightness to the cake.

  7. Transfer the batter into the prepared pan and bake for about 40 minutes, or until golden brown and a toothpick inserted in the center comes out clean.

  8. Prepare the glaze by combining the granulated sugar, butter, water, vanilla extract, and almond extract in a small saucepan over medium heat.

  9. Heat the mixture gently until the butter melts and the sugar dissolves, stirring occasionally to ensure everything comes together beautifully.

  10. Drizzle the glaze over the warm cake once it’s out of the oven, allowing it to be absorbed, which makes every bite gloriously sweet and decadent.

Optional: Top with sliced almonds for an added crunch!

Exact quantities are listed in the recipe card below.

French Butter Cake Variations

Feel free to get creative with this French Butter Cake recipe and make it your own!

  • Gluten-Free: Substitute all-purpose flour with a 1:1 gluten-free flour blend for a delightful gluten-free version. The cake remains just as tender and moist!

  • Citrus Zing: Add the zest of one lemon or orange to your batter for a refreshing citrus twist. This brightens the flavors and adds a lovely aroma.

  • Nutty Crunch: Fold in ½ cup of chopped walnuts or almonds before baking for an added texture and bonus flavor. The delightful crunch balances the cake’s softness beautifully.

  • Berry Bliss: Incorporate 1 cup of fresh blueberries or raspberries into the batter for a fruity burst. This twist creates an exciting contrast with the rich cake flavor.

  • Spiced Delight: Include ½ teaspoon of cinnamon or nutmeg in the dry ingredients for a cozy warmth. These spices add a wonderful depth to your cake’s flavor profile.

  • Chocolate Drizzle: Instead of the glaze, melt dark chocolate and drizzle it over the cooled cake for a decadent finish. The sweetness of chocolate elevates the experience to a whole new level!

  • Caramel Swirl: Fold caramel sauce into the batter before baking for an indulgent surprise in every slice. The caramel melts into the cake, making it even more irresistible.

  • Dairy-Free: Swap yogurt with a plant-based alternative, like coconut yogurt, to make it dairy-free without sacrificing moisture or flavor. Enjoy the cake while catering to dietary preferences!

What to Serve with French Butter Cake?

Create a delightful dining experience around your French Butter Cake with these delicious pairings.

  • Fresh Berries: Juicy strawberries and blueberries offer a burst of freshness that balances the cake’s richness beautifully.

  • Whipped Cream: The light, airy texture of whipped cream adds a luscious touch and complements the cake’s moistness wonderfully.

  • Coffee: A serving of rich coffee enhances the cake’s flavors, creating a perfect afternoon pick-me-up moment.

  • Chocolate Sauce: Drizzling warm chocolate sauce over the cake adds an indulgent touch for chocolate lovers; it creates a delightful contrast.

  • Tea: Light herbal tea or classic Earl Grey can cut through the buttery richness, providing a soothing pairing for dessert time.

  • Vanilla Ice Cream: The creaminess of vanilla ice cream elevates every bite, providing a chilly contrast to the warm cake.

  • Lemon Curd: A dollop of tangy lemon curd brightens the palate, creating a refreshing contrast to the cake’s sweet, rich flavors.

Hosting friends? Serve the cake with assorted toppings like chopped nuts or even candied ginger for a unique touch. Delight in these pairings—the perfect complement to your sweet, aromatic French Butter Cake!

How to Store and Freeze French Butter Cake

Room Temperature: Store the cake in an airtight container at room temperature for up to 3 days to keep it moist and delicious.

Fridge: If you prefer a chill, keep the cake in the refrigerator, wrapped tightly, for up to 5 days. Just remember to bring it to room temperature before serving for the best flavor!

Freezer: For longer storage, wrap the cake well in plastic wrap and aluminum foil, then freeze for up to 3 months. Thaw overnight in the fridge before enjoying!

Reheating: To revive the cake, warm individual slices in the microwave for 10–15 seconds, or pop them in a low oven (300°F) for a few minutes until just heated through.

Make Ahead Options

These French Butter Cakes are perfect for meal prep enthusiasts looking to save time during busy weeks! You can prepare the batter up to 24 hours in advance by mixing all the wet and dry ingredients separately, then combine them right before baking. Simply refrigerate the mixed wet ingredients (yogurt, sugar, and eggs) and the dry mixture (flour, baking powder, and salt) separately to maintain their freshness and prevent any reaction. On baking day, mix them together, pour the batter into the prepared pan, and bake as directed for a delicious cake that’s just as moist and flavorful as if made fresh! For the glaze, you can prepare it a day ahead and store it in the fridge; just gently reheat it before drizzling for that warm, inviting touch.

Chef's Helpful Tips

  • For the perfect French Butter Cake, make sure to mix the wet ingredients thoroughly before adding the dry ones to avoid lumps in the batter.
  • A common mistake is overmixing; remember to stir gently until just combined to keep the cake tender.
  • When it comes to measuring flour, spoon it into your measuring cup and level it off with a knife to avoid packing too much in.
  • Bake the cake at 350°F and keep an eye on it around the 35-minute mark to ensure it doesn’t overbake, as ovens can vary in temperature.
  • Lastly, let the cake cool slightly before adding the glaze so it can soak in beautifully, enhancing the overall flavor and texture.

French Butter Cake Recipe FAQs

What type of yogurt is best for this French Butter Cake?
Absolutely! You can use either plain yogurt or Greek yogurt for this cake. Greek yogurt adds a bit more creaminess, while plain yogurt gives a lighter texture. Just ensure it’s unflavored to keep the taste balanced.

How should I store my French Butter Cake?
For optimal freshness, store the cake in an airtight container at room temperature for up to 3 days. If you have leftovers after that, consider refrigerating it tightly wrapped for up to 5 days. Just remember, letting it come to room temperature before serving enhances its flavor!

Can I freeze the French Butter Cake?
Yes, indeed! To freeze, first allow the cake to cool completely. Then, wrap it tightly in plastic wrap followed by aluminum foil, ensuring there’s no air exposure. It can be stored in the freezer for up to 3 months. For the best experience, thaw it overnight in the fridge when you’re ready to enjoy it!

What if my cake sinks in the middle?
Very commonly, a sinking middle can happen if the oven temperature is too low, or if the batter is overmixed. To avoid this, make sure your oven is preheated properly and keep a close eye on your cake in the last few minutes of baking. A toothpick inserted in the center should come out clean. If you notice any cracks forming, that’s often a sign it’s done!

Is this cake suitable for people with nut allergies?
While this French Butter Cake includes almond extract for flavor, you can easily substitute it with an extra splash of vanilla extract if needed. This will ensure that those with nut allergies can enjoy a slice without worry!

French Butter Cake

French Butter Cake

This French Butter Cake recipe features a delightful blend of vanilla and almond flavors, creating a melt-in-your-mouth experience.
Print Recipe Pin Recipe
Prep Time 10 minutes mins
Cook Time 40 minutes mins
Total Time 50 minutes mins
Servings: 8 slices
Course: DESSERT RECIPES
Cuisine: French
Calories: 300
Ingredients Equipment Method Nutrition Notes

Ingredients
  

For the Cake
  • 1 cup plain yogurt or Greek yogurt keeps the cake moist
  • 1 cup granulated sugar sweetens the cake
  • 3 large eggs binds the ingredients
  • 2 teaspoons vanilla extract use pure for best flavor
  • 1 teaspoon almond extract optional, can be omitted
  • 2 cups all-purpose flour sifted for a lighter cake
  • 1 tablespoon baking powder check expiration date
  • 1/2 teaspoon salt enhances sweetness
  • 1/2 cup neutral flavored oil canola or sunflower
For the Glaze
  • 1 cup granulated sugar finely granulated helps dissolve
  • 1/4 cup butter (salted) adds richness
  • 1/4 cup water room temperature
  • 1 teaspoon vanilla extract harmonizes flavors
  • 1 teaspoon almond extract for extra flavor

Equipment

  • 9-inch round cake pan
  • Mixing bowl
  • Saucepan

Method
 

Preparation
  1. Preheat the oven to 350°F (175°C) and prepare your 9-inch round cake pan by greasing it lightly.
  2. Mix the yogurt, granulated sugar, and eggs in a large bowl until smooth.
  3. Stir in the vanilla extract and almond extract.
  4. Combine the all-purpose flour, baking powder, and salt in a separate bowl.
  5. Gradually add the dry mixture to the wet ingredients, mixing gently.
  6. Pour in the neutral oil and mix until the batter is smooth.
  7. Transfer the batter to the prepared pan and bake for about 40 minutes.
  8. Prepare the glaze by combining the granulated sugar, butter, water, vanilla extract, and almond extract in a saucepan over medium heat.
  9. Heat until the butter melts and the sugar dissolves.
  10. Drizzle the glaze over the warm cake once it’s out of the oven.

Nutrition

Serving: 1sliceCalories: 300kcalCarbohydrates: 40gProtein: 4gFat: 14gSaturated Fat: 6gPolyunsaturated Fat: 2gMonounsaturated Fat: 6gCholesterol: 80mgSodium: 150mgPotassium: 200mgFiber: 1gSugar: 20gVitamin A: 300IUCalcium: 50mgIron: 1mg

Notes

Optional: Top with sliced almonds for added crunch.

Tried this recipe?

Let us know how it was!

Filed Under: BREAKFAST & BRUNCH

Meringue Wreath Cookies

January 2, 2026 by JudyWhite Leave a Comment

The holiday season always has a way of bringing out the baker in me, and this year, I found myself drawn to a delightful childhood favorite: Meringue Wreath Cookies. Picture this: a sunny afternoon, the scent of vanilla fills the air, and laughter accompanies the sound of my mixer whirling away. These whimsical cookies not only satisfy my sweet tooth but also serve as a creative outlet.

After years of mastering classic recipes, I stumbled upon this gem while experimenting with egg whites and cream of tartar during a baking session. The result? Light, airy wreaths that are perfect for decorating with colorful sprinkles and sharing with loved ones. Their versatility makes them a delightful treat at any gathering—be it a holiday party or cozy family gathering.

So, whether you’re a seasoned chef or just beginning your culinary journey, let me guide you through this simple yet enchanting recipe that will add a festive flair to your dessert table!

Why You'll Love This Meringue Wreath Cookies

  • These Meringue Wreath Cookies are incredibly easy to make, allowing even novice bakers to enjoy a fun and festive experience in the kitchen.
  • The light and airy texture combined with the delightful vanilla flavor makes these cookies an irresistible treat for anyone with a sweet tooth.
  • Their versatility allows for creative decorating, making them perfect for any occasion, from holiday celebrations to everyday snacking.
  • Not only do they taste amazing, but their visually appealing design will impress guests and add a charming touch to any dessert table.

Meringue Wreath Cookies Ingredients

• Create this delightful recipe with ease!

For the Meringue
• 2 egg whites – Ensure your bowl and utensils are grease-free for better volume.
• 1 dash salt – A pinch helps stabilize the egg whites and enhances flavor.
• 0.5 teaspoon cream of tartar – This helps create that magical fluffy texture that makes meringue shine!
• 0.5 cup granulated sugar – Using superfine sugar can help it dissolve more easily, leading to a smoother meringue.
• 1 teaspoon vanilla extract – This adds a delightful depth of flavor to every bite.

For Decorations
• Green food coloring – Add as desired for a festive touch; mixing with the meringue gives a cheerful vibe.
• Sprinkles – Personalize your cookies with colorful sprinkles for an extra dose of fun!

How to Make Meringue Wreath Cookies

  1. Preheat your oven to 225°F. This low temperature is key for drying out the meringue, giving you that perfect crispiness.

  2. Beat the egg whites, salt, and cream of tartar in a mixing bowl until stiff peaks form. You’ll know it’s ready when you can turn the bowl upside down without spilling!

  3. Add sugar gradually while mixing. Continue until the mixture is thick, glossy, and forms stiff peaks. This is what makes your Meringue Wreath Cookies airy and delightful.

  4. Mix in the vanilla extract and 4 drops of green food coloring. Feel free to adjust the color to your liking! A cheerful green adds a festive flair.

  5. Prepare baking sheets by lining them with parchment paper or a silicone baking mat. This ensures that your delicate meringues don’t stick during baking.

  6. Pipe circles using a star tip to create wreath shapes. Aim for even pressure as you pipe to achieve beautiful, uniform wreaths.

  7. Create trees by piping in a swirling circular motion. Start with a larger circle at the base and work your way up with smaller circles on top for that charming tree shape.

  8. Sprinkle your festive decorations on top before baking. Watch those sprinkles add a pop of color and excitement!

  9. Bake in the preheated oven for 45 minutes. The meringues should be dry to the touch and lightly crisp.

  10. Turn off the oven and leave the cookies undisturbed for 1 hour. This helps them dry out completely and prevents cracking.

  11. Cool them on a wire rack before storing. Allow the cookies to cool completely to maintain their delightful crunch.

Optional: Garnish with edible glitter for an extra festive touch!

Exact quantities are listed in the recipe card below.

How to Store and Freeze Meringue Wreath Cookies

Room Temperature: Store the cookies in a dry, airtight container for up to 3 days to maintain their crispiness. Avoid exposure to humidity, which can make them soggy.

Fridge: While it’s preferable to keep Meringue Wreath Cookies at room temperature, you can refrigerate them if necessary. Just be sure they’re well sealed, and they’ll last up to 1 week.

Freezer: For longer storage, wrap the cookies in plastic wrap and place them in an airtight container. They can be frozen for up to 2 months without losing their delightful texture.

Reheating: If you want to refresh your cookies after thawing, pop them back in a preheated oven at 225°F for about 5-10 minutes to regain their crispiness.

Make Ahead Options

These Meringue Wreath Cookies are perfect for busy home cooks who want to save time without sacrificing flavor! You can prepare the meringue mixture up to 24 hours in advance. Simply follow steps 1 through 4, then refrigerate the mixture in an airtight container until you’re ready to pipe your cookies. It’s important to gently stir the mixture before piping to revive its airy texture. When it’s time to serve, just preheat your oven, pipe the wreaths onto lined baking sheets, and bake as directed. By preparing ahead, you’ll enjoy stress-free baking while still serving up delicious, festive treats that are just as delightful!

Meringue Wreath Cookies Variations

Feel free to let your imagination run wild as you customize these cookies to suit your taste and festive spirit!

  • Dairy-Free: Substitute the cream of tartar with lemon juice or vinegar for a dairy-free meringue. Your wreaths will still bake up beautifully!

  • Colorful Delight: Use different food colorings to create vibrant shades of your favorite colors for themed occasions—think pink for Valentine’s Day or spooky black and orange for Halloween.

  • Nutty Twist: Fold in finely chopped nuts like pistachios or hazelnuts into the meringue for a delightful crunch. These add a wonderful texture that complements the airy cookie.

  • Flavored Meringue: Swap vanilla extract for almond or peppermint extract to add a unique flavor profile. Imagine a minty holiday treat everyone will love!

  • Chocolate Drizzle: Once cooled, drizzle melted dark or white chocolate on top of the meringue cookies for an extra sweet touch. The rich chocolate contrasts with the light meringue perfectly.

  • Spiced Sensation: Add a dash of ground cinnamon or nutmeg into the meringue mix for a warm, cozy flavor that evokes feelings of holiday cheer.

  • Citrus Zing: Incorporate a bit of lemon or orange zest into the meringue for a subtle citrus twist that brightens the overall taste.

  • Gourmet Topping: Instead of sprinkles, consider crushed candy canes or edible glitter for an eye-catching finish that adds a festive touch to your decorations.

Each of these ideas invites you to get creative—a true testament to the versatility of these delightful Meringue Wreath Cookies!

What to Serve with Meringue Wreath Cookies?

The sweet crunch of these festive cookies invites delightful pairings that elevate any gathering.

  • Hot Chocolate: A rich, creamy cup adds warmth and contrasts the lightness of the meringue, creating a cozy dessert experience.
  • Fruit Salad: Fresh, juicy fruits provide a burst of flavor that complements the sweetness of the cookies, making for a refreshing balance.
  • Coffee: The robust notes of a freshly brewed cup bring out the vanilla flavor in the cookies, making each bite feel indulgent.
  • Whipped Cream: A dollop of fluffy whipped cream adds an elegant touch, enhancing the airy texture of the meringues while making them even more delightful.
  • Chocolate Ganache: Drizzling warm ganache over the cookies introduces a luscious, chocolatey twist that pairs beautifully with the delicate meringue.
  • Holiday Fruit Punch: A festive, fruity drink brings a vibrant note that pairs harmoniously with the meringue’s sweetness, perfect for cheerful gatherings.
  • Cheese Platter: Salty cheeses provide an unexpected yet delightful contrast to the sugar, creating a tantalizing balance of flavors.
  • Cupcakes: Light vanilla or almond-flavored cupcakes can mimic the sweetness, while their moist texture offers a lovely contrast to the crisp meringues.
  • Vanilla Ice Cream: Scoops of creamy ice cream add a delightful chill that pairs wonderfully, softening the light crunch of the wreaths.

Chef's Helpful Tips

  • For perfect Meringue Wreath Cookies, make sure your mixing equipment is absolutely grease-free to achieve maximum volume when whipping the egg whites.
  • Gradually add the sugar while mixing to ensure it dissolves completely, which will result in a glossy and stable meringue.
  • When piping your wreaths, maintain consistent pressure on the piping bag to create uniform shapes, ensuring that your cookies look as delightful as they taste.
  • Remember to bake at the low temperature of 225°F for the full 45 minutes and leave them in the oven for an additional hour after turning it off to guarantee a crisp texture.

Meringue Wreath Cookies Recipe FAQs

What should I look for in fresh egg whites?
Absolutely! When selecting egg whites, it’s crucial to ensure that the eggs are fresh. Look for clean eggs without cracks, and consider using pasteurized egg whites if you’re concerned about food safety. Fresh egg whites should be clear and free from any red or dark spots.

How should I store Meringue Wreath Cookies?
I recommend storing your Meringue Wreath Cookies in a dry, airtight container at room temperature. They’ll stay fresh and crisp for up to 3 days this way. Avoid exposing them to humidity, as this can make them lose their delightful crunch and become chewy.

Can I freeze Meringue Wreath Cookies?
Absolutely! For longer storage, you can freeze your Meringue Wreath Cookies. Simply wrap them individually in plastic wrap and place them in an airtight container. They can stay in the freezer for up to 2 months. When you’re ready to enjoy them, just thaw at room temperature or pop them in a preheated oven at 225°F for about 5-10 minutes to bring back that lovely crunch.

What if my meringue is not forming stiff peaks?
Very well! If your meringue isn’t forming stiff peaks, there could be a couple of issues. First, ensure that your mixing bowl and utensils are completely grease-free; any fat can prevent the egg whites from whipping up properly. If you added the sugar too quickly, it may not have dissolved completely, affecting the texture. Try mixing on a higher speed, and don’t forget that room temperature egg whites will whip up better than cold ones!

Are Meringue Wreath Cookies suitable for a gluten-free diet?
Yes, they are! Meringue Wreath Cookies are naturally gluten-free as they contain no wheat flour or gluten ingredients. However, if you’re preparing them for someone with severe allergies, always check your other ingredients, like vanilla extract, to ensure there are no hidden gluten sources.

Can pets eat Meringue Wreath Cookies?
No, it’s best to keep Meringue Wreath Cookies away from pets. While egg whites are not toxic, the sugar and added decorative components may not be healthy for them. Stick to treats designed specifically for our furry friends when you want to share a yummy snack!

Meringue Wreath Cookies

Meringue Wreath Cookies

These Meringue Wreath Cookies are light, airy, and perfect for holiday celebrations, making them a delightful treat for bakers of all levels.
Print Recipe Pin Recipe
Prep Time 15 minutes mins
Cook Time 45 minutes mins
Cooling Time 1 hour hr
Total Time 2 hours hrs
Servings: 12 cookies
Course: DESSERT RECIPES
Cuisine: American
Calories: 45
Ingredients Equipment Method Nutrition Notes

Ingredients
  

For the Meringue
  • 2 egg whites egg whites Ensure your bowl and utensils are grease-free for better volume.
  • 1 dash salt A pinch helps stabilize the egg whites and enhances flavor.
  • 0.5 teaspoon cream of tartar This helps create that magical fluffy texture that makes meringue shine!
  • 0.5 cup granulated sugar Using superfine sugar can help it dissolve more easily.
  • 1 teaspoon vanilla extract This adds a delightful depth of flavor to every bite.
For Decorations
  • green food coloring Add as desired for a festive touch.
  • sprinkles Personalize your cookies with colorful sprinkles for an extra dose of fun!

Equipment

  • mixer
  • Mixing bowl
  • piping bag
  • baking sheets
  • parchment paper

Method
 

Instructions
  1. Preheat your oven to 225°F.
  2. Beat the egg whites, salt, and cream of tartar in a mixing bowl until stiff peaks form.
  3. Add sugar gradually while mixing, continue until thick and glossy.
  4. Mix in the vanilla extract and green food coloring.
  5. Prepare baking sheets by lining them with parchment paper.
  6. Pipe circles using a star tip to create wreath shapes.
  7. Create trees by piping in a swirling circular motion.
  8. Sprinkle your festive decorations on top before baking.
  9. Bake in the preheated oven for 45 minutes.
  10. Turn off the oven and leave the cookies undisturbed for 1 hour.
  11. Cool them on a wire rack before storing.

Nutrition

Serving: 1cookieCalories: 45kcalCarbohydrates: 10gProtein: 1gSodium: 20mgPotassium: 5mgSugar: 9gCalcium: 1mg

Notes

Optional: Garnish with edible glitter for an extra festive touch.

Tried this recipe?

Let us know how it was!

Filed Under: BREAKFAST & BRUNCH

Raspberry Pistachio Cake

January 2, 2026 by JudyWhite Leave a Comment

The moment I took my first bite of a raspberry pistachio cake at a quaint café, my taste buds awakened to a world of vibrant flavors. It was a delightful symphony of nutty pistachios and tart raspberries, perfectly balanced by a creamy frosting that sent my heart fluttering. This inspiration led me to create my own version that not only captures those delicious notes but is also incredibly simple to make at home, no fancy pastry skills required!

Picture this: a moist, cake adorned with a luscious pistachio frosting, punctuated with juicy raspberries and a sprinkle of chopped pistachios. Whether you’re looking to impress at a dinner party or treat yourself on a cozy afternoon, this raspberry pistachio cake is sure to become a treasured recipe in your kitchen. With just a short prep time and some straightforward steps, you’ll have a show-stopping dessert that appeals to both the novice baker and the seasoned chef. Let’s dive into the recipe and bring a taste of that café magic right into your home!

Why You'll Love This Raspberry Pistachio Cake

  • This Raspberry Pistachio Cake is not only easy to make but also requires minimal time, making it perfect for bakers of all skill levels.
  • The delightful combination of nutty pistachios and succulent raspberries brings an explosion of flavor that will impress your friends and family.
  • Its stunning visual appeal, with vibrant frosting and fresh garnishes, makes it an eye-catching centerpiece for any occasion.
  • Whether served at a gathering or enjoyed as a personal treat, this cake is sure to be a crowd-pleaser that everyone will love.

Raspberry Pistachio Cake Ingredients

• Unlock the secrets to a delightful cake!

For the Cake

  • 250 g unsalted butter – softened to create a light, fluffy texture.
  • 240 g golden caster sugar – adds a subtle caramel flavor and perfect sweetness.
  • 1 tsp vanilla extract – enhances the overall flavor of the cake beautifully.
  • 4 large eggs – crucial for binding and moisture, giving your cake that perfect rise.
  • 150 g plain flour – the foundation for a light and tender crumb.
  • 2 tsp baking powder – ensures your cake rises perfectly, creating a lovely fluffy texture.
  • 0.25 tsp fine sea salt – balances sweetness and elevates all the flavors.
  • 100 g shelled pistachios – provides a nutty crunch and complements the raspberries beautifully.

For the Frosting

  • 175 g unsalted butter – soft and creamy for a luscious frosting.
  • 280 g sifted icing sugar – makes for a sweet, smooth, and easy-to-spread frosting.
  • 2 tbsp smooth pistachio cream – adds richness and a vibrant pistachio flavor to the frosting.
  • 0.5 tsp fine sea salt – enhances sweetness and rounds out the frosting flavors.
  • 1 tsp lemon juice – brightens the frosting with a refreshing zing.
  • 3 tbsp raspberry jam – introduces an extra layer of fruity goodness.

For the Topping

  • 250 g fresh raspberries – juicy and tart, they add a pop of color and flavor.
  • 2 tbsp roughly chopped pistachios – for an extra crunch and beautiful presentation.
  • sprigs of fresh mint – a lovely garnish to elevate your cake’s appearance and aroma.

This Raspberry Pistachio Cake is a delightful masterpiece waiting to happen!

How to Make Raspberry Pistachio Cake

  1. Preheat the oven to 350°F (175°C) and prepare your cake tin by greasing it lightly. This ensures your cake lifts out easily after baking.

  2. Cream together the softened unsalted butter and golden caster sugar in a large bowl until the mixture is light and fluffy, about 3-5 minutes. This step is crucial for a soft, airy cake.

  3. Incorporate the vanilla extract and add the eggs, one at a time, mixing well after each addition. This will help bind everything together and create a rich flavor profile.

  4. Sift the plain flour, baking powder, and fine sea salt into a separate bowl. Then, gently fold this dry mixture into your wet ingredients until just combined. Be careful not to overmix; you want to maintain that light texture!

  5. Add the shelled pistachios to the batter and fold them in until evenly distributed. Their nutty goodness will give the cake a delightful crunch in every bite.

  6. Pour the batter into the prepared cake tin and smooth the top with a spatula to ensure an even bake.

  7. Bake in the preheated oven for 35 minutes or until a skewer inserted into the center comes out clean. You’ll know it’s done when it’s golden brown and springy to touch.

  8. Cool the cake completely in the tin, then transfer it to a wire rack to cool down thoroughly. This will set the texture perfectly for frosting.

  9. For the frosting: Beat the softened butter and sifted icing sugar together until creamy and smooth, about 4-5 minutes. This creates the perfect base for your pistachio frosting.

  10. Mix in the smooth pistachio cream, fine sea salt, lemon juice, and raspberry jam until all ingredients are well combined and glossy. This frosting is deliciously rich!

  11. Generously frost the cooled cake with the pistachio frosting, ensuring even coverage for an enticing presentation.

  12. Top with fresh raspberries and sprinkle the chopped pistachios on top for a burst of color and flavor.

  13. Garnish with sprigs of fresh mint to elevate both the look and the enjoyable aroma of your creation.

Optional: Serve with a dollop of whipped cream for an extra treat!

Exact quantities are listed in the recipe card below.

Raspberry Pistachio Cake Variations

Feel free to explore these exciting twists to make your raspberry pistachio cake truly your own!

  • Gluten-Free: Substitute plain flour with a gluten-free blend for a cake that everyone can enjoy without missing out on flavor.

  • Nut-Free: Replace pistachios with sunflower seeds or pumpkin seeds for a delightful crunch without the nuts.

  • Dairy-Free: Use plant-based butter and a dairy-free frosting made from coconut cream for a creamy finish that still delights.

  • Fruit Twist: Incorporate different berries, like blueberries or strawberries, for a refreshing flavor boost that adds to your cake’s vibrancy.

  • Chocolate Kick: Add cocoa powder to the batter for a rich chocolate flavor that beautifully complements the raspberry and pistachio.

  • Citrus Zest: Grate some lemon or orange zest into the batter to infuse a bright, zesty note that pairs wonderfully with raspberries.

  • Spice It Up: Add a pinch of cardamom or cinnamon to the batter for warm, aromatic undertones that elevate the overall flavor.

  • Level Up the Frosting: Swap out the raspberry jam in the frosting for a tart lemon curd to create a tangy contrast that is simply irresistible.

Embrace your creative side and enjoy this cake in a way that resonates with your taste buds!

What to Serve with Raspberry Pistachio Cake?

The light, vibrant flavors of this cake deserve delightful companions to create a perfect dessert spread.

  • Velvety Vanilla Ice Cream: A scoop of creamy vanilla ice cream provides a cool contrast, balancing the cake’s nutty and fruity notes beautifully.

  • Fresh Berry Compote: Drizzling a homemade berry compote enhances the tartness of the raspberries, resulting in a refreshing burst of flavor.

  • Light Whipped Cream: Add a dollop of lightly sweetened whipped cream for a rich yet airy element that complements the cake’s textures perfectly.

  • Mint Tea: Steep a fragrant cup of mint tea alongside your cake for a soothing and refreshing beverage that beautifully echoes the mint garnish.

  • Chocolate Ganache: A silky chocolate ganache adds a layer of richness, giving an exciting flavor combination with the pistachios and raspberries.

  • Almond Biscotti: Serve crunchy almond biscotti for an added texture. The nutty flavor matches well with the pistachios, creating a delightful bite.

  • Prosecco or Sparkling Wine: A glass of bubbly prosecco enhances the celebratory feel of the cake, with its crisp notes brightening the dessert experience.

  • Lemon Sorbet: A scoop of zesty lemon sorbet provides a tart contrast that refreshes the palate after each indulgent slice of cake.

Make Ahead Options

Preparing your Raspberry Pistachio Cake ahead of time is a fantastic way to save precious minutes on busy days! You can make the cake itself up to 24 hours in advance; simply allow it to cool completely, wrap it tightly in plastic wrap, and refrigerate to maintain its moistness. For the frosting, whip it up three days ahead and store it in an airtight container in the fridge; just give it a quick stir before spreading it on the cake. When you’re ready to serve, frost your chilled cake, add those luscious raspberries and pistachios, and garnish with mint for a fresh touch. This way, you’ll have a stunning dessert that’s just as delicious as if it were freshly made!

How to Store and Freeze Raspberry Pistachio Cake

Fridge: Store your Raspberry Pistachio Cake in an airtight container for up to 3 days to keep it moist and fresh.

Freezer: Wrap individual slices tightly in plastic wrap and then place them in a freezer-safe bag for up to 3 months.

Reheating: Thaw frozen slices in the fridge overnight, then enjoy them at room temperature or warm them briefly in the microwave for a cozy treat.

Frosting Storage: If you have extra frosting, store it in an airtight container in the fridge for up to 1 week; re-whip before using.

Chef's Helpful Tips

  • When making the Raspberry Pistachio Cake, always ensure your butter is softened to room temperature for optimal creaminess and incorporation with sugar.
  • Avoid overmixing once you add the flour mixture to maintain a light and airy texture, which is key to a delicious cake.
  • For an even rise, make sure to sift your dry ingredients before folding them into the wet mixture and be cautious when adding the eggs to create a smooth batter.
  • Baking can vary, so consider checking your cake a few minutes before the suggested time to prevent overbaking, ensuring it stays moist and fluffy.

Raspberry Pistachio Cake Recipe FAQs

What kind of raspberries should I use for the cake?
Absolutely! Fresh raspberries are best for this Raspberry Pistachio Cake, as they provide the perfect tartness and moisture. Look for plump, vibrant berries without dark spots. If you can’t find fresh ones, you can use frozen raspberries, just be sure to thaw and drain them first to avoid excess moisture in the batter.

How should I store leftover Raspberry Pistachio Cake?
To keep your Raspberry Pistachio Cake fresh, store it in an airtight container in the fridge for up to 3 days. This will help maintain its moisture and flavor. You can also place it in a cake box lined with plastic wrap to protect it from drying out.

Can I freeze the Raspberry Pistachio Cake?
Yes, you can! To freeze, wrap individual slices of the cake tightly in plastic wrap and place them in a freezer-safe bag. This will prevent freezer burn and keep your cake fresh for up to 3 months. When you’re ready to enjoy a slice, thaw it in the refrigerator overnight, then let it reach room temperature before serving.

What should I do if my cake doesn’t rise?
If your Raspberry Pistachio Cake doesn’t rise, it may be due to expired baking powder or the batter being overmixed. Make sure to check your baking powder’s expiration date and gently fold the dry ingredients in until just combined. If your eggs were too cold, they could also affect the rise. Always use room temperature eggs for the best results!

Is this cake suitable for people with nut allergies?
Since this Raspberry Pistachio Cake contains pistachios, it’s not suitable for those with nut allergies. If you’re looking for an alternative, I recommend replacing the pistachios with sunflower seeds or pumpkin seeds which can give a similar crunch without the risk of nuts. Make sure to adjust the frosting as well since it includes pistachio cream.

Can I make this recipe vegan?
Absolutely! To make a vegan Raspberry Pistachio Cake, substitute the eggs with flax eggs (1 tablespoon of ground flaxseed mixed with 3 tablespoons of water for each egg) and replace the butter with vegan butter or coconut oil. Ensure that your pistachio cream and any other ingredients are also vegan-friendly for the best results!

Raspberry Pistachio Cake

Raspberry Pistachio Cake

This Raspberry Pistachio Cake is a delightful mix of nutty pistachios and tart raspberries, crowned with creamy frosting. It's perfect for any occasion.
Print Recipe Pin Recipe
Prep Time 20 minutes mins
Cook Time 35 minutes mins
Cooling Time 30 minutes mins
Total Time 1 hour hr 25 minutes mins
Servings: 12 slices
Course: DESSERT RECIPES
Cuisine: American
Calories: 350
Ingredients Equipment Method Nutrition Notes

Ingredients
  

For the Cake
  • 250 g unsalted butter softened
  • 240 g golden caster sugar adds a subtle caramel flavor
  • 1 tsp vanilla extract enhances flavor
  • 4 large eggs for binding and moisture
  • 150 g plain flour foundation for a light crumb
  • 2 tsp baking powder ensures cake rises
  • 0.25 tsp fine sea salt balances sweetness
  • 100 g shelled pistachios provides a nutty crunch
For the Frosting
  • 175 g unsalted butter soft and creamy
  • 280 g sifted icing sugar for a sweet frosting
  • 2 tbsp smooth pistachio cream adds richness
  • 0.5 tsp fine sea salt enhances sweetness
  • 1 tsp lemon juice brightens frosting
  • 3 tbsp raspberry jam extra layer of flavor
For the Topping
  • 250 g fresh raspberries for color and flavor
  • 2 tbsp roughly chopped pistachios for extra crunch
  • sprigs of fresh mint garnish for aroma

Equipment

  • Oven
  • Mixing bowls
  • Cake tin
  • Spatula
  • Wire Rack

Method
 

Cake Instructions
  1. Preheat the oven to 350°F (175°C) and prepare your cake tin by greasing it lightly.
  2. Cream together the softened unsalted butter and golden caster sugar in a large bowl until light and fluffy, about 3-5 minutes.
  3. Incorporate the vanilla extract and add the eggs one at a time, mixing well after each addition.
  4. Sift the plain flour, baking powder, and fine sea salt into a separate bowl, then gently fold this dry mixture into the wet ingredients until just combined.
  5. Add the shelled pistachios to the batter and fold them in until evenly distributed.
  6. Pour the batter into the prepared cake tin and smooth the top with a spatula.
  7. Bake in the preheated oven for 35 minutes or until a skewer inserted into the center comes out clean.
  8. Cool the cake completely in the tin, then transfer to a wire rack to cool down thoroughly.
  9. For the frosting, beat the softened butter and sifted icing sugar together until creamy and smooth, about 4-5 minutes.
  10. Mix in the smooth pistachio cream, fine sea salt, lemon juice, and raspberry jam until well combined.
  11. Generously frost the cooled cake with the pistachio frosting.
  12. Top with fresh raspberries and sprinkle the chopped pistachios on top.
  13. Garnish with sprigs of fresh mint.

Nutrition

Serving: 1sliceCalories: 350kcalCarbohydrates: 52gProtein: 4gFat: 16gSaturated Fat: 10gPolyunsaturated Fat: 3gMonounsaturated Fat: 2gCholesterol: 100mgSodium: 180mgPotassium: 150mgFiber: 1gSugar: 30gVitamin A: 500IUVitamin C: 5mgCalcium: 20mgIron: 1mg

Notes

Optional: Serve with a dollop of whipped cream for an extra treat.

Tried this recipe?

Let us know how it was!

Filed Under: BREAKFAST & BRUNCH

Chocolate Charcuterie Board

January 2, 2026 by JudyWhite Leave a Comment

There’s a special thrill that comes from creating something beautiful and indulgent in the kitchen, and my Chocolate Charcuterie Board embodies that delight. Imagine gathering with friends or family, their eyes lighting up at the sight of a lavish spread of chocolatey goodness. It all started on a rainy afternoon when I decided to use up some leftover sweets from a birthday party. The charm of this indulgent board is its simplicity—built around a whole chocolate cake, it brings together an array of treats that cater to everyone’s sweet tooth, from cookies and cupcakes to luscious chocolate-covered strawberries.

Whether you’re looking to impress at your next gathering or simply want to indulge yourself, this board is not only easy to assemble but also a showstopper that requires just 15 minutes of prep time. With each bite bursting with flavor, it’s the ultimate solution to any chocolate lover’s cravings. So, let’s dive in and recreate a moment of joy with this delectable Chocolate Charcuterie Board!

Why You'll Love This Chocolate Charcuterie Board

  • This Chocolate Charcuterie Board is incredibly easy to assemble, taking just 15 minutes of prep time.
  • You’ll be amazed at the burst of rich flavors from every delightful treat, making it a chocolate lover’s paradise.
  • Its versatility allows you to customize the ingredients based on preferences, ensuring that everyone at your gathering finds something to enjoy.
  • Visually, this board is a feast for the eyes, featuring an appealing arrangement of chocolates, cookies, and fruits that will impress your guests and make any occasion feel special.

Chocolate Charcuterie Board Ingredients

For the Base
• Whole Chocolate Cake – The star of this board, offering a rich and moist foundation for all your treats.

For the Cookies
• Chocolate Cookies – These provide a classic, crunchy texture that pairs beautifully with the cake.
• Chocolate Chip Cookies – Perfectly chewy with melty chocolate chips, an irresistible addition!

For the Sweets
• Chocolate Marshmallows – Soft and fluffy, these add a delightful chewiness to the variety.
• Chocolate Covered Strawberries – Fresh and fruity, they bring a touch of elegance and brightness to the platter.
• Chocolate Covered Nuts – Just the right amount of crunch and saltiness for a well-rounded flavor profile.
• Mini Chocolate Cupcakes – Adorable bites of sweetness that are perfect for sharing and indulging.

For the Fresh Touch
• Blackberries – These juicy berries provide a tart contrast to the sweetness, balancing the flavors beautifully.

Dive into creating your own Chocolate Charcuterie Board, and remember, the possibilities are endless!

How to Make a Chocolate Charcuterie Board

  1. Arrange the Cake: Start by placing the whole chocolate cake in the center of a large serving platter. This beautiful cake will serve as the enticing focal point of your charcuterie board.

  2. Position the Cookies: Next, lovingly place the chocolate cookies and chocolate chip cookies around the cake. Make sure to scatter them in a way that invites everyone to dive in!

  3. Add the Marshmallows: Then, tuck the chocolate marshmallows in among the cookies. Their fluffy texture will contrast wonderfully with the crunch of the cookies, creating a delightful experience.

  4. Incorporate the Strawberries: Delight your guests by strategically placing the chocolate-covered strawberries around the board. Their fresh, fruity essence will balance the richness of the chocolate.

  5. Sprinkle the Nuts: Next, add the chocolate-covered nuts in various spots. Their salty crunch will elevate the overall flavor profile of the board, enticing your palate.

  6. Bring in the Cupcakes: Now, add the mini chocolate cupcakes to the platter for some adorable sweetness! Position them in groups for a delightful presentation.

  7. Finish with Blackberries: Finally, fill any remaining gaps with juicy blackberries. Their tartness will perfectly complement the sweeter elements, rounding out your beautiful display.

Optional: Drizzle some melted chocolate over the top for an extra decadent touch!

Exact quantities are listed in the recipe card below.

How to Store and Freeze Chocolate Charcuterie Board

Room Temperature: Keep leftover components like cookies and cupcakes in an airtight container for up to 3 days to maintain their freshness.

Fridge: Store any unassembled ingredients, like chocolate-covered strawberries and blackberries, in the fridge for up to 2 days to preserve their quality before building your Chocolate Charcuterie Board.

Freezer: If you have leftover cookies or cupcakes, you can freeze them for up to 2 months. Just wrap each item well and place in a freezer bag.

Reheating: For the best experience, enjoy the components at room temperature. Just take them out of the fridge 30 minutes before serving for optimal flavor!

What to Serve with Chocolate Charcuterie Board?

Create the perfect ambiance for sharing this delightful treat by complementing it with inspired accompaniments.

  • Fresh Fruit Salad: A mix of seasonal fruits adds refreshing brightness, balancing the richness of chocolate with a burst of natural sweetness.

  • Whipped Cream: Light and airy, whipped cream provides a creamy contrast to the denser chocolate elements on the board. It’s perfect for dipping!

  • Vanilla Ice Cream: The cold creaminess of vanilla ice cream works harmoniously with warm chocolate, enhancing its flavors and creating a comforting combination.

  • Chocolate Milk: For a true chocolate lover’s feast, serving chilled chocolate milk alongside amplifies the experience. It’s nostalgia in a glass!

  • Coffee or Espresso: A rich cup of coffee or a small shot of espresso enhances the chocolate flavors while providing a delightful energy boost.

  • Mint Sprigs: Adding a few fresh mint sprigs for garnish not only looks stunning but also introduces a refreshing herbal note that cuts through the sweetness.

Indulging in this Chocolate Charcuterie Board is a delight, and these pairings will elevate your gathering into a truly special occasion!

Chocolate Charcuterie Board Variations

Feel free to get creative and personalize your Chocolate Charcuterie Board to make it uniquely yours!

  • Gluten-Free: Substitute the chocolate cookies and chocolate chip cookies with your favorite gluten-free alternatives for a safe indulgence.

  • Nut-Free: Use cookie crumble or caramel popcorn instead of chocolate-covered nuts for a delightful, nut-free crunch.

  • Fruit Medley: Swap out the blackberries for an assortment of berries like raspberries or blueberries for vibrant color and flavor.

  • Minty Twist: Add peppermint patties or fresh mint leaves to bring a refreshing, festive flair to your board—perfect for special occasions!

  • Spicy Kick: Incorporate a few slices of chocolate chili cake or chili-spiced chocolate truffles for a surprising hint of heat that will excite the taste buds.

  • Dairy-Free: Use dairy-free chocolate alternatives for the cookies and marshmallows to create a delicious treat for lactose-intolerant friends.

  • Savory Balance: Include some dark chocolate-covered pretzels for a delightful sweet-salty crunch that perfectly contrasts the rest of the sweeter components.

  • Decadent Drizzle: Drizzle some dark chocolate or white chocolate sauce over the entire board for an extra layer of indulgence that guests will love.

Make Ahead Options

Preparing your Chocolate Charcuterie Board ahead of time is a delightful way to simplify your entertaining experience! You can make it up to 24 hours in advance, which is perfect for busy weeknights. To prep, arrange the whole chocolate cake on your serving platter and group the chocolate cookies, chocolate chip cookies, chocolate-covered marshmallows, and mini chocolate cupcakes around it. Cover the platter tightly with plastic wrap to keep everything fresh. It’s best to hold off on adding the chocolate-covered strawberries and blackberries until right before serving, as they are best enjoyed fresh. This thoughtful strategy ensures your board looks just as tempting and tastes just as delicious when it’s time to indulge!

Chef's Helpful Tips

  • For your Chocolate Charcuterie Board, ensure all ingredients are at room temperature for the best flavor and texture.
  • Avoid overloading the platter to maintain a visually appealing presentation and make it easy for guests to serve themselves.
  • When arranging your items, consider varying heights and colors to create an eye-catching display.
  • Remember that fresh ingredients like blackberries should be added last to keep them looking vibrant and fresh throughout your event.

Chocolate Charcuterie Board Recipe FAQs

How do I select the perfect chocolate cake for my board?
Absolutely! Look for a chocolate cake that has a rich texture and moist crumb. A cake with a glossy ganache or frosting adds an appealing touch. If you’re choosing a store-bought cake, check the expiration date and opt for one without dark spots or unusual scents.

How should I store leftover chocolate treats?
Very simply! For cookies and cupcakes, place them in an airtight container at room temperature for up to 3 days. However, if you have chocolate-covered strawberries or blackberries left over, store them in the fridge and consume them within 2 days for the best flavor and freshness.

Can I freeze any of the components of the charcuterie board?
Yes, you can! To freeze cookies or cupcakes, wrap each piece in plastic wrap and then place them in a freezer bag. This will keep them fresh for up to 2 months. When you’re ready to enjoy, simply thaw them at room temperature for about 30 minutes before serving!

What can I do if my chocolate treats are too dry?
If you find that your baked goods are on the dry side, don’t worry! One trick is to moisten them with a simple syrup. Mix equal parts water and sugar in a saucepan over medium heat until dissolved. Brush or drizzle this syrup over your treats to revive their moisture and enhance their sweetness!

Are there allergy considerations I should keep in mind?
Definitely! Always check labels for allergens like nuts or gluten, especially since some cookies and chocolates might not be suitable for everyone. If you’re catering to guests with dietary restrictions, consider providing alternative sweets, such as gluten-free cookies or dairy-free chocolates, to ensure everyone can indulge.

Chocolate Charcuterie Board

Chocolate Charcuterie Board

Indulge in a delightful Chocolate Charcuterie Board, a feast of chocolatey goodness perfect for gatherings.
Print Recipe Pin Recipe
Prep Time 15 minutes mins
Total Time 15 minutes mins
Servings: 8 slices
Course: DESSERT RECIPES
Calories: 400
Ingredients Equipment Method Nutrition Notes

Ingredients
  

For the Base
  • 1 whole Chocolate Cake The star of this board, offering a rich and moist foundation for all your treats.
For the Cookies
  • 12 pieces Chocolate Cookies These provide a classic, crunchy texture that pairs beautifully with the cake.
  • 12 pieces Chocolate Chip Cookies Perfectly chewy with melty chocolate chips, an irresistible addition!
For the Sweets
  • 12 pieces Chocolate Marshmallows Soft and fluffy, these add a delightful chewiness to the variety.
  • 12 pieces Chocolate Covered Strawberries Fresh and fruity, they bring a touch of elegance and brightness to the platter.
  • 1 cup Chocolate Covered Nuts Just the right amount of crunch and saltiness for a well-rounded flavor profile.
  • 12 pieces Mini Chocolate Cupcakes Adorable bites of sweetness that are perfect for sharing and indulging.
For the Fresh Touch
  • 1 cup Blackberries These juicy berries provide a tart contrast to the sweetness, balancing the flavors beautifully.

Equipment

  • large serving platter

Method
 

How to Make a Chocolate Charcuterie Board
  1. Start by placing the whole chocolate cake in the center of a large serving platter.
  2. Next, lovingly place the chocolate cookies and chocolate chip cookies around the cake.
  3. Then, tuck the chocolate marshmallows in among the cookies.
  4. Delight your guests by strategically placing the chocolate-covered strawberries around the board.
  5. Next, add the chocolate-covered nuts in various spots.
  6. Now, add the mini chocolate cupcakes to the platter for some adorable sweetness!
  7. Finally, fill any remaining gaps with juicy blackberries.

Nutrition

Serving: 1sliceCalories: 400kcalCarbohydrates: 50gProtein: 5gFat: 20gSaturated Fat: 10gPolyunsaturated Fat: 1gMonounsaturated Fat: 5gCholesterol: 60mgSodium: 200mgPotassium: 200mgFiber: 2gSugar: 30gVitamin A: 500IUVitamin C: 2mgCalcium: 30mgIron: 2mg

Notes

For your Chocolate Charcuterie Board, ensure all ingredients are at room temperature for the best flavor and texture. Avoid overloading the platter to maintain a visually appealing presentation.

Tried this recipe?

Let us know how it was!

Filed Under: BREAKFAST & BRUNCH

New York-Style Bagels with Cream Cheese and Toppings

January 2, 2026 by JudyWhite Leave a Comment

There’s a certain warmth that infuses the kitchen when you take a bite of a freshly baked New York-Style bagel. The crust is perfectly chewy, while the interior is soft and pillowy, just begging for a generous spread of smooth cream cheese. One chilly morning, inspired by a craving, I decided to embrace the art of bagel-making that seemed both daunting and delightful. Little did I know, these homemade treats would become my go-to solution for brunch gatherings, lazy weekend breakfasts, or even a comforting late-night snack.

Imagine your friends’ faces lighting up as you present a platter of bagels, topped with everything from scallions to your favorite smoked salmon, all made right in your own kitchen. With just a few simple ingredients and a dash of patience, you can create these delicious gems from scratch, ensuring they’re always fresh and tailored to your taste. So roll up your sleeves and join me in this culinary adventure, because there’s nothing quite like the satisfaction of warm New York-Style bagels with cream cheese and toppings!

Why You'll Love This New York-Style Bagels with Cream Cheese and Toppings

  • These New York-Style bagels are incredibly easy to make, allowing you to impress your family and friends without the need for complicated techniques.
  • The flavor is unbeatable, with a perfectly chewy crust and a soft, pillowy interior that pairs beautifully with cream cheese and your favorite toppings.
  • Their versatility means you can customize each bagel to cater to everyone’s tastes, whether you prefer classic toppings or something more adventurous.
  • Not only are they visually appealing, creating a stunning centerpiece for any brunch, but they are also a crowd-pleasing dish that will have everyone coming back for more.

New York-Style Bagels Ingredients

For the Bagel Dough

  • Warm water – 2.5 cups, this helps activate the yeast for that perfect rise in your New York-Style bagels with cream cheese and toppings.
  • Active dry yeast – 2.25-ounce packets, essential for creating that airy, chewy texture we love.
  • Bread flour – 8 cups, chosen for its high gluten content which gives the bagels their characteristic chewiness.
  • Granulated sugar – 2 tablespoons, helps to sweeten the dough and boosts yeast activity for a better rise.
  • Kosher salt – 2 tablespoons, enhances the flavor and controls the dough’s fermentation.
  • Dark brown sugar – 2 tablespoons, adds a subtle depth of flavor to your bagels.
  • Beaten egg – 1, adds richness to the dough and contributes to a shiny crust when baked.

For Boiling and Topping

  • Egg white – 1, beaten until frothy, used to brush the bagels for a glossy finish.
  • Everything bagel seasoning – 0.75 cup, this mix adds a delightful crunch and flavor explosion to your finished bagels.

For the Cream Cheese Spread

  • Cream cheese – 2 8-ounce packages (at room temperature), the perfect creamy base for your toppings.
  • Sliced scallion – 0.33 cup, for a fresh, oniony kick that complements the cream cheese beautifully.

How to Make New York-Style Bagels with Cream Cheese and Toppings

  1. Combine warm water and yeast in a large bowl. Let it stand for about 5-10 minutes until it becomes foamy. This step is crucial for activating the yeast, which gives your bagels that delightful rise!

  2. Mix in the bread flour, granulated sugar, kosher salt, dark brown sugar, beaten egg, and everything bagel seasoning. Stir until a dough forms, and don’t hesitate to get your hands in there if needed!

  3. Knead the dough on a floured surface for about 10 minutes. Aim for a smooth, elastic texture which is key for achieving that beloved bagel chewiness.

  4. Place the dough in a greased bowl, cover it with a damp cloth, and allow it to rise in a warm area for about 1 hour or until it doubles in size. Keep an eye on it, as this is the magic moment!

  5. Preheat the oven to 425°F (220°C). This high temperature is essential for achieving that great crust you love on New York-style bagels.

  6. Punch down the risen dough and divide it into 12 equal pieces. Shape each piece into a bagel by forming a small ball and then punching a hole through the center. This may feel odd, but it’s a crucial part of bagel making!

  7. Boil a large pot of water. Gently drop in the bagels, boiling for 1-2 minutes on each side. This gives them that signature glance, so don’t skip this step!

  8. Remove the bagels and place them on a greased baking sheet. Brush each bagel with frothy egg white for that stunning glossy finish.

  9. Bake in the preheated oven for 20-27 minutes until they turn golden brown. The aroma wafting through your kitchen will make you giddy with anticipation!

  10. Let cool slightly before serving. Now it’s time to spread that warm, creamy bagel with cream cheese and your favorite toppings!

Optional: Serve with a sprinkle of extra everything bagel seasoning for an added flavor boost.

Exact quantities are listed in the recipe card below.

New York-Style Bagel Variations

Customize your bagels to suit every craving and occasion with these delightful variations. Each twist offers a new adventure for your taste buds!

  • Dairy-Free: Substitute cream cheese with a dairy-free alternative, like cashew or almond cream cheese, for a vegan-friendly option. You’ll get that creamy delight without the dairy!

  • Whole Wheat: Swap half of the bread flour for whole wheat flour. This adds a nutty flavor and boosts nutrients while still keeping that beloved chew.

  • Herb-Infused: Incorporate chopped fresh herbs like dill or chives directly into the dough for aromatic bagels. Imagine the bright flavors dancing on your palate as you take each bite!

  • Sweet Treat: Add raisins or dried cranberries to the dough for a hint of sweetness. Enjoy them as breakfast bagels with cream cheese or as an afternoon snack!

  • Spicy Kick: Mix in crushed red pepper flakes or a dash of cayenne pepper for a spicy twist. The heat adds an exciting contrast to the rich cream cheese spread.

  • Savory Variation: For a savory surprise, fold in shredded cheese, like sharp cheddar or pepper jack, into the dough before shaping. Every bite will be rich and flavorful!

  • Smoked Salmon Bagels: Top your bagels with smoked salmon, capers, and red onion instead of traditional cream cheese for a classic deli experience. It’s a flavor explosion that’ll keep you coming back for more!

  • Gluten-Free: Use a gluten-free bread flour blend to make these delicious bagels suitable for gluten-sensitive friends without sacrificing taste or texture. They’ll be amazed at how good homemade gluten-free bagels can be!

How to Store and Freeze New York-Style Bagels

Room Temperature: Store bagels in an airtight container for up to 2 days to prevent them from getting stale or dry.

Fridge: If you’re planning to keep them longer, place bagels in the fridge for up to 5 days, wrapped tightly to avoid moisture loss.

Freezer: Freeze bagels individually wrapped in plastic wrap and then placed in a freezer bag for up to 3 months. This keeps them fresh for a quick warm-up later.

Reheating: To enjoy your New York-Style bagels, reheat them in the oven at 375°F (190°C) for about 10-12 minutes or for a few minutes in a toaster for that fresh-out-of-the-oven taste!

What to Serve with New York-Style Bagels with Cream Cheese and Toppings?

There’s nothing quite like enjoying a warm bagel, especially when it’s paired with the perfect accompaniments to elevate your meal!

  • Fresh Fruit Salad: A mix of juicy oranges, sweet strawberries, and tangy berries adds a refreshing burst of flavor to your breakfast spread.

  • Smoked Salmon Platter: This classic pairing enhances the savory richness of the cream cheese, providing a delightful texture and a hint of luxury to your bagels.

  • Hard-Boiled Eggs: Slice them for a protein boost that complements the flavors of the bagels and gives your meal a satisfying heartiness.

  • Caesar Salad: Crisp romaine and creamy dressing create a contrasting crunch, making it a perfect light companion for a brunch gathering.

  • Pickled Vegetables: The tanginess cuts through the creaminess, adding a bold kick and an exciting visual element to your bagel display.

  • Chai Latte: This fragrant spiced tea complements the warm bagels beautifully, offering a cozy drink to sip alongside.

  • Chocolaty Brownies: Satisfy your sweet tooth by serving brownies for dessert, balancing out the savory bagels with a bite of indulgence.

  • Mimosas: This bubbly drink brightens the morning with a refreshing citrus twist, making your brunch celebration truly festive!

Make Ahead Options

These New York-Style Bagels with Cream Cheese and Toppings are perfect for meal prep enthusiasts! You can prepare the bagel dough up to 24 hours in advance. Simply follow the recipe until the first rise, then shape the bagels and refrigerate them (covered) overnight. When you’re ready to enjoy, just boil and bake them as directed, and you’ll have freshly baked bagels that are just as delicious as if they were made that day. For the cream cheese spread, you can also mix it up to 3 days ahead and refrigerate it; this allows the flavors to meld beautifully. Just give it a quick stir before spreading, and serve with fresh toppings for a delightful breakfast or brunch!

Chef's Helpful Tips

  • Ensure your water is warm but not hot, as too high a temperature can kill the yeast, preventing your New York-Style Bagels from rising properly.
  • When kneading the dough, aim for a smooth and elastic texture which is crucial for that classic bagel chewiness, so don’t rush this step.
  • Allow the dough to rise in a warm environment, and cover it with a damp cloth to retain moisture and enhance the rising process.
  • Be patient while boiling the bagels, as this crucial step contributes to their chewy texture and glossy finish after baking.

New York-Style Bagels with Cream Cheese and Toppings Recipe FAQs

How do I select the right ingredients for my bagels?
Absolutely! When choosing ingredients, always opt for fresh active dry yeast; if it’s not foamy after combining with warm water, it’s best to start over. For the flour, bread flour is ideal due to its higher gluten content, giving your bagels that perfect chewiness. Use room temperature cream cheese for easy spreading and a delightful taste.

How should I store my New York-Style bagels?
Very good question! For short-term storage, keep your bagels in an airtight container at room temperature for up to 2 days. If you plan to enjoy them later, wrap them tightly in plastic and store in the fridge for up to 5 days to maintain freshness while preventing moisture loss.

Can I freeze New York-Style bagels for later use?
Absolutely! To freeze, first let the bagels cool completely. Then, wrap each bagel individually in plastic wrap and place them into a freezer bag. They can be preserved for up to 3 months. When you’re ready to enjoy one, just take it out and reheat it in the oven at 375°F (190°C) for 10-12 minutes or pop it in the toaster for a few minutes.

What should I do if my bagel dough doesn’t rise properly?
Oh no! If your dough doesn’t rise, it’s often due to inactive yeast. Make sure the water is warm, not hot; temperatures above 120°F (49°C) can kill the yeast. If you realize your dough hasn’t doubled in size after an hour, try placing it in a warmer spot or giving your yeast another chance. In the future, check the expiration date on your yeast packet, and remember, the yeast should be foamy when mixed with water.

Are there any dietary considerations for this bagel recipe?
Very much so! This recipe is vegetarian-friendly, but be mindful of allergies, particularly with cream cheese which may contain lactose. If you have a dairy allergy, feel free to substitute the cream cheese with a dairy-free alternative. Always check the ingredients of your everything bagel seasoning, as some brands may include allergens.

Can I customize the toppings for my bagels?
Of course! The more the merrier when it comes to toppings. You can generously layer your bagels with various spreads such as flavored cream cheeses, avocado, or even hummus. Add fresh veggies, smoked salmon, or deli meats to create a gourmet bagel experience right at home. Let your creativity flow!

New York-Style Bagels with Cream Cheese and Toppings

New York-Style Bagels with Cream Cheese and Toppings

Delight in these New York-Style Bagels with Cream Cheese and Toppings, perfect for brunch or lazy weekend breakfasts.
Print Recipe Pin Recipe
Prep Time 45 minutes mins
Cook Time 27 minutes mins
Rising Time 1 hour hr
Total Time 2 hours hrs 12 minutes mins
Servings: 12 bagels
Course: BREAKFAST & BRUNCH
Cuisine: American
Calories: 250
Ingredients Equipment Method Nutrition Notes

Ingredients
  

For the Bagel Dough
  • 2.5 cups Warm water Helps activate the yeast for rise.
  • 2.25 ounce packets Active dry yeast Essential for chewy texture.
  • 8 cups Bread flour High gluten for chewiness.
  • 2 tablespoons Granulated sugar Boosts yeast activity.
  • 2 tablespoons Kosher salt Enhances flavor.
  • 2 tablespoons Dark brown sugar Adds depth of flavor.
  • 1 large Beaten egg Adds richness and contributes to a shiny crust.
For Boiling and Topping
  • 1 large Egg white Beaten until frothy for glazing.
  • 0.75 cup Everything bagel seasoning Adds flavor explosion.
For the Cream Cheese Spread
  • 2 8-ounce packages Cream cheese At room temperature.
  • 0.33 cup Sliced scallion Fresh, oniony kick.

Equipment

  • Large Bowl
  • Floured surface
  • Large pot
  • Baking sheet
  • Oven

Method
 

Steps to Make Bagels
  1. Combine warm water and yeast in a large bowl. Let it stand for about 5-10 minutes until it becomes foamy.
  2. Mix in the bread flour, granulated sugar, kosher salt, dark brown sugar, beaten egg, and everything bagel seasoning. Stir until a dough forms.
  3. Knead the dough on a floured surface for about 10 minutes.
  4. Place the dough in a greased bowl, cover it with a damp cloth, and allow it to rise in a warm area for about 1 hour.
  5. Preheat the oven to 425°F (220°C).
  6. Punch down the risen dough and divide it into 12 equal pieces. Shape each piece into a bagel.
  7. Boil a large pot of water. Gently drop in the bagels, boiling for 1-2 minutes on each side.
  8. Remove the bagels and place them on a greased baking sheet. Brush each bagel with frothy egg white.
  9. Bake in the preheated oven for 20-27 minutes until they turn golden brown.
  10. Let cool slightly before serving.

Nutrition

Serving: 1bagelCalories: 250kcalCarbohydrates: 45gProtein: 8gFat: 4gSaturated Fat: 2gPolyunsaturated Fat: 1gMonounsaturated Fat: 1gCholesterol: 30mgSodium: 300mgPotassium: 150mgFiber: 2gSugar: 4gVitamin A: 150IUCalcium: 30mgIron: 1mg

Notes

Serve with a sprinkle of extra everything bagel seasoning for an added flavor boost.

Tried this recipe?

Let us know how it was!

Filed Under: BREAKFAST & BRUNCH

  • « Previous Page
  • 1
  • 2
  • 3
  • 4
  • …
  • 10
  • Next Page »

Recent Posts

  • One Pot Cheesy Pasta
  • Steak with Mushroom Sauce
  • St. Patrick’s Day Puppy Chow
  • Salmon with Lemon Butter
  • St. Patrick’s Day Puppy Chow

Recent Comments

No comments to show.

Footer

  • Contact
  • Privacy Policy
  • About Us
  • Terms
  • ↑ back to top

Copyright © 2024 www.Forkono.com

Table Of Content