Forkono

  • BREAKFAST & BRUNCH
  • DESSERT RECIPES
  • DINNER RECIPES
  • LUNCH RECIPES
  • About uS
  • SNACKS & APPETIZERS
menu icon
go to homepage
  • BREAKFAST & BRUNCH
  • DESSERT RECIPES
  • DINNER RECIPES
  • LUNCH RECIPES
  • About uS
  • SNACKS & APPETIZERS
search icon
Homepage link
  • BREAKFAST & BRUNCH
  • DESSERT RECIPES
  • DINNER RECIPES
  • LUNCH RECIPES
  • About uS
  • SNACKS & APPETIZERS
×

Chicken Gyros with Tzatziki Sauce

February 13, 2026 by JudyWhite Leave a Comment

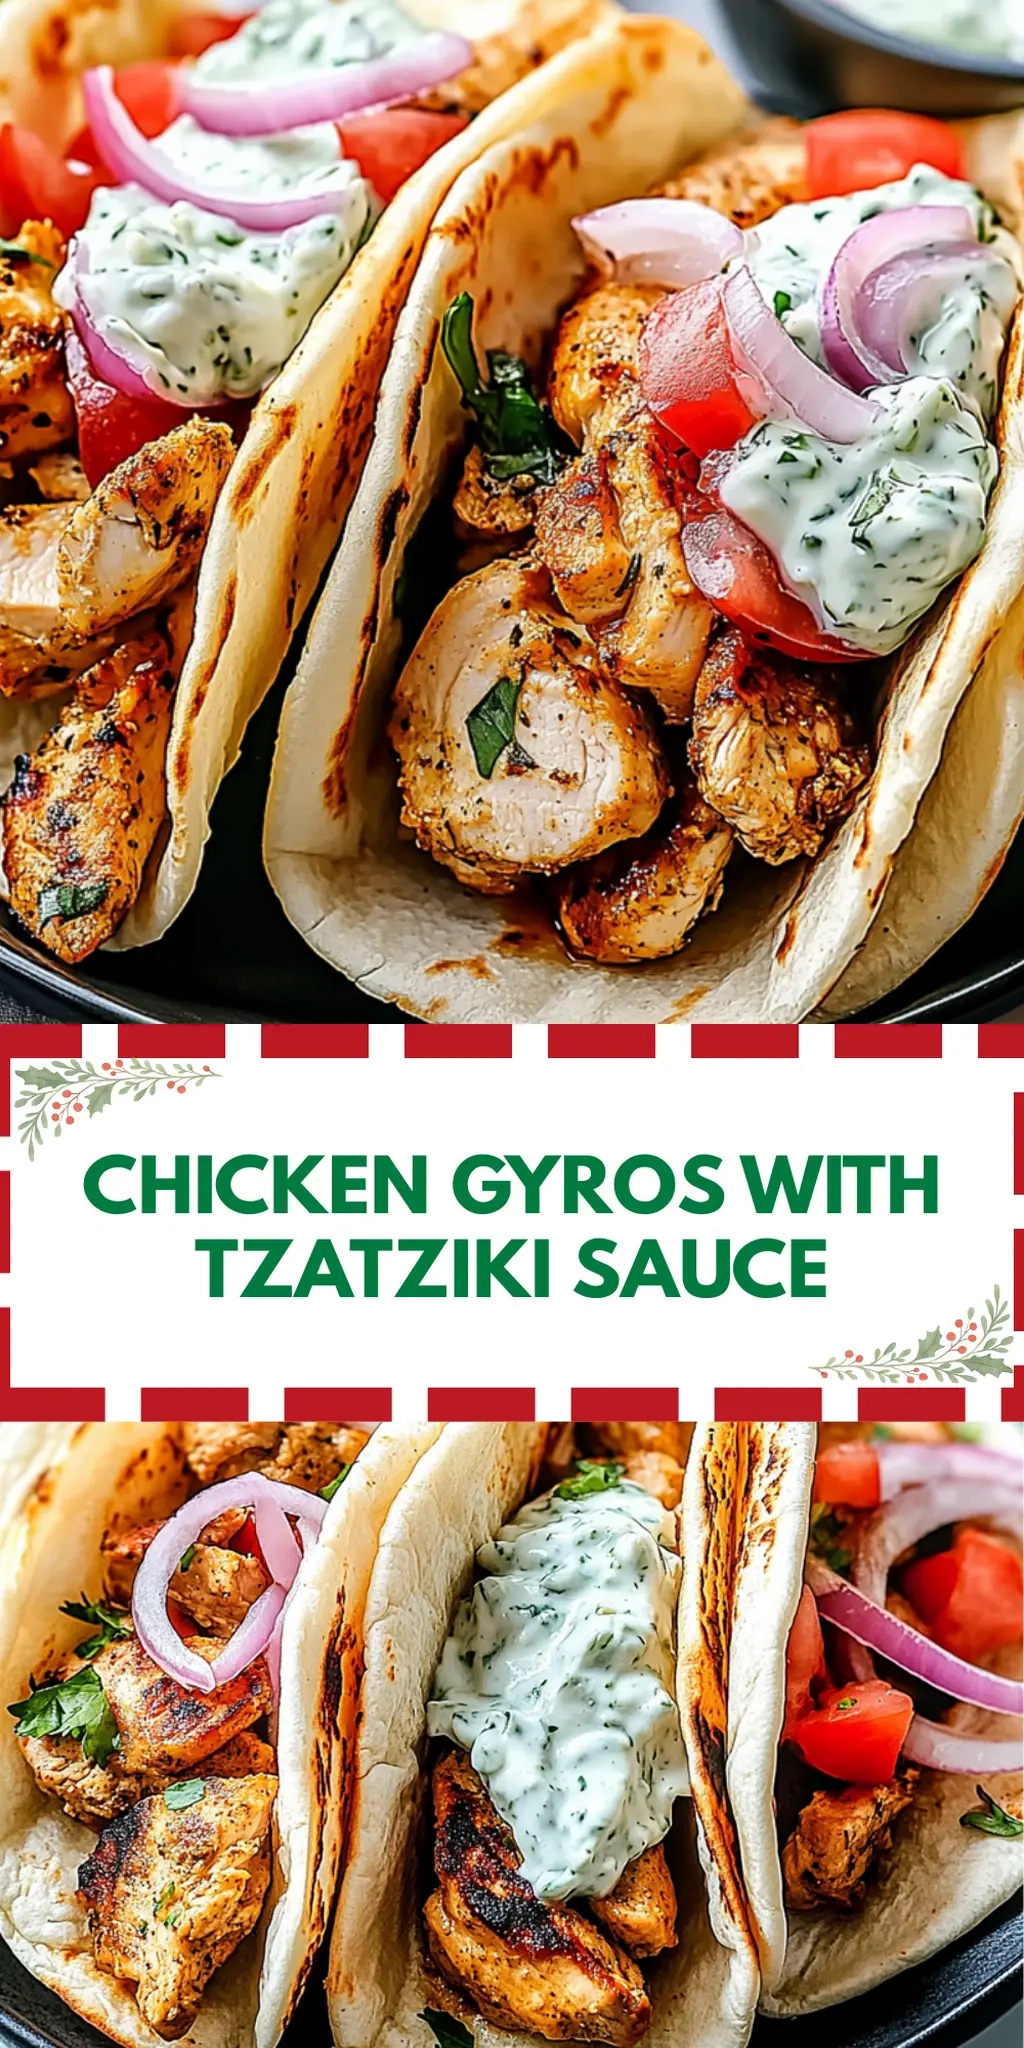
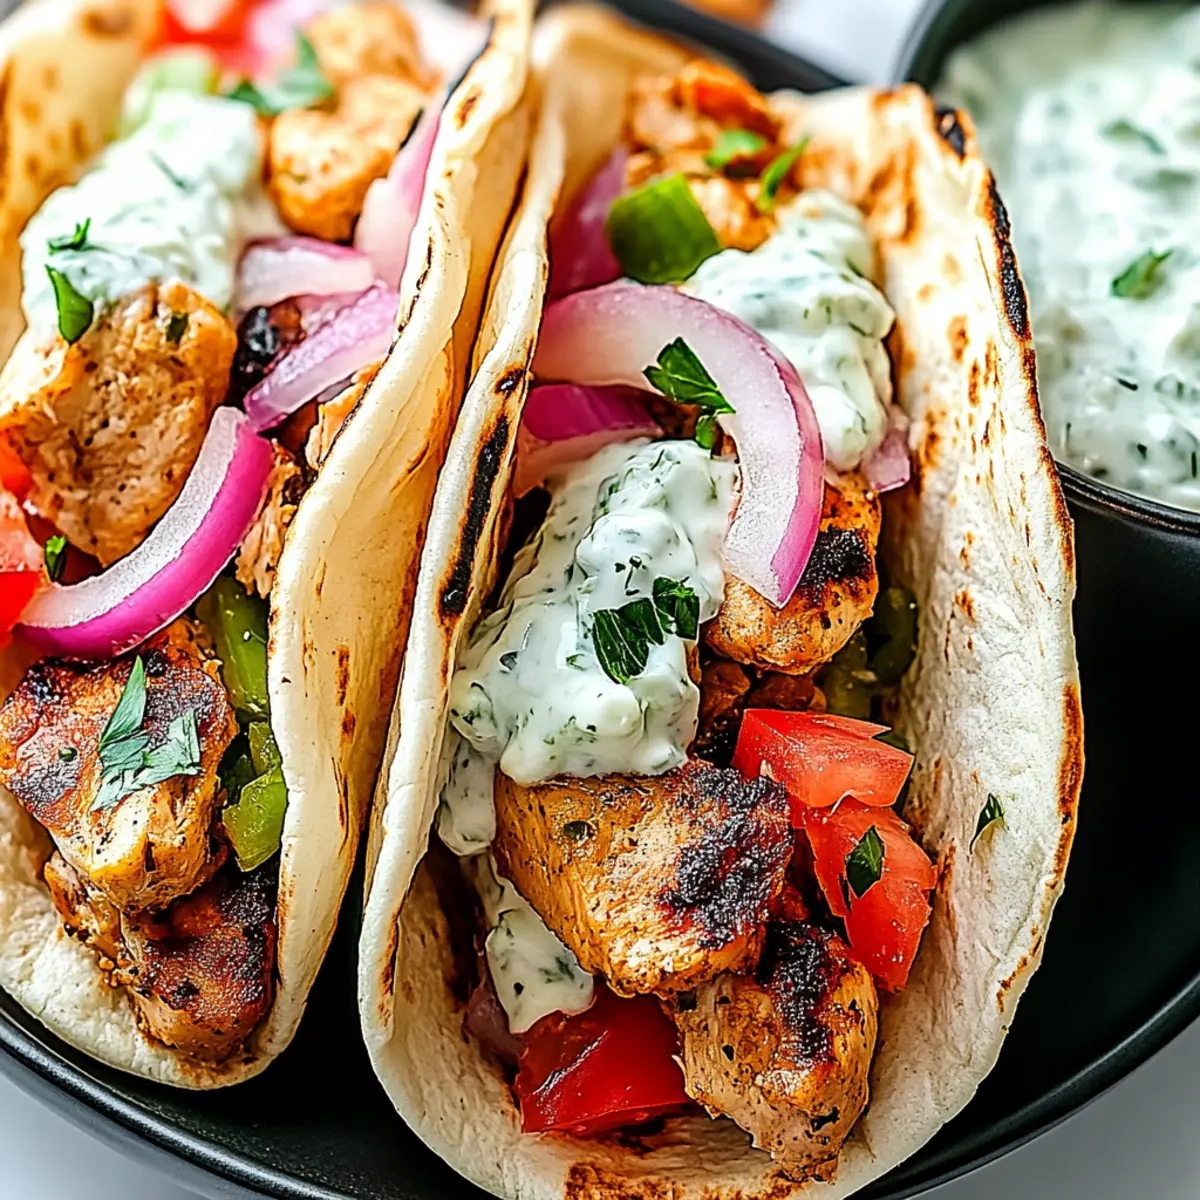
There’s nothing quite like the warm embrace of a homemade Chicken Gyros with Tzatziki Sauce, especially when craving something fresh and full of flavor. The moment I pull the marinated chicken from the fridge, the garlicky aroma wafts through the kitchen, teasing my senses and making my stomach rumble with anticipation. Marinated to perfection, the chicken is grilled until it’s beautifully charred and juicy.

As I whip together the creamy tzatziki, the tangy yogurt blends seamlessly with refreshing cucumber and bright lemon juice, creating a vibrant sauce that elevates each bite. Whether it’s a quick weeknight dinner or the centerpiece of a casual gathering, these gyros have become my go-to recipe for satisfying home-cooked goodness.

Join me on this culinary adventure as we transform simple ingredients into a deliciously healthy meal that’ll leave your taste buds dancing. Let’s get started!

Why You'll Love This Chicken Gyros with Tzatziki Sauce

  • This Chicken Gyros with Tzatziki Sauce is incredibly easy to prepare, making it a perfect weeknight dinner option for busy schedules.
  • The flavor combination of marinated grilled chicken and refreshing tzatziki is a crowd-pleaser that will impress your family and friends.
  • Its versatility allows you to customize your gyros with a variety of toppings such as lettuce, tomatoes, or onions to suit your taste.
  • With minimal cook time, you can whip up this delicious meal in under an hour while enjoying the beautiful aroma that fills your kitchen.

Chicken Gyros with Tzatziki Sauce Ingredients

For the Chicken
• Boneless, skinless chicken breasts – they provide lean protein and absorb the marinade beautifully.
• Fresh garlic – adds a fragrant punch that elevates the overall flavor.
• Dried oregano – imparts a warm, herbal note that makes it taste authentic.
• Olive oil – acts as a marinade base, keeping the chicken juicy and flavorful.
• Salt and pepper – essential for enhancing all the delicious flavors.
• Lemon juice – adds a zesty brightness that balances the richness of the dish.

For the Tzatziki
• Full-fat Greek yogurt – creamy and rich, it’s the main ingredient for a luscious sauce.
• Medium cucumber – adds a refreshing crunch; make sure to squeeze out excess moisture.
• Dill (optional) – gives additional flavor, complementing the yogurt and cucumber.
• Lemon juice – brings out the freshness, making this tzatziki a must-have in your Chicken Gyros.
• Salt – to taste, ensuring all the flavors are well-rounded.

For Assembly
• Pita breads – warm them up for a delightful wrap that holds everything together.
• Fresh veggies (e.g., lettuce, tomatoes, red onions) – customize your gyros and add freshness!

Now that we’ve gathered all the ingredients for our Chicken Gyros with Tzatziki Sauce, let’s move on to the delicious cooking process that will turn these simple components into a feast to remember!

How to Make Chicken Gyros with Tzatziki Sauce

  1. Mix Marinade: In a bowl, whisk together olive oil, minced garlic, oregano, salt, pepper, and lemon juice. Add chicken breasts, ensuring they’re fully coated. Marinate in the fridge for at least 30 minutes—this helps deepen the flavors.

  2. Prepare Tzatziki: While the chicken marinates, squeeze excess moisture from the grated cucumber. In a separate bowl, combine Greek yogurt, cucumber, minced garlic, lemon juice, salt, and dill if you’re using it. Chill in the fridge to let the flavors meld.

  3. Preheat Grill or Skillet: Set your grill or skillet to medium-high heat. Cook the marinated chicken for about 6-8 minutes on each side, or until fully cooked (165°F). Look for a beautiful golden-brown color.

  4. Let Chicken Rest: Once cooked, take the chicken off the heat and let it rest for a few minutes. This step is crucial for juicy chicken! After resting, slice it into strips.

  5. Assemble Gyros: Warm your pita breads and fill them with sliced chicken. Top with your freshly made tzatziki sauce and add any fresh veggies you like for an extra crunch.

Optional: Serve with a sprinkle of fresh herbs for a burst of flavor!
Exact quantities are listed in the recipe card below.

How to Store and Freeze Chicken Gyros with Tzatziki Sauce

Fridge: Store leftover Chicken Gyros in an airtight container for up to 3 days. Keep chicken and tzatziki separate until ready to eat to maintain freshness.

Freezer: If you’d like to freeze the chicken, place cooked, sliced chicken in a freezer-safe bag and freeze for up to 3 months. Reheat directly from frozen.

Reheating: To reheat, thaw chicken in the fridge overnight, then warm up in a skillet over medium heat for 5-7 minutes. Serve in warm pita with fresh tzatziki for a delicious meal.

Tzatziki Storage: Store any leftover tzatziki in the fridge for up to 4 days in an airtight container. If the tzatziki becomes watery, give it a stir before serving again.

Chicken Gyros Variations

Feel free to get creative and put your own spin on these Chicken Gyros!

  • Gluten-Free: Use lettuce wraps instead of pita for a refreshing gluten-free option.
  • Spicy: Add a dash of cayenne pepper to the marinade for a fiery kick to your grilled chicken.
  • Herb-Infused: Swap out dried oregano for fresh herbs like parsley or mint to brighten the flavors.
  • Creamy Avocado: Layer slices of ripe avocado inside your gyro for an extra creamy texture and richness.
  • Vegan: Replace chicken with marinated tofu or grilled portobello mushrooms for a plant-based delight.
  • Extra Crunchy: Toss in some pickled red onions for a tangy crunch that complements the tzatziki beautifully.
  • Cheesy: A sprinkle of crumbled feta cheese inside the gyros adds a salty and tangy flavor explosion.
  • Zesty Twist: Swap lemon juice for lime juice in the tzatziki to introduce a delightful, zesty flavor contrast.

Make Ahead Options

These Chicken Gyros with Tzatziki Sauce are a fantastic choice for meal prep, allowing you to enjoy a homemade meal even on your busiest days! You can marinate the chicken up to 24 hours in advance, enhancing the flavors while keeping it juicy. Additionally, the tzatziki sauce can be prepared up to 3 days ahead; simply store it in the refrigerator to let the flavors marry beautifully. To maintain quality, ensure you refrigerate everything in airtight containers. When it’s time to serve, grill the marinated chicken straight from the fridge, slice it, and then assemble your gyros with warm pita and tzatziki, delivering fresh, restaurant-quality results with minimal effort!

What to Serve with Chicken Gyros with Tzatziki Sauce?

Transform your delightful gyros into a complete meal with these mouthwatering pairings that enhance each flavor and texture.

  • Greek Salad:
    A vibrant mix of tomatoes, cucumbers, and olives that offers a refreshing contrast to the warm, savory gyros. Dress it simply with olive oil and lemon juice for a zesty kick.

  • Lemon Rice:
    Fluffy and tangy, lemon-infused rice is the perfect side to soak up the tzatziki sauce, adding a fluffy texture that balances the dish beautifully.

  • Roasted Vegetables:
    Carrots, bell peppers, and zucchini tossed with olive oil and herbs bring a crispy, caramelized sweetness that complements the spiced chicken perfectly.

  • Pita Chips:
    Crunchy and salty, these are perfect for dipping into leftover tzatziki sauce. They add a delightful texture while echoing the flavors of the gyros.

  • Minted Yogurt Dip:
    A cool, herby dip made with yogurt and fresh mint enhances every bite and offers a fresh contrast to the grilled chicken and tzatziki.

  • Baklava:
    For a sweet finish, this flaky pastry filled with nuts and honey syrup creates a rich and indulgent end to your meal, balancing the savory flavors of the gyros.

Whether you’re enjoying a sunny afternoon outdoors or a cozy dinner at home, these serving ideas will elevate your Chicken Gyros with Tzatziki Sauce into a feast that warms the heart!

Chef's Helpful Tips

  • When marinating the chicken for Chicken Gyros with Tzatziki Sauce, ensure the chicken is fully coated for maximum flavor absorption.
  • Avoid overcrowding the grill or skillet to achieve even cooking and prevent steaming.
  • Allow the chicken to rest for a few minutes after cooking to lock in the juices for a more succulent bite.
  • To enhance the tzatziki, make sure to squeeze out as much moisture from the grated cucumber as possible to achieve the perfect texture.

Chicken Gyros with Tzatziki Sauce Recipe FAQs

How do I choose the right chicken breasts for this recipe?
Absolutely! Look for boneless, skinless chicken breasts that are firm and pink; avoid any that appear discolored or have dark spots. Freshness is key for the most juicy and flavorful gyros.

What’s the best way to store leftovers?
You can store leftover Chicken Gyros in an airtight container in the fridge for up to 3 days. To keep everything fresh, I recommend separating the chicken from the tzatziki until you’re ready to eat. This will help maintain the texture of both components.

Can I freeze the chicken gyros?
Yes, you can! If you want to freeze the chicken, place the cooked, sliced chicken in a freezer-safe bag or container and freeze for up to 3 months. When you’re ready to enjoy, thaw it in the fridge overnight, then reheat in a skillet over medium heat for 5-7 minutes until warmed through.

What should I do if my tzatziki is watery?
Great question! If your tzatziki becomes watery, don’t worry! Simply give it a good stir. To prevent this in the future, ensure you squeeze out as much moisture as possible from the grated cucumber before mixing. This way, you’ll have a thicker, creamier sauce.

Are there any dietary considerations I should keep in mind?
Definitely! This recipe contains chicken, dairy (in the tzatziki), and gluten (in the pita bread). If you’re making this for someone with allergies, consider using gluten-free pita or a lettuce wrap as an alternative. Also, if you’re cooking for pets, be sure to keep their safety in mind—avoid giving them seasoned chicken or garlic, which can be harmful.

How long can I keep the tzatziki in the fridge?
Your tzatziki will stay fresh for up to 4 days in the fridge when stored in an airtight container. If you notice it getting watery, just give it a quick stir before serving. Freshness is a key player in enjoying this delicious sauce!

Chicken Gyros with Tzatziki Sauce

Chicken Gyros with Tzatziki Sauce

Enjoy homemade Chicken Gyros with Tzatziki Sauce—fresh, flavorful, and easy to prepare for a delightful meal.
Print Recipe Pin Recipe
Prep Time 30 minutes mins
Cook Time 15 minutes mins
Resting Time 5 minutes mins
Total Time 50 minutes mins
Servings: 4 gyros
Course: LUNCH RECIPES
Cuisine: Mediterranean
Calories: 350
Ingredients Equipment Method Nutrition Notes

Ingredients
  

For the Chicken
  • 1 pound boneless, skinless chicken breasts
  • 3 cloves fresh garlic minced
  • 1 teaspoon dried oregano
  • 2 tablespoons olive oil
  • to taste salt
  • to taste pepper
  • 2 tablespoons lemon juice
For the Tzatziki
  • 1 cup full-fat Greek yogurt
  • 1 medium cucumber squeezed of excess moisture
  • 1 tablespoon dill (optional)
  • 2 tablespoons lemon juice
  • to taste salt
For Assembly
  • 4 pita breads warmed
  • to taste fresh veggies (e.g., lettuce, tomatoes, red onions)

Equipment

  • grill or skillet

Method
 

Cooking Instructions
  1. In a bowl, whisk together olive oil, minced garlic, oregano, salt, pepper, and lemon juice. Add chicken breasts, ensuring they’re fully coated. Marinate in the fridge for at least 30 minutes.
  2. While the chicken marinates, squeeze excess moisture from the grated cucumber. In a separate bowl, combine Greek yogurt, cucumber, minced garlic, lemon juice, salt, and dill if using. Chill in the fridge.
  3. Set your grill or skillet to medium-high heat. Cook the marinated chicken for about 6-8 minutes on each side until fully cooked and golden-brown.
  4. Once cooked, take the chicken off the heat and let it rest for a few minutes. After resting, slice it into strips.
  5. Warm your pita breads and fill them with sliced chicken. Top with tzatziki sauce and fresh veggies for added crunch.

Nutrition

Serving: 1gyroCalories: 350kcalCarbohydrates: 30gProtein: 30gFat: 15gSaturated Fat: 3gPolyunsaturated Fat: 0.5gMonounsaturated Fat: 10gCholesterol: 70mgSodium: 600mgPotassium: 500mgFiber: 2gSugar: 3gVitamin A: 500IUVitamin C: 5mgCalcium: 150mgIron: 2mg

Notes

Optional: Serve with a sprinkle of fresh herbs for added flavor.

Tried this recipe?

Let us know how it was!

Filed Under: LUNCH RECIPES

Cottage Cheese Egg Salad

February 7, 2026 by JudyWhite Leave a Comment

The first bite of this Cottage Cheese Egg Salad transports me to sunny picnics and laid-back brunches with friends. The creamy texture of cottage cheese blends beautifully with hard-boiled eggs, creating a delightful salad that’s both nutritious and satisfying. I found myself craving something fresh and flavorful—something that would elevate my lunch from a simple sandwich to a culinary delight.

After a busy week of cooking and catering to everyone else’s cravings, this dish was a refreshing twist that came together with minimal effort. As the chives add a fresh bite and the Dijon mustard gives it a zing, it quickly became a favorite in my kitchen. Whether you’re looking for a light meal to enjoy on its own, as a sandwich filling, or served atop a bed of greens, this salad is a versatile way to enjoy wholesome ingredients without sacrificing flavor. Join me as I share this easy, crowd-pleasing recipe that’s sure to liven up your lunch routine!

Why You'll Love This Cottage Cheese Egg Salad

  • This Cottage Cheese Egg Salad is incredibly easy to make, saving you time in the kitchen while delivering delicious results.
  • Its creamy texture and flavorful ingredients create a taste sensation that will have everyone asking for seconds.
  • This recipe is versatile enough to be served on its own, as a tasty sandwich filling, or on a bed of fresh greens, making it perfect for any meal.
  • With its vibrant colors and inviting presentation, this salad is sure to impress at your next gathering.
  • Enjoy the nutritious benefits without compromising on flavor and bring a delightful dish to your table.

Cottage Cheese Egg Salad Ingredients

• Here’s everything you need for this delicious dish!

For the Salad
• Hard-boiled eggs – A protein powerhouse, they add heartiness to the salad.
• Cottage cheese – Provides a creamy base while being low in fat and high in protein.
• Mayonnaise – Adds a rich creaminess; you can use Greek yogurt as a healthier alternative.
• Dijon mustard – Offers a zesty kick that elevates the flavor profile beautifully.
• Fresh chives – Their mild onion flavor brightens the salad and adds a pop of color.
• Salt and pepper – Essential for enhancing all the wonderful flavors in this cottage cheese egg salad.

Feel free to get creative with the ingredients or add your favorite spices for an extra flavor twist!

How to Make Cottage Cheese Egg Salad

  1. Boil the eggs: Place your 6 eggs in a pot, cover them with water, and bring to a rolling boil. Once bubbling, cover the pot and turn off the heat; let them sit for 12 minutes before transferring to an ice bath for cooling.

  2. Mix the base: In a large mixing bowl, combine 1 cup of cottage cheese, 2 tablespoons of mayonnaise, and 1 teaspoon of Dijon mustard. Stir until the mixture is smooth and creamy, creating a delicious base for your salad.

  3. Chop the eggs: After your eggs have cooled, carefully peel them and chop them into bite-sized pieces. Fold the chopped eggs into your creamy mixture, adding salt and pepper to taste for personalized seasoning.

  4. Add chives: Gently fold in 2 tablespoons of finely chopped fresh chives until they are evenly distributed throughout the salad, bringing a fresh and vibrant flavor to every bite.

  5. Chill: Cover your bowl with plastic wrap and refrigerate for at least 30 minutes. This step allows the flavors to meld beautifully, enhancing the taste before serving.

  6. Serve: Spoon your delightful Cottage Cheese Egg Salad over fresh greens or use it as a flavorful sandwich filling. Enjoy the light and refreshing flavors at any time of day.

Optional: Serve with a sprinkle of paprika for an extra burst of color and flavor.
Exact quantities are listed in the recipe card below.

What to Serve with Cottage Cheese Egg Salad?

Elevate your meal with delightful sides that balance the creamy and zesty flavors of this egg salad.

  • Crispy Green Salad: Fresh, crunchy greens topped with a light vinaigrette add a refreshing contrast to the creamy texture of the salad.
  • Whole Grain Bread: This nutty bread brings a wholesome touch and makes the perfect base for a sandwich, enhancing your lunch experience.
  • Avocado Slices: Creamy avocado enhances the richness while providing healthy fats and a boost of flavor; it pairs beautifully for a fulfilling meal.
  • Chilled Gazpacho: A vibrant and tangy cold soup refreshes the palate and complements the richness of the egg salad; perfect for a sunny day.
  • Sweet Potato Wedges: Oven-roasted with a sprinkle of salt, their sweetness complements the savory notes of the salad, making every bite delightful.
  • Herbed Quinoa: This fluffy, protein-packed grain is perfect for adding texture and an earthiness that harmonizes with the fresh chives in your dish.
  • Sparkling Lemonade: A refreshing, zesty drink that cleanses the palate between bites; its citrus notes heighten the flavors of the salad beautifully.
  • Fruit Salad: A blend of seasonal fruits provides a sweet and juicy counterpart that adds a burst of color and flavor to your meal.
  • Chocolate Chip Cookies: For dessert, these classic treats add a comforting sweetness to round off your meal, reminding everyone of home-baked love.

Cottage Cheese Egg Salad Variations

Get ready to embrace creativity in your kitchen with these exciting twists on a classic favorite!

  • Herbed Delight: Add your favorite fresh herbs like dill or parsley for an aromatic flavor boost that brightens each bite. They’ll infuse the salad with an inviting fragrance.

  • Spicy Kick: Mix in a dash of hot sauce or finely chopped jalapeños for a delightful zing that brings warmth and excitement to your Cottage Cheese Egg Salad!

  • Avocado Creaminess: Swap out some cottage cheese for avocado to add a rich and buttery texture while keeping the flavors light and fresh. This twist offers heart-healthy fats that make every spoonful satisfying.

  • Crunchy Contrast: Fold in diced celery or crunchy bell peppers for an extra layer of texture. This addition not only enhances the salad but also adds a colorful pop that makes it visually appealing.

  • Cheesy Goodness: Stir in crumbled feta or shredded cheddar cheese for a creamy, tangy layer that elevates the taste experience. The cheese brings a lovely richness to the overall flavor profile.

  • Nutty Flavor: Toss in some chopped walnuts or almonds for a nutty crunch that adds depth and richness to your salad. The contrasting textures create a delightful mouthfeel that you’ll love.

  • Fruit Fusion: Add diced apples or grapes for a sweet twist that balances out the savory elements. This surprising combination makes for a refreshing summer dish that sings with vibrancy.

  • Eggless Option: For a vegan-friendly version, substitute eggs with chickpeas for the same protein punch and use a plant-based yogurt instead of cottage cheese. This alternative makes for a deliciously creamy salad that’s completely guilt-free!

How to Store and Freeze Cottage Cheese Egg Salad

Fridge: Store your Cottage Cheese Egg Salad in an airtight container in the refrigerator for up to 3 days. This ensures it stays fresh and flavorful!

Freezer: While it’s best to enjoy this salad fresh, you can freeze it for up to 2 months. Be aware that the texture may change upon thawing, so consider freezing only if necessary.

Reheating: If you enjoy warm dishes, gently reheat your salad in a microwave for 15-20 seconds to soften. However, it’s often best served chilled for maximum enjoyment.

Make Ahead Options

These Cottage Cheese Egg Salad preparations are perfect for busy cooks looking to save time during the week! You can boil and chop your hard-boiled eggs and prepare the creamy base (cottage cheese, mayonnaise, and Dijon mustard) up to 24 hours in advance, storing them separately in airtight containers in the refrigerator to maintain freshness. To ensure the salad’s delightful texture, mix the chopped eggs and fresh chives with the base only right before serving. This way, you’ll enjoy the salad just as delicious as when freshly made, with flavors that meld wonderfully after a quick chill. Enjoy a quick, nutritious lunch or snack without the last-minute rush!

Chef's Helpful Tips

  • Ensure your hard-boiled eggs are perfectly cooked by starting them in cold water and bringing it to a boil before turning off the heat for 12 minutes.
  • For a creamier texture in your Cottage Cheese Egg Salad, try using full-fat cottage cheese instead of low-fat options.
  • When chopping the eggs, aim for uniform pieces to ensure they mix evenly with the other ingredients and provide a consistent taste in every bite.
  • Remember to chill the salad for at least 30 minutes to let the flavors meld together for an enhanced taste experience.

Cottage Cheese Egg Salad Recipe FAQs

What kind of eggs should I use for this Cottage Cheese Egg Salad?
Absolutely! For the best results, use fresh large eggs. Look for eggs with smooth, unblemished shells, and avoid any with dark spots or cracks. Organic or free-range eggs are great choices, as they often have richer flavors.

How long can I store Cottage Cheese Egg Salad in the fridge?
You can store your Cottage Cheese Egg Salad in an airtight container in the refrigerator for up to 3 days. Make sure it is well-sealed to keep the flavors locked in and prevent it from absorbing any odors from the fridge.

Can I freeze Cottage Cheese Egg Salad?
Very! While freezing is possible, the texture may alter slightly upon thawing. To freeze, place the salad in an airtight container, leaving some space for expansion, and store it for up to 2 months. When ready to enjoy, thaw in the refrigerator overnight and stir gently before serving.

What should I do if the eggs are not peeling easily?
If your hard-boiled eggs are sticking to the shells, try using older eggs instead of fresh ones, as they tend to peel more easily. An ice bath helps too—after boiling, submerge the eggs in ice water for at least 10 minutes. This process contracts the egg, making it easier to remove the shell.

Are there any dietary considerations for this recipe?
Absolutely! This Cottage Cheese Egg Salad is a fantastic source of protein, but if you have lactose intolerance or a dairy allergy, you can substitute cottage cheese with a dairy-free version. Additionally, for those watching their sodium intake, consider using low-sodium mayonnaise or Greek yogurt. It’s versatile and can be tailored to different dietary needs!

Can I add other ingredients to my Cottage Cheese Egg Salad?
I often make this salad with added ingredients like diced celery for crunch or a dash of smoked paprika for extra flavor! Feel free to experiment with herbs or spices that you love, such as dill or parsley, to create your perfect version!

Cottage Cheese Egg Salad

Cottage Cheese Egg Salad

This Cottage Cheese Egg Salad is a refreshing, nutritious dish perfect for brunch or lunch.
Print Recipe Pin Recipe
Prep Time 15 minutes mins
Cook Time 12 minutes mins
Chill Time 30 minutes mins
Total Time 57 minutes mins
Servings: 4 servings
Course: LUNCH RECIPES
Calories: 200
Ingredients Equipment Method Nutrition Notes

Ingredients
  

For the Salad
  • 6 eggs Hard-boiled eggs Protein powerhouse
  • 1 cup Cottage cheese Creamy base, low in fat
  • 2 tablespoons Mayonnaise Adds richness, Greek yogurt can be used
  • 1 teaspoon Dijon mustard Zesty kick
  • 2 tablespoons Fresh chives Mild onion flavor
  • to taste Salt
  • to taste Pepper

Equipment

  • Pot
  • Mixing bowl
  • plastic wrap
  • Knife
  • Cutting Board

Method
 

Steps to Make
  1. Boil the eggs: Place your 6 eggs in a pot, cover them with water, and bring to a rolling boil. Once bubbling, cover the pot and turn off the heat; let them sit for 12 minutes before transferring to an ice bath for cooling.
  2. Mix the base: In a large mixing bowl, combine 1 cup of cottage cheese, 2 tablespoons of mayonnaise, and 1 teaspoon of Dijon mustard. Stir until smooth.
  3. Chop the eggs: After cooling, peel and chop the eggs into bite-sized pieces. Fold them into the mixture, adding salt and pepper to taste.
  4. Add chives: Fold in 2 tablespoons of finely chopped fresh chives evenly throughout the salad.
  5. Chill: Cover with plastic wrap and refrigerate for at least 30 minutes.
  6. Serve: Enjoy over fresh greens or as a sandwich filling.

Nutrition

Serving: 1servingCalories: 200kcalCarbohydrates: 5gProtein: 14gFat: 15gSaturated Fat: 3gPolyunsaturated Fat: 1gMonounsaturated Fat: 1gCholesterol: 186mgSodium: 350mgPotassium: 300mgSugar: 3gVitamin A: 400IUVitamin C: 1mgCalcium: 150mgIron: 1mg

Notes

For a creamier texture, use full-fat cottage cheese. Chill for better flavor melding.

Tried this recipe?

Let us know how it was!

Filed Under: LUNCH RECIPES

Cottage Cheese Egg Salad

February 7, 2026 by JudyWhite Leave a Comment

The first bite of this Cottage Cheese Egg Salad transports me to sunny picnics and laid-back brunches with friends. The creamy texture of cottage cheese blends beautifully with hard-boiled eggs, creating a delightful salad that’s both nutritious and satisfying. I found myself craving something fresh and flavorful—something that would elevate my lunch from a simple sandwich to a culinary delight.

After a busy week of cooking and catering to everyone else’s cravings, this dish was a refreshing twist that came together with minimal effort. As the chives add a fresh bite and the Dijon mustard gives it a zing, it quickly became a favorite in my kitchen. Whether you’re looking for a light meal to enjoy on its own, as a sandwich filling, or served atop a bed of greens, this salad is a versatile way to enjoy wholesome ingredients without sacrificing flavor. Join me as I share this easy, crowd-pleasing recipe that’s sure to liven up your lunch routine!

Why You'll Love This Cottage Cheese Egg Salad

  • This Cottage Cheese Egg Salad is incredibly easy to make, saving you time in the kitchen while delivering delicious results.
  • Its creamy texture and flavorful ingredients create a taste sensation that will have everyone asking for seconds.
  • This recipe is versatile enough to be served on its own, as a tasty sandwich filling, or on a bed of fresh greens, making it perfect for any meal.
  • With its vibrant colors and inviting presentation, this salad is sure to impress at your next gathering.
  • Enjoy the nutritious benefits without compromising on flavor and bring a delightful dish to your table.

Cottage Cheese Egg Salad Ingredients

• Here’s everything you need for this delicious dish!

For the Salad
• Hard-boiled eggs – A protein powerhouse, they add heartiness to the salad.
• Cottage cheese – Provides a creamy base while being low in fat and high in protein.
• Mayonnaise – Adds a rich creaminess; you can use Greek yogurt as a healthier alternative.
• Dijon mustard – Offers a zesty kick that elevates the flavor profile beautifully.
• Fresh chives – Their mild onion flavor brightens the salad and adds a pop of color.
• Salt and pepper – Essential for enhancing all the wonderful flavors in this cottage cheese egg salad.

Feel free to get creative with the ingredients or add your favorite spices for an extra flavor twist!

How to Make Cottage Cheese Egg Salad

  1. Boil the eggs: Place your 6 eggs in a pot, cover them with water, and bring to a rolling boil. Once bubbling, cover the pot and turn off the heat; let them sit for 12 minutes before transferring to an ice bath for cooling.

  2. Mix the base: In a large mixing bowl, combine 1 cup of cottage cheese, 2 tablespoons of mayonnaise, and 1 teaspoon of Dijon mustard. Stir until the mixture is smooth and creamy, creating a delicious base for your salad.

  3. Chop the eggs: After your eggs have cooled, carefully peel them and chop them into bite-sized pieces. Fold the chopped eggs into your creamy mixture, adding salt and pepper to taste for personalized seasoning.

  4. Add chives: Gently fold in 2 tablespoons of finely chopped fresh chives until they are evenly distributed throughout the salad, bringing a fresh and vibrant flavor to every bite.

  5. Chill: Cover your bowl with plastic wrap and refrigerate for at least 30 minutes. This step allows the flavors to meld beautifully, enhancing the taste before serving.

  6. Serve: Spoon your delightful Cottage Cheese Egg Salad over fresh greens or use it as a flavorful sandwich filling. Enjoy the light and refreshing flavors at any time of day.

Optional: Serve with a sprinkle of paprika for an extra burst of color and flavor.
Exact quantities are listed in the recipe card below.

Cottage Cheese Egg Salad Variations

Get ready to embrace creativity in your kitchen with these exciting twists on a classic favorite!

  • Herbed Delight: Add your favorite fresh herbs like dill or parsley for an aromatic flavor boost that brightens each bite. They’ll infuse the salad with an inviting fragrance.

  • Spicy Kick: Mix in a dash of hot sauce or finely chopped jalapeños for a delightful zing that brings warmth and excitement to your Cottage Cheese Egg Salad!

  • Avocado Creaminess: Swap out some cottage cheese for avocado to add a rich and buttery texture while keeping the flavors light and fresh. This twist offers heart-healthy fats that make every spoonful satisfying.

  • Crunchy Contrast: Fold in diced celery or crunchy bell peppers for an extra layer of texture. This addition not only enhances the salad but also adds a colorful pop that makes it visually appealing.

  • Cheesy Goodness: Stir in crumbled feta or shredded cheddar cheese for a creamy, tangy layer that elevates the taste experience. The cheese brings a lovely richness to the overall flavor profile.

  • Nutty Flavor: Toss in some chopped walnuts or almonds for a nutty crunch that adds depth and richness to your salad. The contrasting textures create a delightful mouthfeel that you’ll love.

  • Fruit Fusion: Add diced apples or grapes for a sweet twist that balances out the savory elements. This surprising combination makes for a refreshing summer dish that sings with vibrancy.

  • Eggless Option: For a vegan-friendly version, substitute eggs with chickpeas for the same protein punch and use a plant-based yogurt instead of cottage cheese. This alternative makes for a deliciously creamy salad that’s completely guilt-free!

Make Ahead Options

These Cottage Cheese Egg Salad preparations are perfect for busy cooks looking to save time during the week! You can boil and chop your hard-boiled eggs and prepare the creamy base (cottage cheese, mayonnaise, and Dijon mustard) up to 24 hours in advance, storing them separately in airtight containers in the refrigerator to maintain freshness. To ensure the salad’s delightful texture, mix the chopped eggs and fresh chives with the base only right before serving. This way, you’ll enjoy the salad just as delicious as when freshly made, with flavors that meld wonderfully after a quick chill. Enjoy a quick, nutritious lunch or snack without the last-minute rush!

What to Serve with Cottage Cheese Egg Salad?

Elevate your meal with delightful sides that balance the creamy and zesty flavors of this egg salad.

  • Crispy Green Salad: Fresh, crunchy greens topped with a light vinaigrette add a refreshing contrast to the creamy texture of the salad.
  • Whole Grain Bread: This nutty bread brings a wholesome touch and makes the perfect base for a sandwich, enhancing your lunch experience.
  • Avocado Slices: Creamy avocado enhances the richness while providing healthy fats and a boost of flavor; it pairs beautifully for a fulfilling meal.
  • Chilled Gazpacho: A vibrant and tangy cold soup refreshes the palate and complements the richness of the egg salad; perfect for a sunny day.
  • Sweet Potato Wedges: Oven-roasted with a sprinkle of salt, their sweetness complements the savory notes of the salad, making every bite delightful.
  • Herbed Quinoa: This fluffy, protein-packed grain is perfect for adding texture and an earthiness that harmonizes with the fresh chives in your dish.
  • Sparkling Lemonade: A refreshing, zesty drink that cleanses the palate between bites; its citrus notes heighten the flavors of the salad beautifully.
  • Fruit Salad: A blend of seasonal fruits provides a sweet and juicy counterpart that adds a burst of color and flavor to your meal.
  • Chocolate Chip Cookies: For dessert, these classic treats add a comforting sweetness to round off your meal, reminding everyone of home-baked love.

How to Store and Freeze Cottage Cheese Egg Salad

Fridge: Store your Cottage Cheese Egg Salad in an airtight container in the refrigerator for up to 3 days. This ensures it stays fresh and flavorful!

Freezer: While it’s best to enjoy this salad fresh, you can freeze it for up to 2 months. Be aware that the texture may change upon thawing, so consider freezing only if necessary.

Reheating: If you enjoy warm dishes, gently reheat your salad in a microwave for 15-20 seconds to soften. However, it’s often best served chilled for maximum enjoyment.

Chef's Helpful Tips

  • Ensure your hard-boiled eggs are perfectly cooked by starting them in cold water and bringing it to a boil before turning off the heat for 12 minutes.
  • For a creamier texture in your Cottage Cheese Egg Salad, try using full-fat cottage cheese instead of low-fat options.
  • When chopping the eggs, aim for uniform pieces to ensure they mix evenly with the other ingredients and provide a consistent taste in every bite.
  • Remember to chill the salad for at least 30 minutes to let the flavors meld together for an enhanced taste experience.

Cottage Cheese Egg Salad Recipe FAQs

What kind of eggs should I use for this Cottage Cheese Egg Salad?
Absolutely! For the best results, use fresh large eggs. Look for eggs with smooth, unblemished shells, and avoid any with dark spots or cracks. Organic or free-range eggs are great choices, as they often have richer flavors.

How long can I store Cottage Cheese Egg Salad in the fridge?
You can store your Cottage Cheese Egg Salad in an airtight container in the refrigerator for up to 3 days. Make sure it is well-sealed to keep the flavors locked in and prevent it from absorbing any odors from the fridge.

Can I freeze Cottage Cheese Egg Salad?
Very! While freezing is possible, the texture may alter slightly upon thawing. To freeze, place the salad in an airtight container, leaving some space for expansion, and store it for up to 2 months. When ready to enjoy, thaw in the refrigerator overnight and stir gently before serving.

What should I do if the eggs are not peeling easily?
If your hard-boiled eggs are sticking to the shells, try using older eggs instead of fresh ones, as they tend to peel more easily. An ice bath helps too—after boiling, submerge the eggs in ice water for at least 10 minutes. This process contracts the egg, making it easier to remove the shell.

Are there any dietary considerations for this recipe?
Absolutely! This Cottage Cheese Egg Salad is a fantastic source of protein, but if you have lactose intolerance or a dairy allergy, you can substitute cottage cheese with a dairy-free version. Additionally, for those watching their sodium intake, consider using low-sodium mayonnaise or Greek yogurt. It’s versatile and can be tailored to different dietary needs!

Can I add other ingredients to my Cottage Cheese Egg Salad?
I often make this salad with added ingredients like diced celery for crunch or a dash of smoked paprika for extra flavor! Feel free to experiment with herbs or spices that you love, such as dill or parsley, to create your perfect version!

Cottage Cheese Egg Salad

Cottage Cheese Egg Salad

This Cottage Cheese Egg Salad is a refreshing, nutritious dish perfect for brunch or lunch.
Print Recipe Pin Recipe
Prep Time 15 minutes mins
Cook Time 12 minutes mins
Chill Time 30 minutes mins
Total Time 57 minutes mins
Servings: 4 servings
Course: LUNCH RECIPES
Calories: 200
Ingredients Equipment Method Nutrition Notes

Ingredients
  

For the Salad
  • 6 eggs Hard-boiled eggs Protein powerhouse
  • 1 cup Cottage cheese Creamy base, low in fat
  • 2 tablespoons Mayonnaise Adds richness, Greek yogurt can be used
  • 1 teaspoon Dijon mustard Zesty kick
  • 2 tablespoons Fresh chives Mild onion flavor
  • to taste Salt
  • to taste Pepper

Equipment

  • Pot
  • Mixing bowl
  • plastic wrap
  • Knife
  • Cutting Board

Method
 

Steps to Make
  1. Boil the eggs: Place your 6 eggs in a pot, cover them with water, and bring to a rolling boil. Once bubbling, cover the pot and turn off the heat; let them sit for 12 minutes before transferring to an ice bath for cooling.
  2. Mix the base: In a large mixing bowl, combine 1 cup of cottage cheese, 2 tablespoons of mayonnaise, and 1 teaspoon of Dijon mustard. Stir until smooth.
  3. Chop the eggs: After cooling, peel and chop the eggs into bite-sized pieces. Fold them into the mixture, adding salt and pepper to taste.
  4. Add chives: Fold in 2 tablespoons of finely chopped fresh chives evenly throughout the salad.
  5. Chill: Cover with plastic wrap and refrigerate for at least 30 minutes.
  6. Serve: Enjoy over fresh greens or as a sandwich filling.

Nutrition

Serving: 1servingCalories: 200kcalCarbohydrates: 5gProtein: 14gFat: 15gSaturated Fat: 3gPolyunsaturated Fat: 1gMonounsaturated Fat: 1gCholesterol: 186mgSodium: 350mgPotassium: 300mgSugar: 3gVitamin A: 400IUVitamin C: 1mgCalcium: 150mgIron: 1mg

Notes

For a creamier texture, use full-fat cottage cheese. Chill for better flavor melding.

Tried this recipe?

Let us know how it was!

Filed Under: LUNCH RECIPES

Cuban Sliders

February 5, 2026 by JudyWhite Leave a Comment

When the rich aroma of slow-cooked pork fills my kitchen, it instantly transports me to a sun-kissed street in Havana. It’s amazing how a simple meal can evoke such nostalgia, isn’t it? That’s the beauty of these Cuban Sliders—every bite is a trip to the tropics, blending tender, seasoned pork with gooey Swiss cheese and tangy dill pickles, all nestled in soft slider buns.

I discovered this recipe during a particularly long day craving something hearty yet hassle-free. The slow cooker does all the hard work while you sip on a refreshing beverage and catch up on your favorite show. From game-day gatherings to cozy family dinners, these sliders are the perfect crowd-pleaser, effortlessly elevating any occasion.

So, roll up your sleeves and let’s whip up a batch of these Cuban Sliders, ensuring that your next meal is not just delicious, but also a memorable experience!

Why You'll Love This Cuban Sliders

  • These Cuban Sliders are the epitome of ease, allowing you to enjoy a flavorful meal without spending all day in the kitchen.
  • The combination of tender slow-cooked pork, gooey Swiss cheese, and tangy pickles creates an explosion of flavor that will keep everyone coming back for more.
  • They’re incredibly versatile, perfect for casual family dinners or festive gatherings, making them a go-to choice for any occasion.
  • Not to mention, the visual appeal of these sliders, golden brown and inviting, will surely impress your guests and leave a lasting impression.

Cuban Sliders Ingredients

For the Sliders

  • Slider buns – a perfect soft vessel to hold all the delicious fillings; opt for whole-wheat for a healthier twist.
  • Pork shoulder – this tender cut is ideal for slow cooking, ensuring melt-in-your-mouth bites; feel free to substitute with chicken or jackfruit for a lighter option.
  • Swiss cheese – its creamy texture balances the flavors beautifully; Gouda can be a delightful substitute if you’re looking for a smokier profile.
  • Dill pickles – they add that signature tang that cuts through the richness of the pork; if you prefer a sweeter flavor, try bread-and-butter pickles instead.
  • Yellow mustard – it provides a zesty kick; Dijon mustard adds a touch more sophistication if desired.

For the Butter Mixture

  • Butter – it brings richness and helps achieve that golden-brown crust; feel free to use olive oil for a lighter option.
  • Garlic powder – this adds savory depth to your sliders; fresh minced garlic could be a fantastic substitute if you’re feeling adventurous.

Remember, these ingredients come together to create the delightful Cuban Sliders that will transport your taste buds straight to the beautiful streets of Cuba!

How to Make Cuban Sliders

  1. Preheat your oven to 350°F (175°C) and lightly grease a baking dish with nonstick spray. This prepares a warm, welcoming space for your delicious sliders.

  2. Season the pork shoulder with salt and pepper, and place it in a slow cooker with just a splash of water. Cook it on low for about 8 hours until it’s tender and shreddable, filling your home with mouthwatering aromas.

  3. Shred the cooked pork using two forks, letting it become fluffy and inviting. While you work, slice the slider buns in half horizontally and smother each bottom half with yellow mustard for that tangy base.

  4. Layer the shredded pork on the buns, followed by the velvety Swiss cheese slices and crunchy dill pickles. Gently replace the tops of the slider buns, creating bite-sized treasures filled with flavor.

  5. Mix the melted butter with garlic powder in a small bowl, and then brush this tasty mix over the assembled sliders, ensuring they soak up all that rich flavor.

  6. Cover the baking dish with foil and pop it in the oven for 15 minutes. Then remove the foil and bake for an additional 10 minutes until the sliders are golden brown and calling your name.

Optional: Serve with extra dill pickles on the side for a delightful crunch!

Exact quantities are listed in the recipe card below.

Cuban Sliders Variations

Feel free to get creative with these Cuban Sliders, ensuring they match your tastes and dietary needs!

  • Pulled Chicken: Swap pork shoulder for slow-cooked pulled chicken for a lighter but equally flavorful option. You won’t sacrifice taste here!

  • Vegetarian Delight: Substitute with jackfruit or mushrooms, seasoned and shredded, offering a hearty bite that satisfies without meat.

  • Cheese Swap: Use Gouda or pepper jack cheese to add a smokier or spicier kick, respectively, elevating the flavor profile beautifully.

  • Whole Wheat Buns: Opt for whole wheat slider buns to add a nutritious twist; your sliders will be as wholesome as they are delicious.

  • Spicy Kick: Add sliced jalapeños or a dash of hot sauce in the layering process for those who crave a bit of heat. This will make your sliders sing!

  • Herbed Butter: Mix in fresh herbs like parsley or thyme with the melted butter for a fragrant twist. It enhances the savory notes of the dish beautifully.

  • Sweet Pickles: Try bread-and-butter pickles instead of dill for a sweeter contrast that complements the rich, savory pork.

  • Mustard Variety: Experiment with spicy brown mustard or whole grain mustard for a more complex flavor profile that adds sophistication.

Make Ahead Options

These Cuban Sliders are perfect for busy weeknights or meal prep! You can season and place the pork shoulder in the slow cooker up to 24 hours in advance, allowing those flavors to deepen. Once cooked, shred the pork and layer it on the slider buns with Swiss cheese and dill pickles, then wrap the assembled sliders in plastic wrap and refrigerate for up to 3 days. To maintain quality, avoid adding the butter mixture until you’re ready to bake; this keeps the buns soft. When you’re ready to serve, brush the melted garlic butter over the sliders, cover with foil, and bake at 350°F (175°C) for 15 minutes, then an additional 10 minutes uncovered for a golden finish. Enjoy the delicious ease of these make-ahead Cuban Sliders!

What to Serve with Cuban Sliders?

Imagine a vibrant soirée where plates are filled with flavor and laughter fills the air—these Cuban Sliders are the perfect centerpiece of such a gathering.

  • Crispy French Fries: Their golden crunch complements the tender sliders, making every bite a delightful contrast in texture.

  • Classic Coleslaw: This refreshing side adds a cool, tangy element that cuts through the richness of the pork and cheese.

  • Sweet Potato Fries: The natural sweetness enhances the savory sliders, creating a delicious balance that your guests will love.

  • Garlic Butter Corn On The Cob: Juicy, sweet corn with a buttery garlic finish elevates your meal, bringing a touch of summer to your table.

  • Black Bean Salad: Packed with protein and vibrant flavors, this can add a refreshing crunch alongside the sliders and keep things light.

  • Mojito Mocktail: A minty fizz pairs beautifully with the Cuban flavors, creating a tropical vibe that complements the sliders wonderfully.

  • Mango Salsa: The fruity brightness of mango salsa atop the sliders adds an unexpected twist of flavor and freshness.

  • Chocolate Chip Cookies: End the meal on a sweet note with warm, gooey cookies that everyone will be reaching for.

Tailoring these sides to your Cuban Sliders ensures a delicious harmony of flavors that will make your gathering unforgettable!

Storage Tips for Cuban Sliders

Room Temperature: Allow Cuban Sliders to cool completely before storing, then keep them at room temperature for up to 2 hours.

Fridge: Store leftover sliders in an airtight container for up to 3 days. For best results, separate the sliders and toppings to maintain texture.

Freezer: Wrap sliders tightly in plastic wrap and aluminum foil to freeze for up to 3 months. Thaw overnight in the fridge before reheating.

Reheating: To reheat, warm the sliders in the oven at 350°F (175°C) for about 10-15 minutes, until heated through and the cheese is melty again.

Chef's Helpful Tips

  • When making Cuban Sliders, ensure that you season the pork shoulder generously to enhance its flavor while it cooks.
  • To prevent the buns from becoming soggy, consider toasting them lightly before adding the mustard and fillings.
  • Using two forks to shred the pork can create a fluffier texture, which makes the sliders more delightful to eat.
  • Remember to let the assembled sliders rest for a few minutes after baking; this helps the flavors meld together beautifully.

Cuban Sliders Recipe FAQs

How do I choose the best pork shoulder for my Cuban Sliders?
Absolutely! When selecting a pork shoulder, look for one with evenly distributed marbling and a bright pink color. Avoid cuts that have dark spots or excessive liquid in the packaging, as these can indicate spoilage. A good cut ensures tenderness and richer flavor in your sliders.

How should I store leftover Cuban Sliders?
Very! Allow your Cuban Sliders to cool completely before placing them in an airtight container. They can be stored in the fridge for up to 3 days. For best results, I recommend separating the buns from the fillings to prevent sogginess. Just gently reassemble before reheating!

Can I freeze Cuban Sliders? If so, how?
Yes, you can freeze them! To freeze your Cuban Sliders, wrap each slider tightly in plastic wrap and then in aluminum foil to prevent freezer burn. They can be stored for up to 3 months. When you’re ready to enjoy them again, simply thaw overnight in the fridge before reheating in the oven at 350°F (175°C) for about 10-15 minutes until warmed through.

What if my pork isn’t shredding well?
If your pork shoulder isn’t shredding well after 8 hours, it may need a bit more time in the slow cooker. I suggest checking the internal temperature; it should reach at least 195°F to 205°F for optimal shredding. If it’s not there yet, cover it up and let it cook for another 1-2 hours. Be patient, as the result will be worth the wait!

Are there any dietary considerations with Cuban Sliders?
Absolutely! If you have a gluten intolerance, consider using gluten-free slider buns. For those with dairy sensitivities, swap the Swiss cheese with a dairy-free cheese alternative. As always, make sure to check labels for any ingredients that could trigger allergies. When serving, be mindful of guests’ dietary needs, just to ensure everyone can indulge in these flavorful sliders!

How long will Cuban Sliders stay fresh in the fridge?
Cuban Sliders will remain fresh in the fridge for about 3 days. Be sure they’re in an airtight container, and if possible, store the sliders without toppings, keeping the buns and fillings separate for maximum freshness. If you notice any discoloration or an off smell, it’s best to err on the side of caution and discard them. Enjoy!

Cuban Sliders

Cuban Sliders

Cuban Sliders are delicious bite-sized sandwiches filled with slow-cooked pork, Swiss cheese, and pickles, perfect for any occasion.
Print Recipe Pin Recipe
Prep Time 15 minutes mins
Cook Time 8 hours hrs
Baking Time 25 minutes mins
Total Time 8 hours hrs 40 minutes mins
Servings: 8 sliders
Course: LUNCH RECIPES
Cuisine: Cuban
Calories: 250
Ingredients Equipment Method Nutrition Notes

Ingredients
  

For the Sliders
  • 8 pieces slider buns whole-wheat for a healthier twist
  • 3 pounds pork shoulder substitute with chicken or jackfruit for a lighter option
  • 8 slices Swiss cheese Gouda can be a substitute
  • 1 cup dill pickles bread-and-butter pickles can be used instead
  • 2 tablespoons yellow mustard Dijon mustard can be used for a sophisticated touch
For the Butter Mixture
  • 1/2 cup butter olive oil can be a lighter option
  • 1 teaspoon garlic powder fresh minced garlic can be a substitute

Equipment

  • Slow Cooker
  • Oven
  • Baking dish
  • nonstick spray
  • Mixing bowl

Method
 

How to Make Cuban Sliders
  1. Preheat your oven to 350°F (175°C) and lightly grease a baking dish with nonstick spray.
  2. Season the pork shoulder with salt and pepper. Place it in a slow cooker with a splash of water and cook on low for about 8 hours.
  3. Shred the cooked pork using two forks, while slicing the slider buns in half horizontally and smothering each bottom half with yellow mustard.
  4. Layer the shredded pork on the buns, followed by Swiss cheese slices and dill pickles. Replace the top buns.
  5. Mix melted butter with garlic powder and brush over the assembled sliders.
  6. Cover the baking dish with foil and bake for 15 minutes. Remove the foil and bake for another 10 minutes.

Nutrition

Serving: 1sliderCalories: 250kcalCarbohydrates: 28gProtein: 15gFat: 10gSaturated Fat: 5gPolyunsaturated Fat: 0.5gMonounsaturated Fat: 4gCholesterol: 45mgSodium: 600mgPotassium: 300mgFiber: 2gSugar: 2gVitamin A: 500IUVitamin C: 2mgCalcium: 200mgIron: 1.5mg

Notes

Serve with extra dill pickles on the side for a delightful crunch!

Tried this recipe?

Let us know how it was!

Filed Under: LUNCH RECIPES

Buffalo Chicken Sliders

February 5, 2026 by JudyWhite Leave a Comment

It’s amazing how the simplest ingredients can create a dish that brings everyone together—especially when you’re preparing a plate of Buffalo Chicken Sliders. Picture this: a gathering of friends, laughter filling the air, and the scent of spicy buffalo chicken wafting through the kitchen, igniting excitement long before the first bite.

I often find myself craving the satisfying heat and creamy tang of buffalo sauce, but I also want something that’s quick and easy to whip up. These sliders are the answer! With tender, shredded chicken coated in a zesty buffalo sauce, nestled between soft slider buns and topped with cooling ranch dressing and crisp lettuce, they’re the perfect antidote to fast food fatigue.

Whether you’re hosting a game day or just looking for a comforting weeknight meal, these sliders promise to be a hit. Plus, they’re simple enough for any home chef to conquer. Let’s dive into this delicious recipe that’s sure to become a staple in your kitchen!

Why You'll Love This Buffalo Chicken Sliders

  • These Buffalo Chicken Sliders are incredibly easy to prepare, making them perfect for a quick weeknight dinner or a last-minute gathering.
  • The flavors are a delicious fusion of spicy buffalo chicken and creamy ranch dressing, ensuring every bite is packed with taste.
  • Their versatility means you can customize them with your favorite toppings, making them suitable for any occasion or palate.
  • Visually, these sliders are a feast for the eyes, with their vibrant colors and appealing presentation that will impress your guests.
  • Overall, these sliders are a guaranteed crowd-pleaser that everyone will flock to at your next party or family meal.

Buffalo Chicken Sliders Ingredients

• Get ready to whip up these mouthwatering sliders!

For the Chicken

  • Boneless, skinless chicken breasts – ensures lean, tender meat that soaks up the spicy buffalo sauce.
  • Buffalo sauce – provides that perfect kick of heat that the sliders are known for!
  • Melted butter – helps to meld the flavors together and keep the chicken moist.

For the Sliders

  • Slider buns – these soft, pillowy buns are ideal for holding all that flavorful filling.
  • Creamy ranch dressing – balances the spiciness of the buffalo sauce, adding a cool contrast.
  • Shredded lettuce – adds a refreshing crunch to each bite.
  • Sliced pickles (optional) – for a tangy twist that brings another layer of flavor to your Buffalo Chicken Sliders.

How to Make Buffalo Chicken Sliders

  1. Preheat your oven to 400°F (200°C) and generously spray a baking dish with nonstick cooking spray. This ensures that your chicken will come out easily and stay juicy.

  2. Season the chicken breasts with salt and pepper, then arrange them neatly in the baking dish. This step adds flavor to your chicken that mingles beautifully with the buffalo sauce.

  3. Mix melted butter with buffalo sauce in a bowl until combined, then pour this zesty mixture over the chicken. Feel free to use more or less buffalo sauce depending on your heat preference!

  4. Bake for 25-30 minutes or until the internal temperature of the chicken reaches 165°F (74°C). The chicken should be tender and easily shred with a fork when it’s done.

  5. Shred the chicken using two forks, mixing it with any remaining sauce in the dish for extra flavor. This will create that irresistible, spicy goodness that everyone loves.

  6. Assemble the sliders by placing shredded chicken on the bottom half of each slider bun. Top with ranch dressing, shredded lettuce, and pickles. Finally, cap them with the top buns and serve warm!

Optional: Garnish with extra buffalo sauce or fresh herbs for a bright finish.

Exact quantities are listed in the recipe card below.

How to Store and Freeze Buffalo Chicken Sliders

Fridge: Store leftover Buffalo Chicken Sliders in an airtight container for up to 3 days. To keep the buns from getting soggy, separate the chicken and toppings until ready to eat.

Freezer: For longer storage, freeze the shredded buffalo chicken in a freezer-safe bag for up to 3 months. Make sure to remove as much air as possible before sealing.

Reheating: When ready to enjoy, thaw the chicken overnight in the fridge and reheat in the microwave or on the stove until warm. Assemble your sliders fresh for the best texture and taste.

Wrap: If you’ve assembled sliders ahead of time, wrap them tightly in plastic wrap or foil before refrigerating or freezing to prevent dryness.

Make Ahead Options

Busy home cooks will love how easy it is to prep Buffalo Chicken Sliders ahead of time! You can marinate the chicken in buffalo sauce and refrigerate it for up to 24 hours to enhance the flavor. After cooking, simply shred the chicken and store it in an airtight container in the fridge for up to 3 days. When you’re ready to serve, reheat the chicken in the microwave or on the stovetop until warmed through. Assemble the sliders right before serving to keep the buns from getting soggy. With these make-ahead tips, you’ll enjoy delicious, hassle-free sliders that are just as tasty as if you made them fresh!

Buffalo Chicken Sliders Variations

Feel free to unleash your creativity and make these sliders your own—it’s all about the flavors that delight your taste buds!

  • Spicy Twist: Add extra diced jalapeños or a dash of cayenne pepper to the buffalo sauce for an added kick.

  • Cheesy Upgrade: Sprinkle shredded cheddar or blue cheese over the chicken before baking to create a rich, gooey topping.

  • Honey BBQ Blend: Mix half buffalo sauce with honey BBQ sauce for a sweeter, tangy flavor that still packs a punch.

  • Caribbean Vibe: Substitute buffalo sauce with jerk sauce for a tropical twist that adds warmth and depth to your sliders. This is perfect for anyone looking to transport their taste buds!

  • Vegetarian Option: Swap out chicken for roasted cauliflower or chickpeas, tossed in buffalo sauce, for a hearty, plant-based version that everyone will love.

  • Low-Carb Buns: Use lettuce wraps or cloud bread instead of slider buns for a keto-friendly meal that’s still full of flavor.

  • Herby Freshness: Add fresh cilantro or green onions to the toppings for a burst of flavor that enhances the overall freshness of your sliders.

  • Sweet and Tangy: Top the finished sliders with caramelized onions or a slice of grilled pineapple for a balance of sweet and savory. This adds an unexpected delight everyone will rave about!

What to Serve with Buffalo Chicken Sliders?

Looking to create a mouthwatering feast that complements your spicy Buffalo Chicken Sliders?

  • Crispy French Fries: The saltiness and crunch of fries make the perfect companion to these tangy sliders, soaking up any leftover sauce. A sprinkle of garlic salt can elevate this classic pairing!

  • Coleslaw: A tangy, crunchy coleslaw adds brightness and a refreshing contrast to the richness of the buffalo chicken, balancing the flavors beautifully. Its creamy dressing can also mellow the heat for those who prefer a milder experience.

  • Sweet Potato Wedges: The natural sweetness of sweet potatoes contrasts delightfully with the spicy sliders, creating a satisfying mix of flavors. Bake them crispy on the outside for a textural delight with every bite!

  • Vegetable Platter: A vibrant platter of fresh vegetables like carrots, bell peppers, and cucumbers with a dip adds a nutritious crunch that complements the sliders well. You’ll love the rainbow of colors on your table!

  • Buffalo Cauliflower Bites: For a fun twist on flavors, these spicy cauliflower bites echo the buffalo sauce’s heat and are a great vegetarian alternative for your guests. They pair perfectly with the cool ranch dressing.

  • Beer or Cider: An ice-cold beer or a refreshing hard cider complements the spicy flavors of your sliders beautifully, enhancing the overall dining experience. A light lager or a fruity cider would be ideal.

  • Chocolate Brownies: For dessert, rich and fudgy brownies add a sweet finish to your meal, balancing out the spicy sliders with their velvety texture. Who could resist that combination?

With these delicious sides, your Buffalo Chicken Sliders will take center stage as the star of a memorable meal!

Chef's Helpful Tips

  • When preparing Buffalo Chicken Sliders, ensure to season the chicken breasts adequately with salt and pepper for optimal flavor.
  • If you prefer a milder heat, consider reducing the amount of buffalo sauce or mixing it with additional melted butter.
  • To shred the chicken effortlessly, allow it to rest for a few minutes after baking to retain its moisture, making shredding easier.
  • Always verify that the internal temperature reaches 165°F to guarantee that the chicken is cooked through and safe to eat.

Buffalo Chicken Sliders Recipe FAQs

How do I select the right chicken breasts?
Absolutely! When choosing chicken breasts, look for those that are plump, white in color without any dark spots or bruises. Fresh chicken should feel firm to the touch, and if possible, opt for organic or free-range chicken for the best flavor and quality.

How should I store leftover Buffalo Chicken Sliders?
To store leftover sliders, place them in an airtight container and keep them in the fridge for up to 3 days. For the best results, I recommend separating the chicken from the buns and toppings to prevent sogginess. Reheat as needed to enjoy them again!

Can I freeze the Buffalo Chicken for later use?
Very! You can freeze the shredded buffalo chicken by placing it in a freezer-safe bag. Make sure to remove as much air as possible before sealing. It can be frozen for up to 3 months. When you’re ready to enjoy, simply thaw it overnight in the fridge before reheating.

What if my chicken doesn’t shred easily?
If your chicken breasts are tough and resist shredding, it may need additional cooking time. Ensure that the internal temperature reaches 165°F (74°C) before removing from the oven. If it’s done but still tough, let it rest for a few minutes before trying to shred again. This resting time helps retain moisture, making shredding easier.

Are there any dietary considerations I should keep in mind?
If you’re serving these to kids or guests with dietary restrictions, it’s always wise to double-check for allergies. Buffalo sauce can be spicy, so consider offering a milder sauce option alongside. For a gluten-free version, look for gluten-free slider buns and ensure that your buffalo sauce is also gluten-free.

Can I customize the toppings for the sliders?
The more the merrier! Feel free to get creative with toppings. You can include additional vegetables like tomatoes, red onions, or jalapeños, or even swap the ranch dressing for blue cheese for an authentic buffalo flavor. Make it your own!

Buffalo Chicken Sliders

Buffalo Chicken Sliders

Enjoy these Buffalo Chicken Sliders, a perfect blend of spicy buffalo chicken and creamy ranch dressing, ideal for any gathering.
Print Recipe Pin Recipe
Prep Time 10 minutes mins
Cook Time 30 minutes mins
Total Time 40 minutes mins
Servings: 4 sliders
Course: LUNCH RECIPES
Cuisine: American
Calories: 250
Ingredients Equipment Method Nutrition Notes

Ingredients
  

For the Chicken
  • 1 pound Boneless, skinless chicken breasts
  • 1/2 cup Buffalo sauce
  • 1/4 cup Melted butter
For the Sliders
  • 8 count Slider buns
  • 1/2 cup Creamy ranch dressing
  • 1 cup Shredded lettuce
  • optional Sliced pickles for a tangy twist

Equipment

  • Baking dish
  • Oven

Method
 

How to Make Buffalo Chicken Sliders
  1. Preheat your oven to 400°F (200°C) and generously spray a baking dish with nonstick cooking spray.
  2. Season the chicken breasts with salt and pepper, then arrange them neatly in the baking dish.
  3. Mix melted butter with buffalo sauce in a bowl until combined, then pour this mixture over the chicken.
  4. Bake for 25-30 minutes or until the internal temperature of the chicken reaches 165°F (74°C).
  5. Shred the chicken using two forks, mixing it with any remaining sauce in the dish.
  6. Assemble the sliders by placing shredded chicken on the bottom half of each slider bun. Top with ranch dressing, shredded lettuce, and pickles, then cap with the top buns.

Nutrition

Serving: 1sliderCalories: 250kcalCarbohydrates: 20gProtein: 18gFat: 14gSaturated Fat: 6gPolyunsaturated Fat: 1gMonounsaturated Fat: 5gCholesterol: 70mgSodium: 800mgPotassium: 350mgFiber: 1gSugar: 2gVitamin A: 20IUVitamin C: 4mgCalcium: 4mgIron: 8mg

Notes

Optional: Garnish with extra buffalo sauce or fresh herbs for a bright finish. Store leftovers in an airtight container.

Tried this recipe?

Let us know how it was!

Filed Under: LUNCH RECIPES

Roast Beef Sliders

February 3, 2026 by JudyWhite Leave a Comment

There’s something truly satisfying about the first bite of a warm slider, especially when it’s packed with layers of tender roast beef and melted cheese. I found myself craving something hearty and fulfilling after countless fast-food trips left me underwhelmed. That’s when these Roast Beef Sliders came to life—a delicious melding of flavors that turned a simple meal into a cherished occasion.

Picture friends gathered around your kitchen, laughter mingling with the irresistible aroma of caramelized onions and savory beef wafting through the air. With just a handful of ingredients and a mere 30 minutes, you’ll have a platter of sliders that not only ease weekday dinners but also elevate any gathering!

Whether you’re a seasoned chef or just starting to explore the joys of homemade comfort food, these sliders are a delicious solution that promises to impress without the hassle. Ready to dive in? Let’s bring that culinary magic to your home!

Why You'll Love This Roast Beef Sliders

  • These Roast Beef Sliders are incredibly easy to prepare, making them a perfect weeknight meal or party appetizer.
  • The combination of tender roast beef, melted cheese, and sweet caramelized onions creates a symphony of flavors that will delight your taste buds.
  • Their versatility allows you to customize toppings and sauces, ensuring everyone can enjoy their sliders just the way they like them.
  • Plus, they look stunning on a platter, making them a visual centerpiece that will have your guests excited to dig in.

Roast Beef Sliders Ingredients

Prepare for a mouthwatering experience with these essential ingredients!

For the Sliders

  • 1 lb thinly sliced roast beef – This is the star of your sliders, adding rich flavor and tenderness.
  • 12 soft slider buns – Opt for fluffy buns that cradle your fillings and soak up the delicious juices.
  • 8 oz Swiss or provolone cheese – These cheeses melt beautifully, creating a gooey, savory topping.

For the Toppings

  • 1 cup caramelized onions – Sweet, soft onions bring an irresistible depth of flavor to every bite.

For the Sauce

  • 1/2 cup beef broth – A drizzle of broth keeps the sliders moist and enhances the savory profile.
  • 2 tbsp horseradish sauce – Adds a zesty kick that balances the richness of the beef and cheese beautifully.

Dive into this delightful recipe and enjoy your homemade Roast Beef Sliders!

How to Make Roast Beef Sliders

  1. Preheat your oven to 350°F (175°C). This temperature is perfect for heating the sliders evenly while melting the cheese to gooey perfection.

  2. Slice the slider buns in half horizontally. Arrange them on a baking sheet lined with parchment paper for easy cleanup and to prevent sticking.

  3. Layer a generous amount of roast beef on the bottom half of each bun. Make sure to fill them well, as this is the heart of your delicious sliders!

  4. Top with cheese and caramelized onions. Feel free to be generous; the melty cheese and sweet onions will add wonderful flavor and texture.

  5. Mix beef broth and horseradish sauce in a small bowl. Drizzle this savory mixture over the sliders to keep them moist and flavorful.

  6. Cover with the bun tops and bake for 15-20 minutes. You want them heated through and the cheese to be bubbly and lightly golden.

Optional: Garnish with fresh parsley for a pop of color and added freshness!

Exact quantities are listed in the recipe card below.

Make Ahead Options

These Roast Beef Sliders are perfect for meal prep, allowing you to savor homemade comfort during busy weeknights. You can prepare most components in advance: the caramelized onions, roast beef, and even the mixed horseradish sauce can be made up to 3 days ahead. Store the onions and beef in airtight containers in the refrigerator to maintain moisture and flavor. When you’re ready to serve, simply layer the prepped beef and onions onto the buns, drizzle with the sauce, and bake as directed for about 15-20 minutes. This way, you’ll enjoy fresh, delicious sliders with minimal fuss—just as comforting as if you cooked them all at once!

How to Store and Freeze Roast Beef Sliders

Fridge: Store leftover Roast Beef Sliders in an airtight container for up to 3 days. Reheat in the oven at 350°F (175°C) until warmed through.

Freezer: Wrap each slider individually in plastic wrap and then foil, placing them in a freezer bag. They can be frozen for up to 2 months.

Reheating: For the best texture, reheat thawed sliders in the oven at 350°F (175°C) for about 10-15 minutes, ensuring that the cheese is melting and the beef is heated thoroughly.

What to Serve with Roast Beef Sliders?

Set the stage for a delightful feast with these perfect pairings that enhance the deliciousness of your sliders.

  • Crispy Sweet Potato Fries: Their natural sweetness and crunchy exterior provide a delightful contrast to the savory sliders, making every bite a treat.

  • Tangy Coleslaw: Bright and crunchy, coleslaw adds a refreshing bite that balances the richness of the roast beef and cheese.

  • Garlic Butter Green Beans: Tender beans sautéed in garlic butter create a wonderfully aromatic side that complements the hearty flavors of the sliders perfectly.

  • Creamy Potato Salad: This indulgent dish offers a comforting creaminess that melds beautifully with the sliders while adding a hearty touch.

  • Herb-Infused Pasta Salad: A light and vibrant pasta salad brings freshness with its medley of herbs and veggies, elevating the meal into a delightful feast.

  • Crisp Caesar Salad: With crunchy romaine and a tangy dressing, this classic salad cuts through the richness of the sliders, making it a refreshing addition to your spread.

  • Chilled Lemonade: This tangy drink refreshes the palate and complements the savory flavors of the sliders, making every sip an invigorating experience.

Enjoy these pairings that turn a simple gathering into an unforgettable culinary moment!

Roast Beef Sliders Variations

Feel free to sprinkle your own flair into these sliders, making them even more delightful and uniquely yours!

  • Spicy Kick: Add sliced jalapeños or a dash of hot sauce to introduce an exciting heat that awakens your taste buds. The balance between spicy and savory will be a game-changer!

  • Cheese Change: Substitute Swiss or provolone with pepper jack or gouda for a different flavor profile. Each option adds its own unique character that complements the beef beautifully.

  • Veggie Boost: Toss in some sautéed bell peppers or mushrooms to pack in additional nutrients and flavors. These additions not only amplify taste but also bring a lovely texture to each bite.

  • Herb Infusion: Mix fresh herbs like rosemary or thyme into the caramelized onions for a fragrant twist. Aromatic herbs elevate the dish’s depth, making each slider feel gourmet.

  • Dijon Delight: Swap out horseradish sauce for Dijon mustard to give your sliders a tangy sophistication. The zesty touch pairs wonderfully with the richness of the beef.

  • Gluten-Free: Use gluten-free slider buns or collard greens as a wrap for a delicious gluten-free version. This way, everyone can indulge without worry!

  • Slow Cooker Style: Cook roast beef low and slow in broth with garlic and spices, then shred it for a more tender, pulled-beef experience. You’ll love the depth of flavor from this method.

  • Sweet & Savory: Add a dollop of fig jam or a sweet onion spread before topping with meat and cheese, creating a delightful contrast to the savory elements. This twist will delight guests looking for something special!

Chef's Helpful Tips

  • When making Roast Beef Sliders, ensure the roast beef is sliced thinly for optimal tenderness and flavor integration.
  • Avoid overcomplicating the sauce by mixing beef broth and horseradish; drizzling it over the sliders enhances moisture without overwhelming the beef’s flavor.
  • Preheating the oven to 350°F (175°C) is crucial as it allows the cheese to melt perfectly while warming the filling evenly.
  • Finally, keep an eye on the baking time; sliders are best when heated through and the cheese is bubbly, typically taking about 15-20 minutes.

Roast Beef Sliders Recipe FAQs

How do I choose the right roast beef?
Absolutely! When selecting roast beef, look for a cut that is labeled “thinly sliced.” Ideally, you want roast beef that’s tender, well-marbled, and has a fresh aroma. If you can, visit a butcher shop for quality slices; this ensures rich flavor and delightful tenderness in your sliders.

How should I store leftover Roast Beef Sliders?
Very! To keep your sliders fresh, store them in an airtight container in the fridge for up to 3 days. If you’d like to keep them longer, it’s best to freeze them. Reheating can be done in the oven at 350°F (175°C) until they’re warmed through—about 10-15 minutes will do the trick.

Can I freeze Roast Beef Sliders?
You absolutely can! To freeze, wrap each slider individually in plastic wrap, followed by a layer of aluminum foil. Place them in a freezer bag for extra protection against freezer burn. They will stay fresh for up to 2 months. To reheat, thaw them overnight in the fridge and then bake at 350°F (175°C) for 10-15 minutes until heated through.

What if my sliders are too dry after baking?
No worries! If your sliders turn out a bit dry, it may be from either insufficient sauce or not enough beef broth during the cooking process. It’s important to drizzle a generous amount of the broth and horseradish mixture on before baking. If they seem dry after baking, you can always add a little warm beef broth directly on top before serving!

Are Roast Beef Sliders safe for pets or people with allergies?
Good question! Typically, these sliders are not suitable for pets, especially due to the cheese and horseradish’s potential harmful effects on dogs and cats. If you or your guests have allergies, ensure to check for any dairy or gluten sensitivities. You can easily substitute the cheese with dairy-free alternatives and use gluten-free buns to accommodate those dietary needs.

What if I can’t find slider buns?
The more the merrier! If slider buns aren’t available, feel free to use small dinner rolls, mini bagels, or even cut a large loaf into smaller pieces. Just ensure they can hold up to the fillings without falling apart! A sturdy bread will make for a delightful bite.

Roast Beef Sliders

Roast Beef Sliders

Delicious Roast Beef Sliders packed with tender beef, cheese, and caramelized onions, perfect for lunch or a gathering.
Print Recipe Pin Recipe
Prep Time 10 minutes mins
Cook Time 20 minutes mins
Total Time 30 minutes mins
Servings: 12 sliders
Course: LUNCH RECIPES
Cuisine: American
Calories: 250
Ingredients Equipment Method Nutrition Notes

Ingredients
  

For the Sliders
  • 1 lb thinly sliced roast beef This is the star of your sliders, adding rich flavor and tenderness.
  • 12 count soft slider buns Opt for fluffy buns that cradle your fillings and soak up the delicious juices.
  • 8 oz Swiss or provolone cheese These cheeses melt beautifully, creating a gooey, savory topping.
For the Toppings
  • 1 cup caramelized onions Sweet, soft onions bring an irresistible depth of flavor.
For the Sauce
  • 1/2 cup beef broth Keeps the sliders moist and enhances the savory profile.
  • 2 tbsp horseradish sauce Adds a zesty kick that balances the richness of the beef.

Equipment

  • Baking sheet
  • parchment paper
  • Small bowl
  • Oven

Method
 

How to Make Roast Beef Sliders
  1. Preheat your oven to 350°F (175°C).
  2. Slice the slider buns in half horizontally.
  3. Layer a generous amount of roast beef on the bottom half of each bun.
  4. Top with cheese and caramelized onions.
  5. Mix beef broth and horseradish sauce in a small bowl. Drizzle this over the sliders.
  6. Cover with the bun tops and bake for 15-20 minutes.

Nutrition

Serving: 1sliderCalories: 250kcalCarbohydrates: 30gProtein: 15gFat: 10gSaturated Fat: 4gPolyunsaturated Fat: 0.5gMonounsaturated Fat: 3gCholesterol: 50mgSodium: 800mgPotassium: 250mgFiber: 1gSugar: 2gVitamin A: 6IUVitamin C: 2mgCalcium: 15mgIron: 10mg

Notes

Optional: Garnish with fresh parsley for added freshness. Store leftovers in an airtight container for up to 3 days. Reheat in the oven until warmed through.

Tried this recipe?

Let us know how it was!

Filed Under: LUNCH RECIPES

Chicken Veggie Wrap

January 30, 2026 by JudyWhite Leave a Comment

After a long day, when the cravings for something fresh and flavorful hit, I often find myself returning to the Chicken Veggie Wrap. The satisfying crunch of colorful bell peppers and the tender, grilled chicken come together to create a delightful meal that’s both nourishing and quick to whip up.

Imagine standing in your kitchen, the sweet aroma of honey mingling with the rich scent of garlic sizzling away in the pan. It’s one of those simple recipes that effortlessly brings joy to the table and it’s a fantastic way to make use of leftovers or seasonal produce.

What I love most about this wrap is its versatility. You can switch up the veggies based on what you have on hand, making it a perfect go-to for meal prep or a light dinner on busy nights. With only 30 minutes needed from start to finish, these wraps promise a delicious escape from the monotony of fast food. So, let’s roll up our sleeves and dive into this amazing Chicken Veggie Wrap recipe!

Why You'll Love This Chicken Veggie Wrap

  • This Chicken Veggie Wrap is incredibly easy to prepare, making it a perfect choice for busy weeknights.
  • The combination of tender grilled chicken and fresh, vibrant vegetables creates a flavor explosion that will satisfy your taste buds.
  • You can easily customize this wrap with whatever veggies you have on hand, allowing for endless variations that suit any occasion.
  • Plus, in just 30 minutes, you can have a delicious meal ready to enjoy, saving you time on hectic days while impressing your family or guests.

Chicken Veggie Wrap Ingredients

• Everything you need for a delicious wrap!

For the Chicken

  • Boneless, skinless chicken breasts – ensure they’re evenly sized for consistent cooking.
  • Fresh garlic – adds aromatic flavor; you can use garlic powder if needed.

For the Veggies

  • Bell peppers (mixed colors) – they provide sweetness and crunch; feel free to substitute with zucchini or mushrooms.
  • Red onion – brings a mild sweetness; yellow onions work as a great substitute.

For the Tortilla

  • Tortillas (flour or whole wheat) – choose whole wheat for a healthier option, or use gluten-free tortillas if needed.

For the Sauce

  • Low-sodium soy sauce – adds a savory depth; tamari is a great gluten-free alternative.
  • Honey – balances the saltiness; maple syrup can be used as a vegan substitute.
  • Sesame oil – enhances the wrap’s nuttiness; you can skip it if you prefer a lighter taste.

Seasoning

  • Salt and pepper – essential for enhancing flavors, adjust to your taste!

This Chicken Veggie Wrap is not just a meal; it’s a canvas for creativity in the kitchen!

How to Make Chicken Veggie Wrap

  1. Preheat the grill or skillet over medium heat. While it warms up, season the chicken breasts with salt and pepper for that extra layer of flavor to infuse during cooking.

  2. Cook the chicken for 6-7 minutes on each side. Ensure it’s fully cooked, reaching an internal temperature of 165°F, then let it rest for a few minutes before slicing into tender strips.

  3. Sauté garlic, bell peppers, and red onion in the same skillet. Drizzle a little olive oil before adding the veggies and cook for about 4-5 minutes until they’re tender and vibrant.

  4. Whisk together the soy sauce, honey, and sesame oil in a small bowl, creating a delicious glaze that will complement the earthy flavors of your wraps perfectly.

  5. Assemble your wraps by laying down sliced chicken on each tortilla, topped with those sautéed veggies. Drizzle with the prepared sauce for a burst of flavor.

  6. Roll the tortillas tightly, ensuring all ingredients are snug inside. Cut in half to serve, showcasing those beautiful layers of goodness!

Optional: Garnish with fresh cilantro or a squeeze of lime for an extra zesty kick.

Exact quantities are listed in the recipe card below.

Chicken Veggie Wrap Variations

Feel free to get creative with your Chicken Veggie Wrap by trying out these delicious twists!

  • Spicy Kick: Add sliced jalapeños or a drizzle of sriracha for a zesty heat that elevates your wrap to a new level. It’s the perfect way to satisfy those spicy cravings!

  • Herb-Infused: Mix in fresh herbs like cilantro or basil for an aromatic burst of flavor that brightens each bite. Herbs can transform the wrap into a fresh and vibrant experience.

  • Avocado Cream: Replace the sauce with a creamy avocado spread; simply mash ripe avocado with lime and salt for a buttery richness. This also adds a lovely creaminess that pairs perfectly with the crunchy veggies.

  • Quinoa Boost: Include cooked quinoa for a hearty texture and extra protein. It lends a nutty flavor that complements the chicken and vegetables beautifully.

  • Fruit Twist: Add slices of mango or peach for a sweet contrast that balances the savory elements of the wrap. This unexpected addition can really surprise and delight!

  • Veggie-Packed: Swap out chicken for grilled tofu or chickpeas to make a meatless version. This keeps the protein while also catering to vegetarians and still delivers robust flavor.

  • Nuts & Seeds: Sprinkle in some toasted sesame seeds or chopped nuts for added crunch and richness. This brings not only texture but also a delightful nutty flavor.

  • Cheese Please: Top with shredded cheese like feta or pepper jack for a creamy element that adds more depth. This melted goodness will tie all the flavors together, creating a comforting bite.

How to Store and Freeze Chicken Veggie Wrap

Fridge: Store any leftover Chicken Veggie Wraps in an airtight container for up to 3 days. This keeps the flavors fresh and the tortillas from becoming soggy.

Freezer: For longer storage, wrap the Chicken Veggie Wraps individually in plastic wrap, then place them in a freezer-safe bag. They can be frozen for up to 3 months.

Reheating: To enjoy frozen wraps, thaw them in the refrigerator overnight. Reheat in a skillet over medium heat for about 5 minutes on each side, or until warmed through.

Assembly Tip: When making wraps in advance, consider keeping the sauce separate until you’re ready to eat to maintain tortilla freshness.

What to Serve with Chicken Veggie Wrap?

To create a memorable meal around your Chicken Veggie Wrap, consider these delightful pairings that enhance its bright flavors and fresh textures.

  • Crispy Sweet Potato Fries: Their sweetness and crunch offer a satisfying contrast to the tender wrap. A delicious way to enjoy a classic side!
  • Garden Salad: A mix of fresh greens, cucumbers, and a zesty vinaigrette brings a light, refreshing combat to the hearty wrap. Each bite is a burst of freshness!
  • Roasted Asparagus: The earthy flavor and tender-crisp texture complement the chicken perfectly, adding a touch of elegance to your dinner. Toss with olive oil and parmesan for extra flavor!
  • Hummus with Veggie Sticks: A creamy, protein-packed dip that pairs wonderfully with crunchy carrots and bell peppers, echoing the wrap’s freshness. Perfect for a light appetizer!
  • Cold Mango Salsa: This sweet and tangy salsa adds a refreshing contrast that brightens the whole meal, giving each bite an exciting twist!
  • Chilled Green Tea: This light, refreshing drink with subtle notes complements the savory and sweet flavors while keeping you cool. A perfect sipper alongside your wrap!
  • Fruit Salad: A colorful medley of seasonal fruits can act as a delightful dessert after the savory main. It brings vibrancy and sweetness to round off your meal!
  • Coconut Rice: The delicate, fragrant rice serves as a soft and mildly sweet bedding that harmonizes beautifully with the bold flavors of the wrap. A simple comfort!
  • Garlic Knots: These buttery, herby bites make for a fun side that everyone can enjoy, adding daily charm and familiarity to the dinner table. Perfect for sharing!

Make Ahead Options

These Chicken Veggie Wraps are a fantastic choice for meal prep, allowing you to savor delicious homemade food even on the busiest days! You can marinate the chicken in the soy sauce, honey, and sesame oil mix up to 24 hours in advance to infuse it with flavor. Additionally, the sautéed veggies can be prepared up to 3 days ahead and refrigerated in an airtight container; this will keep them fresh and prevent sogginess. When you’re ready to serve, simply grill the chicken until fully cooked, slice, and assemble the wraps. This way, you can enjoy fresh, nutritious Chicken Veggie Wraps with minimal effort and maximum taste!

Chef's Helpful Tips

  • To ensure your Chicken Veggie Wrap is perfectly cooked, choose chicken breasts that are similar in size for even cooking.
  • A common mistake is to skip resting the chicken after cooking; let it rest for a few minutes before slicing to maintain its juiciness.
  • Use a meat thermometer to check that the chicken reaches the safe internal temperature of 165°F for optimal safety and texture.
  • Remember to keep your sautéed veggies vibrant and tender by not overcrowding the pan, which can lead to uneven cooking.

Chicken Veggie Wrap Recipe FAQs

How do I know if my chicken breasts are fresh?
Absolutely! When selecting chicken breasts, look for firm flesh that’s pink with no dark spots or unusual odors. Fresh chicken should be moist but not slimy. If the breasts have dark spots all over or a strong smell, it’s best to choose another pack.

How should I store leftover Chicken Veggie Wraps?
To keep your Chicken Veggie Wraps fresh, store them in an airtight container in the fridge for up to 3 days. For best results, you’ll want to keep the sauce separate until you’re ready to eat to avoid sogging the tortillas. This way, you’ll maintain that delightful crunch when you bite into them!

Can I freeze my Chicken Veggie Wraps?
Very! You can freeze the Chicken Veggie Wraps for up to 3 months, making them a great option for meal prep. Begin by wrapping each individual wrap tightly in plastic wrap. Then, place them in a freezer-safe bag. When you’re ready to enjoy, let them thaw in the refrigerator overnight and reheat them in a skillet over medium heat for about 5 minutes on each side, or until warmed through.

What’s a common issue people face with wraps, and how do I solve it?
One common troubleshooting point is dealing with soggy tortillas. To allow for crispier wraps, try heating the tortillas slightly before assembling, and keep the veggies and sauce separate until you’re ready to eat. This tip ensures that the wraps enjoy a delightful crunch rather than getting mushy in storage.

Are there any dietary considerations I should be aware of?
Definitely! If you’re cooking for someone with allergies or dietary restrictions, always check labels on the soy sauce and tortillas for gluten and allergens. For a gluten-free option, choose gluten-free tortillas and tamari instead of soy sauce. Additionally, substituting maple syrup in place of honey makes this wrap vegan-friendly!

Chicken Veggie Wrap

Chicken Veggie Wrap

Delicious and customizable Chicken Veggie Wrap perfect for a quick lunch or dinner.
Print Recipe Pin Recipe
Prep Time 15 minutes mins
Cook Time 15 minutes mins
Total Time 30 minutes mins
Servings: 2 wraps
Course: LUNCH RECIPES
Cuisine: American
Calories: 320
Ingredients Equipment Method Nutrition Notes

Ingredients
  

For the Chicken
  • 2 pieces Boneless, skinless chicken breasts Ensure they're evenly sized for consistent cooking.
  • 2 cloves Fresh garlic Adds aromatic flavor; you can use garlic powder if needed.
For the Veggies
  • 1 cup Bell peppers (mixed colors) They provide sweetness and crunch; feel free to substitute with zucchini or mushrooms.
  • 1 small Red onion Brings a mild sweetness; yellow onions work as a great substitute.
For the Tortilla
  • 2 pieces Tortillas (flour or whole wheat) Choose whole wheat for a healthier option, or use gluten-free tortillas if needed.
For the Sauce
  • 2 tablespoons Low-sodium soy sauce Adds a savory depth; tamari is a great gluten-free alternative.
  • 1 tablespoon Honey Balances the saltiness; maple syrup can be used as a vegan substitute.
  • 1 teaspoon Sesame oil Enhances the wrap's nuttiness; you can skip it if you prefer a lighter taste.
Seasoning
  • 1 pinch Salt Essential for enhancing flavors, adjust to your taste!
  • 1 pinch Pepper Essential for enhancing flavors, adjust to your taste!

Equipment

  • grill or skillet

Method
 

Instructions
  1. Preheat the grill or skillet over medium heat. While it warms up, season the chicken breasts with salt and pepper.
  2. Cook the chicken for 6-7 minutes on each side, ensuring it’s fully cooked, reaching an internal temperature of 165°F. Let it rest for a few minutes before slicing into tender strips.
  3. Sauté garlic, bell peppers, and red onion in the same skillet with a drizzle of olive oil for about 4-5 minutes until tender and vibrant.
  4. Whisk together soy sauce, honey, and sesame oil in a small bowl, creating a glaze that complements the earthy flavors of your wraps.
  5. Assemble your wraps by laying sliced chicken on each tortilla, topped with sautéed veggies. Drizzle with the prepared sauce.
  6. Roll the tortillas tightly, ensuring all ingredients are snug inside. Cut in half to serve.

Nutrition

Serving: 1wrapCalories: 320kcalCarbohydrates: 35gProtein: 28gFat: 10gSaturated Fat: 2gPolyunsaturated Fat: 3gMonounsaturated Fat: 5gCholesterol: 70mgSodium: 600mgPotassium: 450mgFiber: 3gSugar: 7gVitamin A: 15IUVitamin C: 60mgCalcium: 6mgIron: 10mg

Notes

Optional: Garnish with fresh cilantro or a squeeze of lime for an extra zesty kick.

Tried this recipe?

Let us know how it was!

Filed Under: LUNCH RECIPES

Italian Sub Sandwich

January 27, 2026 by JudyWhite Leave a Comment

It was a Saturday afternoon when the craving for a hearty sandwich struck, leading me to whip up my favorite Italian Sub Sandwich. There’s something truly satisfying about layering bold flavors and fresh ingredients between two soft hoagie rolls. With each bite, the salty salami meets the spicy capicola, while provolone cheese adds a creamy richness that dances on the palate.

As I strolled through my local market that week, the vibrant colors of fresh produce called out to me—the bright red tomatoes and crisp romaine lettuce were just begging to be included. A drizzle of tangy balsamic vinegar and zesty olive oil rounds out the ensemble perfectly, bringing everything together in a delightful explosion of flavors. Best of all, this 15-minute recipe allows you to ditch fast food while crafting something far better in the comfort of your home. So grab those hoagie rolls and let’s dive into creating a meal that’s not just easy, but also a sure-fire crowd pleaser!

Why You'll Love This Italian Sub Sandwich

  • This Italian Sub Sandwich is incredibly easy to make, requiring just 15 minutes from start to finish.
  • The combination of flavors from the salami, capicola, and provolone cheese creates a deliciously satisfying experience that you won’t be able to resist.
  • Its versatility means you can customize it with your favorite toppings, making it suitable for any palate.
  • Not to mention, the vibrant colors and fresh ingredients make this sandwich visually appealing, making it a standout choice for any meal.<br />

Italian Sub Sandwich Ingredients

Unleash the flavor with these essentials!

For the Sandwich
• Hoagie rolls – A soft and chewy foundation that holds all the delicious fillings together.
• Thinly sliced salami – Adds a rich, salty flavor that perfectly complements the rest of the ingredients.
• Thinly sliced capicola – Brings a hint of spice and a depth of flavor that’s essential for an authentic Italian sub.
• Provolone cheese – Melts beautifully, offering a creamy texture that balances the savory meats.
• Shredded romaine lettuce – Adds fresh crunch and a pop of color to each delightful bite.
• Medium tomato, sliced – Juicy and vibrant, it introduces a burst of freshness that won’t go unnoticed.
• Small red onion, thinly sliced (optional) – For a tangy bite that enhances the overall flavor profile.
• Banana peppers (optional) – Provides a zesty kick that livens up the sandwich.

For the Dressing
• Extra virgin olive oil – A high-quality oil that enriches the sandwich with its fruity essence.
• Balsamic vinegar – The perfect finishing touch to brighten all the flavors in your Italian Sub Sandwich.

How to Make Italian Sub Sandwich

  1. Prep the Veggies: Start by slicing the medium tomato and thinly slicing the optional red onion. This ensures freshness in every bite of your Italian Sub Sandwich.

  2. Slice the Rolls: Carefully slice open the hoagie rolls without cutting all the way through. This creates a pocket for all the hearty ingredients that will follow, making assembly a breeze!

  3. Layer the Ingredients: Begin layering the salami, capicola, and provolone cheese inside the rolls. Add the shredded romaine lettuce, tomato slices, onions, and banana peppers for that perfect crunch and zest.

  4. Mix the Dressing: In a small bowl, whisk together the extra virgin olive oil and balsamic vinegar. Taste and adjust for your liking, balancing the richness and acidity to perfection.

  5. Dress and Season: Drizzle the dressing generously over the layered fillings and season with salt and pepper to enhance the flavors, making every bite a delight!

  6. Close and Serve: Gently close the rolls, pressing down to meld all the flavors together. Cut them in half if desired, then serve alongside chips or a refreshing side salad.

Optional: Add a sprinkle of Italian herbs for extra flavor!

Exact quantities are listed in the recipe card below.

Make Ahead Options

Preparing your Italian Sub Sandwich ahead of time is a game-changer for busy weeknights! You can slice the vegetables (tomatoes, onions, and lettuce) and store them in airtight containers in the refrigerator for up to 3 days. Additionally, you can layer the meats and cheese in the hoagie rolls, wrapping them tightly in plastic wrap to maintain freshness for up to 24 hours. To assemble, simply drizzle the dressing over the fillings before serving, ensuring each bite is just as delightful as when freshly made. This method not only saves you time but also ensures your family enjoys a hearty, homemade meal at a moment’s notice!

Italian Sub Sandwich Variations

Get ready to put your own twist on this classic sandwich!

  • Whole Wheat Rolls: Swap hoagie rolls for whole wheat for added fiber and a nutty flavor. Healthier doesn’t have to mean sacrificing taste!

  • Spicy Kick: Add spicy capicola or hot giardiniera for an extra layer of heat that will have your taste buds dancing.

  • Vegan Delight: Use plant-based deli slices and vegan cheese to make a delicious, dairy-free version that everyone can enjoy.

  • Extra Crunch: Incorporate sliced cucumbers or bell peppers for a fresh crunch that elevates the textural experience of your sandwich.

  • Herb Infusion: Sprinkle dried Italian herbs, like oregano or basil, over the layers for a burst of fragrant flavor that brightens each bite.

  • Honey Mustard Drizzle: Swap the balsamic dressing for honey mustard, giving your sandwich a tangy sweetness that contrasts beautifully with the salty meats.

  • Mediterranean Style: Include kalamata olives and feta cheese to create a Mediterranean spin that offers a delightful brininess and unique flavor profile.

  • Decadent Cheese: Try gouda or aged cheddar instead of provolone for a sharper, more robust flavor that adds richness to your delightful creation.

With these variations, you can easily customize your Italian Sub Sandwich to suit any occasion or preference!

What to Serve with Italian Sub Sandwich?

Elevate your meal by pairing this sandwich with delightful sides that enhance its bold flavors.

  • Crispy Potato Chips: The crunchiness of these chips adds a satisfying contrast to the soft, hearty sandwich. Perfect for snacking between bites!

  • Fresh Side Salad: A simple mix of greens, cucumbers, and a light vinaigrette complements the richness of the sub while adding a refreshing element.

  • Roasted Vegetables: Caramelized tossing of seasonal veggies brings a sweet and savory balance that works beautifully alongside the Italian flavors.

  • Pickle Platter: Tangy dill pickles and olives brighten the plate, cleansing the palate and enhancing the sandwich’s savory notes.

  • Italian Pasta Salad: This cold, zesty salad is loaded with fresh tomatoes, mozzarella, and basil, creating a lovely contrast that echoes the Italian theme.

  • Herbed Focaccia: Soft, aromatic focaccia with a sprinkle of herbs provides an extra chewy delight and is perfect for dipping into the sandwich dressing.

  • Sparkling Lemonade: For a refreshing drink, this bubbly citrus goodness cuts through the richness of the sandwich with its invigorating flavors.

  • Chocolate Chip Cookies: End your meal on a sweet note! These cookies add a touch of nostalgia and warmth, making your Italian Sub Sandwich experience truly complete.

  • Craft Beer: A crisp lager or fruity wheat beer pairs nicely, balancing the savory richness of the Italian meats with refreshing notes.

Storage Tips for Italian Sub Sandwich

  • Room Temperature: Enjoy your Italian Sub Sandwich fresh, ideally within 2 hours of preparation. Beyond this timeframe, the ingredients may lose their taste and freshness.

  • Fridge: If stored properly, your sandwich can last up to 3 days in the refrigerator. Wrap it tightly in plastic wrap or place it in an airtight container to maintain its quality.

  • Freezer: For longer storage, freeze the assembled sandwich (without lettuce and tomato, to avoid sogginess) for up to 1 month. Wrap in foil or freezer-safe bags, and defrost in the fridge overnight before enjoying.

  • Reheating: If you prefer a warm sandwich, gently reheat it in the oven at 350°F (175°C) for about 10 minutes. Avoid the microwave as it can make the bread chewy.

Chef's Helpful Tips

  • When making an Italian Sub Sandwich, ensure your ingredients are at room temperature for the best flavor and texture integration.
  • Avoid piling on too many toppings to prevent the sandwich from becoming soggy; focus on balancing meat, cheese, and veggies.
  • For enhanced flavor, consider toasting the hoagie rolls for a few minutes in the oven before assembling your sandwich.
  • Remember to taste your dressing before adding it to ensure the right balance of oil and vinegar for your palate.

Italian Sub Sandwich Recipe FAQs

What type of hoagie rolls should I use?
Absolutely! For the best results, I recommend using fresh, soft hoagie rolls. Look for ones that are slightly chewy on the outside and soft on the inside. If you want a little extra flavor, you can choose Italian-style rolls. They are sturdier and can hold the ingredients without getting soggy.

How should I store leftovers of my Italian Sub Sandwich?
Very good question! If you have leftovers, wrap the sandwich tightly in plastic wrap or place it in an airtight container. It will stay fresh in the refrigerator for up to 3 days. Just remember that the quality may decrease as time goes by, so enjoy it as soon as you can!

Can I freeze the Italian Sub Sandwich?
Yes, you can! To freeze, assemble your sandwich without the lettuce and tomato to avoid sogginess. Wrap it tightly in aluminum foil or place it in a freezer-safe bag. It can stay in the freezer for up to 1 month. When you’re ready to eat, simply defrost it in the refrigerator overnight, then enjoy it cold or warm it up in the oven at 350°F (175°C) for about 10 minutes.

What if my sandwich is too soggy?
Oh no! If your sandwich is soggy, it may be due to too much dressing or wet toppings. To prevent this, use just enough dressing to add flavor without being excessive. Also, consider adding drier toppings, like roasted red peppers or olives, instead of juicy fresh ingredients. If you catch it early, you can also remove excess dressing with a paper towel.

Are there any dietary considerations for the Italian Sub Sandwich?
Absolutely! If you have allergies, be cautious with the meats and cheese, as both may contain common allergens like gluten, dairy, or sulfites. For vegan or vegetarian options, you can swap out meats for marinated vegetables or plant-based deli slices. Always check labels when shopping for ingredients to ensure they meet your dietary needs.

Can I customize my Italian Sub Sandwich?
Definitely! The more the merrier! Feel free to swap meats or cheeses based on your preferences. Other delicious additions might include sliced bell peppers, cucumbers, or even a spread of pesto. Just keep in mind the balance of flavors, and don’t hesitate to get creative with your toppings!

Italian Sub Sandwich

Italian Sub Sandwich

This Italian Sub Sandwich is a delightful blend of flavors and textures, perfect for a lunchtime craving.
Print Recipe Pin Recipe
Prep Time 15 minutes mins
Total Time 15 minutes mins
Servings: 2 sandwiches
Course: LUNCH RECIPES
Cuisine: Italian
Calories: 450
Ingredients Equipment Method Nutrition Notes

Ingredients
  

For the Sandwich
  • 2 hoagie rolls Hoagie rolls Soft and chewy foundation for the sandwich.
  • 4 oz Thinly sliced salami Rich, salty flavor.
  • 4 oz Thinly sliced capicola Adds spice and depth.
  • 4 oz Provolone cheese Creamy texture that balances the meats.
  • 1 cup Shredded romaine lettuce Adds crunch.
  • 1 medium tomato, sliced Juicy and vibrant.
  • 1 small red onion, thinly sliced Optional for tangy bite.
  • 1/4 cup banana peppers Optional for a zesty kick.
For the Dressing
  • 2 tbsp Extra virgin olive oil High-quality oil for flavor.
  • 1 tbsp Balsamic vinegar Brightens all flavors.

Equipment

  • Knife
  • Cutting Board
  • Small bowl

Method
 

How to Make Italian Sub Sandwich
  1. Start by slicing the medium tomato and thinly slicing the optional red onion to ensure freshness.
  2. Carefully slice open the hoagie rolls without cutting all the way through.
  3. Layer the salami, capicola, and provolone cheese inside the rolls followed by shredded romaine lettuce, tomato slices, onions, and banana peppers.
  4. In a small bowl, whisk together the extra virgin olive oil and balsamic vinegar.
  5. Drizzle the dressing over the fillings and season with salt and pepper.
  6. Gently close the rolls, pressing down to meld the flavors, and serve. Optionally, cut in half.

Nutrition

Serving: 1sandwichCalories: 450kcalCarbohydrates: 40gProtein: 20gFat: 25gSaturated Fat: 10gPolyunsaturated Fat: 3gMonounsaturated Fat: 15gCholesterol: 50mgSodium: 1100mgPotassium: 300mgFiber: 2gSugar: 4gVitamin A: 800IUVitamin C: 15mgCalcium: 300mgIron: 2mg

Notes

Ensure ingredients are at room temperature for best flavor. Toasting the hoagie rolls can enhance the flavor as well.

Tried this recipe?

Let us know how it was!

Filed Under: LUNCH RECIPES

Crack Chicken Sliders

January 25, 2026 by JudyWhite Leave a Comment

The moment the rich, savory aroma of garlic and ranch envelops my kitchen, I know I’ve stumbled upon something truly special: Crack Chicken Sliders. These little delights are a game-changer for gatherings, yet they’re simple enough for a cozy weeknight dinner. When I first whipped them up on a whim, I marveled at how a handful of pantry staples could transform into such a mouthwatering dish.

Picture this: juicy, shredded chicken smothered in a creamy sauce, nestled in soft slider buns, and topped with melty cheddar cheese. It’s comfort food at its finest, perfect for those evenings when fast food just won’t cut it. Whether you’re hosting a game night or trying to impress family during Sunday dinner, these sliders tick all the boxes—flavorful, easy to make, and totally crowd-pleasing. Ready to dive into a recipe that will become a staple in your kitchen? Let’s get cooking!

Why You'll Love This Crack Chicken Sliders

  • These Crack Chicken Sliders are incredibly easy to make, requiring just a few simple ingredients and minimal prep time.
  • The rich flavors of garlic, ranch, and cheddar blend perfectly to create a mouthwatering dish that everyone will rave about.
  • They are versatile enough to serve at any gathering, whether it’s a casual weeknight dinner or a festive celebration with friends.
  • With their irresistible taste and comforting texture, these sliders are guaranteed to please a crowd and leave your guests asking for seconds.

Crack Chicken Sliders Ingredients

Get ready to craft some flavor-packed sliders!

For the Chicken
• Boneless, skinless chicken breasts – perfect for shredding; 1.5 to 2 lbs will serve around 12 sliders.
• Fresh garlic, minced – adds a depth of savory goodness; don’t skip the garlic!
• Low-sodium soy sauce – adds umami and saltiness; feel free to use tamari for a gluten-free option.
• Ranch dressing – the creamy base that binds all the flavors together; homemade ranch can be a great substitute.

For the Sliders
• Slider buns – choose soft, fluffy buns to complement the tender chicken nicely; mini brioche buns work wonderfully.
• Shredded cheddar cheese – adds a rich, melty finish; you can swap for pepper jack if you like a kick!

How to Make Crack Chicken Sliders

  1. Preheat the Oven: Start by preheating your oven to 400°F (200°C). This step is crucial for cooking the chicken evenly and ensuring it remains juicy throughout the process.

  2. Prepare Chicken: Season the boneless, skinless chicken breasts with a sprinkle of salt and pepper. Next, gently place them in a prepared baking dish that you’ve sprayed with nonstick spray.

  3. Mix the Sauce: In a mixing bowl, whisk together the low-sodium soy sauce, ranch dressing, and minced garlic. This creamy concoction is what will bring those delightful flavors to life when poured over the chicken!

  4. Bake the Chicken: Pour the sauce mixture over the seasoned chicken, ensuring it’s well-coated. Cover the dish with foil and bake for 25-30 minutes, or until the chicken is cooked through and reaches an internal temperature of 165°F (75°C).

  5. Shred the Chicken: Once your chicken is finished baking, remove it from the oven. Using two forks, shred the chicken directly in the baking dish, allowing it to soak up any leftover sauce for an extra burst of flavor.

  6. Assemble Sliders: Time to build your sliders! Take your soft slider buns and fill them generously with the shredded chicken. Top each slider with a sprinkle of shredded cheddar cheese for that melty goodness.

Optional: Add sliced jalapeños for a spicy kick!

Exact quantities are listed in the recipe card below.

Make Ahead Options

These Crack Chicken Sliders are perfect for busy home cooks looking to save time during the week! You can prepare the shredded chicken mixture up to 3 days in advance—simply cook and shred the chicken as directed, then store it in an airtight container in the refrigerator. To maintain that mouthwatering flavor, keep the sauce separate until ready to serve. When you’re ready to enjoy, reheat the chicken in a skillet over medium heat for about 5-7 minutes until warmed through, then assemble the sliders with cheese and buns. This way, you’ll have delicious, homemade sliders on the table with minimal effort and just as tantalizing as when they were freshly made!

What to Serve with Crack Chicken Sliders?

Get ready to create a delightful meal that perfectly complements the creamy, savory flavors of your sliders!

  • Crunchy Coleslaw: This refreshing side adds a crisp texture and bright flavor, balancing the richness of the sliders beautifully.

  • Baked Sweet Potato Fries: Crispy on the outside and tender on the inside, these sweet fries provide a hint of sweetness that pairs perfectly with the savory chicken.

  • Garlic Breadsticks: Soft, buttery breadsticks are the ideal vessel for mopping up any leftover ranch sauce. Plus, who can resist warm, garlicky goodness?

  • Grilled Veggie Skewers: Colorful and charred, a mix of zucchini, bell peppers, and mushrooms brings a vibrant and healthy touch to your meal.

  • Buffalo Cauliflower Bites: For a spicy twist, these crispy bites are a fantastic addition that echoes the flavors of classic game day food.

  • Ice-Cold Lemonade: Pair your sliders with a refreshing glass of lemonade, as its tartness will cut through the creaminess and provide a zingy contrast.

  • Chocolate Chip Cookies: End the meal on a sweet note with warm, gooey cookies. It’s a comforting dessert that everyone will love!

With these delightful sides and drinks, your Crack Chicken Sliders will shine as the star of the meal!

How to Store and Freeze Crack Chicken Sliders

Fridge: Store leftover Crack Chicken Sliders in an airtight container for up to 3 days. This keeps the sliders fresh and prevents drying out.

Freezer: For longer storage, place the shredded chicken in a freezer-safe bag or container for up to 3 months. Just be sure to remove excess air to prevent freezer burn.

Reheating: Thaw frozen chicken in the fridge overnight. Reheat in the microwave or oven until warmed through, adding a splash of ranch dressing if you prefer it extra creamy!

Assembly: For the best texture, consider storing the chicken and slider buns separately. Assemble sliders just before serving to maintain the perfect bun softness.

Crack Chicken Sliders Variations

Feel free to make these sliders your own with a few simple tweaks!

  • Dairy-Free: Substitute the ranch dressing with a dairy-free alternative and choose a dairy-free cheese to maintain creaminess.
  • Spicy Kick: Add diced jalapeños or a drizzle of hot sauce to the chicken mixture before baking for a fiery surprise.
  • BBQ Flavor: Swap soy sauce with your favorite BBQ sauce for a sweet and tangy twist that will delight your taste buds.
  • Herb Infusion: Mix in fresh herbs such as rosemary or thyme into the sauce for an aromatic touch that elevates the flavor profile.
  • Whole Wheat Buns: Choose whole wheat or grain slider buns for a healthier option that doesn’t compromise on taste and texture.
  • Crunchy Topping: Add crispy fried onions on top of the assembled sliders for an extra crunch and burst of flavor with each bite.
  • Sweet & Spicy: Incorporate a spoonful of honey or brown sugar into the sauce to sweeten the deal while balancing out spicy elements.
  • Vegetarian Option: Replace chicken with chickpeas or shredded jackfruit, mixing the same sauce to create a delicious plant-based slider alternative.

Chef's Helpful Tips

  • When making Crack Chicken Sliders, be sure to season your chicken well with salt and pepper before cooking to enhance the flavor.
  • Avoid overcooking the chicken; using a meat thermometer to check that it reaches 165°F ensures juicy, tender meat.
  • For a creamier texture, consider mixing in a bit of cream cheese with the ranch dressing before pouring it over the chicken.
  • When assembling your sliders, don’t forget to warm the slider buns slightly to prevent them from becoming soggy from the filling.

Crack Chicken Sliders Recipe FAQs

How do I choose the right chicken for Crack Chicken Sliders?
Absolutely! Look for boneless, skinless chicken breasts that are firm and have a pinkish hue. Avoid breasts that have dark spots or are excessively slimy, as these may not be fresh. If you can find organic chicken, it’s a fantastic option, but conventional will work just fine too!

What’s the best way to store leftover Crack Chicken Sliders?
Very! Store your leftovers in an airtight container in the fridge for up to 3 days. Make sure they are tightly sealed to prevent drying out. When reheating, I often add a splash of ranch dressing for added creaminess and flavor.

Can I freeze Crack Chicken Sliders?
Of course! For freezing, place the shredded chicken in a freezer-safe bag or container. Remember to push out as much air as possible to prevent freezer burn. It will stay good for up to 3 months. When you’re ready to enjoy, thaw it in the fridge overnight, then warm it up before serving.

What if my chicken is dry after baking?
If you find that your chicken comes out dry, it could be due to overcooking. Always check for doneness using a meat thermometer; it should reach 165°F (75°C). If it’s already cooked and seems dry, shredding and mixing it with a little additional ranch dressing can help moisten and revive the flavors.

Are there any dietary considerations I should keep in mind for Crack Chicken Sliders?
Absolutely! If you’re cooking for guests, be mindful of food allergies; ranch dressing often contains dairy, and soy sauce has gluten. You can find gluten-free ranch alternatives or even make your own. Additionally, if you’re serving this to pets, keep in mind that while chicken is great for them, ranch and soy sauce are not suitable!

Can I customize the toppings for these sliders?
Very! Feel free to add toppings such as sliced jalapeños, pickles, or even coleslaw for a delightful crunch. The more the merrier with flavors! Mix it up according to your guests’ preferences for that personalized touch!

Crack Chicken Sliders

Crack Chicken Sliders

Crack Chicken Sliders are savory, tender sliders filled with shredded chicken and a creamy ranch sauce, perfect for any gathering.
Print Recipe Pin Recipe
Prep Time 10 minutes mins
Cook Time 30 minutes mins
Total Time 40 minutes mins
Servings: 12 sliders
Course: LUNCH RECIPES
Cuisine: American
Calories: 300
Ingredients Equipment Method Nutrition Notes

Ingredients
  

For the Chicken
  • 1.5-2 lbs Boneless, skinless chicken breasts perfect for shredding
  • 3 cloves Fresh garlic, minced adds savory goodness
  • 1/4 cups Low-sodium soy sauce or tamari for gluten-free option
  • 1 cups Ranch dressing homemade ranch can be a substitute
For the Sliders
  • 12 pieces Slider buns mini brioche buns work well
  • 1 cups Shredded cheddar cheese can substitute with pepper jack

Equipment

  • Oven
  • Baking dish
  • Mixing bowl
  • Fork

Method
 

Cooking Instructions
  1. Preheat your oven to 400°F (200°C).
  2. Season the chicken breasts with salt and pepper, and place them in a prepared baking dish.
  3. In a mixing bowl, whisk together soy sauce, ranch dressing, and minced garlic.
  4. Pour the sauce over the chicken, cover with foil, and bake for 25-30 minutes.
  5. Once baked, shred the chicken in the dish to soak up the sauce.
  6. Assemble sliders with shredded chicken and top with cheese.

Nutrition

Serving: 1sliderCalories: 300kcalCarbohydrates: 20gProtein: 25gFat: 15gSaturated Fat: 7gPolyunsaturated Fat: 2gMonounsaturated Fat: 6gCholesterol: 70mgSodium: 800mgPotassium: 300mgFiber: 1gSugar: 2gVitamin A: 200IUVitamin C: 2mgCalcium: 200mgIron: 1.5mg

Notes

For a creamier texture, mix cream cheese with ranch dressing. Assemble sliders just before serving to maintain bun softness.

Tried this recipe?

Let us know how it was!

Filed Under: LUNCH RECIPES

Crack Chicken Sliders

January 25, 2026 by JudyWhite Leave a Comment

Every time I hear the sizzle of garlic melting into a savory blend, my kitchen transforms into a culinary sanctuary. One of my recent triumphs is the irresistibly good Crack Chicken Sliders—a dish that instantly puts me in a good mood. Picture this: warm, tender chicken smothered in a creamy ranch dressing, all nestled inside fluffy slider buns. It’s comfort food elevated, ready to delight family and friends without hours in the kitchen.

I discovered this gem during one particularly busy week when I craved a delicious home-cooked meal but didn’t want to spend hours cleaning up. With just a handful of ingredients and minimal prep, these sliders quickly became a go-to recipe in my home. They’re perfect for relaxed weeknight dinners or entertaining guests. Trust me, your taste buds will thank you, and you might just find yourself making them on repeat! Ready to dive into this flavor-packed experience? Let’s get cooking!

Why You'll Love This Crack Chicken Sliders

  • This recipe is a breeze to make, requiring just 10 minutes of prep time, so you can have a delicious meal ready in no time.
  • The flavor combination of garlic, ranch dressing, and cheddar cheese creates an irresistible taste that will have everyone coming back for seconds.
  • These sliders are incredibly versatile; you can easily customize the toppings or side dishes to suit any occasion or preference.
  • Plus, their visually appealing presentation makes them perfect for entertaining, ensuring your guests will be impressed at first glance.

Crack Chicken Sliders Ingredients

For the Chicken
• Boneless, skinless chicken breasts – 1.5 to 2 lbs will yield tender shredded chicken that absorbs all the delicious flavors.
• Fresh garlic – 4 cloves minced add aromatic depth and a punch of flavor, essential for that savory base.
• Low-sodium soy sauce – 1/4 cup gives a subtle umami kick without overwhelming saltiness.
• Ranch dressing – 1 cup lends creamy goodness and flavor balance, making these Crack Chicken Sliders truly irresistible.

For the Sliders
• Slider buns – 12 soft buns serve as the perfect vessel for your flavorful filling, adding just the right amount of chew.
• Shredded cheddar cheese – 1 cup provides a melty, gooey topping that will delight cheese lovers and enhance the overall flavor.

Feel free to experiment with your favorite toppings or sides to make these sliders your own!

How to Make Crack Chicken Sliders

  1. Preheat your oven to 400°F (200°C) and give your baking dish a light spray with nonstick cooking spray. This ensures an easy cleanup after the deliciousness is gone!

  2. Season the chicken breasts with salt and pepper, placing them gently in the prepared baking dish. This simple step enhances the flavor of your chicken as it cooks.

  3. Mix together the soy sauce, ranch dressing, and minced garlic in a bowl. Pour this heavenly mixture over the seasoned chicken, ensuring every piece is well-coated for maximum flavor.

  4. Cover the dish snugly with foil and bake for 25-30 minutes. You’ll know it’s done when the chicken is cooked through and tender—easy to shred!

  5. Shred the chicken right in the baking dish using two forks. This method keeps all those delicious juices from the sauce intact, contributing to the sliders’ fantastic flavor.

  6. Assemble the sliders by placing a generous amount of shredded chicken onto each slider bun. Crown each one with a sprinkle of shredded cheddar cheese, allowing it to melt into a gooey delight.

Optional: Serve with pickles or fresh herbs for an extra burst of flavor!

Exact quantities are listed in the recipe card below.

What to Serve with Crack Chicken Sliders?

Transform your meal into an unforgettable experience by pairing these sliders with delightful sides that complement their flavors.

  • Crispy Sweet Potato Fries: The natural sweetness and crunchy exterior of sweet potato fries offer a lovely contrast to the savory sliders.

  • Coleslaw: A creamy, tangy coleslaw adds a refreshing crunch to the table, balancing the richness of the chicken.

  • Garlic Bread: The buttery, garlic-infused bread brings an irresistible aroma and texture, perfect for mopping up any leftover sauce.

  • Grilled Corn on the Cob: The charred sweetness from grilled corn enhances the comfort food vibe while adding a pop of color to your plate.

  • Baked Beans: Smoky and sweet baked beans provide a hearty side that pairs wonderfully with the savory notes of the sliders.

  • Pickle Platter: A mix of dill and bread-and-butter pickles adds a zesty crunch, cutting through the creamy richness of the ranch dressing.

  • Sparkling Lemonade: This refreshing drink provides a bright citrus twist that complements the savory flavors without overwhelming them.

  • Chocolate Chip Cookies: For dessert, soft, warm cookies serve as the perfect sweet ending to a savory meal, delighting both kids and adults alike.

How to Store and Freeze Crack Chicken Sliders

Fridge: Store leftover Crack Chicken Sliders in an airtight container for up to 3 days. Reheat gently in the microwave or oven to retain moisture.

Freezer: For longer storage, freeze the shredded chicken mixture (without buns) in a freezer-safe bag for up to 2 months. Thaw overnight in the fridge before reheating.

Airtight Packing: Make sure to wrap sliders tightly in plastic wrap or aluminum foil if storing them as assembled for optimal freshness, lasting up to 1 month in the freezer.

Reheating: When ready to enjoy, reheat the frozen chicken sliders in the oven at 350°F (175°C) until warmed through, about 15-20 minutes.

Make Ahead Options

These Crack Chicken Sliders are perfect for meal prep enthusiasts! You can prepare the chicken by seasoning and covering it with the soy sauce, ranch dressing, and minced garlic up to 24 hours in advance—just refrigerate it in the baking dish for best results. This way, the flavors infuse deeply, enhancing the taste. On the day you plan to serve, simply bake the chicken as directed, shred it, and assemble the sliders with cheese. If you want, you can even assemble the sliders fully and store them for up to 3 days in the fridge; just keep the buns separate until you’re ready to heat them. This method ensures you enjoy delicious, homemade flavors with minimal last-minute effort!

Crack Chicken Sliders Variations

Feel free to mix and match these ideas to create your perfect version of these delightful sliders!

  • Spicy Kick: Add diced jalapeños to the chicken mixture for a fiery kick that brings the heat to each bite.
  • BBQ Flavor: Swap ranch dressing for your favorite BBQ sauce, giving your sliders a sweet and smoky twist.
  • Herbaceous Delight: Mix in fresh herbs like parsley or dill with the chicken for a refreshing, zesty flavor boost.
  • Creamy Spin: Substitute plain Greek yogurt for ranch dressing to lighten things up while maintaining creaminess.
  • Cheesy Heaven: Experiment with different cheeses such as pepper jack or gouda for a unique melt-in-your-mouth experience.
  • Veggie-Packed: Add sautéed bell peppers and onions to the shredded chicken for extra flavor and nutritious goodness.

The beauty of these sliders lies in their versatility, making every batch a new adventure through flavor!

Chef's Helpful Tips

  • When making Crack Chicken Sliders, ensure you season your chicken breasts generously with salt and pepper for enhanced flavor.
  • Avoid overcooking the chicken; check for doneness at the 25-minute mark to ensure it’s juicy and easy to shred.
  • Shredding the chicken directly in the baking dish helps retain the flavorful juices, resulting in a more delicious filling.
  • For a perfect melt, add the shredded cheese on top of the chicken right after removing it from the oven, allowing it to become gooey as you assemble your sliders.

Crack Chicken Sliders Recipe FAQs

What type of chicken should I use for Crack Chicken Sliders?
Absolutely use boneless, skinless chicken breasts! They ensure tender meat that shreds beautifully and absorbs all the delicious flavors from the marinade. Look for fresh chicken breasts that feel firm and are pinkish in color, avoiding any that have dark spots or a foul odor.

How should I store leftover Crack Chicken Sliders?
For optimal freshness, store leftover Crack Chicken Sliders in an airtight container in the fridge. They’ll last up to 3 days. When you’re ready to enjoy them again, you can gently reheat them in the microwave for a quick fix or pop them in the oven to keep them crispy.

Can I freeze Crack Chicken Sliders?
Yes! For freezing, I recommend freezing the shredded chicken mixture (without the buns) in a freezer-safe bag for up to 2 months. To freeze, just let the mixture cool, then transfer it to the bag, pushing out any excess air. When you’re ready to eat, move it to the fridge to thaw overnight and then reheat before assembling the sliders.

What if my chicken doesn’t shred easily?
If your chicken isn’t shredding easily, it might need a little more time in the oven. Ensure it reaches an internal temperature of 165°F (75°C). If time isn’t on your side, try cutting it into smaller chunks before putting it back in the oven for an additional 5-10 minutes. That will help break it down!

Are there any dietary considerations for Crack Chicken Sliders?
Very! If you’re making these for guests, be mindful that ranch dressing can contain dairy—an important consideration for those with lactose intolerance or dairy allergies. A dairy-free ranch dressing alternative works well for different diets, plus, ensure any toppings you add align with guests’ dietary needs.

How do I maximize flavor when making Crack Chicken Sliders?
To enhance the flavor, consider marinating your chicken breasts for at least 30 minutes in the soy sauce, garlic, and ranch dressing mix before baking. This extra step allows all those wonderful flavors to penetrate the chicken deeply. Plus, always top your sliders with freshly shredded cheese right after they come out of the oven to get that lovely, gooey texture that everyone loves!

Crack Chicken Sliders

Crack Chicken Sliders

Delicious Crack Chicken Sliders made with tender chicken and creamy ranch, perfect for lunch or entertaining guests.
Print Recipe Pin Recipe
Prep Time 10 minutes mins
Cook Time 30 minutes mins
Total Time 40 minutes mins
Servings: 12 sliders
Course: LUNCH RECIPES
Calories: 345
Ingredients Equipment Method Nutrition Notes

Ingredients
  

For the Chicken
  • 1.5-2 lbs boneless, skinless chicken breasts tender shredded chicken
  • 4 cloves fresh garlic minced
  • 1/4 cup low-sodium soy sauce adds umami flavor
  • 1 cup ranch dressing for creamy goodness
For the Sliders
  • 12 sliders slider buns soft buns for filling
  • 1 cup shredded cheddar cheese for topping

Equipment

  • Baking dish
  • nonstick cooking spray
  • Mixing bowl

Method
 

Cooking Instructions
  1. Preheat your oven to 400°F (200°C) and spray your baking dish with nonstick cooking spray.
  2. Season the chicken breasts with salt and pepper, placing them in the prepared dish.
  3. Mix the soy sauce, ranch dressing, and minced garlic in a bowl, then pour it over the chicken.
  4. Cover the dish with foil and bake for 25-30 minutes until the chicken is tender.
  5. Shred the chicken in the baking dish using two forks.
  6. Assemble sliders with shredded chicken on each bun, topping with shredded cheddar cheese.

Nutrition

Serving: 1sliderCalories: 345kcalCarbohydrates: 24gProtein: 23gFat: 17gSaturated Fat: 10gPolyunsaturated Fat: 1gMonounsaturated Fat: 5gCholesterol: 75mgSodium: 830mgPotassium: 480mgFiber: 1gSugar: 2gVitamin A: 500IUVitamin C: 1mgCalcium: 220mgIron: 2mg

Notes

Serve with optional pickles or fresh herbs for added flavor.

Tried this recipe?

Let us know how it was!

Filed Under: LUNCH RECIPES

  • 1
  • 2
  • 3
  • …
  • 7
  • Next Page »

Recent Posts

  • Crispy Potatoes in Oven
  • Lucky Charms Pancakes
  • Cheeseburger
  • Boiled Corn on the Cob
  • St. Patrick’s Day Dessert Parfaits

Recent Comments

No comments to show.

Footer

  • Contact
  • Privacy Policy
  • About Us
  • Terms
  • ↑ back to top

Copyright © 2024 www.Forkono.com

Table Of Content